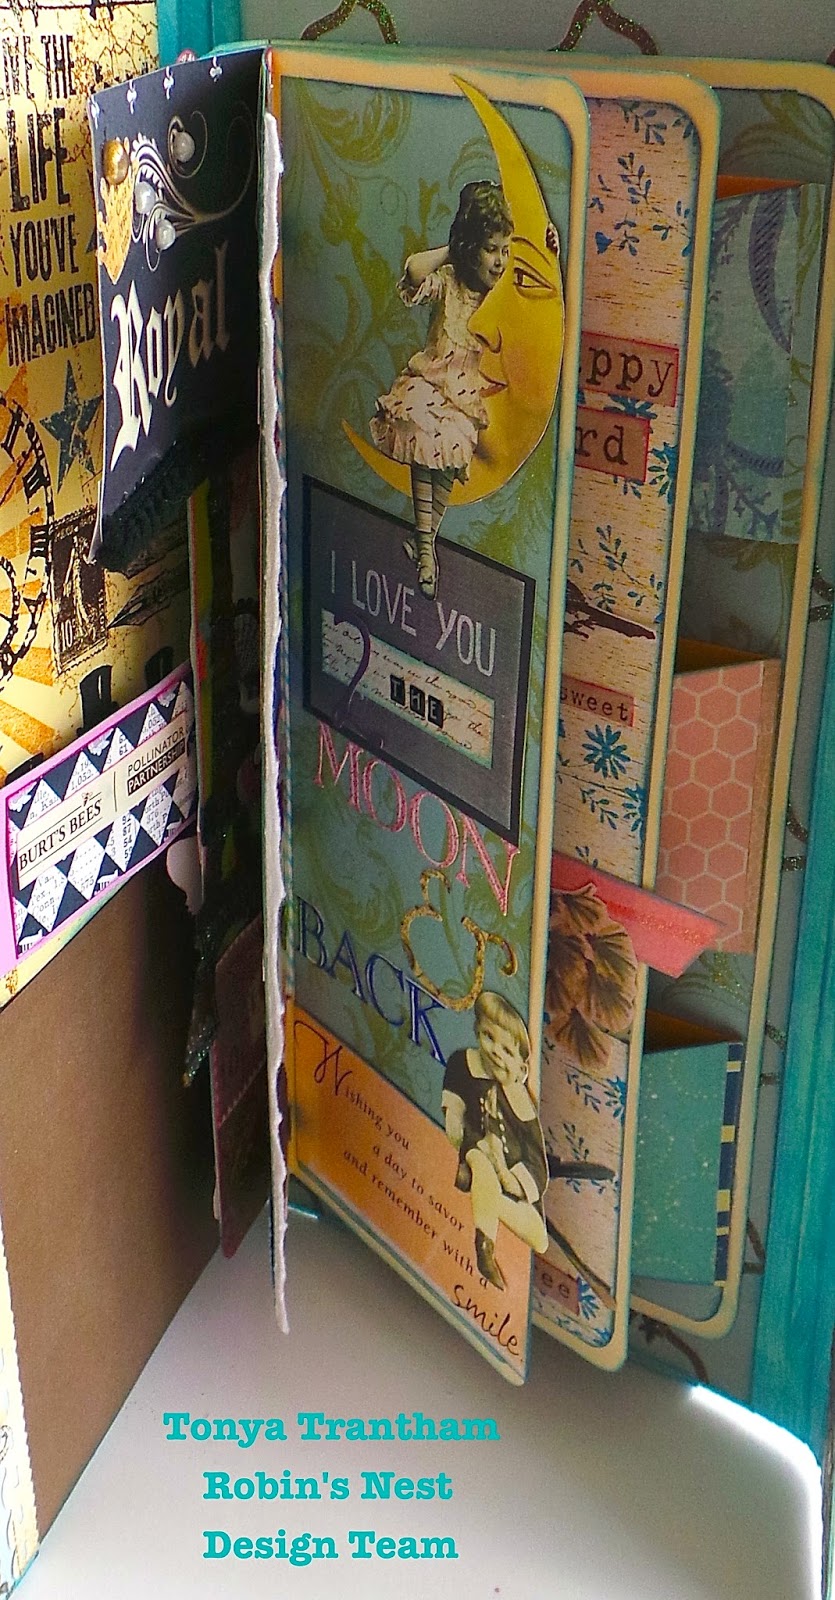
Travel Journal

Hi everyone! I’m here to share a few photos and a quick video of a travel journal I created for a swap I am in over on Junk Journal Junkies Facebook Group. Lori aka Just a Girl From the Bay from YouTube hosted this swap. If you get a chance please stop by her YouTube channel and check out some of her journals she has created…let me say they are stunning!!!

For this swap we had to use a 6″x9″ clasp envelope as the base for our journal. It also had to have pockets, tuck spots and tags. I kept the inside pretty simple so whoever winds up with my journal will have plenty of room to add photos and places to journal. 

A close up of the flap.

The spine looked so naked that I added ribbon and fiber to it.

Here is a quick flip through video showing the inside. If you have any questions please let me know.

Thanks for stopping by, hope your day is wonderful and enjoy creating!

Vintage Theme Junk Journal

Hi everyone! I’m here to share a junk journal I created for a swap I am in over on Swap-bot. My swap partner LisaLaughs agreed to do a journal no smaller than 4″x6″ with three signatures and with each signature having 10 pieces of paper with an open theme. Since Lisa loves pink and anything vintage I tried to incorporate as much of both as I could. 
The cover of the journal is created from a file folder and I used leftover printables, rubber stamping, receipts, paperbag, envelope, paint chips, cardstock and packaging. 

I used Heidi Swapp rubber stamps all the way through the journal.

A lot of the printables I used are free from Ephemera’s Vintage Garden and the little girl on the cover is from the Land of Nod Studio. I love printing on textured cardstock because it gives the printables a look of being printed on canvas. 🙂

I also created a video to show what was inside and I hope you enjoy. 🙂

I would like to submit this junk journal for the following challenges: 

If you have any questions about this journal or anything I used in it please let me know.

Thanks for stopping by, hope your day is awesome and enjoy creating!

Canvas Corp: Decorative Labels

Hi everyone! I’m here to share a quick project for all you planner loves out there. I have a Filofax personal planner and I am by no means have a very busy life but I do like keeping up with my weigh in, steps, projects, blogging, appointments, daily reading, etc. I like to have labels to write like my daily reading, weigh in and steps on and since I couldn’t find any cute labels out there I decided to create my own. I bought a pack of Avery Easy Peel Return Address Labels (5195) which are 2/3×1 3/4″. I figured that gives me enough room to write down either one chapter to several a day in the area. I took one of the sheets of stickers out and cut in half. That’s 30 stickers which is perfect (two leftover) for the month of February. 

First I shook up the Crushed Shells glimmer mist and since this bottle has a slight leak I had ink inside the capped area. So I took the cap off over the stickers and drizzled and splattered. Also I took the cap and added random circles over the area and then lightly spritzed with Bronze glimmer mist. I used a blow dry to speed up the drying process.
Next I spritzed Candy Apple Red glimmer mist (discontinued) and blowed dried again to speed up the process.

I used this Canvas Corp Cig Stamp CVC Grateful stamp set

Also I used Canvas Corp Cig Stamp CVC Be Beautiful stamp set to decorate the stickers.

I used red ink and stamped different images from  both sets of stamps. 

Here is the beginnings of my planner for the month of February. I know it isn’t as pretty as some planners I’ve seen out there but it is a work in progress. 

If you have any questions please let me know.
Thanks for stopping by, hope your Sunday is wonderful and enjoy creating!

Enter at Your Own Risk

Hi everyone! I’m here to share a  project I created for Eileen Hull’s Trick or Treats Art with Heart Challenge and Sizzix Halloween Challenge.
I used the Sizzix Scoreboards XL Die Box Square and the Sizzix Bigz XL Die Country Cottage 3D to create this spooky cute haunted house. 

I decorated an empty spool which had lace wound on it with cardstock, chipboard alphabets, a ghost and moss.

I added a spiderweb sticker from Pink Paislee and scream verbiage that I cut from some scrapbook paper. I also cut from cardstock On The Edge Die Iron Gate which I glued around the top edge of the ATC block along with some moss.

The roof is cut from glitter chipboard and I adhered vellum inside the little house for the windows. The oval Halloween saying is a free image that I got last year from Ephemera Vintage Garden.

The witch is a cut a part which is from the Echo Park’s Chillingsworth Collection. Love this collection!!! 

You can open the little house up and add a little tea light too. I apologize for the photos not being the best but I had no sunlight and it was late in the day when I was able to do my photo shoot but I hope you liked what I shared 🙂

There is still a little bit of time to submit your projects to both the Eileen Hull’s Trick or Treats Art with Heart Challenge and Sizzix Halloween ChallengeI know I cut it very close this month but I’ve been busy with magazine calls, repainting the dining room which should have been easy but wasn’t…the “popcorn” from the ceiling was coming off as my dad was rolling the paint on. Needless to say we had to scrape the “popcorn” off the ceiling and now there is a fine coat of dust all over everything…can we say yuk?!?!? Tomorrow my parents are coming back to the house and hopefully I will not have any more mishaps…fingers crossed.

If you have any questions please let me know.

Supplies Used:
Robin’s Nest: Little Friends Ghost
Chipboard Letters, Cardstock, Scrapbook Paper, Moss, Stickers, Vellum, Black Bead

Thanks for stopping by, hope your day is wonderful and enjoy creating!

Happy Life Tag

Hi everyone! I’m super excited to share a tag that is in this month’s Scrapbook Generation’s Create magazine and it is on page 198!!! The magazine has me listed as Tonya Wilson ( a past alias) but it is me. 

There is a great article about Sizzix and of course lots of layouts, cards and tags to get inspiration from but the best part of all the magazine is free!!! I’ve included a link to the magazine below so go and check it out.


Thanks for stopping by, hope your Friday is awesome and enjoy creating!!!


Artsy Stuff Folio~Part 2

Hi everyone! I’m here to share the inside of my finished folio with you. If you didn’t see last Sunday’s post of how I I created this folio you can find it here. I created it using the Paris Collection by the Robin’s Nest which is 20% off this month. It is simply a gorgeous paper collection and I had some much fun creating this folio with it.

Since I have tons of scraps of paper, embellishments, print-outs, stamped images and stickers I decided I really needed to use up some of my stash thus the name, artsy stuff folio. 🙂 You can check out the rest of my post over at the Chattering Robin’s blog to see how it came out.

Thanks for stopping by, hope your Sunday is awesome and enjoy creating!!!

A Little Birdie Told Me…

Hi everyone!!! Spring is almost here!!! Days are getting longer and a little bit warmer which has got me in the mood to create something fun  and springy. 🙂 I have a card I created for the Crafty Card Gallery and this month is something  birthday related.
I stared with cutting a card base using the Sizzix Card, Scallop #3 die from Moss Green Glitter Cardstock. Next I gathered up my card stock scraps, two stickers from the Robin’s Nest: Spring Sticker and White Dew Drop  to use on this adorable card. The little birdie is from the Little Spring Birdies college sheet from Altered Pages. I fussy cut one of the bird out and added a sequin, Crystal Stickles and a little party hat that I cut from my scraps. The birthday is sentiment is from the Stampin’ Up Simple Sayings II set. 

Isn’t the little birdie just festive???

If you have any questions please let me know. Thanks for stopping by, hope your Tuesday is awesome and enjoy creating!!!


This and That

Hi everyone! It’s me Tonya and I’m back this month to share what I created using the Regency Collections that is 20% off this month over at the Robin’s Nest and  Heartfelt Creations which we are crossing promoting.
I kinda went crazy this month with projects. Instead of just one I have the box I altered into a ATC holder, eight ATC cards and one card using all these wonderful products.
If you are ready lets get started. 🙂

For the ATC holder first I found a box that was 3 1/2″x5″. Find the center of the box on the 3 1/2″ side, mark and drew a line down to the other 3 1/2″ side. Cut and then folded down on either side to make holder more sturdy.  

Make small holes for the “feet” that will hold up the box. Next gesso the sides and bottom of box. 

Once the gesso is dry paint the sides and bottom of the box with black acrylic paint. Let dry. Cut five pieces of cardstock to cover the sides from the Gold Glitter Paisley Cardstock. I cut these a little bit smaller so a little of the black paint would show on the box. Also measure the inside bottom of the box and cut from the black glitter chipboard a piece to fit inside. I embossed it with the Flourish embossing folder and used Sahara Sand Chalk Ink to ink the edges of all the cardstock to give it an “aged” look. Adhere the  Gold Glitter Paisley Cardstock to the sides and bottom of the holder. Next attach the “feet” to each corner of the holder with the brads that are included. Now adhere the black glitter chipboard to the inside of the holder. 

 I used Gold Glitter Chipboard to cut out the book plate that is on the front of my ATC holder. This diecut is from the Heartfelt Creations Burnished Key Custom Design Die Template. I printed the “This & That” sentiment from the computer and inked it to give it a vintage feel. I added an old ear ring that I had received in a swap several years. At the time I didn’t know what I would even use it for??? Now it is the perfect addition to the bookplate and to top it off I added a purple Dew Drop

Don’t you think the holder has an elegant and vintage feel???

The next project I created was some ATCs for my little holder. If you don’t know what an ATC is here is the definition I pulled from the Internet.

artist trading card
Web definition
  1. Artist trading cards are miniature works of art about the same size as modern trading cards baseball cards, or 2 1⁄2 by 3 1⁄2 inches, small enough to fit inside standard card-collector pockets, sleeves or sheets.


I’m a firm believer in using up scraps of cardstock and scrapbook paper that I have laying around. Yes, I have hoarder tendencies…lol
I started with base of the ATC using the Vanilla Fluer Glitter Cardstock. It is double sided  The children are from a digital sheet I got from Cassi’s Creations. I fussie cut, chalked and added scraps of cardstock, dew drops, button, stickers and sentiments…printed from the computer and stamped. Also I found this mini playing card that I thought was perfect for the little “king of hearts”.

The base of these two ATCs are cut from Gold Classic Swirl Glitter Cardstock. I inked both bases with chalk ink which turned nice. The butterflies I cut from scraps of Robin’s Nest cardstock using the Bigz Beautiful Butterflies die. Adhered to the card along with a zipper pull, sequin, gold dew drops and dress pins for antennas.
The other ATC I cut from scraps a heart from the Hearts and Brackets die which I embossed with Gear Box embossing folder and added sprockets gears, game spinner also. I used the Burnished Key Custom Design Die Template to cut out a lock and key from the gold glitter Chipboard. Inked and then attached it with a ring fastener.

For the base of the lion ATC I used Calmity Jane Rose Glitter Cardstock, fussie cut the lion from the Red Lion Cardstock, used scraps and a sticker from the Regency Sticker Set.
The friend is ATC base is cut from Gold Classic Swirl Glitter Cardstock and inked in chalk ink. The sentiment is from the Clearly the Right Words stamp set and to top everything off I used a dolie and bird chipboard pieces, scraps of scrapbook paper, button and twine.

Both of these bases are cut from Gold Glitter Paisley Cardstock and the Cathedral Speciality Paper was used as an accent. Scraps were used on both along with a dress form and butterfly chipboard pieces, dew drops, flower punches, sentiments printed from the computer. The “grumpy fairy” is an image I cut from a Crafty Secrets sheet. The only problem was I had clipped off of the back side of the sheet another image and my fairy was missing an arm so I created the sign to cover up the fact she is a one armed fairy.

I hope you liked the ATCs I created for my holder. The plan is to use up scraps on ATCs and fill this little holder up. 🙂

Also I had to come up with a card for my secret sister and since I had leftovers I decided to create a card. So I’m going to share. 🙂
I cut a 5″x6 1/2″ (approximate) card base from Gold Glitter Paisley Cardstock. I cut from the Vanilla Fluer Glitter Cardstock a piece a little bit smaller than the card base and stamped with the Summer Seasons Pre-cut Set from Heartfelt Creations in Timber Brown StazOn Ink.

Next I cut a piece of Cathedral Speciality Paper  and adhered to the stamped piece. I embossed one end with the Fleur De Lis embossing folder and then inked all the edges. 

I used some of the stickers from the Regency Sticker Set. 

I started with the black Fleur De Lis tag sticker and used Robin’s Nest scraps to make two banners to add to the tag.

The little girl digital image is from Cassi’s Creations. I wanted to add a little bit more color to her so I dragged out my chalk pastels (I’ve had these since elementary school…lol) and used a swab to add color to hair, cheeks and dress.

I also added a tab sticker which I stamped with Hello and I cut a Fleur De Les from the back side of the Gold Glitter Paisley Cardstock using the Fleur De Lis and Eiffel Tower diecut and added to the corner of the card. I topped it off with a Black Diamond Dew Drop.


Supplies Used:
Robin’s Nest: Gold Glitter Paisley CardstockVanilla Fluer Glitter Cardstock, Red Lion CardstockCalmity Jane Rose Glitter CardstockGold Classic Swirl Glitter Cardstock, Dew DropCathedral Speciality Paper,  Regency Sticker SetBlack Diamond Dew Drop, Gold Glitter Chipboard, Very Black Glitter Chipboard
Digital Images: Cassi’s Creations
Heartfelt CreationsBurnished Key Custom Design Die TemplateSummer Seasons Pre-cut Set 
Spare Parts Antique Silver, Box Feet
Apple Barrel Black Acrylic Paint
Sahara Sand Chalk Ink
Martha Stewarts Chalk Inks
Pastels
Gesso
Mod Podge
Tim Holtz: Ring Fastener, Sprocket Gears, Game Spinners 
Sizzix: Flourish and Postcard Embossing Set, Bigz Beautiful Butterflies die, Hearts and Brackets, Fleur De Lis and Eiffel Tower die
Cuttlebug: Gear Box and Fleur De List Embossing Folders
Prima Cling Mounted Stamps
StazOn Timber Brown Ink
Gina’s Designs

Well, that is a wrap! I hope this has inspired to hop on over to the Robin’s Nest  to check out the sale this month and while you are at it stop by Heartfelt Creations to see all of their die cuts and rubber stamps they have.
If you have any questions about any of the projects I created please give me a holler and I will do my best to answer. 
Thanks for stopping by, hope your Sunday is wonderful and enjoy creating!!!


Love Paper Sack Mini Album

Hi everyone!!! I have been sooooo busy creating cards, swaps and design team projects and I just haven’t got around to blogging but I’m now back to share one of my projects I created for a swap I was in on Facebook. We had to altered a 300 count matchbox into a Valentine’s Day theme and add handmade goodies inside of it. Well, I’m going to share the mini album I created using five 4″x6″ paper sacks. I did cut the tops down a little so the mini would fit into the matchbox. I used Baker’s twine to bind it together.

I used bits and pieces of leftover cardstock, scrapbook paper, lace, stickers and images to put this adorable mini together.

I also put together a package of die cuts, stickers, ribbon and dew drops so my swap partner, Norma, could add more to the pages if she wanted to.

Also I shared this mini and matchbox on Maya Roads Facebook page for a challenge they had going on…there is a chance to win a prize package. I have my fingers and toes crossed that I win something. 🙂
Come back Tuesday (treat holder) and Wednesday (matchbox)  to see what I created.
Thanks for stopping by, hope your Monday is awesome and enjoy creating!!!


Singapore Love Art Journal Style

Hi everyone! I’m sharing my first double page spread from my diary I altered. I’m in a group over on Swap-bot were instead of sending your journal off for someone to alter they send you an envelope of, generally a theme, of scrapbook paper, images and bits and pieces of goodies. I received an envelope from Mag who lives in Singapore. How she had the envelope decorated was so much fun. I just couldn’t throw it away so I used the stamps, custom form, deco tape and address label and created my page. I did use a few of the items she included and I used some of my own dot stickers and this is what I came up with.

I‘m still working on the front cover of my journal. I feel it lacks something but once I do finish it I will share. 🙂

Thanks for stopping by, hope your Wednesday is awesome and enjoy creating!!!