S is for Santa

Hi everyone! I’m here to share my altered matchbox using the Robin’s Nest  Christmas  Collection for the Robin’s Nest “Christmas Blog Hop” linky party which is going on today.


 Please be sure to hop on over to the Chattering Robin’s Blog and checkout everyone else’s creations using Robin’s Nest products and be sure to become a follower of each blog  and leave a comment too for a chance to win a bottle of the  Christmas Dew Drops because each blog will pick a winner. 🙂 

For my project I altered a 300 count matchbox. I covered it with Cindy Lou Swirl Glitter Cardstock.

I printed the “Santa” image from a digital sheet I purchased from Pink Paislee. I inked the edges of the image and adhered it to a piece of red cardstock. 

I added bits of tulle, ribbon, holly and twine decoration to the top of the box. I finished off with some buttons and Christmas Dew Drops.  

The “drawer” I added a pull to make it easier to open.

I filled the inside with crafty bits of fun for my friend to use in some of her many craft projects.
If you have any questions about this project please let me know.
Also I am entering this in the Ellen Hull’s Art with Heart Challenge.

Supplies Used: Robin’s Nest: Cindy Lou Swirl Glitter Cardstock, Christmas Dew Drops, 300 count matchbox, drawer pull, Chalk Ink, Tulle, Buttons, Twine, Santa Digital Image, Holly 

Remember to leave a comment and follow each blog for a chance to win a bottle of Christmas Dew Drops! 
Thanks for stopping by, hope your Saturday is awesome and enjoy creating!

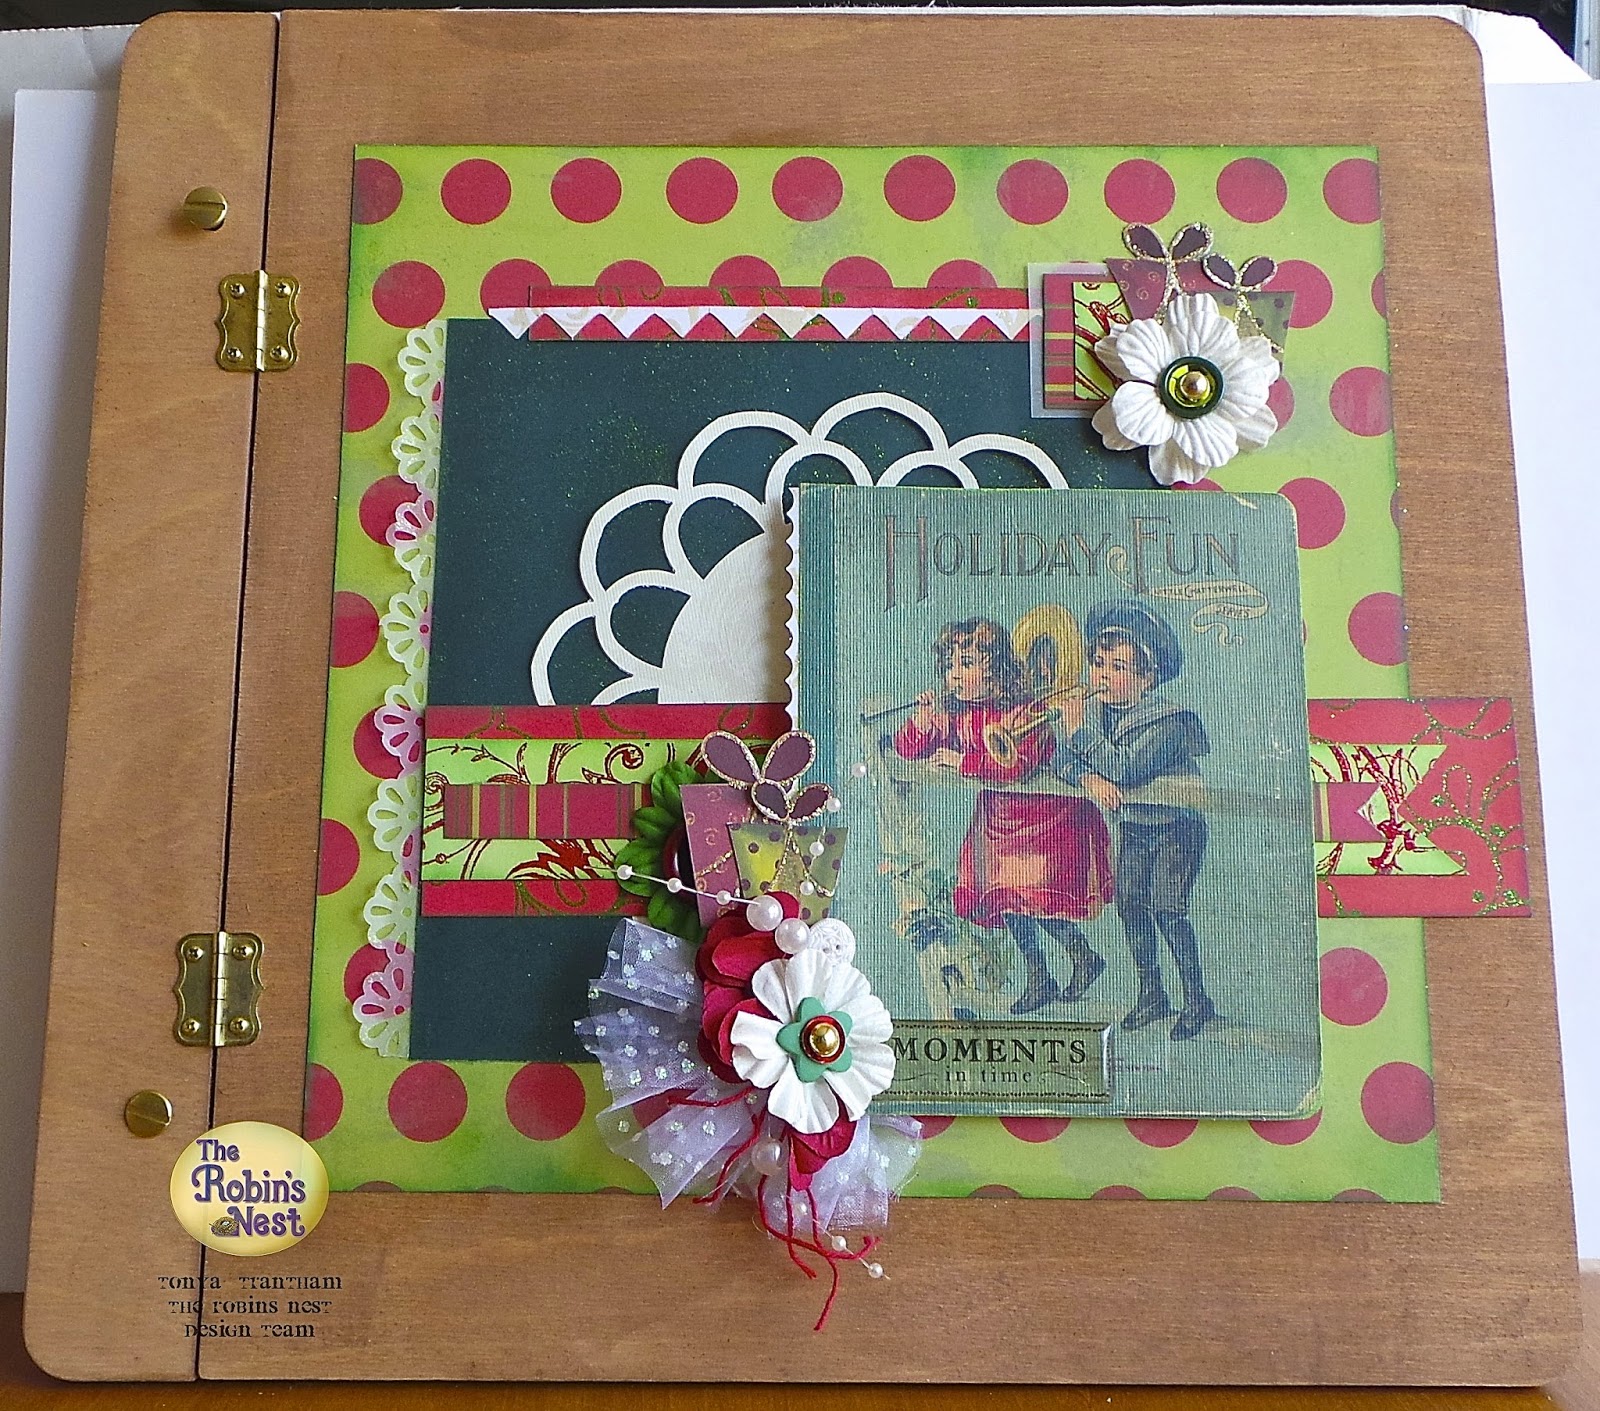
Robin’s Nest: Holiday Fun

Hi everyone! It’s me and I’m here to share my project I created for the Robin’s Nest using the Christmas Collection. Also the altered art design team is cross promoting with Walnut Hollow. I picked the Contemporary Memory Album as my project to alter and this is what I came up with. For more information and photos please check out the Chattering Robin’s blog.

Thanks for stopping by, hope your Sunday is awesome and enjoy creating!


Enter at Your Own Risk

Hi everyone! I’m here to share a  project I created for Eileen Hull’s Trick or Treats Art with Heart Challenge and Sizzix Halloween Challenge.
I used the Sizzix Scoreboards XL Die Box Square and the Sizzix Bigz XL Die Country Cottage 3D to create this spooky cute haunted house. 

I decorated an empty spool which had lace wound on it with cardstock, chipboard alphabets, a ghost and moss.

I added a spiderweb sticker from Pink Paislee and scream verbiage that I cut from some scrapbook paper. I also cut from cardstock On The Edge Die Iron Gate which I glued around the top edge of the ATC block along with some moss.

The roof is cut from glitter chipboard and I adhered vellum inside the little house for the windows. The oval Halloween saying is a free image that I got last year from Ephemera Vintage Garden.

The witch is a cut a part which is from the Echo Park’s Chillingsworth Collection. Love this collection!!! 

You can open the little house up and add a little tea light too. I apologize for the photos not being the best but I had no sunlight and it was late in the day when I was able to do my photo shoot but I hope you liked what I shared 🙂

There is still a little bit of time to submit your projects to both the Eileen Hull’s Trick or Treats Art with Heart Challenge and Sizzix Halloween Challenge. I know I cut it very close this month but I’ve been busy with magazine calls, repainting the dining room which should have been easy but wasn’t…the “popcorn” from the ceiling was coming off as my dad was rolling the paint on. Needless to say we had to scrape the “popcorn” off the ceiling and now there is a fine coat of dust all over everything…can we say yuk?!?!? Tomorrow my parents are coming back to the house and hopefully I will not have any more mishaps…fingers crossed.

If you have any questions please let me know.

Supplies Used:
Robin’s Nest: Little Friends Ghost
Chipboard Letters, Cardstock, Scrapbook Paper, Moss, Stickers, Vellum, Black Bead

Thanks for stopping by, hope your day is wonderful and enjoy creating!

The Robin’s Nest: Snow Flurry Tray

Hi everyone! I’m here to share a project I created for the Robin’s Nest. This year has flown by and can you believe that Christmas is only two months away!?!?!? Most of the time I have over half of my shopping finished and a few presents already made but not this year. Gulp! Well, since the Robin’s Nest Alter Art design team is cross promoting with Walnut Hollow and one of my choices was the 10″x12″ rectangular tray I decided to altered it into something Christmas/Winter related and this is what I came up with.

For more details and photos please hop on over to the Chattering Robin’s blog!

Thanks for stopping by, hope your Sunday is wonderful and enjoy creating!

Fabulous Fall

Hi everyone and Happy World Card Making Day! I’m here to share a quick card I created using mostly Robin’s Nest product. I started by cutting a 6″X12″ piece of Wineberry Glitter Cardstock  and folded to make a 6″X6″ card base. Cut a piece of Honeycomb Daisy Glitter Cardstock to 5 1/4″X 5 1/4″ and adhere to the base of the card. Next cut eight banners in various sizes and adhere to the side of the card. Top off with two buttons and some hemp twine. Cut the following pieces of  cardstock by: 4 1/2″X4 3/8″, 4″X4 1/8″ (crumple and use edge punch on one side) and 3″X3 3/4″ (Emboss with the Swirl embossing folder). Ink all edges, adhere together and add pop dots before gluing to card. Make three sets of hemp bows and adhere to the underneath side of the mats. Fussy cut digis leaves out, add a touch of Stickles and glue to the card. Use a piece small cream colored cardstock and add rub-on and glue to card.

If you have any questions please let me know.

Supply List:
Robin’s Nest: Leaf Glitter Cardstock, Fall Rub-Ons, Witch Accessories Cardstock, Honeycomb Daisy Glitter Cardstock, Boo Words Glitter Cardstock, Love Me Cardstock, Wineberry Glitter Cardstock
Other Supplies: Stickles, Hemp Twine, Buttons, Various cardstock/Scrapbook paper scraps, Martha Stewart Decorative Edge Punch, Tan Chalk Ink, Cuttlebug: Swirl Embossing Folder, Pop Dots, Altered Pages: Fall Splendor Collage Sheet

Thanks for stopping by, hope your Saturday is awesome and enjoy creating!

The Robin’s Nest: Blue Dahlia

Hi everyone! I’m here to share a chest I created out of a Pringles can. Yep, that is right…a Pringles can. I looked on Pinterest and YouTube for inspiration and all I could find was cans decorated where the lid comes off and there was a few videos where both ends were cut off  of the can and then a straight line was drawn and cut from one end to another. Then the ends were traced onto chipboard, cut out and adhered to each end. Well I thought why can’t you leave the ends on and just trace the “lid” onto the can and then cut? Well, I’m going to show you how to create a Pringle’s chest using this month’s featured Floral Collection from the Robin’s Nest. For more photos and how to create this little chest please head on over to the Chattering Robin’s blog.

If you have any questions please let me know. Thanks for stopping by, hope your Sunday is great and enjoy creating!


Enjoying a Dog Gone Good Day

Hi everyone! I created a card for my son’s girlfriend. Her birthday was yesterday and we won’t be getting together until later on but I just had to share. 🙂
She fosters dogs until she can find a forever home so I thought I would do something in a dog theme for her. 
I cut a 6″x6″ piece of striped cardstock for the front of the card, cut a 5 1/2″x5 1/2″ piece of Gold and Pink Daisy Glitter Cardstock, inked the edges and then adhered to the base. Next I printed out the dog digi image and fussy cut it out, stamped the “enjoy” sentiment on a scrap of white cardstock and then I glued cut frames of cardstock for the sentiment and dog image, adhered each to the frame and then to the base. I finished off with punched flowers which I shaped, butterfly, ribbon, baker’s twine and dew drops.

The easel I cut a 6″x 11″ piece of cardstock and folded at 4″, 4″, 1″, 1″, 1″ and I glued the 1″ flap to the back of the 4″ flap to create an easel. I cut from the leftover cardstock a pocket which I added glue to three of the sides and placed on the back of the easel. Next I adhered the card base to the easel and waaa-laaa! I simply and fun card! 🙂

I am submitting this card for the following challenges:
Word Art Wednesday-Anything Goes
Paper Wings Productions-Anything Goes
Simon Says-Anything Goes

Supplies Used:

Robin’s Nest: Gold and Pink Daisy Glitter Cardstock, Love Me Glitter Cardstock, Dew Drops
Eclectic Anthology: Dog digital image
Ribbon, Sequins, Baker’s Twine, Scrapbook Paper, Cardstock, StazOn Ink, Chalk Ink, Studio G Enjoy Rubber Stamp, Flower and Butterfly Punches, Gems

If you have any questions please let me know.
Thanks for stopping by, hope your Wednesday is awesome and enjoying creating!!!

The Robin’s Nest: If the Shoe Fits Wear it

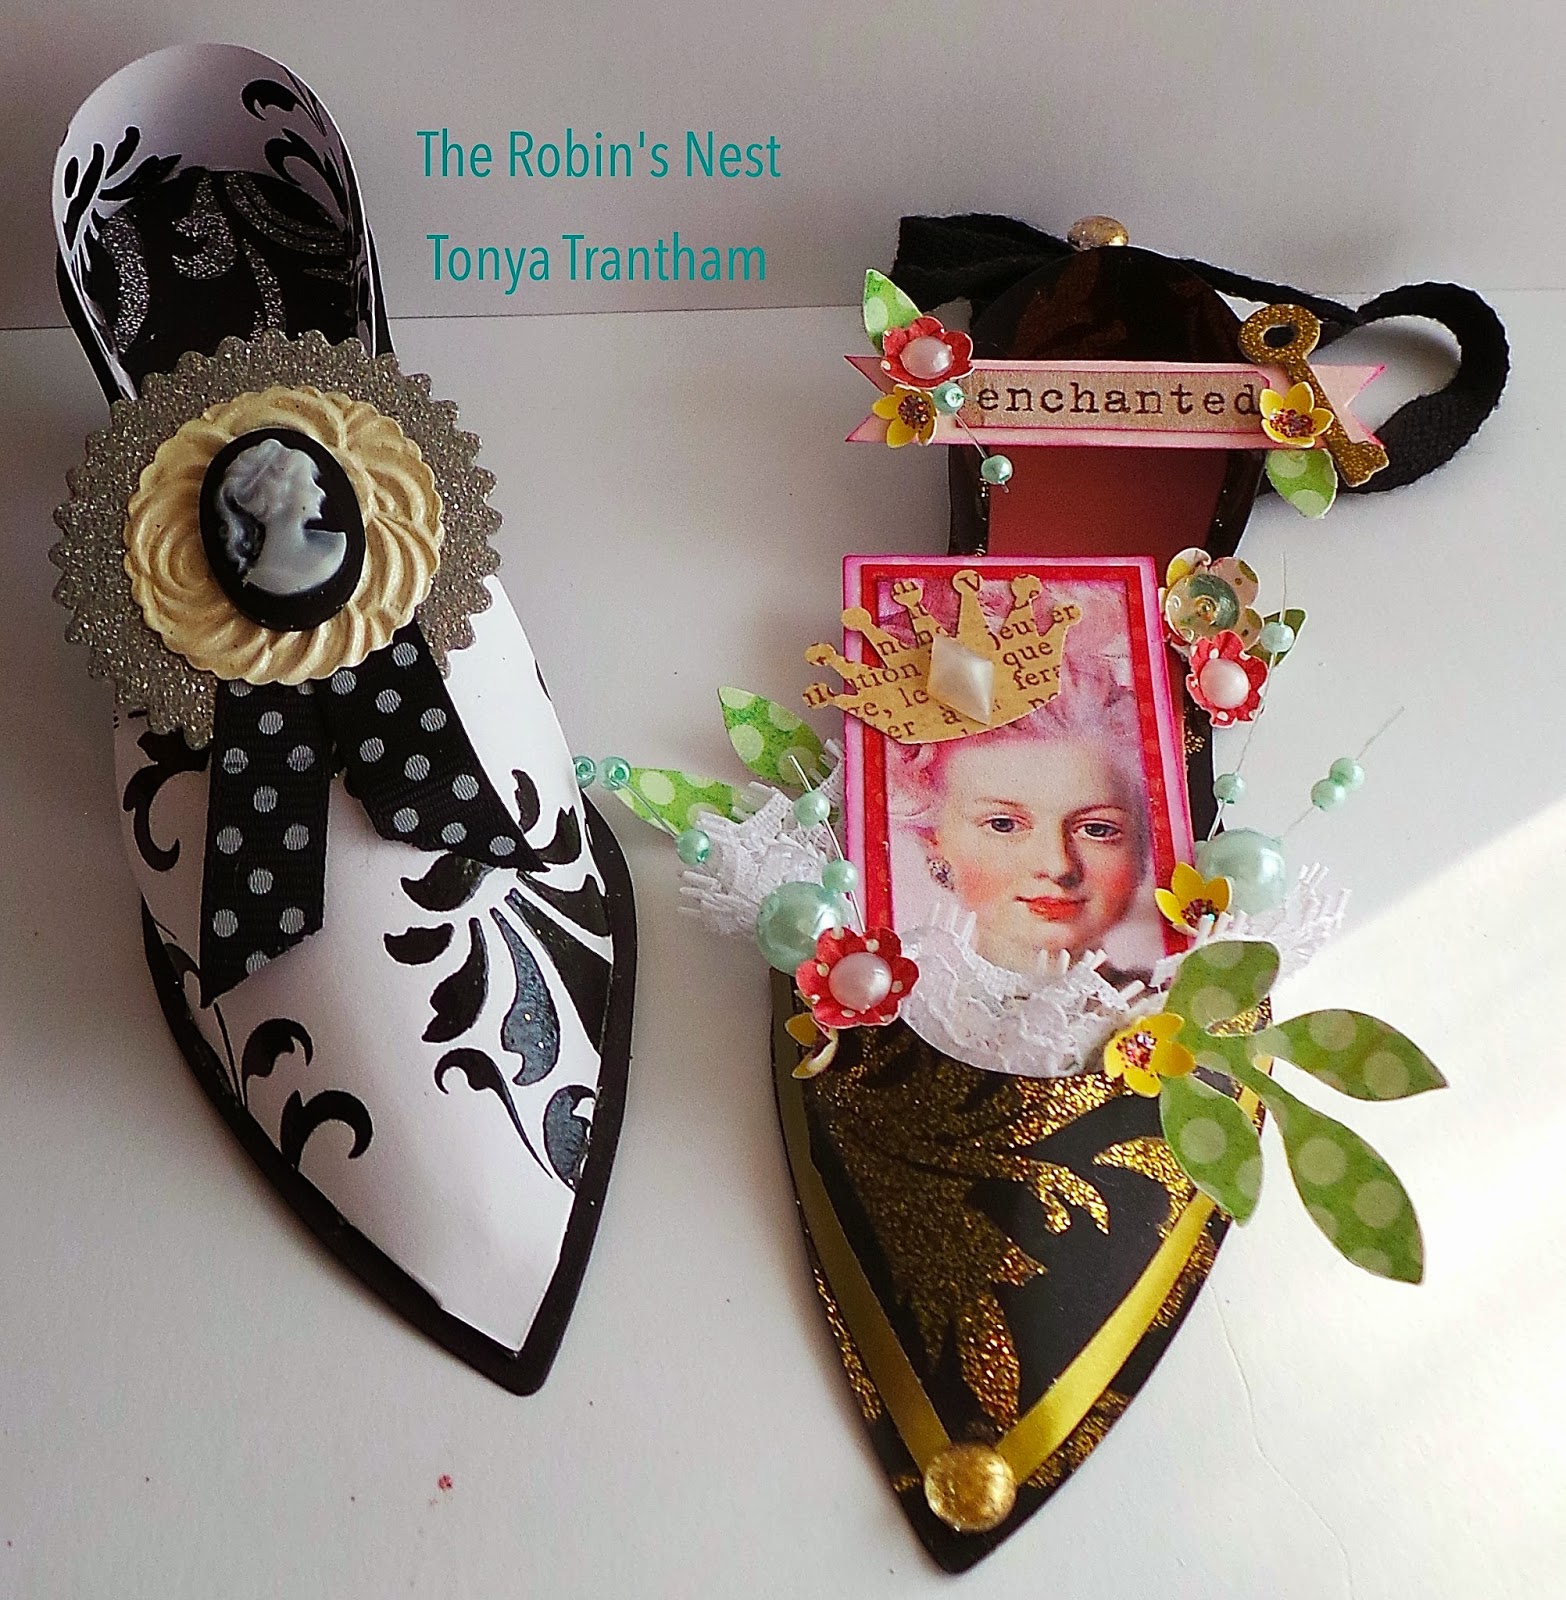
Hi everyone! It’s me and I’m back to share another couple of projects using the Wedding {in love} Collection which is also featured this month over at the Robin’s Nest.
I have these little shoes  I created using Brenda Walton’s: Sizzix Ballroom Slippers Diecut and an Anniversary card.

For more details on how to create these little shoes and card hop on over to the Chattering Robin’s blog and check it out! Also if you have any questions please let me know.
Thanks for stopping by, hope your Thursday is wonderful and enjoy creating!!!

The Robin’s Nest: There is "Gnome" Place Like Home

Hi everyone! I want to share a sneak peak at my projects I created using the Lodge Collection that is one of the Robin’s Nest featured products this month. This collection has a real woodsy outdoor feel and I decided since I had a leftover gnome printout from a previous project I was going to do something woodsy and whimsical. 

For complete directions please stop over at the Chattering Robin’s blog and check it!

Thanks for stopping by, hope your Sunday is wonderful and enjoy creating!!!


Friends Forever

Hi everyone! I’m here to share a fun card I created for the Paper Wings Productions July Challenge. The challenge for this month is use either wet or dry embossing in your project. I stumbled upon their blog last week and I had already started working on this card so I thought why not submit my card? 🙂 
For my card I cut from a 6″x12″ piece of Light Red Plaid/Stripe cardstock and folded in half to create a 6″x6″ card base. I used a variety of cardstock and sticker from the Lodge Collection along with Moss Green Glitter Cardstock, Irredescent Classic Glitter Swirl Vellum, Vanilla Fluer Glitter Cardstock and Dew Drops which can all be found over at the Robin’s Nest.

I embossed a piece of  Moss Green Glitter Cardstock with  the Geometric Rings Embossing Folder for a fun background and I lightly inked the edges with some hot pink chalk ink. The friends printable  I fussy cut out and added on top of the embossed cardstock and then I embellished with handmade flowers, sequins, dew drops, lace and twine.

I hope you enjoy my card I’ve created and if you have any questions please let me know.

Supplies Used:
Robin’s Nest: Lodge Collection, Moss Green Glitter Cardstock, Irredescent Classic Glitter Swirl Vellum,  Vanilla Fluer Glitter Cardstock, Dew Drops
Sequins
Flower Punches
Lace
Hemp Twine
Sizzix: Little Leaves
Cuttlebug: Geometric Rings Embossing Folder
QuicKutz: Antique Doily Diecut
Spellbinders Nestabilities: Splendid Circles Diecuts
Chalk Ink
Eclecticanthology Printable

Thanks for stopping by, hope your Thursday is wonderful and enjoy creating!!!