Tick Tock a Fairy is in the Clock

Hi everyone! I’m here to share a project I created Tim’s Holtz’s Tick Tock Clock diecut and part of Eileen Hull’s  Cookie Box diecut. I had got my inspiration from Lisa’s blog and you can find her post here..I had got the clock diecut on clearance but had never used it and after seeing Lisa’s take on the clock I just knew I had to create one for myself.

I cut two of the clock images from mat board but cut the top part(the bells and handle) off of one of the dies and then embossed with the Cracked embossing folder. 

From the cookie box diecut I cut out the “walls” one and a half times and embossed with the Dot Matrix embossing folder.
I sprayed one side of all the diecut pieces with Tattered Angels Verdigris spray and let dry. I absolutely LOVE the end result! The finish gives the clock an old and weathered look. Next I lined the inside of the clock with cardstock from the Conservatory 6″x6″ Paper Collection and then adhered all the pieces together.

I added bits and pieces of dried moss to the inside. Then printed and fussy cut the fairy image which I found from the Land of Nod blog and adhered it to moss. I made sure there was a good amount of moss behind the image so it would stand up straight.

I used several different flower punches to create from the following Canvas Corp cardstock: Pink and Ivory Zebra and Yellow and Ivory Mini Dot Reverse cardstocks flowers which I shaped and added sequins and Dew Drops to the centers. The leaves I cut from the Gypsy Moments: 12×12 Take Our Breath Away cardstock using the Spring Greenery Diecut which I shaped also.

I adhered the flowers, leaves and pearl sprays around the fairy and to the top of the clock. I can honestly say this is my most favorite project…at the moment! 😉 Thanks to Lisa’s blog post I would have never thought to use this clock the way she did. 🙂
If you have any questions about this project please let me know.

Thanks for stopping by, hope your Saturday is awesome and enjoy creating!

Treasured Friend

Hi everyone! I am here to share a very quick post about a card I submitted to Scrapbook Generation’s Create magazine that was published! EEK!!! It has a lot of great scrapbook pages, cards and tag inspiration and the best part it is fun! 🙂
Below is the link to the online magazine. Also it is almost on the very last page. 


I used the monthly sketch that was provided as a download from Scrapbook Generation and this was what I came up with.

I used a variety of Canvas Corp, Robin’s Nest and other supplies to create this card. If you have any questions please let me know. 

Thanks for stopping by, hope your Thursday is awesome and enjoy creating!


Give a Child Wings

Hi everyone! I am here to share a quick project I created for Eileen Hull’s Mixed Media May-hem Challenge for the month of May. I started with a 3″x3″ Burlap Canvas which I sprayed with a combination of the following Tattered Angels Glimmer Mists: Moss, Bahama Blue and Mint Julip and the outer edges I used a Turquoise paint and then let dry.

I cut a Doily and Leaves (Holiday Greenery diecut) from the Gypsy Moments: Take Our Breath Away cardstock. Also I used up scraps of Gypsy Moments: Express Yourself cardstock  and from the same  Holiday Greenery diecut I cut flowers. I adhered those to the canvas along with other scraps of Maritime: Coquille(shell) and Sirene(mermaid) cardstock.

On one of the edges I used the Lace diecut to add some vintage charm.

The little child is from the Tinted Babies printable. I fussy cut her out and added wings and antennas for some quirky cuteness. I cut the sentiment from the Gypsy Moments: Novel Thought cardstock, adhered to the corner and then finished off with thread and sequins. Oh and I added a little bit of stickles to the wings.
If you have any questions on this project please let me know.

Also craft room update…I am still working on getting things in order along with now remodeling what will be the craft room bathroom. I am super excited on how everything is looking. 😀
Thanks for stopping by, hope your day is awesome and enjoy creating!


Moments

Hi everyone! I wanted to share this card I created using the Sizzix Card, Retro Camera diecut that I bought at Hobby Lobby on clearance for only $7.49. LOVE deals like this! I ran a piece of Brown on Brown Glitter Cardstock through my diecut machine. I also embossed at the fold of the card using the Tim Holtz Texture Fades Dot-Matrix embossing folder. I had decided I was going to go steampunk with this camera. So next I cut the “zipper teeth” off of a piece of zipper which I adhered to card. I cut a small piece of vellum which I inked and then glued to the inside of the card to created the view window and added two 7 Gypsies Dome Studs for the button.

I started with Sprightly Sprockets gear diecuts and before I adhered them to the top of the card I spritzed some with Tattered Angels Verdigris Glimmer Mist and let dry. I also added some Tim Holtz gears, a gold sequin and a brown dew drop.

I also used a bottle cap as part of the lens too.

I added the “moments” coin to the flash and finished off with a dew drop. Later I think I will try to create a mini album with this camera diecut. 🙂 If you have any questions about this card please let me know.

Thanks for stopping by, hope your Sunday is wonderful and enjoy creating!

Robin’s Nest: Love Makes my Tea Cup Over Flow

Hi everyone! I am back as a guest designer this month for the Robin’s Nest. I want to share a quick project I created using a sheet of the Lips Glittered Cardstock which I printed this  Tea cup and Saucer printable on to it. It is a very easy project to do. All you have to do is, of course, print and then cut the cup and saucer out and glue together. For more photos and how to please check out the Chattering Robin’s blog!

Thanks for stopping by, hope your Saturday is awesome and enjoy creating!

Bundle Up Cause it’s Cold Outside!

Hi everyone! I’m here to share a project I created using a folded 6″x6″ piece of Winter Retreat Glitter Swirl Cardstock. I printed this free digital image from Land of Nod Studio. I love the fun colors of the clothing on the children in this photo.

I added burlap as a mat to the photo along with a crumpled piece of Brown on Brown Glitter Cardstock and beige scalloped tulle which I gathered, folded and tied off with thread.

 Also I cut a snowflake from some thin white chipboard, inked the edges with a light blue chalk ink. I adhered it to the card base and added sequins and dew drops. Next I added pop dots to the back of the digital image and then adhered to the card and lastly I made several bows from brown thread and glued around the image and then finished off with a  chipboard snowflake. And there you have it…I really love how this card turned out and hope you like it too.
If you have any questions please let me know.

Thanks for stopping by, hope your Tuesday is awesome and enjoy creating!

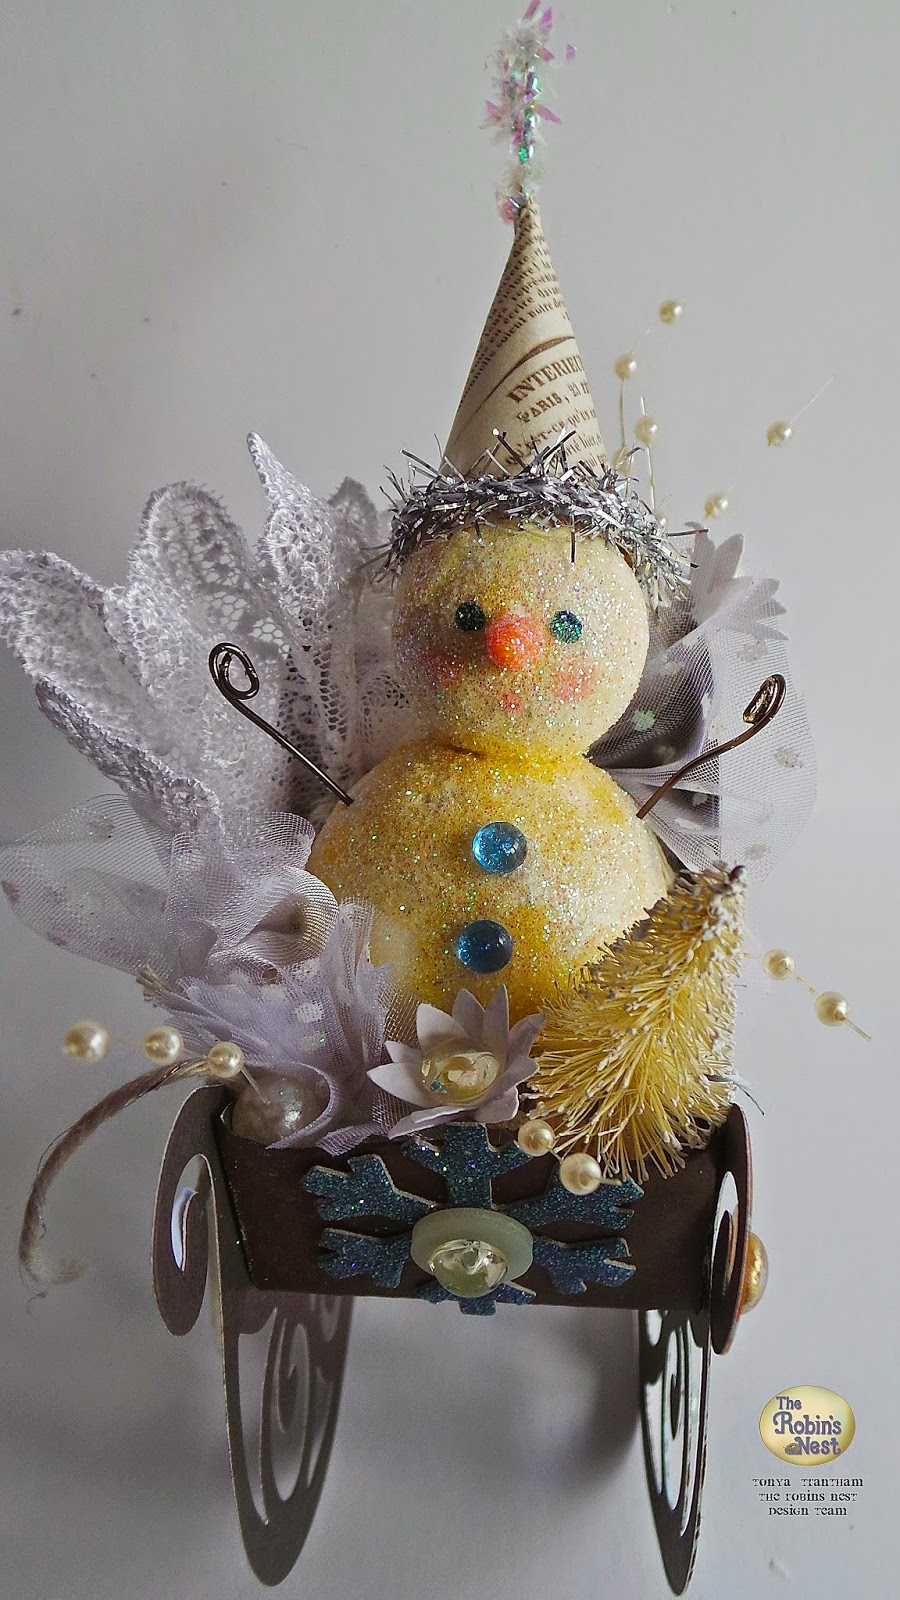
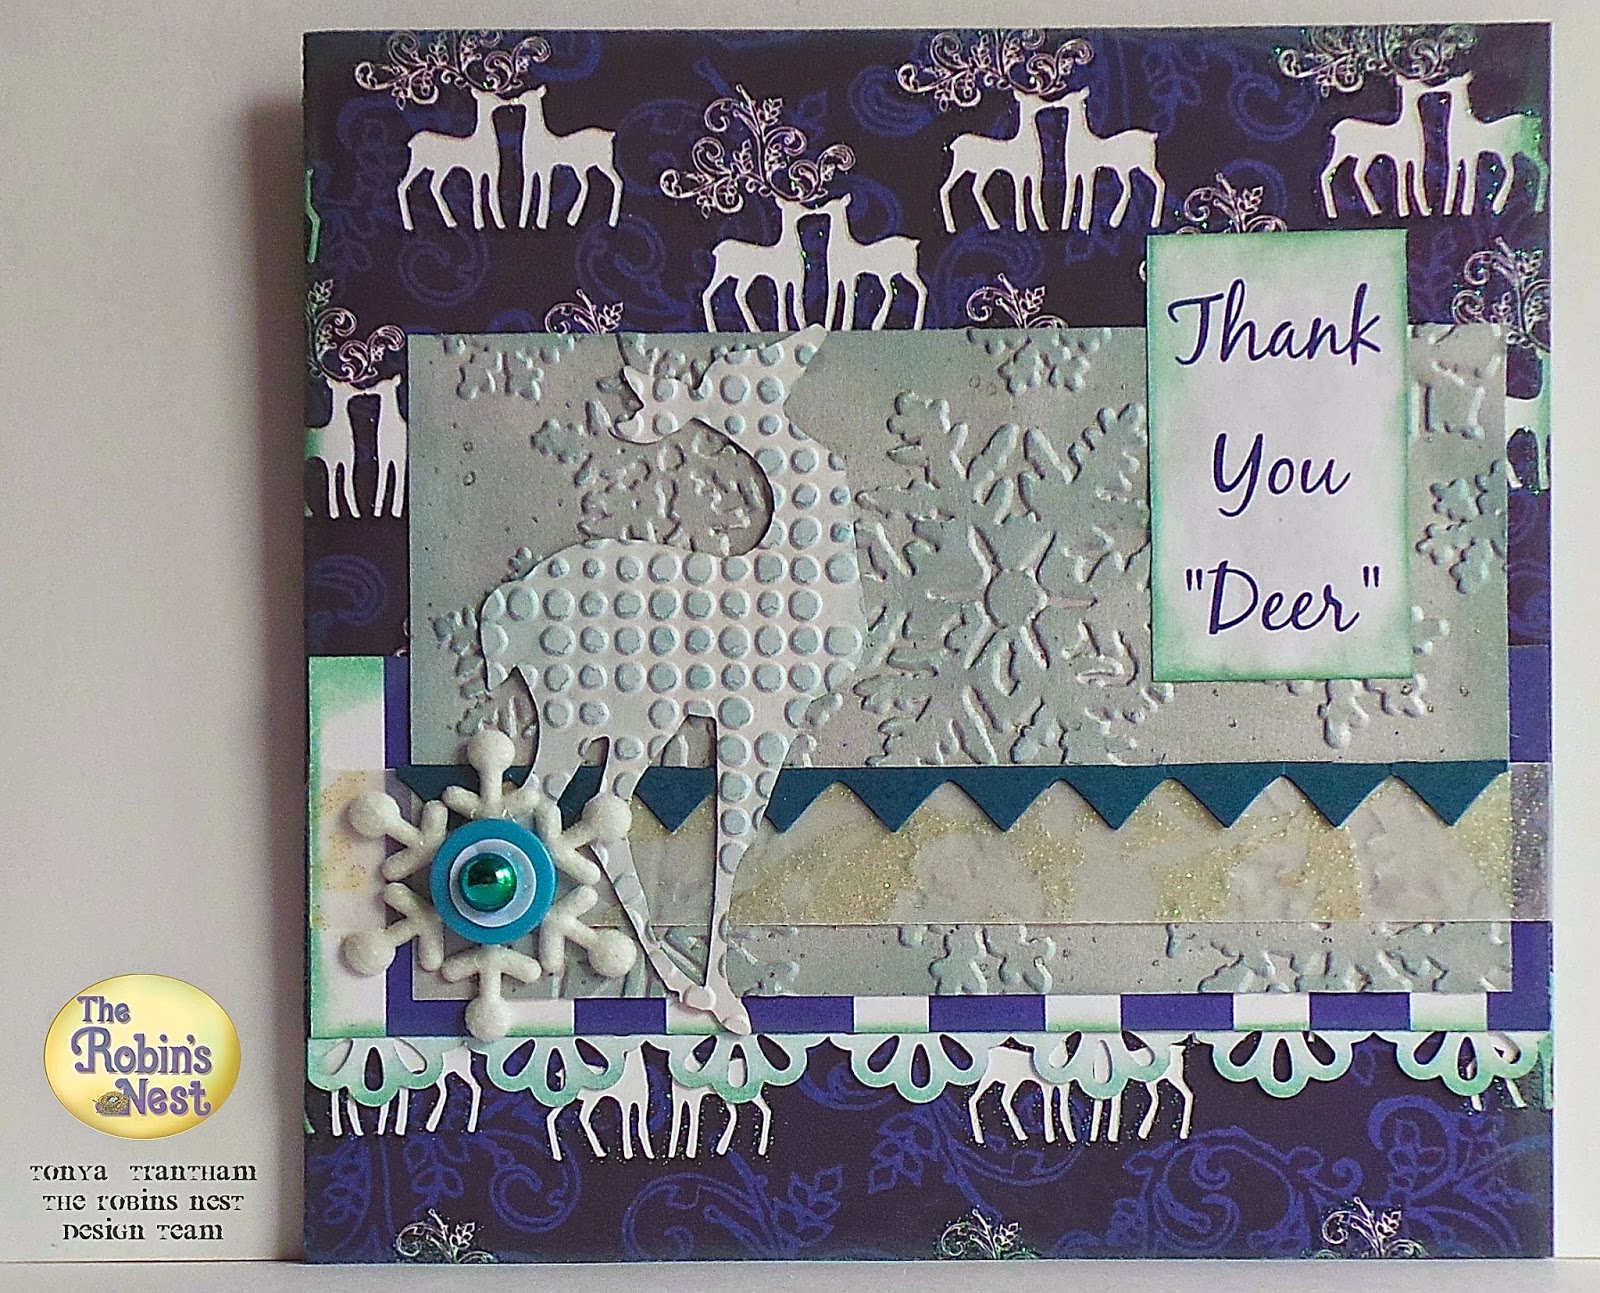
The Robin’s Nest: Snowman Sleigh Ride

Hi everyone! I’m here to share this month’s projects I created for the Robin’s Nest using the Winter Collection. I cut a sleigh (Sleigh Favor Box die from Brenda Walton) out of the Winter Retreat Swirl Cardstock and put together according directions. You can find the how to video on YouTube here.

For more info and photos on both projects please hop on over to the Chattering Robin’s blog!

Supplies Used:
Other Supplies: Sizzix: Brenda Walton-Sleigh Favor Box, Tim Holtz-Reindeer Flight Diecut and Snow Flurries and Dot-Matrix Embossing Folders, Martha Stewart Punch, Sequins, Buttons, Twine, Lace, Tulle, Wire, SmoothFoam 1/2″ and 1 1/2″ Balls, Silver Tinsel, Pearl Spray, Mini Bottle Brush Tree, Pipe Cleaner, Sculpey Clay, Antique Mod Podge, Acrylic Paint, Chalk Ink, Glitter

If you have any questions please let me know. Thanks for stopping by, hope your Sunday is awesome and enjoy creating!

What is in your stocking?

Hi everyone! I’m here to share an ornament I had actually started last Christmas but with all the craziness and such that normally goes on around this time of year I didn’t finish it. Well I did get a complete of photos of me starting the process though. 🙂

The stocking ornament is from SmoothFoam which I had received last year for a blog hop that the Robin’s Nest and SmoothFoam was hosting together. 
I started by lightly sanding and applying a coat of gesso which once dry I painted the stocking with red acrylic paint. I cut the cuff of the stocking from White on White Classic Glitter Swirl Cardstock. I  applied antique Mod Podge to the stocking and then sprinkled glitter all over. Once dry I painted one of the packages, added some lace around the cuff and I put it away for the year.
I dug it out and this is how I finished it off. I used some Prima poinsettias and added a sequin and dew drop to the center for an elegant look.

I added a mini bottle brush tree, along with bells, pearl sprays and miniature Christmas lights.

I finished off with a little gold trim and a holly leaf.

Don’t you think it looks lovely on my four foot tinsel tree I got for 66% off at Hobby Lobby last year. It was a floor model and pre-lit. It reminds me of my great grandmother’s tinsel tree but hers had a color wheel with it. I remember sitting at her house at Christmas time watching the tree turn different colors…such great memories. 🙂

If you have any questions about this project please let me know.

Thanks for stopping by, hope your Monday is awesome and enjoy creating!

Christmas Tree, Angel and a Blog Hop Winner

Hi everyone! I’m here to share a two mini projects I created. First one I covered a mini spool with some left over cardstock, added sequins and a little Crystal Stickles and then topped it off with a tiny little tree from Fancy Pants.

The tag I had purchased a set of these from Target. I changed out the cord for lace, added a Tim Holtz Reinforcer, pom pom trim and a snow angel which I printed out and fussy cut. I adhered it to the tag and added Crystal Stickles to the angel’s coat.
Both project were super easy to do and didn’t take any time at all.

Also I want to announce the winner of the Christmas Dew Drops that was being given away for the Robin’s Nest Blog hop this past Saturday, November 29th. The winner is…..

Colleen aka Scrappingranny 
Congratulations Colleen!!! 🙂
If you have any questions please let me know. 
Thanks for stopping by, hope your Thursday is awesome and enjoy creating!