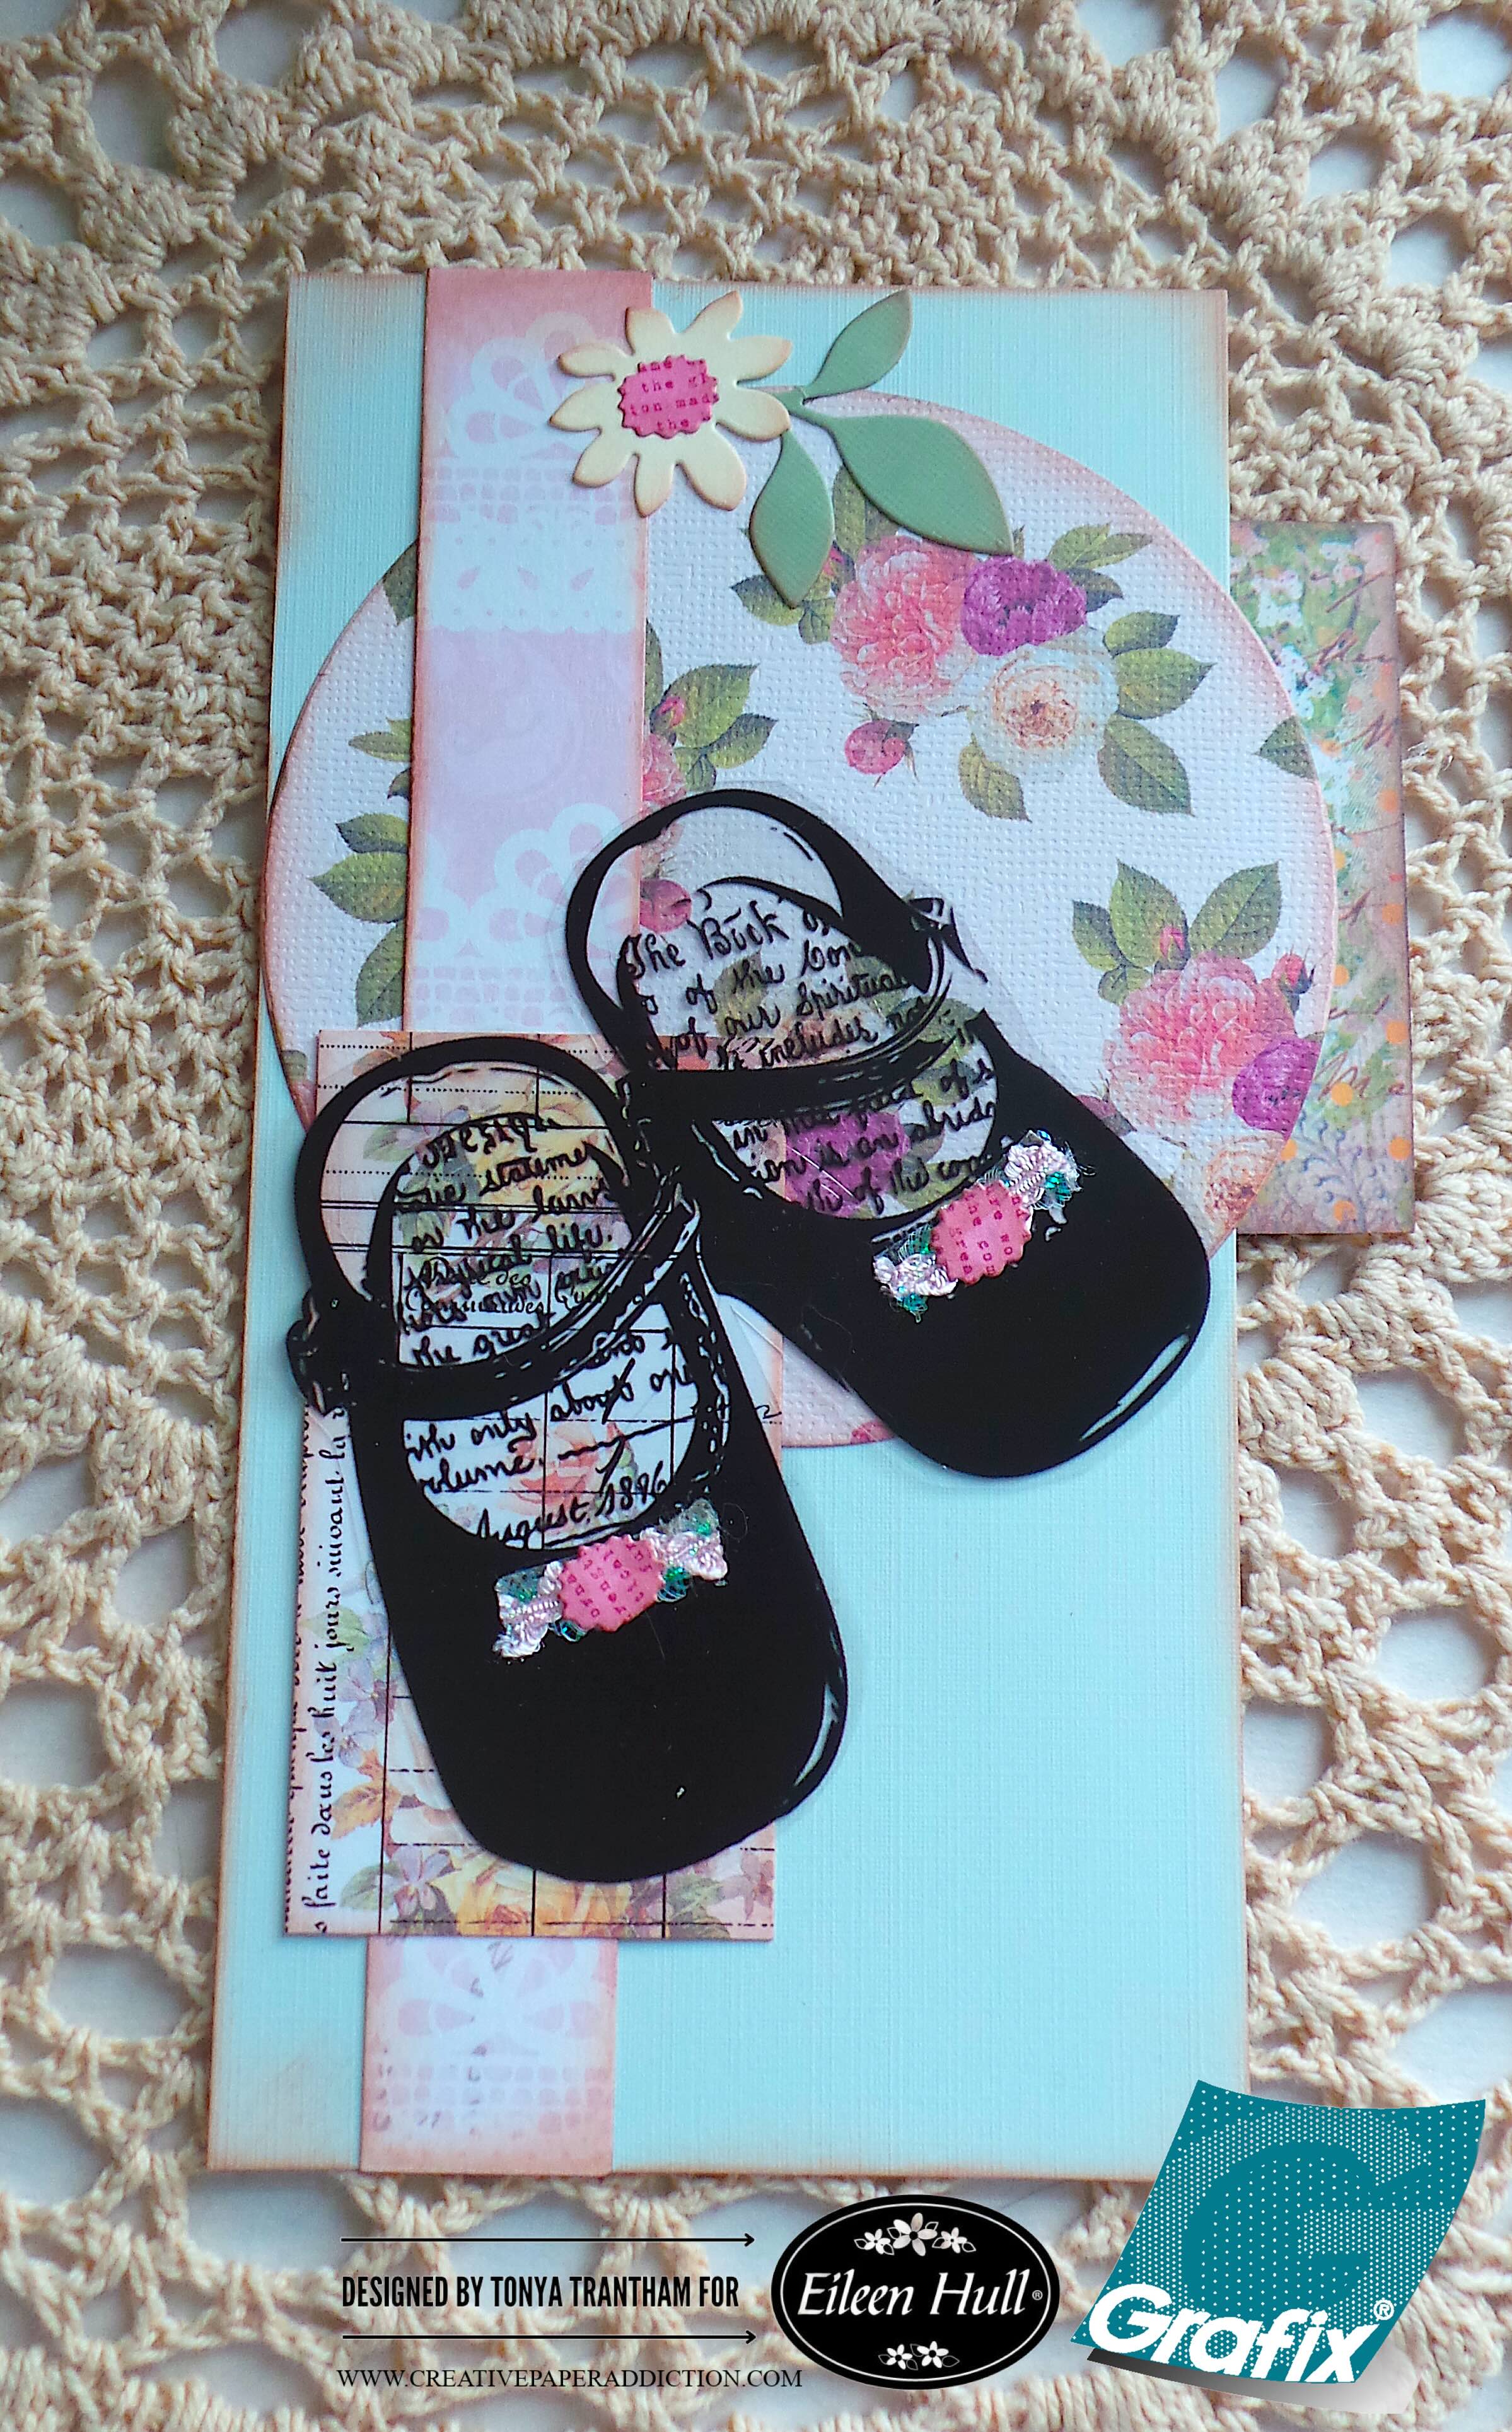
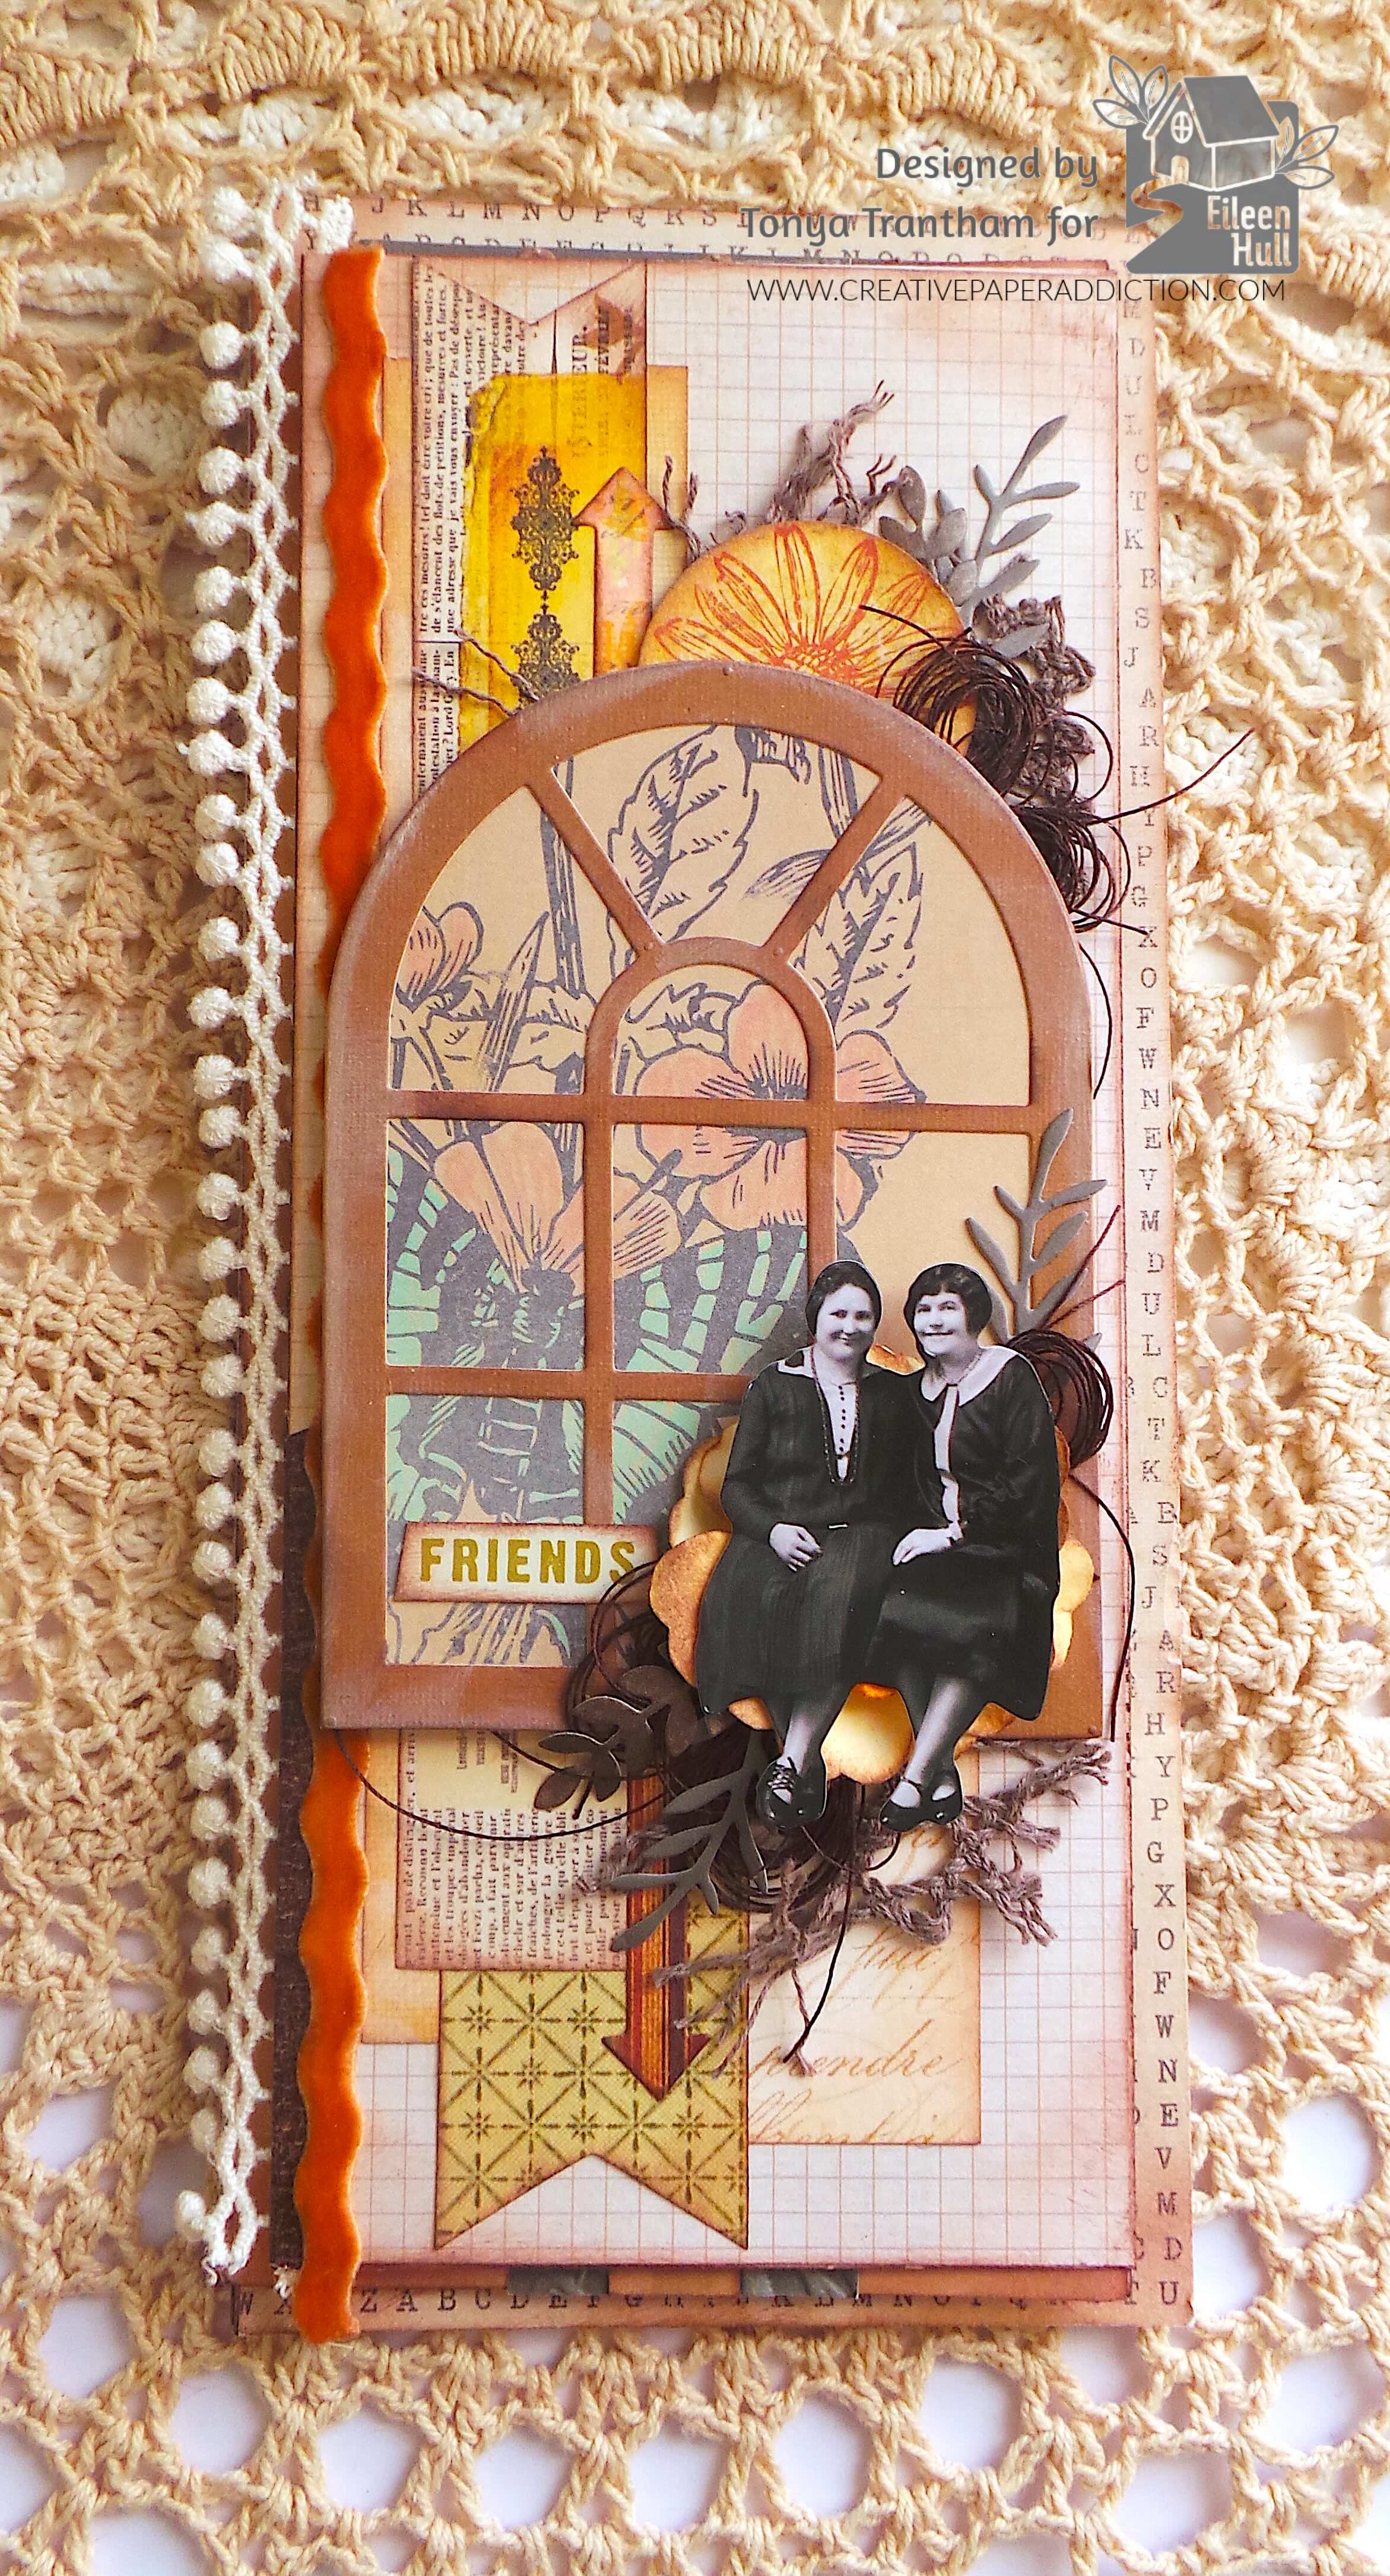
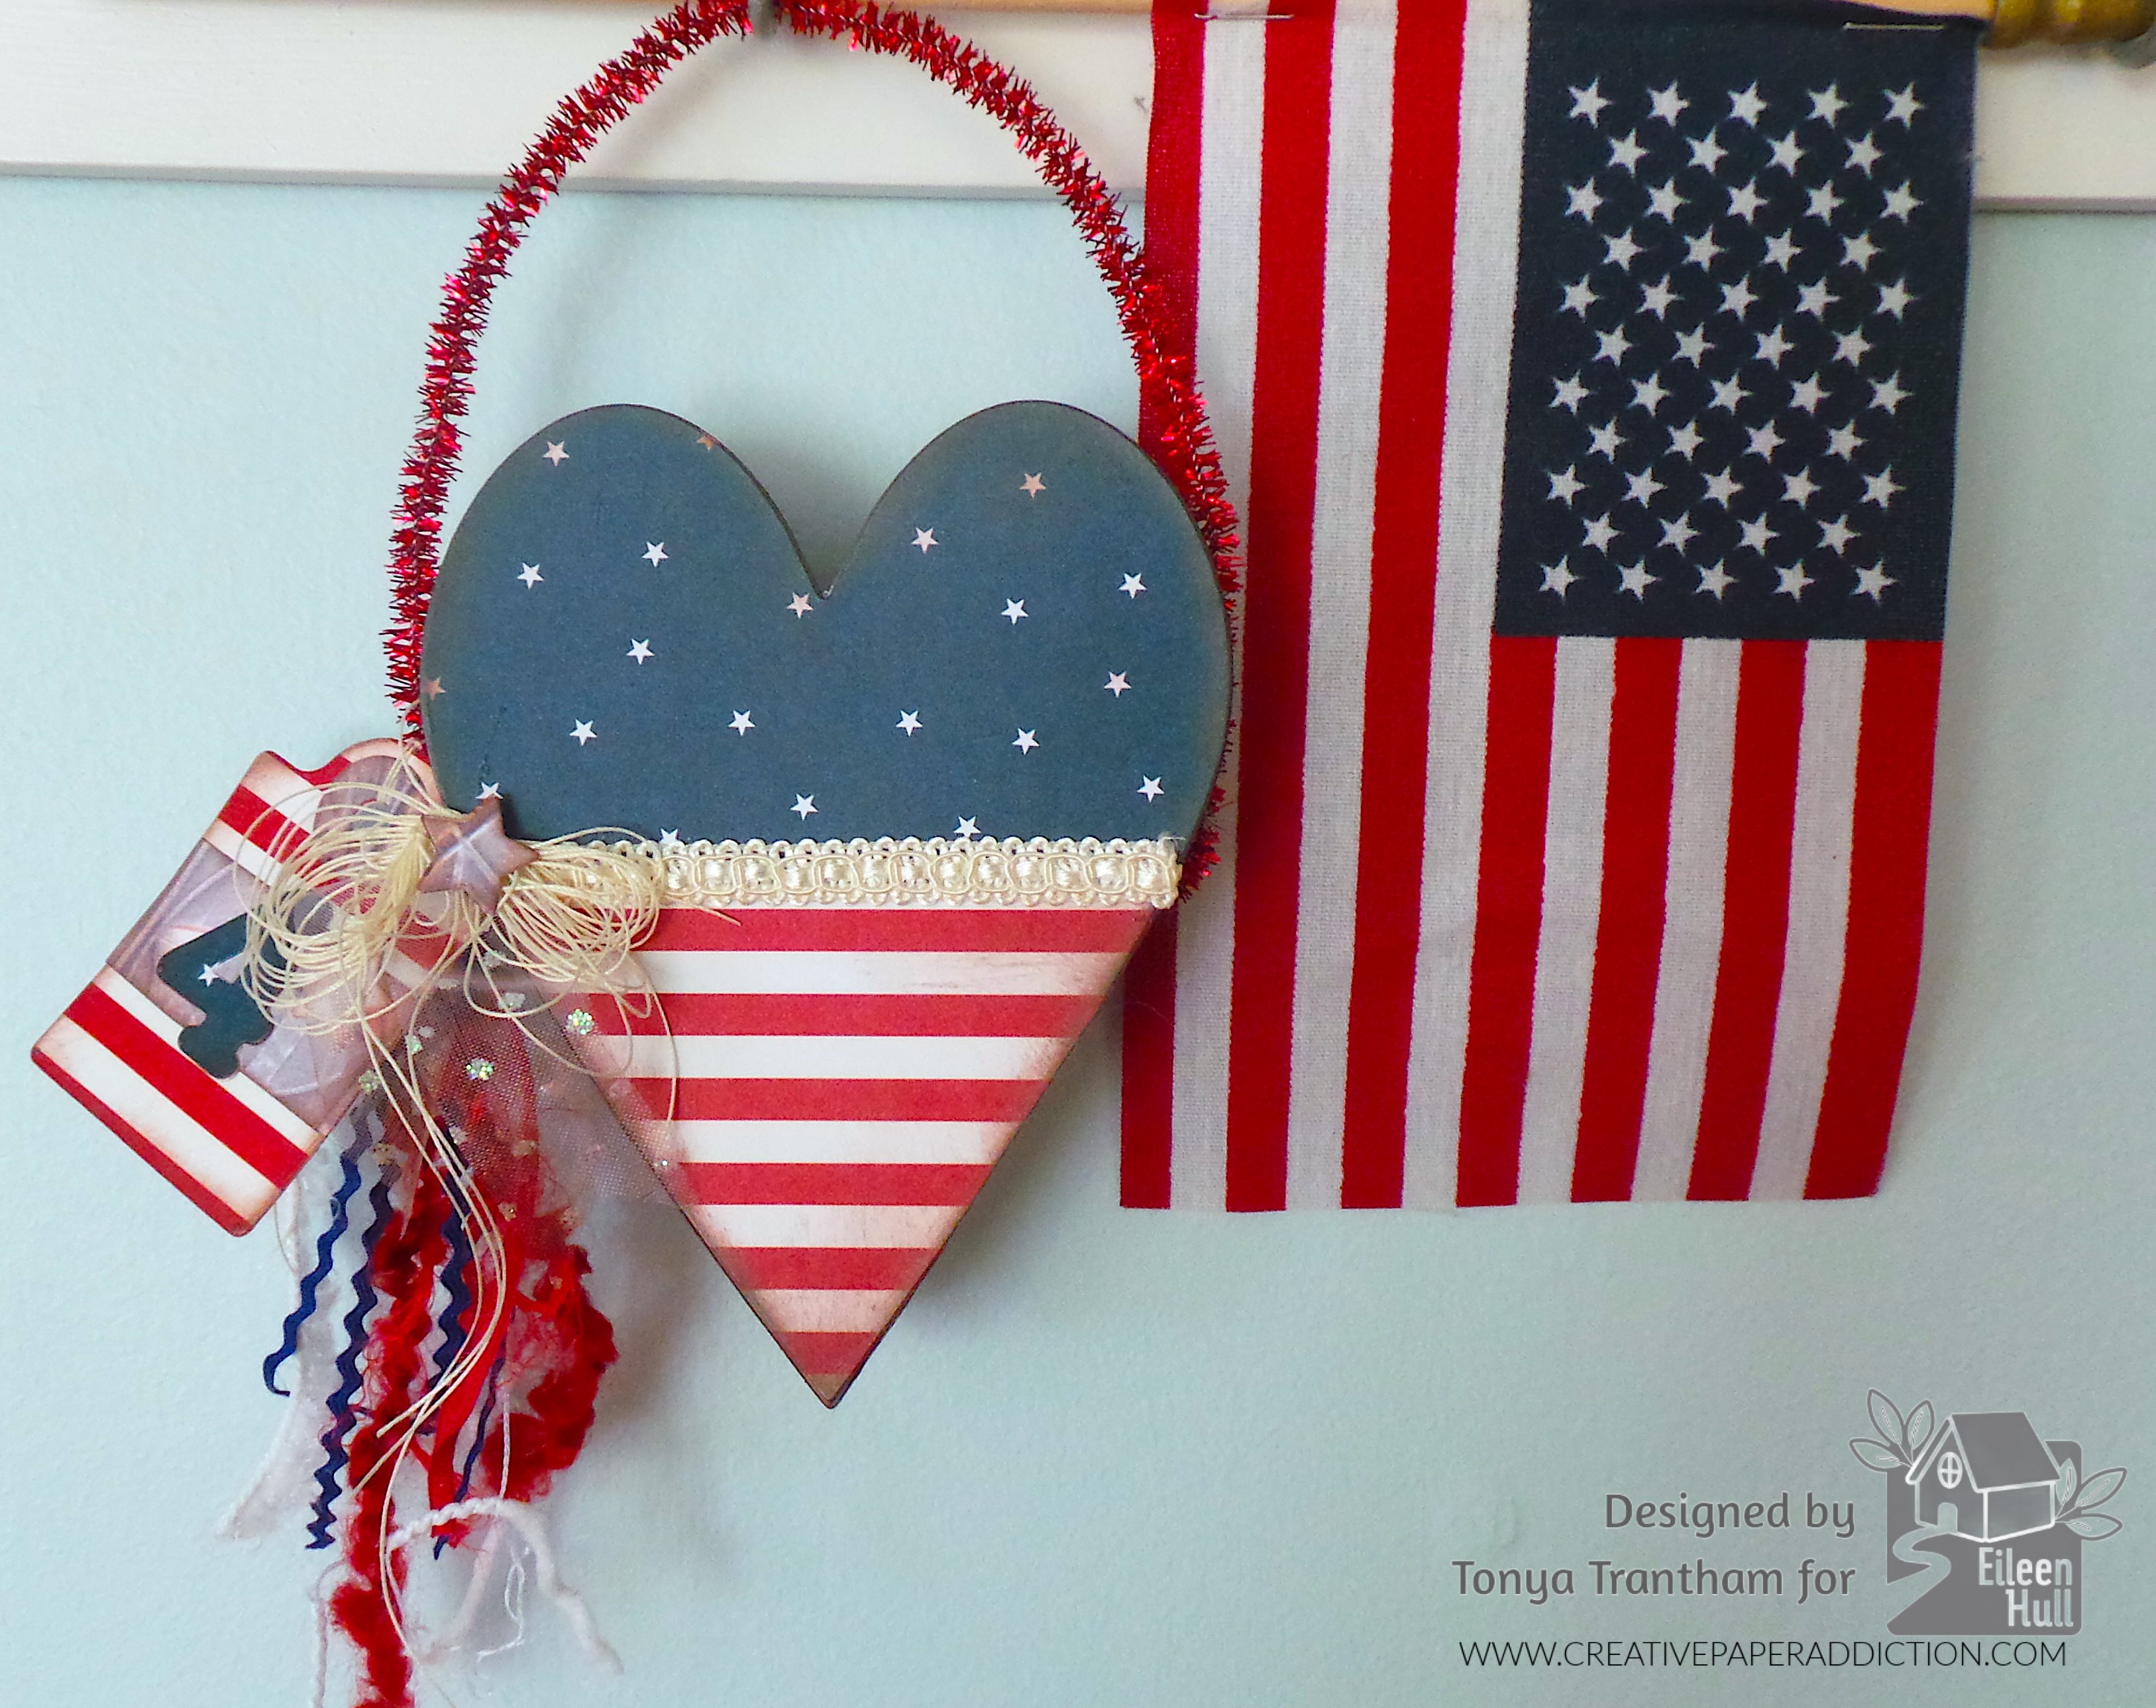
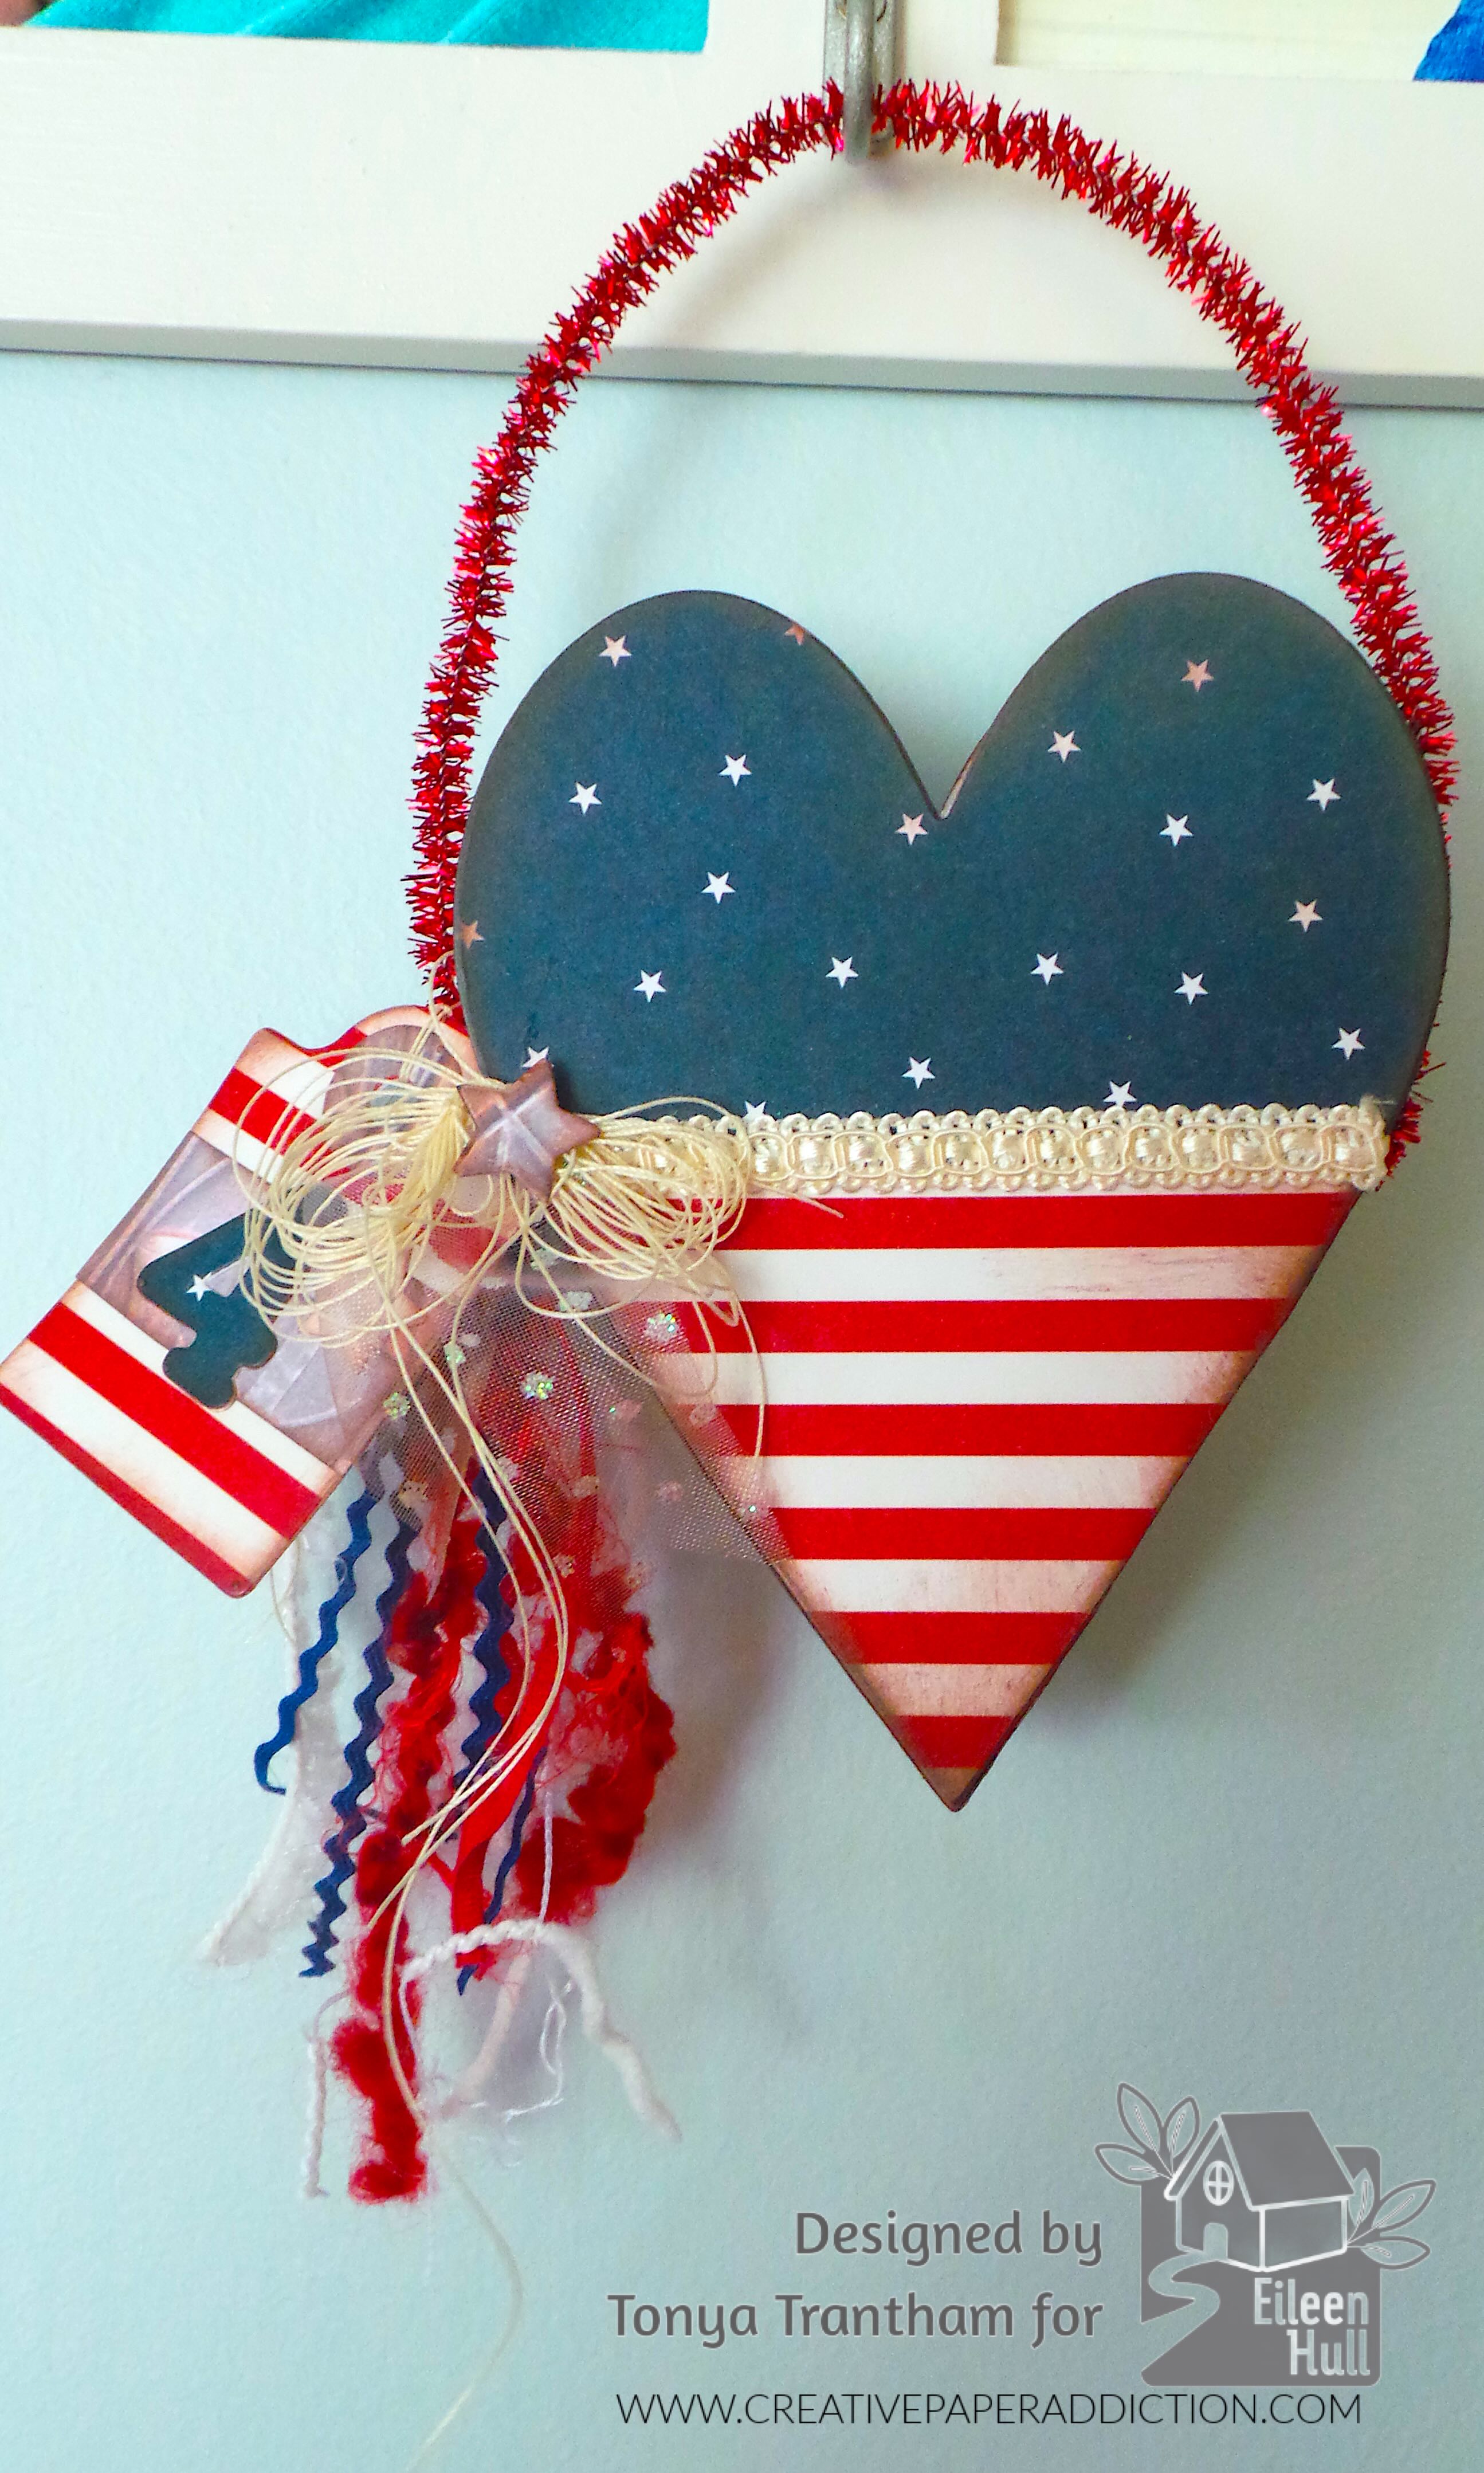
4th of July Patriotic Heart Pocket

Hi everyone! I’m back with my first project of the month for Eileen Hull. The theme for this month is Alphabet Soup. I didn’t use the Nora Alphabet Thinlits on my project but I did use the number four from the Nora Numbers Thinlits. I wanted to create a Fourth of July project that I could display. So I’m going to pass this project off as this month’s theme…wink wink ;-). I also used the Stitched Hearts Thinlits, Ephemera Pocket and Tags Thinlits and the Bookbinding and Label Thinlits (retired) to create this project. Anyways, let’s get started!

A decorative heart-shaped wall hanging featuring a dark blue section with stars and a striped red and white bottom. It is adorned with ribbons, a small photo frame, and a star accent.

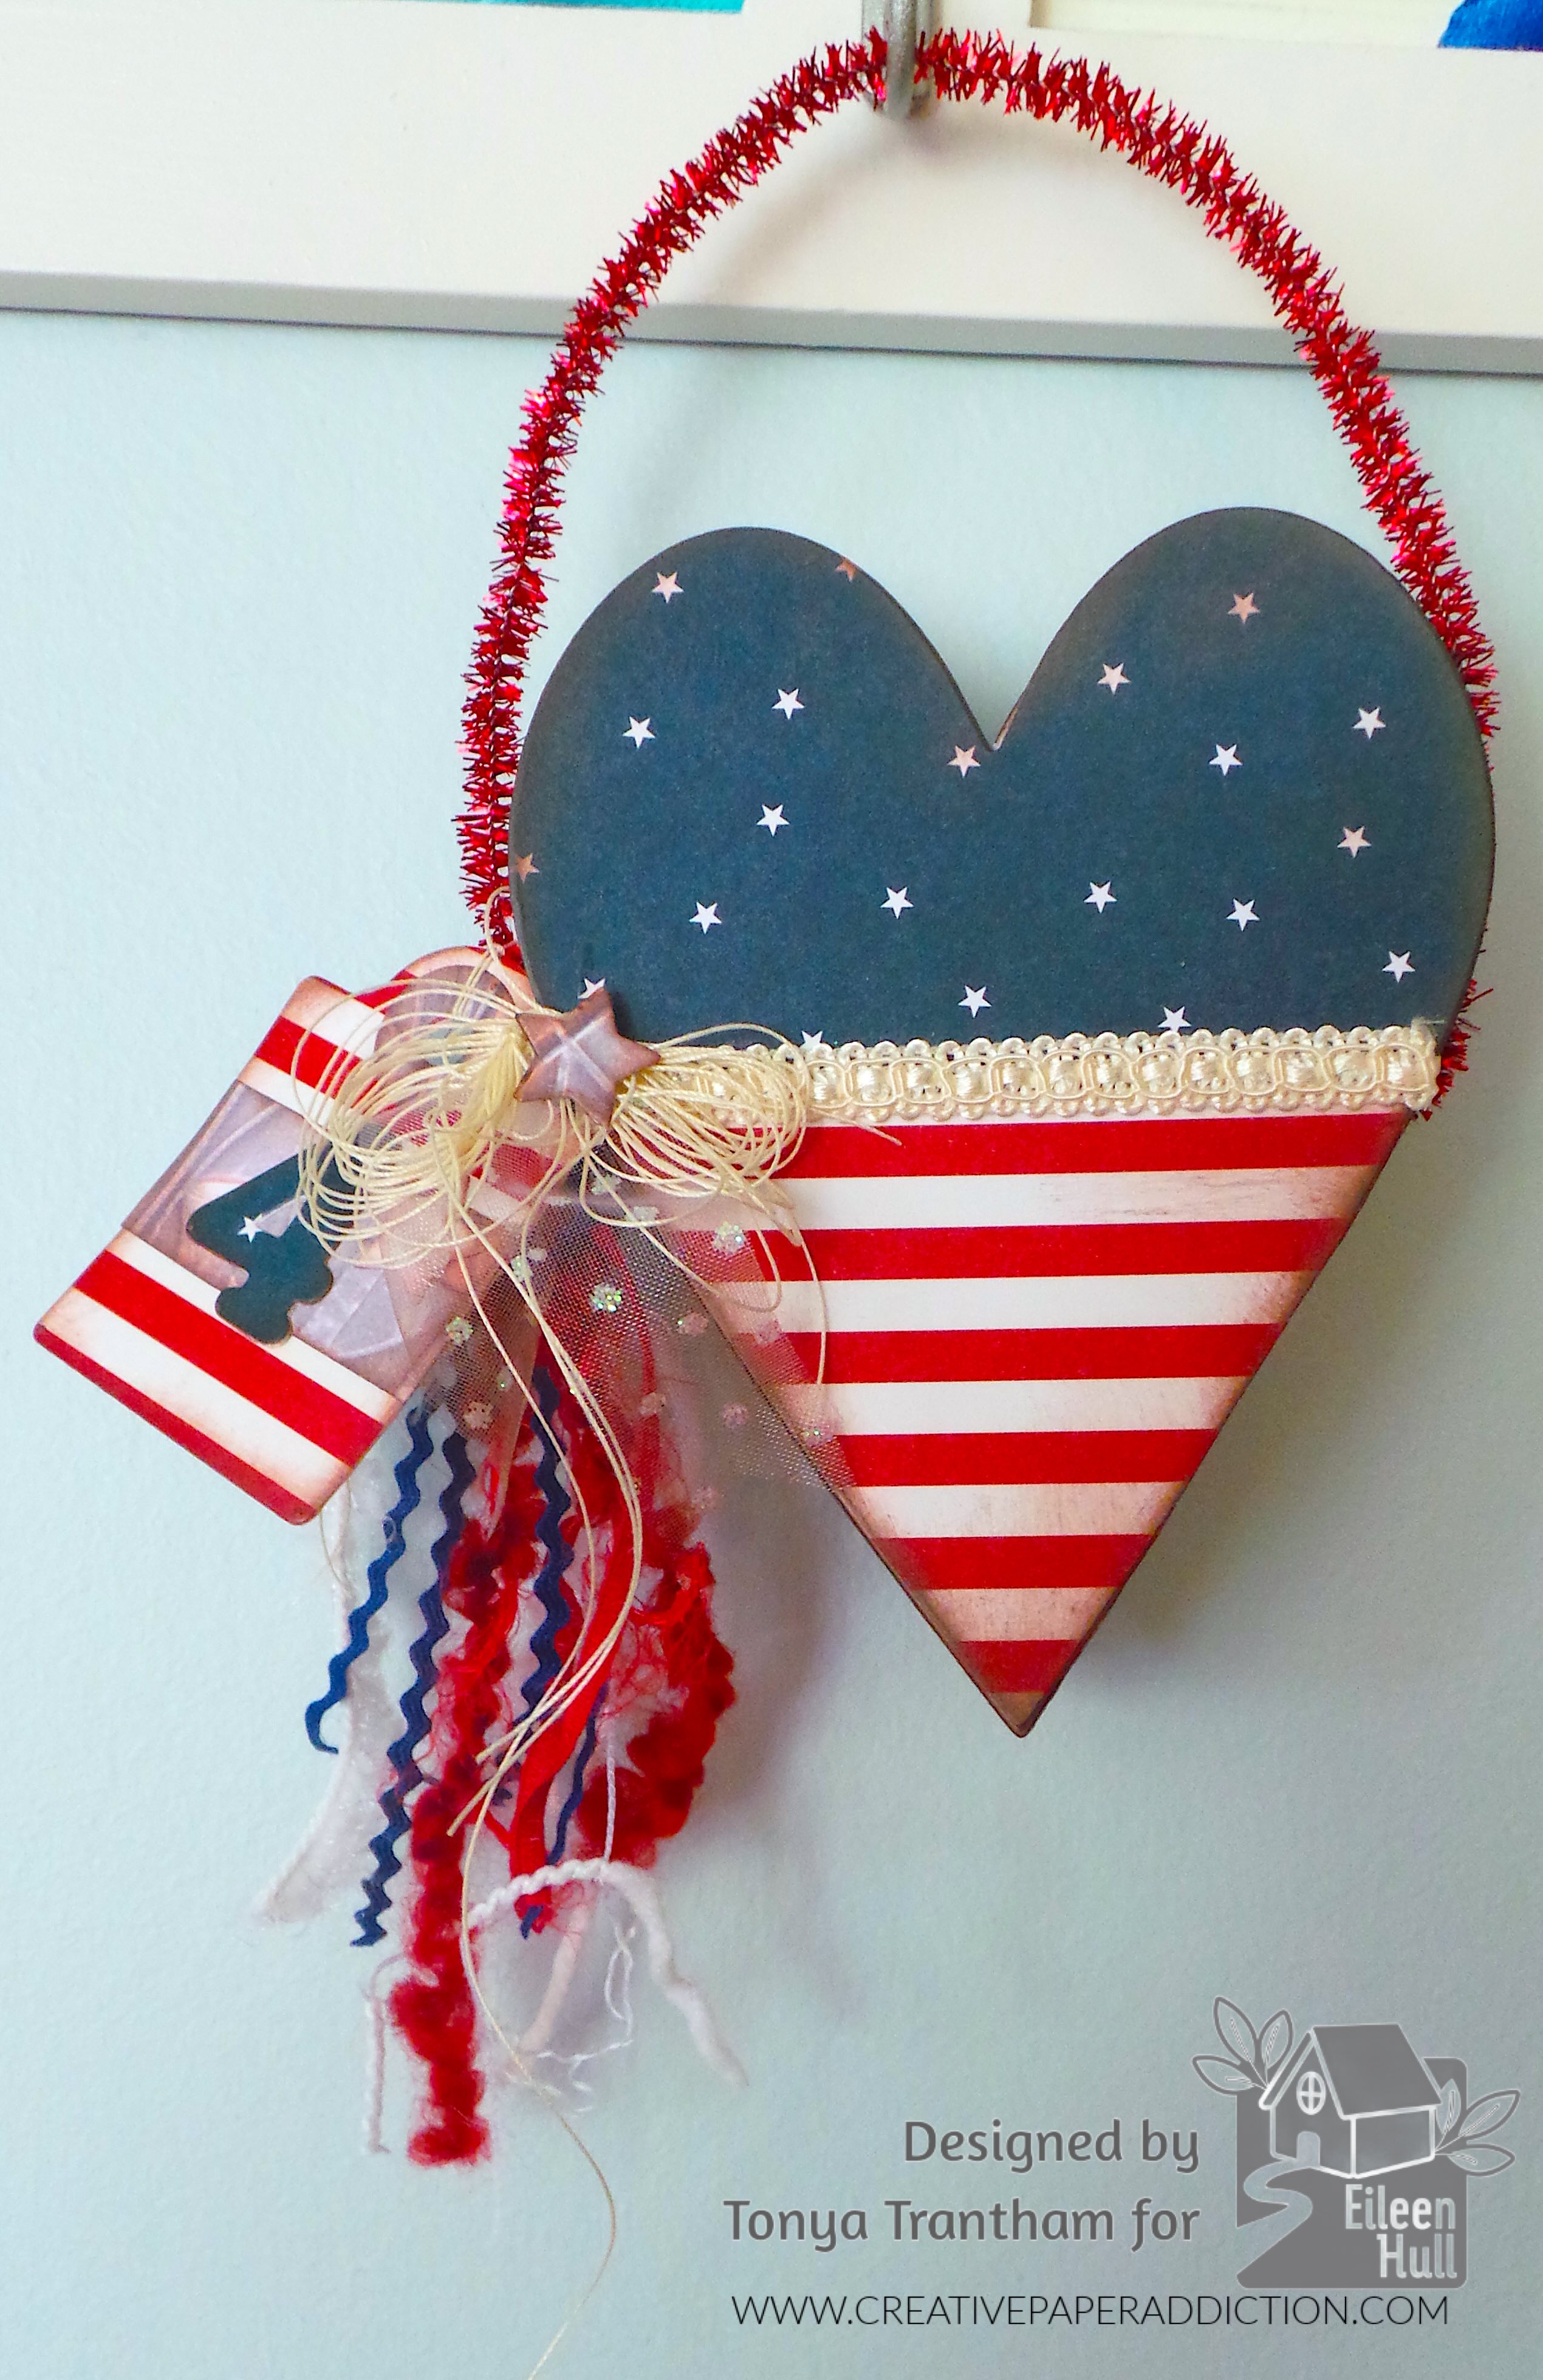
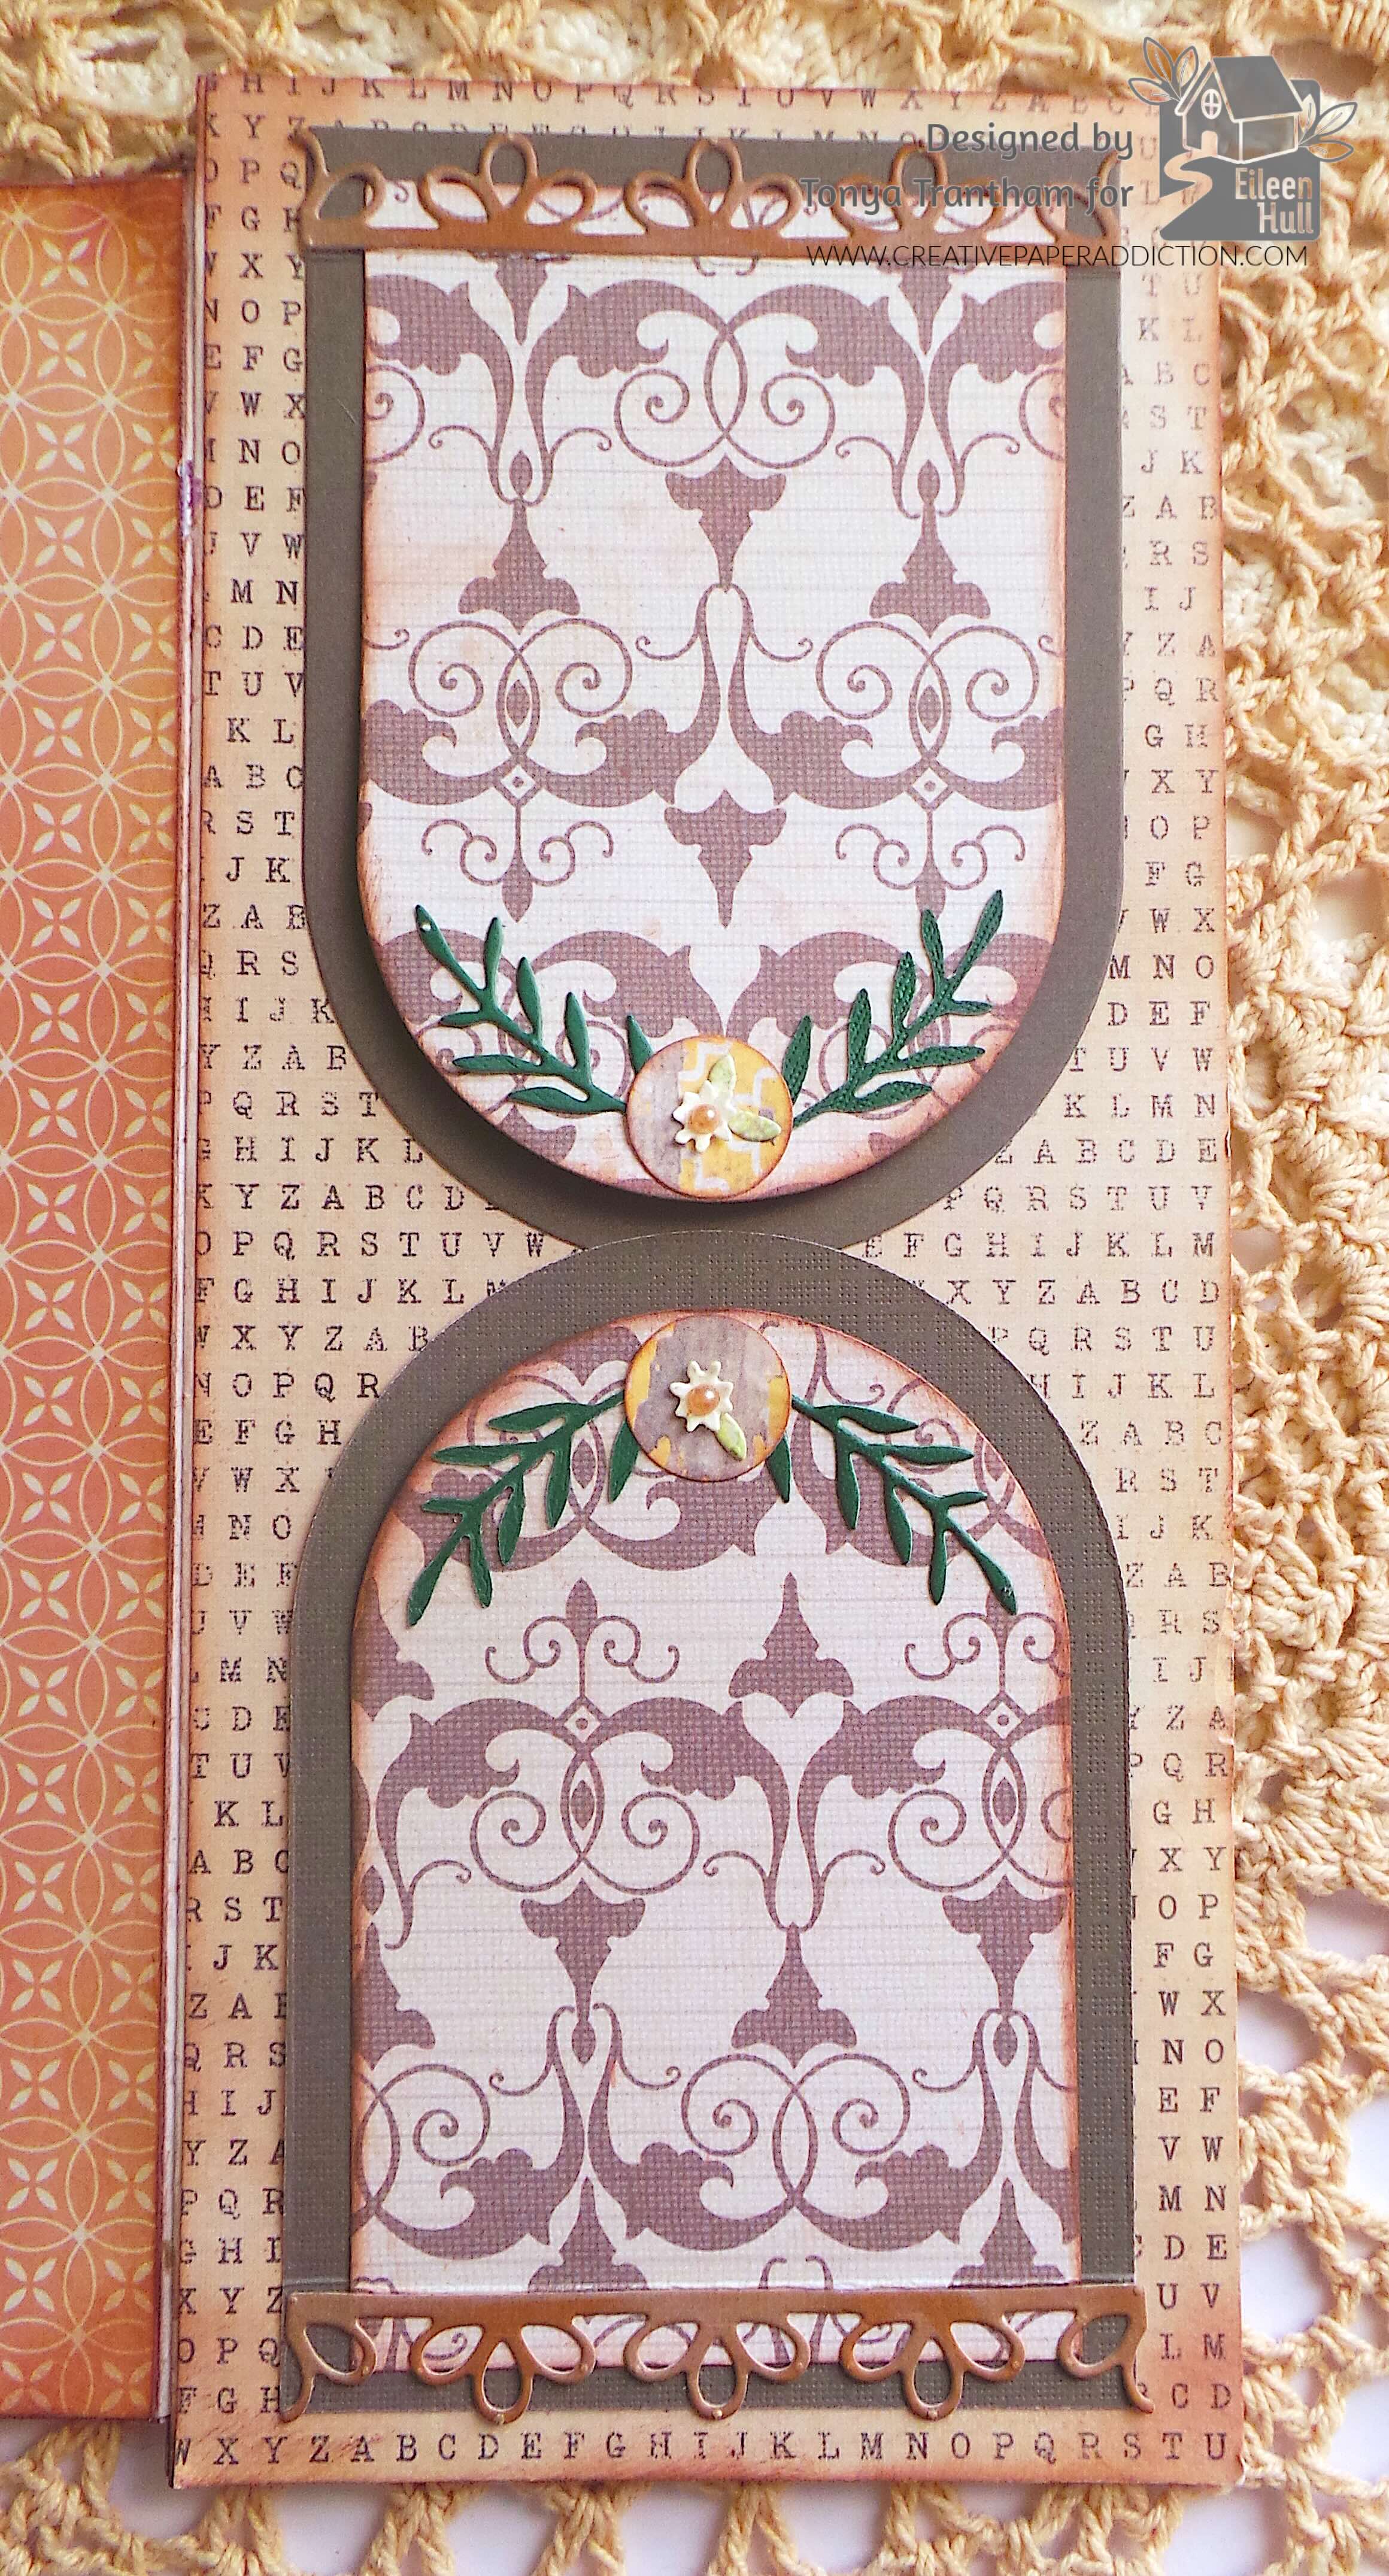
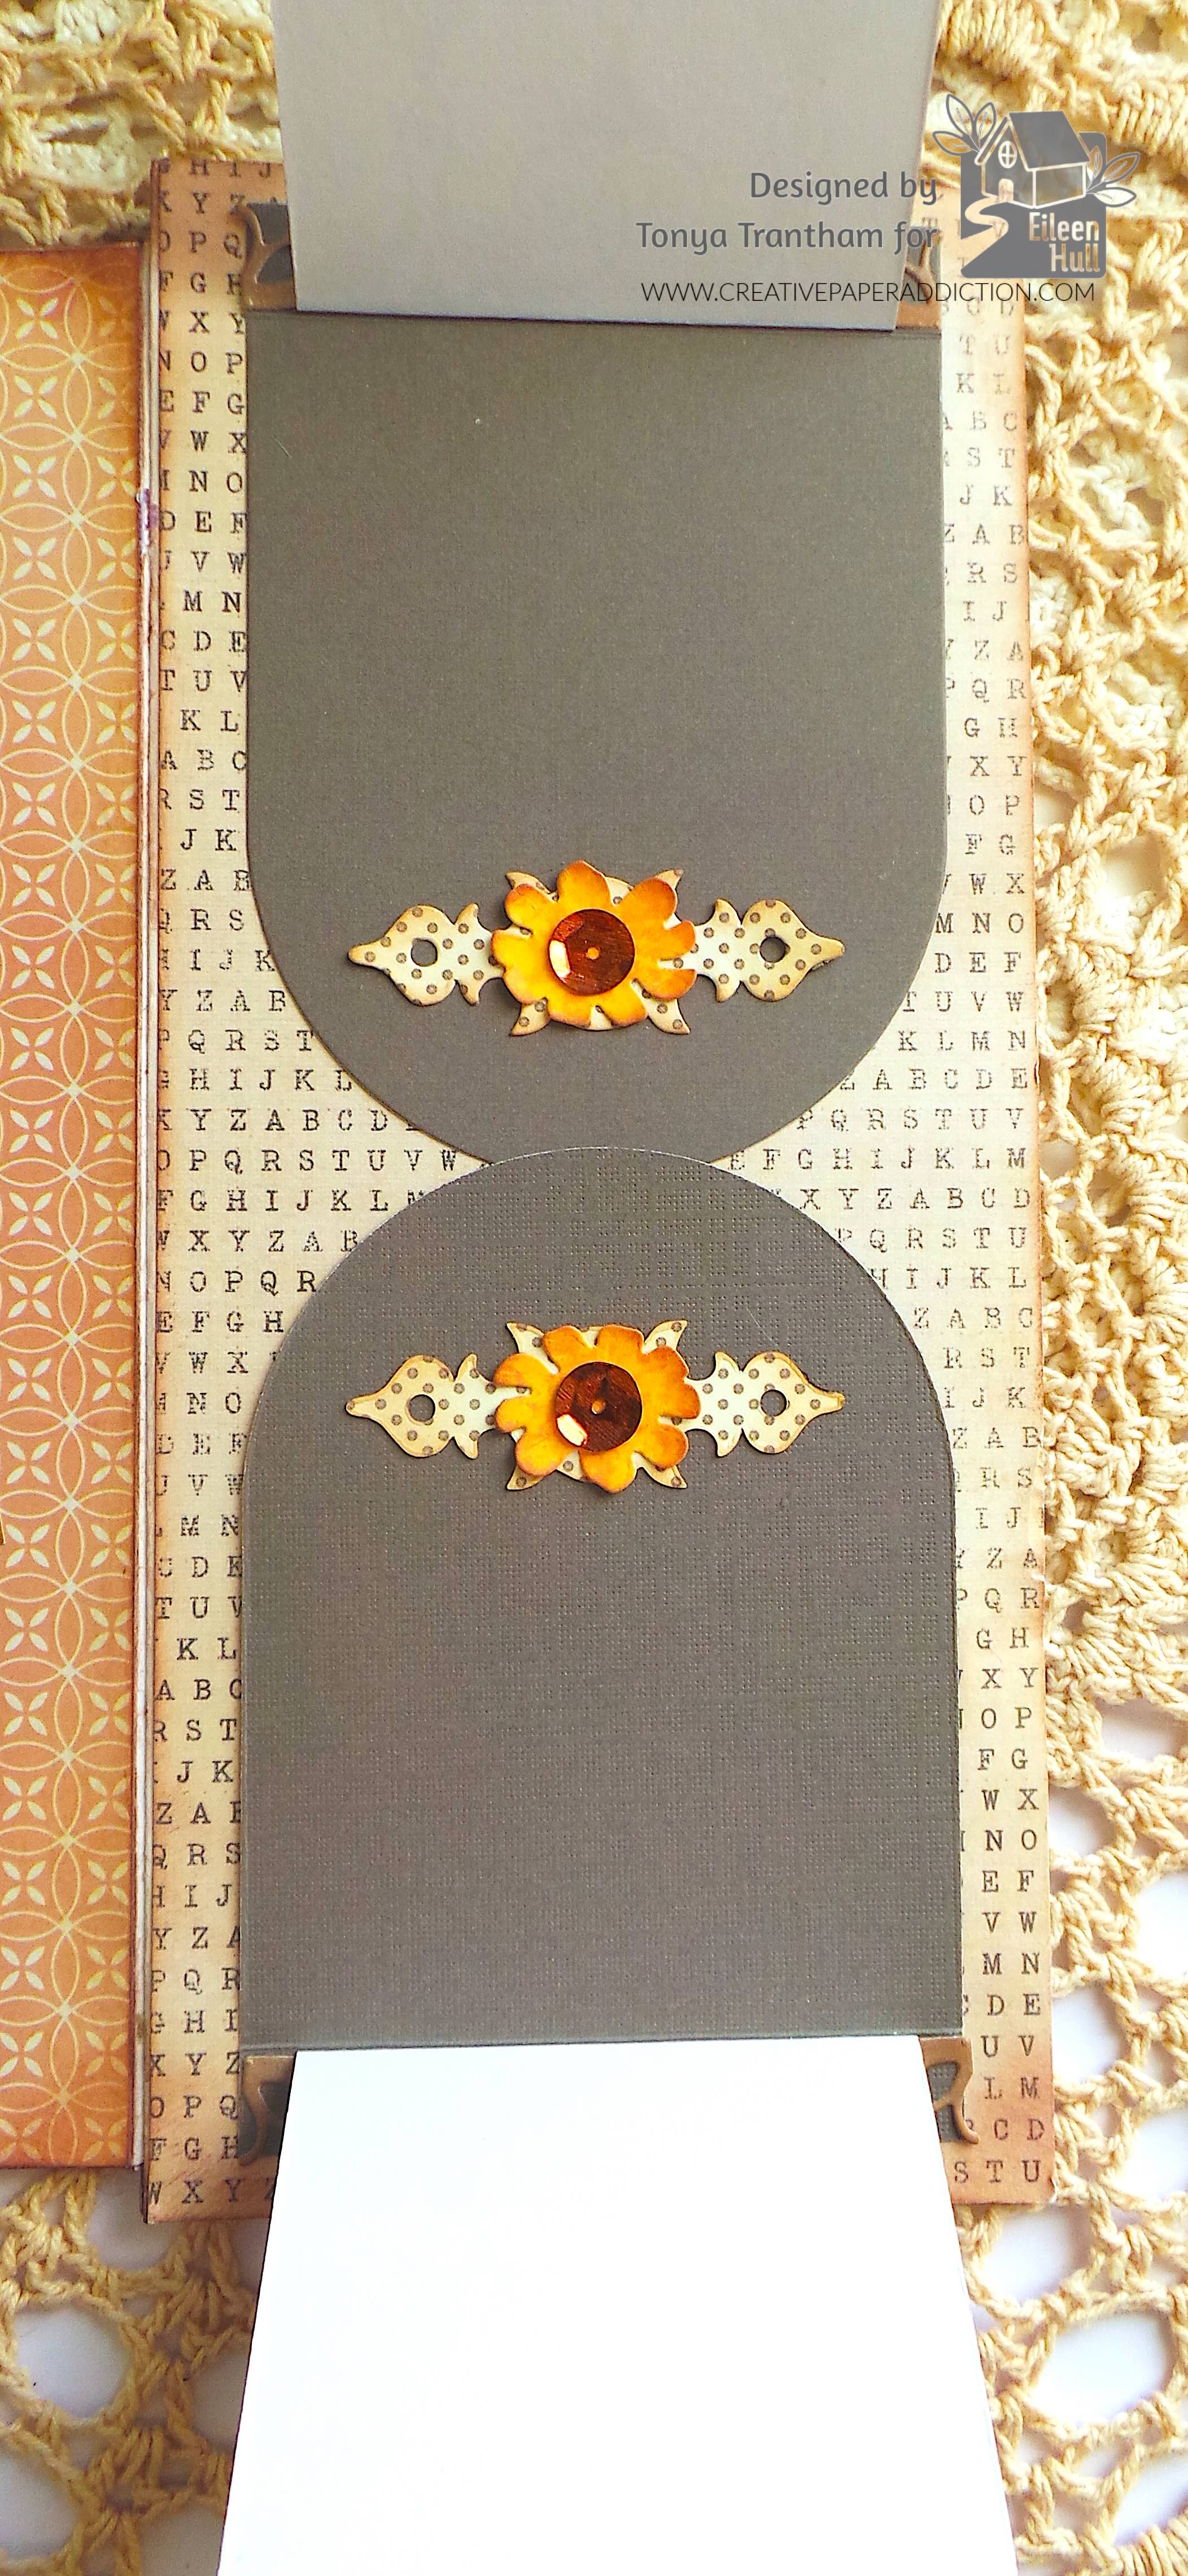
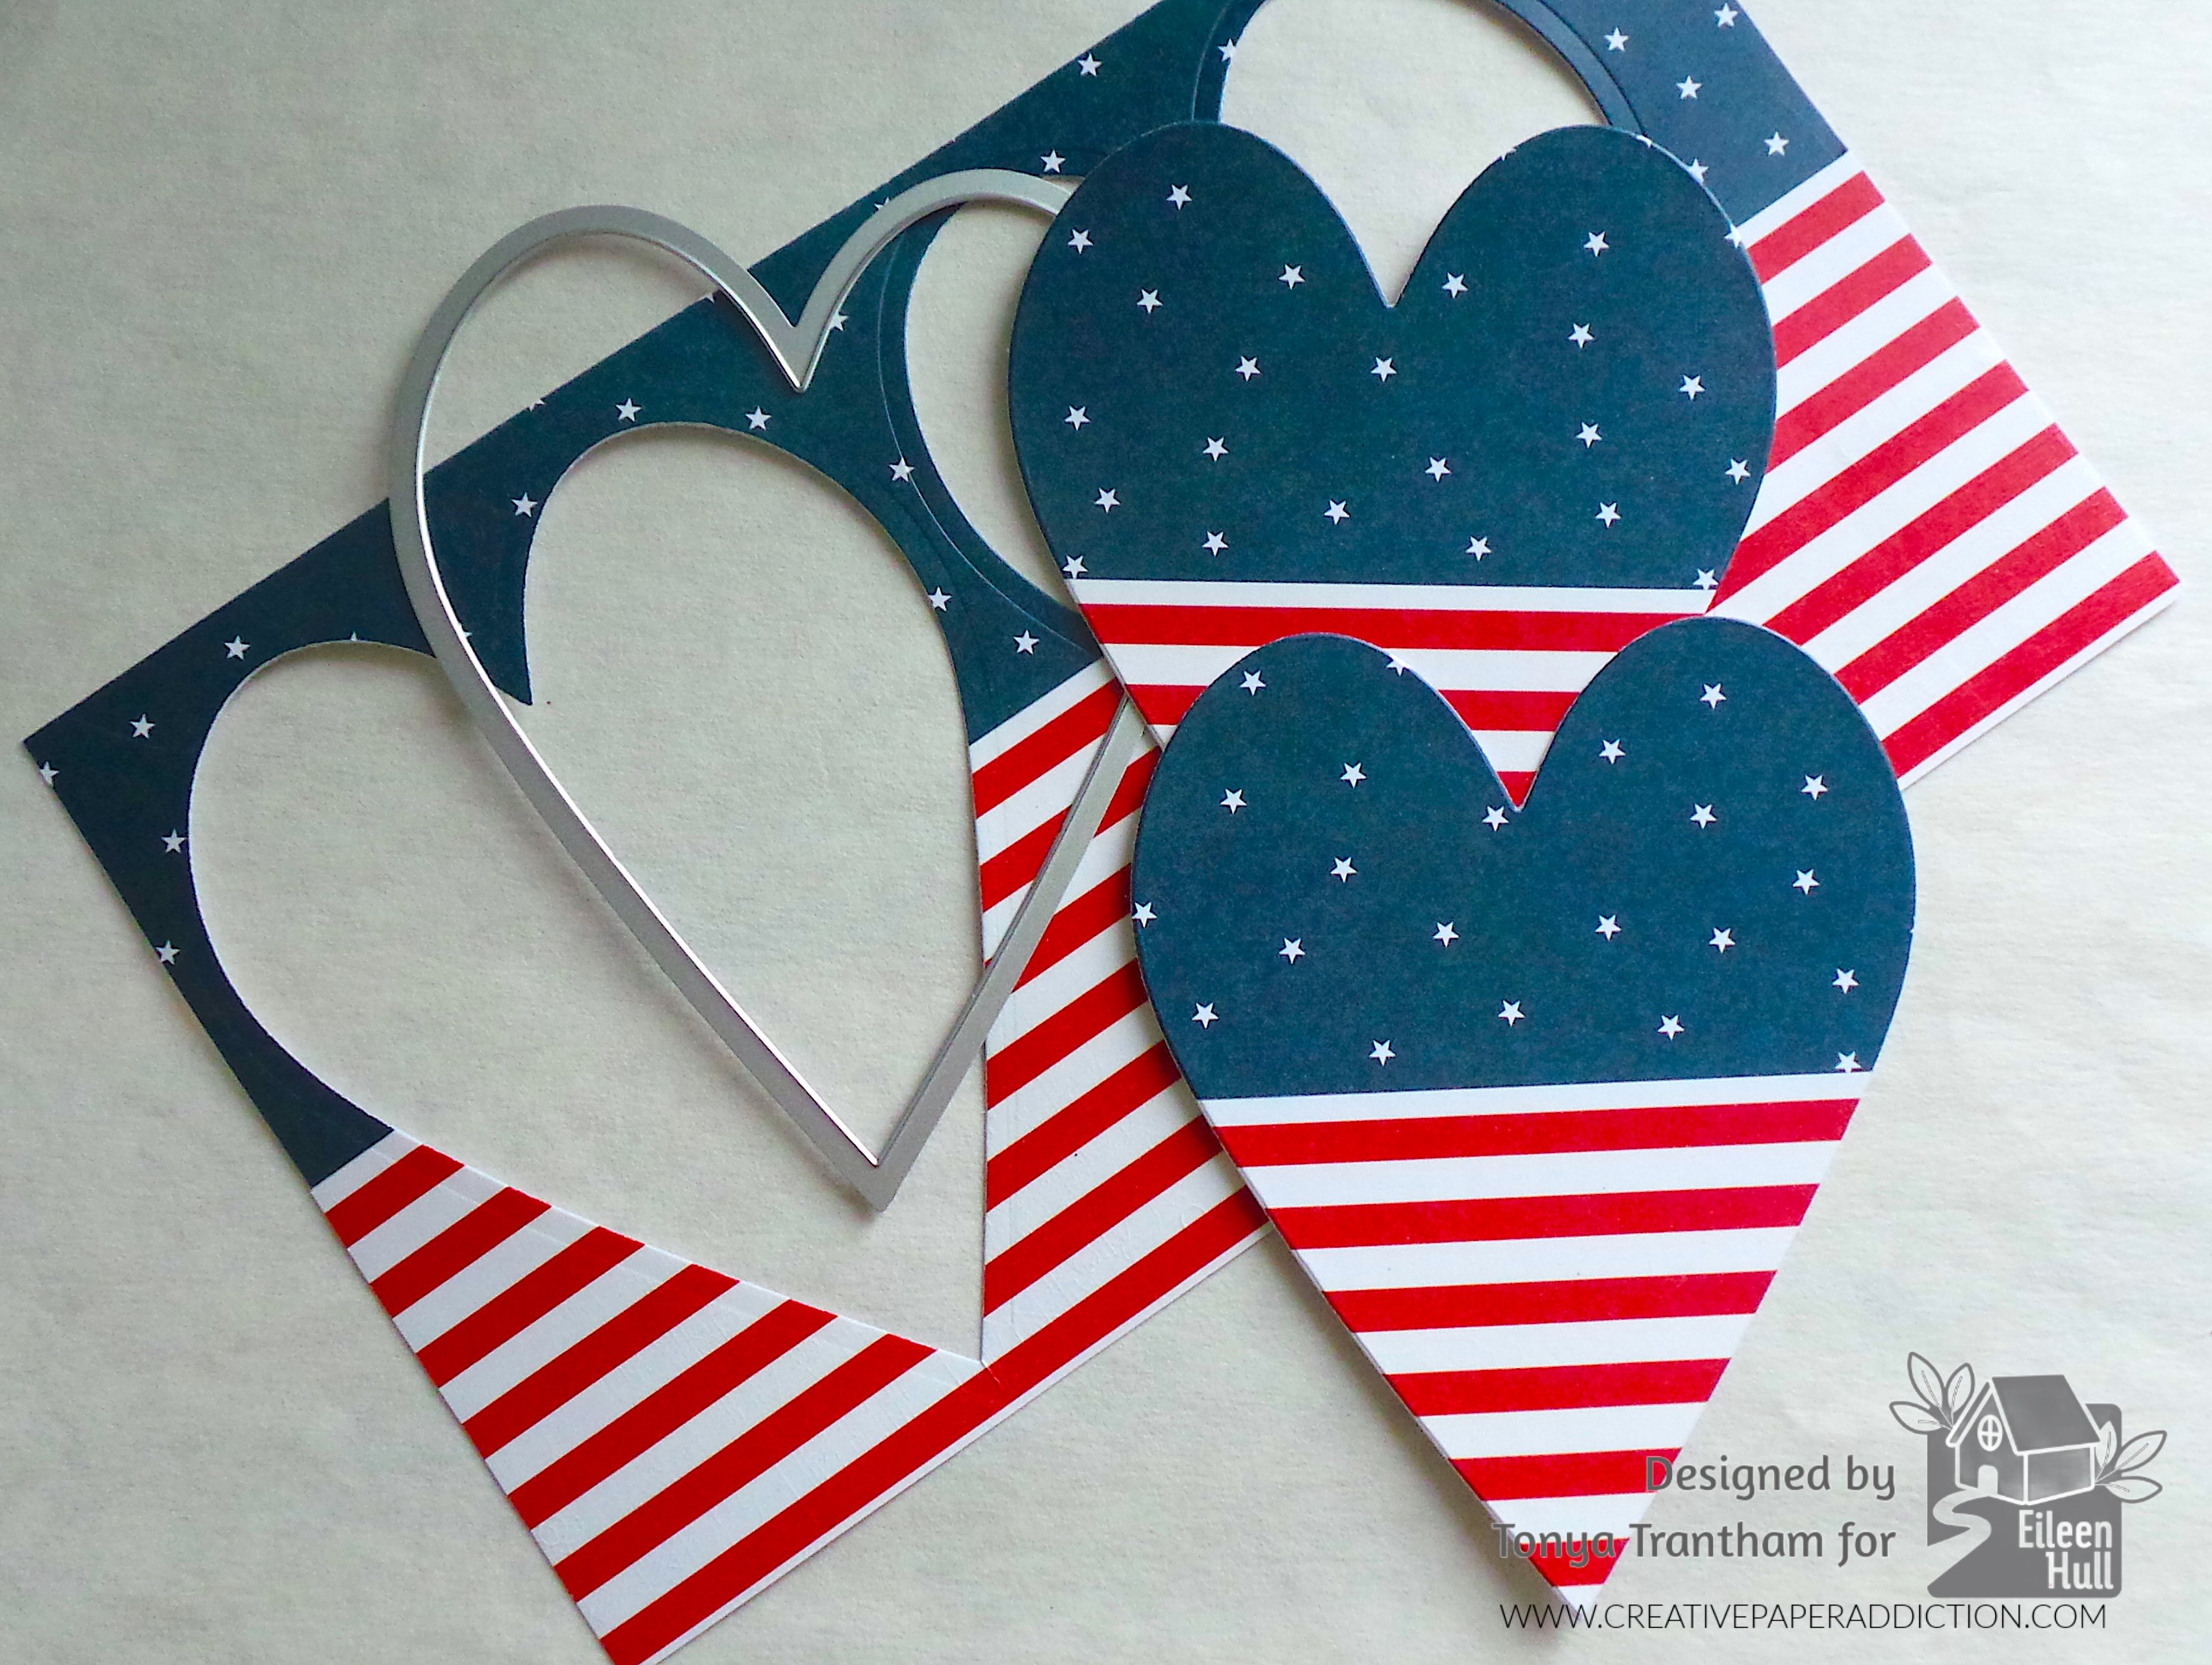
First, I applied an Adhesive Sheet to one side of a piece of White Cardstock. I removed the backing from the adhesive sheet and placed a blue and white star patterned cardstock onto the upper half of the card. I did the same steps and placed a red and white striped cardstock onto the bottom half. I used the largest heart (without holes) from the Stitched Hearts Thinlits and cut two hearts out.

Collection of heart shapes made from patterned paper featuring stars and stripes, symbolizing patriotism.

Next I placed a small piece of white cardstock onto the Bookbinding and Label Thinlits (retired), placed between cutting plates and ran through the Diecut Machine.

A silver embossing plate with horizontal lines and two white, rectangular strips placed on top.

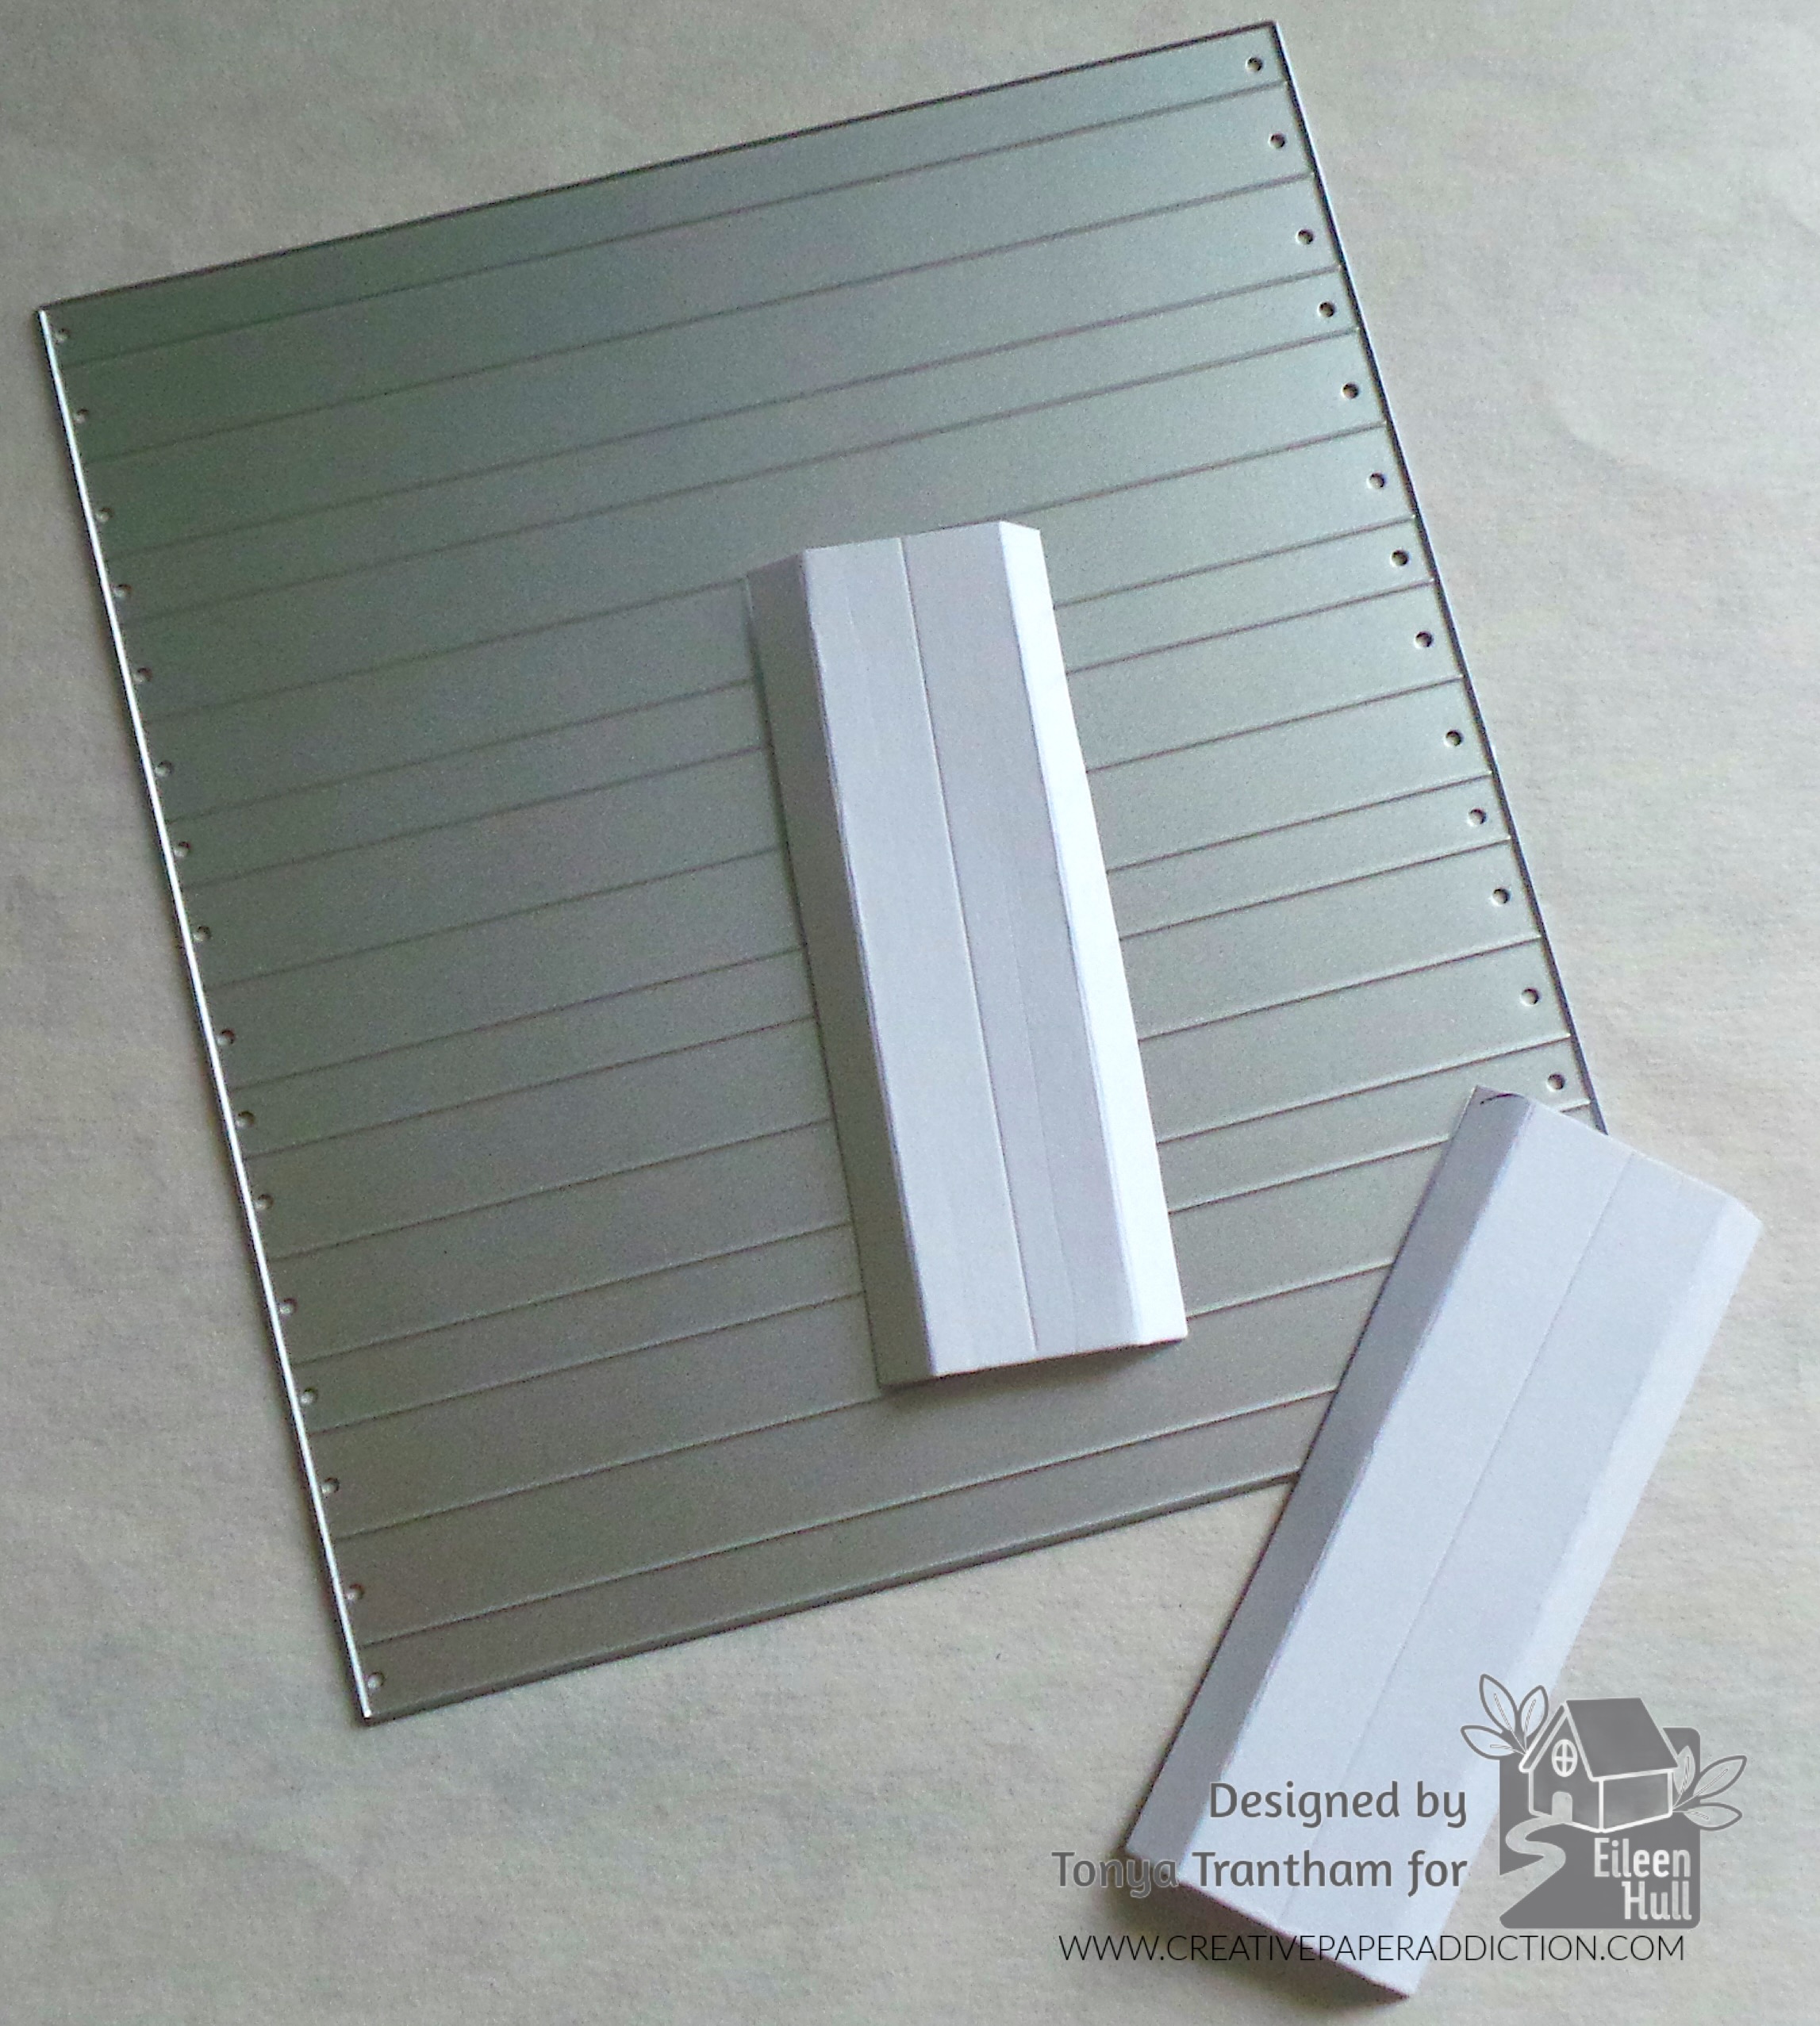
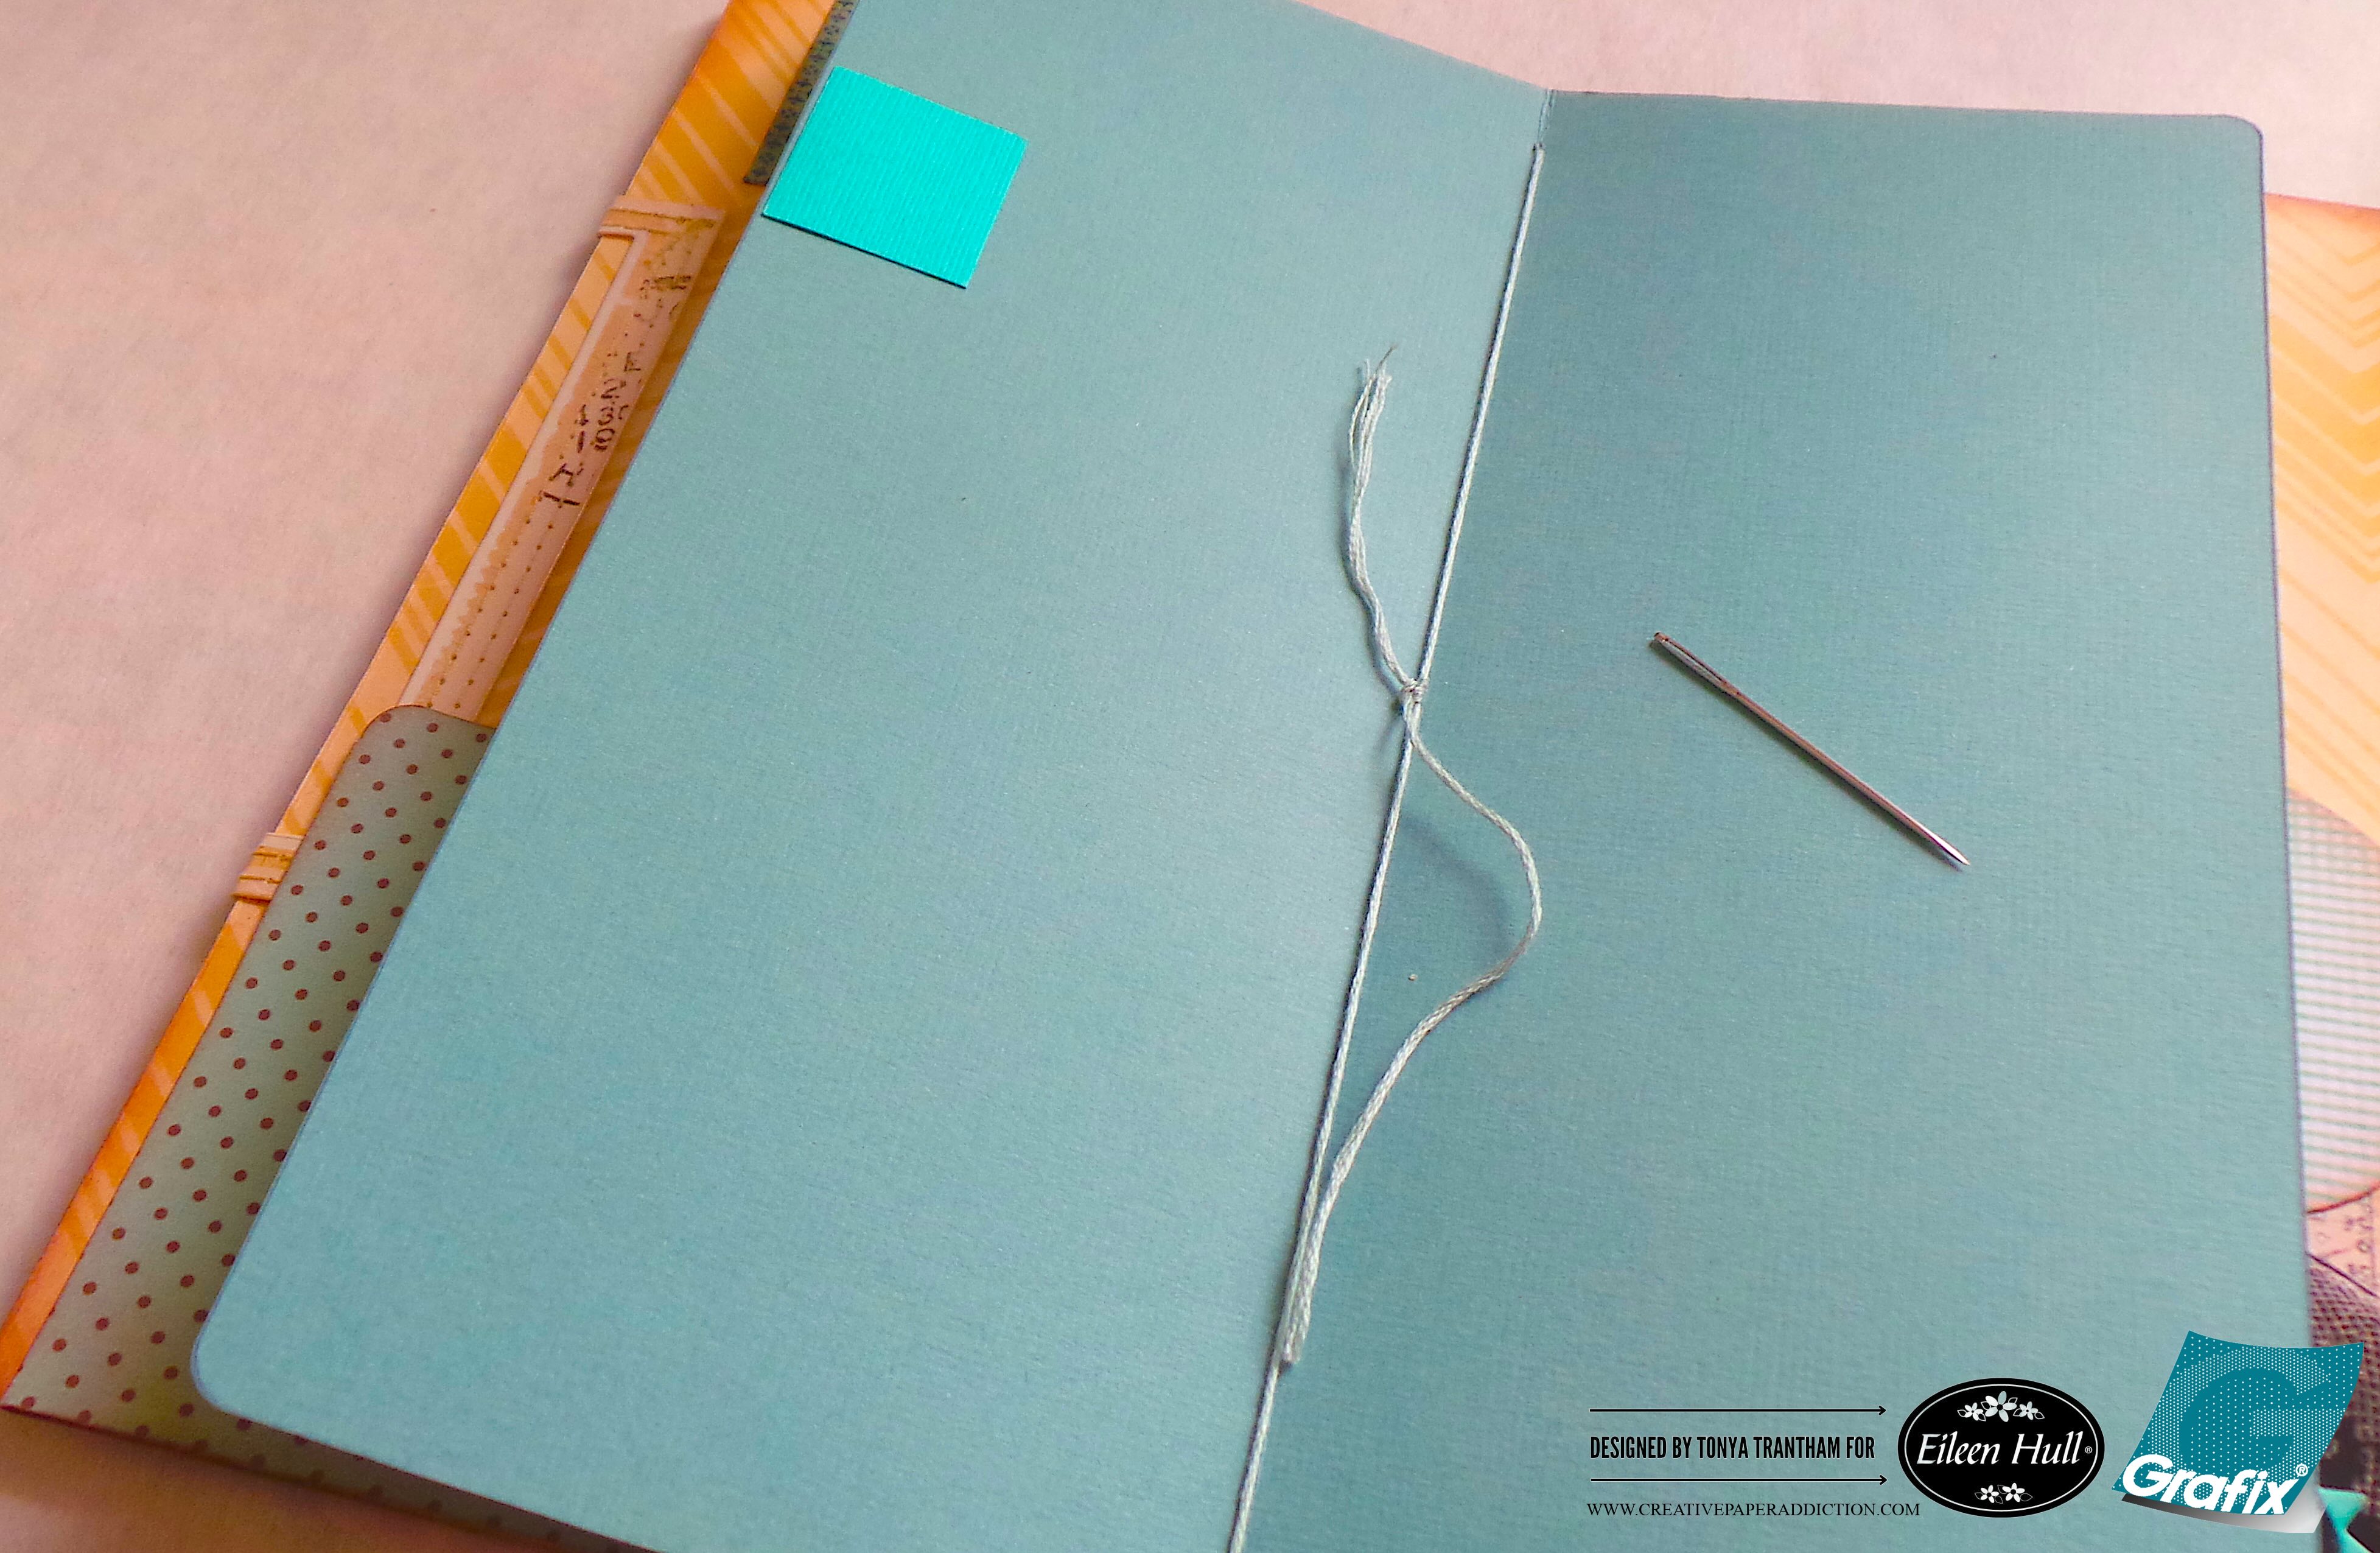
I cut two of the of the bookbinding pieces into three inches lengths. I folded the smaller flap on either side of the two larger folds to create the sides for the pocket. I use a Crop A Dile and punched a hole at the top of each side of pocket.

A heart-shaped decoration featuring a blue top with white stars and a bottom section with red and white stripes, resembling the American flag. The heart is positioned partially open, revealing white pages inside.

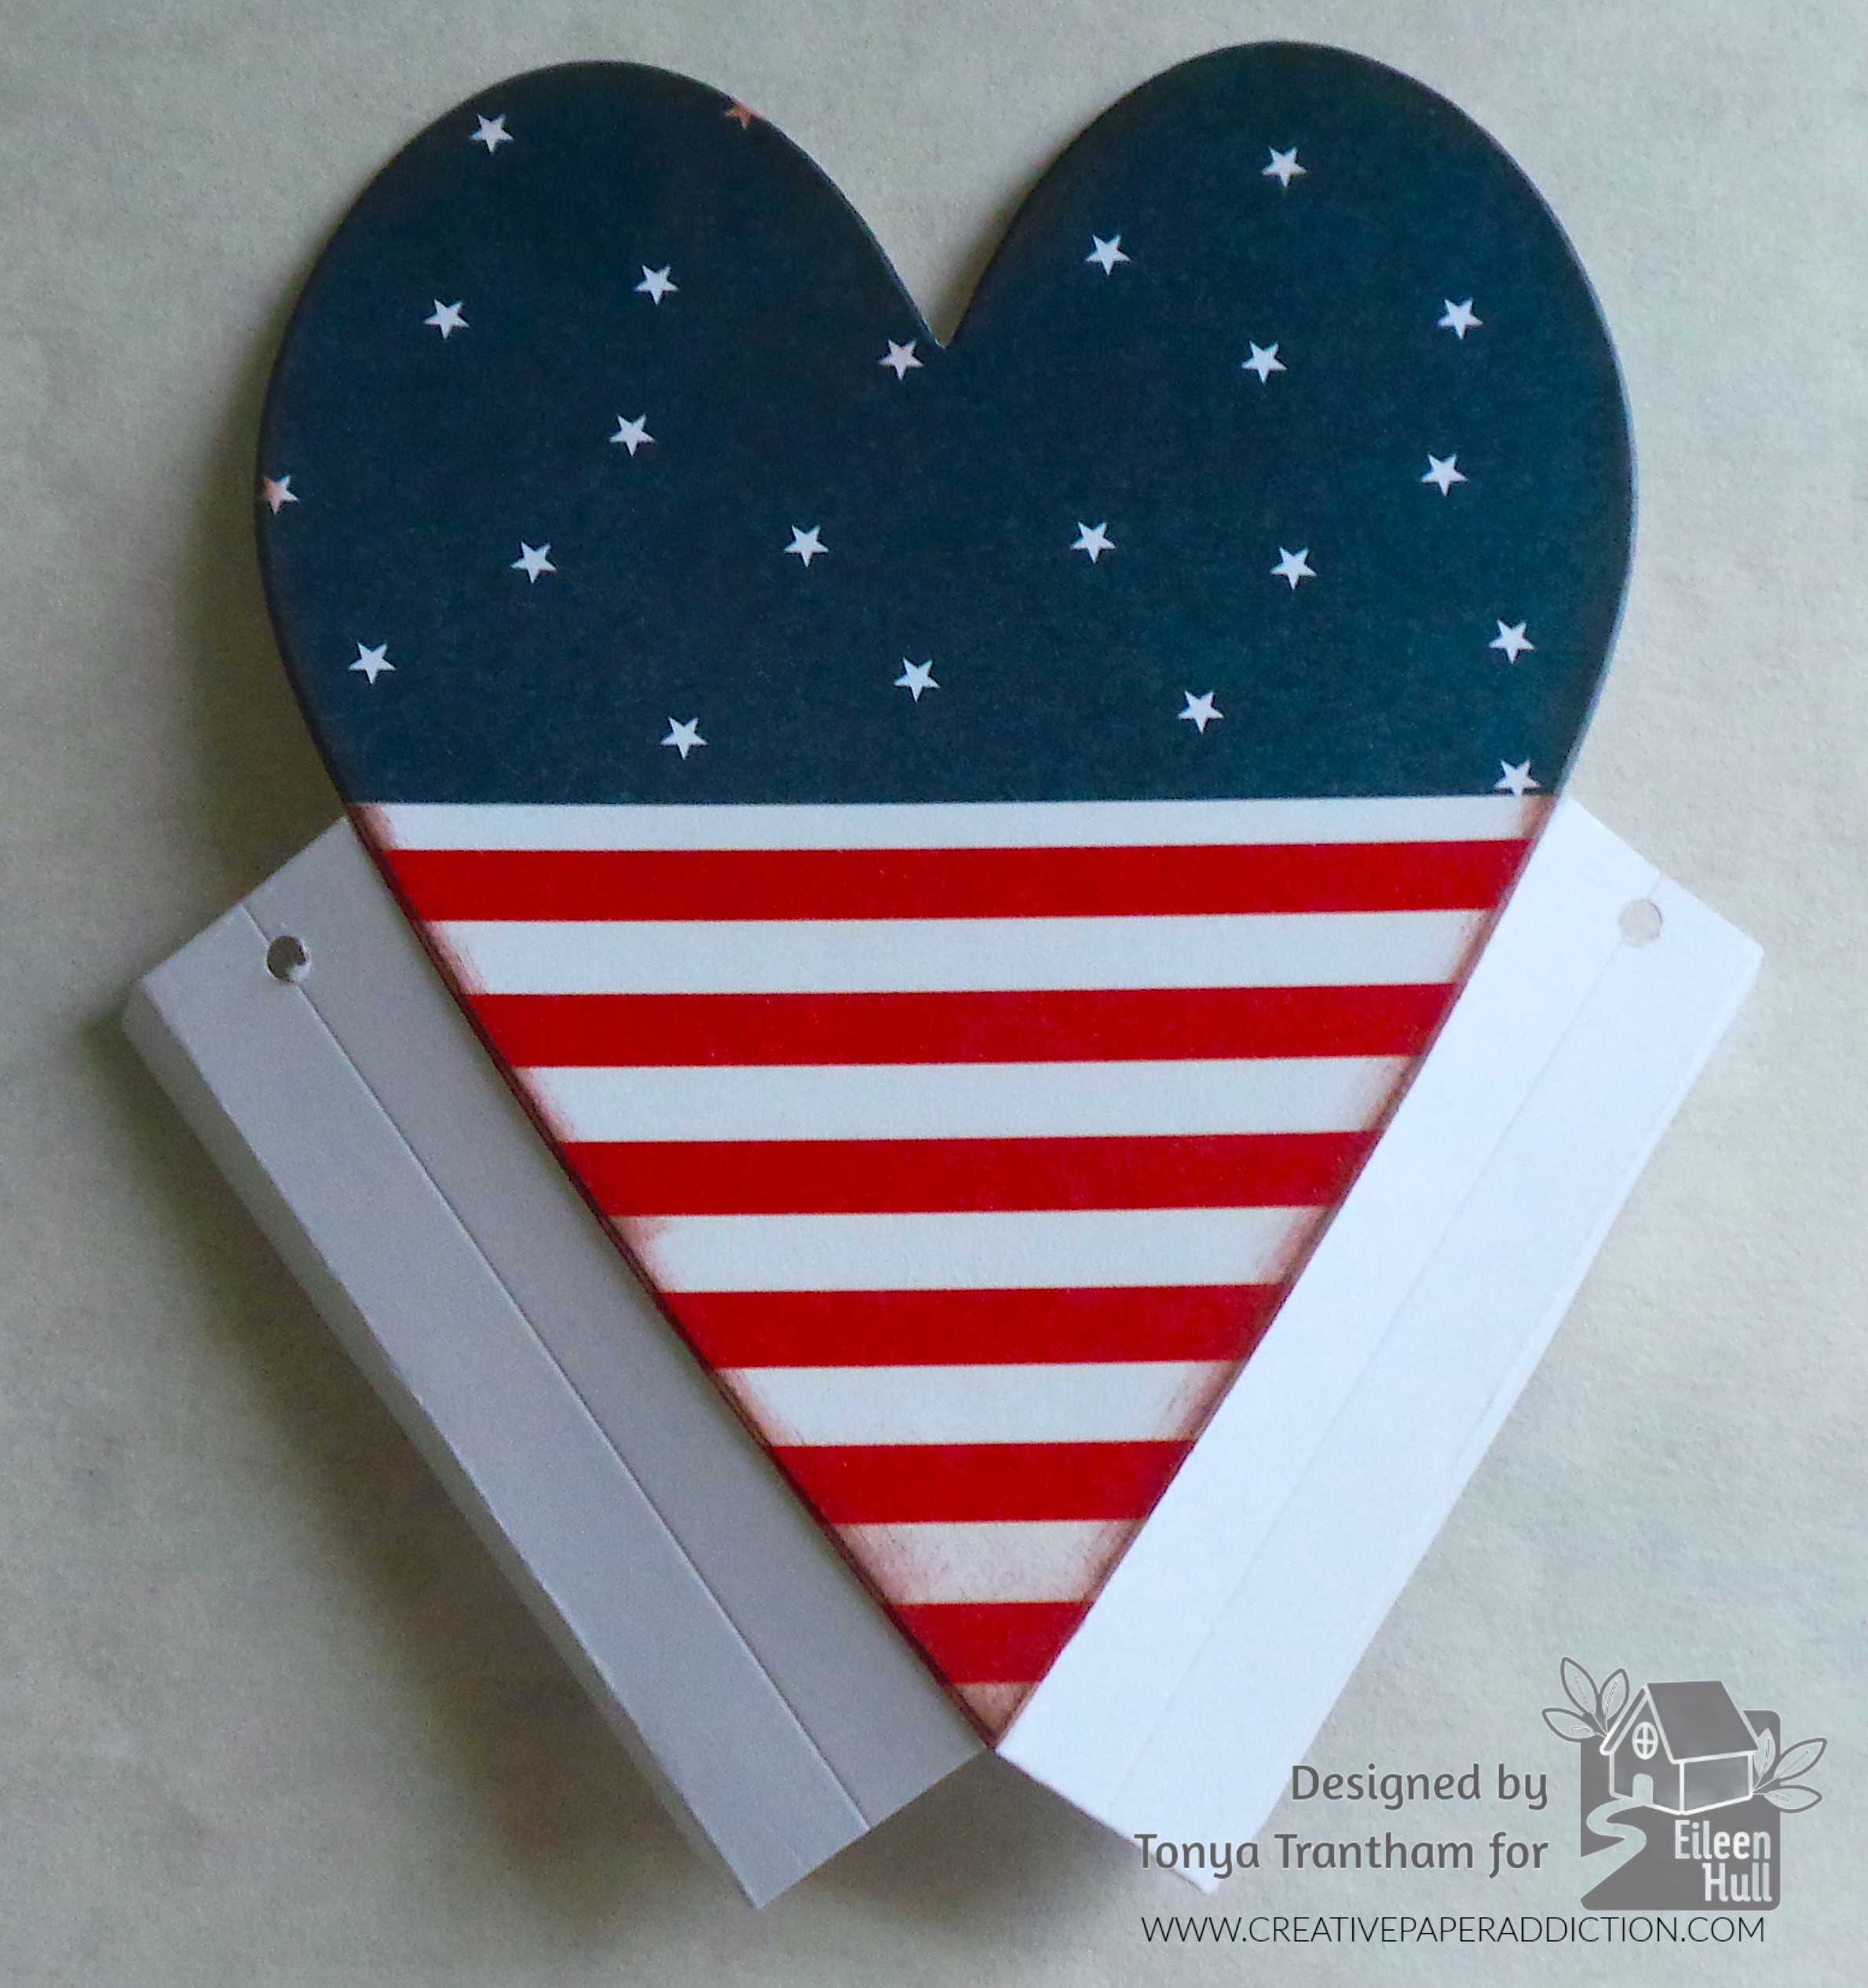
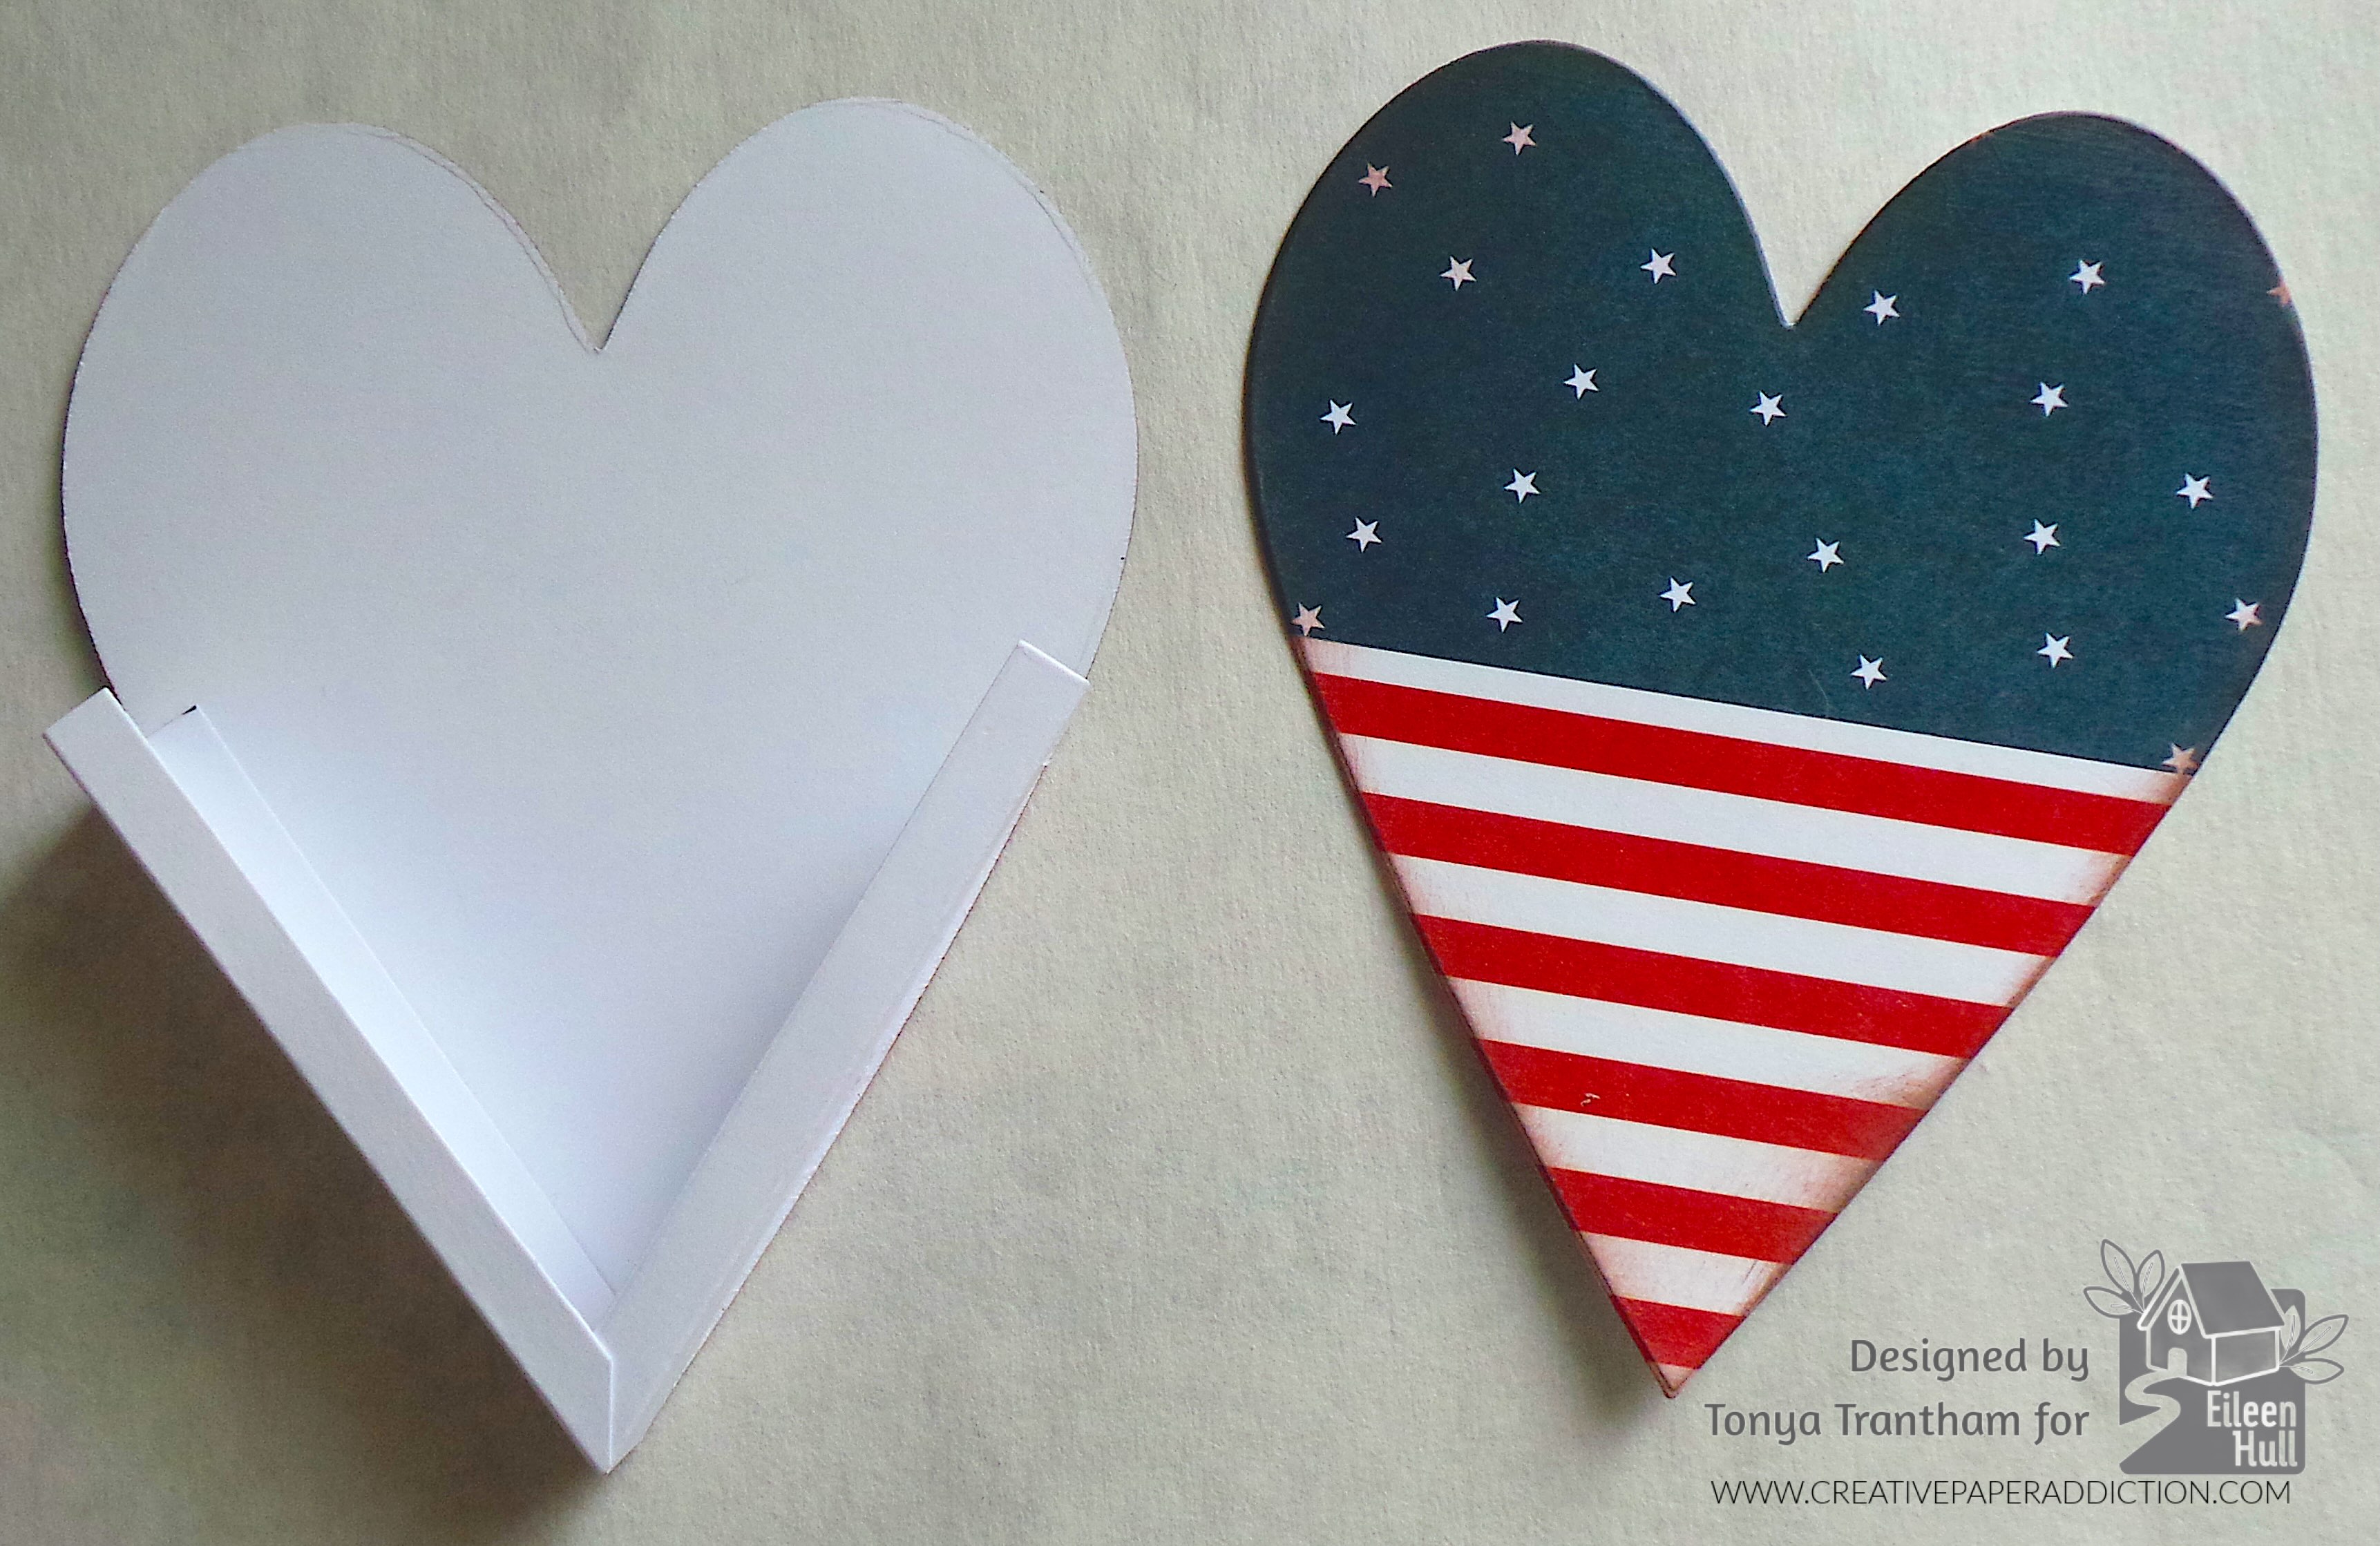
I adhered both pocket sides to the first heart. I cut the flaps at the bottom at an angle and added a drop on glue. I applied glue to the flaps and placed the other heart on top. I covered the sides of the pocket with a patterned cardstock to cover the fold indentions.

An empty white heart-shaped box on the left, and a decorated heart-shaped box with a dark blue background featuring white stars and a red and white striped pattern on the bottom, on the right.

I placed each end of the pipe cleaner through the holes and twisted to secure and create a handle. I adhered a piece of trim in-between the pieces of blue stars and stripe on both sides of the pocket.

A decorative heart-shaped box featuring a dark blue top with white stars and a lower section with red and white stripes, adorned with a golden trim and colorful ribbons.

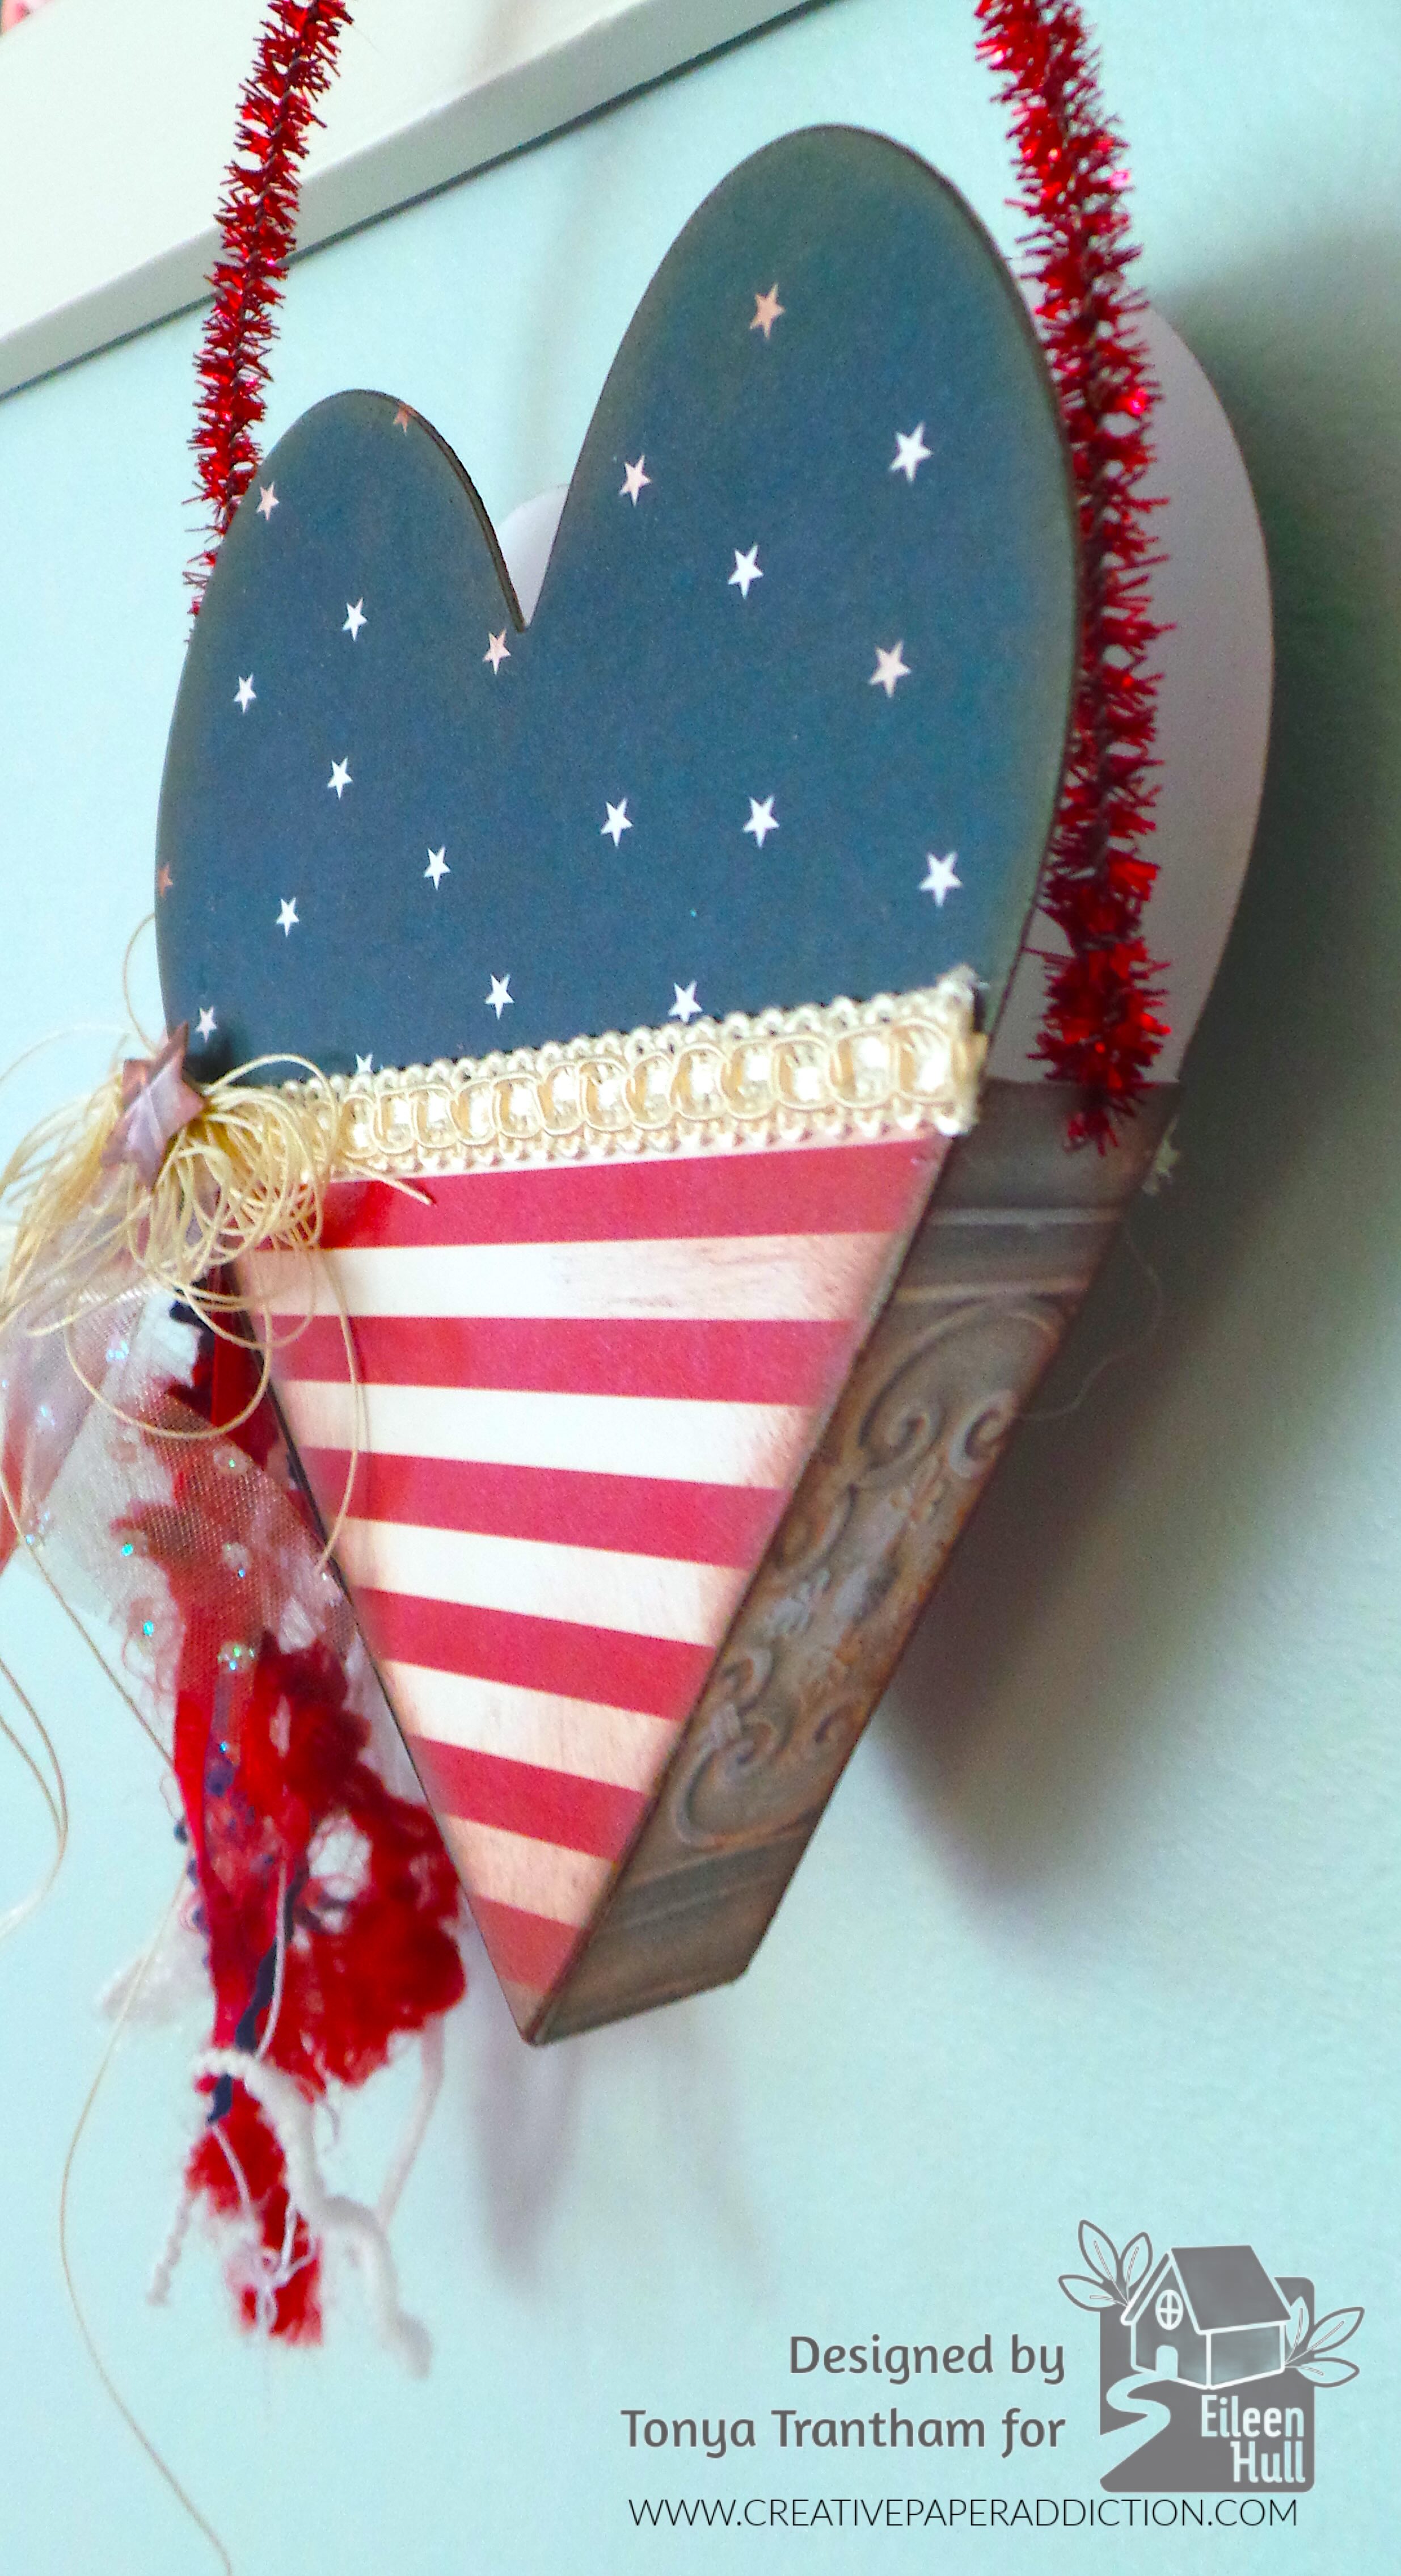
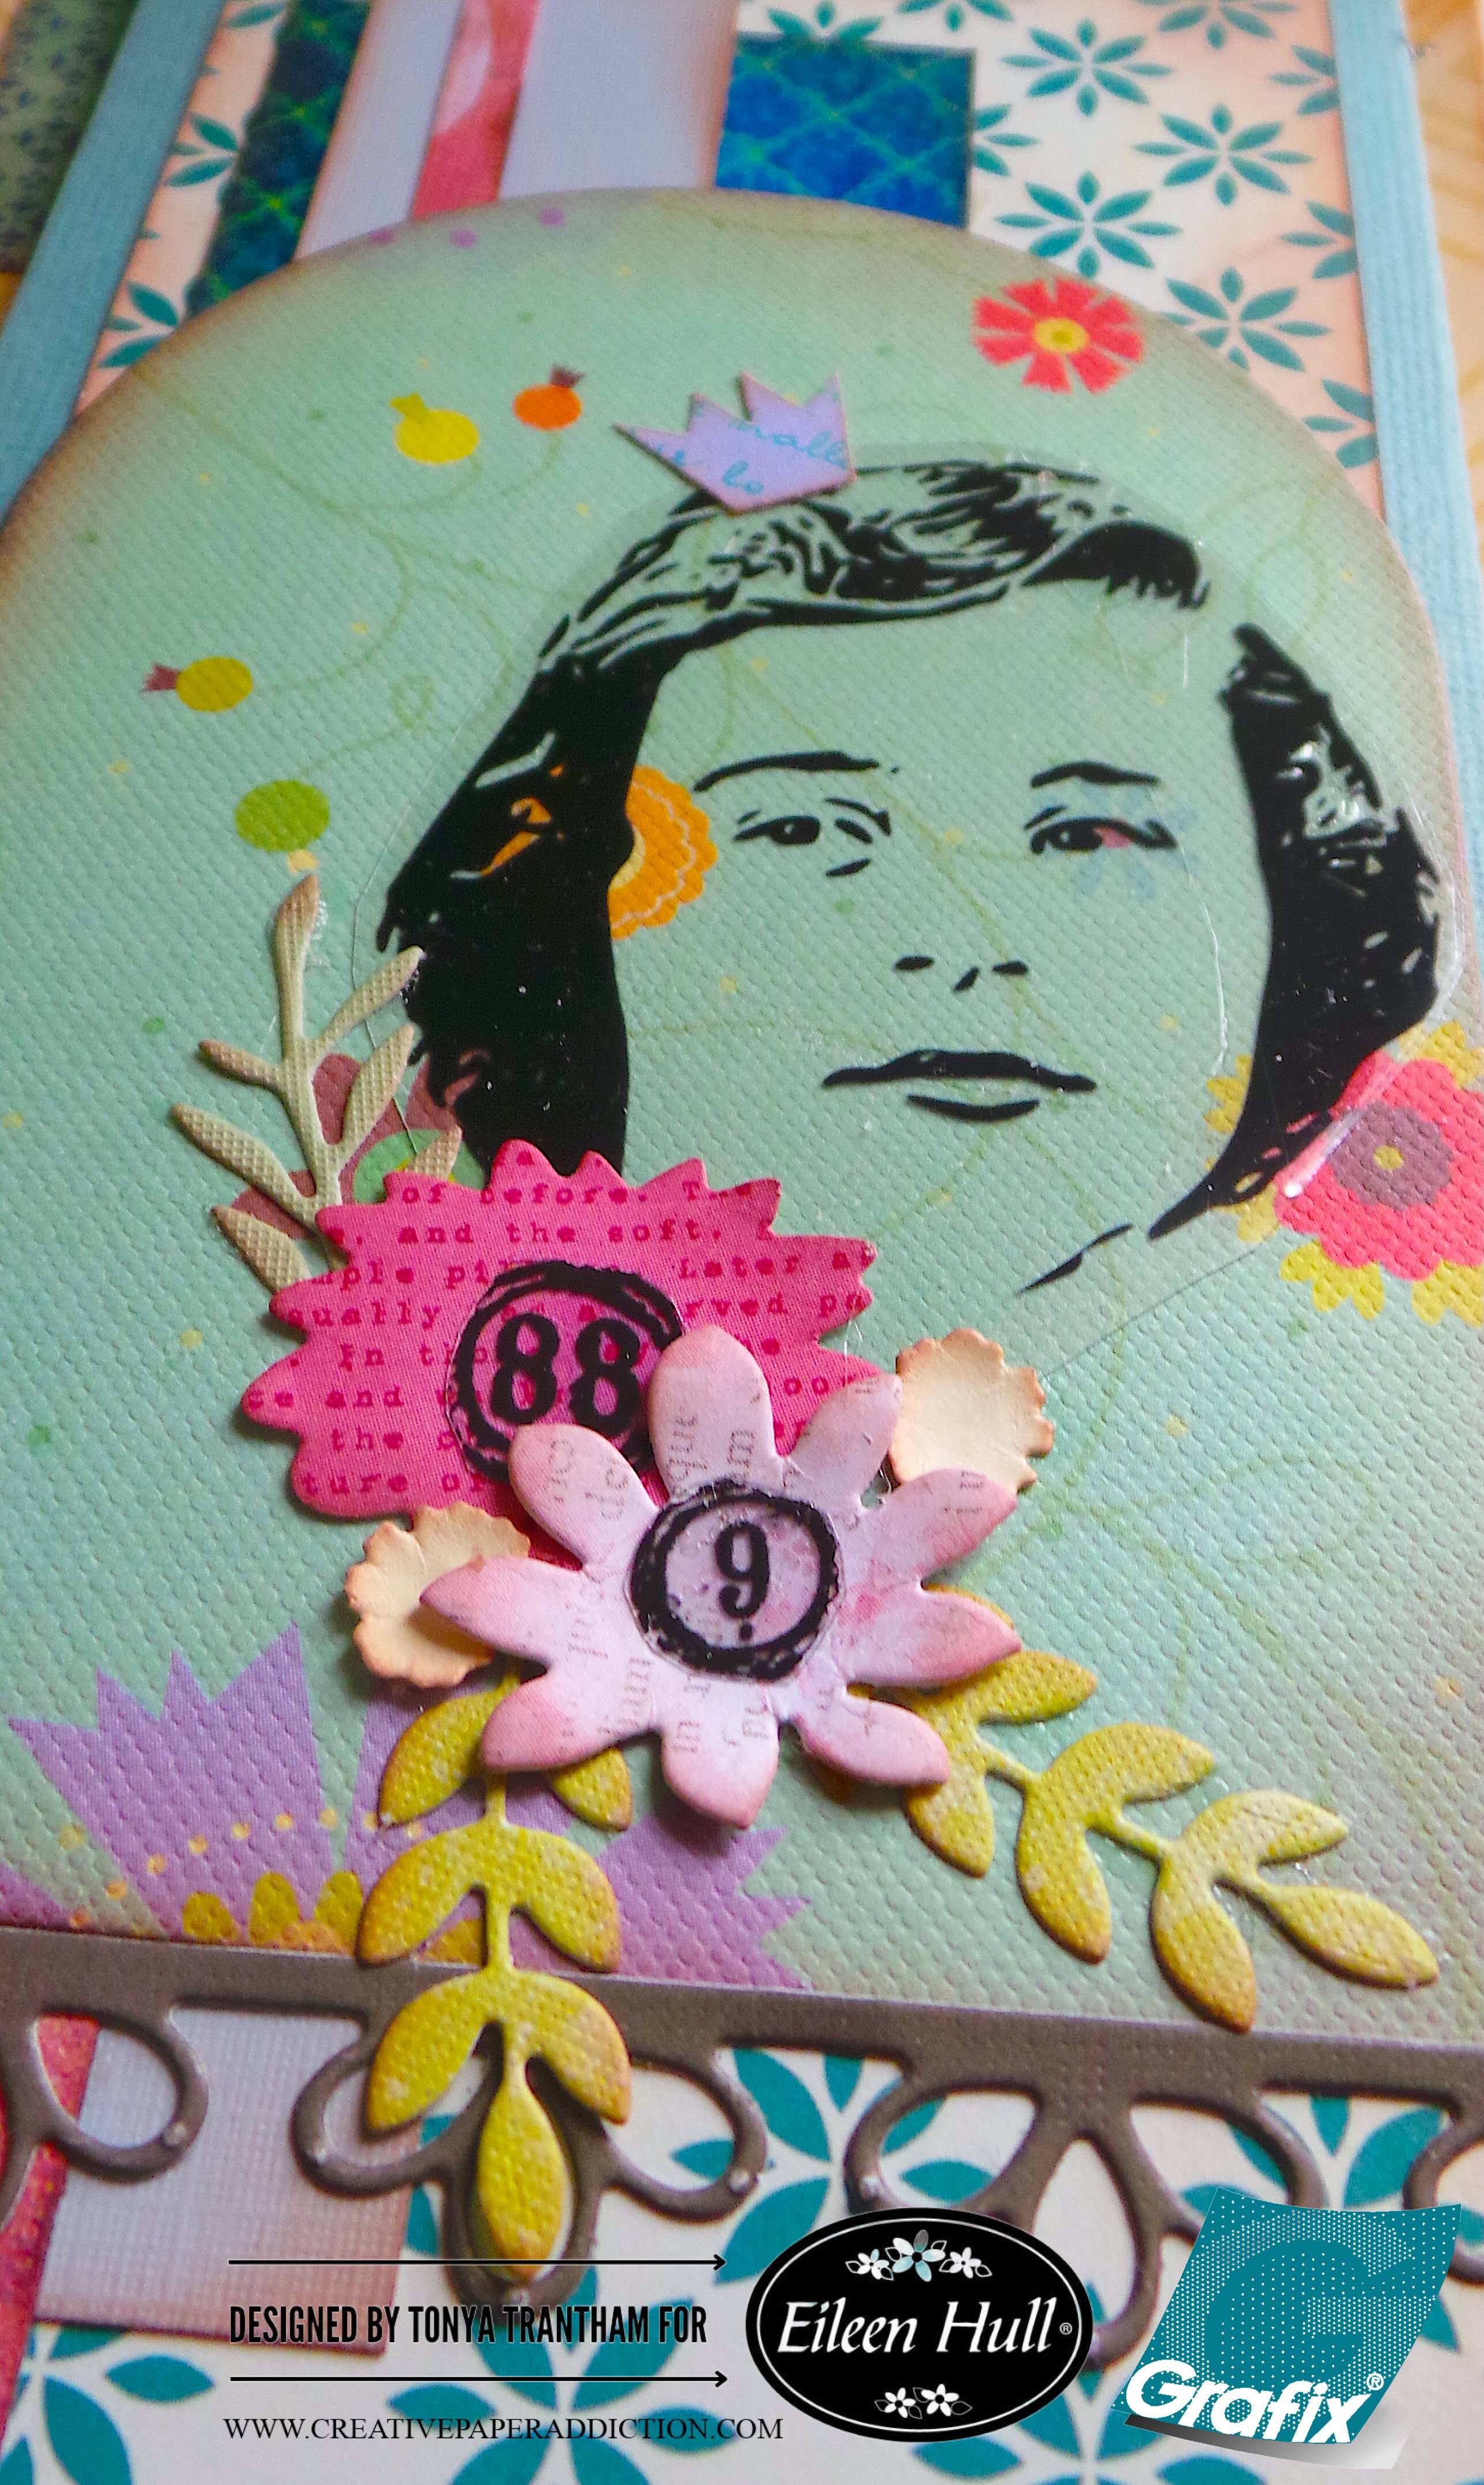
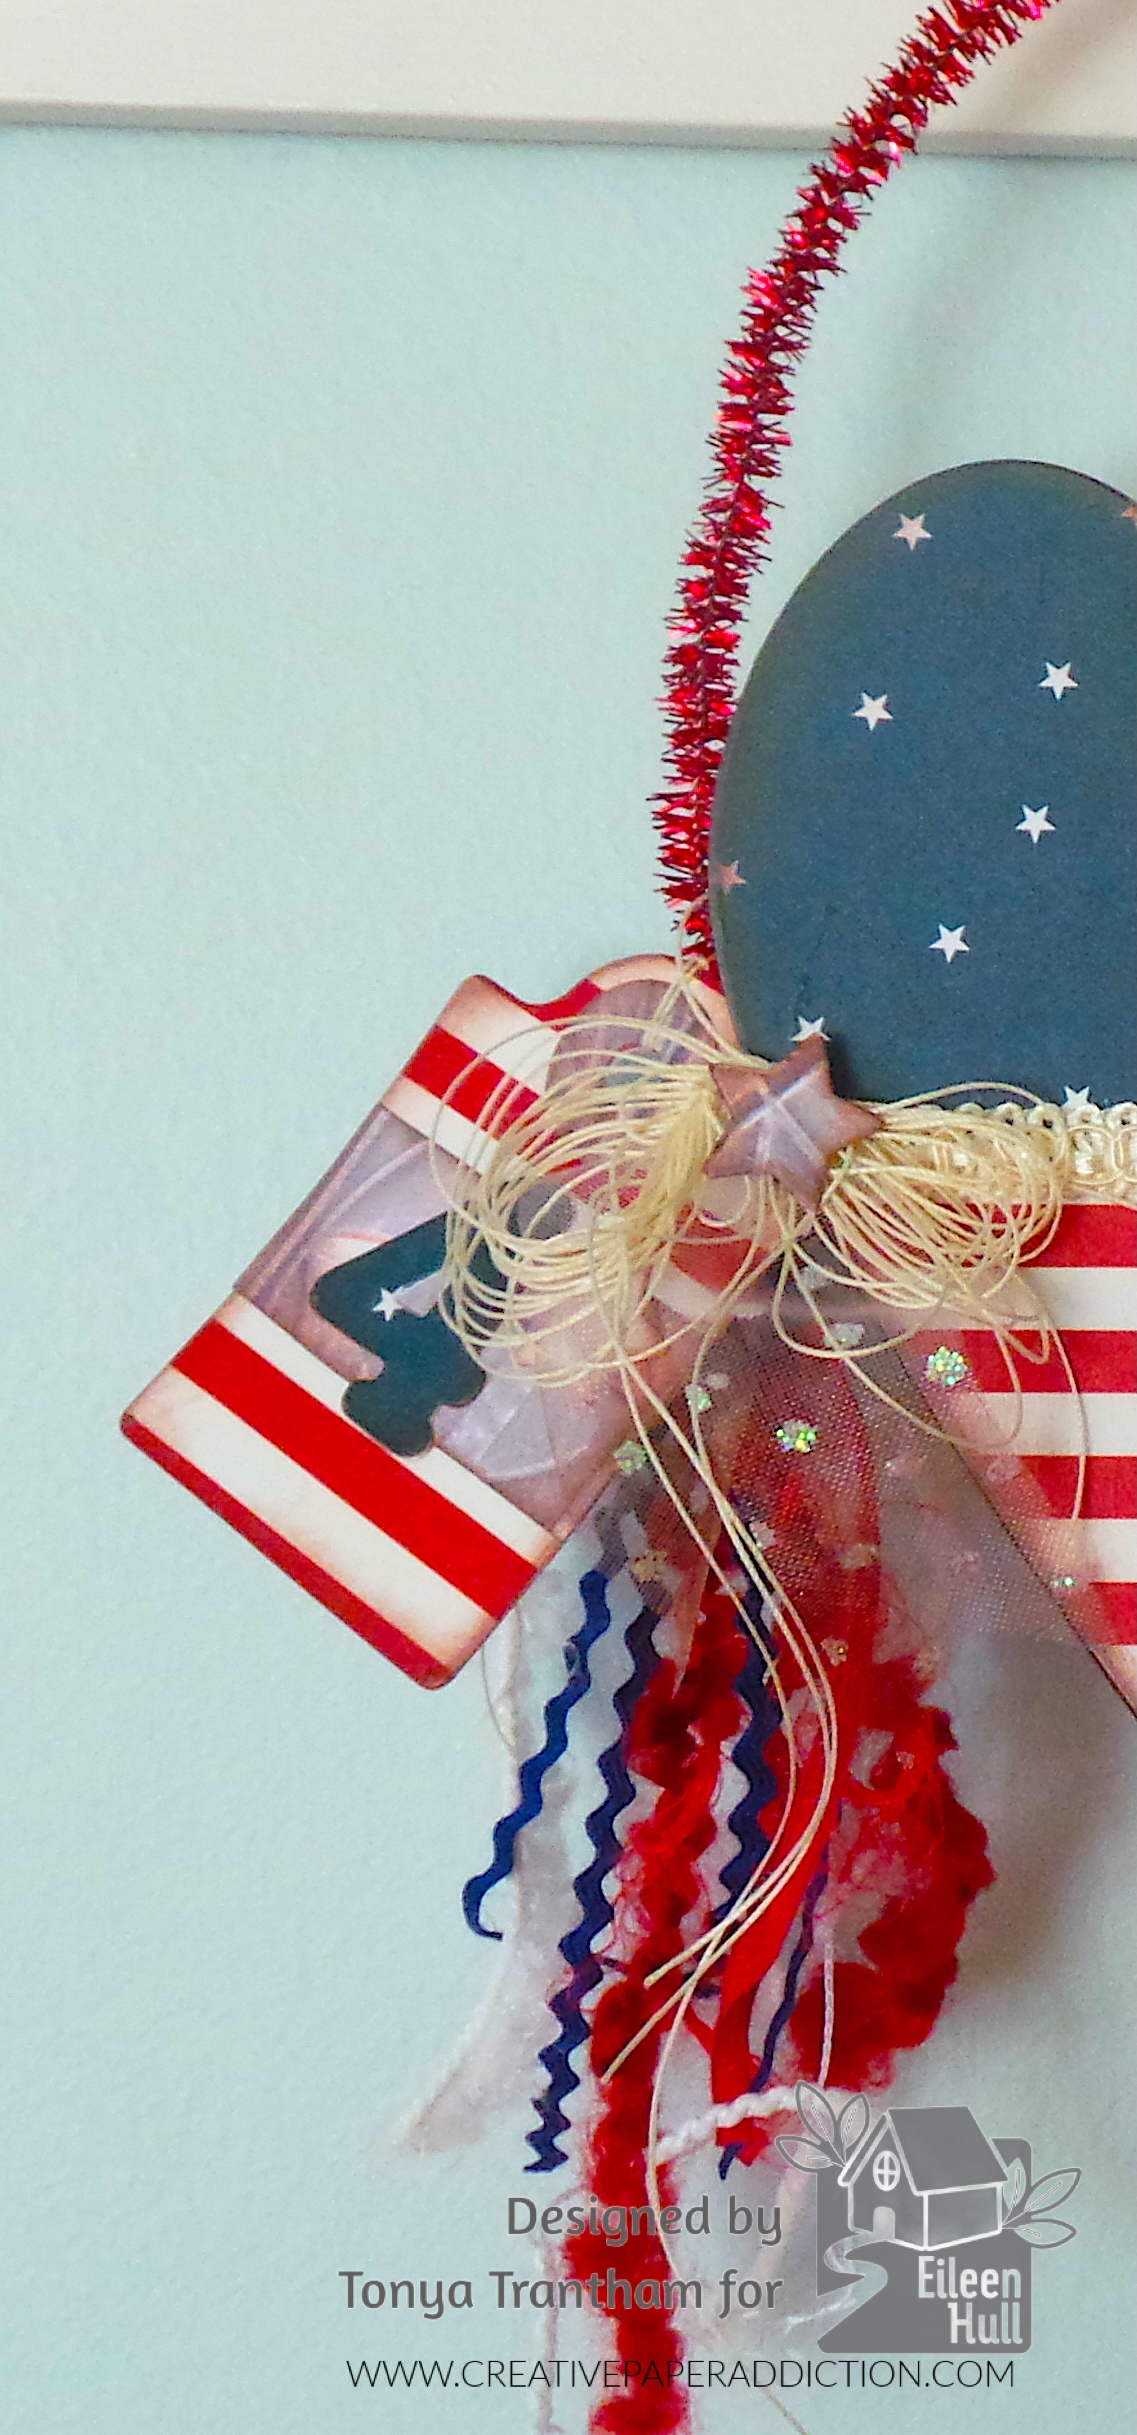
I cut the smallest tag from the Ephemera Pocket and Tags Thinlits. I also cut out a number four from the Nora Alphabet Thinlits. I added a patterned piece of cardstock to the center of the tag. I inked the tag and the edges of the heart with a brown chalk ink along with the number four. I glued the four to the tag. I cut several pieces of fiber, Ric Rac and tulle and tied to the handle along with the tag. I made a bow out of thread and adhered to the corner of the pocket and added a star from my stash to finish.

A decorative craft piece featuring red, white, and blue elements, including a starry oval shape, ribbons, and a tag with the number '4', symbolizing Independence Day or a patriotic theme.

You can change the theme of this pocket to any occasion. Example birthdays, weddings, all the holidays, etc. So many possibilities!

If you have any questions or comments please leave them below and if you haven’t been by Eileen’s blog lately to see what the team has been up to you can find the latest post HERE.

A decorative heart-shaped wall hanging featuring red, white, and blue colors with stars, accompanied by a small tag. It is displayed next to a small American flag.

Supplies

Sizzix/Eileen Hull: Nora Numbers Thinlits

Sizzix/Eileen Hull: Stitched Hearts Thinlits

Sizzix/Eileen Hull: Ephemera Pocket and Tags Thinlits

Sizzix/Eileen Hull: Nora Alphabet Thinlits

Sizzix/Eileen Hull: Bookbinding and Label Thinlits (retired)

Diecut Machine

Paper Cutter

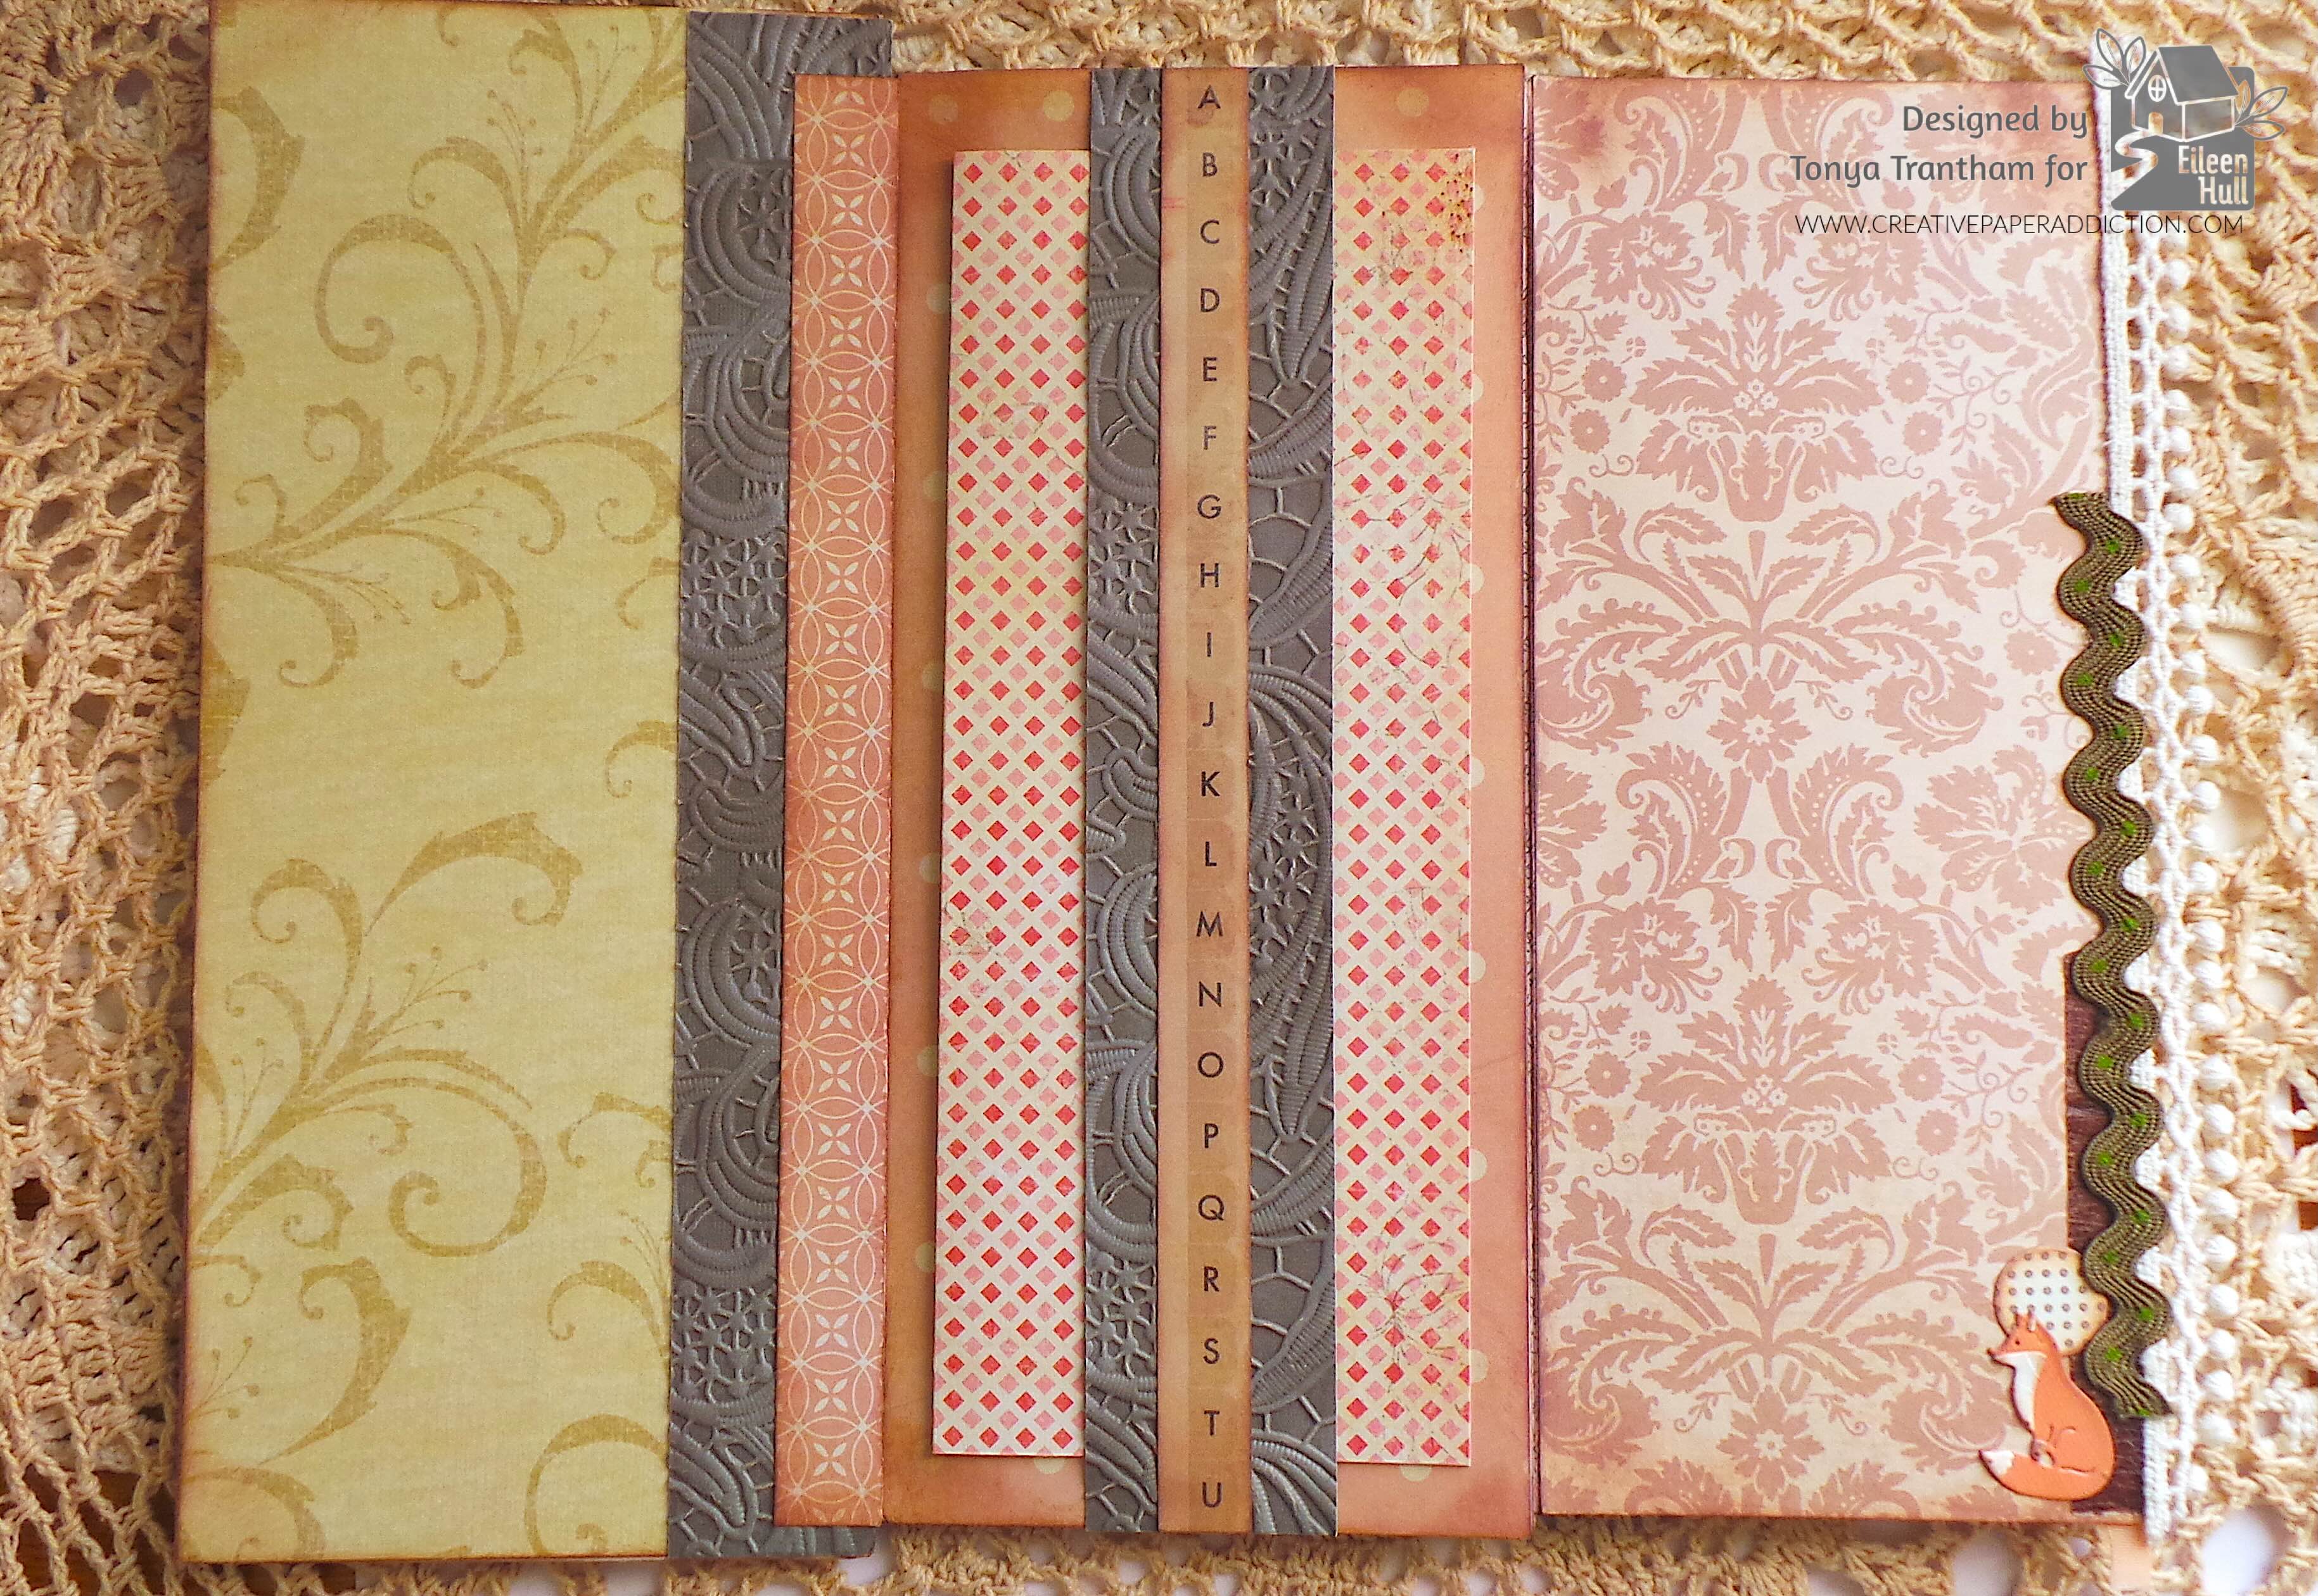
White Cardstock and Patterned Cardstocks

Scissors

Crop A Dile

Adhesive Sheets

Fiber, Ric Rac, Tulle, Trim and Thread

Pipe Cleaner

Brown Chalk Ink

Beacon Adhesives: Zip Dry Adhesive

(Products listed above are Affiliated Links for your convenience)

DISCLAIMERS

This blog is compensated to provide opinion on products, services, websites, and various other topics. Even though the owner(s) of this blog receives compensation for our posts or advertisements. I always give my honest opinions, findings, beliefs, or experiences on those topics or products. The views and opinions expressed on this blog are purely my own. Any product claim, statistic, or quote should be checked with each manufacturer. Verify other representations about a product or service with the provider or party in question.This blog contains affiliate linksClicking these links helps to support Tonya Trantham Designs – Creative Paper Addiction. It’s at no additional cost to you. Today’s features are Sizzix, Eileen Hull and Scrapbook.com Products. 

Red, white, and blue decorative heart-shaped sign with stars, striped pattern, and ribbons, designed for patriotic occasions.

Thanks for stopping by, I hope your Tuesday is wonderful and enjoy creating!

A decorative design featuring a bird among vibrant flowers and the name 'Tonya' in elegant script.

Creative Journaling with Eileen Hull and Grafix Part Two

Hi everyone! I’m back with part two of my journal for Eileen Hull and Grafix. If you haven’t seen part one you can find that post HERE. I created five tags for the pockets and belly band in my journal. Anyways let’s get started!

Artistic collage featuring a silhouette of a person with a colorful butterfly overlay, surrounded by patterned paper in various colors and textures.

For the inside pocket I used the bookmark from the Bookmark, Pocket and Toppers Thinlits and cut out two bookmarks. I inked the edges of the bookmarks with a Brown Chalk Ink.

Three decorative paper pieces in various floral designs, alongside a metal cutting die, all positioned above a crafting template with branding details.

On the front side of both the bookmarks I dug into my stash of scraps of cardstock and glued strips of patterned cardstock to the base of the bookmark. Side note, this is a great way to use up what you have lying on your desk. I added the clear film “Make Every Minute Count” sentiment from the Grungy Vibe by Cat Kerr to the book mark along with a clock button from my stash to finish.

The next bookmark I cut a keyhole die from the Journal Hardware Diecut, adhered to the top corner of the bookmark along with two Gems in each end of the keyhole. I cut out the clear film key and the “Be Kind” sentiment and added to the bookmark.

Two decorative bookmarks featuring motivational phrases. The left bookmark has a vintage design with the text 'Make every minute count' and an orange button. The right bookmark displays 'BE KIND' with a key graphic and teal embellishments, both set against patterned backgrounds.

The back side of both bookmarks I adhered more scraps of cardstock and one of the smallest circle die from the Rainbow Wheels Thinlits to finish.

Two decorative bookmarks featuring various patterned papers and embellishments, placed on a crocheted background. The left bookmark has a floral design and a measuring tape element, while the right bookmark includes a circular embellishment and text elements.

I cut a piece of cardstock to fit inside the center pocket. Side note, I inked all pieces of cardstock and dies cut with Brown Chalk Ink. I cut the largest circle die from the Rainbow Wheels Thinlits and glued to the base of the tag along with two strips of cardstock. I cut one large, four small flowers and two leaf sprigs from the Floral Pocket and Paperclips Thinlits. I adhered the small flower to the center of the large flower. I glued the flower along with the leaf sprig to the upper top of the tag. I cut the little girl shoes out and glued to the tag. I added pink trim and two of the small flowers to the shoes to finish.

A decorative card featuring black flip-flops with floral accents, layered over a pastel background with a flower design.

The back side of the tag I cut the lace clear film out and adhered to a piece of cardstock. I glued to the side of the page to create a tab. I cut out the clear film yearbook photos added to the tag. I place the sunshine outline die from the Home Sweet Home Thinlits over one of the girls. I glued a strip of cardstock over the lace overlay, added a piece of pink trim and another flower and leaf sprig from the Floral Pocket and Paperclips Thinlits to finish.

A collage of vintage black and white photos showcasing several women in various hairstyles, arranged in a grid format. The collage is adorned with decorative elements like flowers and patterned paper along the side.

I cut two tags from cardstock for the belly band on the inside of the back cover. I added an assortment of scraps of cardstock to each tag. The first tag I cut the clear film license plate and gear and for the second tag I added the clear film “grungy vibe” overlay and adhered to each respective tag. I found these vintage cars in my stash so I added them to each tag.

Two artistic cards featuring vintage cars, one with a blue background and a license plate reading '623 AWY NEW YORK', and the other showcasing a grunge-style design with the word 'Grunge'.

The back side of both tags I adhered scraps of cardstock to both tags. I added the largest circle die from the Rainbow Wheels Thinlits and two clear film gears and the number ten to one of the tags to finish.

Two decorative card designs featuring colorful paper strips and embellishments. The top card has blue and green papers with grid patterns, while the bottom card showcases a circular area with lined space for notes, accented with gears and ribbons.

I still have several pieces of the Grungy Vibe by Cat Kerr that I can’t wait to play with. So stay tuned more projects are sure to follow! Also if you haven’t been by Eileen’s blog to see what the team has been up to you can find the latest post HERE. If you have any questions or comments please leave them below.

Pack of Grafix Dura-Lar Film featuring pre-printed designs by various artists, showcasing a variety of creative patterns and images.

Supplies

Sizzix/Eileen Hull: Bookmark, Pocket and Toppers Thinlits

Sizzix/Eileen Hull: Journal Hardware Diecut

Sizzix/Eileen Hull: Rainbow Wheels Thinlits

Sizzix/Eileen Hull: Floral Pocket and Paperclips Thinlits

Sizzix/Eileen Hull: Home Sweet Home Thinlits

Grafix: Grungy Vibe by Cat Kerr

Diecut Machine

Paper Cutter

Scissors

Various Plain and Patterned Cardstocks

Brown Chalk Ink

Clock Button

Gems

Pink Trim

Beacon Adhesives: Zip Dry Adhesive

(Products listed above are Affiliated Links for your convenience)

DISCLAIMERS

This blog is compensated to provide opinion on products, services, websites, and various other topics. Even though the owner(s) of this blog receives compensation for our posts or advertisements. I always give my honest opinions, findings, beliefs, or experiences on those topics or products. The views and opinions expressed on this blog are purely my own. Any product claim, statistic, or quote should be checked with each manufacturer. Verify other representations about a product or service with the provider or party in question.This blog contains affiliate links. Clicking these links helps to support Tonya Trantham Designs – Creative Paper Addiction. It’s at no additional cost to you. Today’s features are Sizzix, Eileen Hull and Grafix Products. 

A colorful scrapbook page featuring a vintage typewriter illustration, floral decorations, a smiling face portrait, and various textured backgrounds. The page includes a decorative window design and elements with pastel colors.

Thanks for stopping by, I hope your Tuesday is great and enjoy creating!

A decorative illustration featuring a bird perched among colorful flowers and foliage, with the name 'Tonya' elegantly displayed in a stylish font.

Discover the Grafix and Eileen Hull Collaboration Part One

Hi everyone! I am back with my project for Eileen Hull this month. The team is also collaborating with Grafix. I’ll be using an assortment of dies, thinlits, embossing folders and Grafix Dura-lar Prints to dress up the Journal Diecut .

A mixed media art piece featuring a silhouette of a person with a large, colorful butterfly overlay, set against a background of patterned paper with various colors and textures.

I received the Grungy Vibe by Cat Kerr to incorporate in my journal. There’s a crystal clear film and a matte translucent film of each design for a total of six sheets in the package. Anyways, let’s get started!

A packaging for Grafix Dura-Lar prints featuring the Grungy Vibe design by Cat Kerr, showcasing pre-printed artistic designs for creative projects. The image includes a mock license plate, colorful portraits, and design descriptions.

I placed Adhesive Sheets on both sides of a piece of Chipboard (I did this step twice). I added patterned cardstock to both sides of the chipboard, placed the chipboard onto the Journal Diecut, sandwiched between the two cutting plates and run through the Diecut Machine.

I lightly inked the cover with Brown Chalk Ink. I cut off the excess spine and peeled one side of the remaining spine so when glued together it will lay flat.

Craft materials arranged on a surface featuring a notebook with a polka dot design and decorative strips.

I adhered scraps of patterned cardstock to the cover of the journal.

A decorated notebook cover featuring colorful patterns including polka dots and floral designs, with various layers of patterned paper and a blue ribbon.

I dug into the packet of Grungy Vibe by Cat Kerr and pulled out both the clear and matte translucent images of the man with a butterfly over his face. The clear image, I cut out only the man with the butterfly. The matte image I only cut out the butterfly to use as a template to trace onto a piece of patterned cardstock and cut out. I adhered the patterned butterfly to the back side of the clear image.

A collage featuring a vintage-style black and white illustration of a man in a suit with stylized butterfly cutouts positioned over his face, alongside sheets of transparent letters and pattern designs.

I dug into my stash of embellishments and found this stitched frame (I think it is from 49 & Market). I glued the bottom edge of the clear image and the top of the man’s head to the frame. I scored the outer edge of frame since it is larger than the journal cover. I wrapped around and adhere to the inside of the cover.

An artistic design featuring a butterfly with colorful wings positioned over a vintage-style portrait of a man in formal attire, within a decorative frame.

I added ric rac and buttons before gluing the frame to the cover.

An artistic scrapbook page featuring a vintage-inspired design with polka dot backgrounds, layered decorative papers, and an illustration of a man with a butterfly for a face.

The inside front cover I cut a pocket from a portion of the Field Notes and Specimen Card Diecut. I did cut down the sides so it would fit on the inside cover of the journal. I lightly inked the edges and added glue to three sides before placing on the inside cover. I added scraps of patterned cardstock to the upper corner of the inside cover. I cut out a label from the Journal Hardware Diecut and the middle size circle from the Rainbow Wheels Thinlits. I inked the edges of both dies before adhering to the pocket.

I cut out the three stitches and the typewriter from the clear film. The typewriter I used a Knife and cut a slit in the top of it. I cut a piece of plain cardstock to fit into the slit of the typewriter. I lightly inked the edges and glued inside the slit of the typewriter. I dug into my stash of stickers and added the “today” to the paper in the typewriter and “details” to the label. I placed two Black Gems in the holes of the label.

A creative scrapbook page featuring a vintage typewriter illustration, decorated with colorful patterned paper, decorative elements, and labels for notes, against a chevron background.

The back inside cover I embossed a piece of cardstock with the Lacy Leaves A5 Embossing Folder. I cut a strip of cardstock to fit the back of the journal and lightly inked with chalk ink. I added glue to each end of the cardstock and placed onto the inside cover. This creates a belly band to hold tags, journaling cards, etc. I cut the largest and middle size circles from the Rainbow Wheels Thinlits. I inked the edges with chalk ink along with a strip of blue cardstock and adhered onto the belly band. I added a couple scraps of patterned cardstock on top of the circles. I cut out the man from the clear film. I adhered on top of the circles. Next, I cut the sunshine from the Home Sweet Home Thinlits twice. One of each in plain and patterned cardstocks. I placed the outer part of the sunshine die over the coat pocket of man. I cut out the number “88” from the clear translucent. I glued on top of the inner circle from the sunshine and added to the center of the sunshine.

Mixed media artwork featuring a vintage-style portrait of a man against colorful patterned backgrounds, including geometric designs and an embossed texture, accented with a badge displaying the number '88'.

For the inside pocket I folded a piece of cardstock in half and placed below the cut lines of the spine of the Journal Diecut. I marked the holes on the inside of pocket and used the needle to poke holes in the spine. I threaded the needle with thread and stitched the pocket onto the spine of the journal. I added glue at each end to create the pocket.

An open blue folder featuring a needle and thread, with decorative patterned paper in the background.

I added the extra piece of Lacy Leaves A5 Embossing Folder to the outside of the pocket along with some strips of patterned cardstock. I cut a piece of patterned cardstock slightly smaller and glued to the back side of the pocket. I also added a few strips of cardstock to the back. Next I cut out two of the largest Tunnel Arches Thinlits. I cut out the windowsill from the Windowsill Flowers and Vase Thinlits. I folded a piece of cardstock to create a hinge.

A colorful paper craft composition featuring a green decorative panel with floral designs on the left and an artistic window frame revealing a portrait underneath on the right. The background has a textured turquoise finish with patterned papers.

I adhered to the windowsill and the back of the tunnel arch. I glued to the pocket. I cut out the clear film of the woman and adhered to the tunnel arch. Next I punched a hole next to the tunnel arch and attached a closure with a flower brad.

An open scrapbook featuring colorful patterned papers, a decorative die-cut window, and an artistic portrait of a woman surrounded by floral designs.

I cut out the following dies: Floral Pocket and Paperclips Thinlits, two of the largest flowers and a leaf sprig. Windowsill Flowers and Vase Thinlits, two large flowers and five of the smaller flowers. Home Sweet Home Thinlits, three leaf sprigs. I used one of the largest flower, one large flower, three of the small flowers and a leaf sprig and placed next to the woman and bottom corner. I cut the number “79” from the clear film and added to the center of the flower.

A colorful mixed media artwork featuring a portrait of a smiling woman, surrounded by floral elements and various textured backgrounds. The composition includes paper cutouts and embellishments like flowers and leaves, adding depth and visual interest.

I adhered the largest tunnel arch to the back of the pocket. I added the decorative trim from the Windowsill Flowers and Vase Thinlits to the bottom of the tunnel arch. I cut out the other woman from the clear film and glued to the tunnel arch. From my stash of embellishments I added a crown to the woman’s head. I adhered the largest, large, two small flowers along with three leaf sprigs next to the woman’s face. I cut a number “9” and a number “88” from the clear film and glued to the center of the flowers.

Close-up of a mixed media art piece featuring a stylized portrait of a woman with a crown, surrounded by colorful flowers, numbers, and decorative elements.

I absolutely love these images from Grafix! They are fun to work with and really dress up any type of project. I will be share a part two blog post later this week/early next week using the Grafix film along with Eileen Hull’s dies. So be sure to keep an eye out for that post.

If you haven’t been by Eileen’s blog to see what the team has been up to you can find the latest post HERE. If you have any questions or comments about this project please leave them below.

A mixed media artistic creation featuring a vintage-style illustration of a man with a colorful butterfly overlay on his face. The background includes patterned papers in various colors and textures, adorned with decorative buttons and ribbons.

Supplies

Sizzix/Eileen Hull: Journal Diecut

Sizzix/Eileen Hull: Field Notes and Specimen Card Diecut

Sizzix/Eileen Hull: Journal Hardware Diecut

Sizzix/Eileen Hull: Rainbow Wheels Thinlits

Sizzix/Eileen Hull: Home Sweet Home Thinlits

Sizzix/Eileen Hull: Lacy Leaves A5 Embossing Folder

Sizzix/Eileen Hull: Tunnel Arches Thinlits

Sizzix/Eileen Hull: Floral Pocket and Paperclips Thinlits

Sizzix/Eileen Hull: Windowsill Flowers and Vase Thinlits

Grafix: Grungy Vibe by Cat Kerr

Chipboard

Adhesive Sheets

Diecut Machine

Brown Chalk Ink

Paper Cutter

Scissors

Knife

Black Gems

Needle and Thread

Crop-A-Dile

Closure and Flower Brad

Plain and Patterned Cardstocks

Ric Rac and Buttons

Beacon Adhesives: Zip Dry Adhesive

(Products listed above are Affiliated Links for your convenience)

DISCLAIMERS

This blog is compensated to provide opinion on products, services, websites, and various other topics. Even though the owner(s) of this blog receives compensation for our posts or advertisements. I always give my honest opinions, findings, beliefs, or experiences on those topics or products. The views and opinions expressed on this blog are purely my own. Any product claim, statistic, or quote should be checked with each manufacturer. Verify other representations about a product or service with the provider or party in question.This blog contains affiliate links. Clicking these links helps to support Tonya Trantham Designs – Creative Paper Addiction. It’s at no additional cost to you. Today’s features are Sizzix, Eileen and Grafix Products. 

A colorful mixed media artwork featuring a black and white portrait of a man with a butterfly overlay on his face. The background includes patterned paper in various colors like blue, pink, and yellow, with decorative elements like buttons and ribbons.

Thanks for stopping by, I hope your Tuesday is wonderful and enjoy creating!

A decorative design featuring a bird perched among colorful flowers, with the name 'Tonya' elegantly displayed in script.

How to Recycle Envelopes into a Tri Fold Journal

Hi everyone! I’m back with my first post of the month. I want to share how I altered three envelopes and turned them into a journal. I used a wide assortment of diecuts from Eileen Hull’s newest collection to create this fun project. Anyways let’s get started!

A handcrafted journal featuring a vintage autumn theme, with a decorative window frame, floral elements, and black-and-white photographs of two women. The cover includes various layers of cardstock, embellishments, and a sentiment that reads 'FRIENDS'.

I have no step out photos of how I put together the envelopes. But I glued the top envelope flap to the middle envelope. The bottom envelope I adhered to the middle envelope to create a trip fold journal.

I went with an Autumn/Vintage theme and picked cardstock and embellishments to match. I covered both sides of all the tri fold journal with cardstock. I had chosen a section of a sheet of cardstock that had a butterfly and florals and cut the largest arch die from the Tunnel Arches Framelits Diecuts. I also cut the window frame die from the Windowsill Flowers and Vase Thinlits Diecuts. I glued the window frame on top of the arch and lightly inked with white chalk ink.

A close-up of a decorated journal cover featuring a window frame, floral designs, and a vintage photograph of two women sitting together. The word 'FRIENDS' is prominently displayed below the window, surrounded by embellishments like leaves and floral accents.

I added an assortment of scraps of cardstock along with two of the longest arrows from the Rainbow Wheels Thinlits to the cover. On the edge of the cover I adhered a piece of velvet ric rac. I added Foam Pop Dots to the back of the window frame and placed on the cover. I dug into my stash and added a yellow flower to the corner of the window frame.

A decorated journal cover featuring a window frame with floral designs, the word 'FRIENDS', and vintage-style photographs of two women, surrounded by embellishments like leaves and stitching.

I created three bows out of thread and glued one behind the window frame and two behind the flower. I cut a part scraps of lace and glued behind the window frame along with a floral circle that I lightly inked with brown chalk ink. I inked with brown chalk ink a friend sentiment and adhered to the window frame. I picked a set of women from the Mini Paper Dolls and glued on top of the flower. I cut a total of four leaf sprigs from the Windowsill Flowers and Vase Thinlits Diecuts. I glued three under the large flower and one to the top of the cover.

A decorated journal cover featuring a window frame design, floral elements, and two vintage-style images of women sitting together. The journal has autumn-themed colors and embellishments like ric rac and layered cardstock.

The middle page of the journal I created a pocket with a journaling spot from my stash. I added glue to the bottom edge. I cut a squirrel, rabbit and two suns from the Home Sweet Home Thinlits Diecuts. I also cut out one label and two key holes from the Journal Hardware Diecuts. I embossed the top edge of a piece of cardstock with the Lacy Leaves Embossing Folder. I folded over and stapled some scraps of cardstock to create a place to add photos or journaling. I glued the label, the outer part of the sun and rabbits to the fold over. I adhered the squirrel to the bottom corner of the journaling spot.

A tri-fold journal created using altered envelopes, featuring a vintage autumn theme with die cuts, cardstock patterns, embellishments, and a decorative window frame.

I cut two of the largest arches and two of the next size down arches from the Tunnel Arches Framelits Diecuts. I added glue to the top edge of both smaller arches and placed on top of the largest arch. I then added adhesive to the top of both largest arch and placed both onto the journal page. I cut two each of the following: lace trim, smallest flowers and larger flowers from the Windowsill Flowers and Vase Thinlits Diecuts. I also cut five of the leaf sprigs from the same set of dies. I adhered two leaf sprigs, one circle from the center of the sun diecut and two leaves cut from one of the leaf sprigs and the small flower to each outer flap. I placed a Flat Back Pearls to the center of each flower.

An embellished journal page featuring two decorative arches with floral designs and a patterned background. The page includes cut leaves and a circular embellishment with a flower.

The inside flap I glued a key hole die side ways on each flap. I adhered the large flower to the middle of the key hole die and placed a sequin in the center of each flower.

Close-up view of a tri-fold journal page featuring two decorative pockets adorned with orange sunflowers and embellishments on a textured gray background.

The other side of the journal. I embossed two strips of cardstock with the Lacy Leaves Embossing Folder and inked with white chalk ink. I glued one piece to the back edge of a page along with a strip of cardstock. The middle page I added adhesive to both end of the embossed cardstock. I placed in the center of the page to create a tuck spot and added a folded piece of cardstock. I glued a strip of cardstock to the center of the embossed cardstock. The other page I added a piece of ric rac to the edge of the page. I glued the circle from the center of the sun and a fox from the Home Sweet Home Thinlits Diecuts to finish.

Craft project showcasing a tri-fold journal made from altered envelopes, featuring a variety of patterned cardstocks and embellishments including a fox cutout and decorative ric rac trim.

This project is a great way to recycle envelopes you get in the mail and use up scrap of cardstock that you might have laying around in your supplies.

Also if you haven’t been by Eileen Hull’s blog lately to see what her team has been up to you can find the latest post HERE. As always if you have any questions or comments please leave them below.

A handcrafted journal featuring an arch window design, decorative paper, and vintage-style embellishments, including a photo of two women labeled 'Friends'.

Supplies

Sizzix/Eileen Hull: Tunnel Arches Framelits Diecuts

Sizzix/Eileen Hull: Windowsill Flowers and Vase Thinlits Diecuts

Sizzix/Eileen Hull: Rainbow Wheels Thinlits

Sizzix/Eileen Hull: Home Sweet Home Thinlits Diecuts

Sizzix/Eileen Hull: Journal Hardware Diecuts

Sizzix/Eileen Hull: Lacy Leaves Embossing Folder

Diecut Machine

Foam Pop Dots

White and Brown Chalk Ink

Lace, Ric Rac, Pom Pom Trim and Brown Thread

Various Embellishments

Mini Paper Dolls

Paper Cutter

Scissors

Various Plain and Patterned Cardstocks

Sequin and Flat Back Pearls

Tiny Attacher

Beacon Adhesives: Zip Dry Adhesive

(Products listed above are Affiliated Links for your convenience)

DISCLAIMERS

This blog is compensated to provide opinion on products, services, websites, and various other topics. Even though the owner(s) of this blog receives compensation for our posts or advertisements. I always give my honest opinions, findings, beliefs, or experiences on those topics or products. The views and opinions expressed on this blog are purely my own. Any product claim, statistic, or quote should be checked with each manufacturer. Verify other representations about a product or service with the provider or party in question.This blog contains affiliate links. Clicking these links helps to support Tonya Trantham Designs – Creative Paper Addiction. It’s at no additional cost to you. Today’s features are Sizzix, Eileen Hull, Scrapbook.com and Spellbinders Products. 

A handcrafted journal featuring a vintage aesthetic, adorned with die-cut elements, including a window frame, floral designs, and black-and-white photographs of two women, set against patterned backgrounds and decorative cardstock.

Thanks for stopping by, I hope your Tuesday is great and enjoy creating!

Artistic design featuring a bird and floral elements with the name 'Tonya' in an elegant font.

Create a Quick and Easy Mini Book

Hi everyone! I know it has been a while since I have made a post. I’ve been working on much needed home projects, gardening and now Eileen Hull’s newest release. But I’m back with a quick and easy project using the Mini Book Diecut and Bookmark, Pockets and Toppers Thinlits. I also used the notes diecut from the Floral Pocket and Paperclips Thinlits. All these dies are by Eileen Hull. Anyways, let get started!

I cut out the notebook cover from the Mini Book Diecut. I also cut four dotted pages to fit inside the notebook. I applied a double sided Adhesive to the back of a piece of cardstock. I placed the “notes” diecut onto the cardstock and run through the Diecut Machine. I also cut out a circle from the Bookmark, Pockets and Toppers Thinlits. Now that I have everything cut out I’m ready to put the notebook together.

I lightly inked the edges of the notebook cover, circle, flower and notes dies. I folded the mini book die and dotted notebook paper in half. I punched two holes in the spine of the mini book and spine of the pages. I threaded a needle with thread. I sewed the pages and covers together and tied off on the inside of the notebook.

I peeled the backing off the adhesive of the notes die and placed onto the cover. Next, I glued the circle and flower slightly above the notes dies.

I added a Mini Gold Gem to the center of the flower. I also used a Mini Paper Clip as a closure to finish.

I have a “bigger” project that I’m working on that this notebook will be eventually be a part of. Hopefully I will be able to share it sooner rather than later.

Also if you haven’t be by Eileen Hull’s blog lately you can find the latest HERE. For the latest happenings sign up for her news letter which can be found on her blog.

Supplies

Sizzix/Eileen Hull: Mini Book Diecut

Sizzix/Eileen Hull: Bookmark, Pockets and Toppers Thinlits

Sizzix/Eileen Hull: Floral Pocket and Paperclips Thinlits

Diecut Machine

Adhesive Roll

Paper Cutter

Scissors

My Mind’s Eye: Gingham Gathered Paper Pad

My Mind’s Eye: Wildflowers Mixed Bag Embellishments

Cardstock

Dotted Notebook Paper ( Office Supply Store)

Mini Gold Gem

Mini Paper Clip

Brown Chalk Ink

Crop-A-Dile

Needle and Thread

Beacon Adhesives: Zip Dry Adhesive

(Products listed above are Affiliated Links for your convenience)

DISCLAIMERS

This blog is compensated to provide opinion on products, services, websites, and various other topics. Even though the owner(s) of this blog receives compensation for our posts or advertisements. I always give my honest opinions, findings, beliefs, or experiences on those topics or products. The views and opinions expressed on this blog are purely my own. Any product claim, statistic, or quote should be checked with each manufacturer. Verify other representations about a product or service with the provider or party in question.This blog contains affiliate links. Clicking these links helps to support Tonya Trantham Designs – Creative Paper Addiction. It runs at no additional cost to you. Today’s features are Sizzix, Eileen Hull and Scrapbook.com Products. 

Thanks for stopping by, I hope your Monday is great and enjoy creating!

Create a Prayer Journal with What You Have on Hand

Hi everyone! The theme this month is”anything goes” with Eileen Hull’s Inspiration Team. I’ve a stack of unfinished projects lying around collecting dust and thought I really need to finish this prayer journal. I’m ashamed to say this journal is promised to someone. Family and life got in the way and I could never find enough time to finish. But I can now say it’s done!

I didn’t take step out photos of the process but will give a little back ground of what I created. I also have attached a flip through video of the journal.

I used the Skinny Mini Book Box Diecut to create the cover of the journal. I cut out two covers for the Skinny Mini Book Box Diecut. This is with applying Double Sided Adhesive to both sides of Mat Board and cardstock too. I extended the spine out to the maximum width by gluing the end tabs of each spine together. I wrapped the outside of the spine with a patterned cardstock. I punched a total of six holes, three on the top and three on the bottom of the spine. I cut and adhered a piece of cardstock to fit the inside of the spine. I poked holes through the cardstock I glued inside the spine. I used the Crop-A-Dile to attach Eyelets in the spine. I strung elastic cording through the holes and tied off inside the journal.

I glued strips of patterned cardstock vertically to the cover of the journal. I added a bit of lace to the cover, a scrap piece of embossed cardstock from the Faux Postage Thinlits. I also glued a postage stamp that I had cut from the Faux Postage Thinlits. I dug into my chipboard pieces and adhered a frame off center the cover. I fussy cut the lamb from the Farm Sweet Farm Collection and glued onto the frame. I added three vintage buttons to the cover to finish.

The inside pages has four signatures with three pages per signature.

I used a lot of inspirational/religious embellishments through the journal.

I used paint chips as pages.

There’s plenty of tuck spots for journaling and adding photos.

I was finally able to find a home for the collection of stickers from my stash.

The video is attached and be sure to click the link below to view the flip through.

Prayer Journal Flip Through Video

Also if you have any questions about this journal please leave a comment section.

Supplies

Sizzix/Eileen Hull: Skinny Mini Book Box Diecut

Sizzix/Eileen Hull: Tablecloth Embossing Folder

Sizzix/Eileen Hull: Faux Postage Thinlits

Diecut Machine

Mat Board

Double Sided Adhesive

Paper Cutter

Scissors

Crop-A-Dile

Eyelets

P13: Farm Sweet Farm Collection

Various Cardstocks, Paint Chips, Chipboard Pieces, Stickers and Journaling Cards

Buttons, Lace and Pom Pom Trim

Elastic Cording

Mini Paper Clips

Gold Gems

Beacon Adhesives: Zip Dry Adhesive

(Products listed above are Affiliated Links for your convenience)

DISCLAIMERS

This blog is compensated to provide opinion on products, services, websites, and various other topics. Even though the owner(s) of this blog receives compensation for our posts or advertisements. I always give my honest opinions, findings, beliefs, or experiences on those topics or products. The views and opinions expressed on this blog are purely my own. Any product claim, statistic, or quote should be checked with each manufacturer. Verify other representations about a product or service with the provider or party in question.This blog contains affiliate linksClicking these links helps to support Tonya Trantham Designs – Creative Paper Addiction. It runs at no additional cost to you. Today’s features are Sizzix, Eileen Hull and Scrapbook.com Products.

Thanks for stopping by, hope your Monday is wonderful and enjoy creating!


Quick DIY Extra Large Christmas Tag Ideas

Hi. everyone! I want to share a few photos of a quick and easy extra large tag I created.

I used a lot of embellishments from my stash that I’ve had for years. Like this “Merry” banner and the poinsettias. I dressed up the poinsettias with chalk ink, gold gems and I shaped them with a Stylus before gluing together.

I placed Foam Pop Dots to the back of the December image before placing onto the tag. I used the holly from the Deck the Halls Thinlits and adhered those behind the poinsettias.

On the other side of the tag, I added strips of cardstock and two images. I placed Foam Pop Dots to the back of one image before placing it onto the tag. I cut a bow, pinecones, and pine needles from Deck the Halls Thinlits. I placed them onto the corner of the sentiment. I also added a poinsettia, holly and a bow made from cording to finish.

If you have any comments or questions about this tag please leave them below.

Supply List

Various Plain and Patterned Cardstock

Christmas Embellishments

Tim Holtz: Deck the Halls Thinlits

Paper Cutter

Scissors

Crop A Dile

Stylus

Foam Pop Dots

Beacon Adhesives: Zip Dry Adhesive

(Products listed above are Affiliated Links for your convenience)

DISCLAIMERS

This blog is compensated to provide opinion on products, services, websites, and various other topics. Even though the owner(s) of this blog receives compensation for our posts or advertisements. I always give my honest opinions, findings, beliefs, or experiences on those topics or products. The views and opinions expressed on this blog are purely my own. Any product claim, statistic, or quote should be checked with each manufacturer. Verify other representations about a product or service with the provider or party in question.This blog contains affiliate linksClicking these links helps to support Tonya Trantham Designs – Creative Paper Addiction. It runs at no additional cost to you. Today’s features are Scrapbook.com Products. 

Thanks for stopping by, hope your Sunday is great and enjoy creating!

Part One: How to Recycle Amazon Mailer into a Journal

Hi everyone! I’m back today with a Christmas junk journal I created! It’s really not junk going into the making of the journal but the leftover bits and pieces from past projects. The definition of what a junk journal is: “a creative and unique book made from found and recycle materials.” In other words you can put anything in a journal.

Really the only “junk” in this journal is this Amazon Mailer that I carefully opened and removed the label. I also cut the flap off and turned it into the cover of the journal. It does say on the mailer “RECYCLABLE JUST LIKE A BOX”. So I recycled it. There will be no process photos only the finished outside and inside cover. Anyways, let’s get started!

The first thing I did was fold the mailer in half to create the cover. I covered both the outside and inside with festive Christmas inspired cardstock. For the cover I glued a flap to the inside opening of the cover. I decorated the flap with “vintage” embellishments from my stash. I have quite the collection of crafts supplies that I have never used. I figured it was time to use them.

The inside of the flap, I added glue on either side of a piece of cardstock. This was to create a belly band.

I added a winter bird sticker, scrap of wrapping paper and a fussy cut sentiment to the belly band. I added three tags to the belly band.

The inside cover I adhered another flap to the inside cover. I glued the three sides of another piece of festive cardstock to the flap. This creates another tuck spot.

The inside of the flap I covered the “seam” with Washi Tape. I placed a folded piece of Christmas cardstock and placed in the tuck spot.

There is an opening on the cover. I added a piece of folded graft paper/accounting paper. This provides more journaling options.

The back cover I added two pockets.

I cut three tags to fit into the pockets on the back cover.

I stitched in the pages to the spine and glued lace over the spine to cover the stitching.

There are many photos of this project. I will share part two of the inside of the journal tomorrow, Thursday. So, be sure to stop back by!

If you have any questions or comments about the process of the cover, please leave them below. I will get back with you.

Supply List

Amazon Mailer

Paper Cutter

Crop A Dile

Scissors

Beacon Adhesives: Zip Dry Adhesive

Various Christmas Cardstocks

Washi Tape

Christmas Embellishments

Needle and Thread

Lace, Ric Rac and Pom Pom Trim

(Products listed above are Affiliated Links for your convenience)

DISCLAIMERS

This blog is compensated to provide opinion on products, services, websites, and various other topics. Even though the owner(s) of this blog receives compensation for our posts or advertisements. I always give my honest opinions, findings, beliefs, or experiences on those topics or products. The views and opinions expressed on this blog are purely my own. Any product claim, statistic, or quote should be checked with each manufacturer. Verify other representations about a product or service with the provider or party in question.This blog contains affiliate linksClicking these links helps to support Tonya Trantham Designs – Creative Paper Addiction. It runs at no additional cost to you. Today’s features are Scrapbook.com Products.

Thanks for stopping by, hope your Wednesday is great and enjoy creating!


Little Itty Bitty Tags

Hi everyone! I’m back with a quick and easy project this week! I created tags using the smallest tag from the Waterfall Card and Tags Thinlits by Eileen Hull. I was in the moment so there’s no step out photos of the project. Anyways, let’s get started!

I cut a total of three tags from the smallest tag die. I “backed” the floral tag with a pink tag since the cardstock was not double sided.

This is a great way to use up those tiny scraps of cardstock that you don’t want to throw away.

I add layers of paper scraps to the tag. Both sides of this tag I used the Mini Paper Dolls to adorn each tag. I dug into my stash. I added a mini flower with a Pink Gem and leaf to one side of the tag. The other side I placed a paper flower with an Enamel Dot to the center. I added a bow made of thread to finish the tag.

The tag with the little boy paper dolls I kept simple.

I glued an assortment of paper scraps to each side of the tag. On one side I did add three Gray Gems and the sticker “Henry”. I also used the sticker “my little girl” on the other tag.

I hope this inspires you to dig out those scraps and create your own tags. It’s so satisfying to use what you have instead of going out and buying more craft supplies. Also if you haven’t been by Eileen Hull’s blog lately you can find the latest post HERE.

Supplies

Sizzix/Eileen Hull: Waterfall Card and Tags Thinlits

Mini Paper Dolls

Various Plain and Patterned Cardstocks

Paper Flower

Enamel Dot

Pink Gem

Gray Gems

Tim Holtz: Clippings Cardstock Stickers

Thread

Diecut Machine

Scissors

Paper Cutter

Beacon Adhesives: Zip Dry Adhesive

(Products listed above are Affiliated Links for your convenience)

DISCLAIMERS

This blog is compensated to provide opinion on products, services, websites, and various other topics. Even though the owner(s) of this blog receives compensation for our posts or advertisements. I always give my honest opinions, findings, beliefs, or experiences on those topics or products. The views and opinions expressed on this blog are purely my own. Any product claim, statistic, quote or other representation about a product or service should be verified with each manufacturer, provider, or party in question.This blog contains affiliate links, clicking and shopping through these links helps to support and run Tonya Trantham Designs – Creative Paper Addiction at no additional cost to you. Today’s features are Sizzix, Eileen Hull and Scrapbook.com Products. 

Thanks for stopping by, hope your Friday is wonderful and enjoy creating!

DIY Summery Journal from Altered File Folder

Hi everyone! Even though we are now in September. I want to share a file folder that I had altered and turned into a summery journal. I actually had this finished and ready to share a couple of months ago. My dad passed away, and it’s been hard to get back into the swing of things. But I’m getting there. I didn’t do any step out photos of the process…sorry. Anyways let’s get started!

The file folder I measured and folded. I folded the top of both sides into the inside of the cover. This created tuck spots. I glued the bottom edge of both tuck spots to the inside cover.

I tucked some notebook paper to the back cover. I had cut it down and added a rub on from the 49 and Market: Rouge Collection.

The front inside tuck spot. I added glue to either end of a cut a part. This was done after I had decorated the cover…details of the cover will come later.

I added a couple journaling cards to the belly band. I also added another piece of notebook paper with rub ons to the tuck spot.

The cover of journal measures 6″x11 1/2″ after folding the tuck spots to the inside of the journal. I gathered up an assortment of cardstock, grid paper, large doily and watercolor paper. I cut to fit and folded in half before punching holes, in the fold of all pages and the cover. I threaded a needle with cording and stitched all together. I tied off on the outside of the cover.

I tied seam binding and fiber to cover where I had tied off on the spine. I also adhered trim to the back and front cover.

The cover I adhered a rectangle doily that I glued to the cover. The extra bit of the doily I wrapped and glued to the tuck spot of the inside. I dug into my stash of paper diecuts. I added a bingo card, frame and a floral image to the cover.

For the inside pages, I used an assortment of paper diecuts and embellishments.

I used one of the journaling cards as a tuck spot.

The two pages in one I thought was pretty cool.

I loved adding the bright green doily as a page to the journal. I also used a parking garage ticket as a tab on a page.

I used a sheet of watercolor paper in the journal. On the back side of the page, I fussy cut out a floral image from a scrap piece of cardstock. I adhered two of the sides to the page to create a pocket. I added scraps of cardstock as journaling spots to the pocket.

I used a journaling card that had a perforated edge. Instead of tearing it from the booklet it was in I carefully removed it with the perforated edge intact. I adhered to the top of the page. I added a strip of cardstock to cover where I tore it from the booklet.

I glued a journaling card along the bottom and added to the middle of the page. I created a tuck spot. I added a scrap of cardstock. I also included a journaling card and a paint chip. I had picked up the paint chip in the paint department at Walmart. These items were added to the tuck spot.

I added glue to the bottom of the “Good Times” cut a part. I placed it on the bottom of the page to create a tuck spot. I added a scrap of cardstock to the pocket.

I added a small Polk a dot paper bag to the side of the page. I secured it by adding washi tape to the page and bag. I glued a sentiment to the bag along with a butterfly embellishment. I placed a decorative journaling card inside of the bag.

I created another tuck spot with a decorative card from my stash.

I filled the tuck spot with journaling cards and scraps of cardstock.

More tuck spots and a flip up card for journaling or adding photos.

I dug into my stash and found this little felt flower and paper leaves I had not used. I thought it was a perfect addition to the page. On the opposite page, I glued another journaling card to the corner. I also added a scrap of cardstock with a sentiment.

The last page in the journal I adhered a butterfly diecut to the top of the page to finish.

This journal was so much fun to put together! If you don’t have file folders laying around your home, you can find them at places like Walmart and Target. You can also check your local office supply stores. For the rest, use what craft supplies you have on hand! You will be surprised how quick one of these journals comes together.

Supplies

File Folder

49 & Market: Rouge Collection

Various Plain and Patterned Cardstock, Notebook and Grid Paper and Paper Doilies

Various Embellishments and Diecuts

Needle and Cording

Seam Binding, Trim and Fiber

Washi Tape

Small Paper Bag

Paper Cutter

Scissors

Beacon Adhesives: Zip Dry Adhesive

(Products listed above are Affiliated Links for your convenience)

DISCLAIMERS

This blog is compensated to provide opinion on products, services, websites, and various other topics. Even though the owner(s) of this blog receives compensation for our posts or advertisements. I always give my honest opinions, findings, beliefs, or experiences on those topics or products. The views and opinions expressed on this blog are purely my own. Any product claim, statistic, quote or other representation about a product or service should be verified with each manufacturer, provider, or party in question.This blog contains affiliate links, clicking and shopping through these links helps to support and run Tonya Trantham Designs – Creative Paper Addiction at no additional cost to you. Today’s features are Scrapbook.com Products. 

Thanks for stopping by, hope your Friday wonderful and enjoy creating!