Step-by-Step Guide to an Embossed Glue Book Using Keys Folder

Hi everyone! I’m back with my first project of the month for Eileen Hull. The theme this month is anything embossed. I’ve had this book in my stash of unfinished projects which I started over two years ago. I’ve been plugging along on the inside pages and hopefully be finished soon. But I thought I could at least show how I completed the cover. I used the Notepad Diecut which is retired. The Keys 3D Embossing Folder I used to emboss the cover. This embossing folder can be found in Eileen Hull’s Etsy Shop. Anyways, let’s get started!
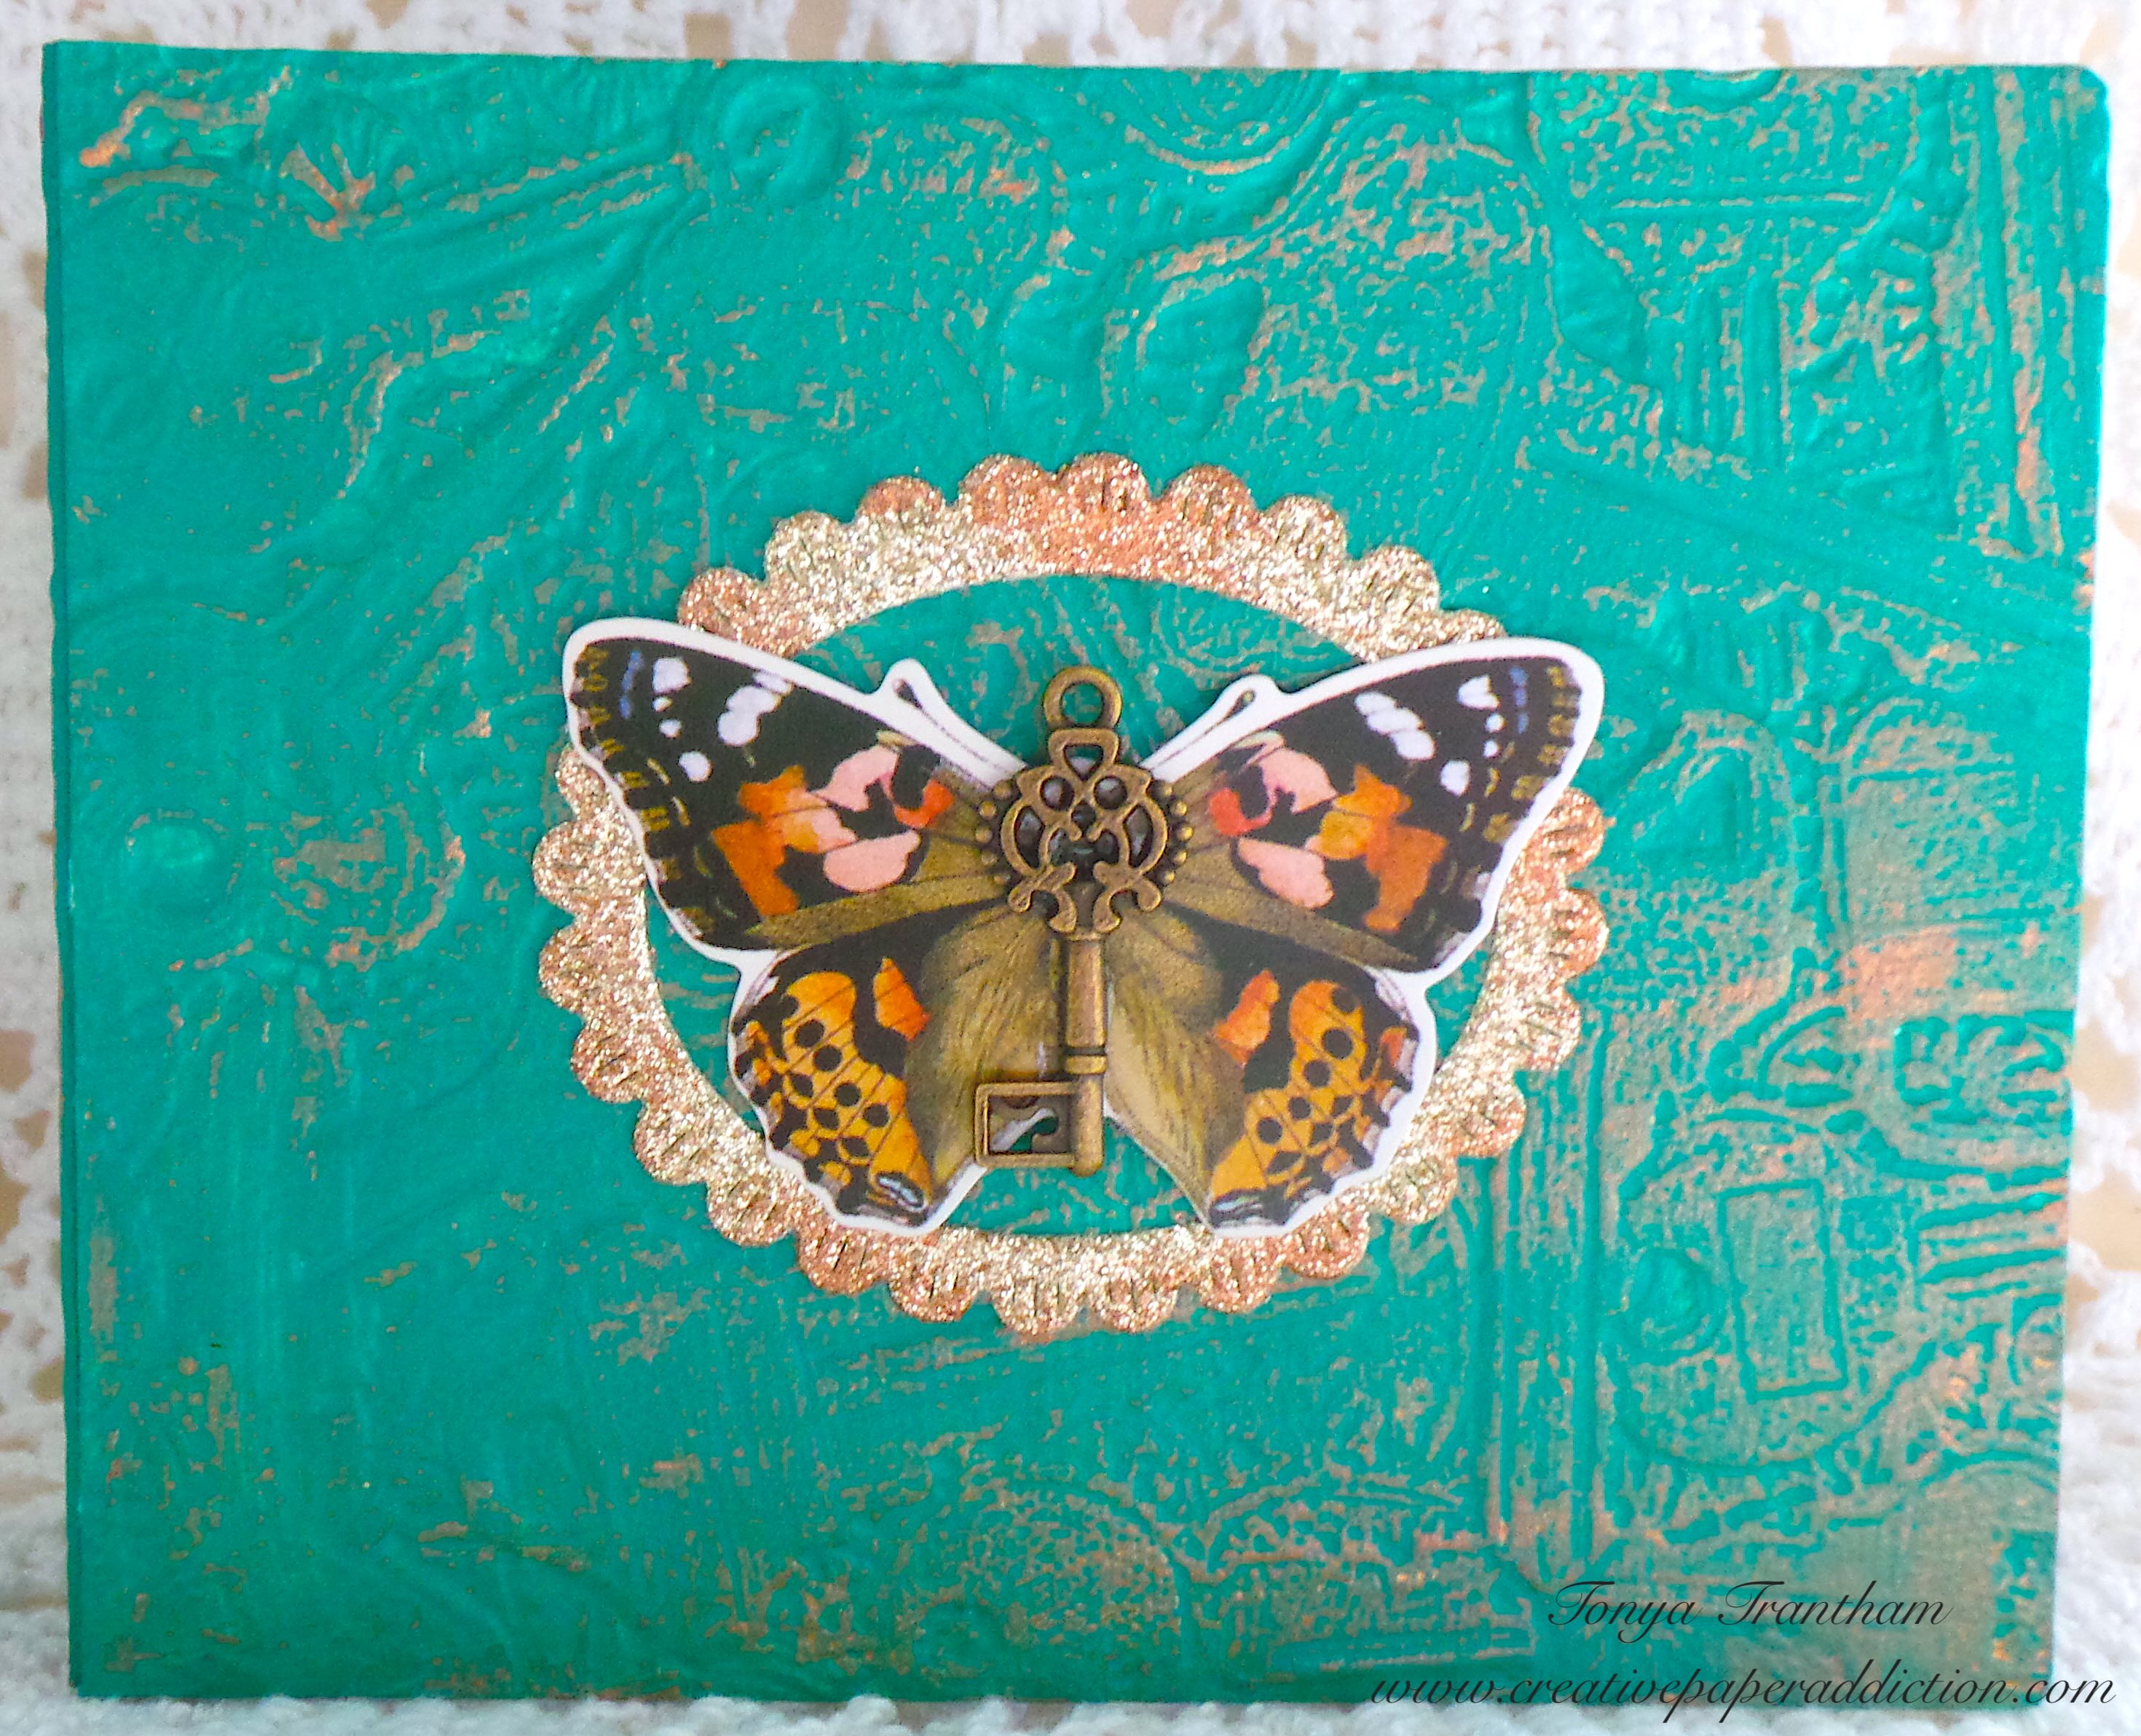
A decorated journal cover featuring an embossed teal background, with a butterfly embellishment and a key in the center, surrounded by a glittery frame.

First I cut two covers of the Notepad Diecut (retired) from Mat Board.

Two covers made from mat board for a notepad, one white and one a cream color, with visible score lines for folding.

I embossed both covers with the Keys 3D Embossing Folder.

Three embossed covers featuring intricate key designs, with a Sizzix packaging in the background.

I painted both sides of each cover with an acrylic paint. I have no idea of the color of the paint I used.

Two green book covers embossed with a key pattern, showcasing different angles of the embossed design.

I glued the covers together at the spine. I cut and adhered cardstock to the inside covers. I punched a total of four hole in each of the spine with a Crop-A-Dile.
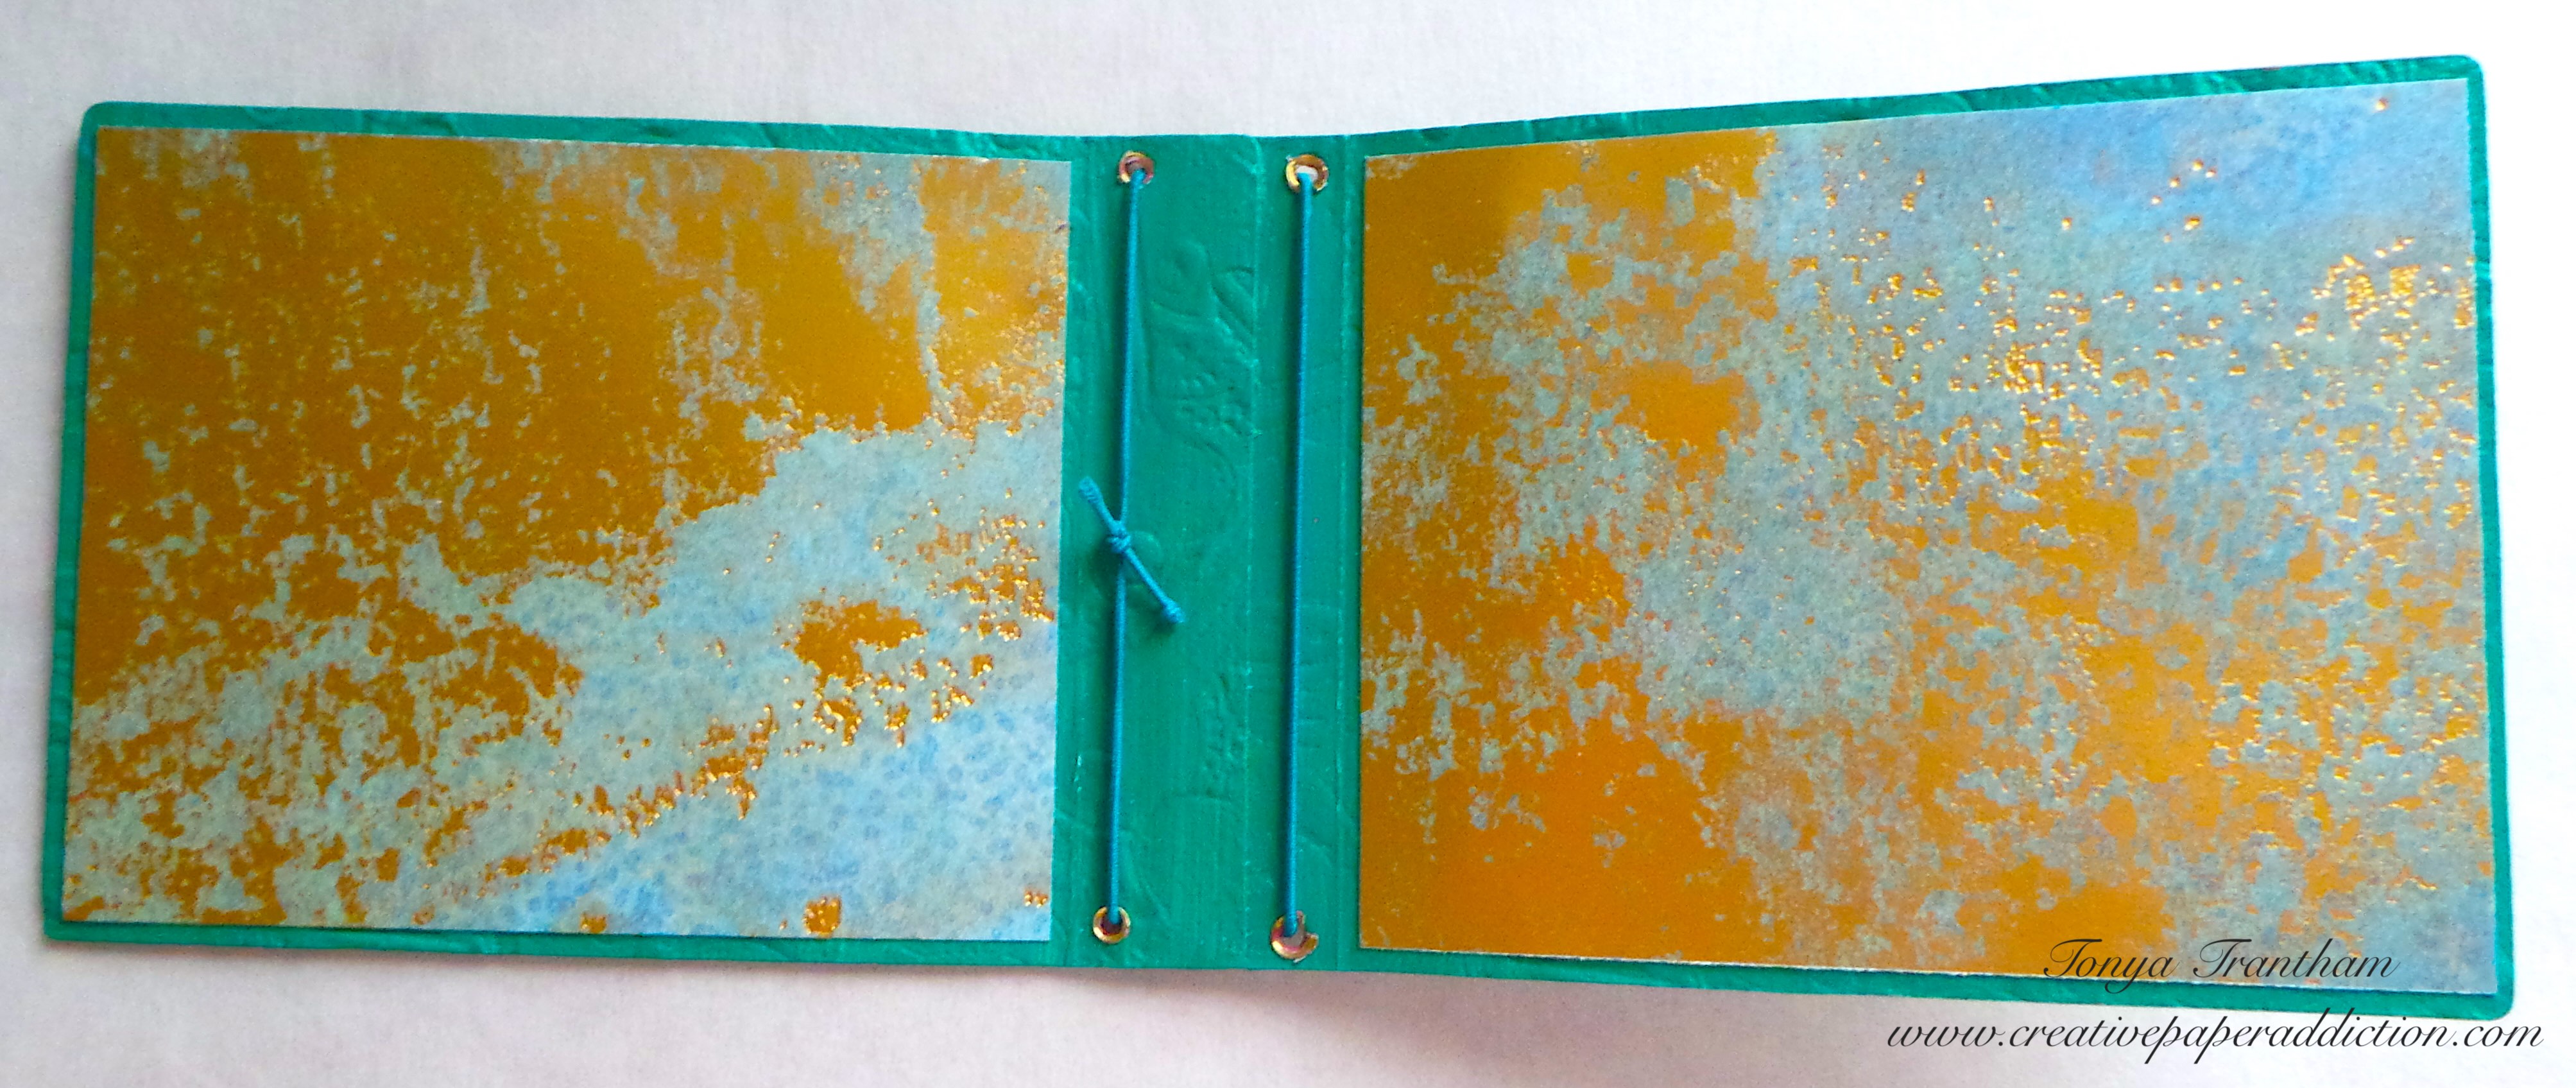
Opened journal cover with metallic gold and teal pages showcasing an artistic embossed design.

I set eyelets in each of the holes. I also cut elastic and strung through the holes and tied off on the inside of the spine. I applied Rose Gold Luster Wax over the embossed areas of the cover.
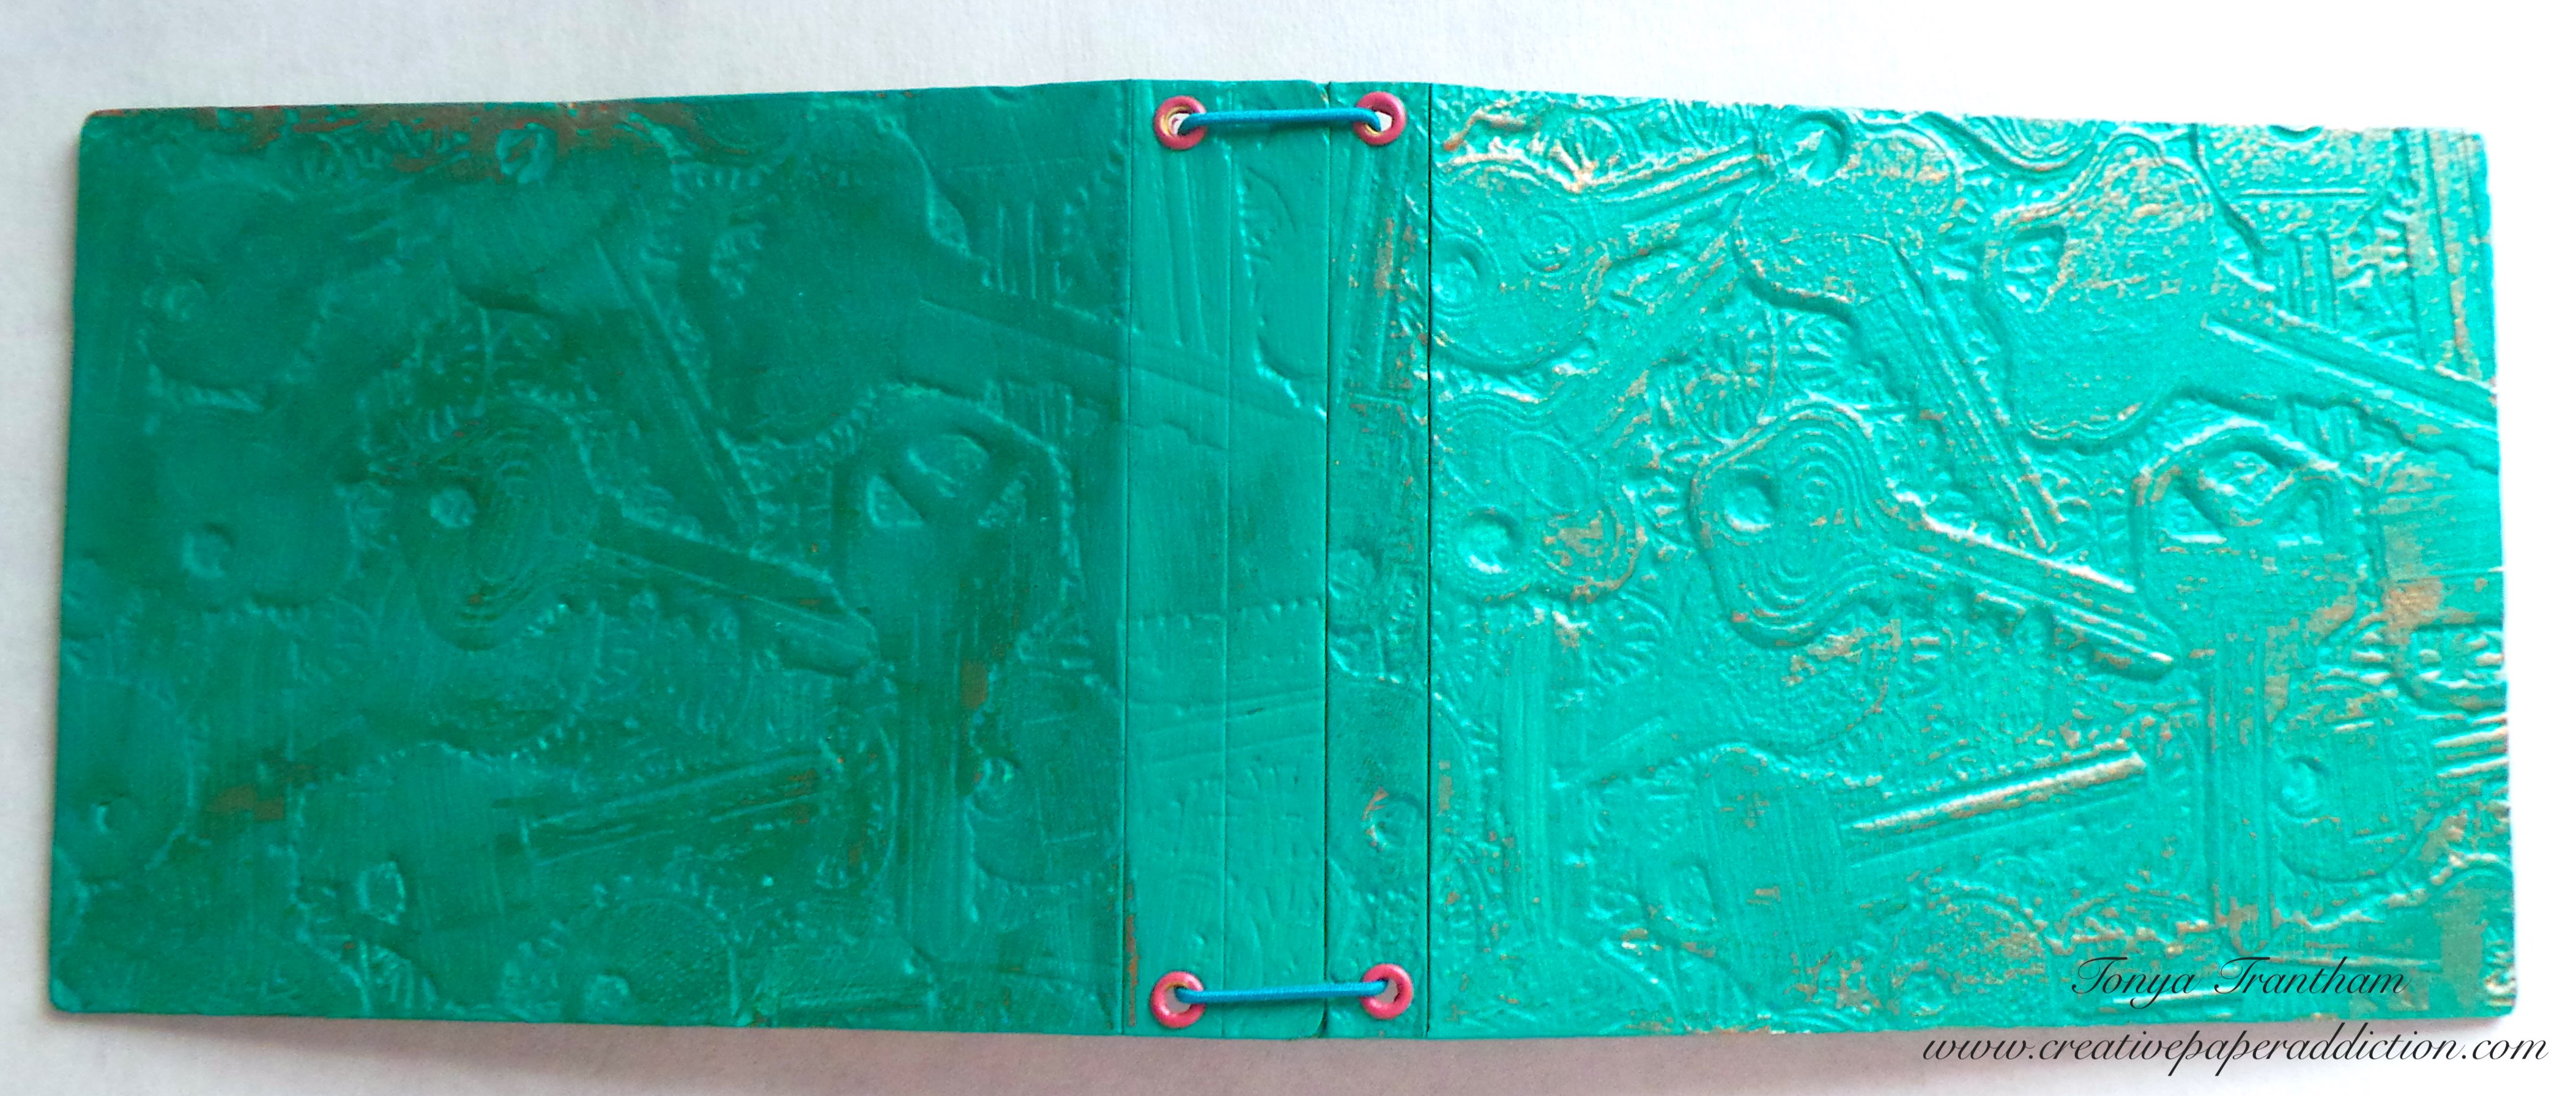
A completed book cover featuring a teal embossed design of keys, secured with pink eyelets.

I have blank journals that I had bought at Target several years ago. I cut two down to fit the inside.
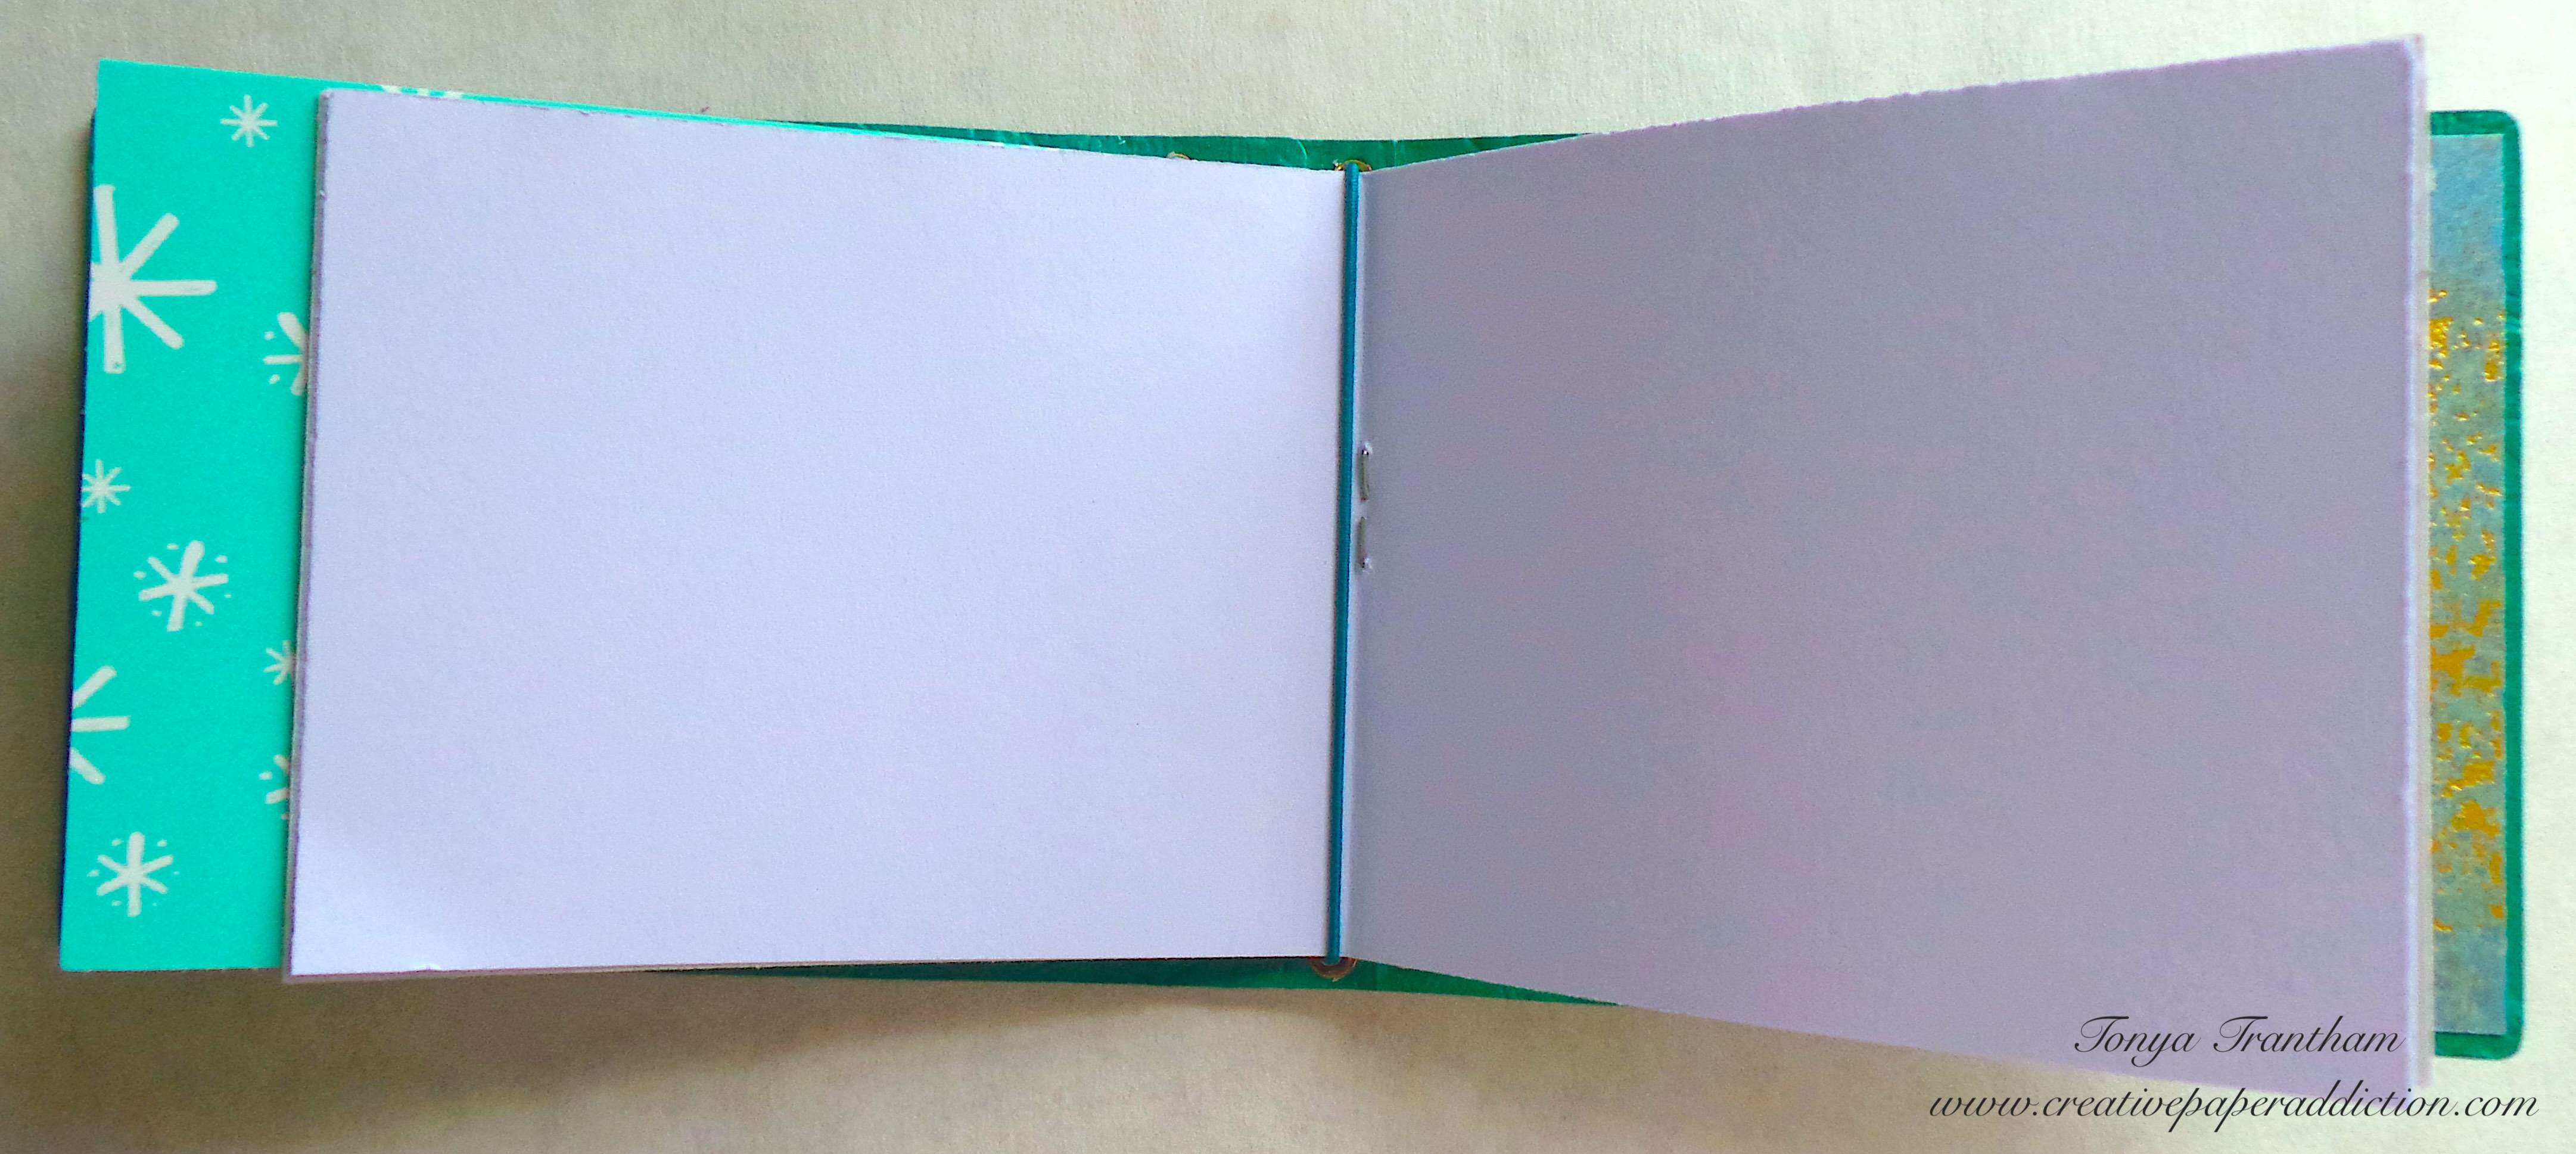
Open blank journal with patterned cover and white pages.

I opened the journals up to the center where it is stapled and slide under the elastic cording.

Side note, I know I have shared about making glue books in the past but would like revisit that thought. A glue book is similar to a junk journal. Anything can be added to them. You can include mail, book pages, clothing tags, etc to the pages. In my case, I like using up the scraps of cardstock I have laying around after finishing up a project. Like the title suggests you use glue to adhere everything to the pages. I hope this explanation helps.
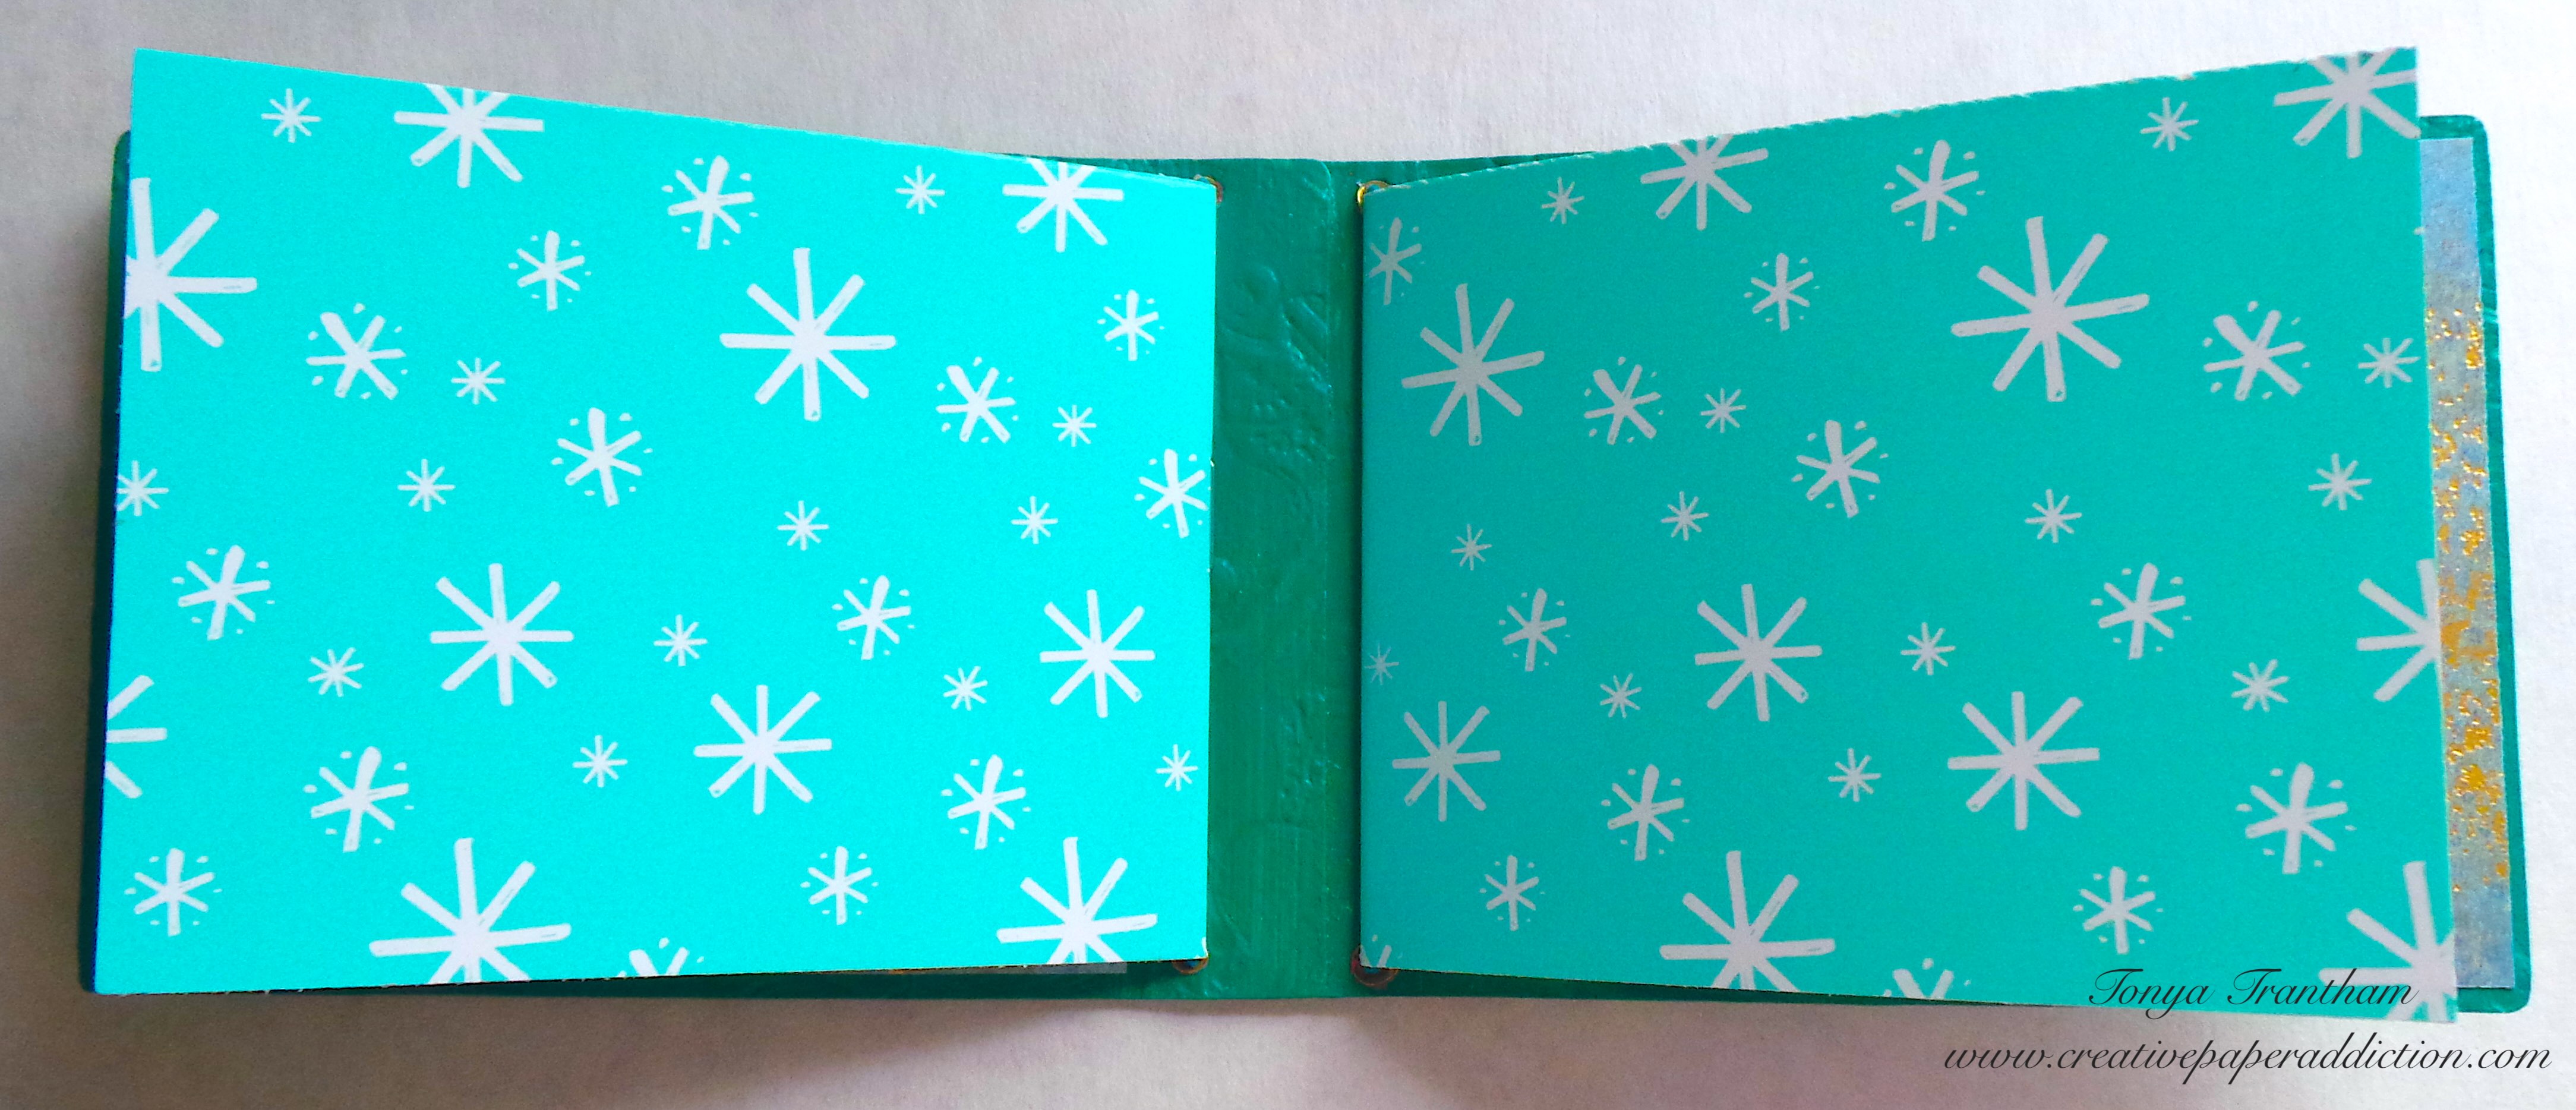
Open journal page featuring a bright turquoise background adorned with white snowflake-like designs.

Now back to the project, I pulled from my stash a butterfly chipboard piece, frame and key. I lightly applied Rose Gold Luster Wax to the frame.
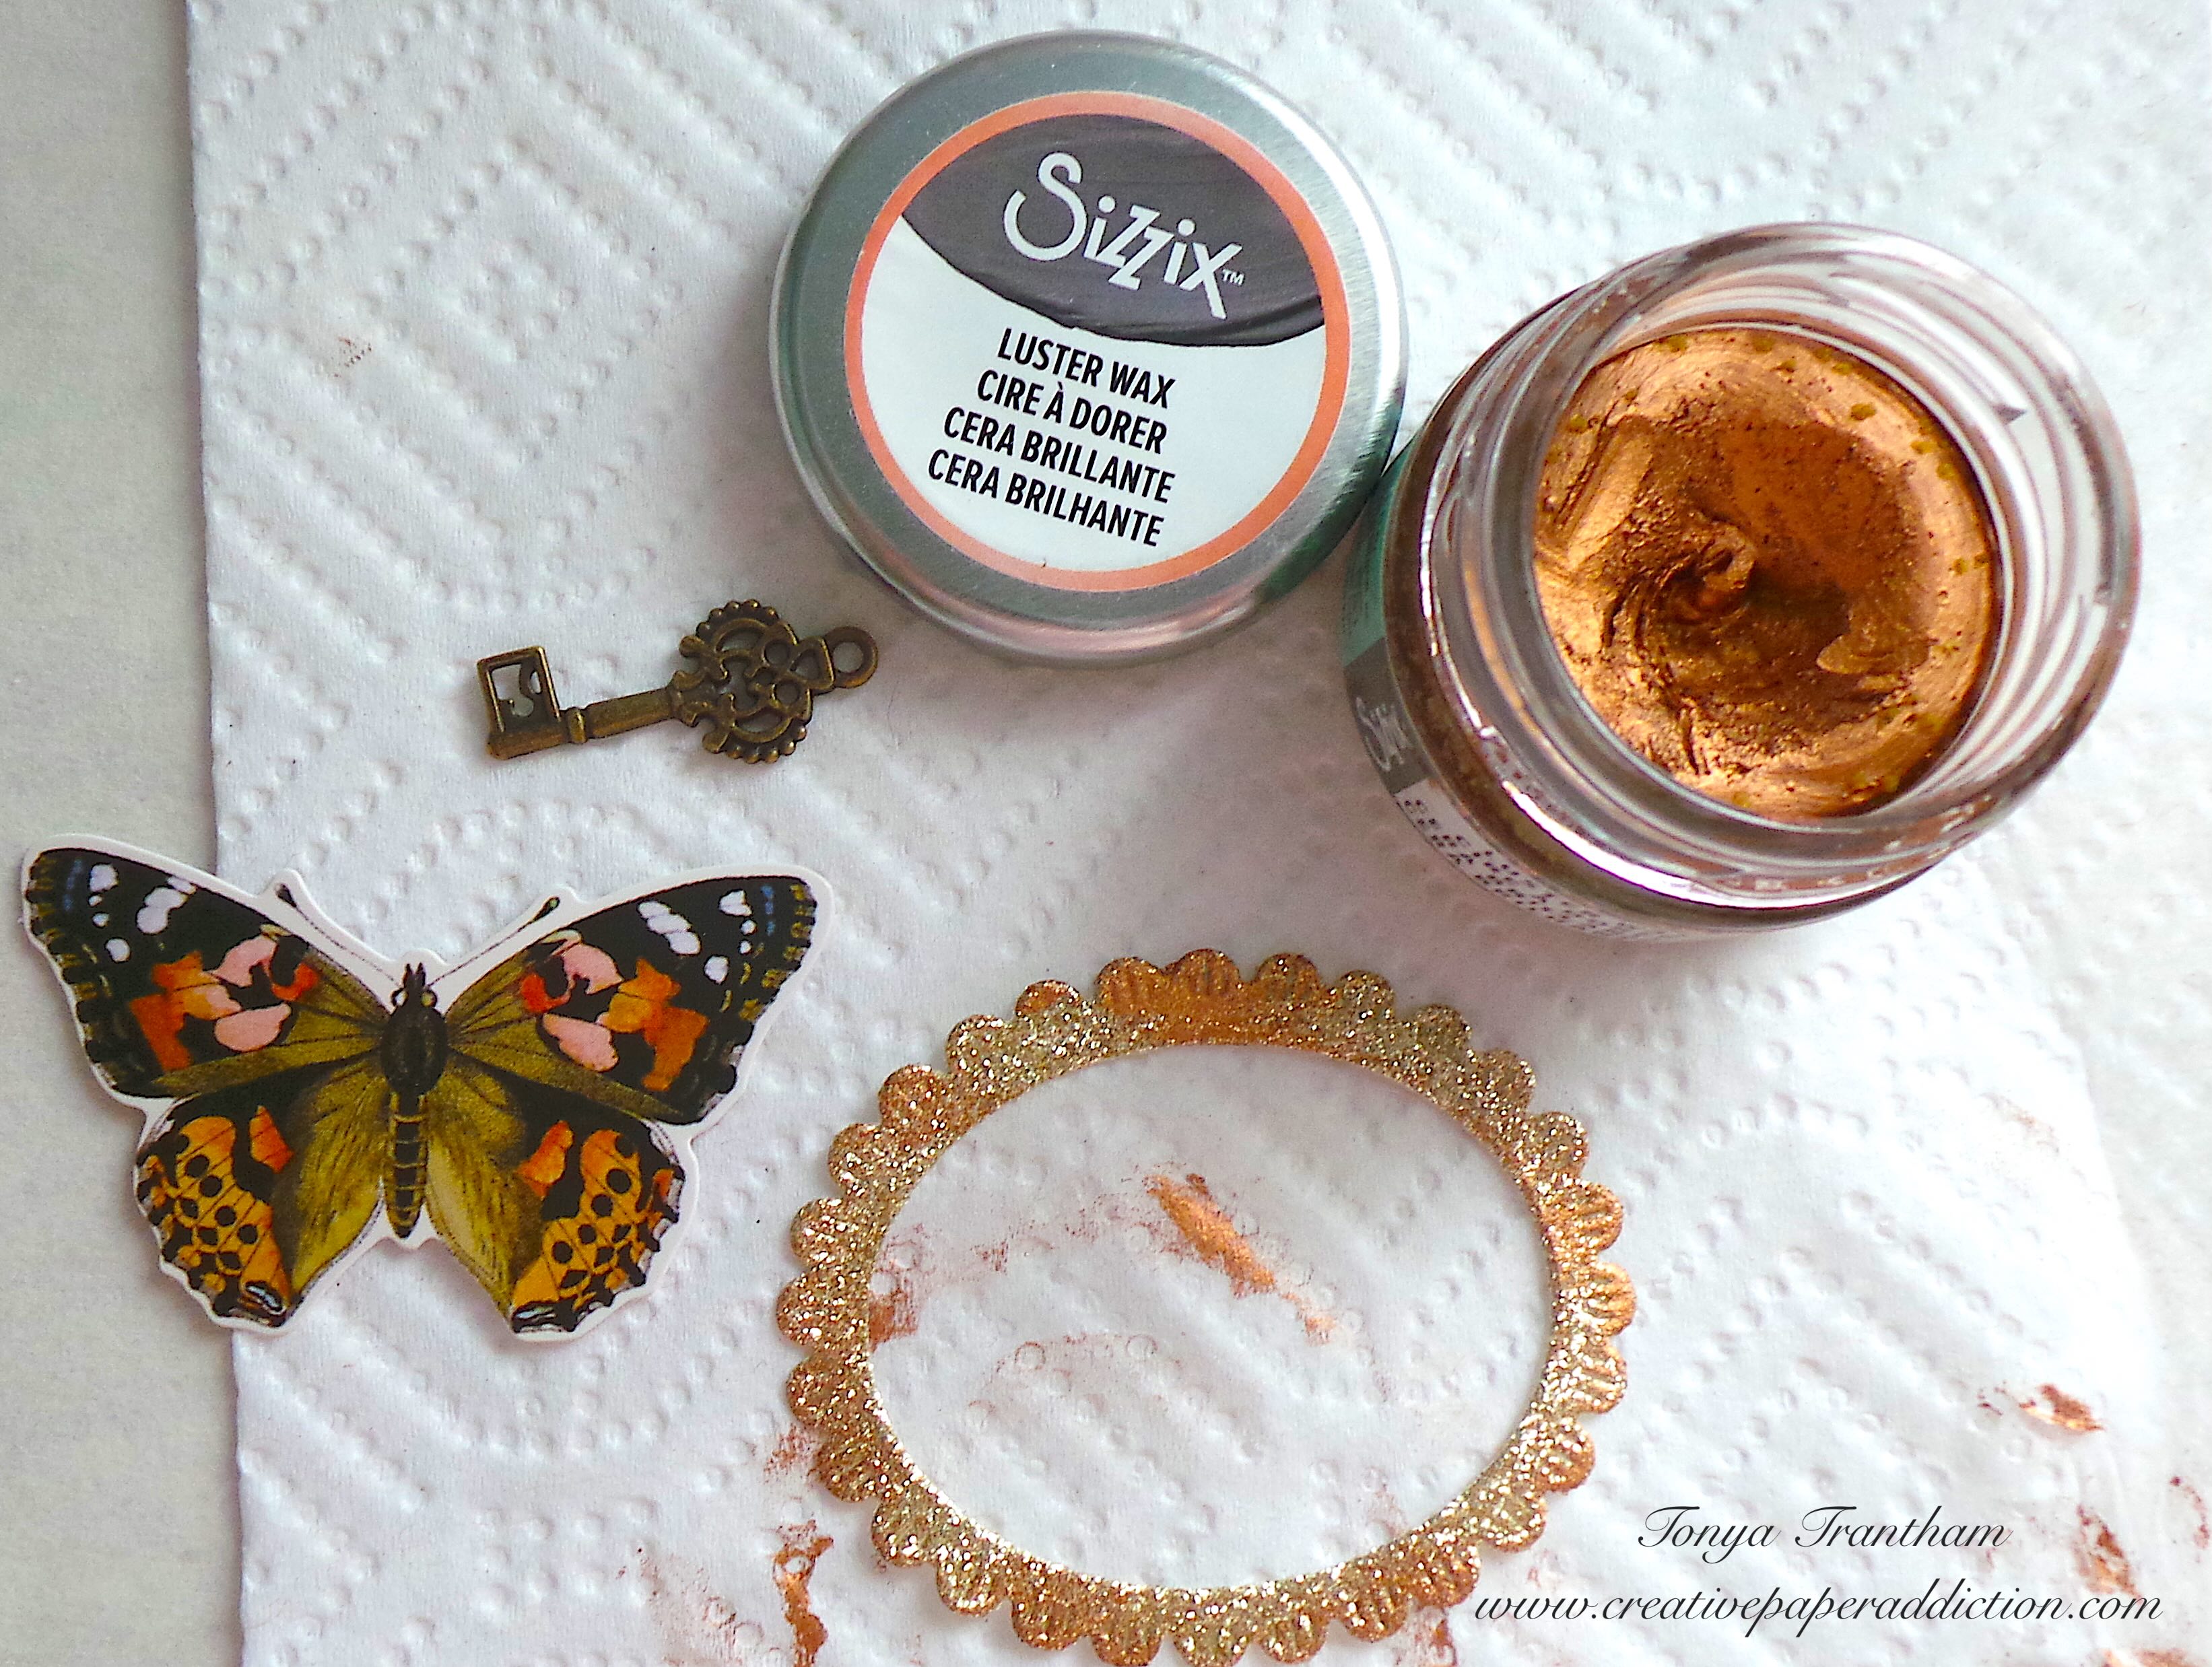
A butterfly chipboard piece, a vintage key, and a jar of Sizzix Rose Gold Luster Wax displayed on a white paper towel with a decorative gold frame.

I adhered the frame and butterfly to the cover. I glued the key to the center of the butterfly to finish. I hope to share the inside of the glue book later with a blog post and a flip through.
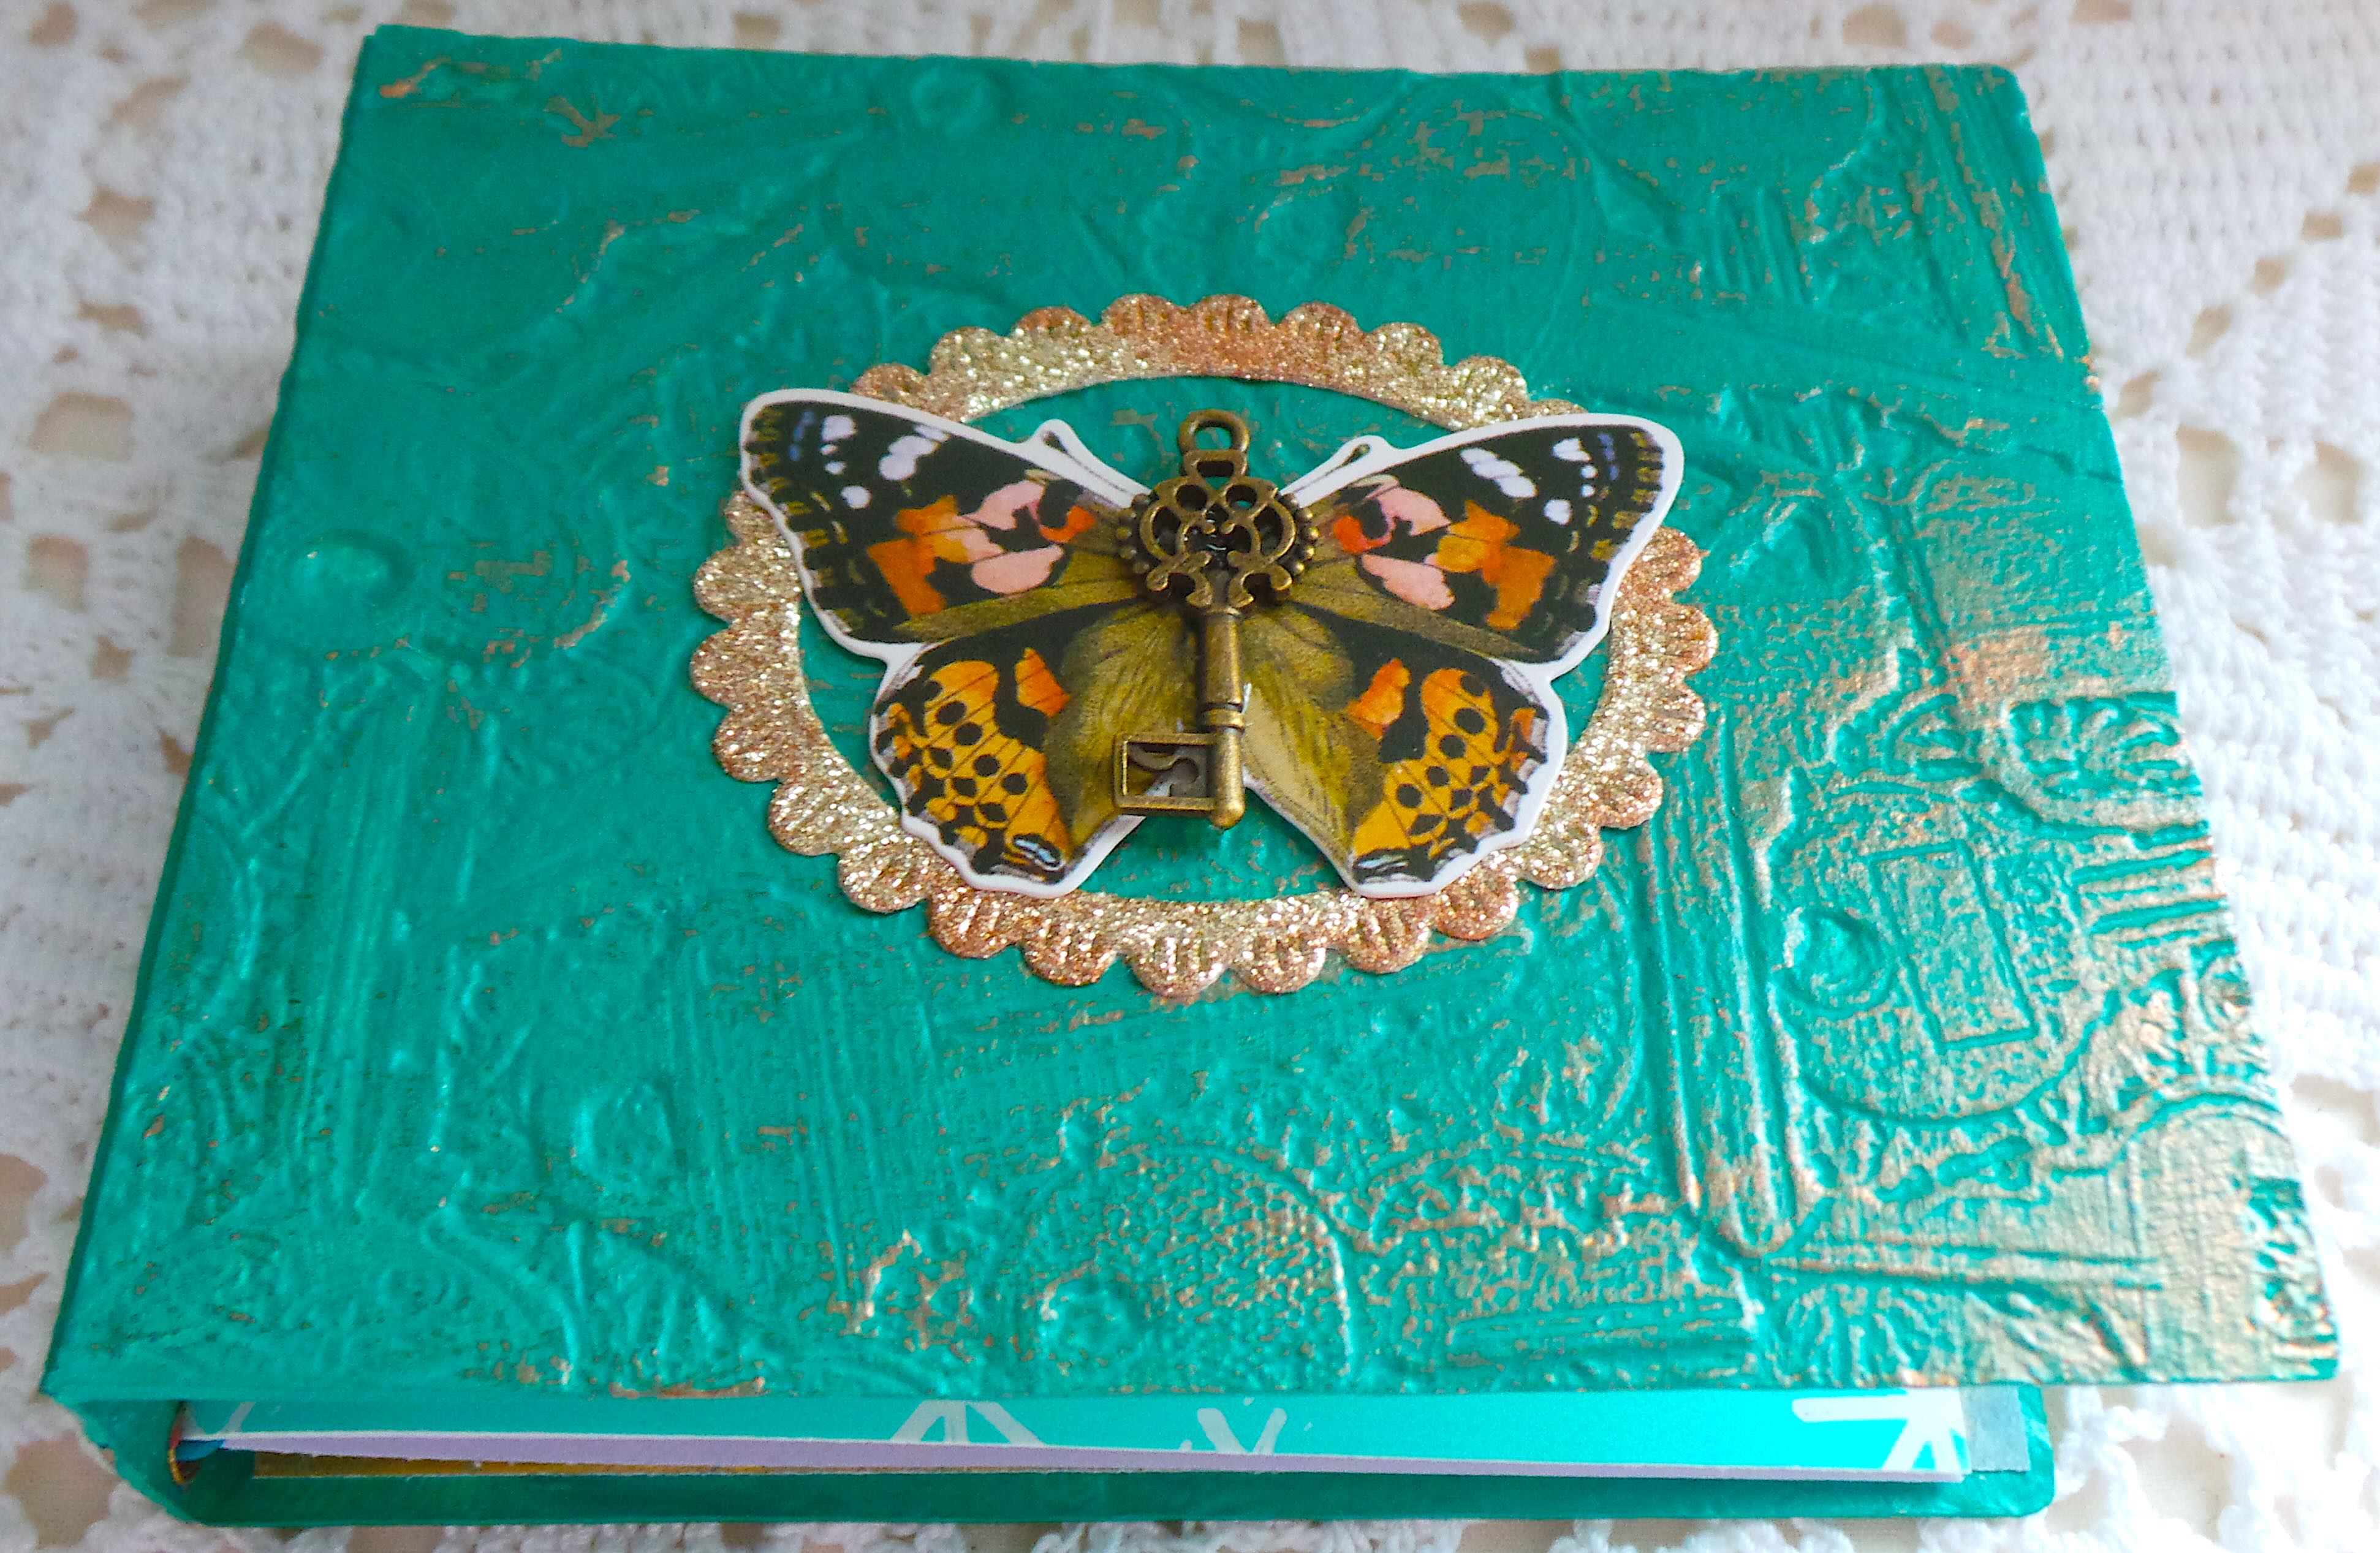
A decorated journal cover featuring a turquoise embossed design, with a butterfly embellishment and a key positioned at the center of a glittery frame.

If you haven’t been by Eileen Hull’s blog lately you can find the latest posts HERE and HERE. Also if you have any questions or comments please leave them below.
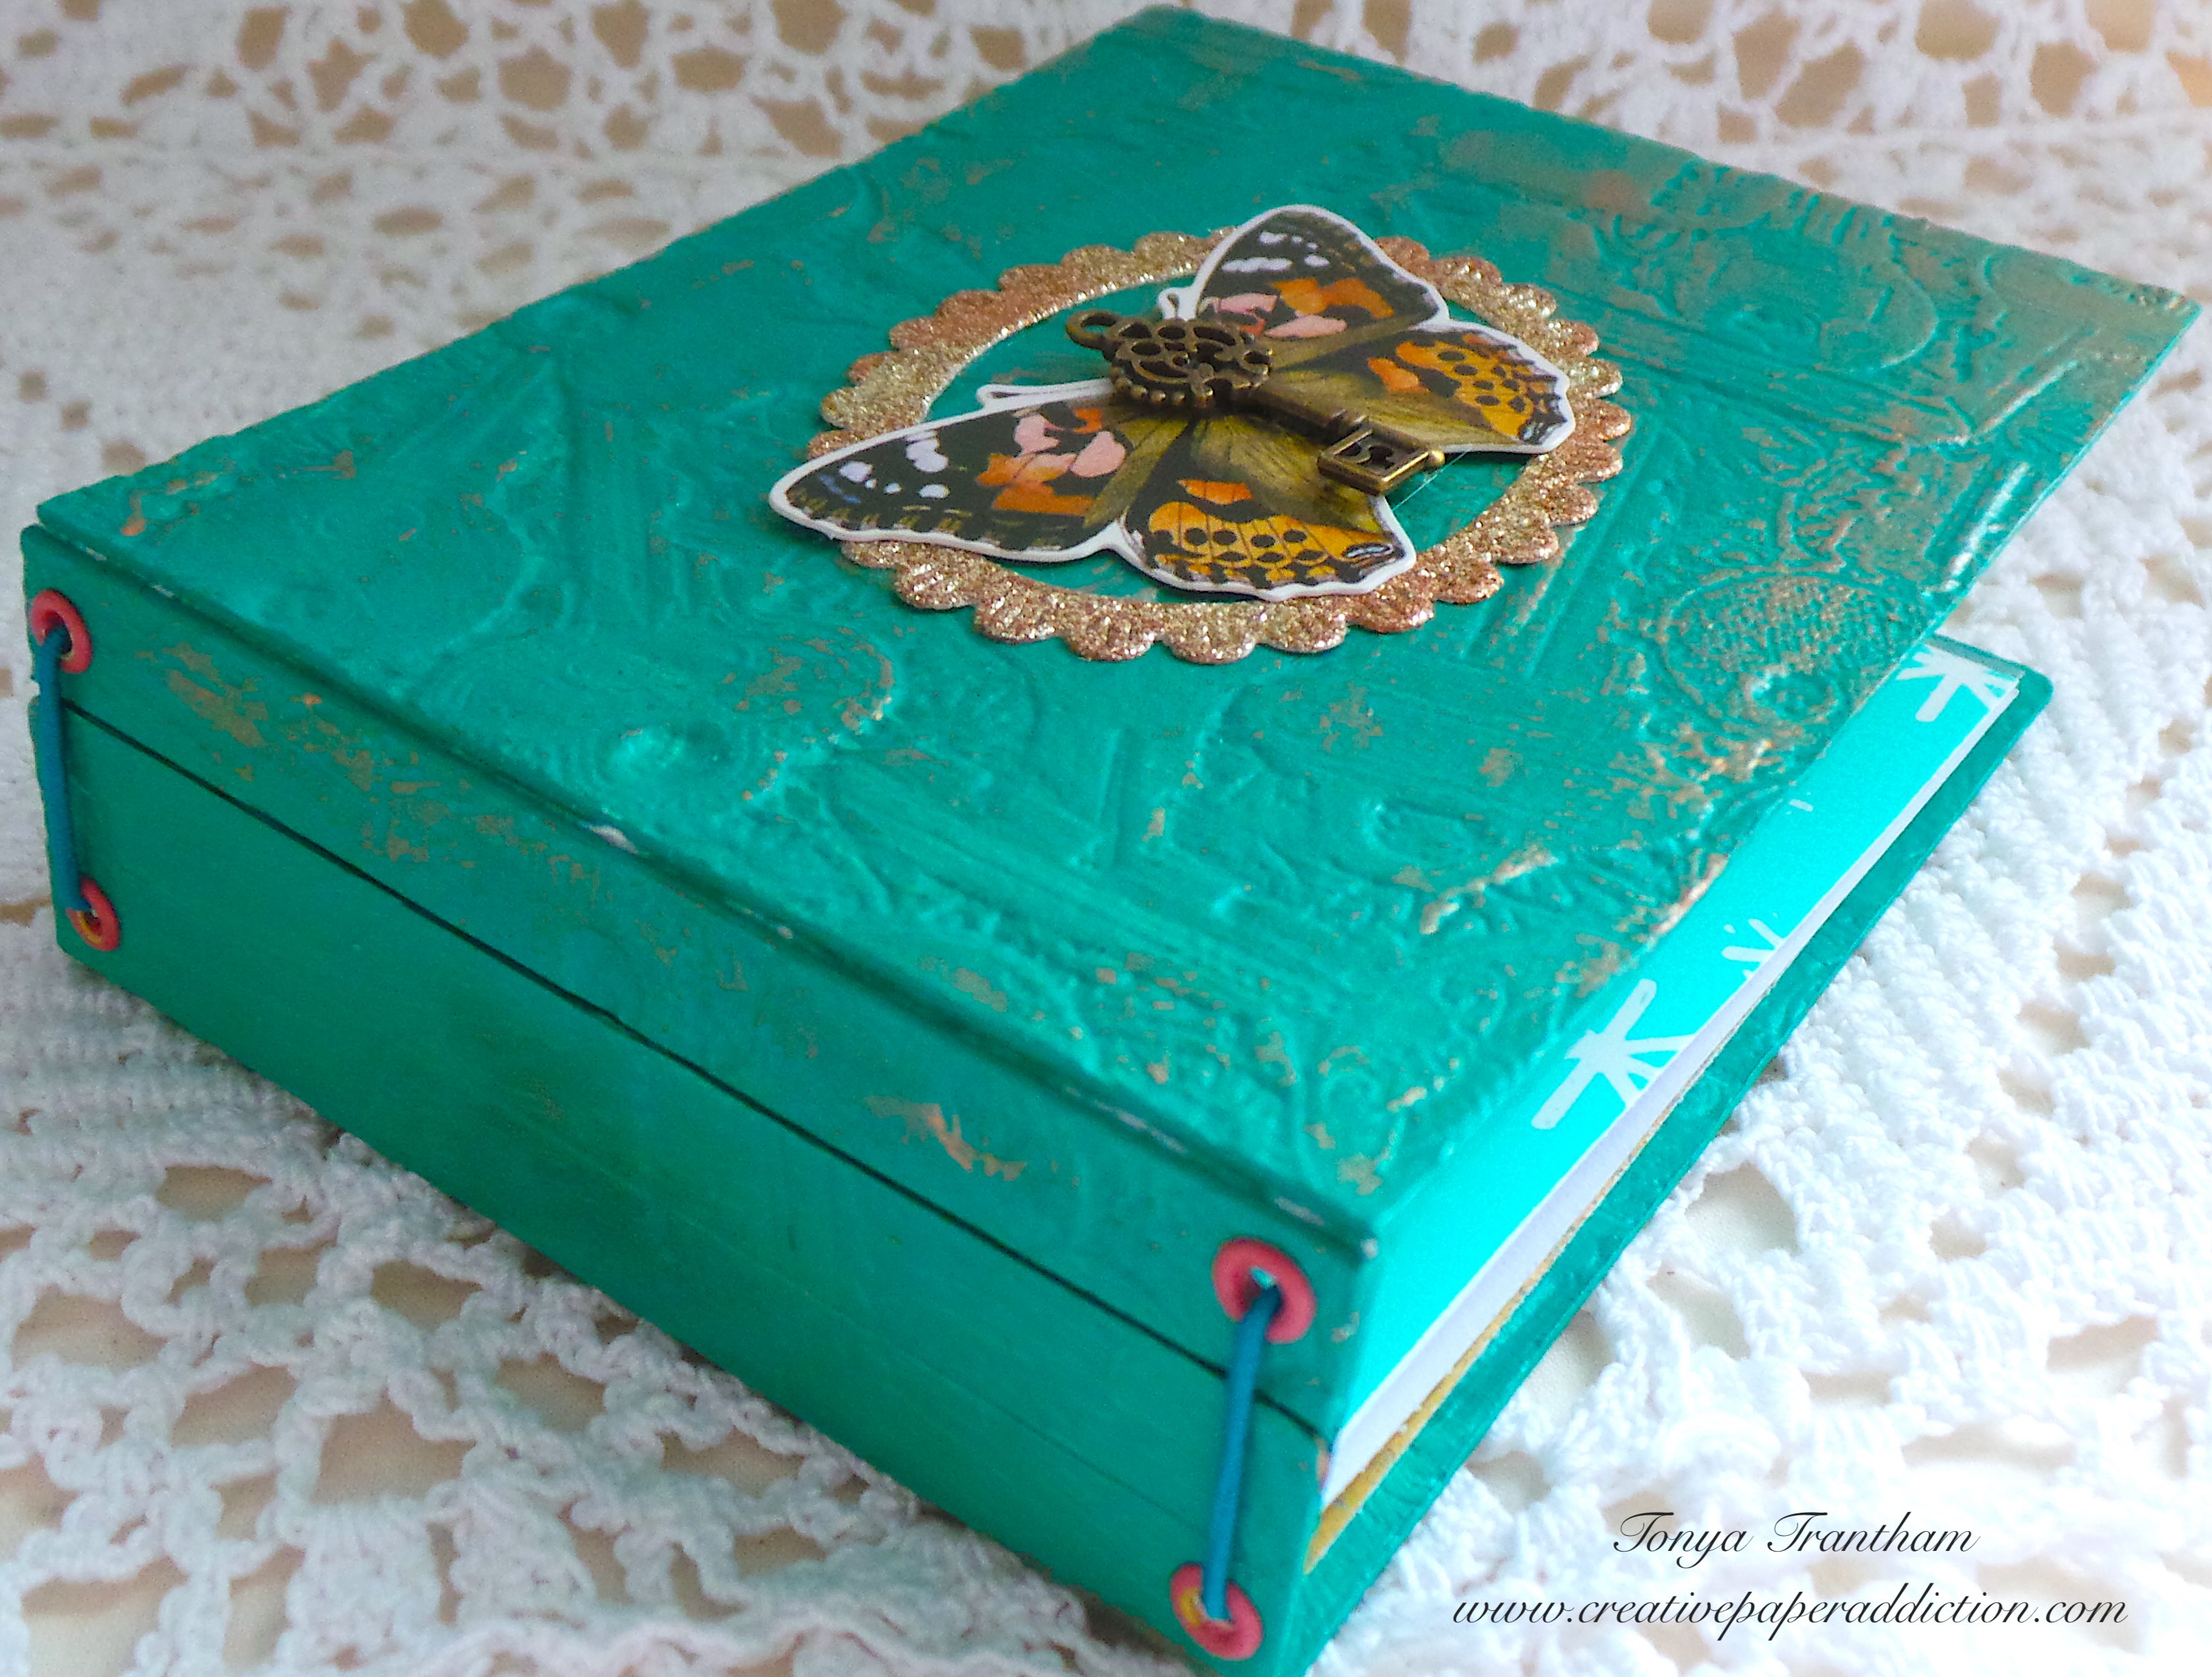
A decorative journal with a turquoise embossed cover, featuring a butterfly embellishment in the center and colorful eyelets on the spine.

Supplies

Sizzix/Eileen Hull: Keys 3D Embossing Folder

Sizzix/Eileen Hull: Notepad Diecut (retired)

Rose Gold Luster Wax

Diecut Machine

Mat Board

Acrylic Paint

Various Plain and Patterned Cardstocks

Butterfly, Key and Frame Embellishments

Eyelets

Crop-A-Dile

Elastic Cording

Blank Journals

Paper Cutter

Scissors

Beacon Adhesives: Zip Dry Adhesive

(Products listed above are Affiliated Links for your convenience)

DISCLAIMERS

This blog is compensated to provide opinion on products, services, websites, and various other topics. Even though the owner(s) of this blog receives compensation for our posts or advertisements. I always give my honest opinions, findings, beliefs, or experiences on those topics or products. The views and opinions expressed on this blog are purely my own. Any product claim, statistic, or quote should be checked with each manufacturer. Verify other representations about a product or service with the provider or party in question.This blog contains affiliate links. Clicking these links helps to support Tonya Trantham Designs – Creative Paper Addiction. It’s at no additional cost to you. Today’s features are Sizzix, Eileen Hull and Scrapbook.com Products. 
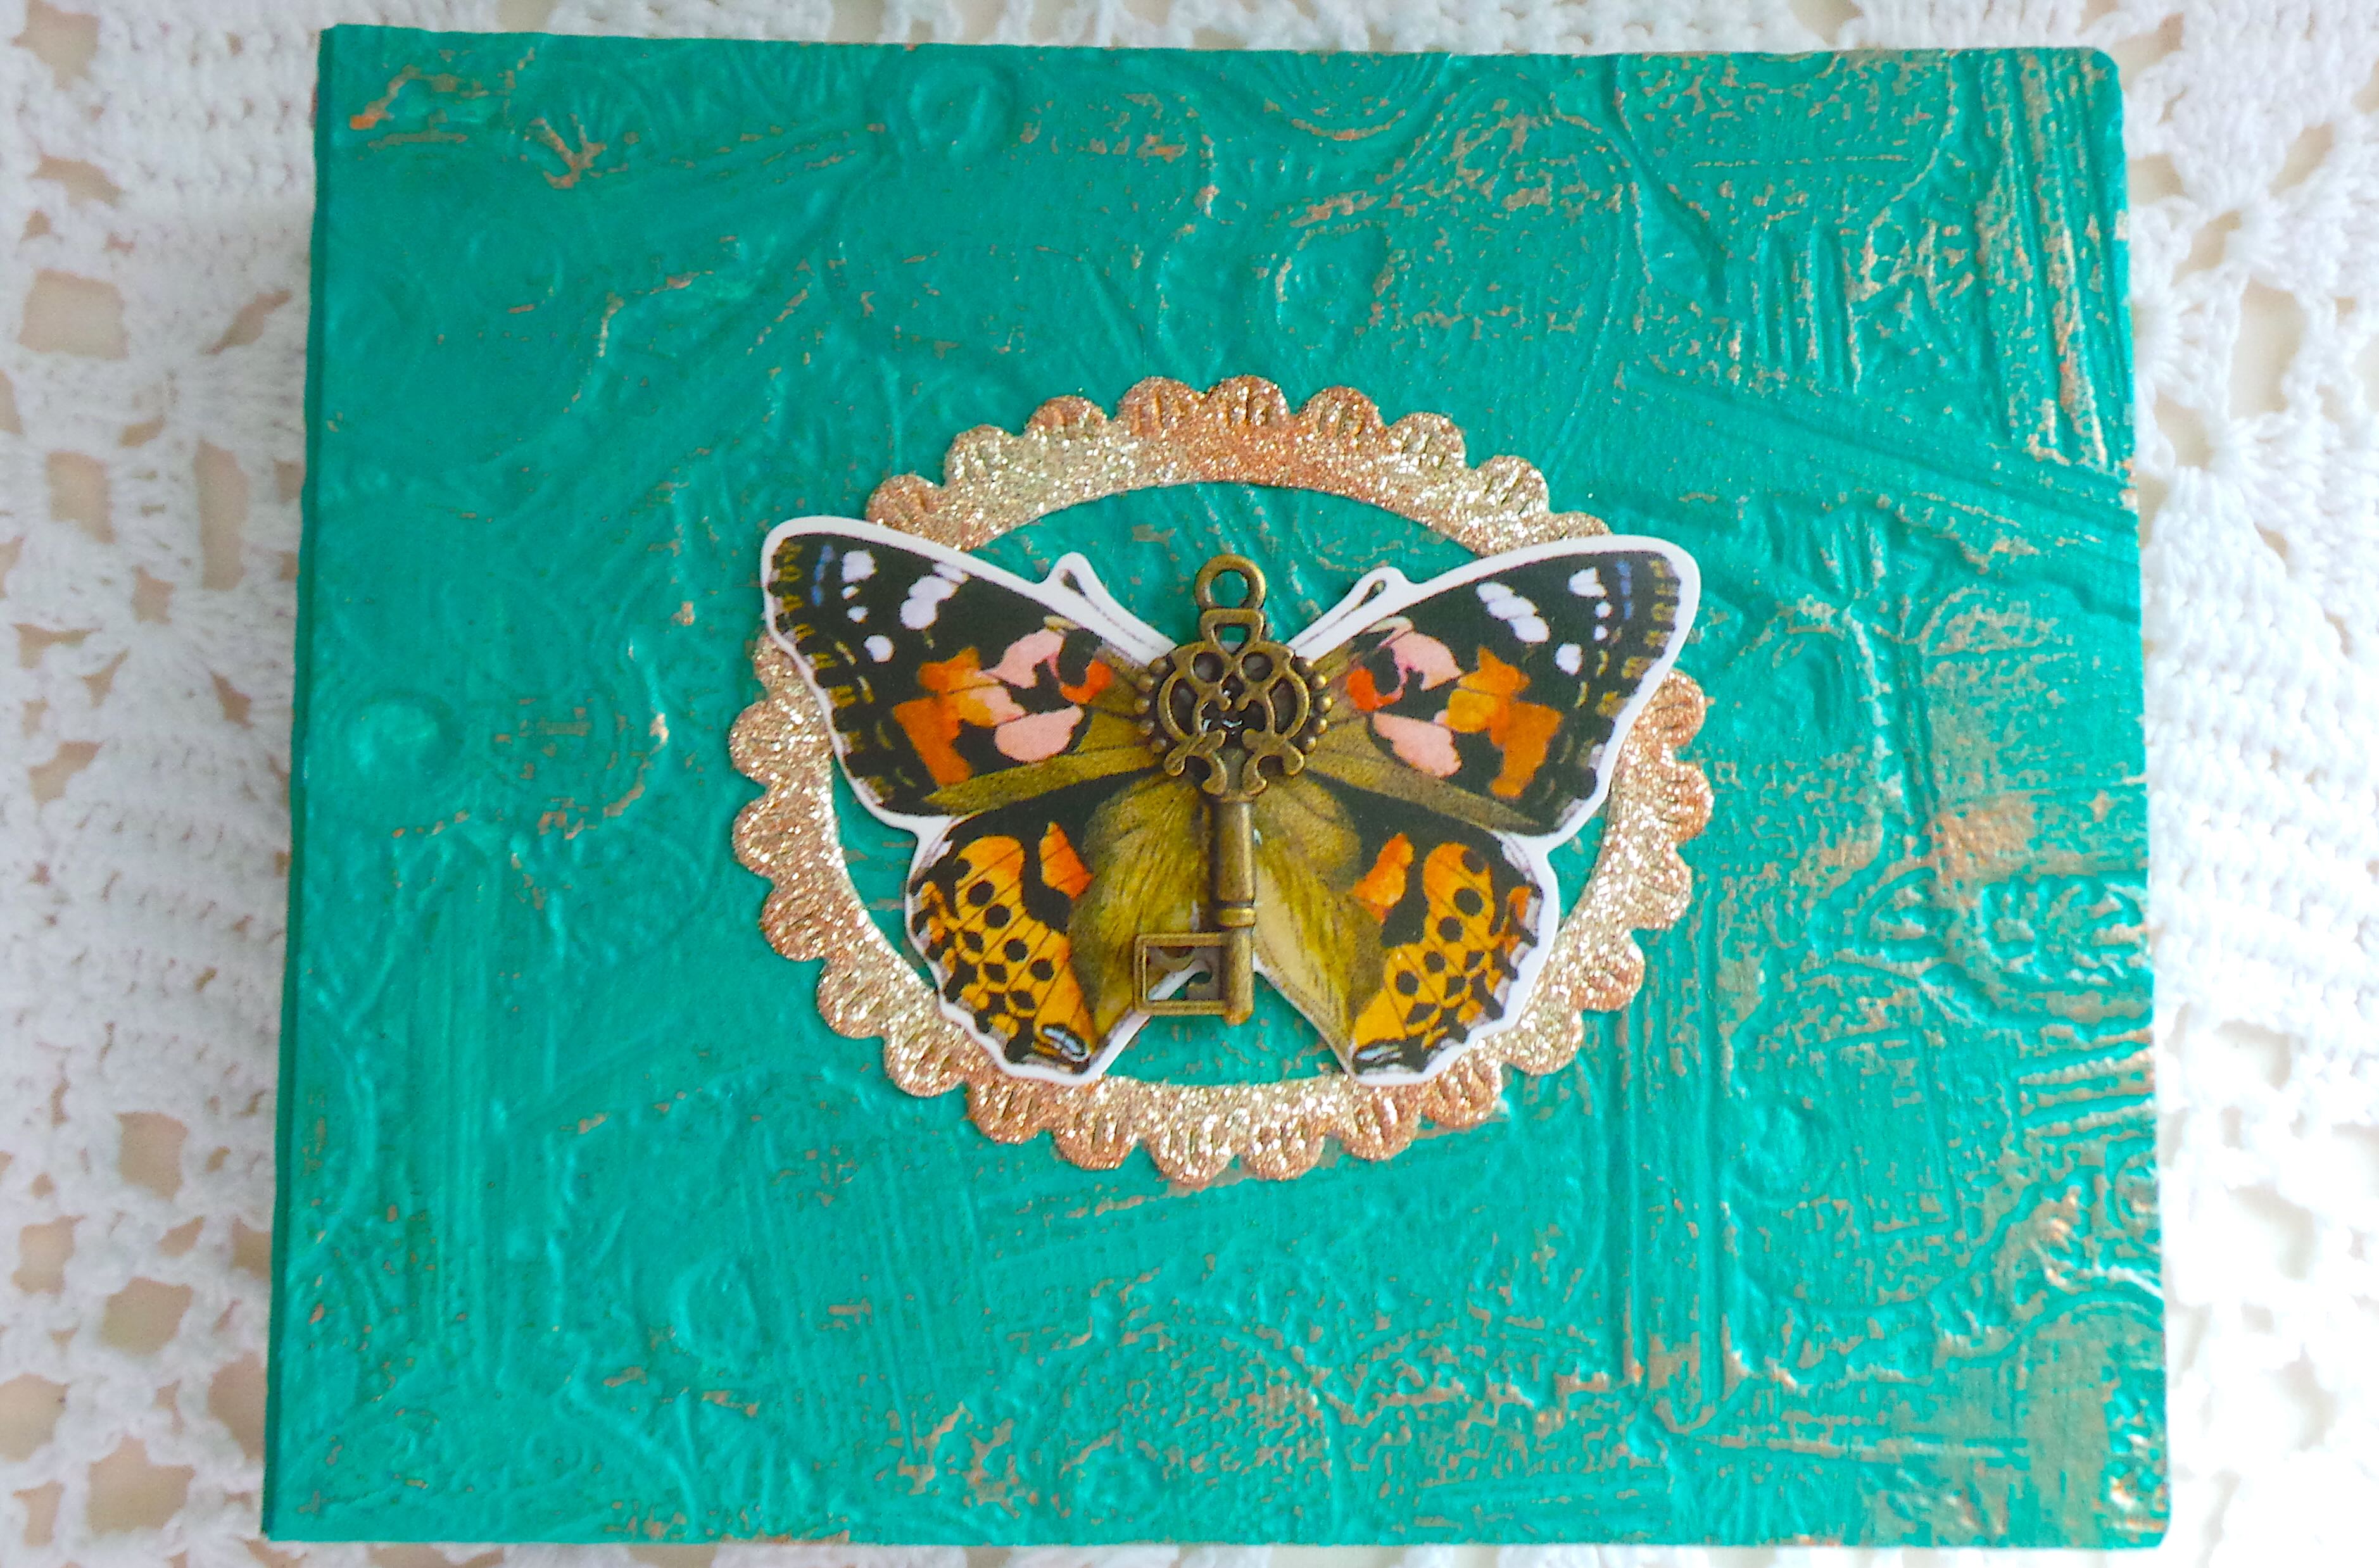
A brightly colored teal journal cover featuring a butterfly embellishment with intricate details and a vintage key accent, surrounded by a golden decorative frame.

Thanks for stopping by, I hope your Friday is wonderful and enjoy creating!

A vintage-style graphic featuring a bird amidst colorful flowers with the name 'Tonya' displayed in an elegant font.

How to Create a Tag with Color Wheel Stencils

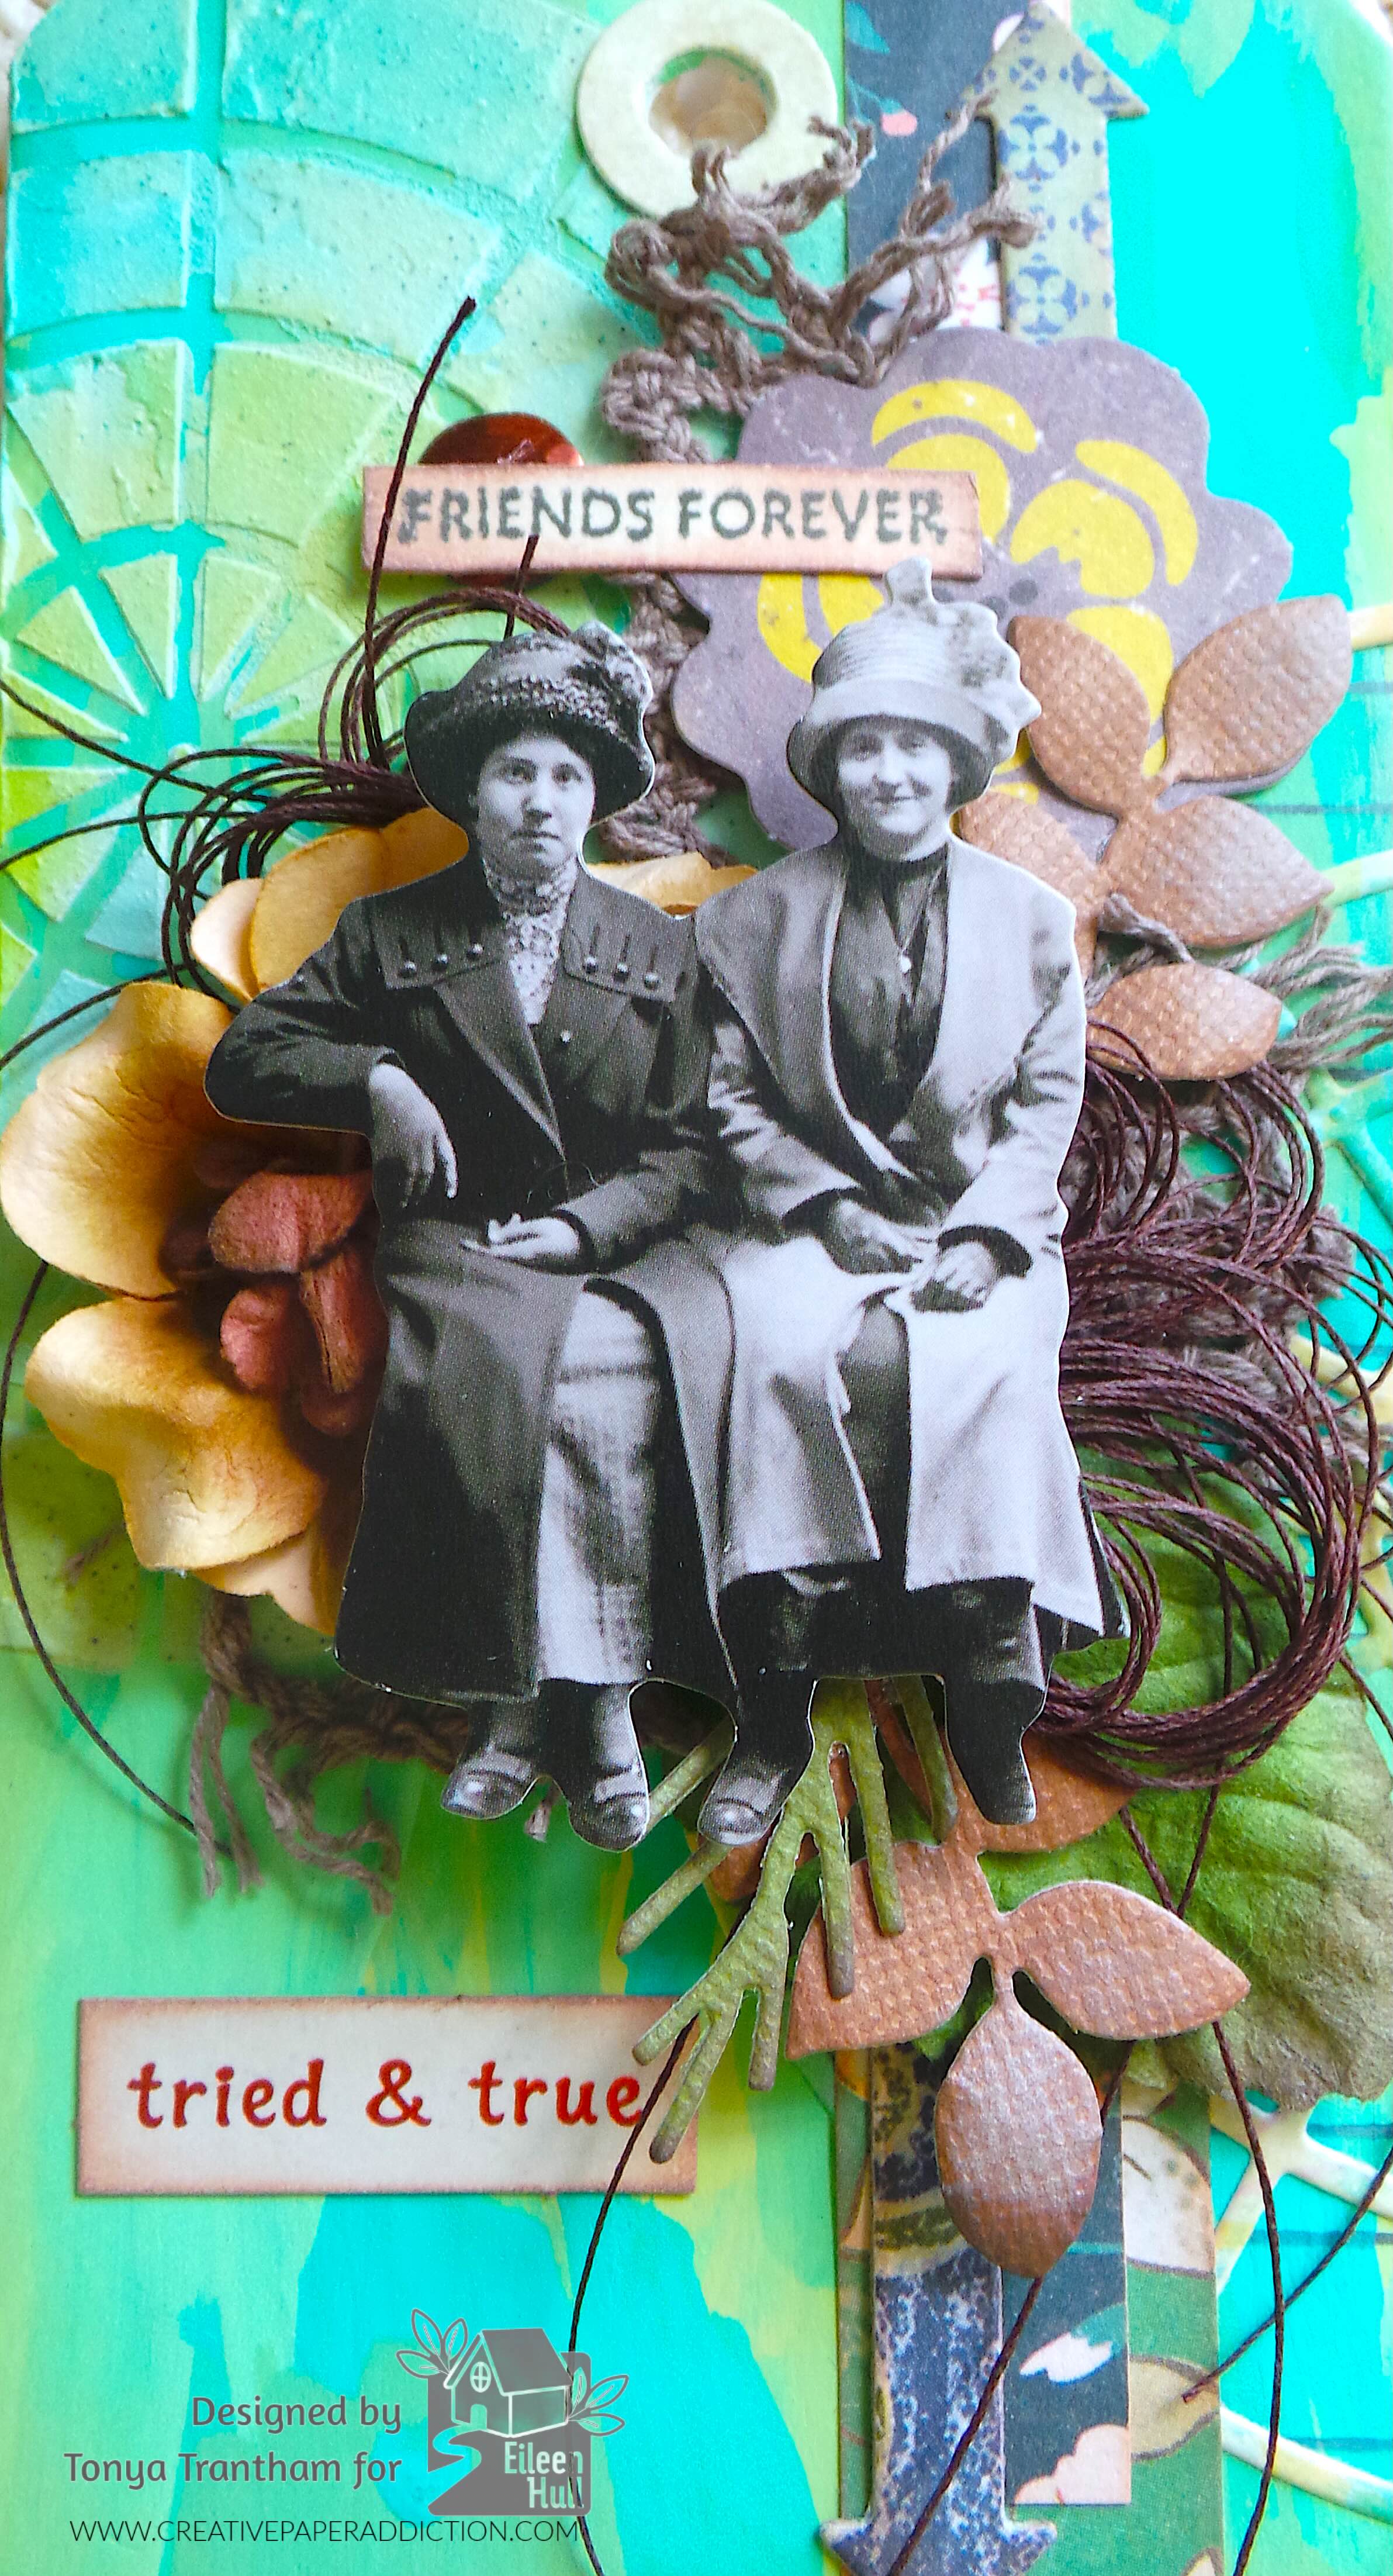
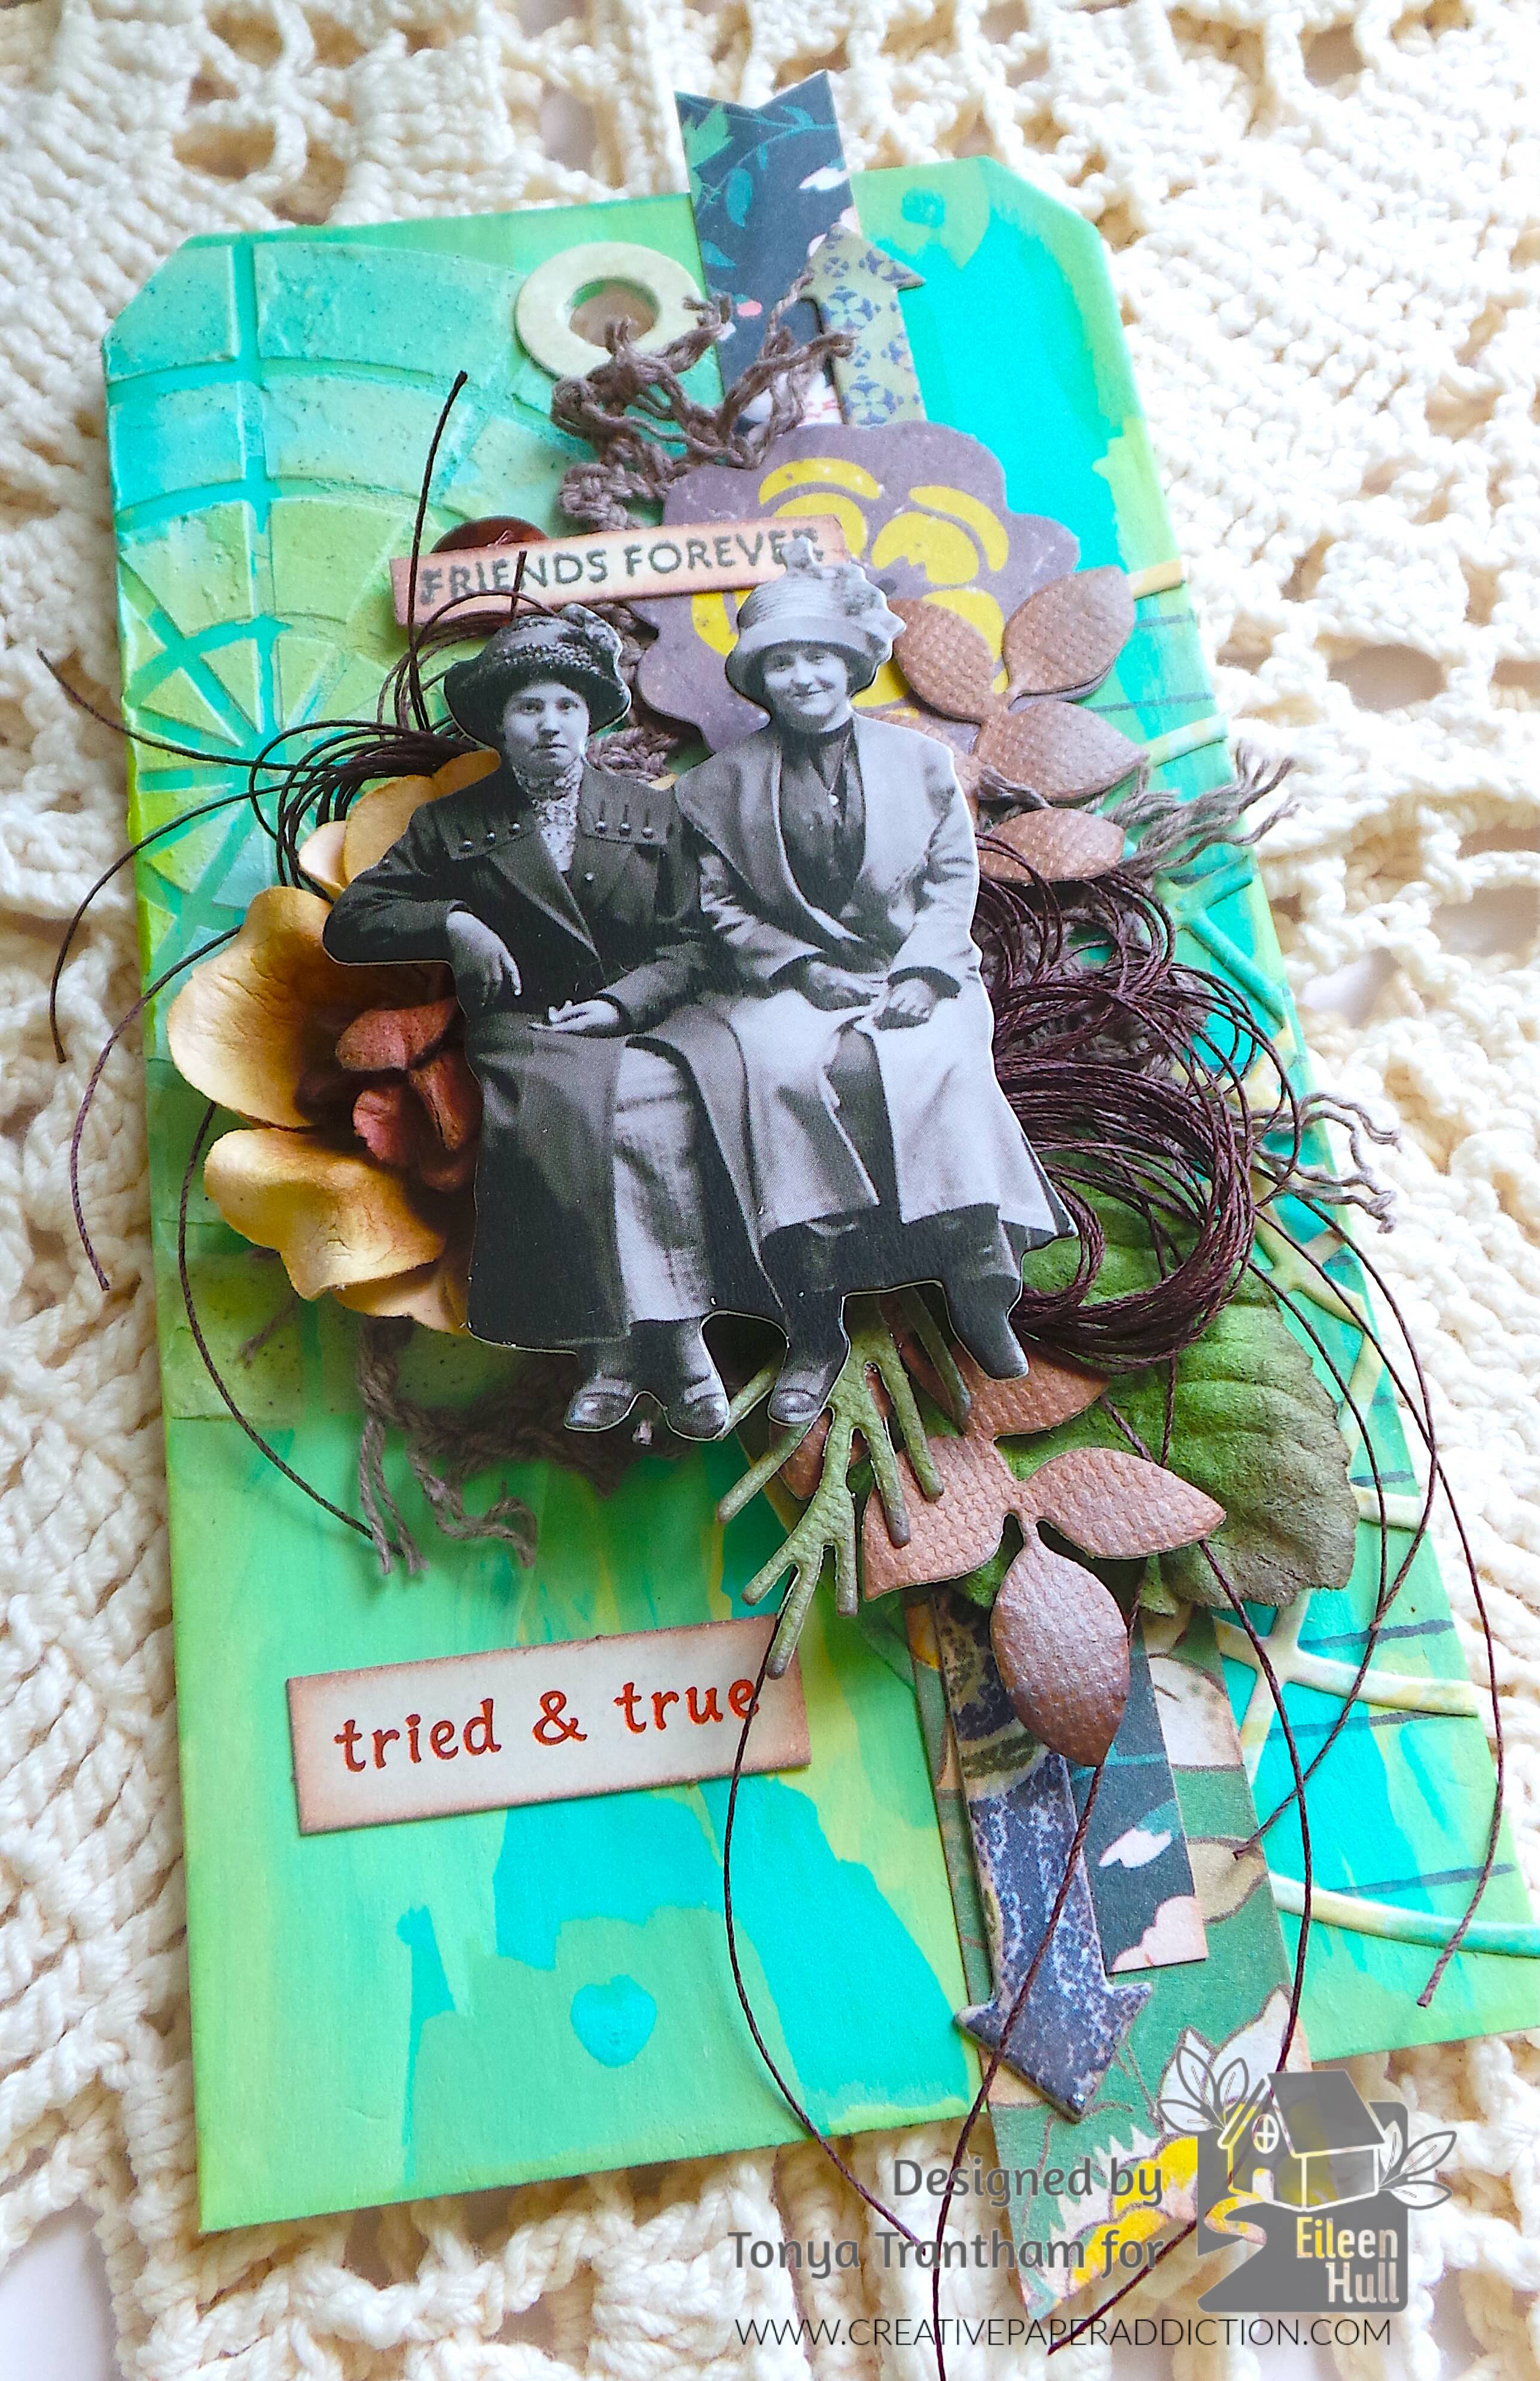
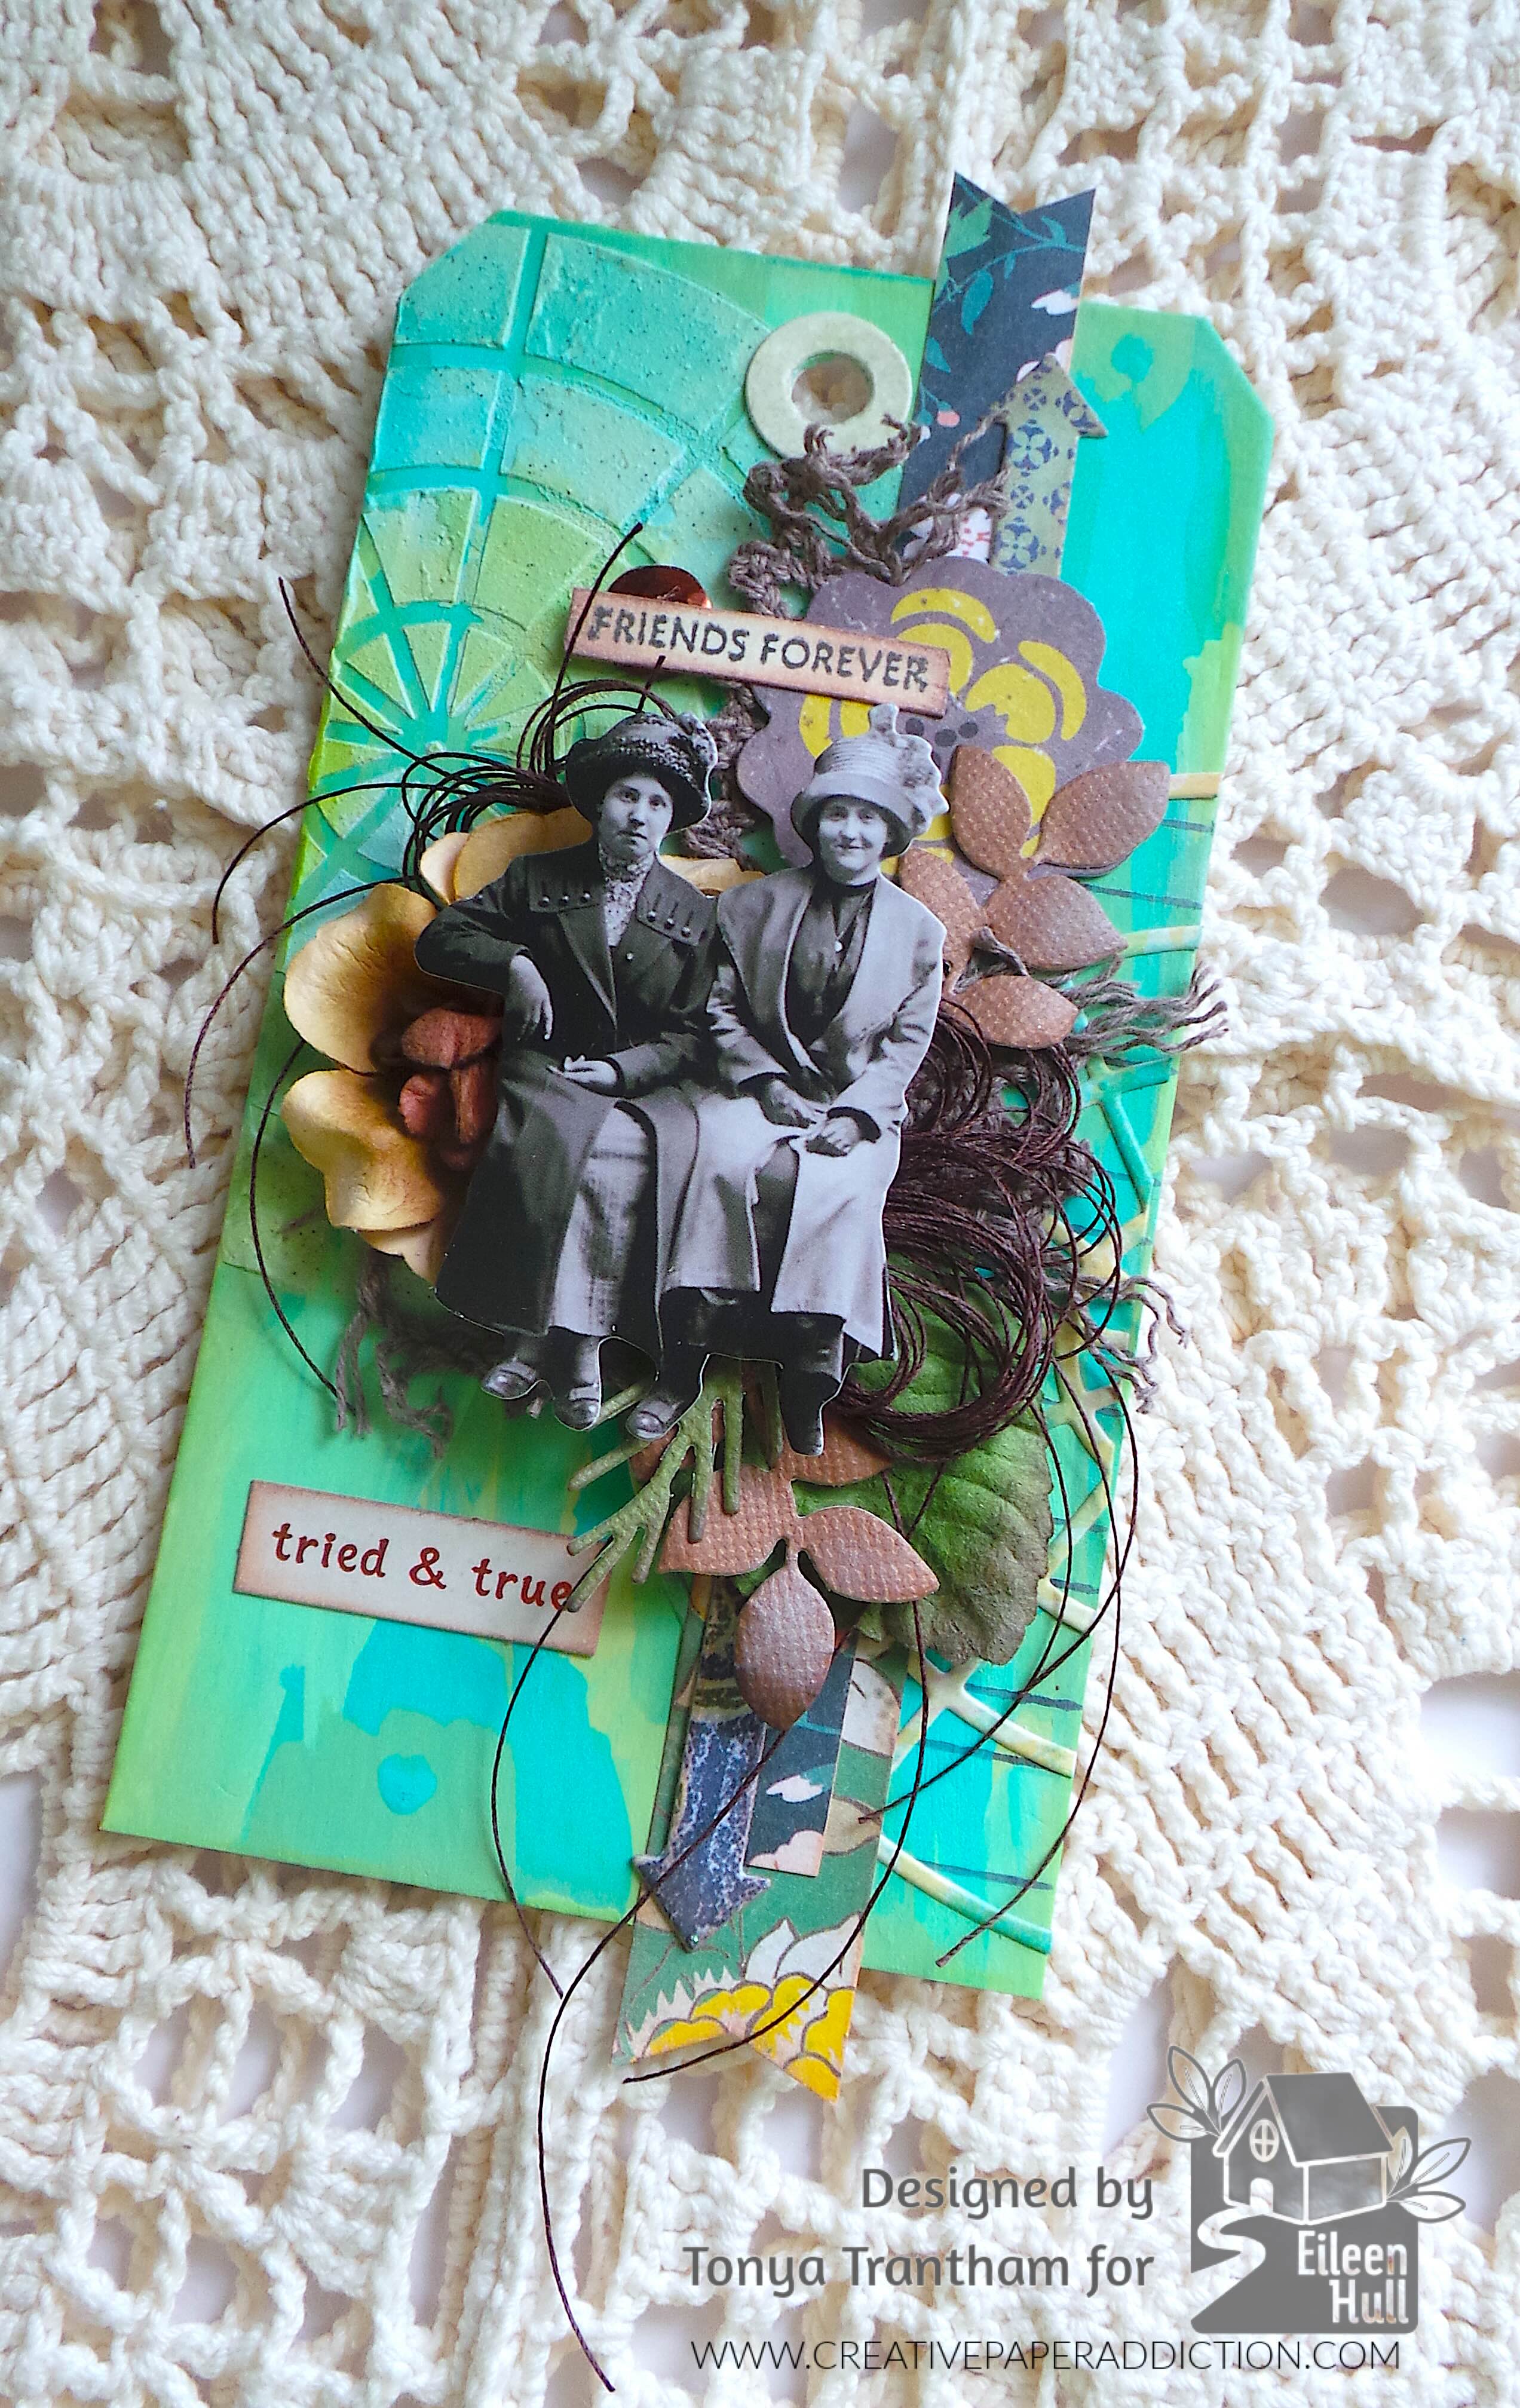
Hi everyone! I’m back this week with a mix media tag I created using the Color Wheel Stencils by Eileen Hull. I used dies from the Rainbow Wheels Thinlits. Stamps from the Swatch Cards Stamp Set were also employed to complete this tag. Anyways, let’s get started!

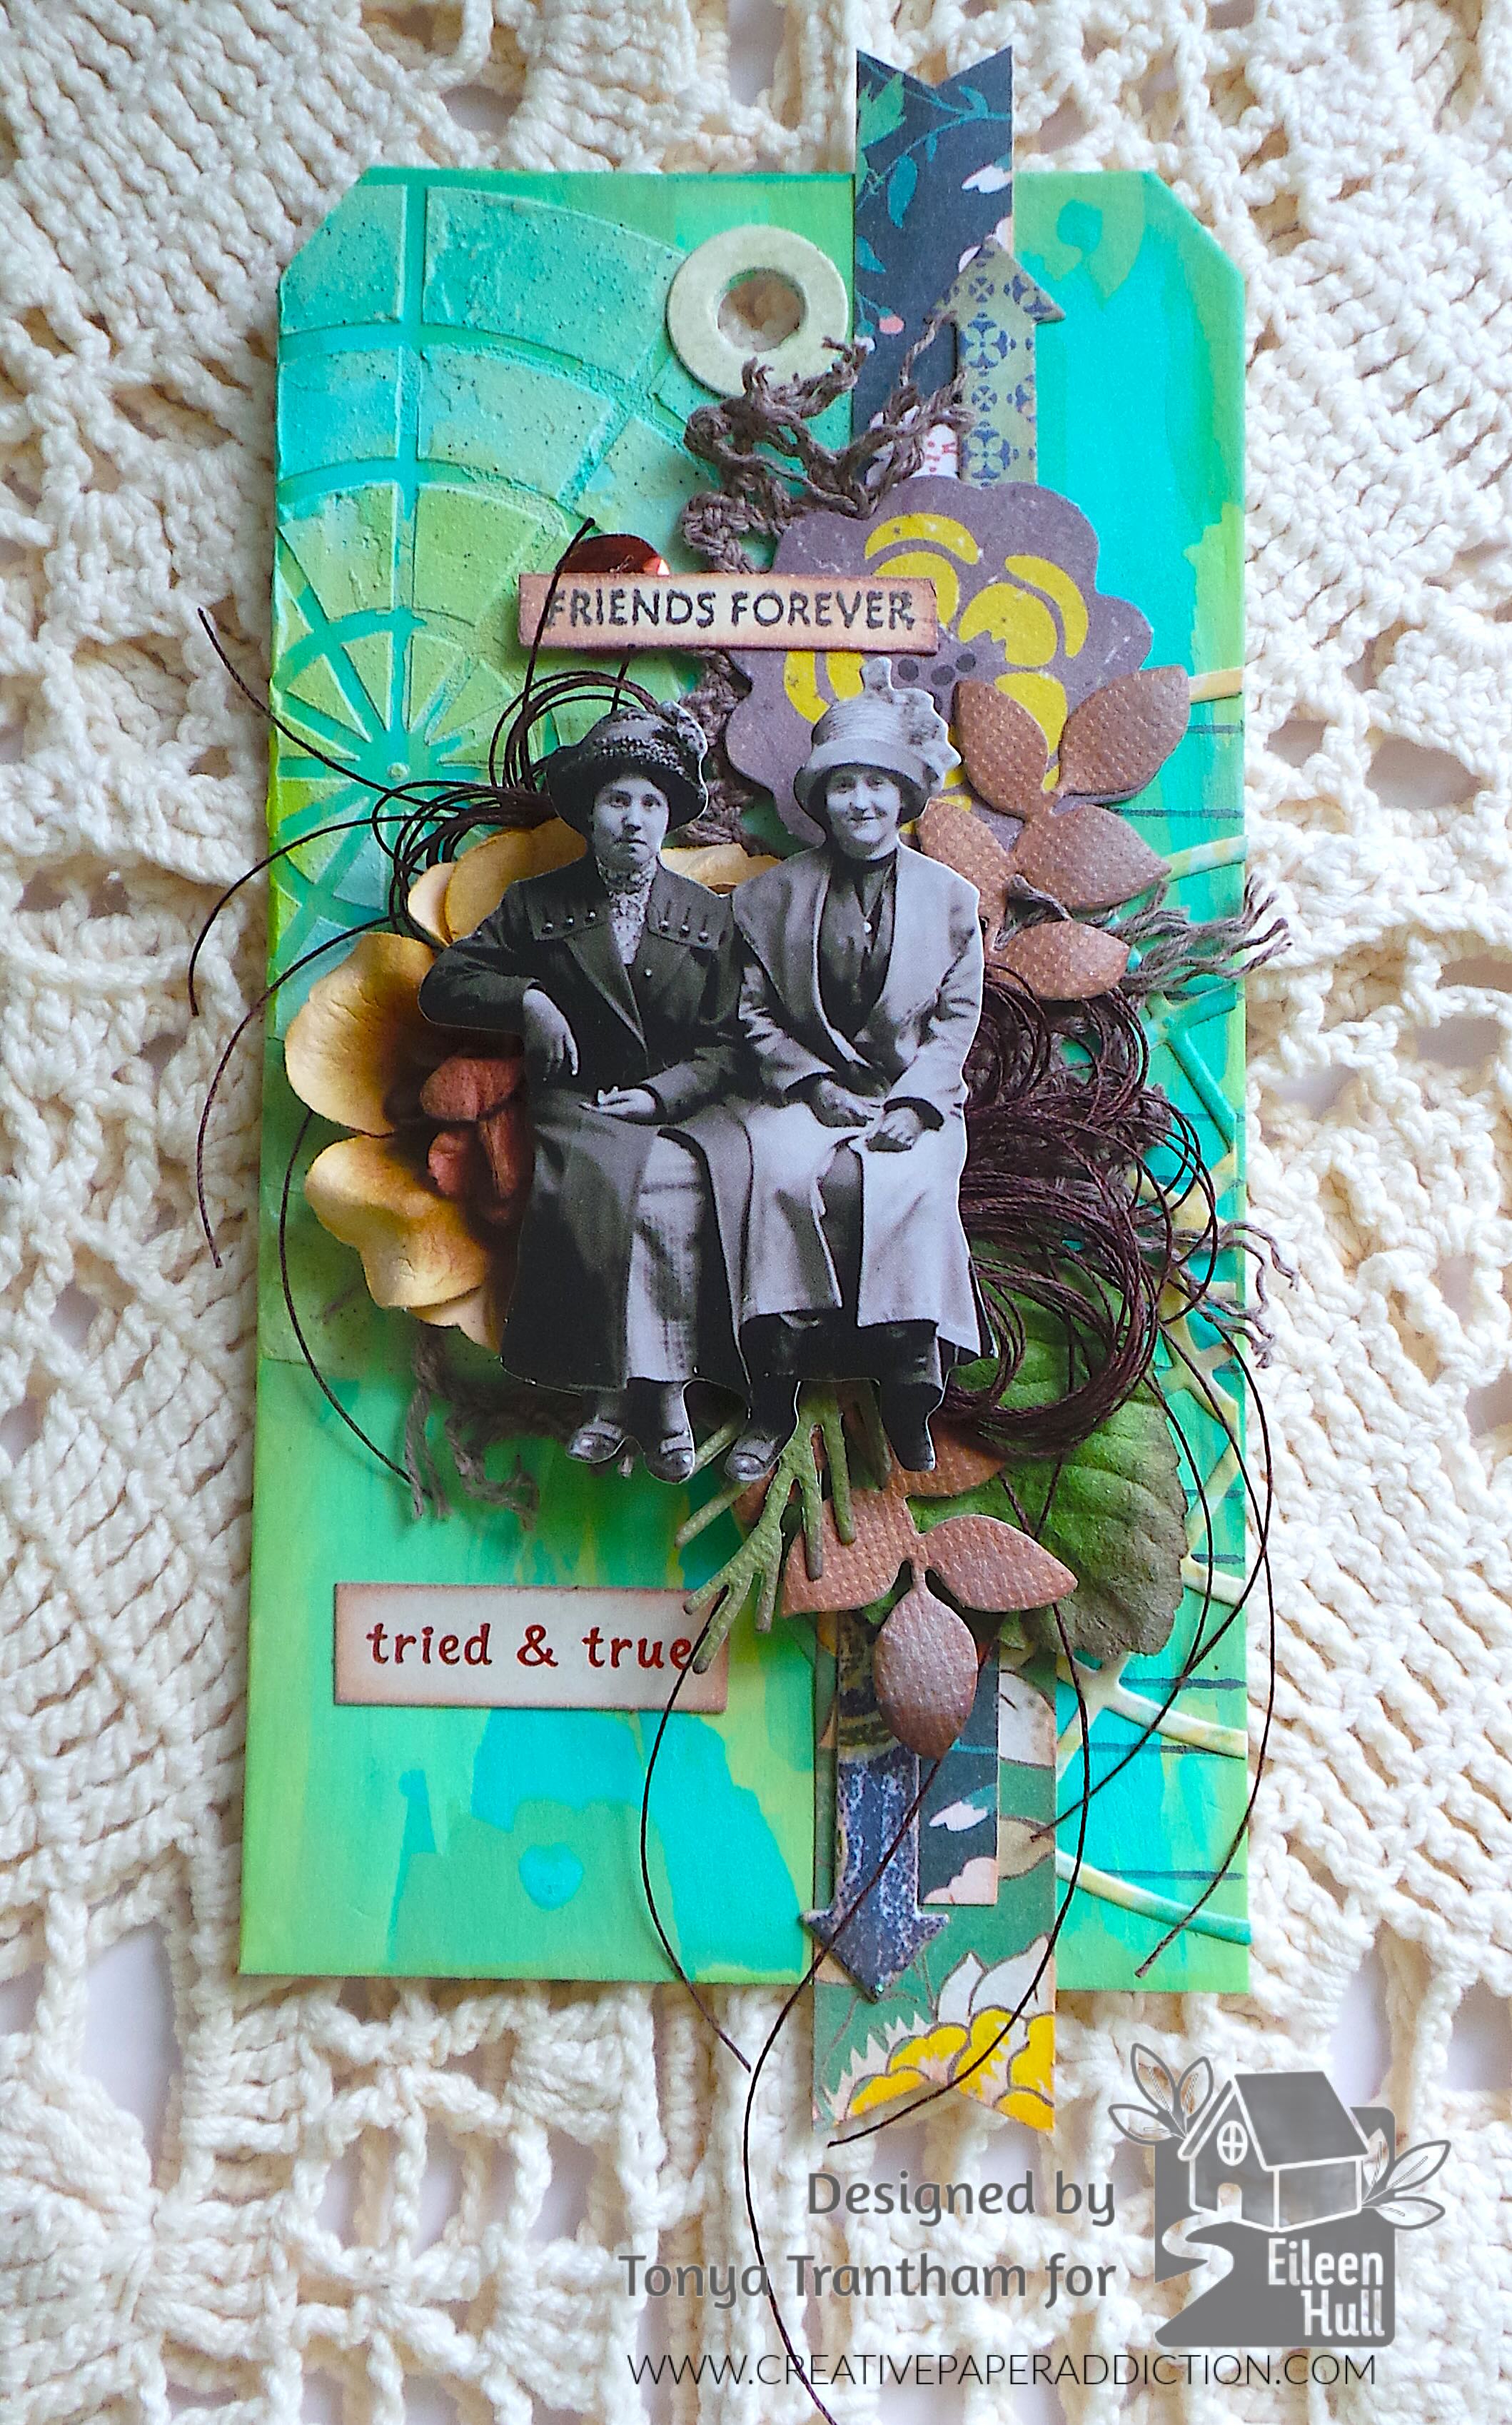
A mixed media tag featuring two vintage black-and-white photographs of women, layered flowers, and embellishments, with the text 'FRIENDS FOREVER' and 'tried & true' on a colorful, textured background.

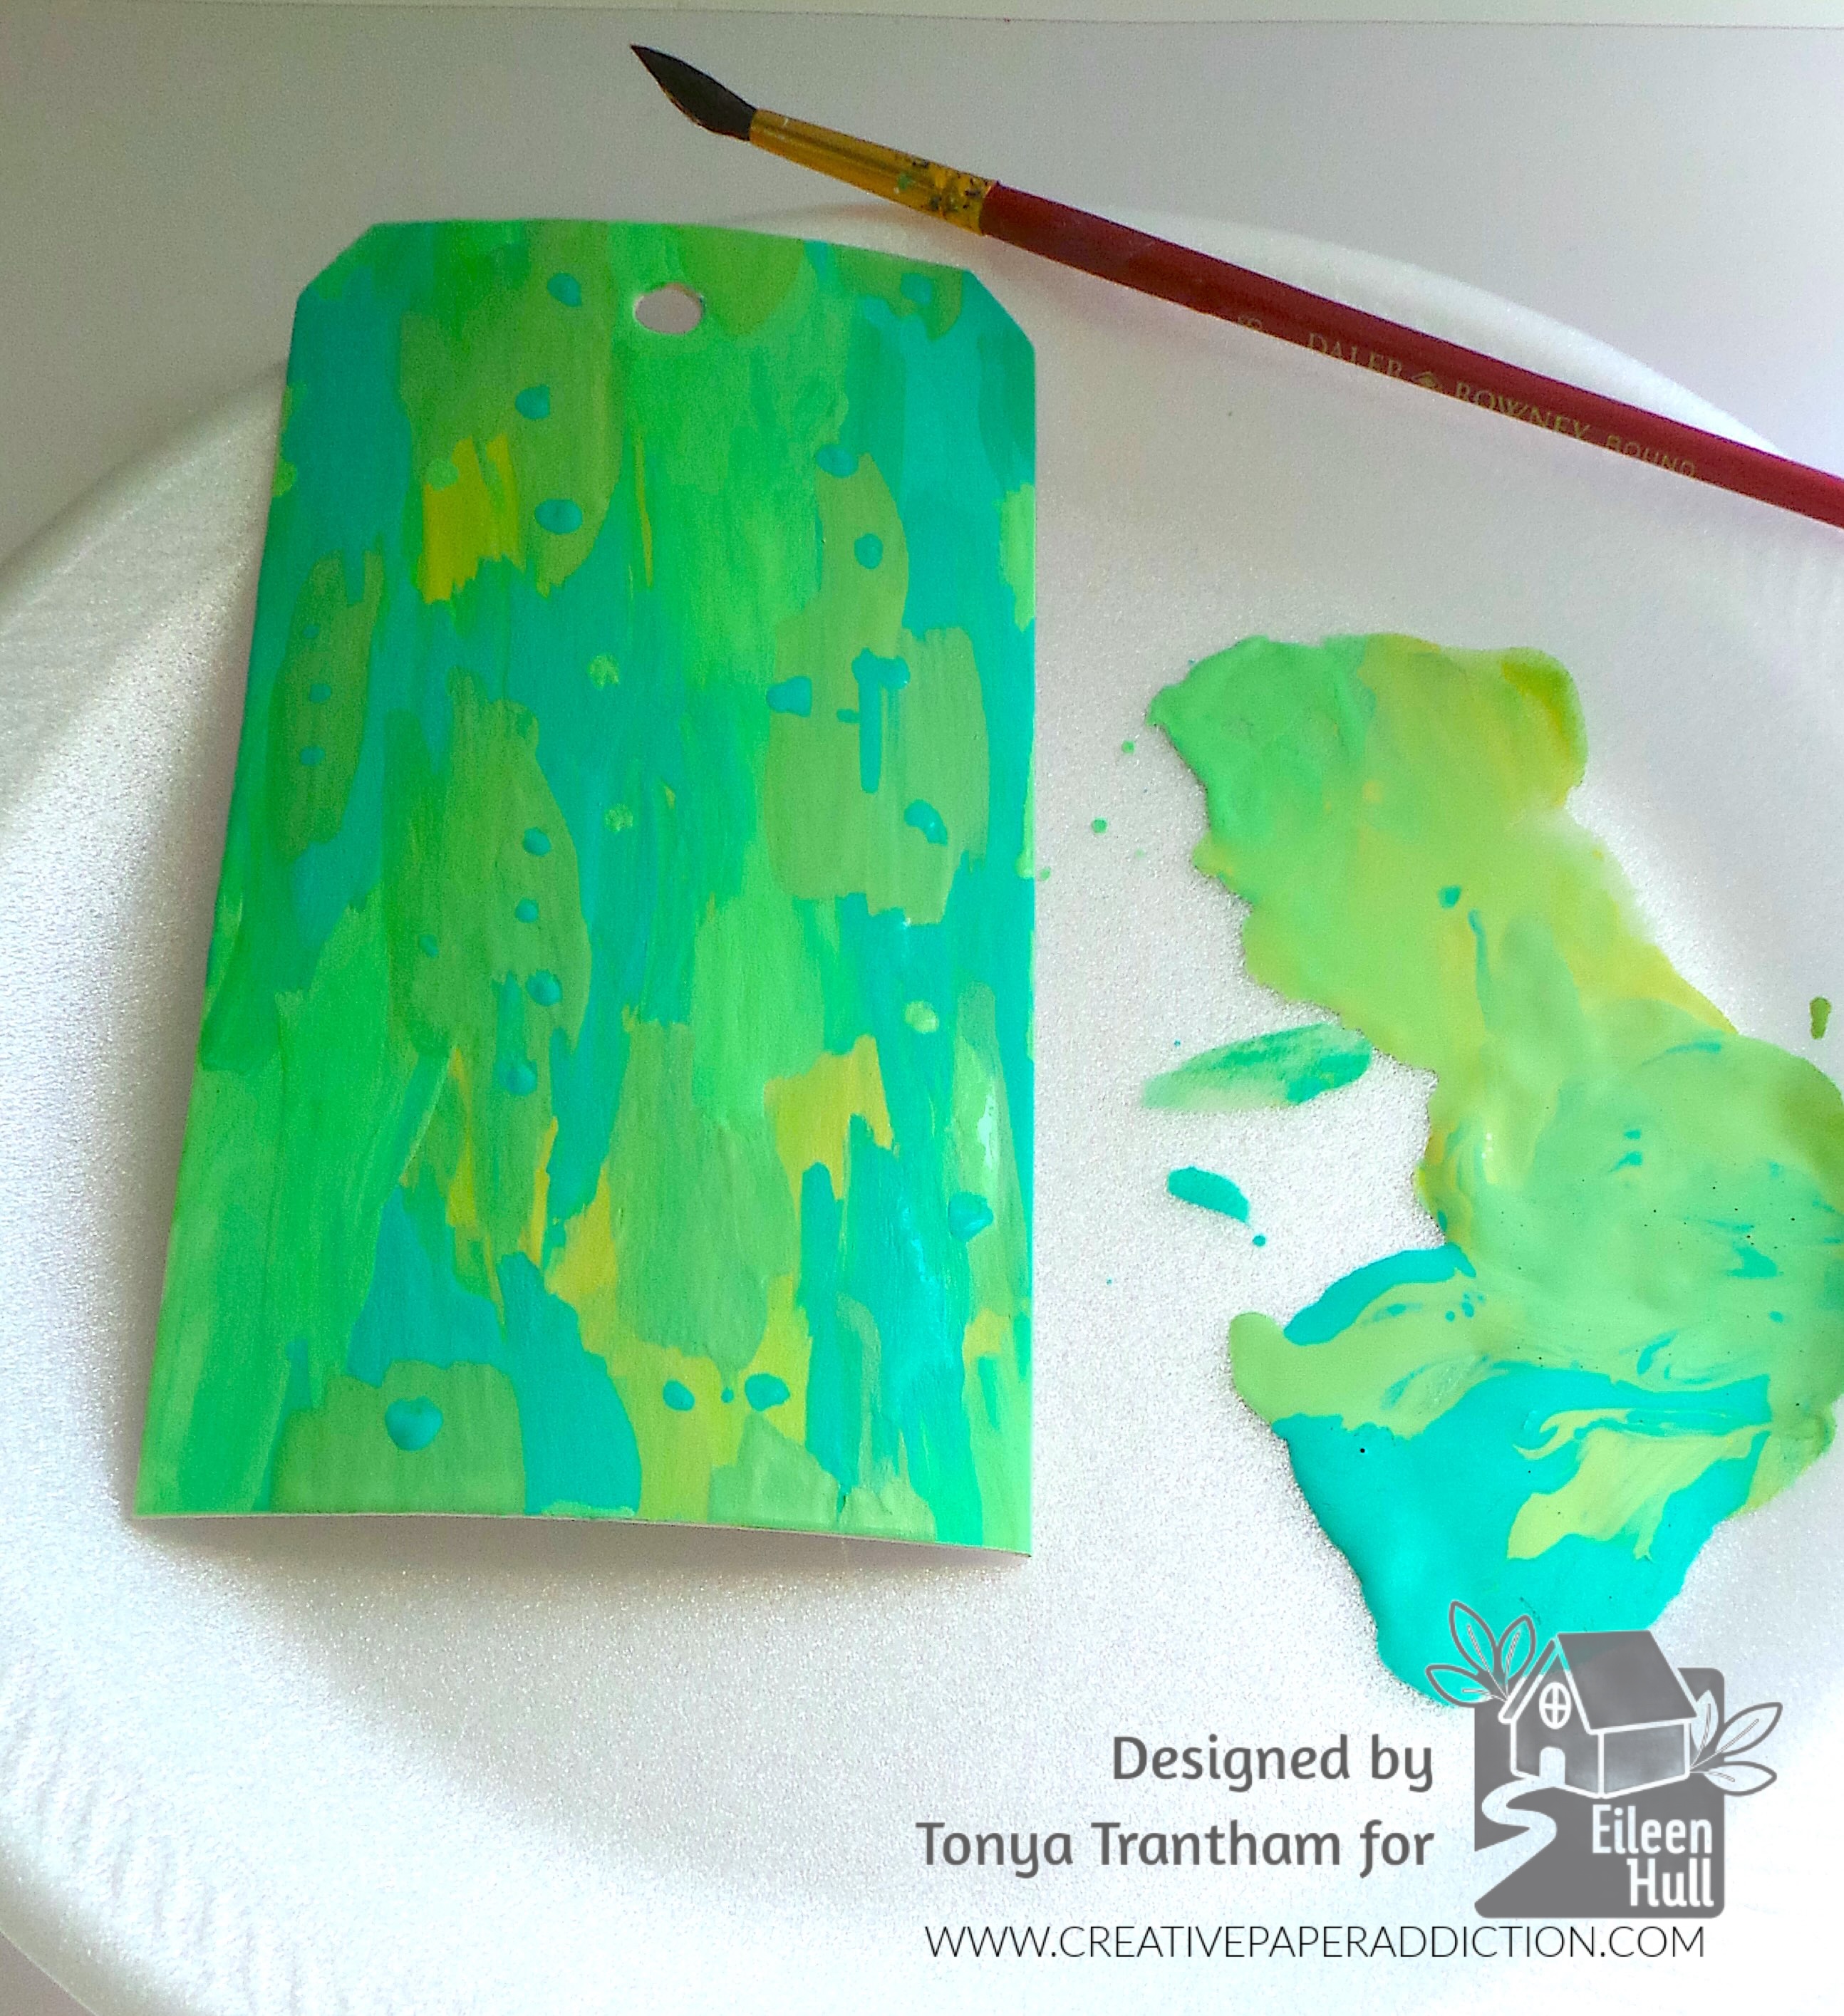
I found in my stash a tag I had cut from the Tag and Bookplates Diecut (retired). I had cut it out of Mat Board. Since it was a sturdy base I decided to use paint to cover the tag. I used an assortment of Ocean Breeze, Bright Mint and Celery acrylic paints.

A colorful tag with a mix of green and blue acrylic paint on a white plate, accompanied by a paintbrush.

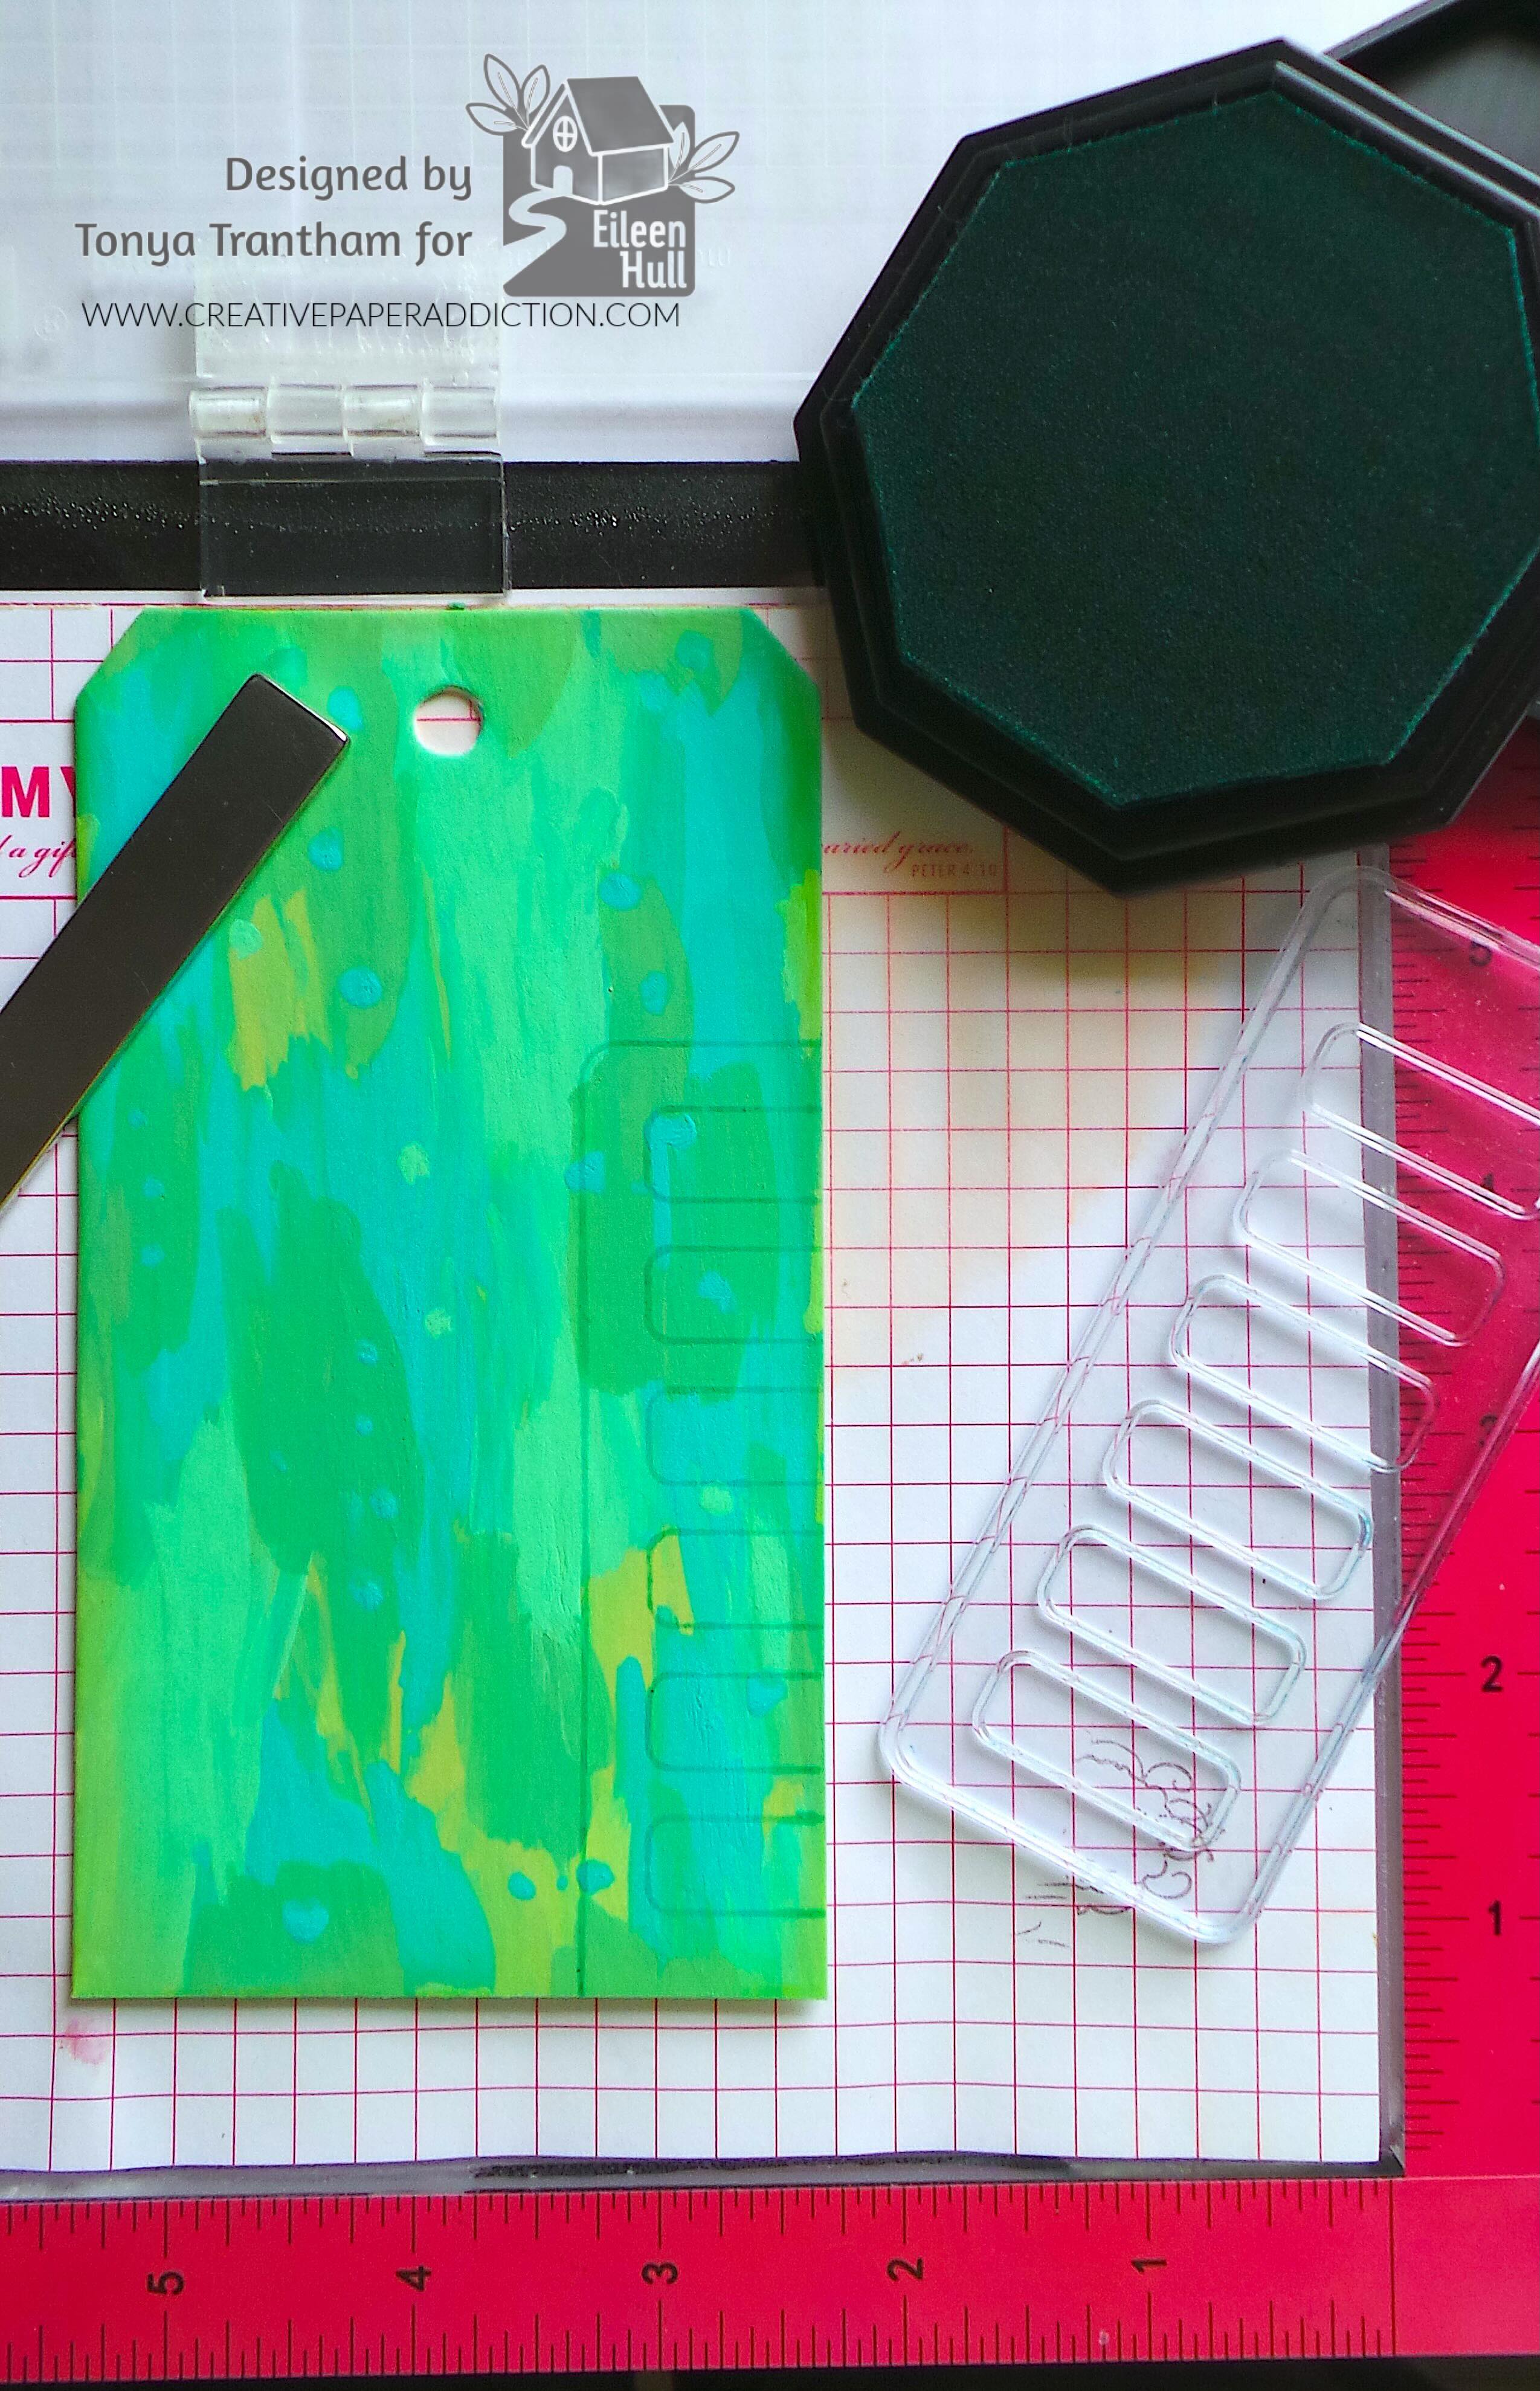
Once dry I stamped the tag with the swatch stamp from the Swatch Cards Stamp Set. I used a blue ink to stamp onto the corner of the tag but the color started to disappear. I was able to reposition the stamp onto the MISTI Stamping Tool. I re-inked the stamp with a Black Ink and re-stamped the tag.

A colorful tag painted with green and blue acrylics, positioned on a stamping tool surrounded by a green ink pad, a black spacer, and a clear stamp block.

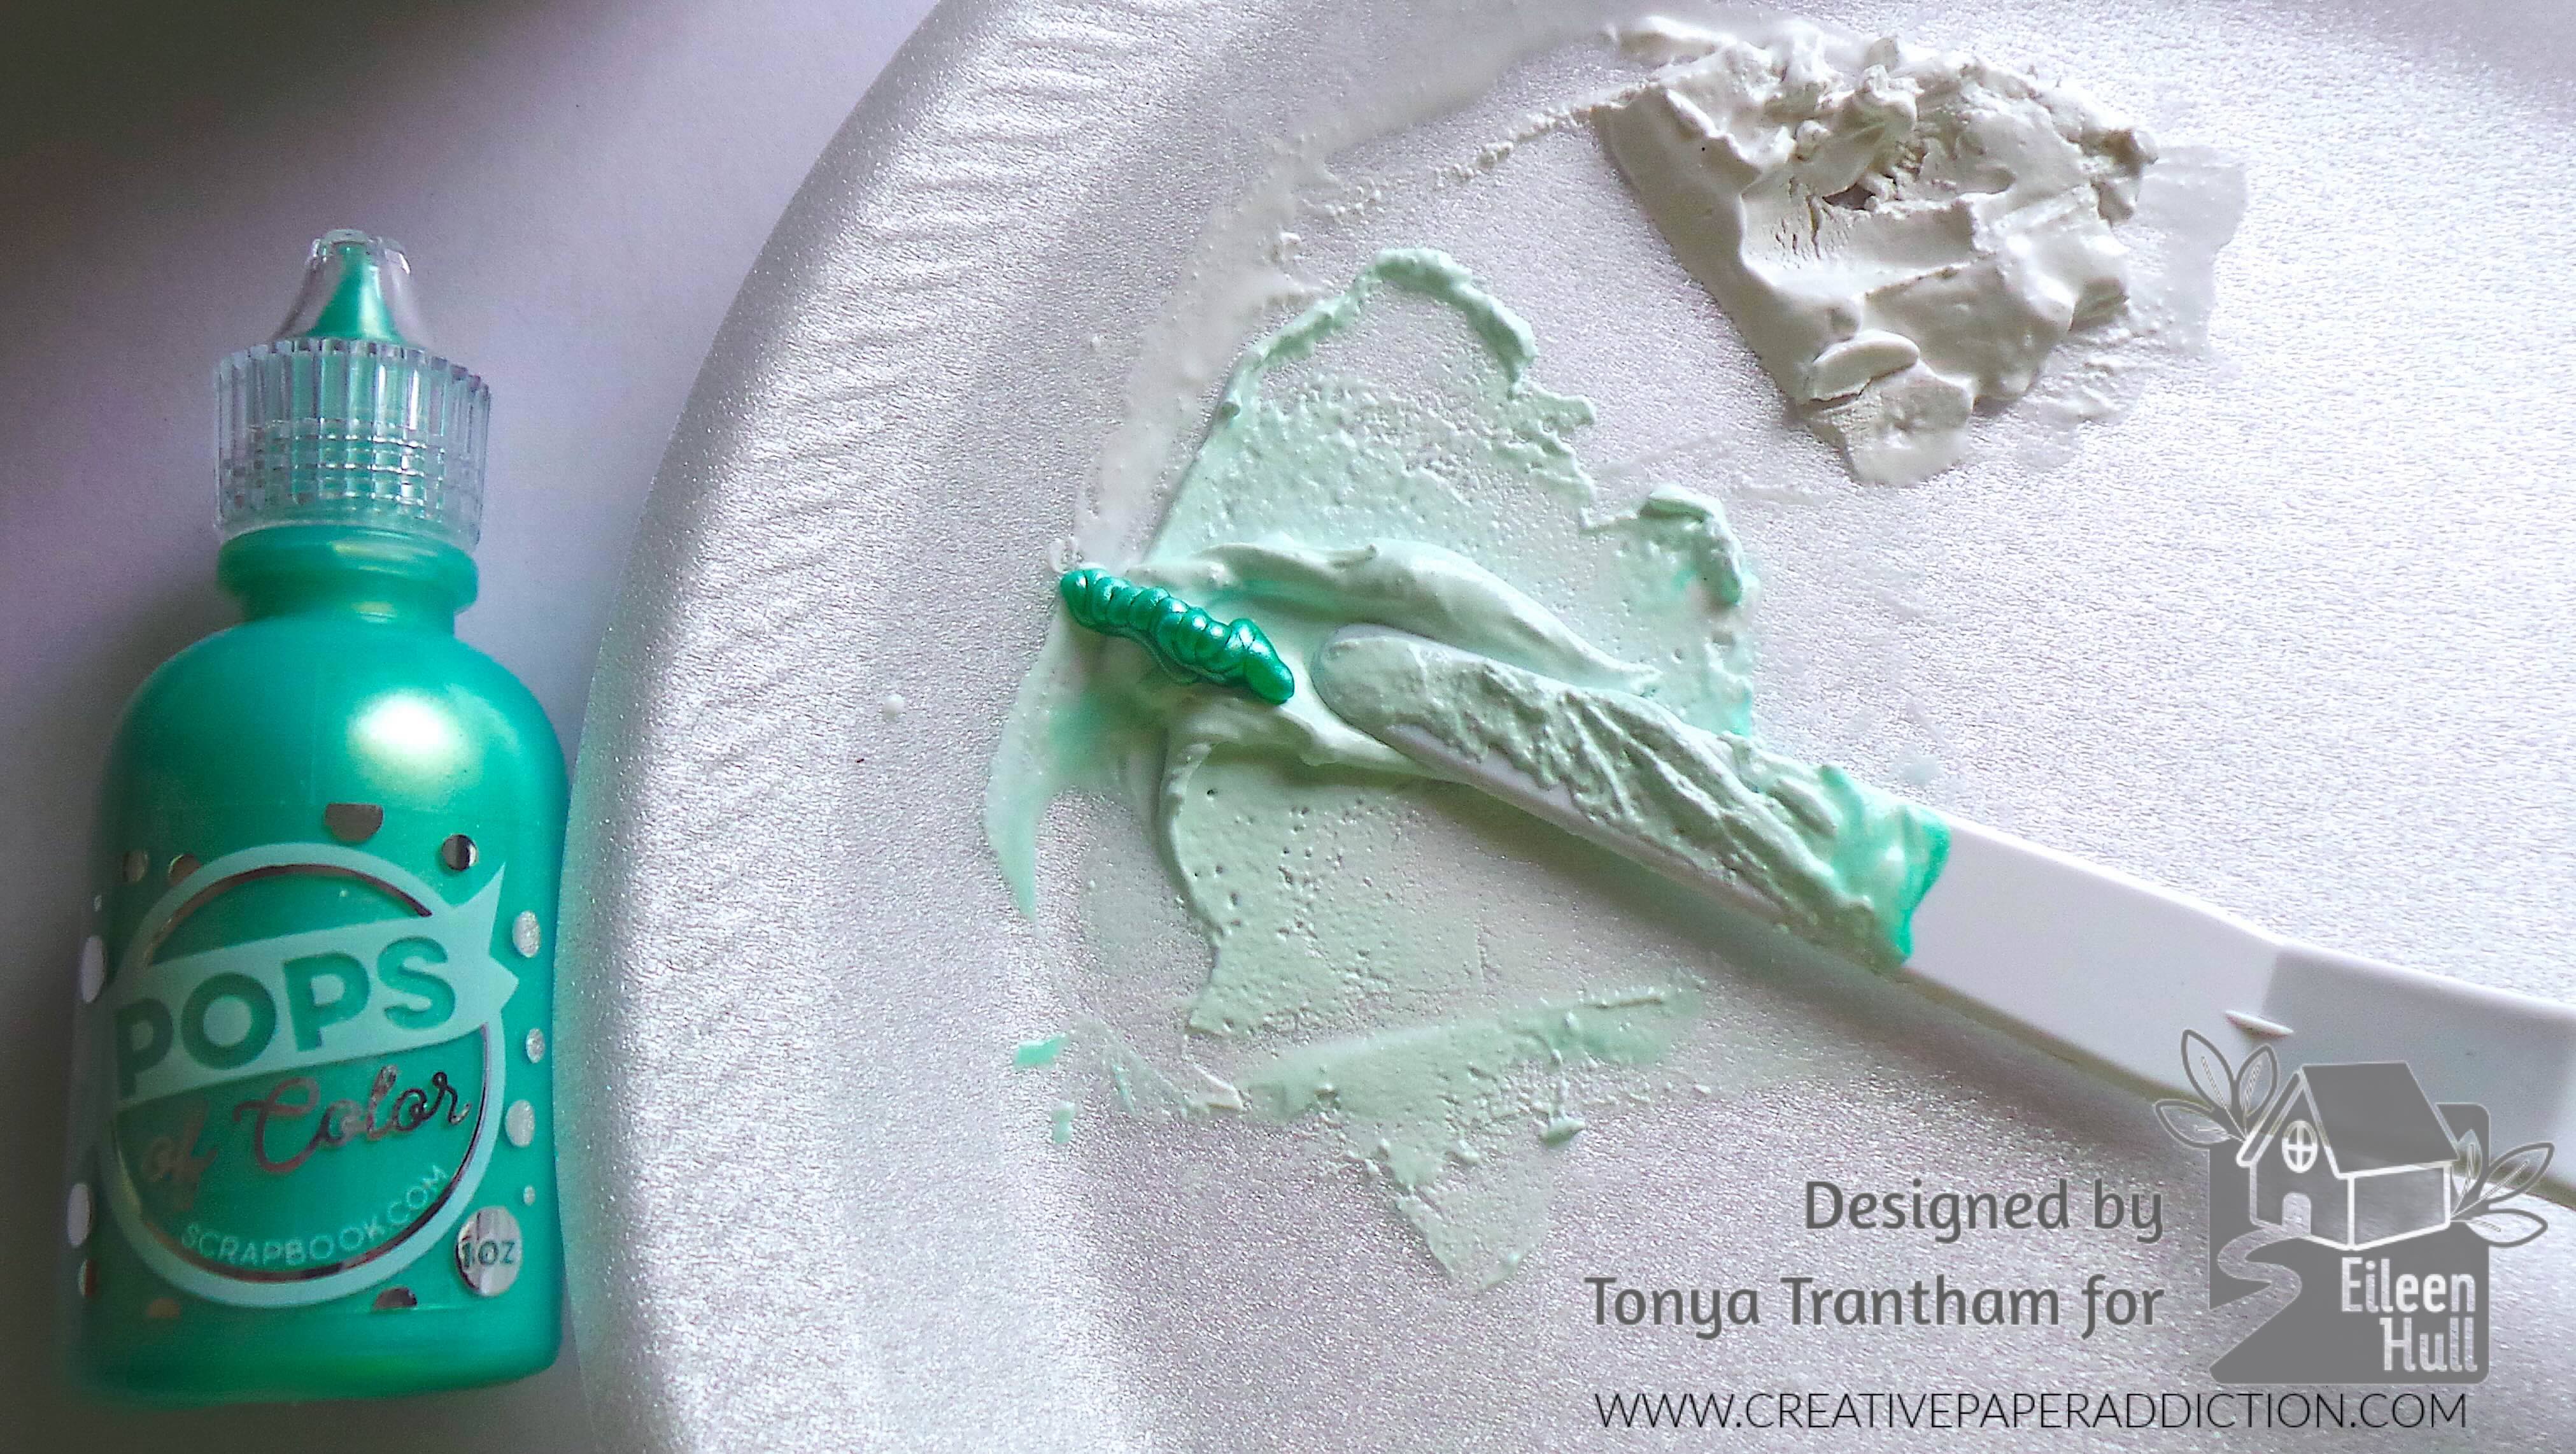
I used a Spatula and added a little Cloud Whip to a Styrofoam plate. I added a little water first to the Cloud Whip to thin it down. Next, I added Honeydew Pops of Colors to the cloud whip and mixed with the spatula.

A close-up image of a teal bottle labeled 'Pops of Color' next to a spatula on a styrofoam plate with mixed light green and white paint.

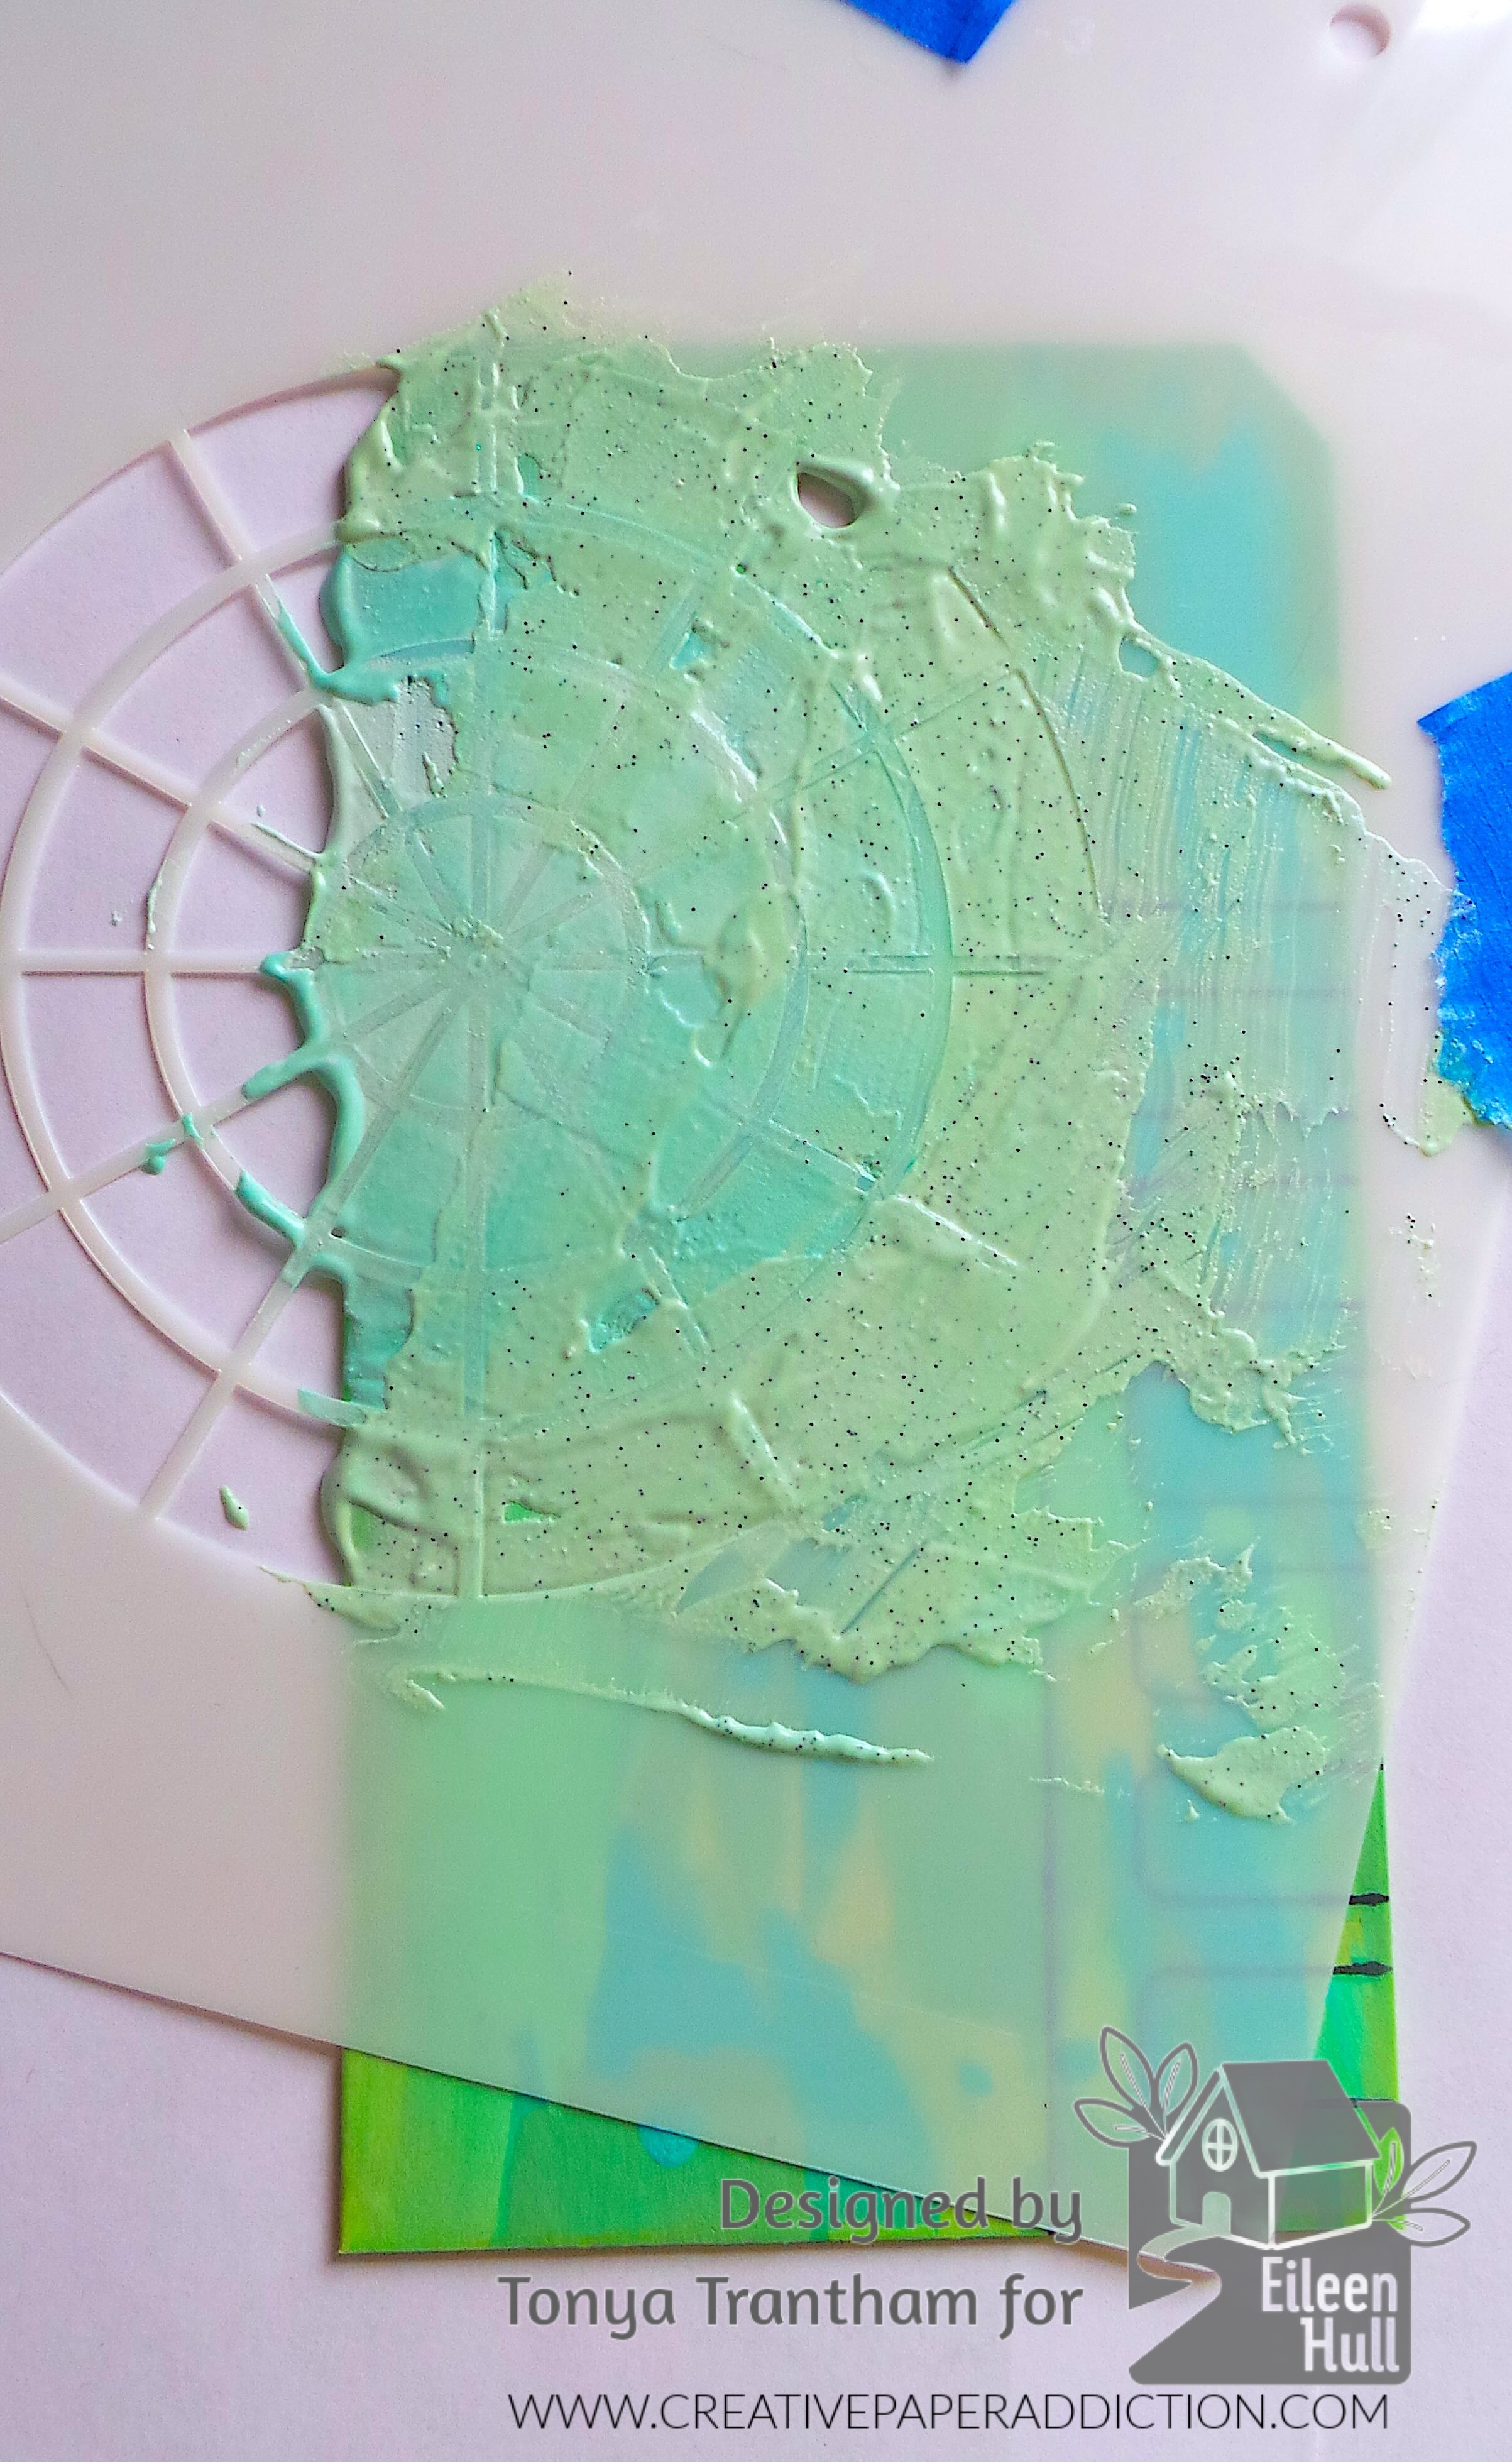
I taped the third stencil from the Color Wheel Stencils over the tag. I applied the Honeydew Cloud Whip mixture to a portion of the stencil. I added Sea Foam Pops of Color to the Cloud whip that was still in the plate and mixed. I applied that to a portion of the stencil. I did the same steps with the Olive, and Holly Green Pops of Color until the stencil was completed covered.

A stencil covered in a green mixture, partially placed over a colorful background, featuring texture and patterns.

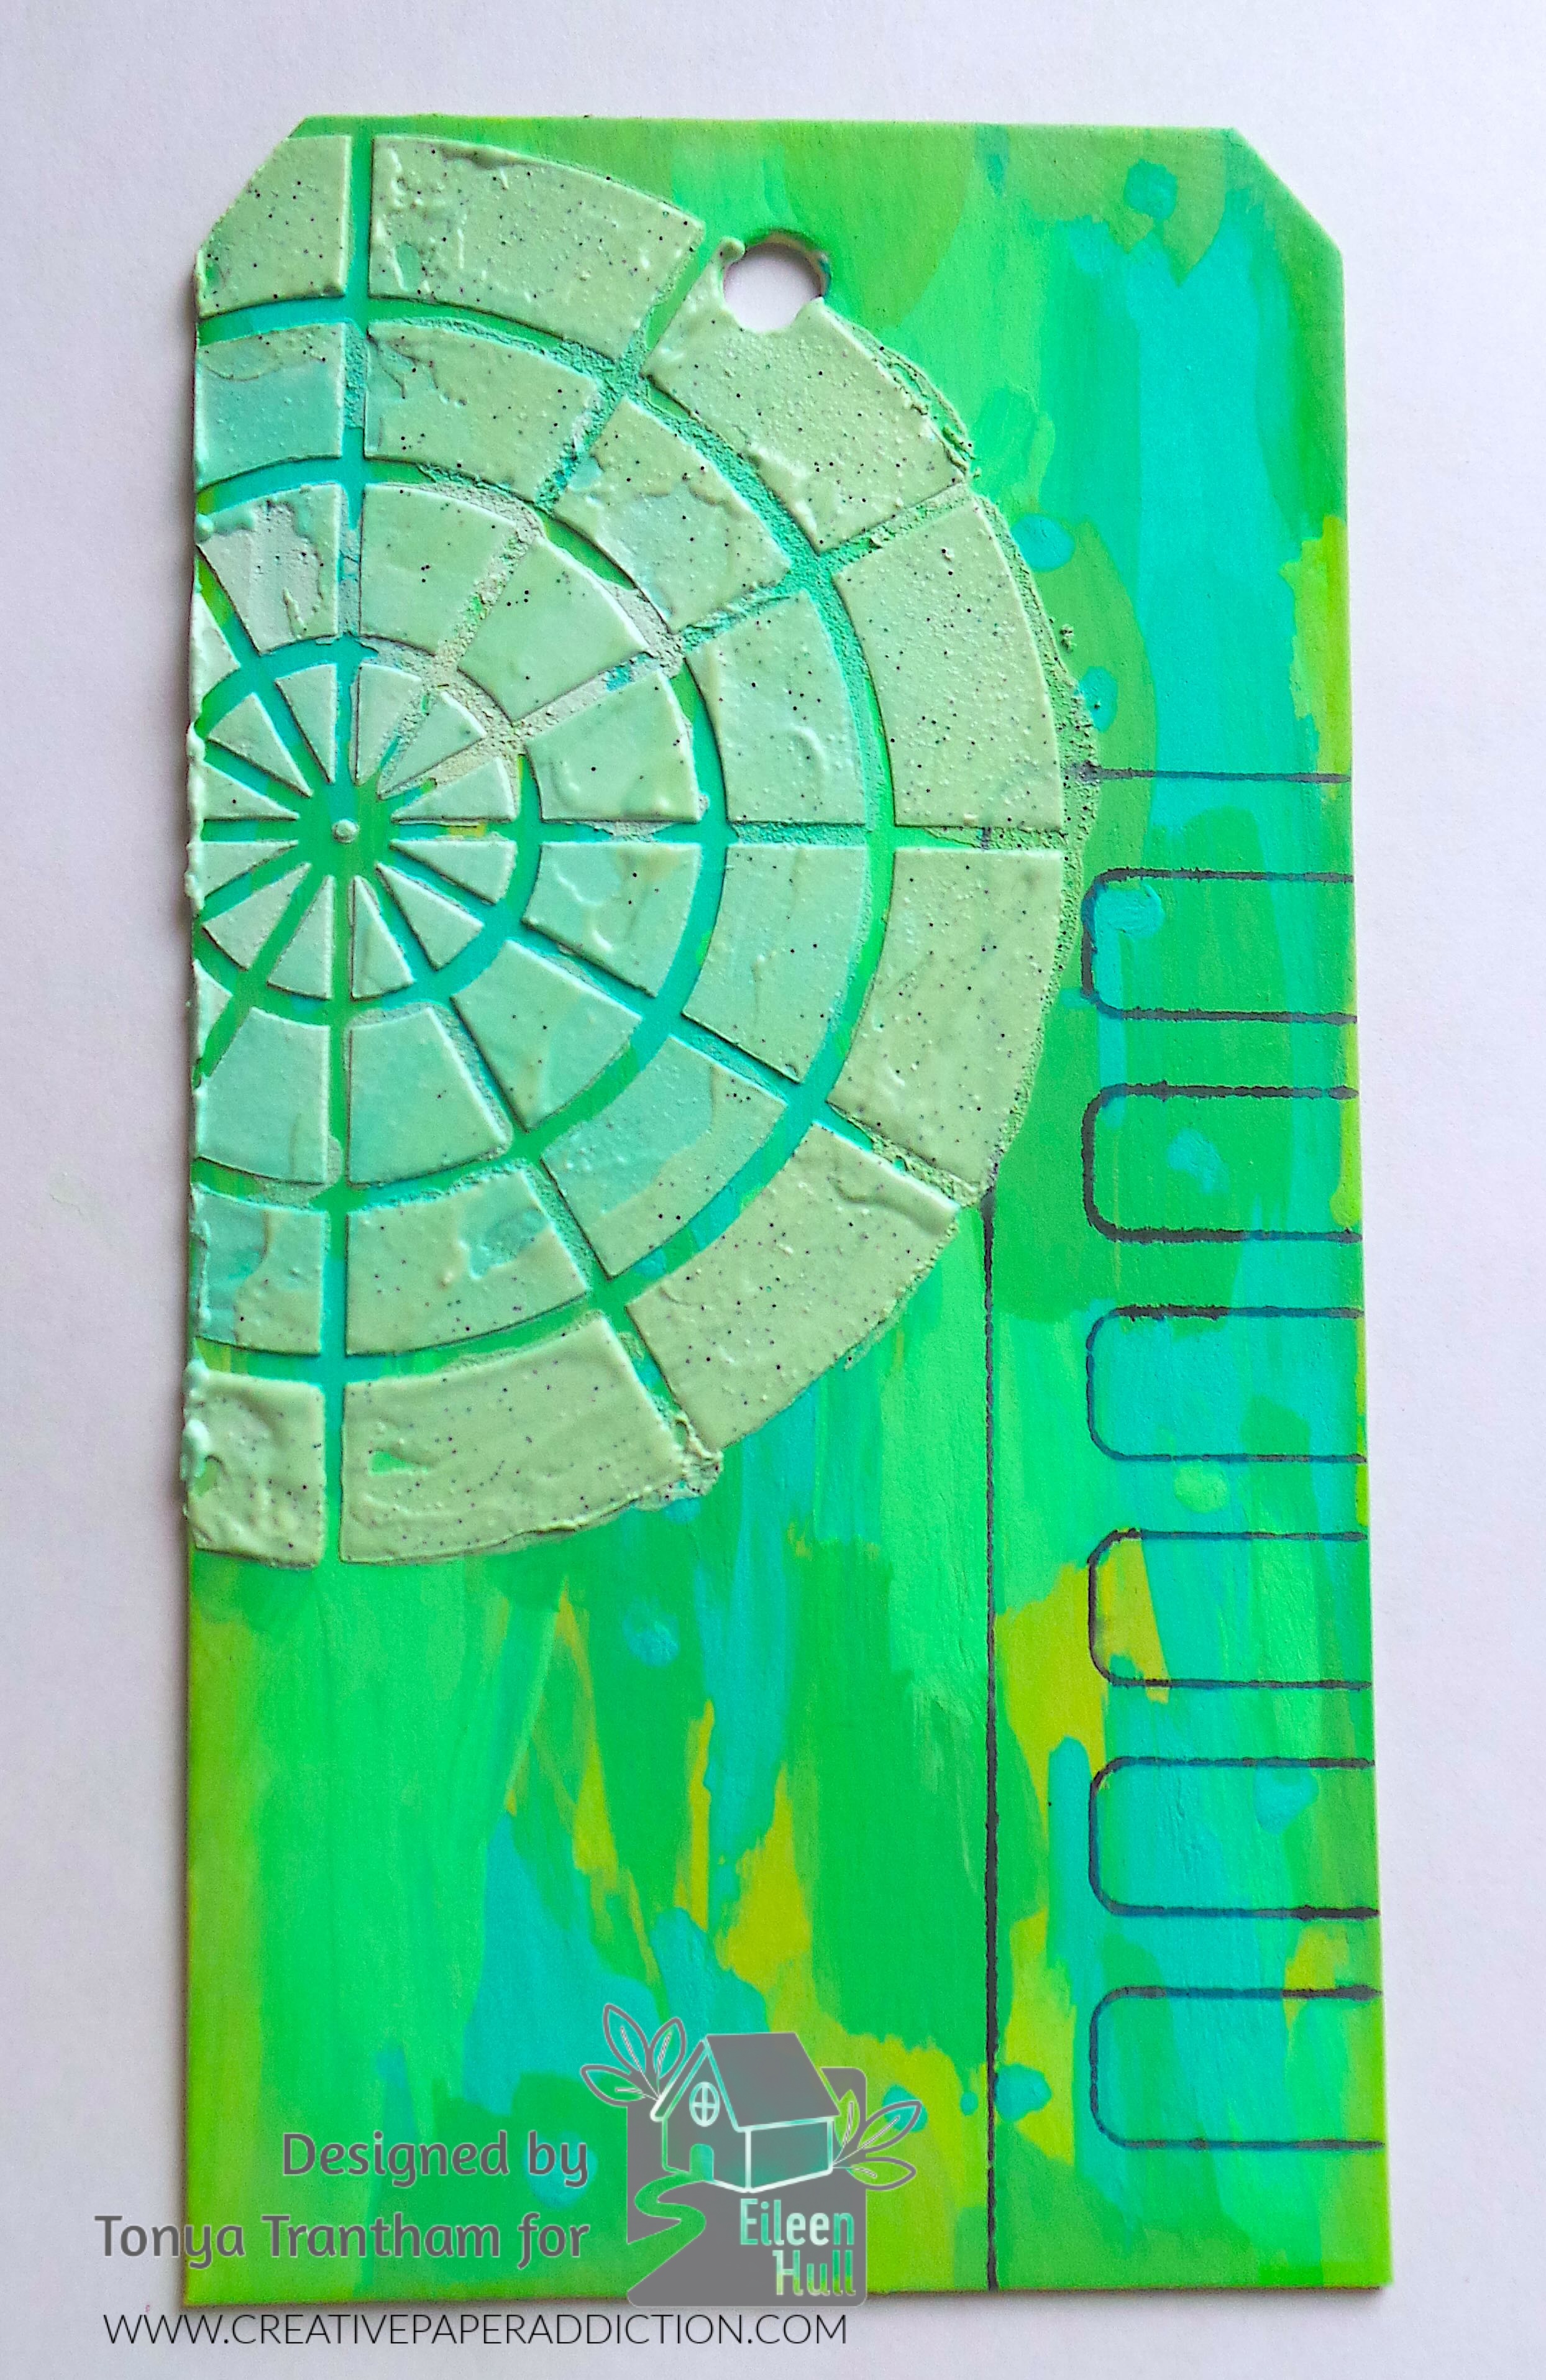
I carefully removed the stencil and let it dry.

A multicolored tag featuring a circular stencil pattern with textured green and blue paint.

I lightly inked over the edges of the tag and the stenciled area with the green and blue Chalk Ink. I applied Adhesive to the back of a piece of cardstock. I cut a color wheel from the Rainbow Wheels Thinlits. I removed the backing from the adhesive and placed the color wheel onto the tag. I cut the excess off.

A colorful mixed media tag featuring circular stencil designs in shades of green and blue, alongside a die cut stencil placed next to it.

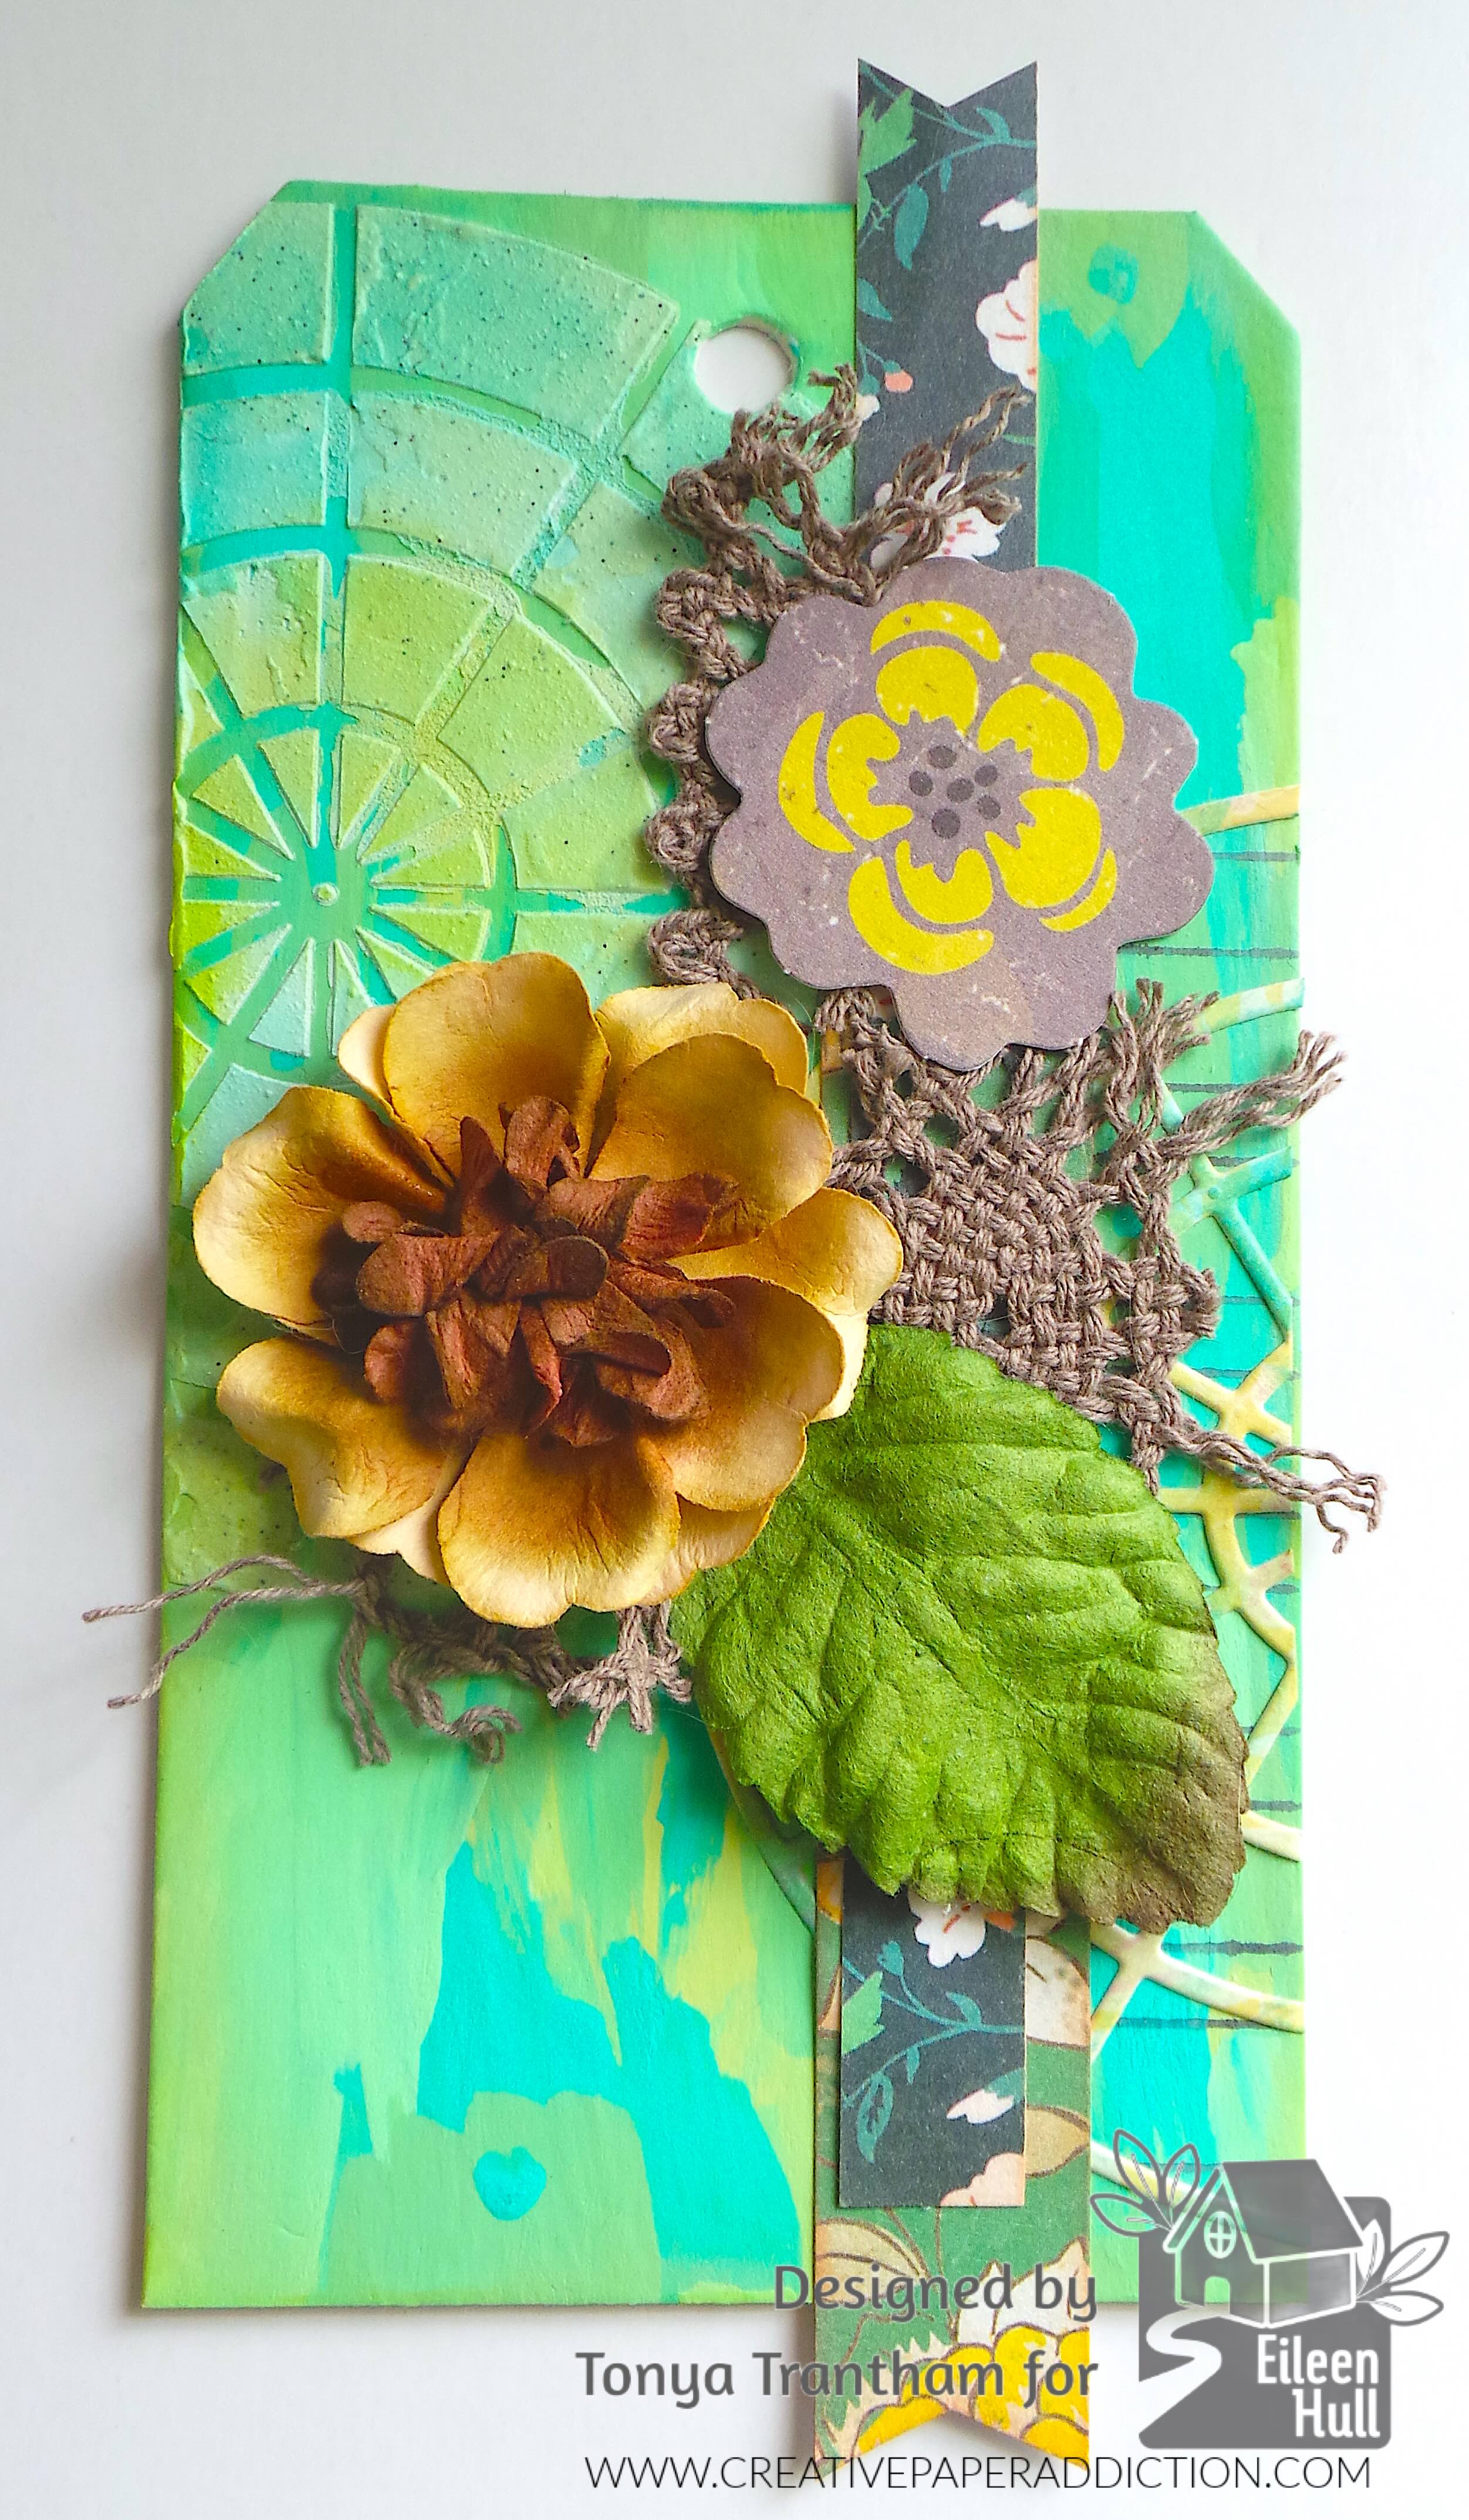
I cut a “v” in the ends of two strips of patterned cardstock and glued to the tag. I cut up some brown lace and added to the tag. Next I dug into my stash and found a flower chipboard piece, paper flower and leaf. I adhered all to the tag.

A handcrafted mixed media tag featuring a textured green background with stenciled patterns, adorned with a large brown flower, green leaves, and patterned paper strips.

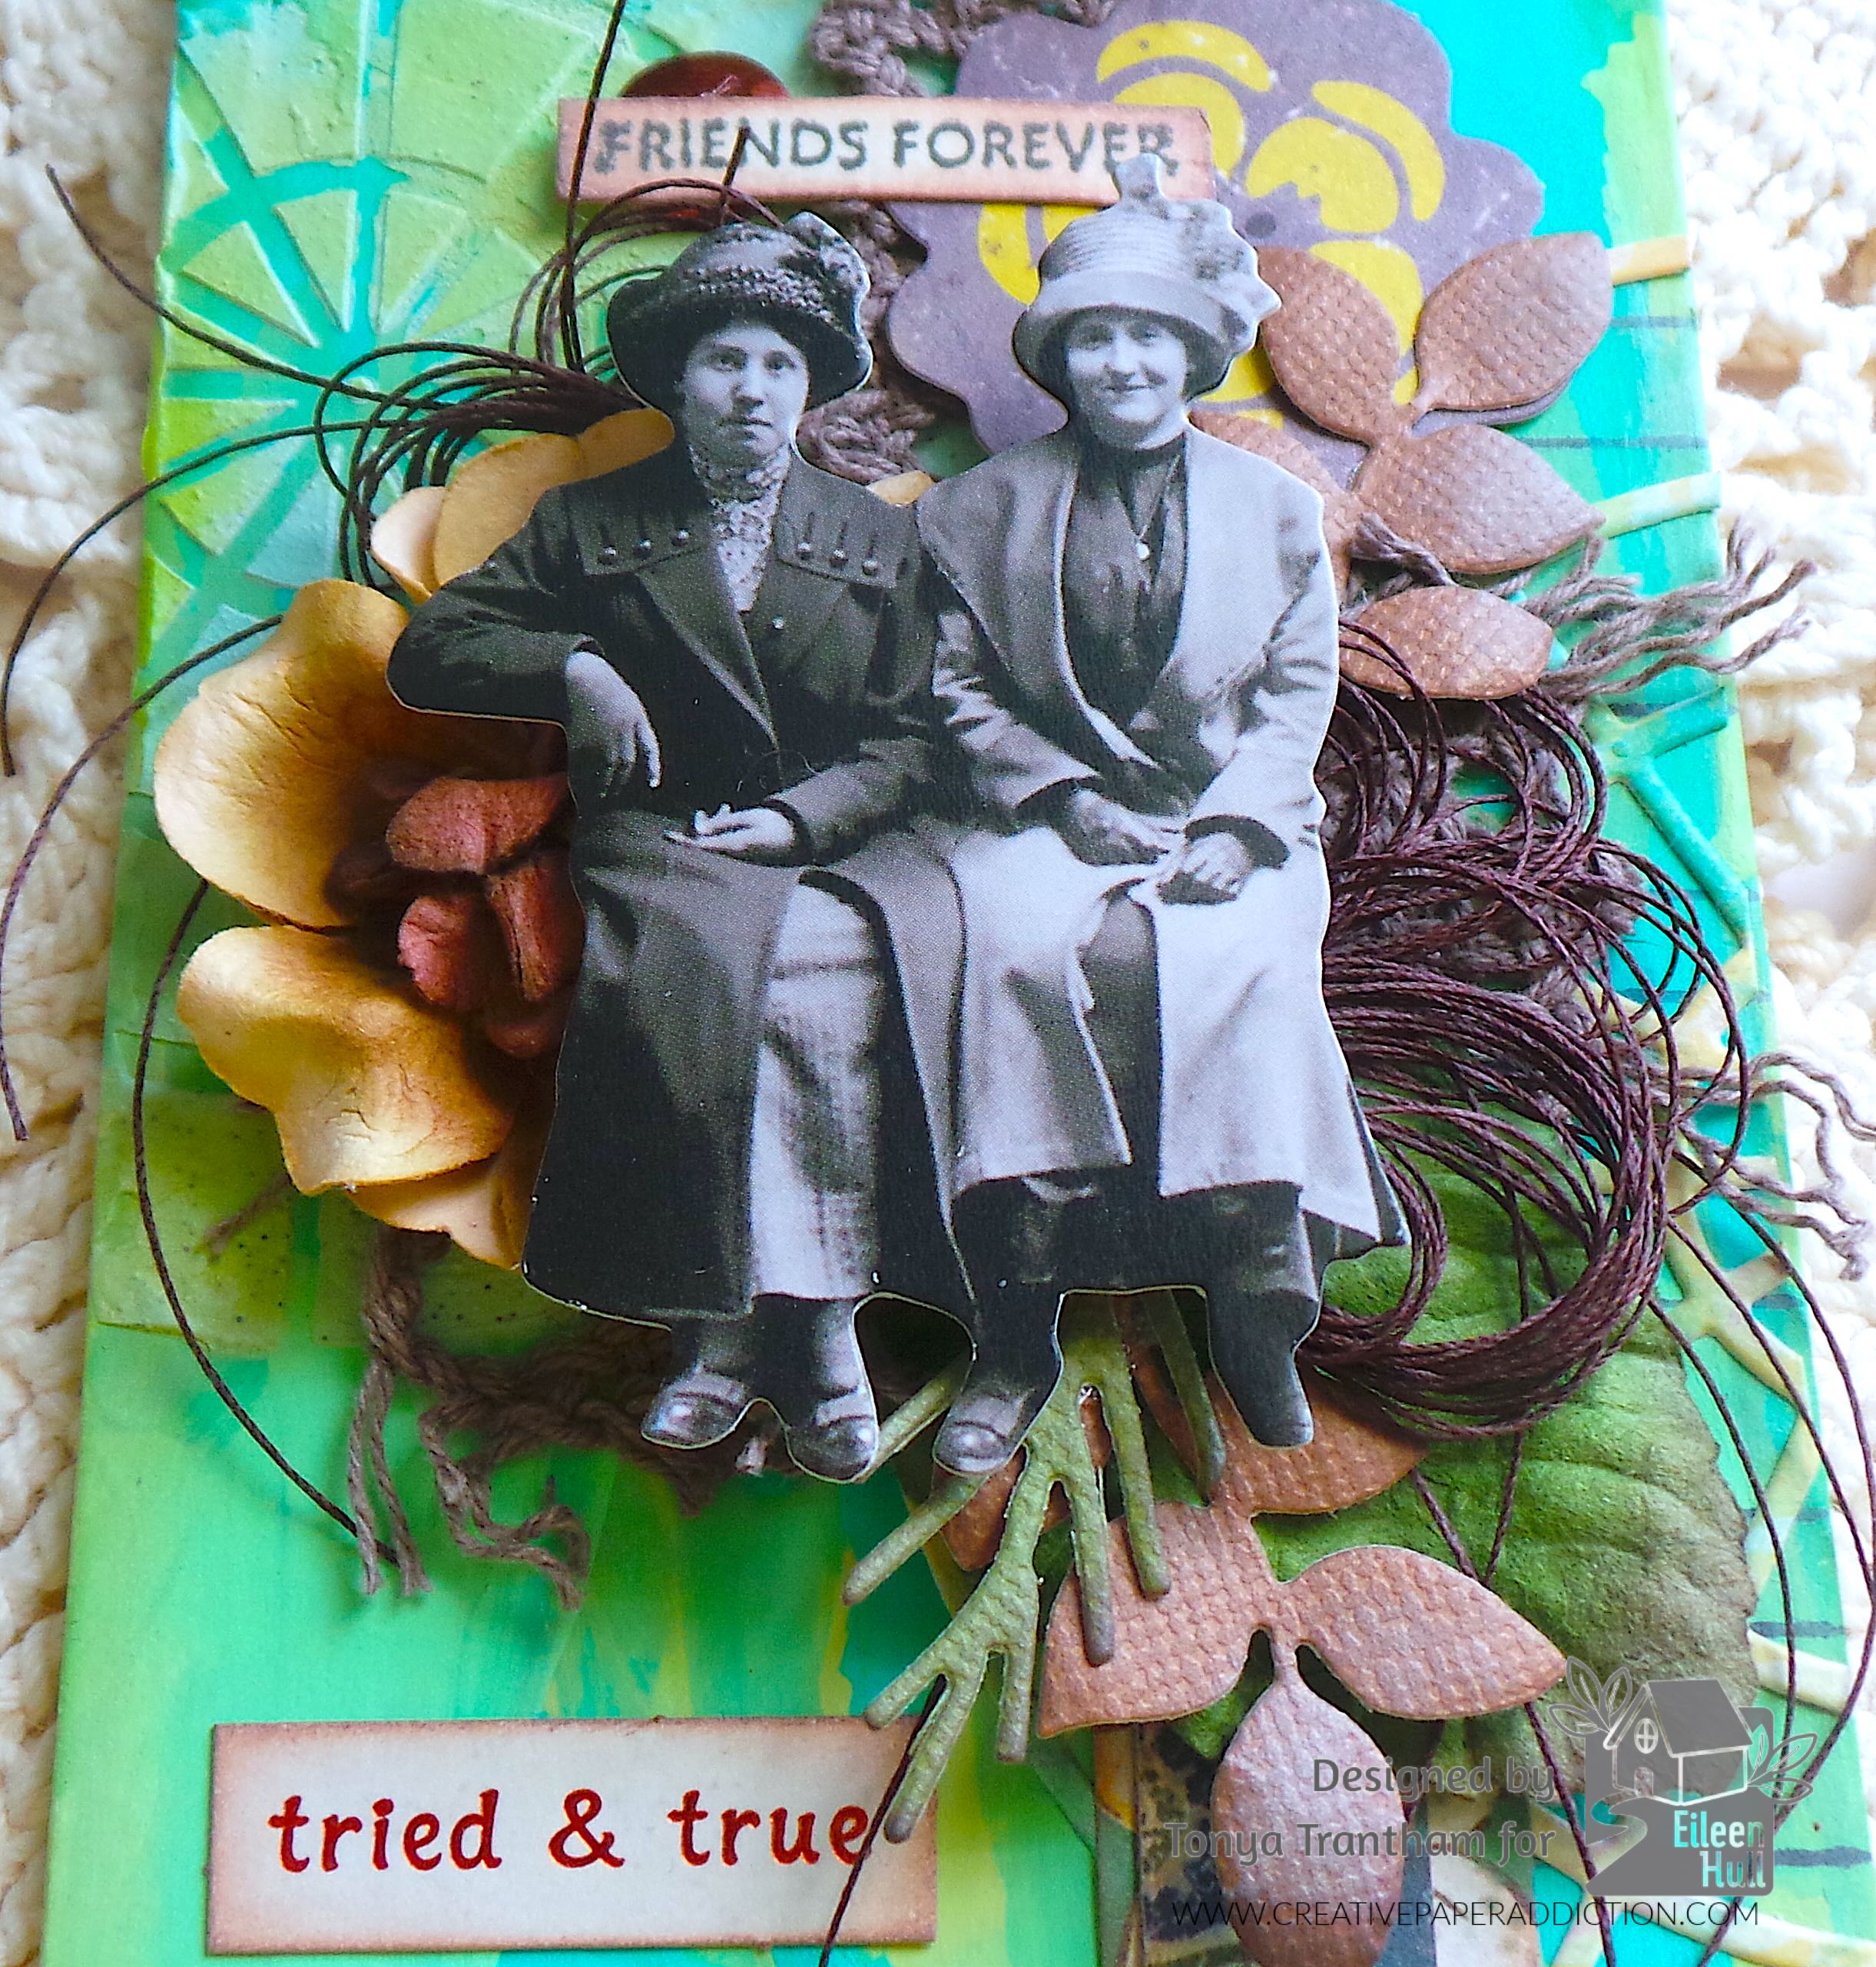
I dug into my Mini Paper Dolls and selected these women and glued onto the paper flower. I picked the “Friends Forever” stamp, inked up and stamped onto a piece of cardstock. I went over the edges of the sentiment with a brown Chalk Ink. I adhered to the chipboard flower and I added a sequin under one edge of the sentiment.

A mixed media tag featuring two vintage-style women figures, layered floral embellishments, and the text 'Friends Forever' and 'tried & true'. The tag has a colorful background with various textures and materials.

I found in my stash the “tried and true” sentiment, leaf sprigs and an evergreen sprig. I glued all to the tag.

Close-up of a mixed media tag featuring two vintage-style photographs of women, layered flowers, and decorative elements with the text 'FRIENDS FOREVER' and 'tried & true' prominently displayed.

I made bows from thread and added. I cut two of the arrows from the Rainbow Wheels Thinlits and glued to the tag to finish.

I want to share a little. I struggle with stencils and I had put off using them. I think this tag turned out decent. Hopefully I will get over my fear of using them and will improve. What are your thoughts on stencils? Do you incorporate them in your projects? Let me know in the comments below.

If you haven’t been by Eileen’s blog lately, you might want to check it out. You can see what her creative team has been up to and find that latest post HERE.

A colorful mixed media tag featuring a black-and-white photo of two women, adorned with floral embellishments, leaves, and text that reads 'FRIENDS FOREVER' and 'tried & true'.

Supplies

Sizzix/Eileen Hull: Color Wheel Stencils

Sizzix/Eileen Hull: Rainbow Wheels Thinlits

Sizzix/Eileen Hull: Swatch Cards Stamp Set

Sizzix/Tim Holtz: Tag and Bookplates Diecut (retired)

Diecut Machine

Mat Board

Cloud Whip

Spatulas

Pops of Color: Honeydew, Sea Foam, Olive, and Holly Green

Paper Cutter

Scissors

Mini Paper Dolls

Adhesive Roll

MISTI Stamping Tool

Black Ink

Chalk Ink

Various Patterned Cardstocks

Lace, Brown Thread and One Sequin

Paper Flower, Leaf Sprigs and Greenery Diecuts

Craft Smart Acrylic Paints: Ocean Breeze, Bright Mint and Celery

Paint Brush

Beacon Adhesives: Zip Dry Adhesive

(Products listed above are Affiliated Links for your convenience)

DISCLAIMERS

This blog is compensated to provide opinion on products, services, websites, and various other topics. Even though the owner(s) of this blog receives compensation for our posts or advertisements. I always give my honest opinions, findings, beliefs, or experiences on those topics or products. The views and opinions expressed on this blog are purely my own. Any product claim, statistic, or quote should be checked with each manufacturer. Verify other representations about a product or service with the provider or party in question.This blog contains affiliate linksClicking these links helps to support Tonya Trantham Designs – Creative Paper Addiction. It’s at no additional cost to you. Today’s features are Sizzix, Eileen Hull and Scrapbook.com Products. 

Mixed media tag featuring a turquoise background with a texture, adorned with layered flowers, leaves, and a sentiment reading 'Friends Forever'. Two vintage-style black and white photos of women are prominently placed, along with decorative embellishments and the phrase 'tried & true'.

Thanks for stopping by, I hope your Wednesday is wonderful and enjoy creating!
A decorative graphic featuring a colorful bird amidst vibrant flowers, with the name 'Tonya' artistically written in a stylish font.

Using Diecuts in Ways Not Intended for Cards

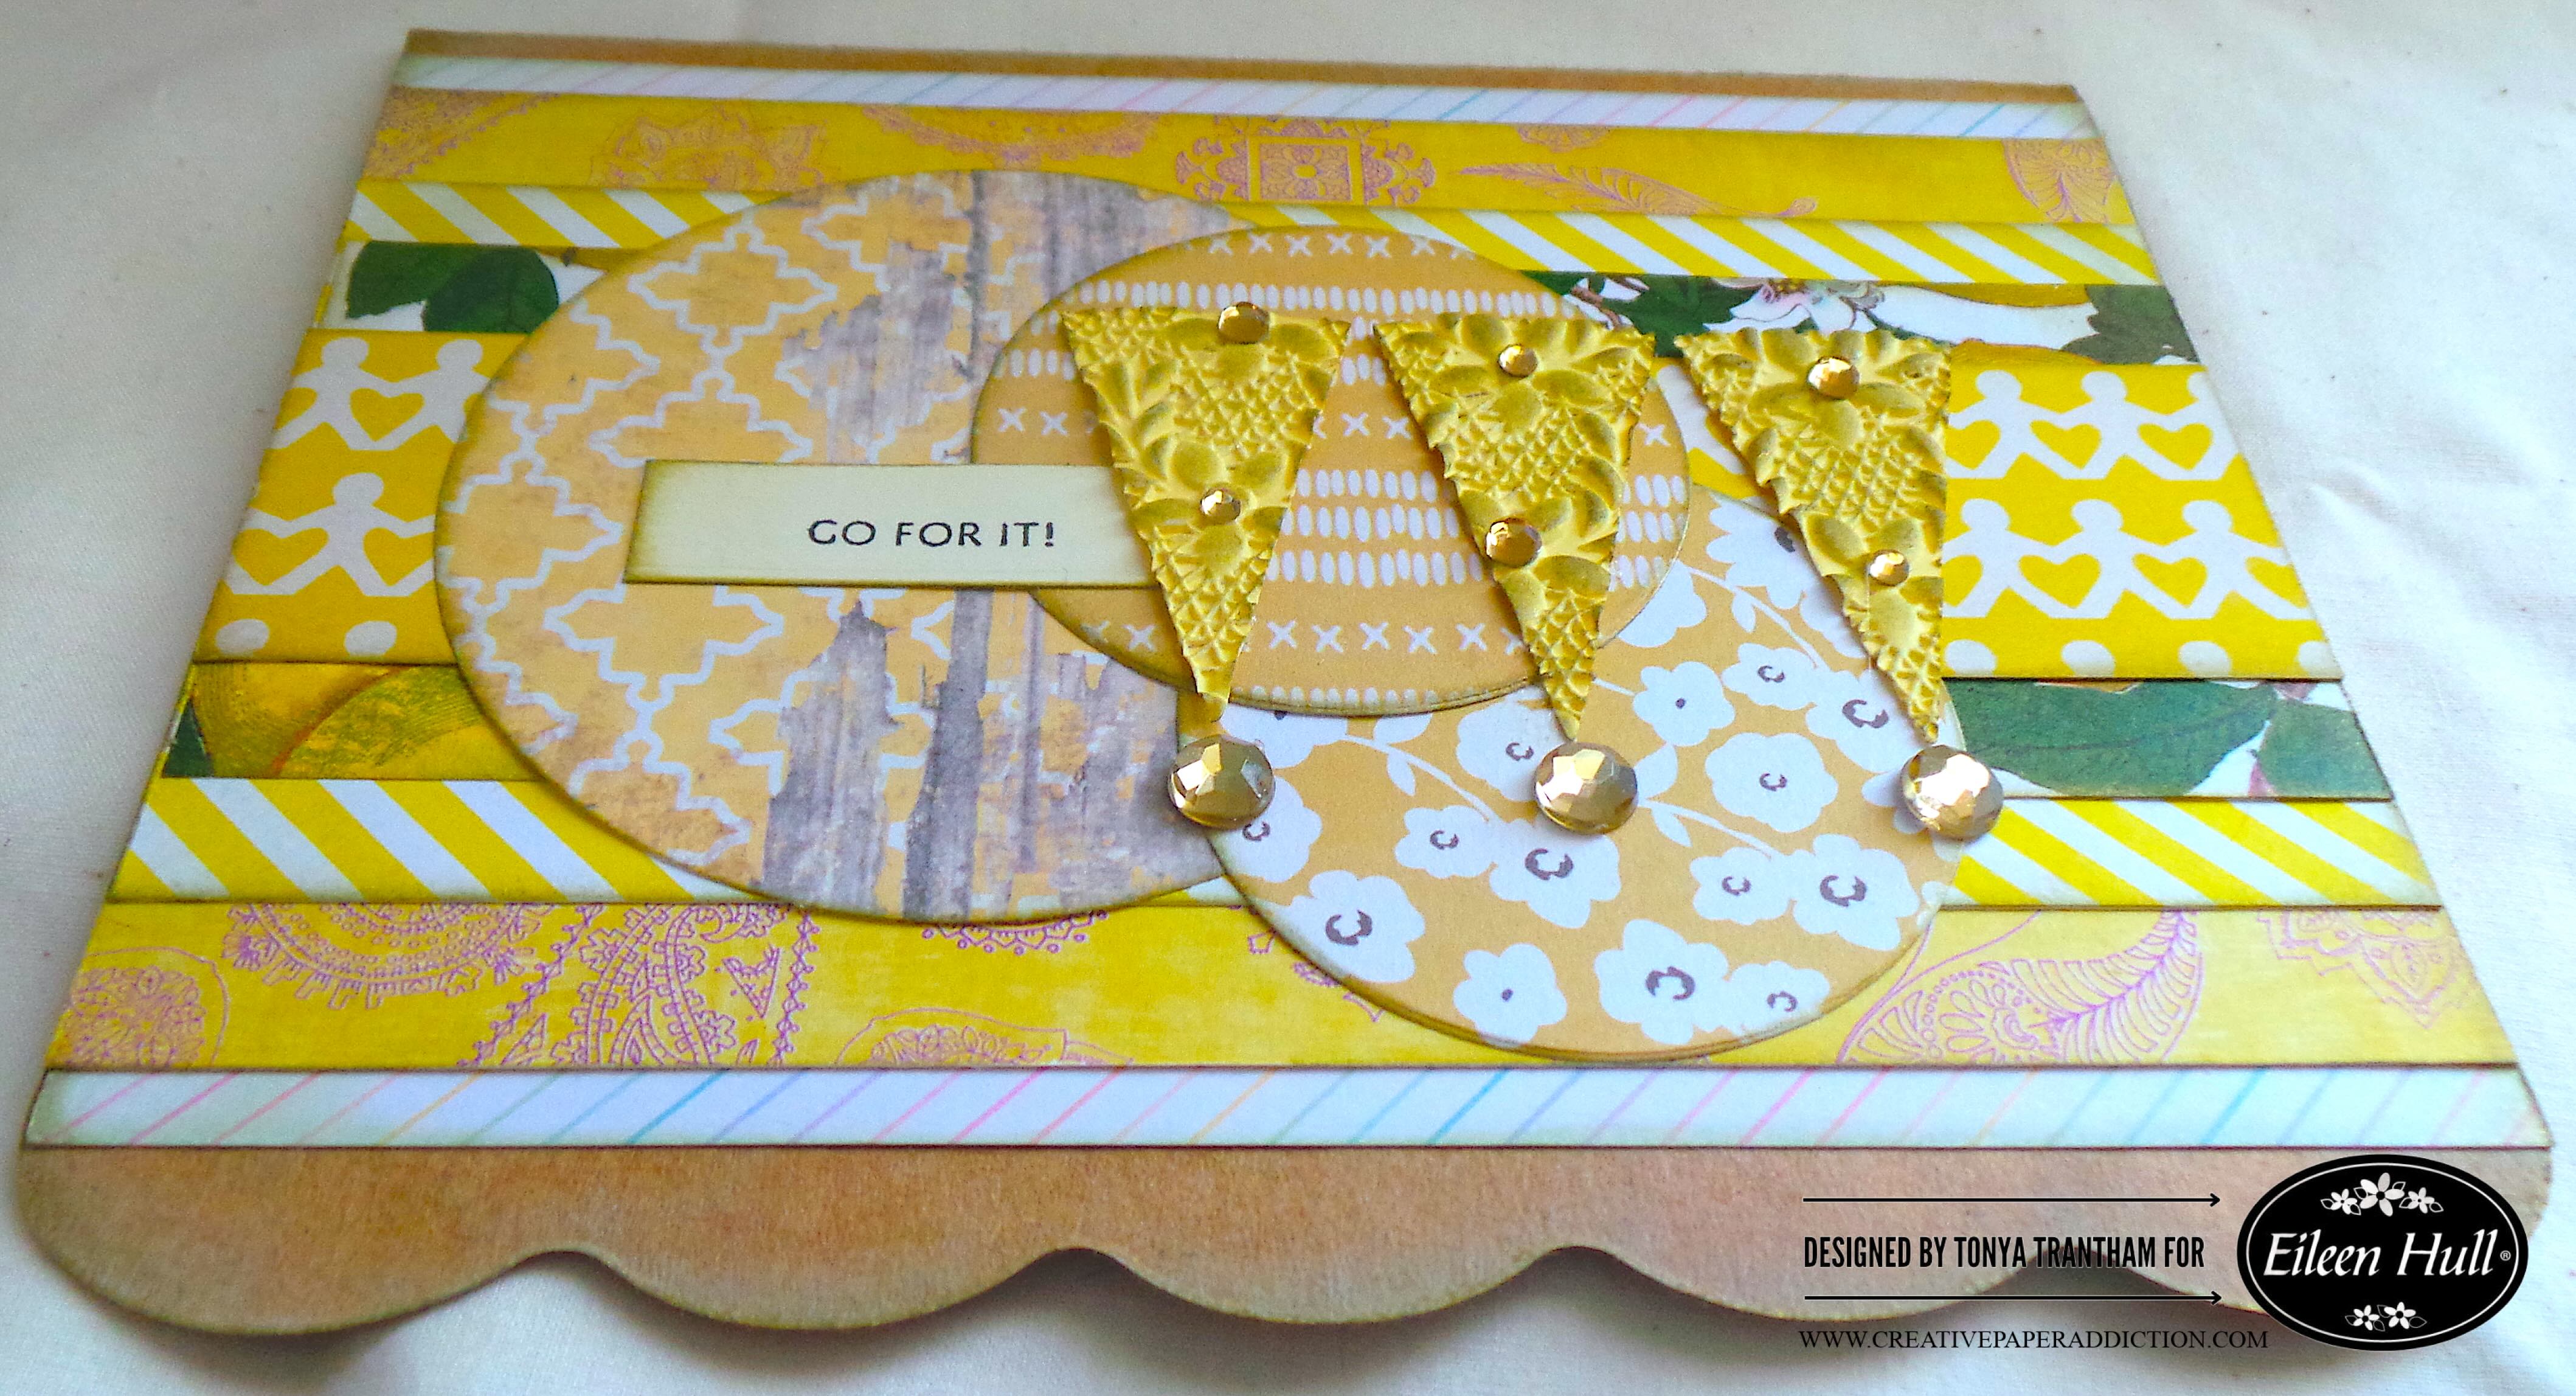
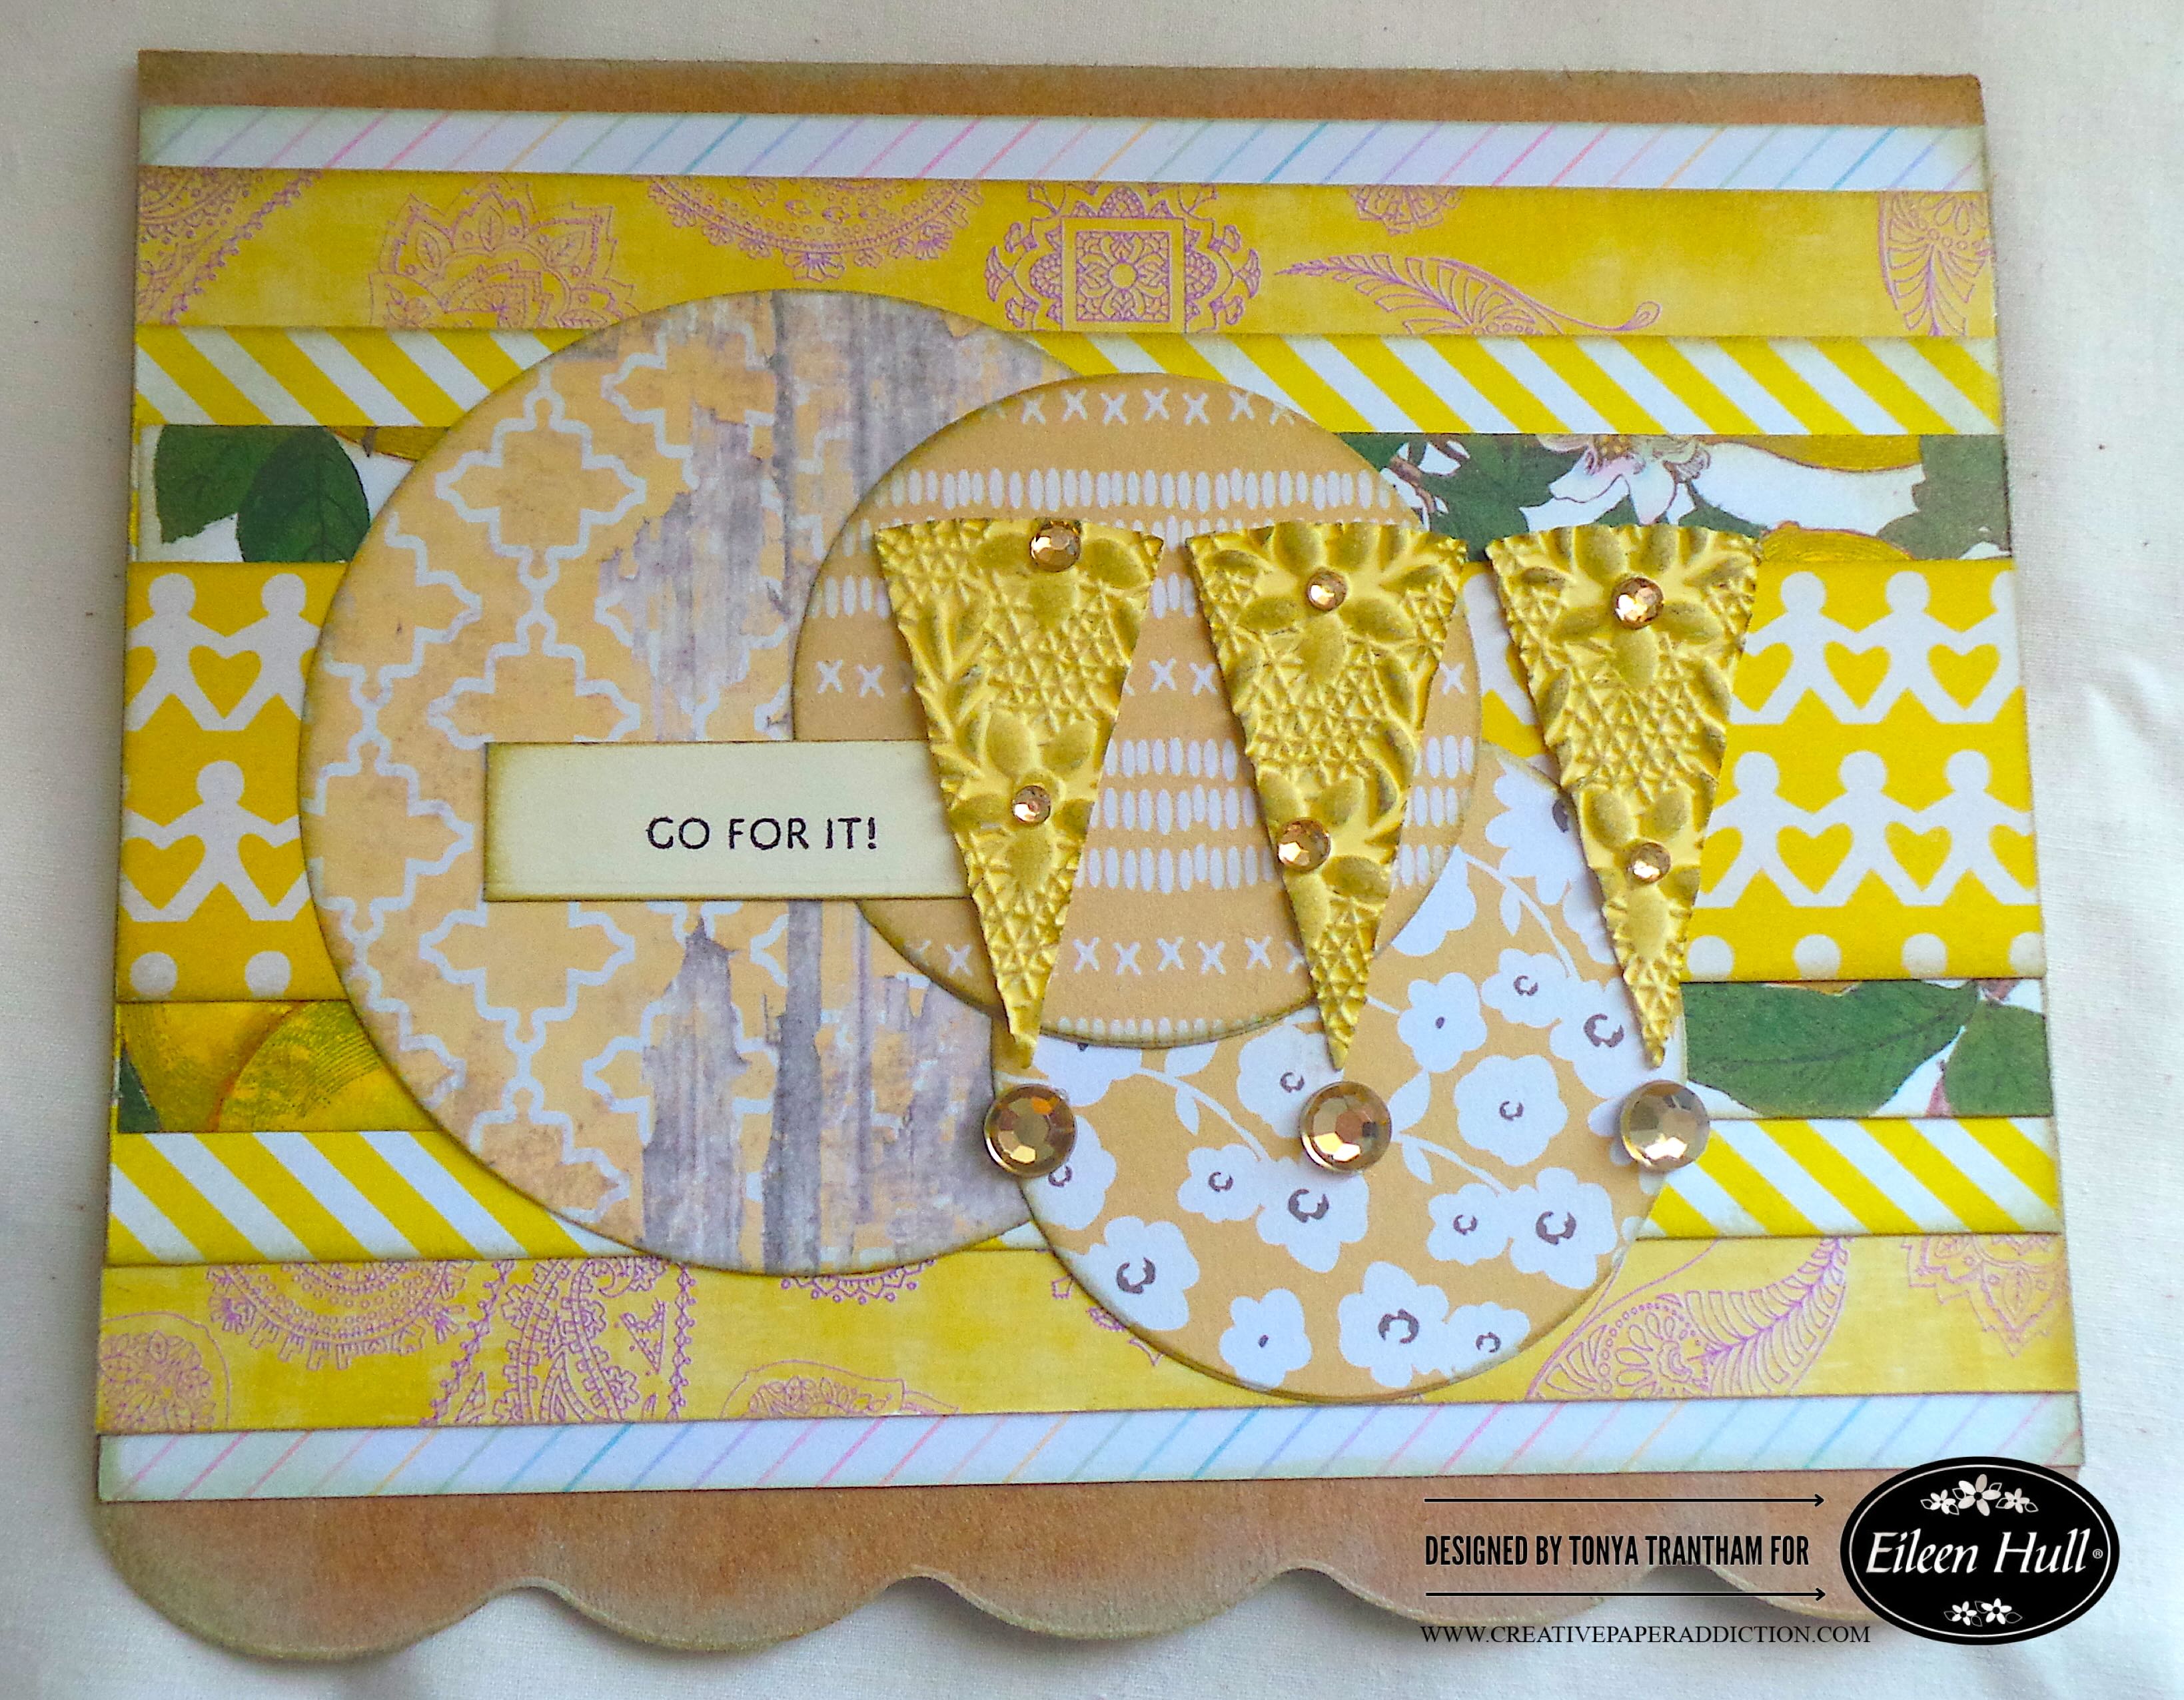
Hi everyone! I’m back with my first Eileen Hull project of the month. I used the Handbound Journal Diecut and Rainbow Wheels Thinlits, along with a few other products all by Eileen to create a card. Anyways, let’s get started!

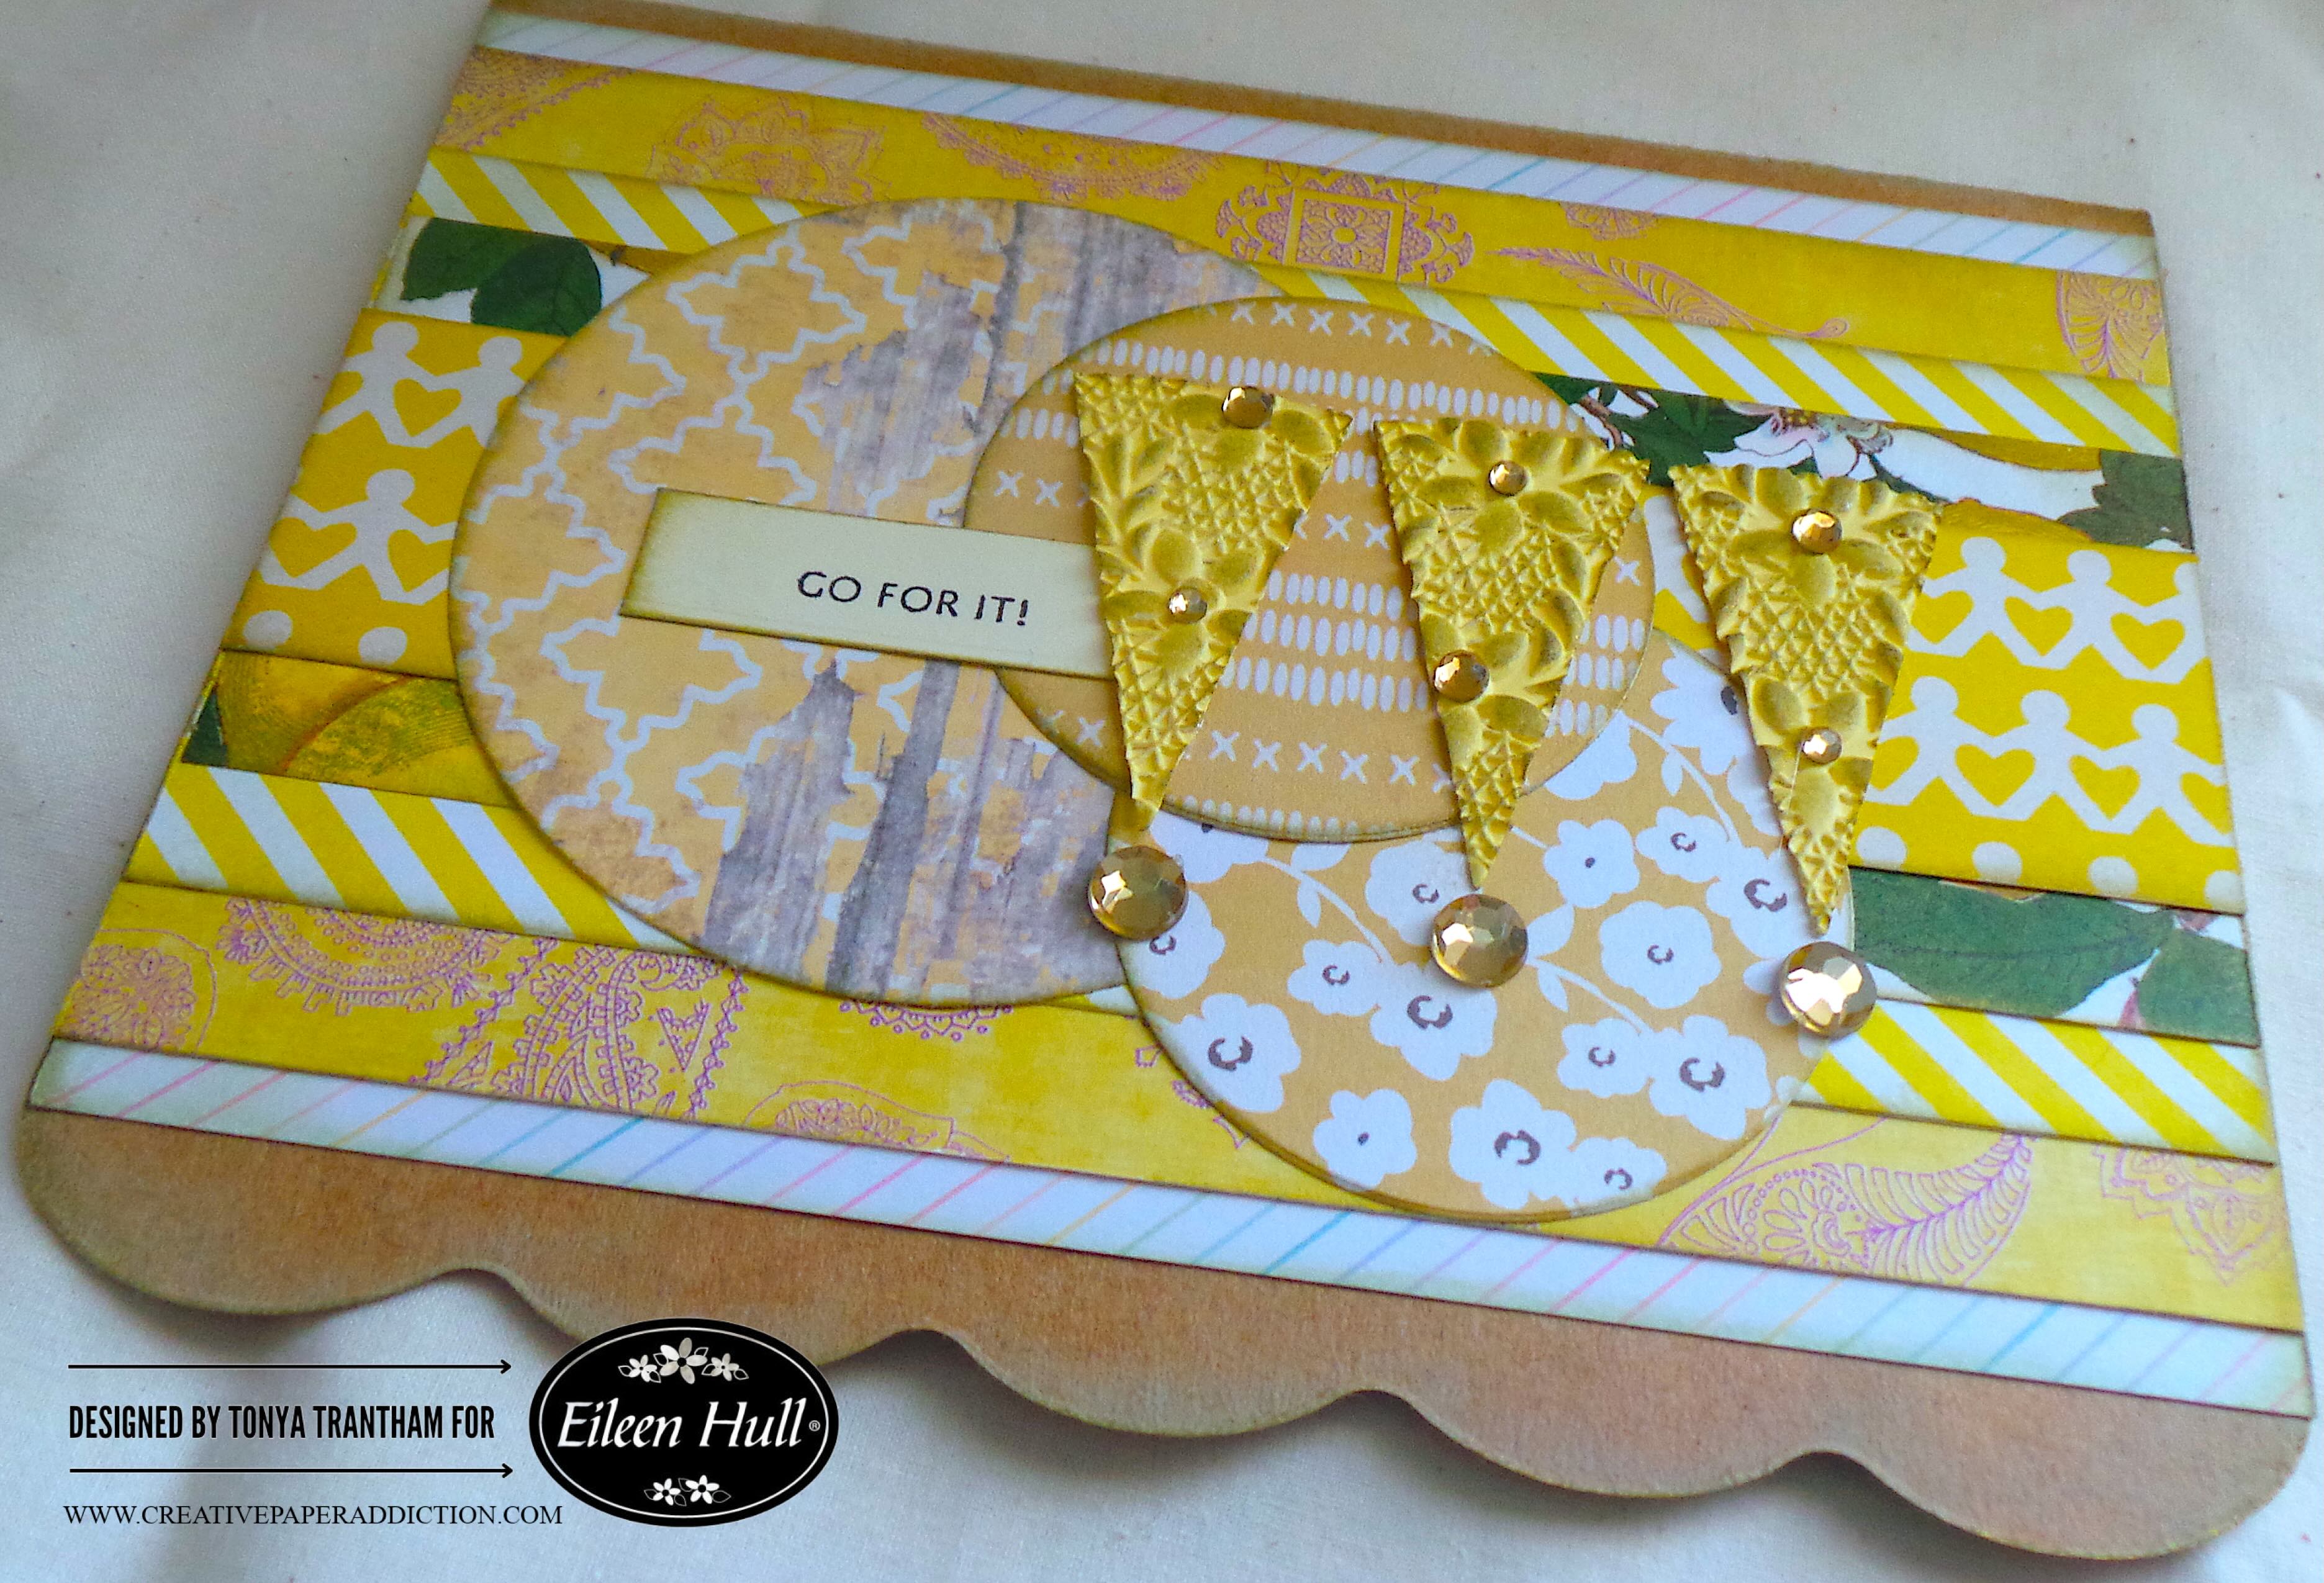
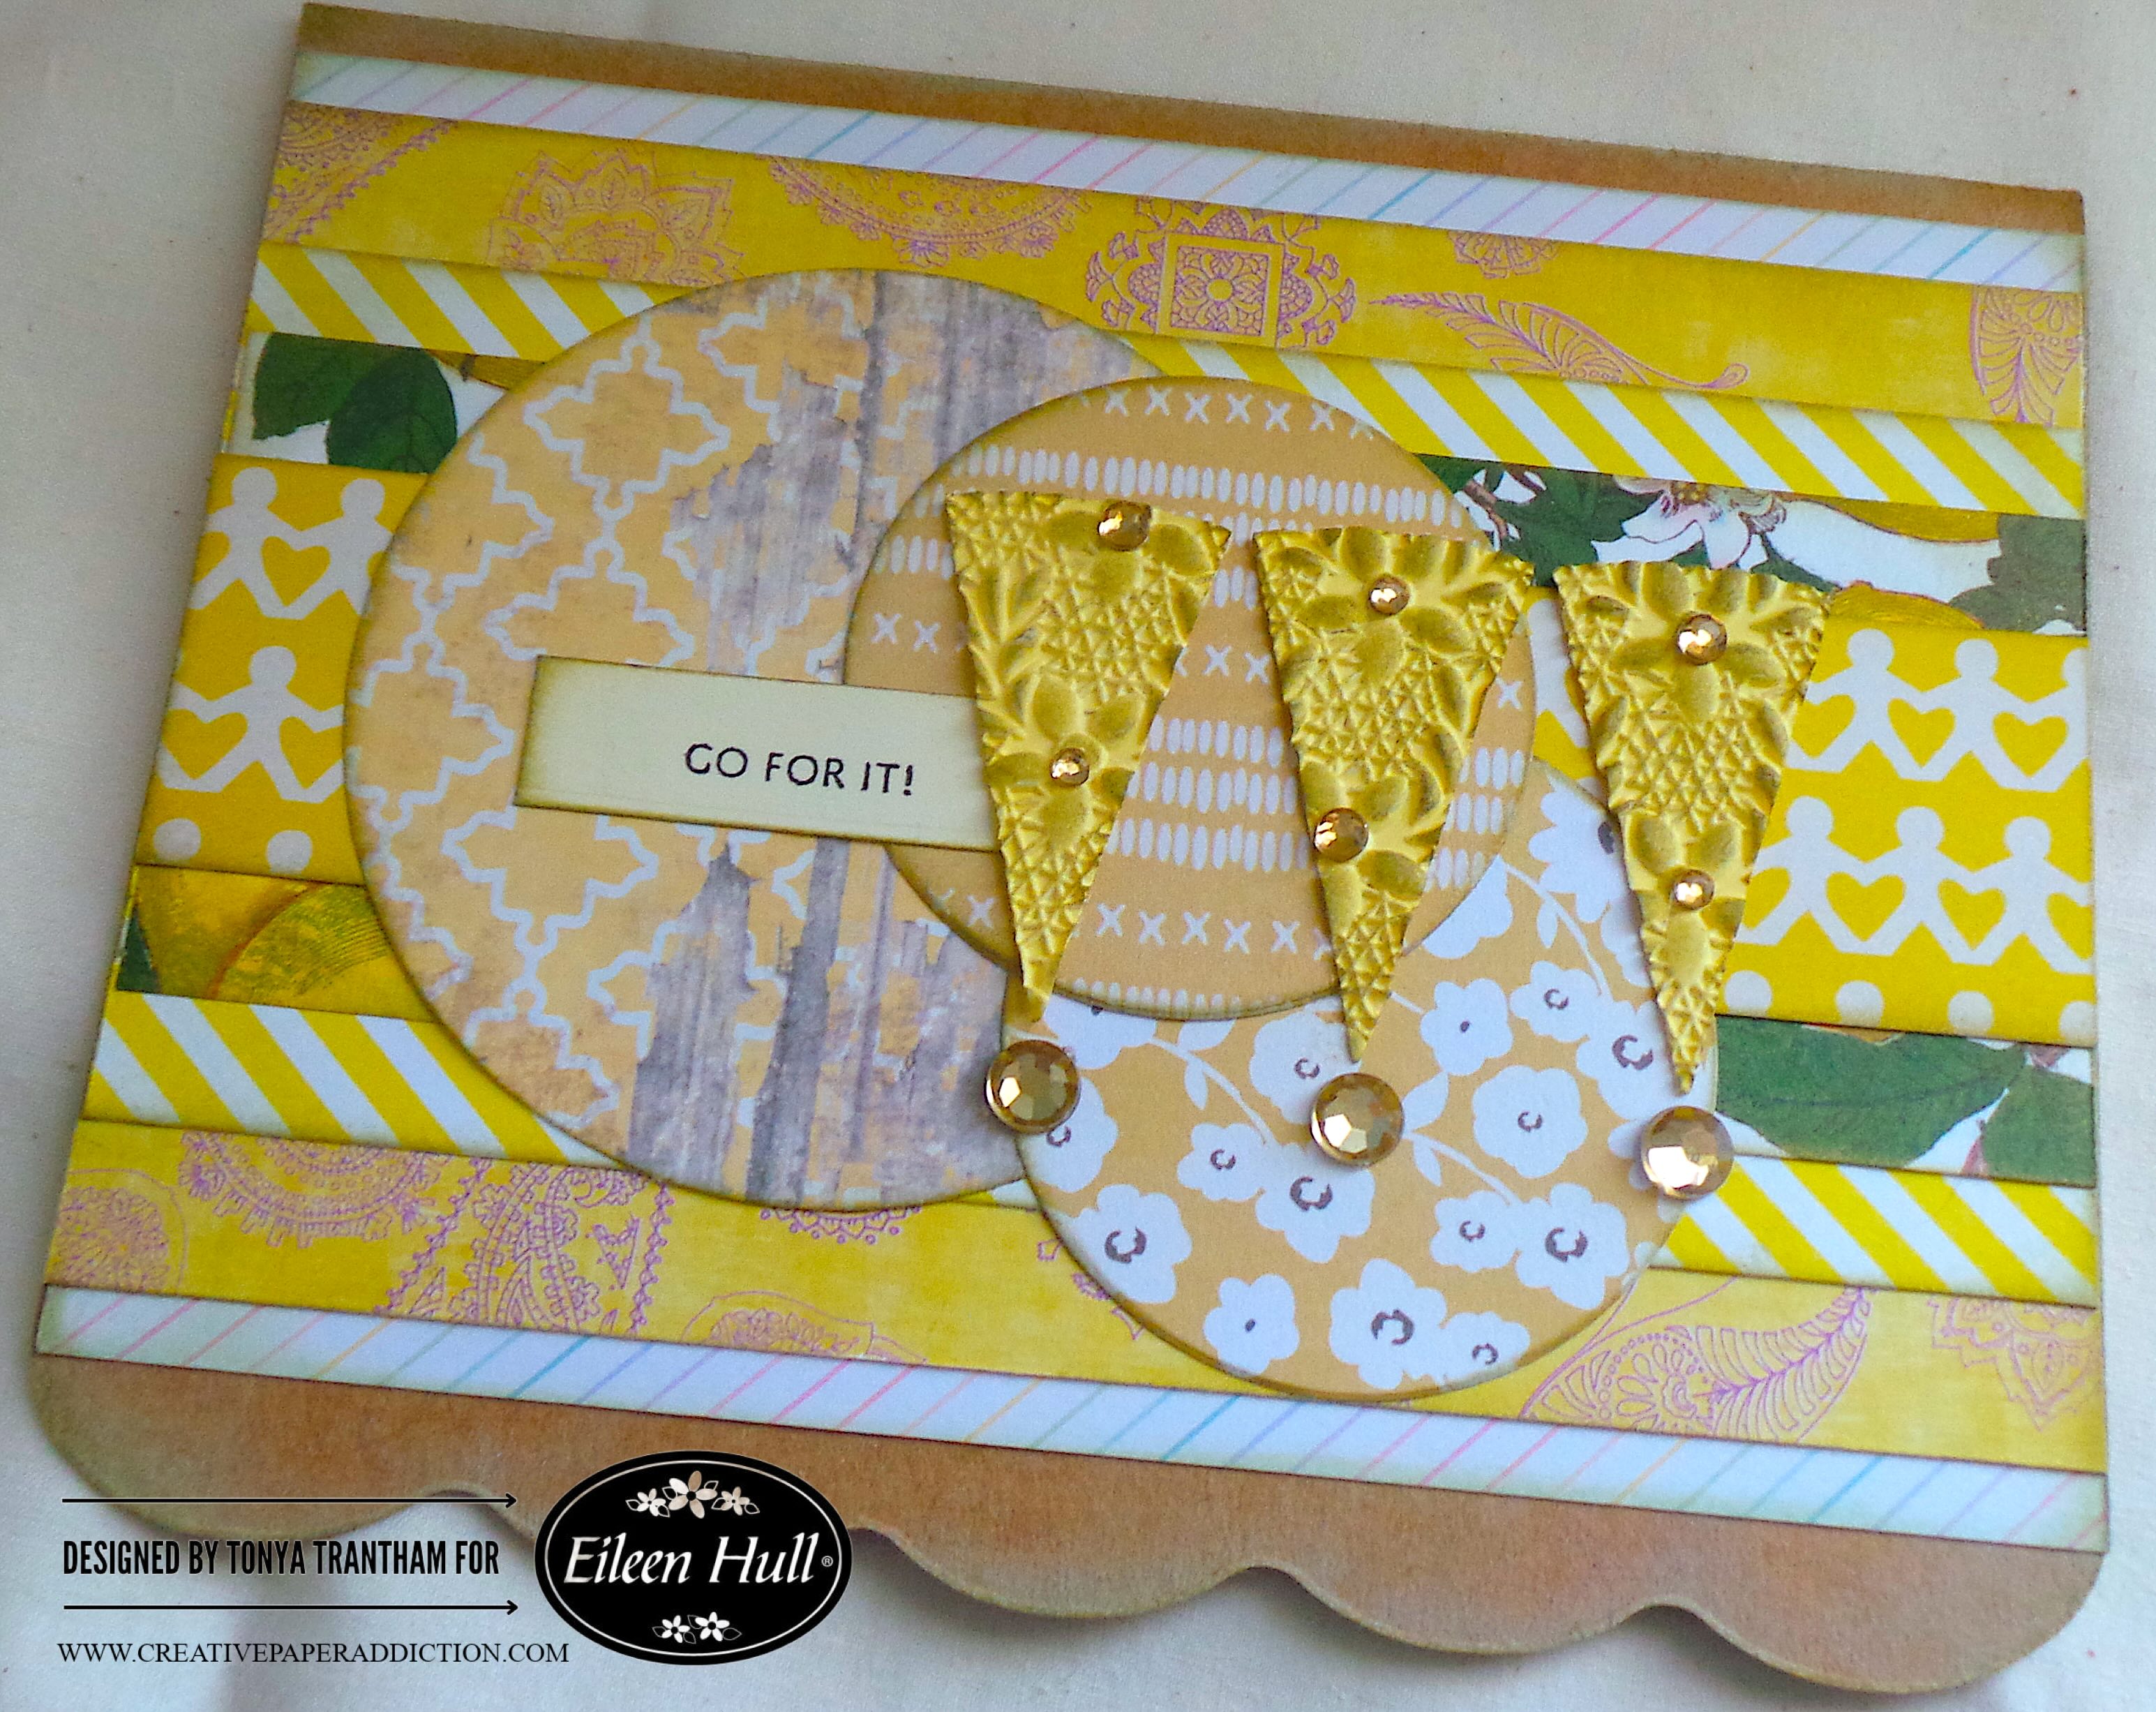
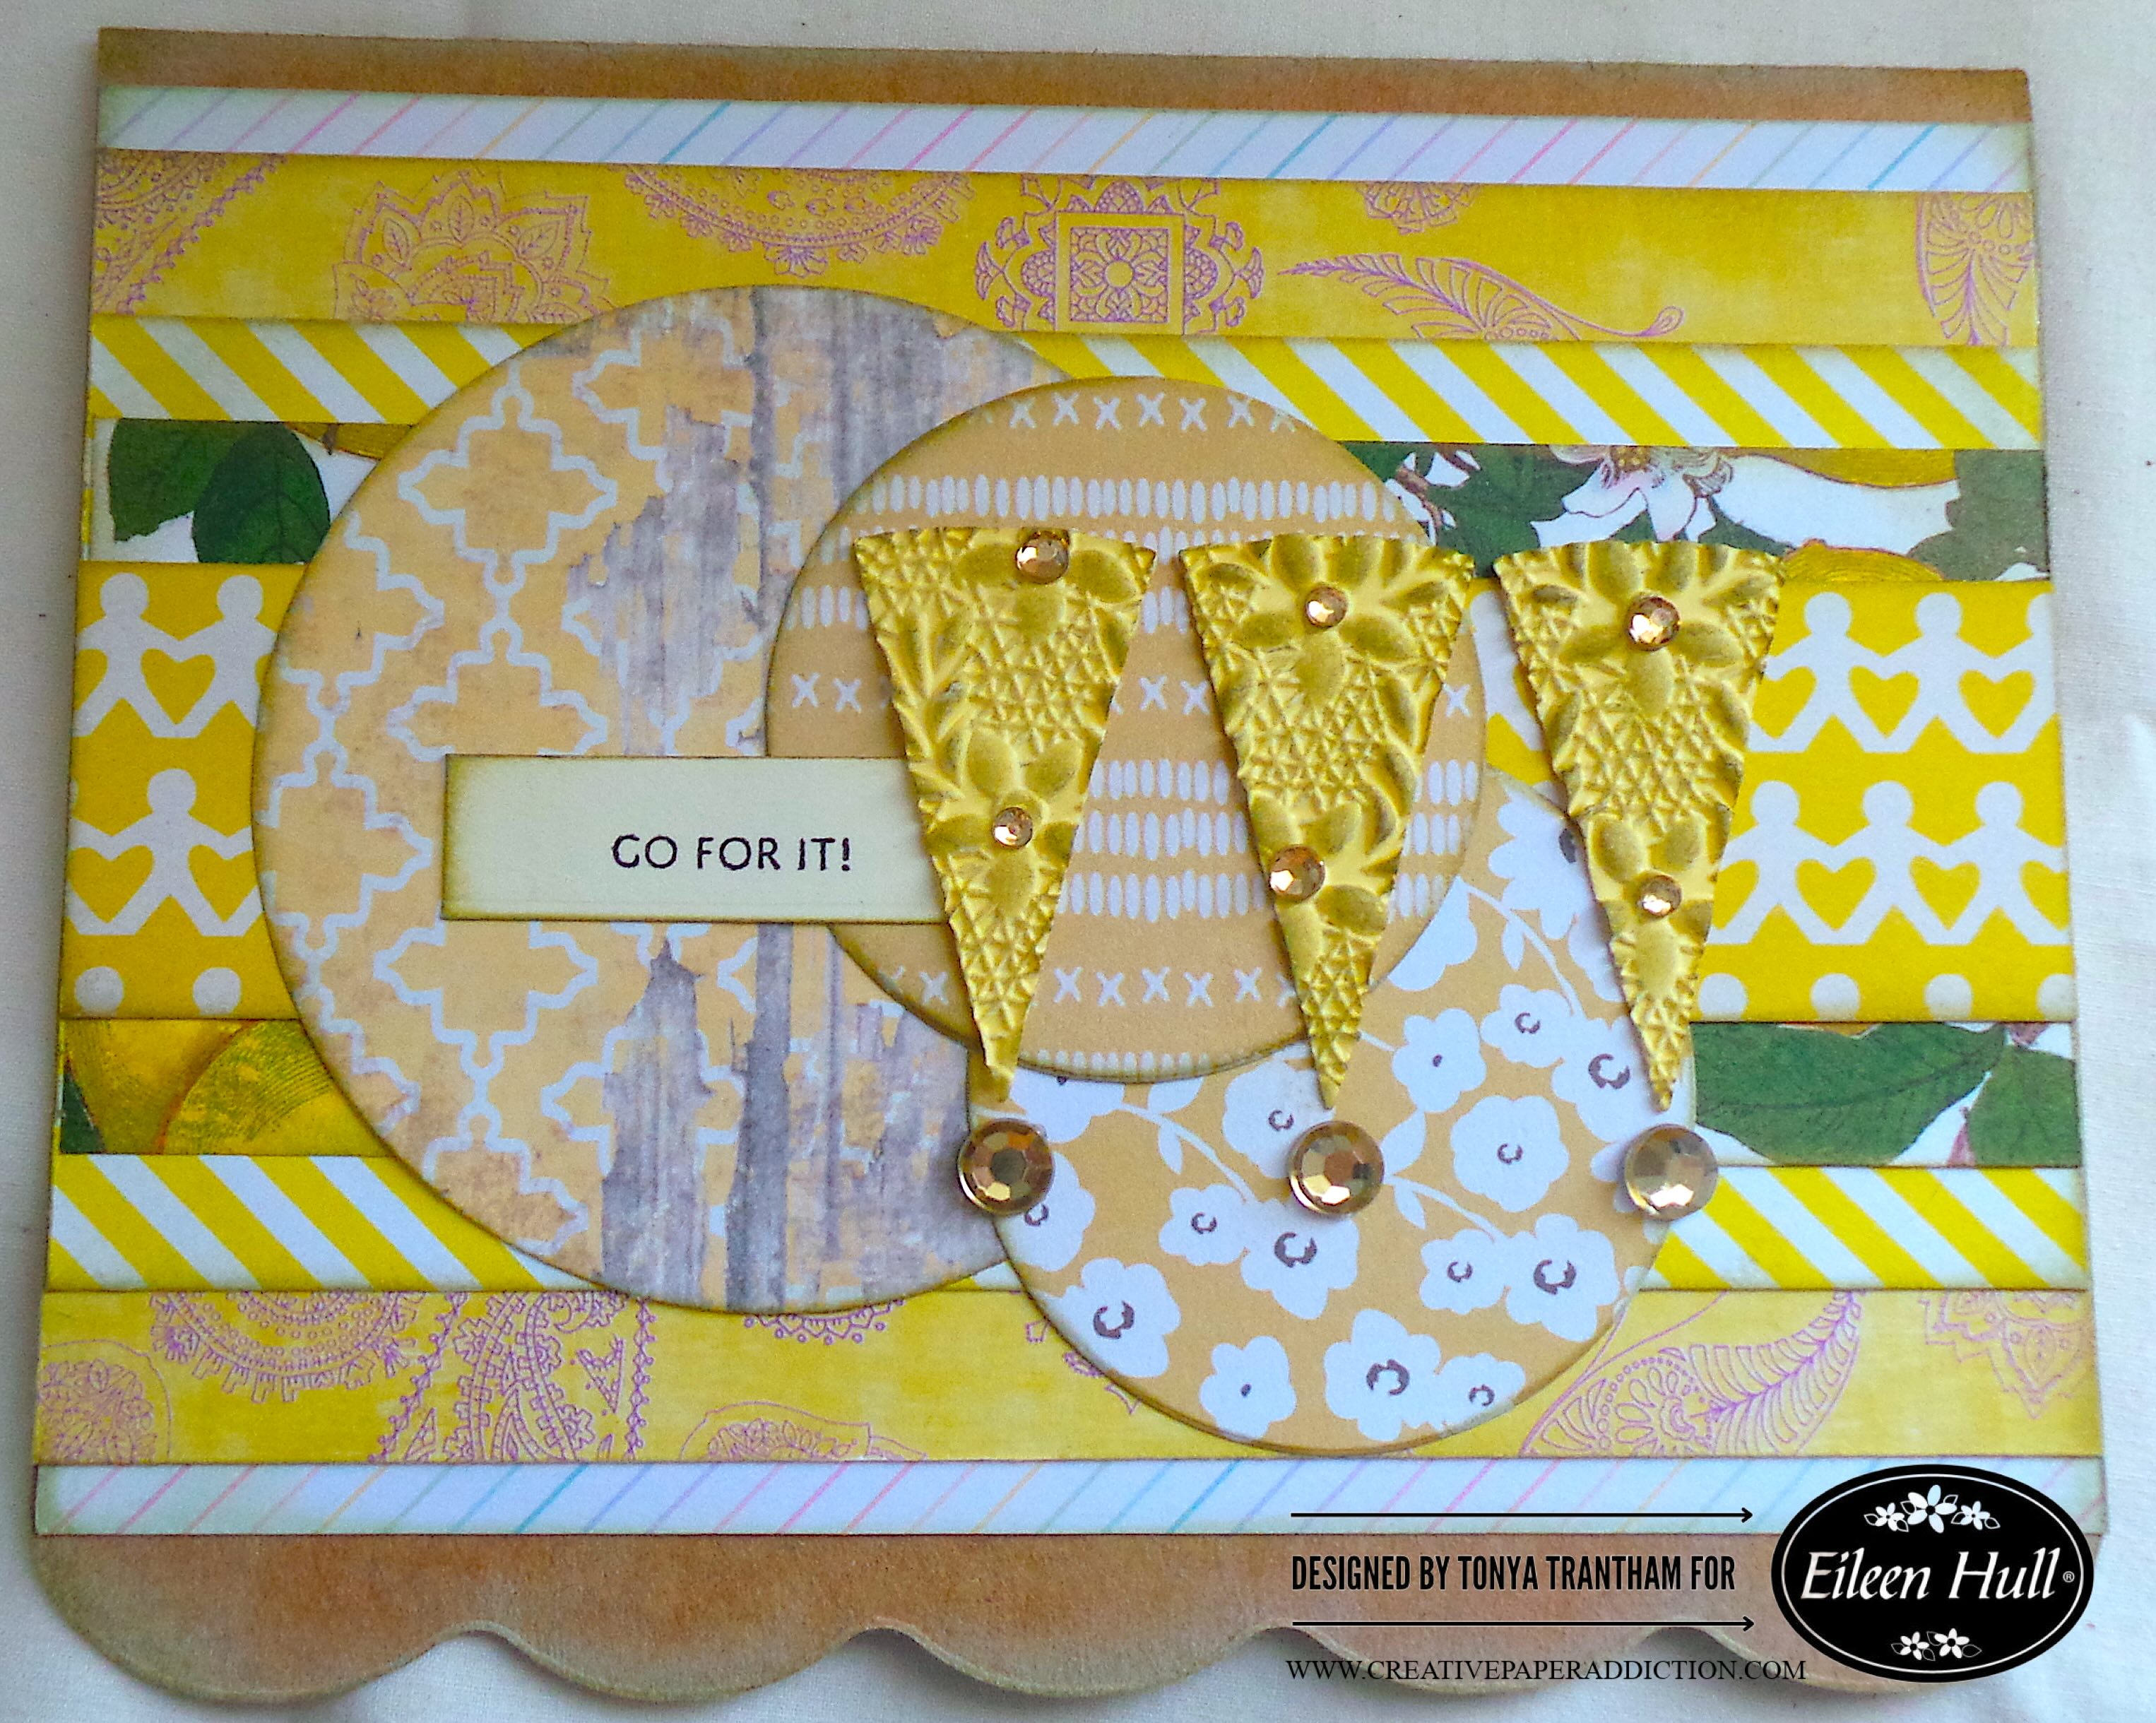
A handmade card featuring a layered design with various patterned yellow cardstocks. The card includes an oval shape with the phrase 'GO FOR IT!' in the center, and three golden embossed pie/wedge shapes adorned with sequins.

I folded a piece of Kraft Cardstock in half. I placed it slightly below the cut line of the spine of the Handbound Journal Diecut. Then, I ran it through the Diecut Machine.

A handmade card featuring a layered design with yellow and patterned cardstock, three triangular die-cut embellishments, and the text 'GO FOR IT!'

I gathered an assortment of yellow and one rainbow patterned cardstocks. I cut five strips in different sizes to fit the base of the card. I glued all in place.

A card decorated with patterned yellow cardstocks, featuring a large circular shape and three wedge-shaped diecuts with gold gems, and a stamped message that says 'GO FOR IT!'

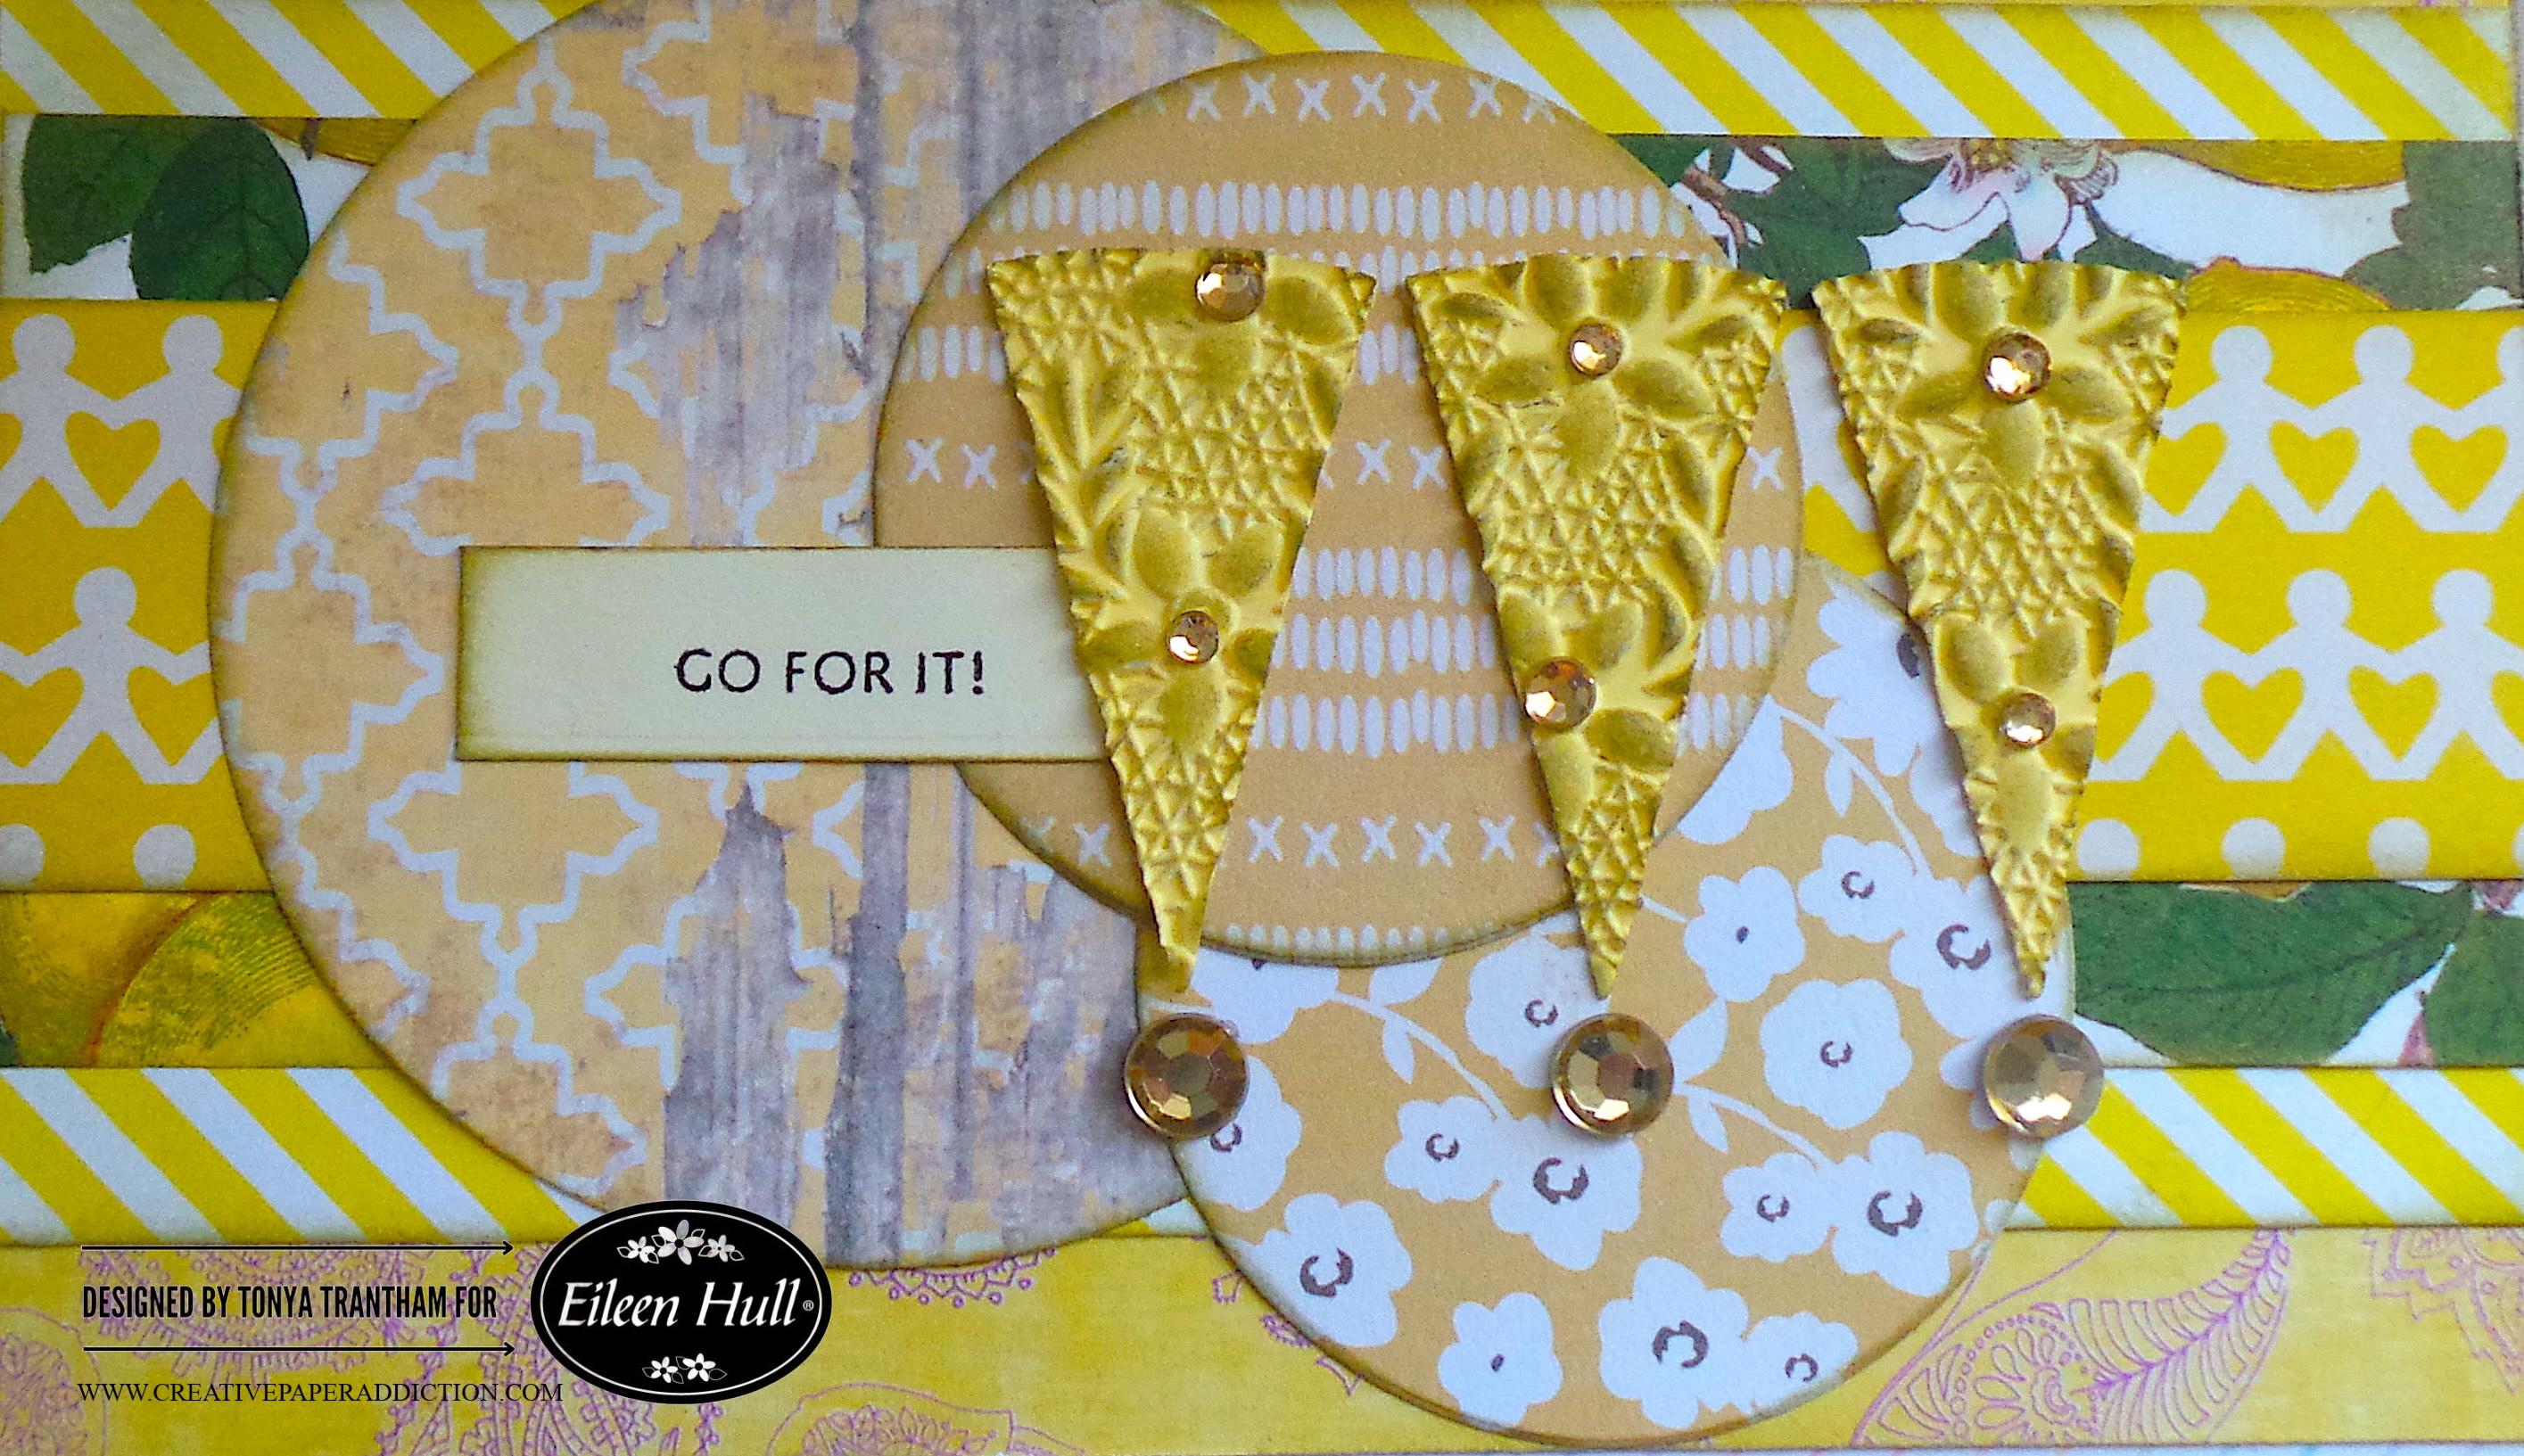
I cut one large and two small circles from the Rainbow Wheels Thinlits and adhered to the card. Side note, the pie/wedge shape diecut looks like an explanation point…if you add a dot to it. I thought it would be the perfect addition to the “Go For It!” stamp that I will be using.

A handmade card featuring layered yellow patterned cardstocks, an oval focal point with the text 'GO FOR IT!', and three embossed pie/wedge shaped elements adorned with gold gems.

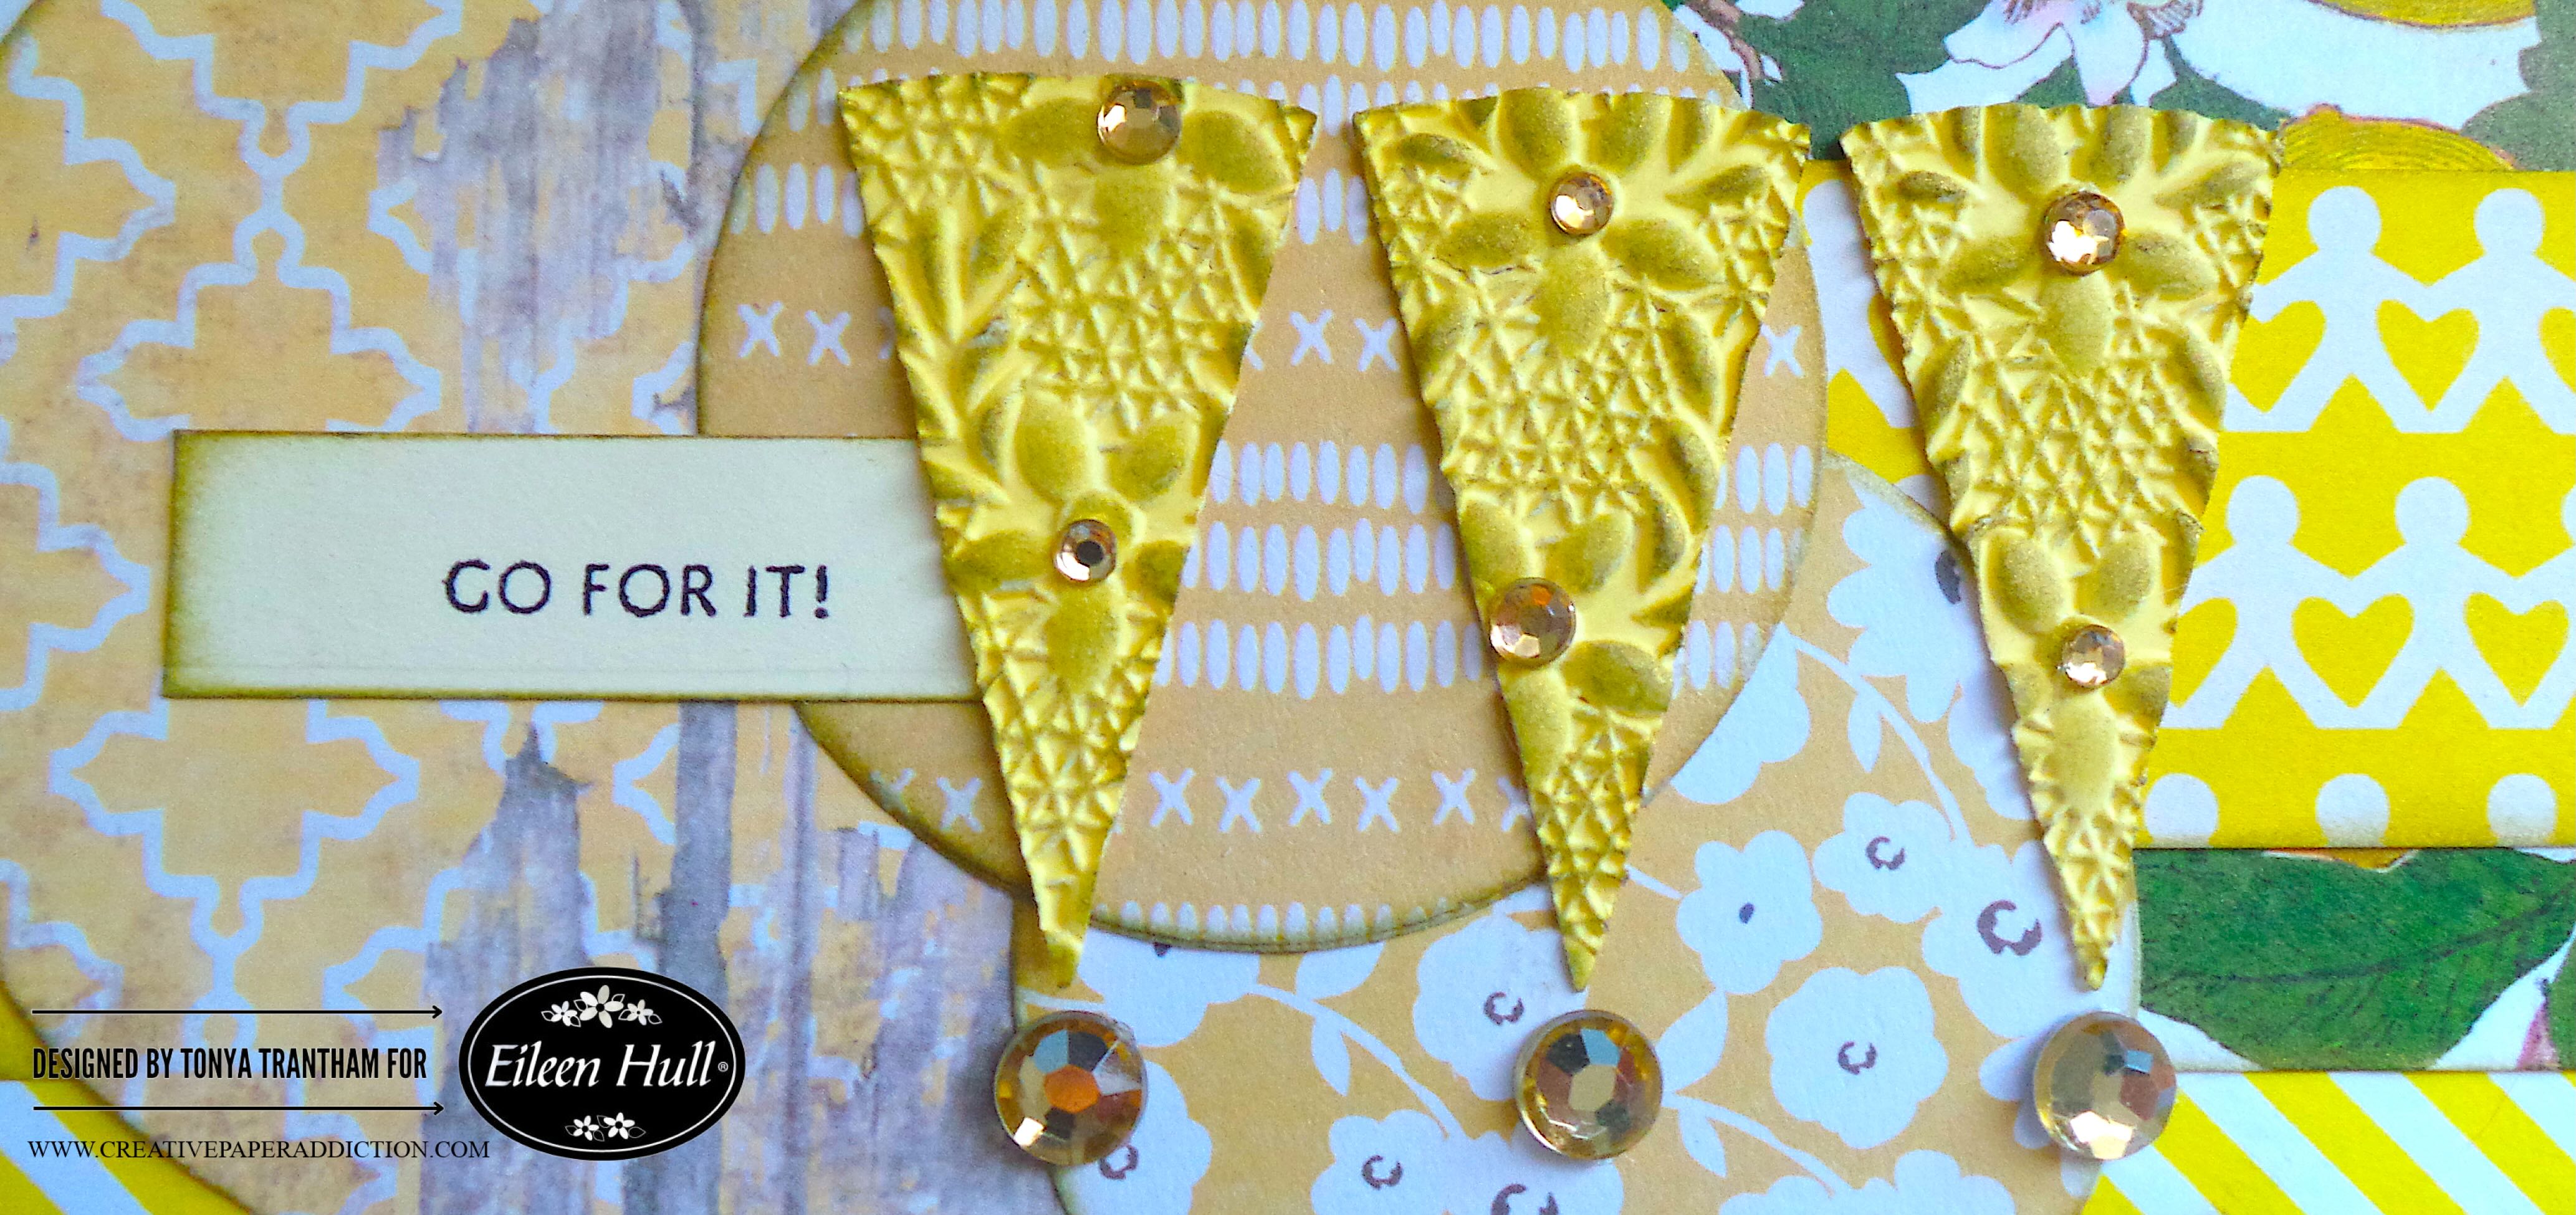
I cut three of the pie/wedge shaped dies from the Rainbow Wheels Thinlits. I embossed all three with the Lace Embossing Folder. I lightly applied Gold Luster Wax over the embossed areas.

A handmade card featuring yellow and patterned cardstocks, with a large circular base, three pie/wedge shapes, and a stamped message that reads 'GO FOR IT!' adorned with gold gems.

I placed the “Go For It!” stamp from the Swatch Cards Stamp Set onto the MISTI Stamping Tool. I inked the stamp with Black Ink and stamped onto a piece of cardstock. I used the Gold Luster Wax and lightly inked the edges of the saying.

Close-up of a handmade card featuring embossed yellow pie/wedge shapes, gold gems, and the phrase 'GO FOR IT!' on a colorful background.

I adhered the pie/wedges dies and sentiment to the card. I added Gold Gems to the bottom of each pie/wedge. I also added smaller gold gems to the center of each embossed flower.

I can’t wait to make more cards with these dies and stamp set. If you haven’t been by Eileen’s blog lately you can find the latest post HERE.

If you have any questions or comments about this card, please leave them below.

A handmade card featuring a circular design with a 'Go For It!' sentiment, adorned with yellow pie-shaped diecuts and gold gems on a patterned cardstock background.

Supplies

Sizzix/Eileen Hull: Handbound Journal Diecut

Sizzix/Eileen Hull: Rainbow Wheels Thinlits

Sizzix/Eileen Hull: Lace Embossing Folder

Sizzix/Eileen Hull: Swatch Cards Stamp Set

Diecut Machine

MISTI Stamping Tool

Black Ink

Paper Cutter

Scissors

Various Patterned Cardstocks

Kraft Cardstock

Gold Gems

Gold Luster Wax

Beacon Adhesives: Zip Dry Adhesive

(Products listed above are Affiliated Links for your convenience)

DISCLAIMERS

This blog is compensated to provide opinion on products, services, websites, and various other topics. Even though the owner(s) of this blog receives compensation for our posts or advertisements. I always give my honest opinions, findings, beliefs, or experiences on those topics or products. The views and opinions expressed on this blog are purely my own. Any product claim, statistic, or quote should be checked with each manufacturer. Verify other representations about a product or service with the provider or party in question.This blog contains affiliate linksClicking these links helps to support Tonya Trantham Designs – Creative Paper Addiction. It runs at no additional cost to you. Today’s features are Sizzix, Eileen Hull and Scrapbook.com Products. 

A colorful handmade card featuring layered yellow and patterned cardstock, a circular element, and a sentiment that reads 'GO FOR IT!' with decorative pie-shaped embellishments.

Thanks for stopping by, I hope your Monday is wonderful and enjoy creating!
A stylized graphic featuring a bird and colorful floral elements with the name 'Tonya' prominently displayed in green, against a soft blue background.

Create a Stunning Swatch Book with Eileen Hull’s Diecuts

Hi everyone! I am back with the complete reveal of my swatch book. I created it using the Hardbound Journal Diecut, Swatch Cards Stamps and a few other dies, all by Eileen Hull. This was a fun journal to create. It was a great way to showcase lace, ribbon, and trim that I have in my stash. Anyways, let’s get started!

Close-up of a handcrafted journal cover featuring floral fabric, lace, and decorative elements such as bookplates, flowers, and embellishments.

I didn’t take any step out photos of how I layered the covers and spine. So I did bullet points to break down the process. A side note… when creating the cover cut two covers and a spine with the diecut.

  • I cut a piece of cardstock to fit the Hardbound Journal Diecut.
  • I cut from the Adhesive Roll strips of adhesive and applied to both sides of the cardstock.
  • I cut two pieces of felt the same size as the cardstock. I place the felt on either side of the cardstock.
  • I did the same steps as above and applied strips of adhesive to both sides of the felt and burnished.
  • I cut fabric and placed over the applied adhesive strips that’s covering the felt. I burnished well before placing onto the Hardbound Journal Diecut and running through the Diecut Machine.
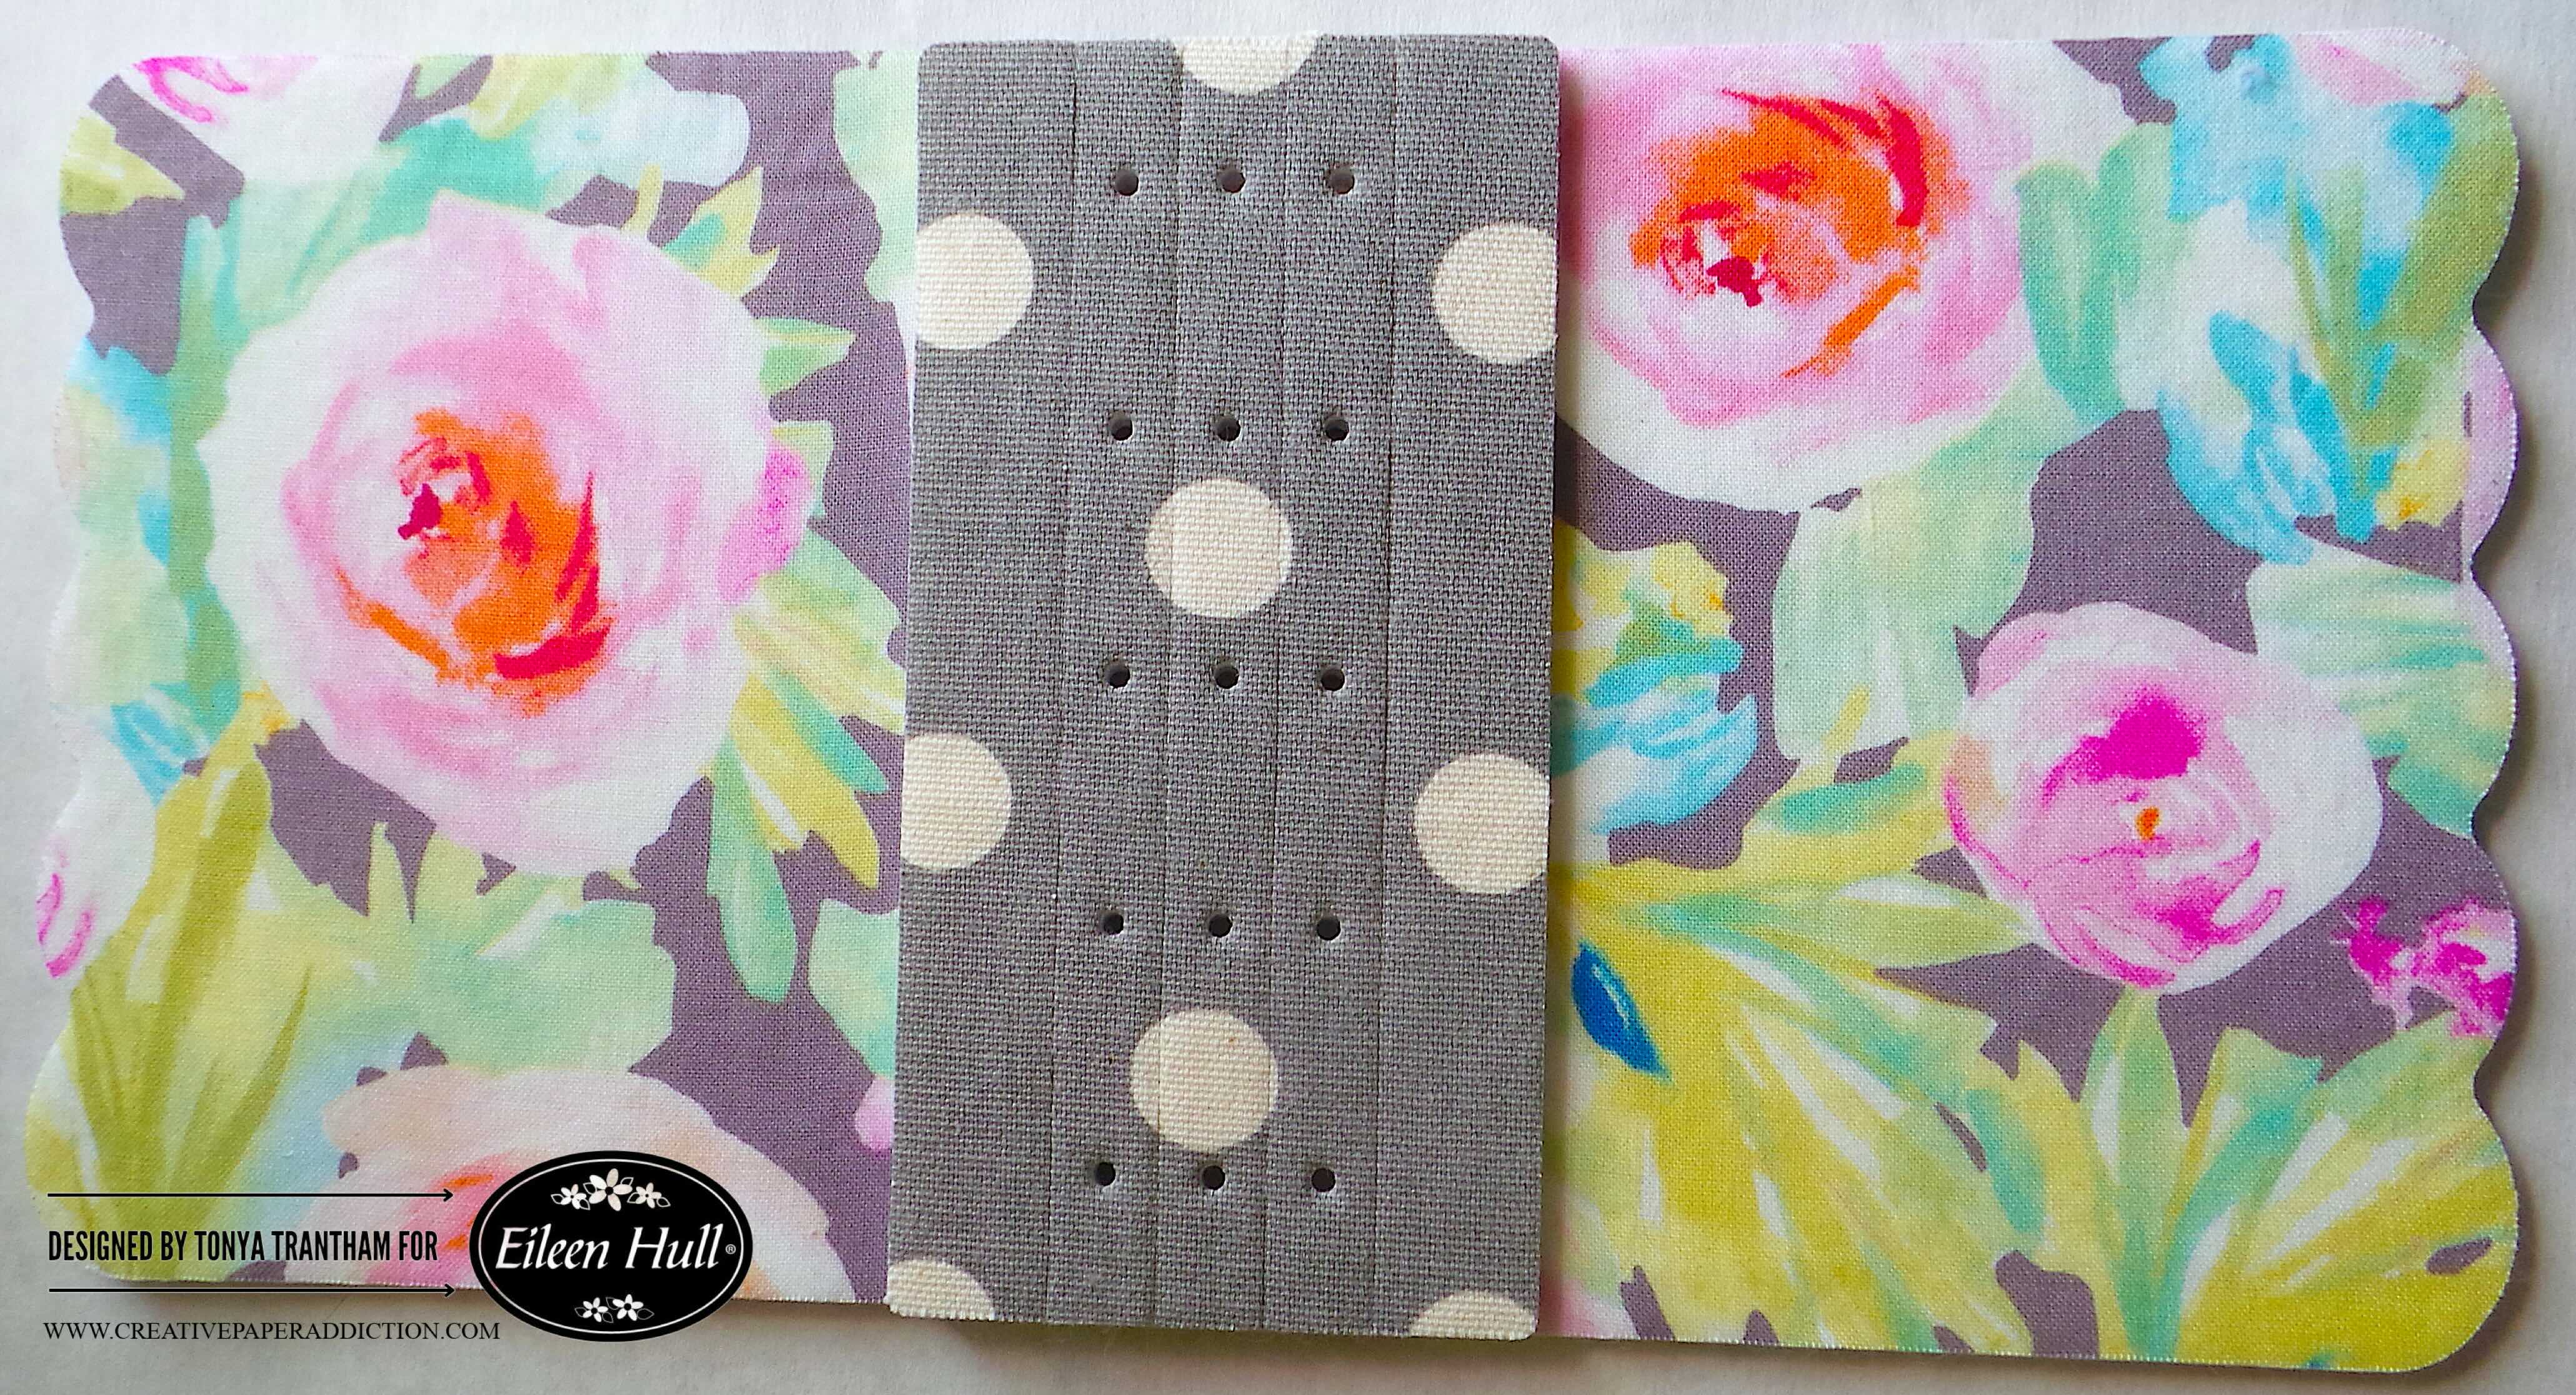
A collection of colorful and patterned die-cut pieces and covers for a journal, featuring floral designs and polka dots.

I glued the end flaps to each straight side of the journal cover.

An assembled journal featuring a floral cover with shades of pink and green, and a gray spine with polka dots and pierced details.

I cut a total of six papers for the journal. I folded in half and made holes in the fold before sewing two papers in per signature. A side note…I had actually sewn in more pages but had to remove them. The extra pages would have “bulked” up the journal too much.

Open journal featuring grid pattern pages with a decorative spine.

I used the MISTI Stamping Tool to stamp the “swatch card” stamp from the Swatch Cards Stamps onto White Cardstock. I hand cut each of the swatches with Scissors.

An assortment of stamped swatch cards on a workspace with an archival ink pad and a ruler.

I went through my lace, ribbon and trim and glued to the swatches. I also used the Journal Hardware Diecut to create labels for the larger lace and trim in my stash.

An array of swatch cards featuring various lace, ribbon, and trim in different colors and patterns, displaying the crafting supplies organized for easy access.

I adhered cardstock to each page before adding a swatch card.

A swatch book page featuring various ribbons and trims displayed in a creative layout with colorful embellishments, including a flower and the phrase 'I PICK YOU'.

This is a great way to use those bits and pieces of random embellishments.

An open swatch book page featuring vintage black and white photos of four men sitting around a table, with decorative lace and ribbon swatches displayed alongside. One side includes a swatch card labeled 'swatch card' with various trims, while the opposite side features colorful painted background with additional lace designs.

Even though it’s fun seeing all the lace, ribbon and trim I included in this journal. It’s kind of alarming that I didn’t even make a dent in what I still have in my collection.

An open journal page featuring decorative swatch cards with lace, ribbon, and a bird illustration. The left side displays swatch cards labeled with various embellishments, while the right side shows fabric swatches accompanied by a floral embellishment.

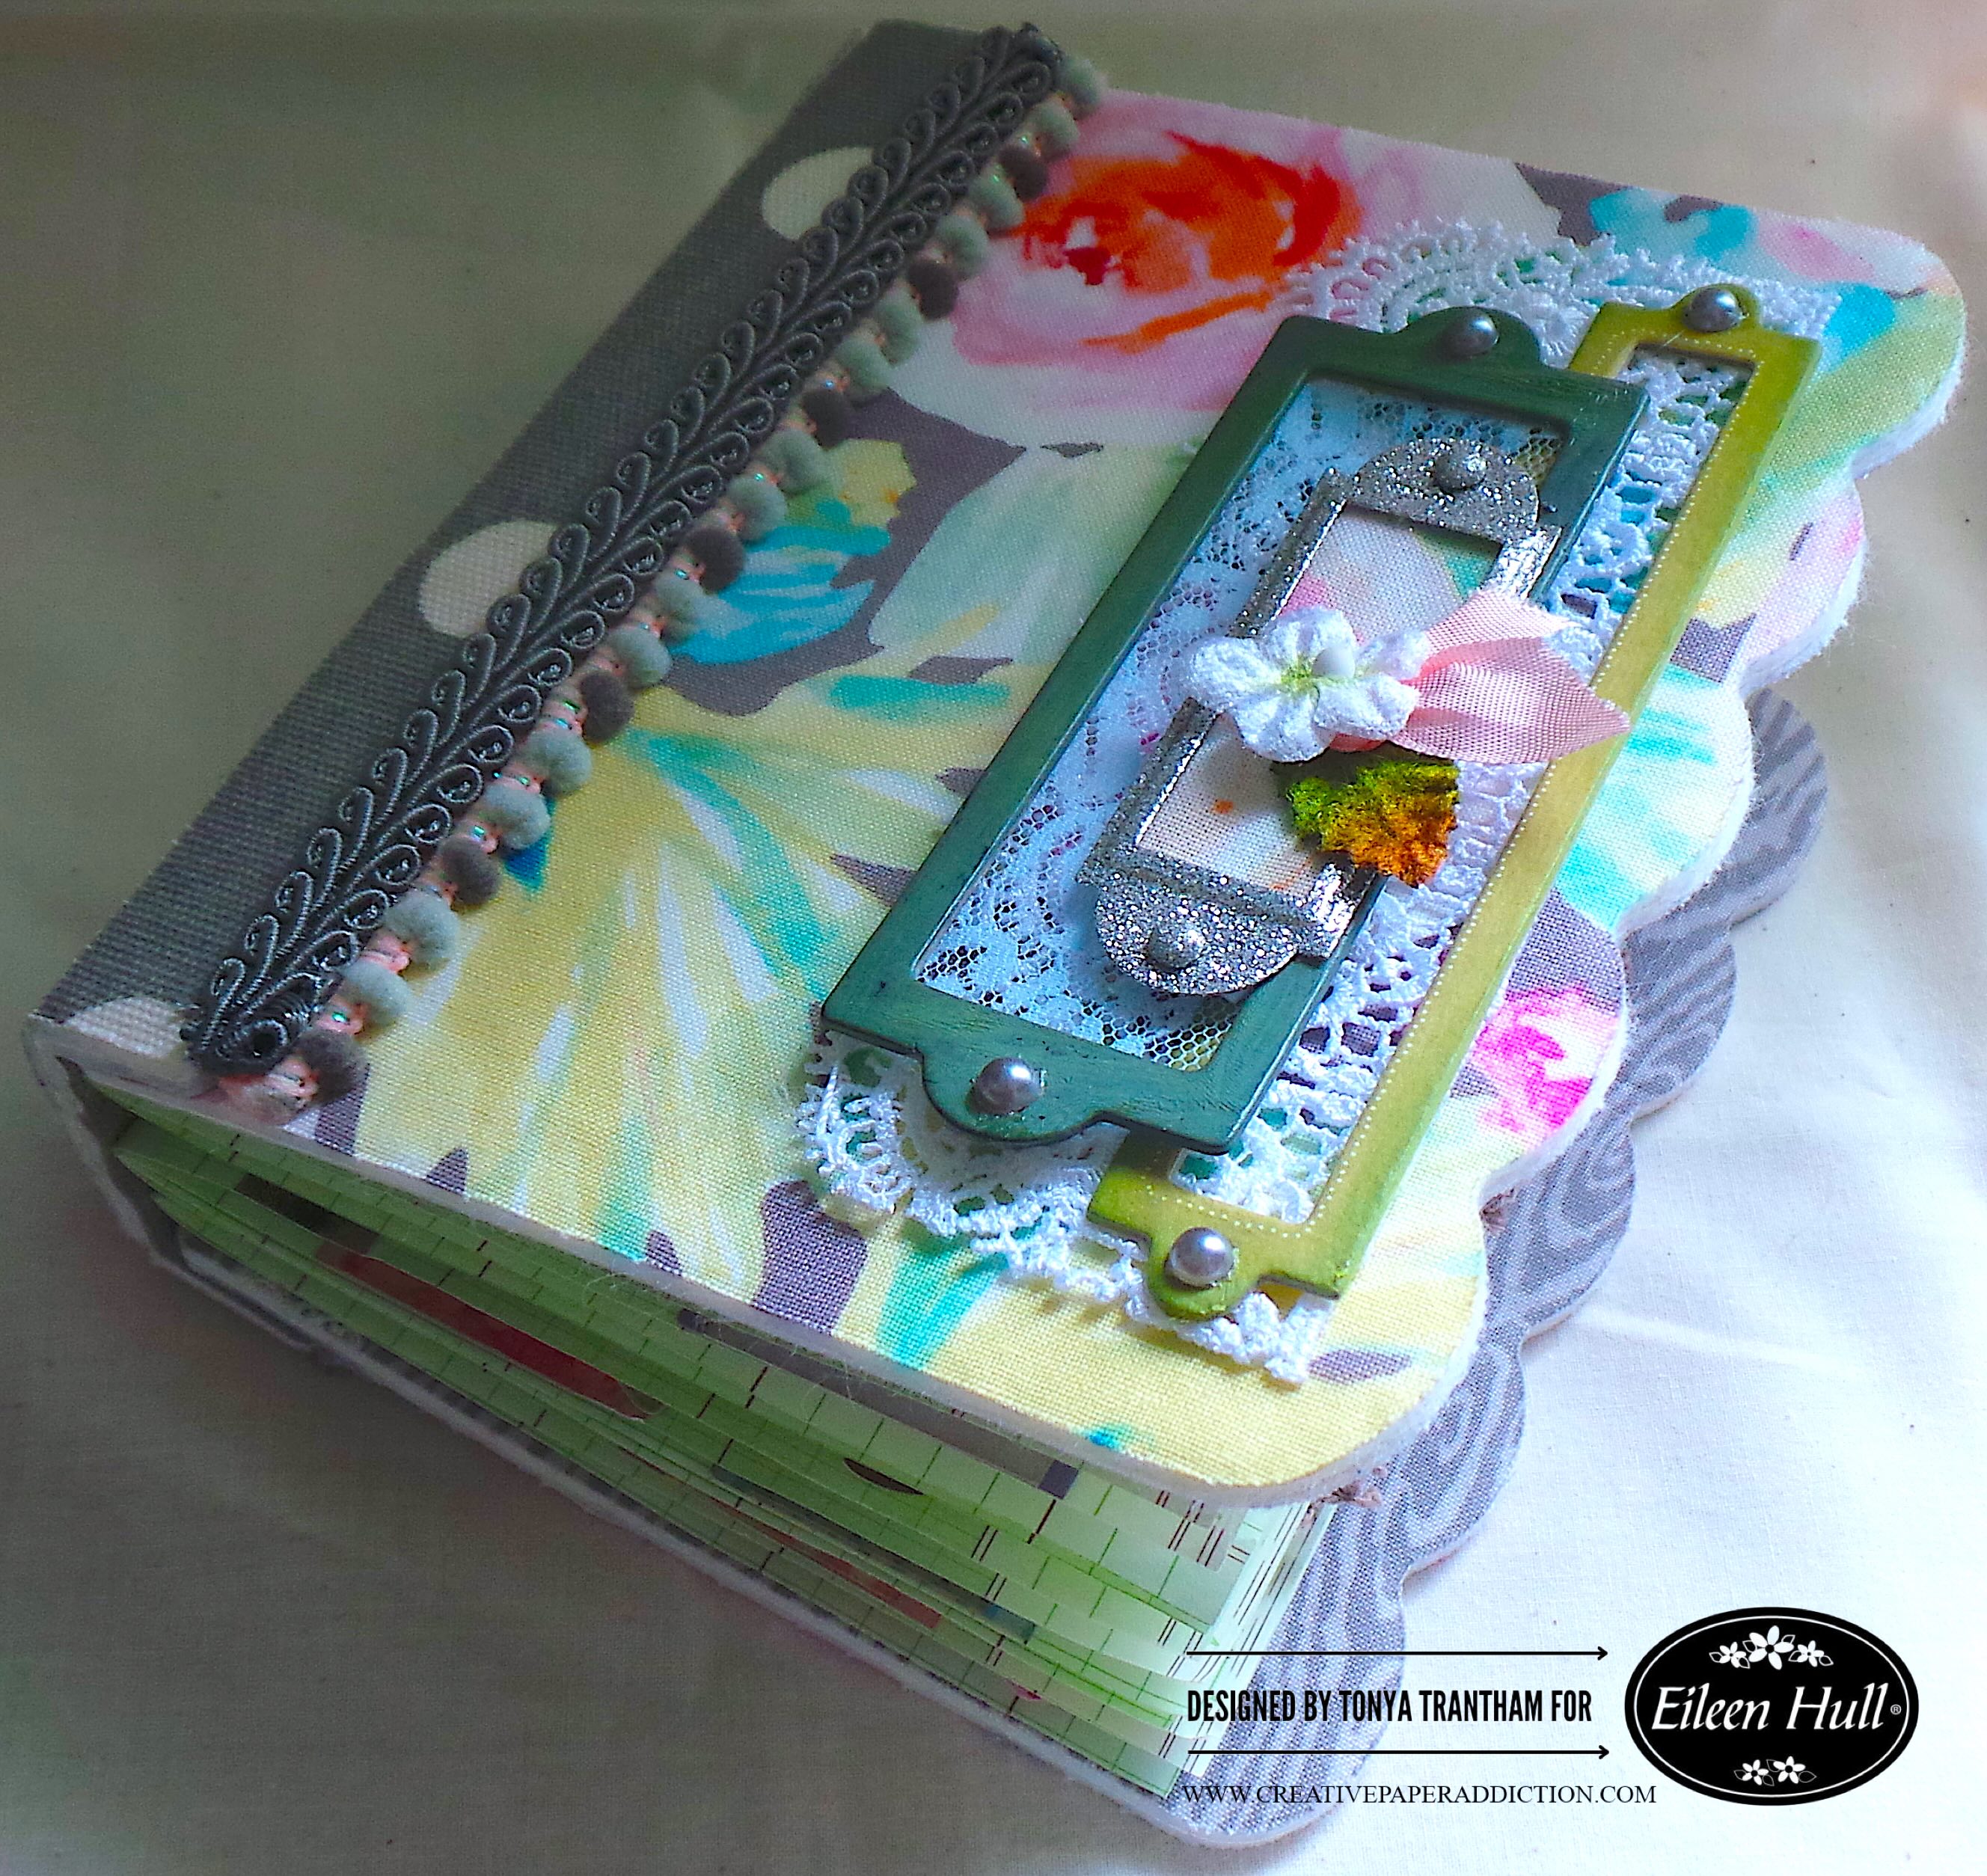
The cover I added a piece of lace and three bookplates in different sizes. The first bookplate, I adhered onto the lace. The second bookplate, I glued a piece of light blue lace inside the plate. I also added Foam Pop Dots to the back edge. I added a scrap of fabric to the third bookplate. Then I stacked all three on top of each other and glued them to the cover.

A handcrafted journal with a floral cover, featuring lace, ribbons, and decorative bookplates. The journal showcases a combination of various textures and colors, emphasizing creativity in design.

I added Gray Flatback Pearls to the ends of each bookplates. I also glued a flower with a leaf and a bit of pink seam binding to the bookplate. The finishing touch was adding mini pom pom trim to the edge of the spine and cover of the book.

A beautifully crafted swatch book featuring multiple layers of colorful fabric and cardstock. The cover is adorned with decorative lace, ribbons, and a decorative metal label holder, showcasing an intricate design and variety of textures.

I can’t wait to make more of these types of journals. Maybe the next journal will be swatches of all the Washi tape that I own?

A handcrafted swatch book featuring a floral fabric cover, decorative lace, and various embellishments like bookplates and trim.

Anyways, if you haven’t been by Eileen Hull’s blog lately you can find the latest post HERE. Also if you have any questions about this journal or comments in general leave them below.

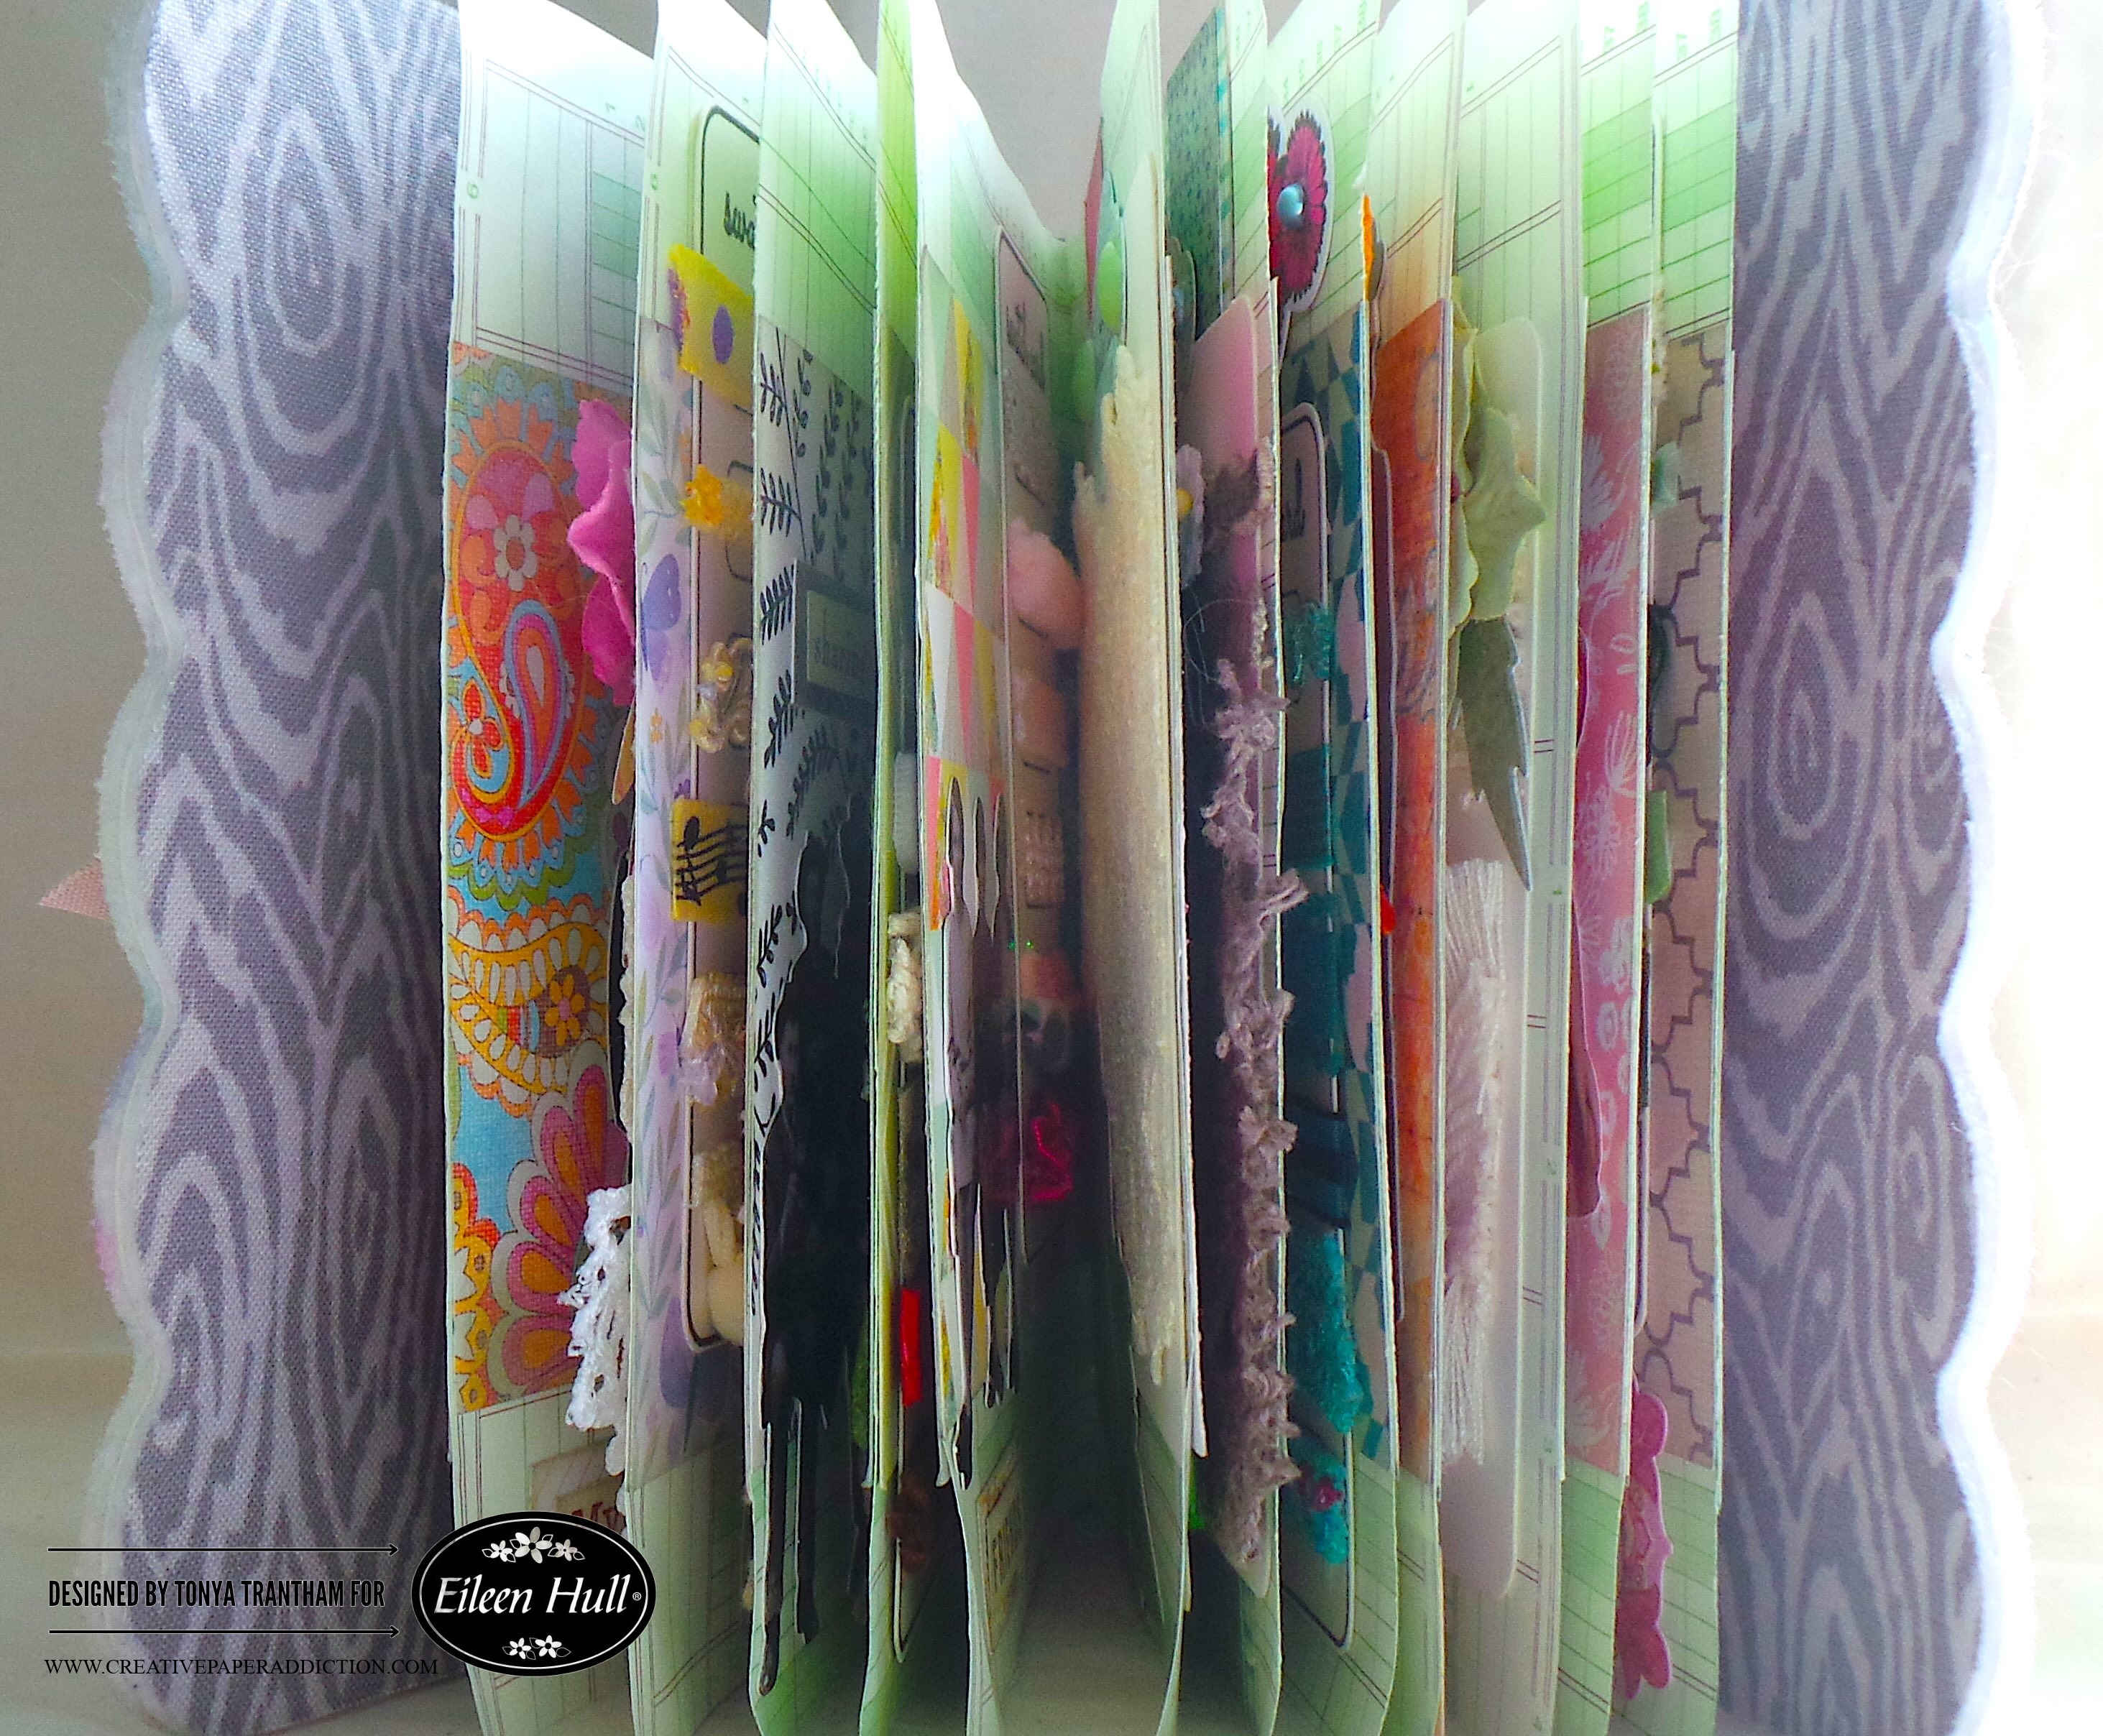
A side view of a colorful handmade journal with various patterned pages and embellishments, showcasing the creative layout and design.

Supplies

Sizzix/Eileen Hull: Hardbound Journal Diecut

Sizzix/Eileen Hull: Swatch Cards Stamps

Sizzix/Eileen Hull: Journal Hardware Diecut

Sizzix/Eileen Hull: Rainbow Wheels Thinlits

Diecut Machine

Paper Cutter

MISTI Stamping Tool

Black Ink

Scissors

White Cardstock

Gray Flatback Pearls

Grid Paper

Various Plain and Patterned Cardstock

Fabric, Felt and Thread

Various Lace, Ribbon and Trim

Various Diecuts and Embellishments

Foam Pop Dots

Adhesive Roll

Beacon Adhesives: Zip Dry Adhesive

(Products listed above are Affiliated Links for your convenience)

DISCLAIMERS

This blog is compensated to provide opinion on products, services, websites, and various other topics. Even though the owner(s) of this blog receives compensation for our posts or advertisements. I always give my honest opinions, findings, beliefs, or experiences on those topics or products. The views and opinions expressed on this blog are purely my own. Any product claim, statistic, or quote should be checked with each manufacturer. Verify other representations about a product or service with the provider or party in question.This blog contains affiliate linksClicking these links helps to support Tonya Trantham Designs – Creative Paper Addiction. It runs at no additional cost to you. Today’s features are Sizzix, Eileen Hull and Scrapbook.com Products. 

A colorful handmade journal cover featuring floral fabric, lace, and layered embellishments, including frames and a flower accent.

Thanks for stopping by, I hope your Wednesday is great and enjoy creating!

A decorative image featuring a bird among colorful flowers with the name 'Tonya' artistically displayed.

Eileen Hull New Release Crafting Essentials: Must-Have Tools

Hi everyone! It’s that time again and the May Release by Eileen Hull is here! I will be sharing sneak peeks of my projects and will do blog posts later.

The Handbound Journal is a ScoreBoards XL die designed to cut and score thick materials like matboard, leather, and felt. It includes built-in score lines, holes, a spine piece, and large labels—no measuring needed! The book measures 6″ x 5″. You can customize its thickness. You can also choose hand or quick binding. It comes with a pretty scalloped edge. One of the most versatile designs yet.

The Bigz Journal Hardware Die offers latches, hinges, and pen loops. These components are perfectly sized to coordinate with the journal. It also cuts a variety of materials.

The Color Wheel Stencil is a three-layer stencil that creates a continuous color wheel—use traditional ROYGBIV or customize your palette. Pair it with the Rainbow Wheel Die, which cuts the framework, segmented circle, and arrows for a functional color wheel.

The Swatch Card Stamp Set includes a round palette, rectangular and pie-shaped swatch cards. Plus color-themed phrases perfect for cards or journals.

Supplies

Sizzix/Eileen Hull: Handbound Journal Diecut 

Sizzix/Eileen Hull: Bigz Journal Hardware Diecut

Sizzix/Eileen Hull: Rainbow Wheel Diecut

Sizzix/Eileen Hull: Color Wheel Stencil

Sizzix/Eileen Hull: Swatch Card Stamp Set

Diecut Machine

(Products listed above are Affiliated Links for your convenience)

DISCLAIMERS

This blog is compensated to provide opinion on products, services, websites, and various other topics. Even though the owner(s) of this blog receives compensation for our posts or advertisements. I always give my honest opinions, findings, beliefs, or experiences on those topics or products. The views and opinions expressed on this blog are purely my own. Any product claim, statistic, or quote should be checked with each manufacturer. Verify other representations about a product or service with the provider or party in question.This blog contains affiliate links. Clicking these links helps to support Tonya Trantham Designs – Creative Paper Addiction. It runs at no additional cost to you. Today’s features are Sizzix, Eileen Hull and Scrapbook.com Products. 

Thanks for stopping by, I hope your Thursday is great and enjoy creating!

Create a Quick and Easy Mini Book

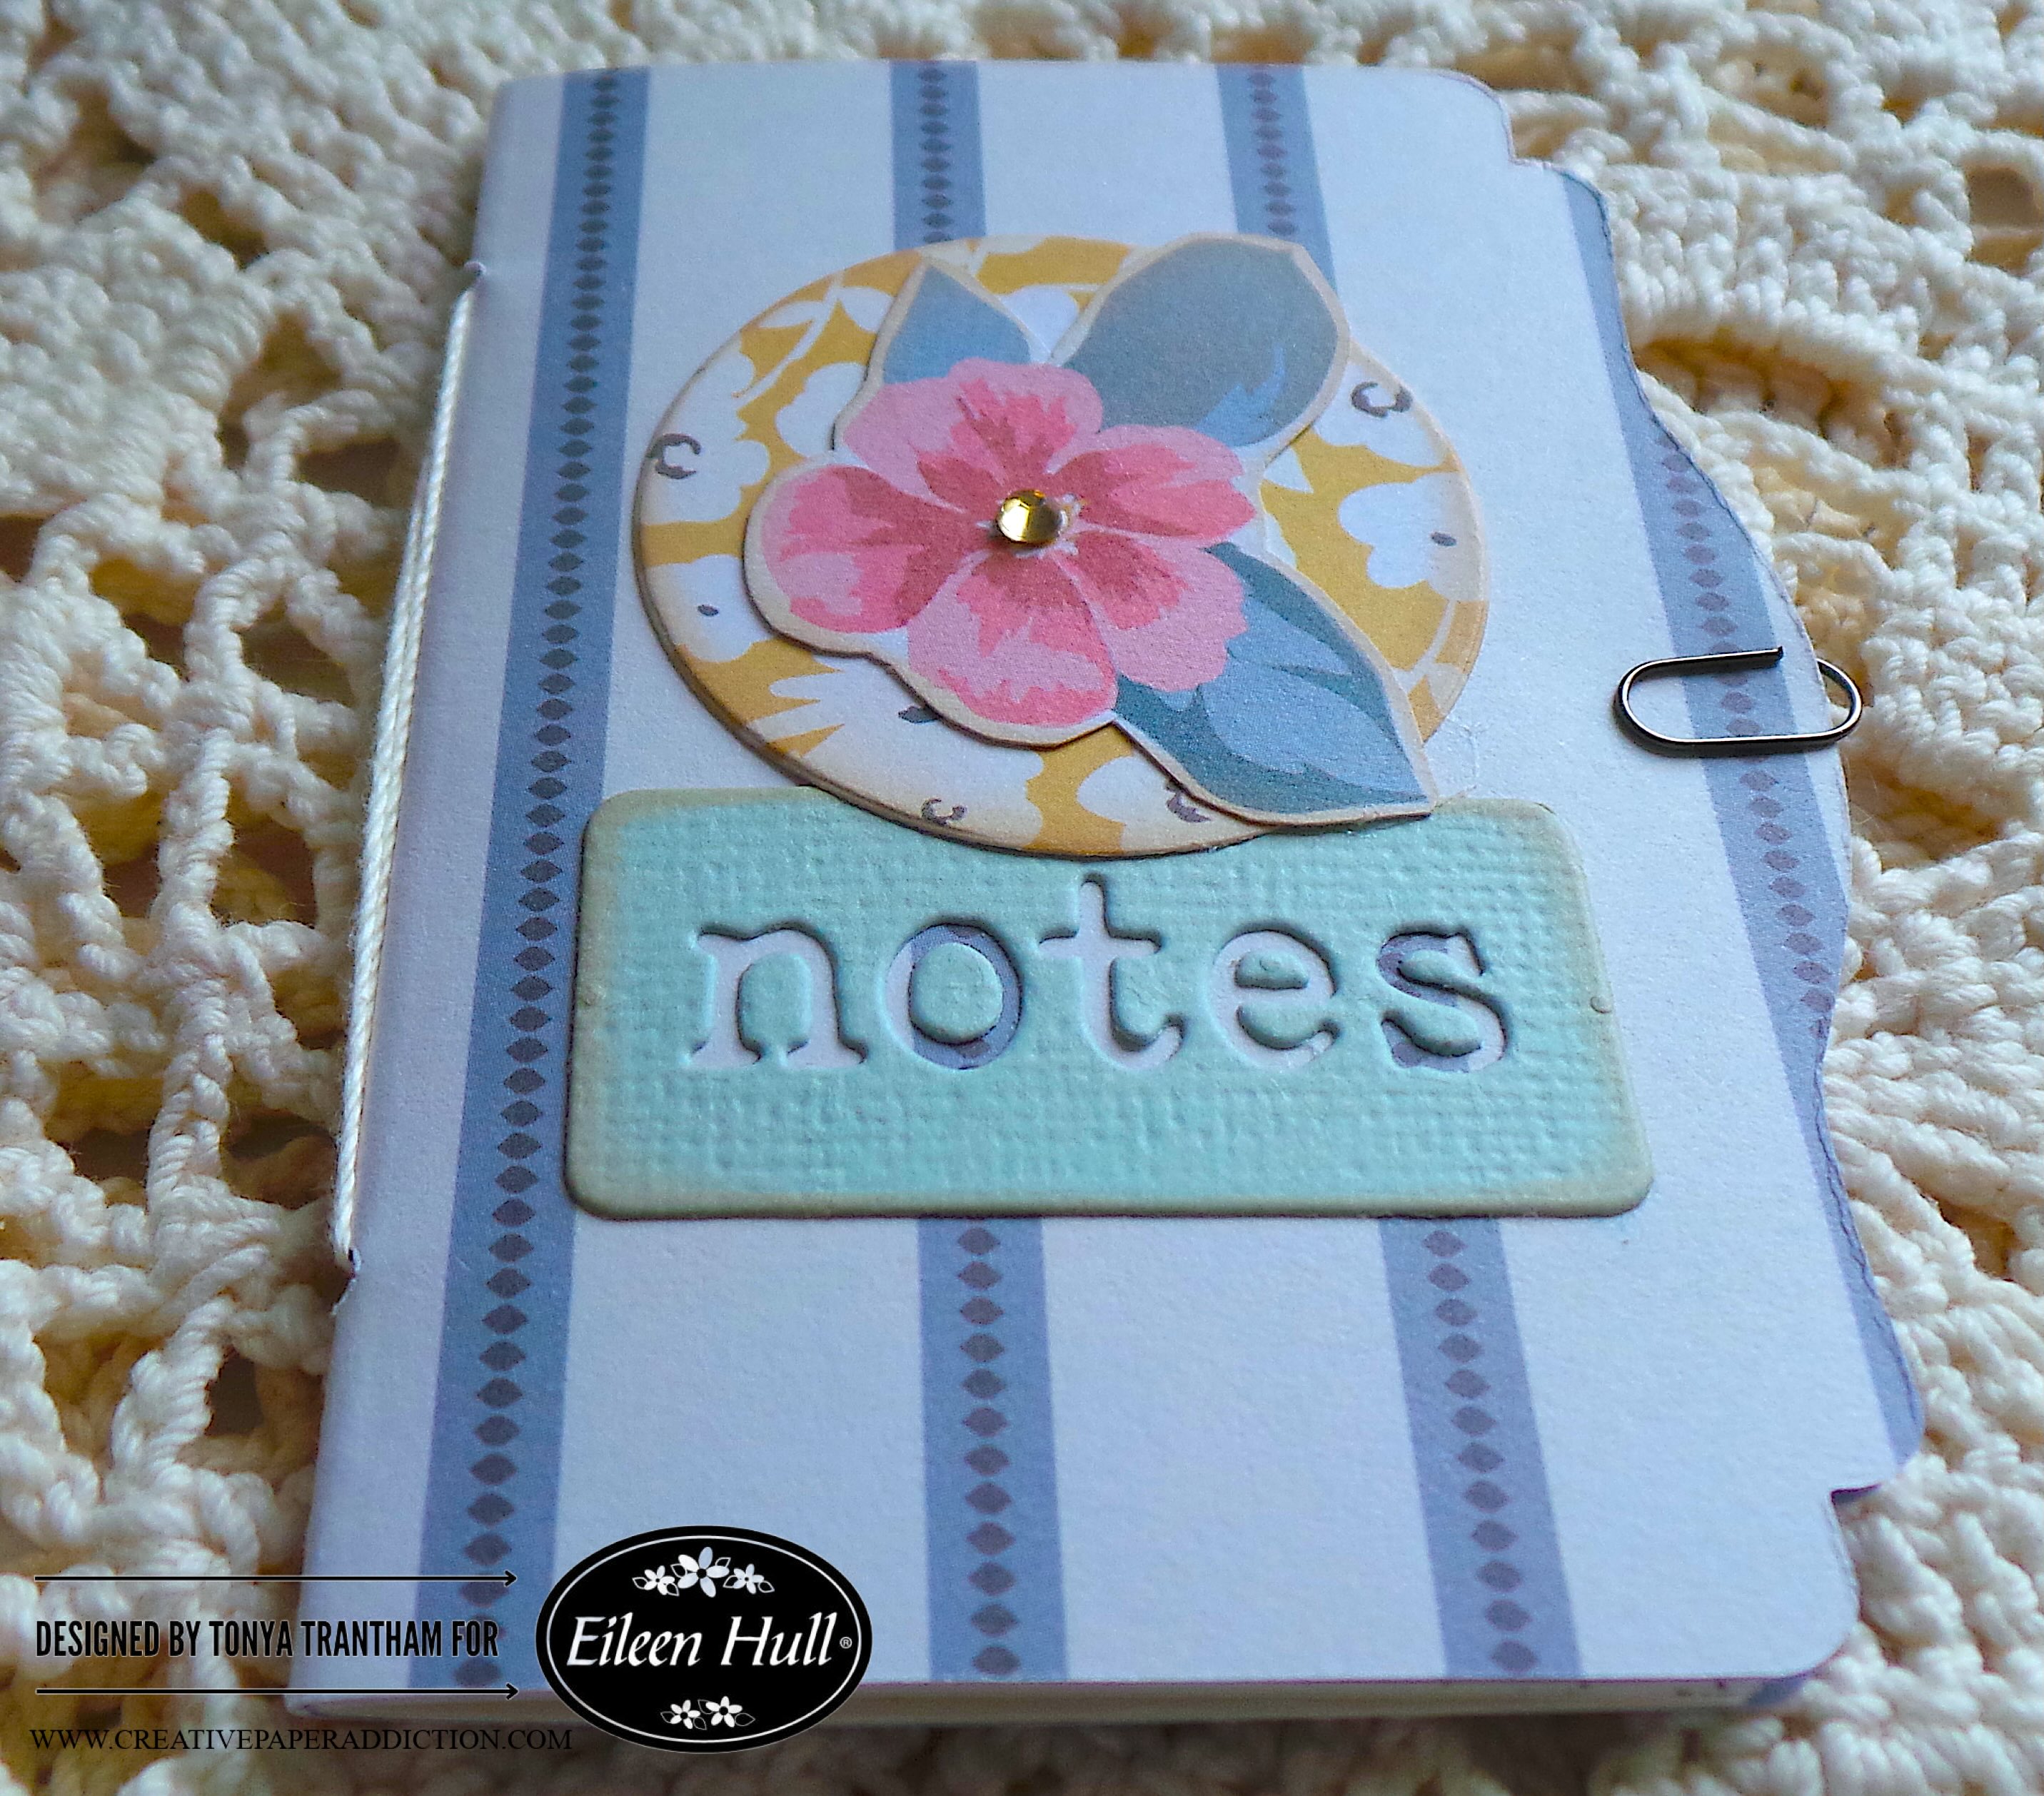
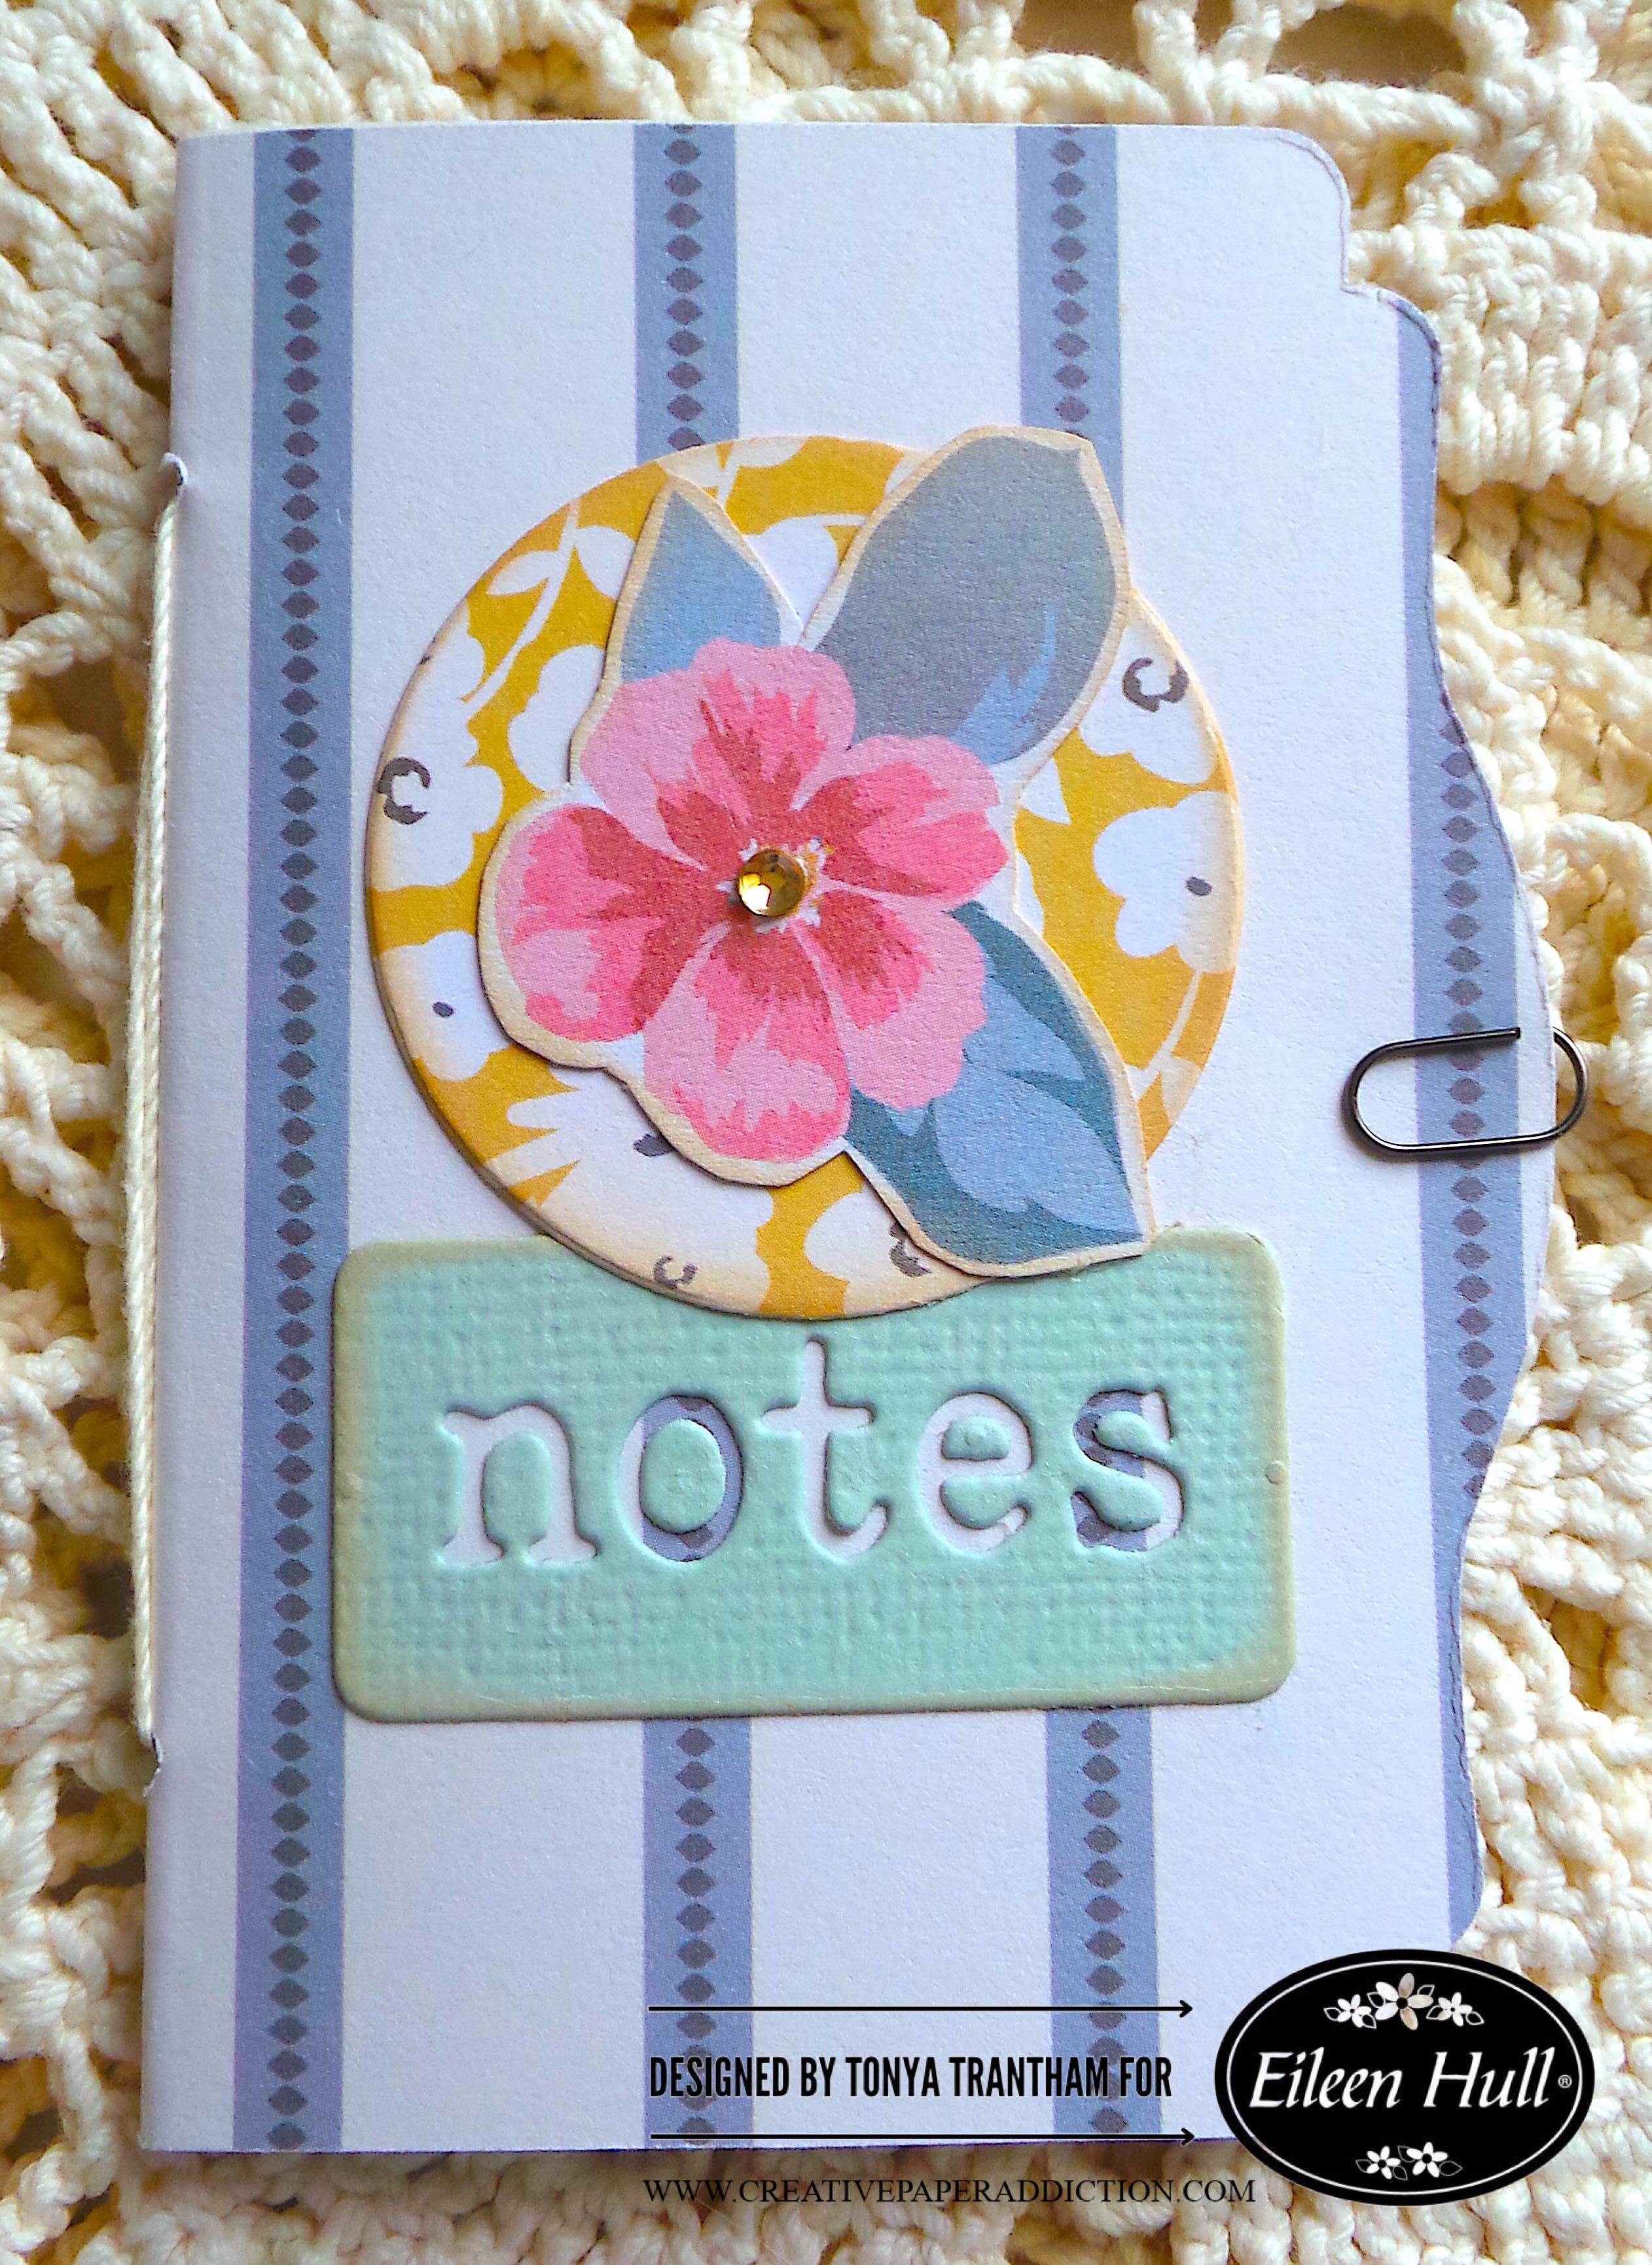
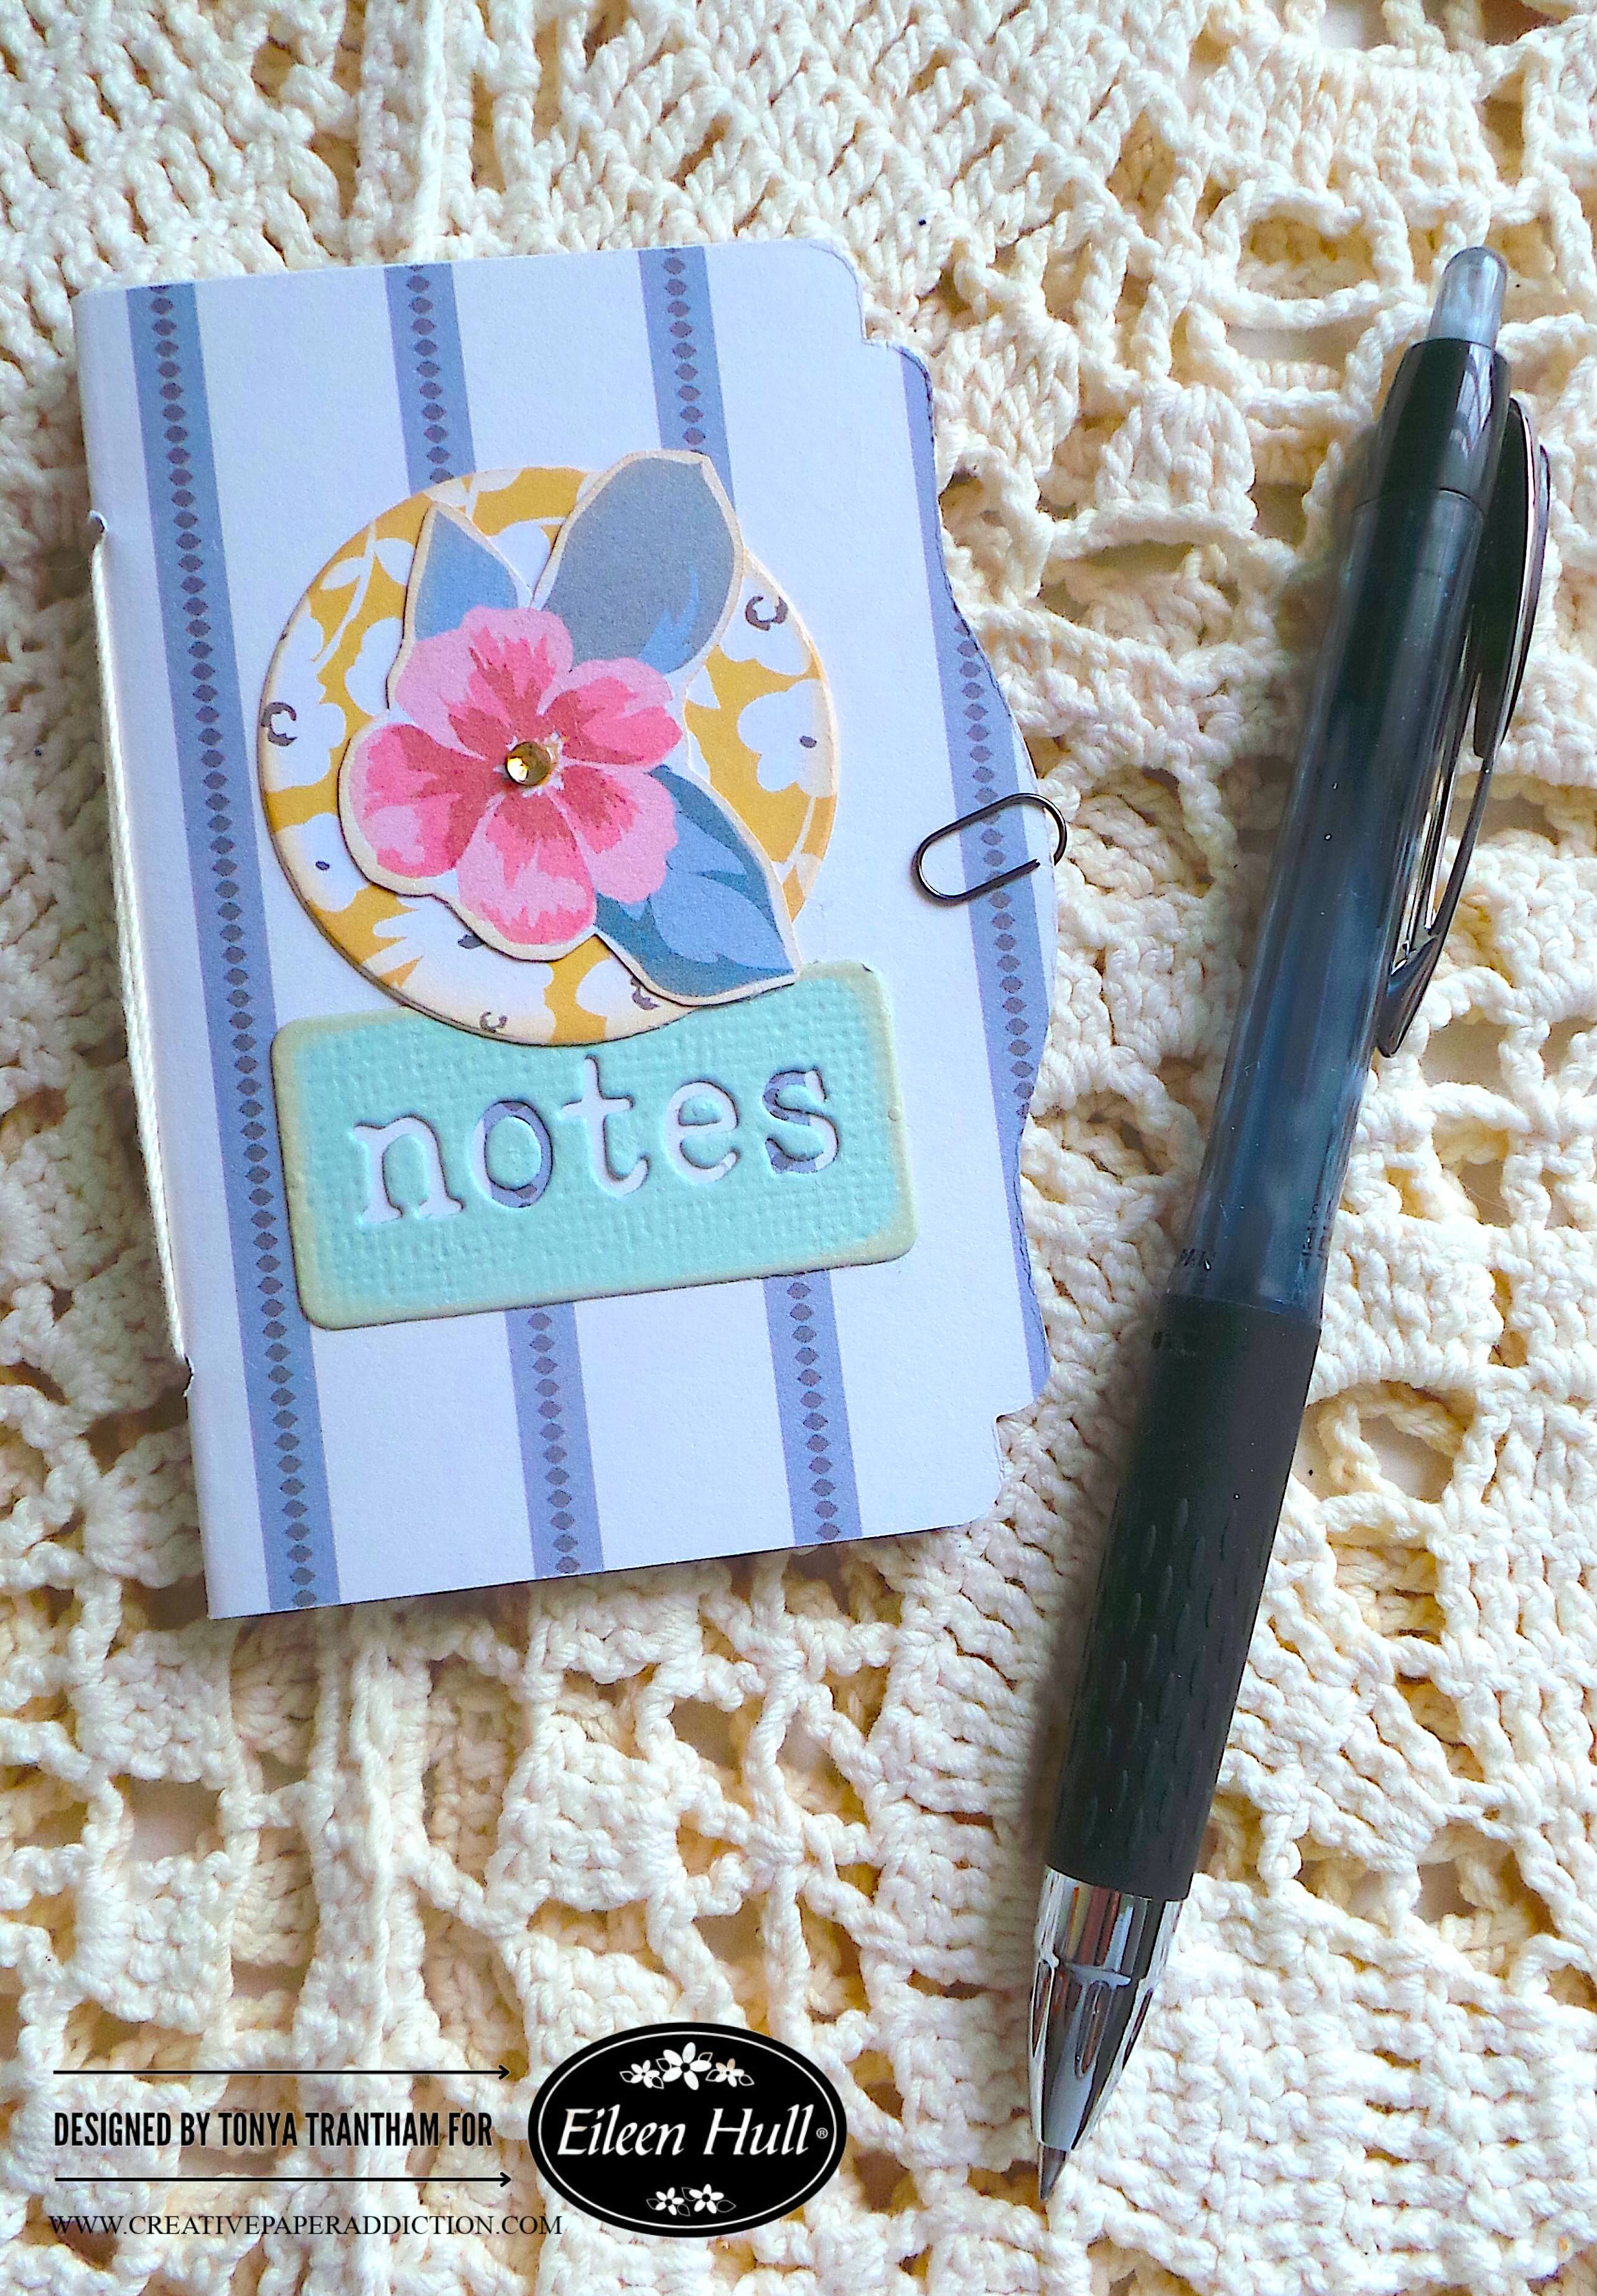
Hi everyone! I know it has been a while since I have made a post. I’ve been working on much needed home projects, gardening and now Eileen Hull’s newest release. But I’m back with a quick and easy project using the Mini Book Diecut and Bookmark, Pockets and Toppers Thinlits. I also used the notes diecut from the Floral Pocket and Paperclips Thinlits. All these dies are by Eileen Hull. Anyways, let get started!

I cut out the notebook cover from the Mini Book Diecut. I also cut four dotted pages to fit inside the notebook. I applied a double sided Adhesive to the back of a piece of cardstock. I placed the “notes” diecut onto the cardstock and run through the Diecut Machine. I also cut out a circle from the Bookmark, Pockets and Toppers Thinlits. Now that I have everything cut out I’m ready to put the notebook together.

I lightly inked the edges of the notebook cover, circle, flower and notes dies. I folded the mini book die and dotted notebook paper in half. I punched two holes in the spine of the mini book and spine of the pages. I threaded a needle with thread. I sewed the pages and covers together and tied off on the inside of the notebook.

I peeled the backing off the adhesive of the notes die and placed onto the cover. Next, I glued the circle and flower slightly above the notes dies.

I added a Mini Gold Gem to the center of the flower. I also used a Mini Paper Clip as a closure to finish.

I have a “bigger” project that I’m working on that this notebook will be eventually be a part of. Hopefully I will be able to share it sooner rather than later.

Also if you haven’t be by Eileen Hull’s blog lately you can find the latest HERE. For the latest happenings sign up for her news letter which can be found on her blog.

Supplies

Sizzix/Eileen Hull: Mini Book Diecut

Sizzix/Eileen Hull: Bookmark, Pockets and Toppers Thinlits

Sizzix/Eileen Hull: Floral Pocket and Paperclips Thinlits

Diecut Machine

Adhesive Roll

Paper Cutter

Scissors

My Mind’s Eye: Gingham Gathered Paper Pad

My Mind’s Eye: Wildflowers Mixed Bag Embellishments

Cardstock

Dotted Notebook Paper ( Office Supply Store)

Mini Gold Gem

Mini Paper Clip

Brown Chalk Ink

Crop-A-Dile

Needle and Thread

Beacon Adhesives: Zip Dry Adhesive

(Products listed above are Affiliated Links for your convenience)

DISCLAIMERS

This blog is compensated to provide opinion on products, services, websites, and various other topics. Even though the owner(s) of this blog receives compensation for our posts or advertisements. I always give my honest opinions, findings, beliefs, or experiences on those topics or products. The views and opinions expressed on this blog are purely my own. Any product claim, statistic, or quote should be checked with each manufacturer. Verify other representations about a product or service with the provider or party in question.This blog contains affiliate links. Clicking these links helps to support Tonya Trantham Designs – Creative Paper Addiction. It runs at no additional cost to you. Today’s features are Sizzix, Eileen Hull and Scrapbook.com Products. 

Thanks for stopping by, I hope your Monday is great and enjoy creating!

Creative Ways to Personalize a Notepad

Hi everyone! I’m back with a quick easy project I created. I decorated the cover of a store bought notepad using an assortment dies and embossing folder by Eileen Hull. So let’s get started!

Confession time! I have a problem picking up notepads when I’m out shopping. I have a mass collection of notepads in different sizes and styles. It’s to the point that if I have to give a gift a notepad is added to their gift. Anyways, I dug into my stash and decided to use this 4″X 6″ notepad to decorate.

I cut a piece of elastic three inches long. I adhered one side of the elastic to the back of the notepad. I wrapped the other side of the elastic around an ink pen. I removed the ink pen before gluing on top of the other side of the elastic.

I cut to fit a piece of pink cardstock and glued to the back of the notepad.

I cut to fit another piece of pink cardstock and adhered to the front. I cut a bookmark from the Bookmark, Pockets and Toppers Thinlits. I embossed with the Floral Damask A5 Embossing Folder and applied Gold Luster Wax over the raised areas. I then adhered to the cover.

I cut a journaling card, bird and Parfum bottles from the Rose Parfum Collection (Discontinued). I cut two mats, each slightly larger than the other. I glued the journaling card and mats on top of each other before gluing to the cover.

I cut the “notes” die out from the Floral Pocket and Paperclips Thinlits. I cut a mat slightly larger than the die and lightly inked with Brown Chalk Ink. I glued both onto the cover. I finished by adhering Parfum bottles, a bird and Gold Gems to the cover.

There’s so many ways you can decorate these notepad. Add an initial, name and nice ink pen and poof you have a nice personalized gift.

If you haven’t been by Eileen Hull’s blog lately you can find out what the team is doing HERE. Also questions and comments are always welcome. Please leave those below.

Supplies

Sizzix/Eileen Hull: Floral Pocket and Paperclips Thinlits

Sizzix/Eileen Hull: Bookmark, Pockets and Toppers Thinlits

Sizzix/Eileen Hull: Floral Damask A5 Embossing Folder

Diecut Machine

Gold Luster Wax

Notepad and Ink Pen

Elastic

Paper Cutter

Scissors

Brown Chalk Ink

Gold Gems

Stamperia: Rose Parfum Collection (Discontinued)

Pink and Mint Green Cardstock

Beacon Adhesives: Zip Dry Adhesive

(Products listed above are Affiliated Links for your convenience)

DISCLAIMERS

This blog is compensated to provide opinion on products, services, websites, and various other topics. Even though the owner(s) of this blog receives compensation for our posts or advertisements. I always give my honest opinions, findings, beliefs, or experiences on those topics or products. The views and opinions expressed on this blog are purely my own. Any product claim, statistic, or quote should be checked with each manufacturer. Verify other representations about a product or service with the provider or party in question.This blog contains affiliate linksClicking these links helps to support Tonya Trantham Designs – Creative Paper Addiction. It runs at no additional cost to you. Today’s features are Sizzix, Eileen Hull and Scrapbook.com Products. 

Thanks for stopping by, hope your Monday is great and enjoy creating!

Create a Prayer Journal with What You Have on Hand

Hi everyone! The theme this month is”anything goes” with Eileen Hull’s Inspiration Team. I’ve a stack of unfinished projects lying around collecting dust and thought I really need to finish this prayer journal. I’m ashamed to say this journal is promised to someone. Family and life got in the way and I could never find enough time to finish. But I can now say it’s done!

I didn’t take step out photos of the process but will give a little back ground of what I created. I also have attached a flip through video of the journal.

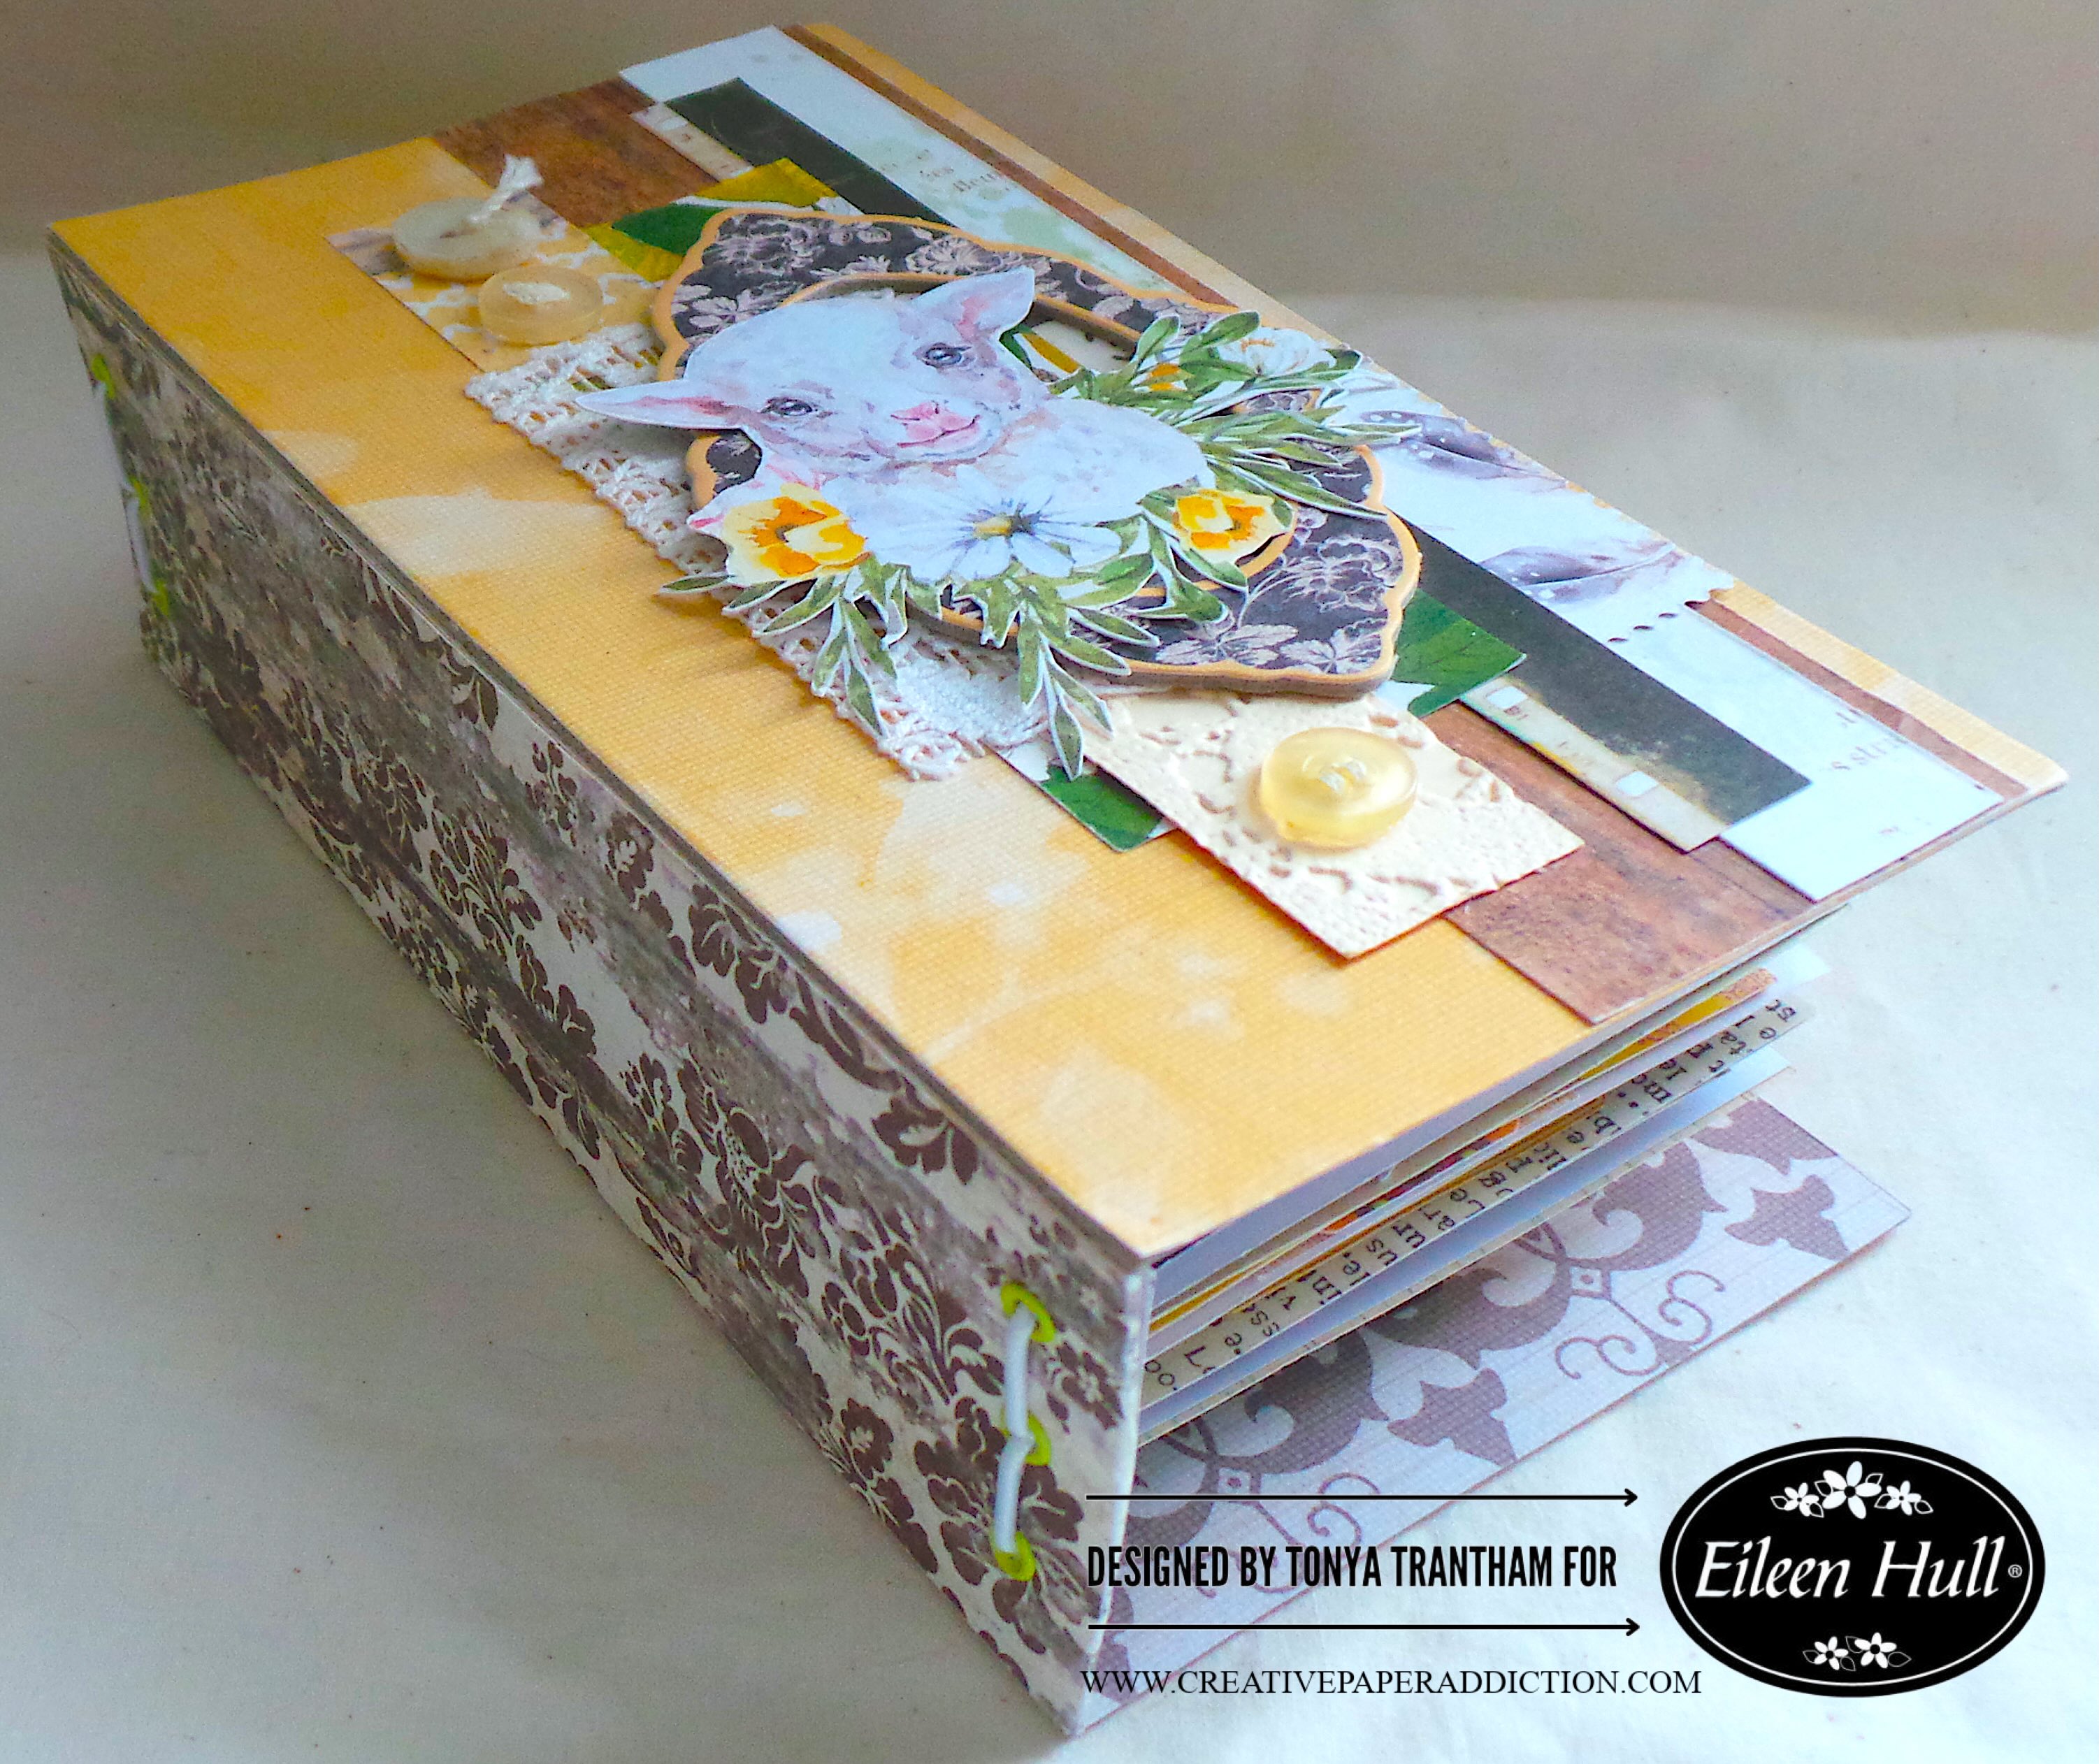
I used the Skinny Mini Book Box Diecut to create the cover of the journal. I cut out two covers for the Skinny Mini Book Box Diecut. This is with applying Double Sided Adhesive to both sides of Mat Board and cardstock too. I extended the spine out to the maximum width by gluing the end tabs of each spine together. I wrapped the outside of the spine with a patterned cardstock. I punched a total of six holes, three on the top and three on the bottom of the spine. I cut and adhered a piece of cardstock to fit the inside of the spine. I poked holes through the cardstock I glued inside the spine. I used the Crop-A-Dile to attach Eyelets in the spine. I strung elastic cording through the holes and tied off inside the journal.

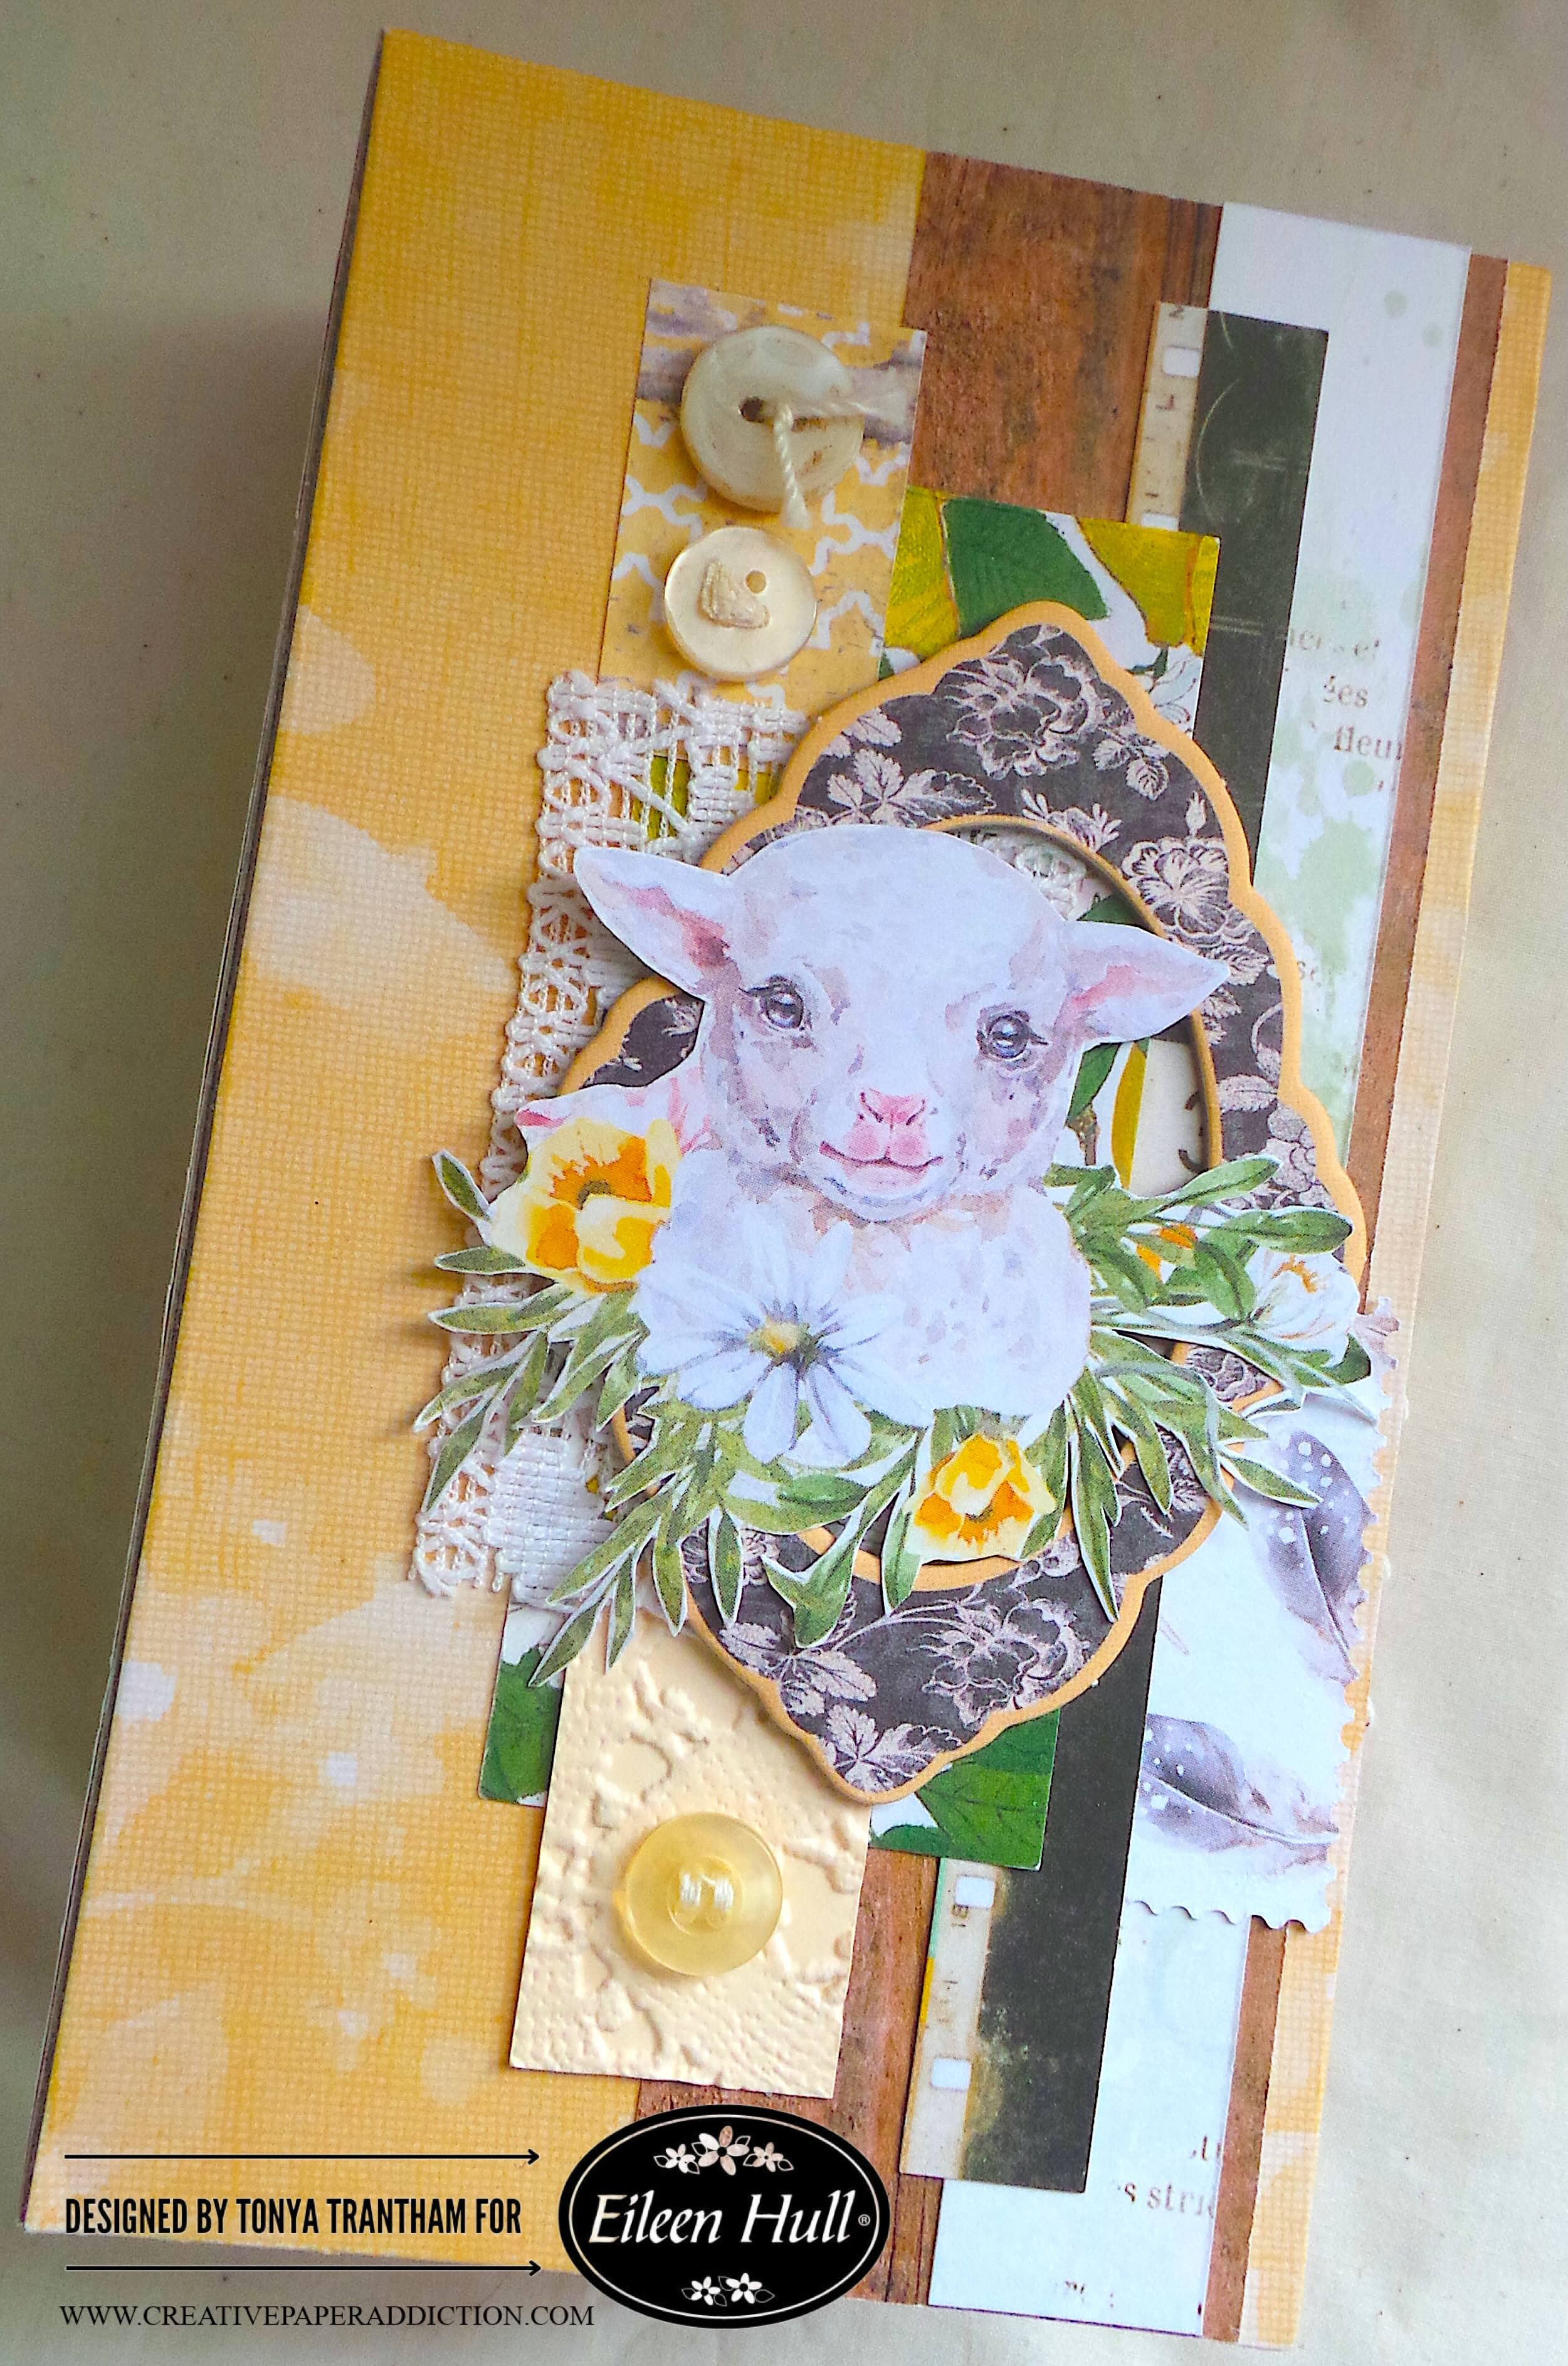
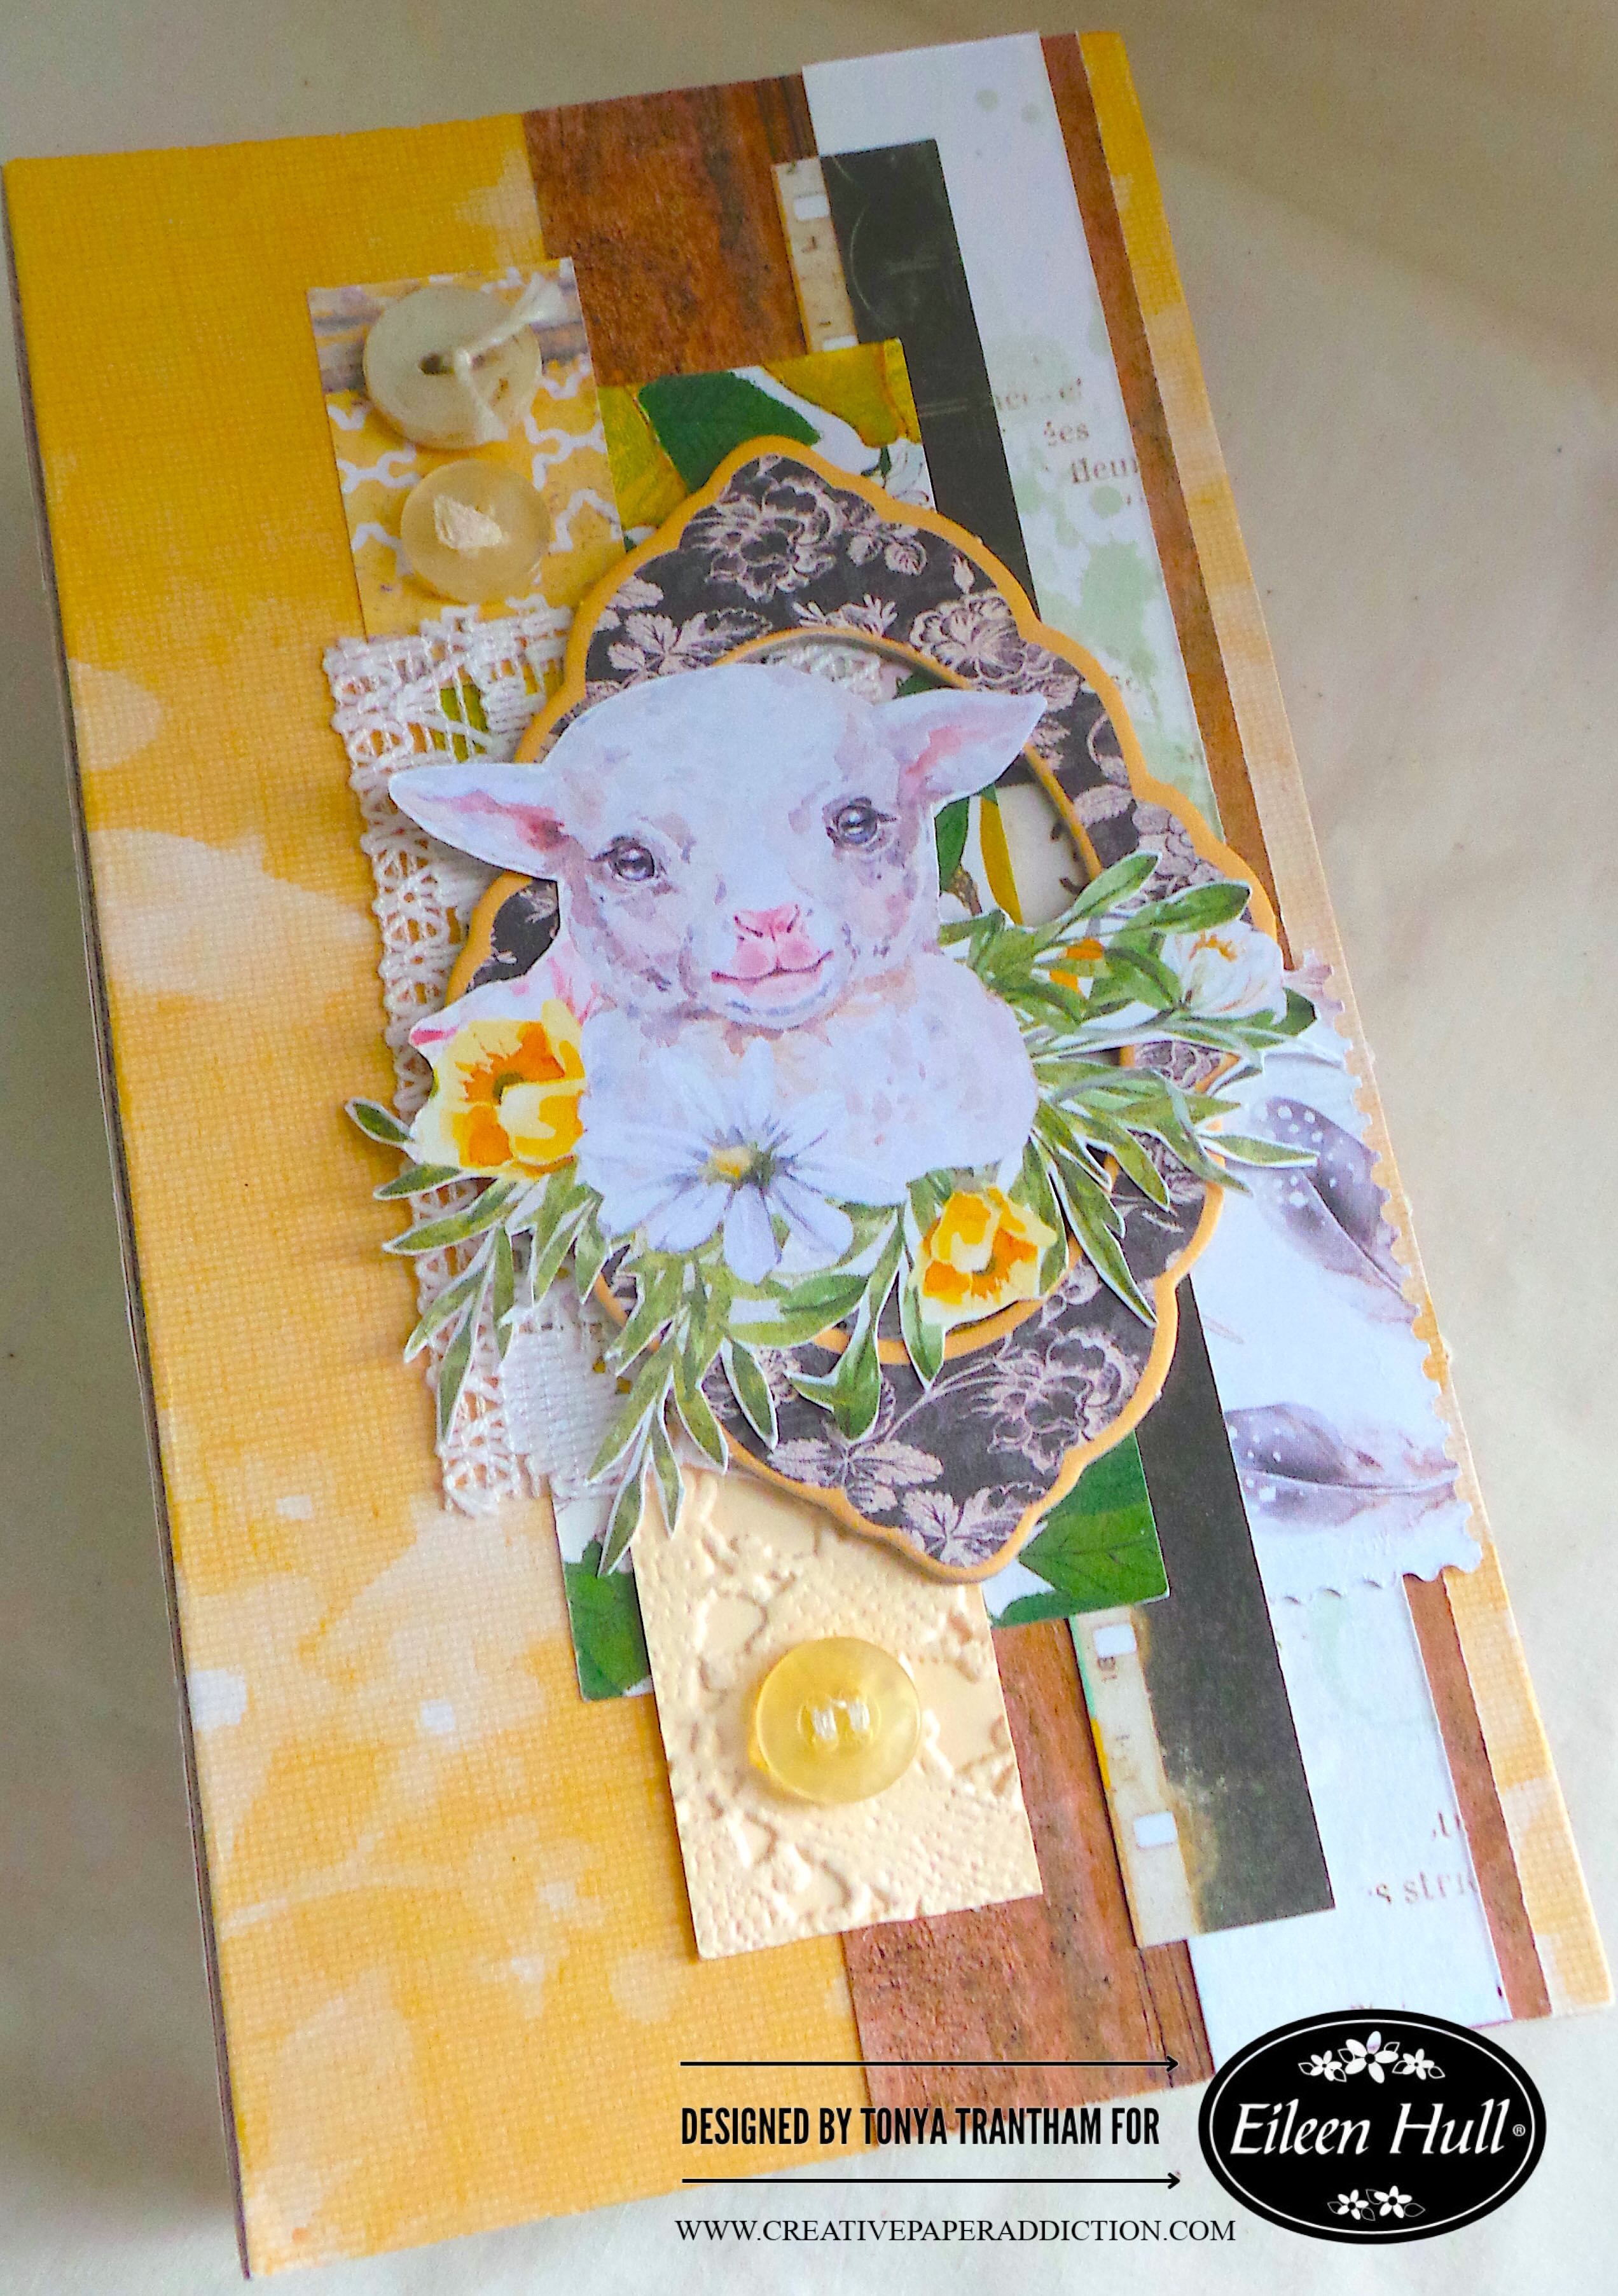
I glued strips of patterned cardstock vertically to the cover of the journal. I added a bit of lace to the cover, a scrap piece of embossed cardstock from the Faux Postage Thinlits. I also glued a postage stamp that I had cut from the Faux Postage Thinlits. I dug into my chipboard pieces and adhered a frame off center the cover. I fussy cut the lamb from the Farm Sweet Farm Collection and glued onto the frame. I added three vintage buttons to the cover to finish.

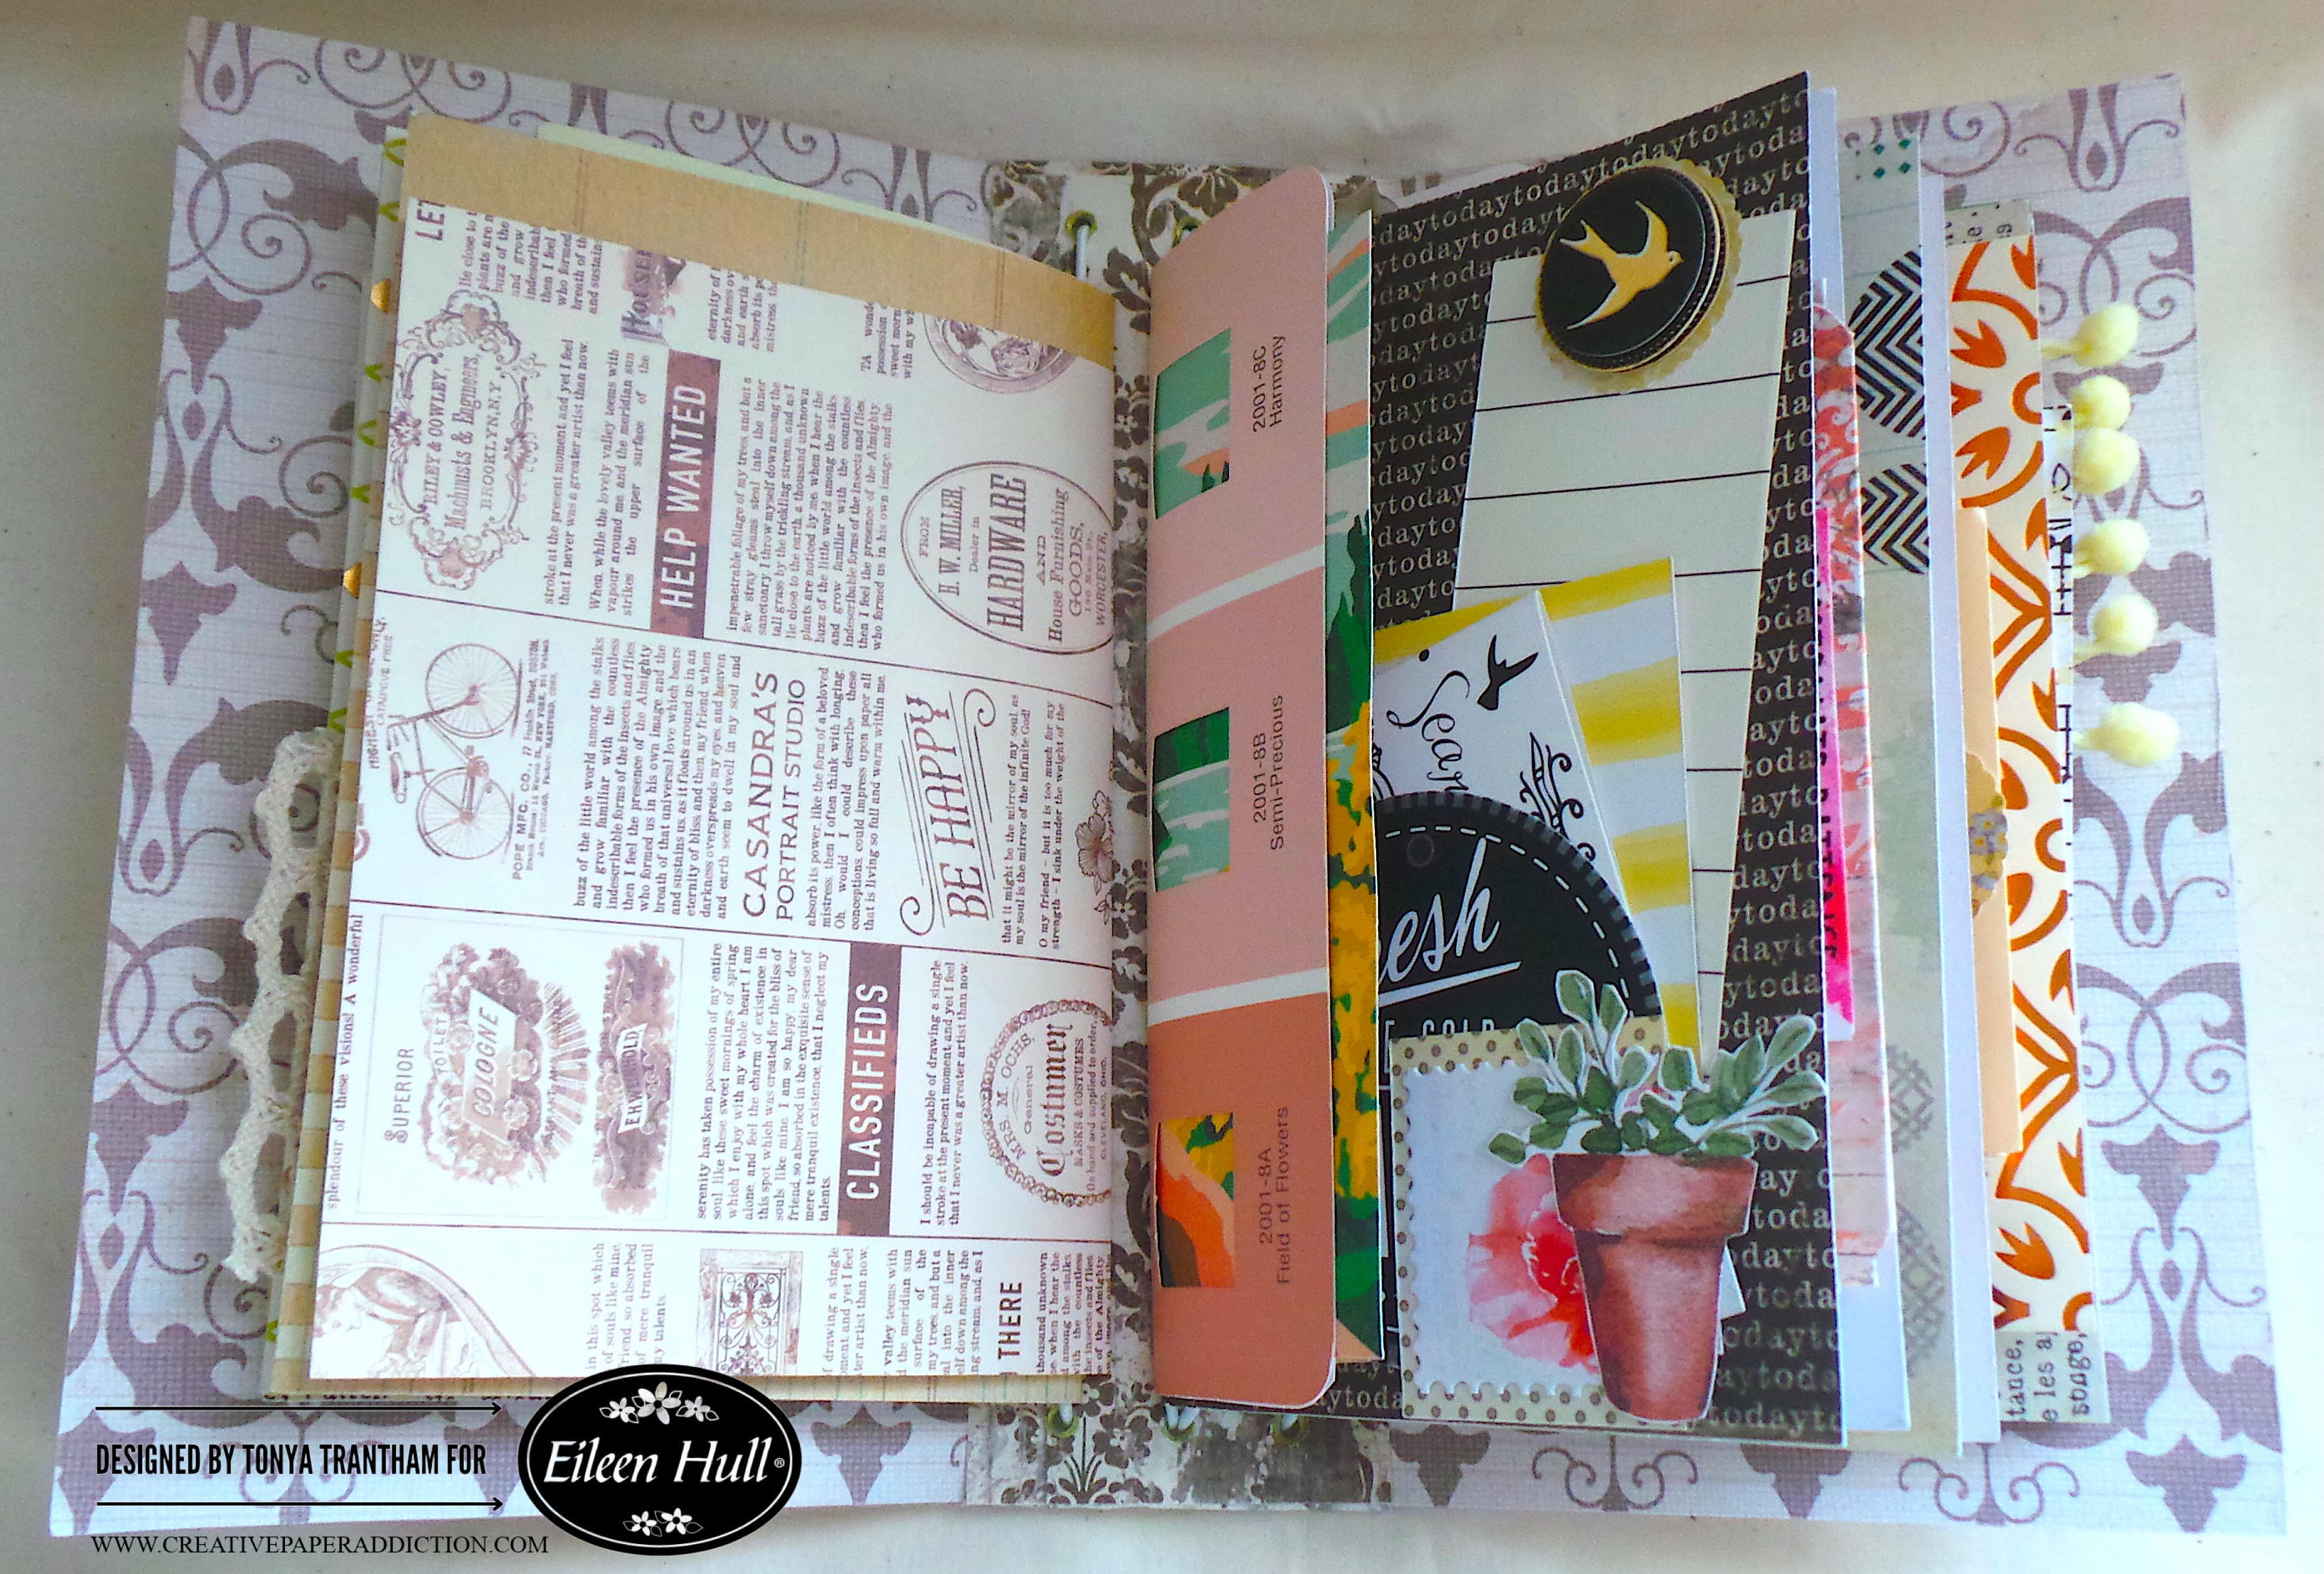
The inside pages has four signatures with three pages per signature.

I used a lot of inspirational/religious embellishments through the journal.

I used paint chips as pages.

There’s plenty of tuck spots for journaling and adding photos.

I was finally able to find a home for the collection of stickers from my stash.

The video is attached and be sure to click the link below to view the flip through.

Prayer Journal Flip Through Video

Also if you have any questions about this journal please leave a comment section.

Supplies

Sizzix/Eileen Hull: Skinny Mini Book Box Diecut

Sizzix/Eileen Hull: Tablecloth Embossing Folder

Sizzix/Eileen Hull: Faux Postage Thinlits

Diecut Machine

Mat Board

Double Sided Adhesive

Paper Cutter

Scissors

Crop-A-Dile

Eyelets

P13: Farm Sweet Farm Collection

Various Cardstocks, Paint Chips, Chipboard Pieces, Stickers and Journaling Cards

Buttons, Lace and Pom Pom Trim

Elastic Cording

Mini Paper Clips

Gold Gems

Beacon Adhesives: Zip Dry Adhesive

(Products listed above are Affiliated Links for your convenience)

DISCLAIMERS

This blog is compensated to provide opinion on products, services, websites, and various other topics. Even though the owner(s) of this blog receives compensation for our posts or advertisements. I always give my honest opinions, findings, beliefs, or experiences on those topics or products. The views and opinions expressed on this blog are purely my own. Any product claim, statistic, or quote should be checked with each manufacturer. Verify other representations about a product or service with the provider or party in question.This blog contains affiliate linksClicking these links helps to support Tonya Trantham Designs – Creative Paper Addiction. It runs at no additional cost to you. Today’s features are Sizzix, Eileen Hull and Scrapbook.com Products.

Thanks for stopping by, hope your Monday is wonderful and enjoy creating!
 

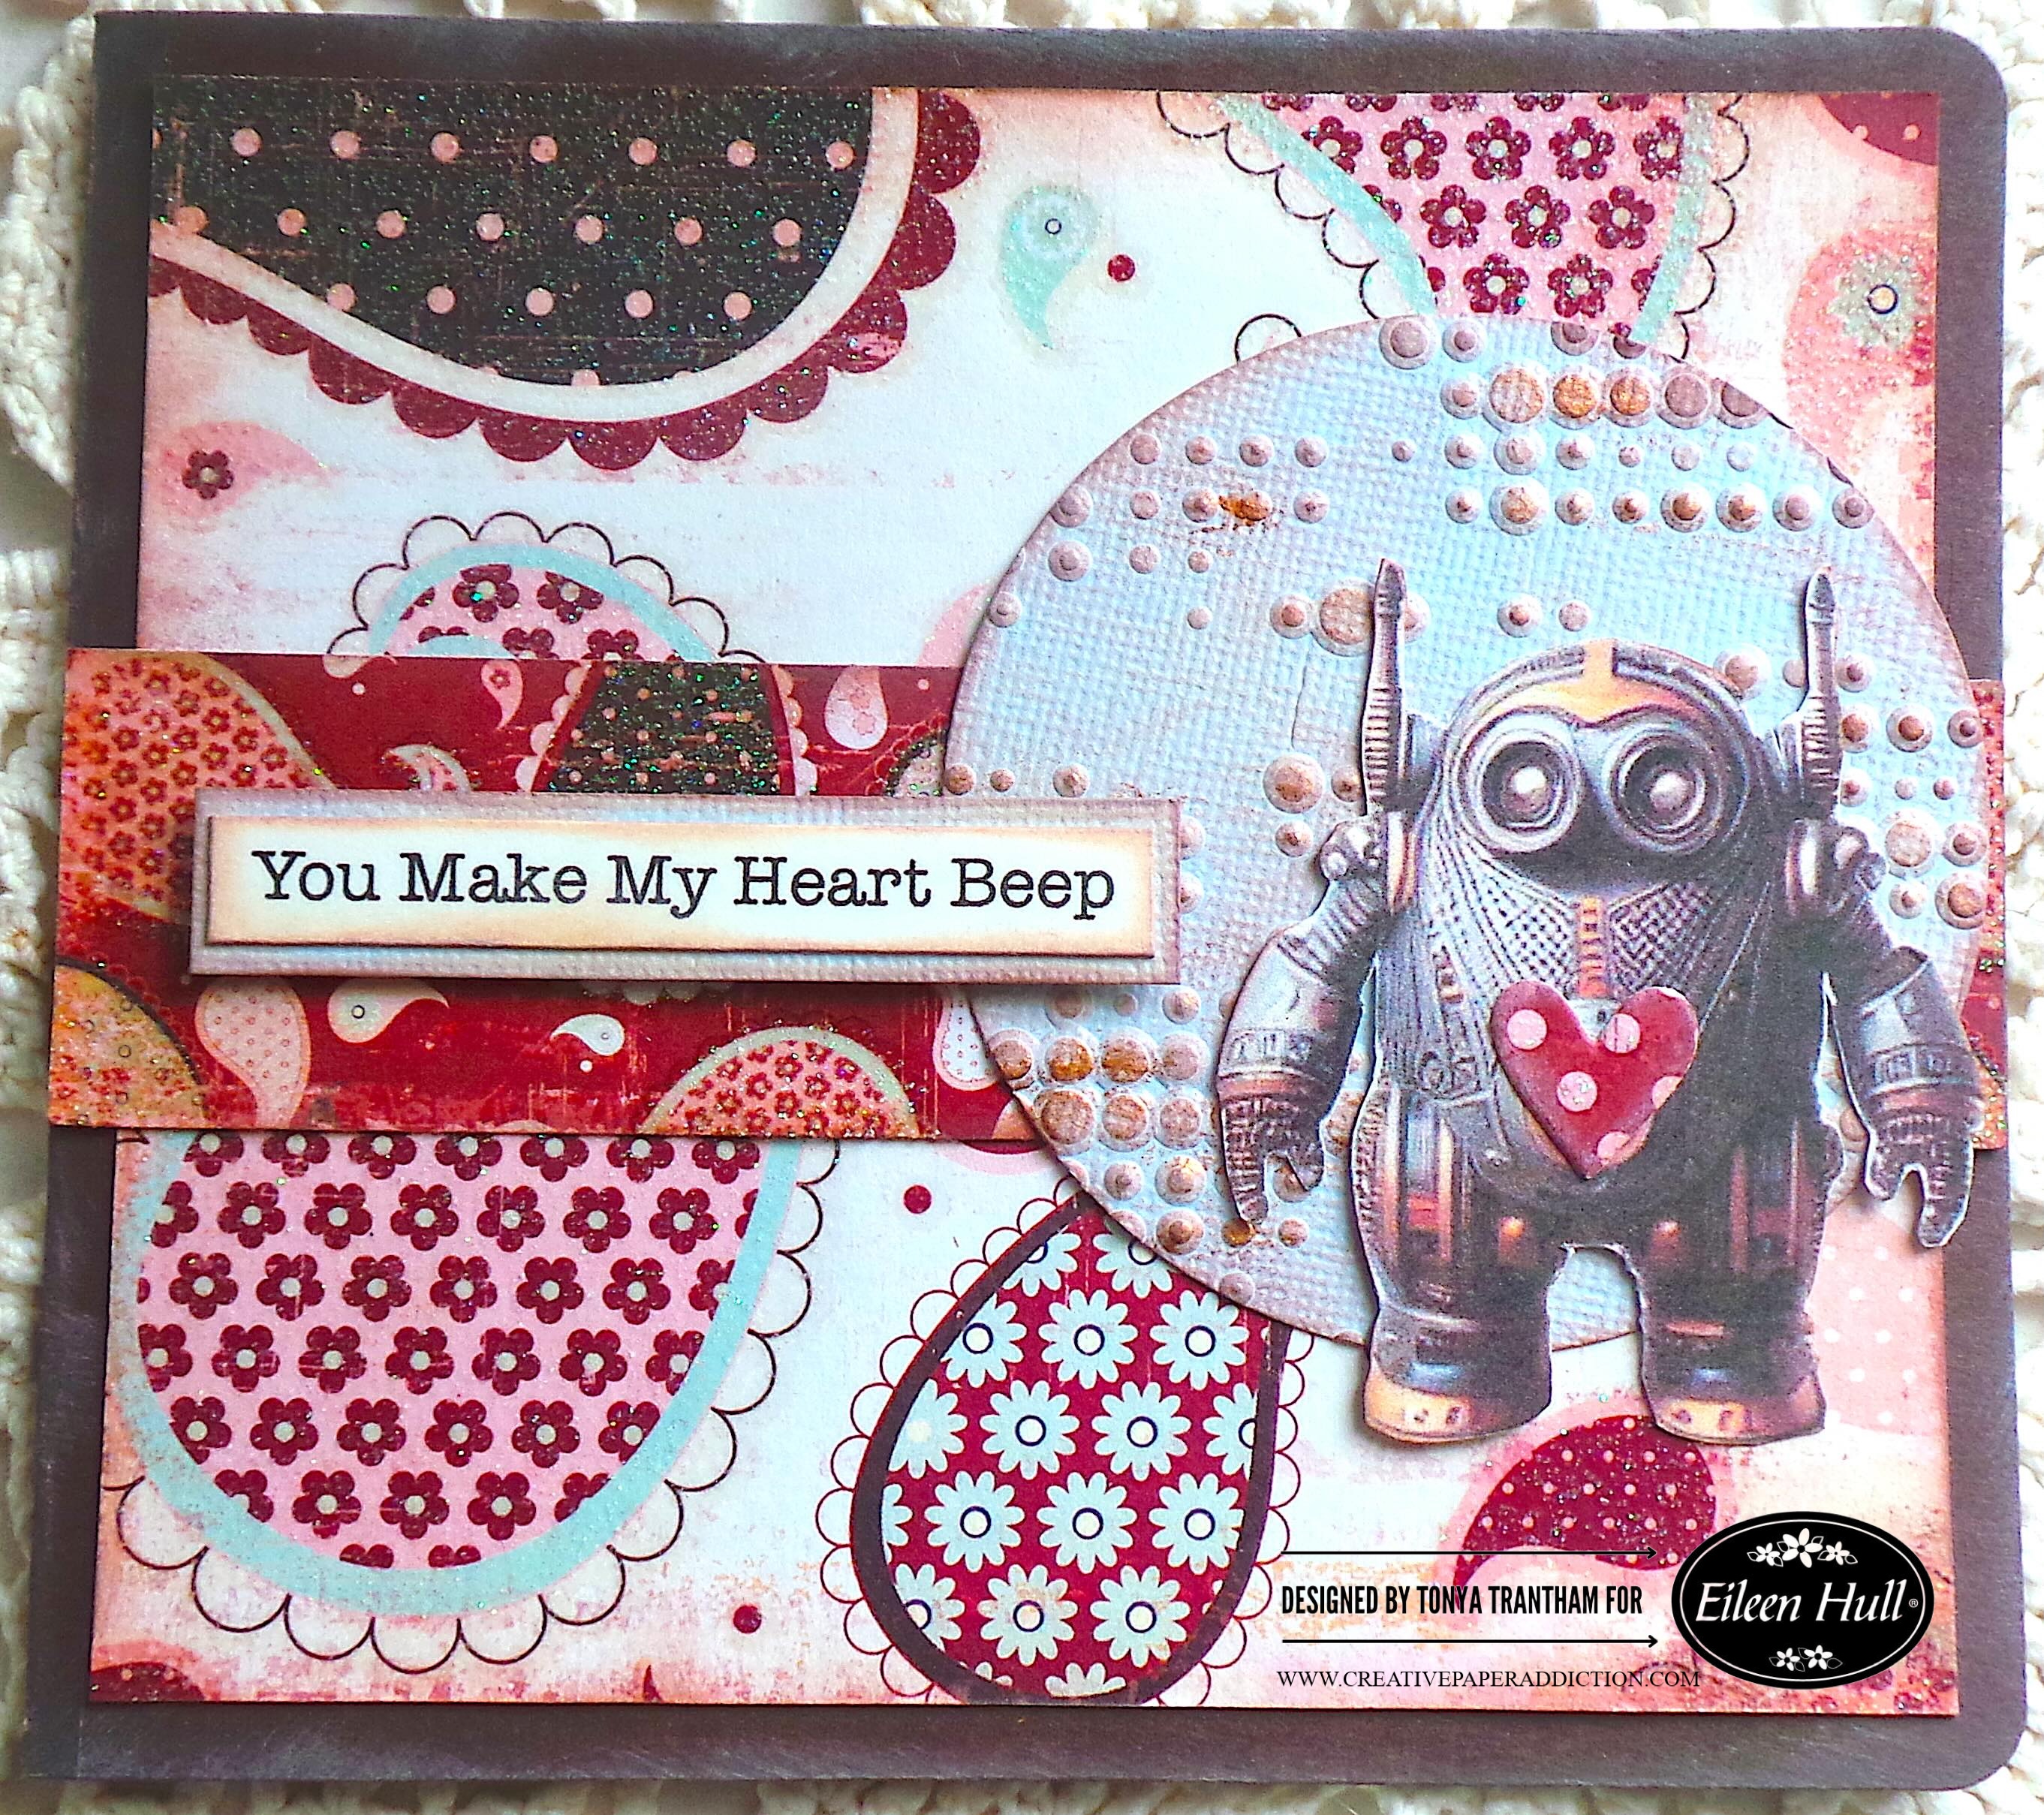
Robot Valentine’s Day Card: You Make My Heart Beep

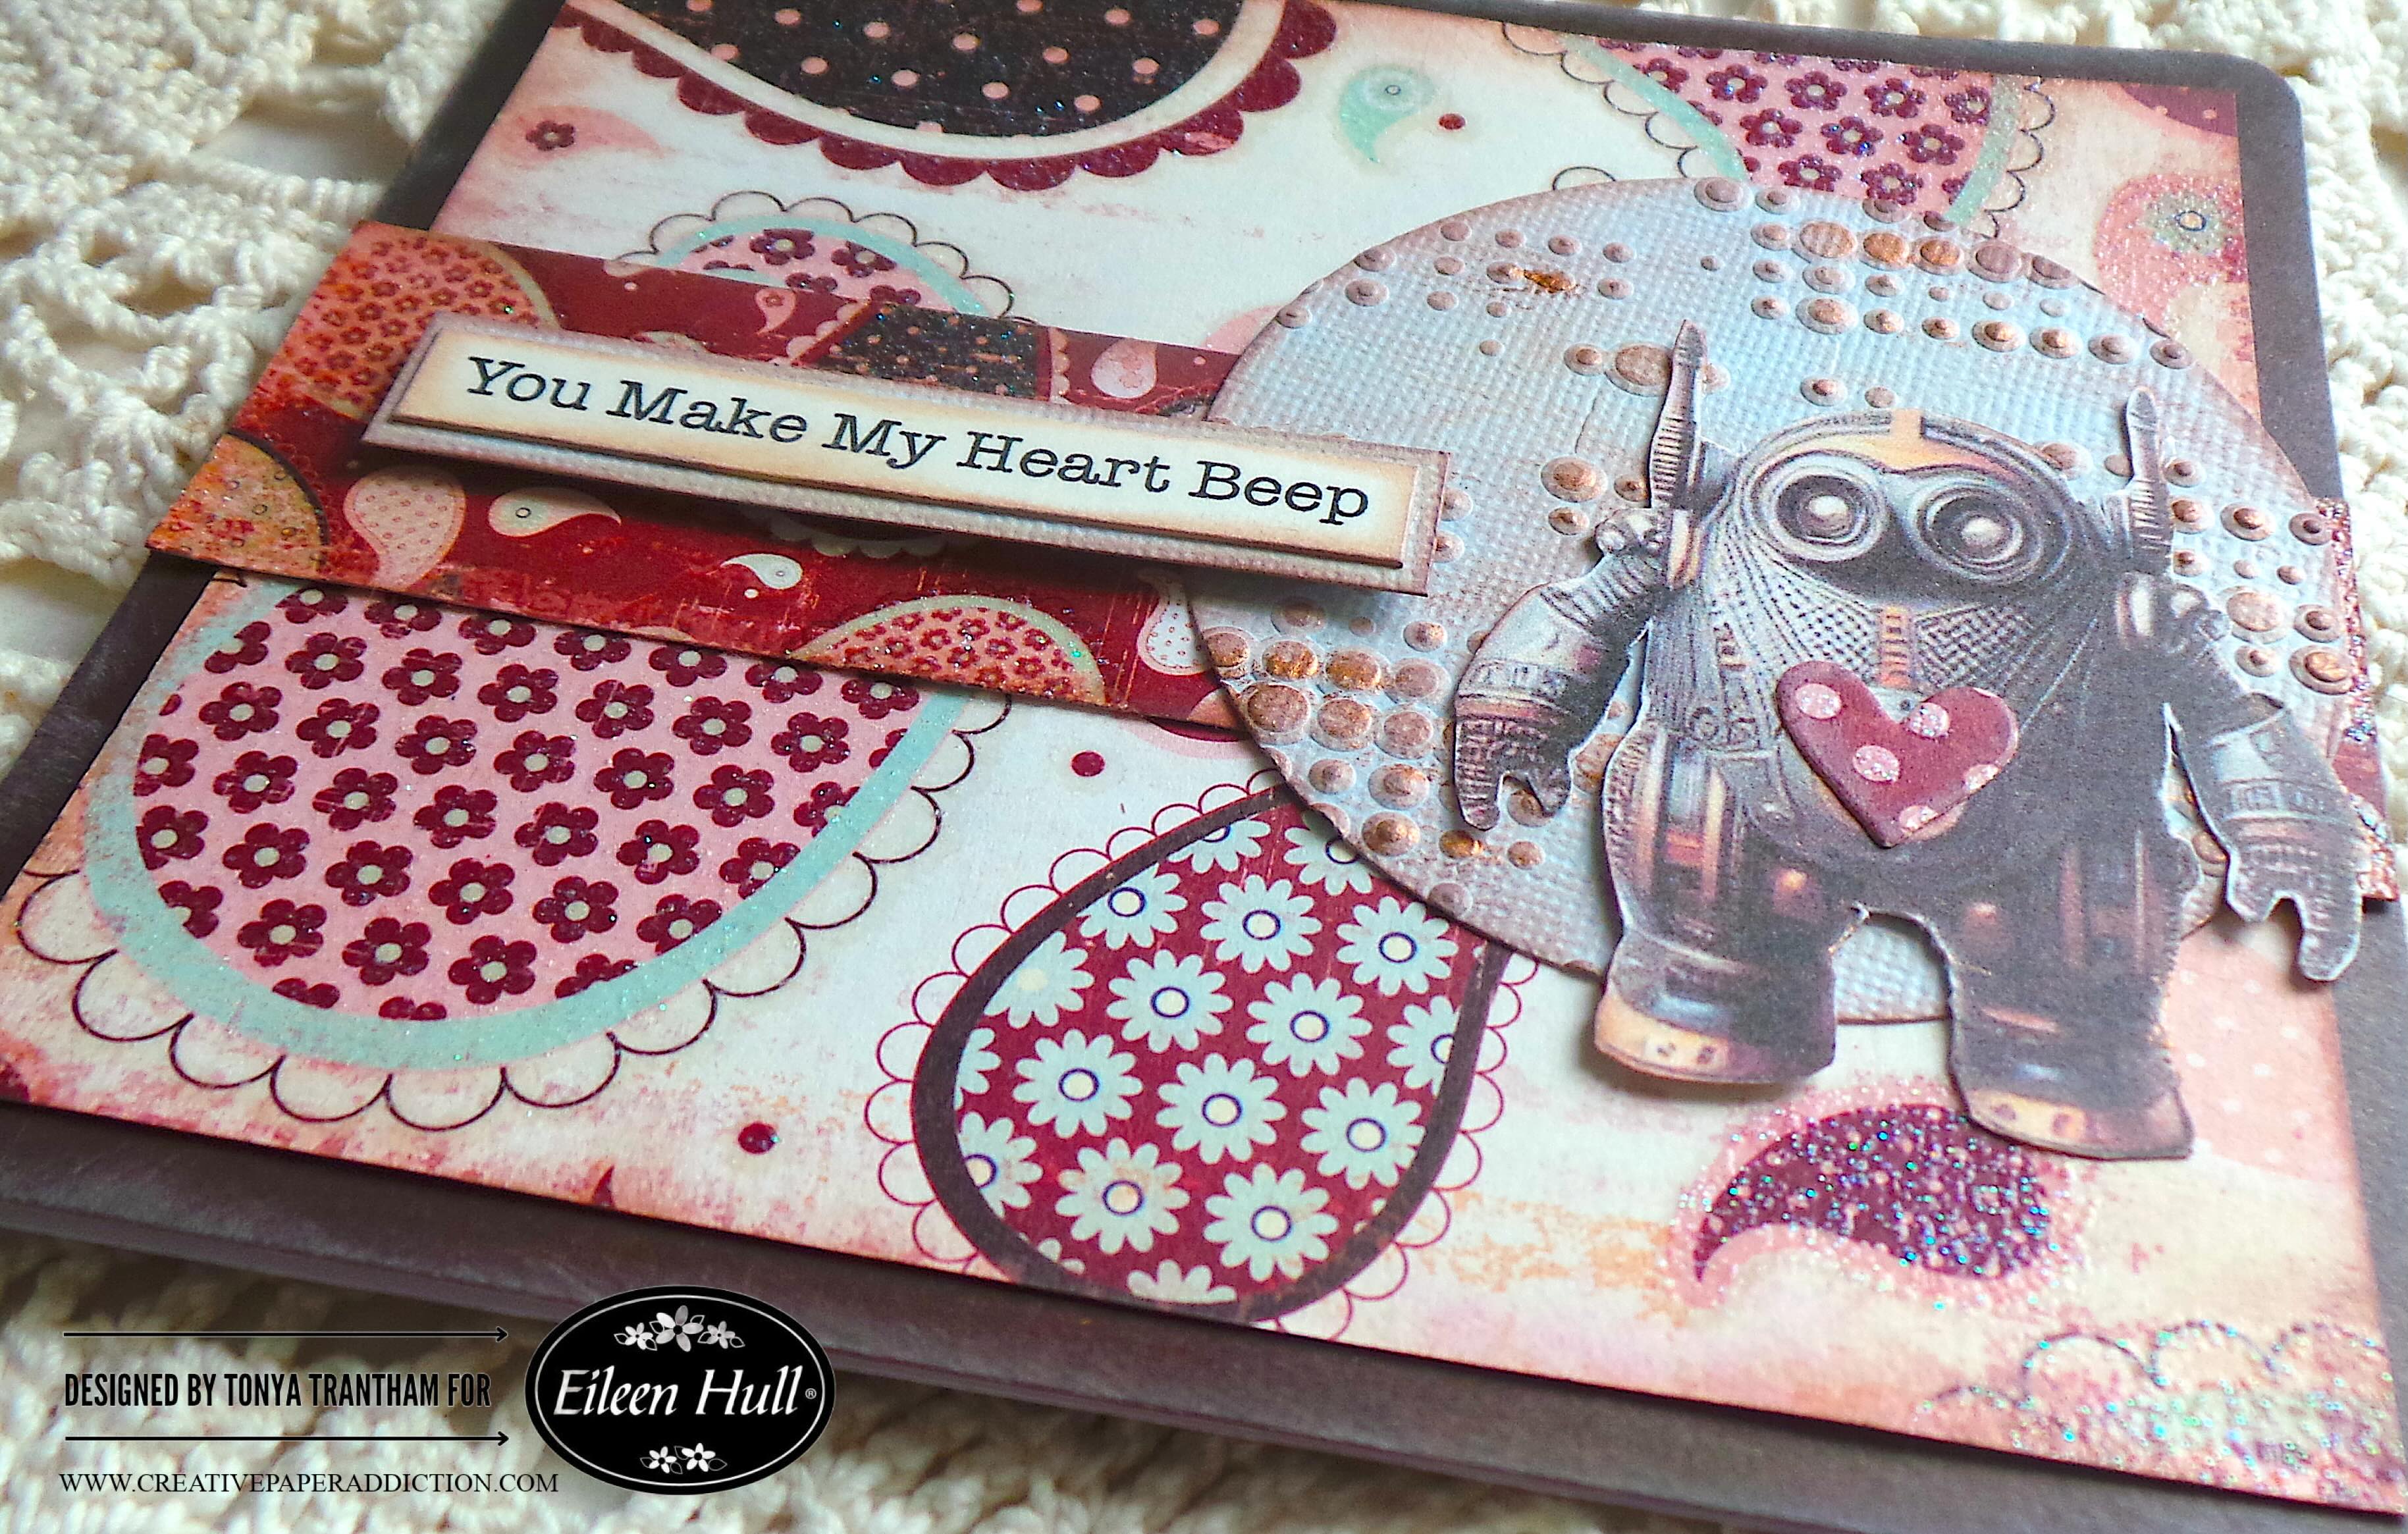
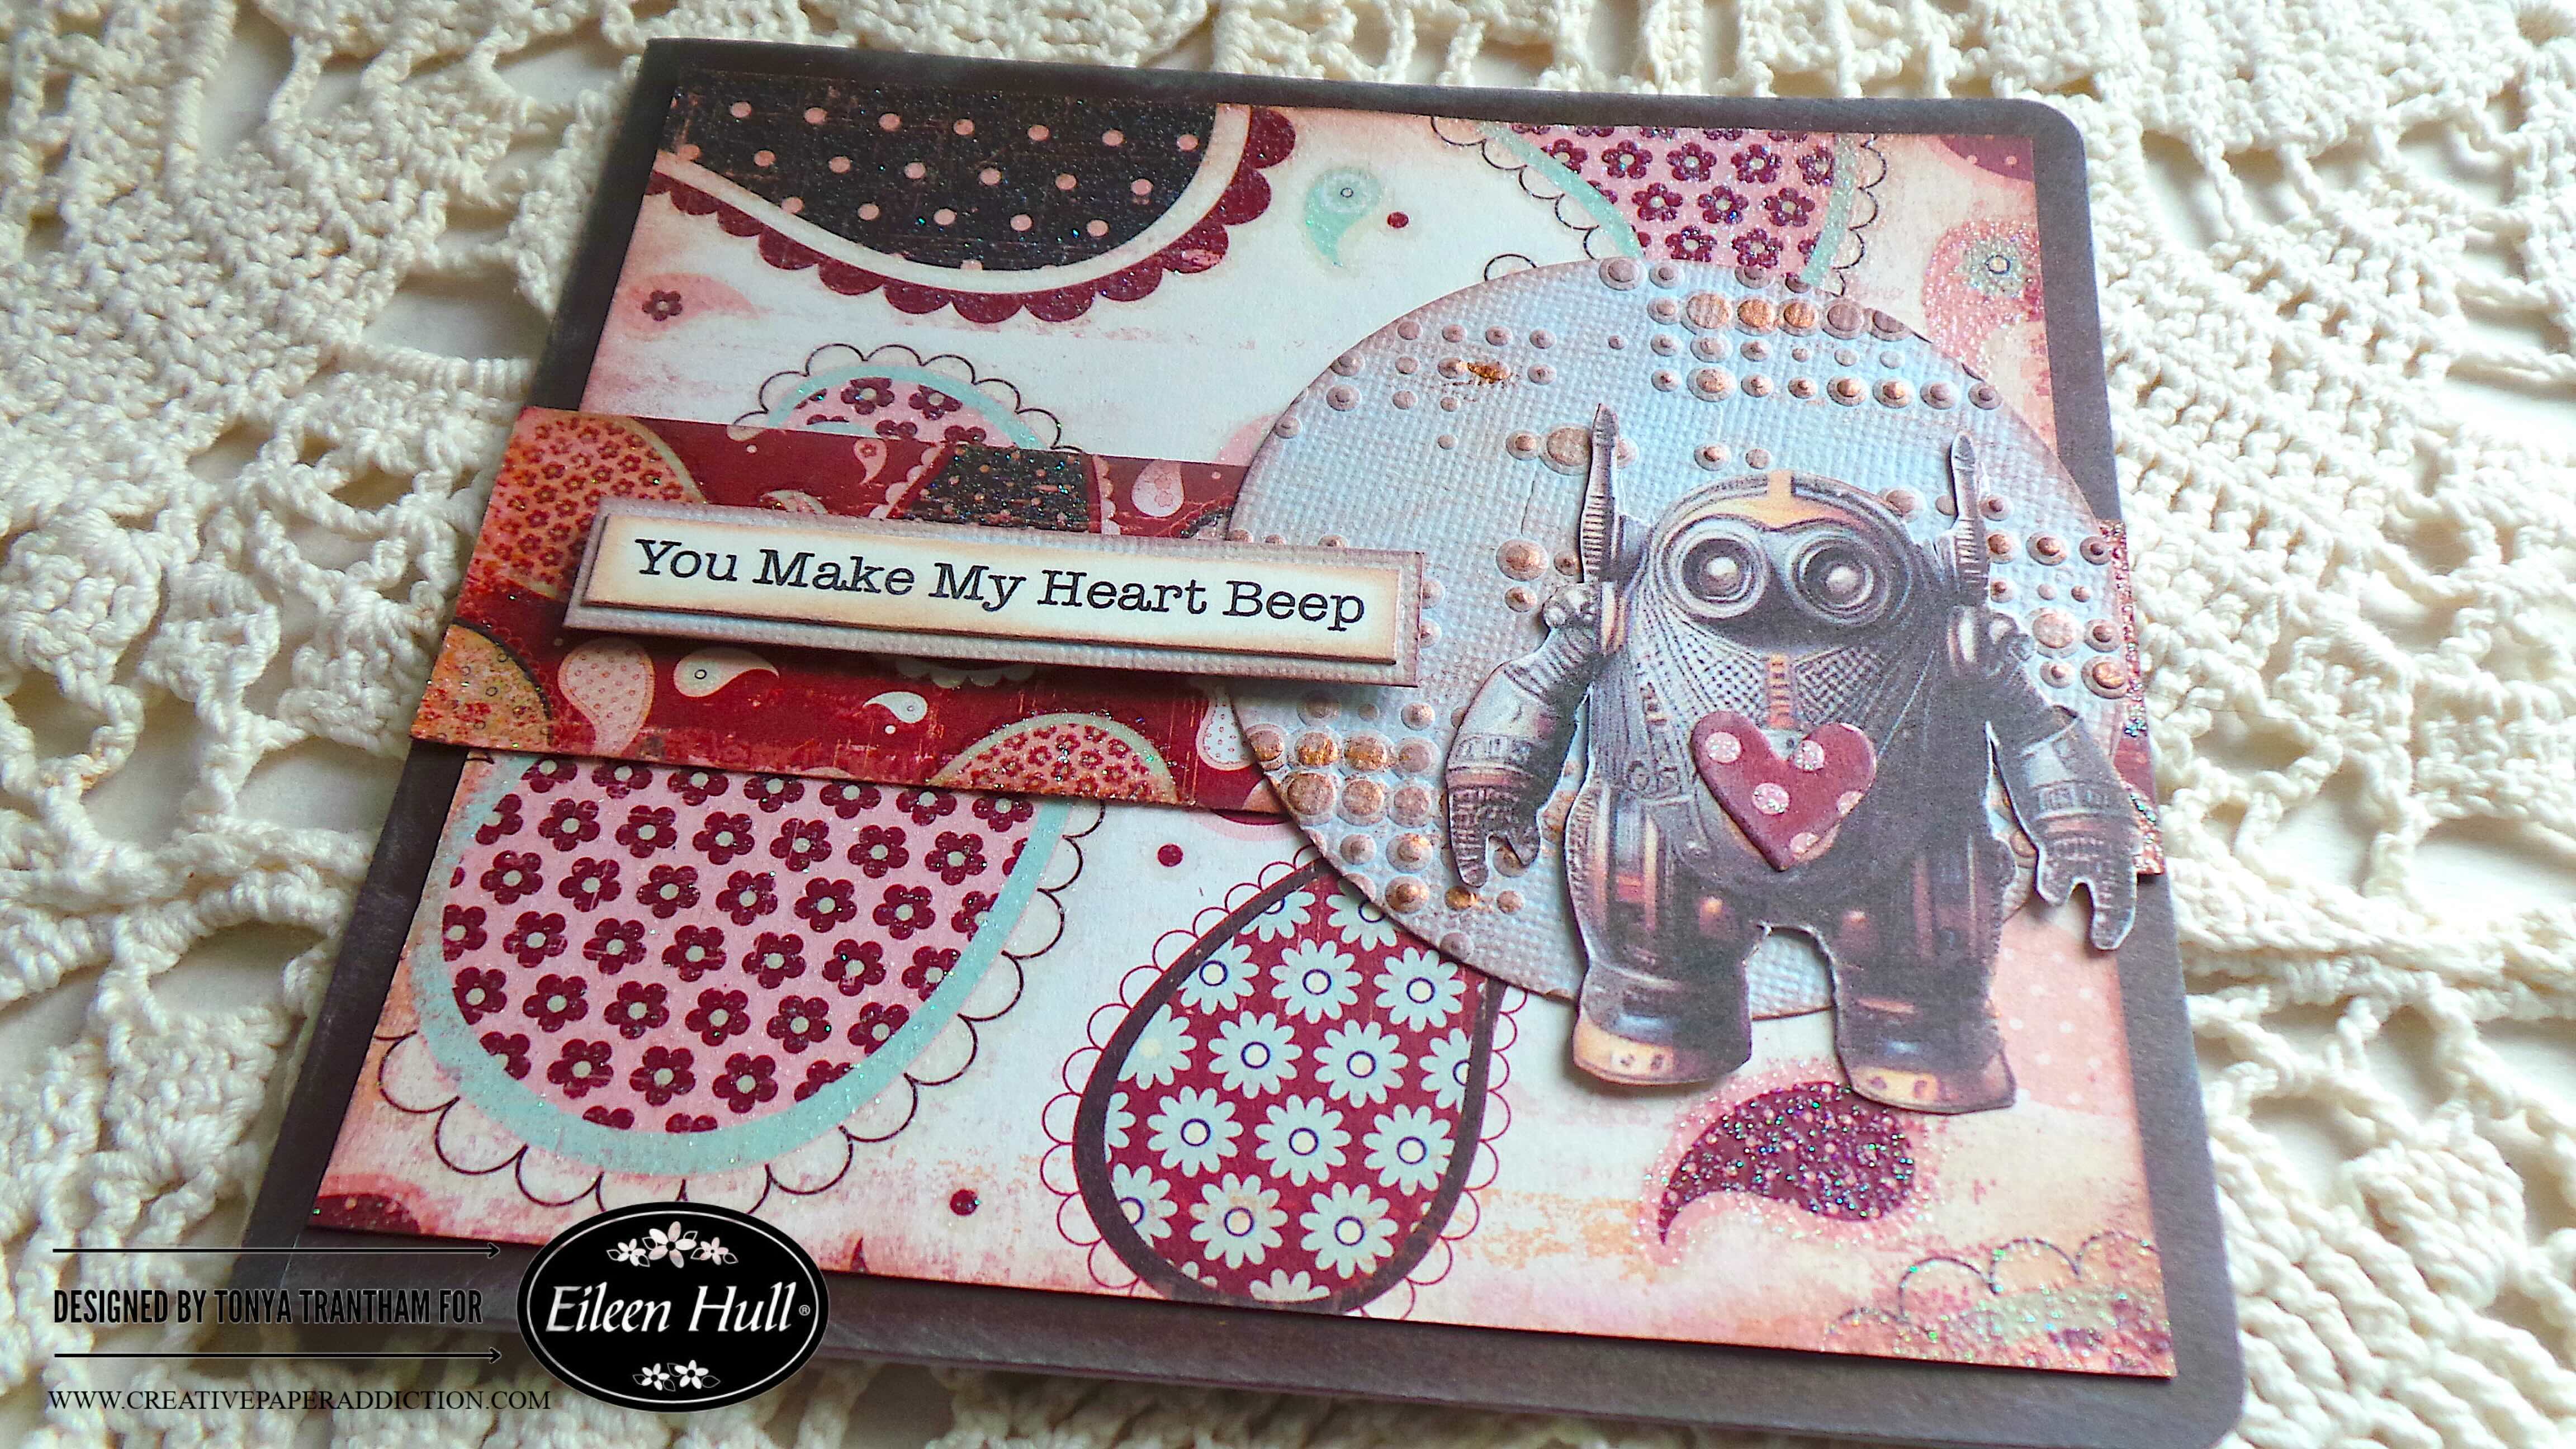
Hi everyone! Valentine’s Day is only a couple of days away and I want to share a quick card I made. I used the Mini Album Diecut as the base for the card. I used a few other dies and thinlits by Eileen Hull. Also this month it’s “Anything Goes” with Eileen Hull’s Inspiration Team. Anyways, let’s get started!

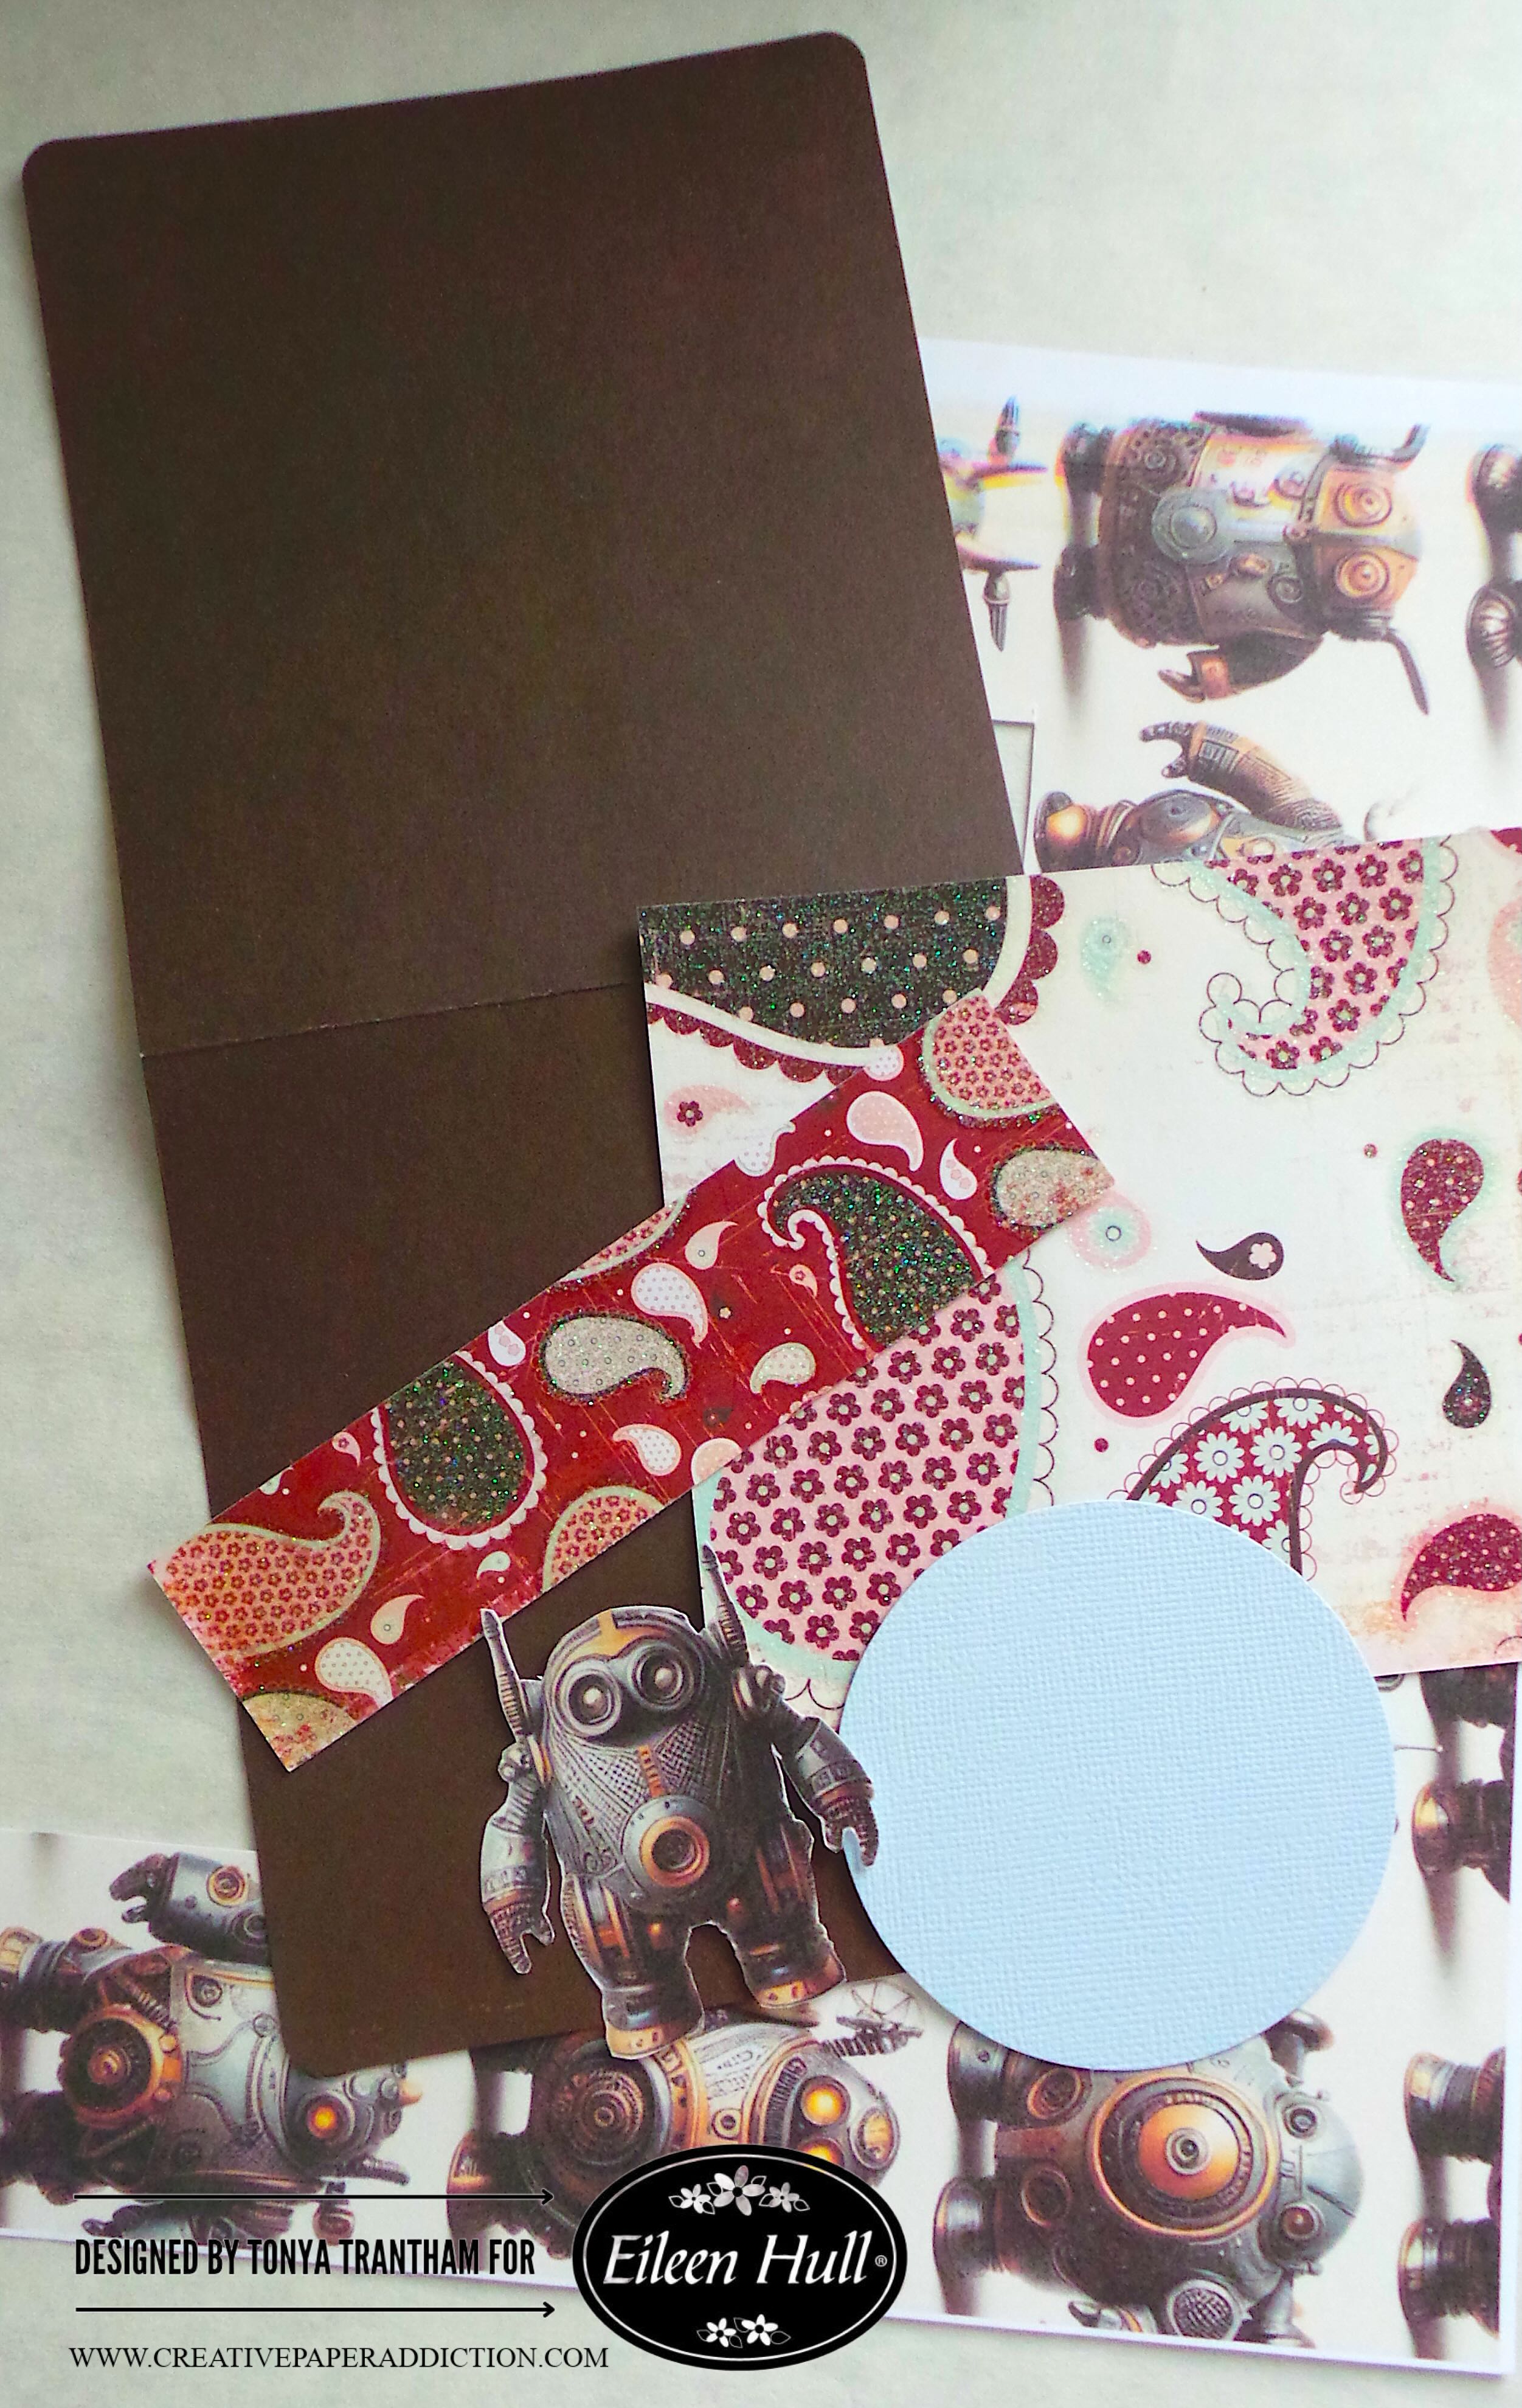
First, I would like to share a side note about the robot printable I used. I had been fooling around on AI creating images and I came up with these fat, steampunk and vintage robots. I thought this would be perfect to use on a card.

Anyways, I placed a piece of brown cardstock onto the Mini Album Diecut. It was sandwiched between cutting plates. Then, I ran it through the Diecut Machine. I folded in half to create the base of the card.

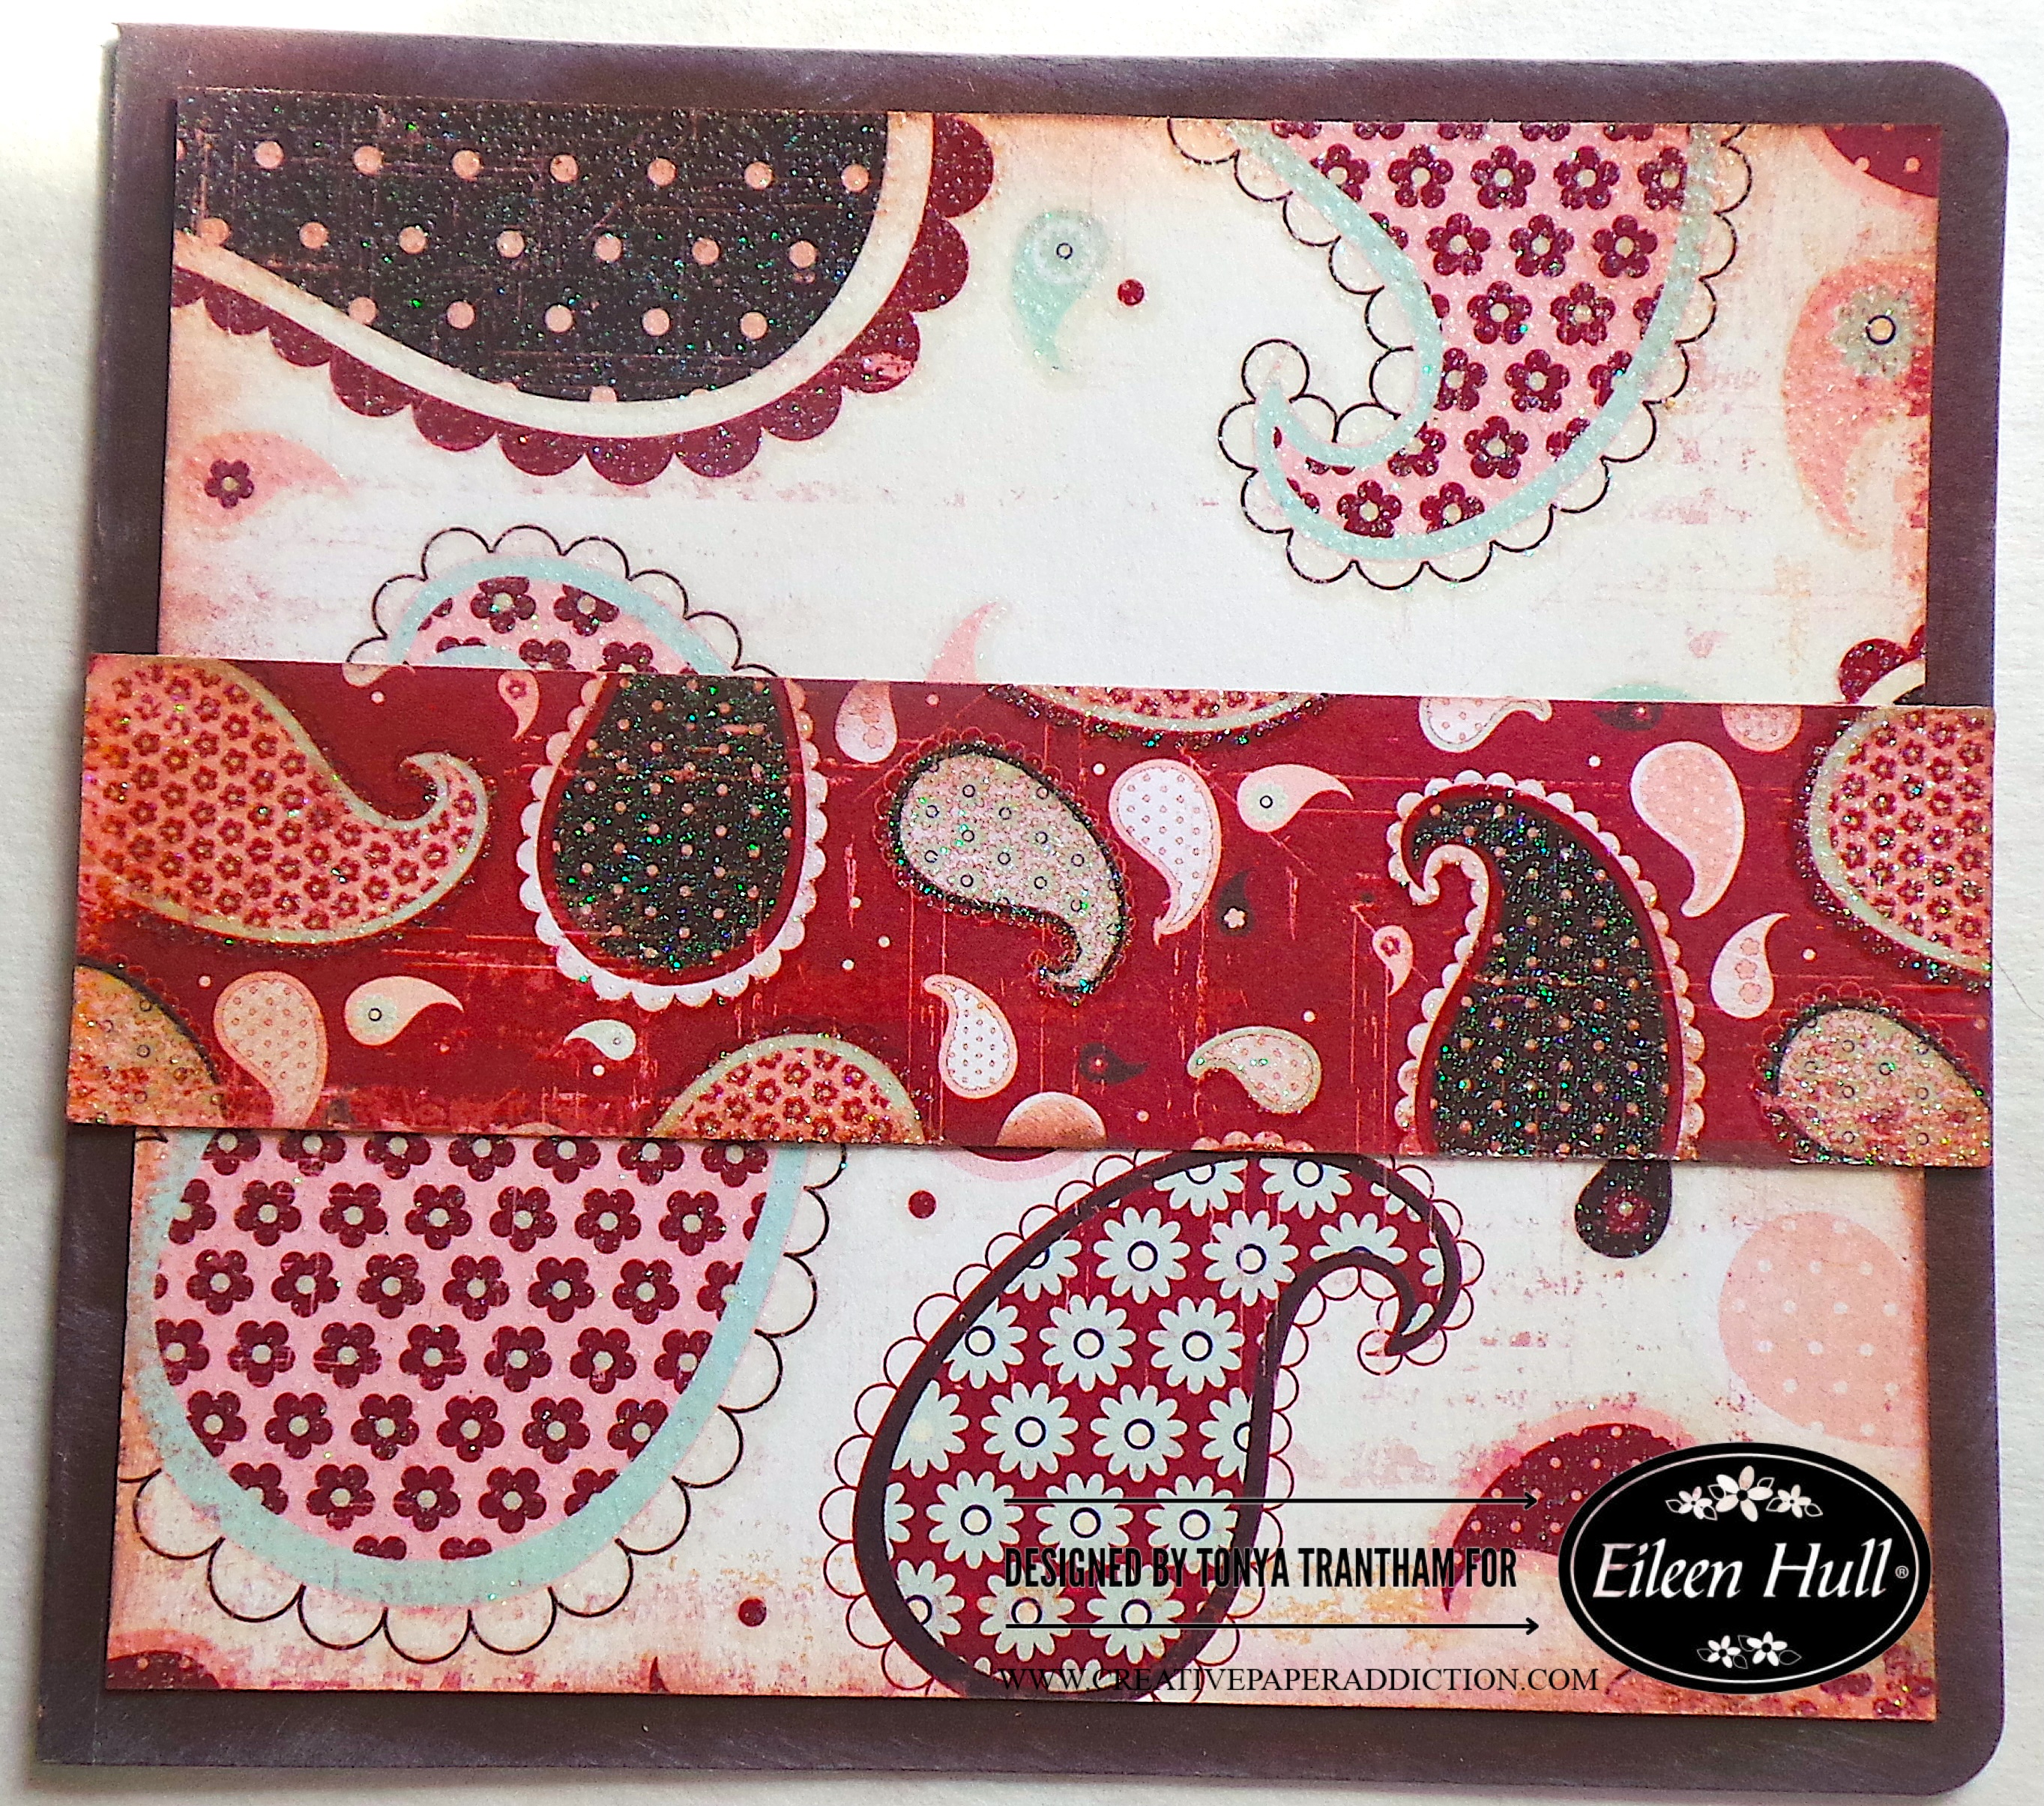
I cut a piece of cardstock slightly smaller than the base of the card.I also cut a strip of cardstock and inked both pieces with Brown Chalk Ink. I glued both to the card base.

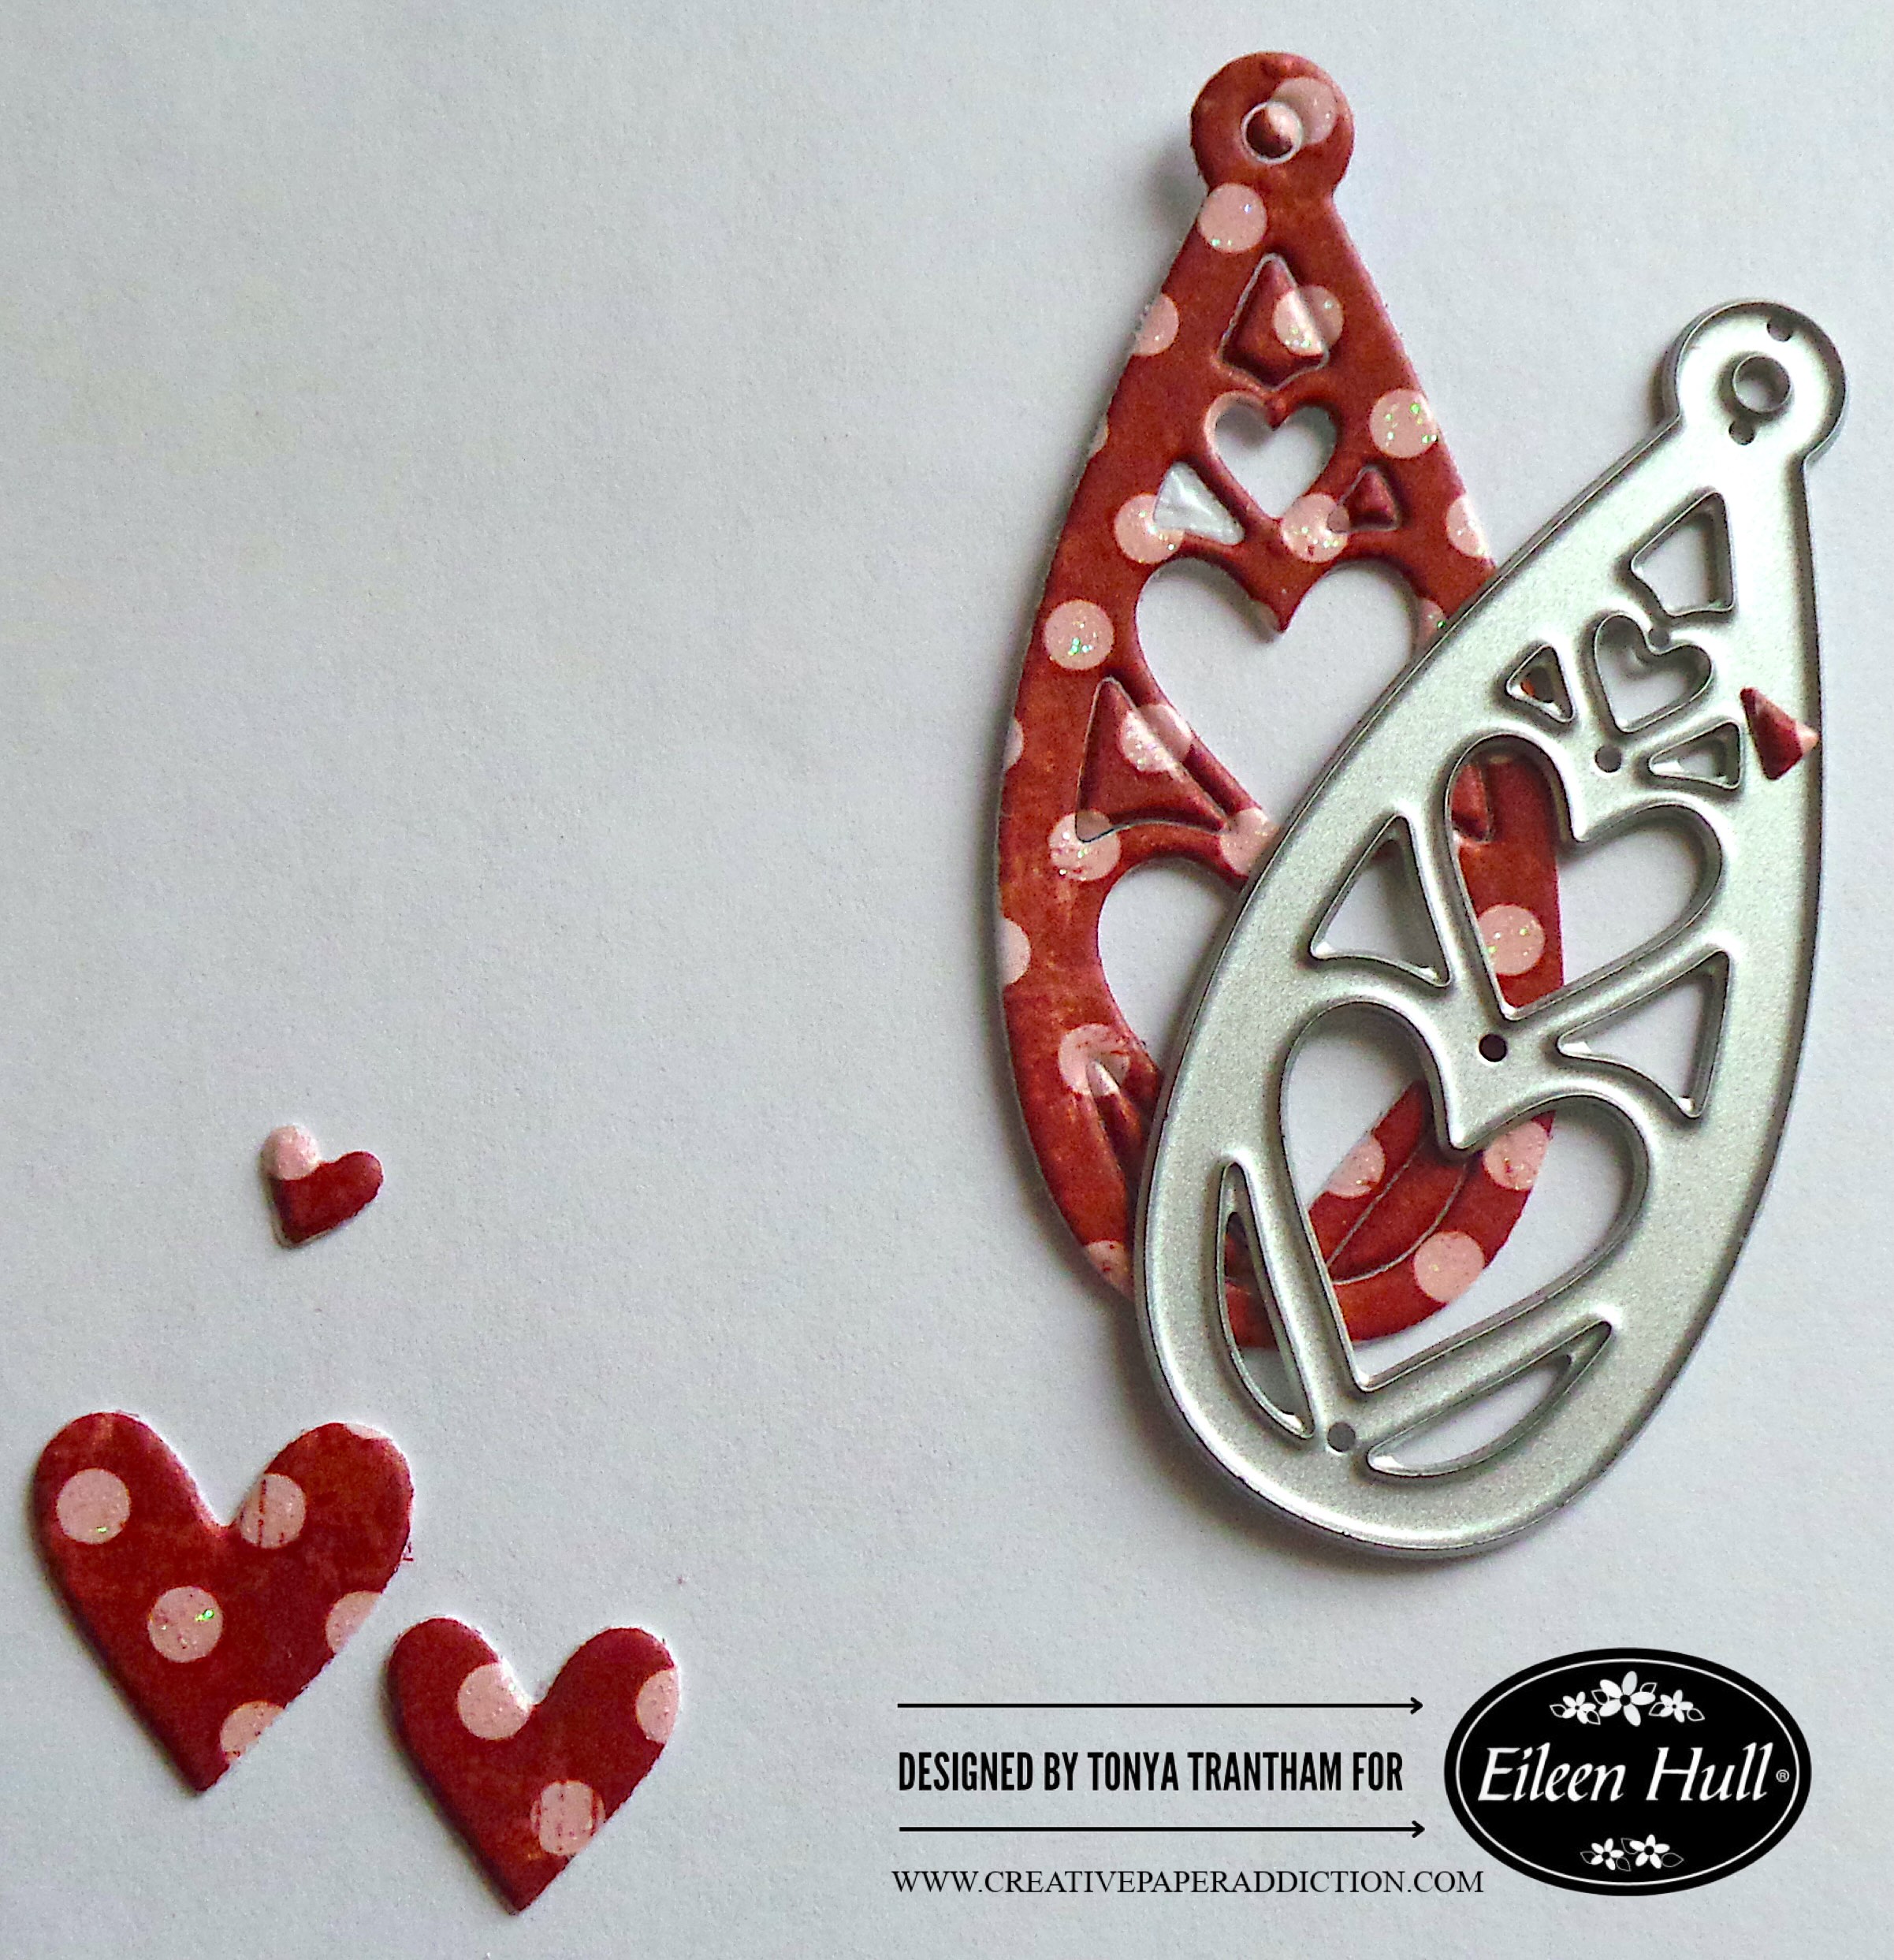
I cut out the teardrop heart from the Charms Thinlits. I will be using the largest heart from the teardrop.

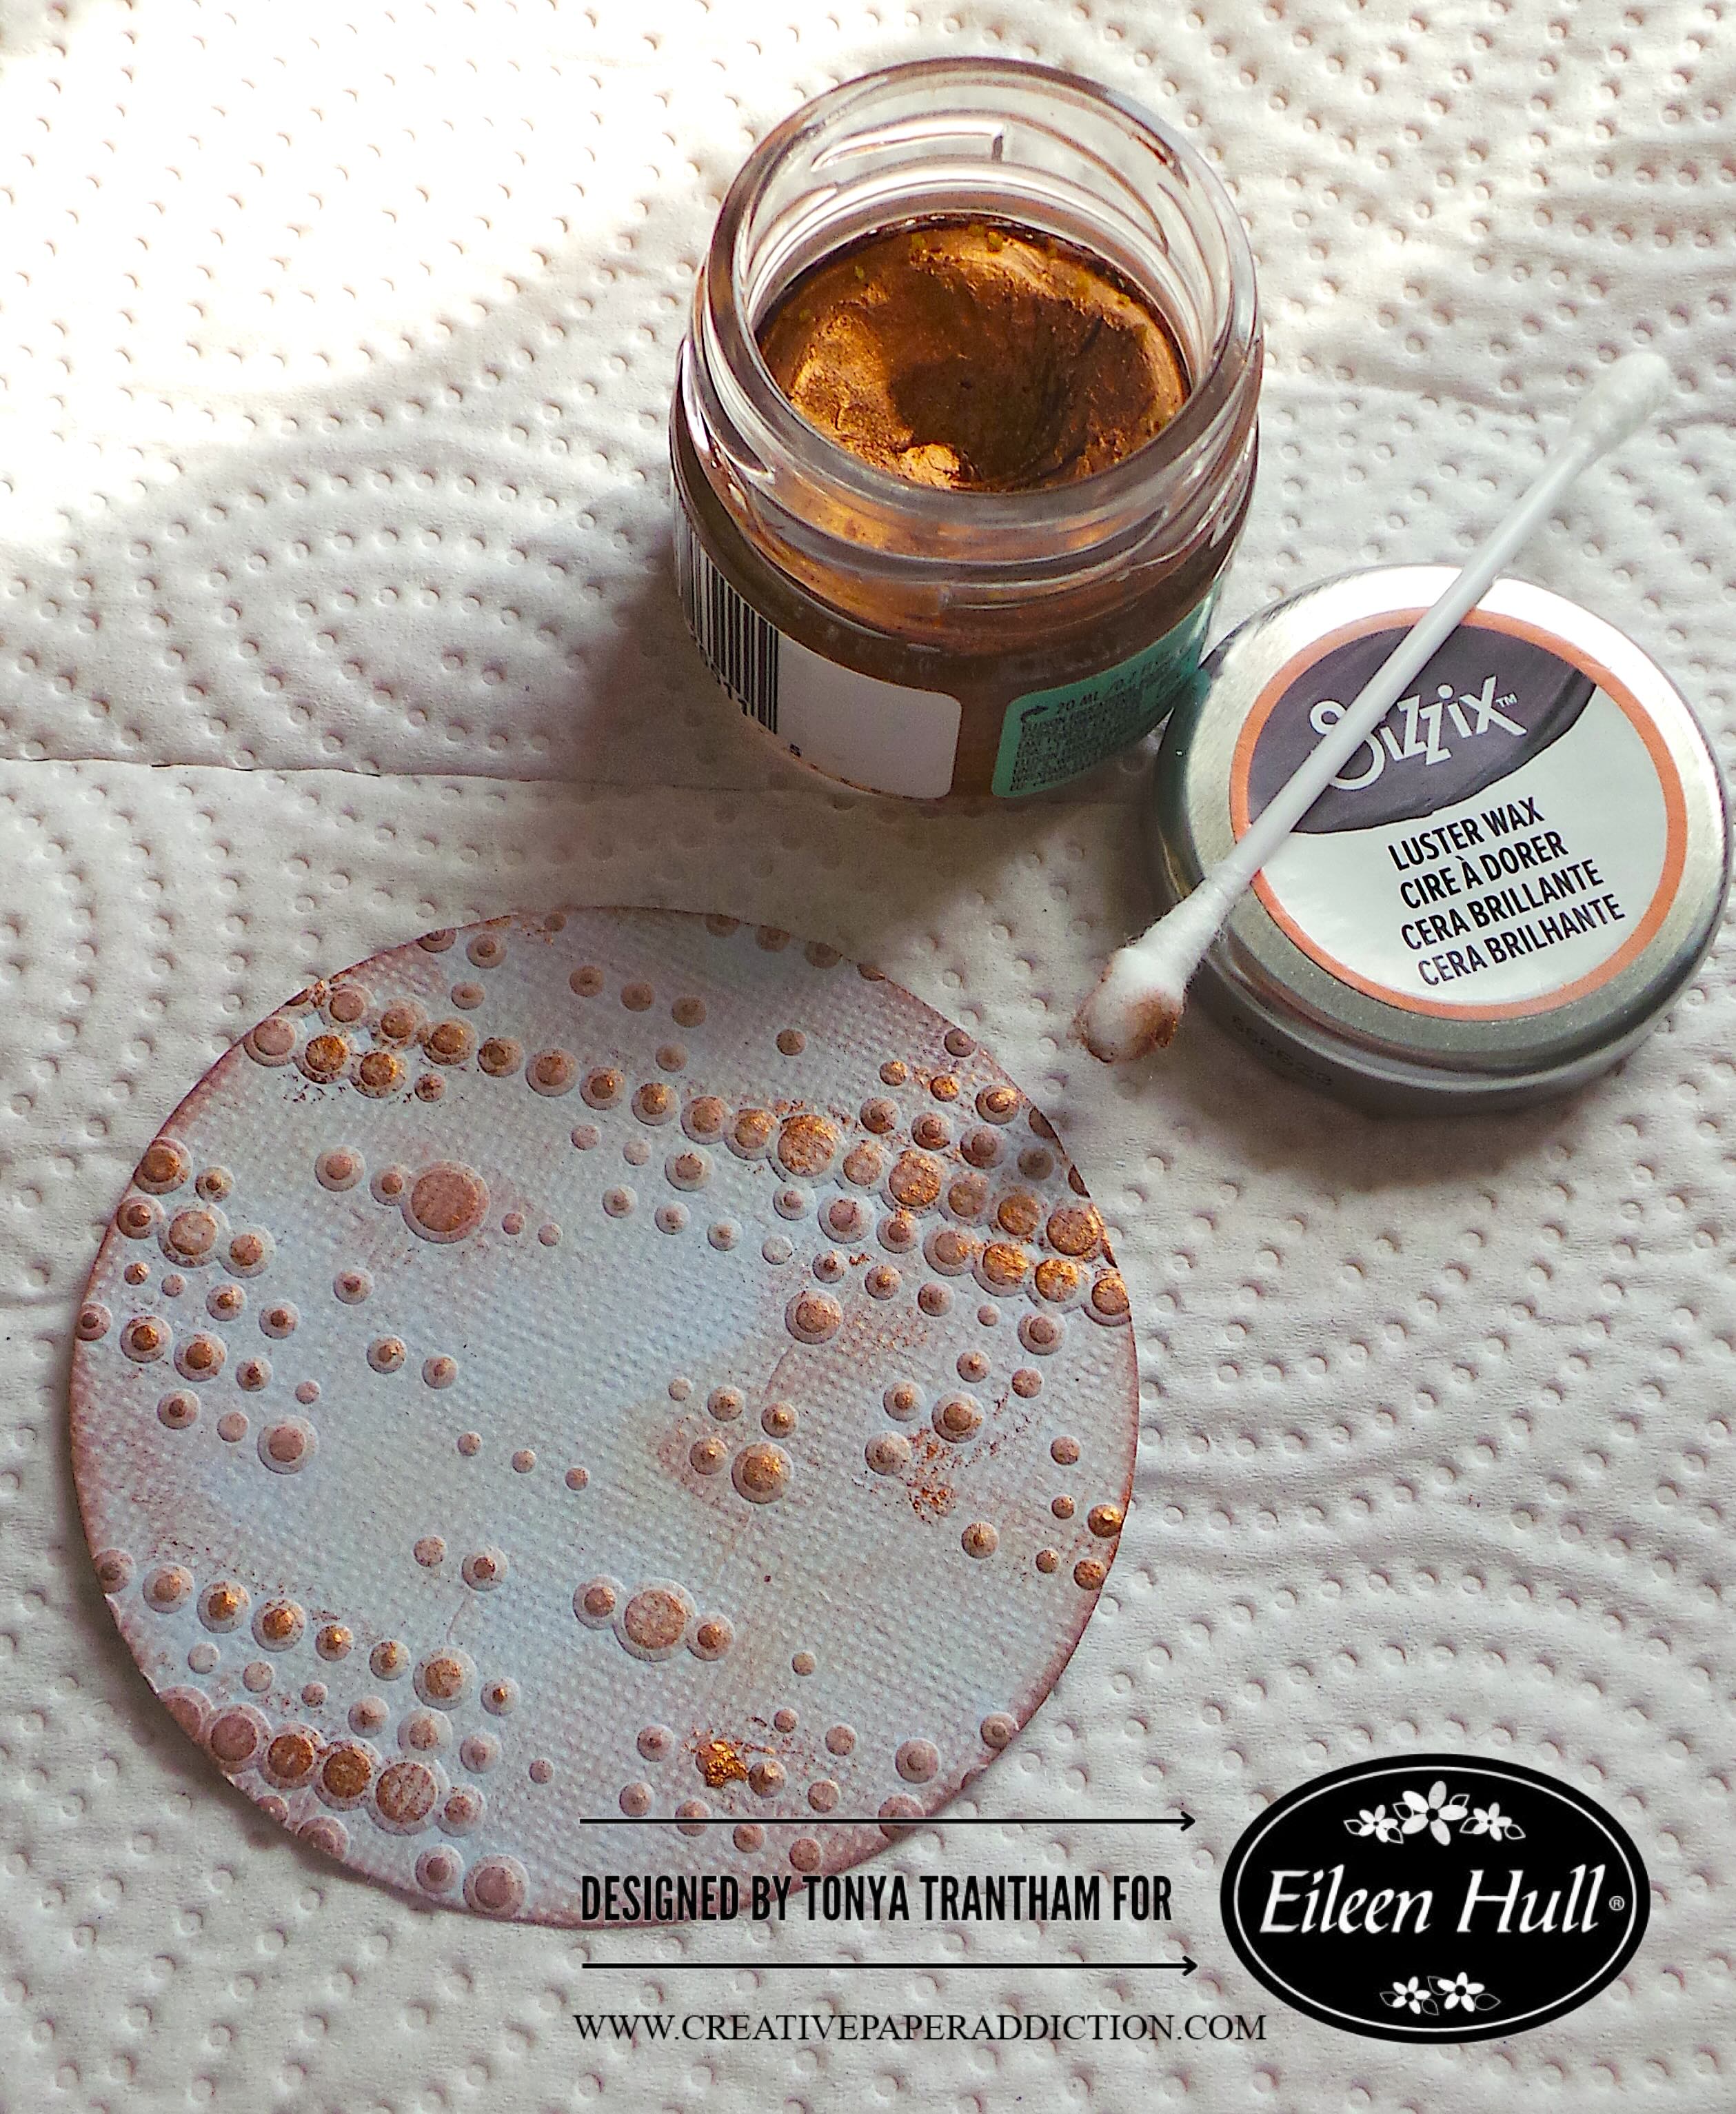
Next, I cut out the circle from the Ornament Box Diecut (retired). I embossed the circle with the Dotted Embossing Folder. I lightly applied Rose Gold Luster Wax over the embossed area of the circle.

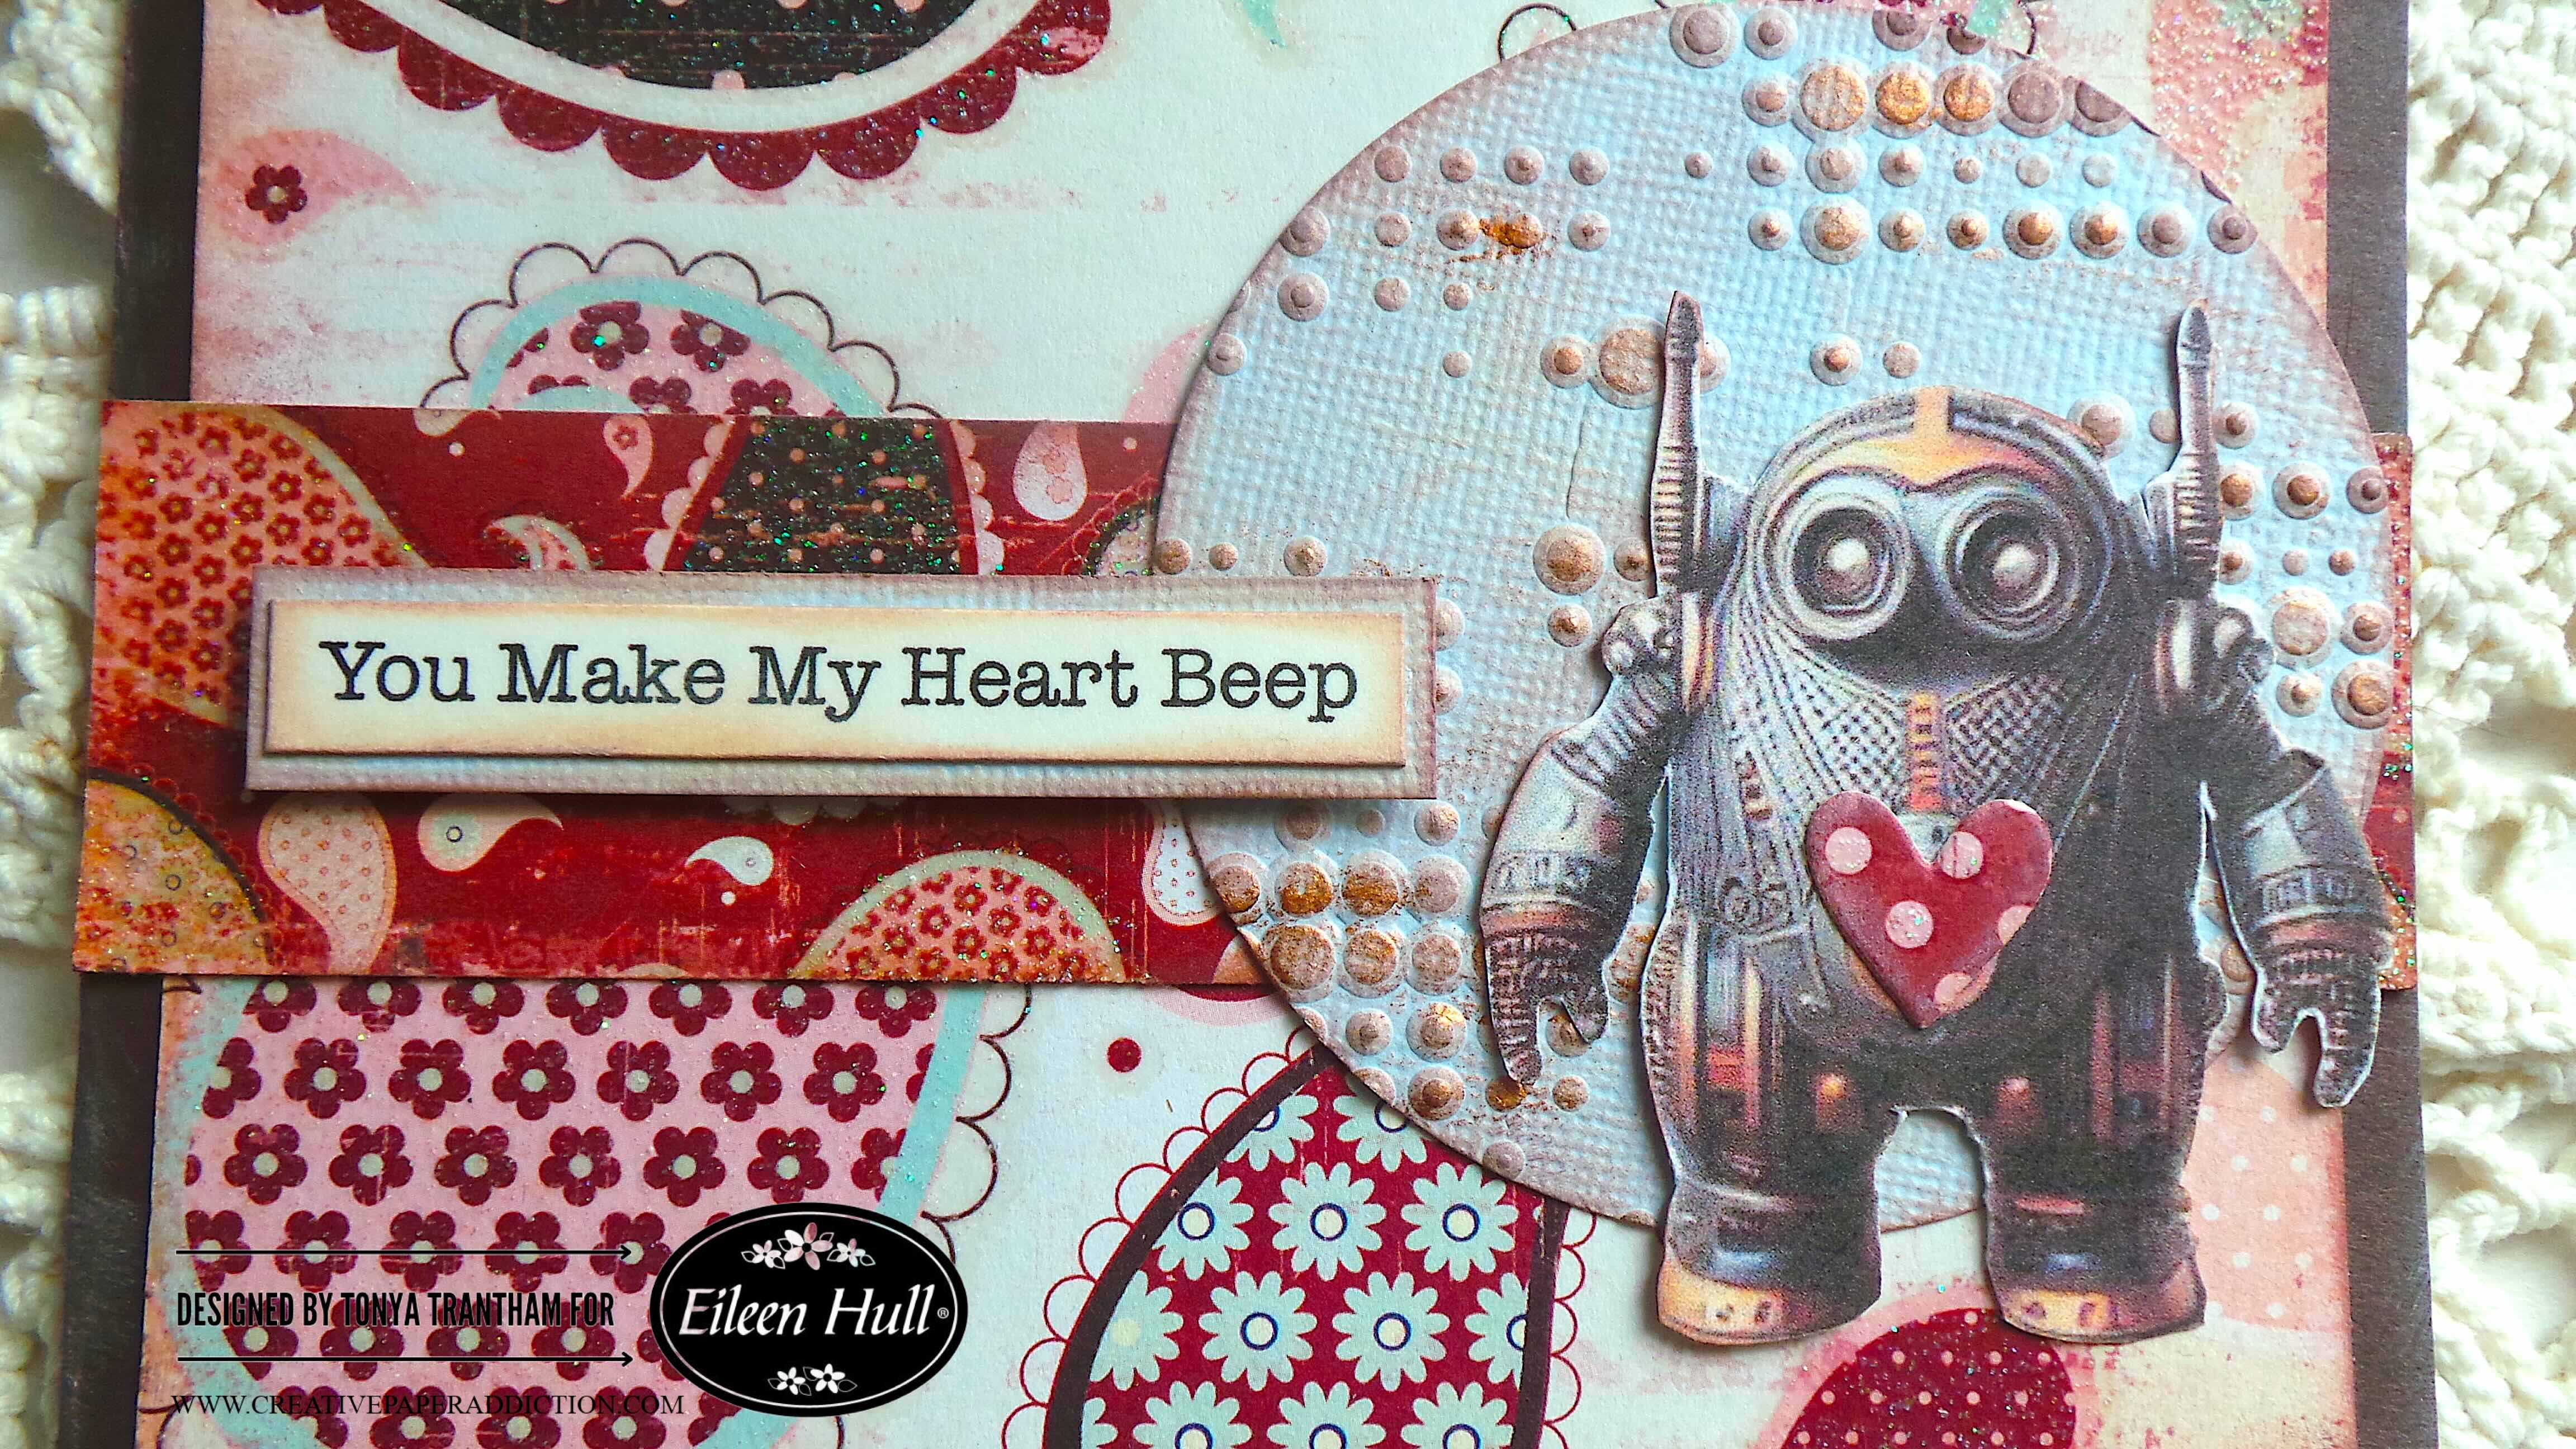
I adhered the circle to the edge of the card. I printed the “You Make my Heart Beep” sentiment from my computer. I cut out a mat to frame the sentiment. I inked the edges and glued both together. I added Foam Pop Dots to the back before placing on the card.

I fussy cut a robot from the printable. I placed it off center of the circle and glued the largest heart to the center of its chest.

Make sure you visit Eileen Hull‘s blog for inspiration. You can also find more details there on other ways to follow and keep up with her and her team.

Also I have a question, would you be interested in me sharing the robot printable I created? Let me know below.

Supplies

Sizzix/Eileen Hull: Mini Album Diecut

Sizzix/Eileen Hull: Charms Thinlits

Sizzix/Eileen Hull: Ornament Box Diecut ( retired)

Sizzix/Tim Holtz: Dotted Embossing Folder

Diecut Machine

Various Patterned Cardstocks

Sizzix: Black, White and Ivory Smooth Cardstock

Rose Gold Luster Wax

Brown Chalk Ink

Paper Cutter

Scissors

Foam Pop Dots

Robot Printable

Beacon Adhesives: Zip Dry Adhesive

(Products listed above are Affiliated Links for your convenience)

DISCLAIMERS

This blog is compensated to provide opinion on products, services, websites, and various other topics. Even though the owner(s) of this blog receives compensation for our posts or advertisements. I always give my honest opinions, findings, beliefs, or experiences on those topics or products. The views and opinions expressed on this blog are purely my own. Any product claim, statistic, or quote should be checked with each manufacturer. Verify other representations about a product or service with the provider or party in question.This blog contains affiliate linksClicking these links helps to support Tonya Trantham Designs – Creative Paper Addiction. It runs at no additional cost to you. Today’s features are Sizzix, Eileen Hull, Tim Holtz and Scrapbook.com Products. 

Thanks for stopping by, I hope your Monday is wonderful and enjoy creating!
Step-by-Step Guide to a Friendship-Themed Craft

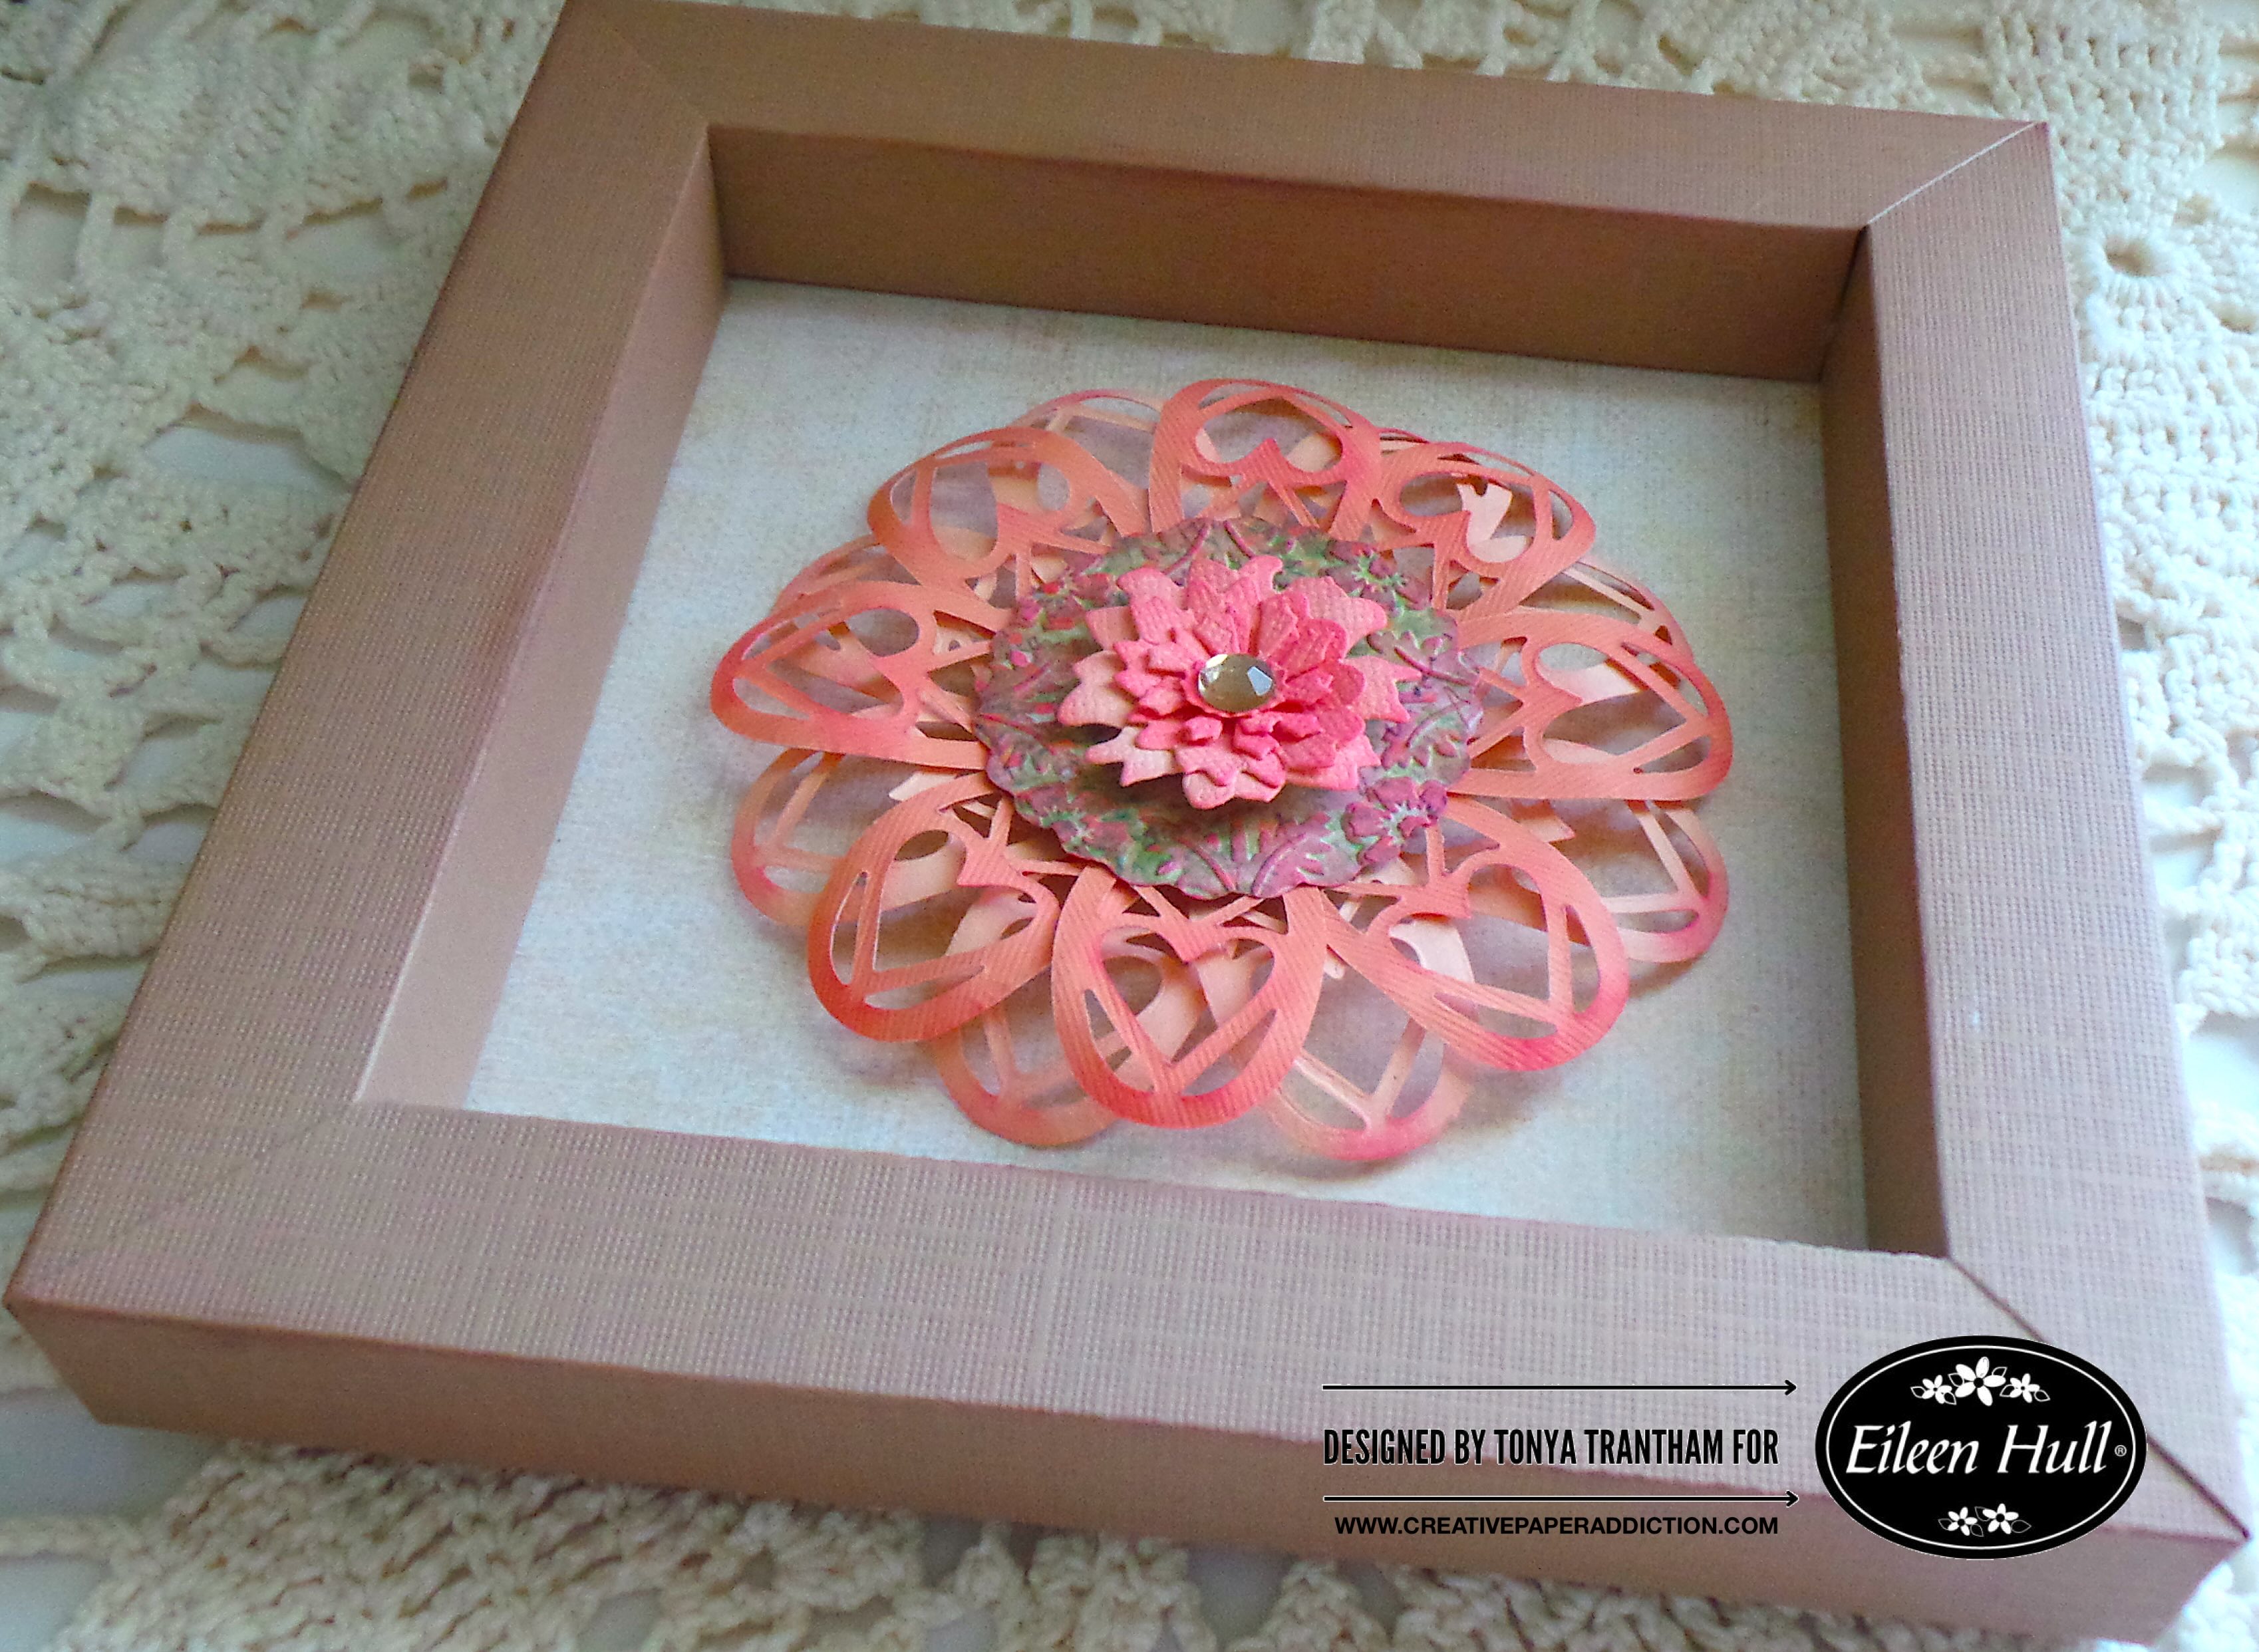
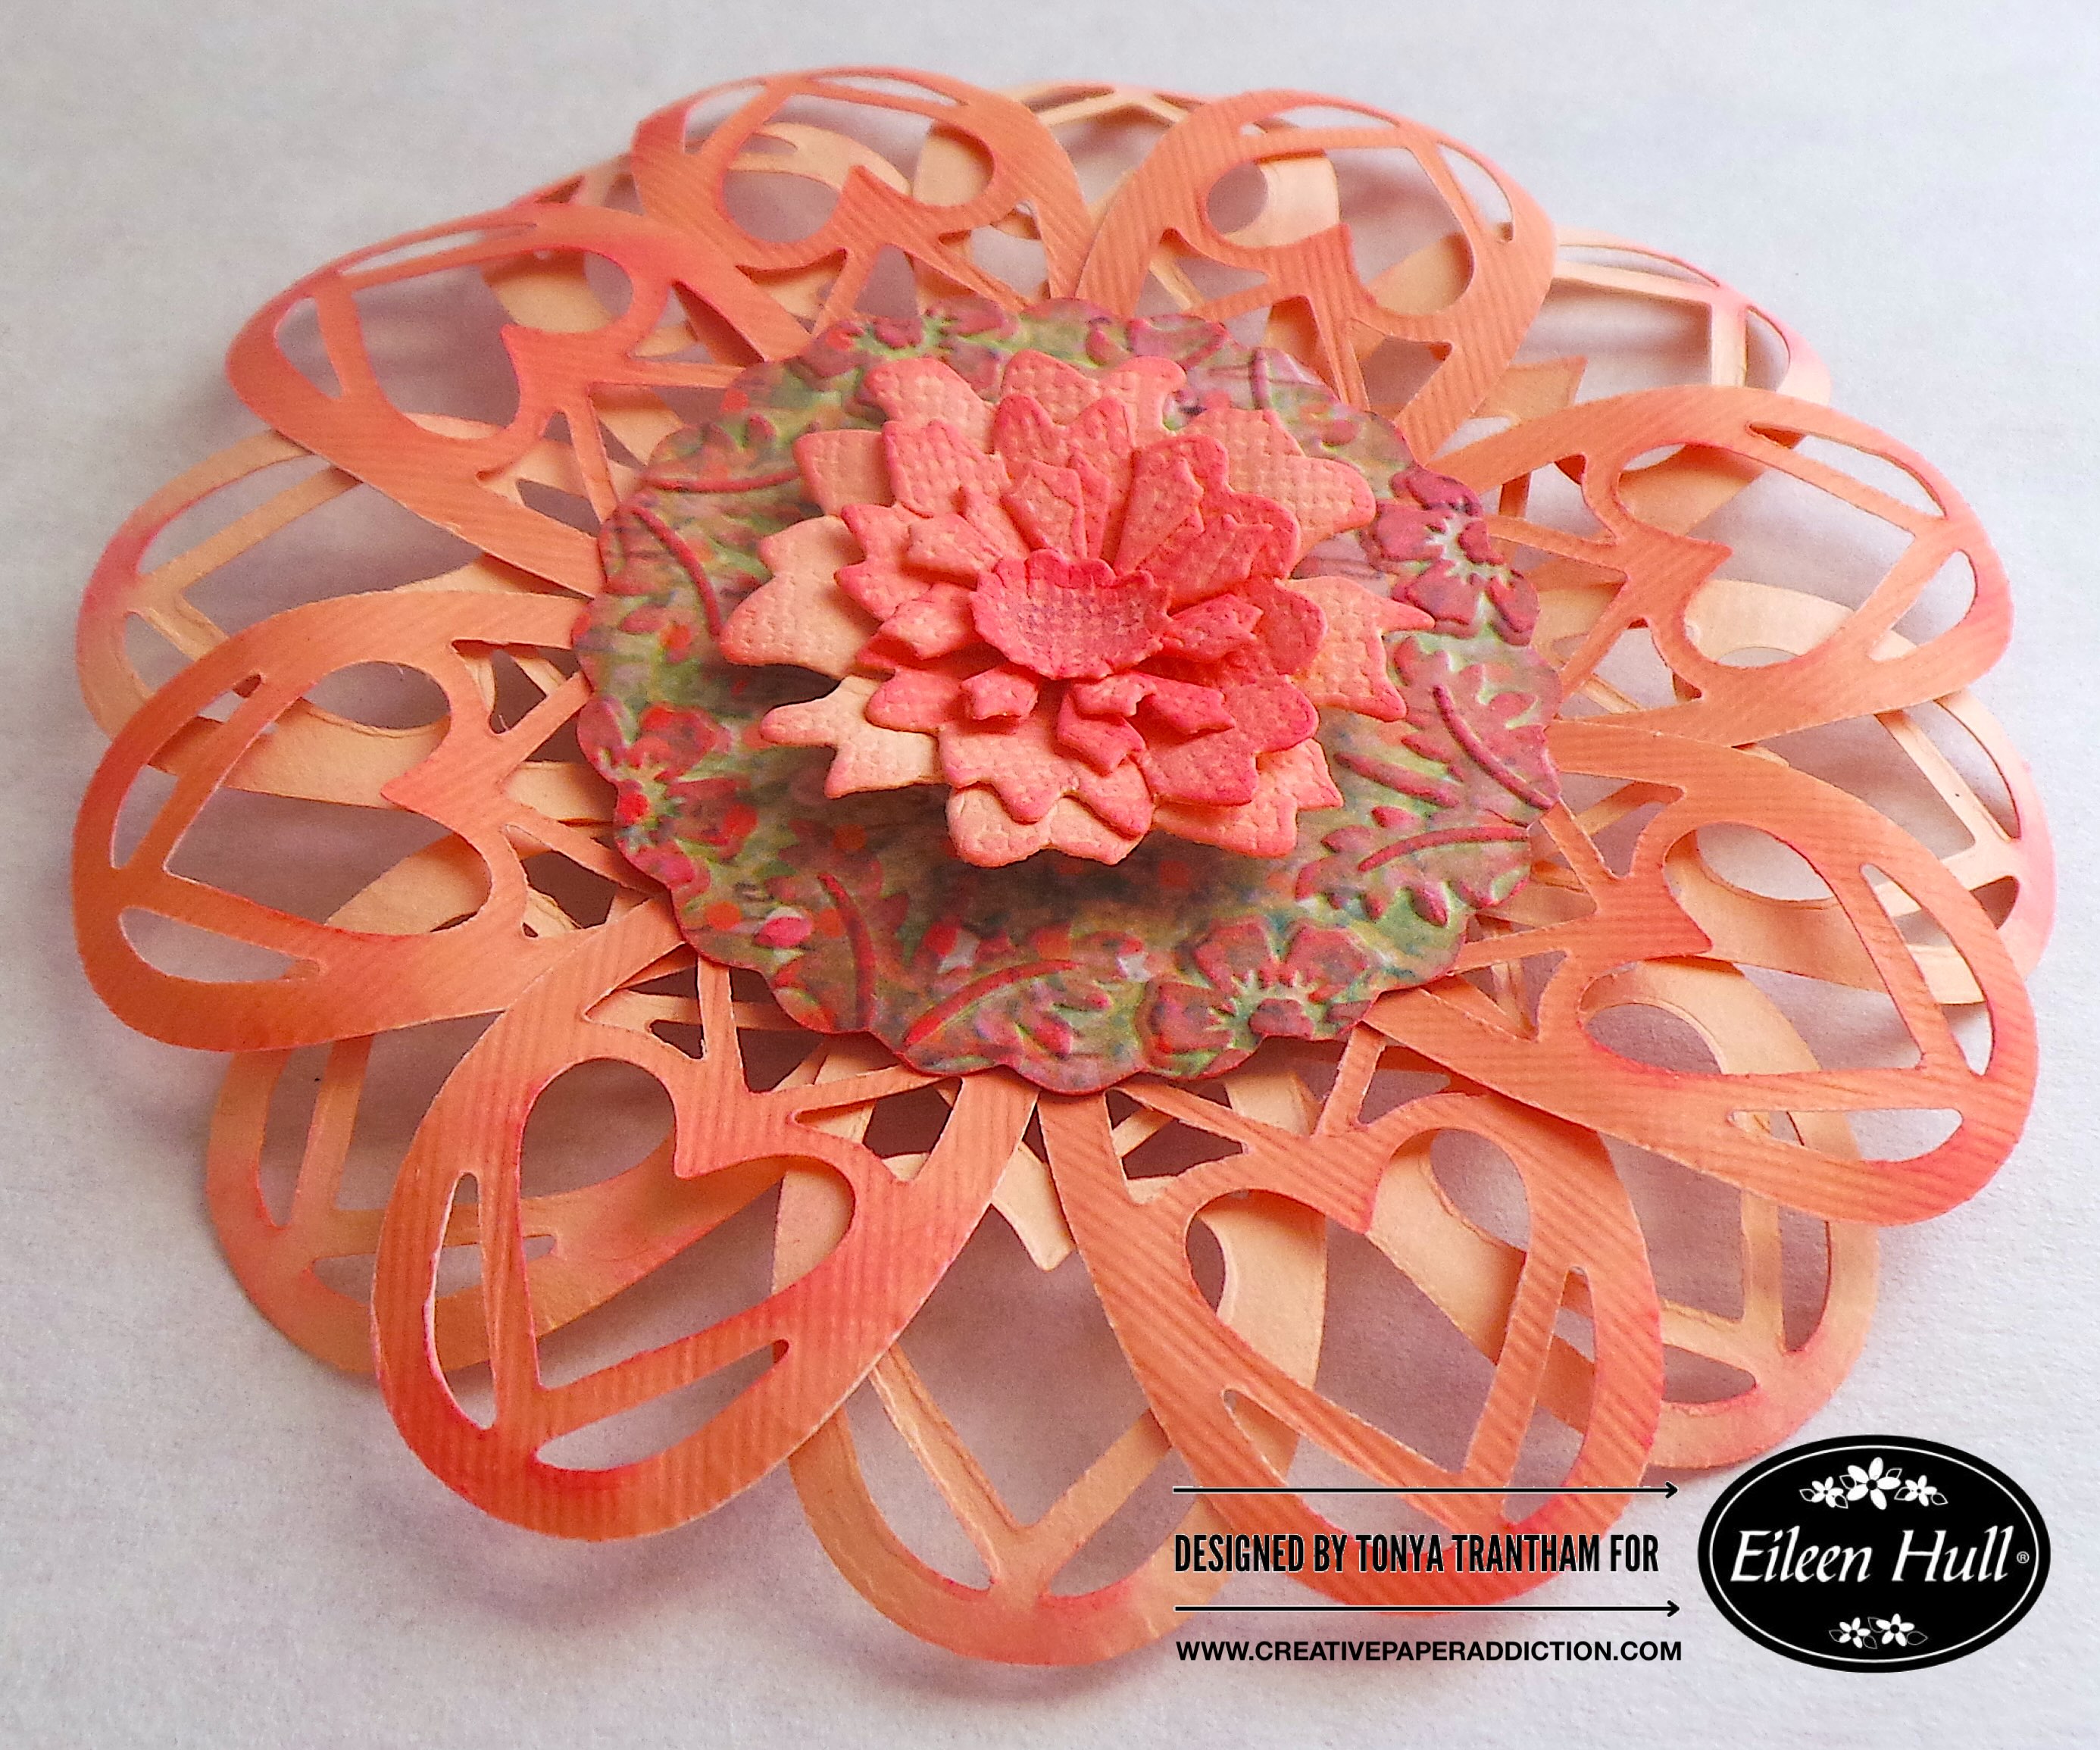
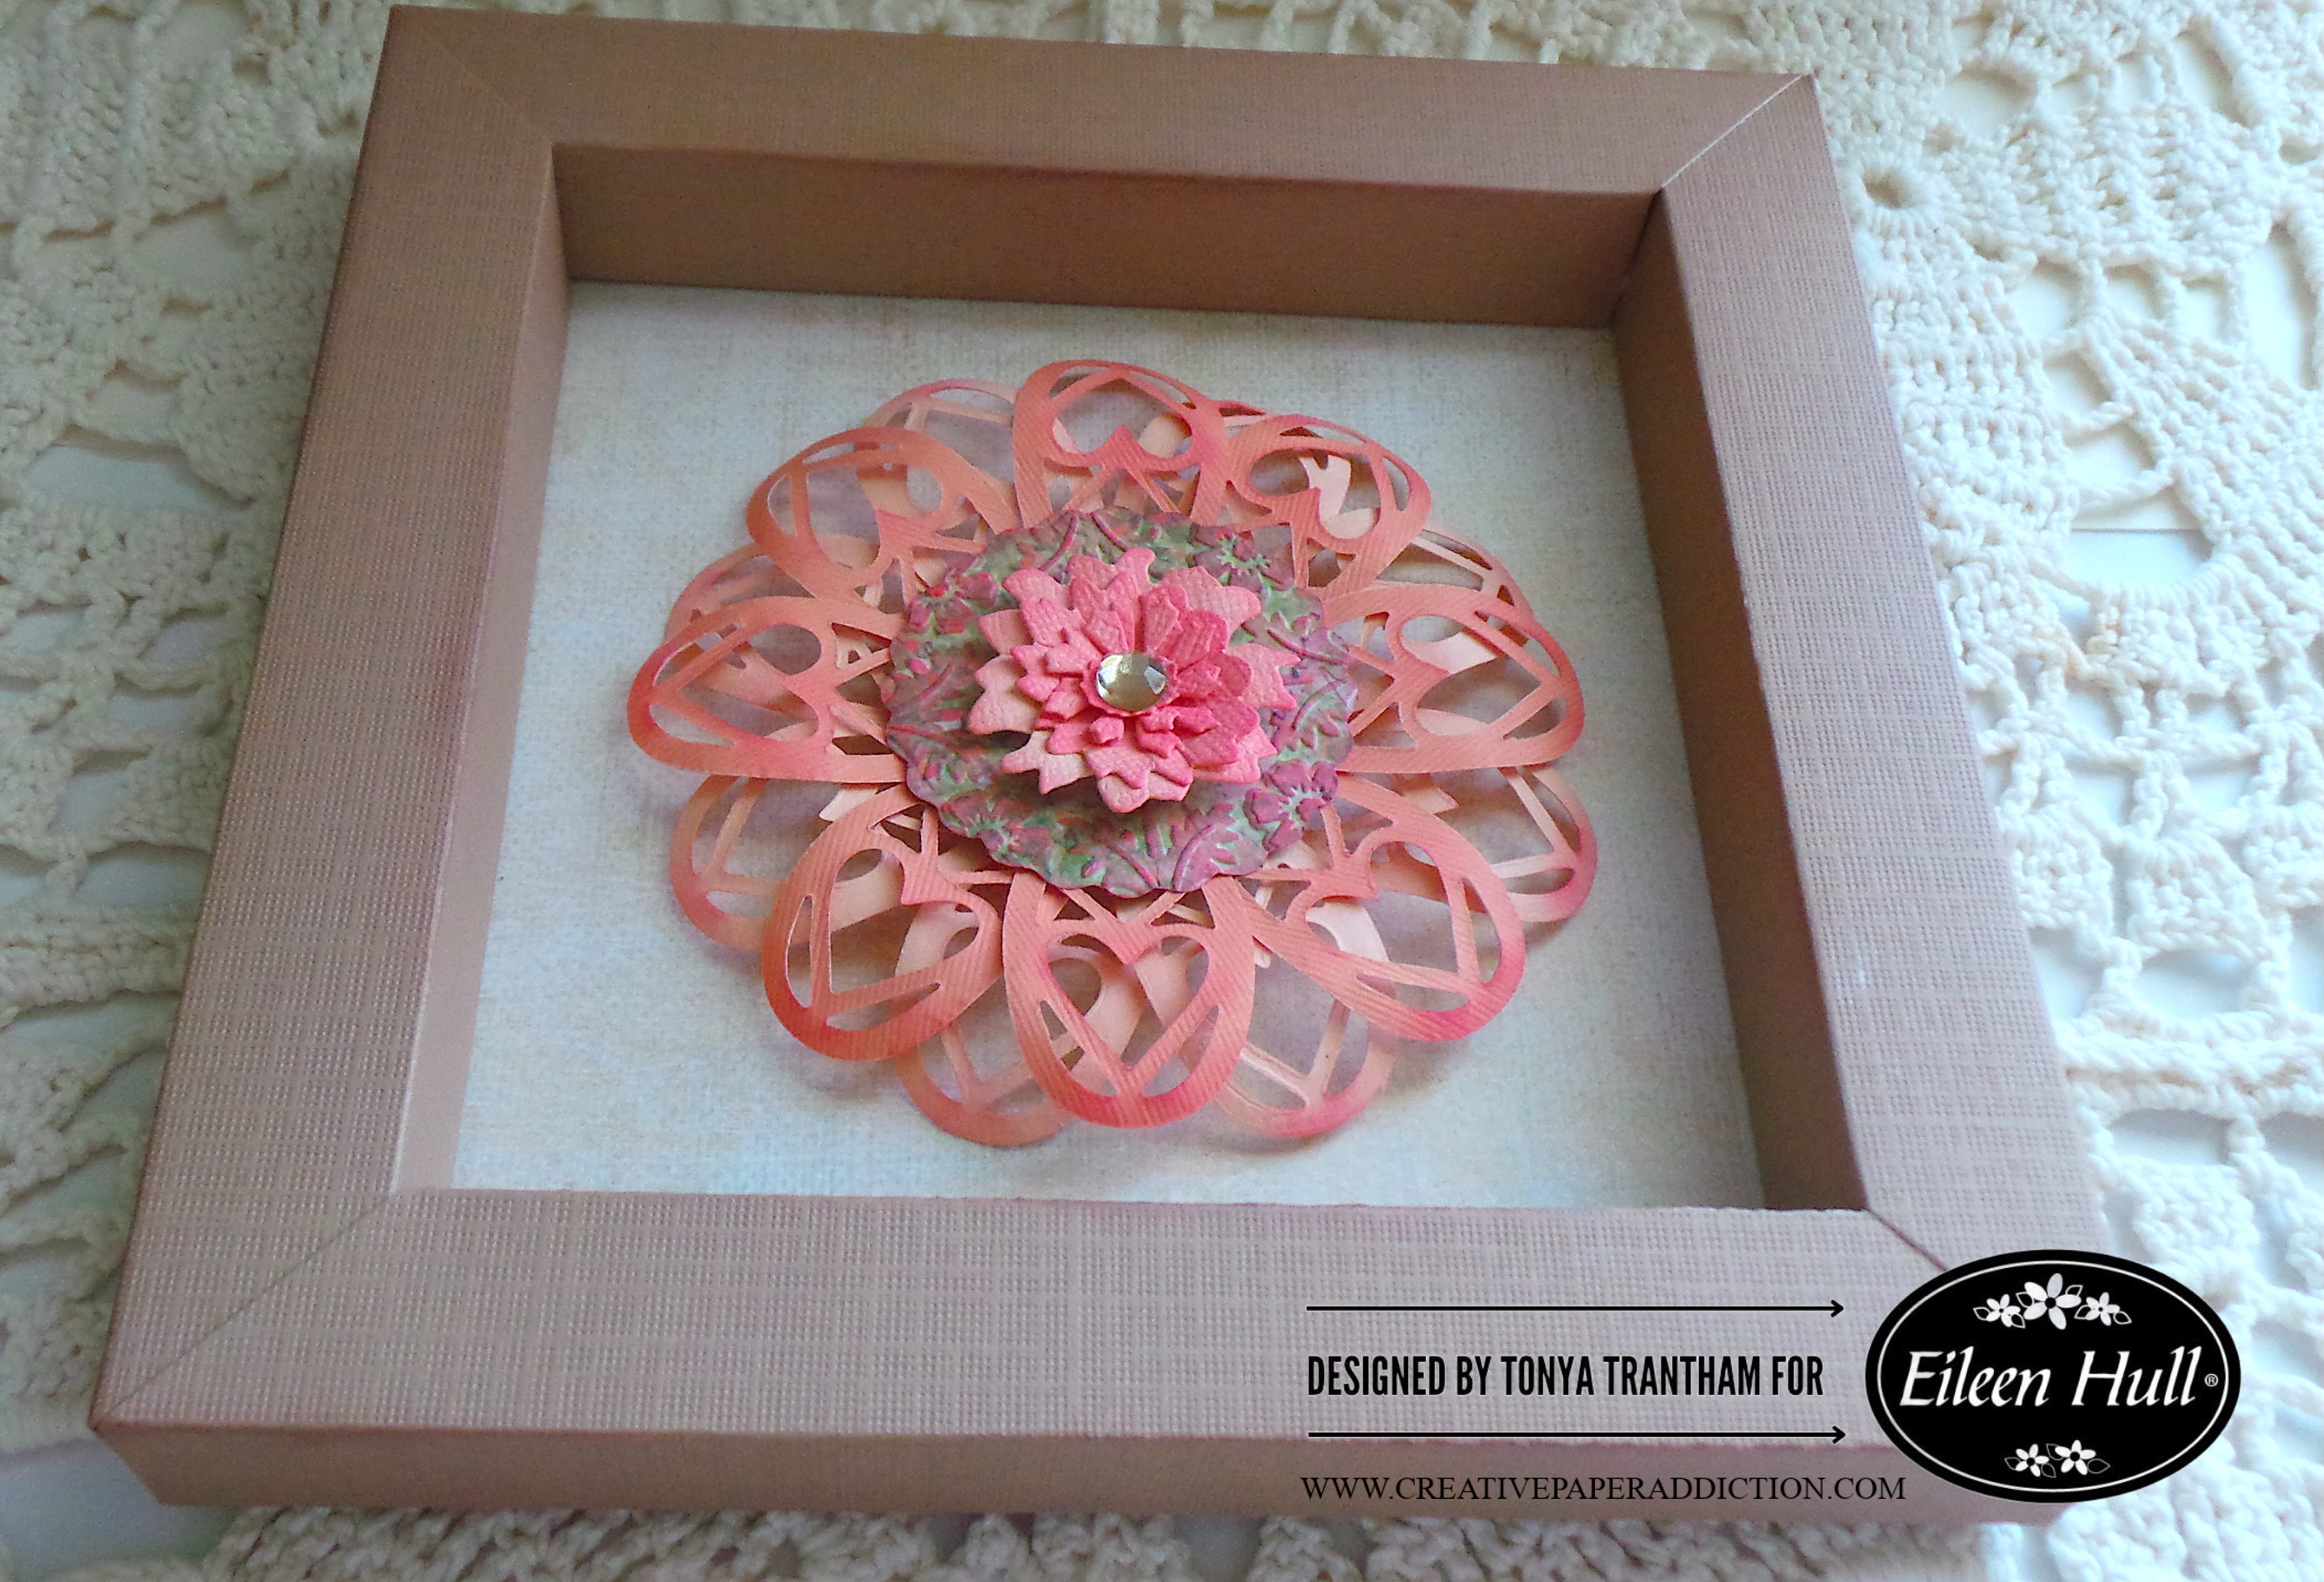
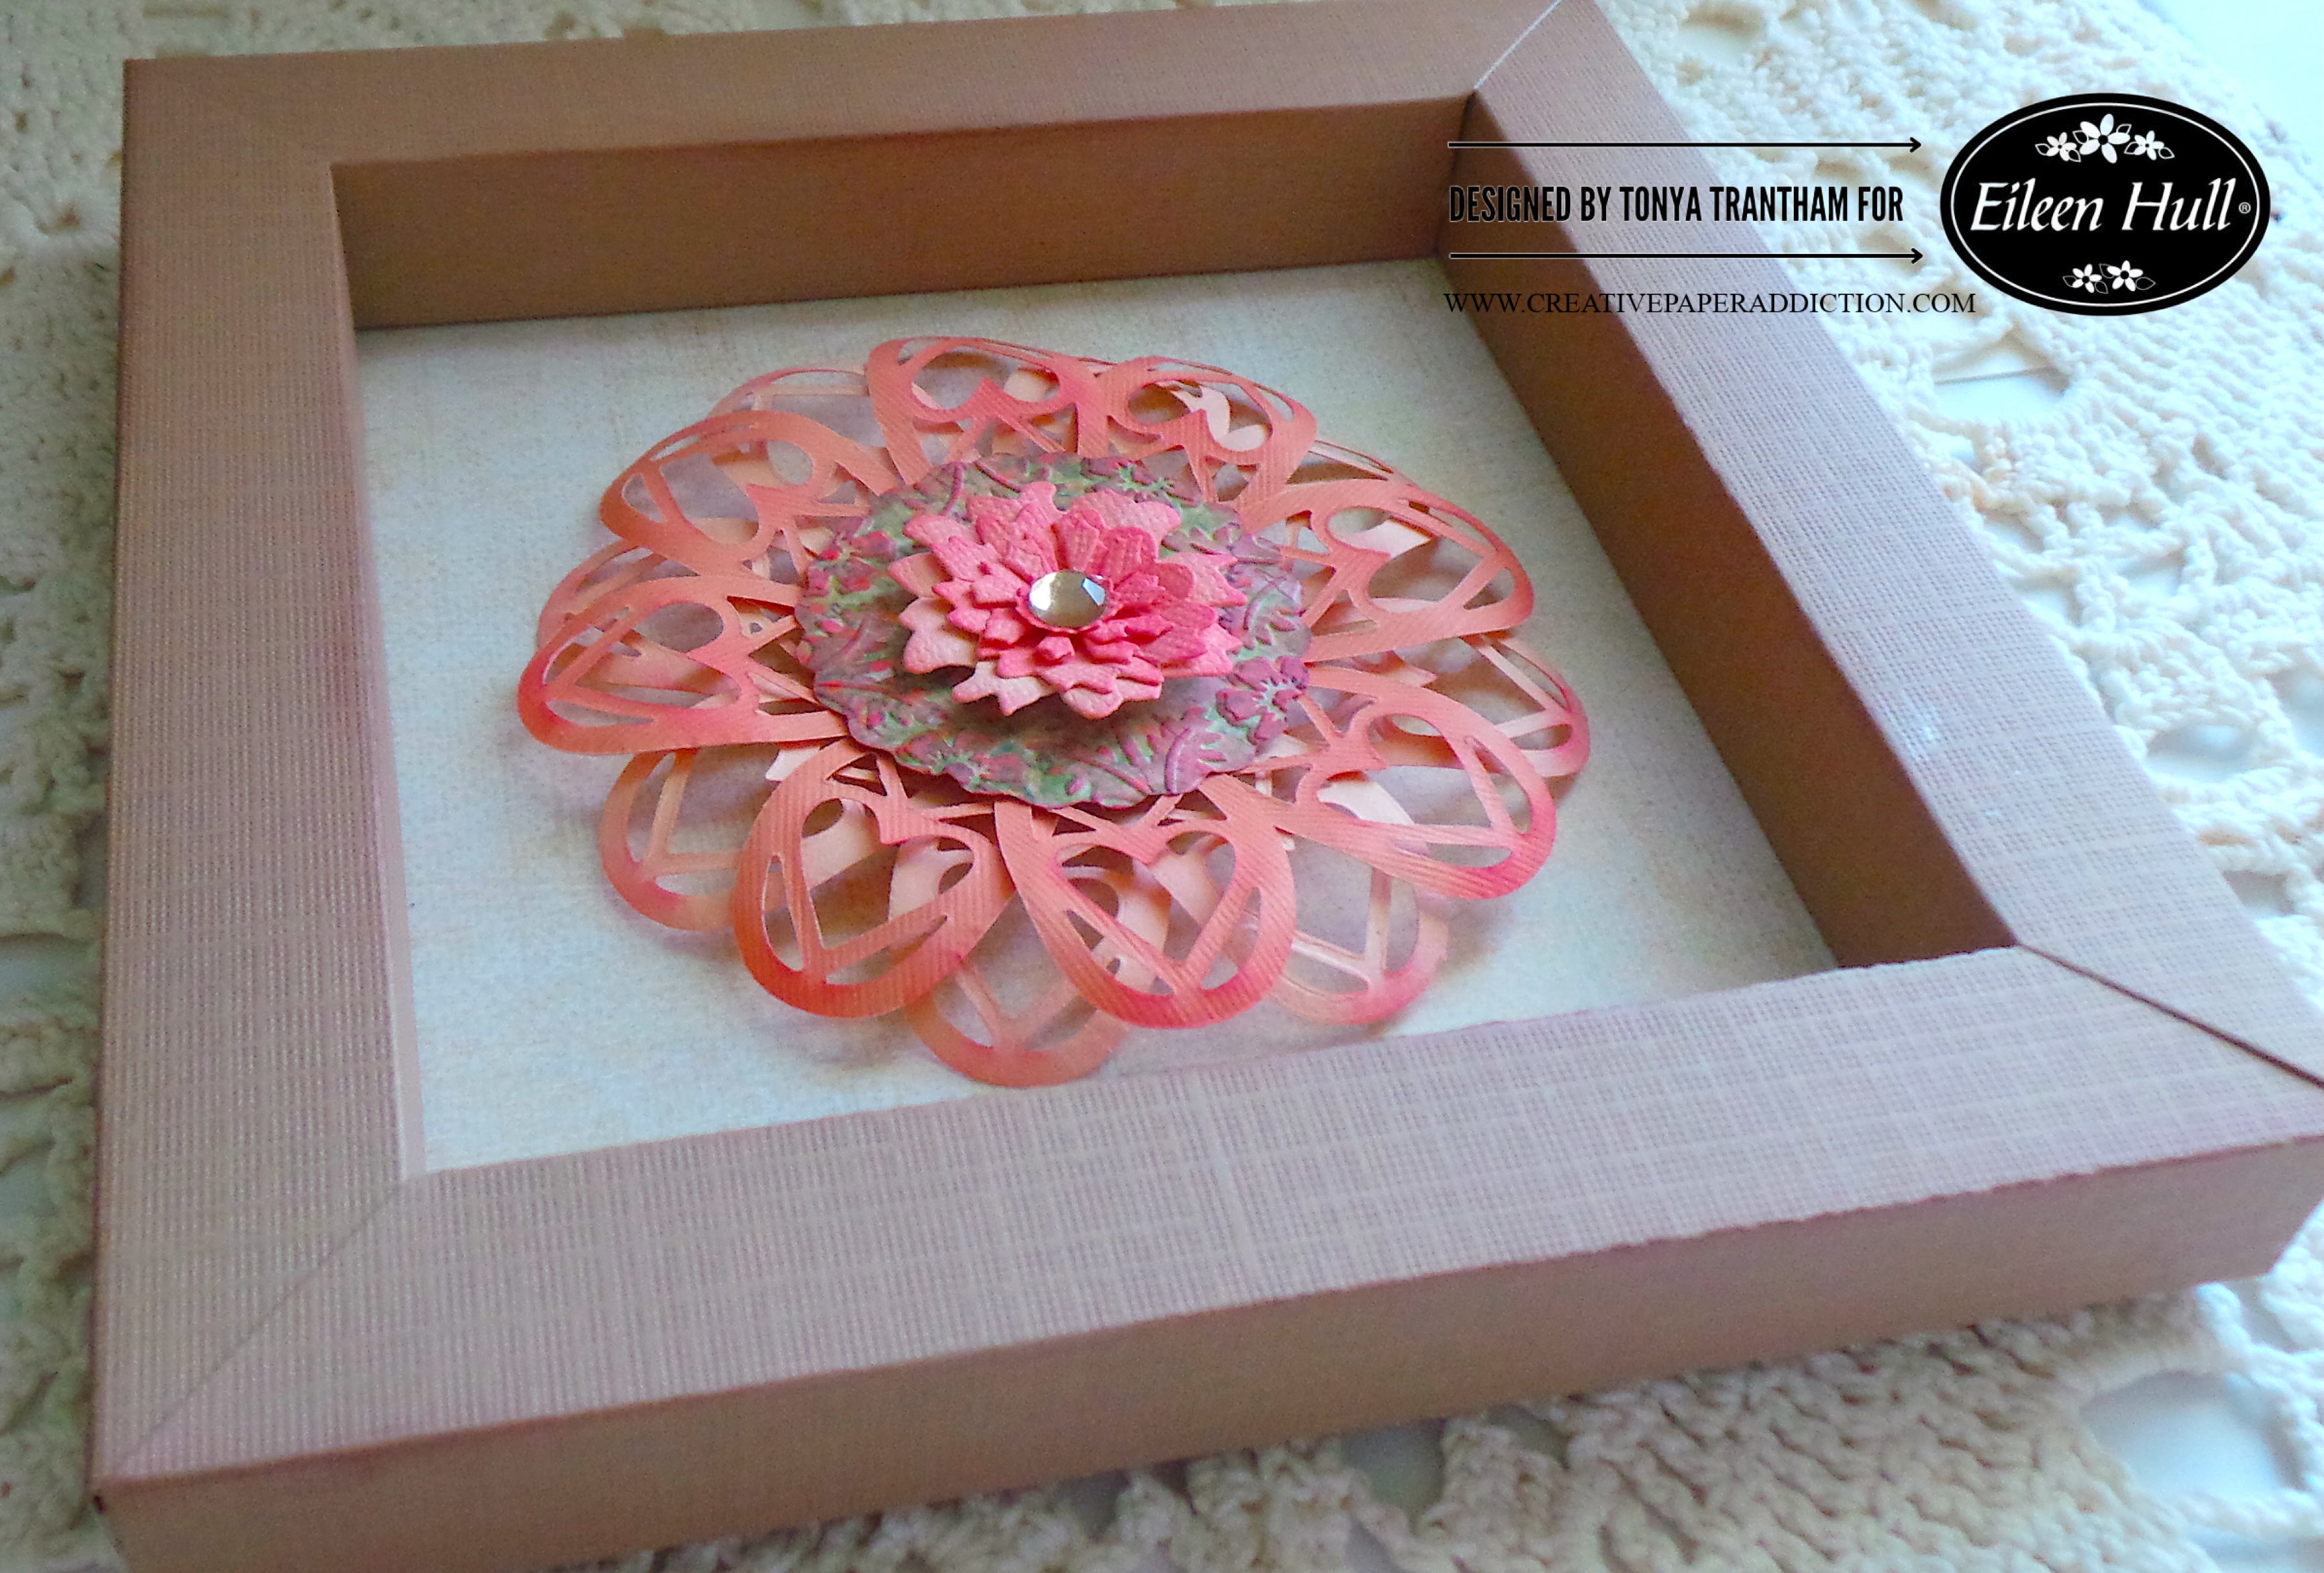
Hi everyone! I am back after a break from the holidays and ready to share my first Eileen Hull project of 2025. This month’s theme is friendship. For this post I’ll be sharing how to create this floral frame using the Charms Thinlits. Along with several of Eileen’s dies and embossing folder. Anyways, let’s get started!

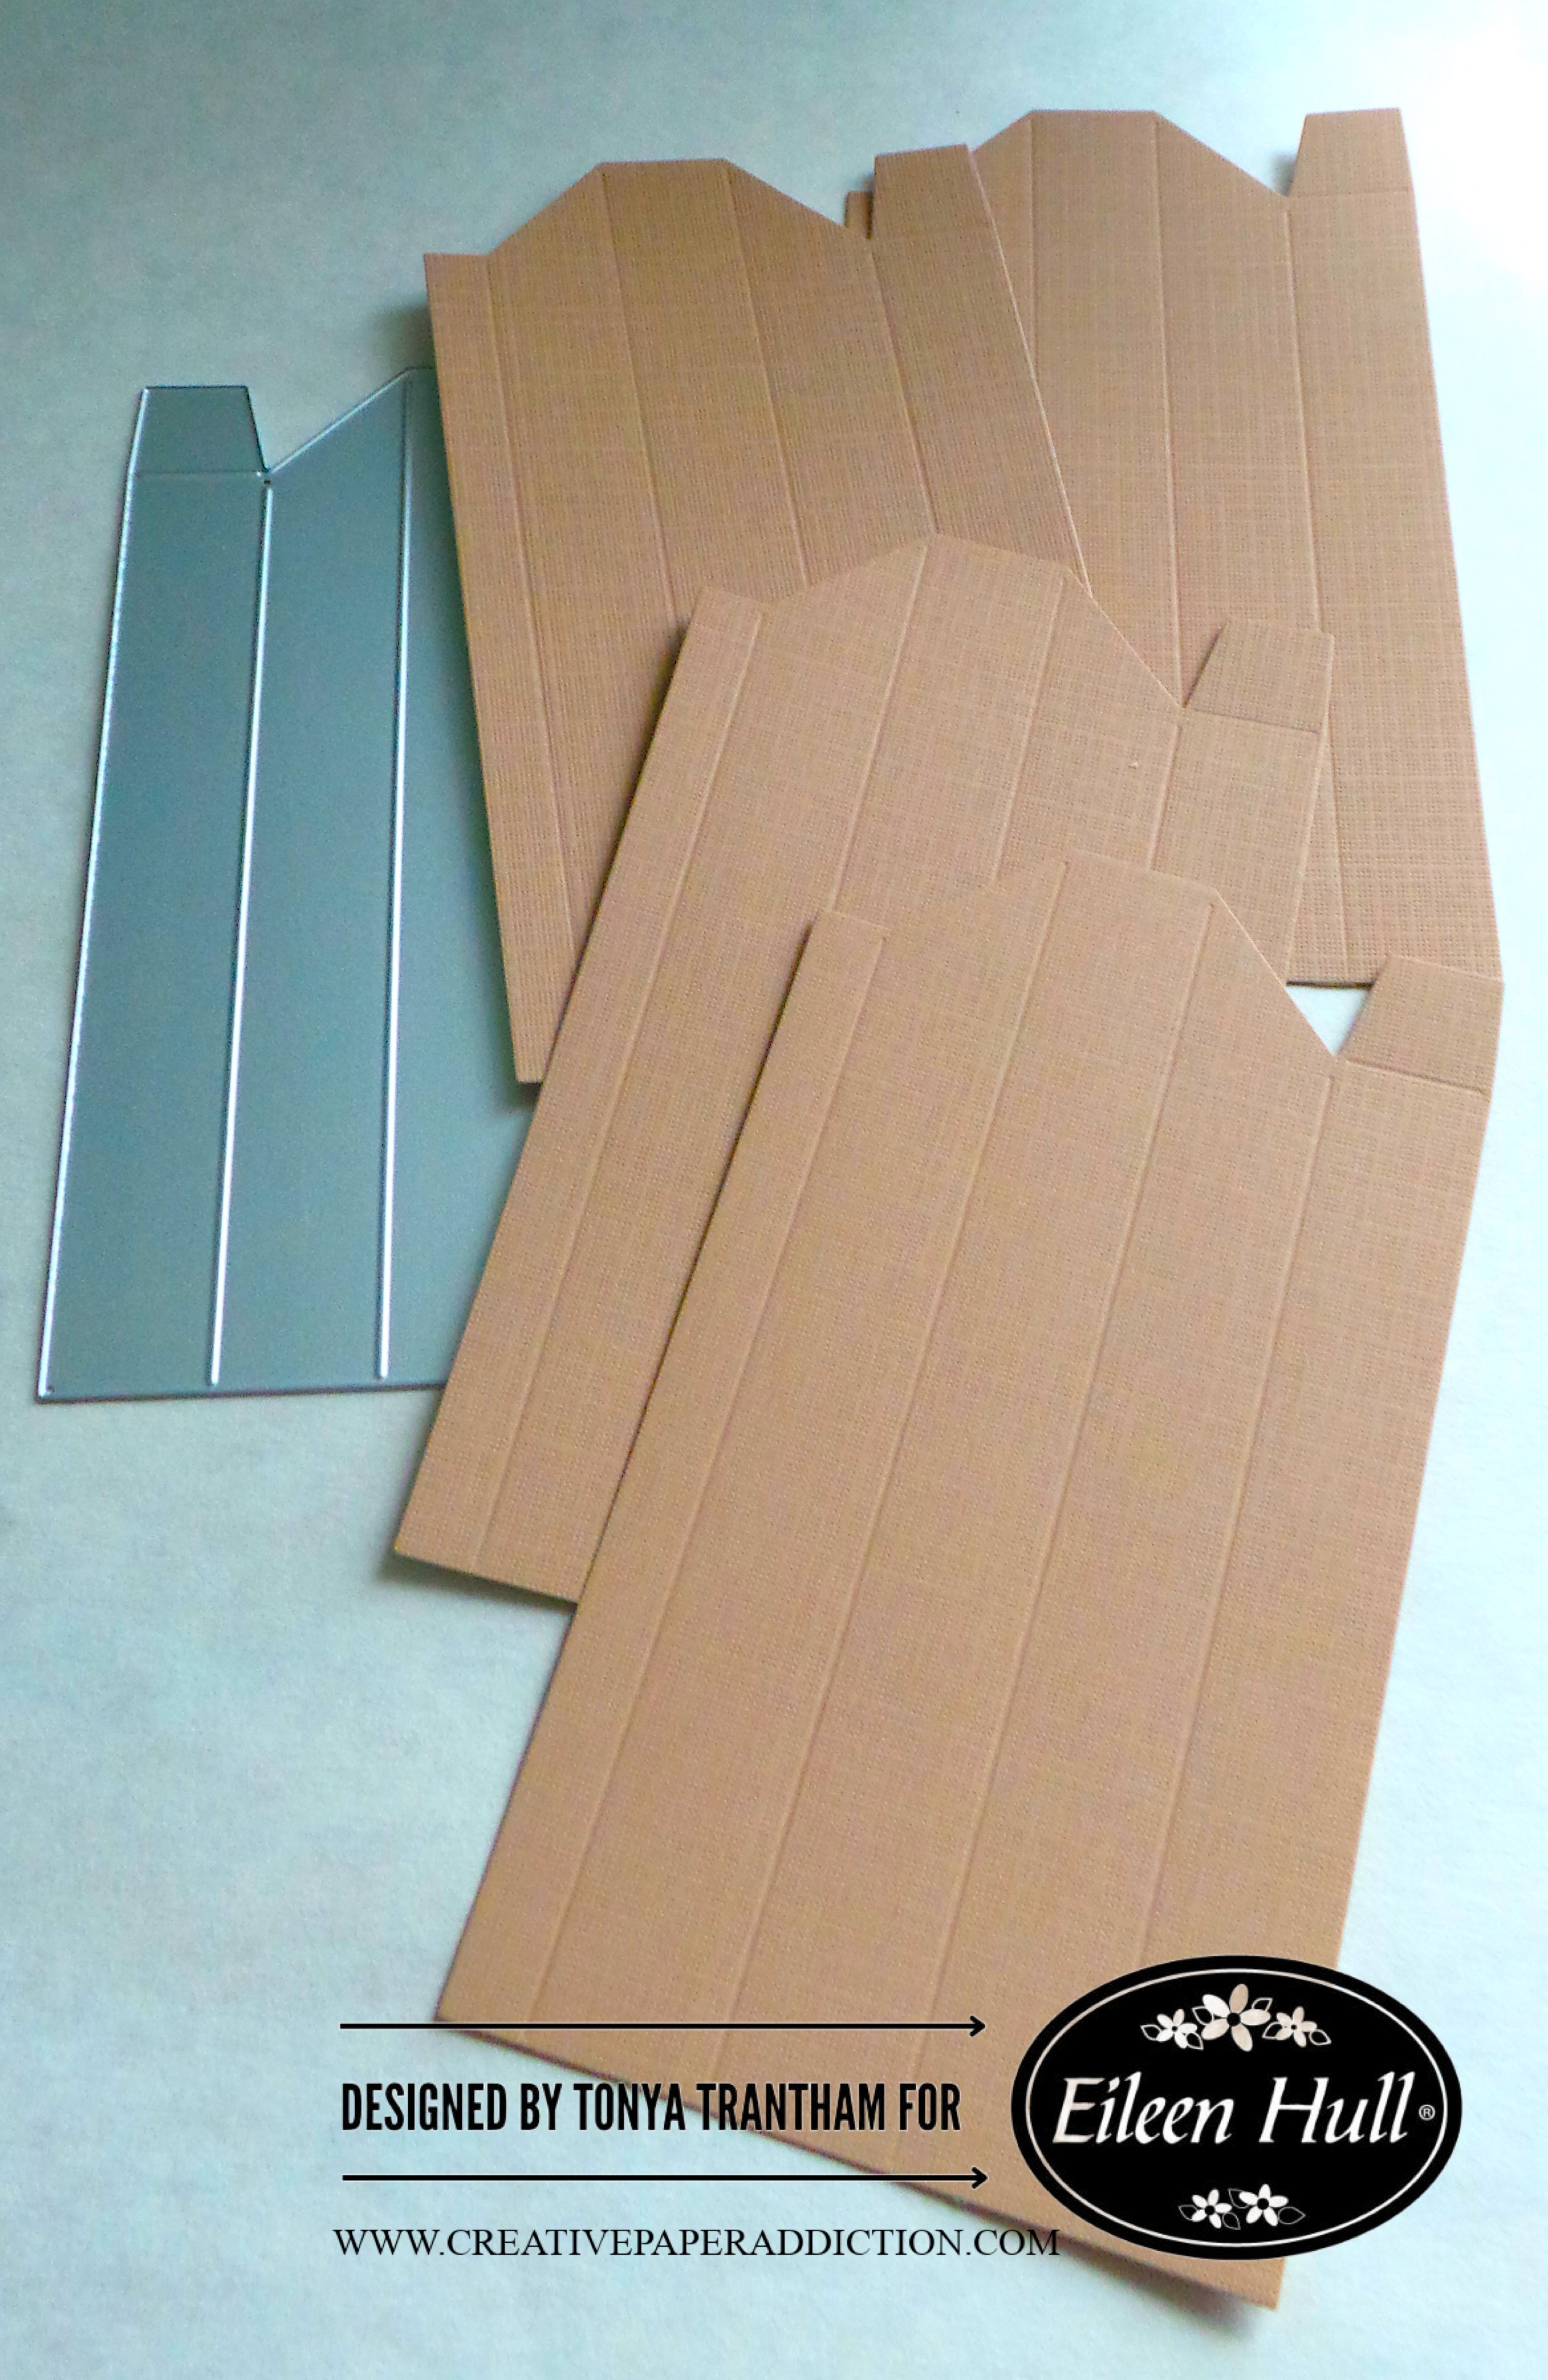
First, I picked out the brown cardstock from the Sizzix Making Essentials Cardstock for the frame. And I cut four frames from the Shadow Box Frames Set 02 Thinlits.

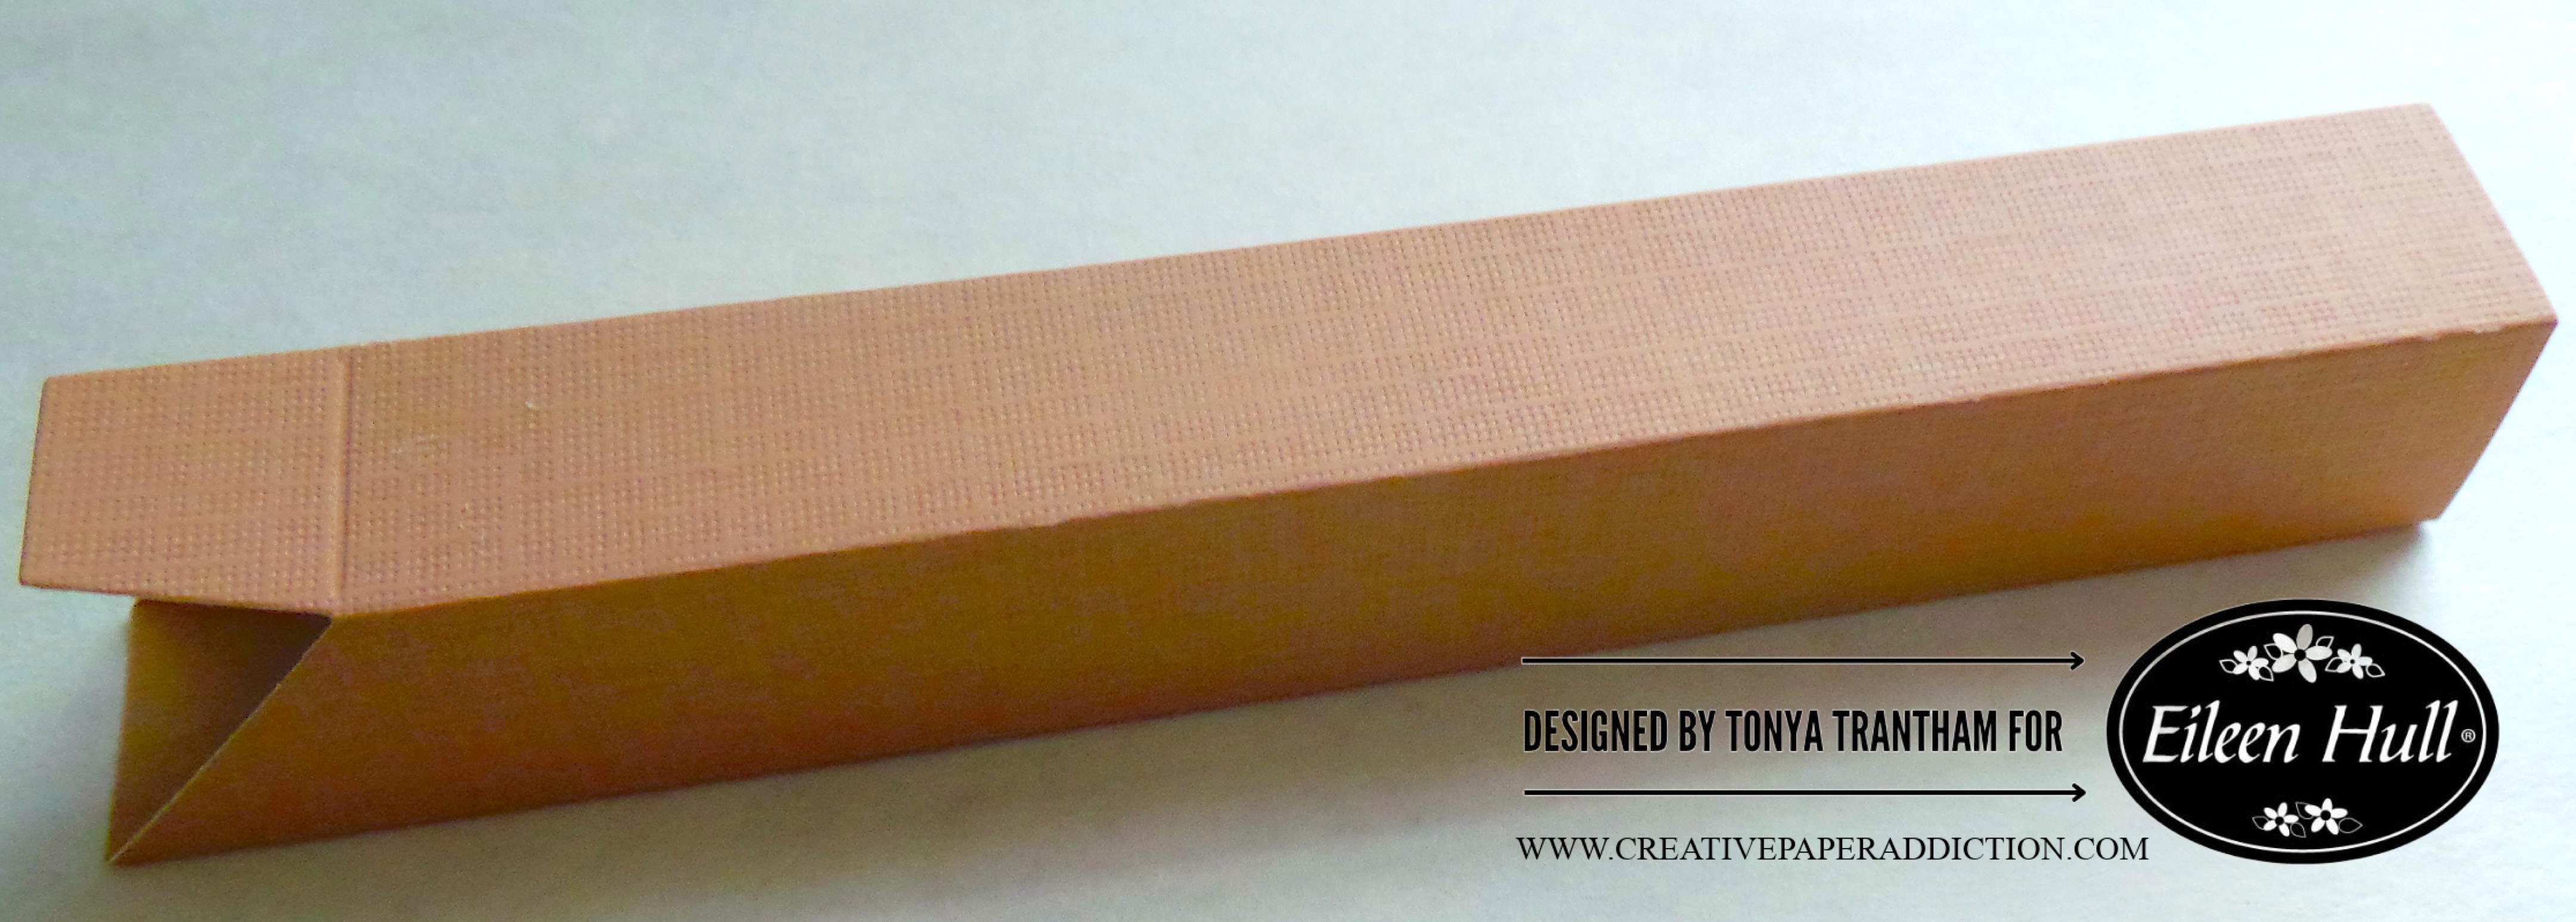
I folded and glued each frame.

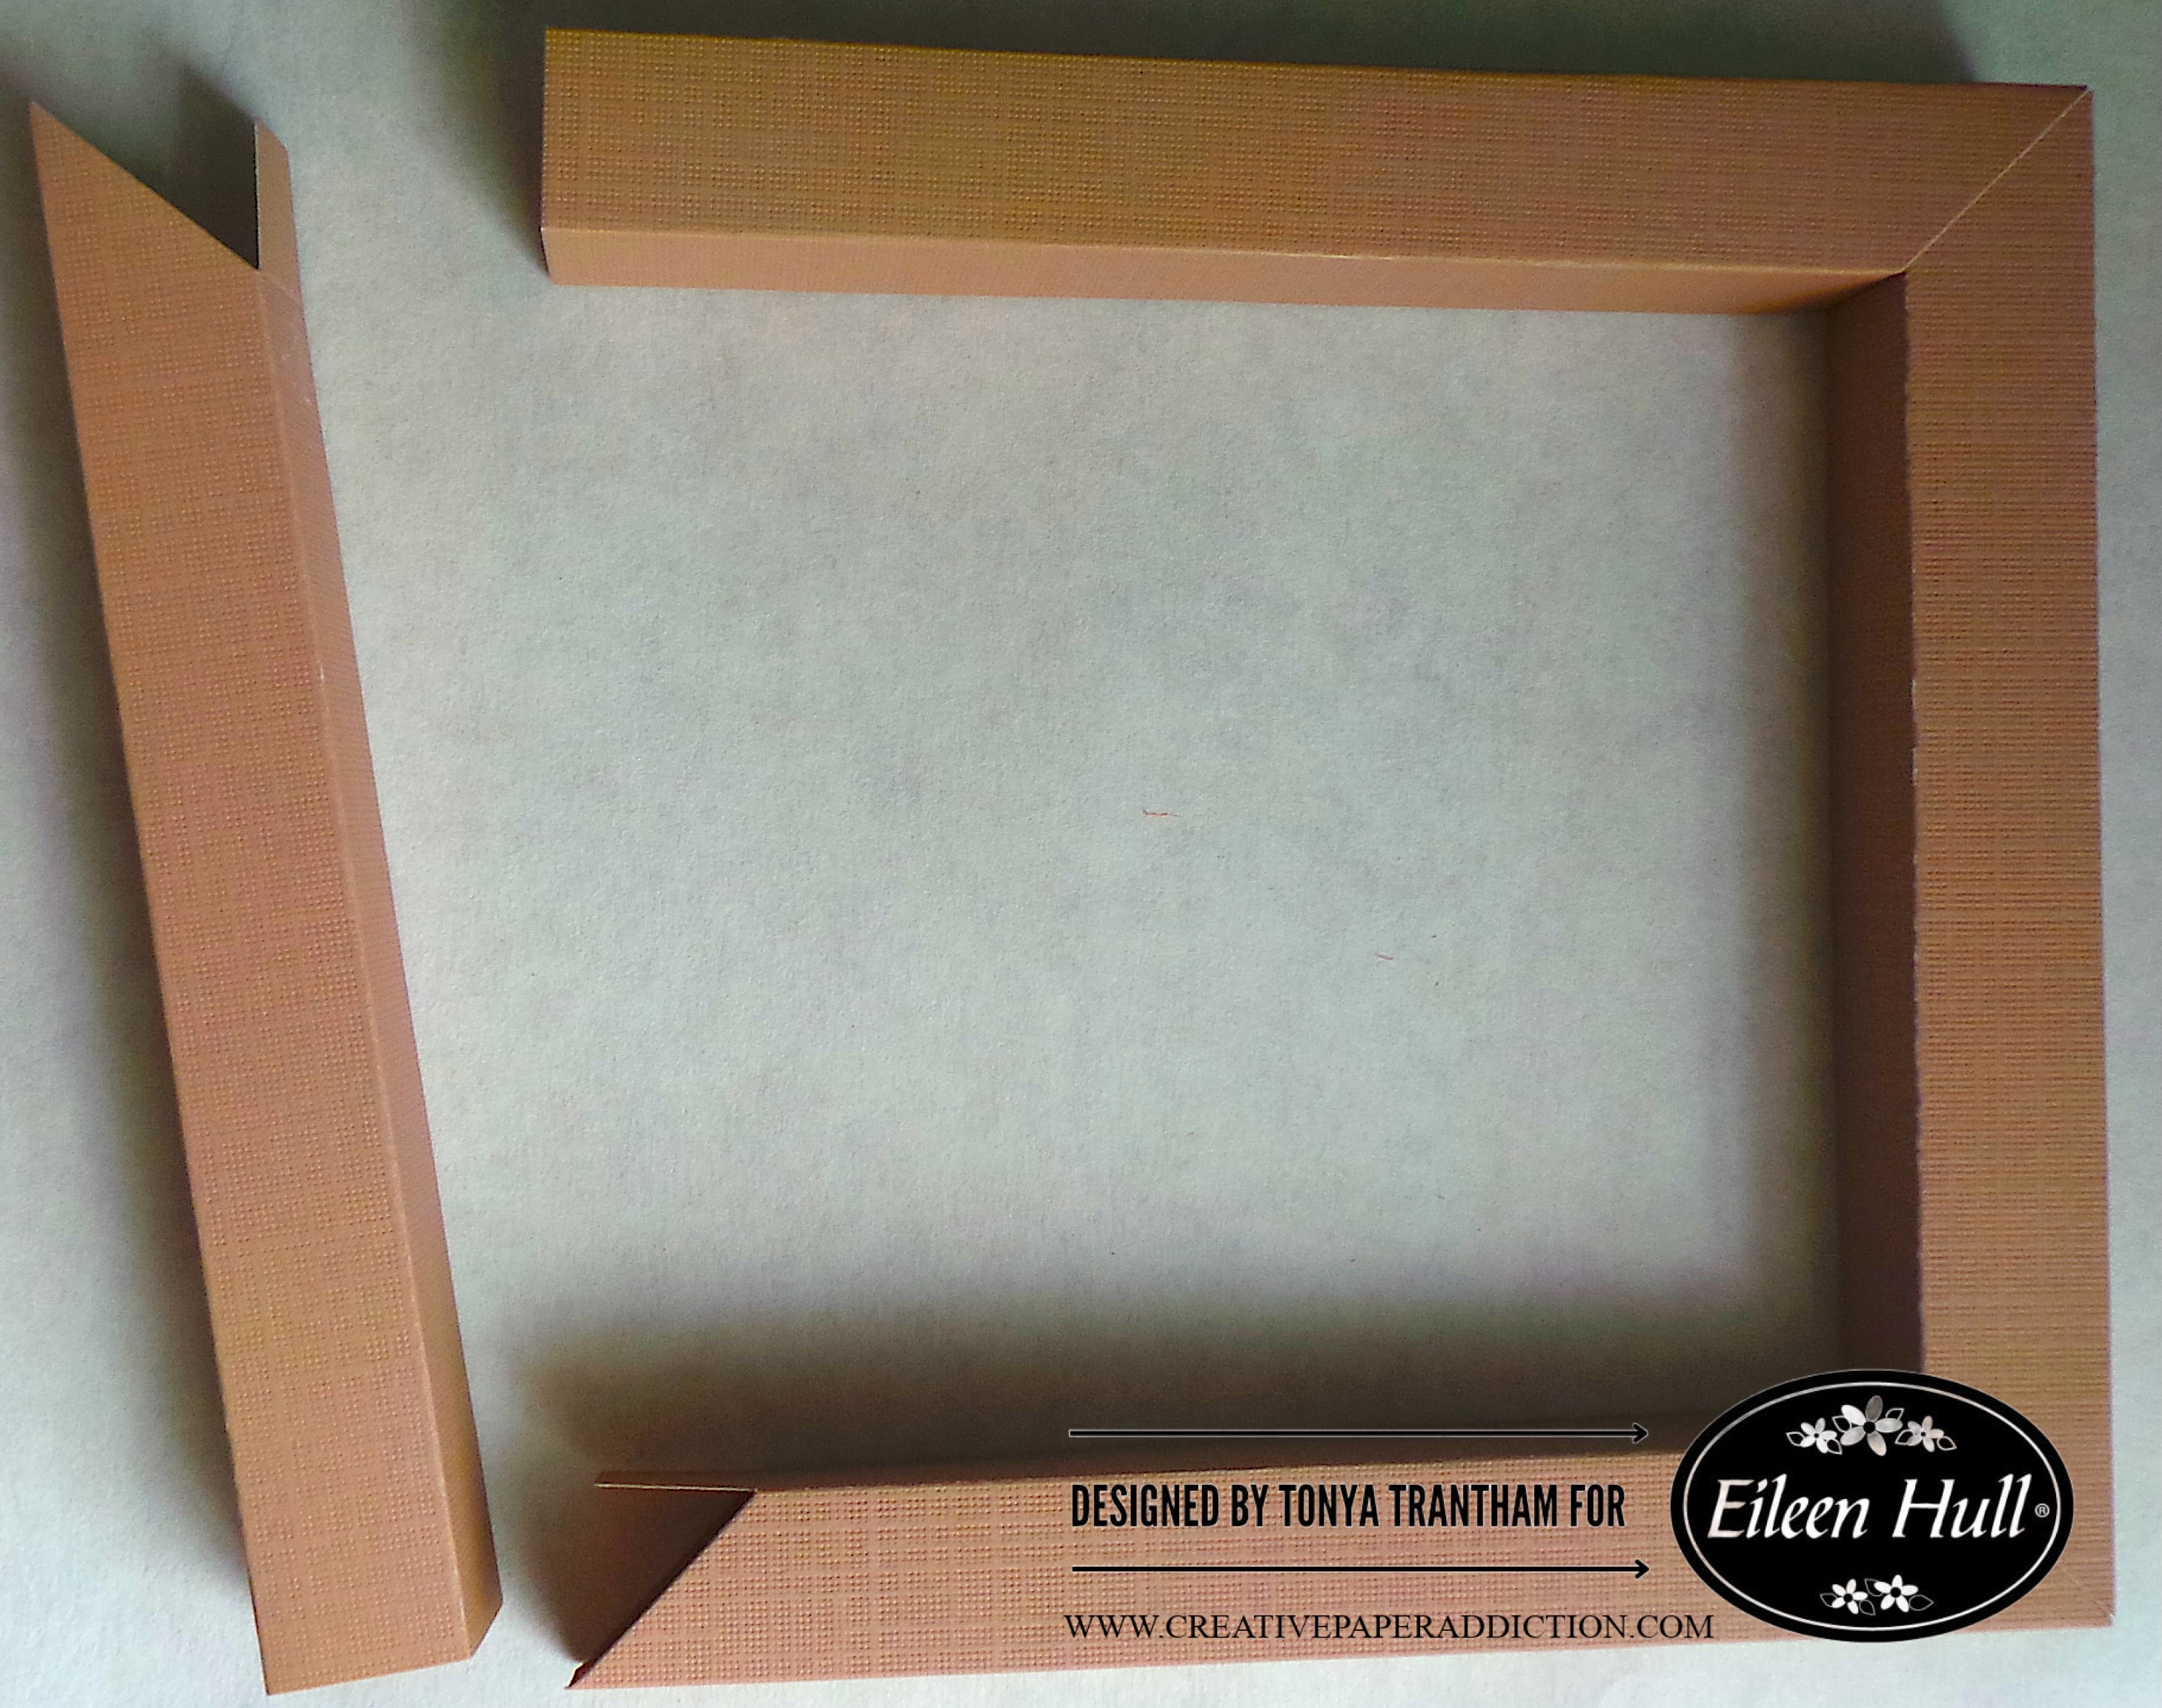
I added adhesive inside the opening that has a tab. And placed it into the straight edge of the next frame. I did hold these while the glue set before adding glue to the next one. I cut and adhered a piece of cardstock to the back of the frame to give the frame stability.

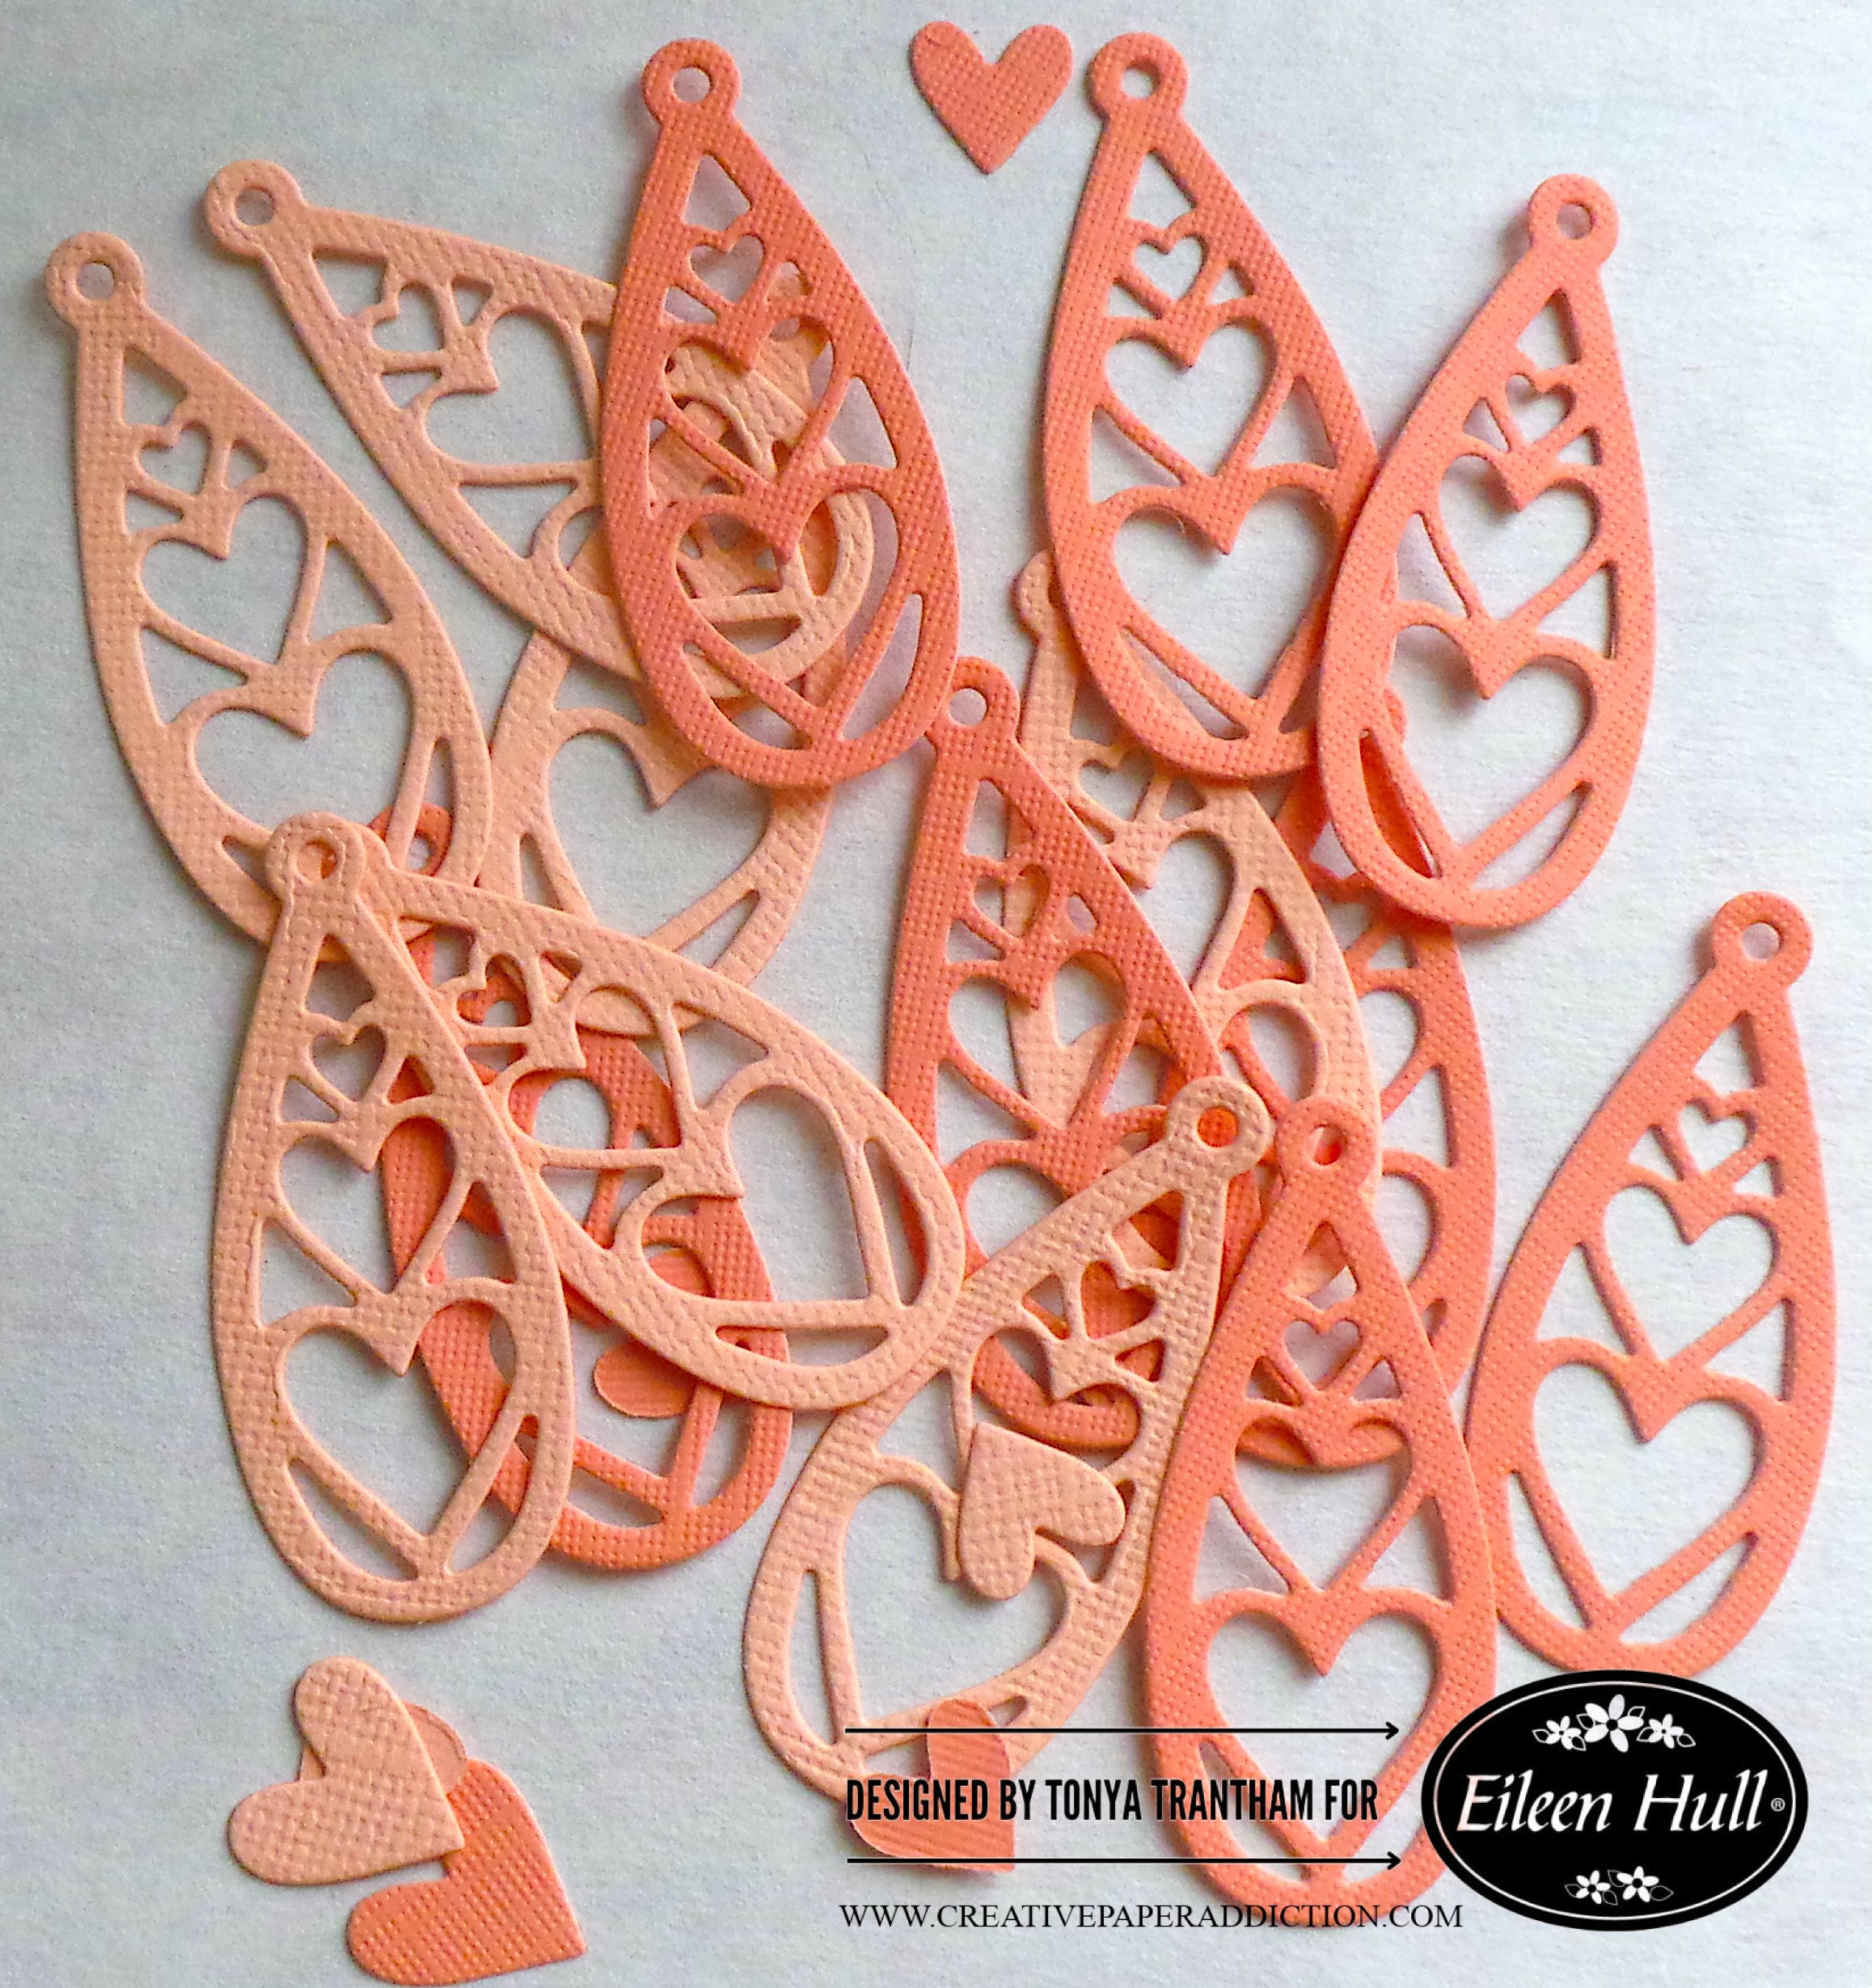
I cut out fifteen of the teardrop heart charms from the Charms Thinlits.

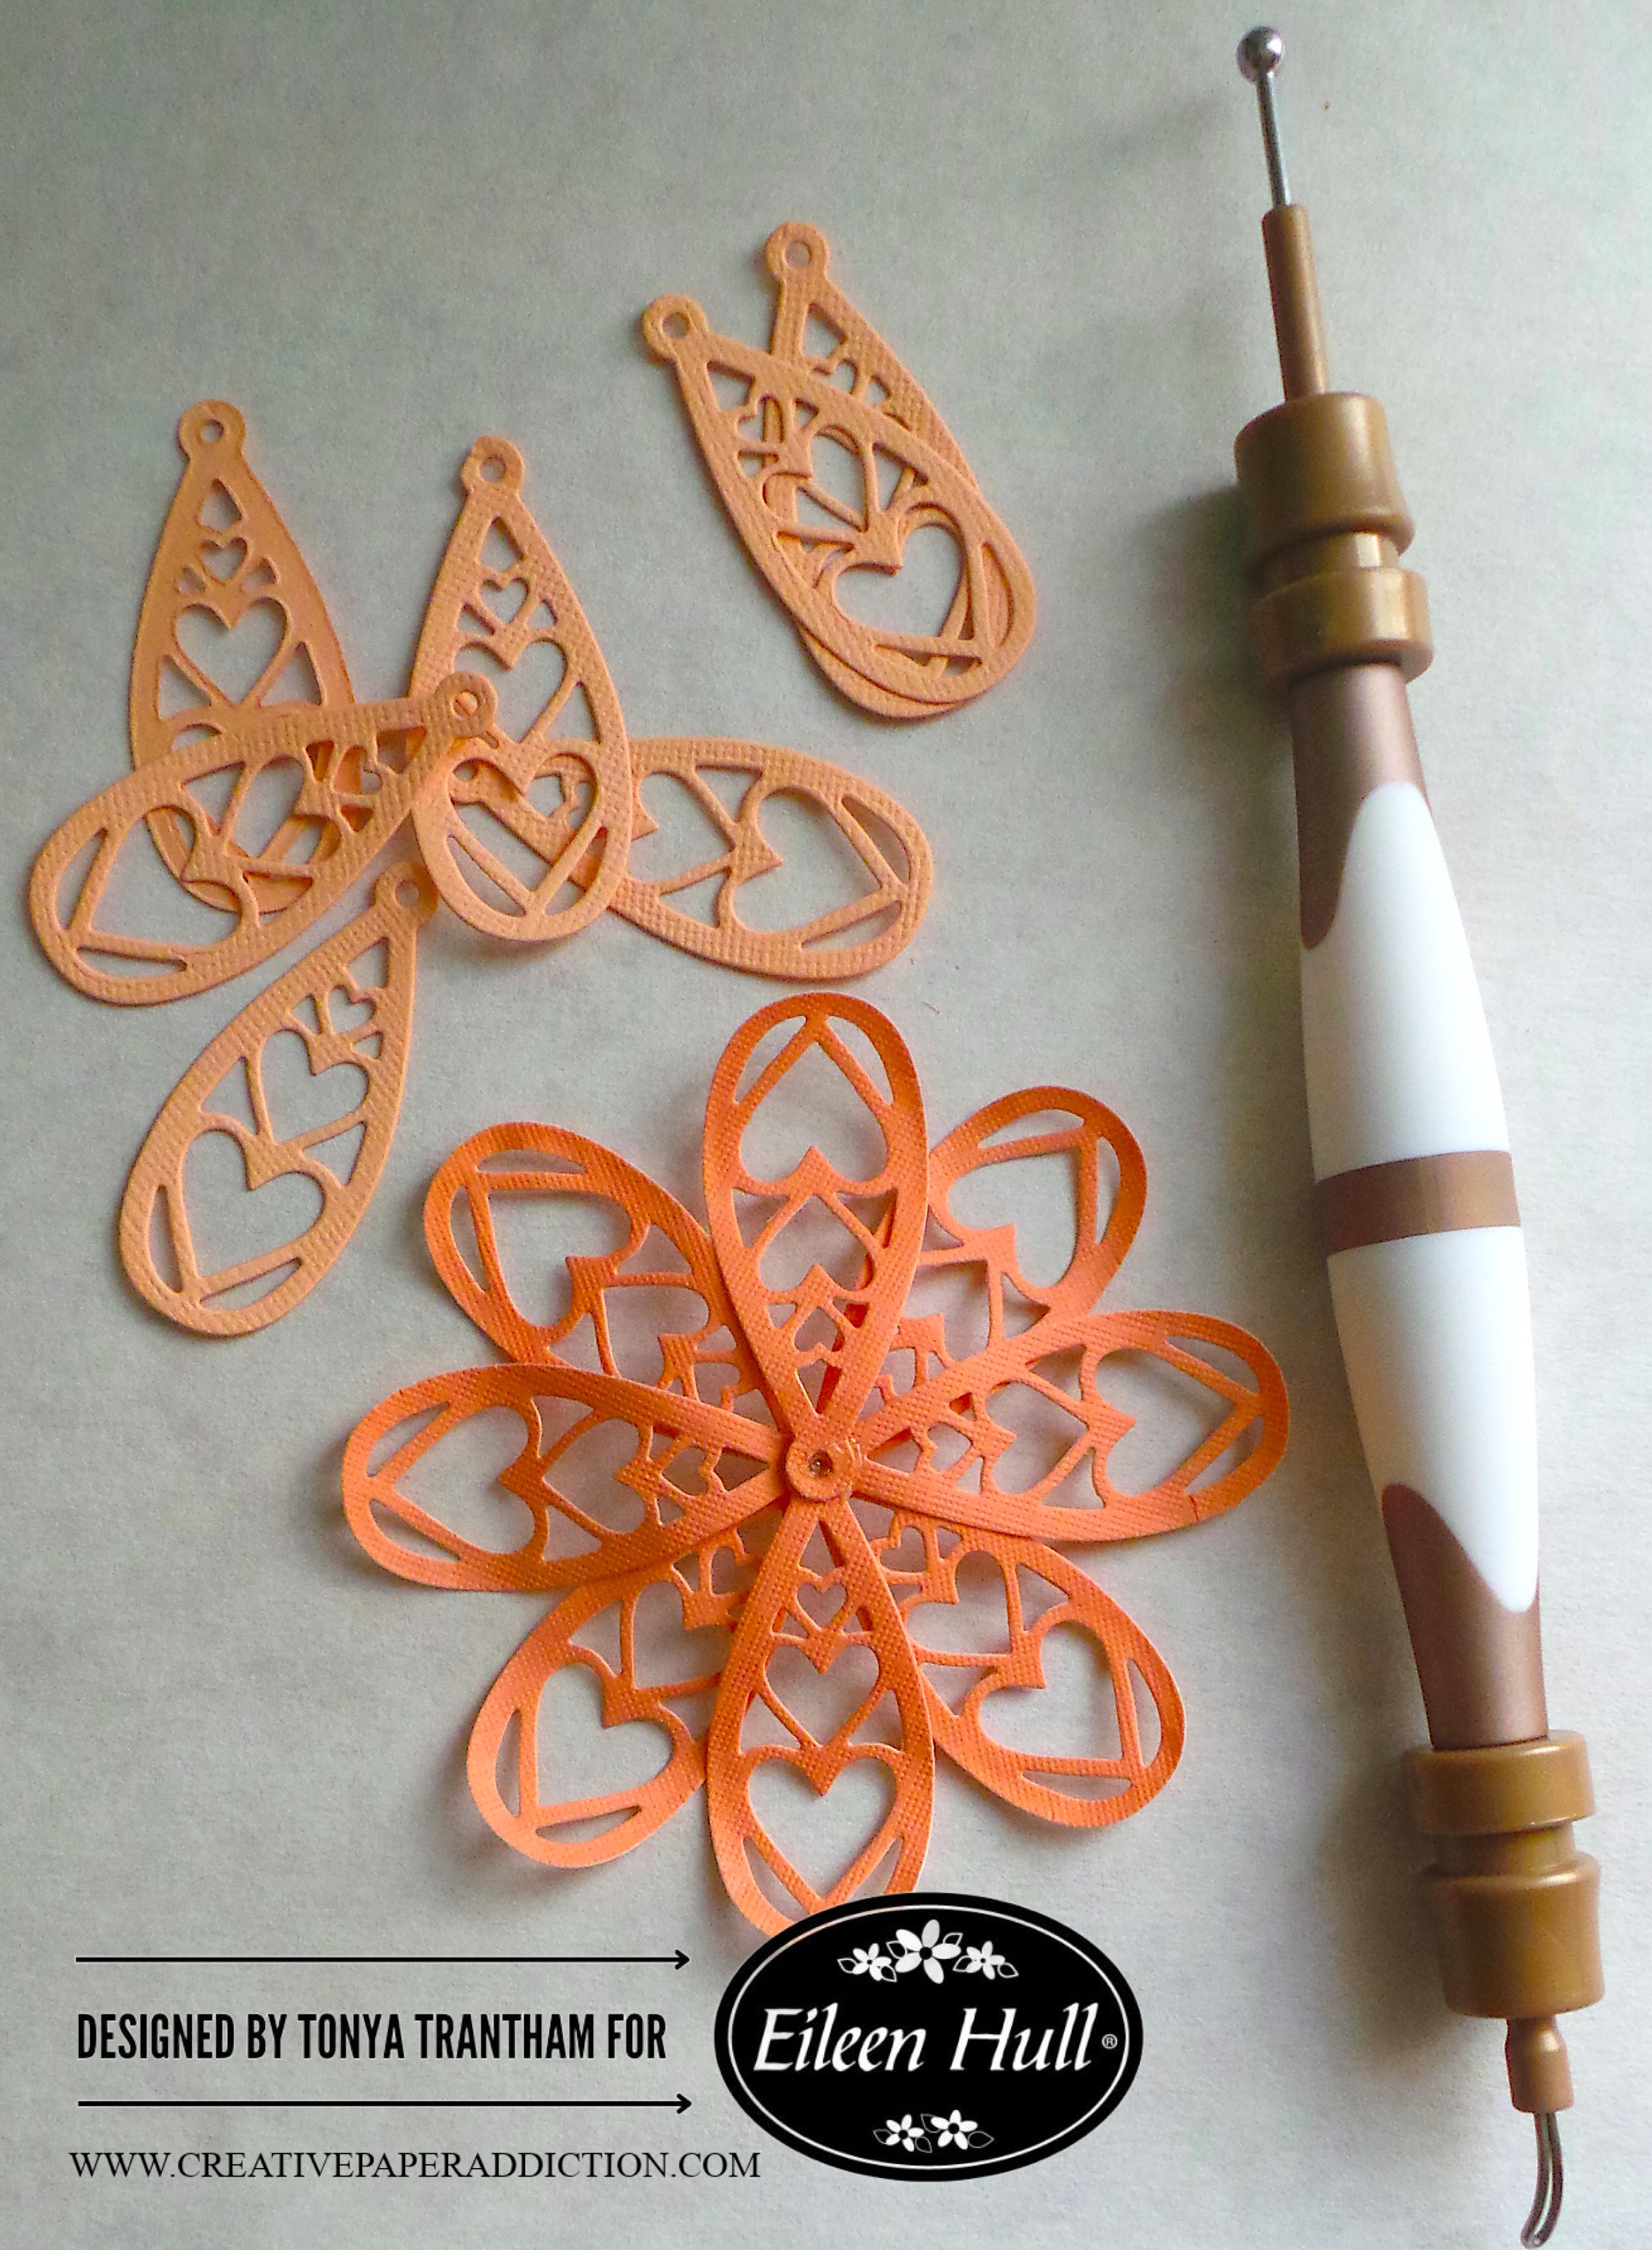
I shaped each teardrop charm with a Stylus.

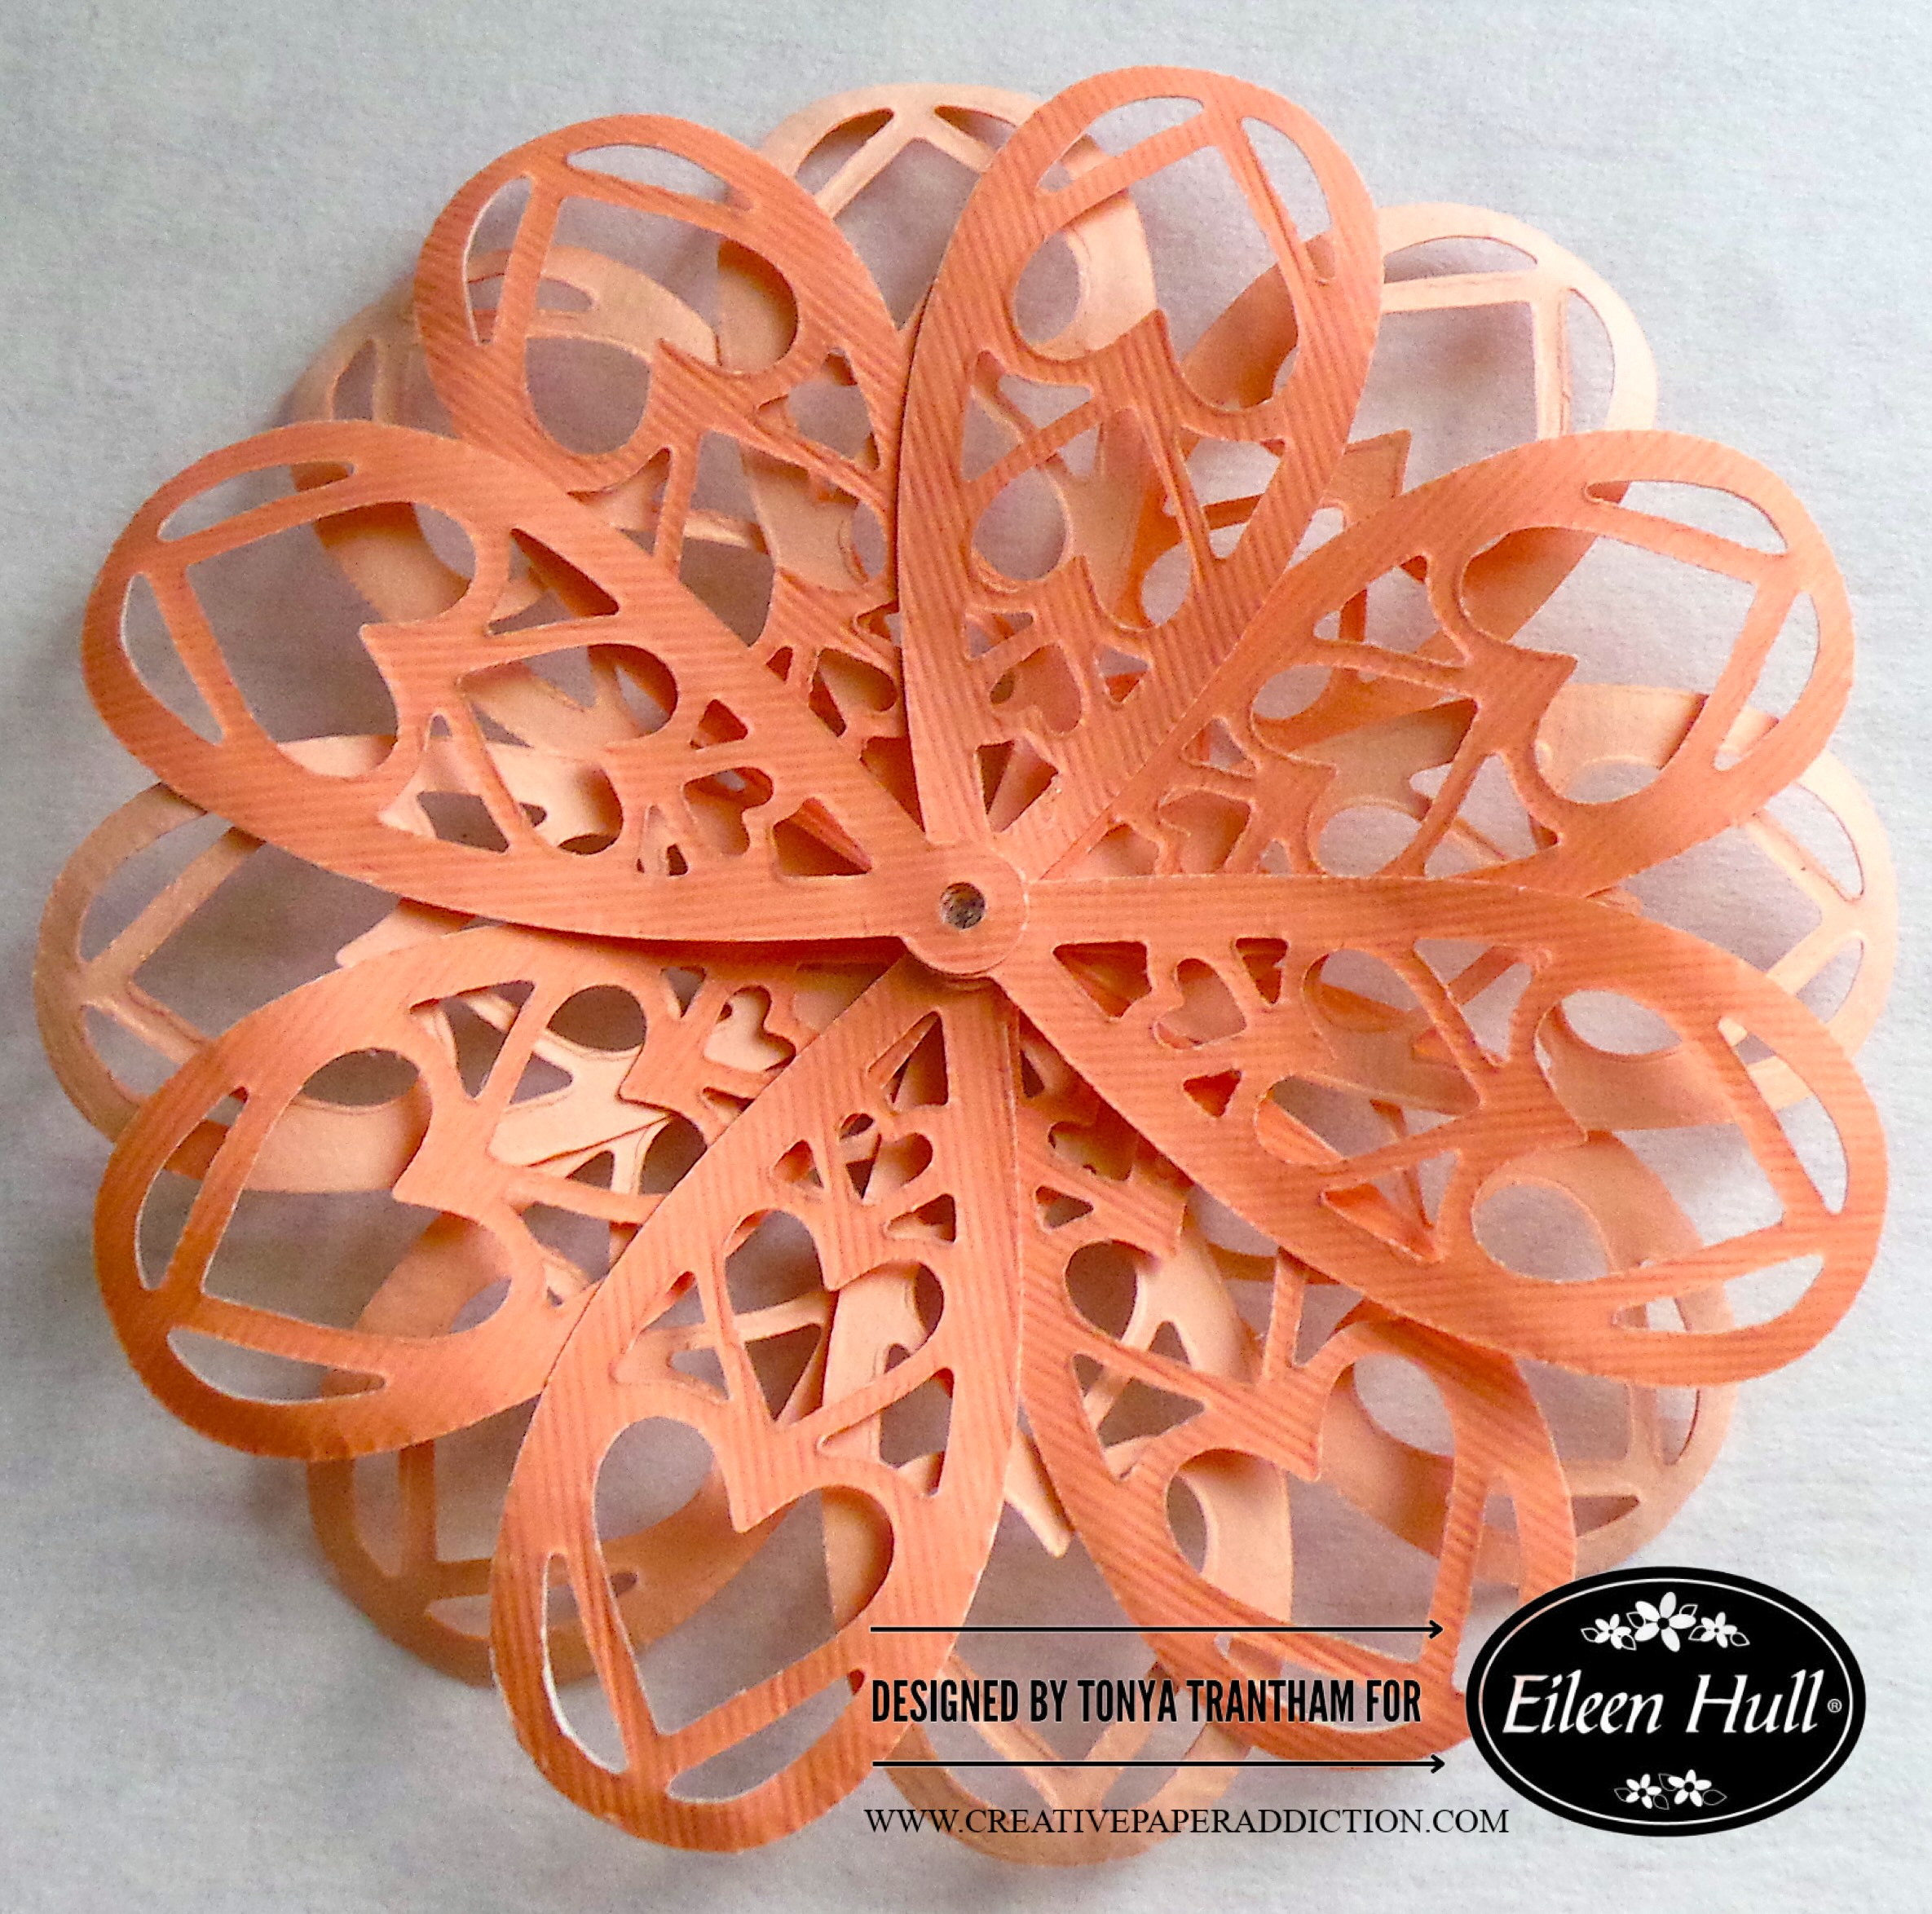
I glued the center of each teardrop charm on top of each other.

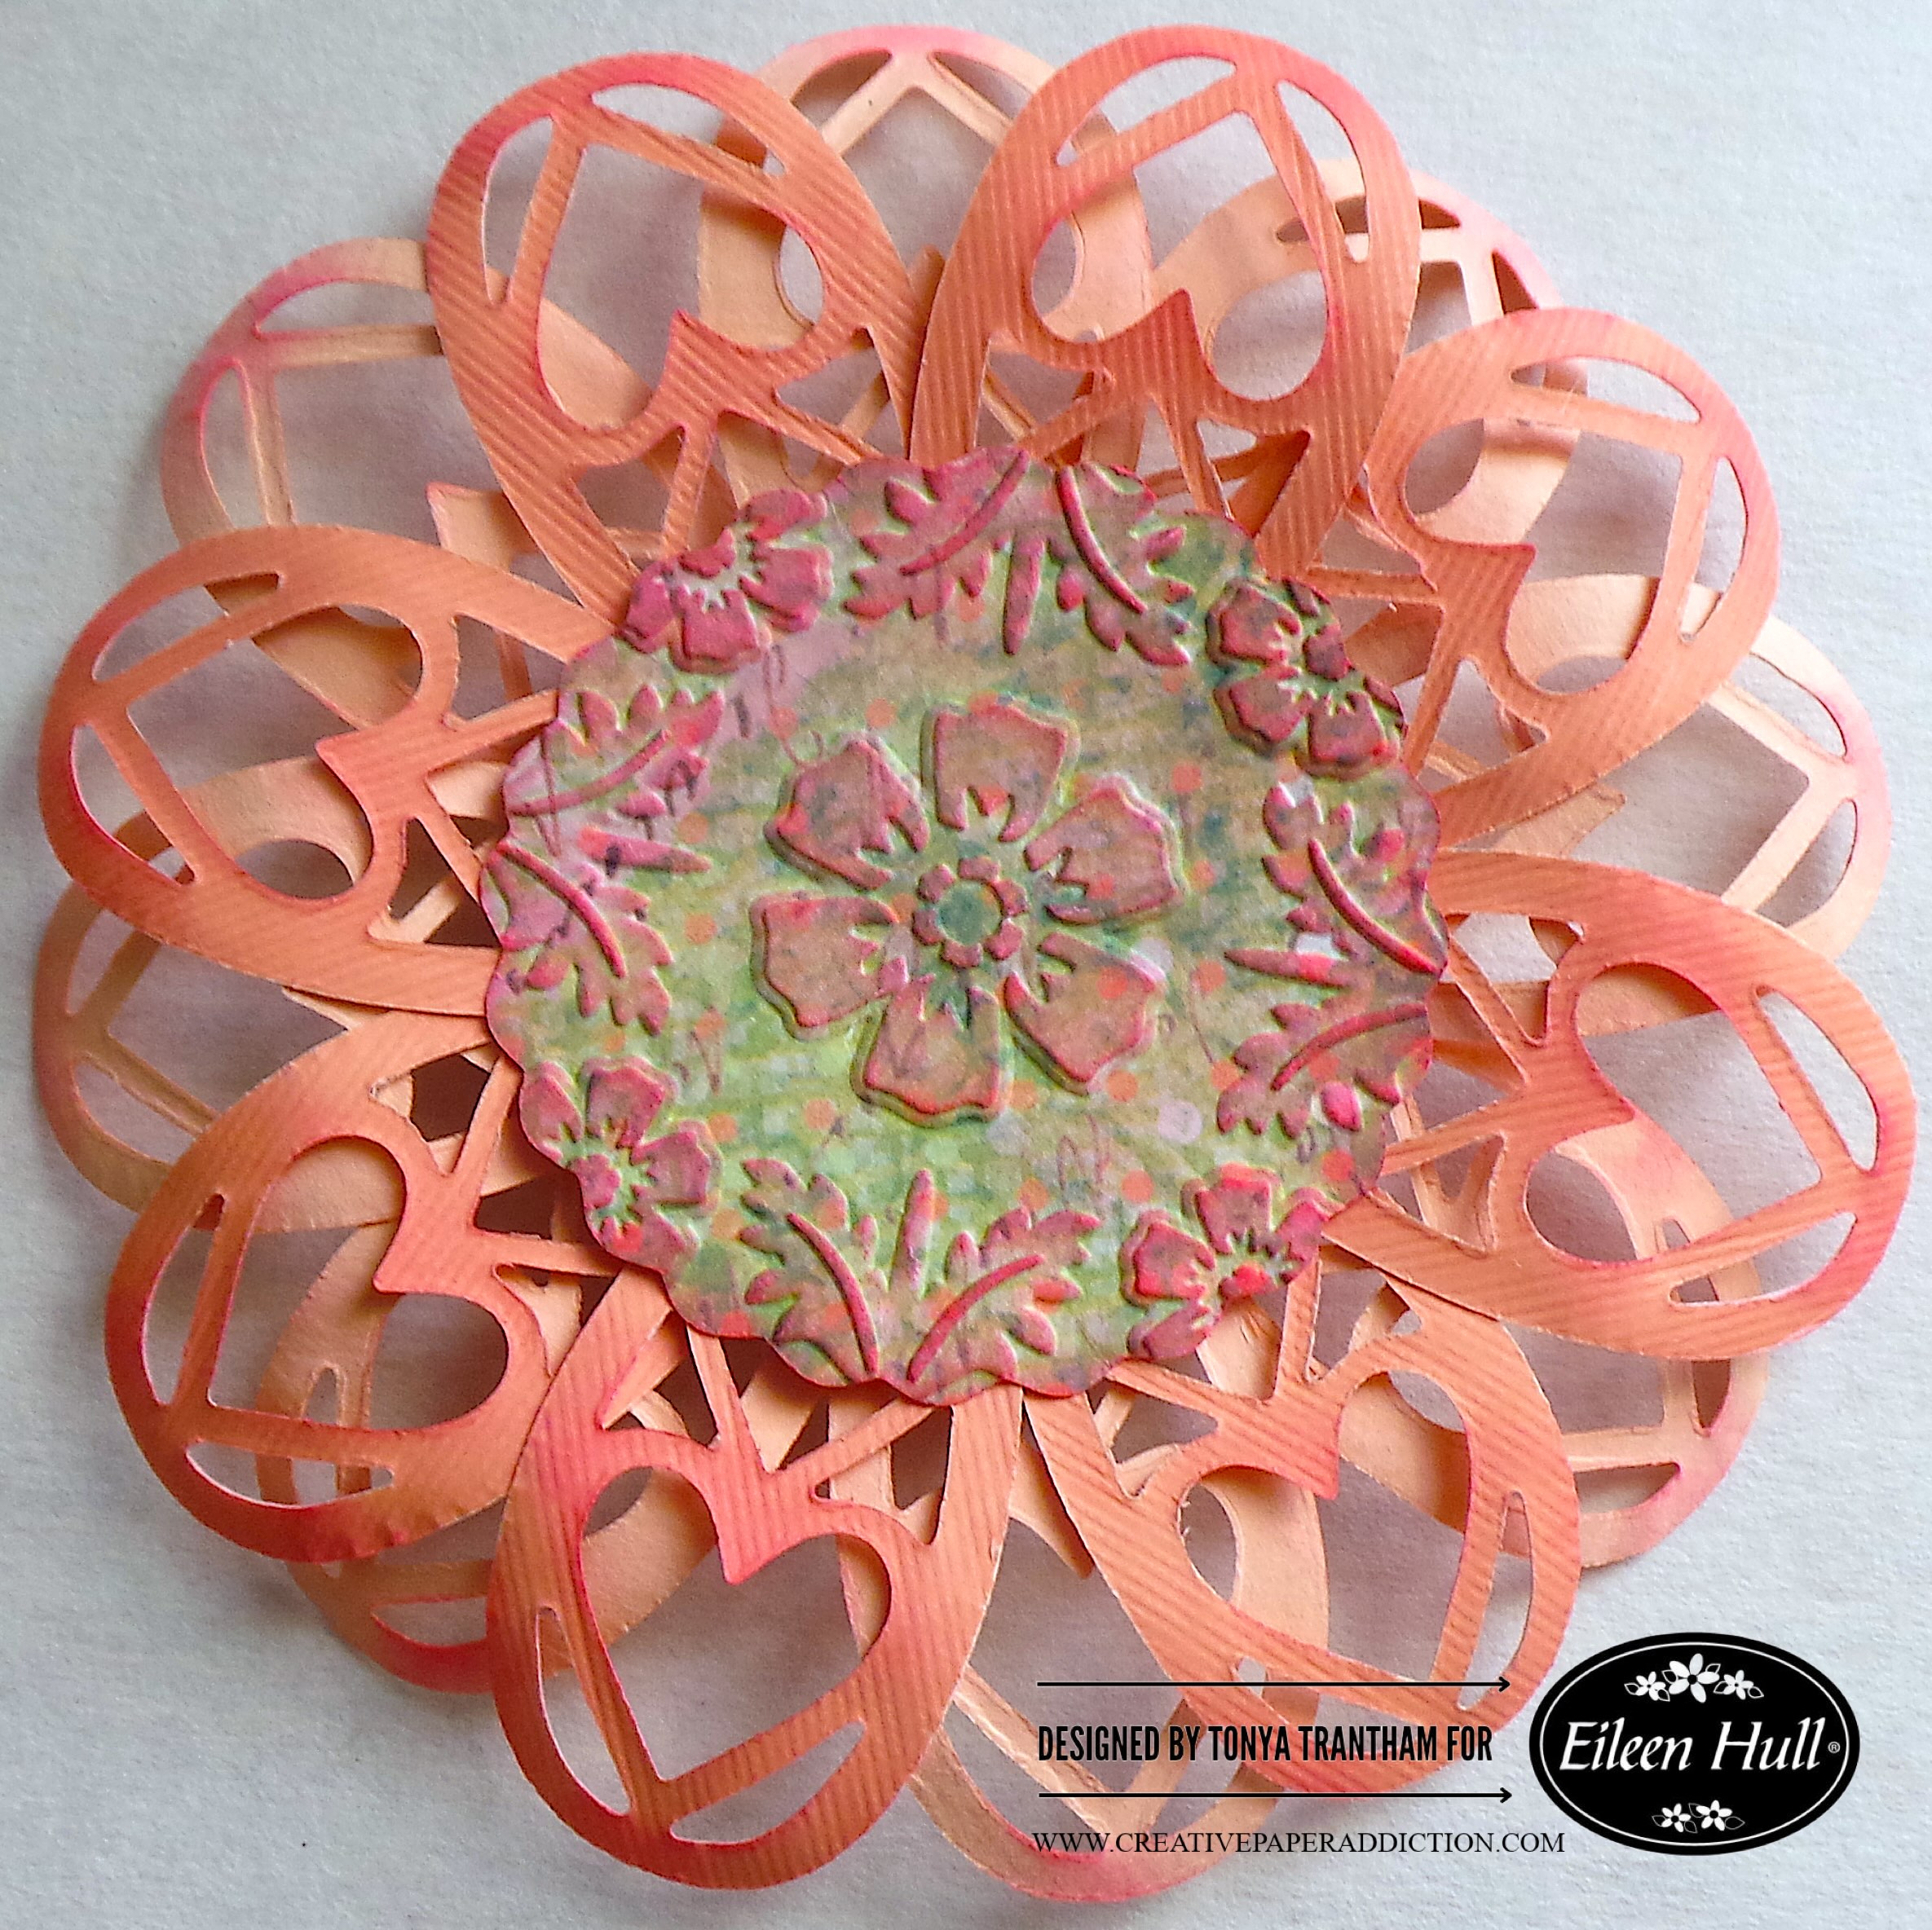
I cut a center from the Sunflower Diecut and embossing that with the Floral Damask Embossing Folder. I inked the center and petals with a Pink Chalk Ink.

I cut an assortment of flowers from the Bookmark, Pockets and Topper Thinlits. I shaped and inked each flower. I adhered on top of each other before gluing to the center of the teardrop flower.

I added two Foam Pop Dots to the back of the flower. I also added a Green Gem to the center of the flower. I placed the flower in the center of the frame. This would make a great gift for a special friend. It can also be displayed as a home decor piece.

If you have any questions or comments about this project please leave them below.

Supplies

Sizzix/Eileen Hull: Charms Thinlits

Sizzix/Eileen Hull: Floral Damask Embossing Folder

Sizzix/Eileen Hull: Bookmark, Pockets and Topper Thinlits

Sizzix/Eileen Hull: Shadow Box Frames Set 02 Thinlits

Sizzix/Eileen Hull: Sunflower Diecut

Diecut Machine

Sizzix Making Essentials Cardstock

Paper Cutter

Scissors

Stylus

Scraps of Cardstock

Foam Pop Dots

Green Gem

Pink Chalk Ink

Beacon Adhesives: Zip Dry Adhesive

(Products listed above are Affiliated Links for your convenience)

DISCLAIMERS

This blog is compensated to provide opinion on products, services, websites, and various other topics. Even though the owner(s) of this blog receives compensation for our posts or advertisements. I always give my honest opinions, findings, beliefs, or experiences on those topics or products. The views and opinions expressed on this blog are purely my own. Any product claim, statistic, or quote should be checked with each manufacturer. Verify other representations about a product or service with the provider or party in question.This blog contains affiliate linksClicking these links helps to support Tonya Trantham Designs – Creative Paper Addiction. It runs at no additional cost to you. Today’s features are Sizzix, Eileen Hull and Scrapbook.com Products. 

Thanks for stopping by, hope your Monday is great and enjoy creating!