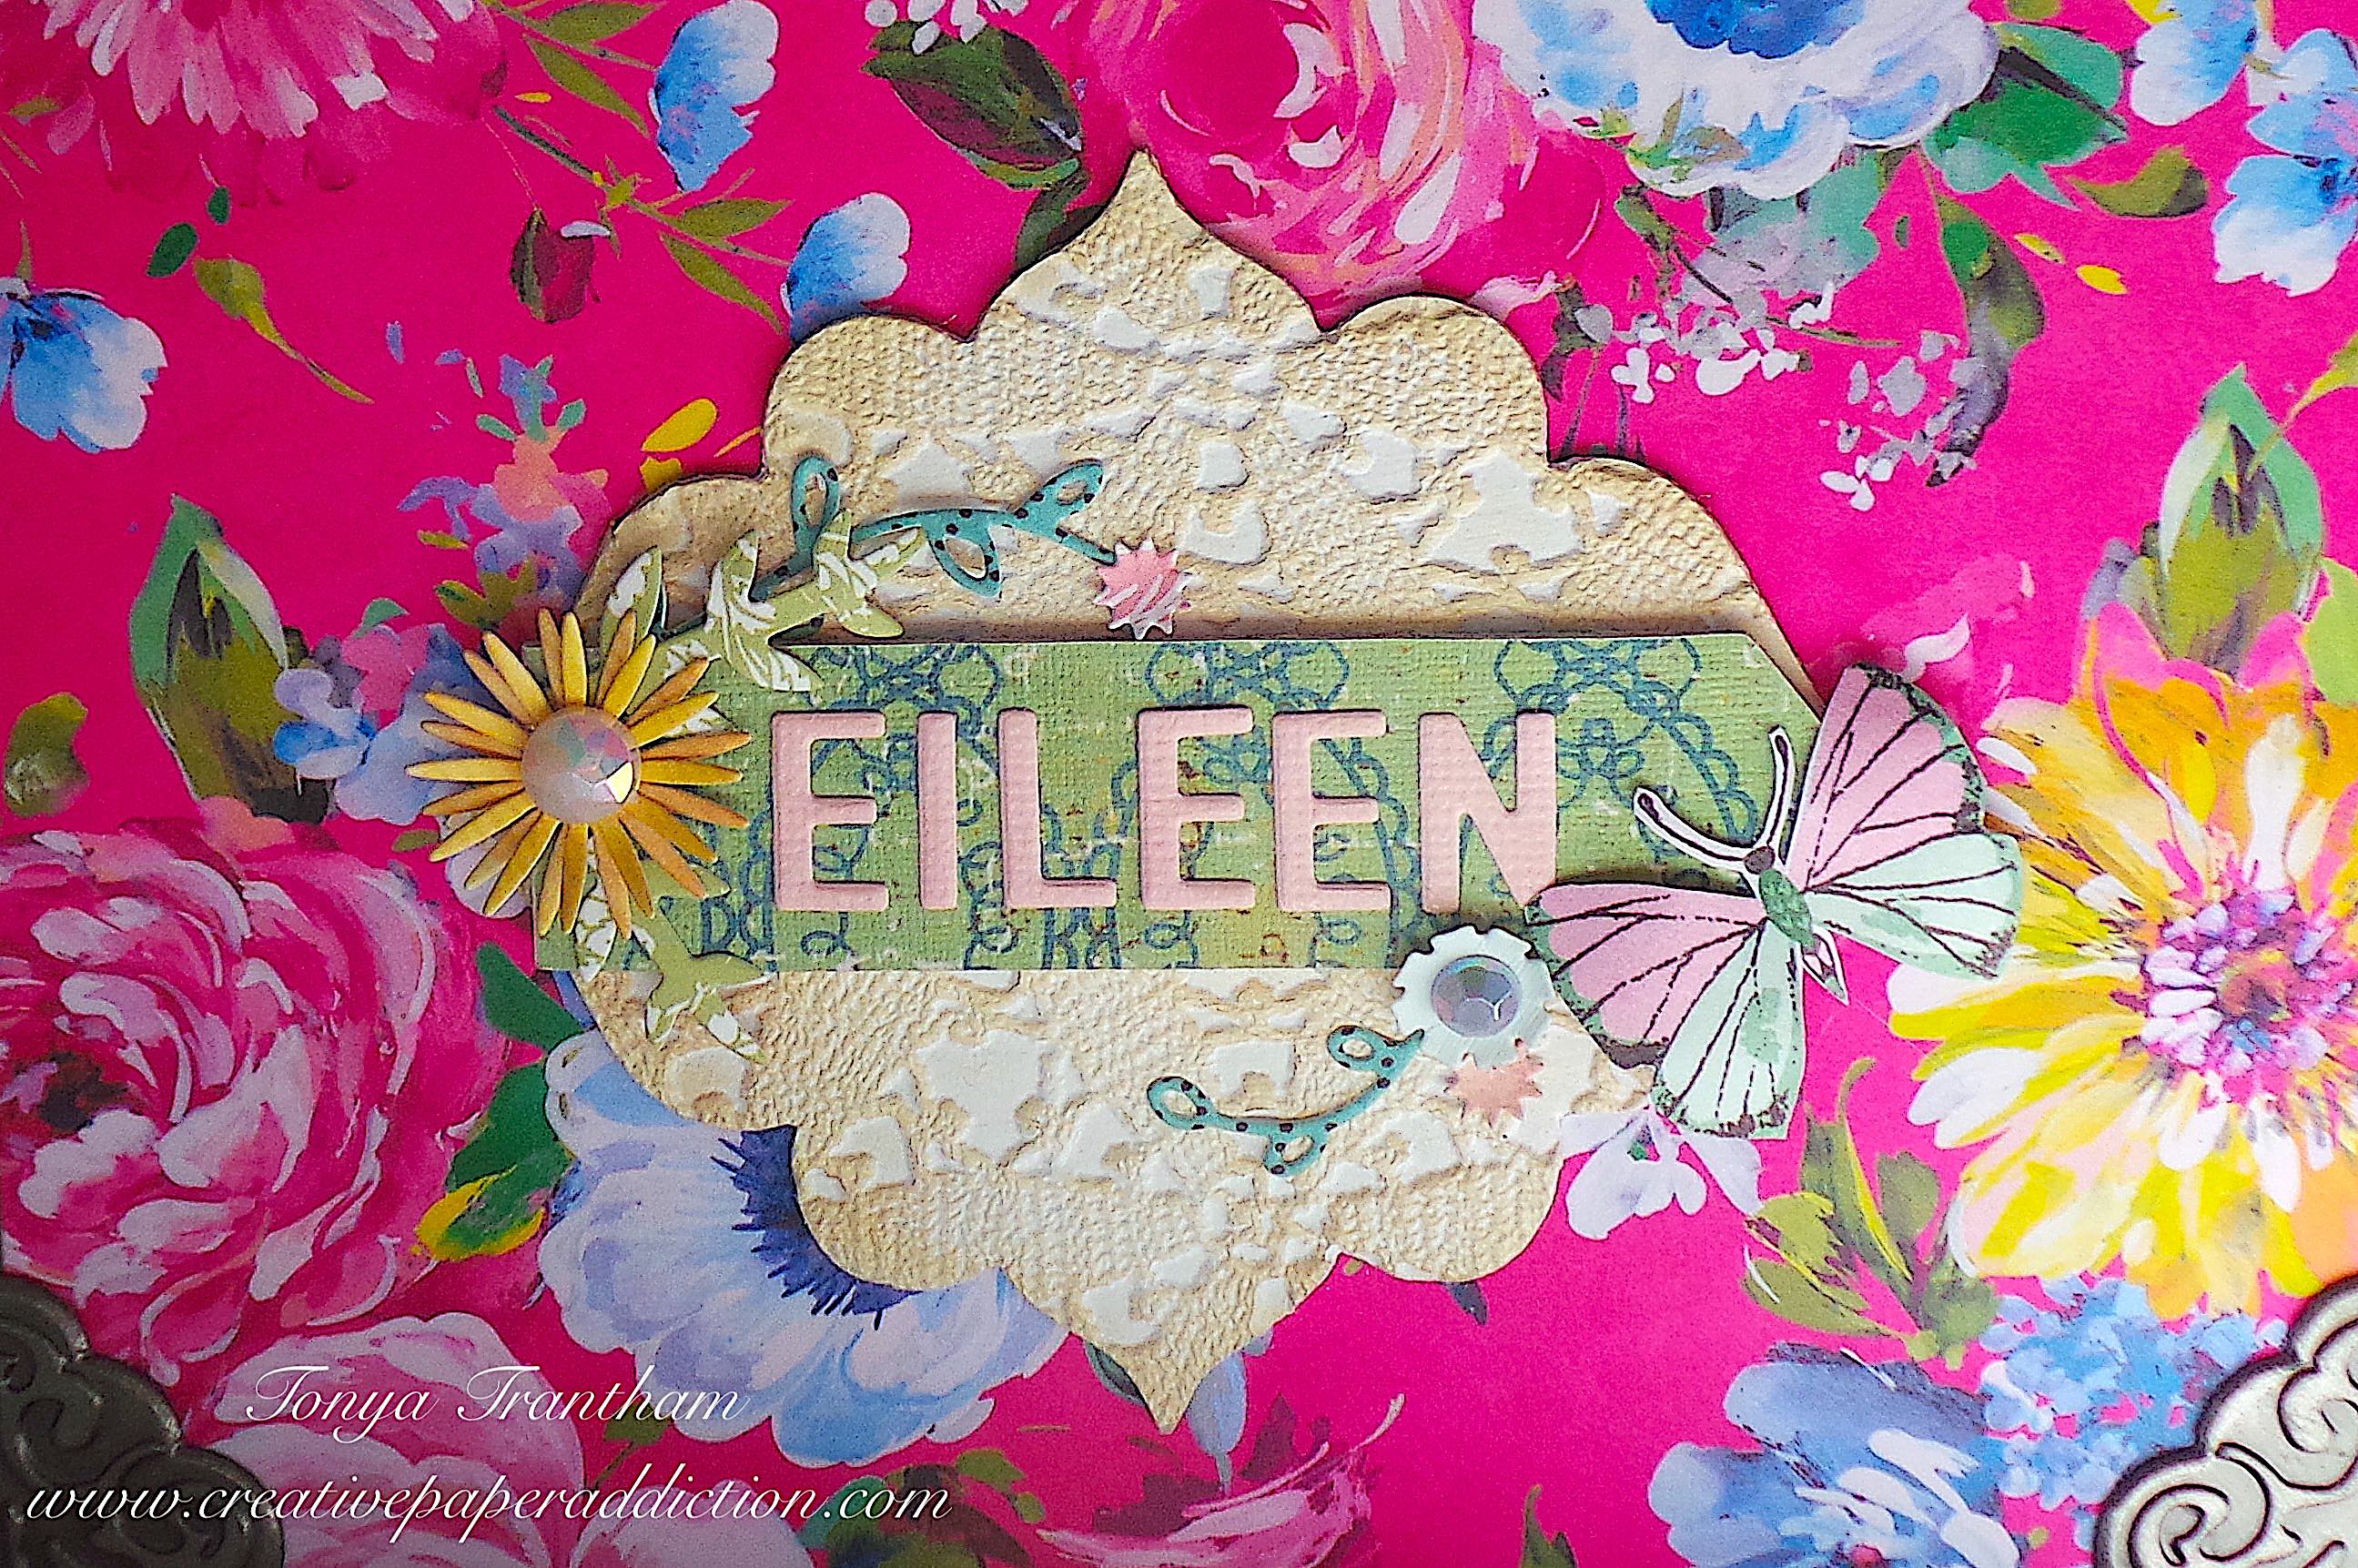
Get Inspired with Eileen Hull’s Latest Scoreboards Dies and Stencils

Hi everyone! It’s June and it’s time for a release by Eileen Hull and Sizzix! This collection combines three classic Eileen Hull Sizzix Scoreboards dies and two new designs- a four layer stencil and coordinating Thinlits that cuts a portion of the stencil!

The three Scoreboards dies are the Treasure Box, Stacking Drawer and Notebook. The fun thing about this set is that they work together but also stand alone.

I will be sharing sneak peeks of my upcoming projects with these dies, thinlits and stencils later this month.

The Treasure Box measures 3 1/4” x 5 1/4” x 4” and holds index cards, two stacks of ATC’s, a whole row of journaling cards and anything else you care to add.

The Stacking Drawer fits a set of three drawers perfectly inside the Treasure Box to create a great storage solution for desk supplies, hair accessories, small collections, jewelry and much more. It also makes a great little gift box for something special!

The Notebook is a favorite because of how quick and easy it is to create. One pass through the Big Shot and you have a book cover! It measures 5” x 3 1/2” x 3/4”. Cover with paper, fabric, metal or cut from leather. So many ways to use this.

 The Watercolour Flowers and Lattice Stencils is based on a watercolor I did. There are three stencil layers to give dimension and then a fourth layer versatile lattice design that can also be used to create a plaid pattern! 

Painterly Blooms and Background is a die that perfectly die cuts the flowers you have just stenciled so no fussy cutting needed plus there are extra flower shapes so you can layer them for dimensional florals. 

Eileen and her team hopes you will watch our release party on June 4 at noon Eastern to see lots of samples and alternate ideas for ways to use this die! There will be a GIVEAWAY! Also you can find the die bundles here in Eileen’s Etsy Shop.

Supplies

Sizzix/Eileen Hull: Treasure Box Diecut

Sizzix/Eileen Hull: Stacking Drawer Box Diecut

Sizzix/Eileen Hull: Notebook Diecut

Sizzix/Eileen Hull: Painterly Blooms and Background Thinlits

Sizzix/Eileen Hull: Watercolour Flowers and Lattice Stencils

Diecut Machine

Beacon Adhesives: Zip Dry Adhesive

(Products listed above are Affiliated Links for your convenience)

DISCLAIMERS

This blog is compensated to provide opinion on products, services, websites, and various other topics. Even though the owner(s) of this blog receives compensation for our posts or advertisements. I always give my honest opinions, findings, beliefs, or experiences on those topics or products. The views and opinions expressed on this blog are purely my own. Any product claim, statistic, quote or other representation about a product or service should be verified with each manufacturer, provider, or party in question.This blog contains affiliate links, clicking and shopping through these links helps to support and run Tonya Trantham Designs – Creative Paper Addiction at no additional cost to you. Today’s features are Sizzix, Eileen Hull and Scrapbook.com Products. 

Thanks for stopping by, hope your Tuesday is awesome and enjoy creating!


Pink and White Storage Box

Hi everyone! I’m back this week with another project using the Storage Box Diecut by Eileen Hull. I only used one diecut for this project. Which is hard to believe because I’m a firm believer in using an assortment of dies, thinlits and embossing folders…yikes! Where was my mind when I was making this!?!?! Also I took no step out photos. I was in the moment and I had it made before I realized it…sorry about that! Anyways, let’s get started!

First, I applied Adhesive Sheets to both sides of Mat Board, then a light pink cardstock, placed onto the Storage Box Diecut, placed in-between two cutting plates and run through a Diecut Machine. Side note, I cut out the parts of the box twice.

Second, I used Prima Dulce Paper Collection (retired) to cover and embellish the lid and the box. Since this paper pad is a 6″x6″ paper pad I thought it was the perfect size to use. I picked sheets from the pad that had multi prints/advertisements and cut slightly smaller than the box and the lid and adhered to each side of the box and lid. I dressed up the top and bottom of the box with pink trim from my stash. I also added a pink trim around the top of the lid.

Third, I dug into my stash of paper flowers and glued to the lid. I added cut a parts, bits of lace, ric rac, strands of pearls, pom poms and loops of thread to finish the lid.

There’s so many uses for this box, such as adding a present and giving as a gift or using it as decorative storagebin your home. Do you have any other suggestion on how you would use this box? If you do leave your comment below.

Also if you haven’t been by Eileen’s blog lately to see what her teams have been up to you can find the latest post HERE.

Supplies

Sizzix/Eileen Hull: Storage Box Diecut

Mat Board

Prima Dulce Paper Collection (retired)

Adhesive Sheets

Diecut Machine

Pink Cardstock

Ric Rac, Trim, Lace and Pom Poms

Thread, Pearls and Flowers

Paper Cutter

Scissors

Beacon Adhesives: Zip Dry Adhesive

(Products listed above are Affiliated Links for your convenience)

DISCLAIMERS

This blog is compensated to provide opinion on products, services, websites, and various other topics. Even though the owner(s) of this blog receives compensation for our posts or advertisements. I always give my honest opinions, findings, beliefs, or experiences on those topics or products. The views and opinions expressed on this blog are purely my own. Any product claim, statistic, quote or other representation about a product or service should be verified with each manufacturer, provider, or party in question.This blog contains affiliate links, clicking and shopping through these links helps to support and run Tonya Trantham Designs – Creative Paper Addiction at no additional cost to you. Today’s features are Sizzix, Eileen Hull, Scrapbook.com and A Cherry on Top Store Products. 

Thanks for stopping by, hope your Thursday is wonderful and enjoy creating!

Rouge Floral Sewing Box

Hi everyone! Earlier this month I shared sneak peeks of the latest “It’s all about the Stitching Classic Dies” re-release by Eileen Hull. If you missed that post that I shared you can find that HERE. But today I’m sharing the complete project using the Cantilever Sewing Box Diecut along with a few other dies by Eileen. So let’s get started!

First, I gathered all the scraps of Mat Board I had been saving because the hinges, feet, lids and boxes are small and this is a great way to use up scraps. Side note, there will be a lot of cuts for this project.

Next, I covered mat board for the feet, hinges and lids with Adhesive Sheets and placed patterned cardstock from the 6″x8″ Rouge Paper Collection onto the mat board. These are the cuts you will need to make for each of the following parts for the sewing box:

Two Hole Hinges: Eight Cuts

Triple Hole Hinges: Four Cuts

Feet: Two Cuts

Lids: Two Cuts

Boxes: Six Cuts

Second, I didn’t cover the mat board for the boxes since I planned on cutting cardstock from the 12″x12″ Rouge Paper Collection to fit the boxes, this was for the inside and outside of each box. I know that’s a lot of work but is so worth the extra effort for a clean and neat look.

I covered the outside of four of the boxes and two of the boxes I adhered together before covering.

Third, I punched out the holes on the outside before adding the hinges and Brads to each of the boxes. I then cut to fit cardstock for the inside of each box. I also glued the lids to the top boxes.

Fourth, I cut out two leaves, four centers and eight of the smaller flowers from the Envelope, Folder and Flowers Thinlits, three leaf sprigs from the Wreath and Snowflake Thinlits and two flowers from the Folio Page, Pockets and Flowers Thinlits.

I took all of the flowers that are from the Envelope, Folder and Flowers Thinlits and inked the edges with a red chalk ink before shaping each with a Stylus. I layered and glued four of those flowers on top of each other along with a shaped center and a leaf. I did the same for the other of flower, center and leaves but set those aside.

Next I shaped with a stylus the other two flowers from the Folio Page, Pockets and Flowers Thinlits, another center and the all the leaf sprigs. I adhered one layered flower, sprigs and the other two flowers to the corner of the lid. I did added a flat back pearl to the smallest flower and loops of thread to finish that side of the lid.

Fifth, for the other lid I fussy cut two flowers from one of the sheets of 12″x12″ Rouge Paper Collection, shaped with a stylus and glued on top of each other. I added a leaf and center to the flower before gluing to the lid. I also added more leaf sprigs, the other layered flower, a fussy cut ticket, pearl top pins, lace and loops of thread.

Sixth, I used two sewing bobbins as knobs to open the lids. I adhered to each lid and punched a small circle from cardstock and glue to each spool. I also glued the feet to the bottom of the sewing box.

This sewing box is perfect to store sewing supplies in but would be great to hold craft supplies, candy or add trinkets and give as a gift. What would you do if you created one? Let me know in the comments below.

Also if you haven’t been by Eileen Hull’s blog lately to see what her teams have been up to you can find the latest post HERE.

Supplies

Sizzix/Eileen Hull: Cantilever Sewing Box Diecut

Sizzix/Eileen Hull: Envelope, Folder and Flowers Thinlits

Sizzix/Eileen Hull: Wreath and Snowflake Thinlits

Sizzix/Eileen Hull: Folio Page, Pockets and Flowers Thinlits

Mat Board

Adhesive Sheets

49 & Market: 6″x8″ Rouge Paper Collection

49 & Market: 12″x12″ Rouge Paper Collection

Stylus

Brads

Sewing Machine Bobbins

Thread, Lace, Pearl Top Pins,, Flat Back Pearl

Scissors

Paper Cutter

Beacon Adhesives: Fabri-Tac Adhesive

(Products listed above are Affiliated Links for your convenience)

DISCLAIMERS

This blog is compensated to provide opinion on products, services, websites, and various other topics. Even though the owner(s) of this blog receives compensation for our posts or advertisements. I always give my honest opinions, findings, beliefs, or experiences on those topics or products. The views and opinions expressed on this blog are purely my own. Any product claim, statistic, quote or other representation about a product or service should be verified with each manufacturer, provider, or party in question.This blog contains affiliate links, clicking and shopping through these links helps to support and run Tonya Trantham Designs – Creative Paper Addiction at no additional cost to you. Today’s features are Sizzix, Eileen Hull, Scrapbook.com and A Cherry on Top Store Products. 

Thanks for stopping by, hope your Tuesday is wonderful and enjoy creating!

Farmhouse Florals and Pig Frame

Hi everyone! I’m back with a home decor piece that I created using Eileen Hull’s Envelope Folder and Flowers Thinlits, which is one of her newest dies, Snail Mail Thinlits and the Shadow Box Frames Set 1 Thinlits. I also used the P13 Farm Sweet Farm Paper Pad to create this project. So let’s get started!

First, I cut four of the frames sides from the Shadow Box Frames Set 1 Thinlits out of the patterned brown cardstock from the P13 Farm Sweet Farm Paper Pad. I folded and glued together according to directions.

I cut a piece of patterned cardstock from the same collection to fit the frame and adhered to the backside of the frame.

I spent a night fussy cutting all the images from the this fun collection out. I glued the florist store onto back of the frame. I cut out a stamp that I had diecut from the Snail Mail Thinlits, placed Foam Pop Dots to the back before placing off center of the floral store. I also added a pair of scissors to the raised image.

I double up on the Foam Pop Dots and placed onto the back of the pig image before placing inside the frame.

First I applied Liquid Gloss to the bulbs of the string of lights and put aside to dry.

Next I cut out six of the smaller flowers, four leaves and two of the smaller centers from the Envelope Folder and Flowers Thinlits. I shaped all with the Stylus.

Now for the fun part! I had glued three of the shaped flowers, two of leaves and one of the centers to create two pieced together flowers. I then started layering all the fussy cut flowers and foliage from the paper collection to the frame.

I glued the string of lights to the top of the frame. You can’t really tell be the liquid gloss gives the blubs a glassy look which I love.

I also added liquid gloss dots to the shaped flowers and leaves for a dew effect.

There you have it! I absolutely love how it turned out! If you are looking for more inspiration stop by Eileen Hull’s blog to see what her teams are up to. You can find the latest posts HERE, HERE and HERE.

Supplies

Sizzix/Eileen Hull: Envelope Folder and Flowers Thinlits

Sizzix/Eileen Hull: Snail Mail Thinlits

Sizzix/Eileen Hull: Shadow Box Frames Set 1 Thinlits

P13 Farm Sweet Farm Paper Pad

Sizzix: Liquid Gloss

Foam Pop Dots

Scissors

Diecut Machine

Paper Cutter

Stylus

Beacon Adhesives: Zip Dry Adhesive

(Products listed above are Affiliated Links for your convenience)

DISCLAIMERS

This blog is compensated to provide opinion on products, services, websites, and various other topics. Even though the owner(s) of this blog receives compensation for our posts or advertisements. I always give my honest opinions, findings, beliefs, or experiences on those topics or products. The views and opinions expressed on this blog are purely my own. Any product claim, statistic, quote or other representation about a product or service should be verified with each manufacturer, provider, or party in question.This blog contains affiliate links, clicking and shopping through these links helps to support and run Tonya Trantham Designs – Creative Paper Addiction at no additional cost to you. Today’s features are Sizzix, Eileen Hull, Scrapbook.com and A Cherry on Top Store Products. 

Thanks for stopping by, hope your Wednesday is great and enjoy creating!

Fox and Flowers Stuffed Envelope Folio

Hi everyone! Summer has been crazy busy which hasn’t left me much time to sit down and blog. There has been crafting but nothing I can share…yet. Anyways, this month’s theme over on Eileen Hull’s blog is Journal Fodder. You ask what is that? It’s anything you can add/stuff/tuck into a journal and here is my take on that theme. So let’s get started!

I cut two of the envelopes from the Journaling Card Envelope and Windows Thinlits. One envelope I folded on all the crease lines. I cut off the end of the second envelope that has the “v” shape and left a 1/2″ flap. I also cut off the side flaps.

Next, I adhered the 1/2″ flap to the bottom of the folded envelope.

I applied adhesive to each of the side flaps and glued the cut “v” envelope together to create a pocket.

I cut another envelope from a floral piece of cardstock slightly smaller and cut a part at all the folds.

I glued each of those pieces to the outside of the envelope.

I cut three pages from an old dictionary and plant book. I punched two small holes in the fold of the envelope flap and holes in all pages and then sewed into the fold/spine.

I tied off in the inside of the folio.

I decorated the cover before adding anything to the inside. I cut an oval from the Journaling Card Envelope and Windows Thinlits and for the cover and insides I used an assortment of embellishments from Garden Party by Maggie Holmes.

First off, I tied seam binding to the cord that has the pages stitched inside. Next,I placed the seam binding across the flap, embossed tickets from the Mini Slimline and Tickets Thinlits with the Crochet Mandala Embossing Folder. I glued the tickets to the flap, before adhering the oval diecut and gold frame on the outside of the flap.

I adhered the fox and flower to the bottom of the oval frame and the “beauty” puffy sticker to the top of the oval. I added to gold gems to the finish.

The inside flap I added a few puffy stickers and the back pocket I used a piece of cardstock that was embossed with Woven Leather Embossing Folder . I placed the “kind” puffy sticker across the embossed cardstock and added a bee sticker.

The first page inside I cut a tab from the Journaling Card Envelope and Windows Thinlits. I staples it along with a piece of lace the top of the page and added a “be you” sticker to the tab.

The next two pages more puffy stickers, embellishments and a few flowers that I had cut from the Folio Page Pocket and Flowers Thinlits that I shaped with a Stylus , added gems and sequins to each flower.

Behind the “Here We Go” tag I created a tuck spot. The ATC die from the Library Pocket ATC Card and Tab Thinlits I placed a folded piece of cardstock slightly inside the cut line to create a mini book. I dressed the outside up with a butterfly sticker, scalloped circle and a puffy bow.

More tuck spots on the next two pages.

I used the center of the Sunflower Diecut and an embossed ticket to create a unique tuck spot.

I cut out a library pocket and label from the Library Pocket ATC Card and Tab Thinlits. I glued the pocket together and adhered the bottom edge to the bottom of the page. The opposite page I added the center die from the Sunflower Diecut, a couple of punches, banner, puffy flower sticker as decoration.

The library pocket I added a tag and a embossed ticket and I tucked a folded piece of paper.

On the next two pages I glued two sides of the little house diecut to the bottom corner of the page. The opposite page I adhered a scraps of cardstock and a puffy flower sticker to the bottom corner.

I tucked in behind the house a couple of cut a parts.

On the next two pages I added a banner and scalloped circle punch and a couple of stickers to the bottom of the page. The opposite page I added a tab from the Library Pocket ATC Card and Tab Thinlits, a “us” sticker to the tab and a bit of trim to finish this page.

I added folded patterned cardstock and a adorable floral diecut to the pocket to finish.

If you haven’t been by Eileen’s blog lately to see what her teams have been up to you can find the latest posts HERE and HERE.

Supplies

Sizzix/Eileen Hull: Journaling Card Envelope and Windows Thinlits

Sizzix/Eileen Hull: Mini Slimline and Tickets Thinlits

Sizzix/Eileen Hull: Crochet Mandala Embossing Folder

Sizzix/Eileen Hull: Woven Leather Embossing Folder

Sizzix/Eileen Hull: Folio Page Pocket and Flowers Thinlits

Sizzix/Eileen Hull: Library Pocket ATC Card and Tab Thinlits

Sizzix/Eileen Hull: Sunflower Diecut

Diecut Machine

Stylus

Maggie Holmes: Garden Party

Paper Cutter

Scissors

Seam Binding, Lace, Trim

Needle and Cording

Various Plain and Patterned Cardstocks

Beacon Adhesives: Zip Dry Adhesives

(Products listed above are Affiliated Links for your convenience)

DISCLAIMERS

This blog is compensated to provide opinion on products, services, websites, and various other topics. Even though the owner(s) of this blog receives compensation for our posts or advertisements. I always give my honest opinions, findings, beliefs, or experiences on those topics or products. The views and opinions expressed on this blog are purely my own. Any product claim, statistic, quote or other representation about a product or service should be verified with each manufacturer, provider, or party in question.This blog contains affiliate links, clicking and shopping through these links helps to support and run Tonya Trantham Designs – Creative Paper Addiction at no additional cost to you. Today’s features are Sizzix, Eileen Hull, Scrapbook.com and A Cherry on Top Crafts Products. 

If you have any questions about this project please let me know!

Thanks for stopping by, hope your Tuesday is wonderful and enjoy creating!

Eileen Hull Chapter One Release 2023 Style!

Hi everyone and Happy New Year! It’s time again for a new release by Eileen Hull and I’m super excited about it. There’s so many possibilities with this collection and, of course, with my project I didn’t use the diecut the way it was original suppose to be used. I’m only sharing a tease and will post a full reveal later on in the month. So let’s get started!

Let’s start with the ScoreBoards Frame Pocket Journal– this is a Bigz Plus die so you will need a 9” cutting machine. The Journal measures 4 1/2” x 6 1/2” x 1 1/4” with an adjustable spine. What makes this die special are the additional pieces on the die, a pocket to hold ephemera, a frame and flap! These extra pieces may be used in many of my other journals or they can be used independently. The die may also be configured in a few different ways so watch the blog and Facebook live shows for ideas.

There are two Thinlits sets that coordinate with the Journal. You asked for a new alphabet- you got it- and I added numbers too! The Tile Alphanumeric is very versatile because you can use both the positive and negative shapes. Each letter is perforated which makes it easy to create and line up words.

The other Thinlits set is the Library Pocket, ATC Card and Tab Thinlits– a journal essential! Use the ATC card die to knock out a bunch of Artist Trading Card bases and add the library pocket to package it up to swap. The Tab die is perfect to add to the Journal pages or on the ATC.

The last item is a 3D embossing folder called Tablecloth which was inspired by a crocheted cotton piece from my Mom. This adds beautiful texture and dimension to card backgrounds, book pages or tags!

There will also be a giveaway so make sure to watch our live on Facebook and/or YouTube. Comment in the chat and tell us what you would create with these dies, then you will be eligible to win a Chapter 1 die/embossing folder! Also be sure to stop by Eileen’s blog which you can find it HERE.

Supplies

Sizzix/Eileen Hull: ScoreBoards Frame Pocket Journal Diecut

Sizzix/Eileen Hull: Tile Alphanumeric Thinlit

Sizzix/Eileen Hull: Library Pocket, ATC Card and Tab Thinlits

Sizzix/Eileen Hull: Tablecloth Embossing Folder

Diecut Machine

(Products listed above are Affiliated Links for your convenience)

DISCLAIMERS

This blog is compensated to provide opinion on products, services, websites, and various other topics. Even though the owner(s) of this blog receives compensation for our posts or advertisements. I always give my honest opinions, findings, beliefs, or experiences on those topics or products. The views and opinions expressed on this blog are purely my own. Any product claim, statistic, quote or other representation about a product or service should be verified with each manufacturer, provider, or party in question.This blog contains affiliate links, clicking and shopping through these links helps to support and run Tonya Trantham Designs – Creative Paper Addiction at no additional cost to you. Today’s features are Sizzix, Eileen Hull and Scrapbook.com Products. 

Thanks for stopping by, hope your Tuesday is wonderful and enjoy creating!

Flower and Wreath Shadow Box

Hi there! I hope everyone is enjoying warmer weather like I am. This happens to be the most favorite time of year for me, lounging in the pool, reading books, gardening and cooking out. But I still have time to craft and I want to share a project I created using a few of Eileen Hull’s diecuts and thinlits. This month’s theme over on Eileen Hull’s blog is using leftover bits and pieces and this project that I am getting ready to share is just that…a lot of leftovers. So lets get started!

I had one sheet of leftover cardstock from 49 and Market: Vintage Artistry Sage Collection and I thought that would make a great little shadow box (the cardstock is a heavy weight and is perfect for creating this box). I also had created a wedding album with this collection which you can find that post HERE.

I cut four of the smaller “frames” from the Shadow Box Frames Set 2 Thinlits, put together according to the directions and cut to fit a piece of cardstock for the back of the shadow box.

I always cut from whatever small scraps of cardstock I have leftover from previous projects leaves, flowers, etc. to have on hand. To me it’s one less step in cutting those out when in the middle of making something. The wreaths I had cut from the Wreath and Snowflake Thinlits.

I cut two a part and “wove” around the one not cut a part to make it look fuller.

I had also cut out a couple of leaf sprigs from the same wreath and snowflake thinlits and the flowers I cut from the Shadow Box Elements Thinlits. I adhered the wreath to the inside of the shadow box, shaped and glued the flower and leaves together, placed a gem in the center of the flower before adding a Foam Pop Dot to the back and placing in the center of the wreath.

I used hinges from the Treasure Box Diecut (retired) to dress up the corners of the shadow box. I also added gems to each corner of the hinges to finish off the box.

If you haven’t been by Eileen’s blog lately to see what her teams have been up to you can find the latest blog posts HERE and HERE..

Supplies

Sizzix/Eileen Hull: Shadow Box Frames Set 2 Thinlits

Sizzix/Eileen Hull: Wreath and Snowflake Thinlits

Sizzix/Eileen Hull: Shadow Box Elements Thinlits

Sizzix/Eileen Hull: Treasure Box Diecut (retired)

49 and Market: Vintage Artistry Sage Collection

Foam Pop Dot

Various Patterned Cardstocks

Diecut Machine

Paper Cutter

Scissors

Gems

Sytlus

Beacon Adhesives: Zip Dry Adhesive

(Products listed above are Affiliated Links for your convenience)

DISCLAIMERS

This blog is compensated to provide opinion on products, services, websites, and various other topics. Even though the owner(s) of this blog receives compensation for our posts or advertisements. I always give my honest opinions, findings, beliefs, or experiences on those topics or products. The views and opinions expressed on this blog are purely my own. Any product claim, statistic, quote or other representation about a product or service should be verified with each manufacturer, provider, or party in question.This blog contains affiliate links, clicking and shopping through these links helps to support and run Tonya Trantham Designs – Creative Paper Addiction at no additional cost to you. Today’s features are Sizzix, Eileen Hull and Scrapbook.com Products. 

Thanks for stopping by, hope your Monday is great and enjoy creating!

Field Notes Journal

Hi everyone! After I short break from the holidays I’m back with a project I created for the collaborating between Eileen Hull’s teams and GelPress! This collab has been going on the whole month of January and at the end of this post I will share links for those posts.

I chose to use a cut out I had laying around from the Notebook Diecut-663635(retired).

I gathered up some stencils, acrylic paints along with the Gel Press Printing Plate and Brayer. I’m looking forward to trying the plate and the brayer since this will be the first time using these. So let’s get started!

First I applied dollops of paint to the plate and with the brayer covered the plate with the paint.

I placed the notebook diecut (cover side down), placed a piece of cardstock over the diecut and plate and with the brayer rolled over the diecut and plate. The photo below is just paint that’s been applied to the plate with no stencils. It’s kind of cool how the paint separated on the plate and left negative areas on the notebook diecut.

I applied more paint to the plate and used two stencils, Petal Stencil and Handcut Blossom 12″x12″ Stencil (discontinued), to add texture and a design to the cover.

I had a leftover label from another project from the Full Size Journal Diecut which I applied paint with the plate and brayer. I also used the Field Notes Stamp from the Field Notes Nature Stamp Set (discontinued) and stamped the label. I strung two pieces of elastic cording through the ends of the label and tied.

I slipped the label and elastic around the spine of the notebook and placed two store bought notebooks under the elastic.

From my stash of fussy cut printables I adhered a floral bulb to the cover to complete.

If you would like to know more about GelPress you can find them HERE for more inspiration. Also if you haven’t seen the latest projects by Eileen’s Inspiration and Educator Teams you can find those posts HERE and HERE.

Supplies

Sizzix/Eileen Hull: Notebook Diecut-663635(retired)

Sizzix/Eileen Hull: Full Size Journal Diecut

GelPress: Gel Press Printing Plate

GelPress: Brayer

Acrylic Paints

TCW: Petal Stencil

TCW: Handcut Blossom 12″x12″ Stencil (discontinued)

Field Notes Nature Stamp Set (discontinued)

Elastic Cording

Diecut Machine

Mat Board

MISTI Stamping Tool

Brown Ink

Floral Printable

Scissors

Beacon Adhesive: Zip Dry Adhesive

(Products listed above are Affiliated Links for your convenience)

DISCLAIMERS

This blog is compensated to provide opinion on products, services, websites, and various other topics. Even though the owner(s) of this blog receives compensation for our posts or advertisements. I always give my honest opinions, findings, beliefs, or experiences on those topics or products. The views and opinions expressed on this blog are purely my own. Any product claim, statistic, quote or other representation about a product or service should be verified with each manufacturer, provider, or party in question.This blog contains affiliate links, clicking and shopping through these links helps to support and run Tonya Trantham Designs – Creative Paper Addiction at no additional cost to you. Today’s features are Sizzix, Eileen Hull, GelPress and Scrapbook.com Products. 

Thanks for stopping by, hope your Wednesday is wonderful and enjoy creating!

Vintage Artistry Wedding Album

Hi everyone! I’m back this week with a project created for this month’s Eileen Hull project. My best friend’s son was married this past Saturday I decided to use the Full Size Journal Diecut to create an album for all the wedding photos I’m sure that was taken.

I had 12″x12″ Mat Board that I used to create the cover with but if you have a hard time finding mat board that size chipboard is the next best thing. Since the finished journal is around 8 3/4″x6 1/4″ (not counting the spine) I used 8.5″x11″ Adhesive Sheets (so much easier than piecing together 6″x6″ sheets of adhesive) to adhere patterned cardstock to both sides of the mat board before running it through the Diecut Machine. Next I adhered both covers together at the spine and strung the spine with elastic cording.

The colors of the wedding was navy blue, modern gold and cream but I was given the go ahead that I could use muted and soft greens as an accent color. I added an assortment of patterned cardstocks to the cover and placed Foam Pop Dots to the largest diecut from the Reflective Moment Diecut Set (retired) that I cut out. Next I applied glue to three sides of the Vintage Artistry Sage Stitched Frames (retired) and added on top of the frame diecut. I cut out several flowers from the Tattered Flower Garland Diecuts (retired) in White Cardstock and shaped each with a Stylus, adhered on top of each other, added a flat back pearl to the center of each and I cut leaves from the foliage diecuts from the Artistry Sage 12″x12″ Collection. I used this collection through out the album.

I started out with three pages per signatures but as I added cardstock and tucks and flip outs and waterfalls the album bulked up. So I removed the third page from each signatures.

To keep the embellishments to a minimum I used rub ons from the Vintage Sky Collection and an assortment of embossing folders to add a little texture and visual interest.

I used the Waterfall Card and Tags Thinlits and created a place in the back of the album for candid snapshots.

I can tell you the wedding was a beautiful event (even though the ceremony was outside…it was cold). Also the bride loved the album…YAY! That is always stressful to me especially if I’m not sure of the brides style…modern, vintage, etc.

If you haven’t stopped by Eileen Hull’s blog lately to see what the rest of the Inspiration and Educator Teams have been up to you can find the latest posts HERE and HERE.

Supplies

Sizzix/Eileen Hull: Full Size Journal Diecut

Sizzix/Eileen Hull: Waterfall Card and Tags Thinlits

8.5″x11″ Adhesive Sheets

Diecut Machine

Foam Pop Dots

49 and Market: Vintage Artistry Sage Stitched Frames (retired)

White Cardstock

Cream Cardstock

49 and Market: Artistry Sage 12″x12″ Collection

49 and Market: Vintage Sky Collection

Blue Chalk Ink

Various Patterned Cardstocks

Gold Glitter Cardstock

Mat Board

Paper Cutter

Scissors

Zip dry Adhesive

Elastic Cording

Flat Back Pearls

Sizzix/Tim Holtz: Tattered Flower Garland Diecuts (retired)

Spellbinders: Reflective Moments Diecuts (retired)

Cuttlebug: Polka Dots Embossing Folder (retired)

Cuttlebug: Blossom Dance Embossing Folder (retired)

Sizzix/Brenda Walton: Floral Tapestry Embossing Folder (retired)

(Products listed above are Affiliated Links for your convenience)

DISCLAIMERS

This blog is compensated to provide opinion on products, services, websites, and various other topics. Even though the owner(s) of this blog receives compensation for our posts or advertisements. I always give my honest opinions, findings, beliefs, or experiences on those topics or products. The views and opinions expressed on this blog are purely my own. Any product claim, statistic, quote or other representation about a product or service should be verified with each manufacturer, provider, or party in question.This blog contains affiliate links, clicking and shopping through these links helps to support and run Tonya Trantham Designs – Creative Paper Addiction at no additional cost to you. Today’s features are Sizzix, Eileen Hull and Scrapbook.com Products. 

Thanks for stopping by, hope your Tuesday is great and enjoy creating!

Just Truckin’ Along!

Hi everyone! I’m back with the complete reveal of my truck that I created for Eileen Hull’s Chapter 3 Reveal Party! Remember I shared a sneak peek on the first of July along with a list of team members from the Inspiration and Educator teams. You can find that blog post HERE. But let’s get started on how I created this truck.

First, I applied Adhesive Sheets to both side of the Chipboard and then placed the patterned cardstock (Prima: Garden Fable-retired) on both sides, placed onto the Vintage Truck Diecut and ran through the Diecut Machine.

I adhered the “pocket” to each side of the truck.

Next, I cut out two of the “pockets” from the 3D Camper Diecut.

I cut “notches” in the “flaps’ of the pocket diecuts.

I slowly worked and adhered both flaps to either side of the truck diecuts.

Once all the pockets was glued in place I adhered trim and flatback pearls to finish up the “cab” of the truck.

I glued the bumpers, tail gate and wheels to either side of the truck.

I cut flowers and leaf sprigs from the Folio Page, Pocket and Flowers Thinlits, shaped and adhered, along with several loops of thread and gems in the center of each flower, to the corner of the window.

There you have it! I can’tdiecut wait to make more of these so stay tuned! As always if you have any questions about this project please let me know.

Also be sure to stop by Eileen’s blog and see what the Inspiration and Educator Teams have been up to. You can find the latest blog posts HERE and HERE.

Supplies

Sizzix/Eileen Hull: Vintage Truck Diecut

Sizzix/Eileen Hull: 3D Camper Diecut

Sizzix/Eileen Hull: Folio Page, Pocket and Flowers Thinlits

Adhesive Sheets

Chipboard

Diecut Machine

Prima: Garden Fable Paper Pad (retired)

Trim, Flatback Pearls, Gems, Thread

Scissors

Paper Cutter

Beacon Adhesive: Zip Dry Adhesive

Stylus

(Products listed above are Affiliated Links for your convenience)

DISCLAIMERS

This blog is compensated to provide opinion on products, services, websites, and various other topics. Even though the owner(s) of this blog receives compensation for our posts or advertisements. I always give my honest opinions, findings, beliefs, or experiences on those topics or products. The views and opinions expressed on this blog are purely my own. Any product claim, statistic, quote or other representation about a product or service should be verified with each manufacturer, provider, or party in question.This blog contains affiliate links, clicking and shopping through these links helps to support and run Tonya Trantham Designs – Creative Paper Addiction at no additional cost to you. Today’s features are Sizzix, Eileen Hull and Scrapbook.com Products. 

Thanks for stopping by, hope your Monday is wonderful and enjoy creating!