How to Turn a Cottage Cheese Container into a Mini Easter Basket

Hi everyone! I want to share a mini Easter basket I created using an empty cottage cheese container.

I started with an empty container of cottage cheese…if you aren’t fond of eating cottage cheese a yogurt container will work too and if you don’t like yogurt maybe you can find someone to eat it for you. 😁 I cleaned it inside and out and let dry.

The cottage cheese container I used I peeled the label off. So I traced with a pencil the outside of the label onto a piece of Watercolor Paper and cut out with scissors. 

I inked the glass tray with Hydrangea Blends Ink. I added water, painted the watercolor paper and let dry.

I inked the Simple Dots Rollagraph with Glacier Lake Archival Dye Ink and roll onto the piece of watercolor paper. 

Once the watercolor paper is dry I adhered watercolor paper to container.

I punched holes on either side of the container with a hole punch and ran a pipe cleaner through each hole and twist to secure to the container.

I placed a piece of textured white cardstock on top of the Brenda Walton: Medallion Diecut (retired) and place between two cutting plates and run through the Diecut Machine. I put the medallion together according to directions on packaging. I inked an Art Dauber with Old Rose Ink from the Sunset Petal Point Ink Pad and ink edges of the medallion diecut and adhered to container. I also adhered trim to the top and bottom of container.

I placed the flowers and leaf sprigs stamps from the Thankful Clear Stamp Set onto MISTI Stamping Tool. I inked the flowers with Pink and Peony Inks from the Enchantment Petal Point Inks and the leaf sprigs with Olive Ink from the Sunset Petal Points Inks. I stamped all onto a piece of Textured White Cardstock. I fussy cut the stamped flowers and leaf sprigs out and looped thread several times and made a mess bow. I adhered flowers, leaf sprigs and bow onto the medallion. The finishing touches I added gems, flatback pearl and sequin to the center of each flower.  

I added Easter grass and decorative eggs to this little Easter basket but it would be perfect for candy, stickers and tiny little goodies. As always if you have any questions please let me know.

SUPPLIES USED:
ColorBox: Glacier Lake Archival Dye Ink
ColorBox/Eileen Hull:Hydrangea Blends Ink
ColorBox: Simple Dots Rollagraph
ColorBox: Jumbo Handle Self Inking (No Cartridge Used)
ColorBox: Enchantment Petal Point Inks
ColorBox: Art Dauber
ColorBox: Thankful Clear Stamp Set
ColorBox: Sunset Petal Point Ink Pad
Gems and Flatback Pearl
Sequin
Textured White Cardstock
Watercolor Paper 
Beacon Adhesive: Fabri-Fix Permanent Adhesive
Paper Cutter
Pencil
Empty Cottage Cheese Container
Hole Punch
Trim and Thread
Pipe Cleaner
Glass Tray
Paint Brush
Scissors   
Sizzix/Brenda Walton: Medallions Diecut
MISTI Stamping Tool

Thanks for stopping by, hope your Tuesday is wonderful and enjoy creating!

Butterflies and Flowers Altered Ice Cream Container

Hi everyone! I am so excited to share that I am a Brand Ambassador for Momenta! I’ll be sharing twice a month projects that I have created using their wonderful assortment of products such as cardstock, diecuts, stamps, traveler’s notebooks, etc.! 

Well, lets get started with my first project of the month! 

I had decided I was going to alter an empty ice cream/gelato container. I liked the shape and size of the container and thought once altered I could either use it as storage or give it as a gift.

I measured and cut a piece of cardstock, from the Metallic Ink Paper Pad, and adhered to the container.

I picked out the pink and gold polka dot doily from the 4″ Doily Watercolor Pack and cut a small section of the doily off.

I pinched and folded both pieces of the doilies to create “fans” and I adhered the larger of the two to the container. 

Next I adhered trim around the top of the container.

From the Intricate Floral Cutting Plate I cut several paper diecuts out from the Peony Paper Pad and from the Metallic Ink Paper Pad.

I then started by cutting a section of butterfly and flowers off from the yellow/off white cardstock. I used this as the base to adhere all the layers to.

I cut flowers and the butterfly from the different diecuts and adhered…I used Adhesive Sheets for the t-tiny pieces and Beacon Adhesives…generally Zip Dry Adhesive but I was out and the Fabri-Fix works as good if not better.

I added sequins and gems to the center of the flowers.

I traced onto the same piece of cardstock I used to cover the container a circle using the lid as the template. Since my cutting wasn’t perfect I covered the edges with flatback pearls.

I adhered the flowers and butterfly diecut to the front of the container. I added bits of tulle behind the diecut.

I also adhered the smaller doily “fan” behind the diecut as a filler.
For the final touches I made several loops of thread and added those and pearl sprays to finish this container.

I hope you have enjoyed this project as much as I enjoyed creating it! As always if you have any questions about this project please let me know. Also be sure to check out Momenta website which can be found: HERE, Facebook HERE, Twitter HERE and Instagram HERE.
SUPPLIES USED:
Momenta: Peony Paper Pad
Beacon Adhesive: Zip Dry Adhesive
Sequins
Gems
Trim
Thread
Pearl Sprays
Flatback Pearls
Ice Cream/Gelato Container (empty)

Thanks for stopping by, hope your Thursday is wonderful and enjoy creating!

ClearSnap: Christmas Cookie Canister

Hi everyone! How can it be December already!?!?! And the 4th?!?! I’m still trying to wrap my mind around that fact that it’s almost the end of the year but I want to share a quick DIY canister project I created for ClearSnap that might inspire you to create a thoughtful gift to give to a family member or special friend.

I started with an empty hot cocoa tin that my sister had given me…nothing like up-cycling something that you would toss in the garbage can. 😀

I cut a piece of Red and Ivory Ticking Cardstock to fit around the lid and container and adhered.

I placed a scallop circle rubber stamp, from the Cookies Clear Stamp Set, onto an Acrylic Block and ink with Wicked Black Ink which I stamped onto a piece of patterned cardstock.


I fussy cut the stamped image out and adhered on top of container lid. I glued the chipboard button to the center of the lid an on top of the button I glued the felt ball. I added mini pom pom trim underneath the “lip” of the container. I cut one recipe card from the Black and White Recipe Cards Cardstock and stamped the mixing bowl and wooden spoon onto patterned cardstock. I fussy cut both images out and adhere to the bottom corner of the recipe card.

I also added the “To” and “From” to the tag stamp before inking with Wicked Black ink and stamp onto a white piece of cardstock. I fussy cut the tag out and punch a hole in the top of the tag. Next I inked the holly stamp with Wicked Black Ink and stamped onto a piece of green cardstock. I fussy cut, shape and add mini red gems to the berries and adhered the holly to the top of the tag. I finished off by tying the tag with baker’s twine to the top of the container. Now all I need is either candy or some sweet treat to add to the inside  before giving as a gift. If you have any question about this project please let me know.

Thanks for stopping by, hope your Tuesday is wonderful and enjoy creating!

Eileen Hull: A Little Boo Mini Album

Hi everyone! I’m back today sharing this little mini Halloween album I created for Eileen Hull’s Inspiration Team! 

I started by flattening and cutting a paper towel roll 5 1/2″ in length.

Next I cut one side open and inked the outside and inside of the “spine” with the Purple Chalk Ink from the ColorBox Paintbox Mercantile Chalk.

I adhered Kraft Halloween Cardstock to the front and inside covers of the mini album.

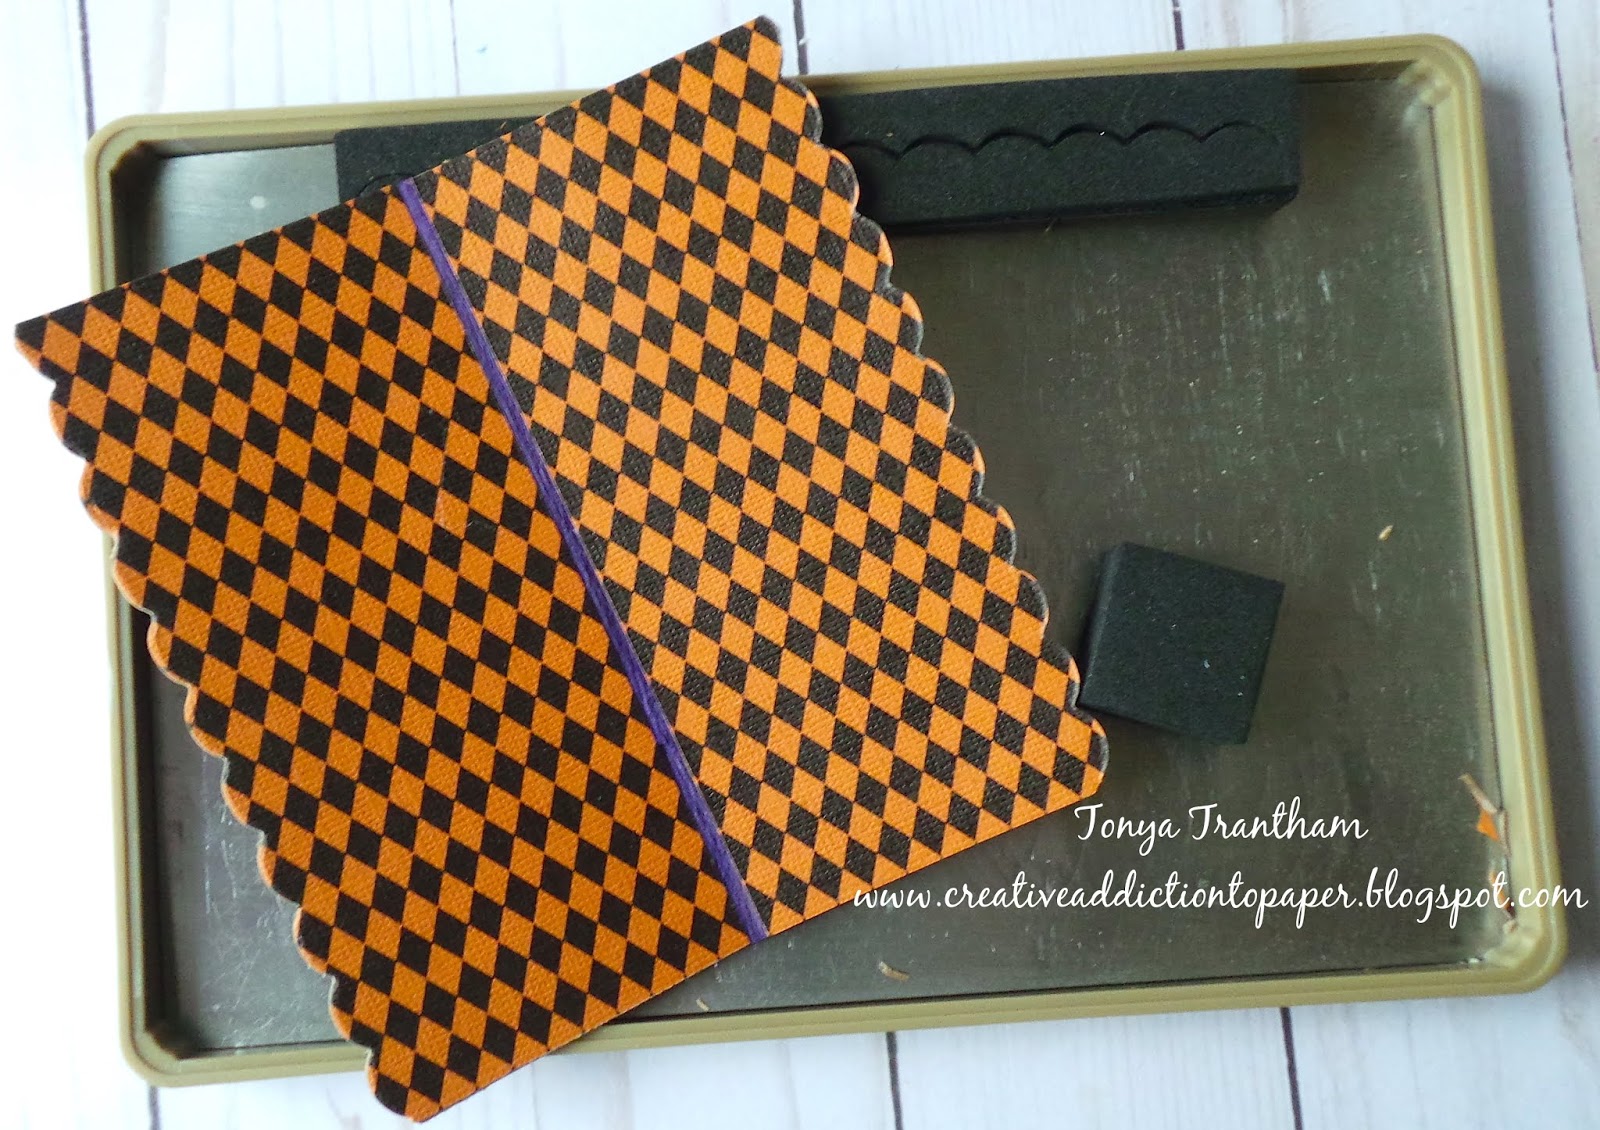
I placed the Scalloped Border Diecut onto the Base Tray (retired) but you can use a Movers and Shapers Shuttle to hold the diecut in place. I placed the closed mini album cover on top of the Scalloped Border Diecut and ran through the diecutting machine.

I gather some scraps of Halloween cardstock from my stash and cut and folded to fit album.

I cut from the following diecuts: Bookplate, Hinges and Label, Bookmark, Tags and Pocket, Credit Card Sleeve and Tags and Banners and Pennants Diecuts tags, pockets and banners to decorate the pages and the doily. I also added printables and bits of patterned cardstock to the pockets too.

The other side of the pages I added stickers and a bat diecut from my stash.

The cover I adhered a diecut from my stash of extra cut outs.  The little girl I had printed out several of her in different sizes for a past project and I thought she would make a cute addition to the cover. I did cut around her arm so I could slip the jack-o-lateen diecut underneath it. I added googly eyes to the pumpkin and bits of thread. I cut one of the pennants off the banner diecut and created a little hat for the little girl image. I added a Bookplate Diecut with “BOO” stickers and two mini black gems to the bottom of the cover. I took a part a binder clip and added an Owl Charm, some fiber and clipped to the album cover and  finished off with sequin randomly placed. 

I gathered all the pages and stitched inside the album cover.

I couldn’t help myself  but I added more tags and embellishments to the pages.

I cut tags from the Credit Card Sleeve and Tags along with some bits of patterned cardstock, punched a hole in the top of each and put all together with a jack-o-lantern brad and then paperclip to the top of one of the pages. I’m now ready to add mini photos  and journaling of the grand babies.

Be sure to hop on over to hop on over to Eileen Hull’s blog to see what the rest of the Inspiration Team has been up to! You can find the latest blog post HERE. As always if you have any questions please let me know.

I would also like to submit this project for the following challenges:

Word Art Wednesday Challenge: #356-#357
Crafter’s Castle: Challenge #10
Mini Album Makers Challenge: October

Thanks for taking the time to stopping by, hope your Thursday is awesome and enjoy creating!

ClearSnap: Mum Planner Ink Pen Clip and Fall Notebooks

Hi everyone! Today I two projects in one blog post I would like to share. I created an ink pen clip holder and decorated mini notebooks for the Woodsy Autumn Planner. You can find the Woodsy Autumn blog post HERE in case you missed that.

For the first project I’ll start with directions for the ink pen holder. 

I cut three medium, three small flowers and two leaves from Crinoline fabric with the Journaling Cards, Flowers and Leaves Diecuts, inked a glass tray with Sunshine and Golden Blend Inks and add water to ink. I laid each flower into the ink mixture, removed and let dry. I cleaned the glass tray off and ink with Leaf and Frog Blends Inks, add water to ink, laid both leaves into mixture, removed and let dry.

I inked Art Daubers with Butter and Candied Yam Ink and lightly ink the edges of each flower. I added a drop of Zip Dry Adhesive to the center of each flower. Laid each flower on top of each other, pinch in the center, shaped and added a gem to the center of the flower. I folded each leaf down the center and edge with Candied Yam ink, adhered each leaf to the back of the flower with a loop of hemp cording. 

I cut a 1 7/8 inch piece of stretch elastic and adhere each end with Fabri-Tac adhesive to each side of a binder clip. But sure to tuck the elastic up under the “rolled” metal of each side of the clip.

I adhered the flower to elastic loop  and let dry. 

For my second project I cut patterned cardstock to fit the front and back of each notebook and I inked edges of cardstock with Leather Ink and adhere to the front and back of each notebook. I also cut two strips of cardstock and ink edges with Leather ink and glue to the center of each notebook.
I cut two wreath diecuts from cardstock and adhere to the front of each notebook. Punch two circles and two seal circles, ink edges with Leather ink and glue to the corner of each wreath diecut. Next I cut two mini flowers, one small flower and a leaf sprig from Crinoline Fabric using the Journaling Cards, Flowers and Leaves Diecuts. 

I inked a glass tray with Melon and Golden Blend Inks, add water and lay the mini flower diecuts into the mixture, remove and let dry. Ink edges of the mini flowers with Butter ink.
I cleaned the glass tray and ink with Leaf Blends Ink, add water and lay the leaf sprig into ink mixture. Remove and let dry. Ink edges of the leaf sprig with Mint ink.
I adhered a monogram to one of the notebooks and add a mini flower and cut one leaf from the leaf sprig and adhere both on top of the monogram. Glue a sequin and a gem to the center of the flower.
The other wreath notebook apply a drop of glue to the center of the medium flower and pinch and shape. Add a sequin and a gem to the center of the flower along with a leaf from the sprig and loop some hemp cording and glue both the front of the notebook. Also add a mini flower with a gem in the center of the flower next to the medium flower.

The other two notebooks I stamped the words “ideas” and “notes” with the Leather Ink onto patterned cardstock, cut out and adhere one word to each cover. 

I adhered Ric Rac on the front of each cover. Punch two butterflies from patterned cardstock and add next to each word and added gems down the center of each butterfly. 

Next I slid each of the notebooks underneath the elastic cording of the planner.

I clipped the ink pen holder to one of the notebooks and added an ink pen.

As always if you have any questions about these projects please let me.

Thanks for stopping by, hope your Wednesday is awesome and enjoy creating!

Altered Cherub Paint Brush

Hi everyone! I have had two weeks of LOTS of errands and not much crafting time. Last week would have been perfect crafting weather since every day had consisted of rain whether only a passing shower off and on or the all day, stay in your pjs type of day. 

 So today I want to share an altered paint brush I created for ClearSnap. I have always wanted to try my hand at altering a paint brush and I finally got my chance with this old paint brush I had laying round.

I started by spraying a small amount of Splash Smooch Spritz into a plastic bowl and add a little water.  Place paint brush in Color Catcher and with a rag wipe the paint down with the watered down Splash Smooch Spritz. To speed up the process dry the brush with a heat gun. Spritz the following Smooch Spritz: Log Cabin, Platinum and Citrus Tickle randomly all over the brush and dry with the heat gun.

To seal the colors on the brush apply Antique Mod Podge. To get a cool “bubbling effect” use the heat gun to the brush. I sprayed the doily, Border Diecut, Butterfly Wings, Flower and Cherub with Platinum Smooch Spritz. Side note before spraying the flower deconstruct so you will have three each layers and I let dry. Spray the Cherub with Log Cabin Smooch Spritz and rub excess off. 

I Mod Podge doily around the side of the brush and let dry. 


Also run cording and gold thread through the Border Diecut and adhere along with the Butterfly Wings and flowers.  

Before adding the cherub to the butterfly wings mod podge to seal.

I added one deconstructed flower next to the cherub and the other flower to the top of the paint brush handle to finish off.  As always if you have any questions about this project please let me know.

Supplies Used:

  1. ClearSnap Smooch Spritz: Log Cabin, Platinum, Citrus Tickle, Splash
  2. ClearSnap Color Catcher
  3. Paint Brush
  4. Antique Mod Podge
  5. Beacon Adhesive Mix Media Adhesive
  6. Gold Thread
  7. Cording
  8. Paper Flower
  9. Doily
  10. Eileen Hull/Sizzix: Buttons, Border and Trim Diecut (Retired)
  11. Mat Board
  12. Chipboard Butterfly
  13. Heat Gun
  14. Cherub Figurine 
  15. Rag

Thanks for stopping by, hope your Wednesday is wonderful and enjoy creating!

Five and Dime Mini Album

Hi everyone! I’m back with a fun little album I created with toilet paper rolls, Eileen Hull’s Book Binding Diecut and Amyjdelightful’s Small Town Feel Printable. I was selected to be a “Project Girl” for Amy this month on her instagram page which you can find HERE.

I gathered up an assortment of cardstock, leftover scraps, four of 1.75″ Expander Discs and a pair of scissors and began fussy cutting all of the images out from the printable.

Before I embellished I flattened, added patterned cardstock to each TP roll and used the Book Binding Diecut  before adding pockets and tuck spots to the pages.

I cut a Medallion Diecut out and adhered the 25 cent printable to the center.

The paper bow I received in a swap so I added a flower to the center before embellishing the page.

 I cut some of the tags with the Bookplate, Hinges and Label Diecuts. and added printables and tabs.

On the backside of the tags I adhered some of the printables to create mini pockets to hold tags.

As always if you have any questions regarding this project please let me know.
I would also like to submit this project for the following challenges:

Mini Album Makers Challenge: March Mini
Word Art Wednesday: Challenge #328-#329
Thanks for stopping by, hope your Wednesday is wonderful and enjoy creating!

Canvas Corp: Spring "Snow" Globe

Hi everyone! Today I want to share a musical snow globe that I have altered for the Canvas Corp blog. I found the globe sitting in my husband’s study window, all the water evaporated and the base and the “winter scene” bleached from the sun. I thought this would be fun to give the globe new life by altering and creating a Spring scene inside. For the complete blog post you can find more photos and the how to’s HERE.

Thanks for stopping by, hope your Saturday is awesome and enjoy creating!

Valentine’s Day Candy Jar

Hi everyone! I am back with a very quick and easy project that I created for Valentine’s Day! 


I purchase these cups of Oui yogurt  and the cups are made of glass. I love the shape and thought wouldn’t these make great gifts if I could dress them up in some way?

Well, I started by peeling the labels off, giving the jar a good washing and rubbing Goof Off to get the sticky residue off the glass.

I cut several flowers and leaves from the Stitchy Flowers and Leaf Diecuts on White Cardstock.

I spritzed the following glimmer and simply sheer mists onto a glass plate: Gold, Moss (retired), Soft Peach, Rosy and Classy Green.

I added a little water to the mists and watercolored the flowers and leaves and let dry.

I cut strips of white and soft blue cheese cloth…Hobby Lobby now has cheese cloth in different colors…and tied around the lip of the jar. I added a bit of adhesive to hold the cheese cloth in place. I cut a two inch strip of lace and bunched up an assortment of different colored thread and adhered to where I tied off the cheese cloth.

I used a stylus and shaped the flower pedals and leaf and adhered together.

I used pliers to snip off the shank off the back of a button so it would lay flat when I glued it to the center of the flower.

I adhered the flower to the jar and waaaa laaaaa finished!!! Now all I have to do is add candy!

Which I did! 😊 Once the candy is eaten a battery operated candle can be added to the jar for a nice decorative touch. 
As always if you have any questions about this project please let me know.

Also I would like submit this for the following challenge:

Word Art Wednesday Anything Goes: Challenge #318-#319

Thanks for stopping by, hope your Wednesday is awesome and enjoy creating!

Little Birdie Crafts: Snowman Snow Globe

Hi everyone! Are you ready for Christmas??? Me? I am almost there…I still have some shopping to do, wrapping presents and crafting also…not enough hours in the day for everything!
I want to share a snow globe I created from a wine glass and paper tart pan. For more photos and the how to’s you can find the blog post HERE.

If you have any questions about this project please let me know.

Thanks for stopping by, hope your day is awesome and enjoy creating!