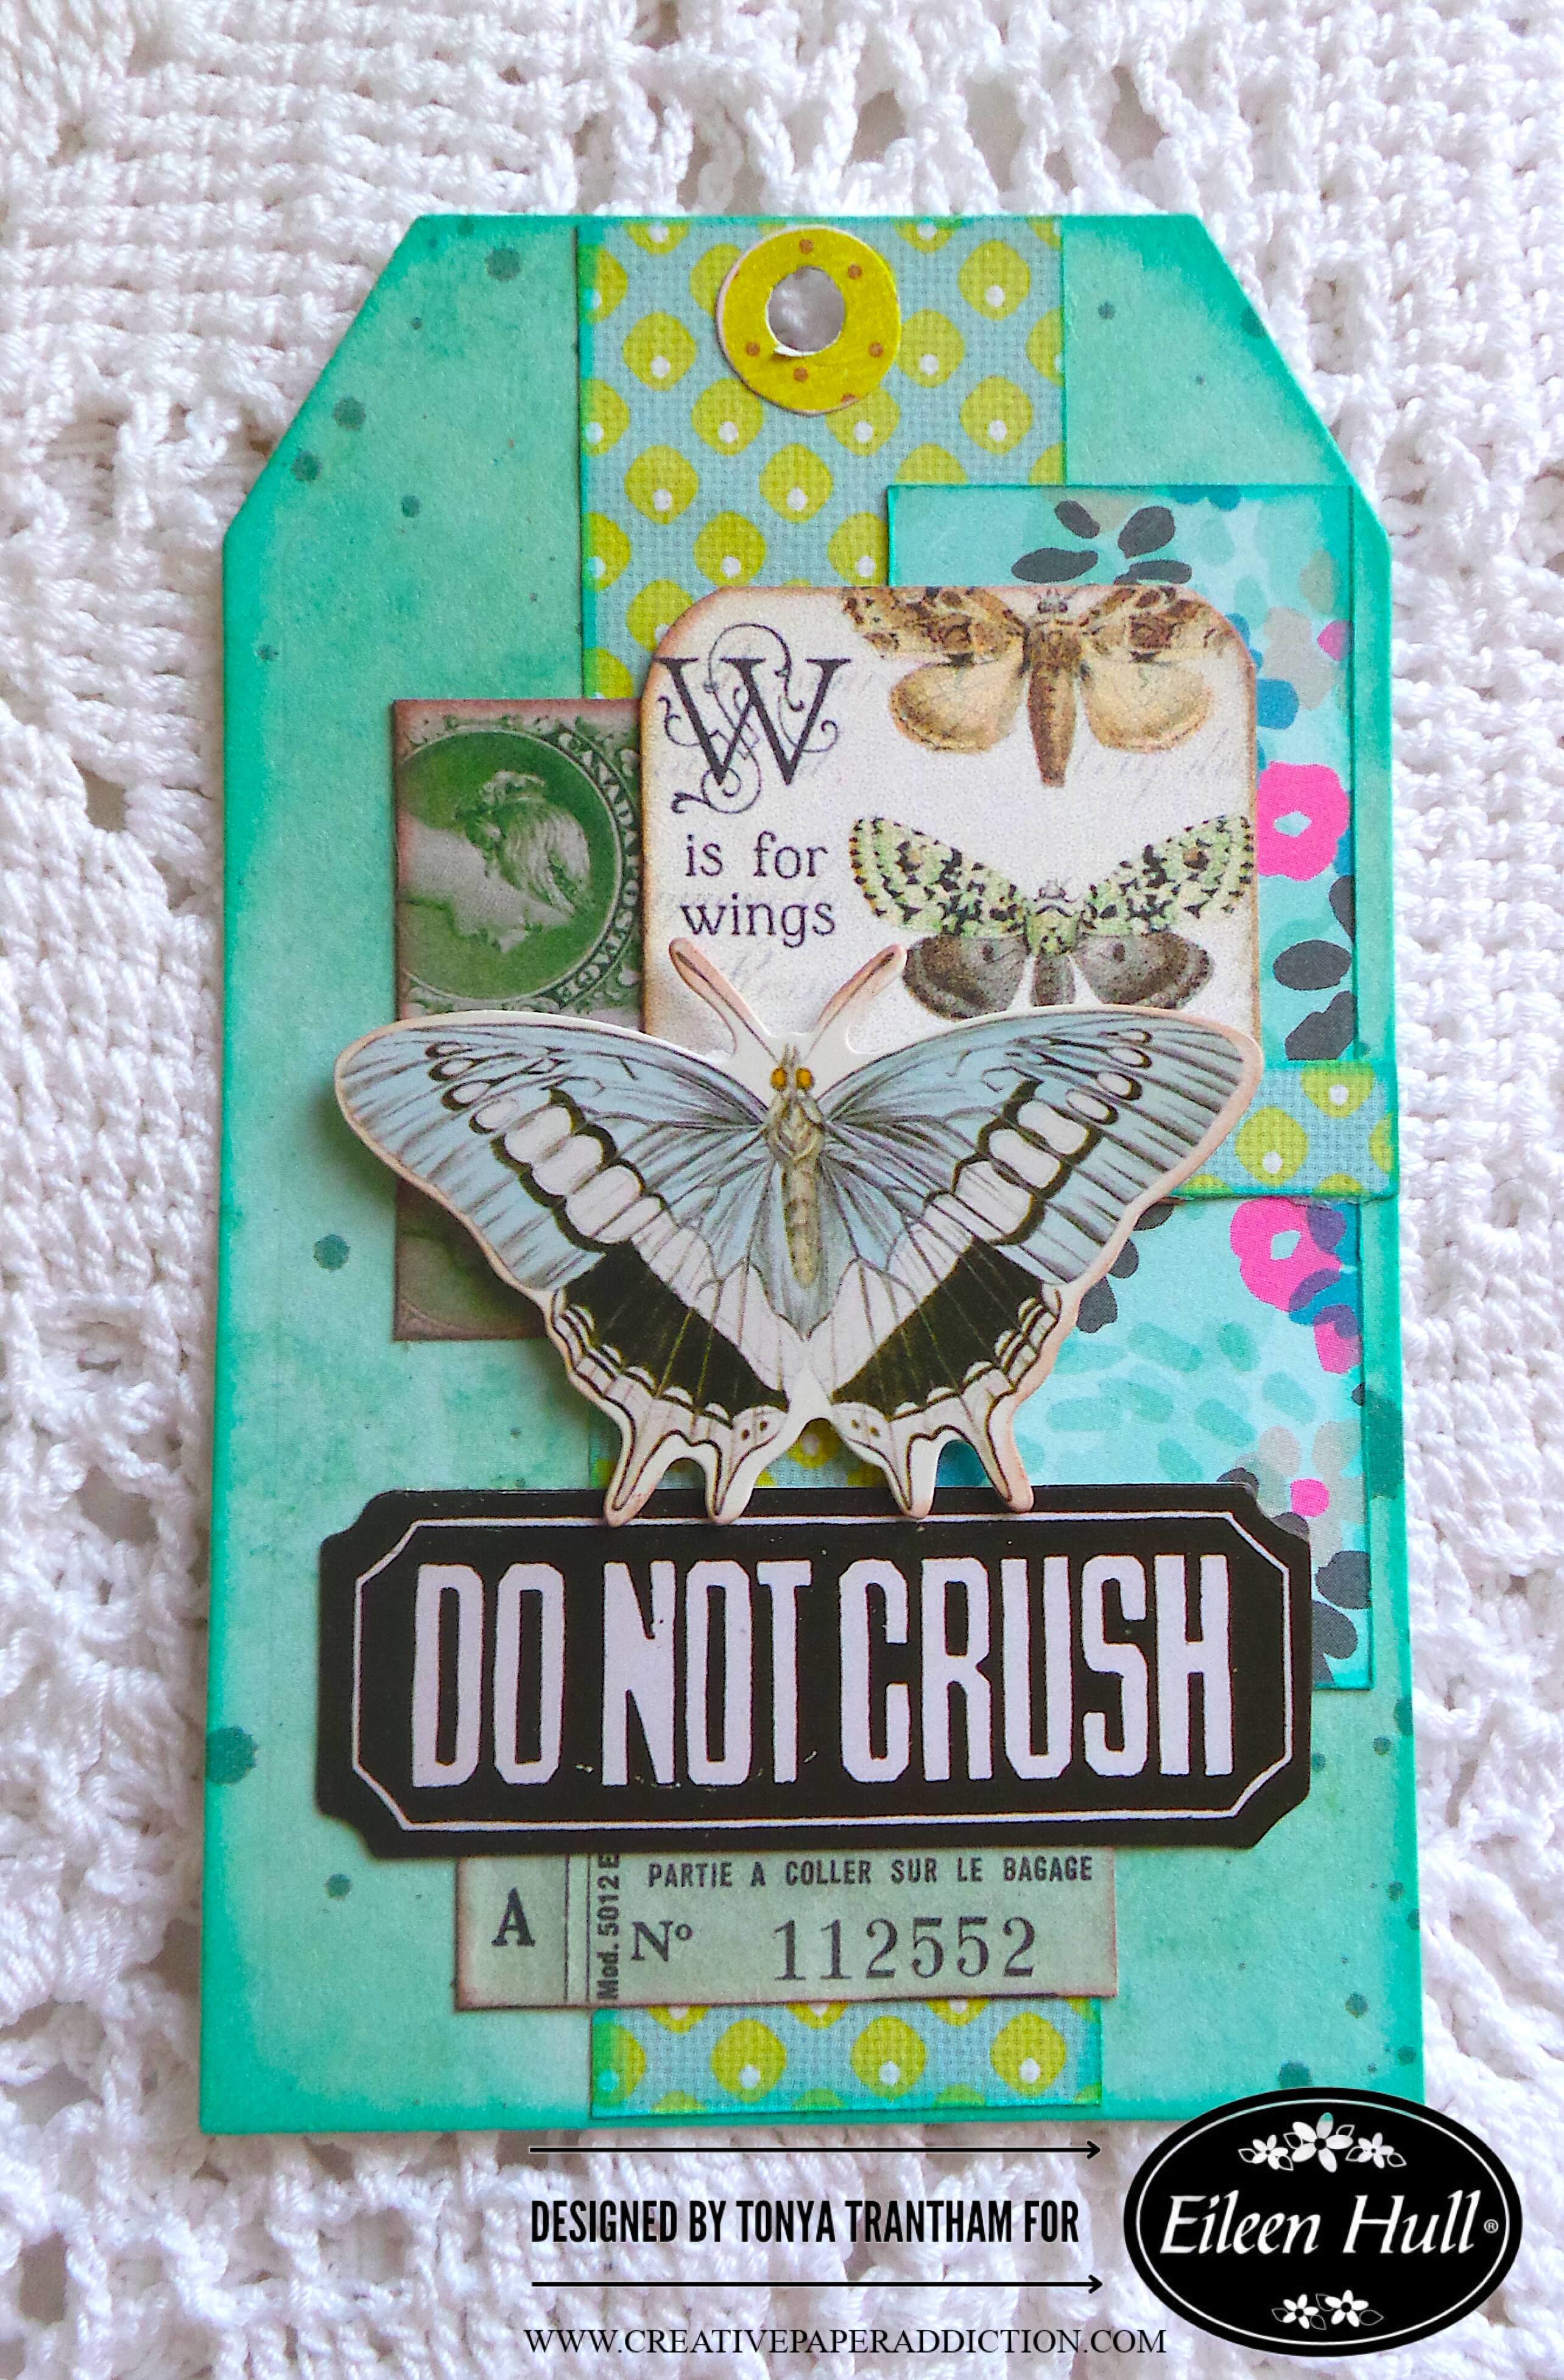
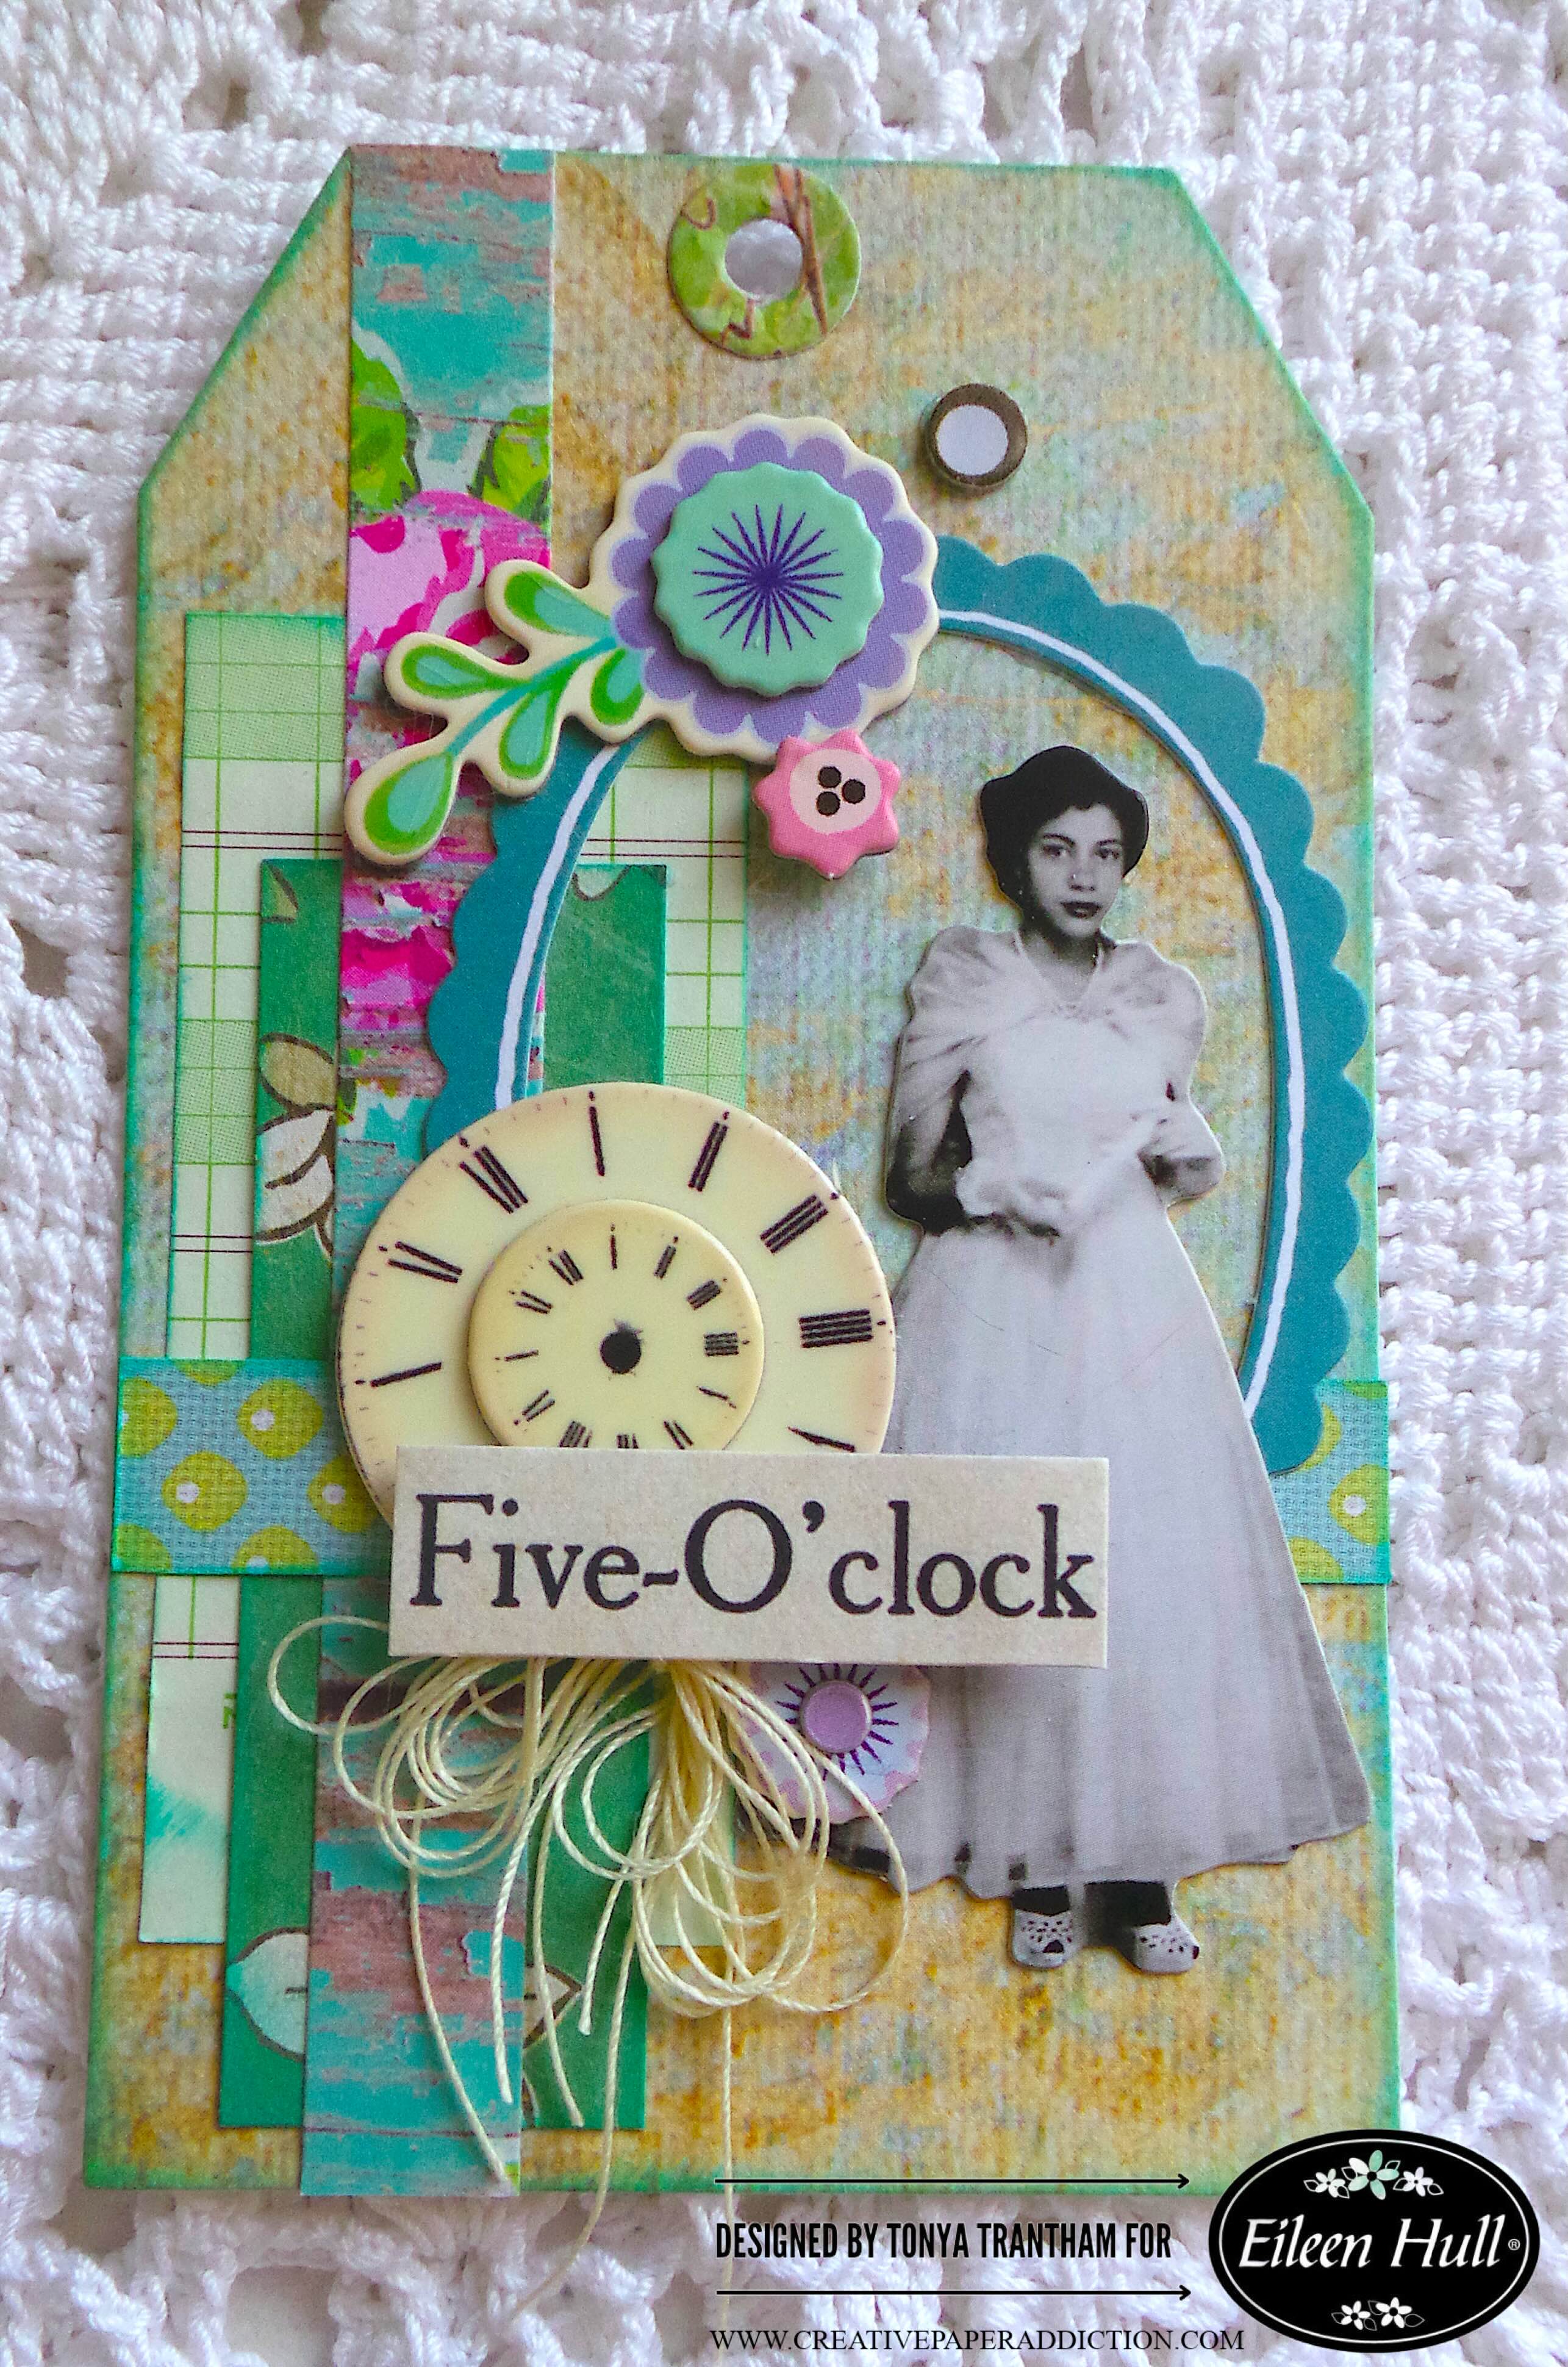
Hi everyone! I’m back with my first project of the month for Eileen Hull. I created two quick tags using the largest tag die from the Waterfall and Tags Thinlits. Tags are a great way to use up scraps of cardstock and those random bits of lace or embellishments that cover your desk. Anyways, let’s get started!
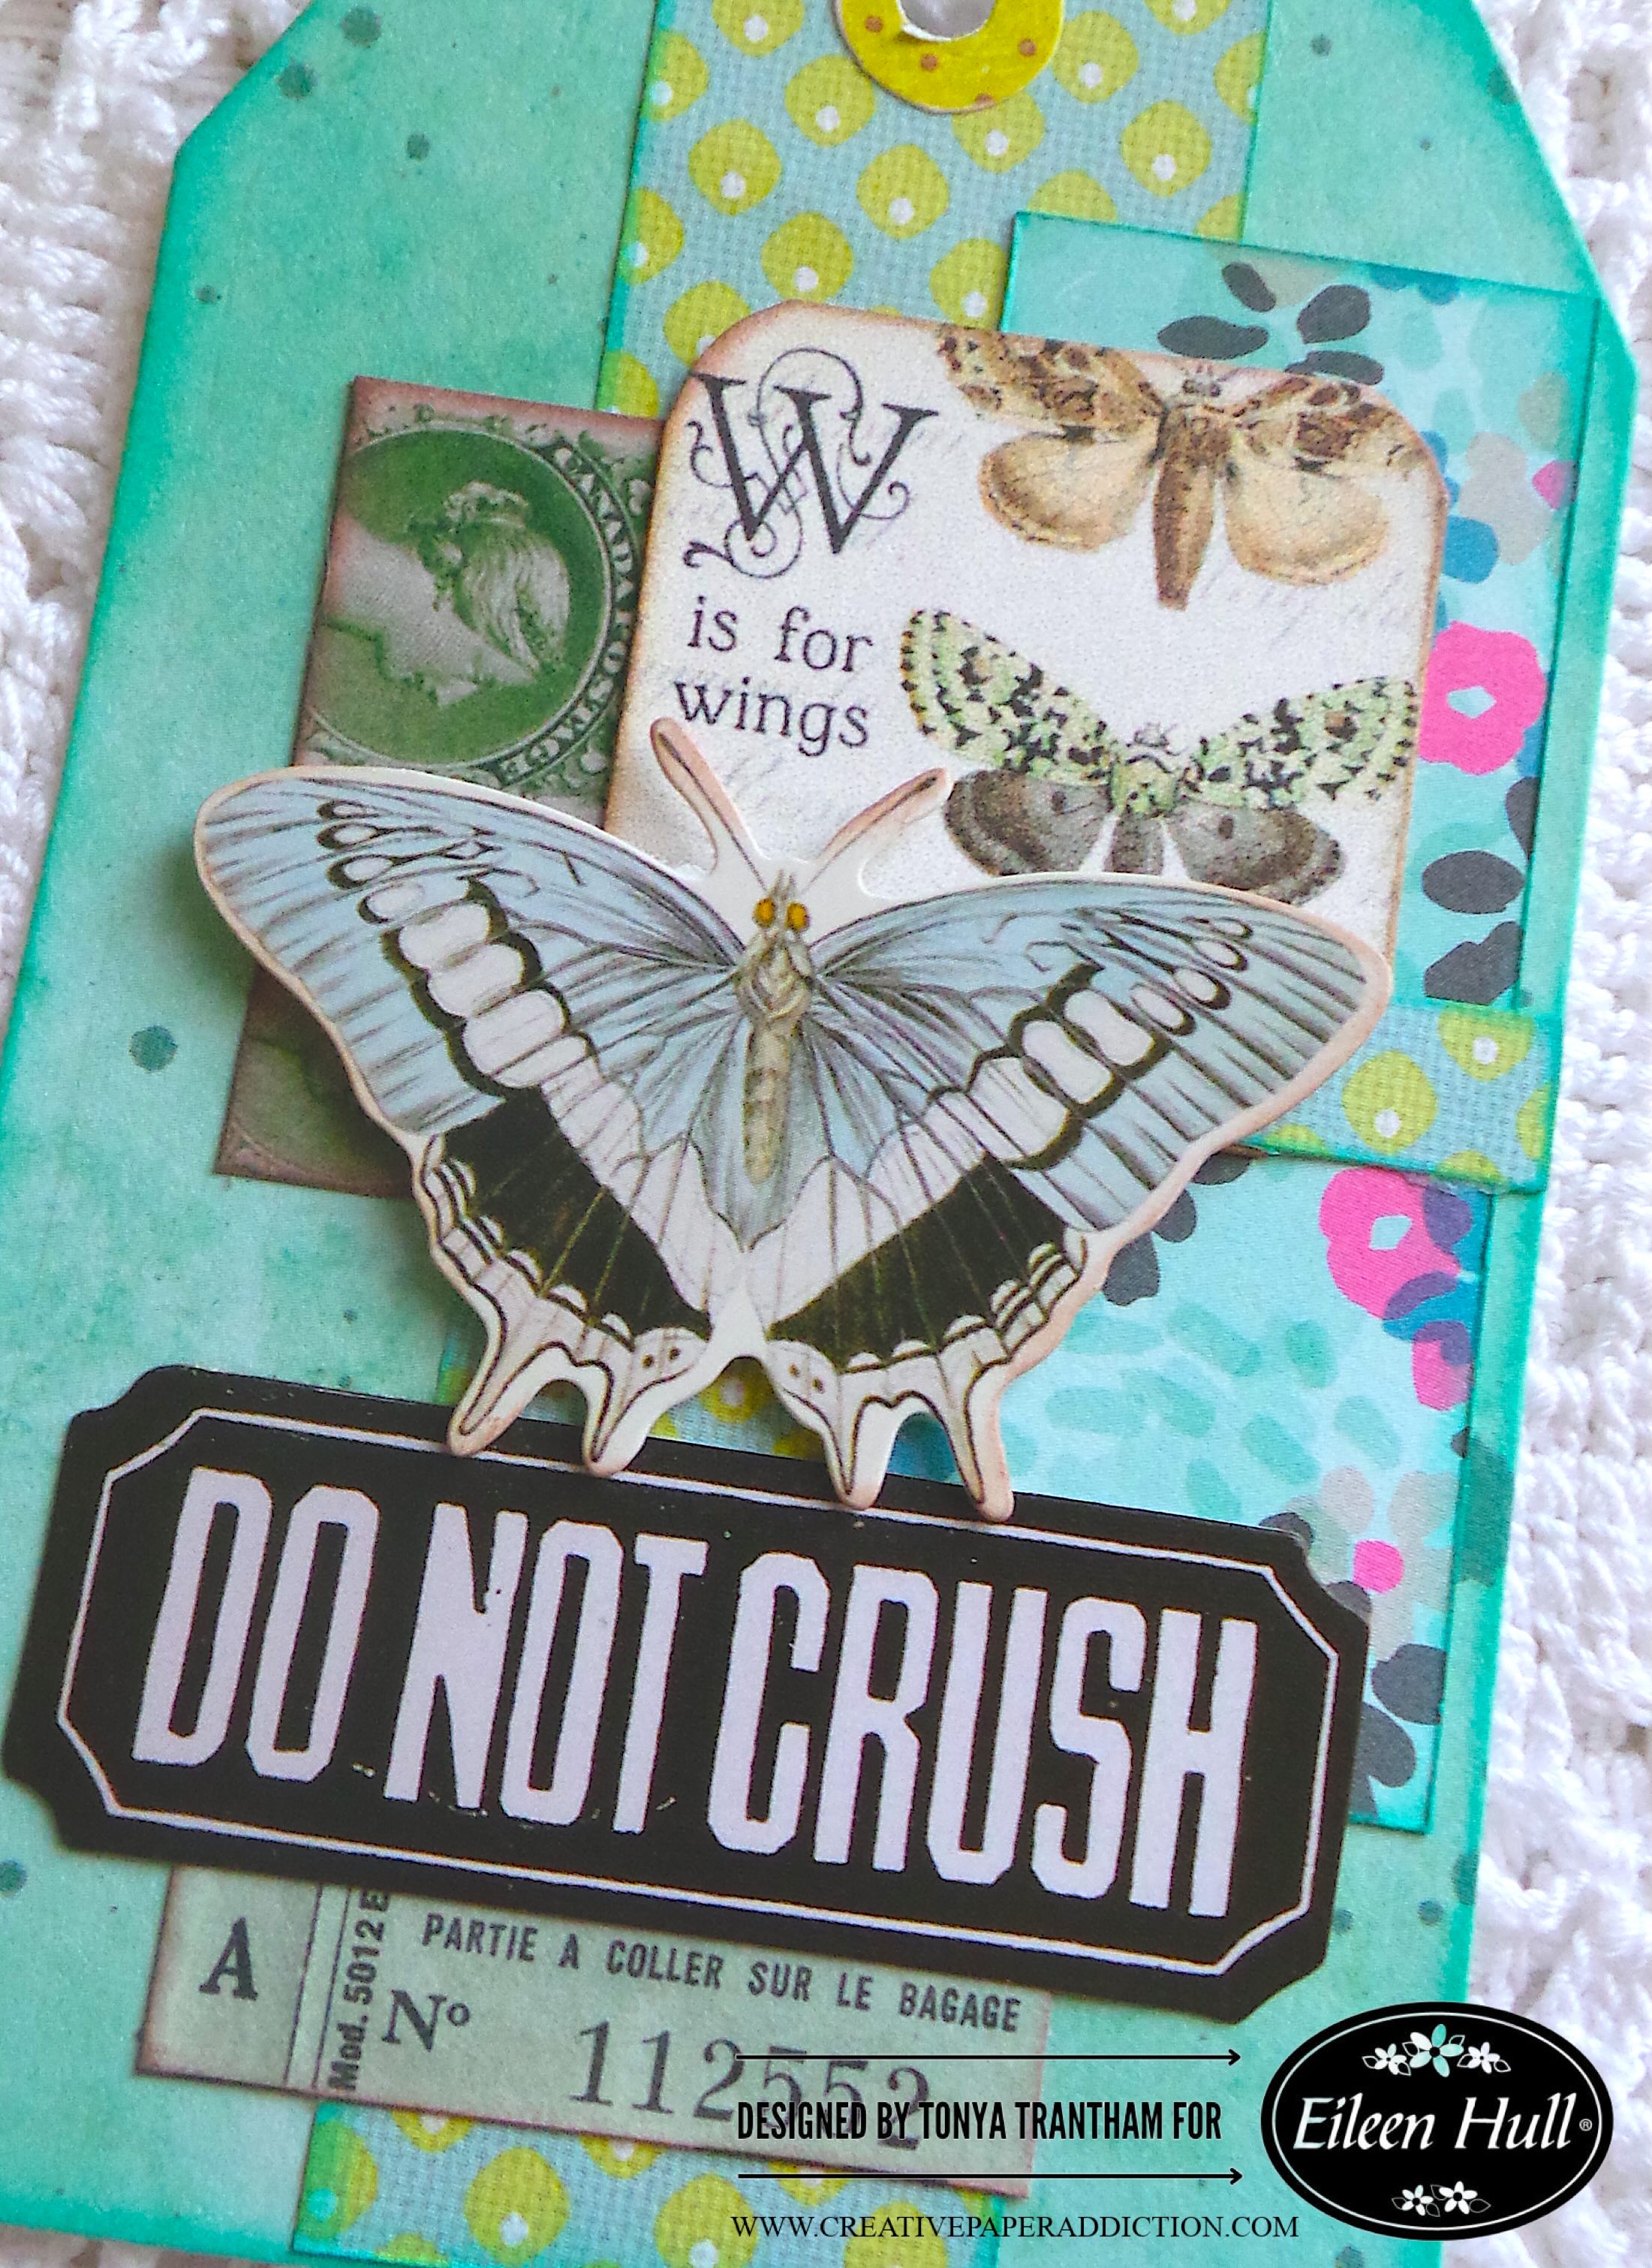
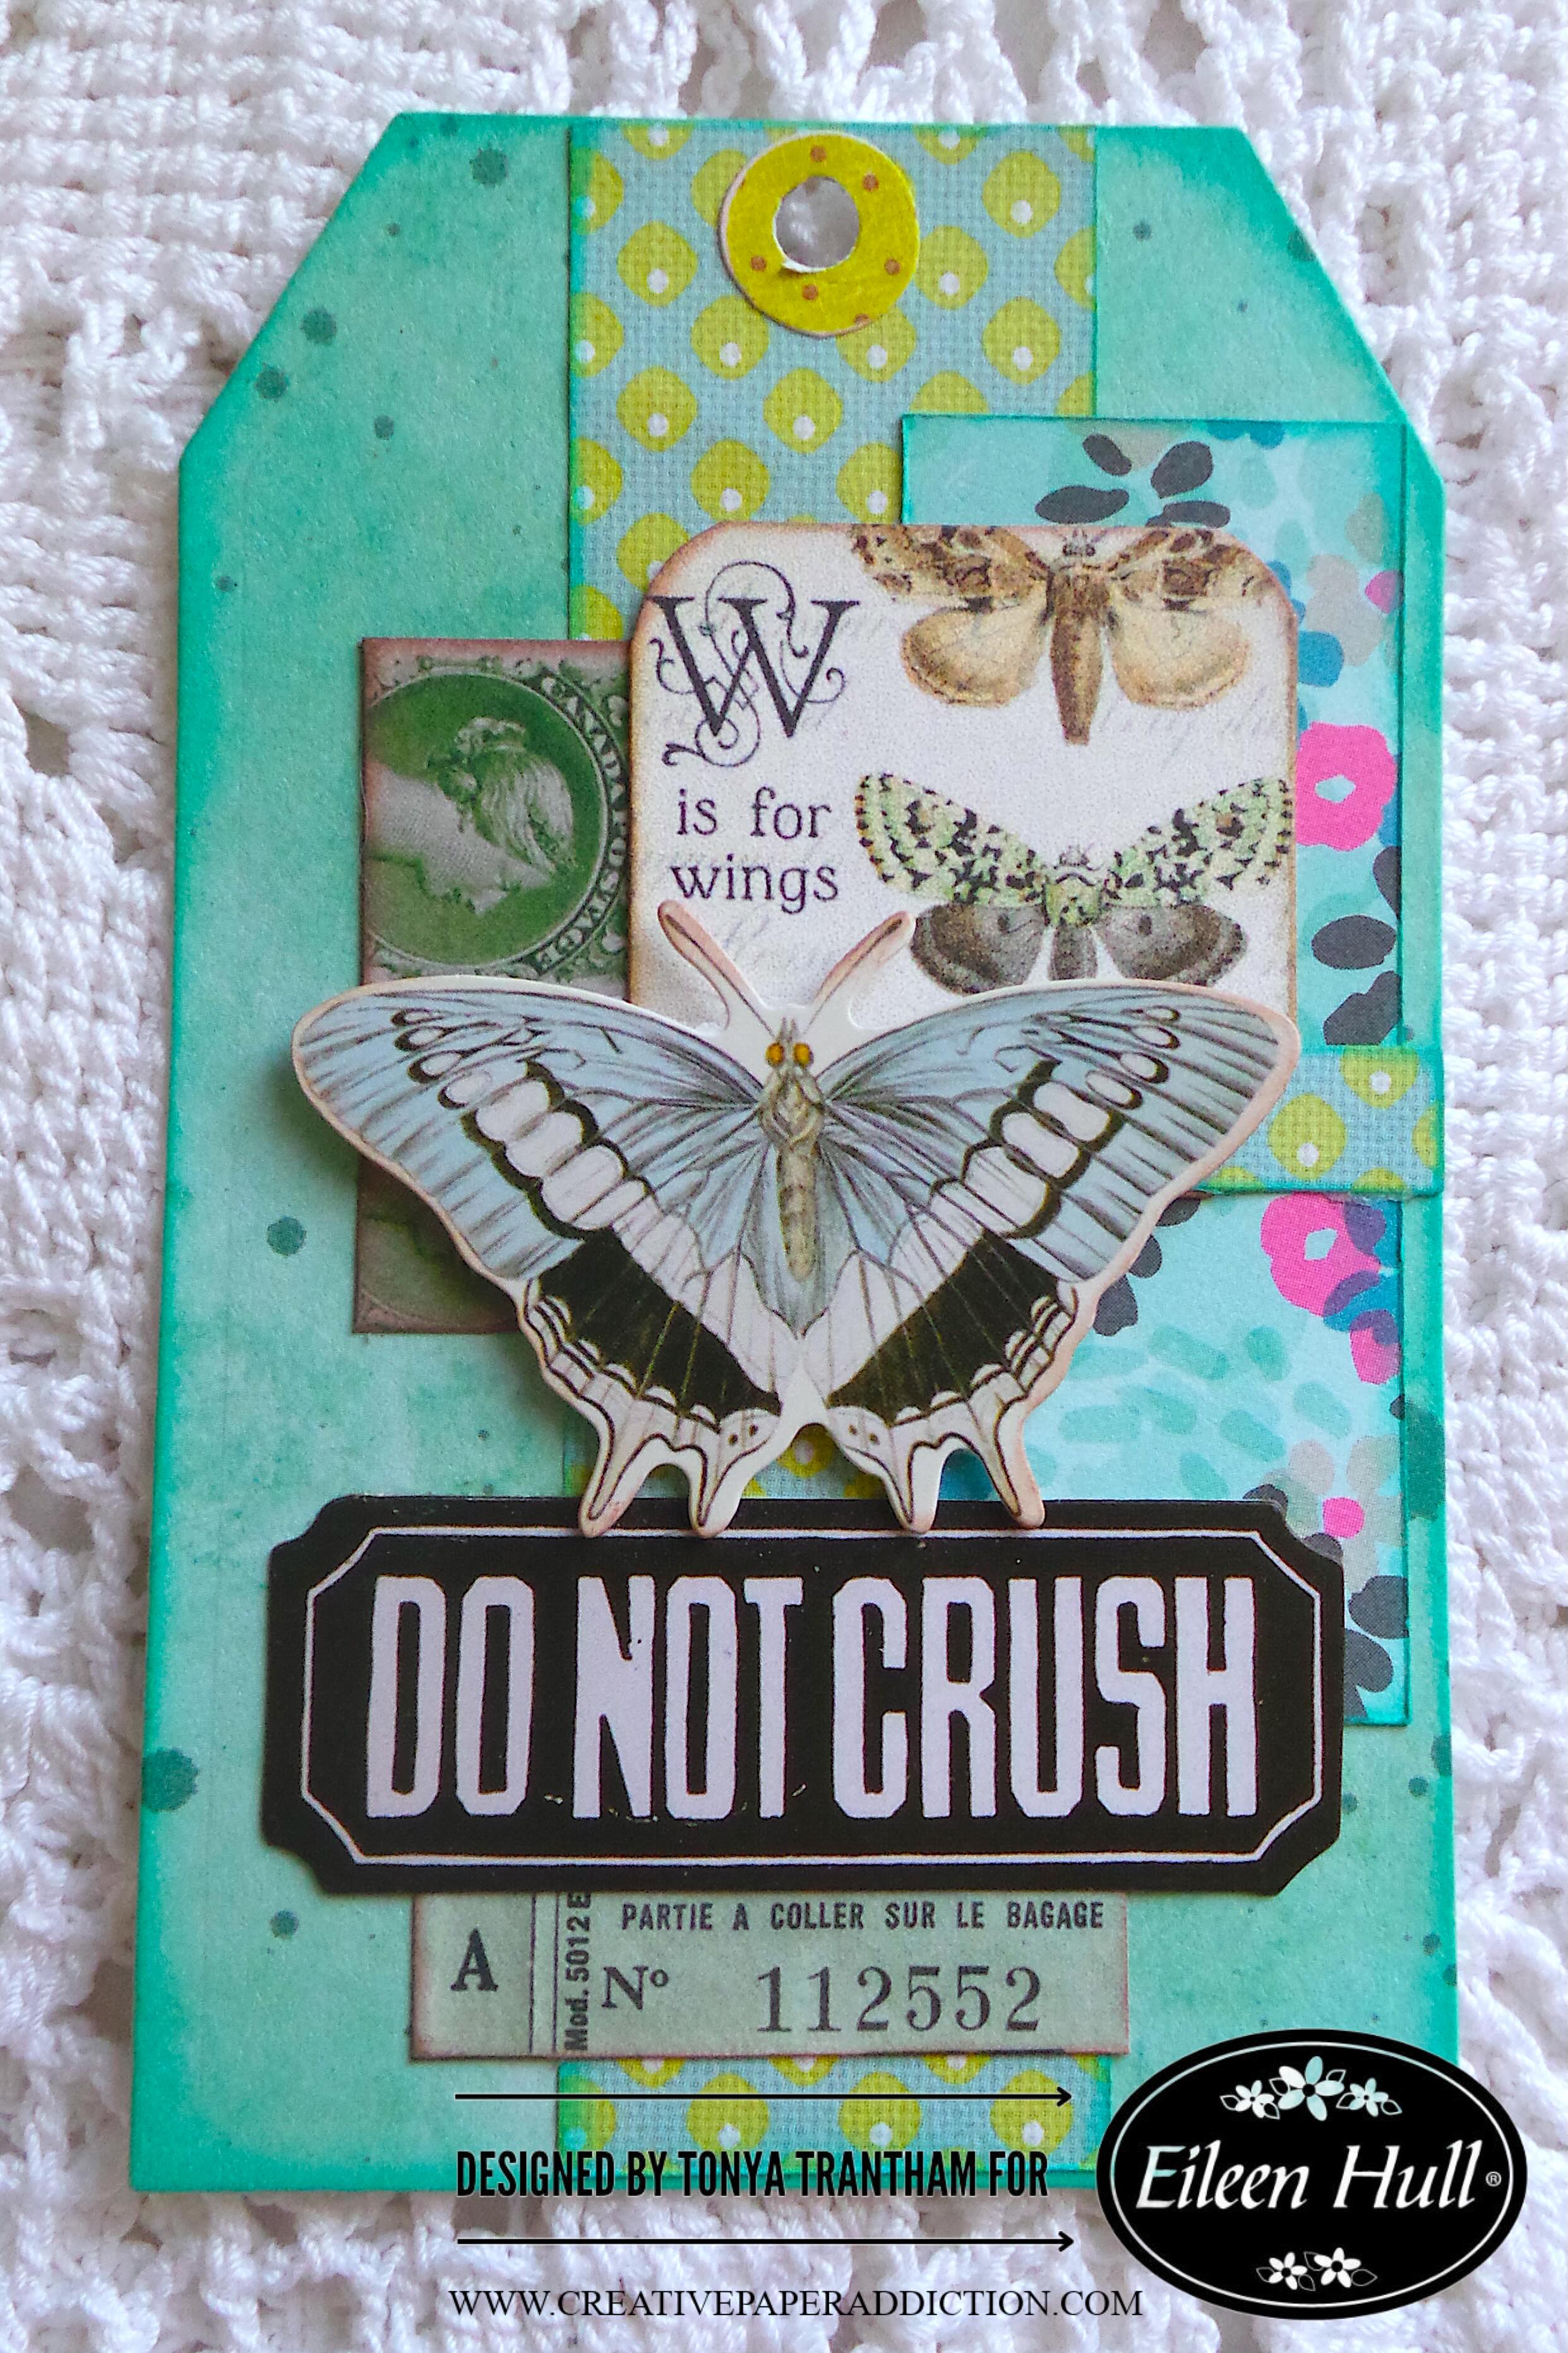
First I gathered up scrap of cardstock that coordinated with the color of the tag. I inked the edges of the scraps with a combo of blue and brown chalk inks and adhered to the tag.
The “W is for Wings” is a printable, the butterfly is a chipboard piece and the “do not crush” sentiment is from one of Tim Holtz’s collections. I glued all to the tag to finish.
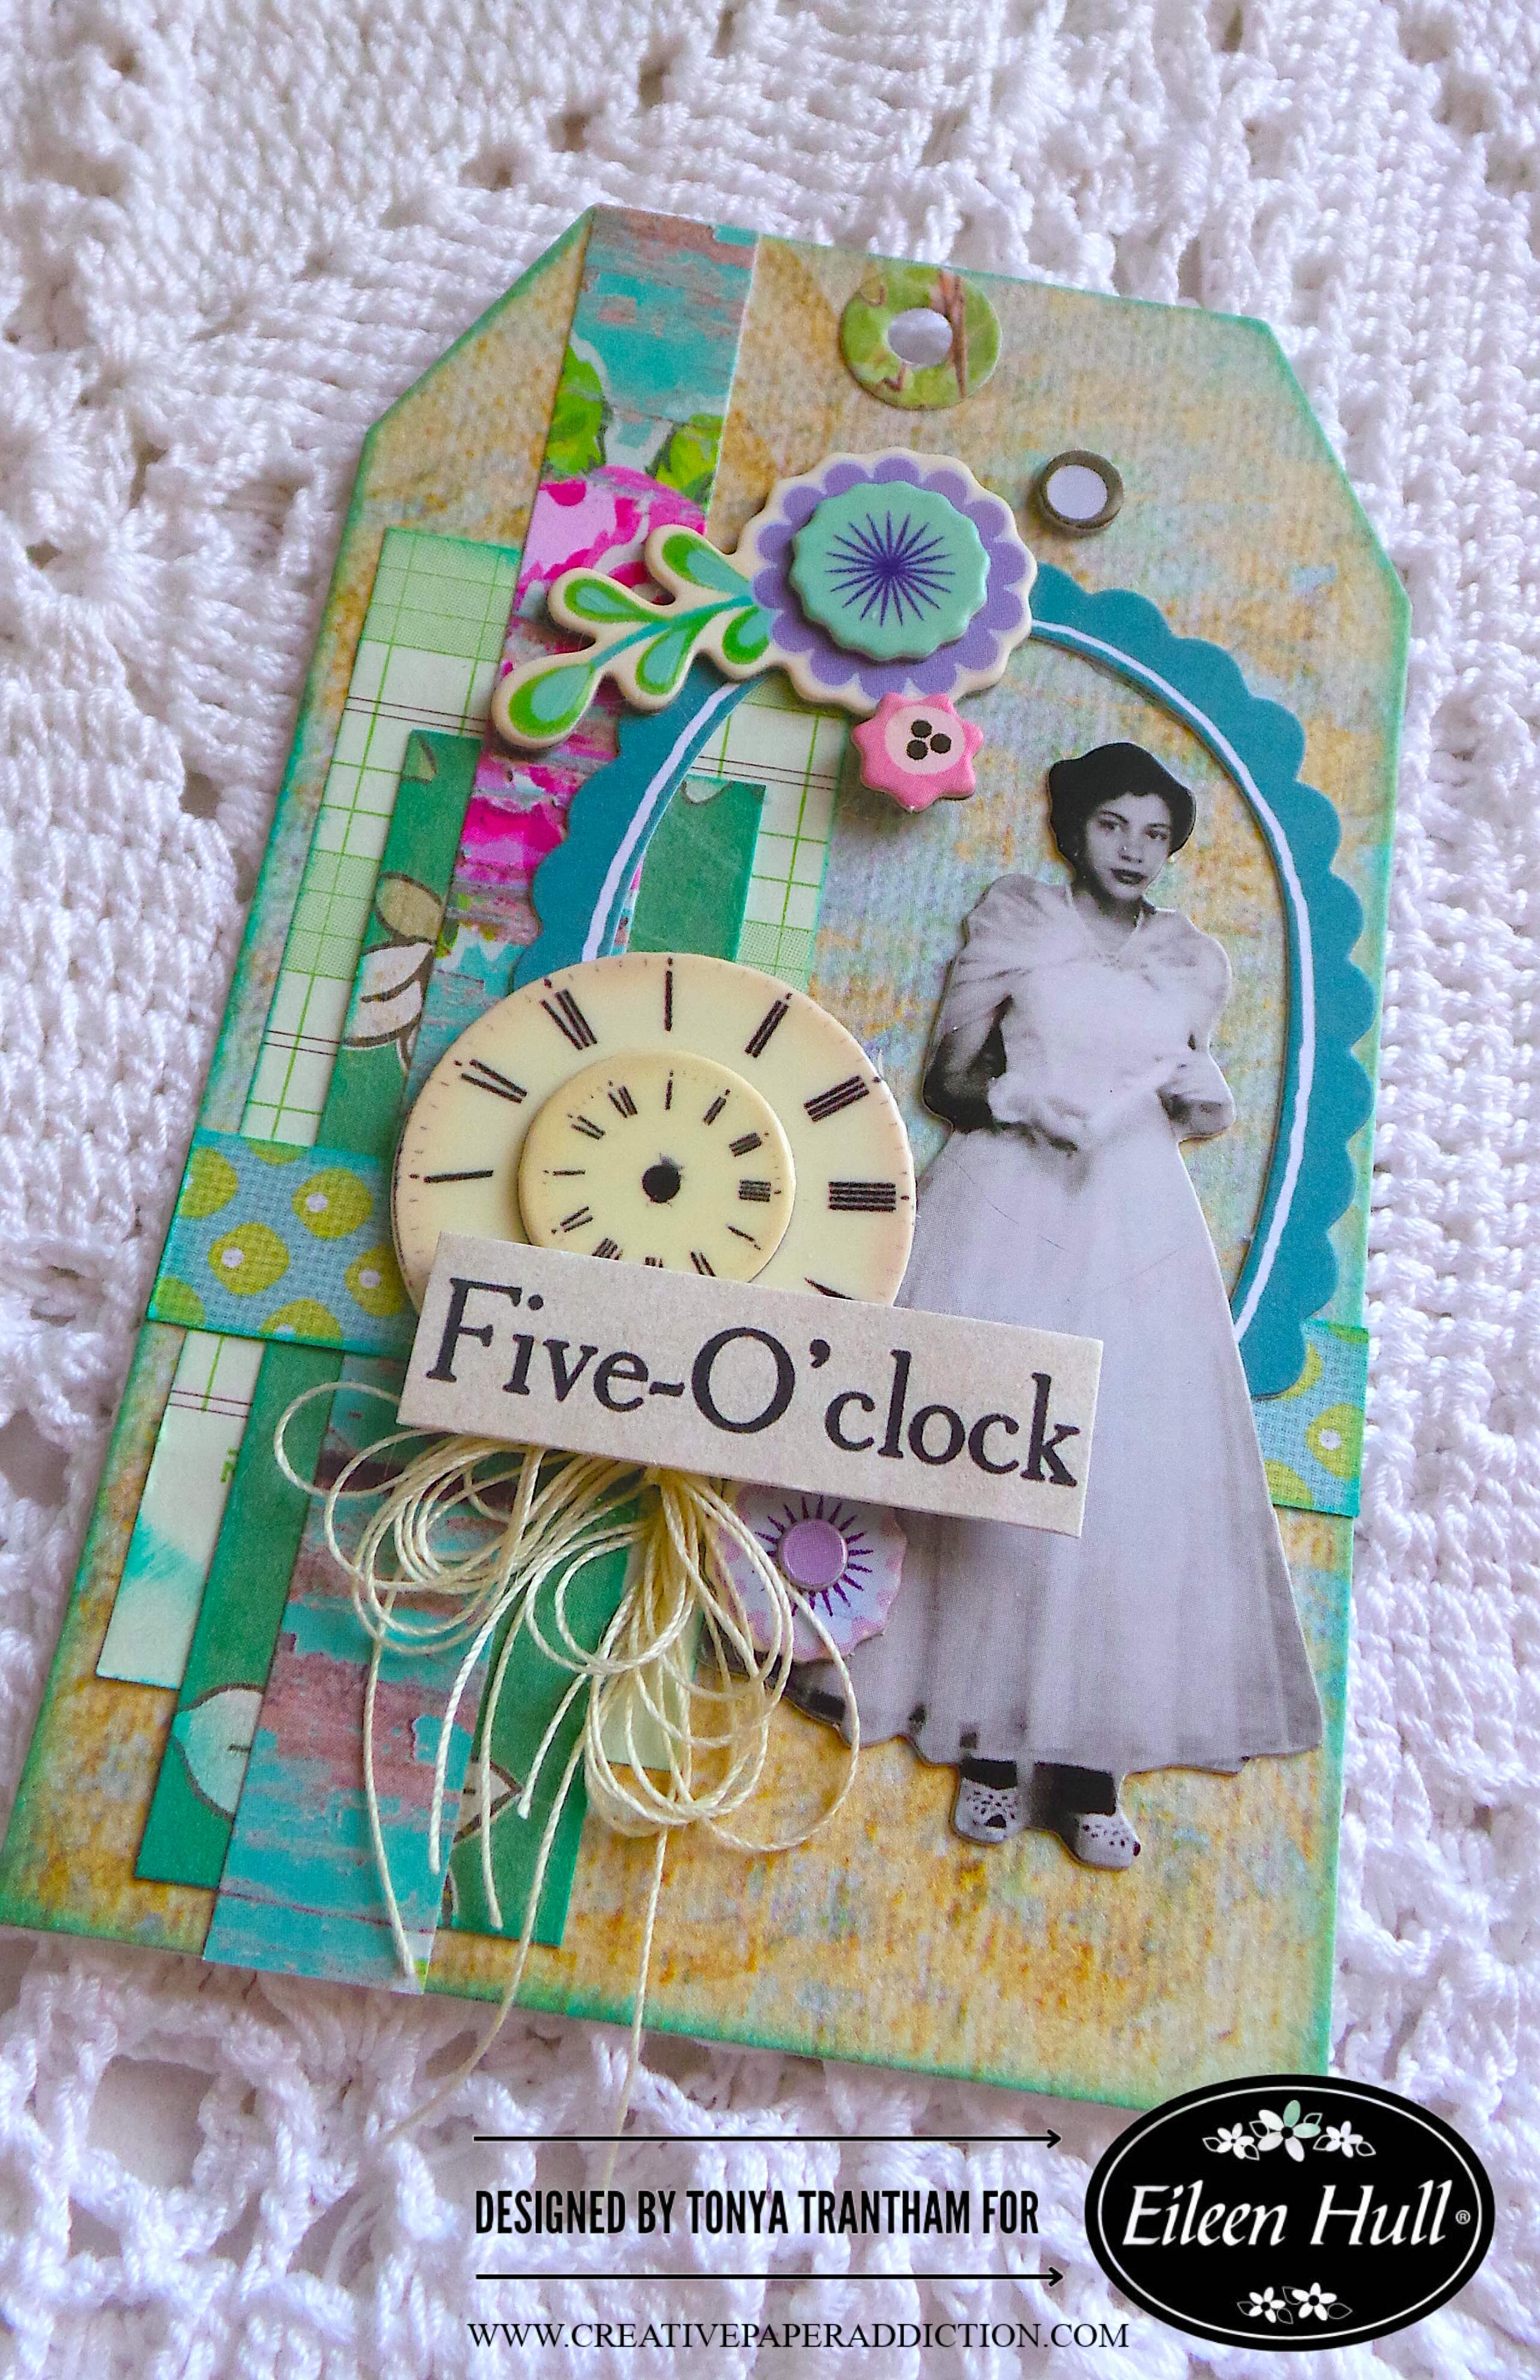
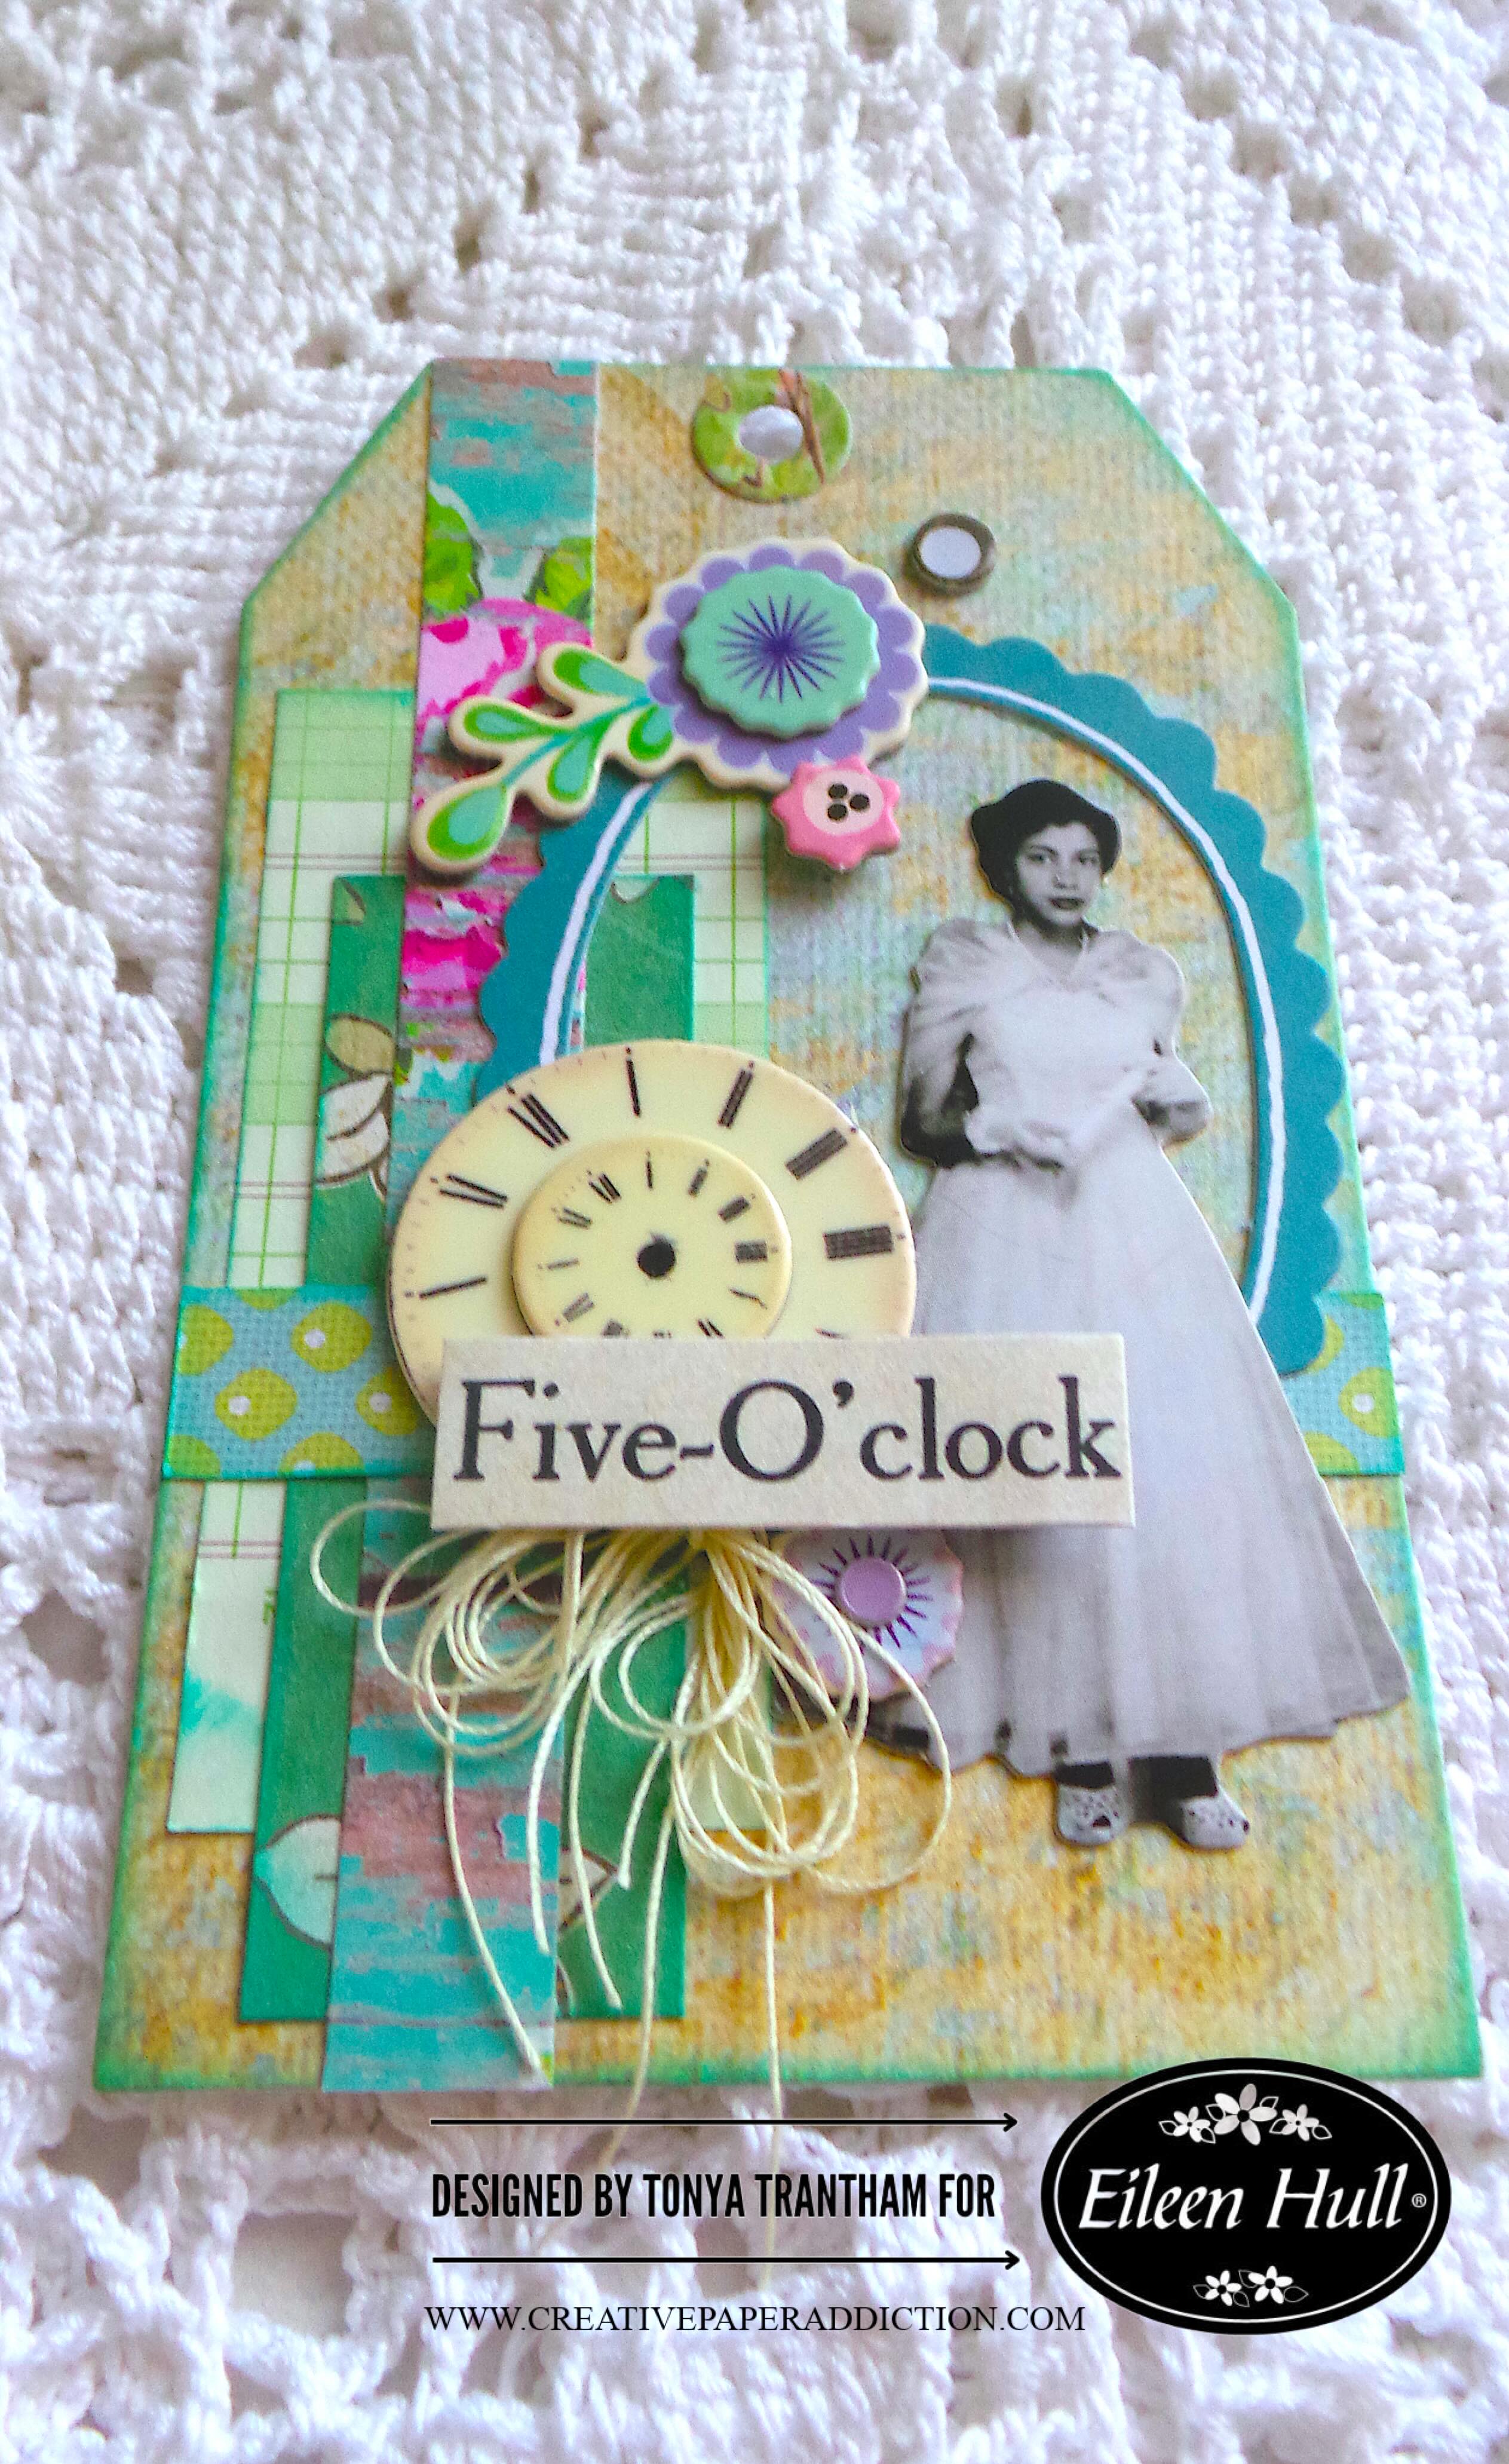
The second tag I used an assortment of cardstock and a little piece of ledger paper which I inked with blue chalk ink. I adhered all to the tag.
I added a Mini Paper Dolls, a clock face and floral chipboard pieces, oval scalloped frame and the “five-O’clock” sentiment to the tag. I used thread to create a bow and adhered underneath the sentiment to finish. Oh how I love creating tags and have already started more! I’ll be sharing those soon.
If you have any comments or questions please leave them below. If you haven’t been by Eileen’s blog lately you can find the latest post HERE.
(Products listed above are Affiliated Links for your convenience)
DISCLAIMERS
This blog is compensated to provide opinion on products, services, websites, and various other topics. Even though the owner(s) of this blog receives compensation for our posts or advertisements. I always give my honest opinions, findings, beliefs, or experiences on those topics or products. The views and opinions expressed on this blog are purely my own. Any product claim, statistic, or quote should be checked with each manufacturer. Verify other representations about a product or service with the provider or party in question.This blog contains affiliate links. Clicking these links helps to support Tonya Trantham Designs – Creative Paper Addiction. It’s at no additional cost to you.Today’s features areSizzix and Eileen Hull Products.
Thanks for stopping by, I hope your Monday is awesome and enjoy creating!
Hi everyone! I’m back with part two of my journal for Eileen Hull and Grafix. If you haven’t seen part one you can find that post HERE. I created five tags for the pockets and belly band in my journal. Anyways let’s get started!
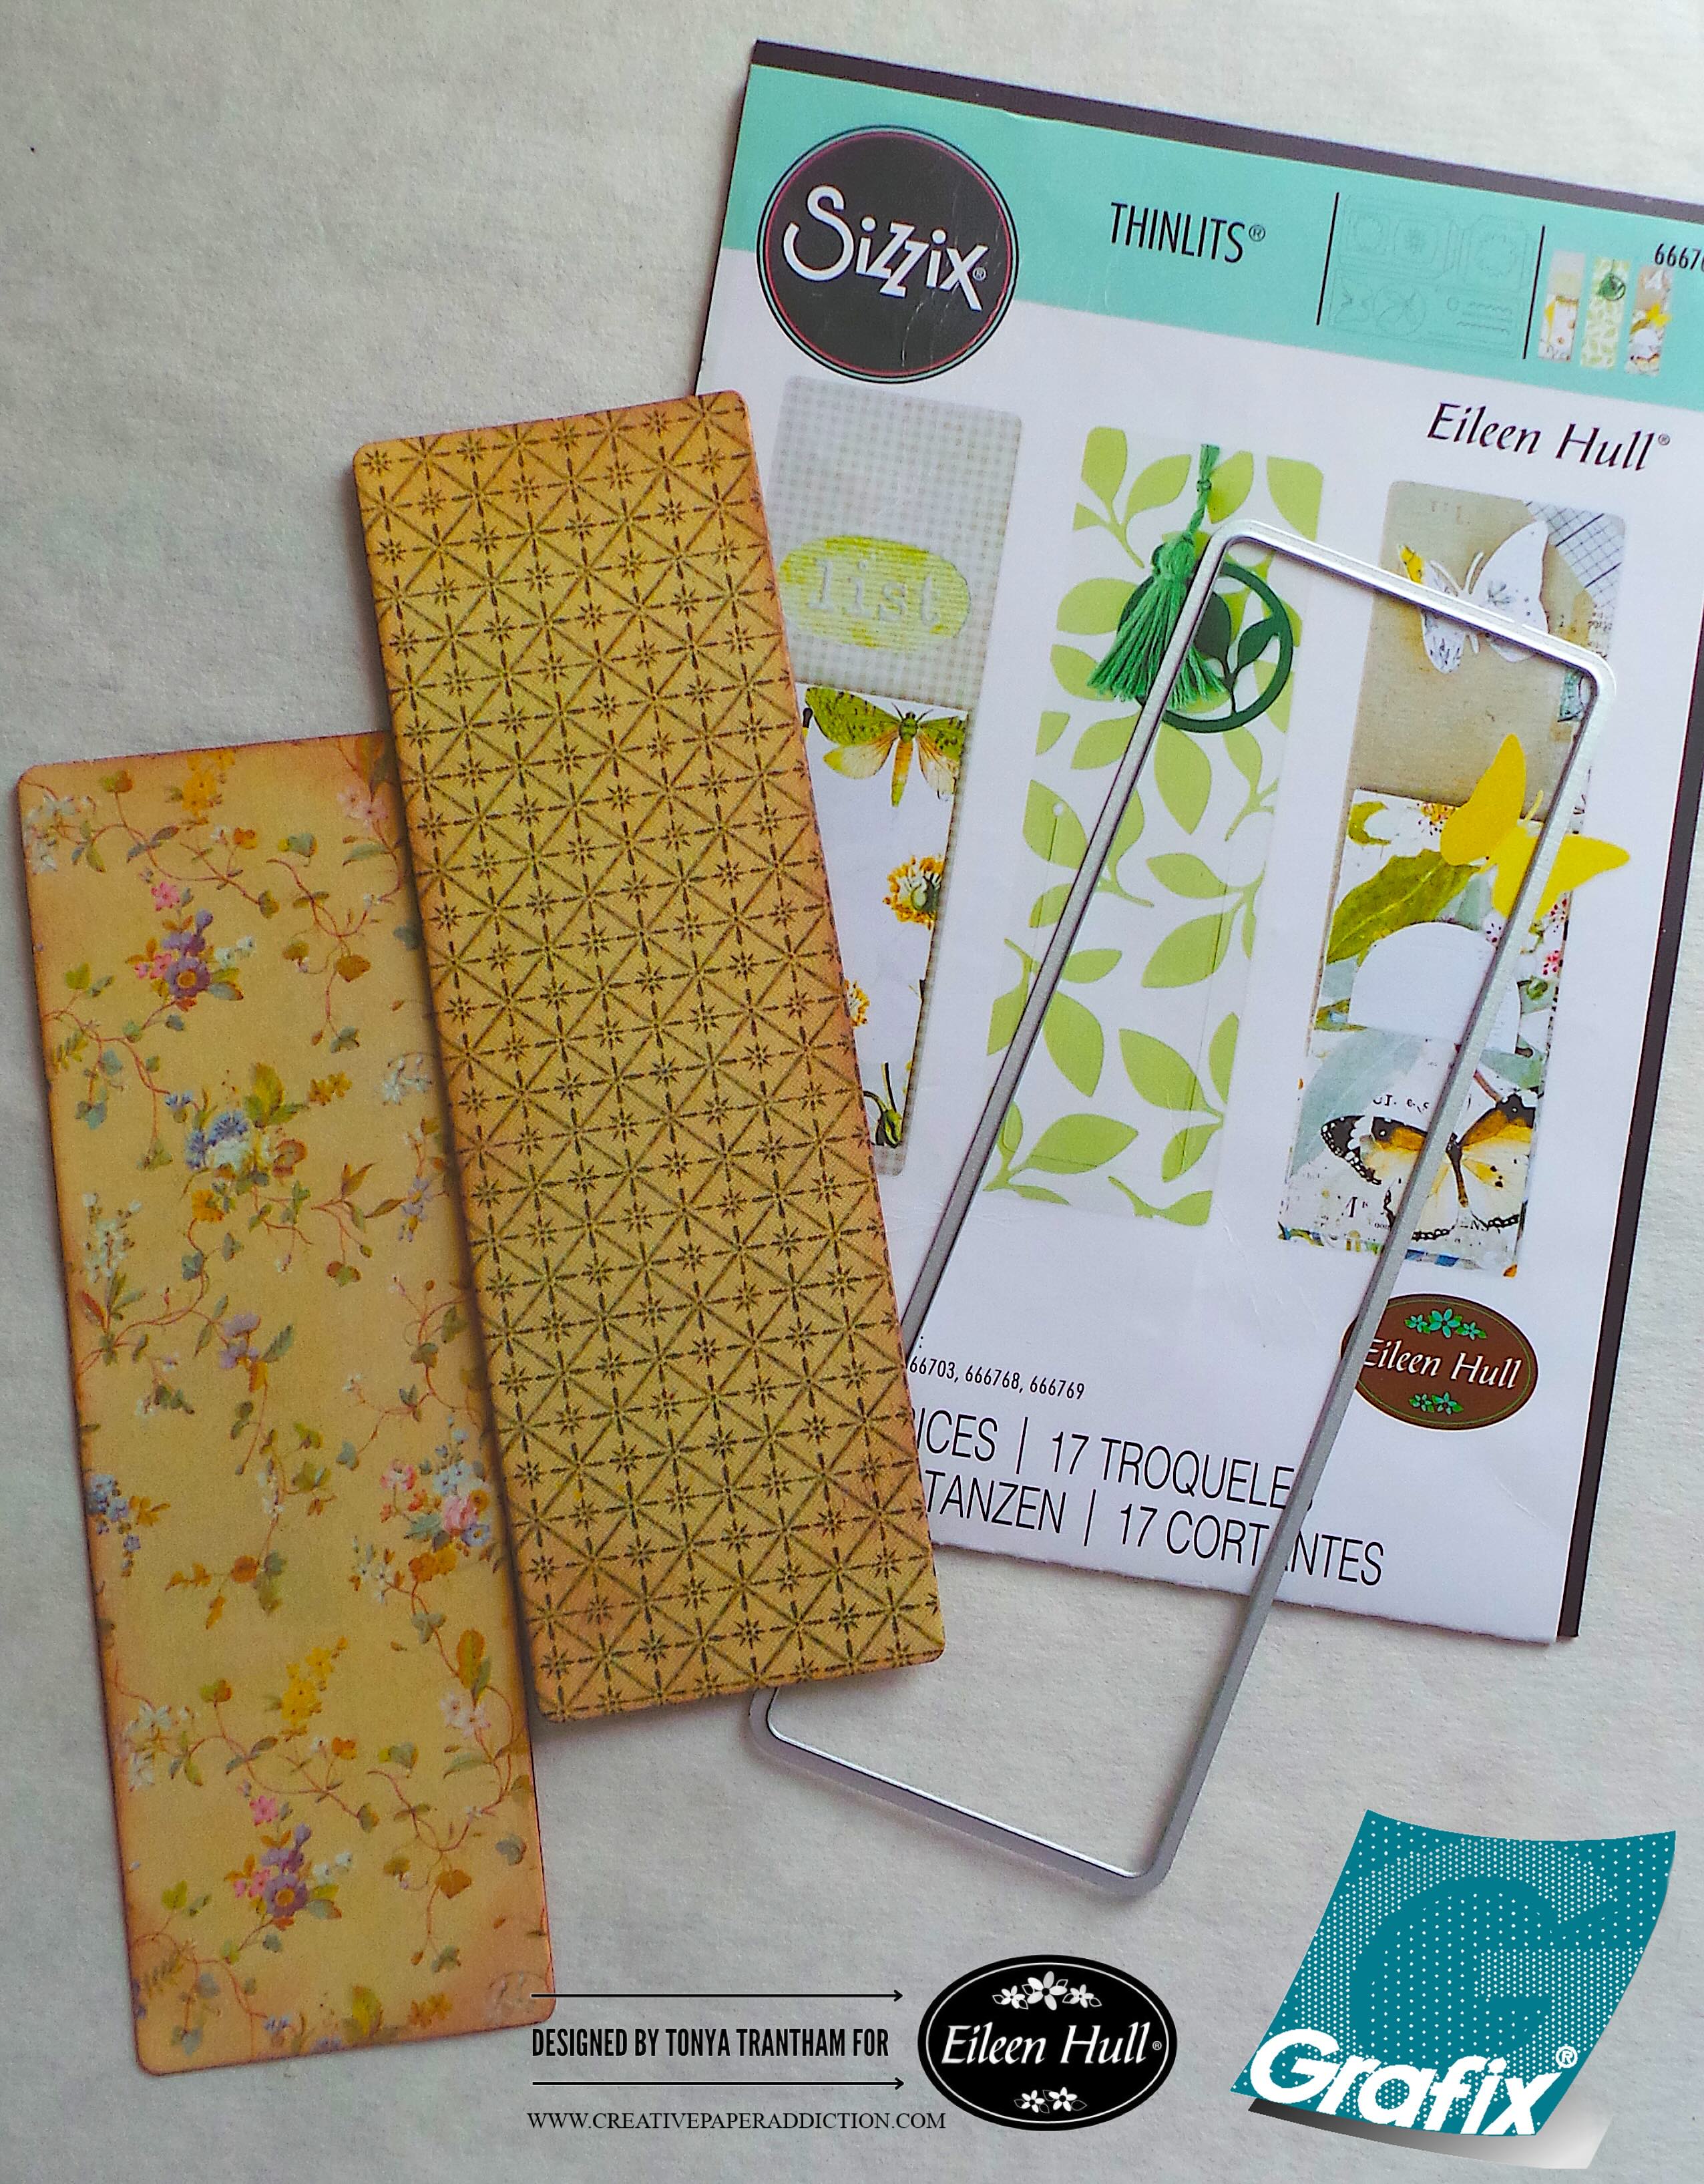
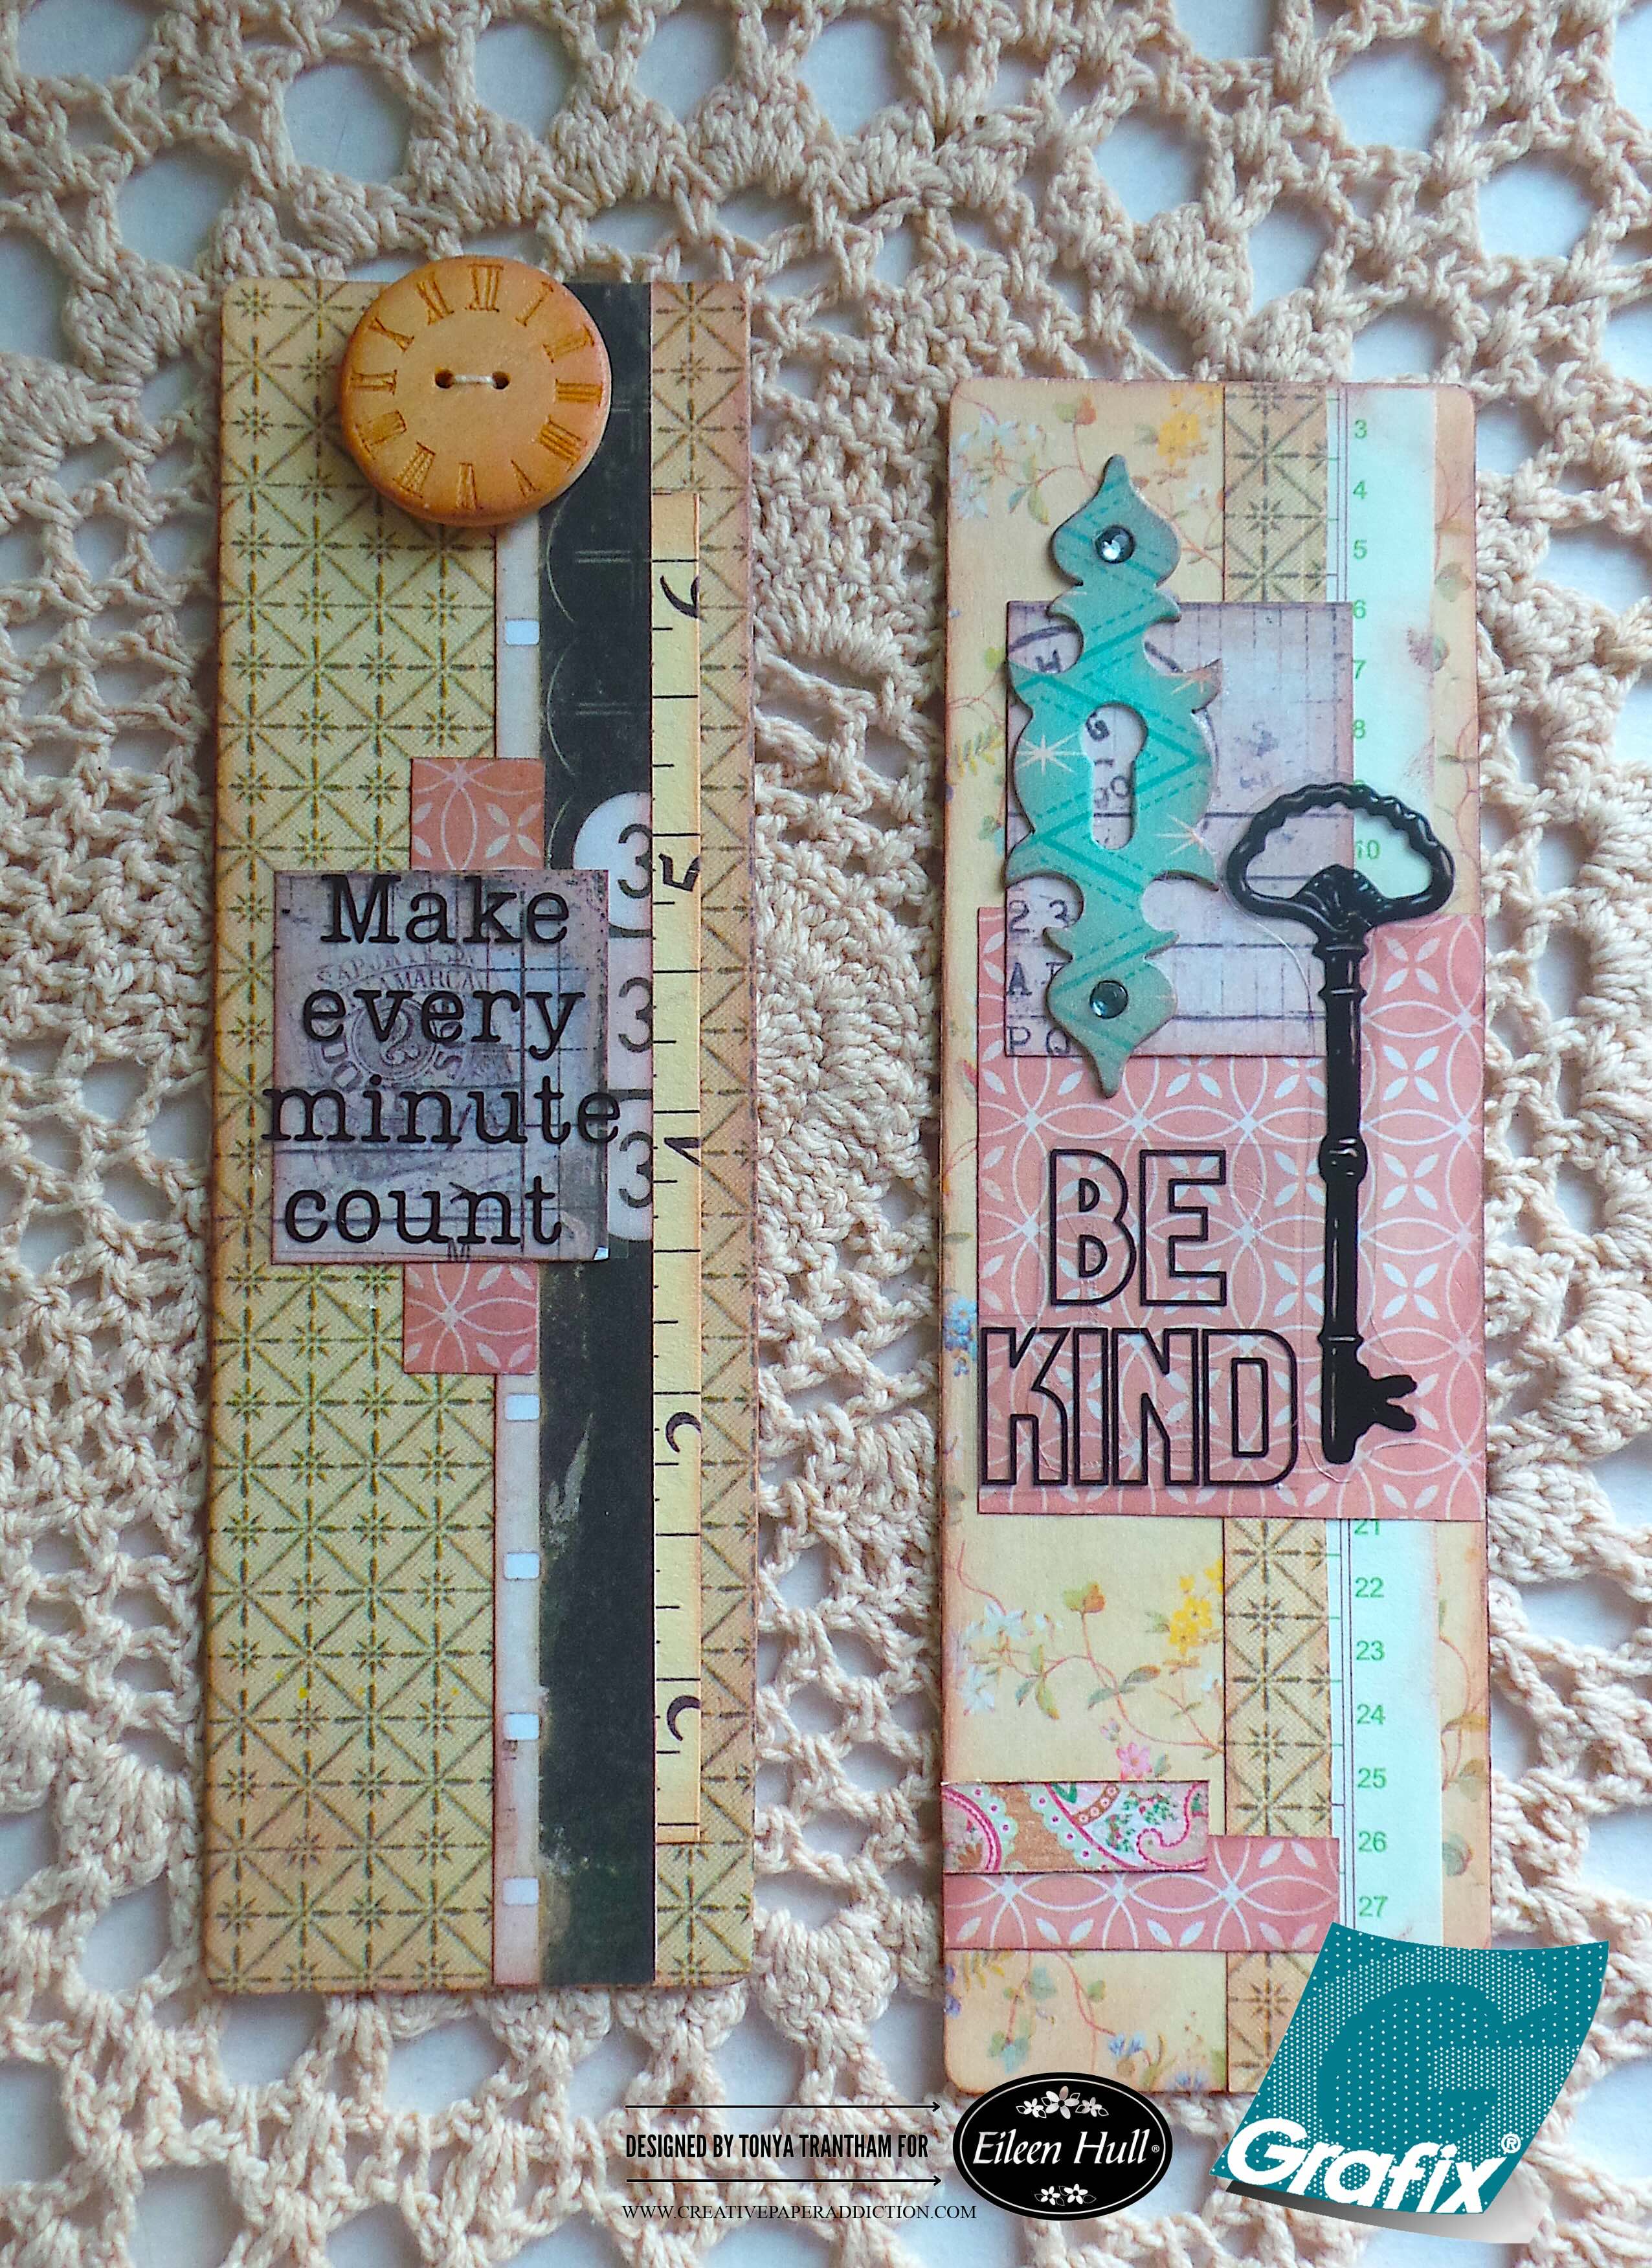
For the inside pocket I used the bookmark from the Bookmark, Pocket and Toppers Thinlits and cut out two bookmarks. I inked the edges of the bookmarks with a Brown Chalk Ink.
On the front side of both the bookmarks I dug into my stash of scraps of cardstock and glued strips of patterned cardstock to the base of the bookmark. Side note, this is a great way to use up what you have lying on your desk. I added the clear film “Make Every Minute Count” sentiment from the Grungy Vibe by Cat Kerr to the book mark along with a clock button from my stash to finish.
The next bookmark I cut a keyhole die from the Journal Hardware Diecut, adhered to the top corner of the bookmark along with two Gems in each end of the keyhole. I cut out the clear film key and the “Be Kind” sentiment and added to the bookmark.
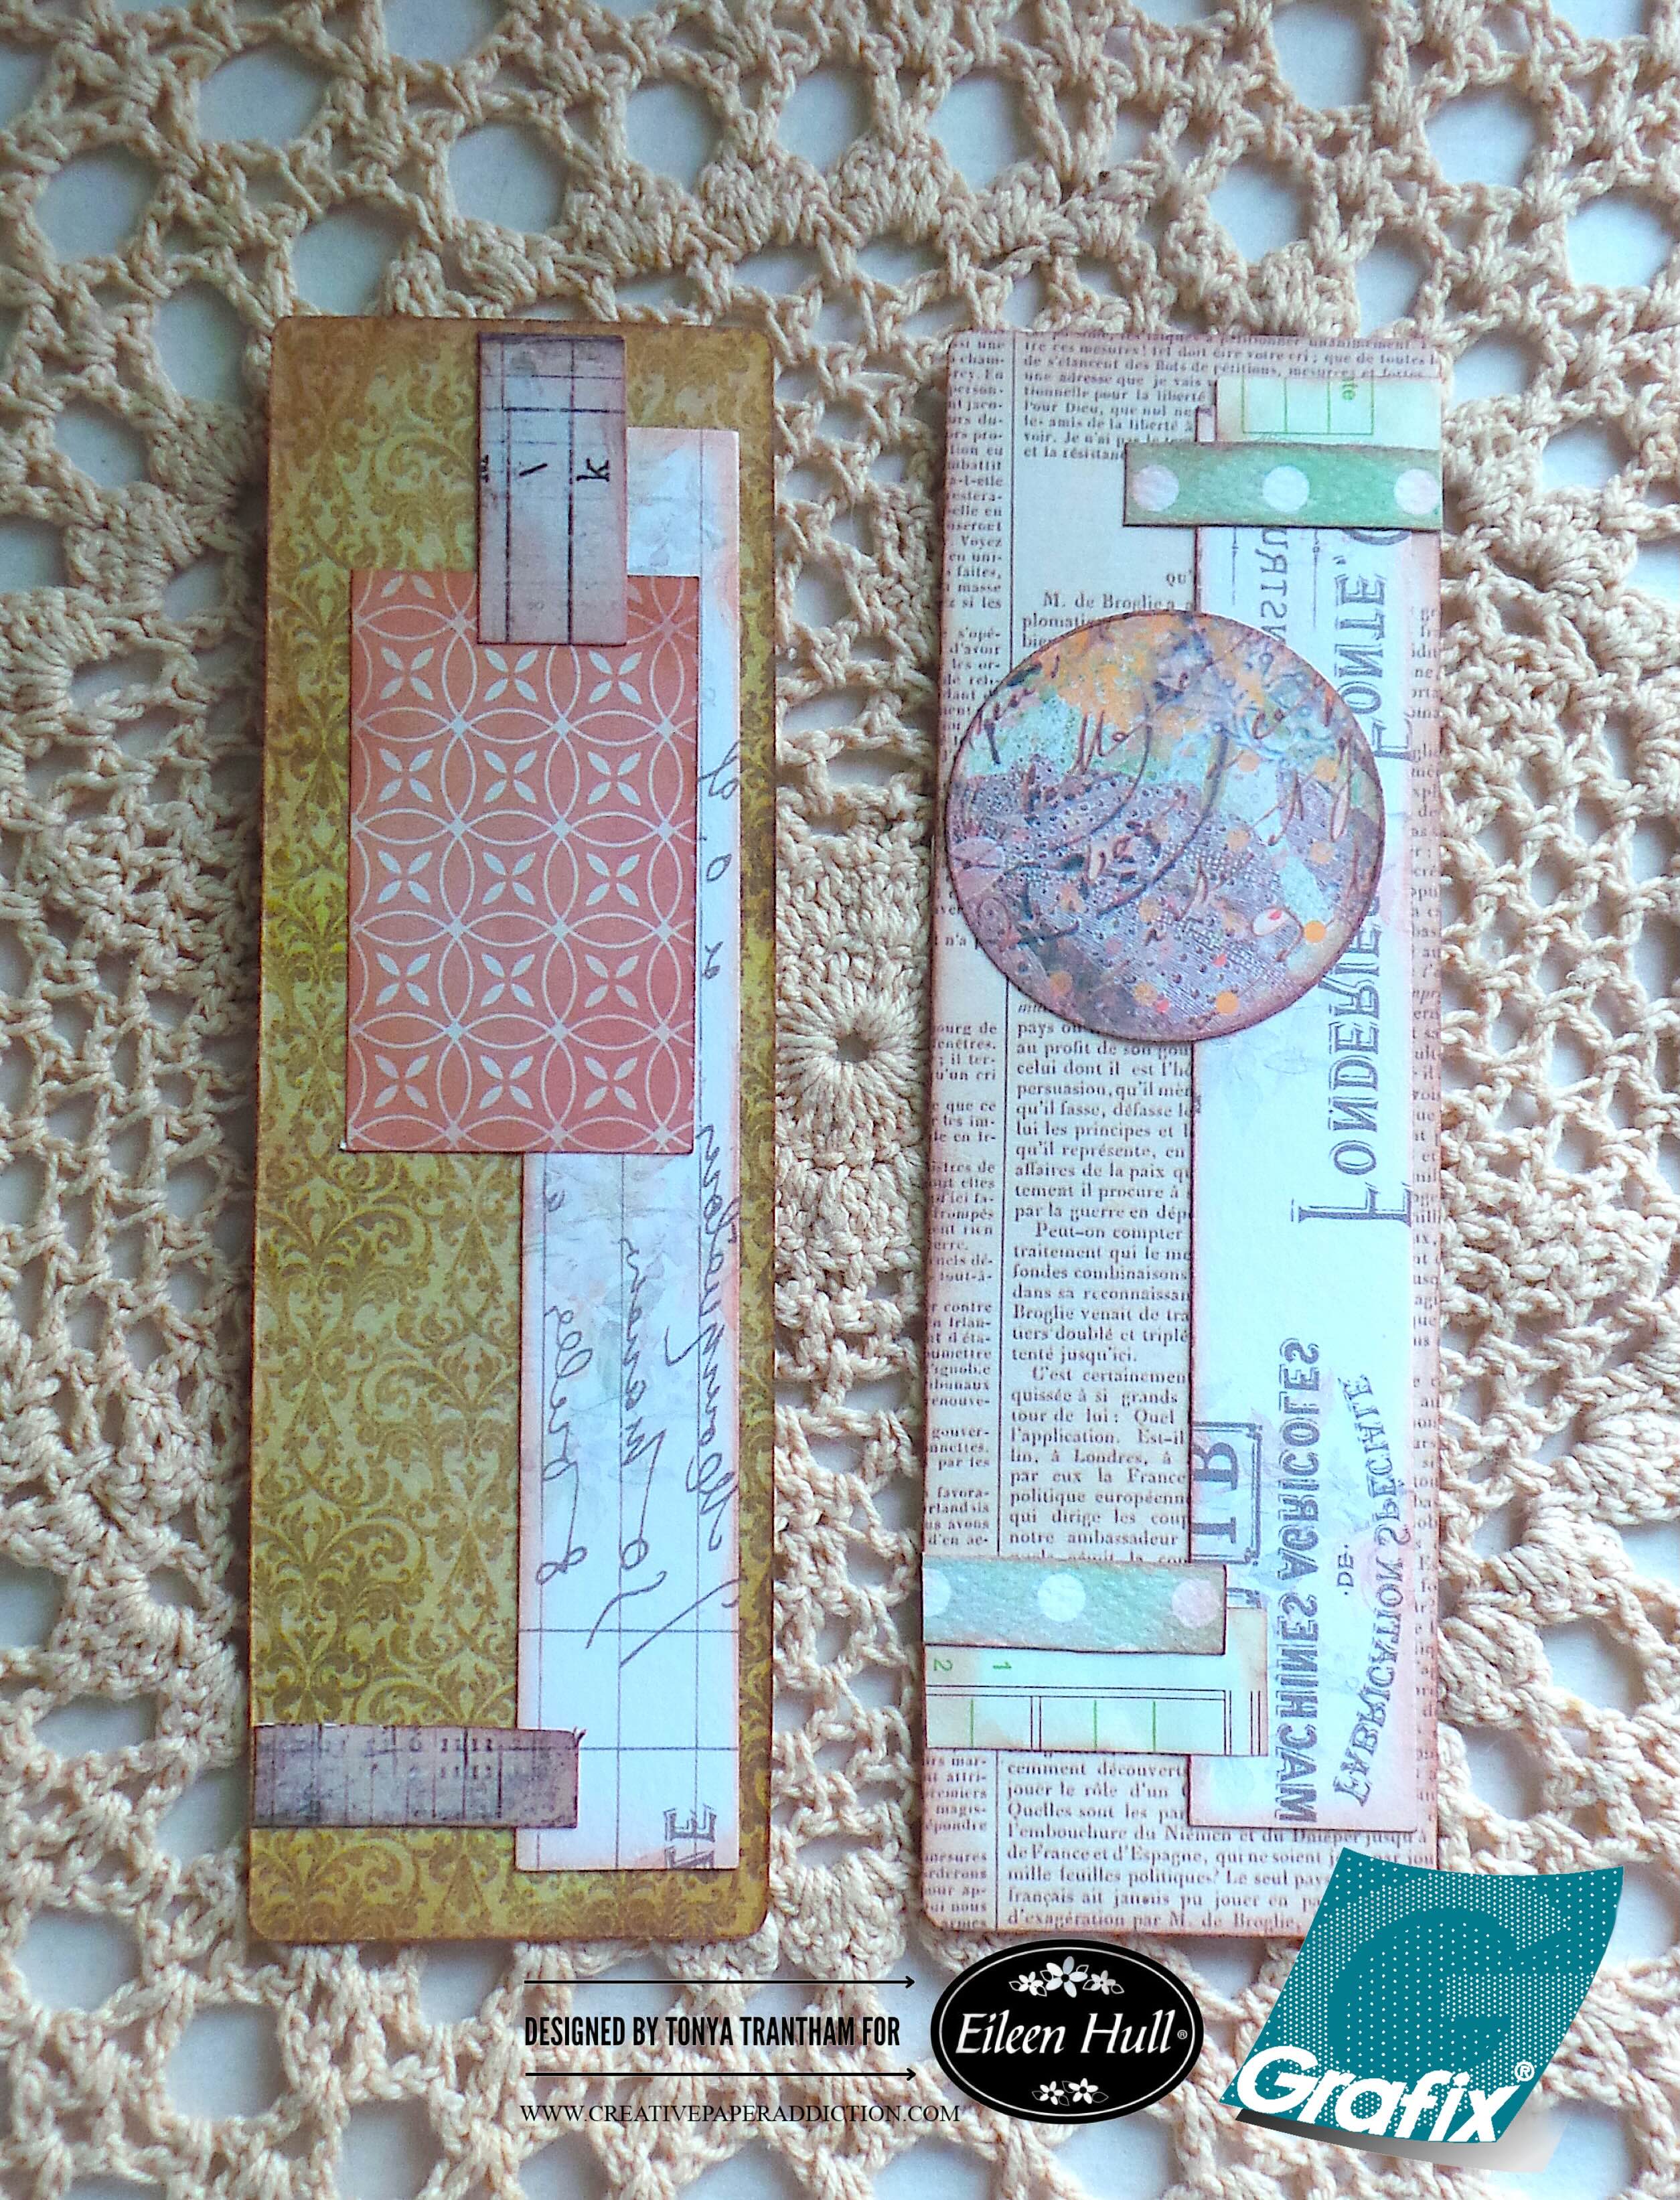
The back side of both bookmarks I adhered more scraps of cardstock and one of the smallest circle die from the Rainbow Wheels Thinlits to finish.
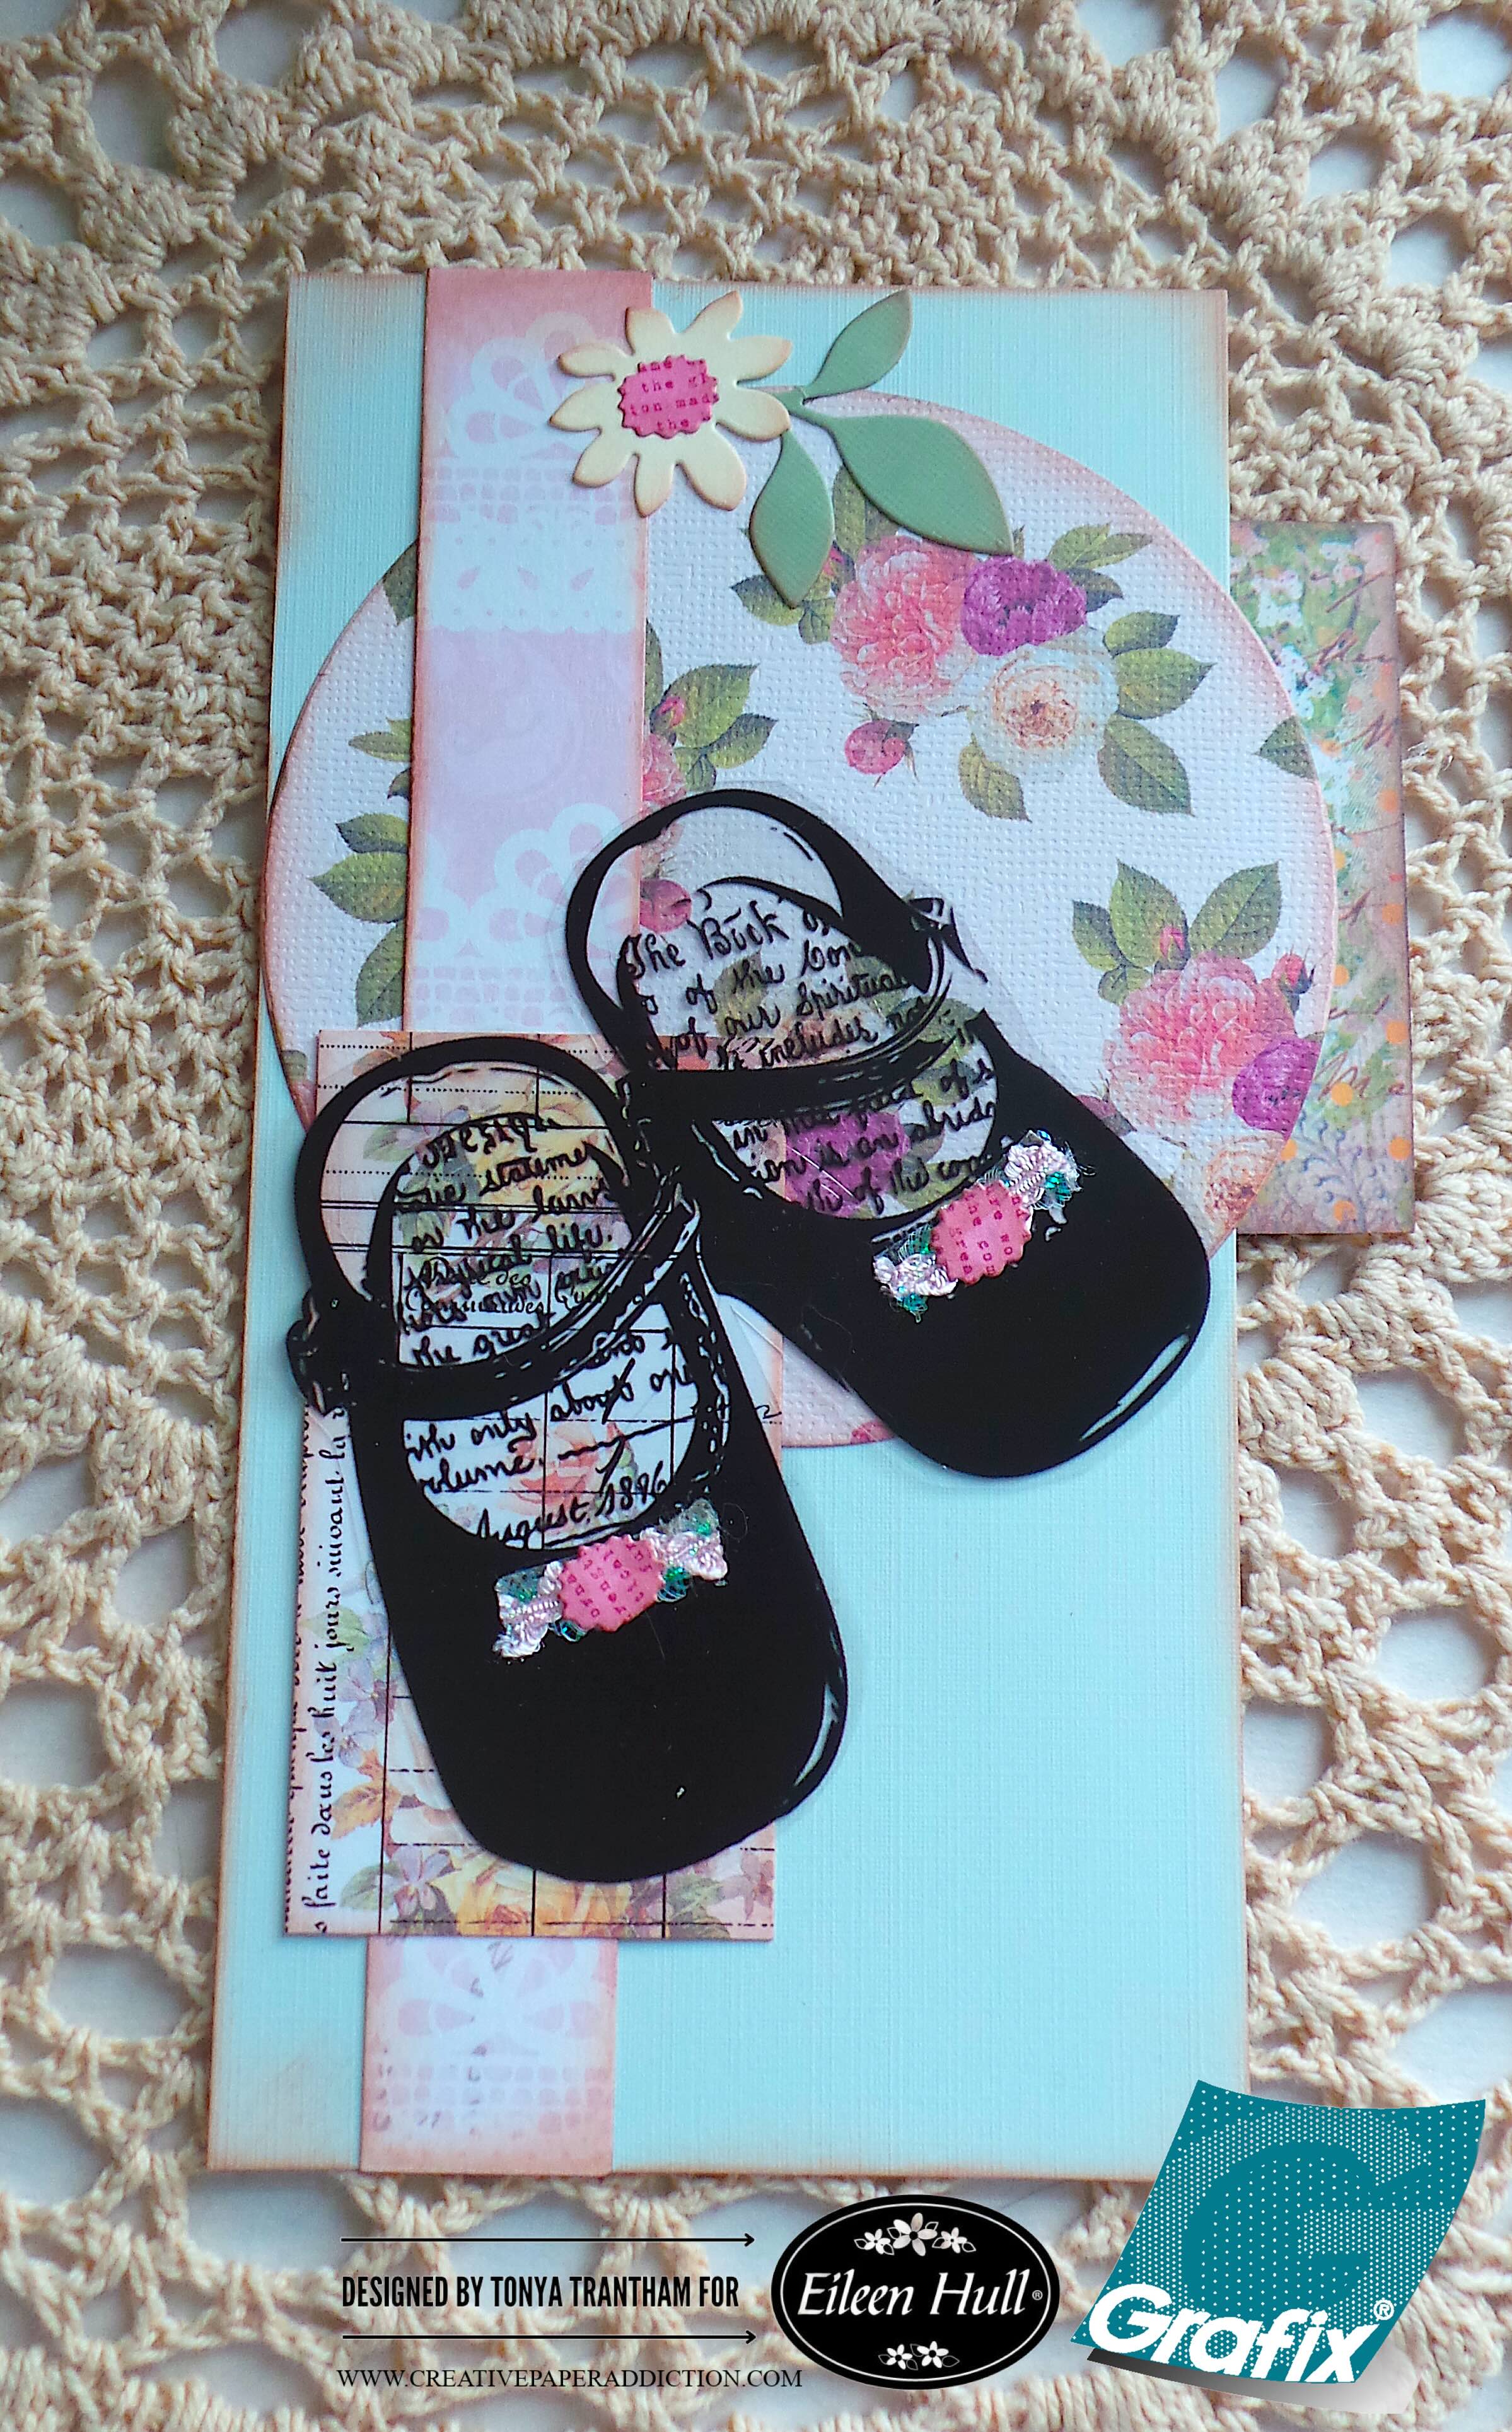
I cut a piece of cardstock to fit inside the center pocket. Side note, I inked all pieces of cardstock and dies cut with Brown Chalk Ink. I cut the largest circle die from the Rainbow Wheels Thinlits and glued to the base of the tag along with two strips of cardstock. I cut one large, four small flowers and two leaf sprigs from the Floral Pocket and Paperclips Thinlits. I adhered the small flower to the center of the large flower. I glued the flower along with the leaf sprig to the upper top of the tag. I cut the little girl shoes out and glued to the tag. I added pink trim and two of the small flowers to the shoes to finish.
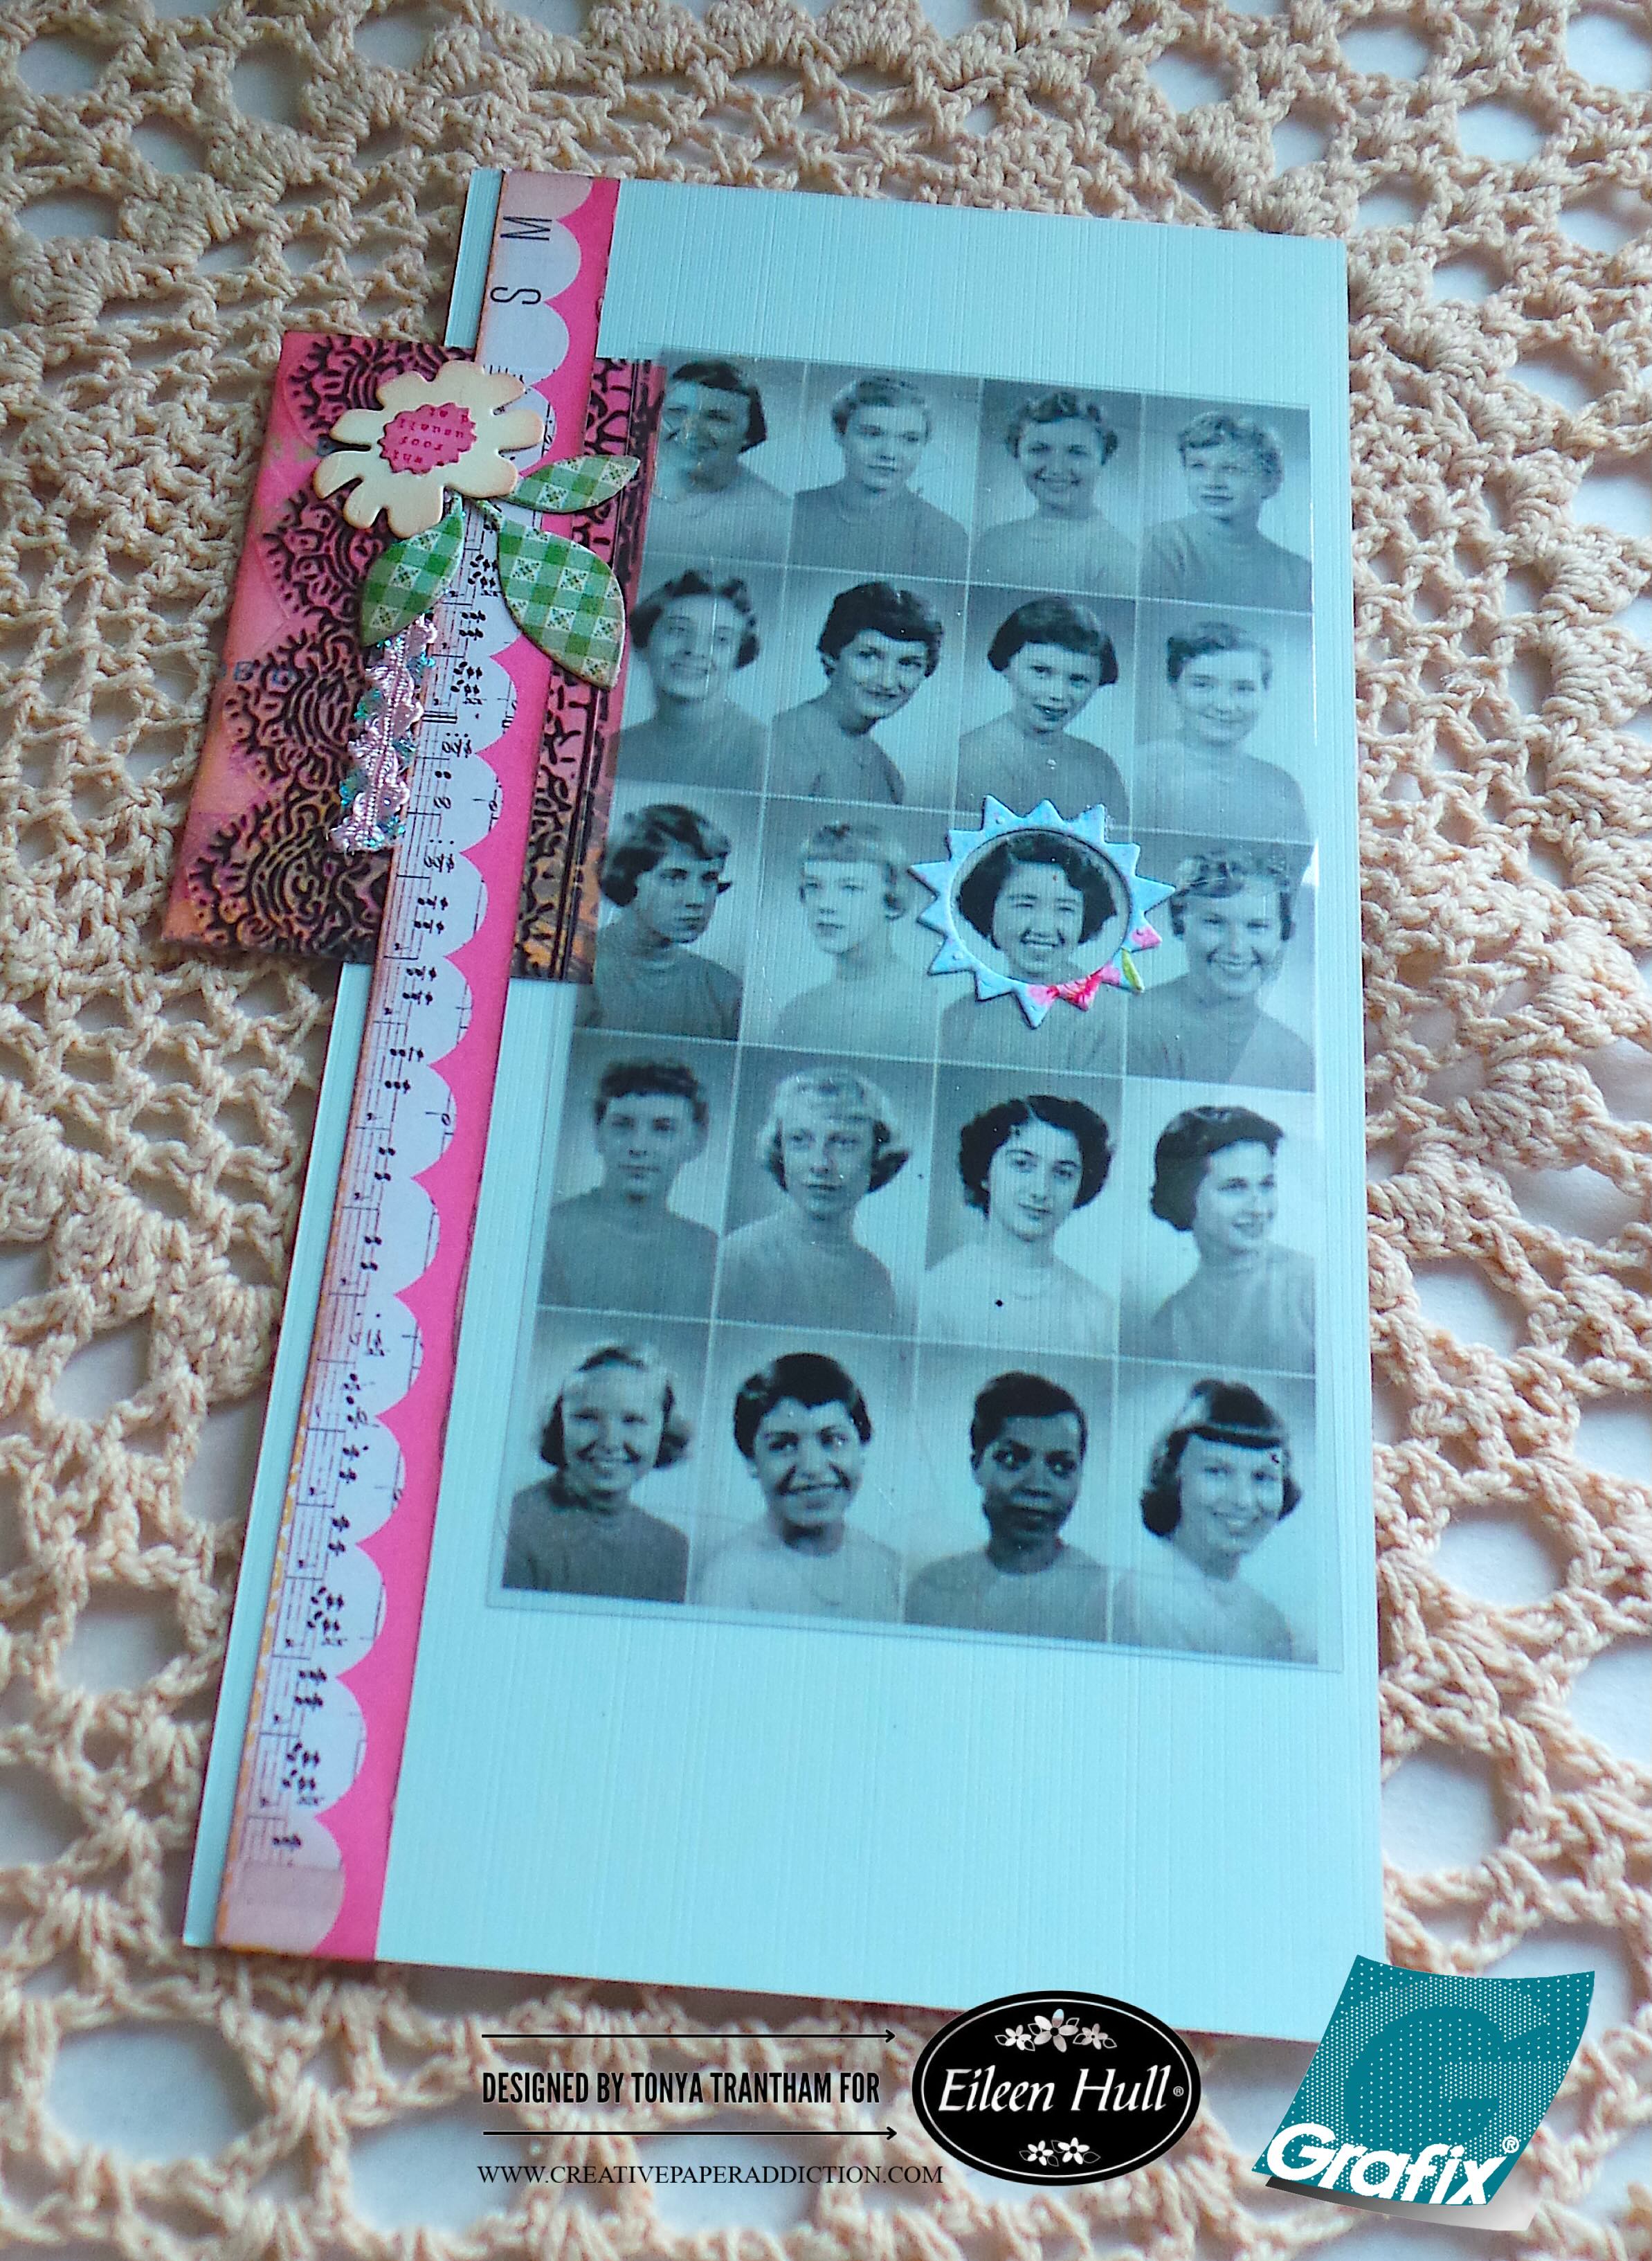
The back side of the tag I cut the lace clear film out and adhered to a piece of cardstock. I glued to the side of the page to create a tab. I cut out the clear film yearbook photos added to the tag. I place the sunshine outline die from the Home Sweet Home Thinlits over one of the girls. I glued a strip of cardstock over the lace overlay, added a piece of pink trim and another flower and leaf sprig from the Floral Pocket and Paperclips Thinlits to finish.
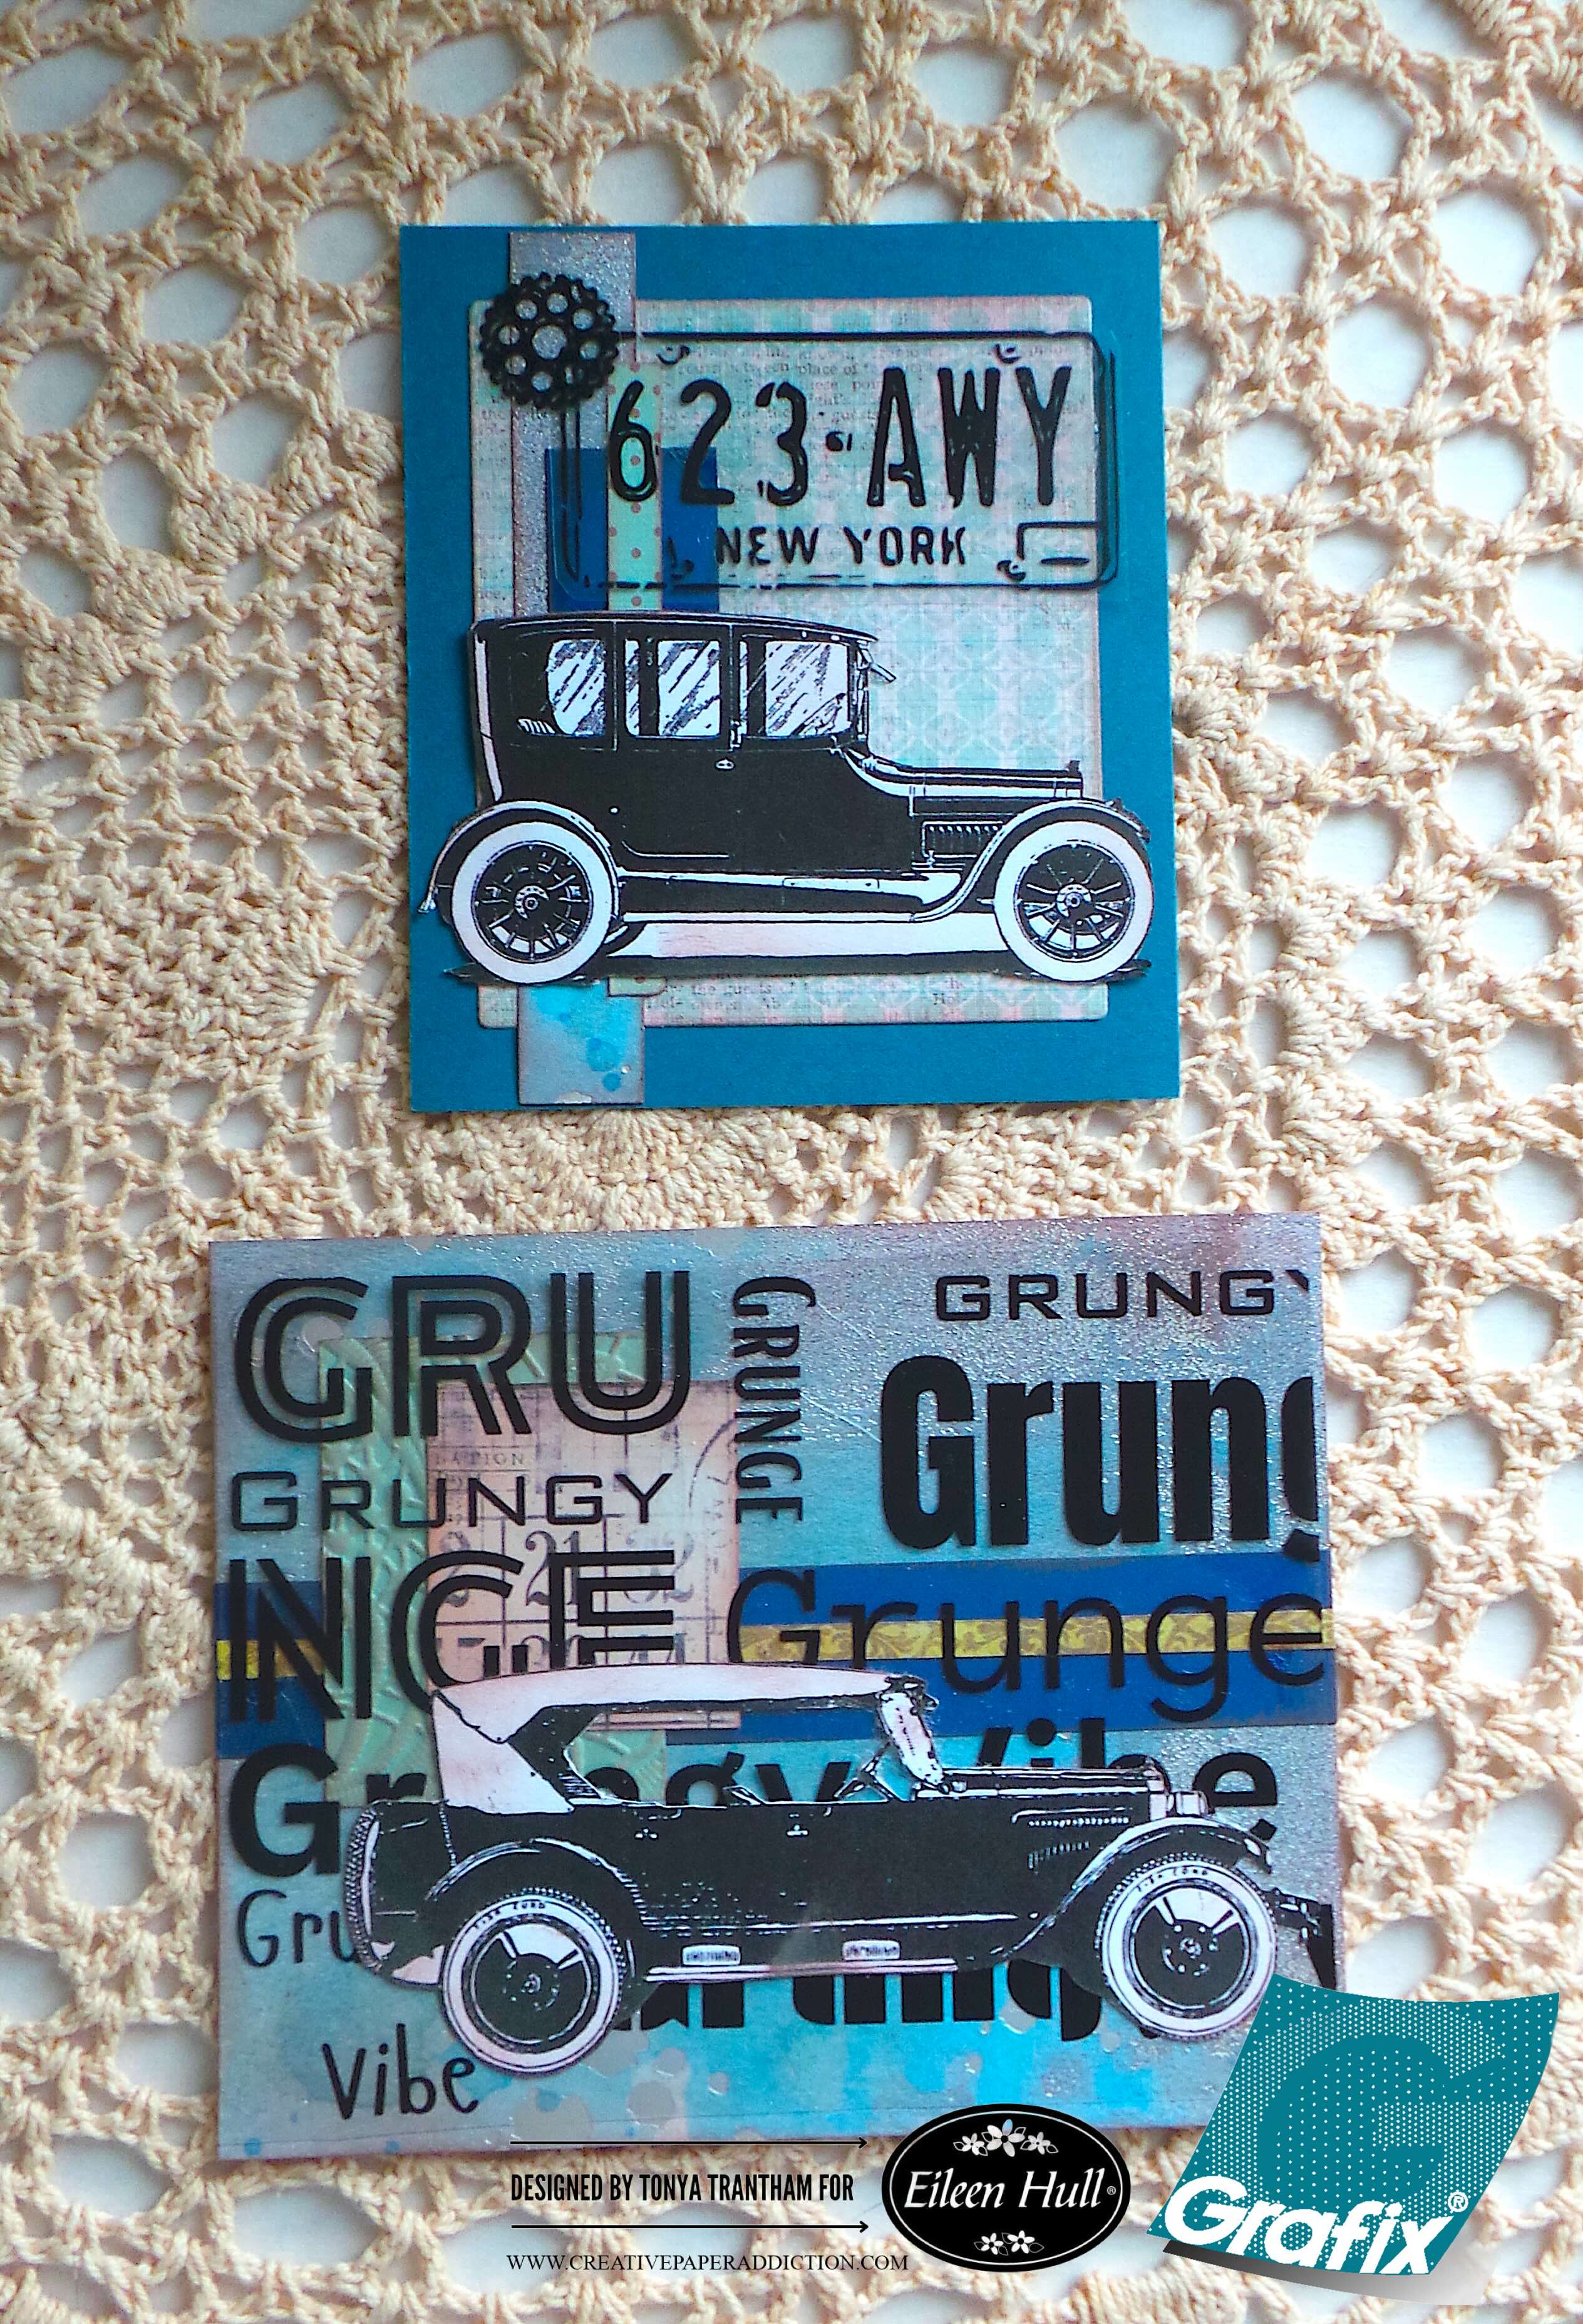
I cut two tags from cardstock for the belly band on the inside of the back cover. I added an assortment of scraps of cardstock to each tag. The first tag I cut the clear film license plate and gear and for the second tag I added the clear film “grungy vibe” overlay and adhered to each respective tag. I found these vintage cars in my stash so I added them to each tag.
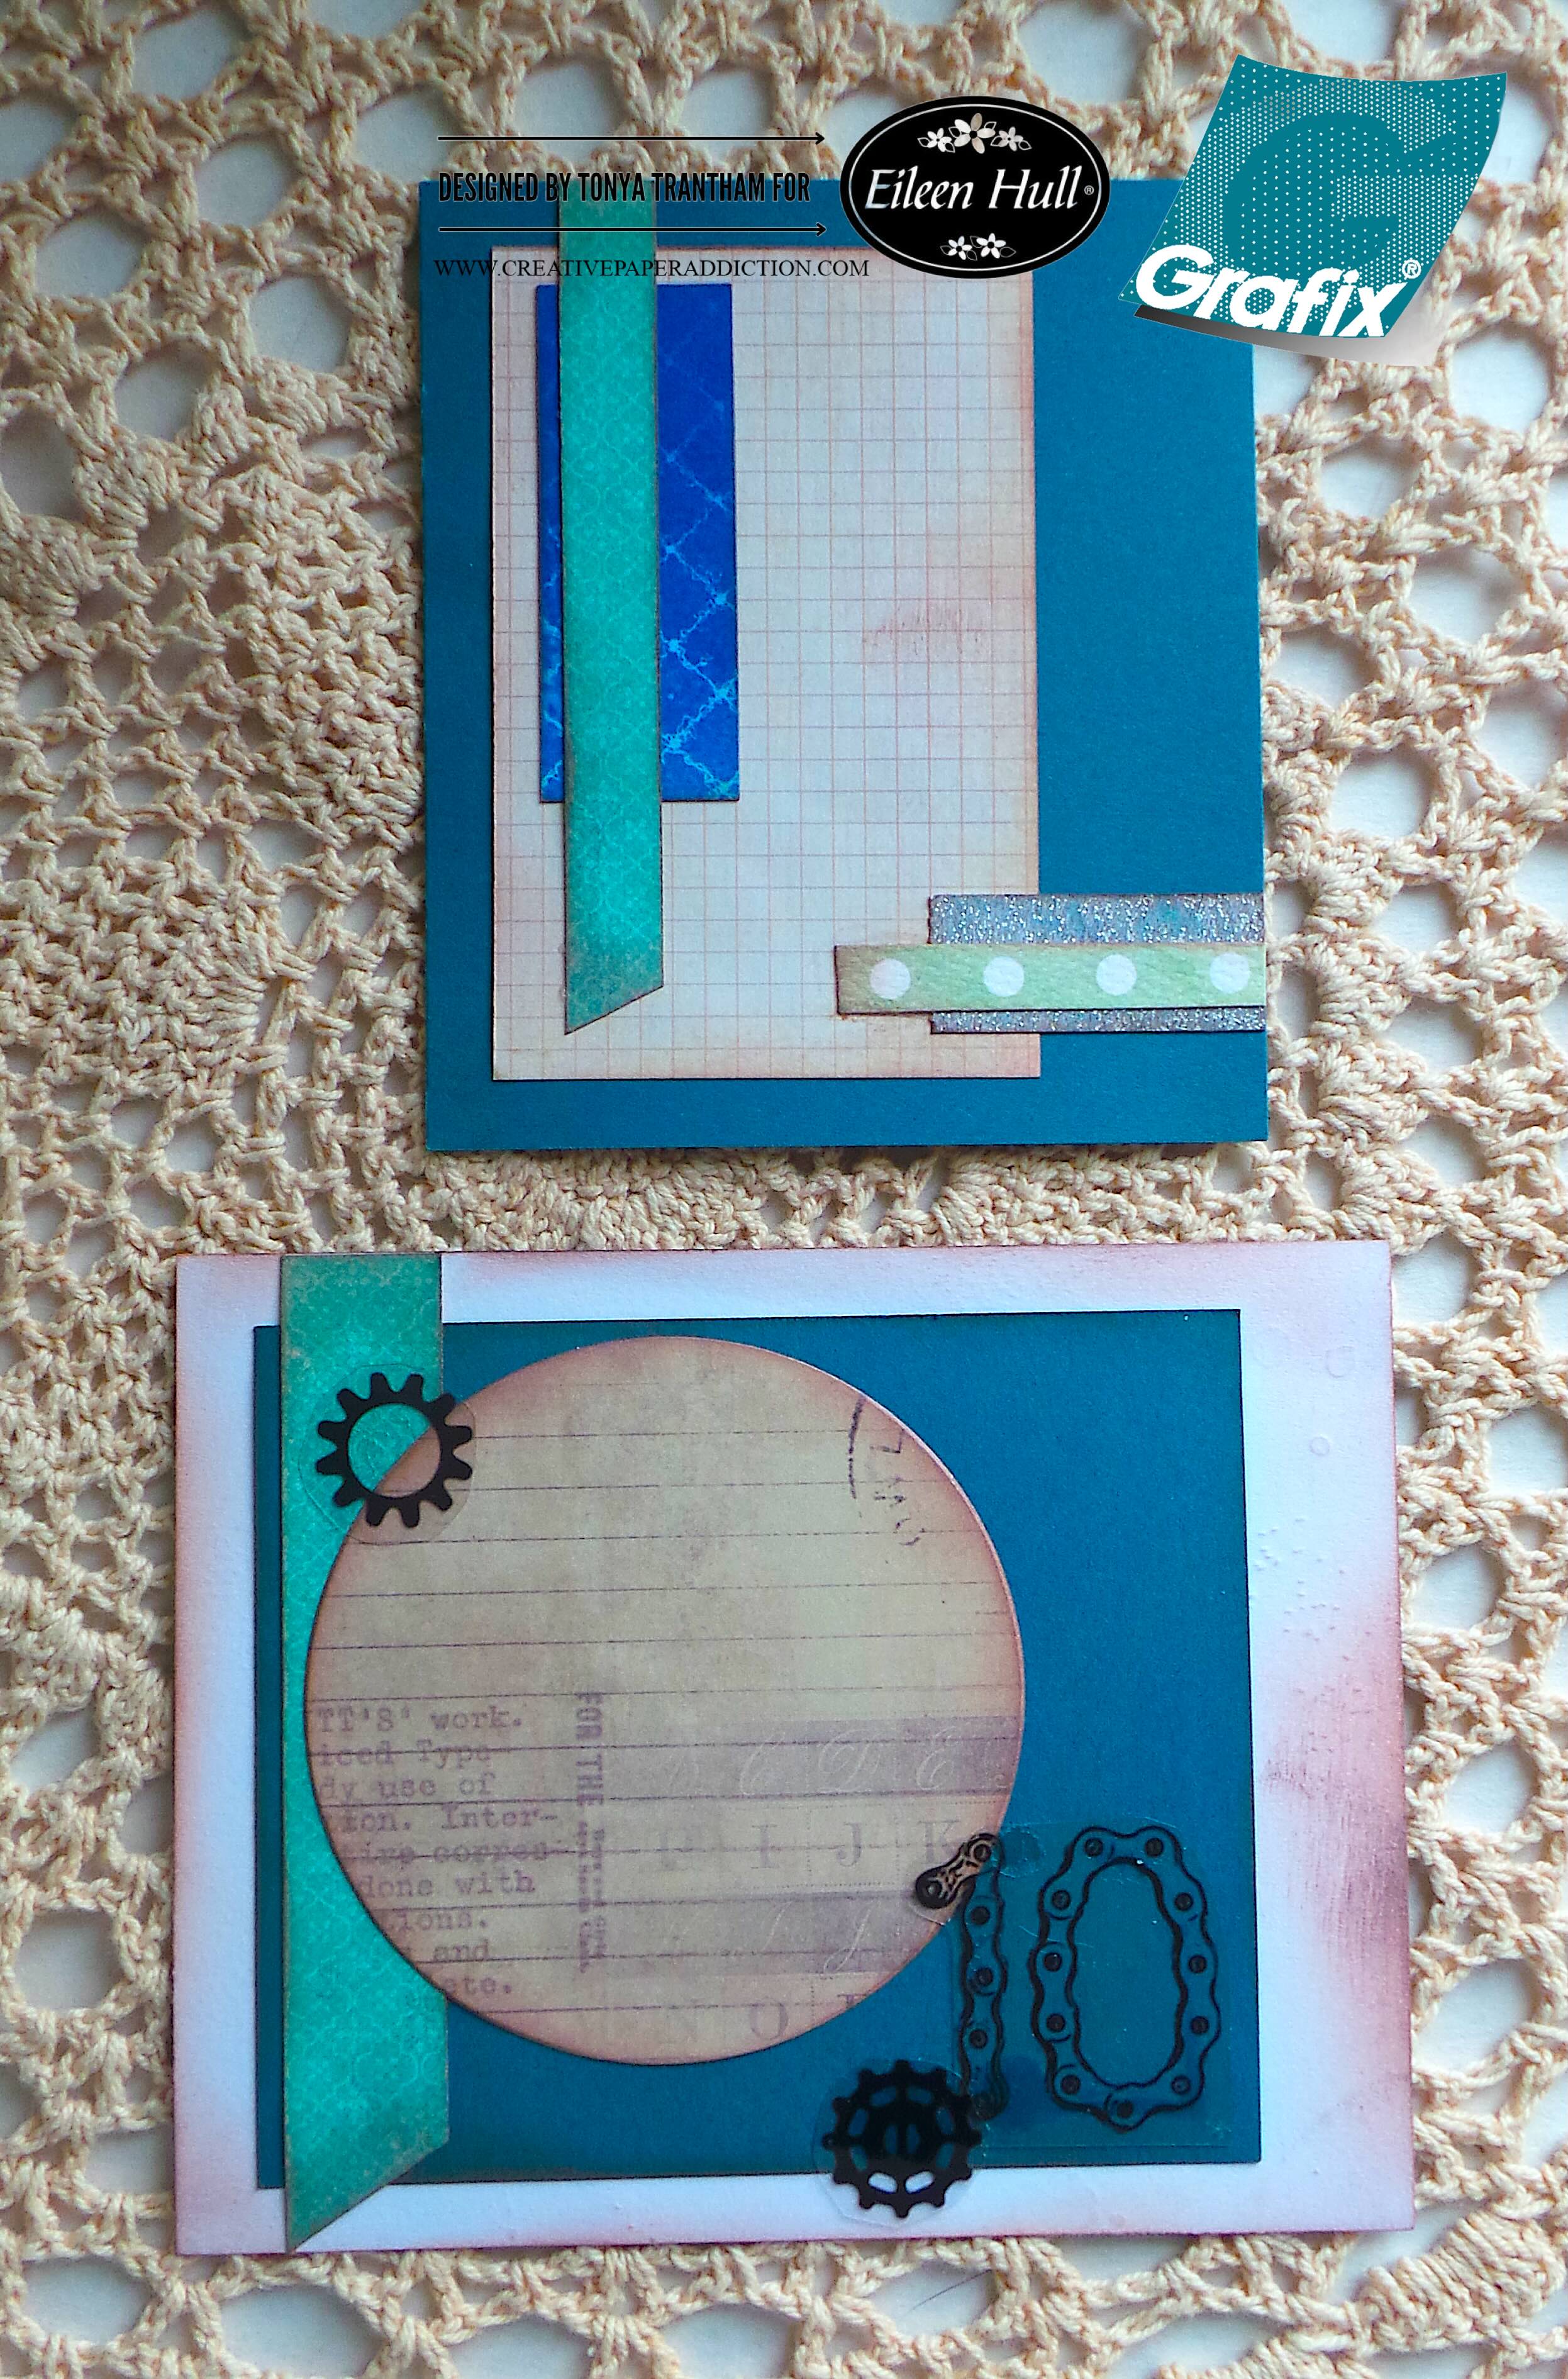
The back side of both tags I adhered scraps of cardstock to both tags. I added the largest circle die from the Rainbow Wheels Thinlits and two clear film gears and the number ten to one of the tags to finish.
I still have several pieces of the Grungy Vibe by Cat Kerr that I can’t wait to play with. So stay tuned more projects are sure to follow! Also if you haven’t been by Eileen’s blog to see what the team has been up to you can find the latest post HERE. If you have any questions or comments please leave them below.
(Products listed above are Affiliated Links for your convenience)
DISCLAIMERS
This blog is compensated to provide opinion on products, services, websites, and various other topics. Even though the owner(s) of this blog receives compensation for our posts or advertisements. I always give my honest opinions, findings, beliefs, or experiences on those topics or products. The views and opinions expressed on this blog are purely my own. Any product claim, statistic, or quote should be checked with each manufacturer. Verify other representations about a product or service with the provider or party in question.This blog contains affiliate links. Clicking these links helps to support Tonya Trantham Designs – Creative Paper Addiction. It’s at no additional cost to you.Today’s features are Sizzix, Eileen Hull and Grafix Products.
Thanks for stopping by, I hope your Tuesday is great and enjoy creating!
Hi everyone! I am back with my project for Eileen Hull this month. The team is also collaborating with Grafix. I’ll be using an assortment of dies, thinlits, embossing folders and Grafix Dura-lar Prints to dress up the Journal Diecut .
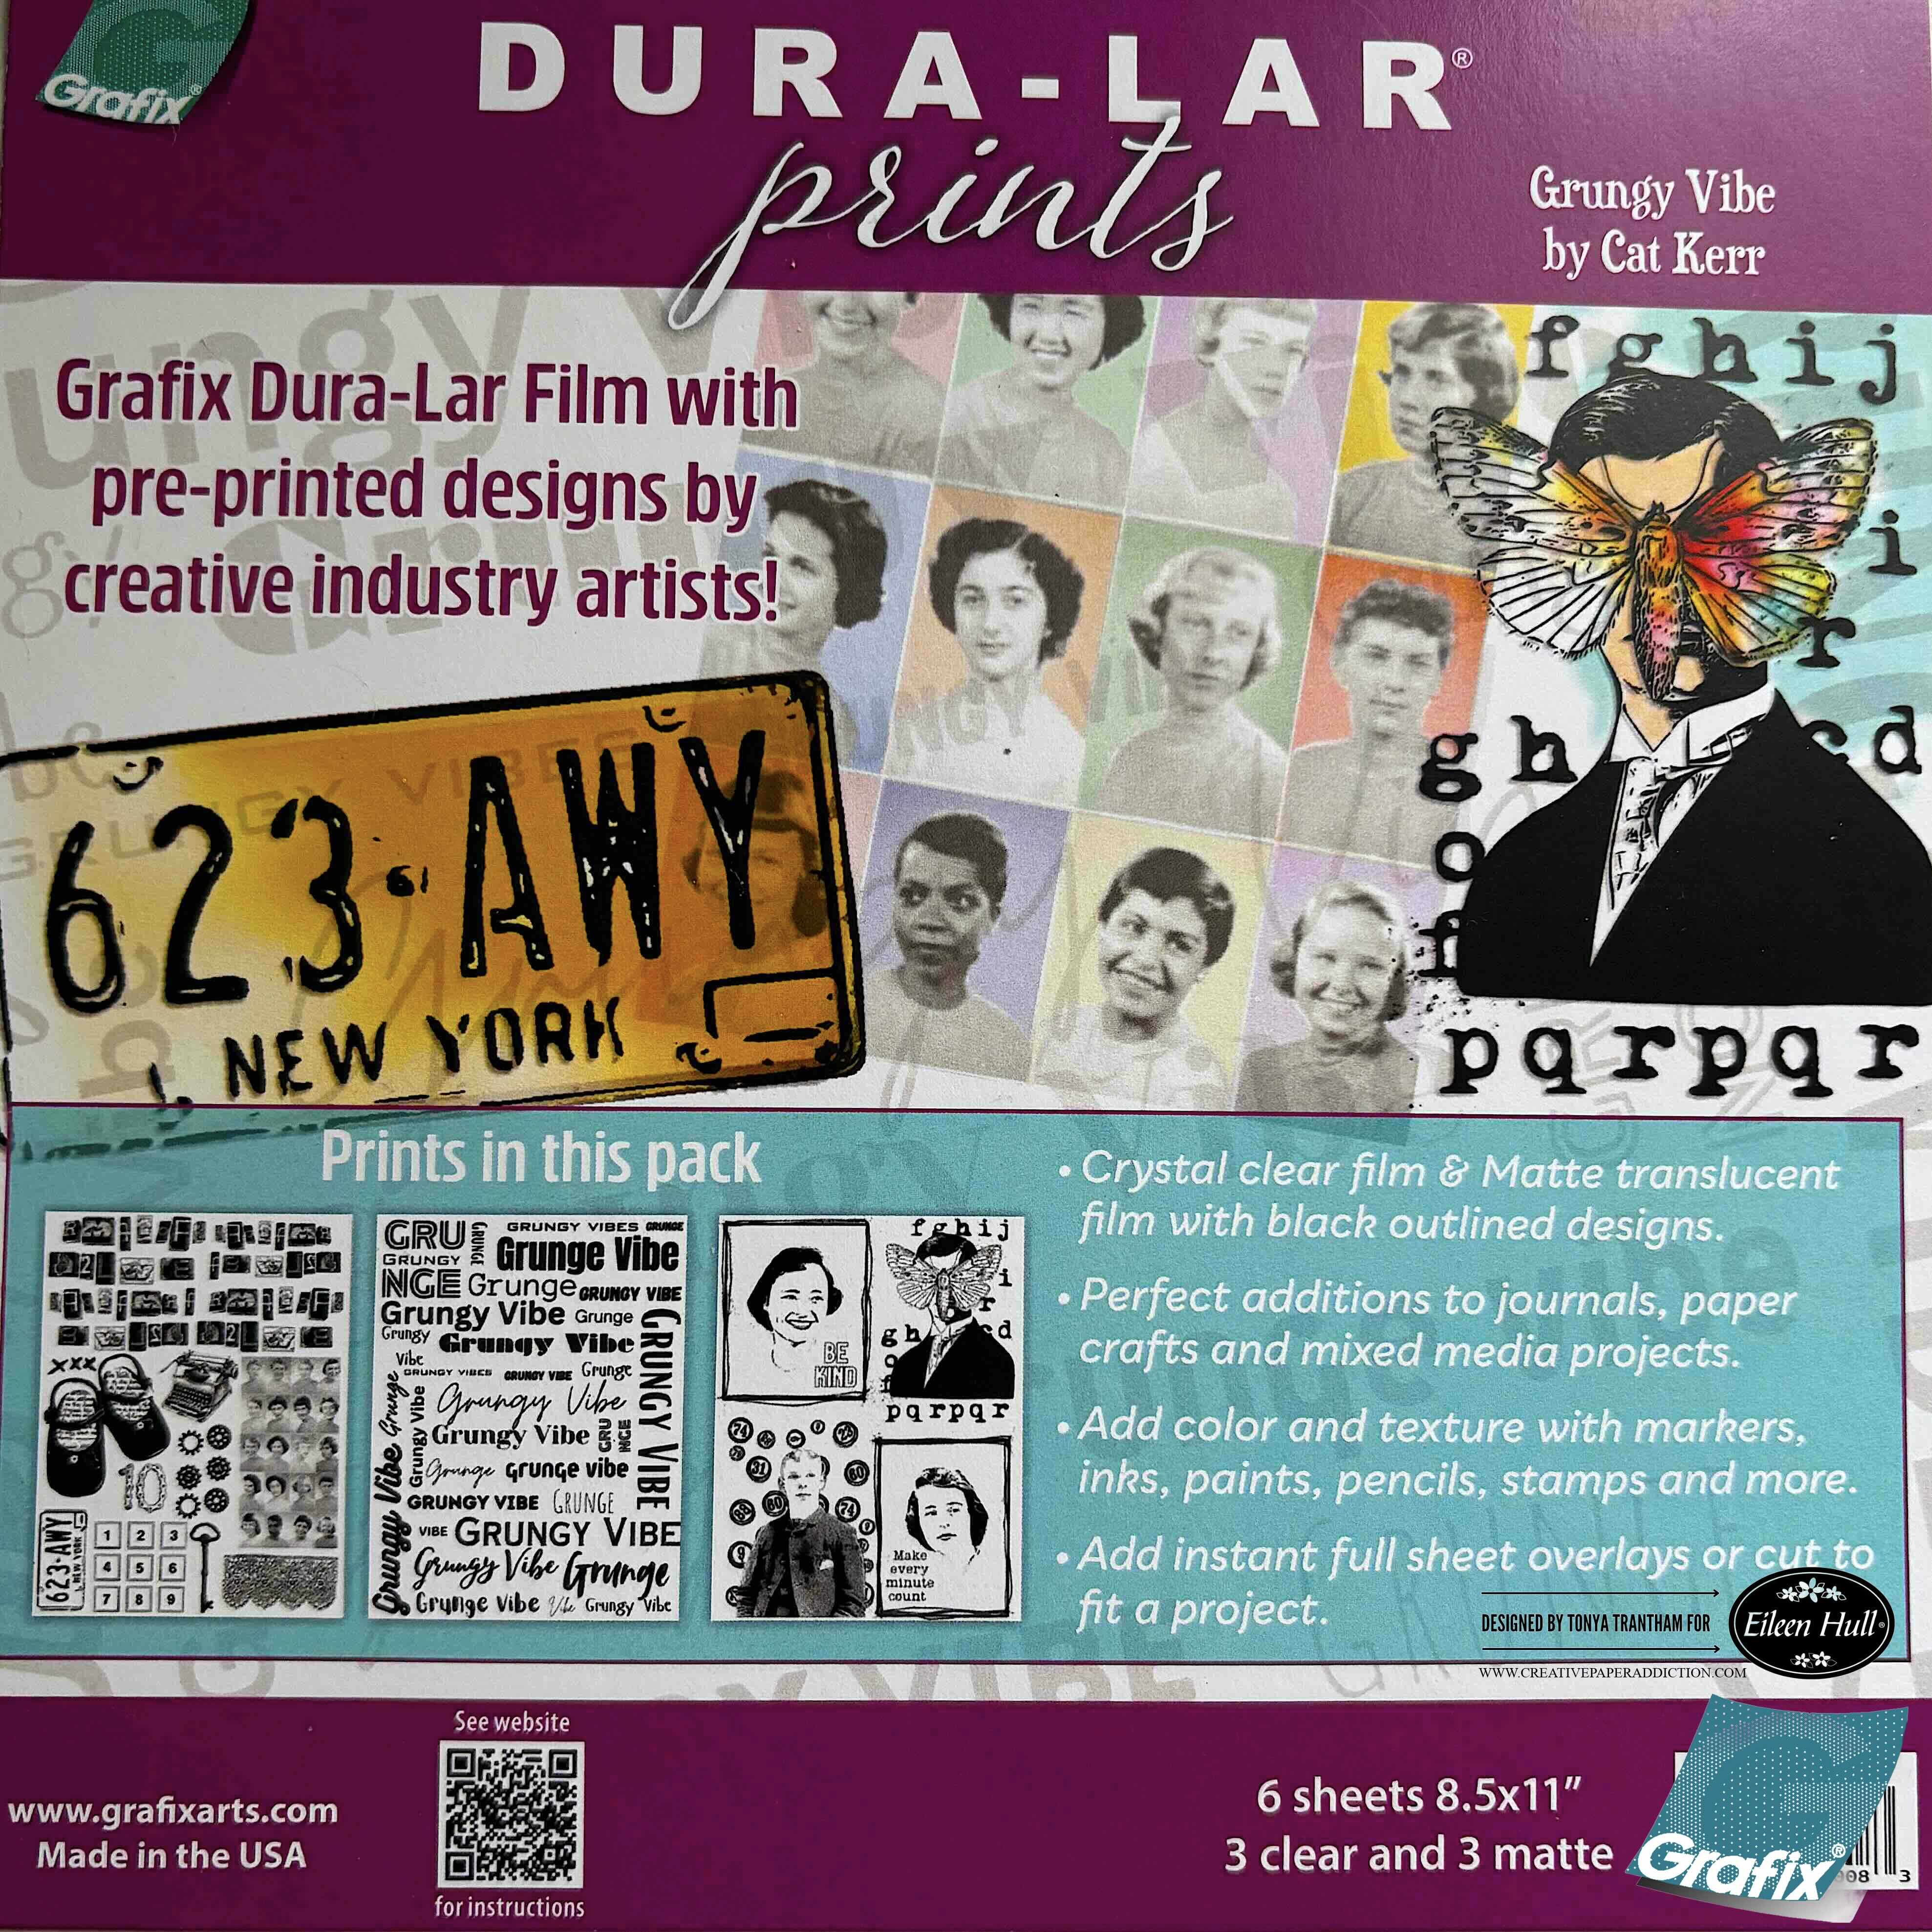
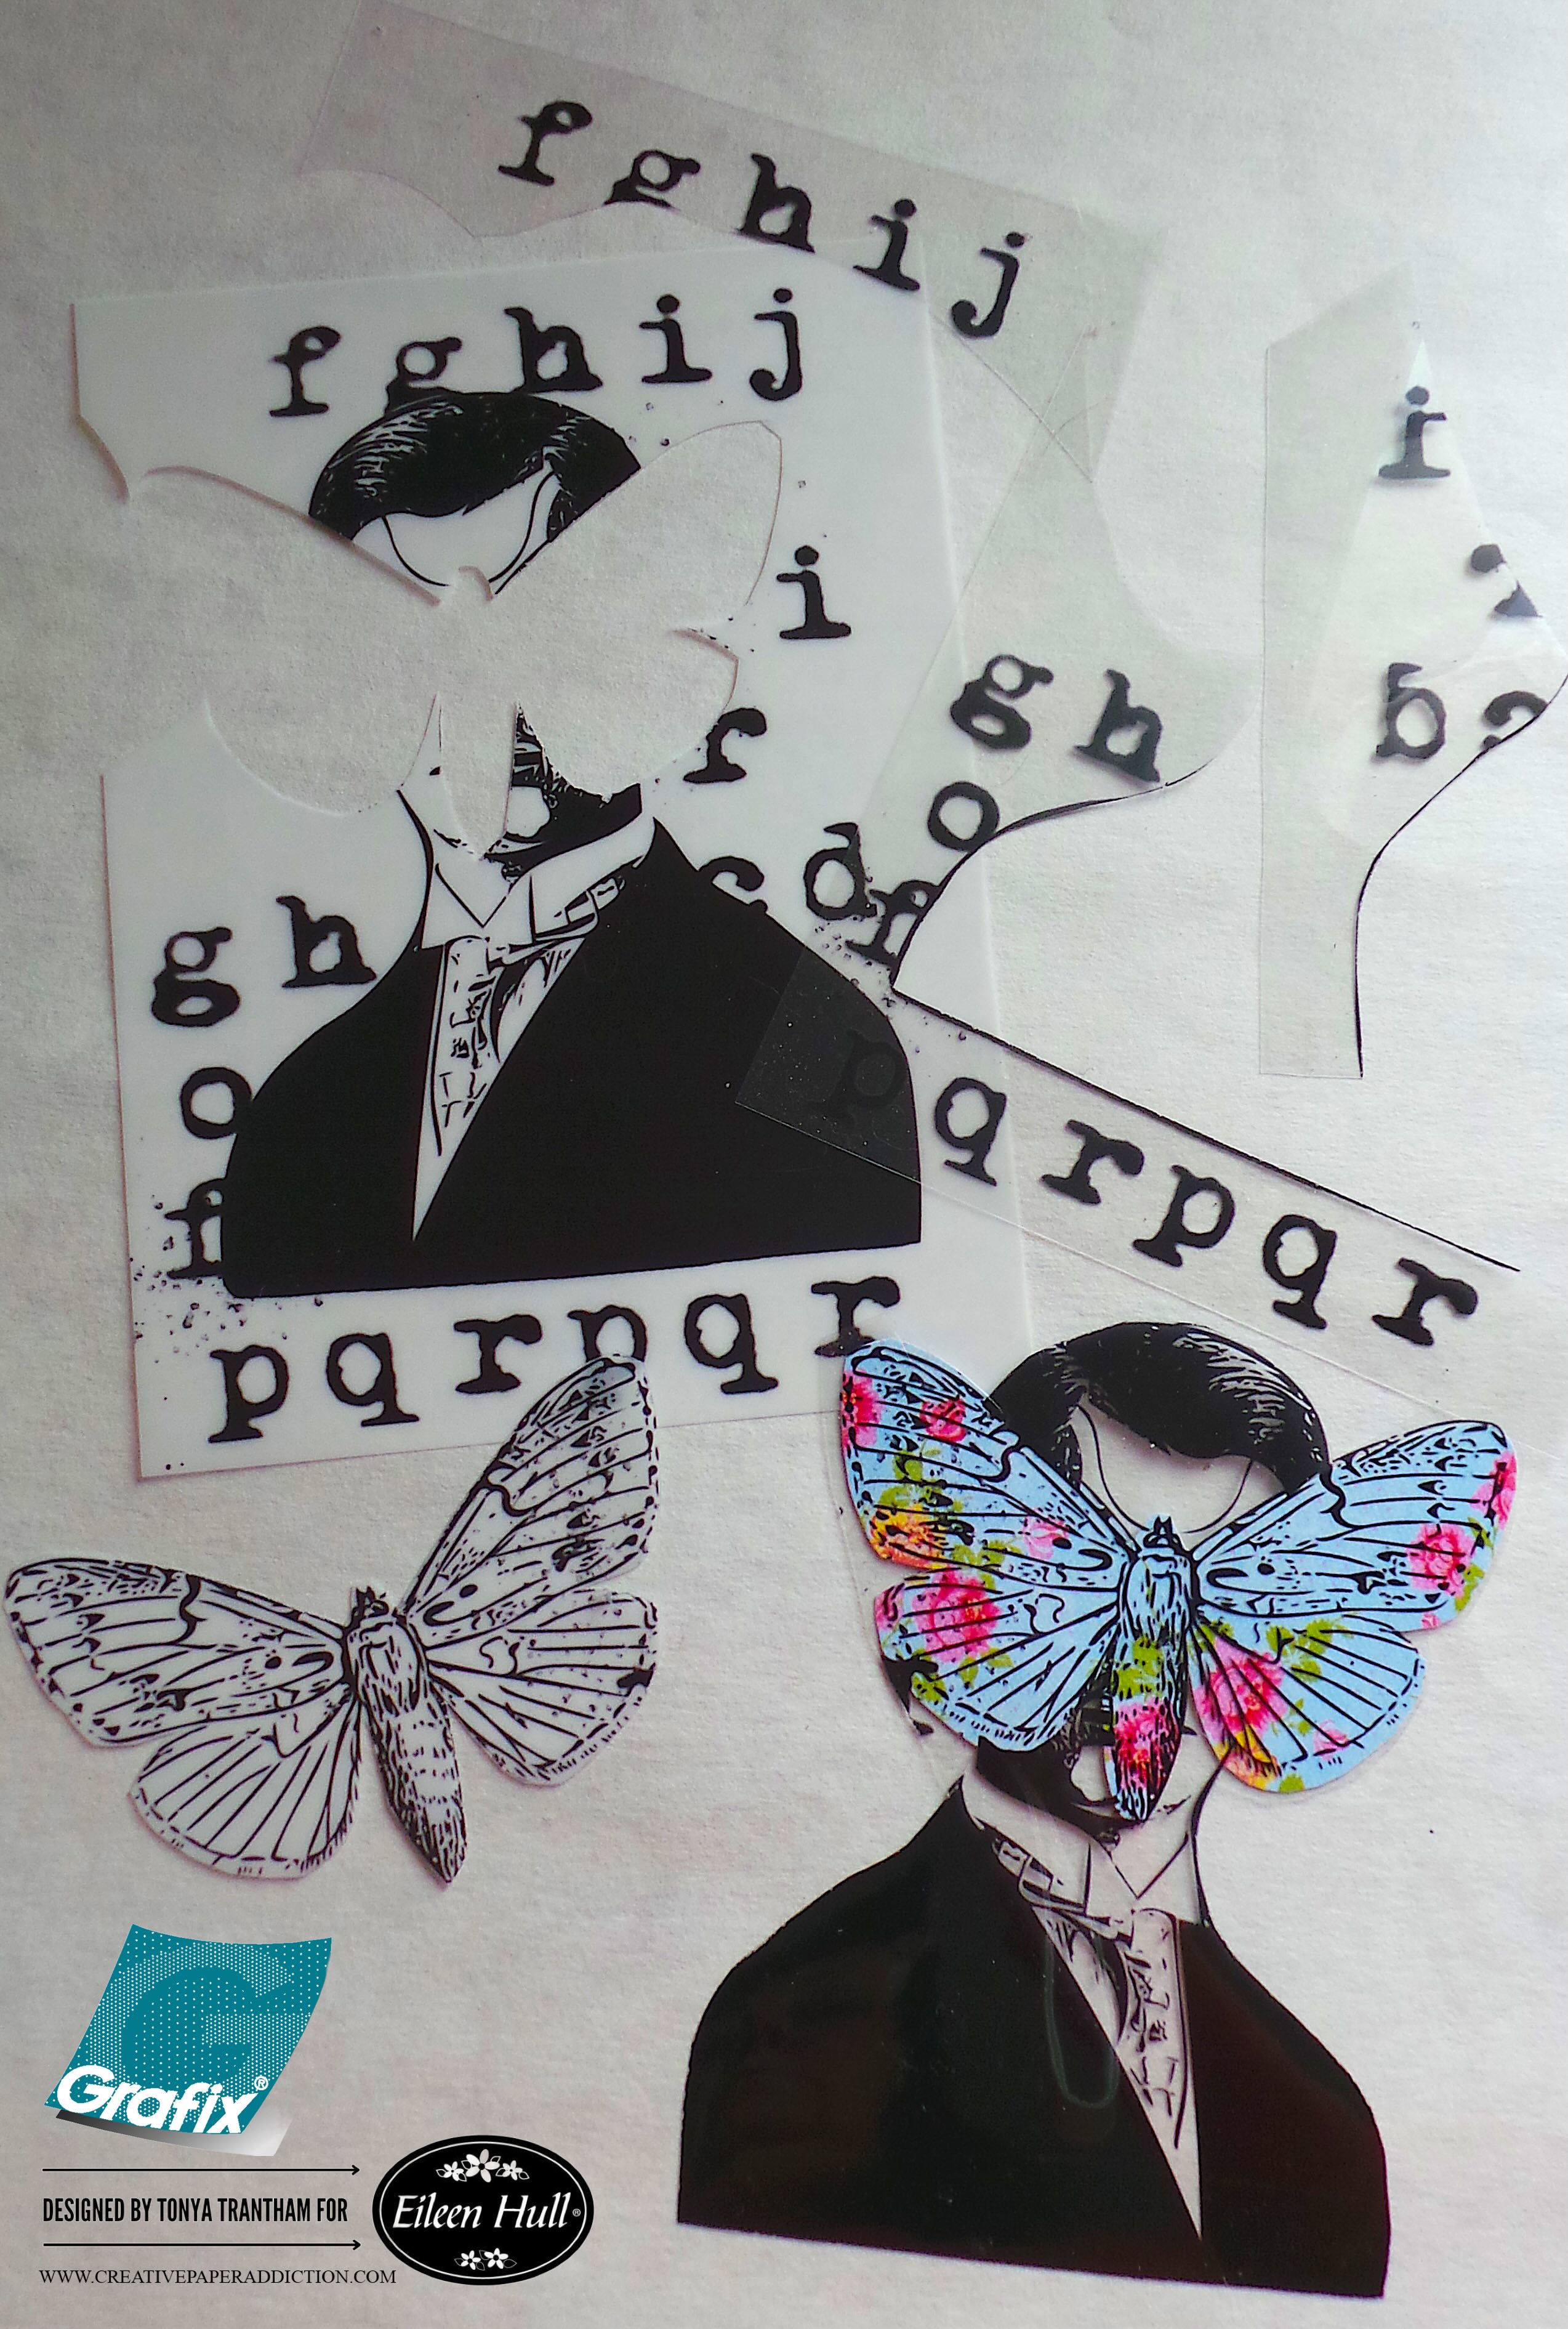
I received the Grungy Vibe by Cat Kerr to incorporate in my journal. There’s a crystal clear film and a matte translucent film of each design for a total of six sheets in the package. Anyways, let’s get started!
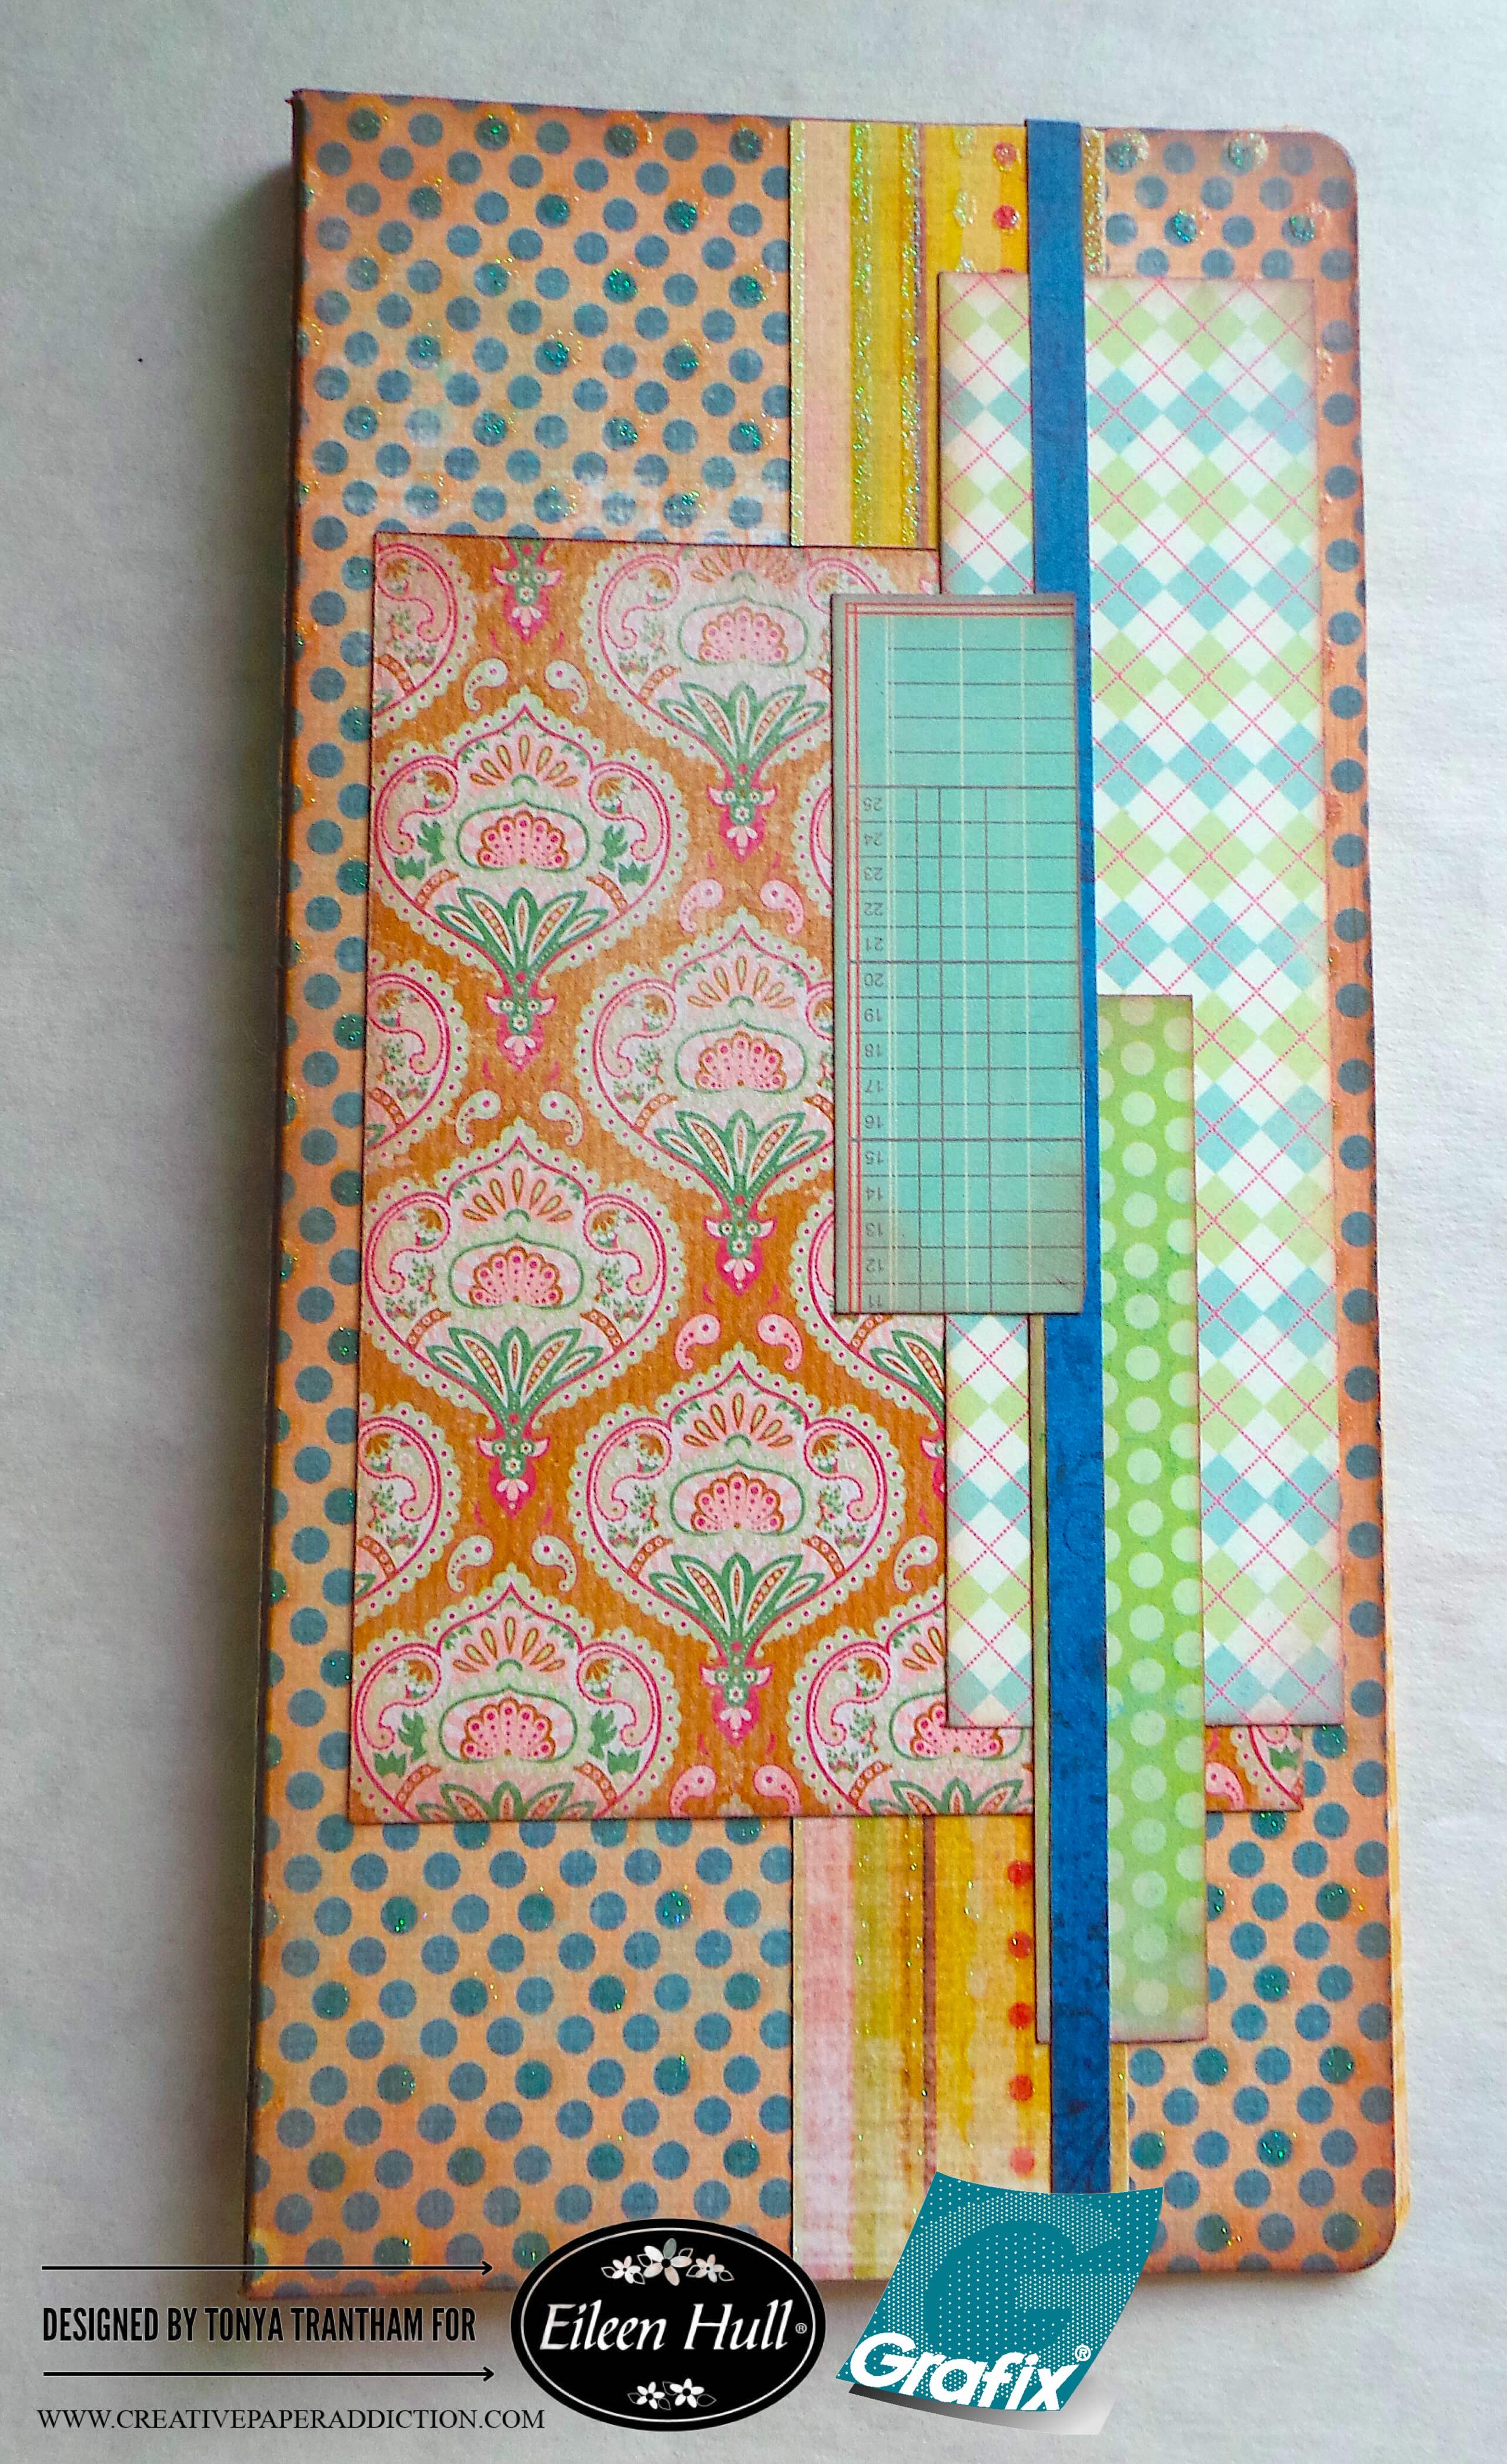
I placed Adhesive Sheets on both sides of a piece of Chipboard (I did this step twice). I added patterned cardstock to both sides of the chipboard, placed the chipboard onto the Journal Diecut, sandwiched between the two cutting plates and run through the Diecut Machine.
I lightly inked the cover with Brown Chalk Ink. I cut off the excess spine and peeled one side of the remaining spine so when glued together it will lay flat.
I adhered scraps of patterned cardstock to the cover of the journal.
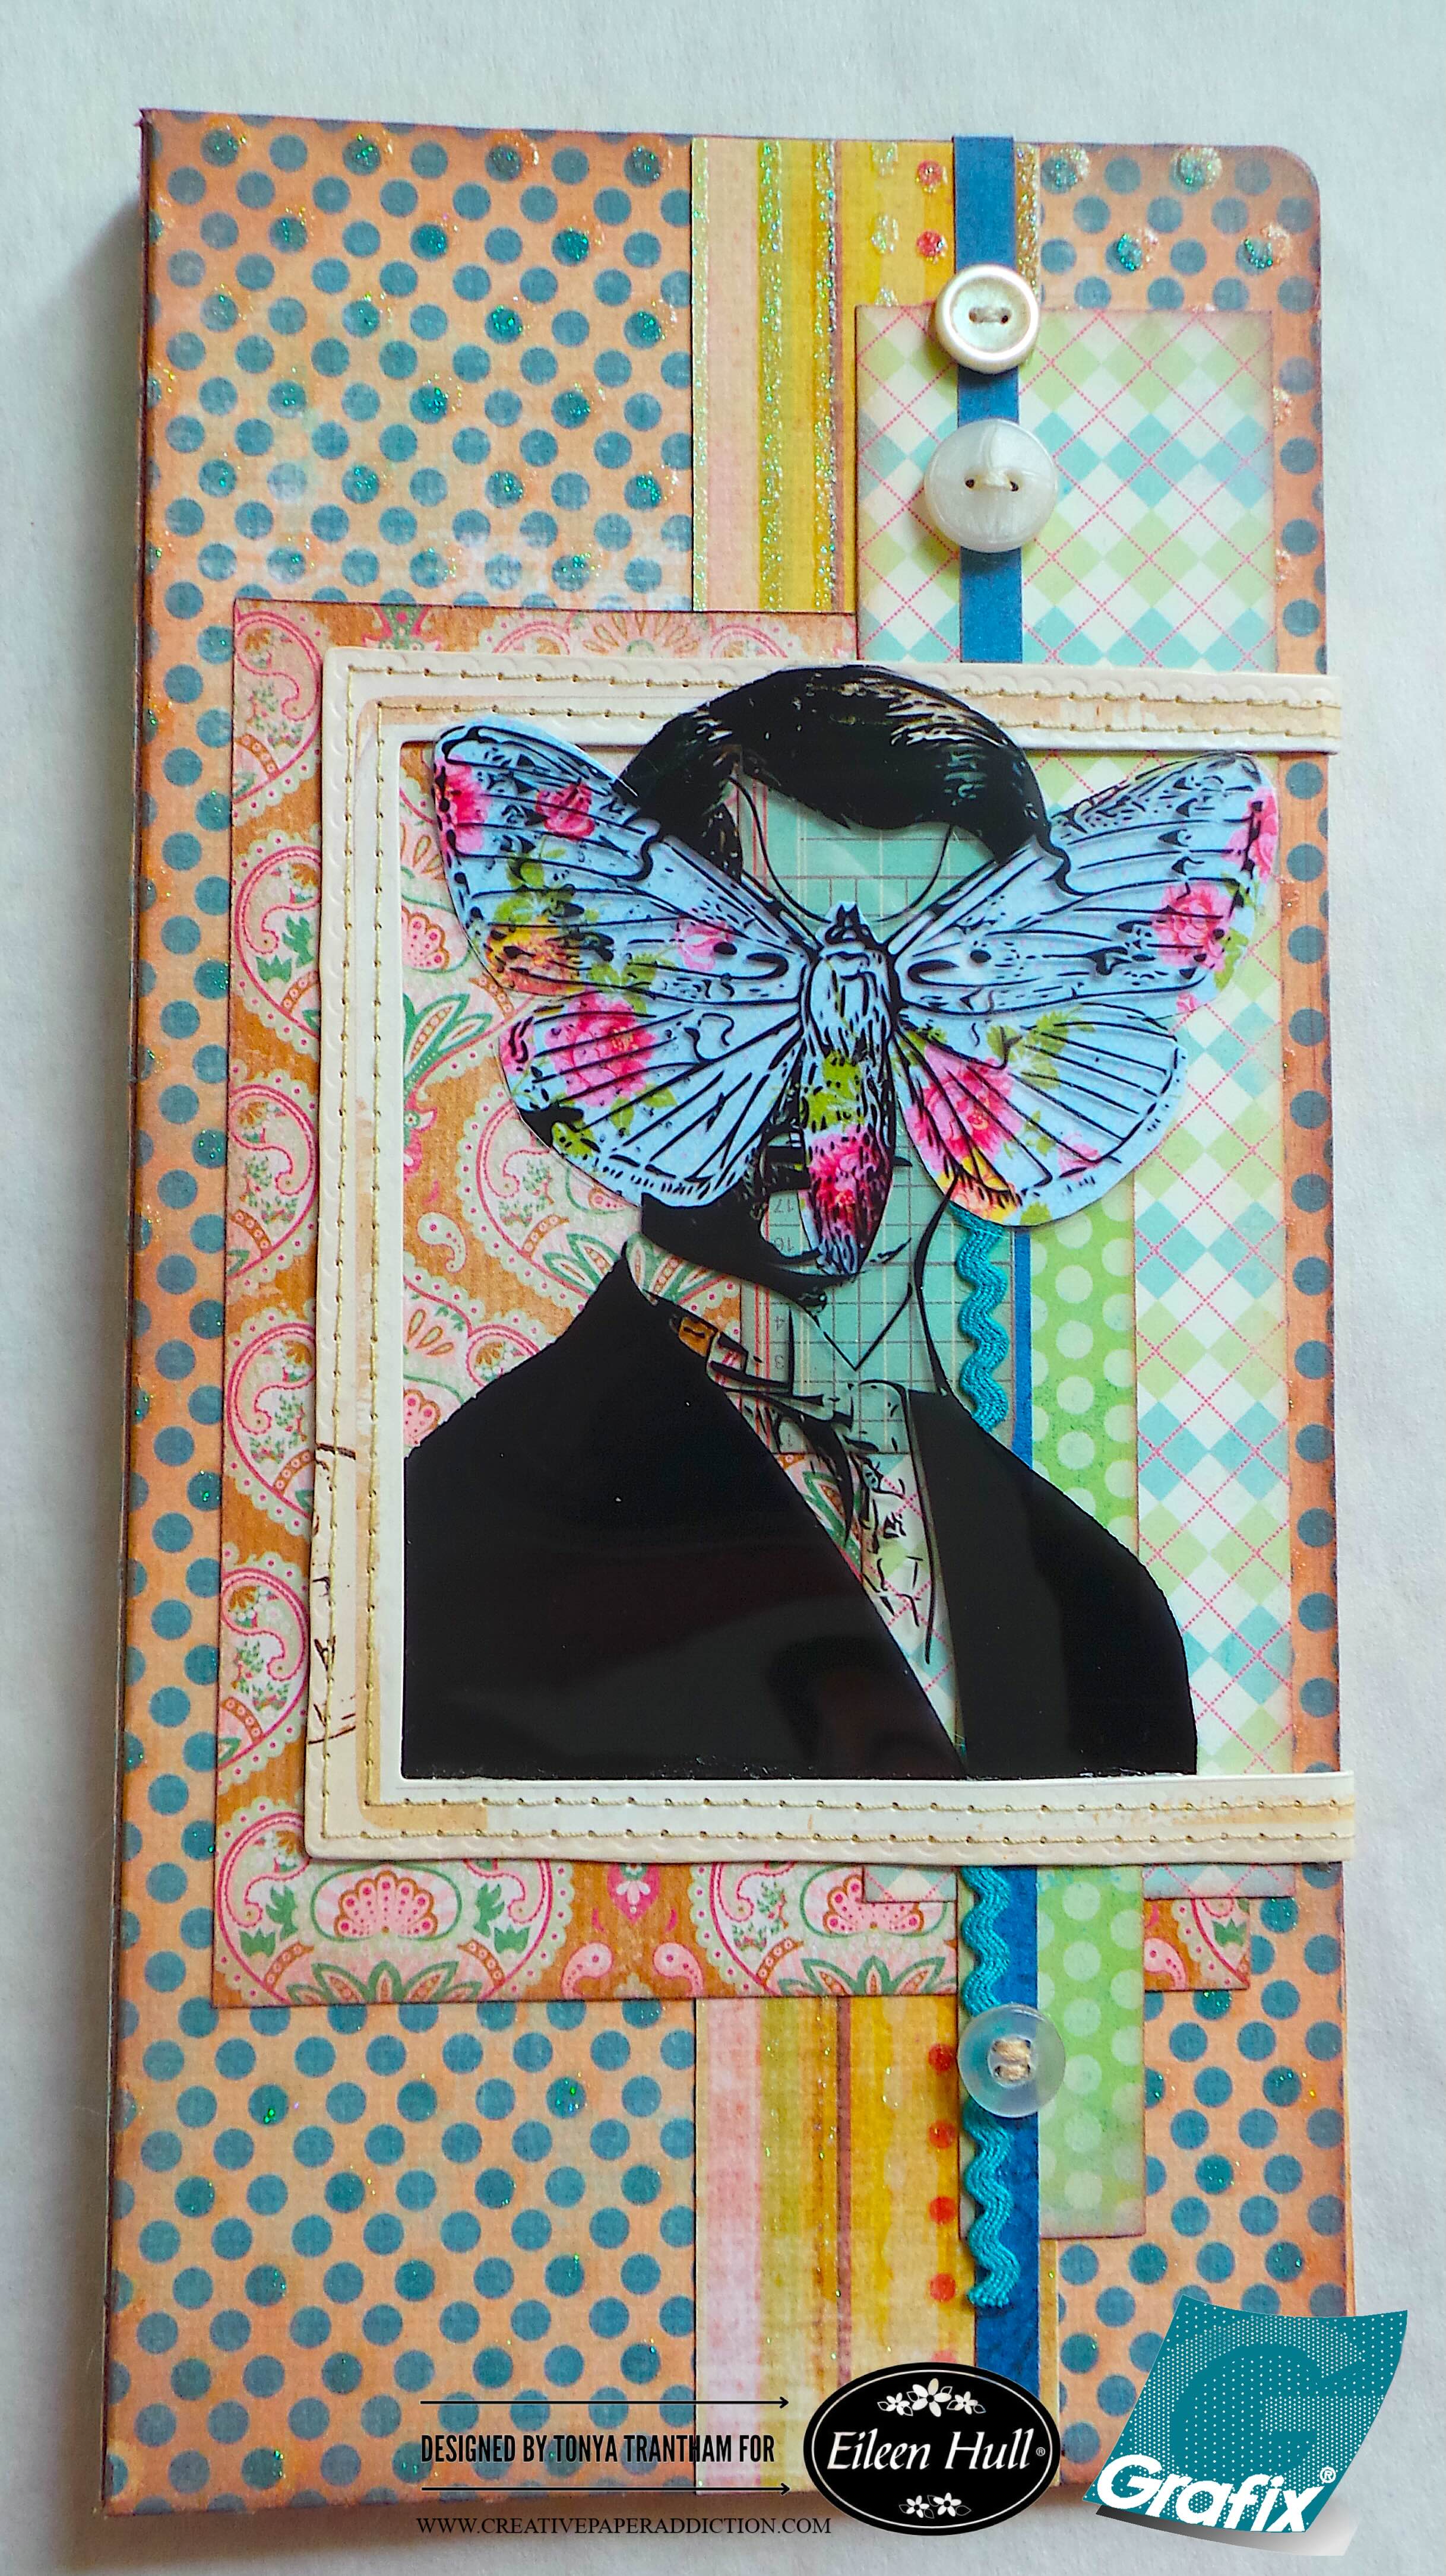
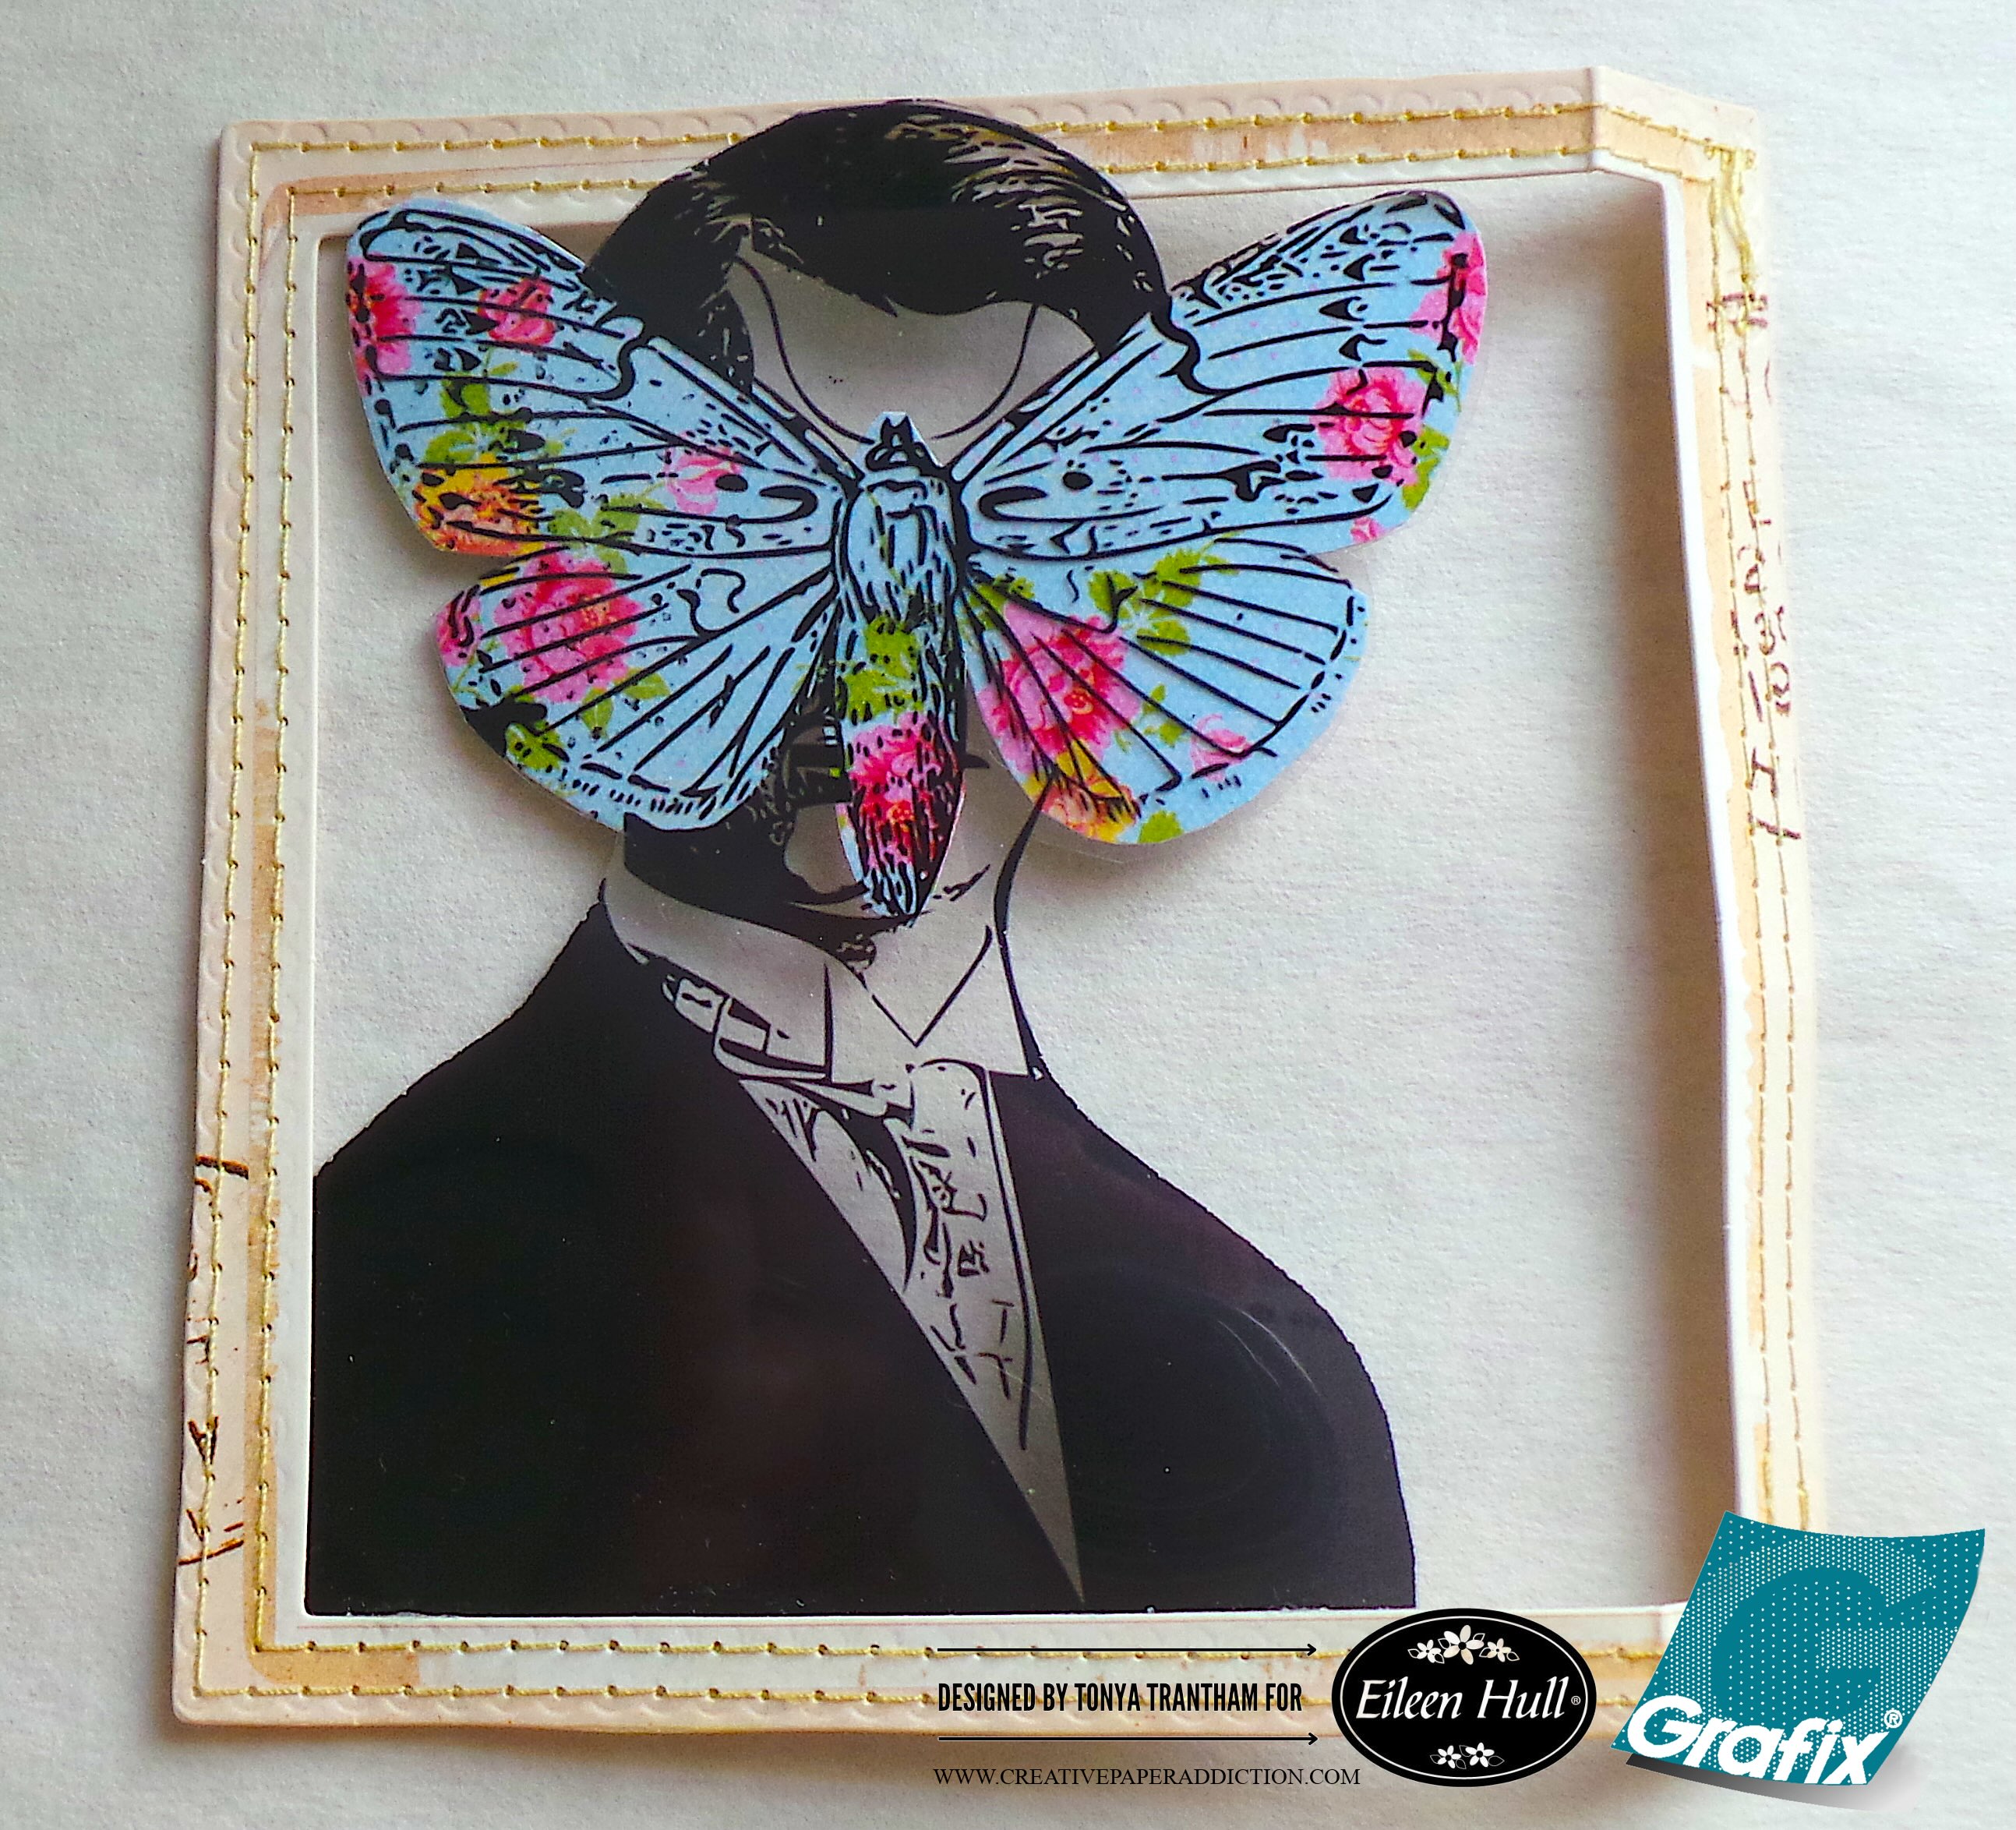
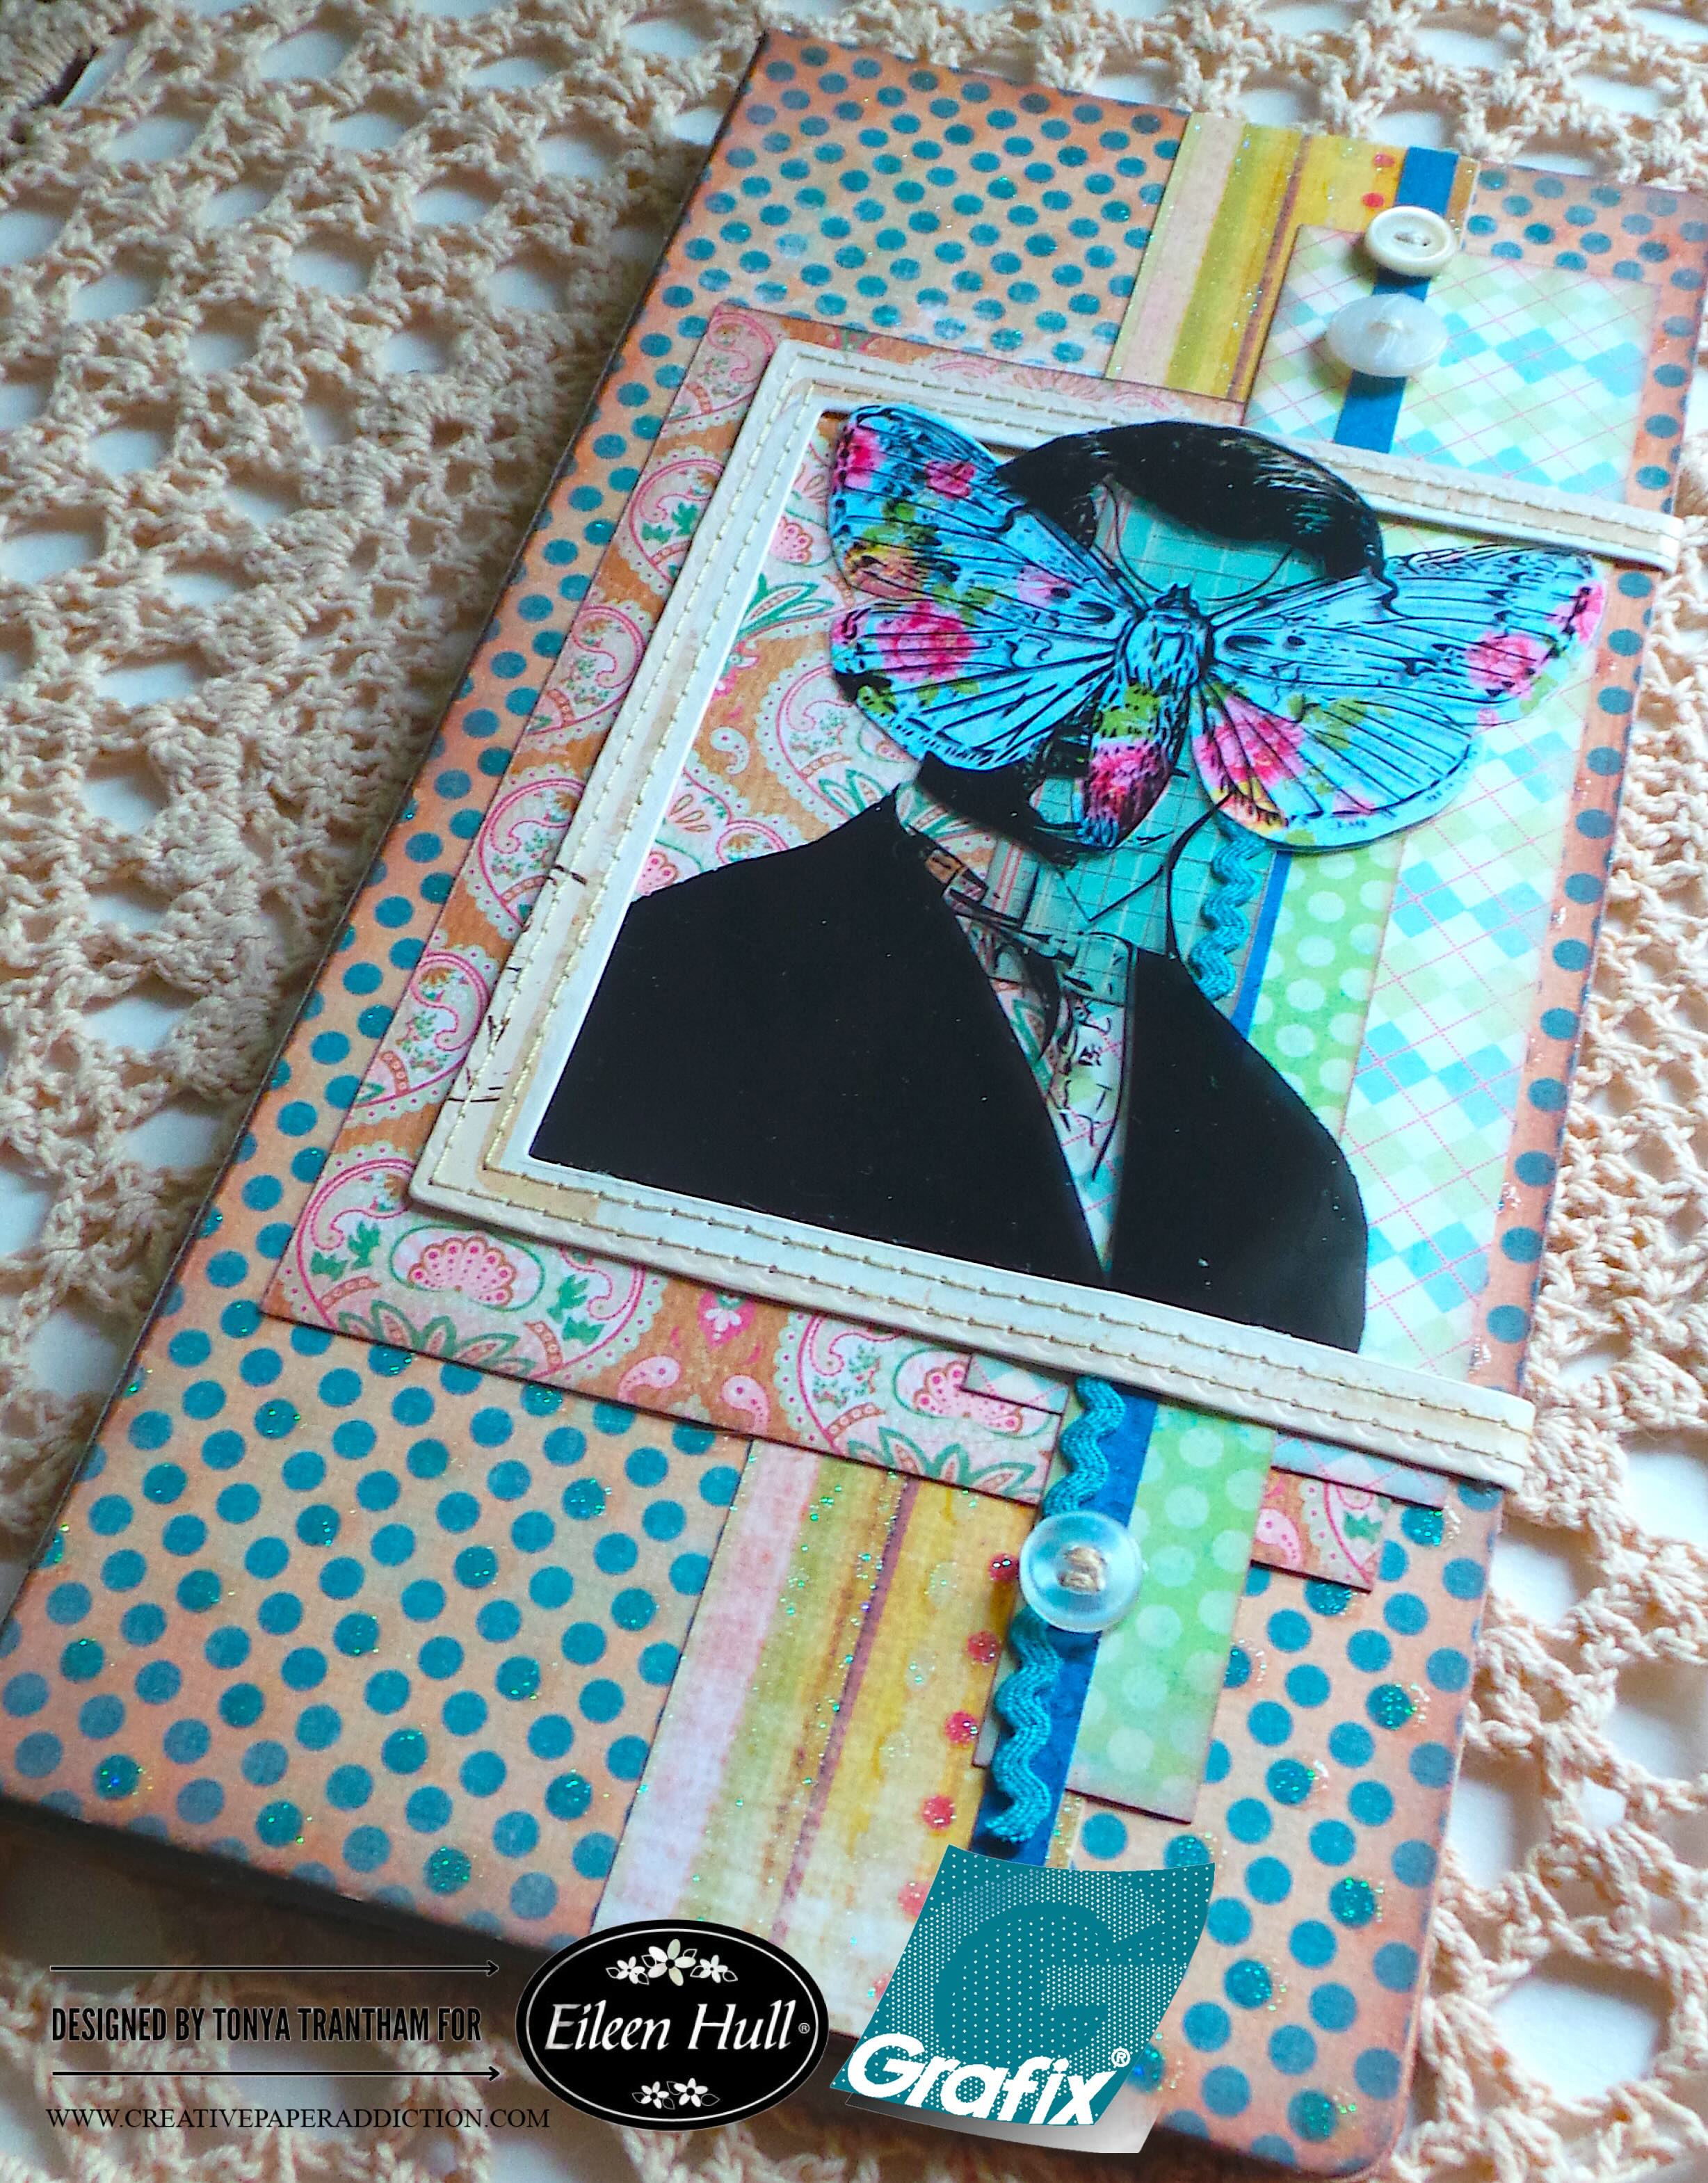
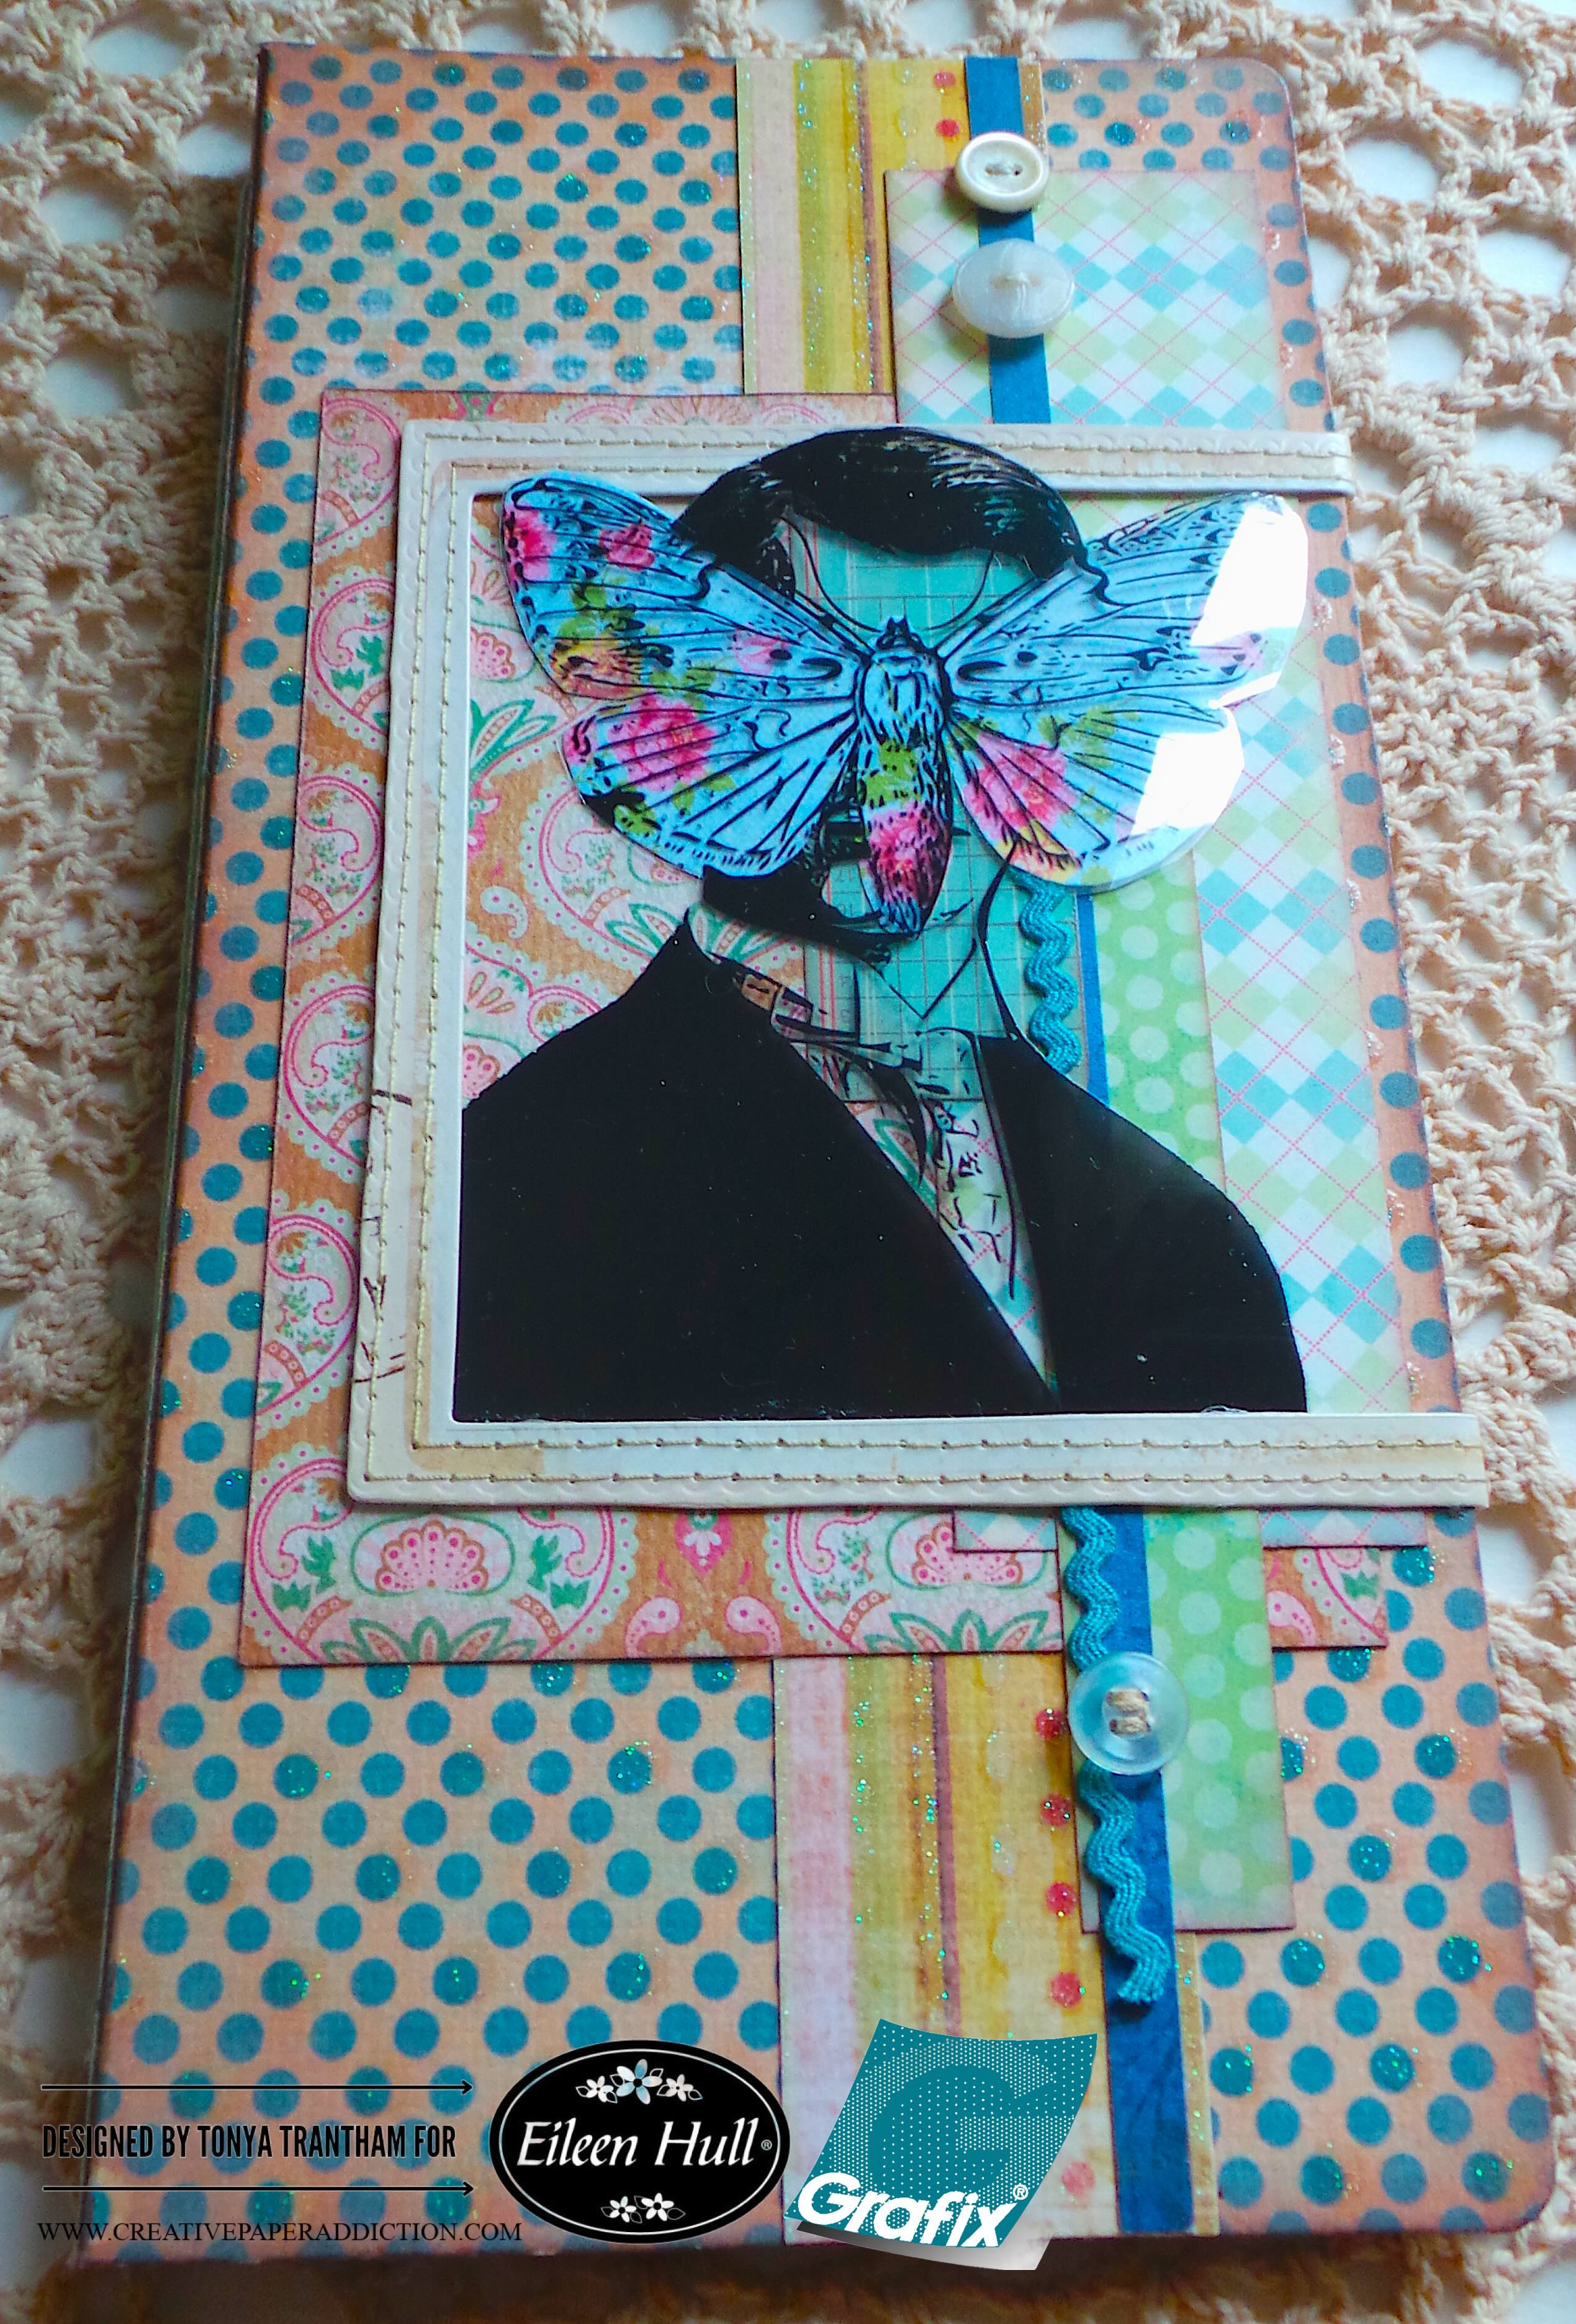
I dug into the packet of Grungy Vibe by Cat Kerr and pulled out both the clear and matte translucent images of the man with a butterfly over his face. The clear image, I cut out only the man with the butterfly. The matte image I only cut out the butterfly to use as a template to trace onto a piece of patterned cardstock and cut out. I adhered the patterned butterfly to the back side of the clear image.
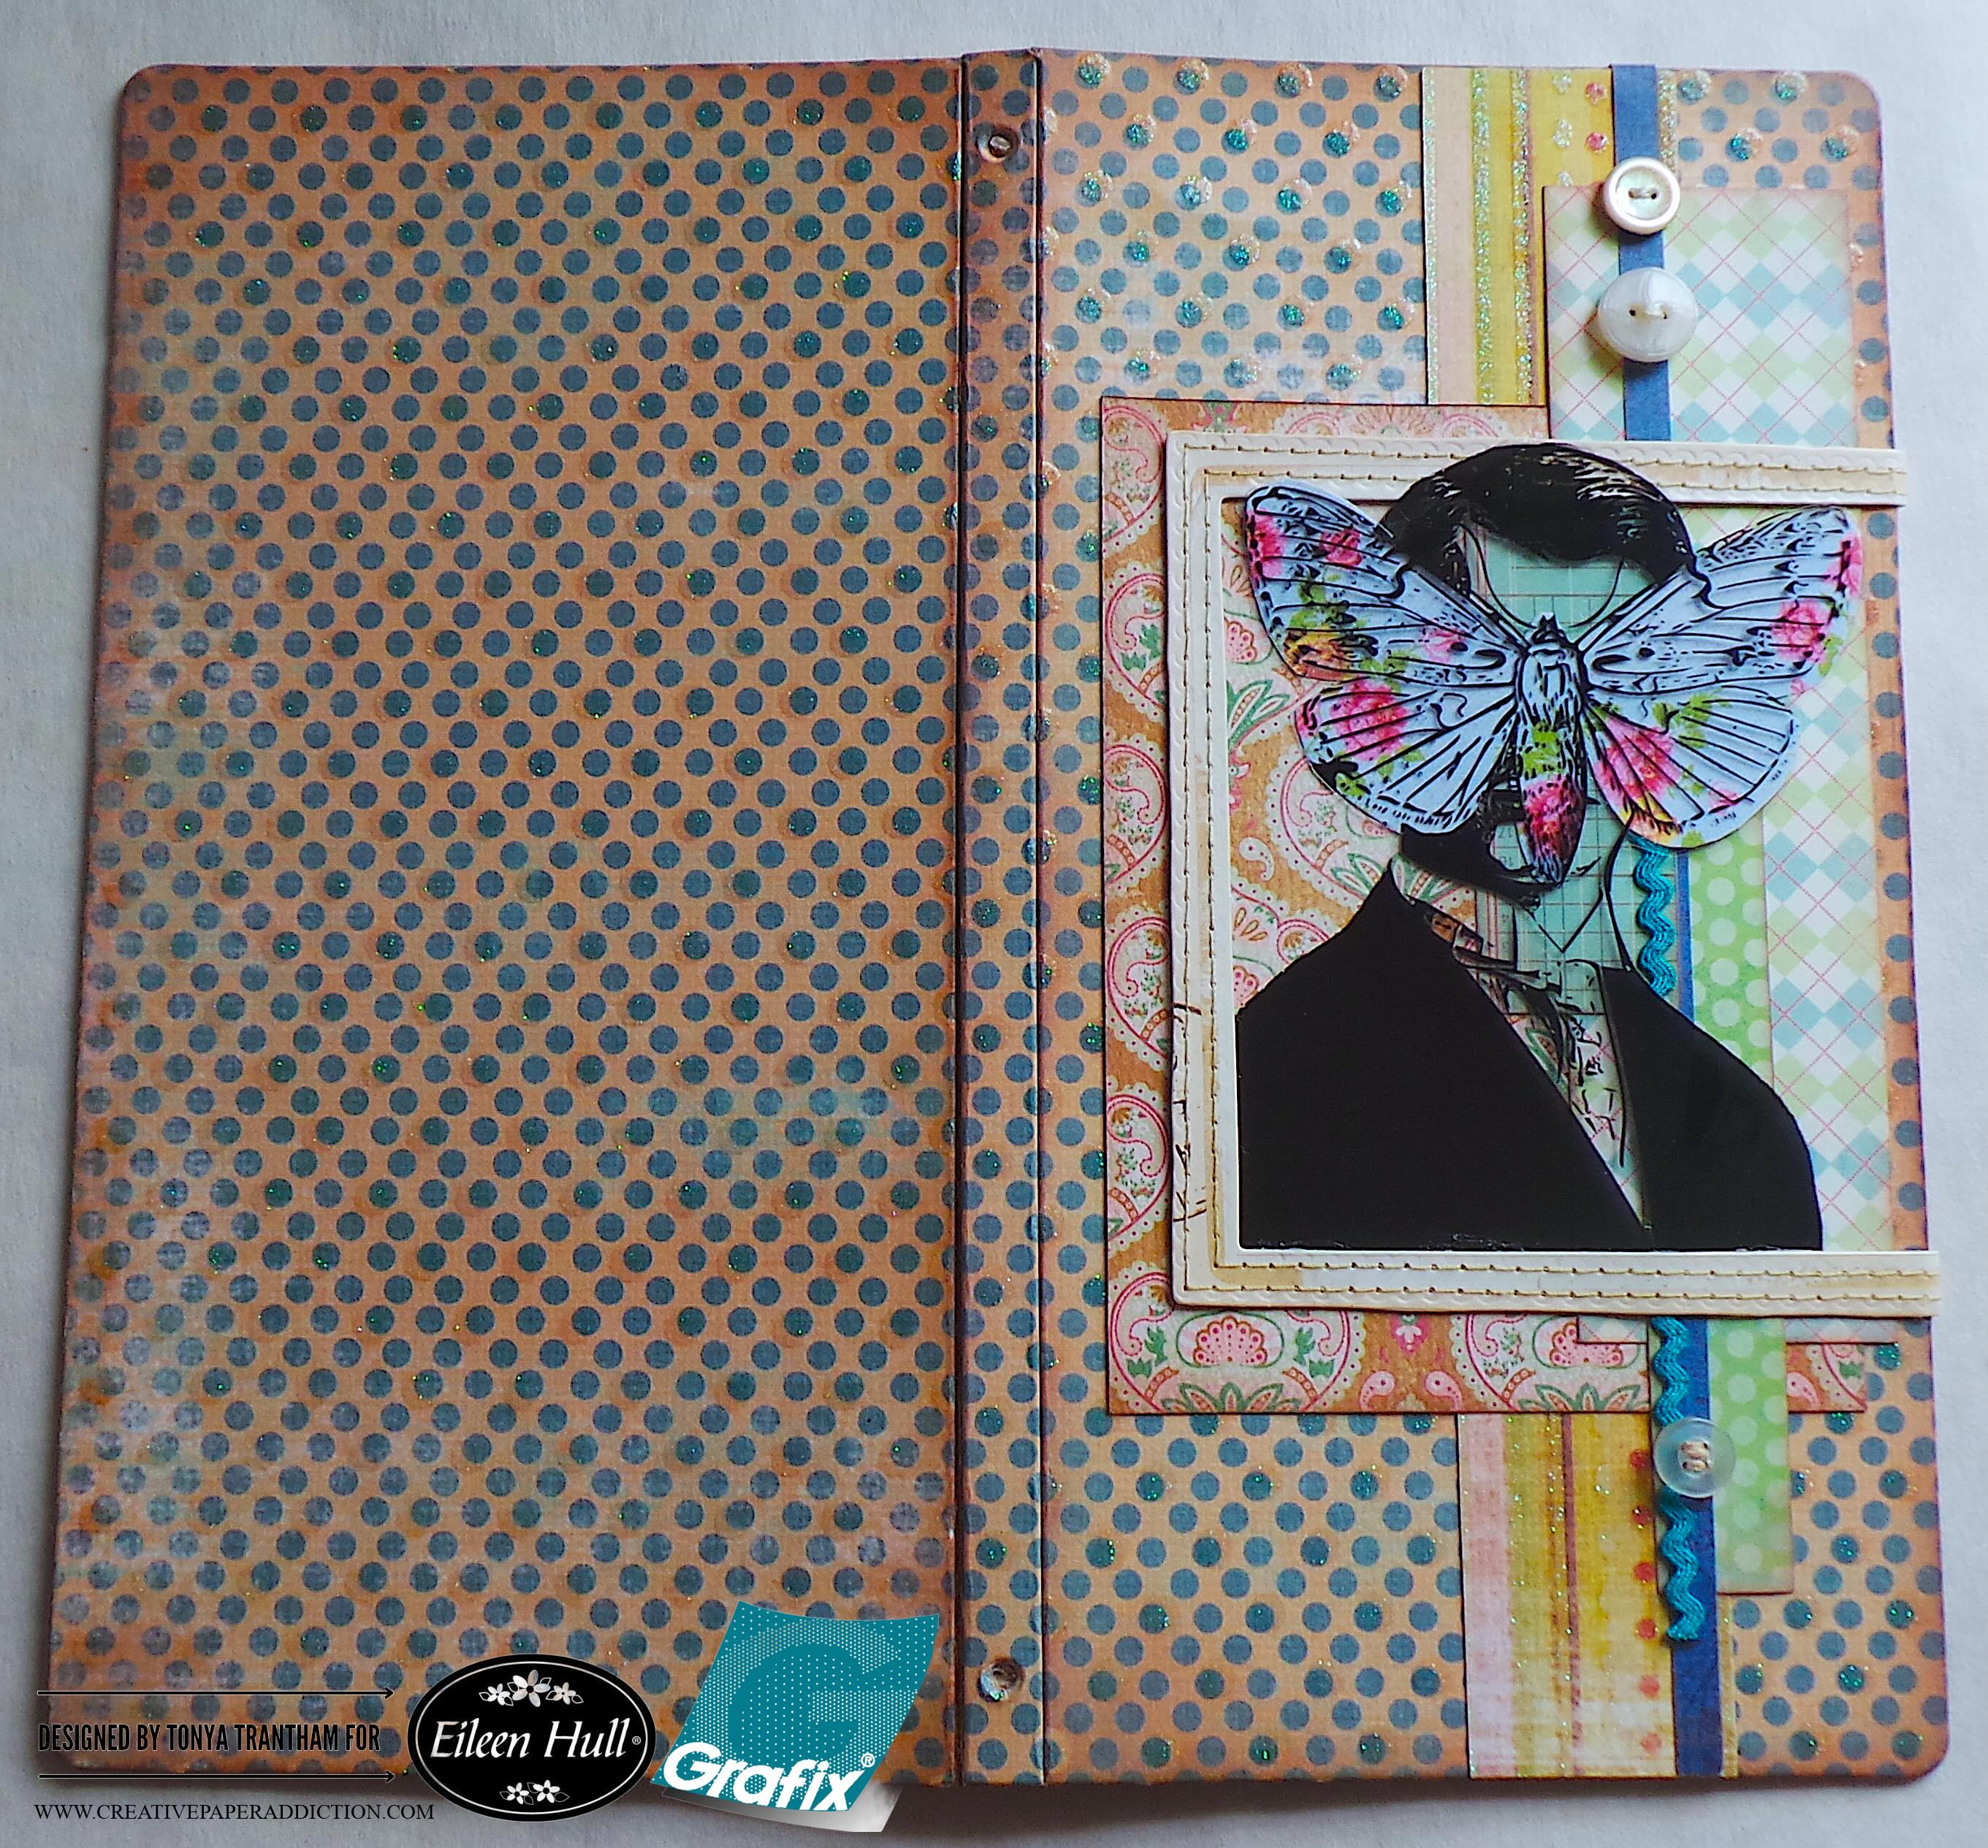
I dug into my stash of embellishments and found this stitched frame (I think it is from 49 & Market). I glued the bottom edge of the clear image and the top of the man’s head to the frame. I scored the outer edge of frame since it is larger than the journal cover. I wrapped around and adhere to the inside of the cover.
I added ric rac and buttons before gluing the frame to the cover.
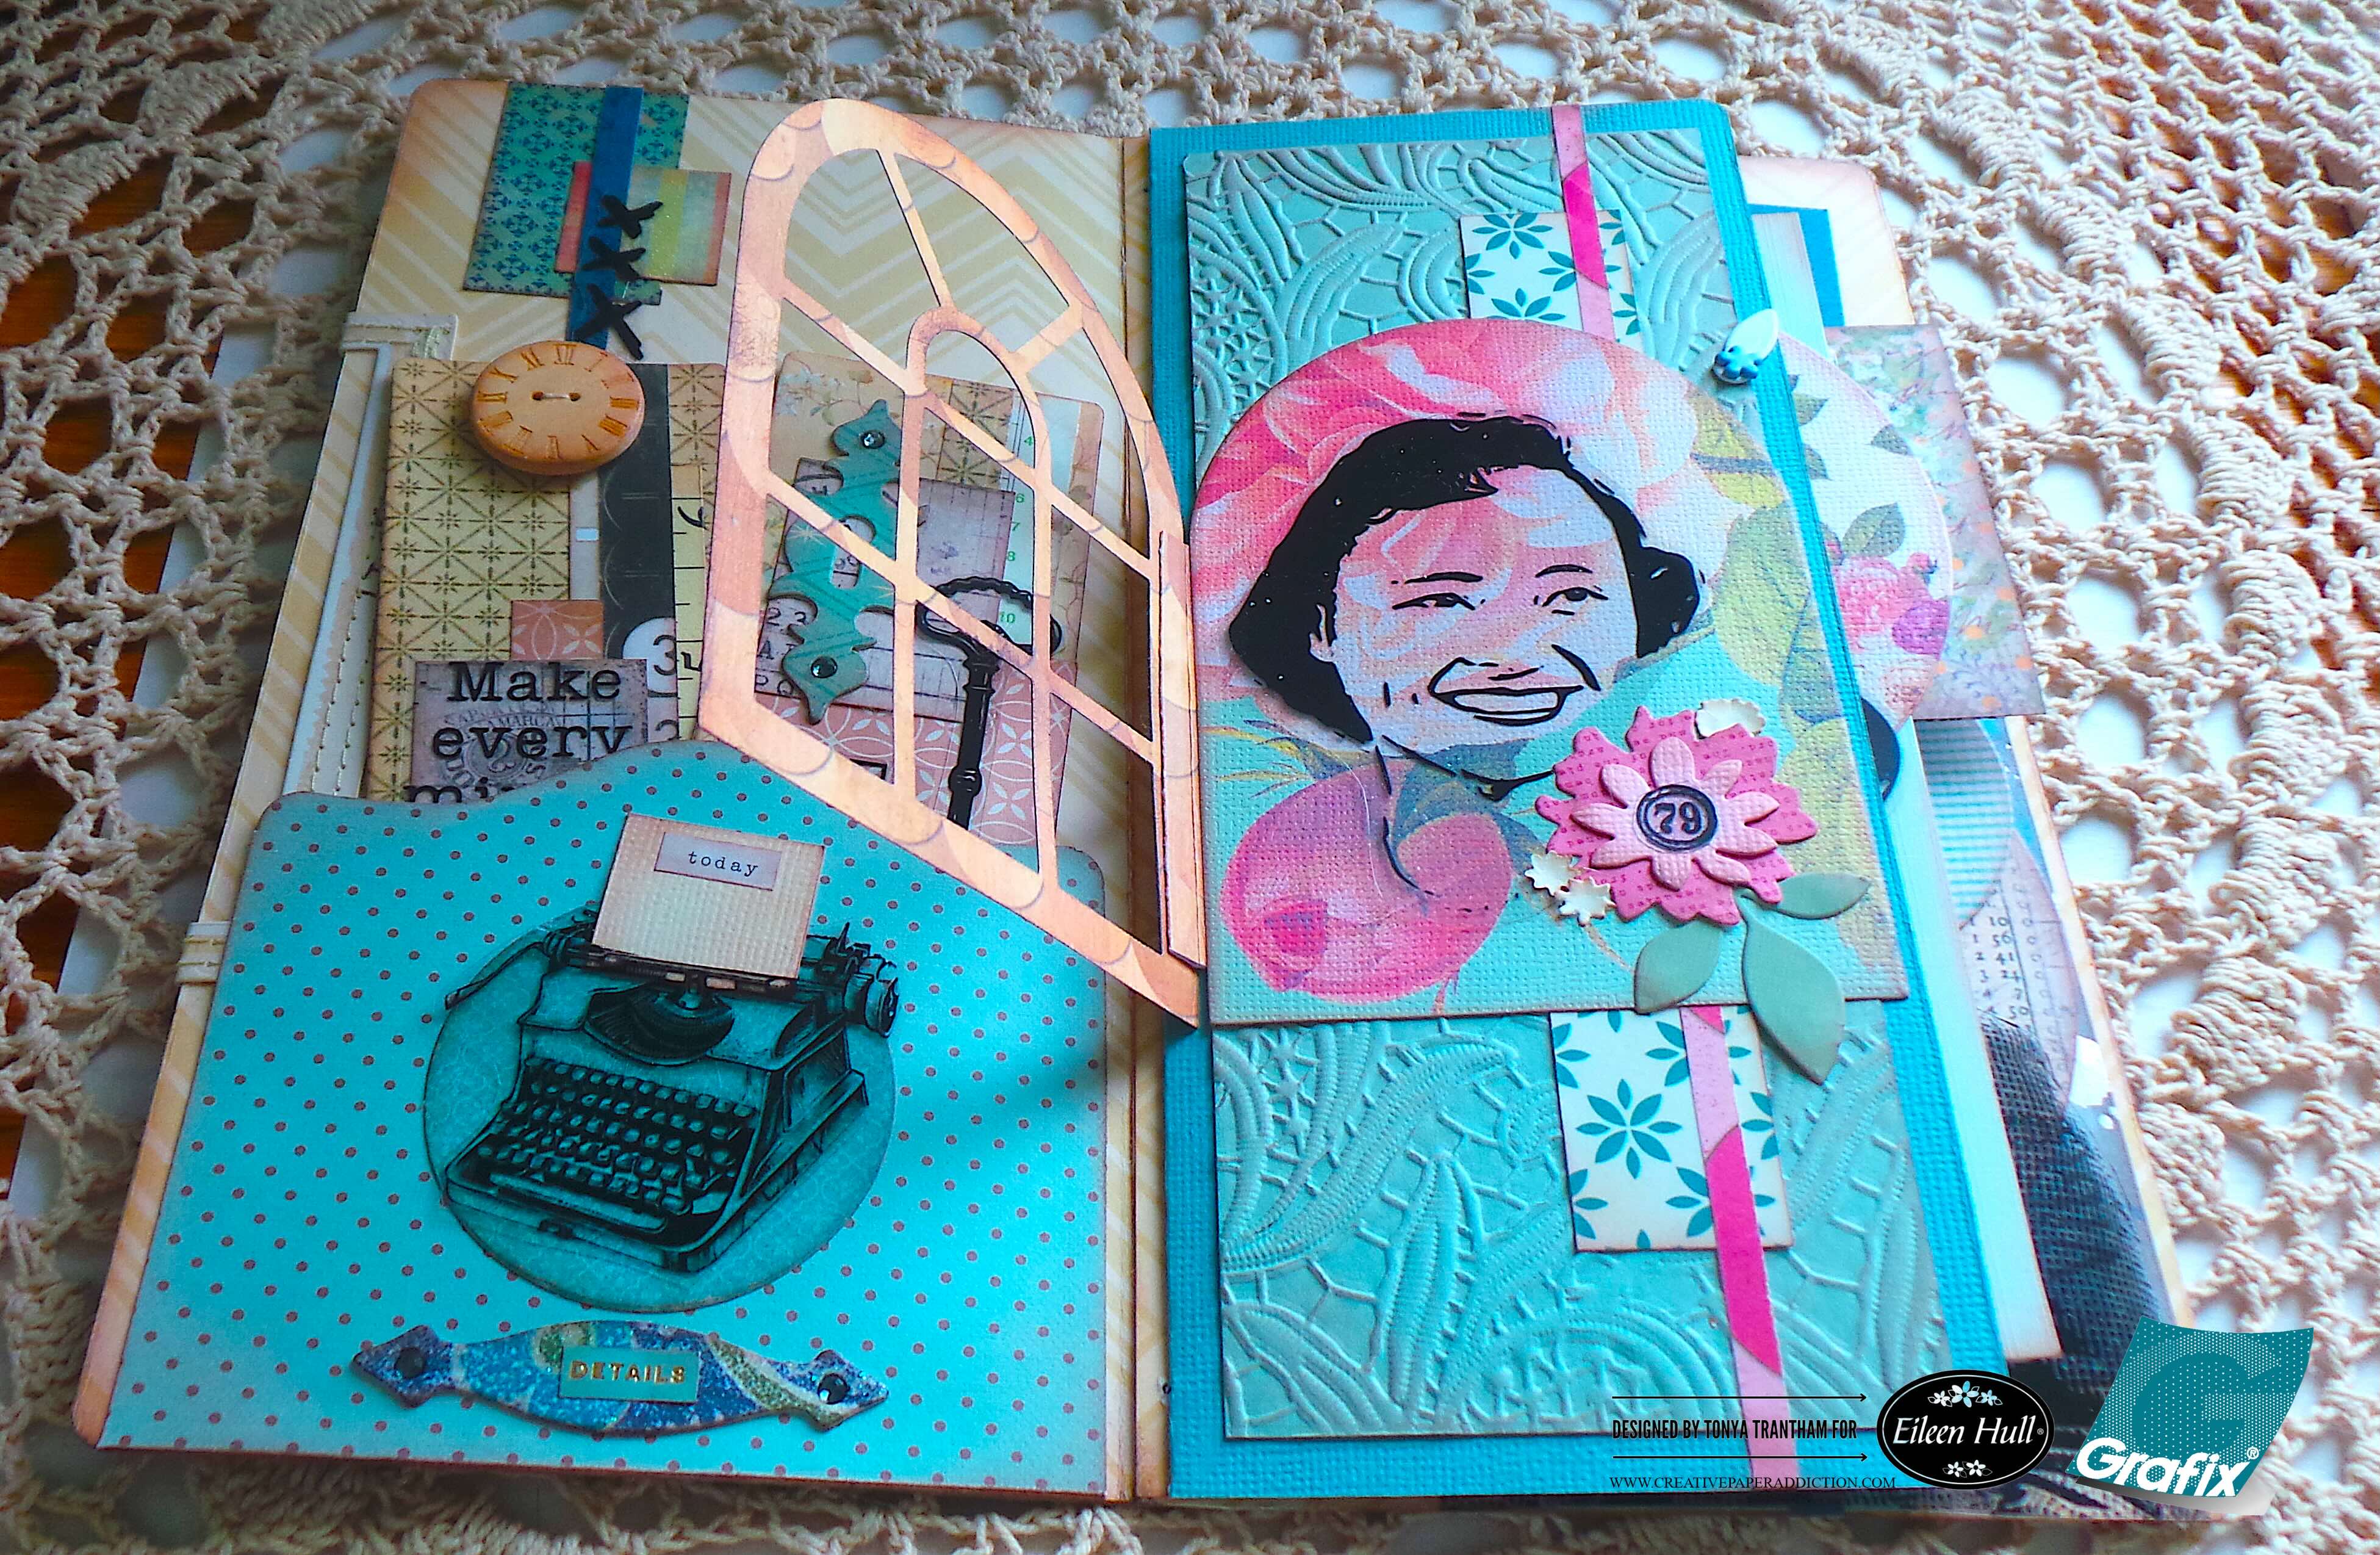
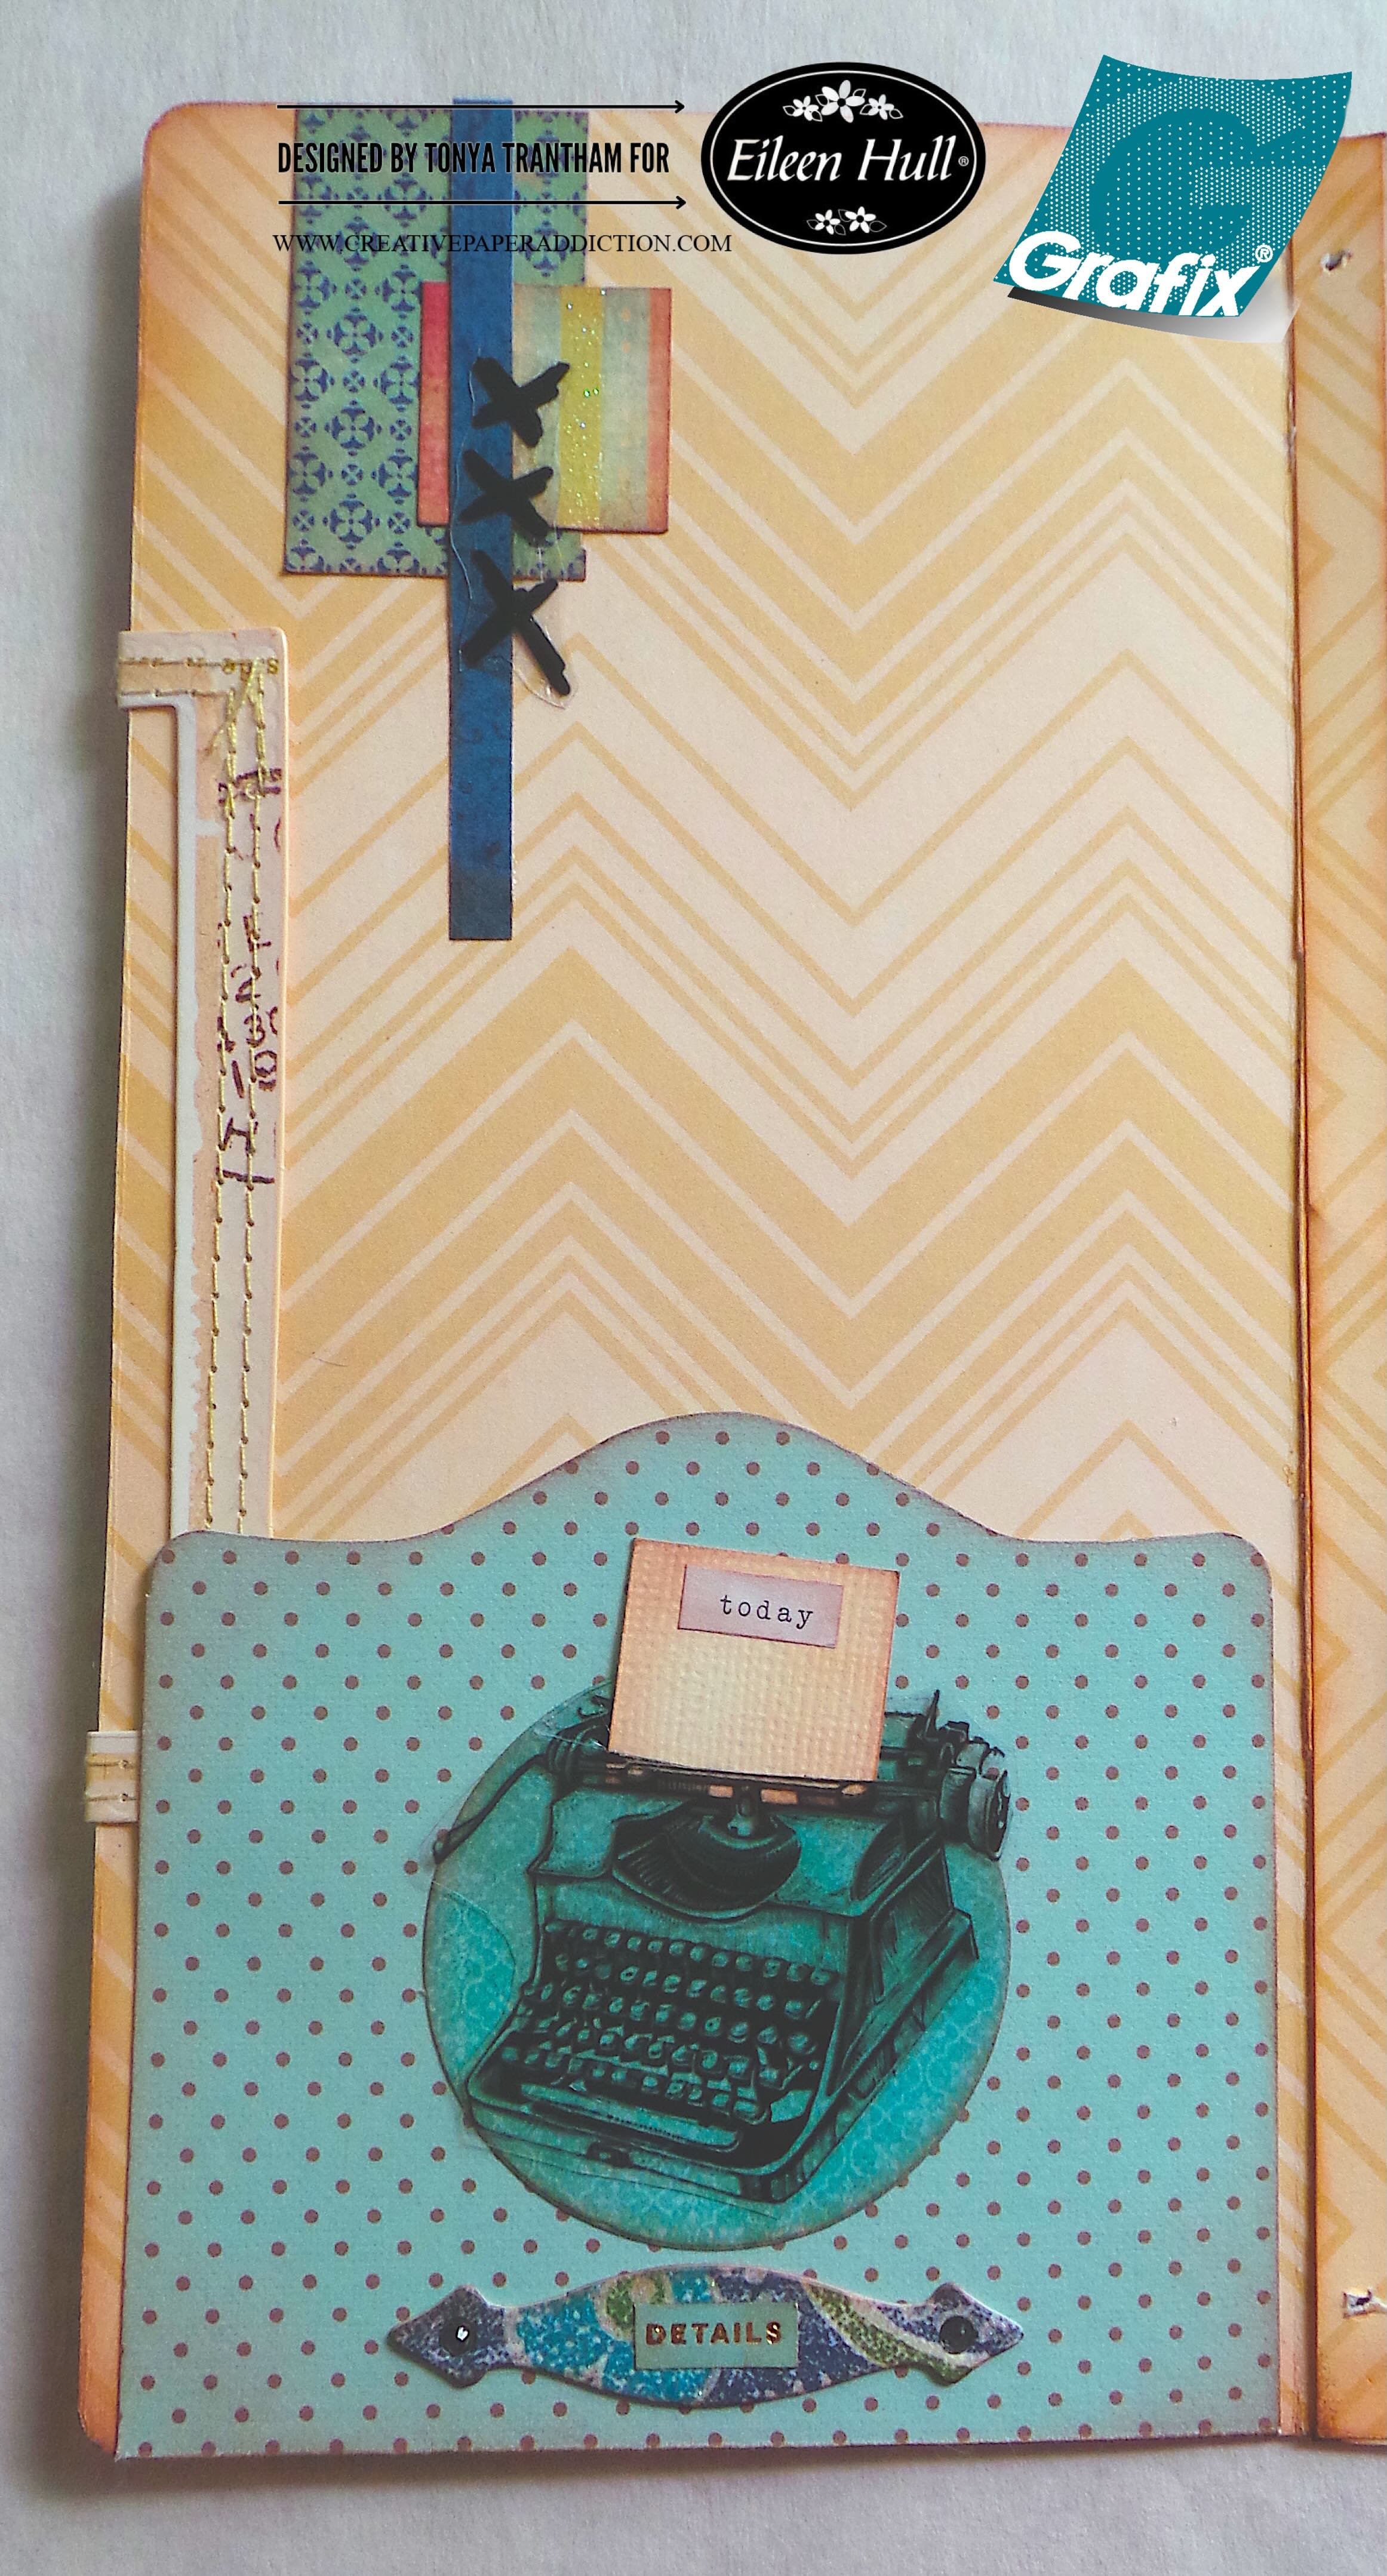
The inside front cover I cut a pocket from a portion of the Field Notes and Specimen Card Diecut. I did cut down the sides so it would fit on the inside cover of the journal. I lightly inked the edges and added glue to three sides before placing on the inside cover. I added scraps of patterned cardstock to the upper corner of the inside cover. I cut out a label from the Journal Hardware Diecut and the middle size circle from the Rainbow Wheels Thinlits. I inked the edges of both dies before adhering to the pocket.
I cut out the three stitches and the typewriter from the clear film. The typewriter I used a Knife and cut a slit in the top of it. I cut a piece of plain cardstock to fit into the slit of the typewriter. I lightly inked the edges and glued inside the slit of the typewriter. I dug into my stash of stickers and added the “today” to the paper in the typewriter and “details” to the label. I placed two Black Gems in the holes of the label.
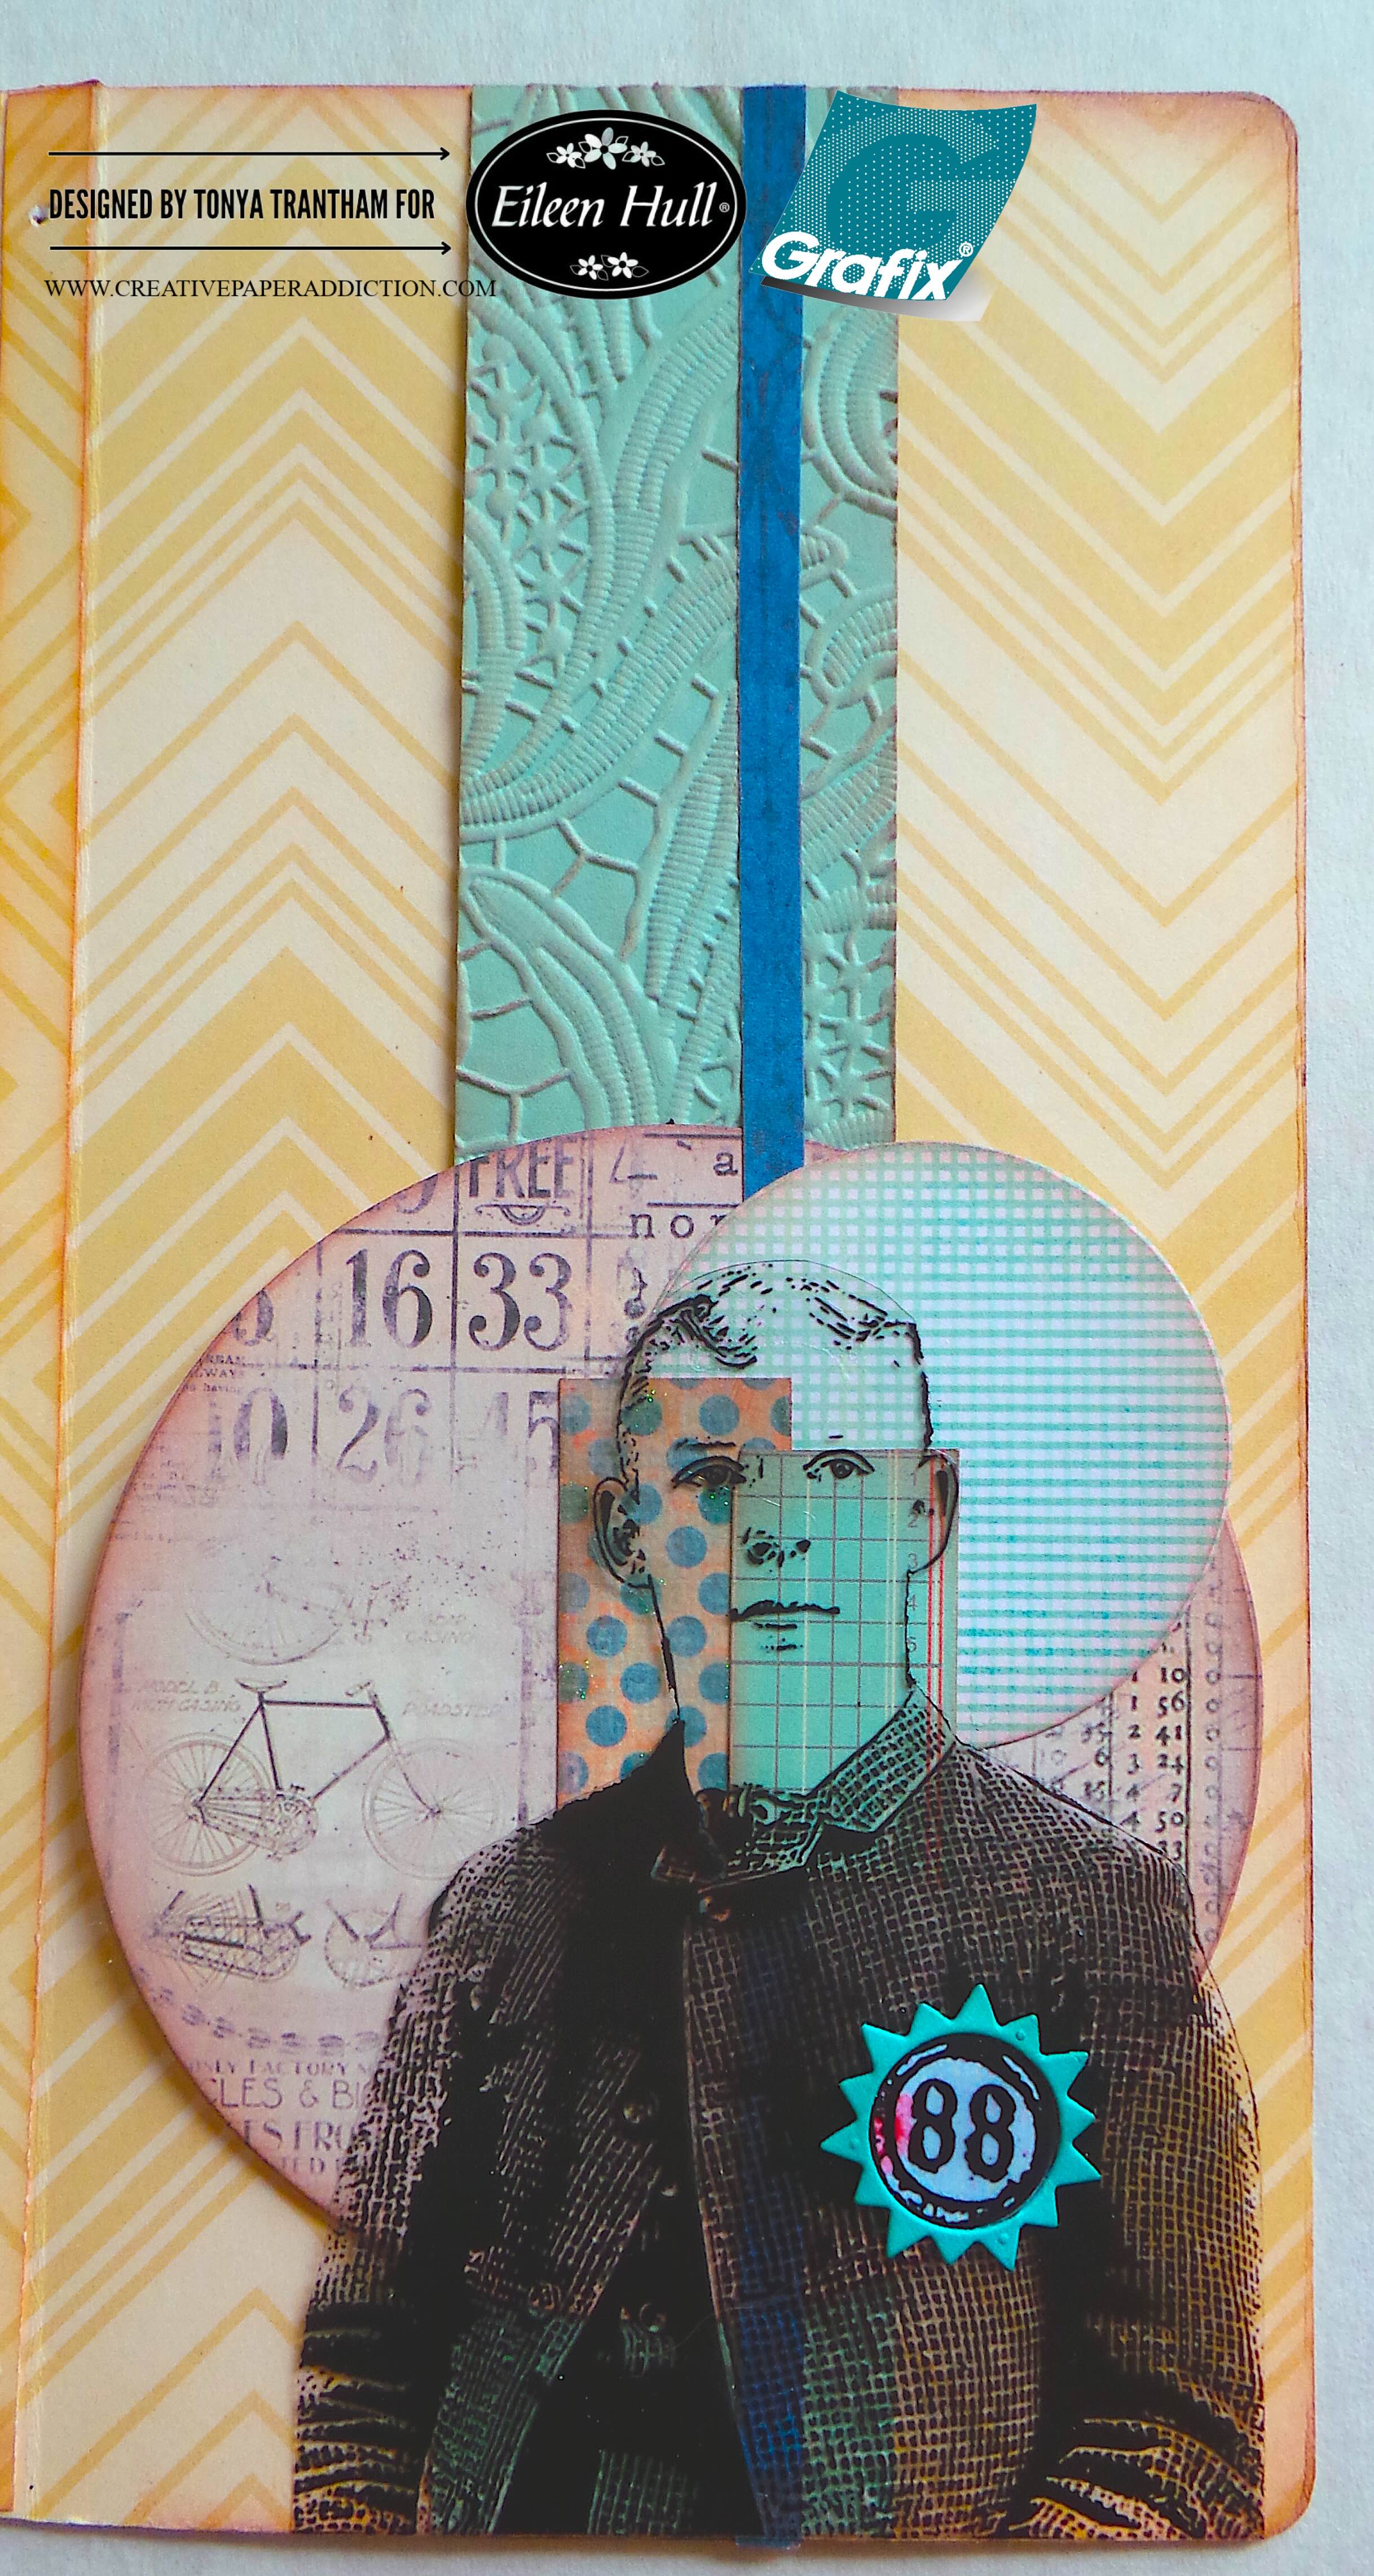
The back inside cover I embossed a piece of cardstock with the Lacy Leaves A5 Embossing Folder. I cut a strip of cardstock to fit the back of the journal and lightly inked with chalk ink. I added glue to each end of the cardstock and placed onto the inside cover. This creates a belly band to hold tags, journaling cards, etc. I cut the largest and middle size circles from the Rainbow Wheels Thinlits. I inked the edges with chalk ink along with a strip of blue cardstock and adhered onto the belly band. I added a couple scraps of patterned cardstock on top of the circles. I cut out the man from the clear film. I adhered on top of the circles. Next, I cut the sunshine from the Home Sweet Home Thinlits twice. One of each in plain and patterned cardstocks. I placed the outer part of the sunshine die over the coat pocket of man. I cut out the number “88” from the clear translucent. I glued on top of the inner circle from the sunshine and added to the center of the sunshine.
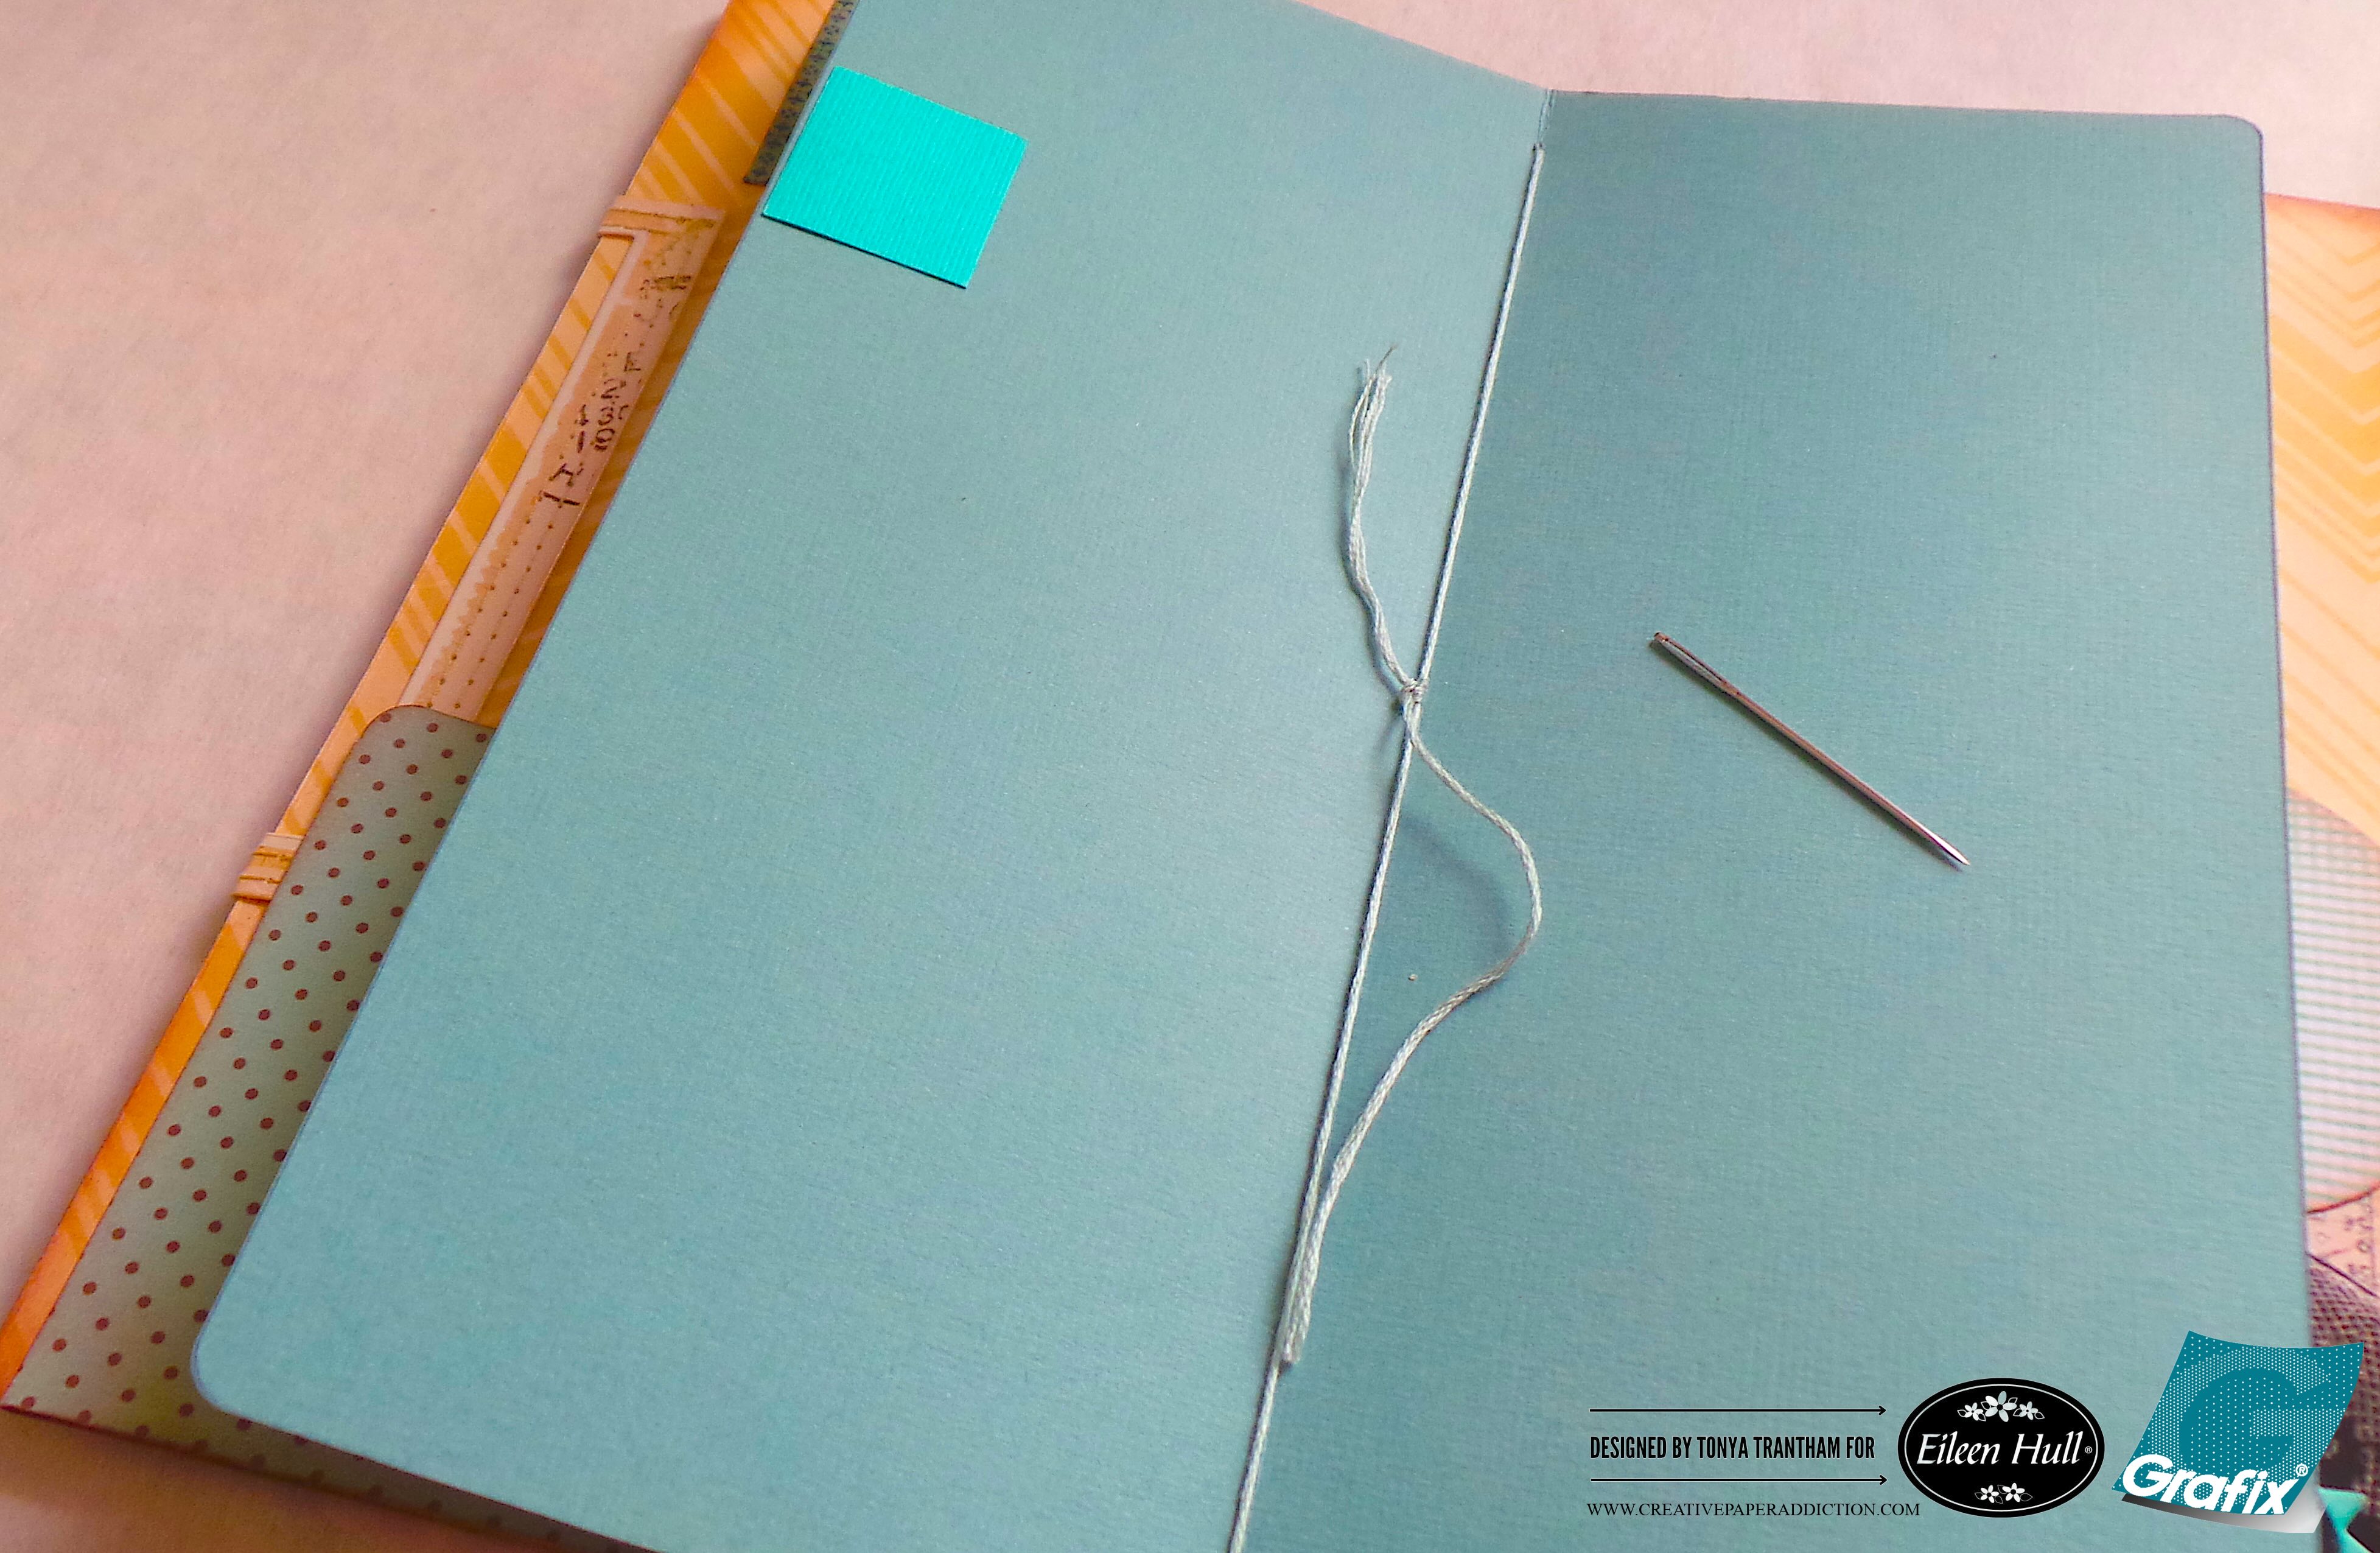
For the inside pocket I folded a piece of cardstock in half and placed below the cut lines of the spine of the Journal Diecut. I marked the holes on the inside of pocket and used the needle to poke holes in the spine. I threaded the needle with thread and stitched the pocket onto the spine of the journal. I added glue at each end to create the pocket.
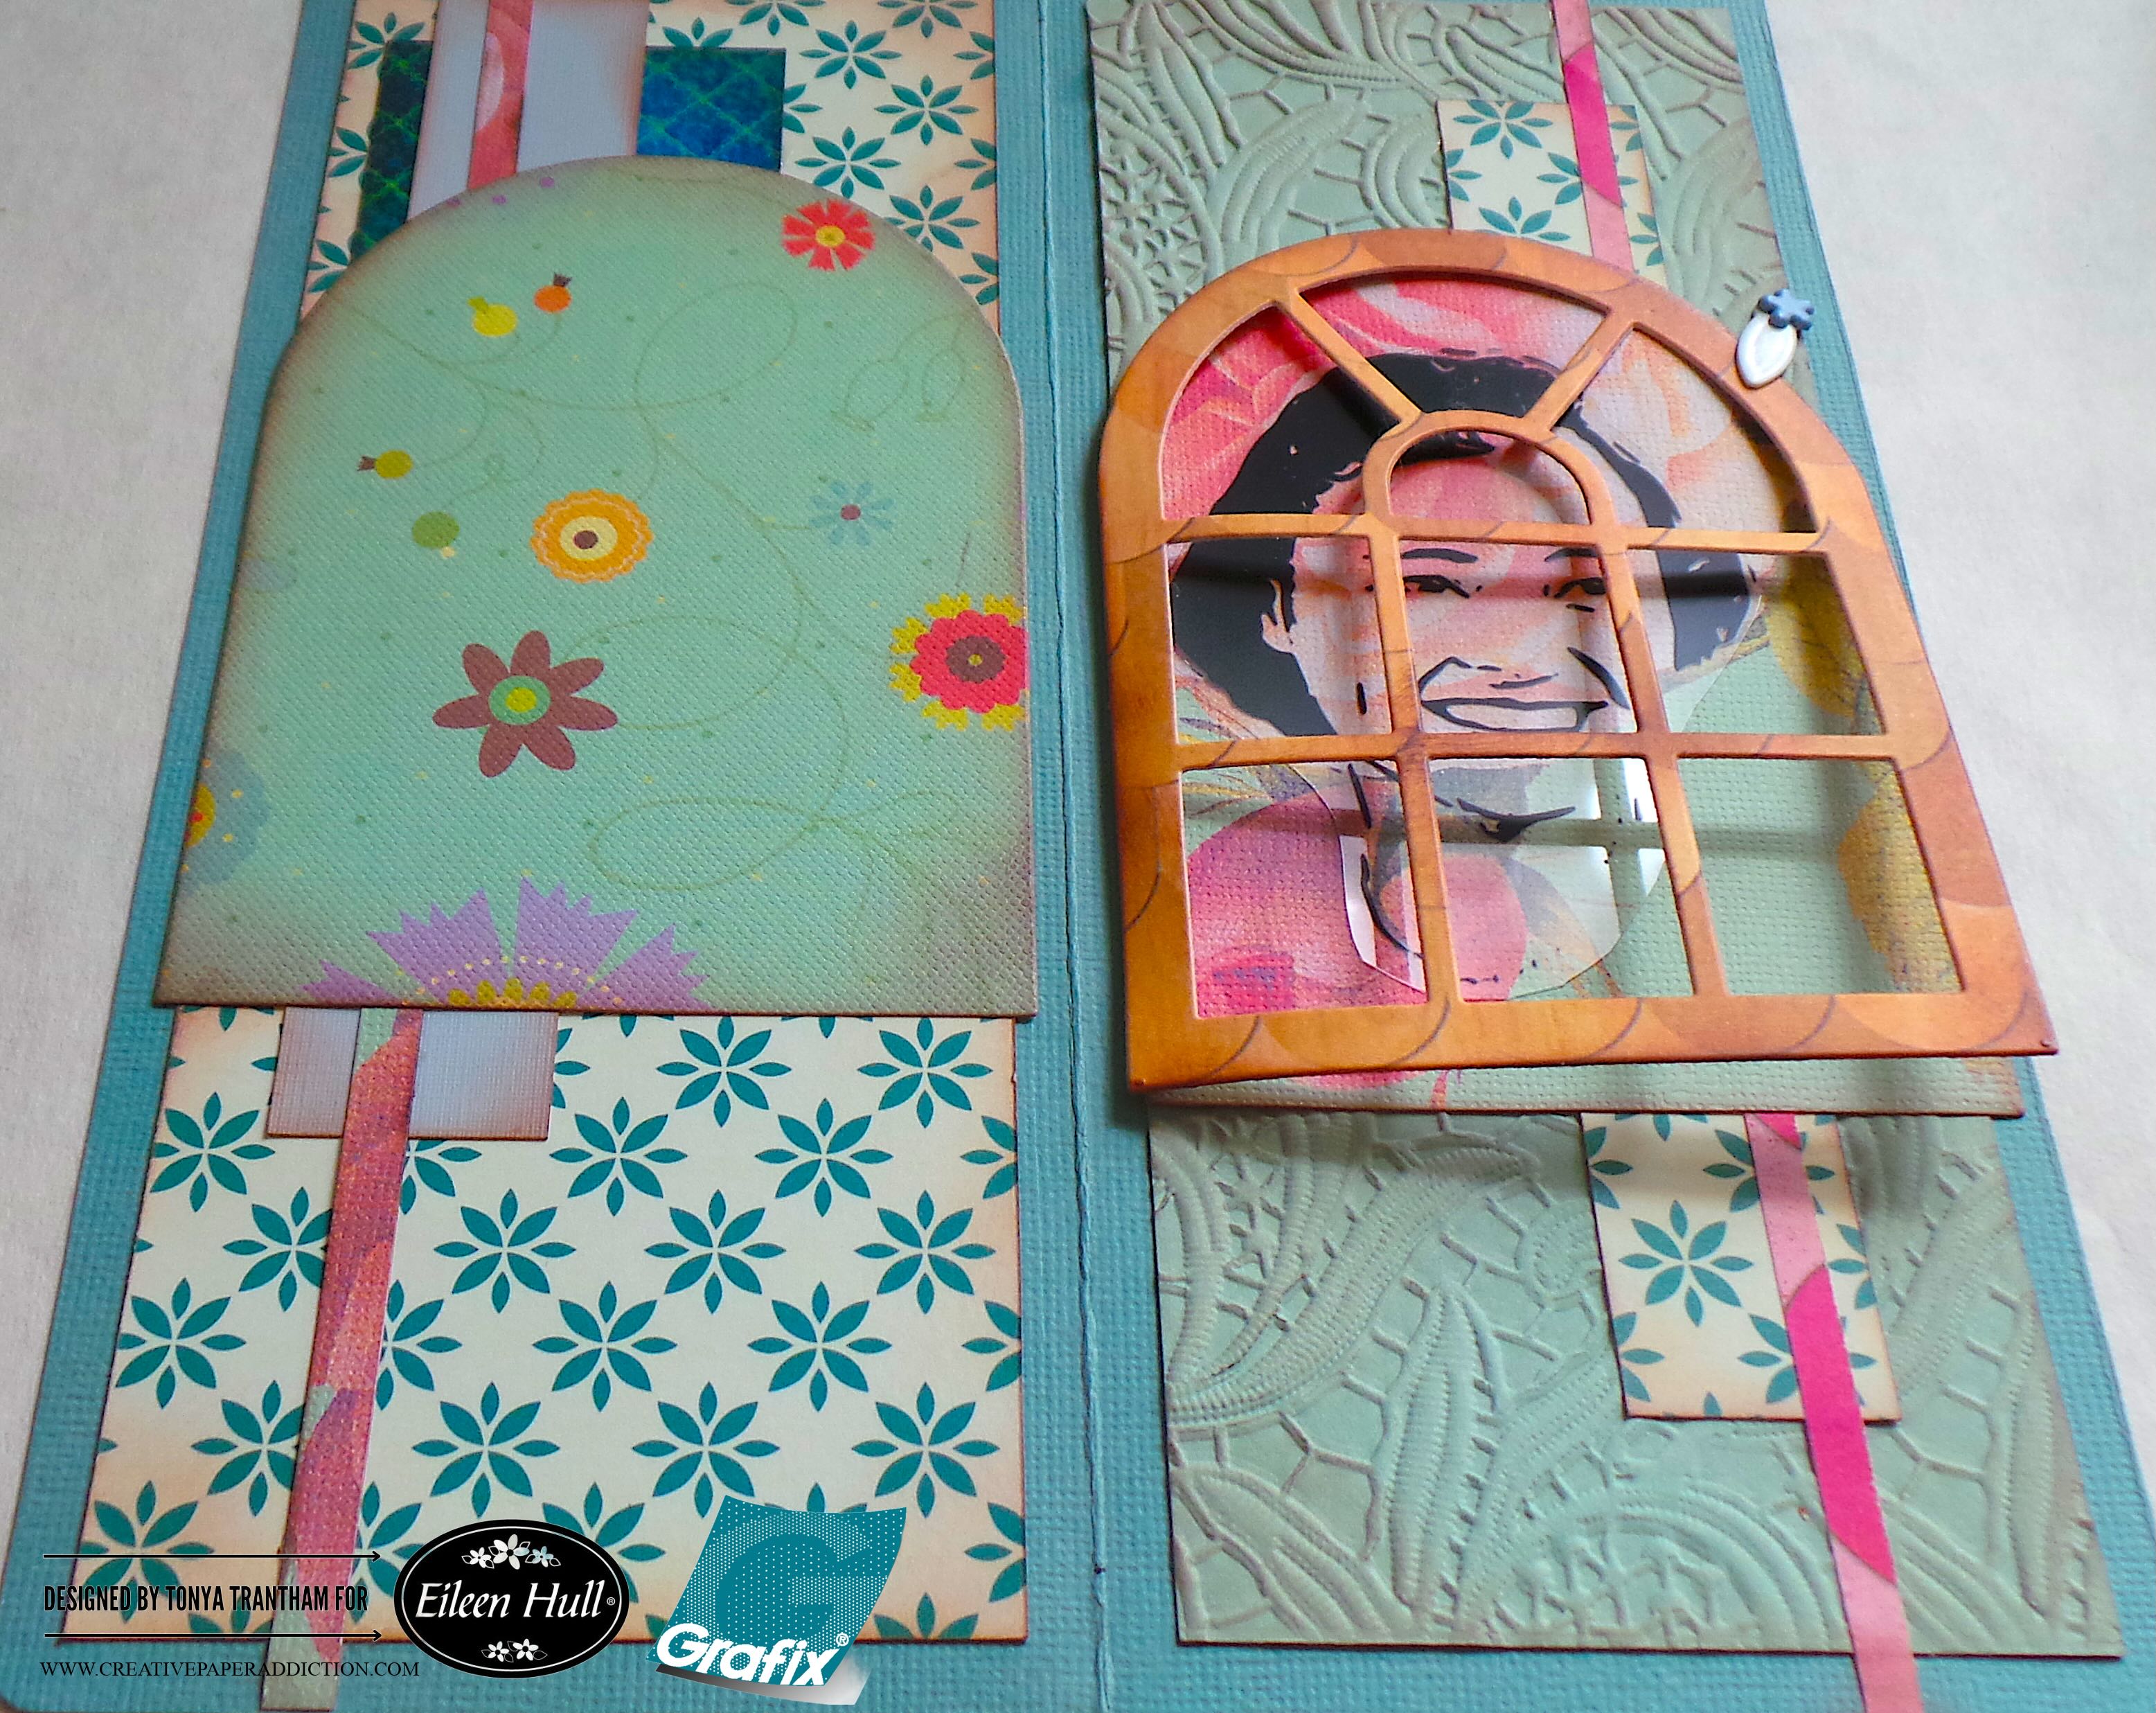
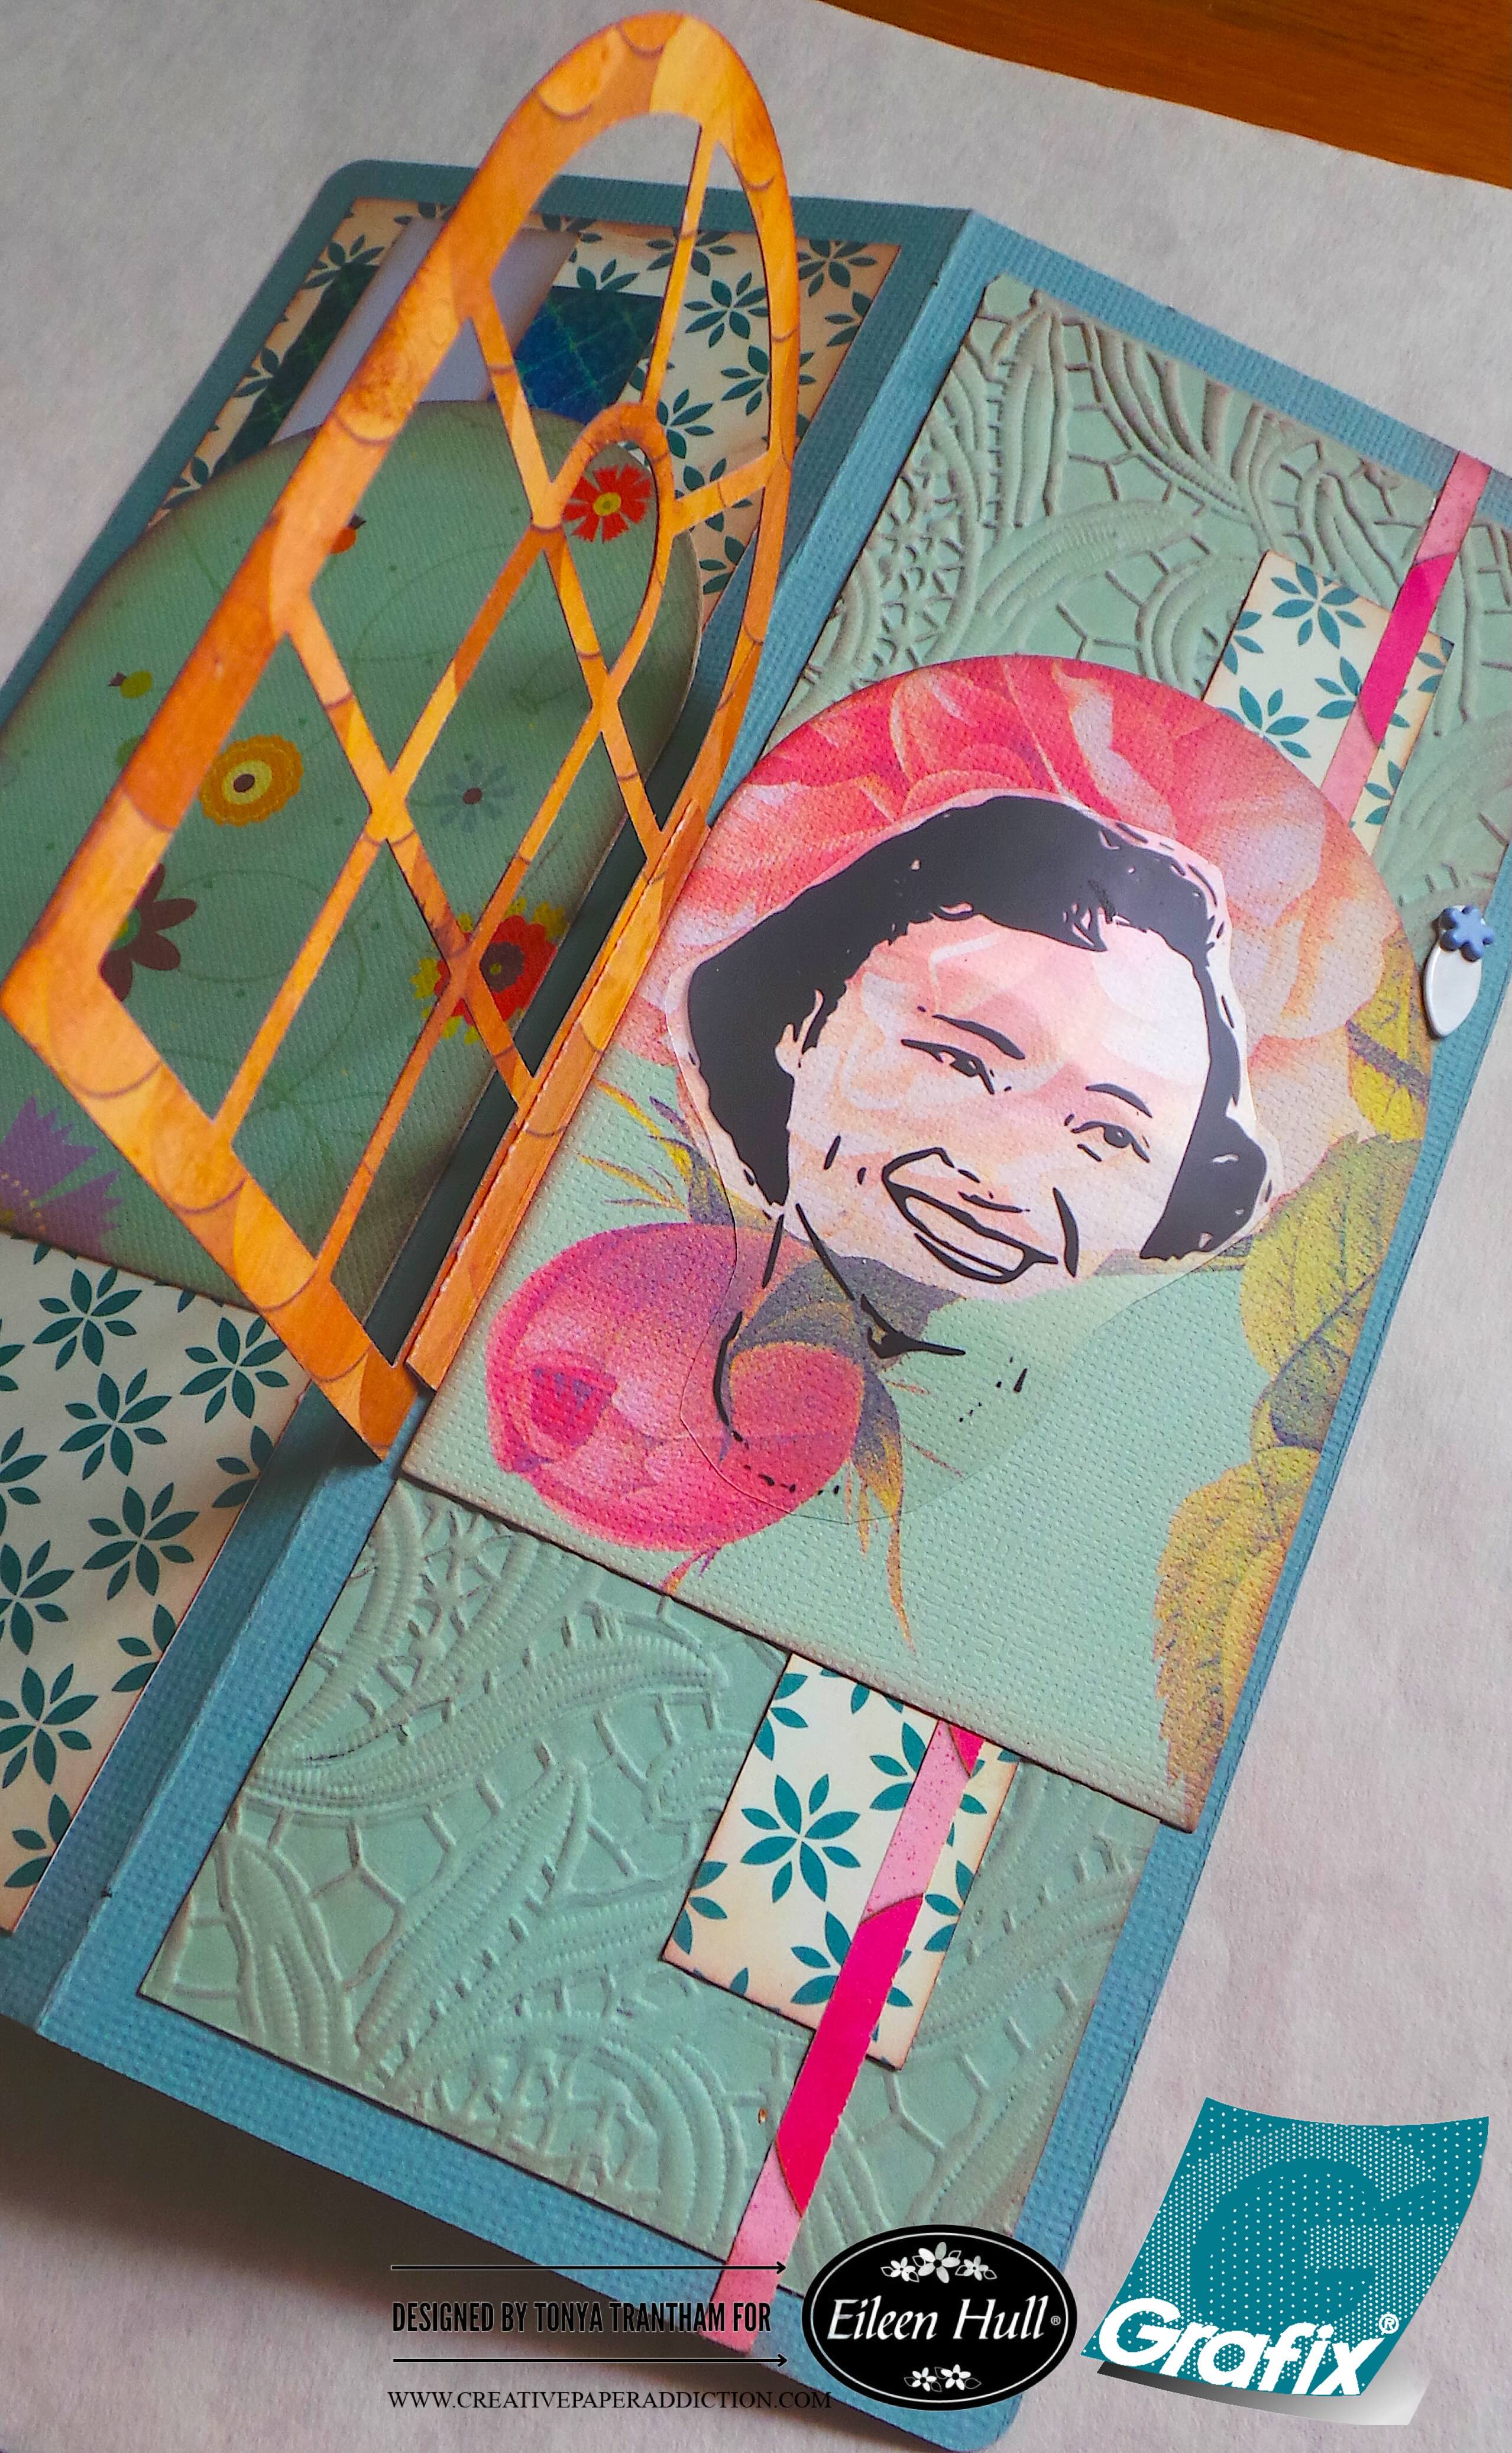
I added the extra piece of Lacy Leaves A5 Embossing Folder to the outside of the pocket along with some strips of patterned cardstock. I cut a piece of patterned cardstock slightly smaller and glued to the back side of the pocket. I also added a few strips of cardstock to the back. Next I cut out two of the largest Tunnel Arches Thinlits. I cut out the windowsill from the Windowsill Flowers and Vase Thinlits. I folded a piece of cardstock to create a hinge.
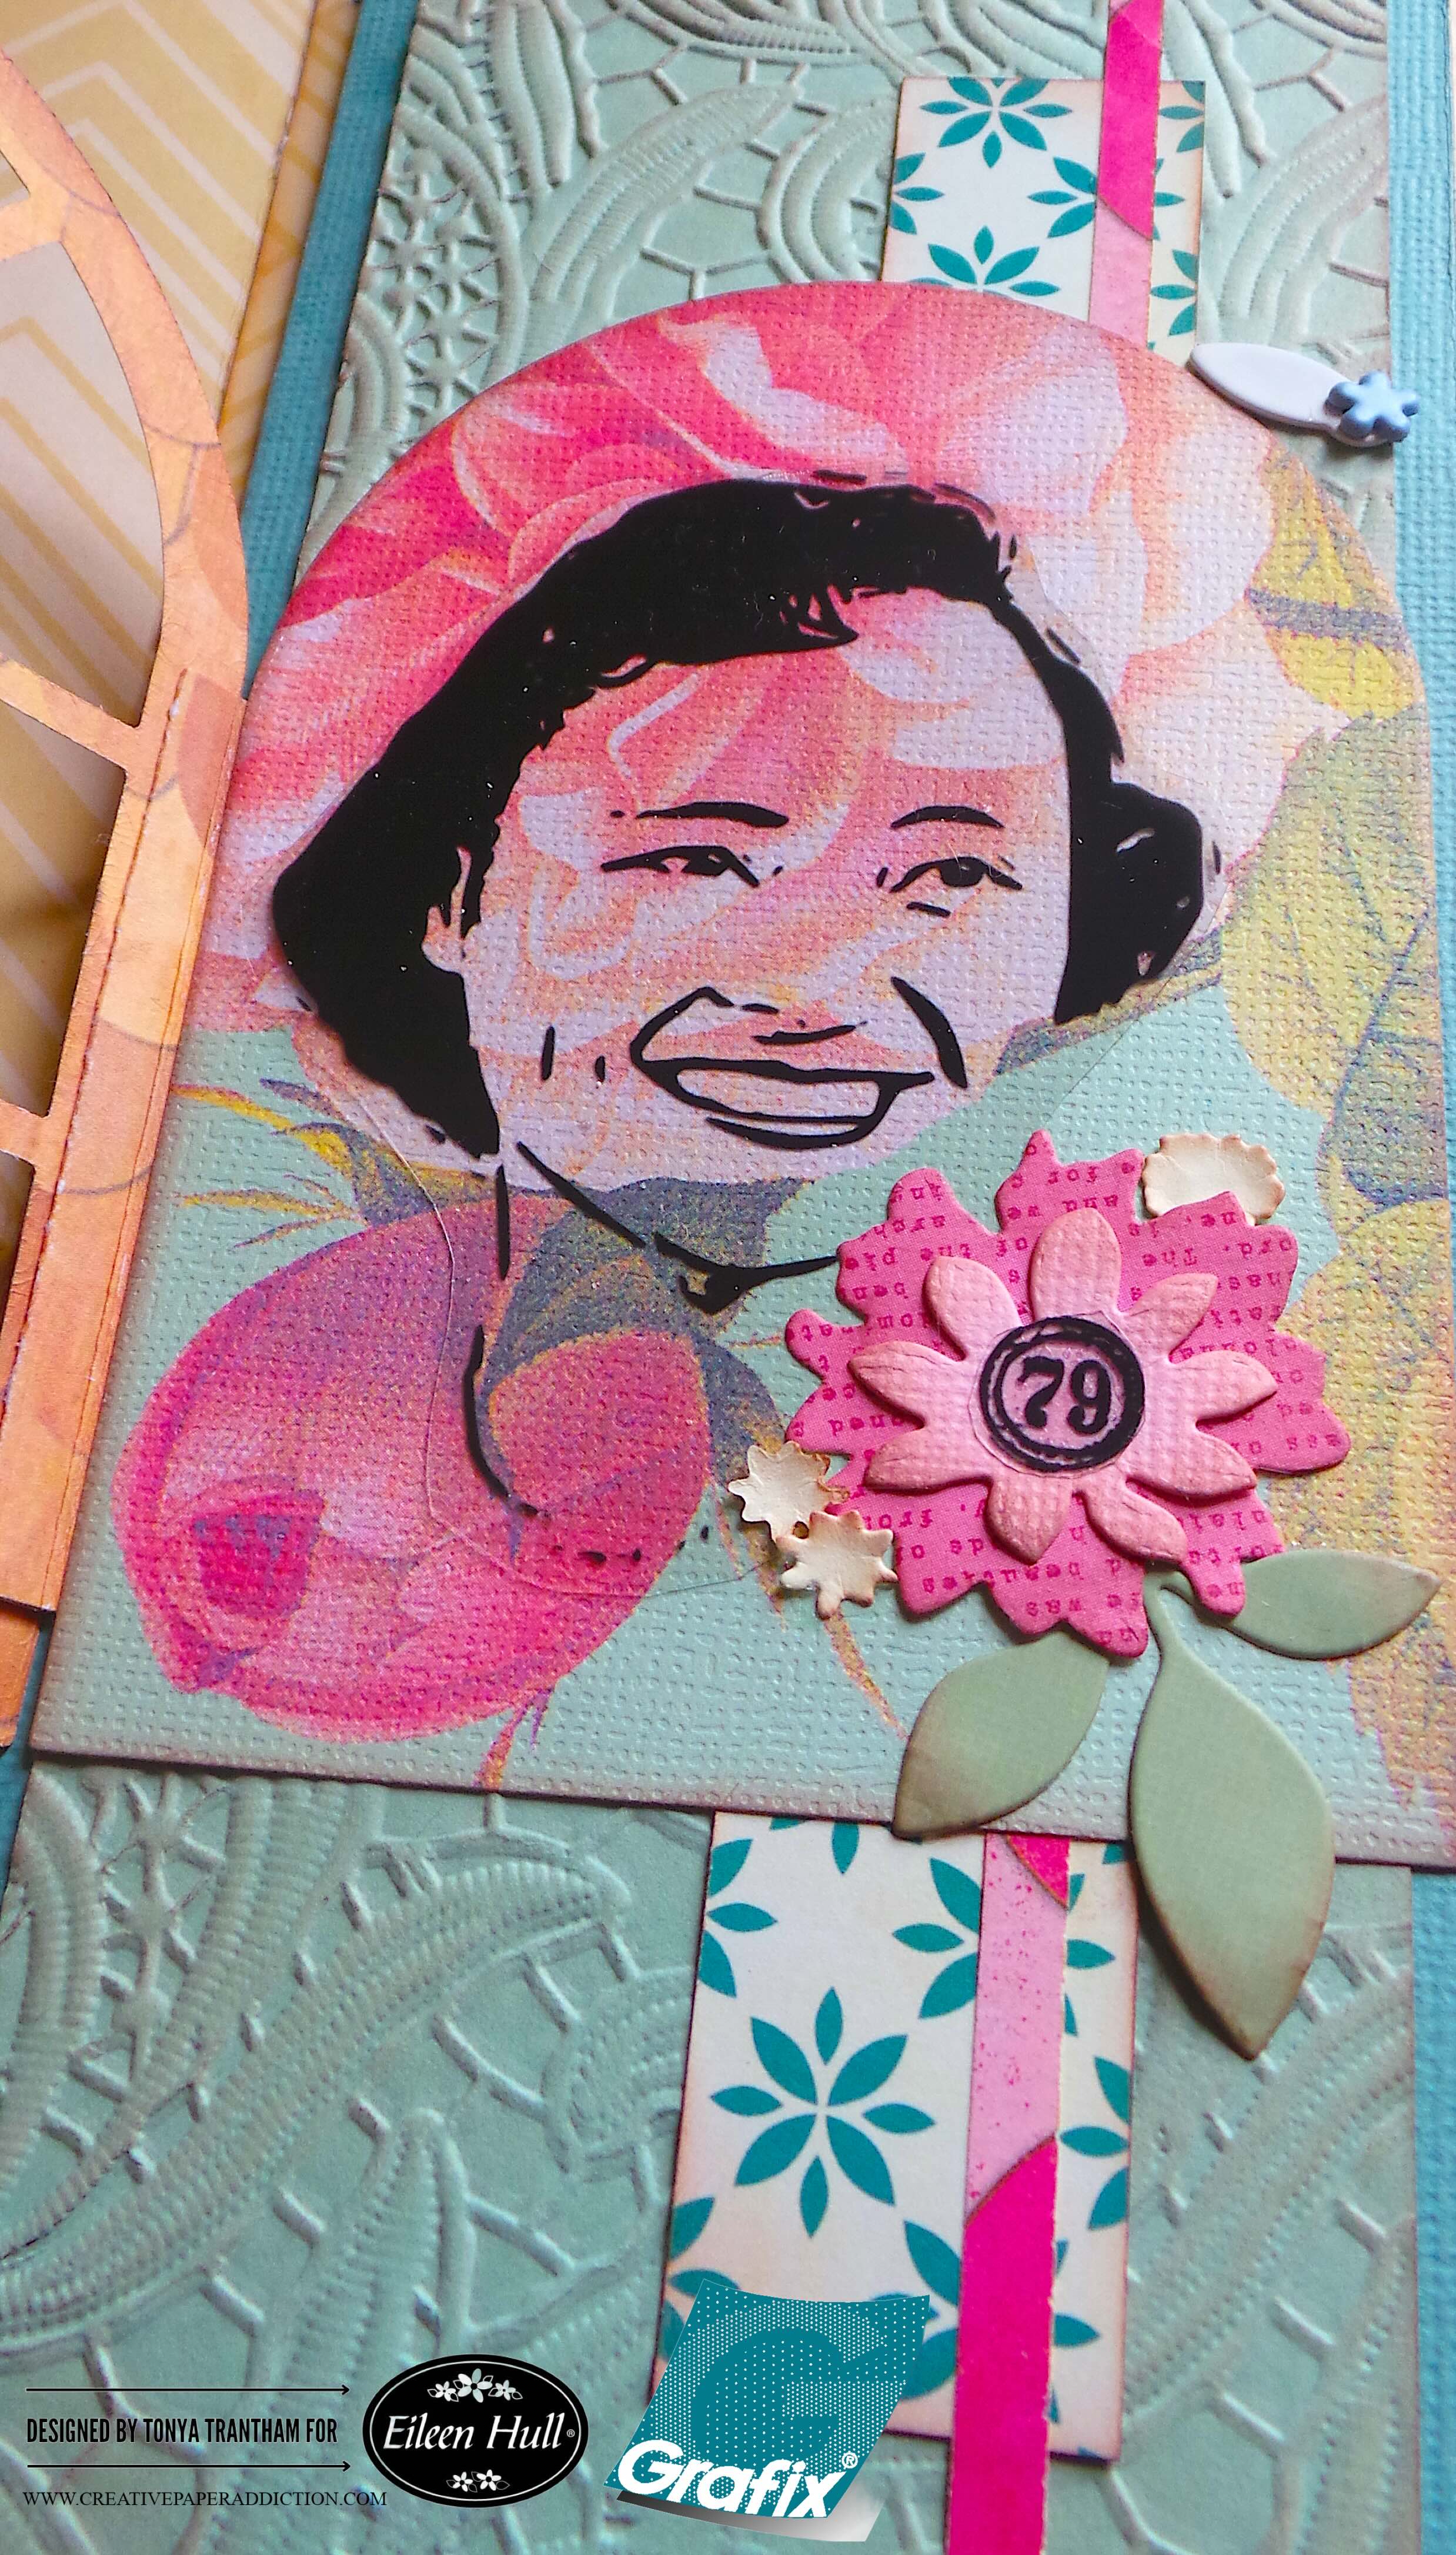
I adhered to the windowsill and the back of the tunnel arch. I glued to the pocket. I cut out the clear film of the woman and adhered to the tunnel arch. Next I punched a hole next to the tunnel arch and attached a closure with a flower brad.
I cut out the following dies: Floral Pocket and Paperclips Thinlits, two of the largest flowers and a leaf sprig. Windowsill Flowers and Vase Thinlits, two large flowers and five of the smaller flowers. Home Sweet Home Thinlits, three leaf sprigs. I used one of the largest flower, one large flower, three of the small flowers and a leaf sprig and placed next to the woman and bottom corner. I cut the number “79” from the clear film and added to the center of the flower.
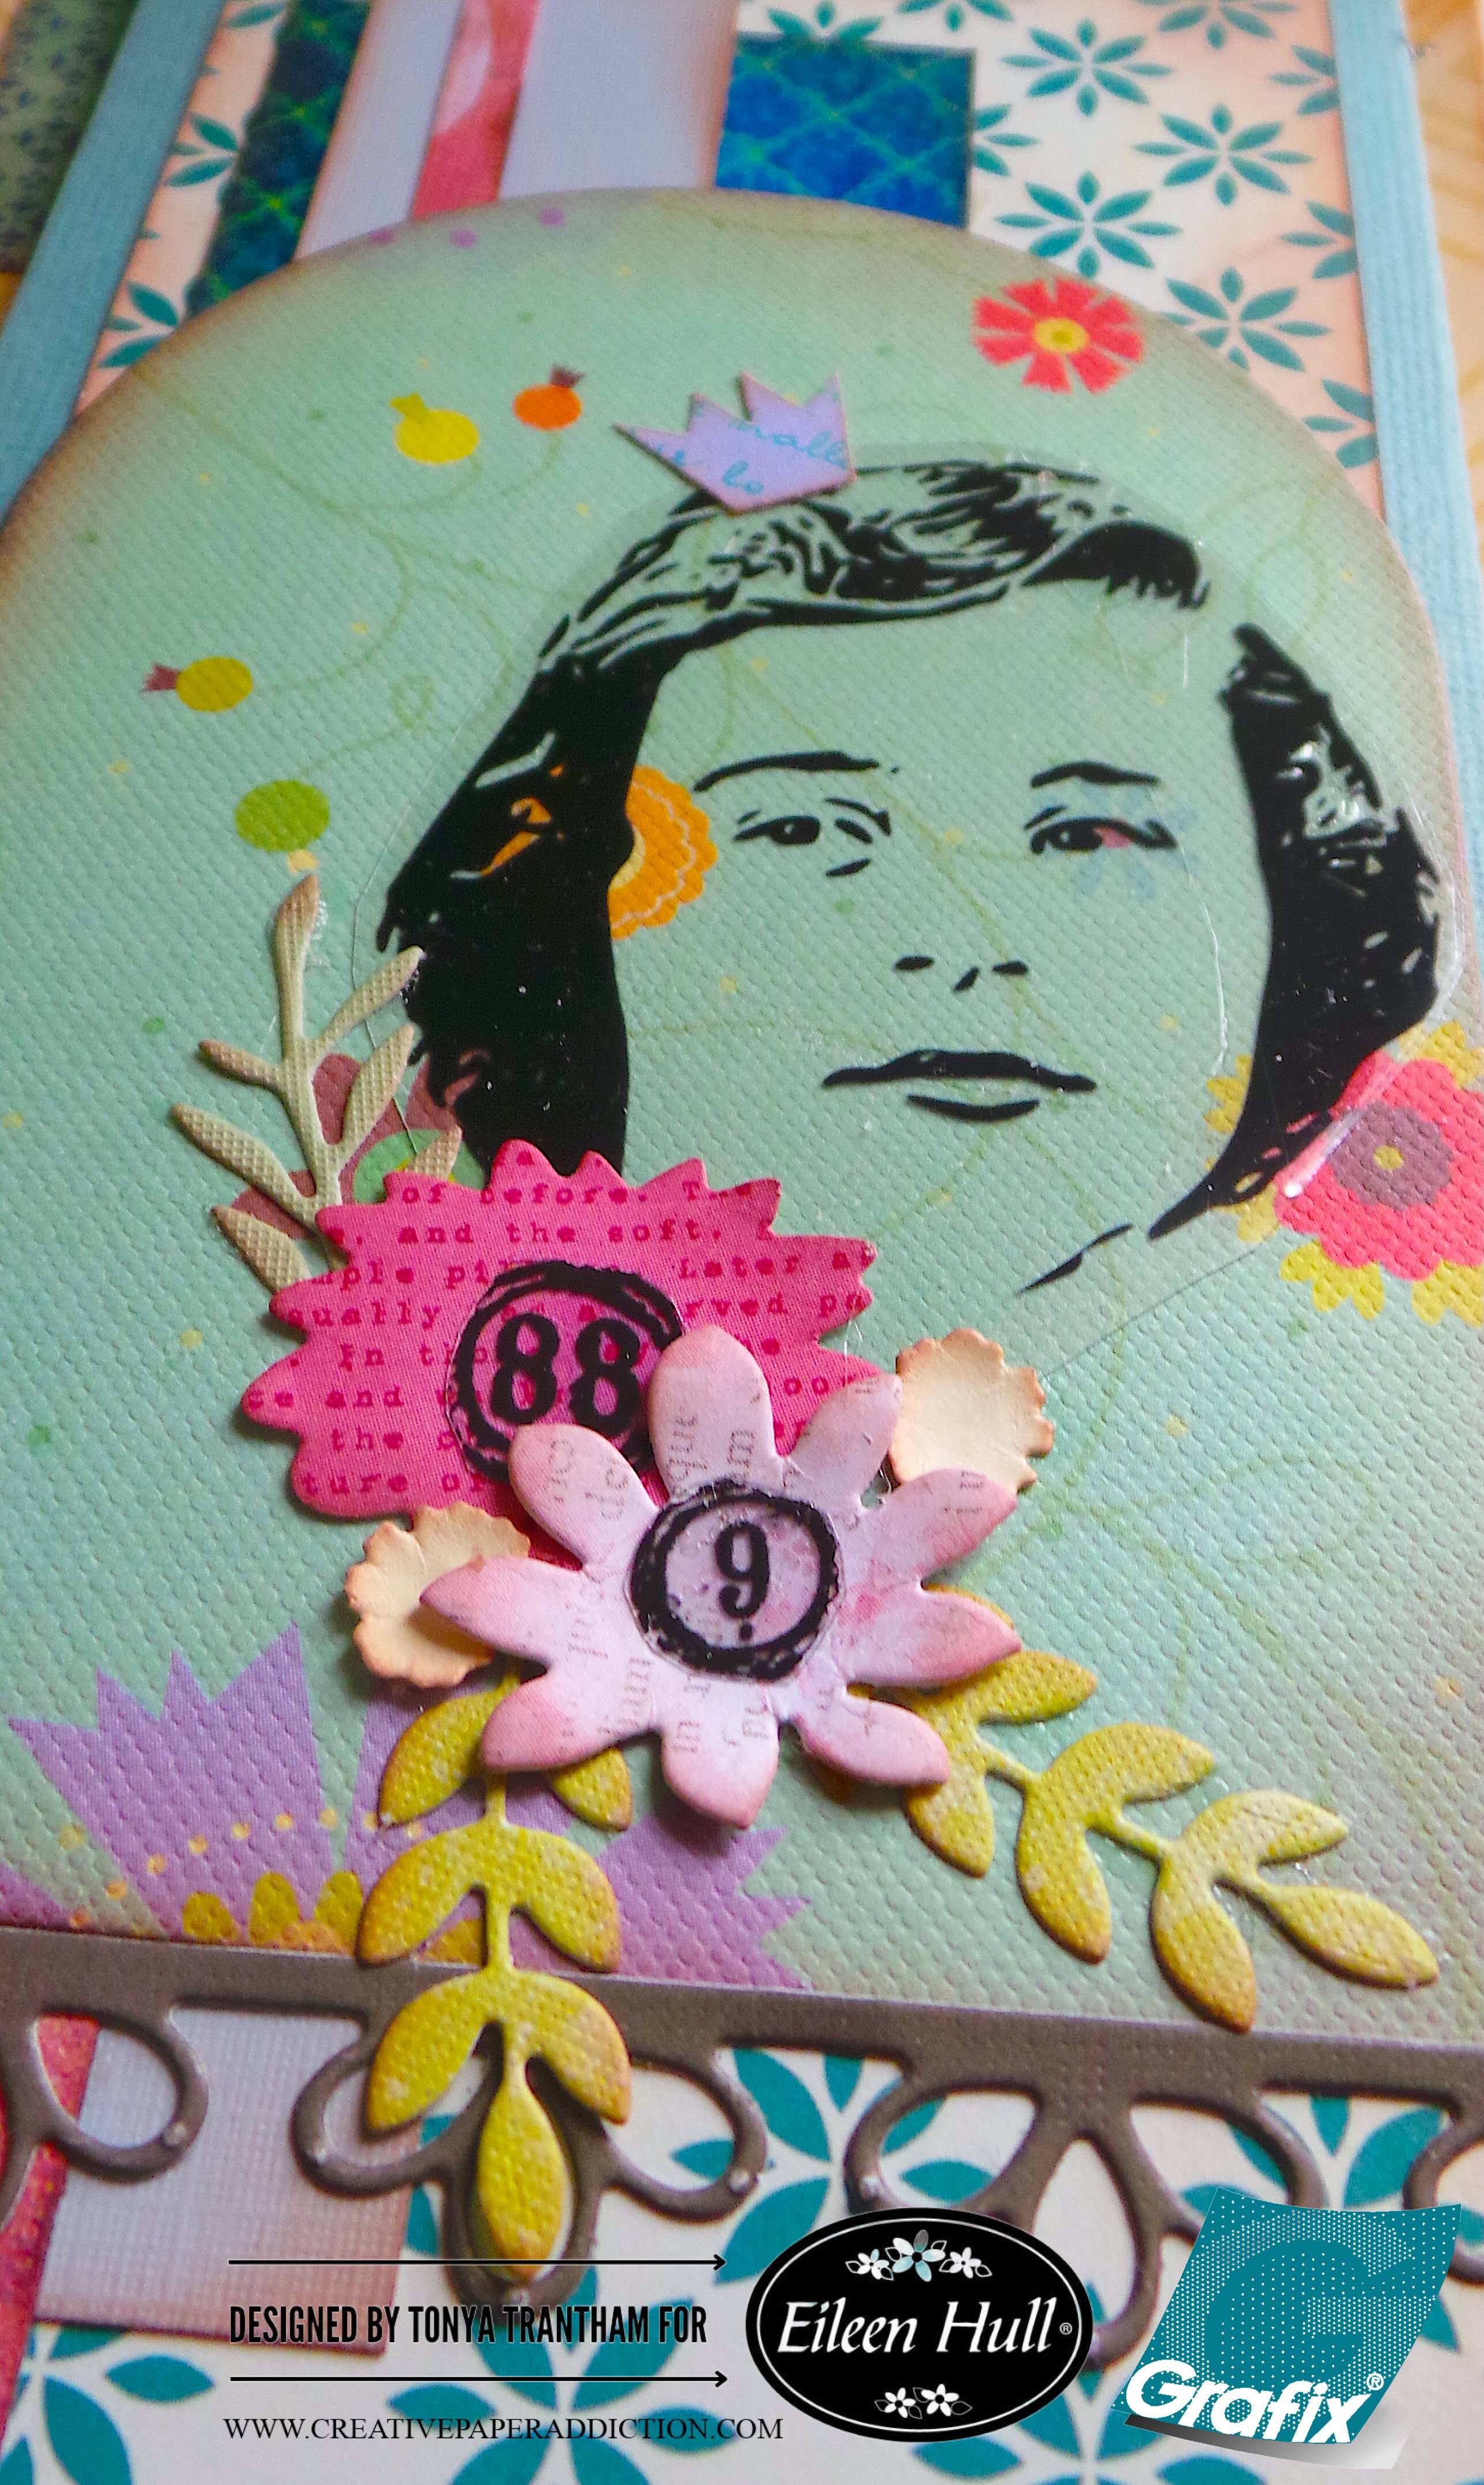
I adhered the largest tunnel arch to the back of the pocket. I added the decorative trim from the Windowsill Flowers and Vase Thinlits to the bottom of the tunnel arch. I cut out the other woman from the clear film and glued to the tunnel arch. From my stash of embellishments I added a crown to the woman’s head. I adhered the largest, large, two small flowers along with three leaf sprigs next to the woman’s face. I cut a number “9” and a number “88” from the clear film and glued to the center of the flowers.
I absolutely love these images from Grafix! They are fun to work with and really dress up any type of project. I will be share a part two blog post later this week/early next week using the Grafix film along with Eileen Hull’s dies. So be sure to keep an eye out for that post.
If you haven’t been by Eileen’s blog to see what the team has been up to you can find the latest post HERE. If you have any questions or comments about this project please leave them below.
(Products listed above are Affiliated Links for your convenience)
DISCLAIMERS
This blog is compensated to provide opinion on products, services, websites, and various other topics. Even though the owner(s) of this blog receives compensation for our posts or advertisements. I always give my honest opinions, findings, beliefs, or experiences on those topics or products. The views and opinions expressed on this blog are purely my own. Any product claim, statistic, or quote should be checked with each manufacturer. Verify other representations about a product or service with the provider or party in question.This blog contains affiliate links. Clicking these links helps to support Tonya Trantham Designs – Creative Paper Addiction. It’s at no additional cost to you.Today’s features are Sizzix, Eileen and Grafix Products.
Thanks for stopping by, I hope your Tuesday is wonderful and enjoy creating!
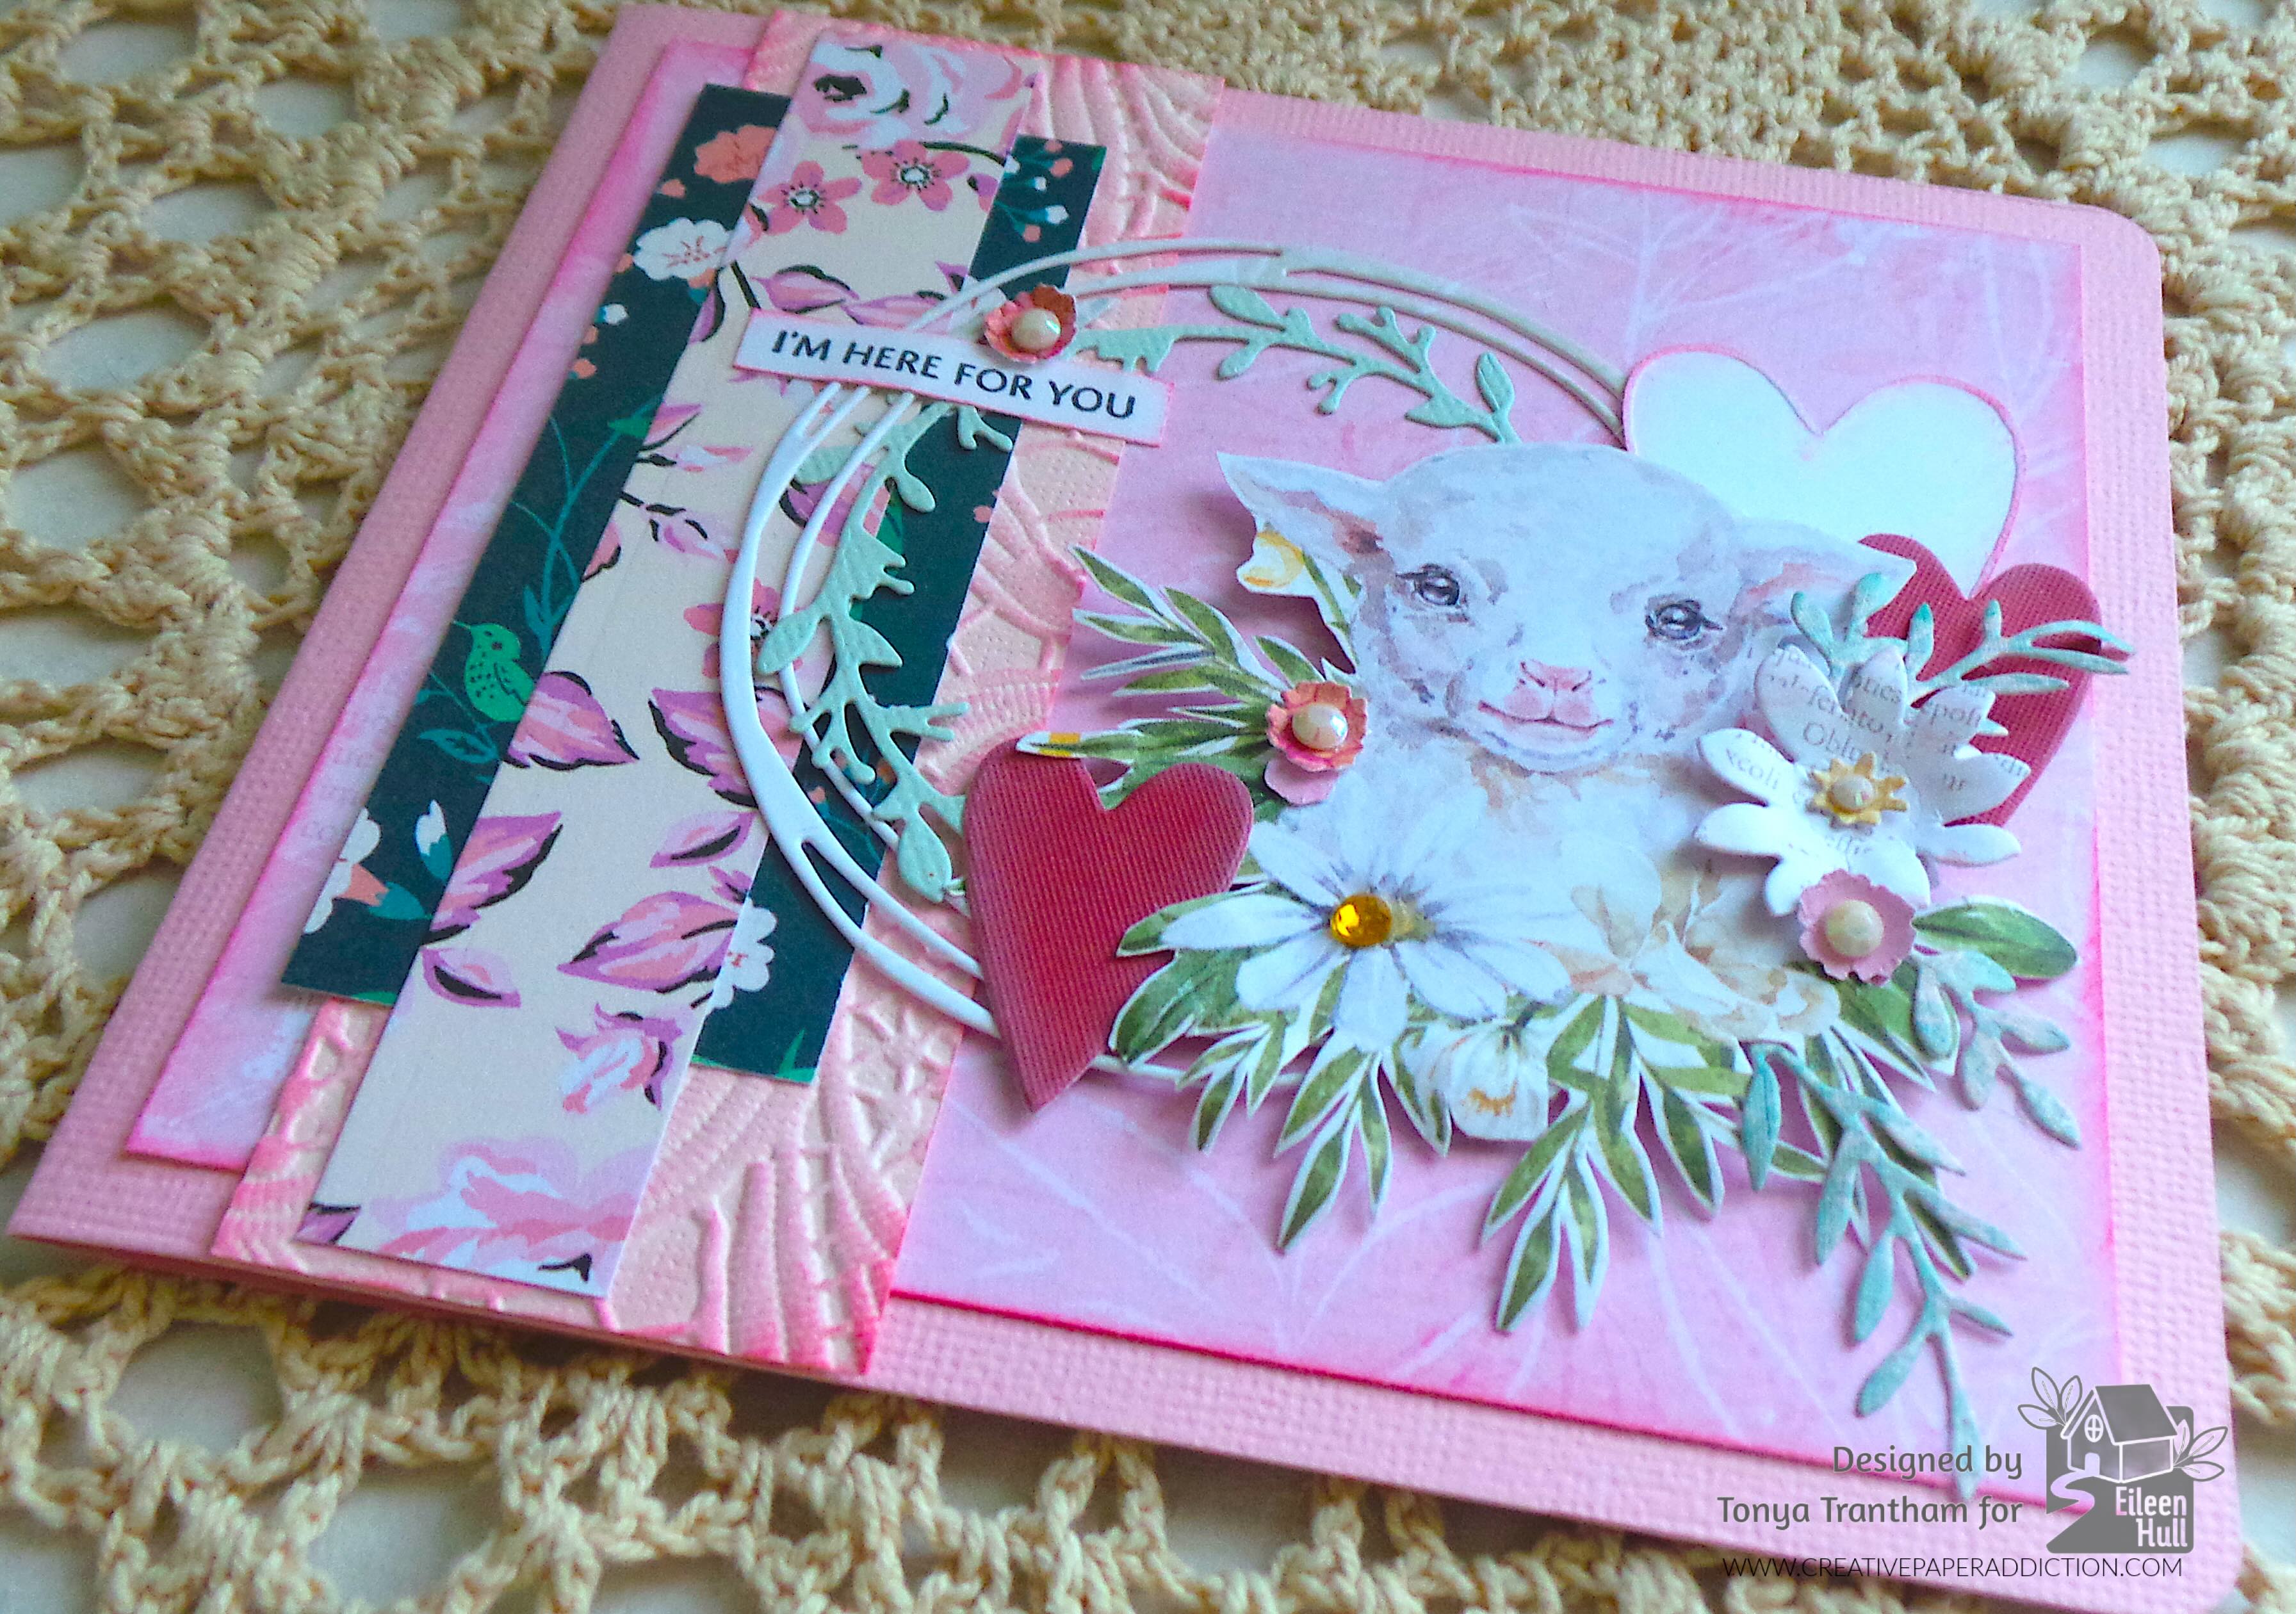
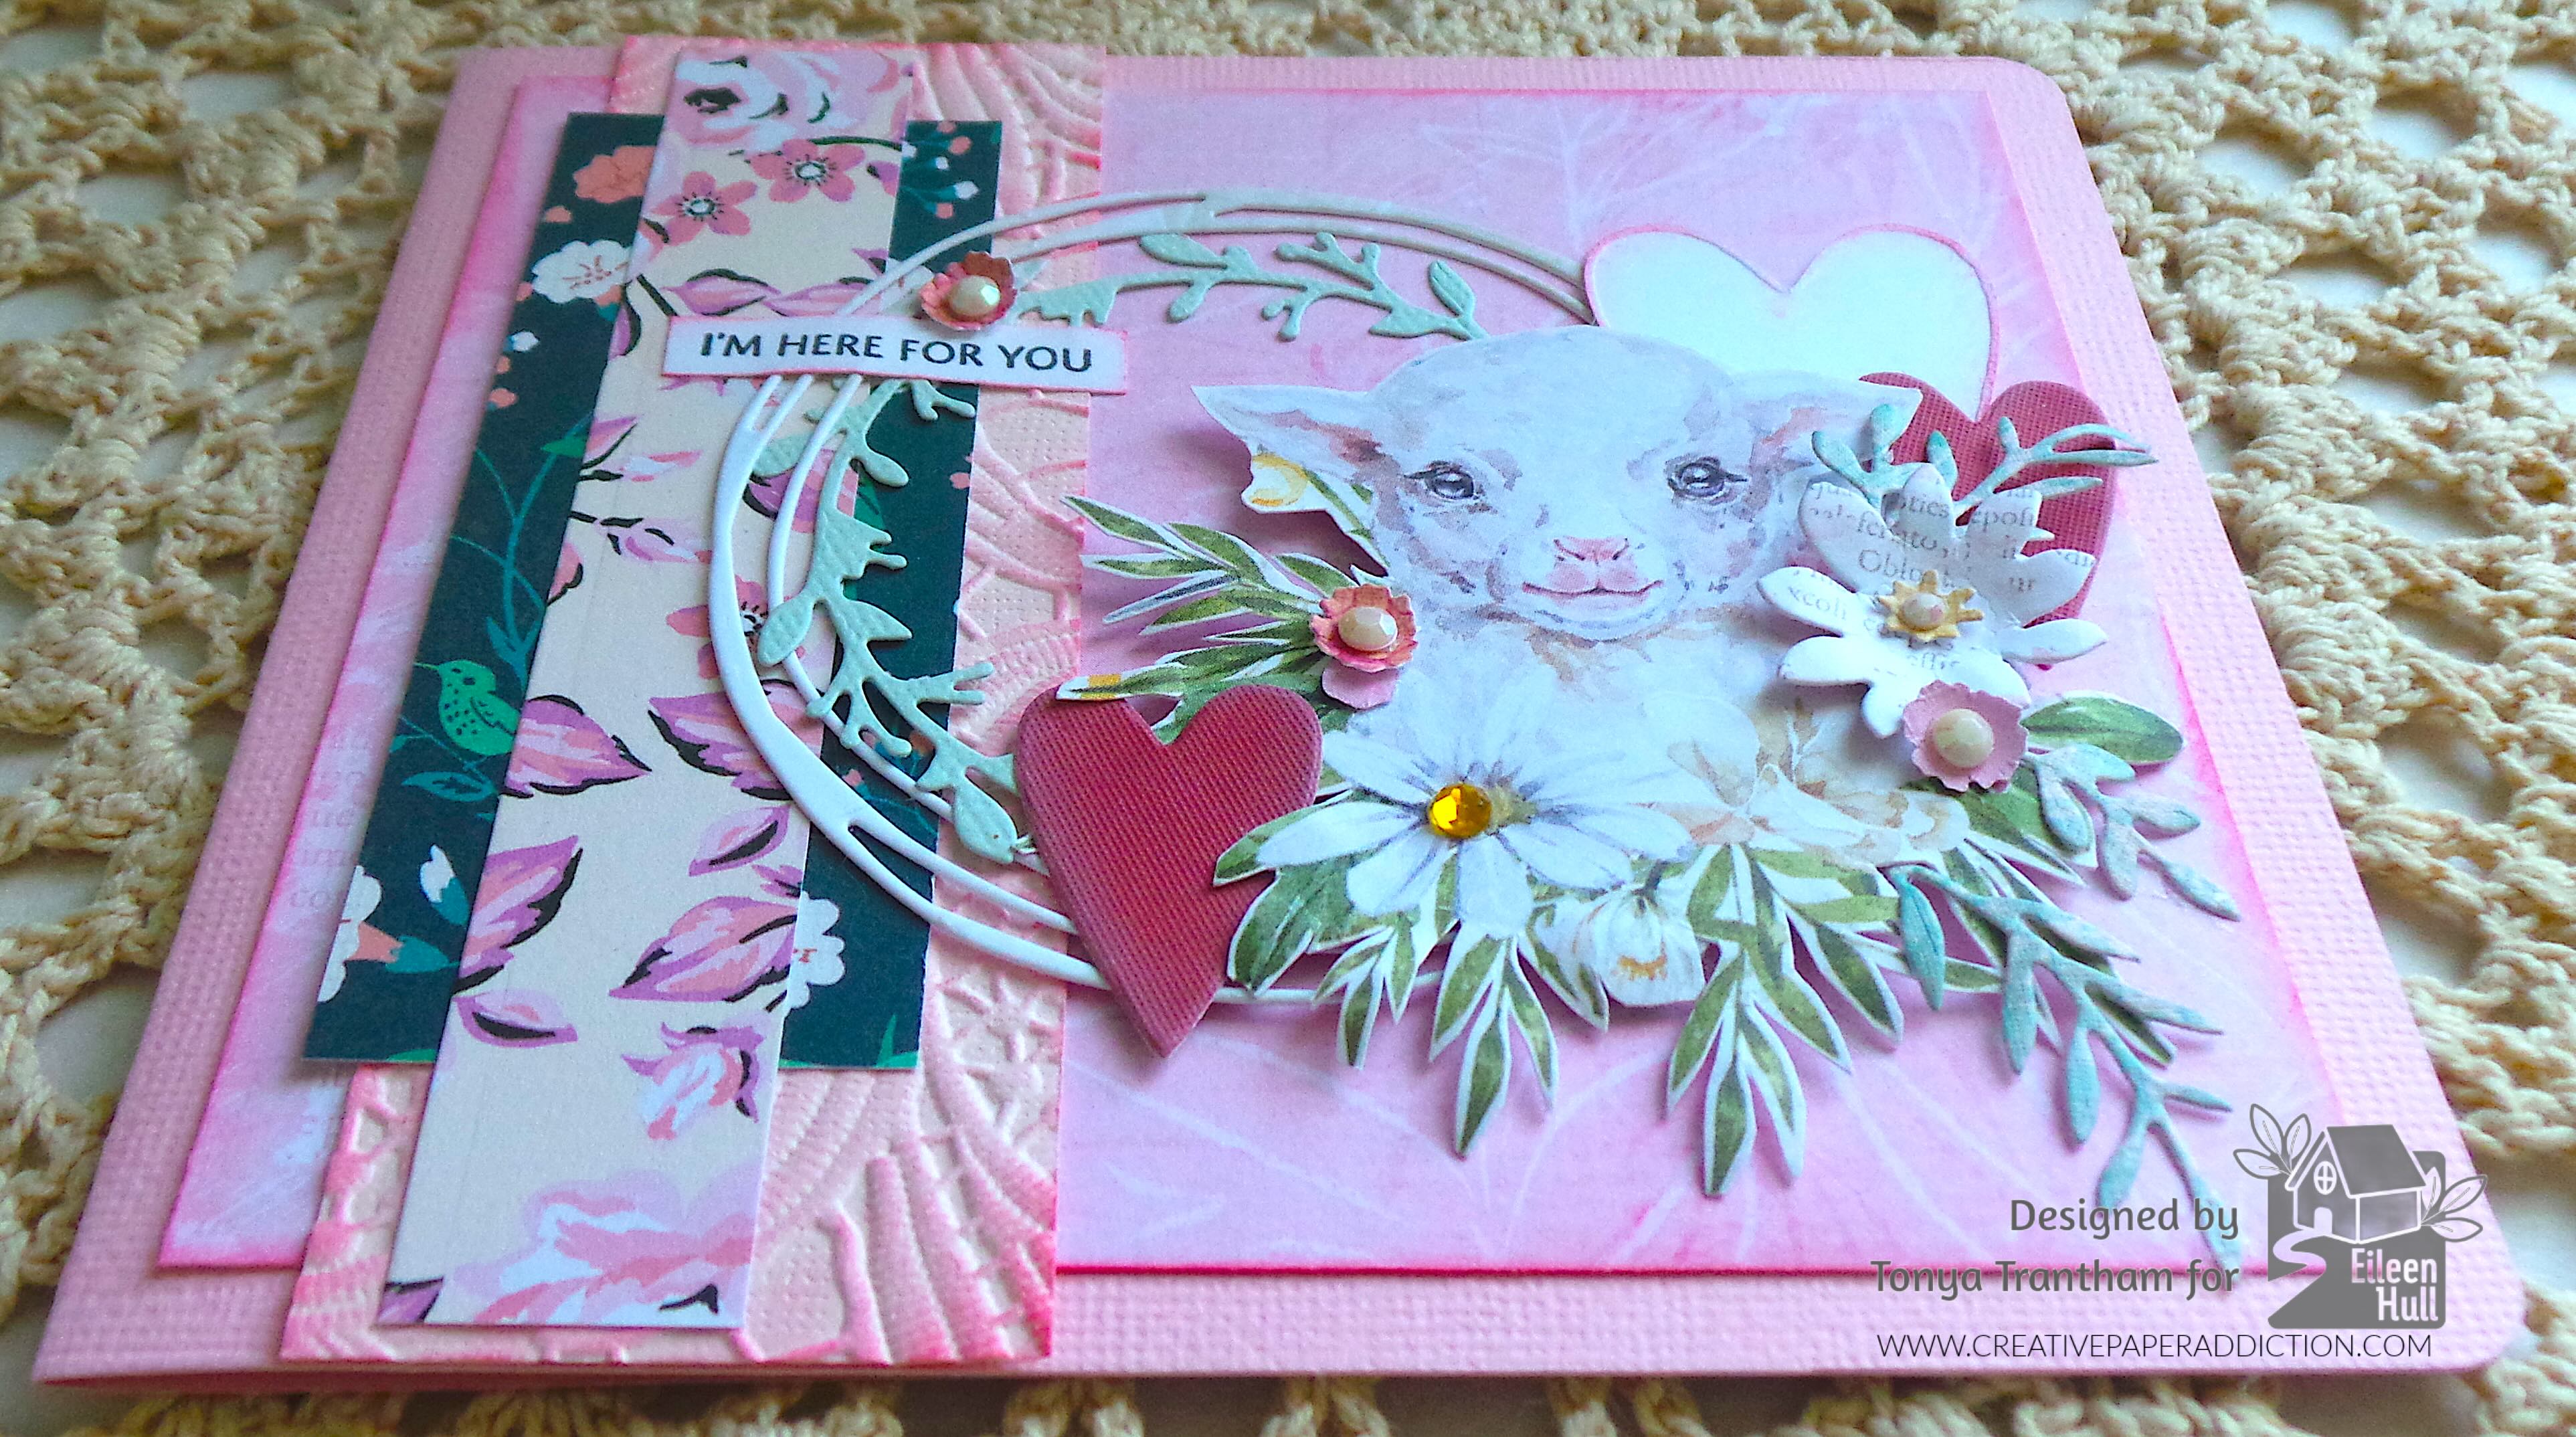
Hi everyone! I hope everyone had a great holiday. I took time to enjoy family and I wound up with a nasty cold that took awhile to get over. But I’m back with my first Eileen Hull project of the month and the theme is Card Bonanza. I used an assortment of dies, stamp set and an embossing folder to come up with this uplifting card. Let’s get started!
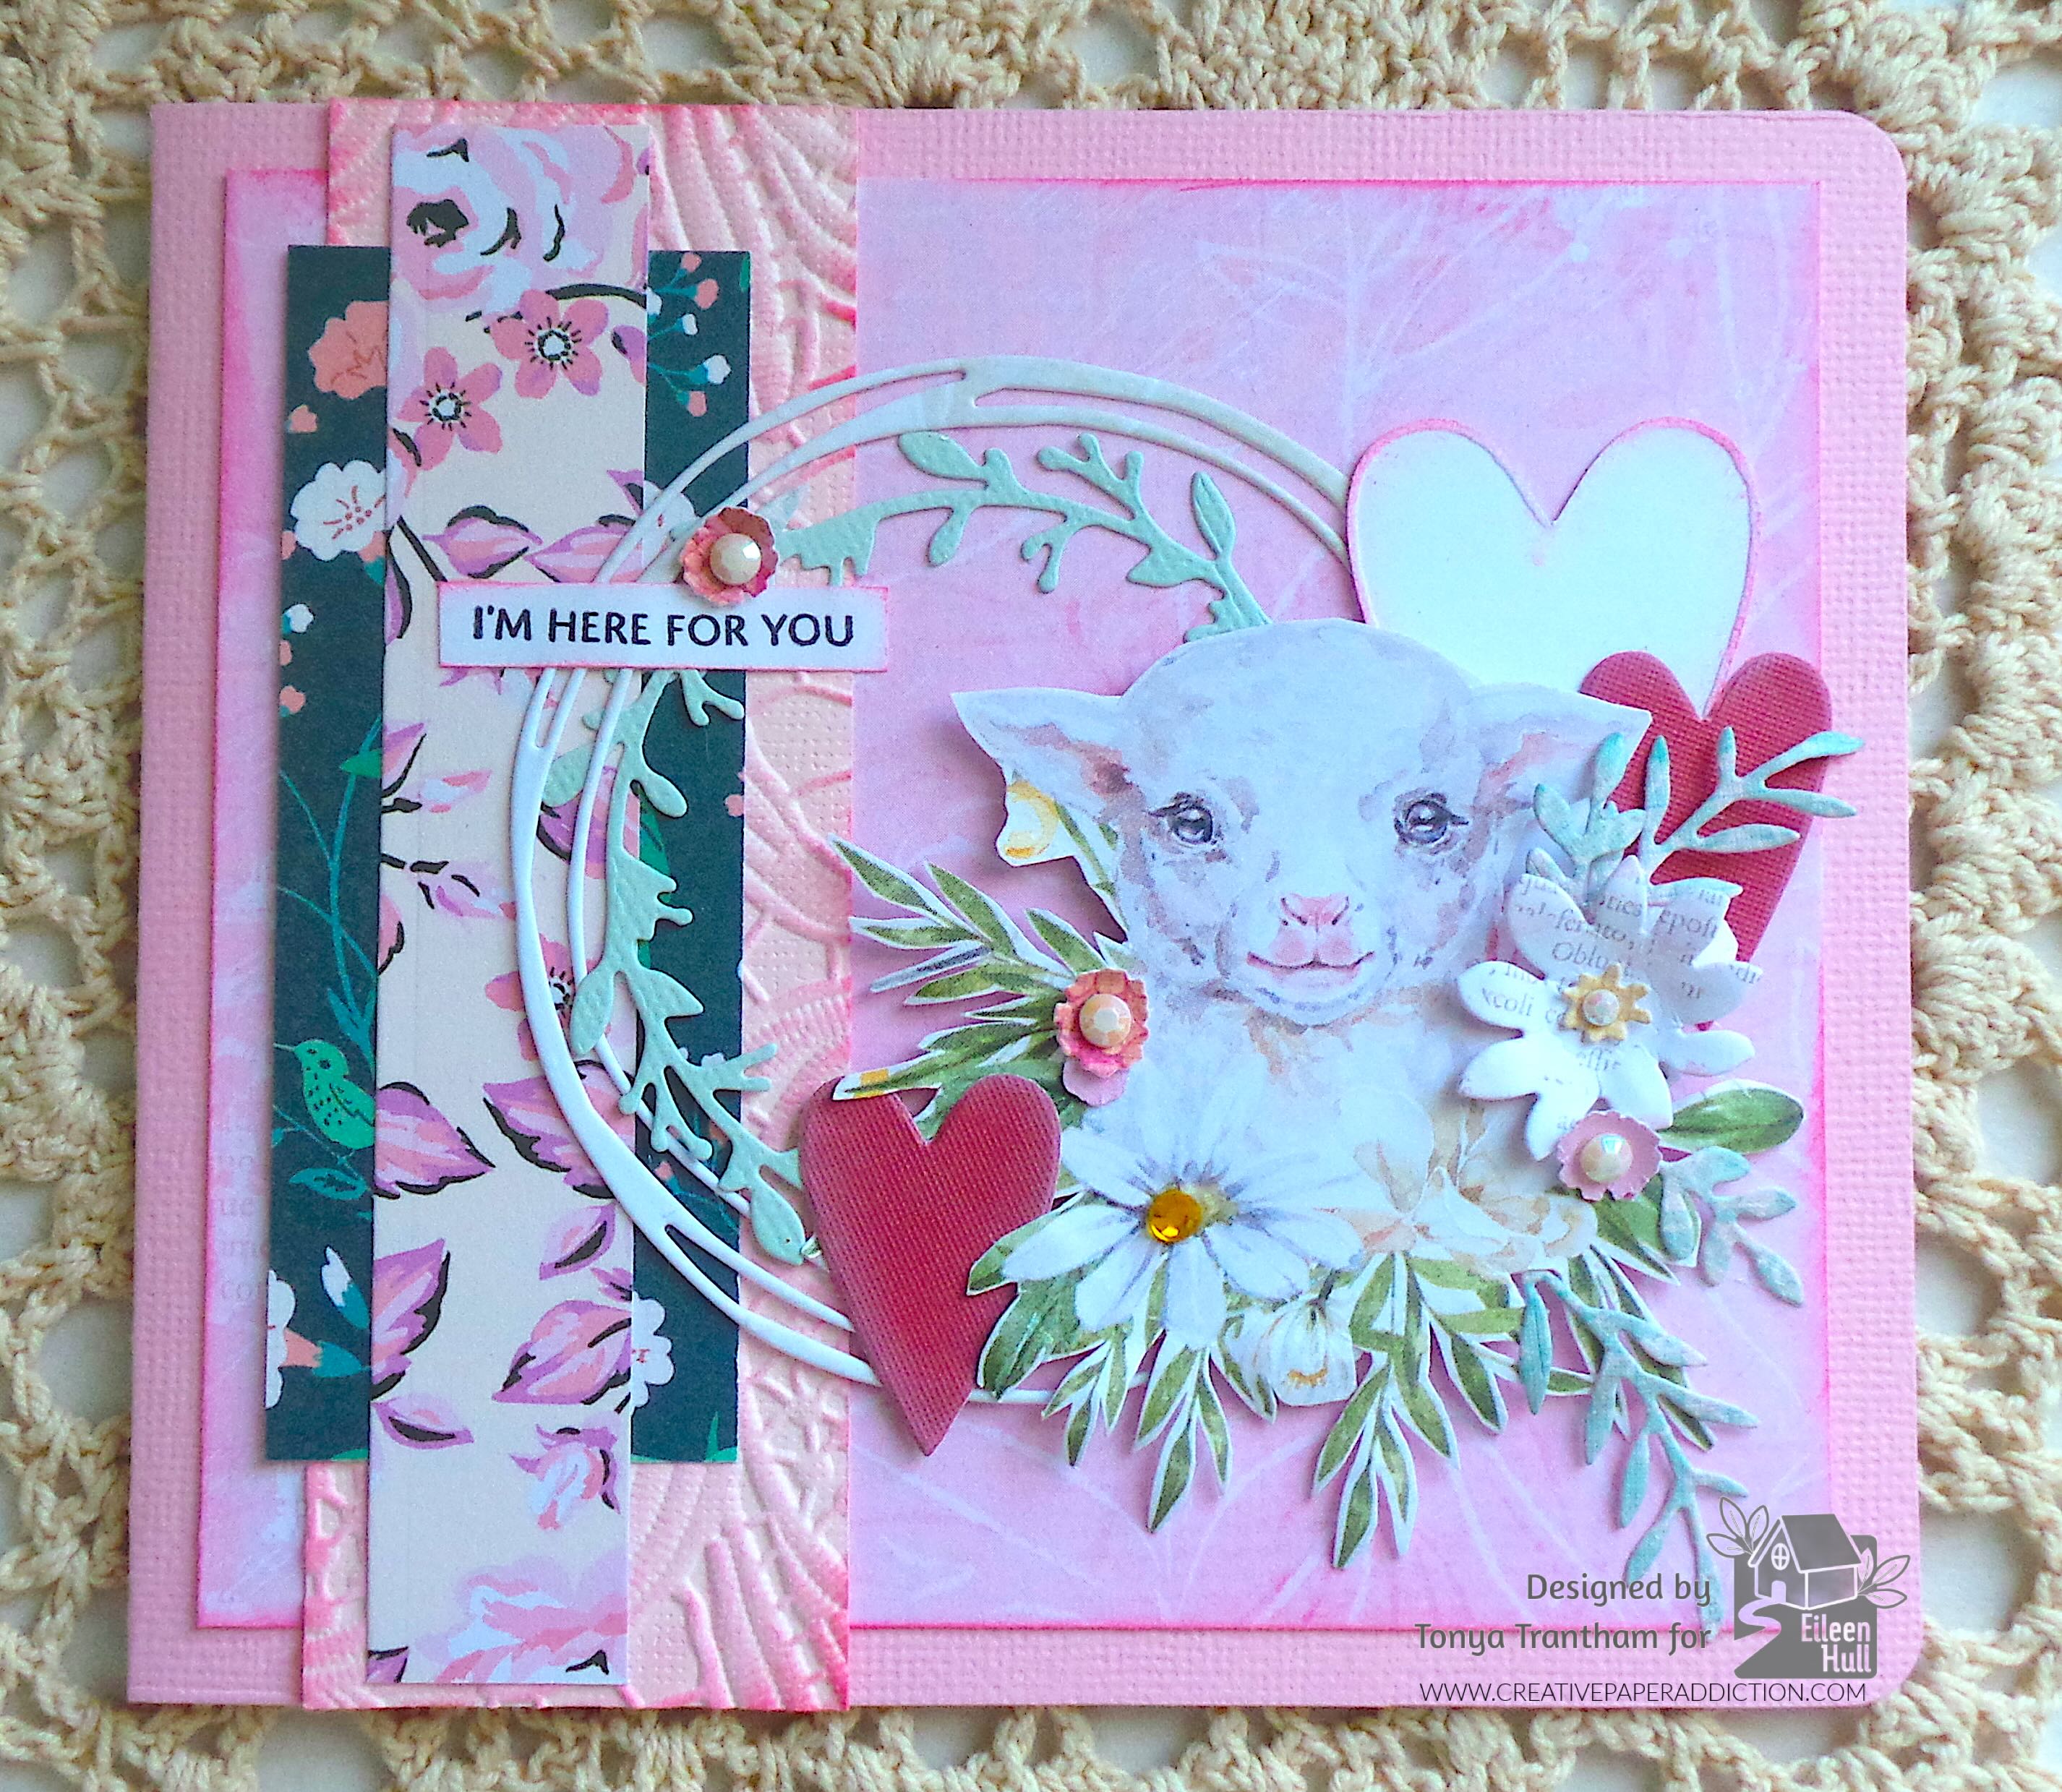
I used a piece of cardstock and the Mini Album Diecut to create the base for my card. All I had to do was fold the diecut in half. Next I cut a piece of patterned cardstock slightly smaller than the base. I inked the edges with a hot pink chalk ink before gluing to the card.
I used an assortment of patterned cardstocks along with a plain piece of cardstock which I embossed with the Lacy Leaves A5 Embossing Folder. I lightly inked the embossed cardstock with a mix of hot pink and regular pink chalk inks before adhering all strips of cardstock to the base of the card.
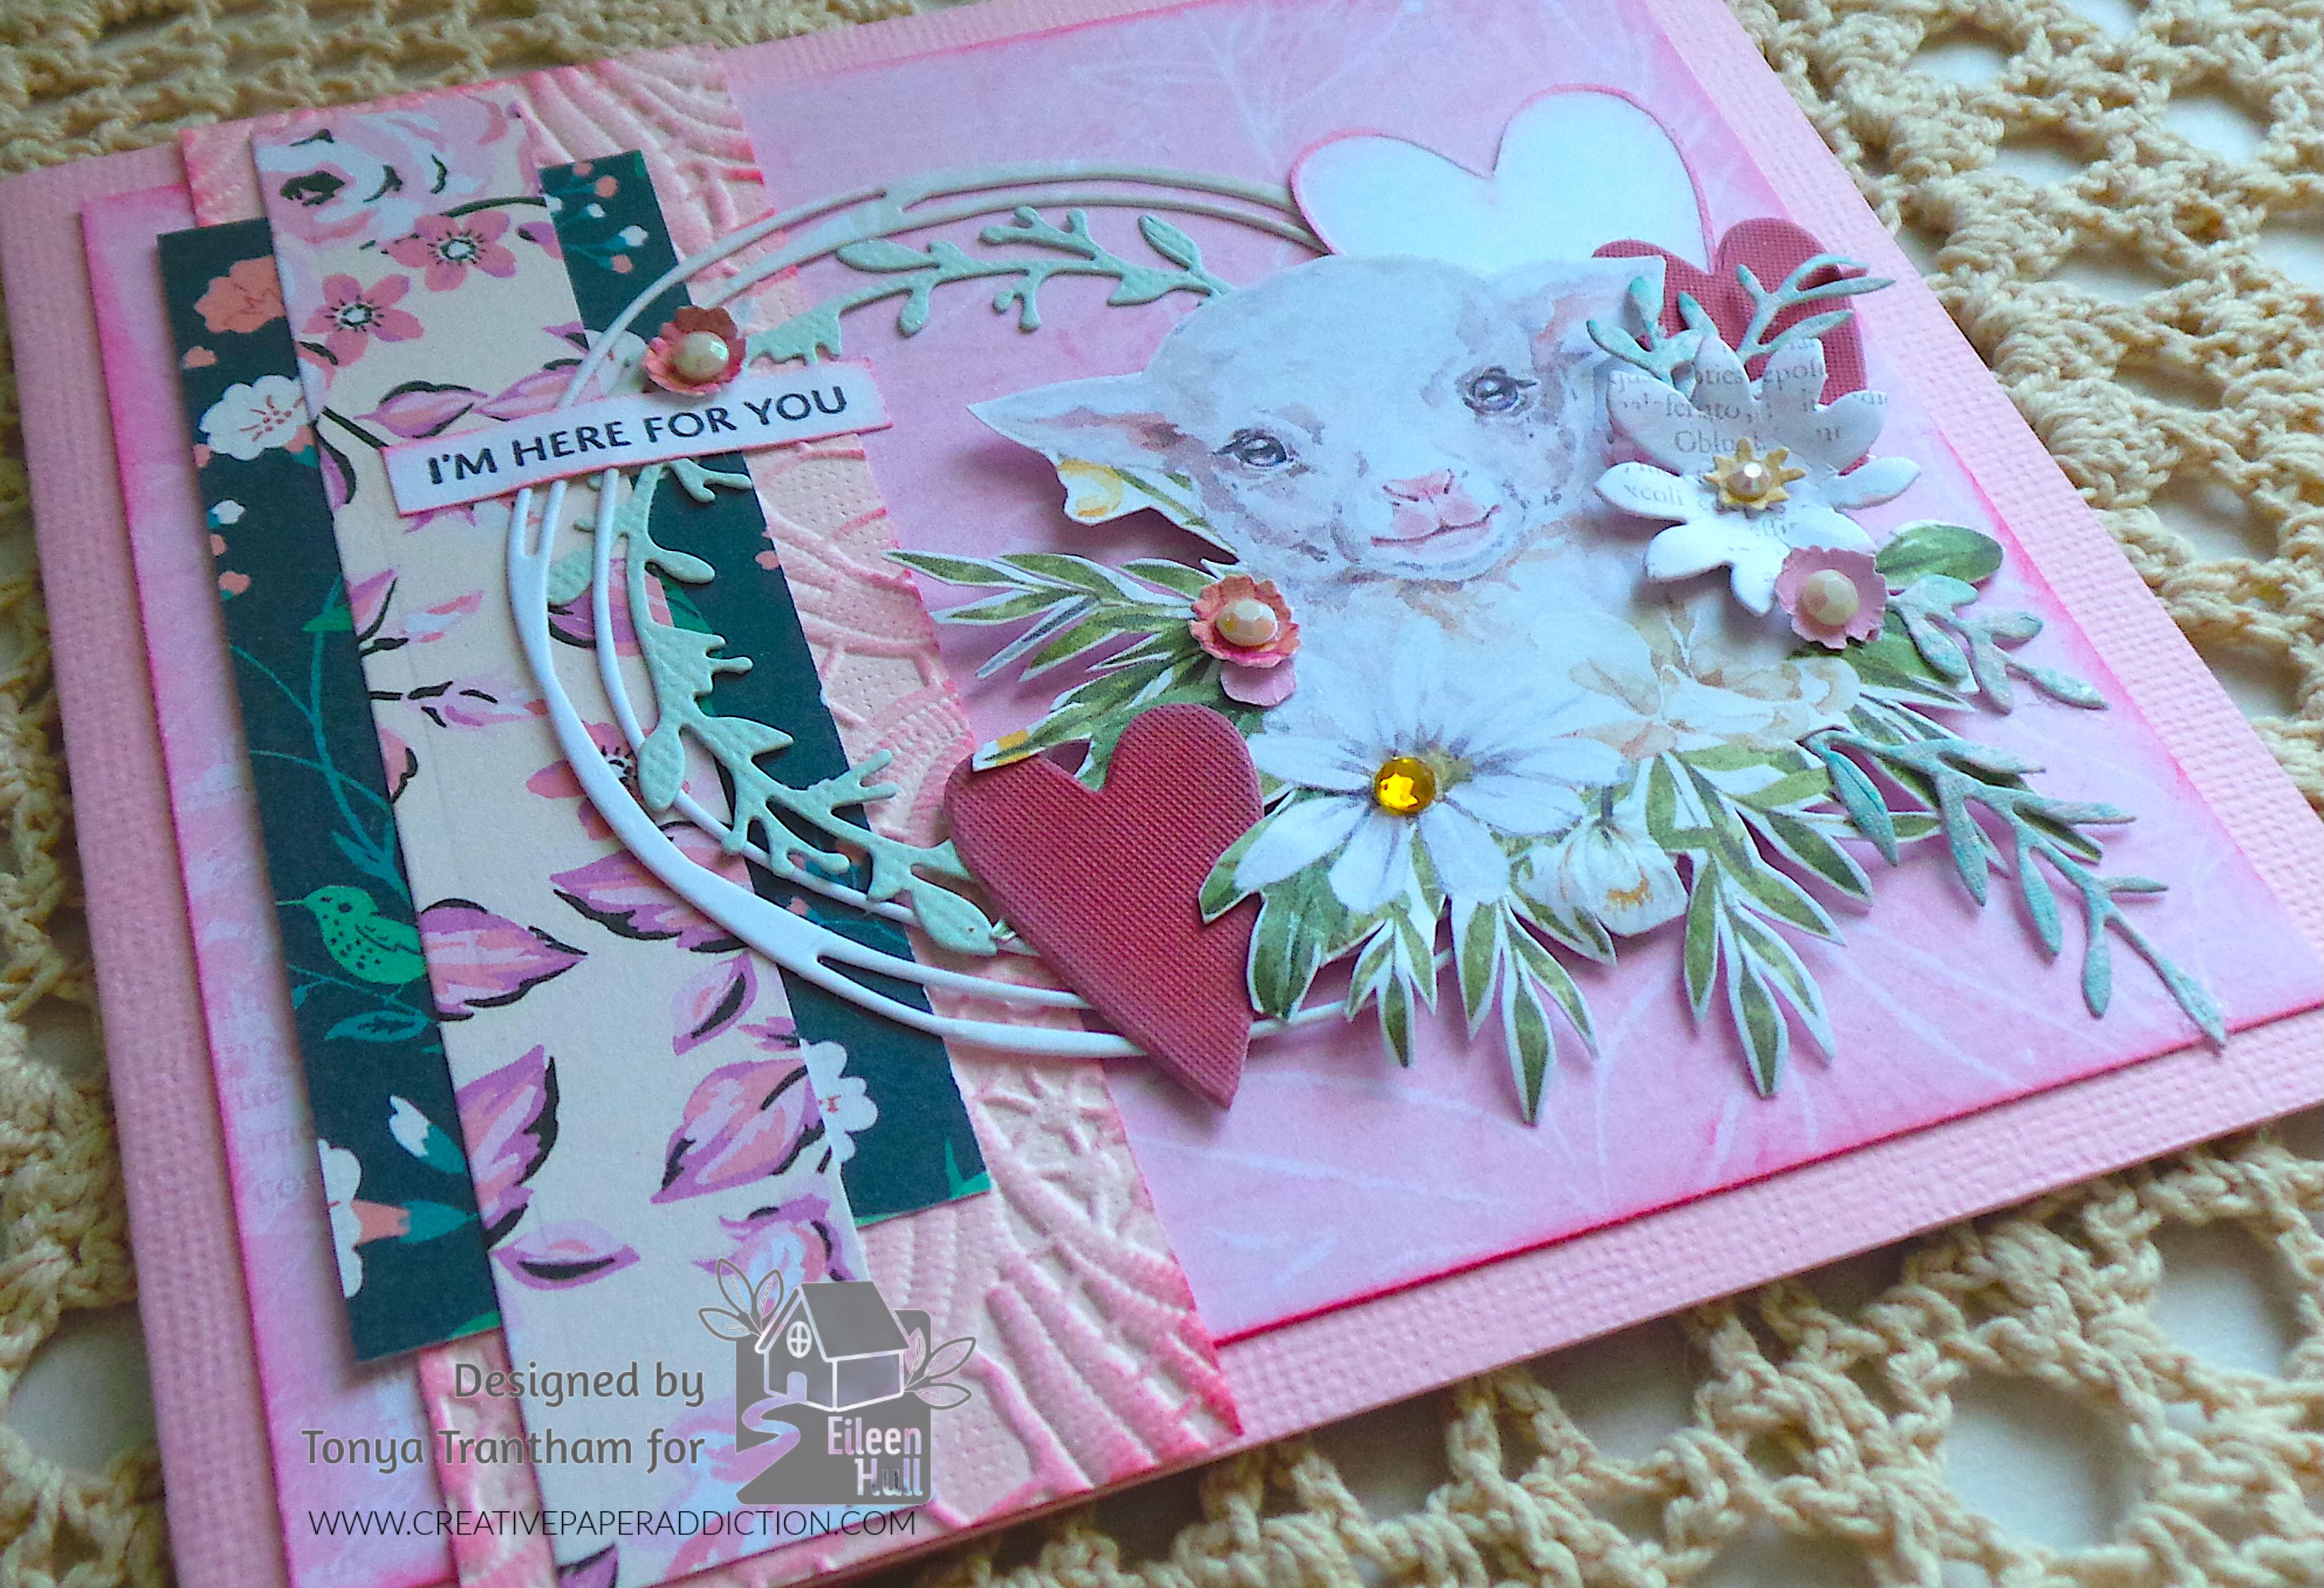
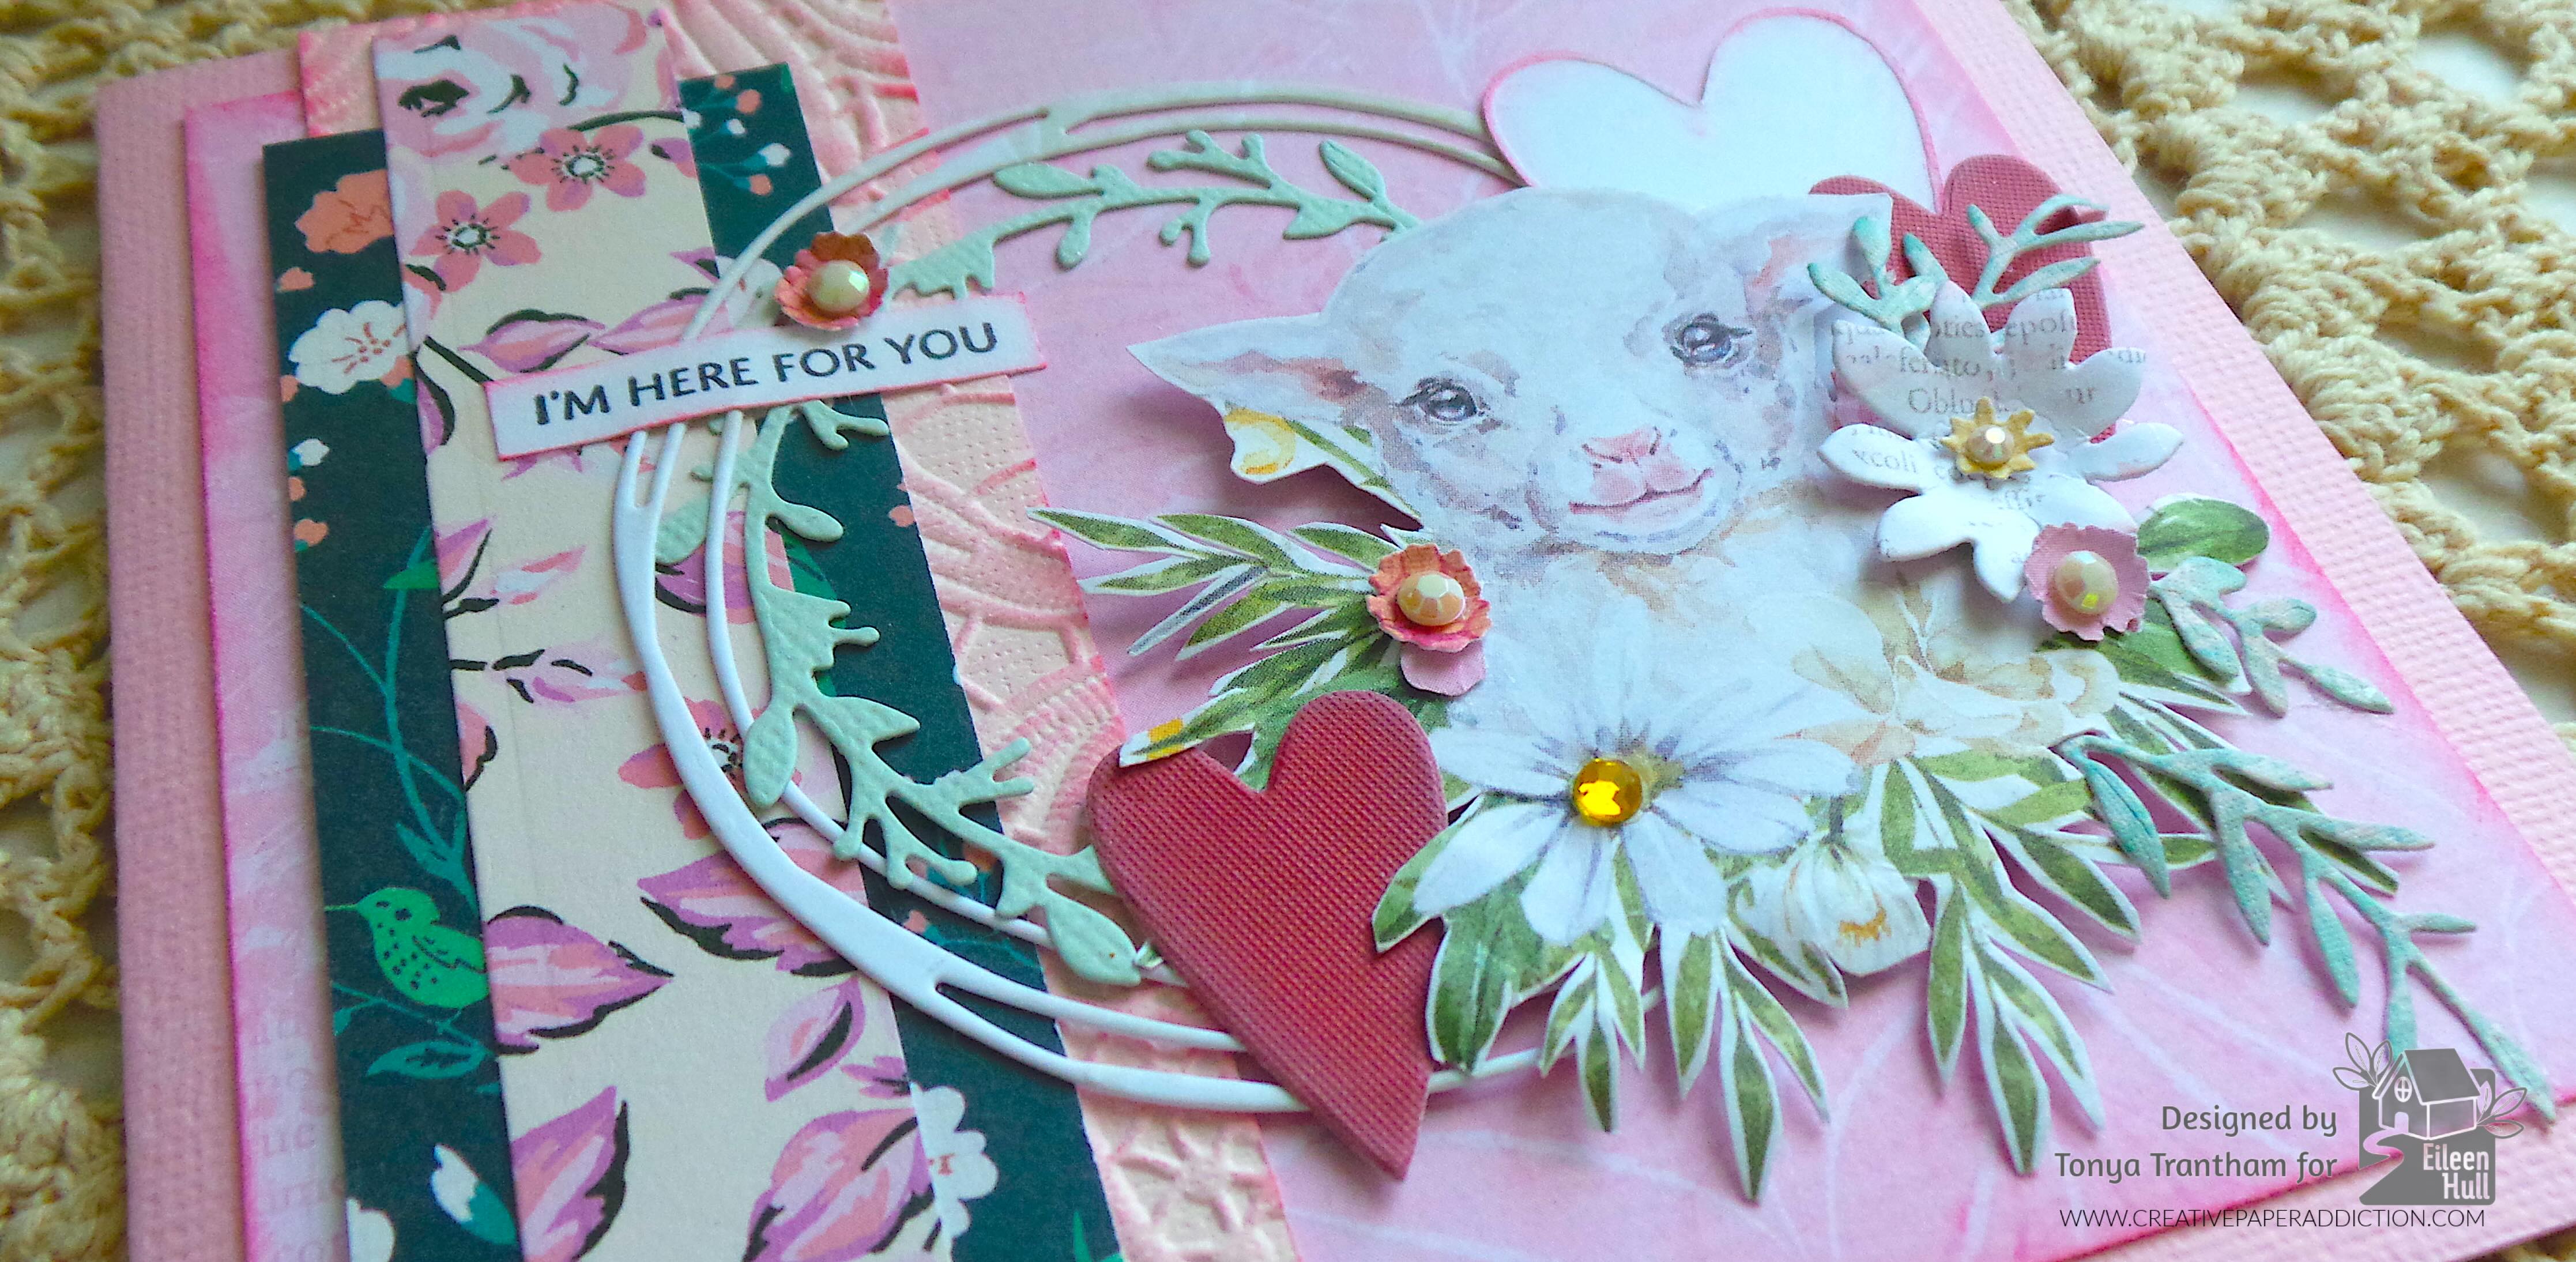
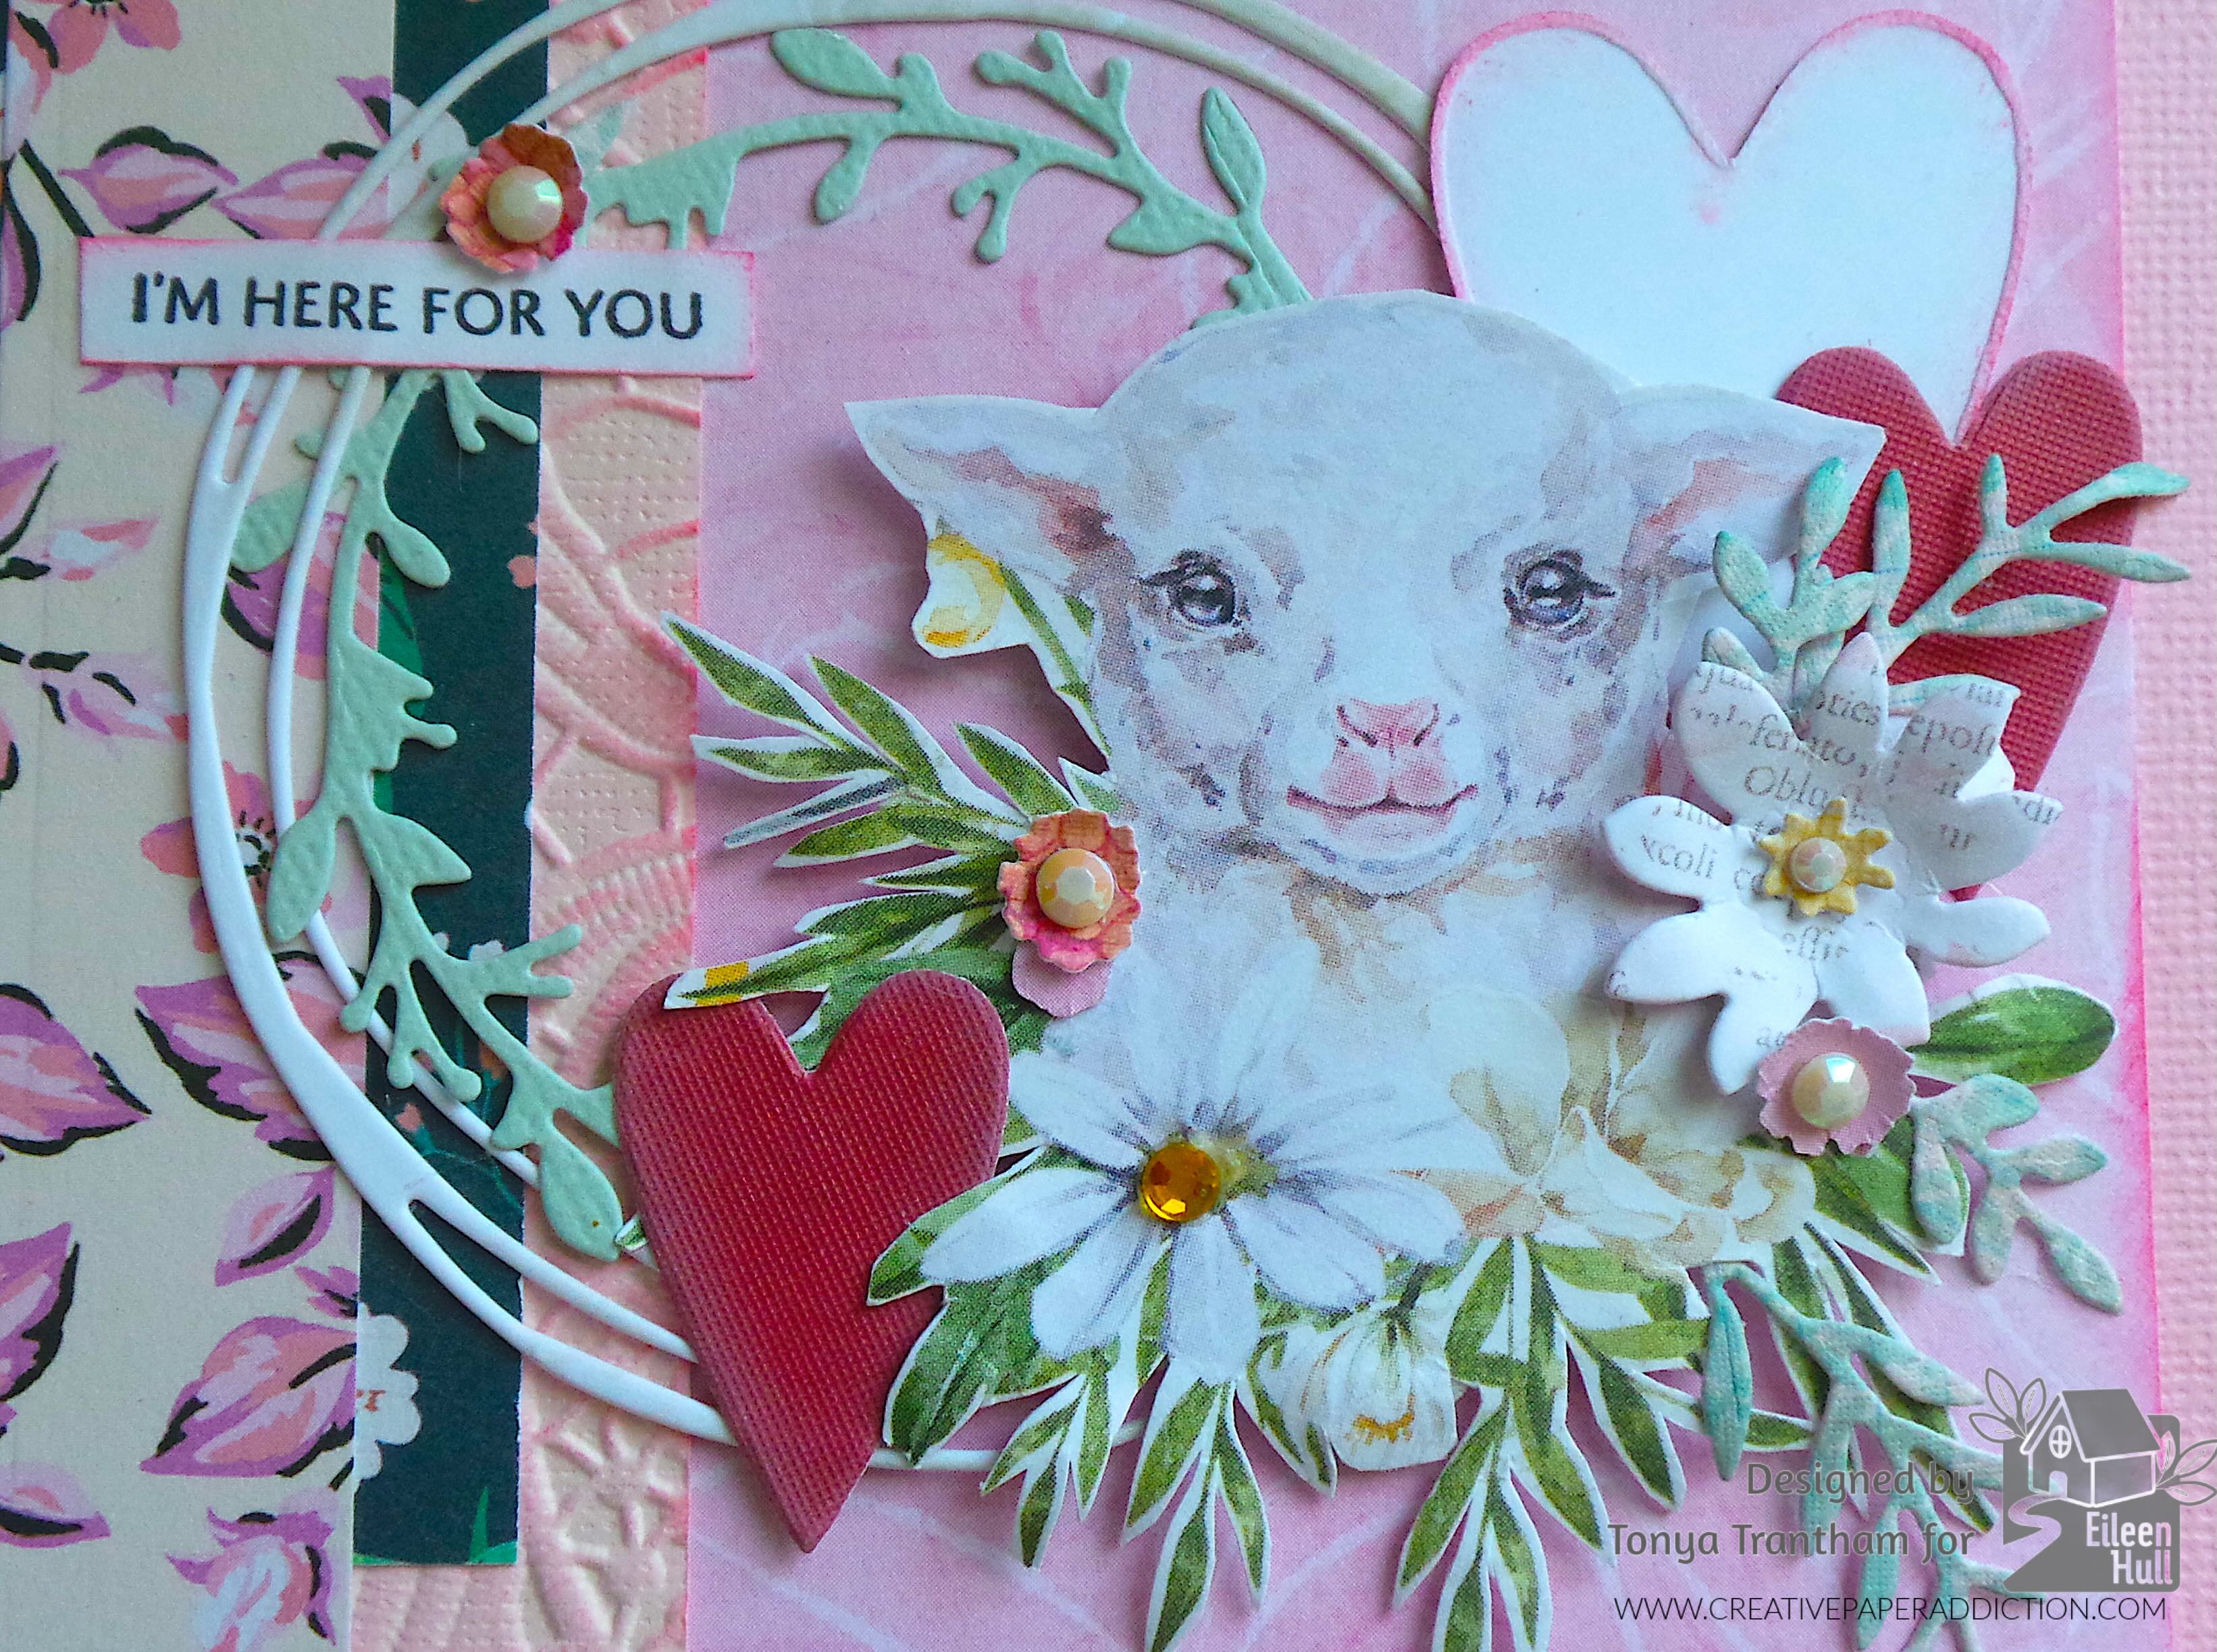
I found in my stash a wreath from the Wreath and Snowflake Thinlits and a garland from the Winter Garland Thinlits(retired) already cut out. I glued both to the center of the card. The lamb is a leftover piece I had fussy cut from cardstock. I shaped the leaves and made an indention in the center of the largest flower with a Stylus before adding Foam Pop Dots to the back of the lamb. I placed that off center of the wreath and garland.
Next I cut one large and two of the medium size hearts from the Envelope, Folder and Flowers Thinlits. I inked the edges of all the hearts with a pink chalk ink before adhering all to the card.
I placed the “I’m Here for You” sentiment from the Swatch Cards Stamp Set onto the MISTI Stamping Tool and inked with Black Ink. I stamped onto a piece of cardstock, cut to size and inked with pink chalk ink. I adhered to the upper edge of the wreath and garland along with a mini flower to finish.
If you haven’t been by Eileen Hull’s blog lately to see what the team has been up to you can find the latest blog post HERE. Also if you have any questions or comments please leave them below.
(Products listed above are Affiliated Links for your convenience)
DISCLAIMERS
This blog is compensated to provide opinion on products, services, websites, and various other topics. Even though the owner(s) of this blog receives compensation for our posts or advertisements. I always give my honest opinions, findings, beliefs, or experiences on those topics or products. The views and opinions expressed on this blog are purely my own. Any product claim, statistic, or quote should be checked with each manufacturer. Verify other representations about a product or service with the provider or party in question.This blog contains affiliate links. Clicking these links helps to support Tonya Trantham Designs – Creative Paper Addiction. It’s at no additional cost to you.Today’s features are Sizzix, Eileen Hull and Scrapbook.com Products.
Thanks for stopping by, I hope your Monday is awesome and enjoy creating!
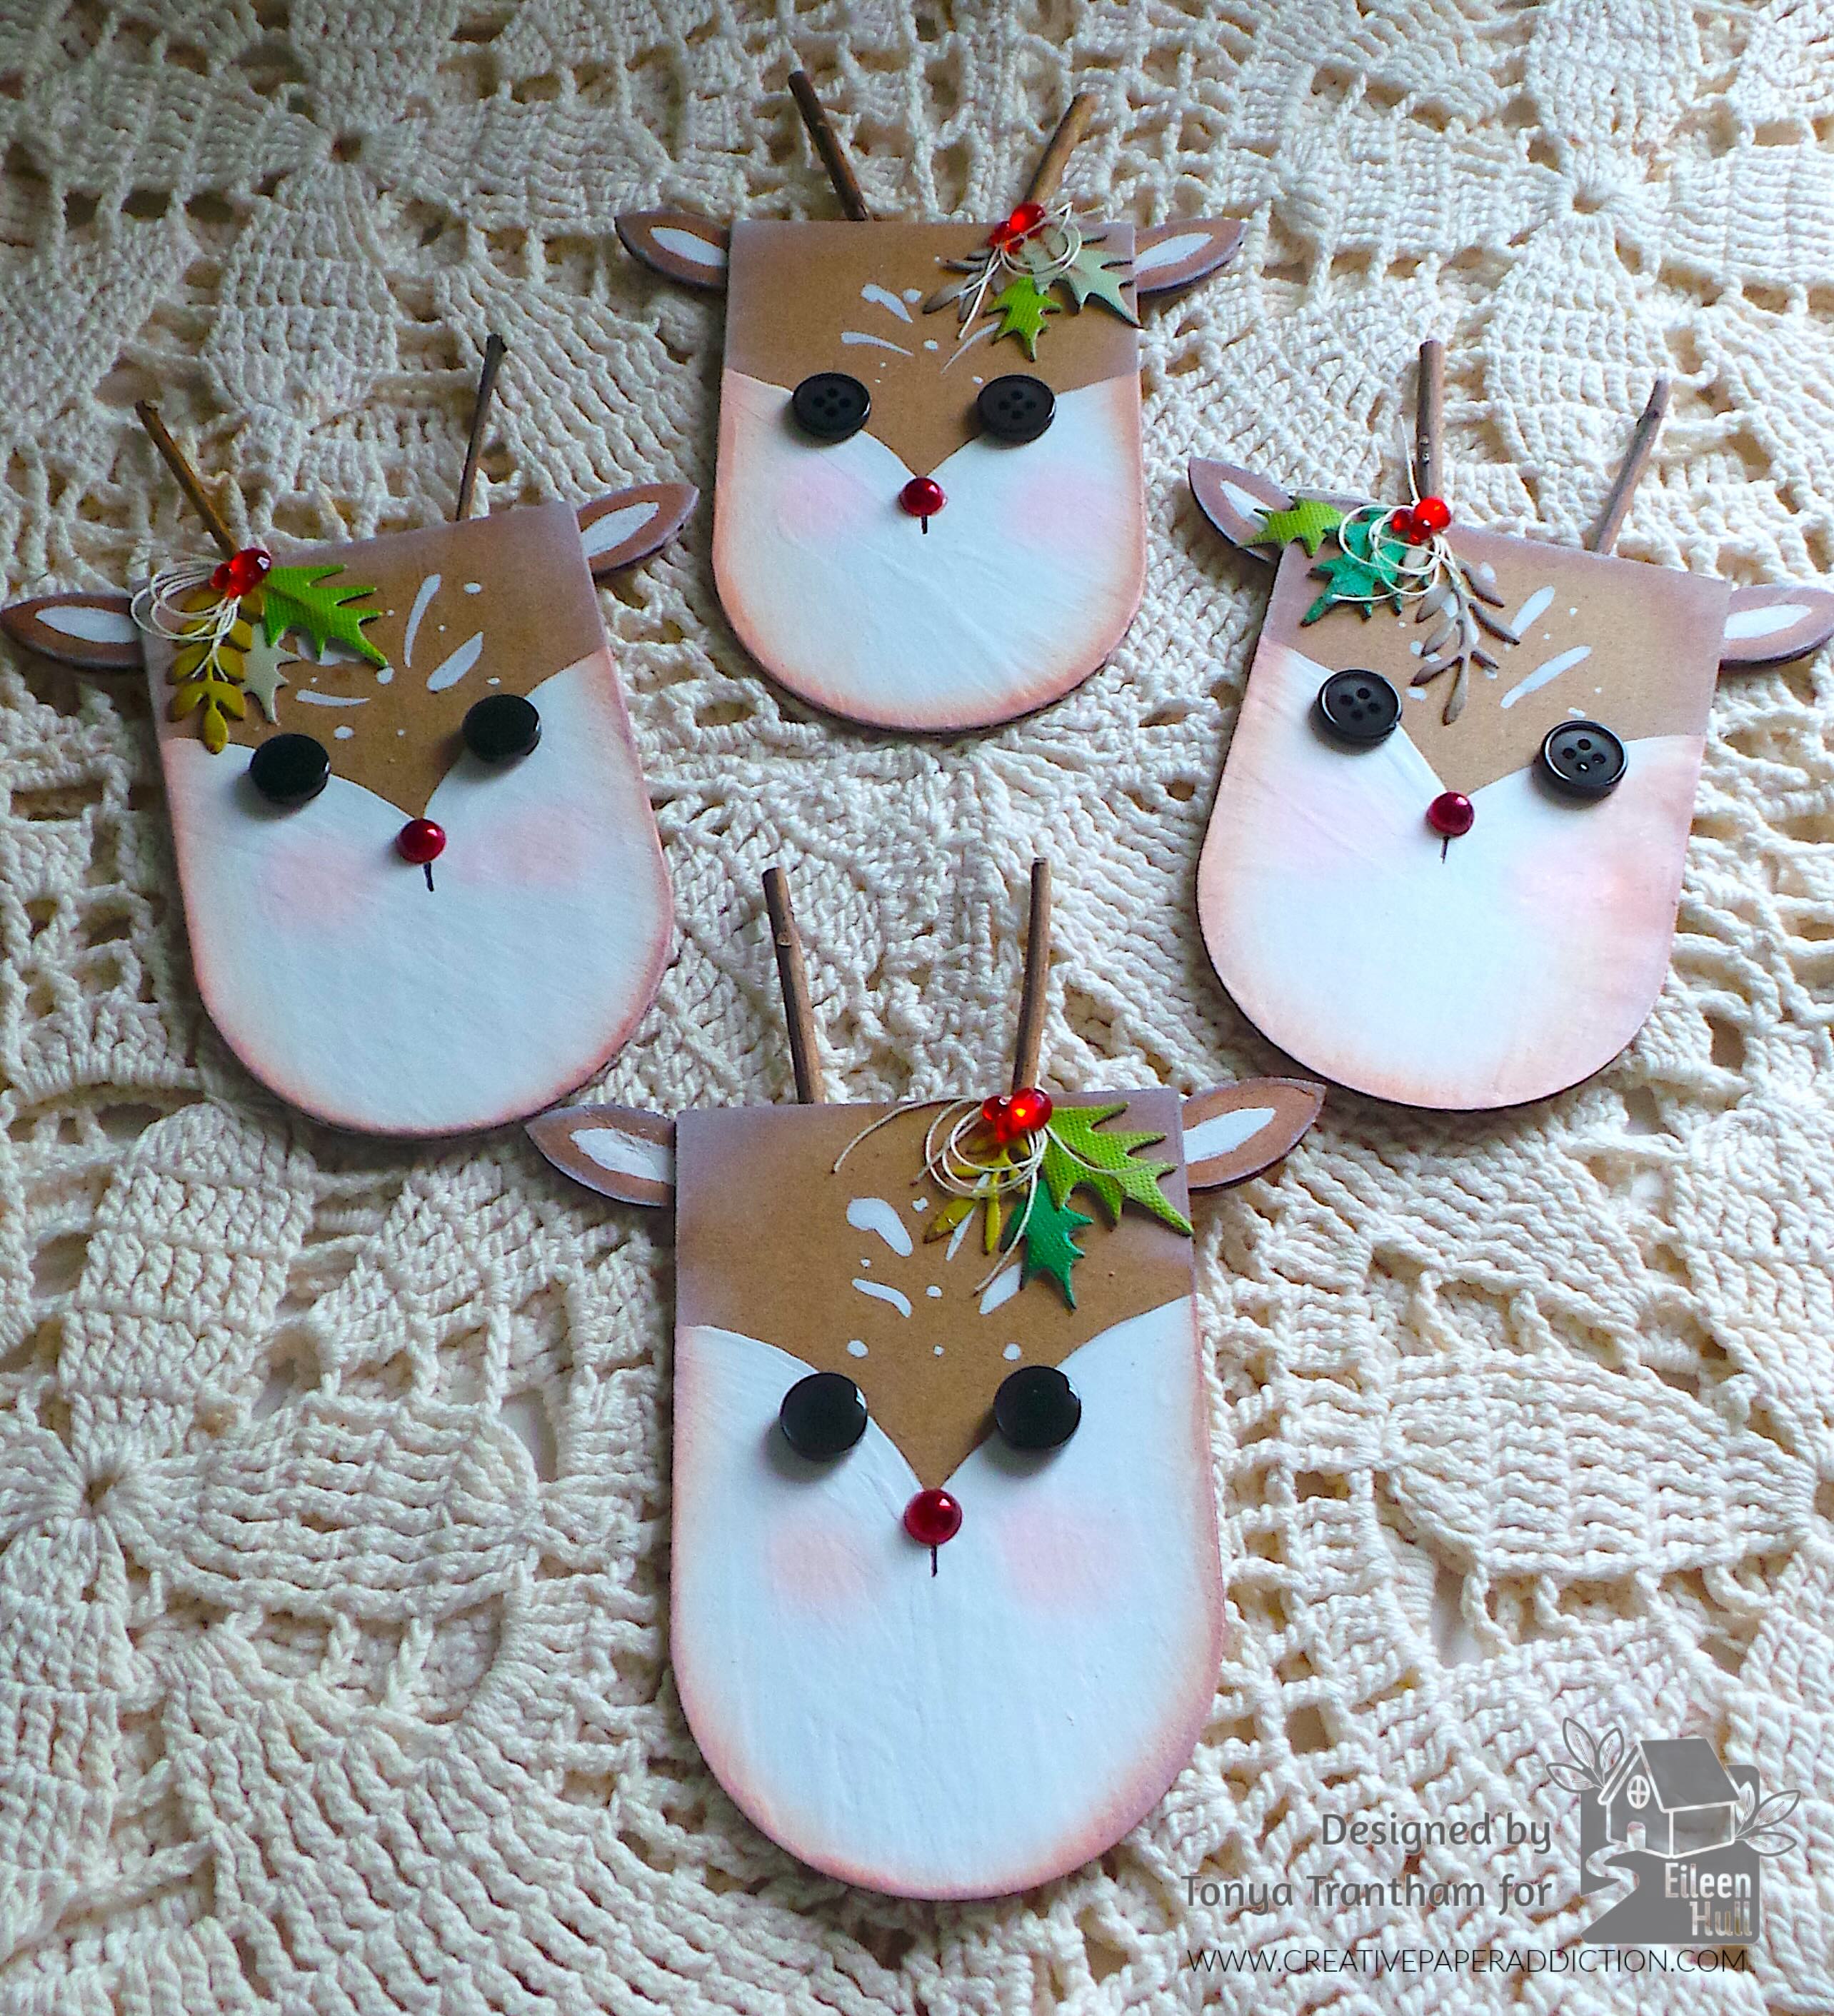
Hi everyone! It’s my turn to share my quick and easy Comfort and Joy project for Eileen Hull! I’m on a recycle kick and choose to use corrugated cardboard to create a Rudolph the Red Nose Reindeer Tag.
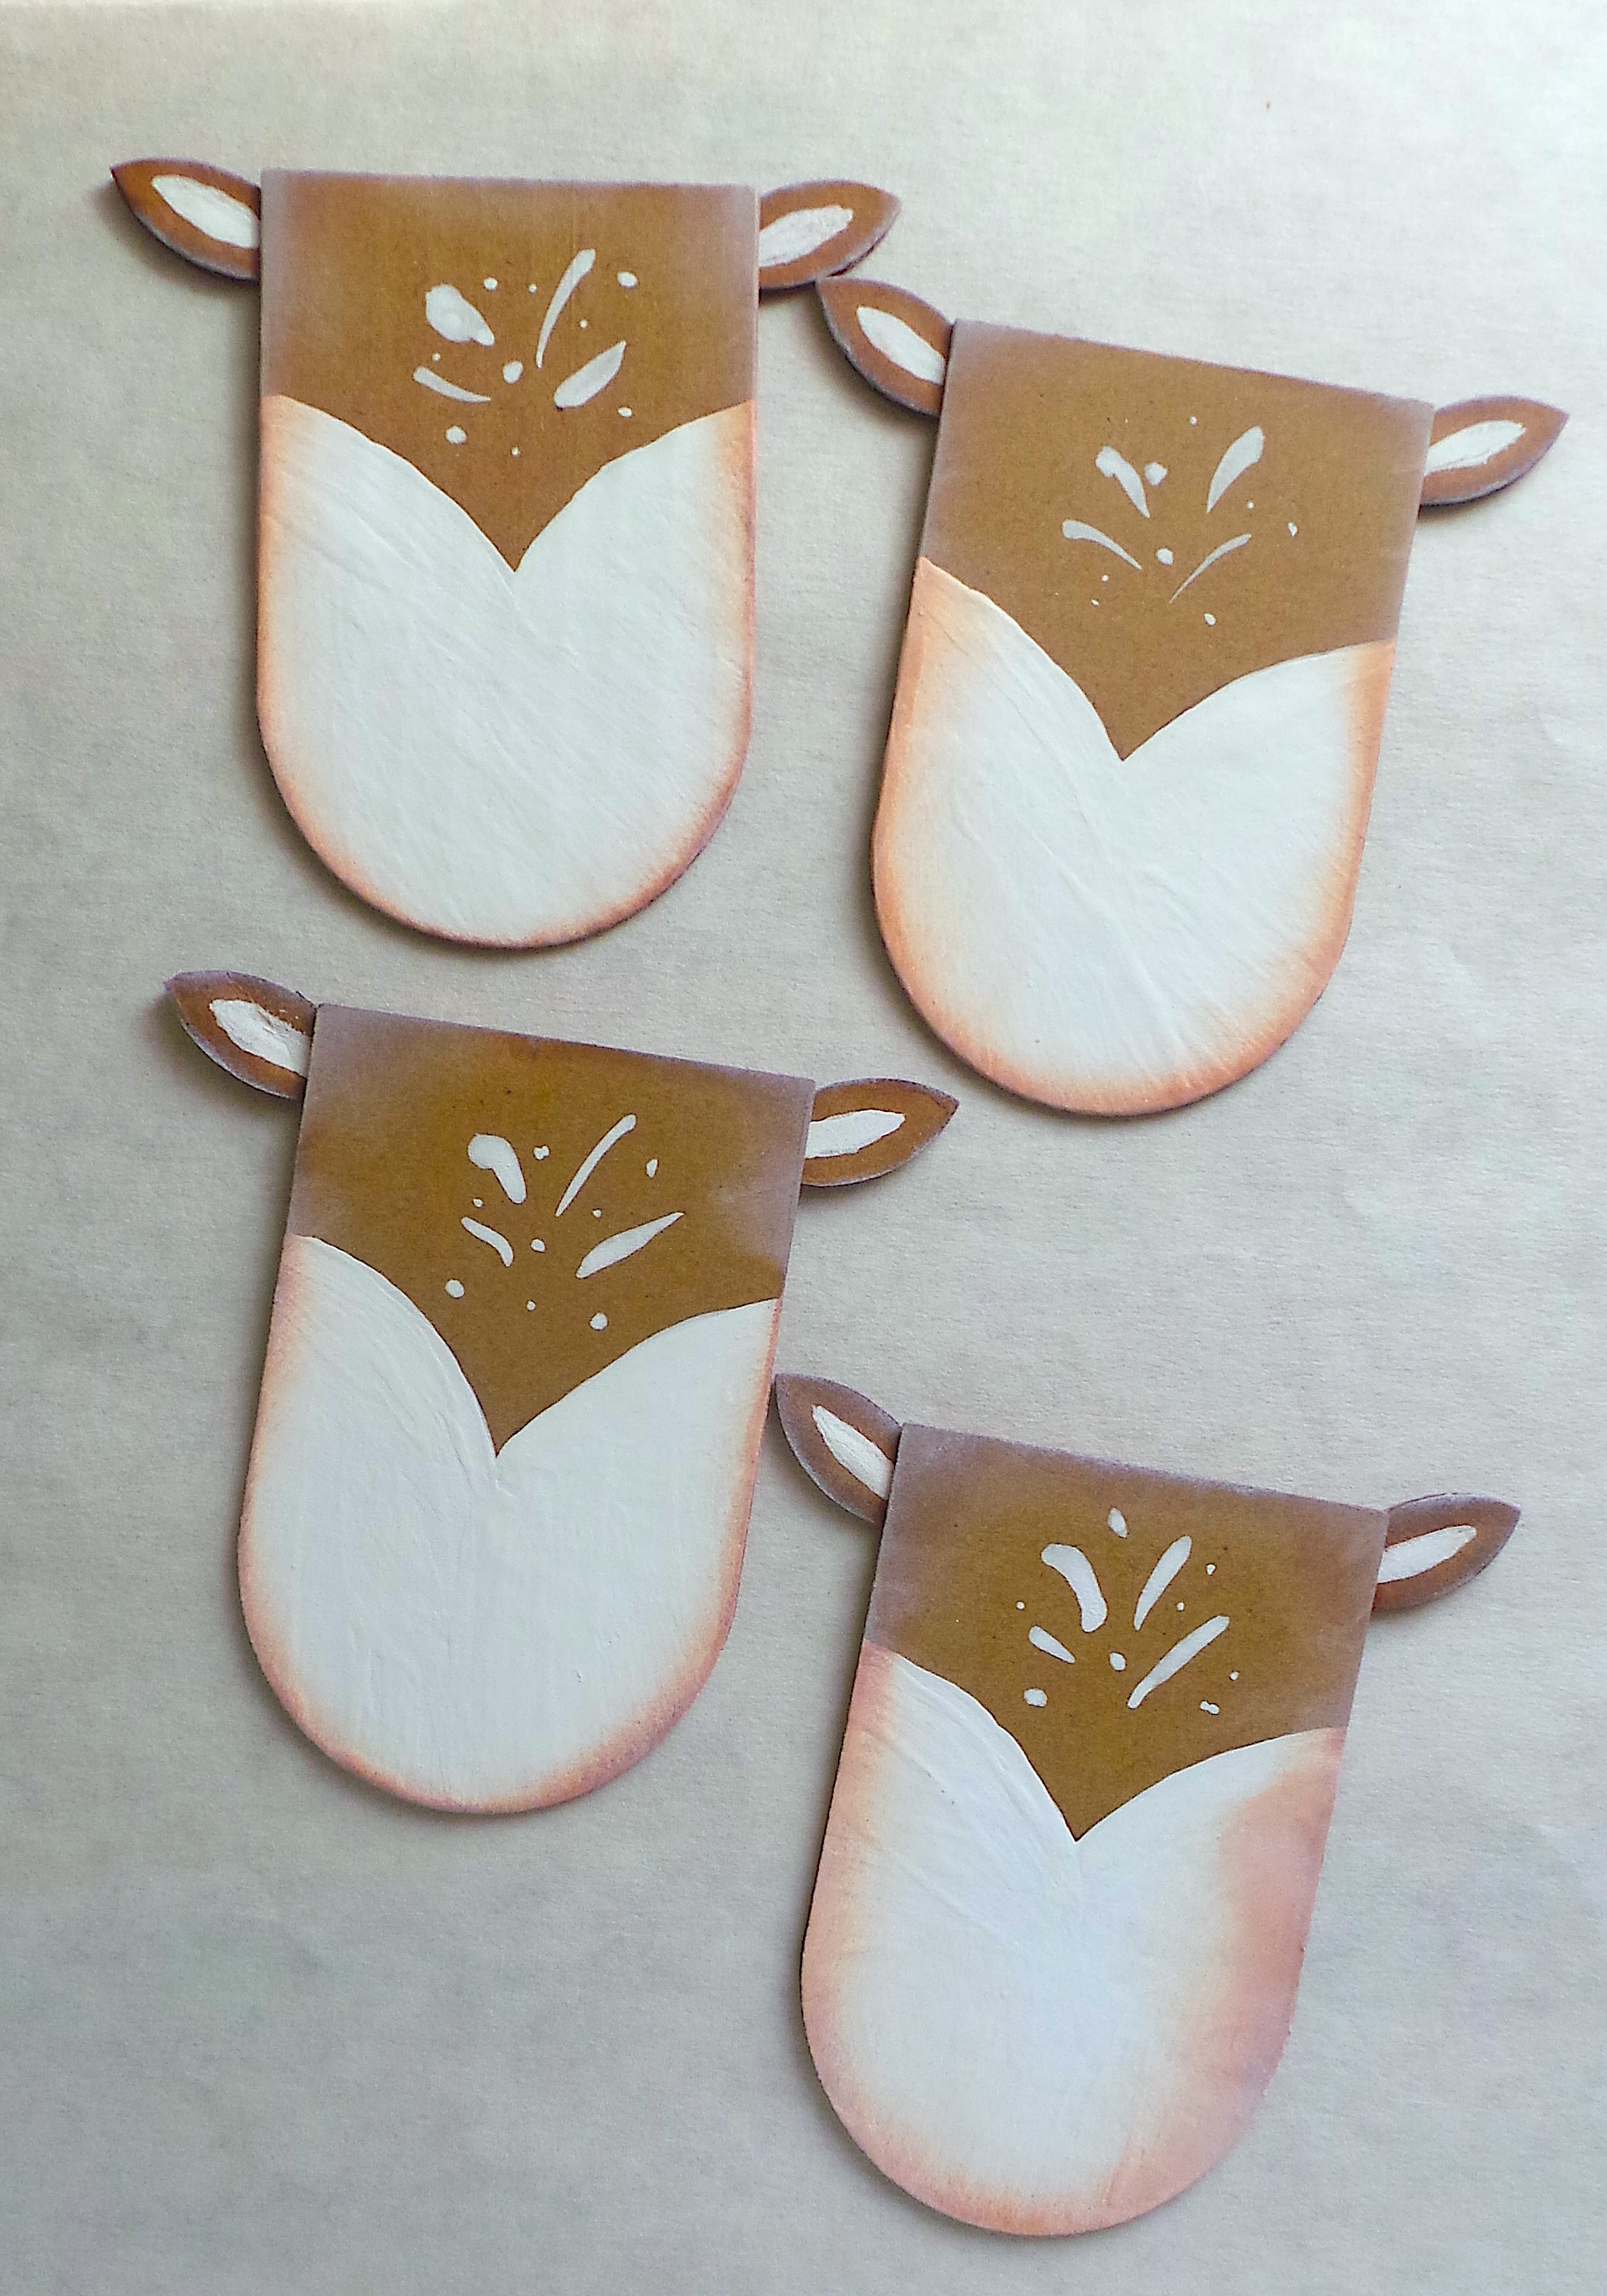
Since I have a lot of corrugated cardboard laying around I decided this would be a great way to keep it out of the landfill. The reindeer head I used the largest arch die from the Tunnel Arches Thinlits. The first time running it through the Diecut Machine it would not cut through the corrugated chipboard. So I ran it through the diecut machine three times and it cut the die out with no problem.
I used the Sunflower Diecut and cut out a couple of the sunflower from the corrugated cardboard. I cut the petals off to create ears for the reindeer. With a pencil I free handed the face onto the die. The face, the center of the ears and spots I painted with white acrylic paint.
I glued the ears to the face and lightly inked the edge with white and brown chalk inks.
I adhered two Black Buttons for eyes and added a red gem for the nose to the face. I drew a black line with a fine tip black marker under the nose. I used a pink pastel to add color to the cheeks.
I sent my husband outside to round up some twigs to use as antlers. He came back with a couple of sticks. I cut all of those with a pair of scissors since they weren’t that thick. I glued to the back of the head.
Since I had several of the hollies cut from the Funky Festive Thinlits (retired) I added those to one of the antlers. I also added a leaf sprig which are from the Home Sweet Home Thinlits, loops of thread and red gems to finish.
Even though the plan is to use these reindeer as tags. I could easily add a mini clothes pin to the back to use as a closure to a bag. Or string them up to create an adorable banner. Also if you don’t have the supplies listed below you can change out with brown and white cardstock, hand draw or use a circle pinch for the eyes, pipe cleaners for the antlers, etc. There’s endless possibilities. Let me know in the comments below what you would use these reindeers for or if you have any questions.
(Products listed above are Affiliated Links for your convenience)
DISCLAIMERS
This blog is compensated to provide opinion on products, services, websites, and various other topics. Even though the owner(s) of this blog receives compensation for our posts or advertisements. I always give my honest opinions, findings, beliefs, or experiences on those topics or products. The views and opinions expressed on this blog are purely my own. Any product claim, statistic, or quote should be checked with each manufacturer. Verify other representations about a product or service with the provider or party in question.This blog contains affiliate links. Clicking these links helps to support Tonya Trantham Designs – Creative Paper Addiction. It’s at no additional cost to you.Today’s features are Sizzix, Eileen Hull and Scrapbook.com Products.
Thanks for stopping by, I hope your Friday is great and enjoy creating!
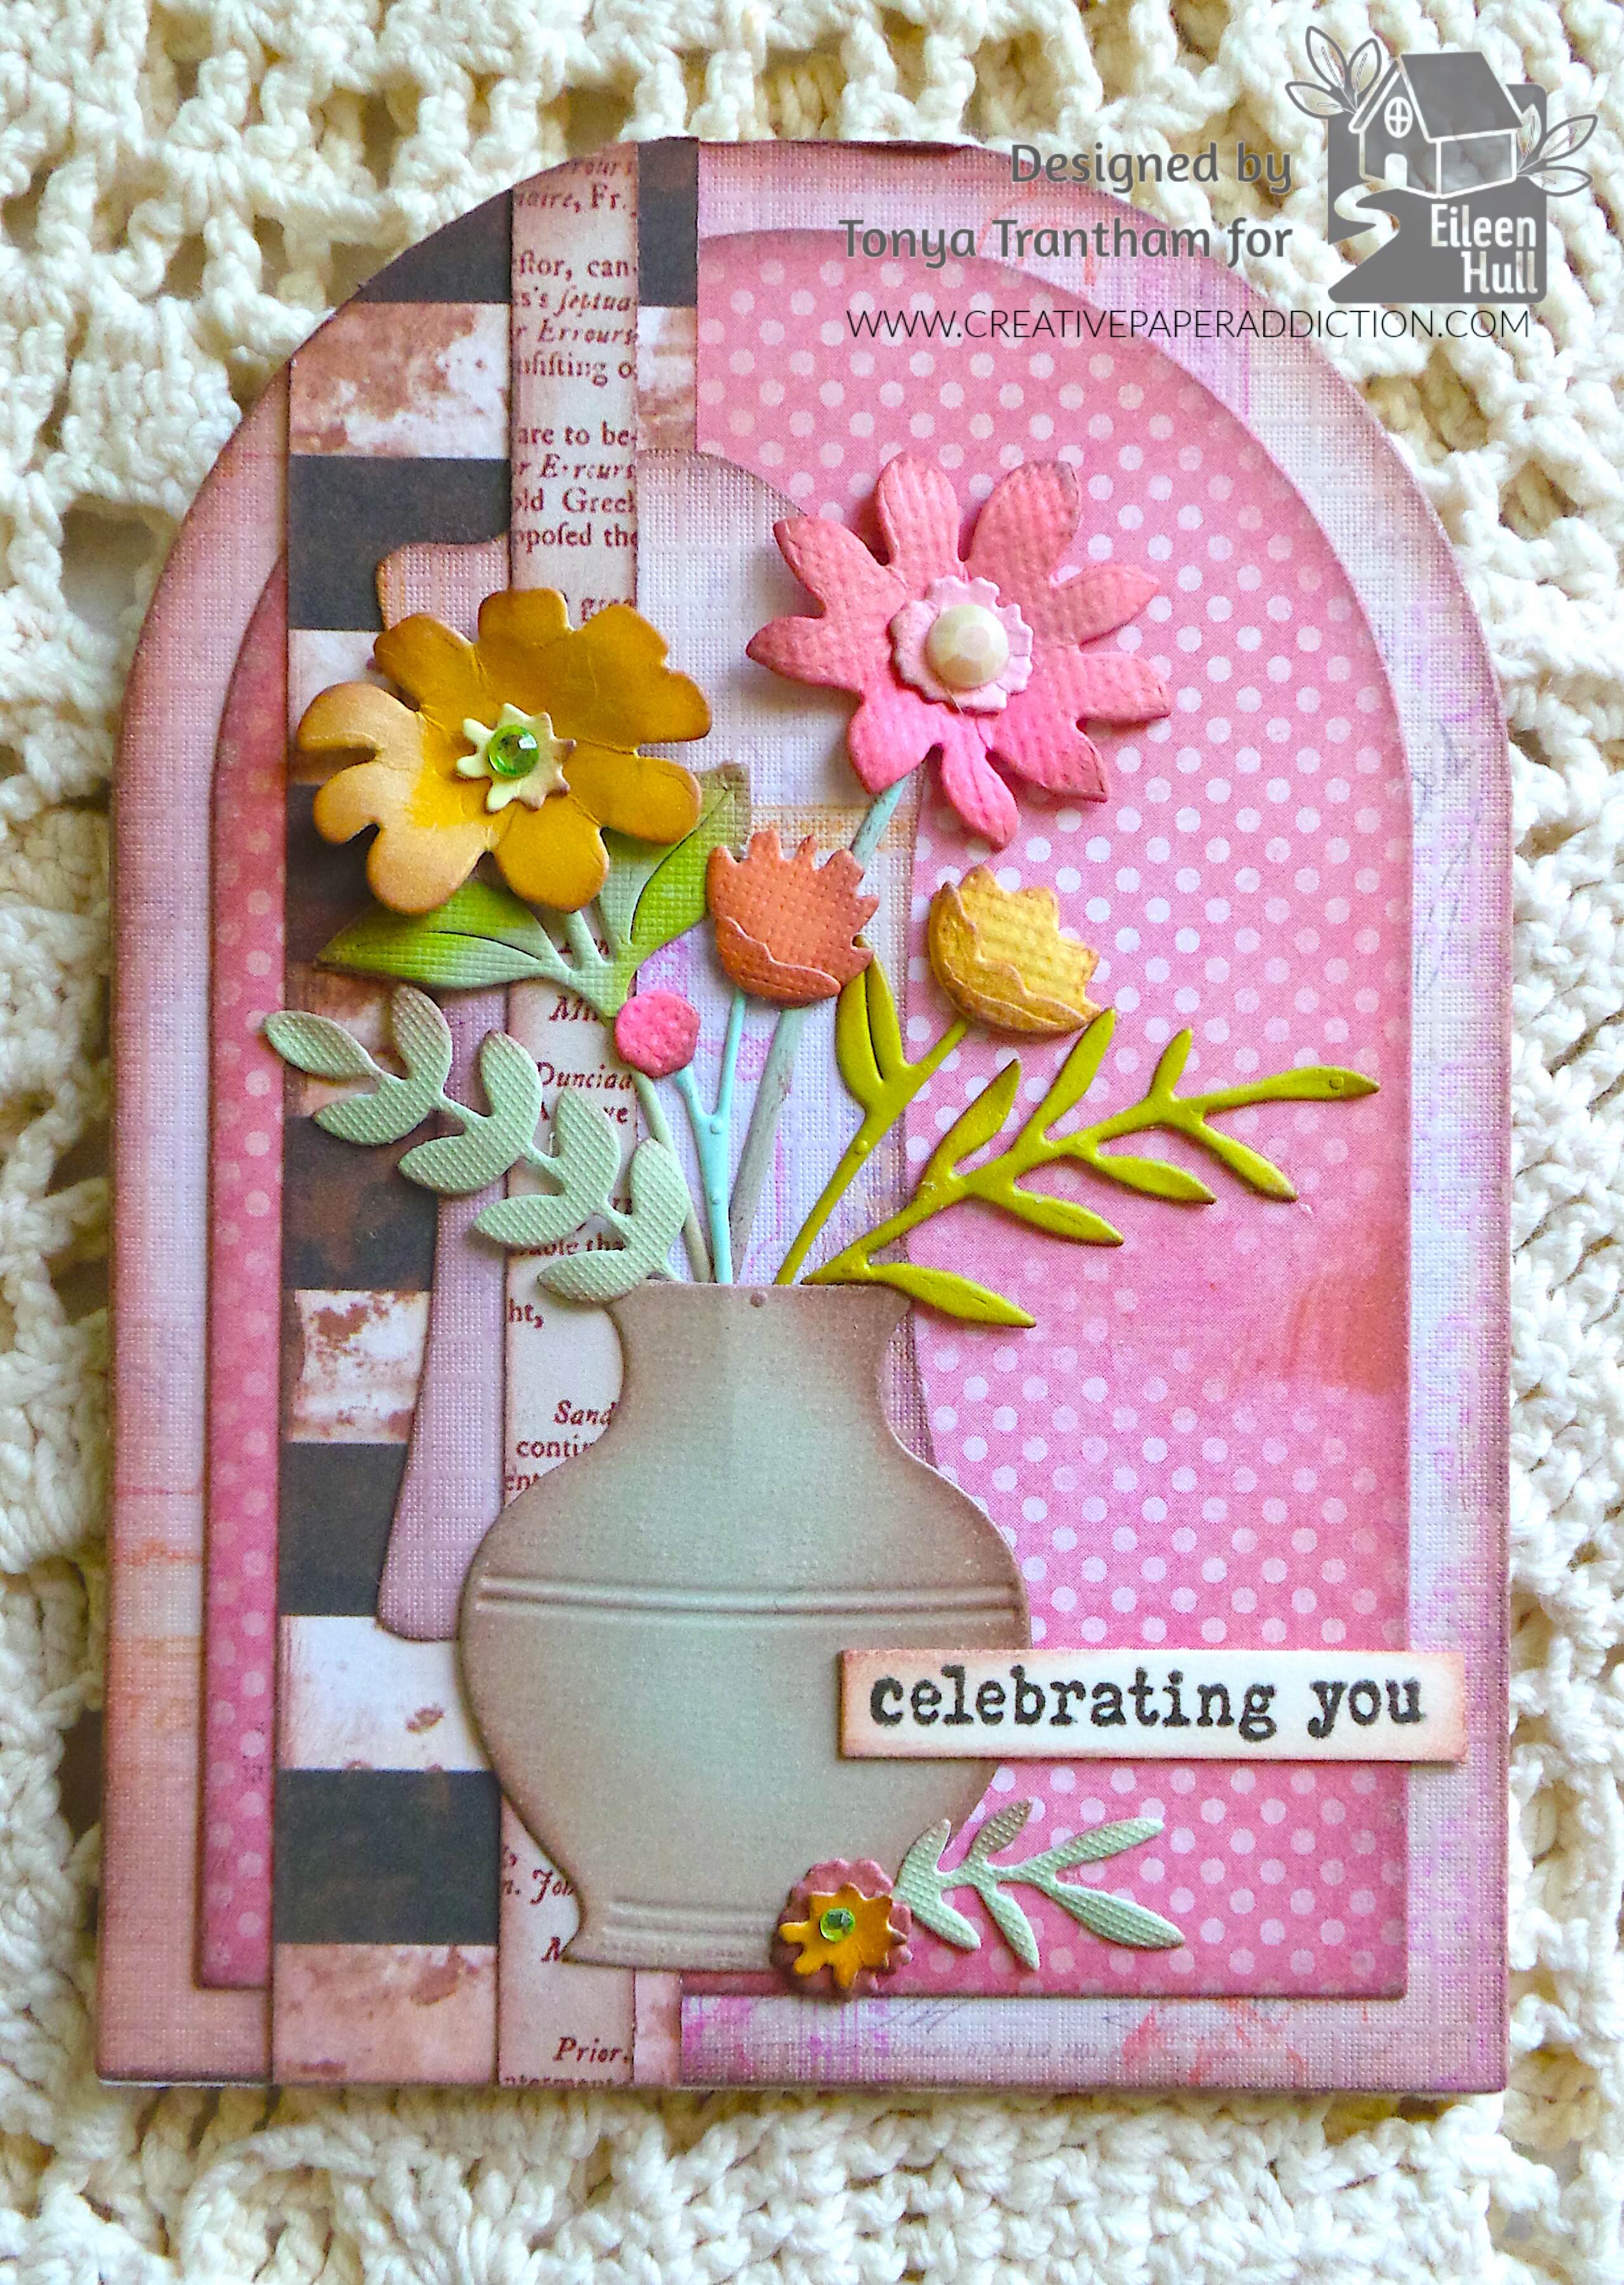
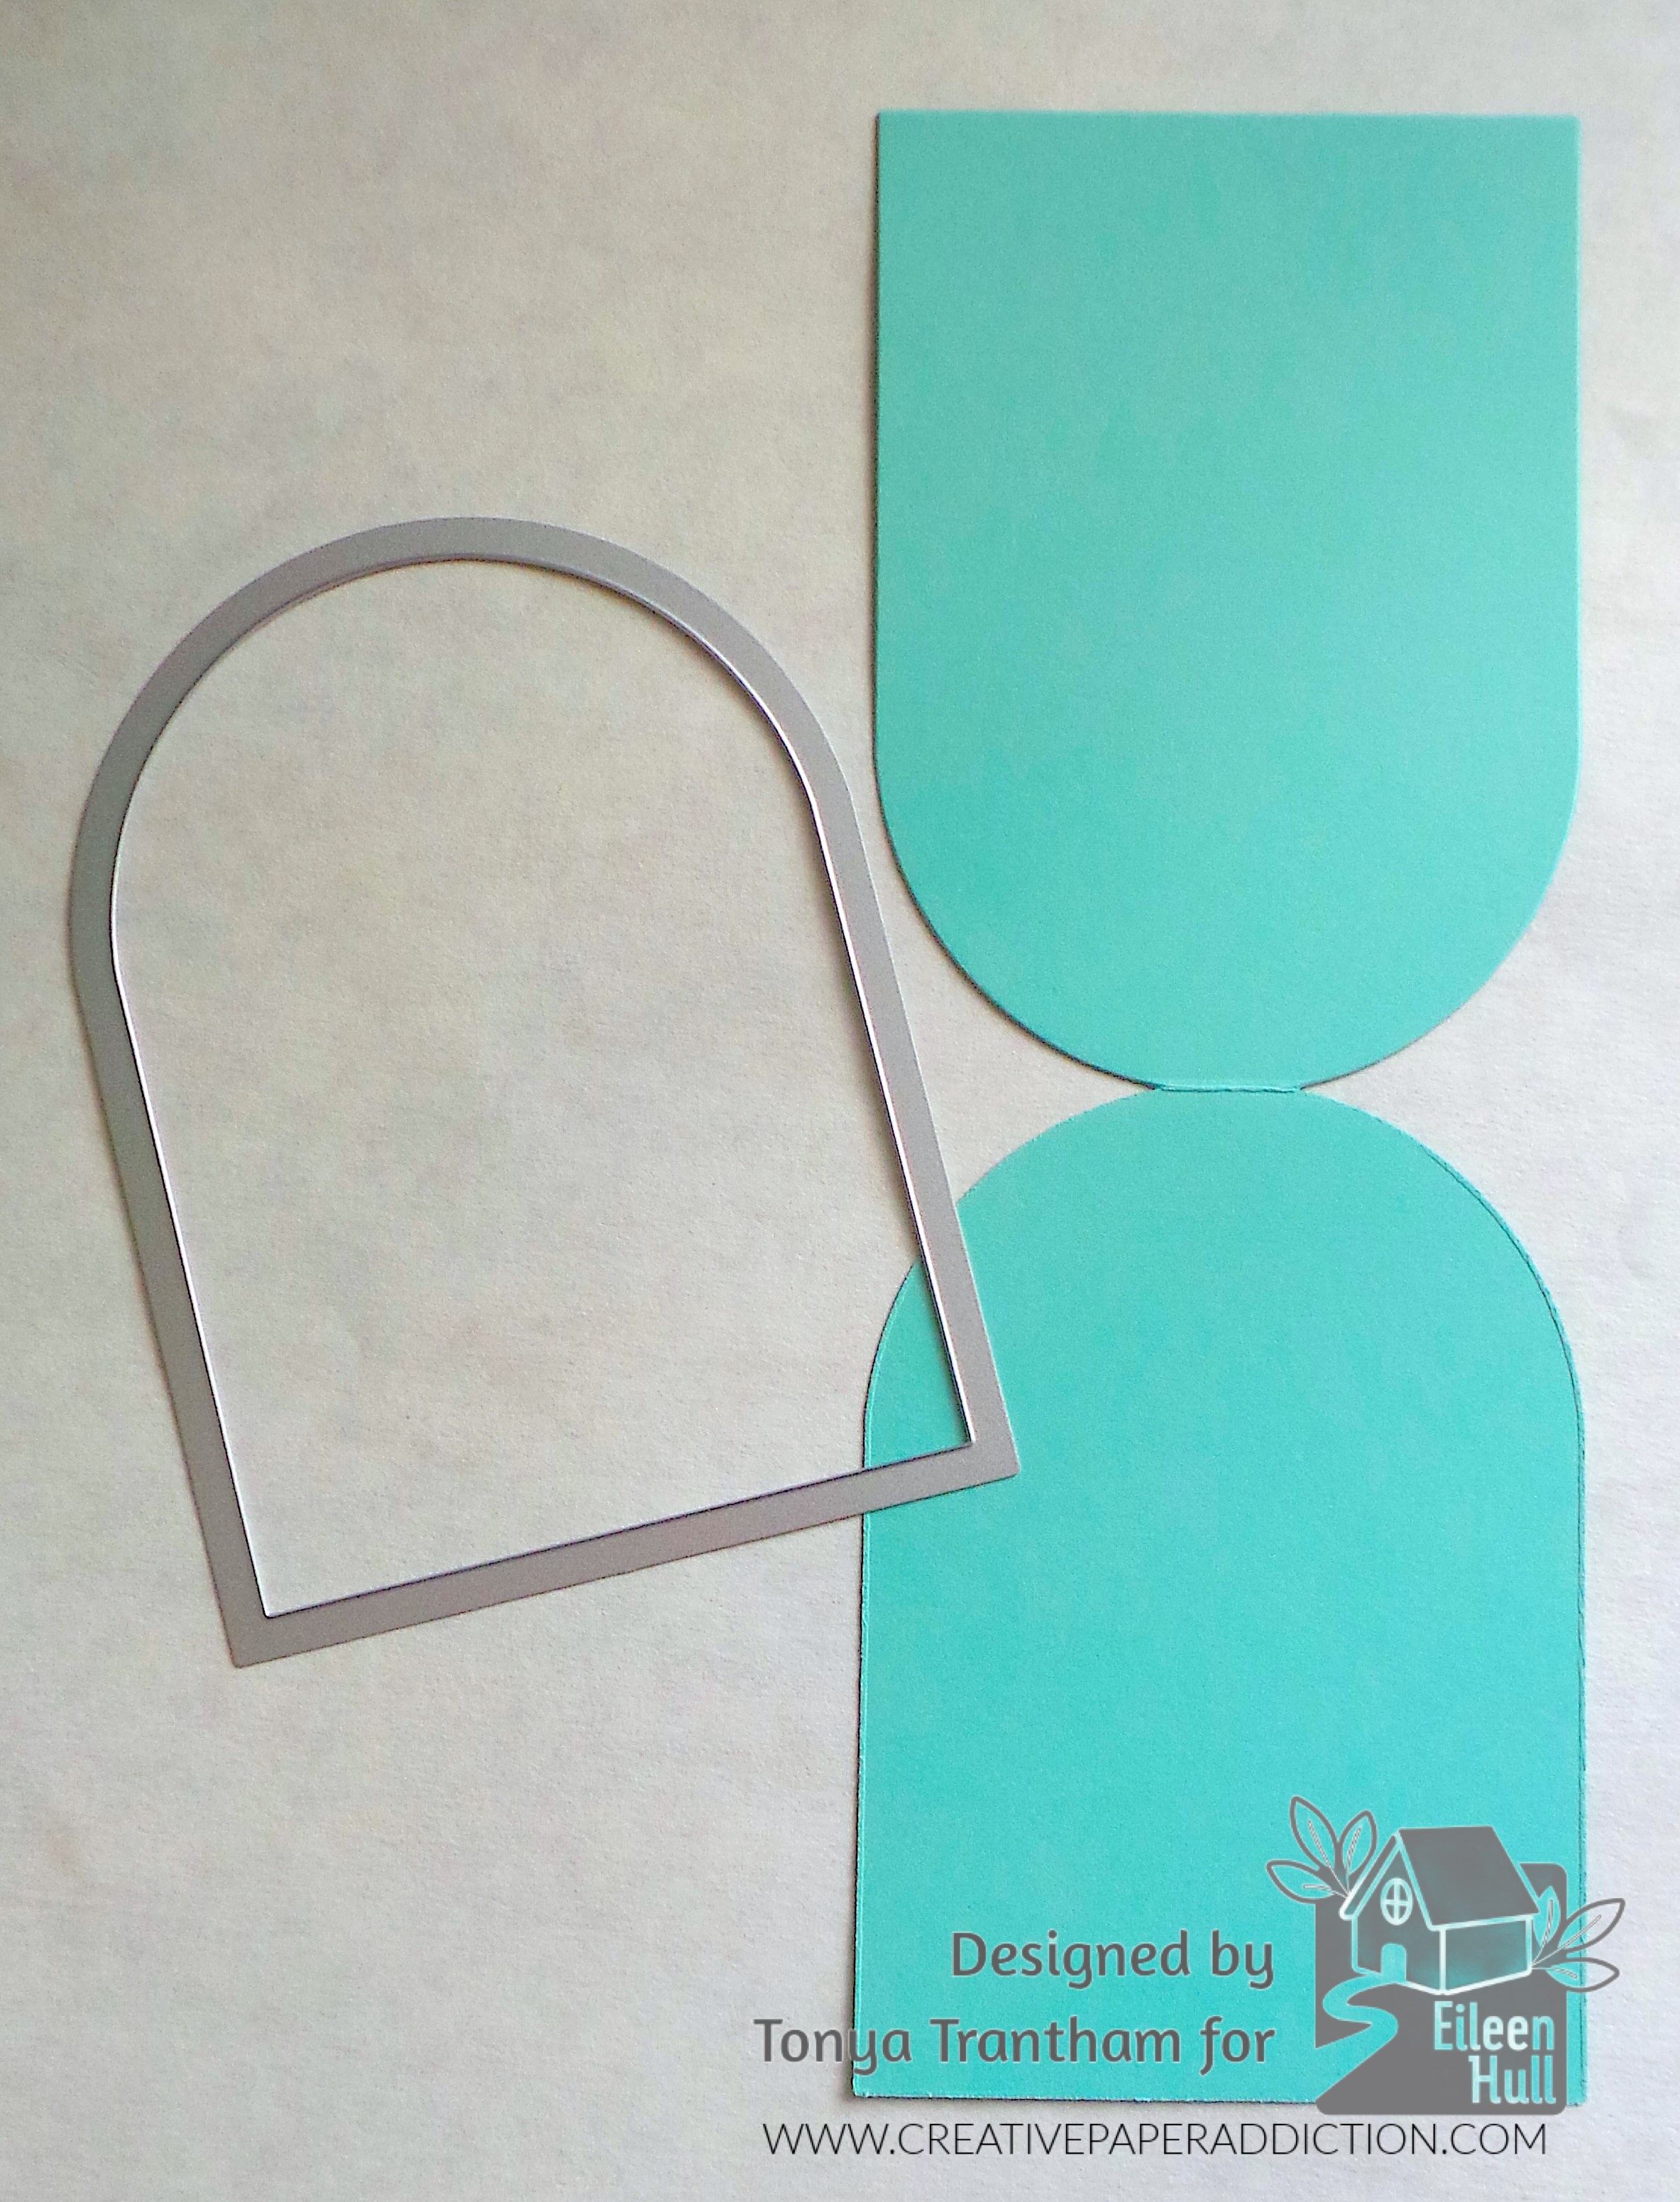
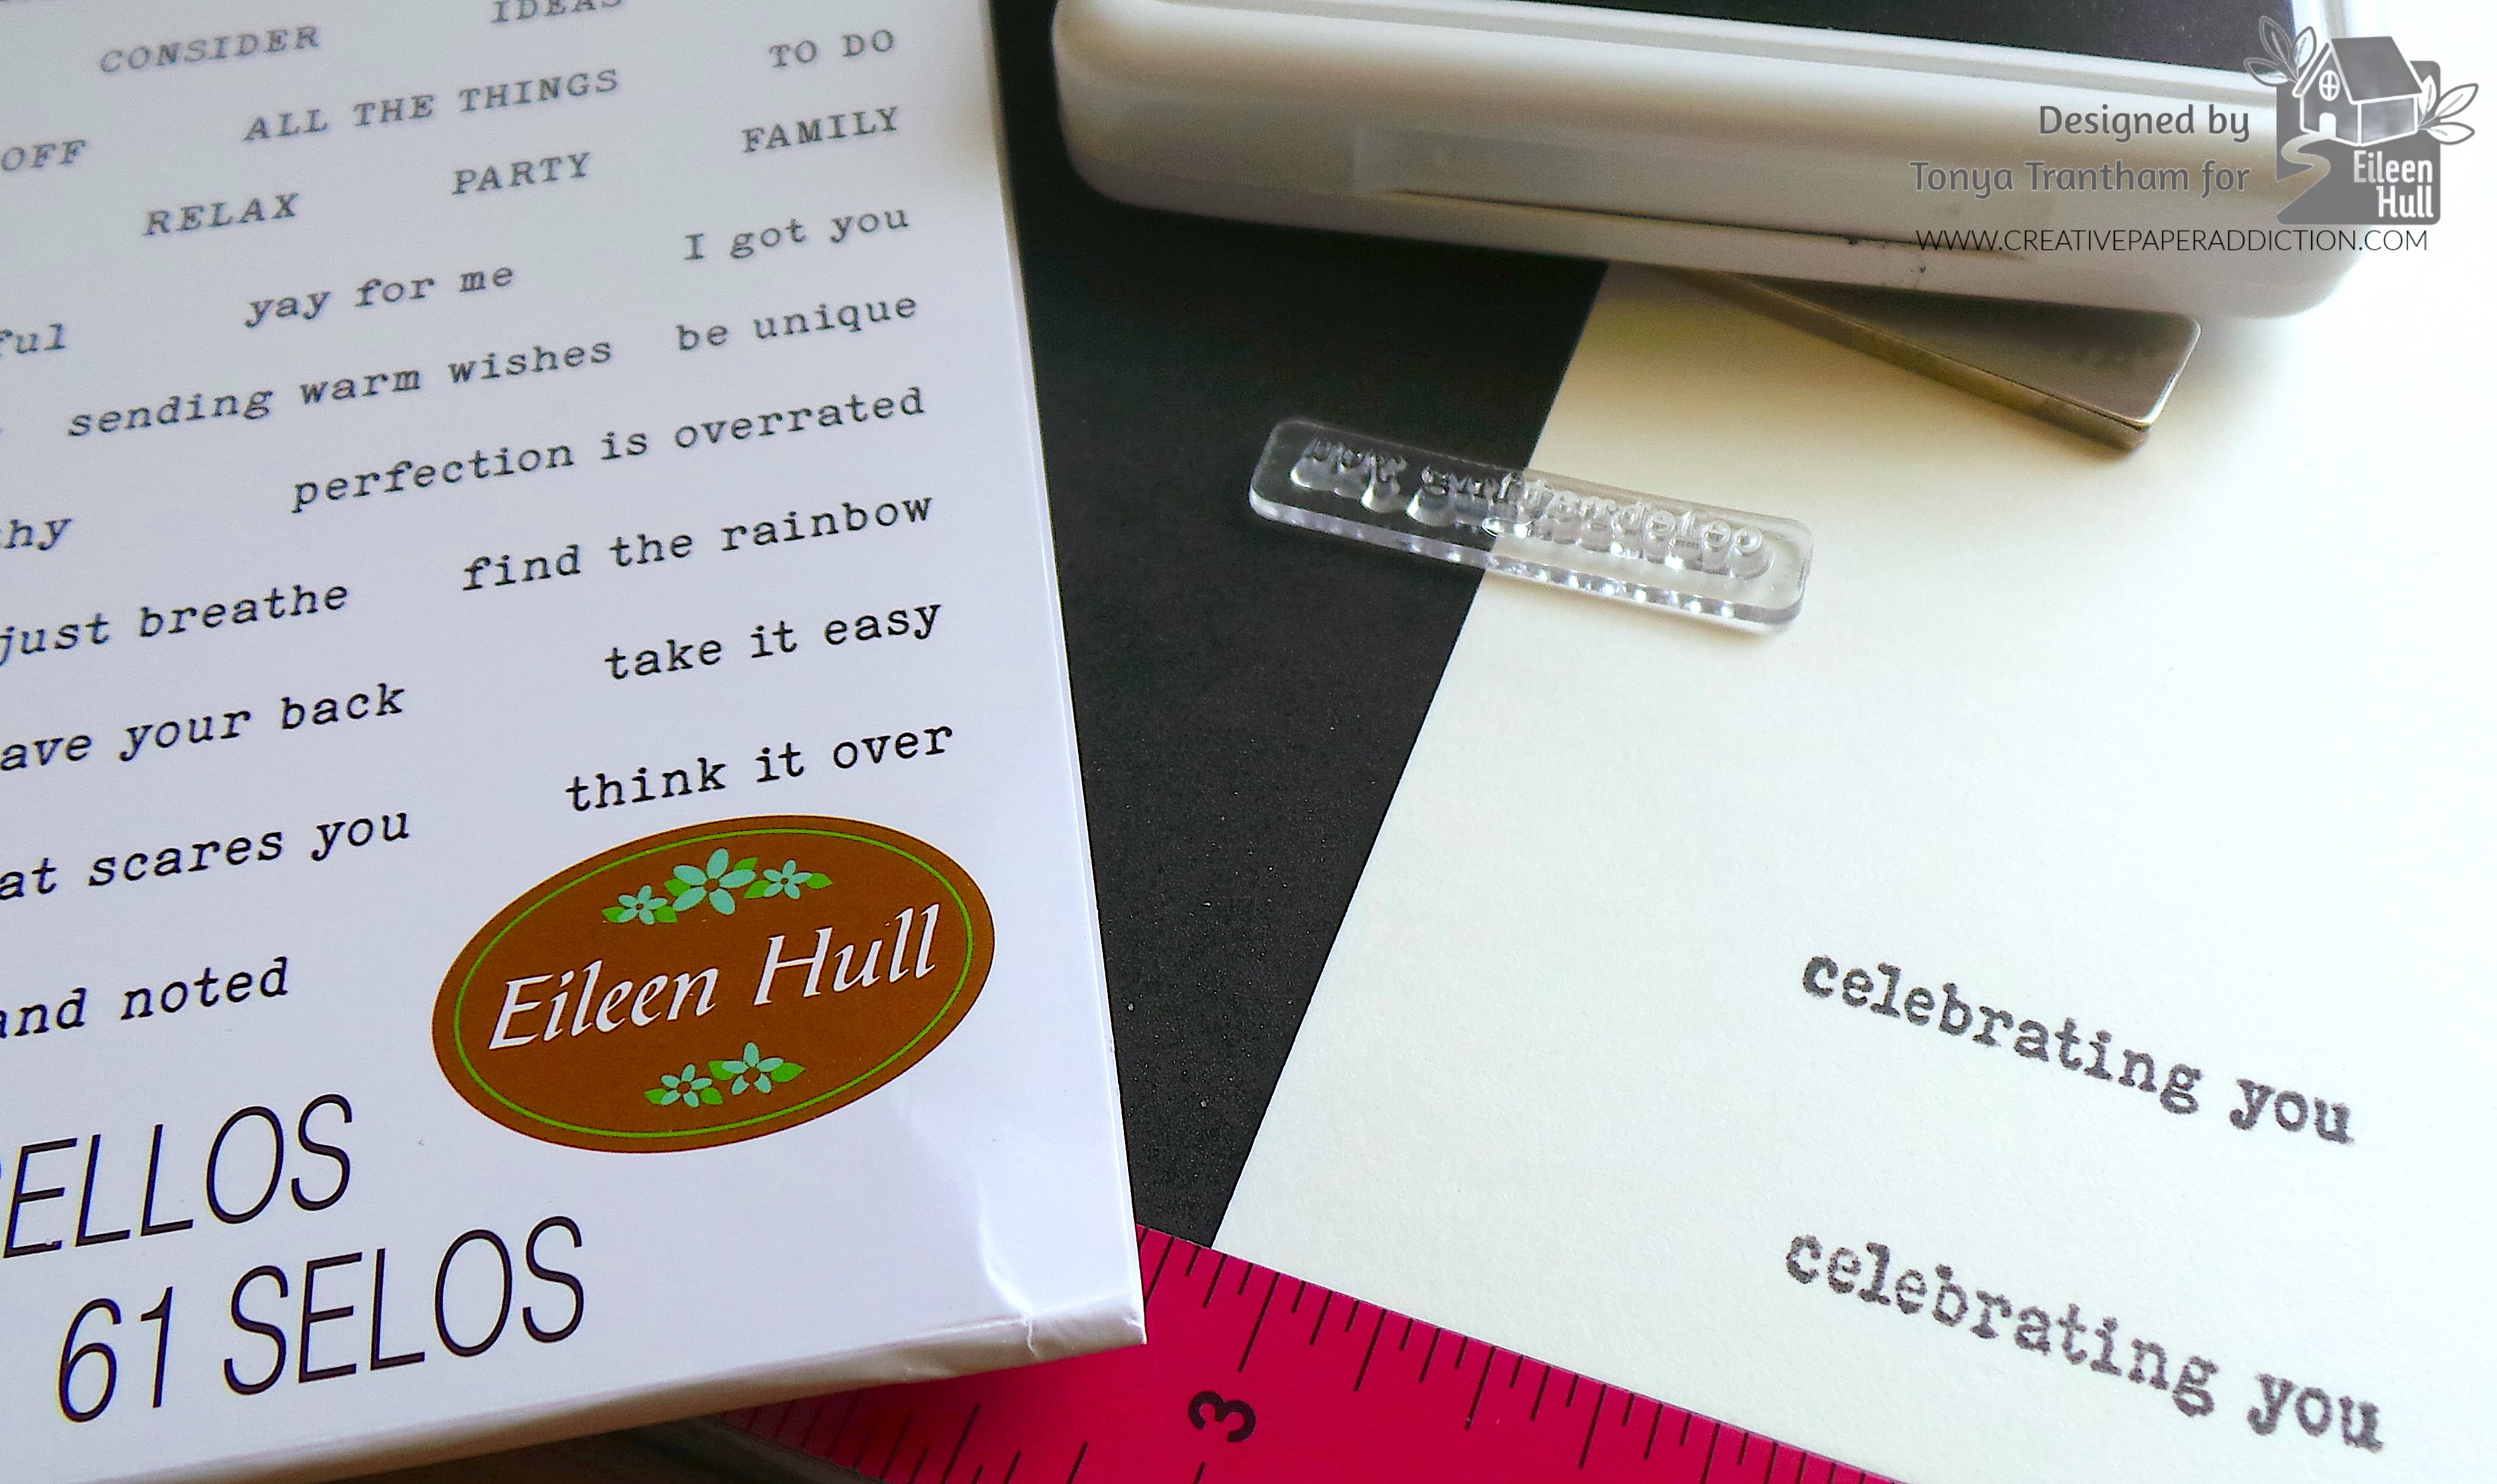
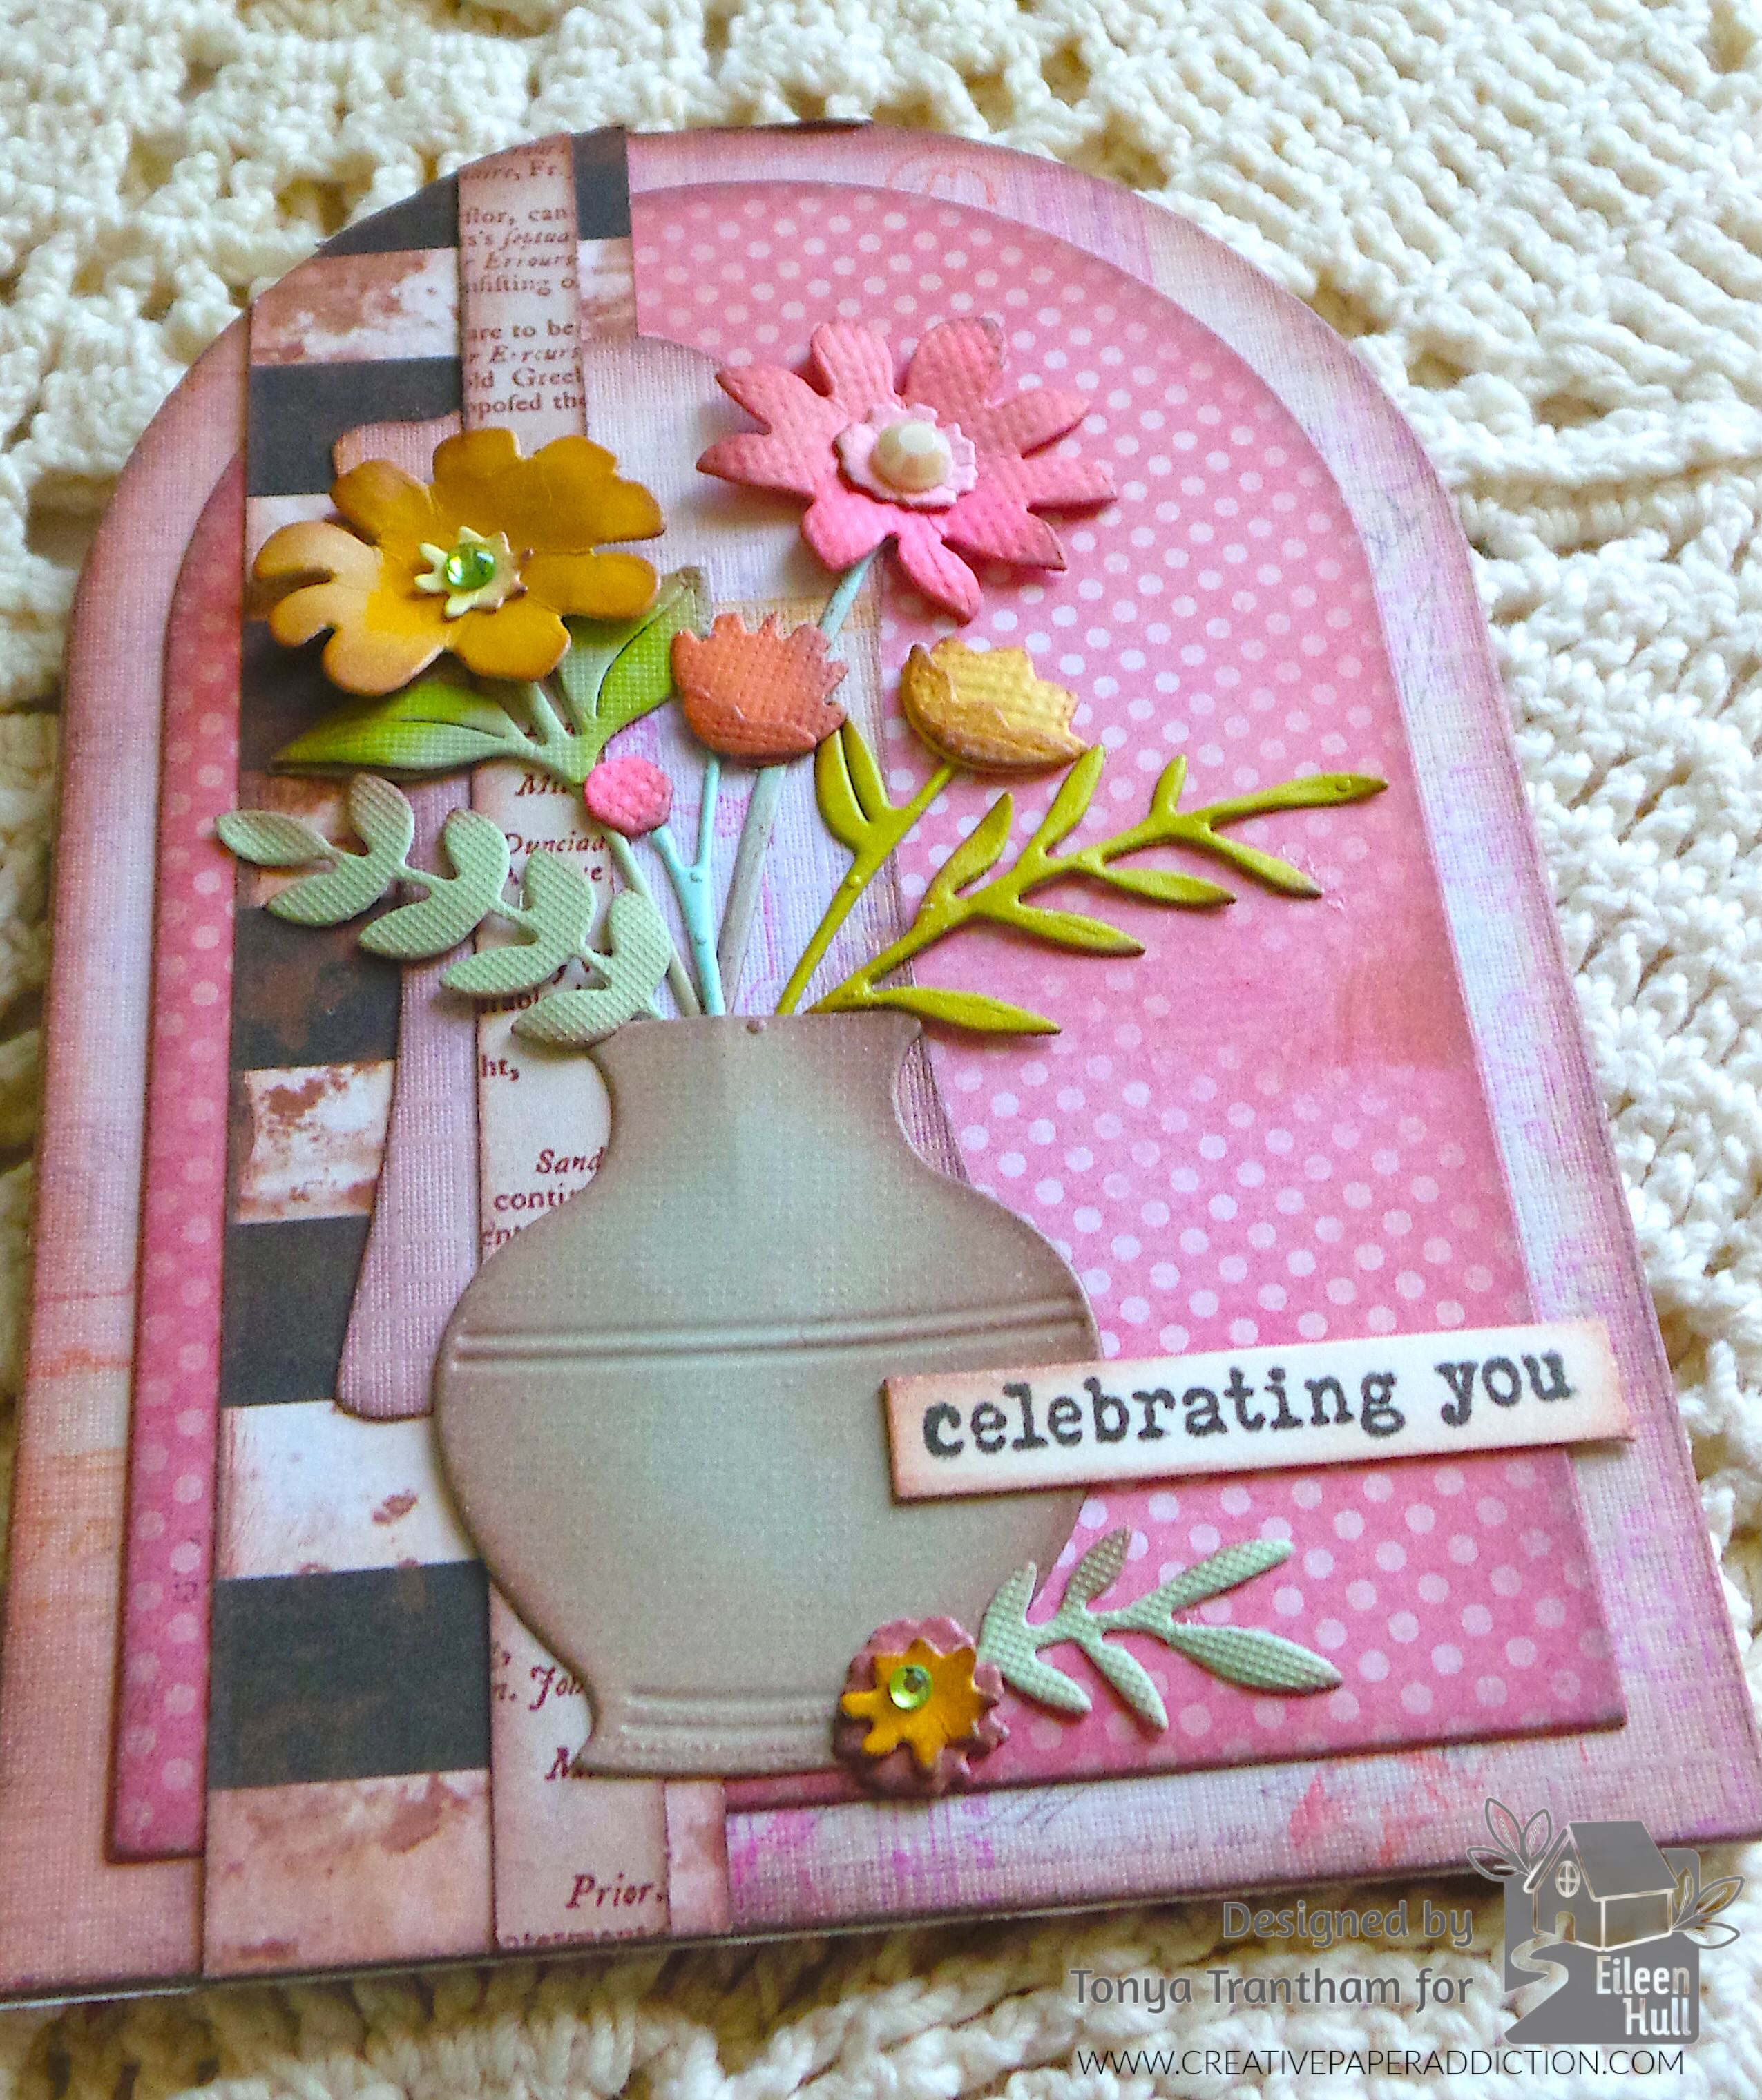
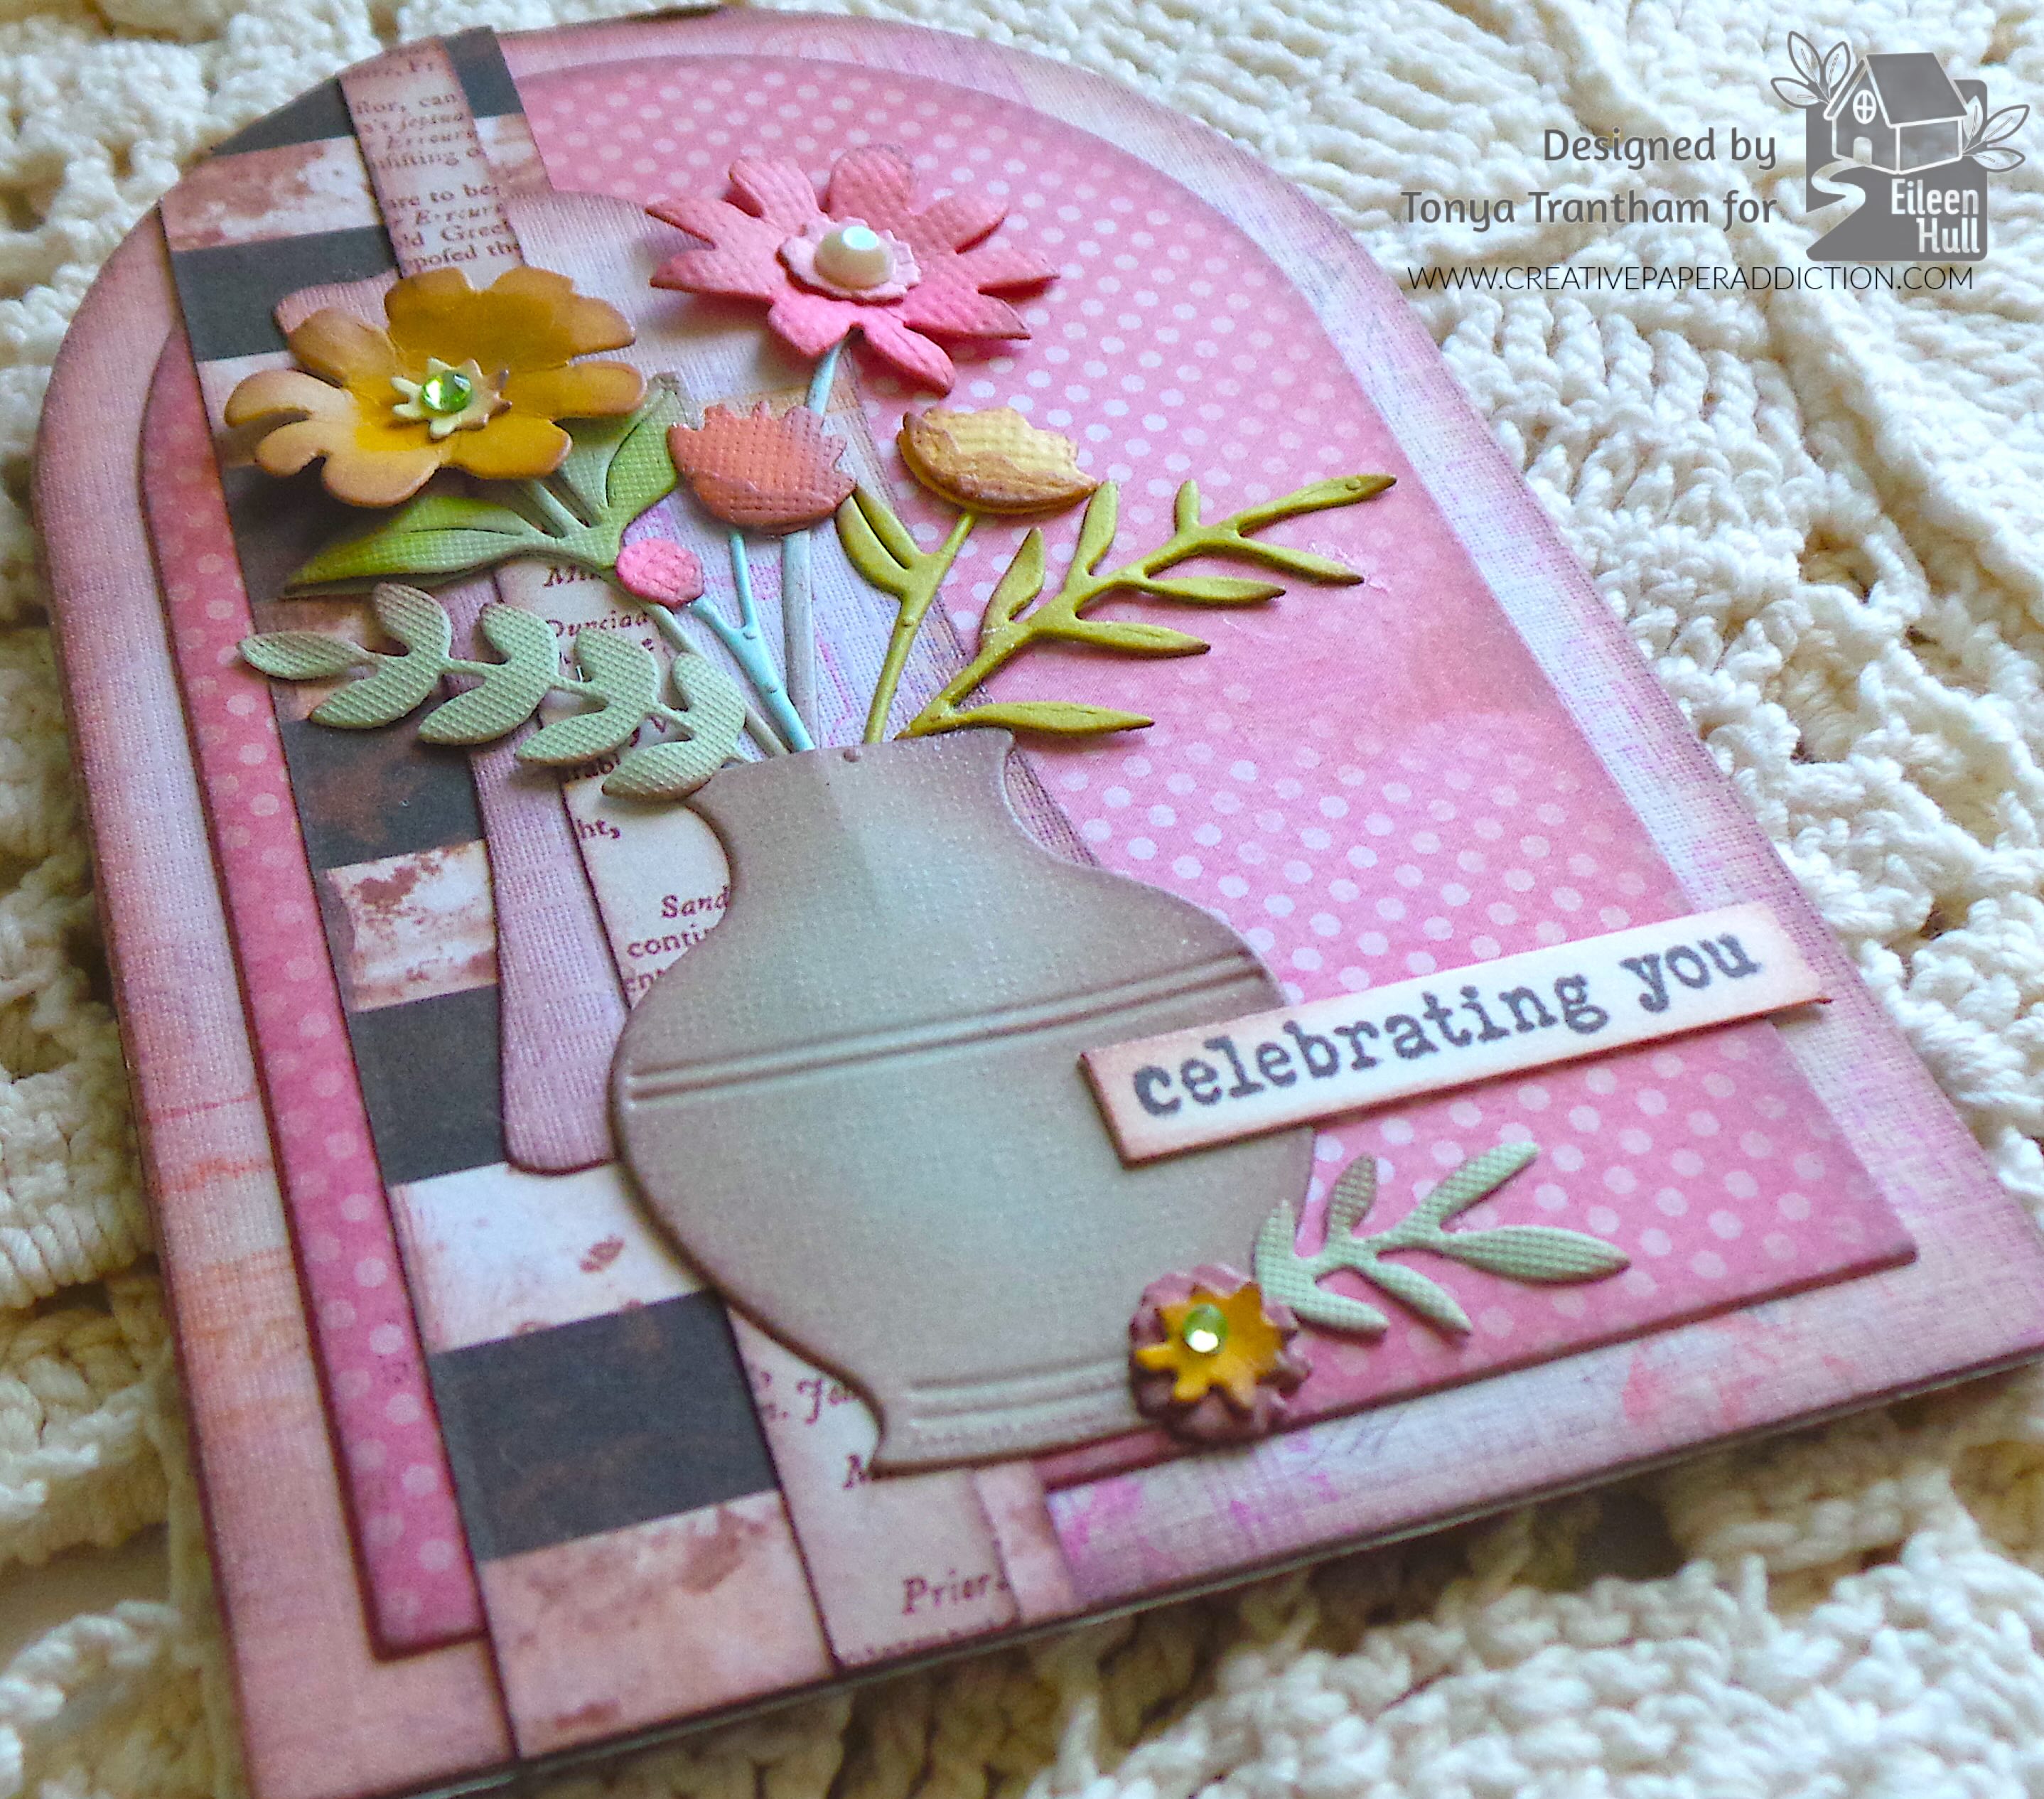
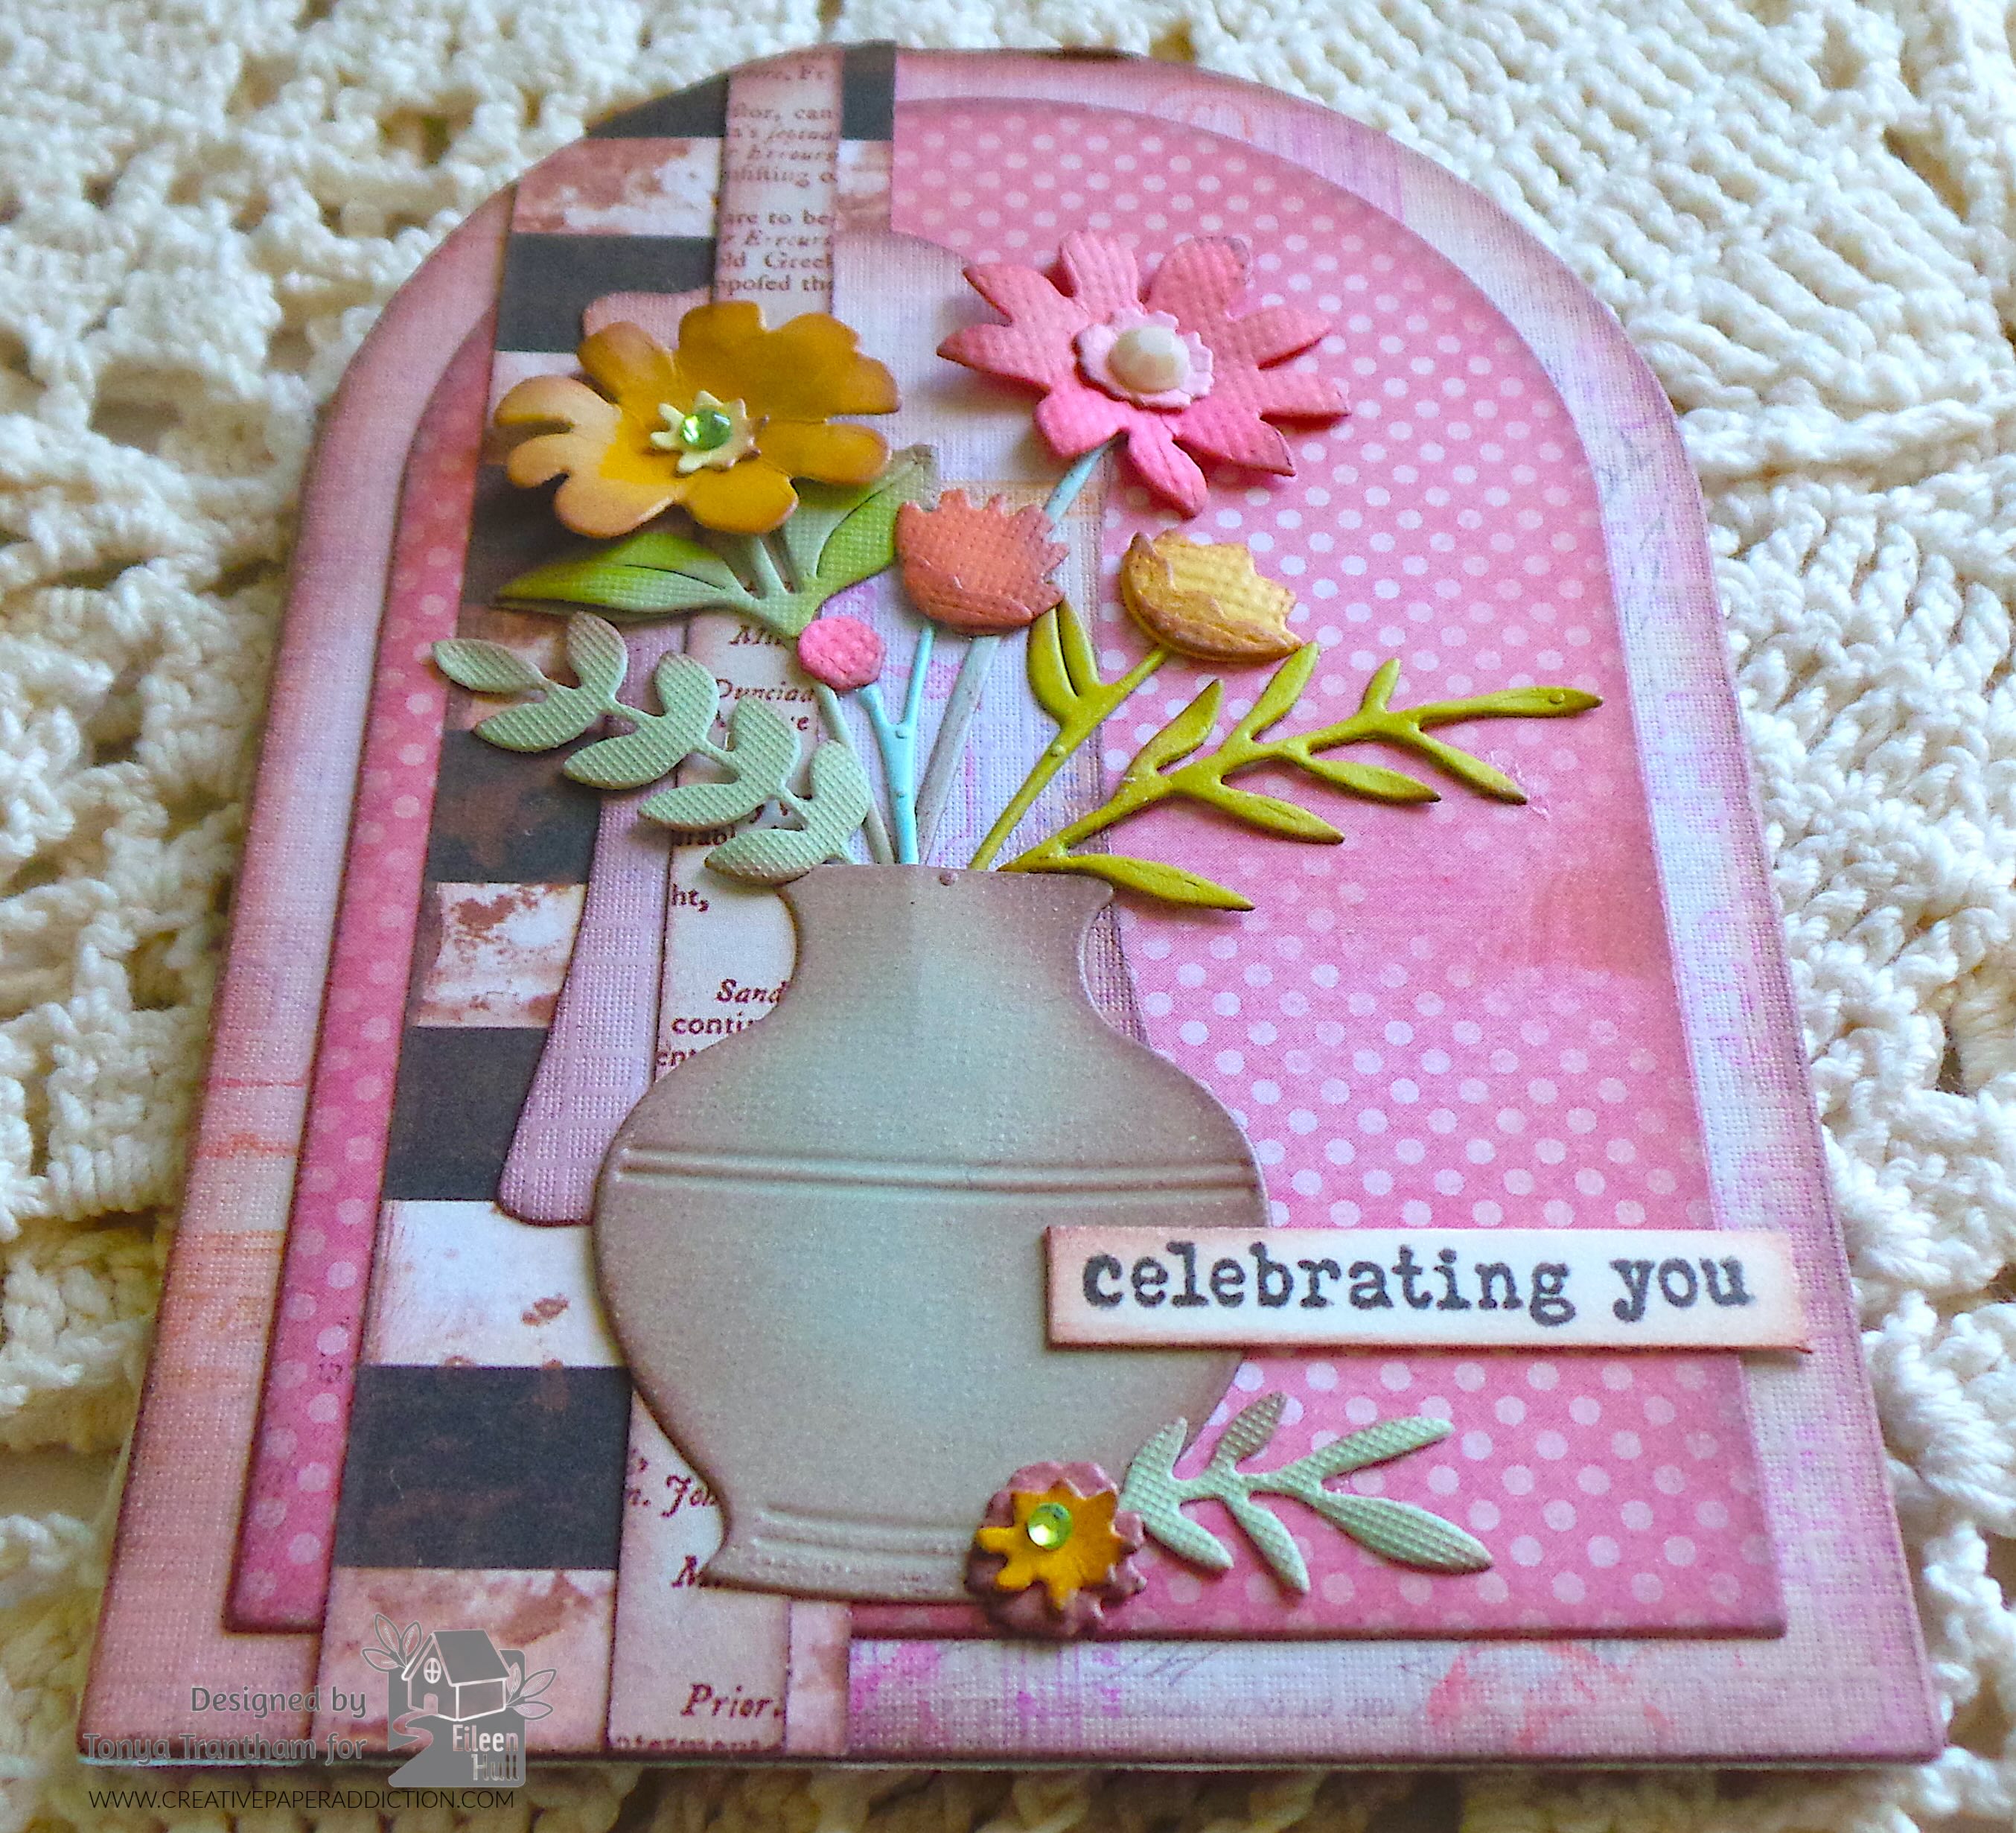
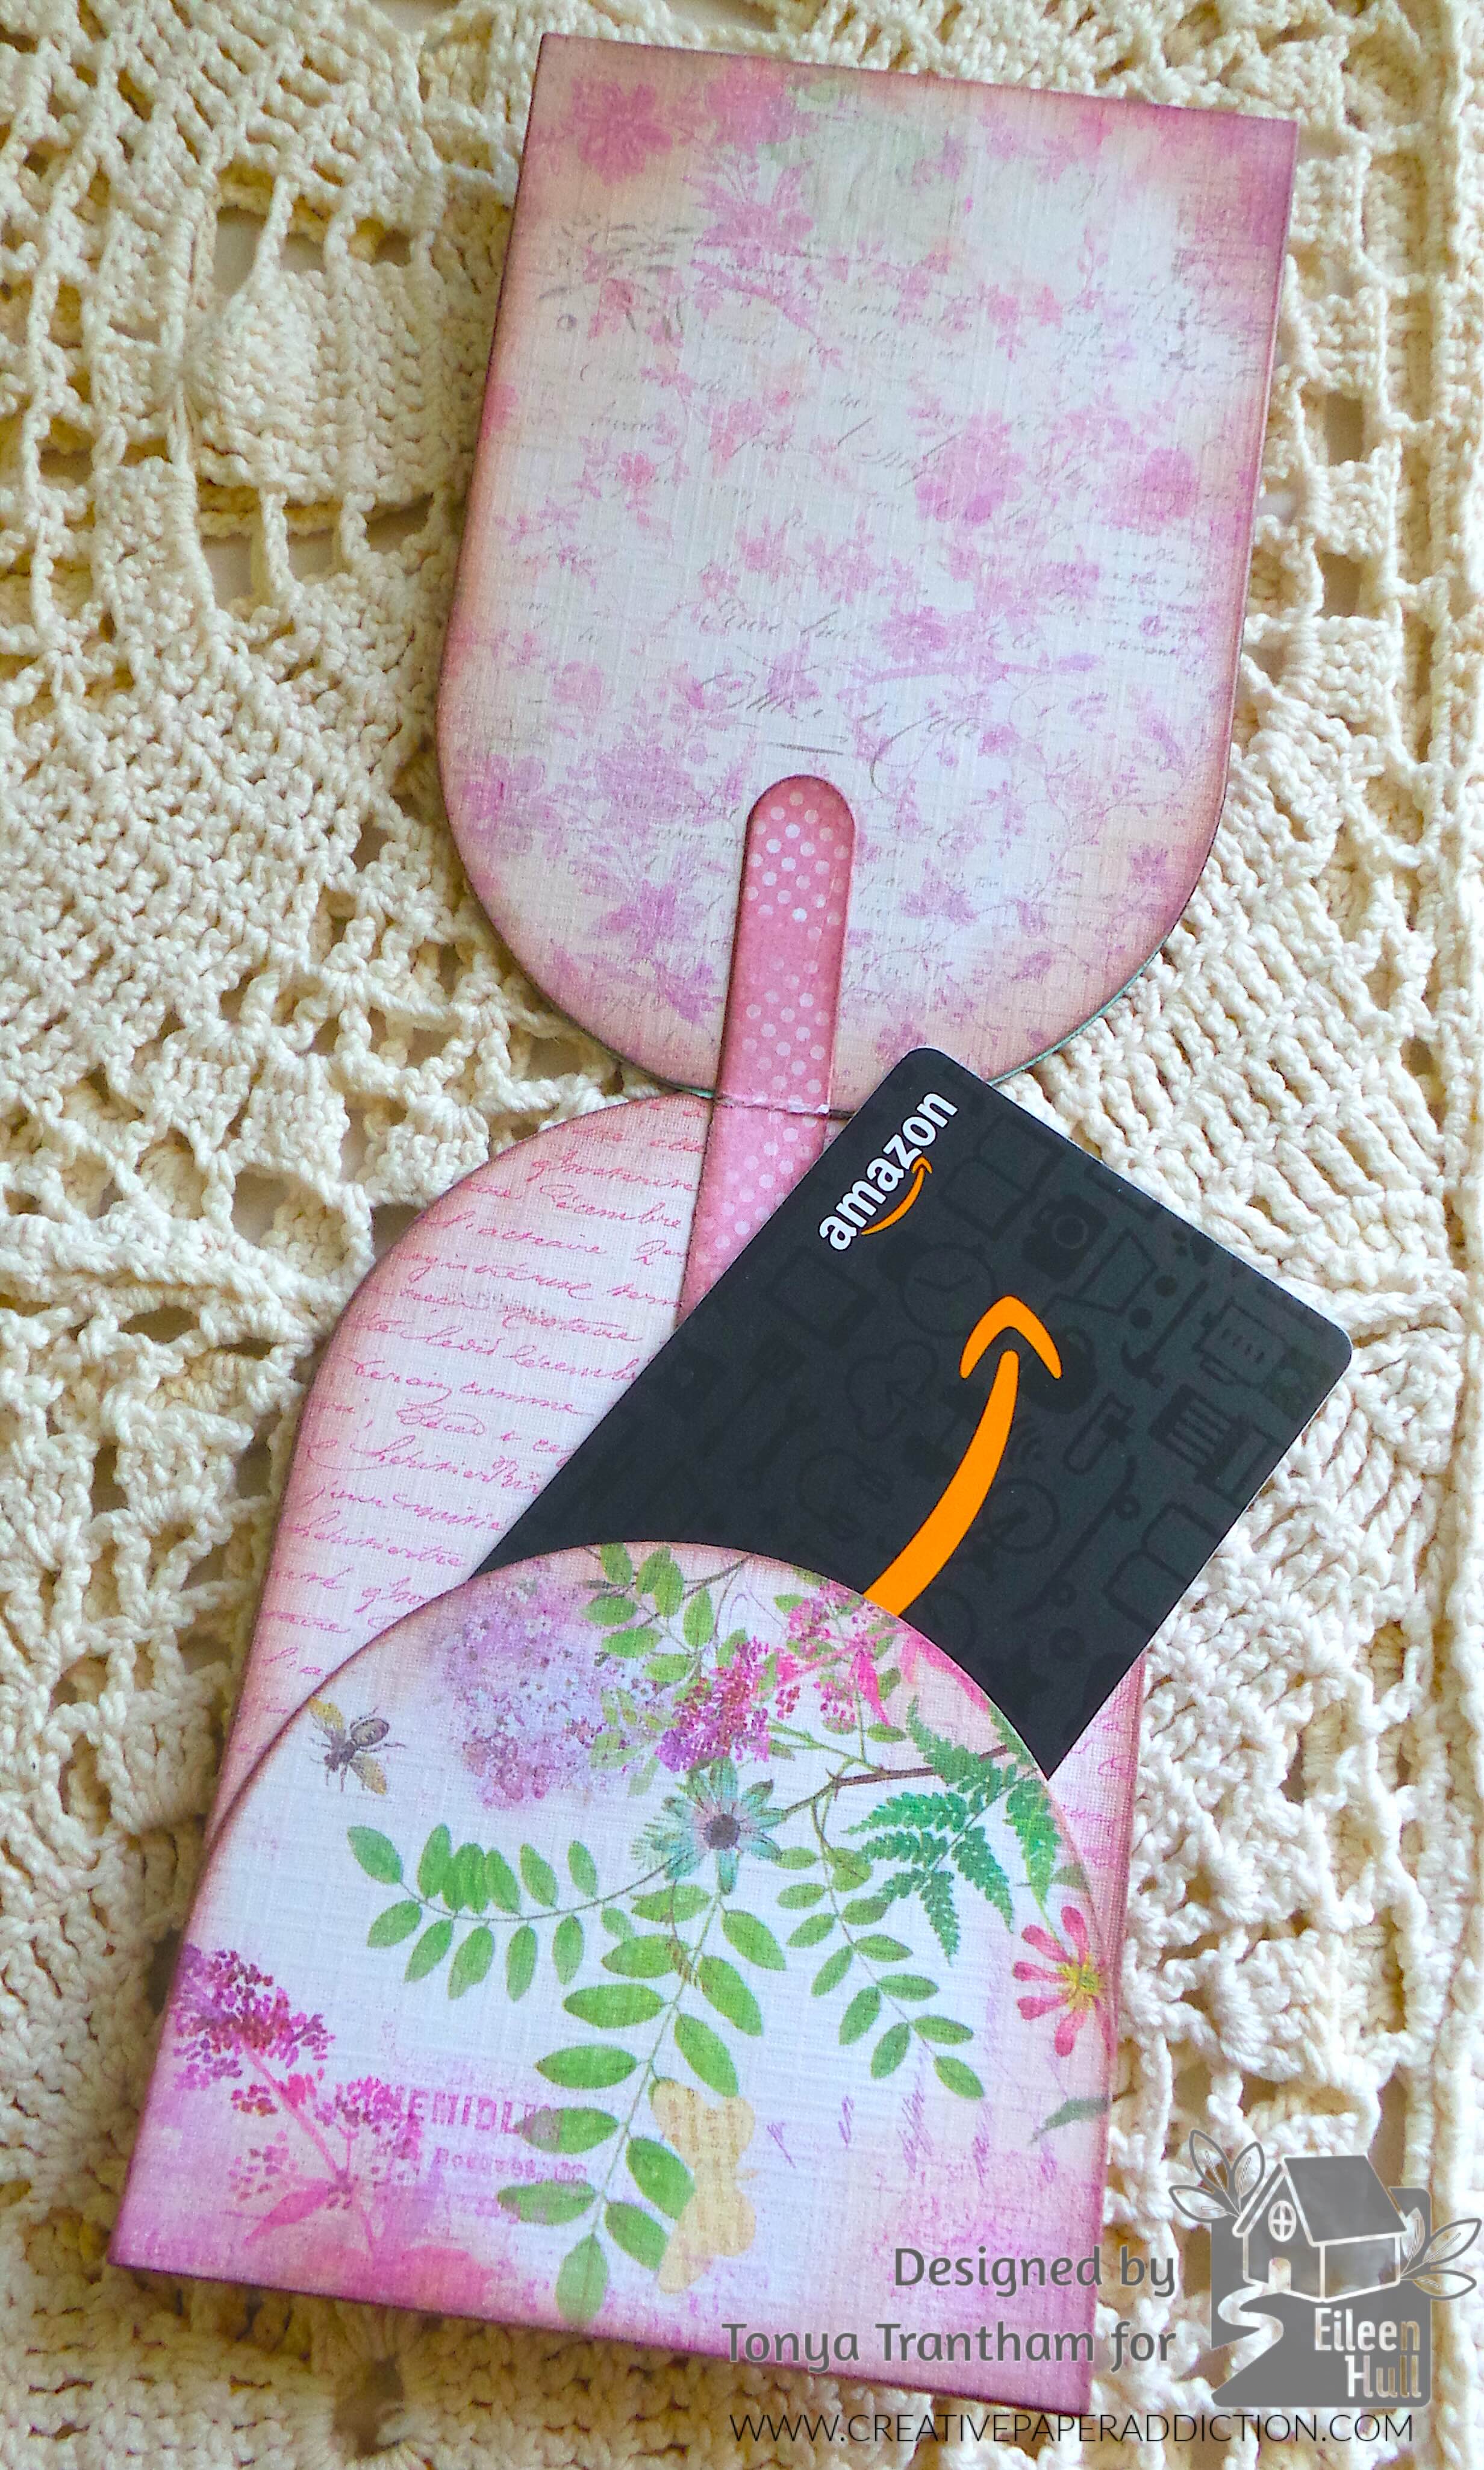
The first thing I did was fold a piece of cardstock in half. I placed the folded edge of the cardstock just below the top edge of the largest tunnel die from the Tunnel Arches Thinlits and run through the Diecut Machine. This created the base for the card.
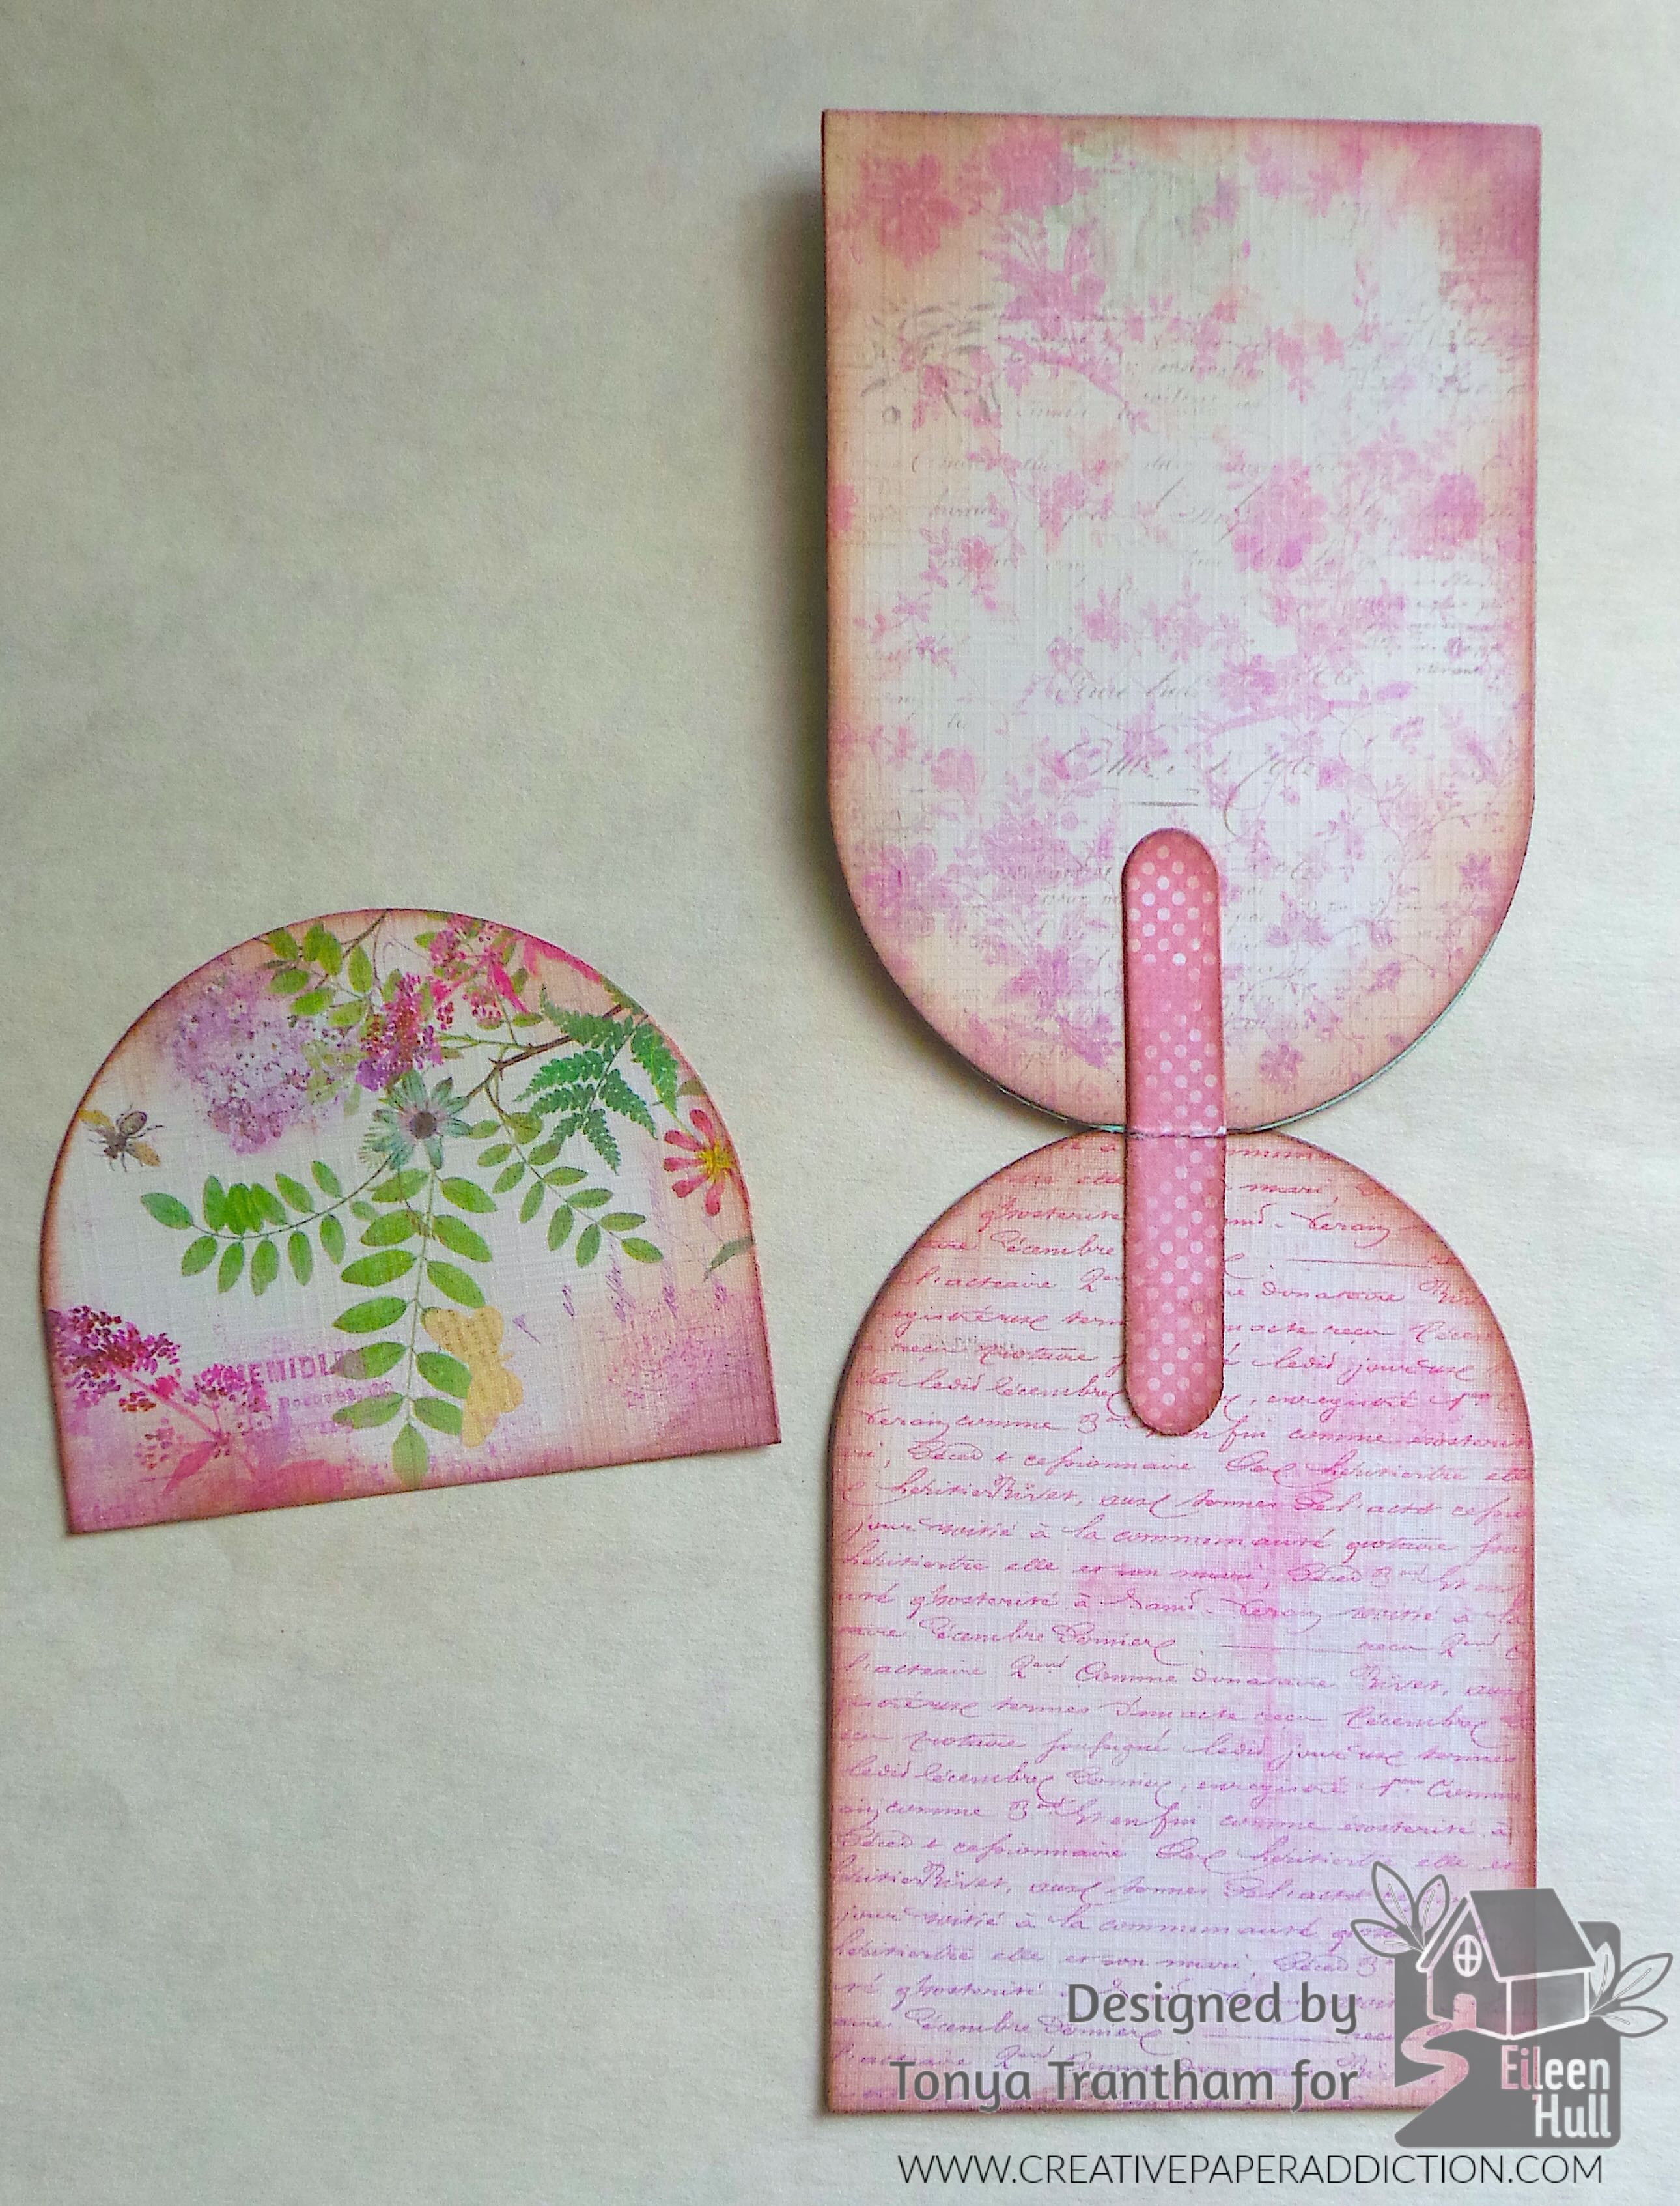
I didn’t like how flimsy the cardstock felt so I wound up covering both sides of the card base with patterned cardstock. I cut the largest tunnel die and the bottom half off to use as a pocket for inside the card and adhered the sides and the bottom to the card. I also folded half a piece of patterned cardstock. I placed below the bottom of the smallest tunnel die and run through the diecut machine. I glued that to the inside of the card base to reinforce the card.
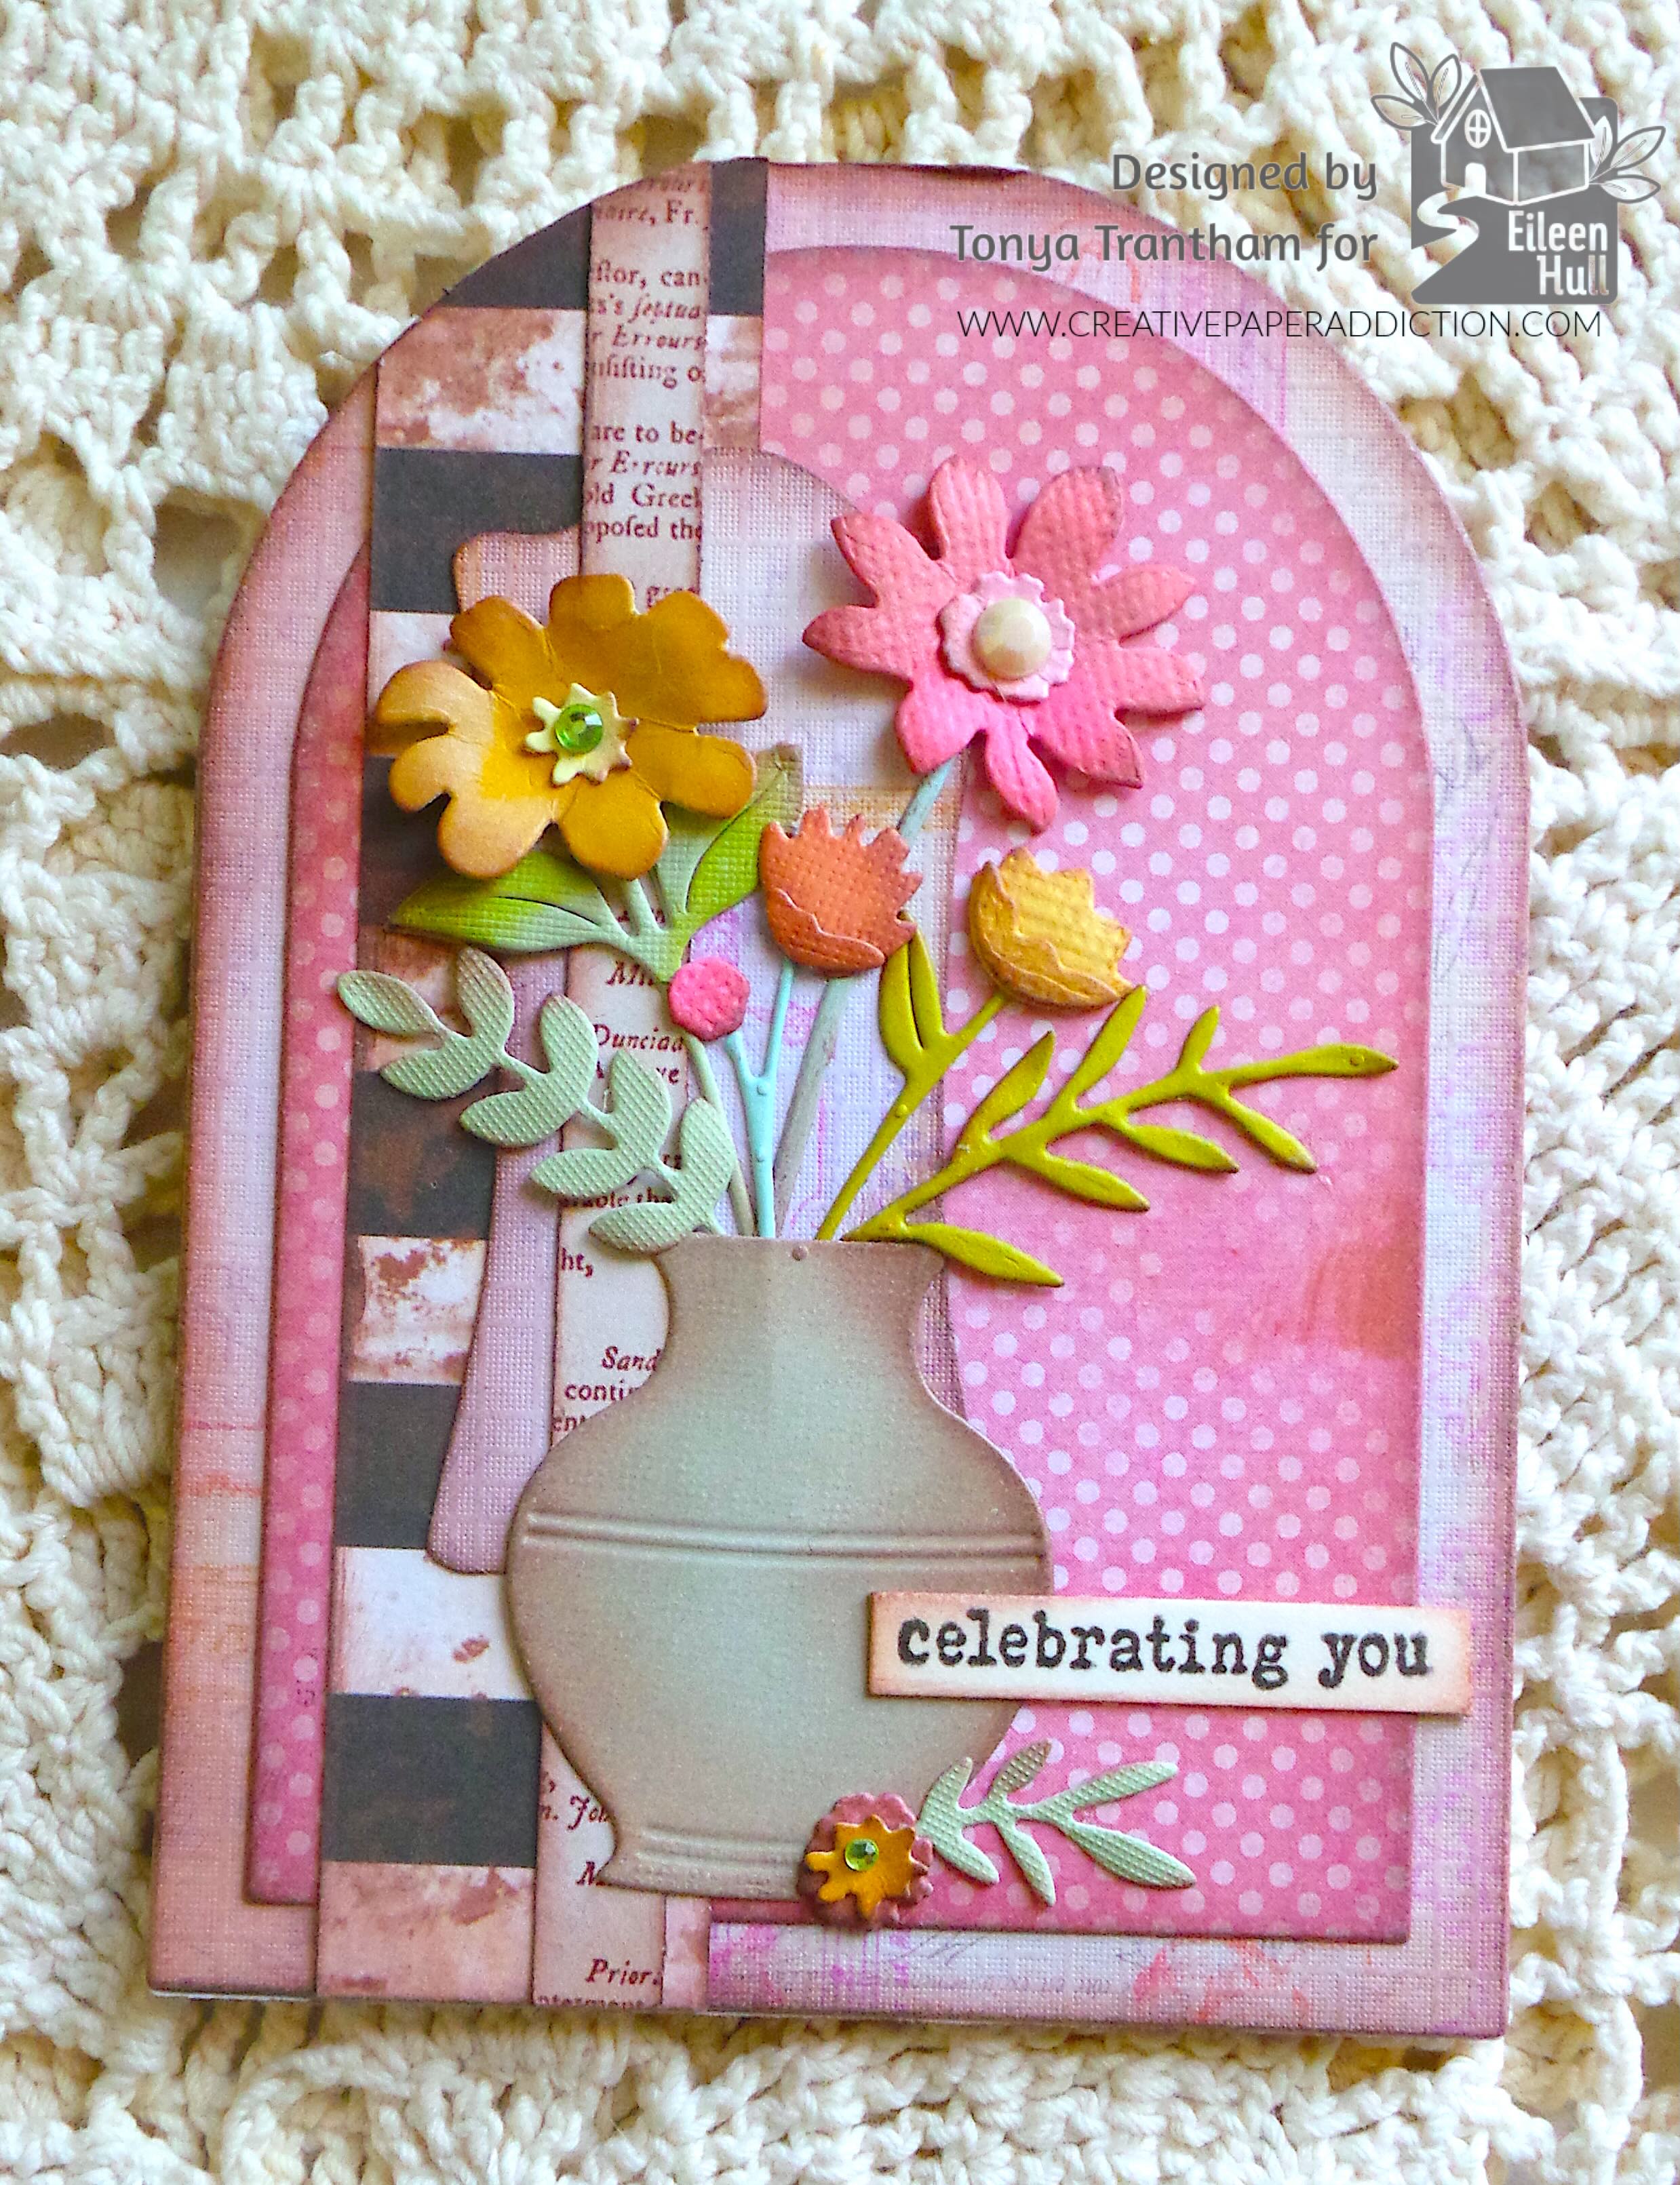
I inked all dies with brown chalk ink. I shaped the flowers and stems and leaf sprigs with a Stylus. I applied the stem dies to the card first. I layered the flowers and placed on the stems. I added a gems to the center of the flowers. I glued the vase over the bottoms of the stems. I added a couple of the I added a couple of leaf sprigs to the vase.
I also adhered a smaller leaf sprig and small flower to the bottom of the vase. I lightly inked the edges of the sentiment before gluing to the card to finish.
All you need to do is add a gift card and it is ready to give. I plan on making a few more of these but change the theme to Christmas.
If you haven’t been by Eileen’s blog lately you can find the latest post HERE. Also if you have any questions or comments please leave them below.
(Products listed above are Affiliated Links for your convenience)
DISCLAIMERS
This blog is compensated to provide opinion on products, services, websites, and various other topics. Even though the owner(s) of this blog receives compensation for our posts or advertisements. I always give my honest opinions, findings, beliefs, or experiences on those topics or products. The views and opinions expressed on this blog are purely my own. Any product claim, statistic, or quote should be checked with each manufacturer. Verify other representations about a product or service with the provider or party in question.This blog contains affiliate links. Clicking these links helps to support Tonya Trantham Designs – Creative Paper Addiction. It’s at no additional cost to you.Today’s features are Sizzix, Eileen Hull and Scrapbook.com Products.
Thanks for stopping by, I hope your Monday is wonderful and enjoy creating!
Hi everyone! I’m back with my project for Eileen Hull this month. This month theme is mix and match and I’ve definitely used an assortment of dies for this project. Anyways, let’s get started!
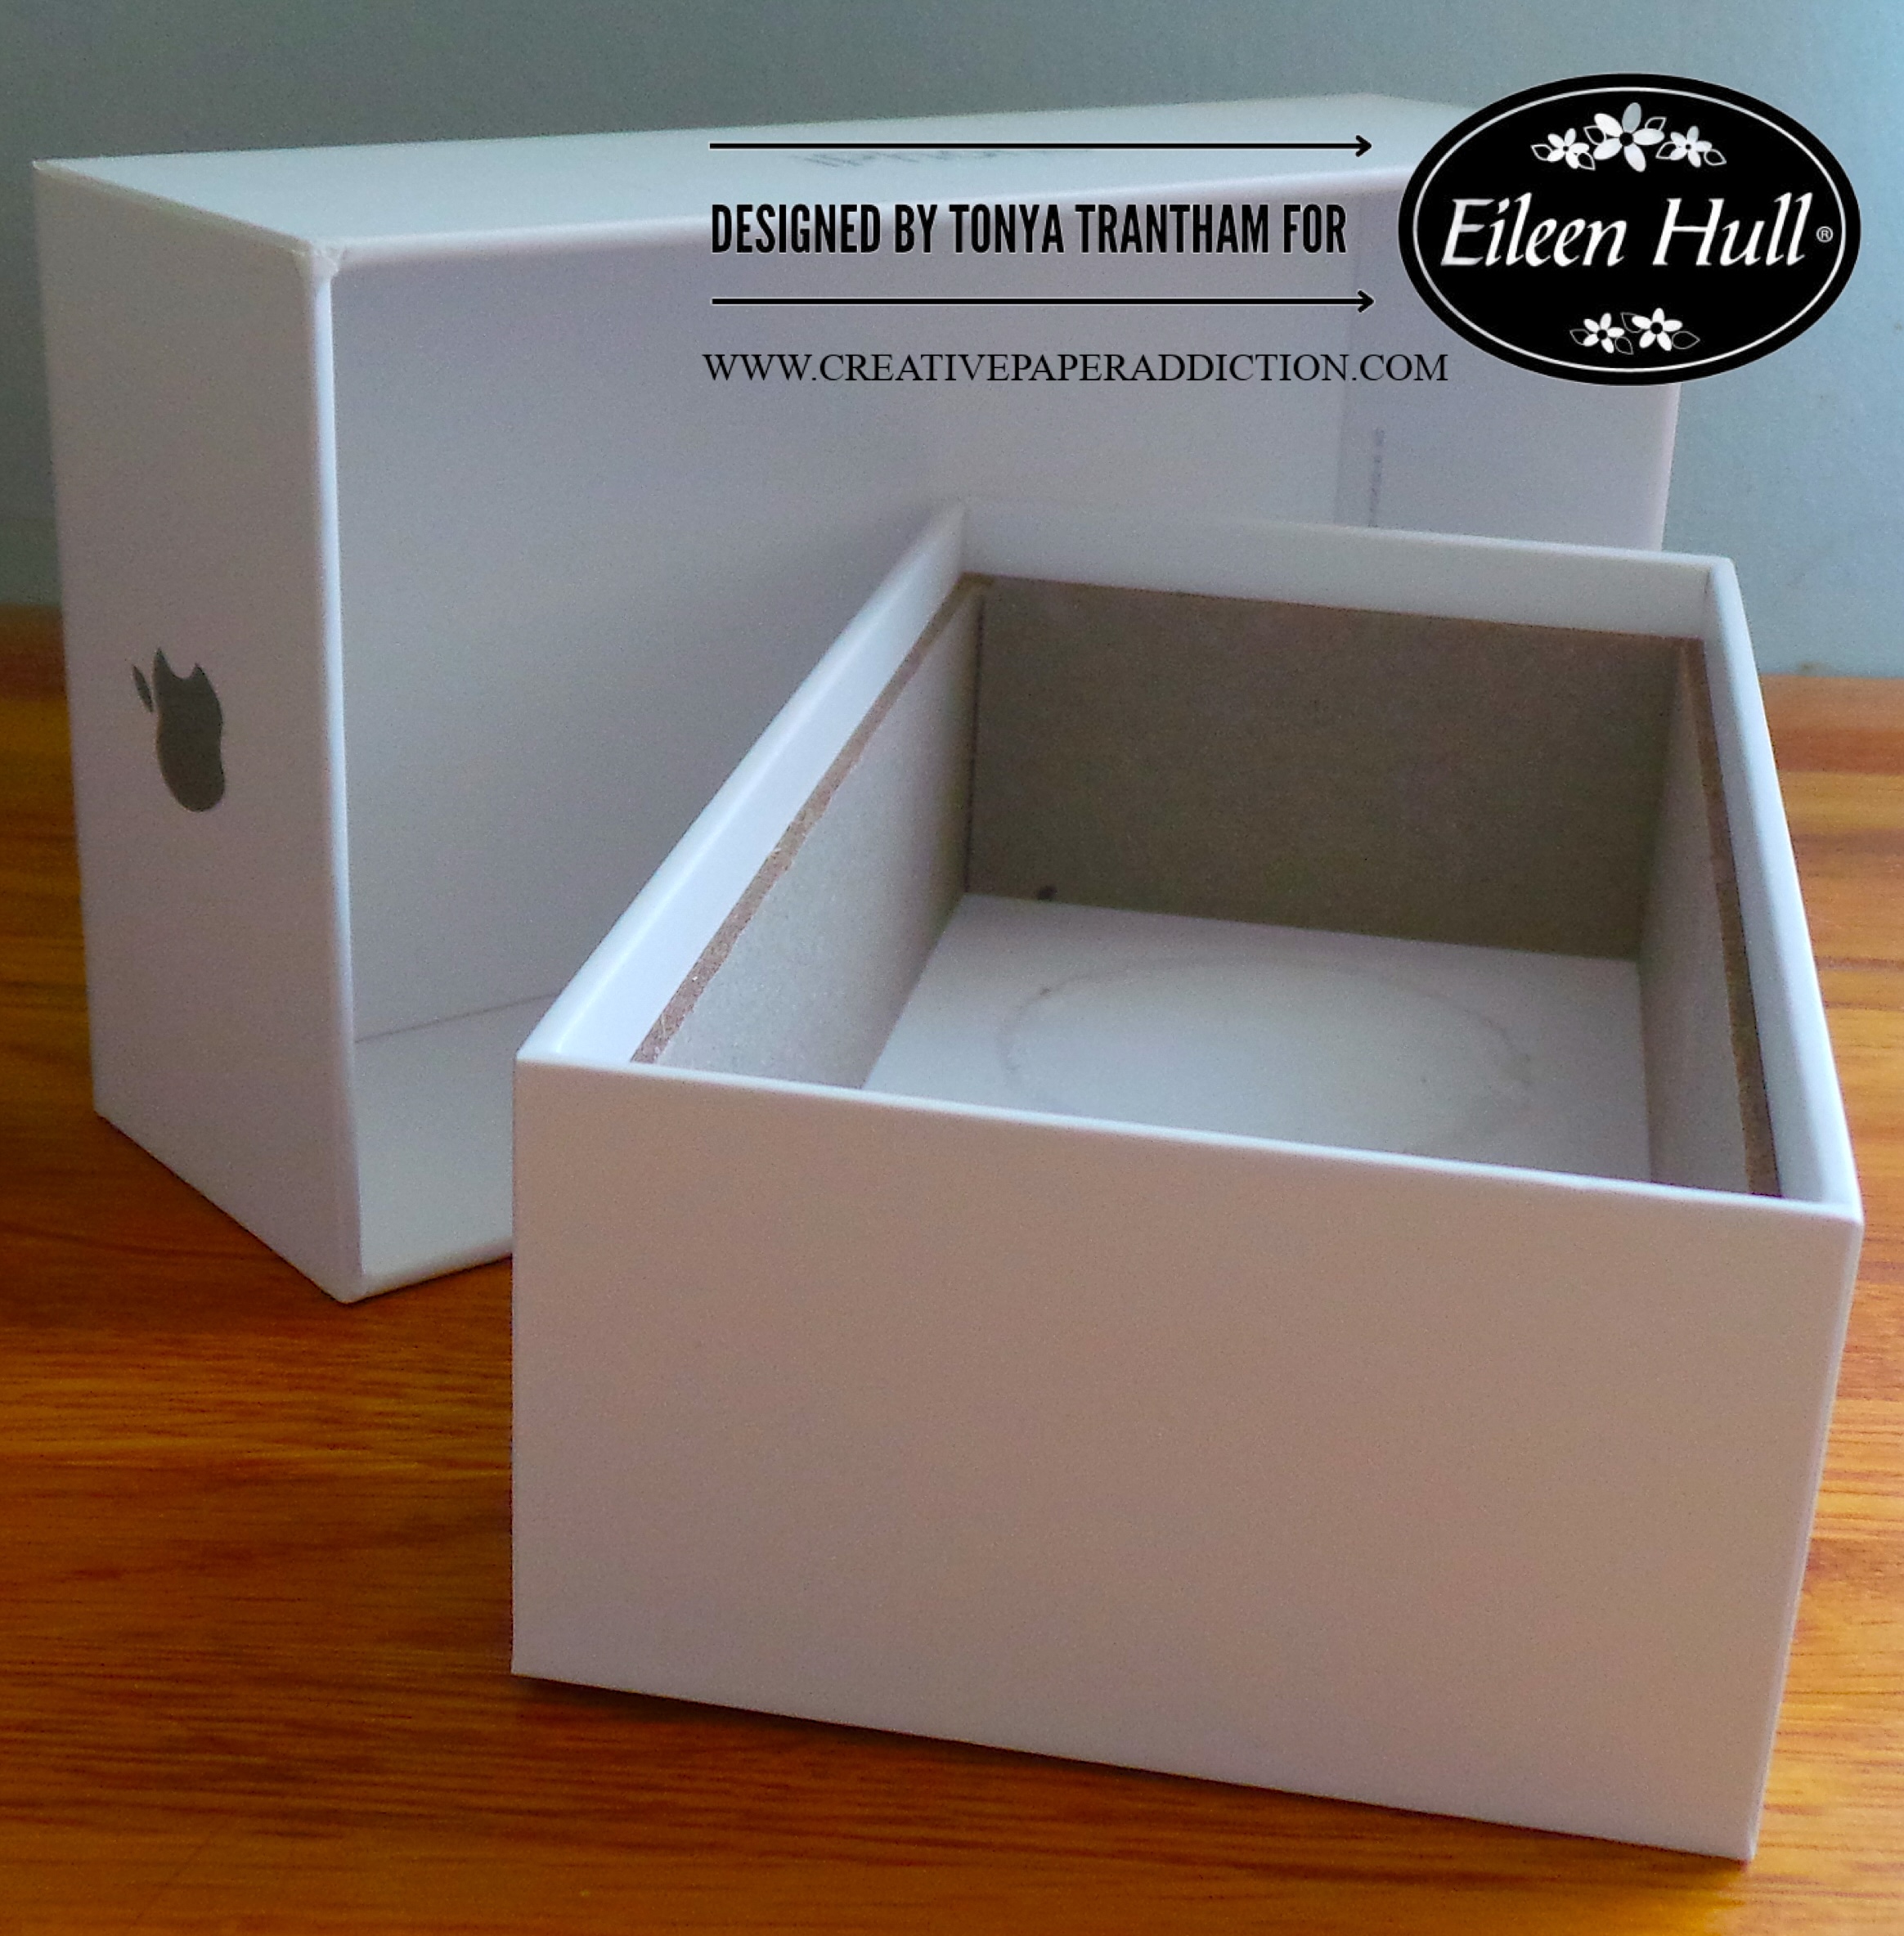
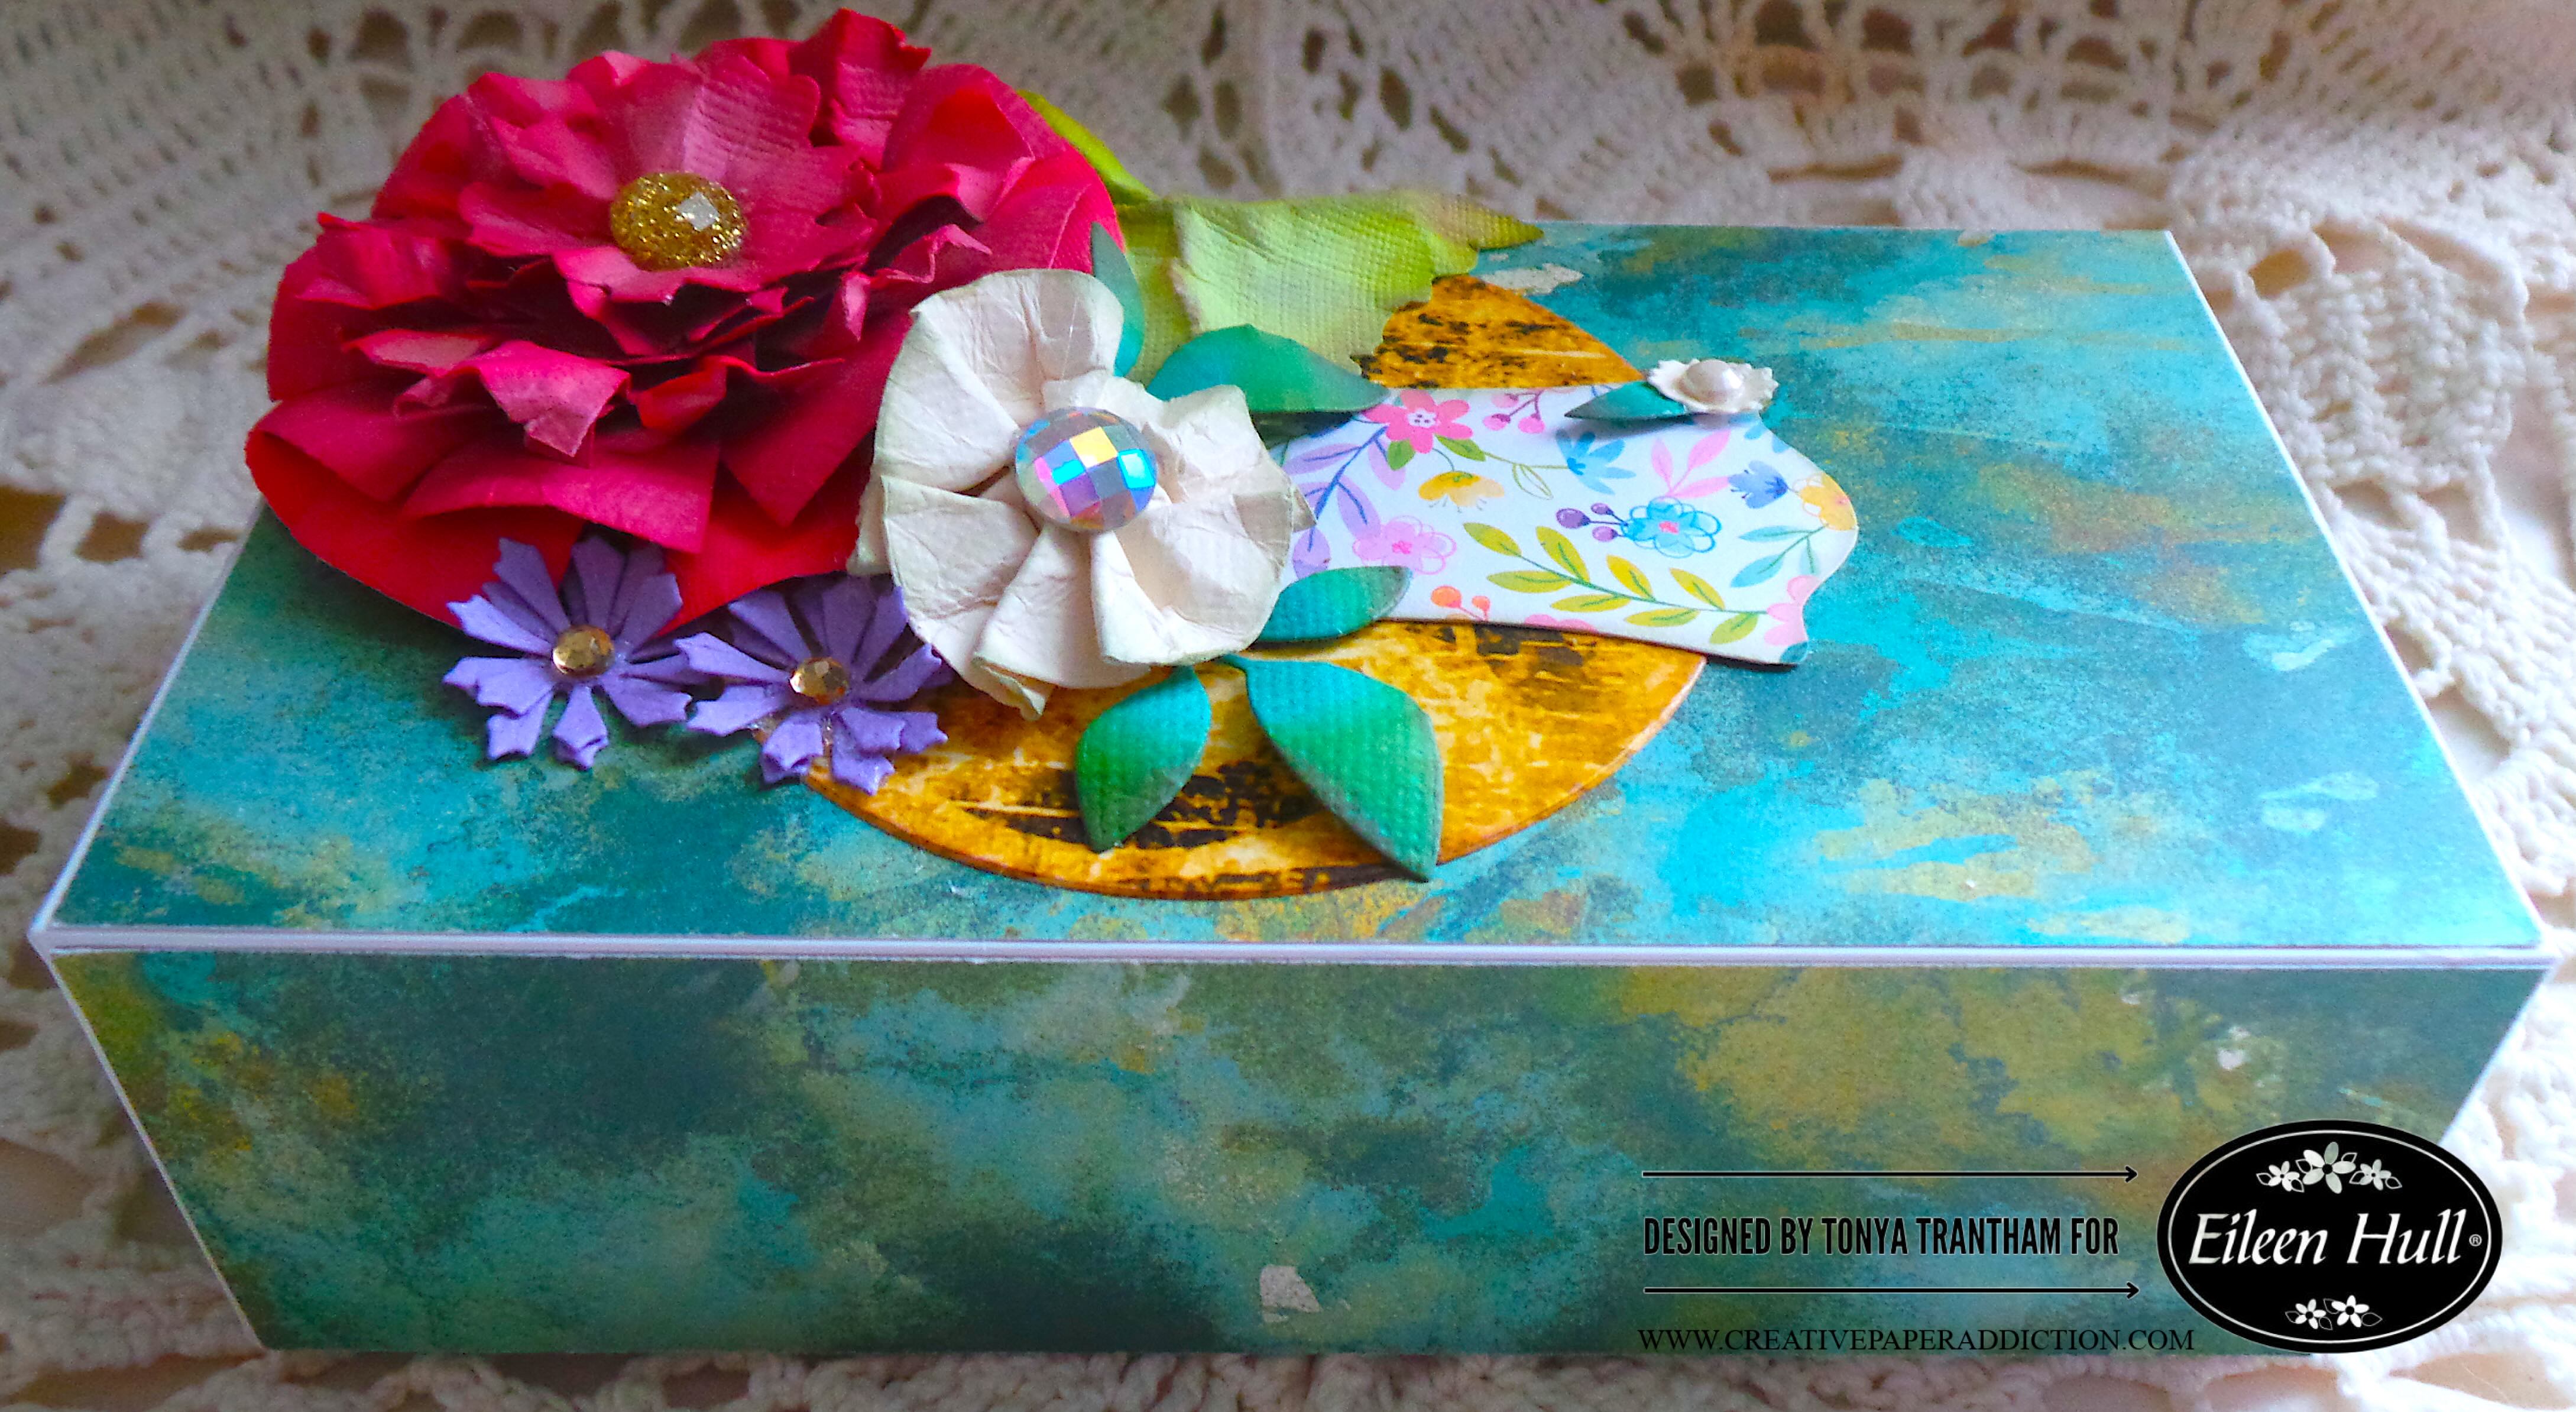
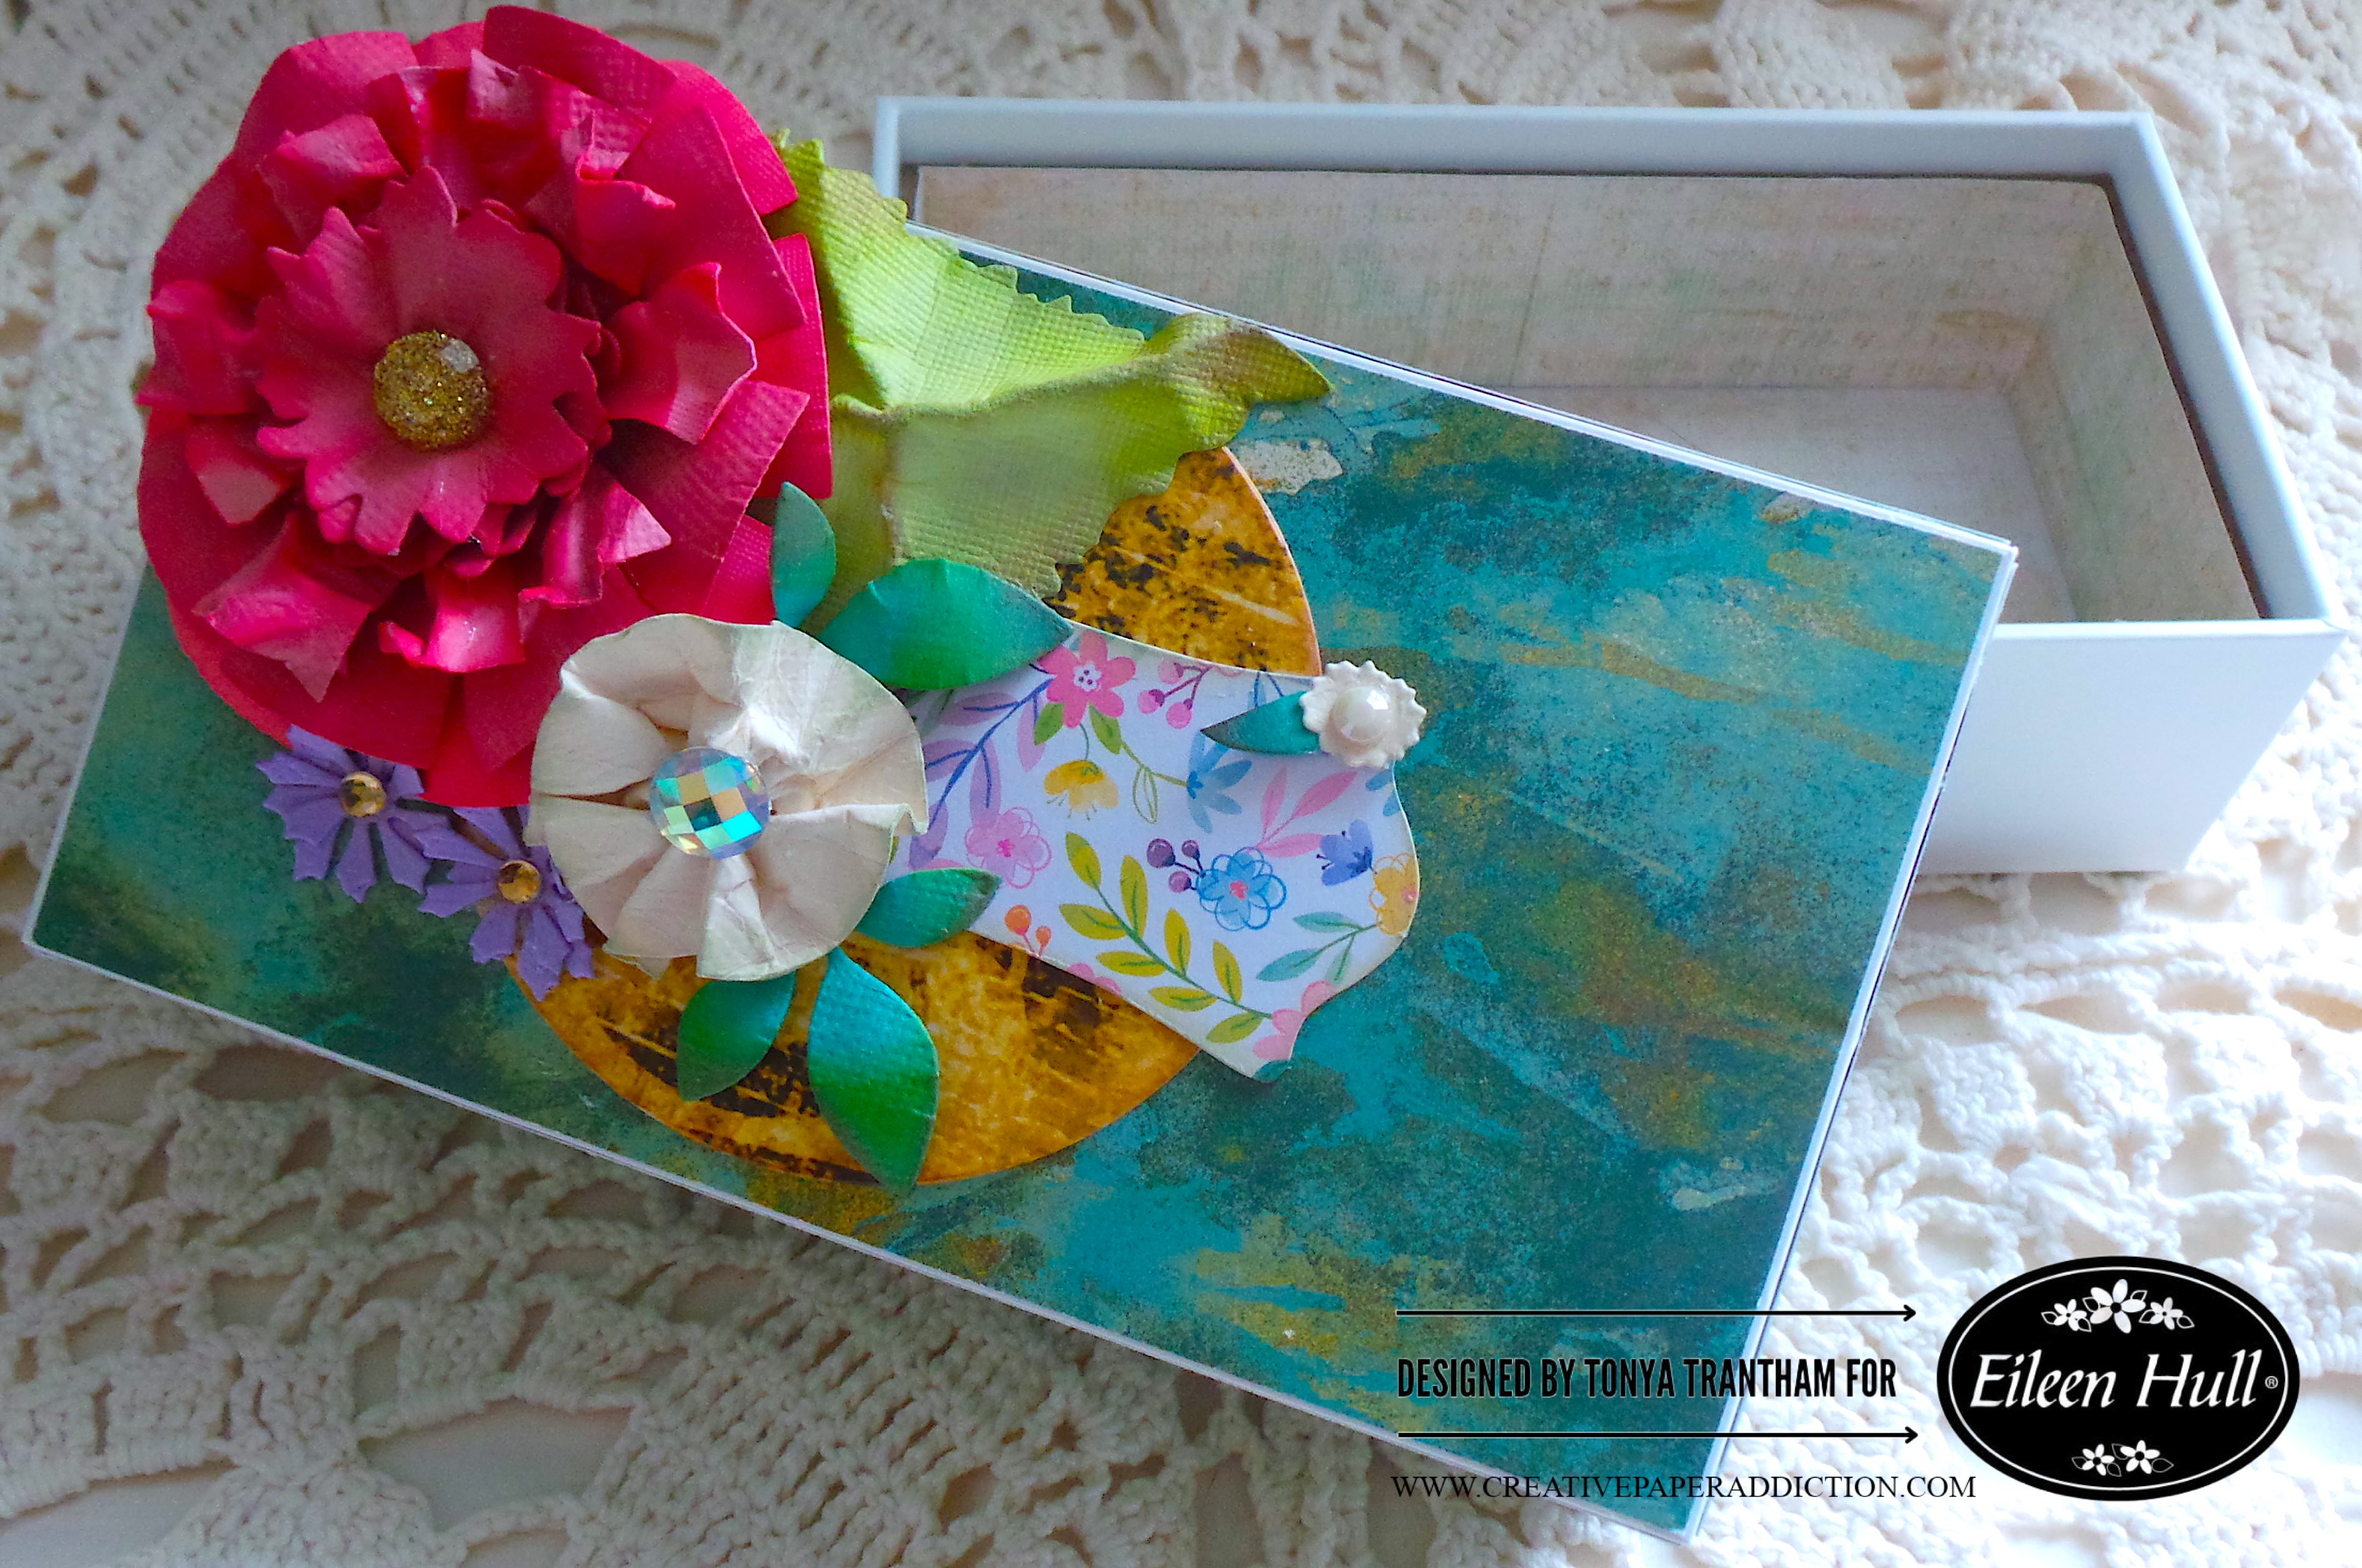
I have a collection of phone boxes in my stash. Since they are sturdy I decided to up-cycle and turn one into a gift box. The first thing I did was remove the plastic piece that is in the bottom of the box.
Next I cut and covered the outside of the box with a patterned cardstock. I also cut and covered the inside of the box to cover up where I removed the plastic.
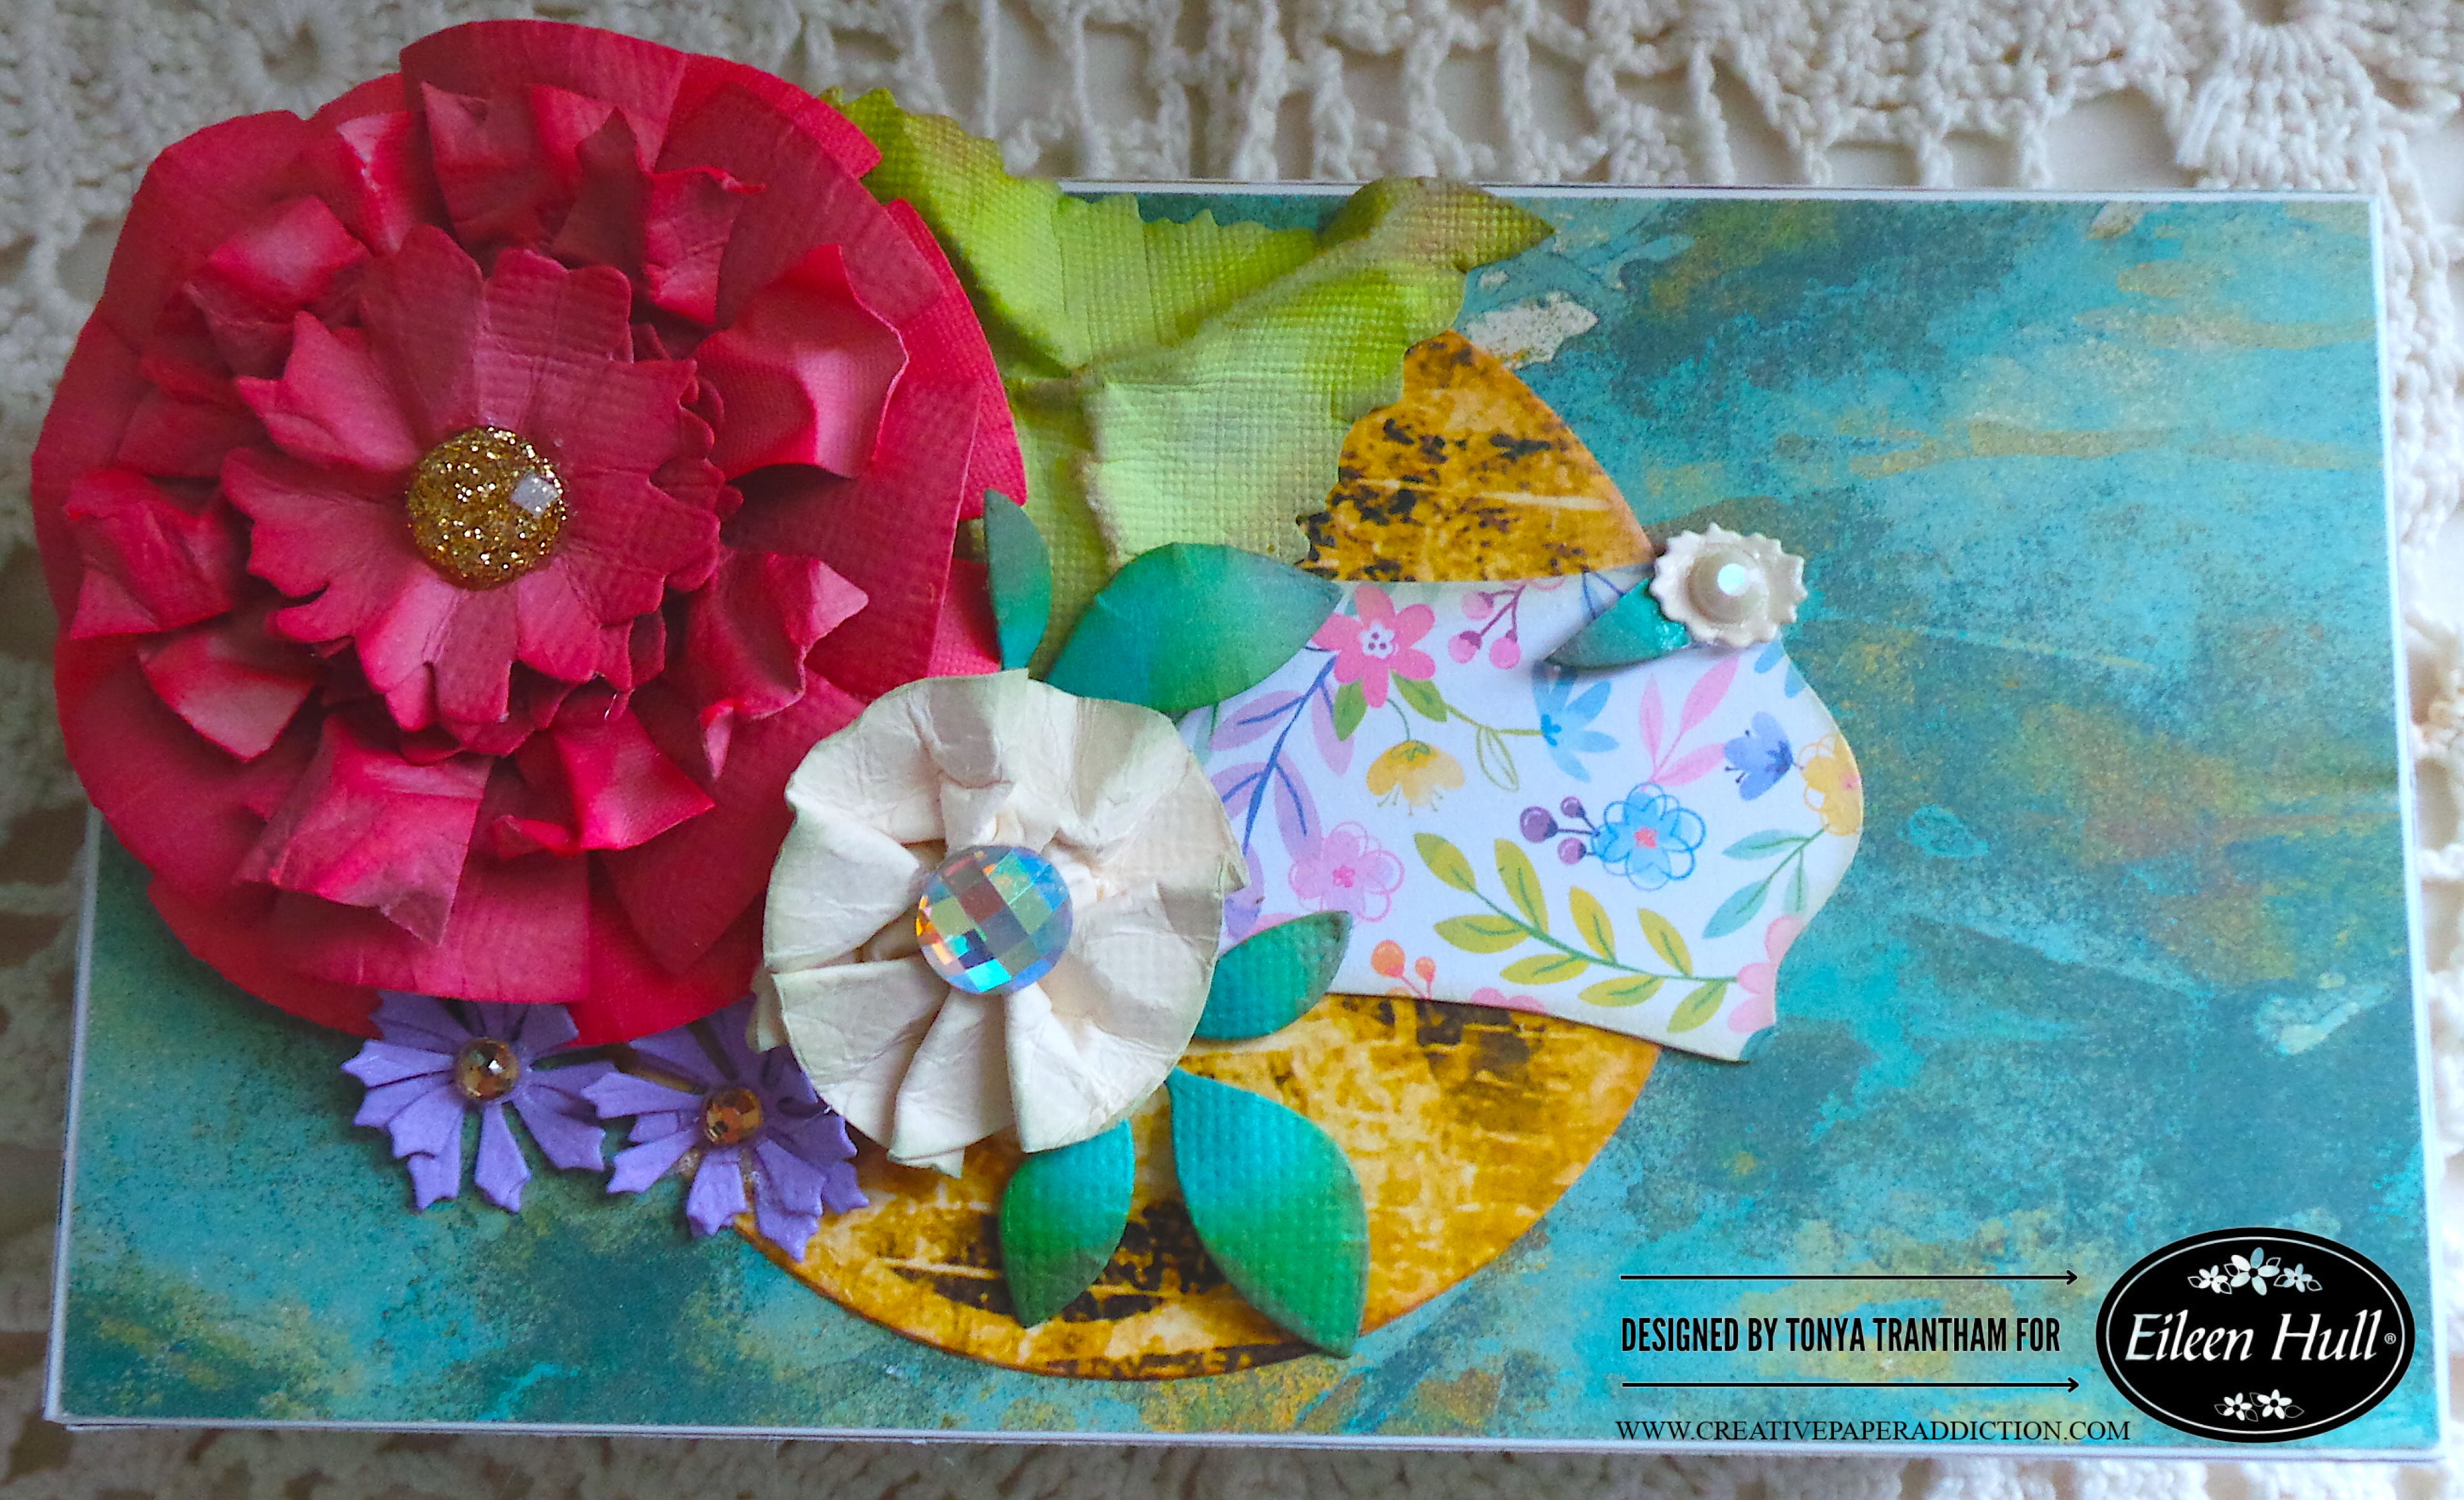
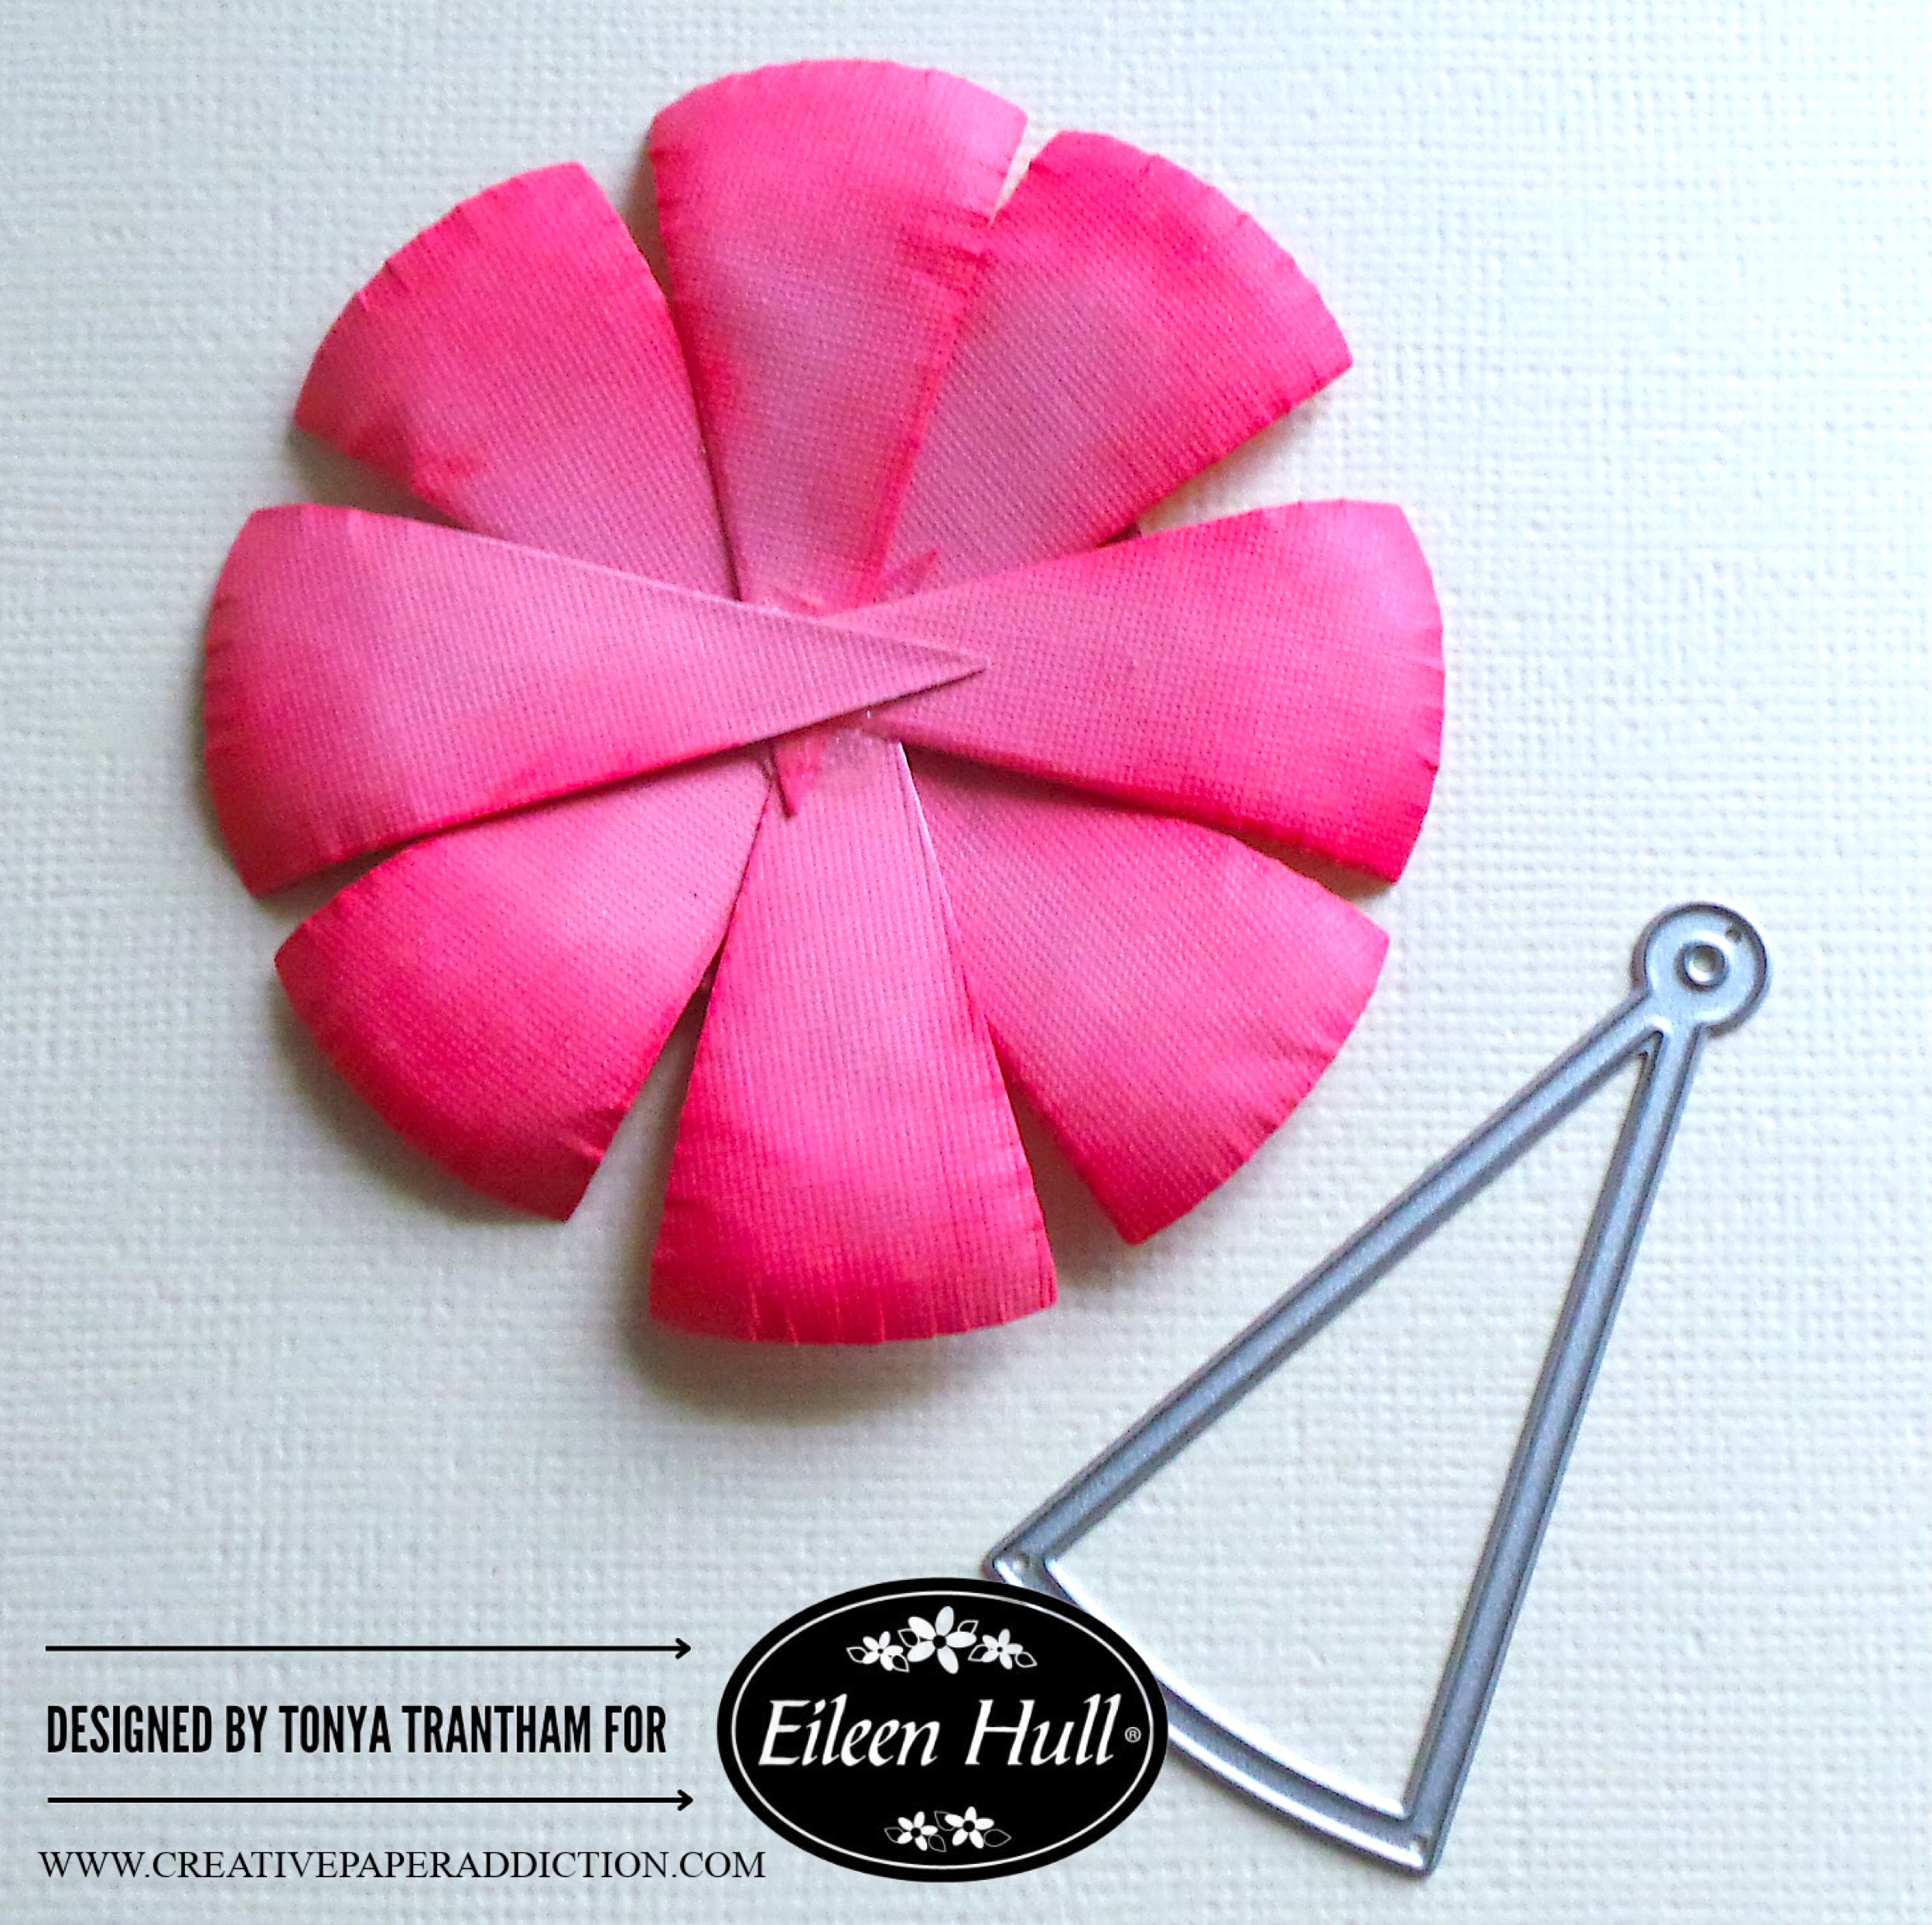
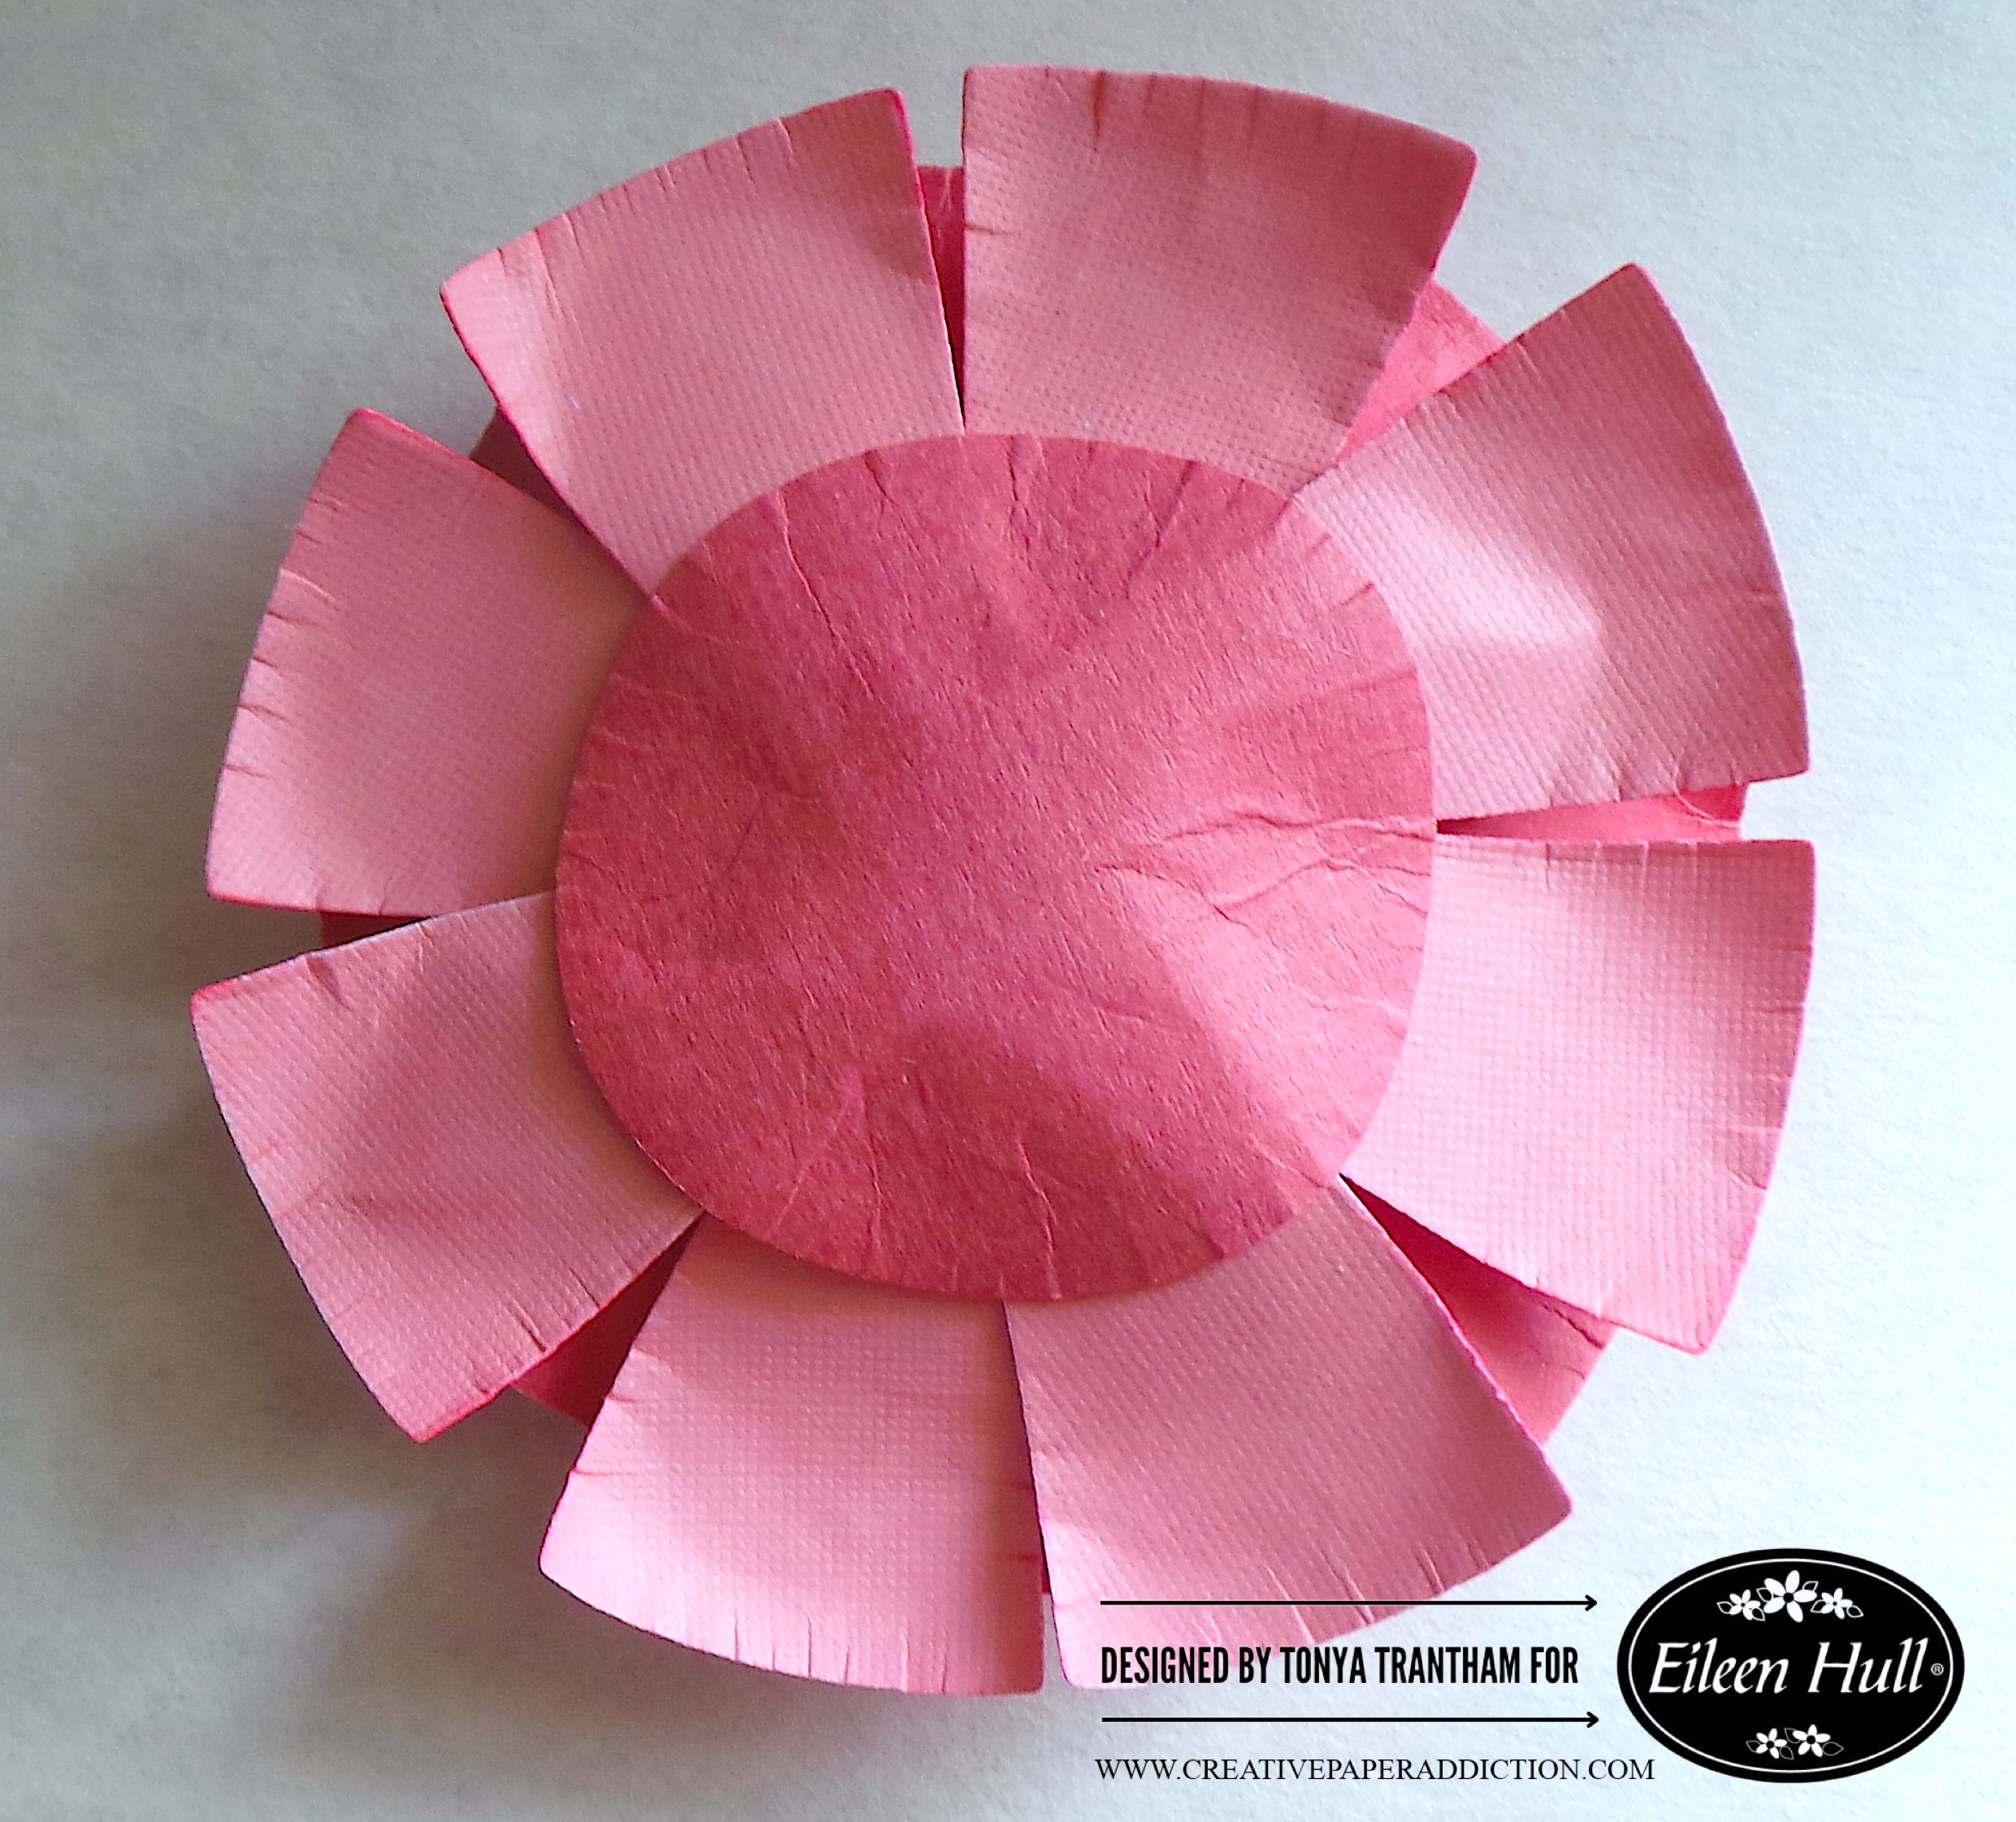
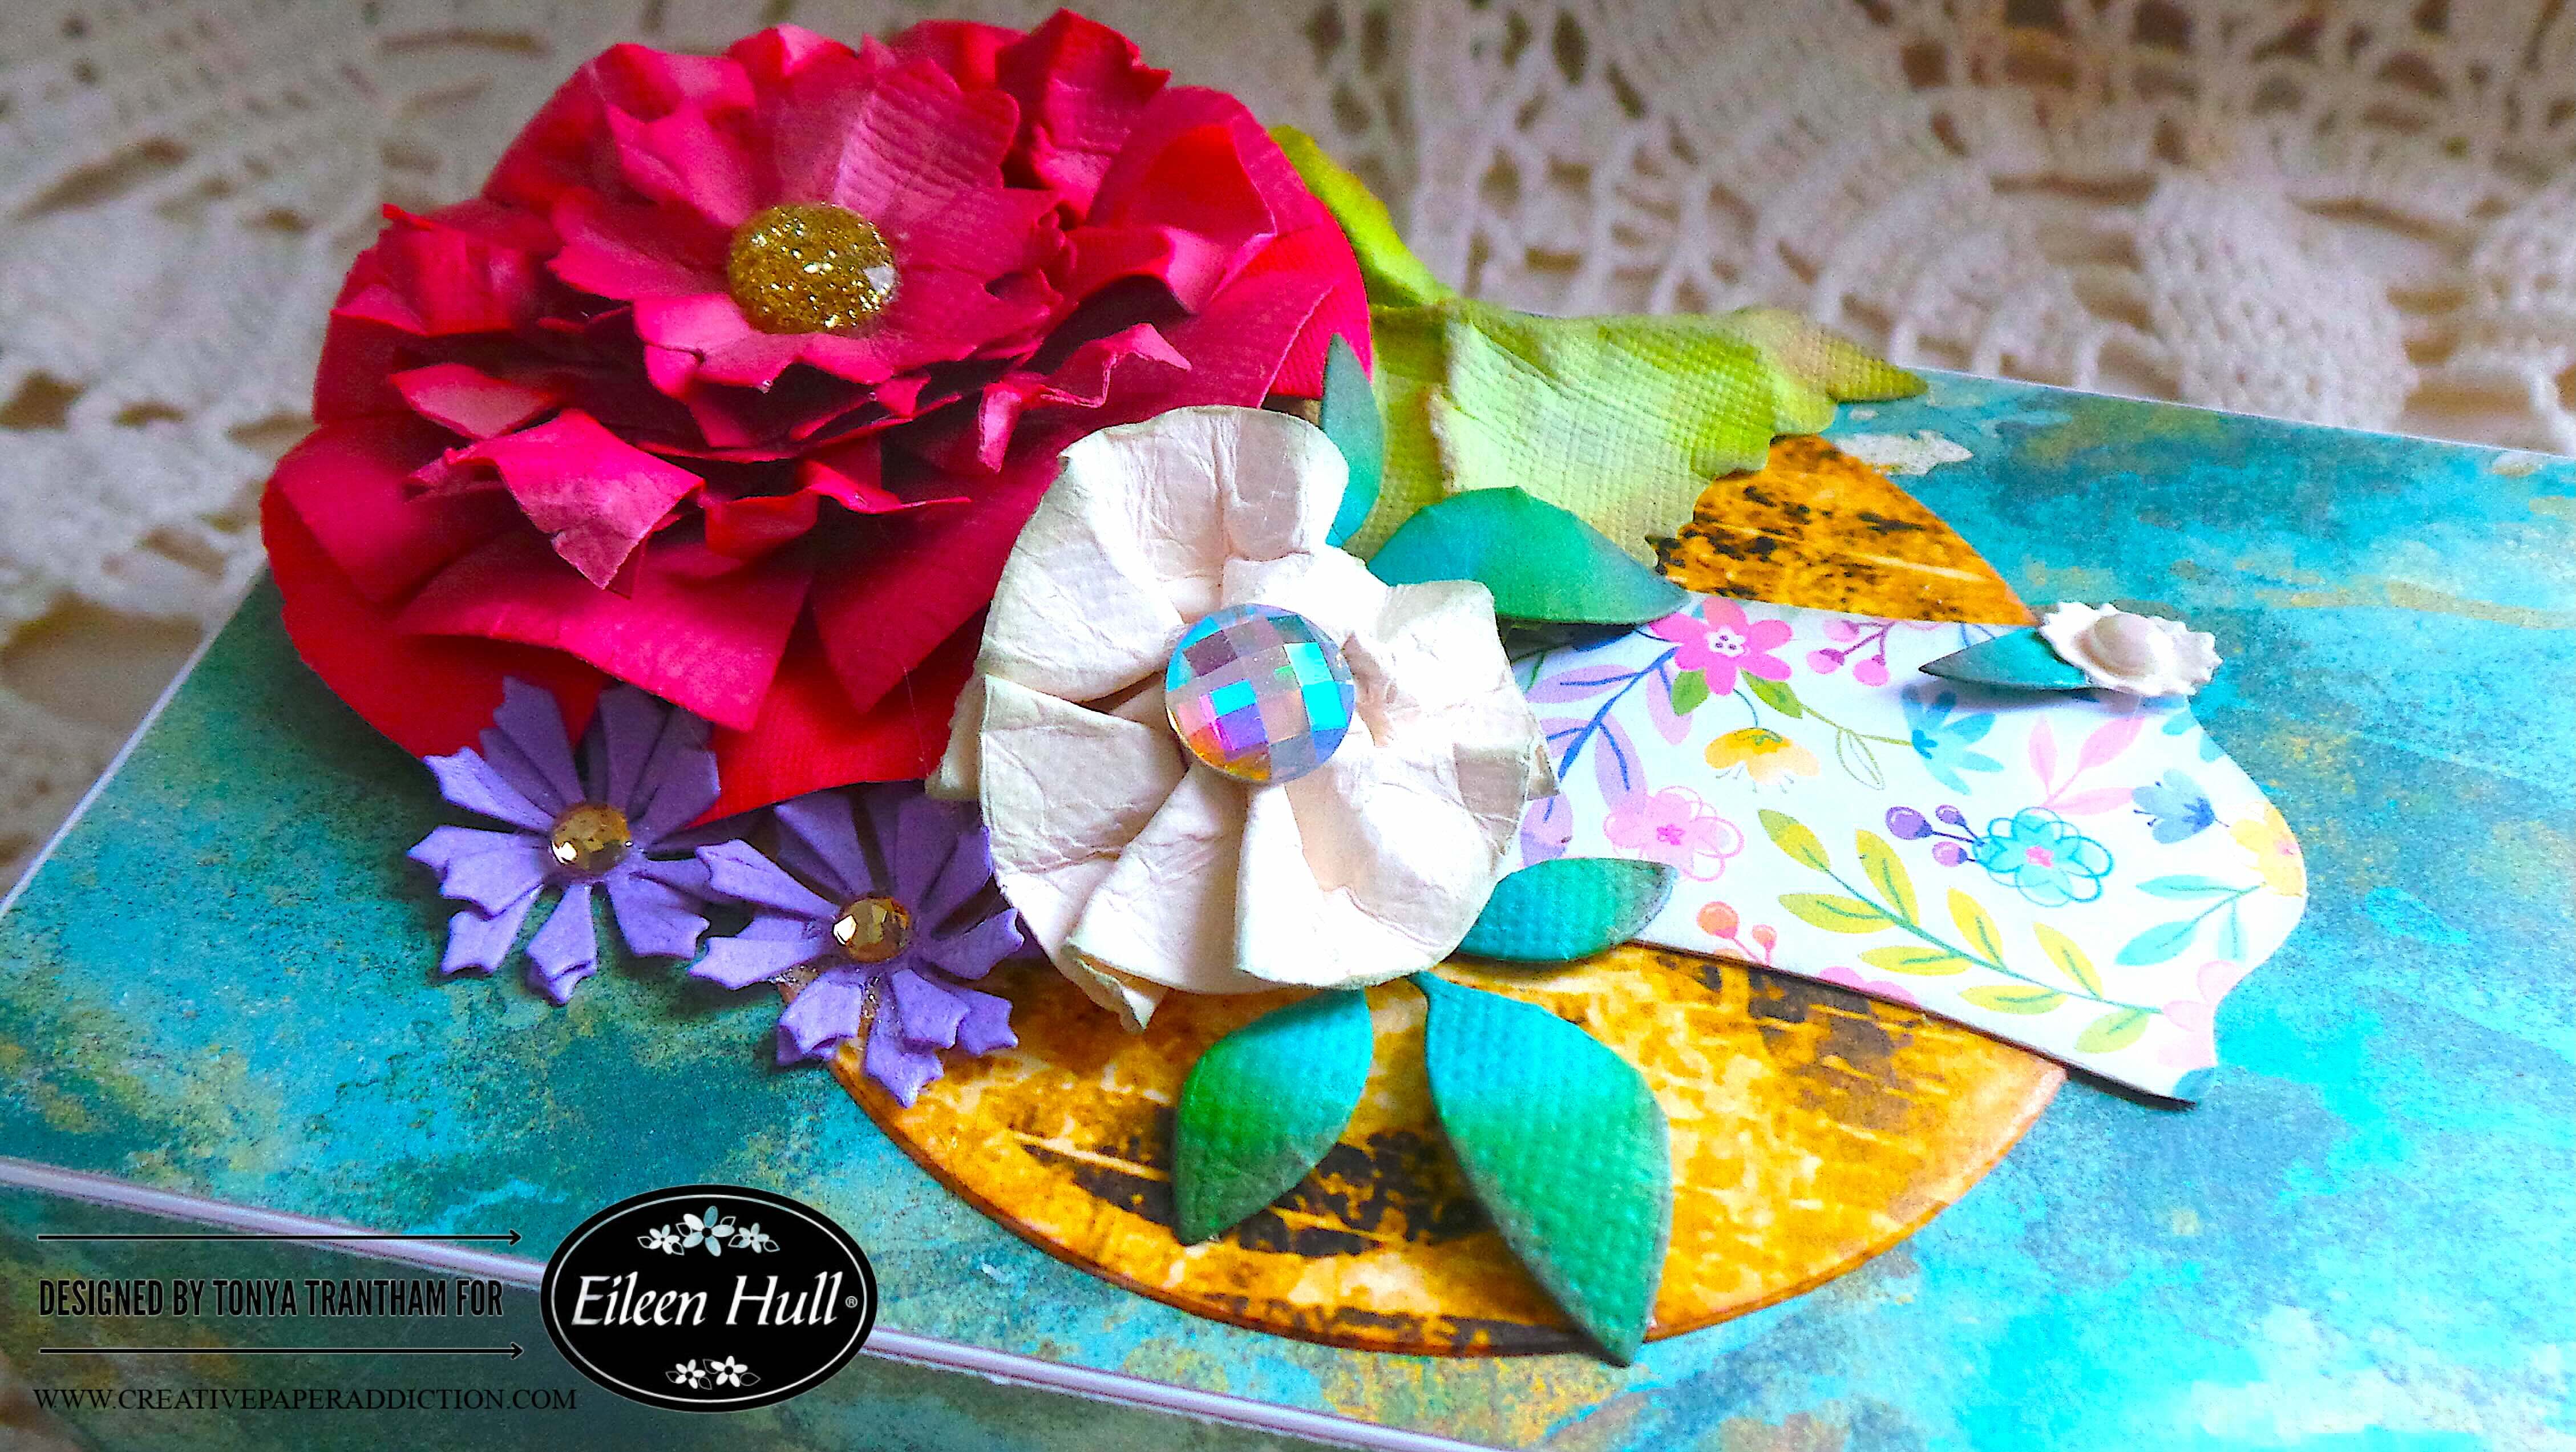
To create the largest flower on the box I cut over twenty of the triangles from the Rainbow Wheels Thinlits. I lightly inked the edges with a pink chalk ink and shaped with a Stylus.
I also cut the smallest circle from the Rainbow Wheels Thinlits and shaped with a Stylus. I started adhering the triangles to the circle. I added two layers of the regular size triangles dies to the circle.
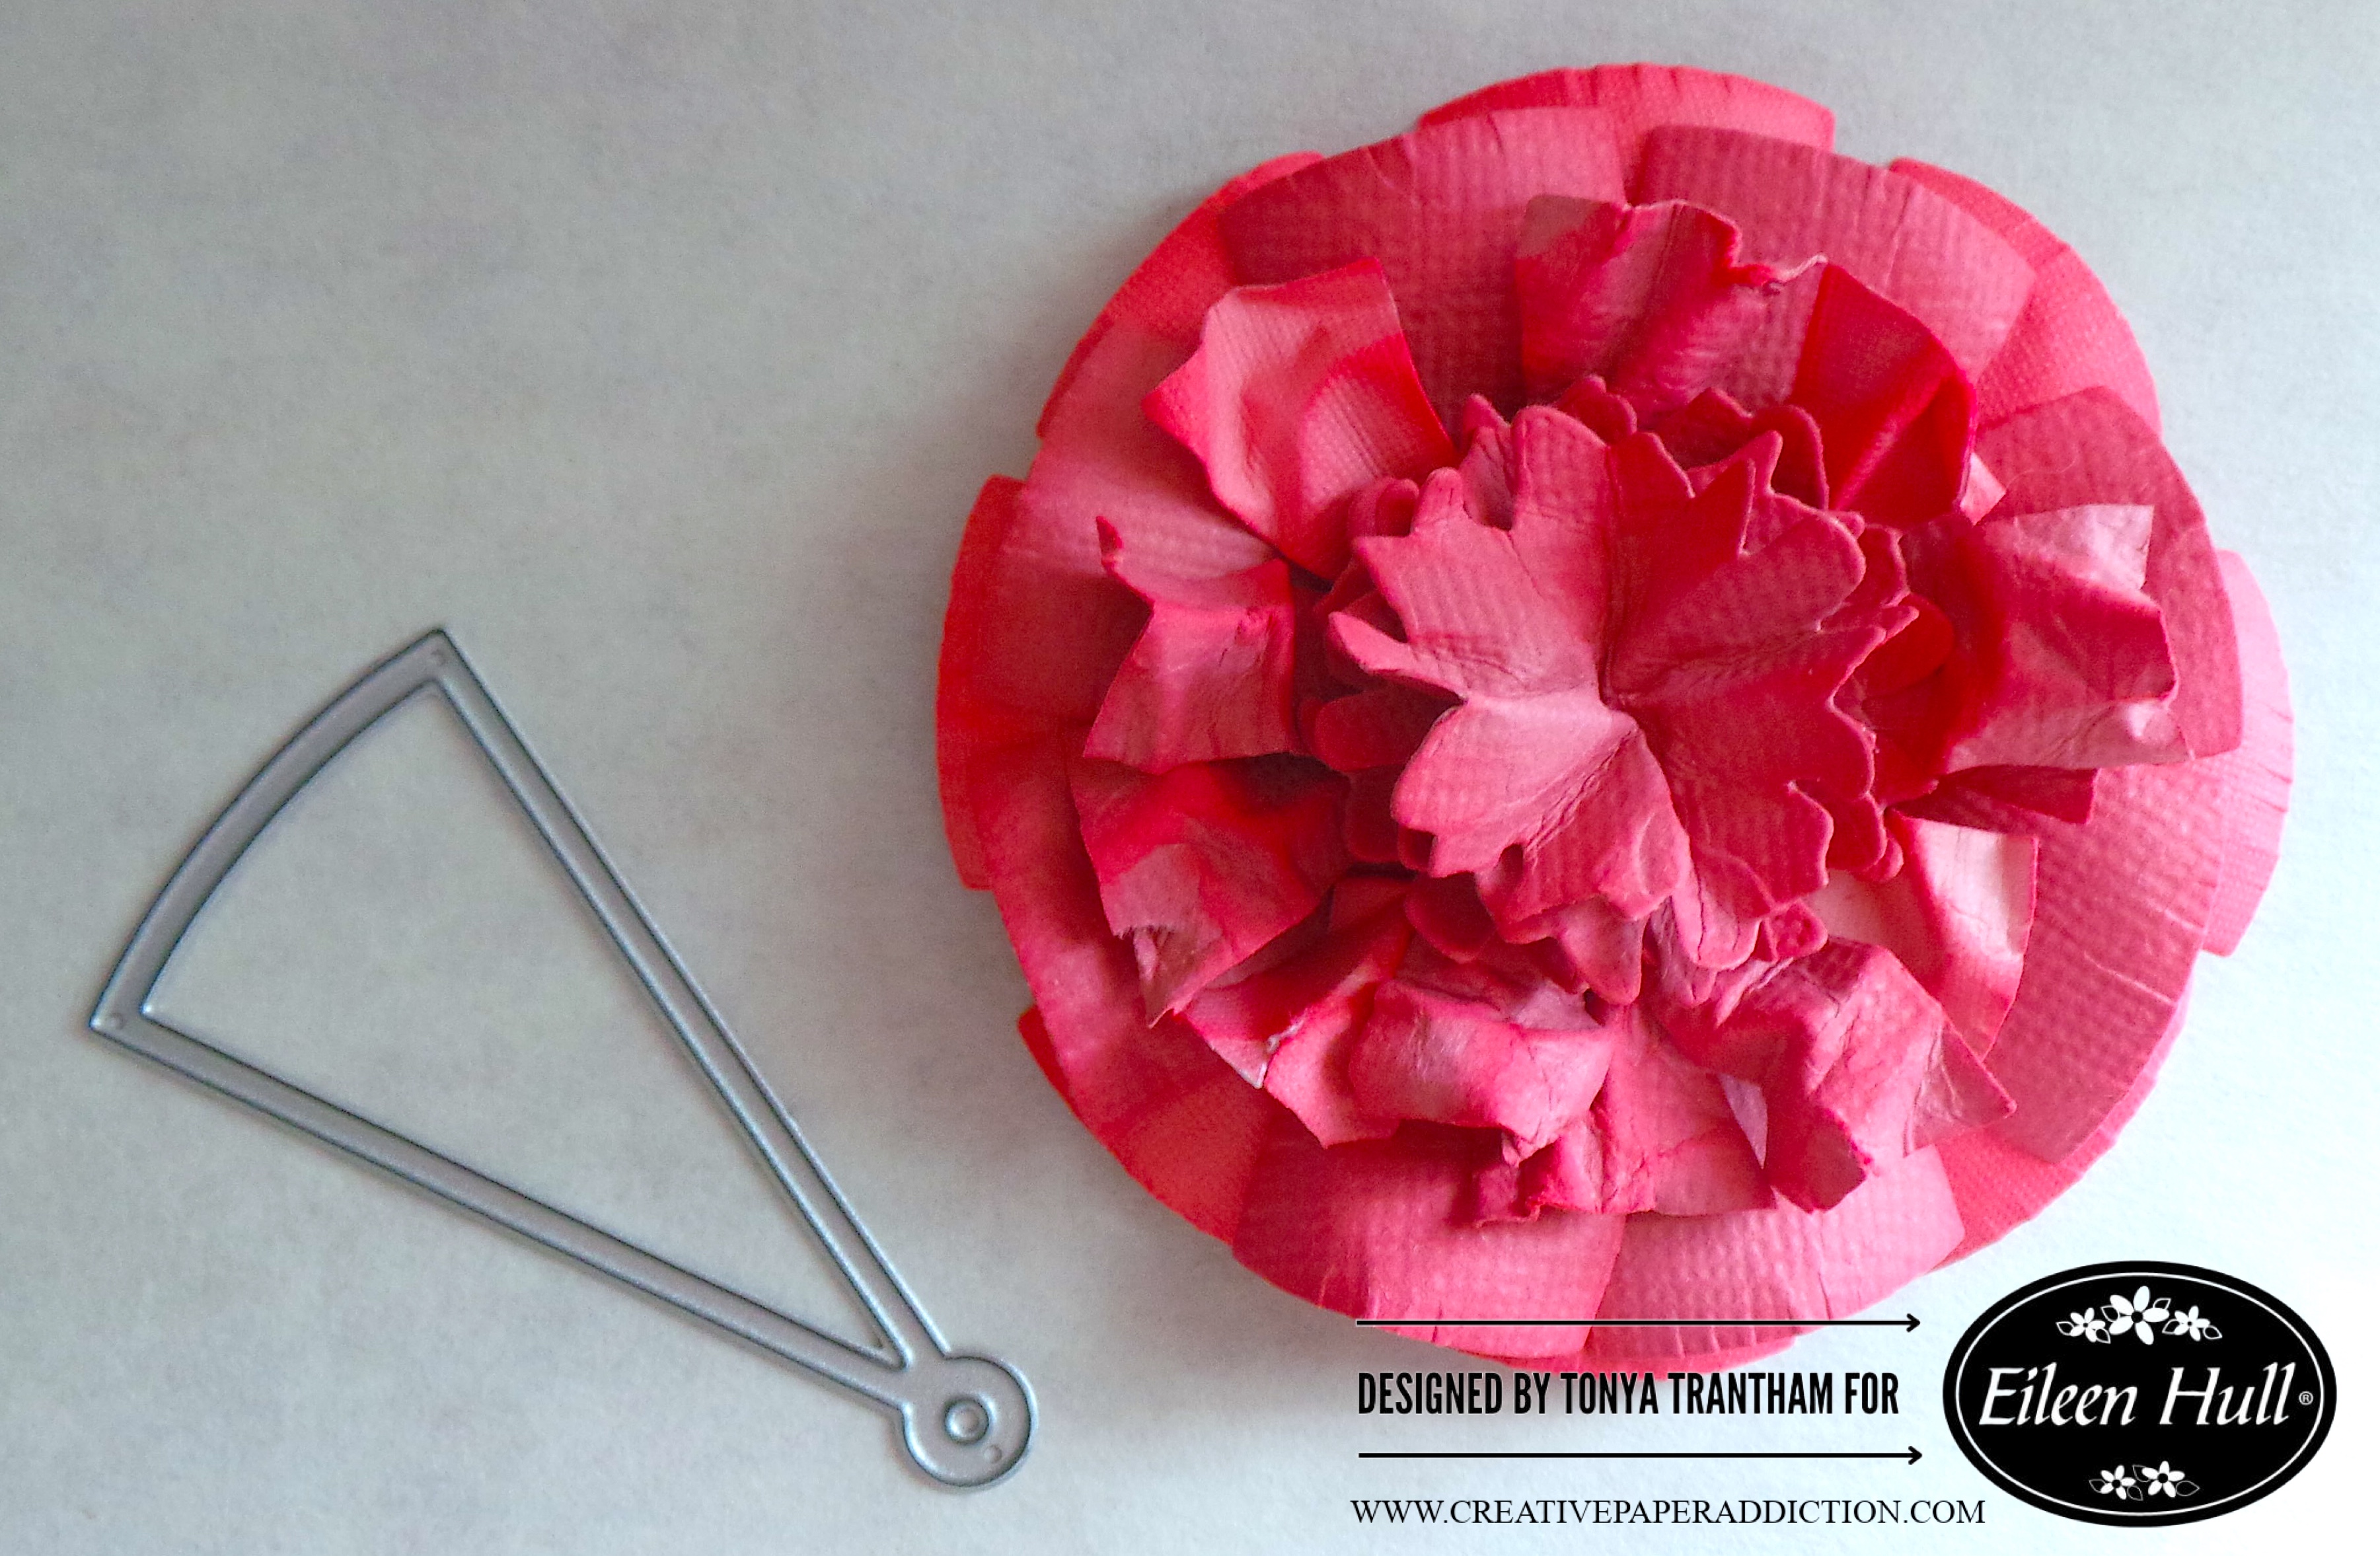
I cut the “v” end off ten triangle dies and crunched up in my hand before adding to the flower. I cut out three flowers from the Bookmark, Pockets and Topper Thinlits. I inked with pink chalk ink and shaped with a Stylus and my hand. I glued each on top of each other before adding to the flower.
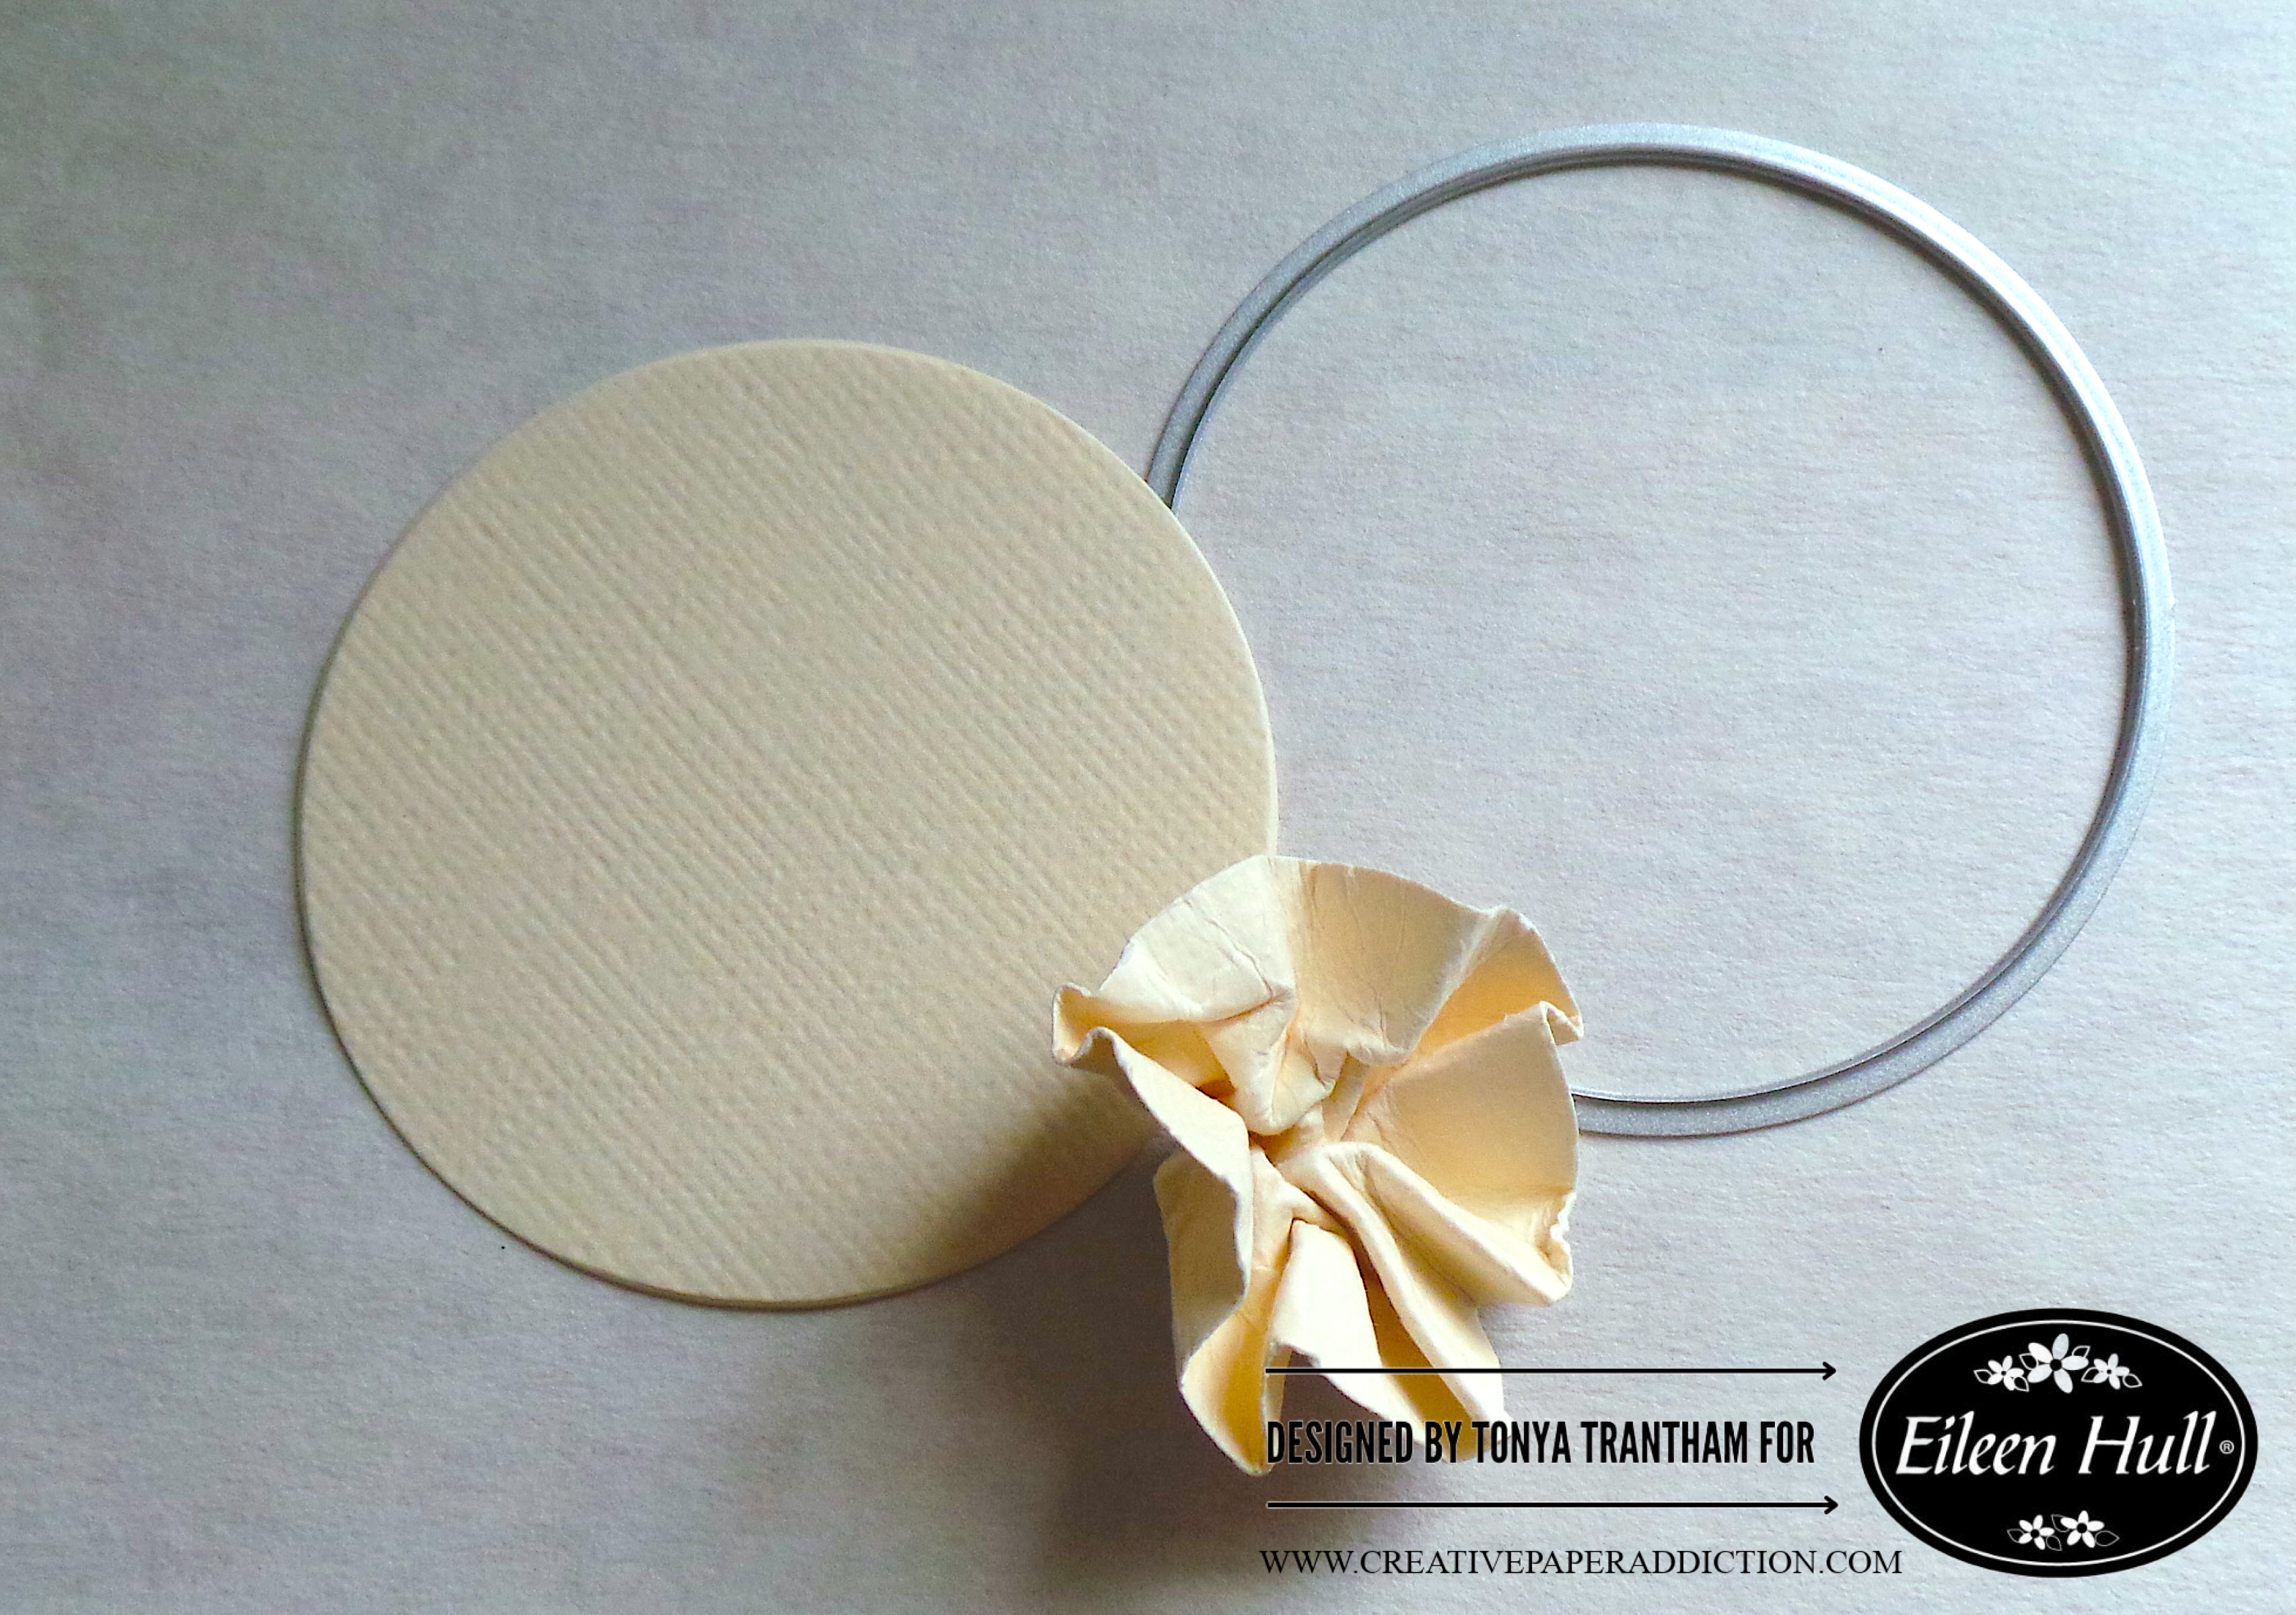
I cut the smallest circle from the Rainbow Wheels Thinlits. I lightly wet the circle with water and crunched, shaped in my hand and let it dry.
I cut the largest circle from the Rainbow Wheels Thinlits and adhered to the center of the box. I cut one of the labels from the Journal Hardware Diecut and glued onto the large circle.
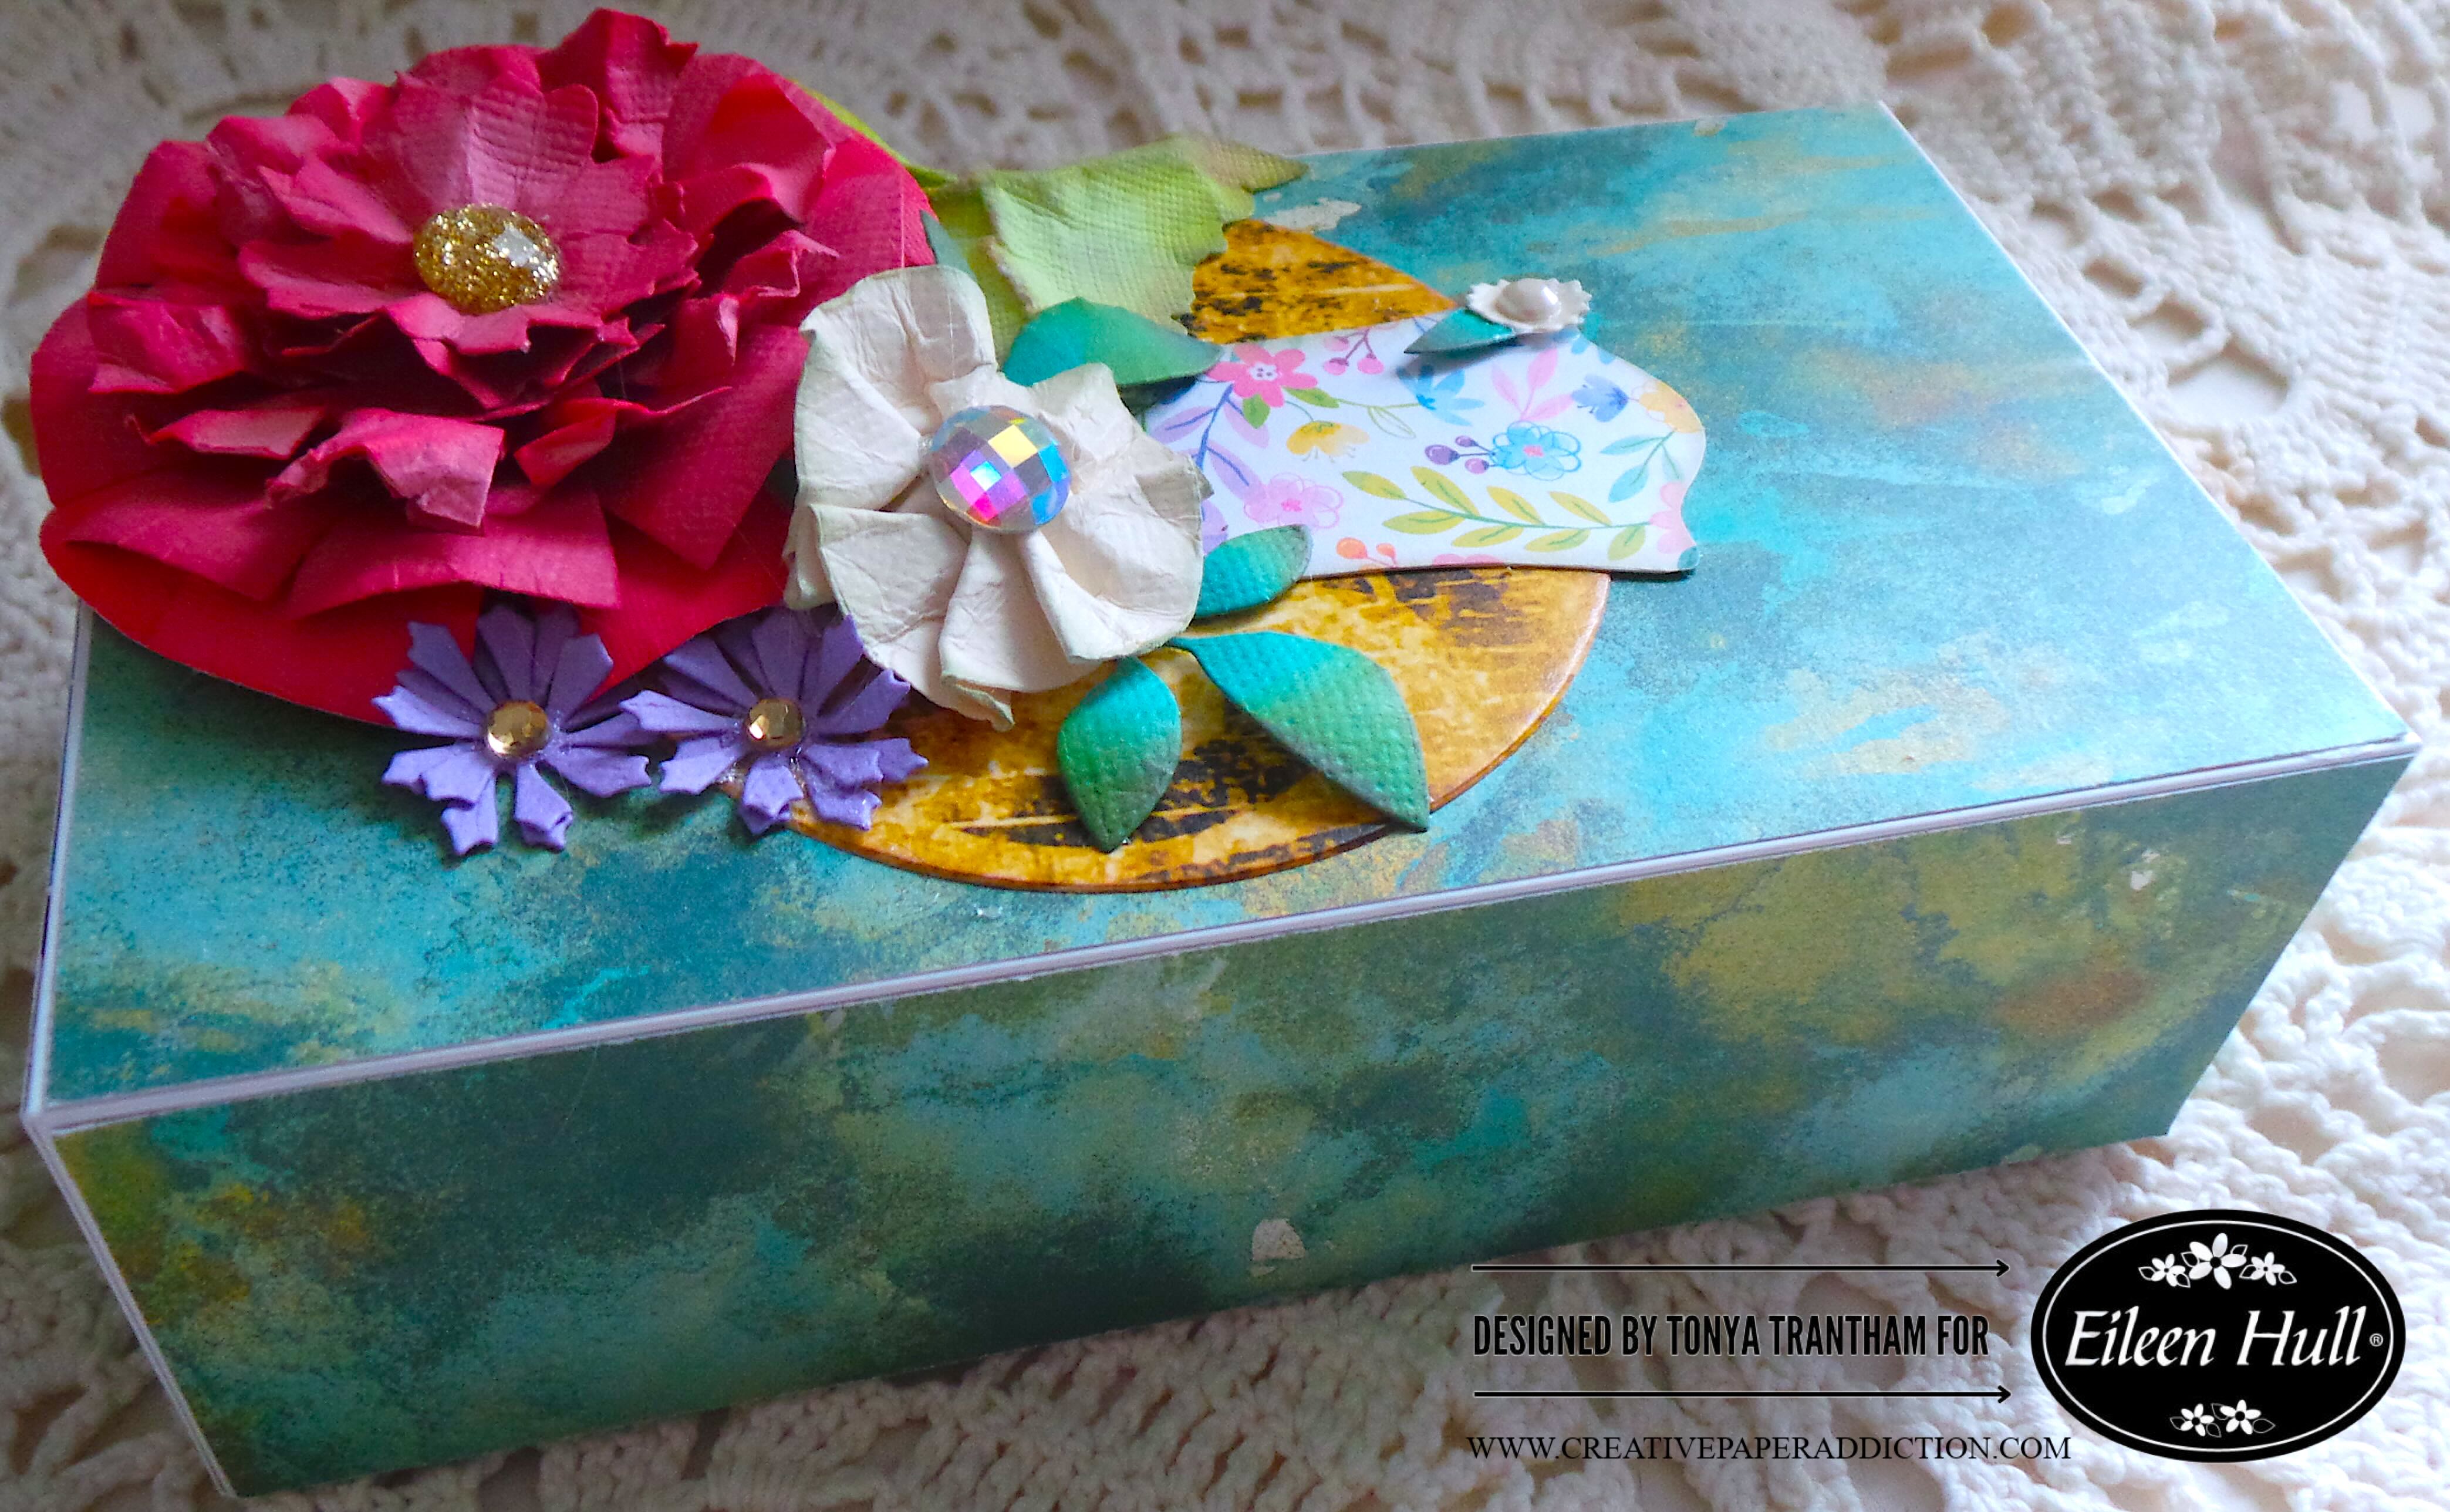
I glued the largest flower to the upper corner of the lid. Next I dug into my stash and found a leaf from the Sunflower Diecut (retired). I inked, shaped and adhered underneath the larger flower. I glued the white flower next to the large flower. I cut and shaped two leaf sprigs from the Bookmark, Pockets and Topper Thinlits and adhered underneath the white flower.
I cut four of the purple and one small flowers from the Bookmark, Pockets and Topper Thinlits. I shaped all flower with a Stylus. I glued a purple flower on top of each other and added to the lid. The white flower I adhered to the corner of the label along with a single leaf from a leaf sprig.
I added Gold and White Gems to the center of each flower to finish. This box makes a beautiful home decor piece or a gift to a special someone.
If you haven’t been by Eileen Hull’s blog lately you can find the latest post HERE. Also if you have any questions or comments please leave them below.
(Products listed above are Affiliated Links for your convenience)
DISCLAIMERS
This blog is compensated to provide opinion on products, services, websites, and various other topics. Even though the owner(s) of this blog receives compensation for our posts or advertisements. I always give my honest opinions, findings, beliefs, or experiences on those topics or products. The views and opinions expressed on this blog are purely my own. Any product claim, statistic, or quote should be checked with each manufacturer. Verify other representations about a product or service with the provider or party in question.This blog contains affiliate links. Clicking these links helps to support Tonya Trantham Designs – Creative Paper Addiction. It’s at no additional cost to you.Today’s features are Sizzix, Eileen Hull and Scrapbook.com Products.
Thanks for stopping by, I hope your Monday is wonderful and enjoy creating!
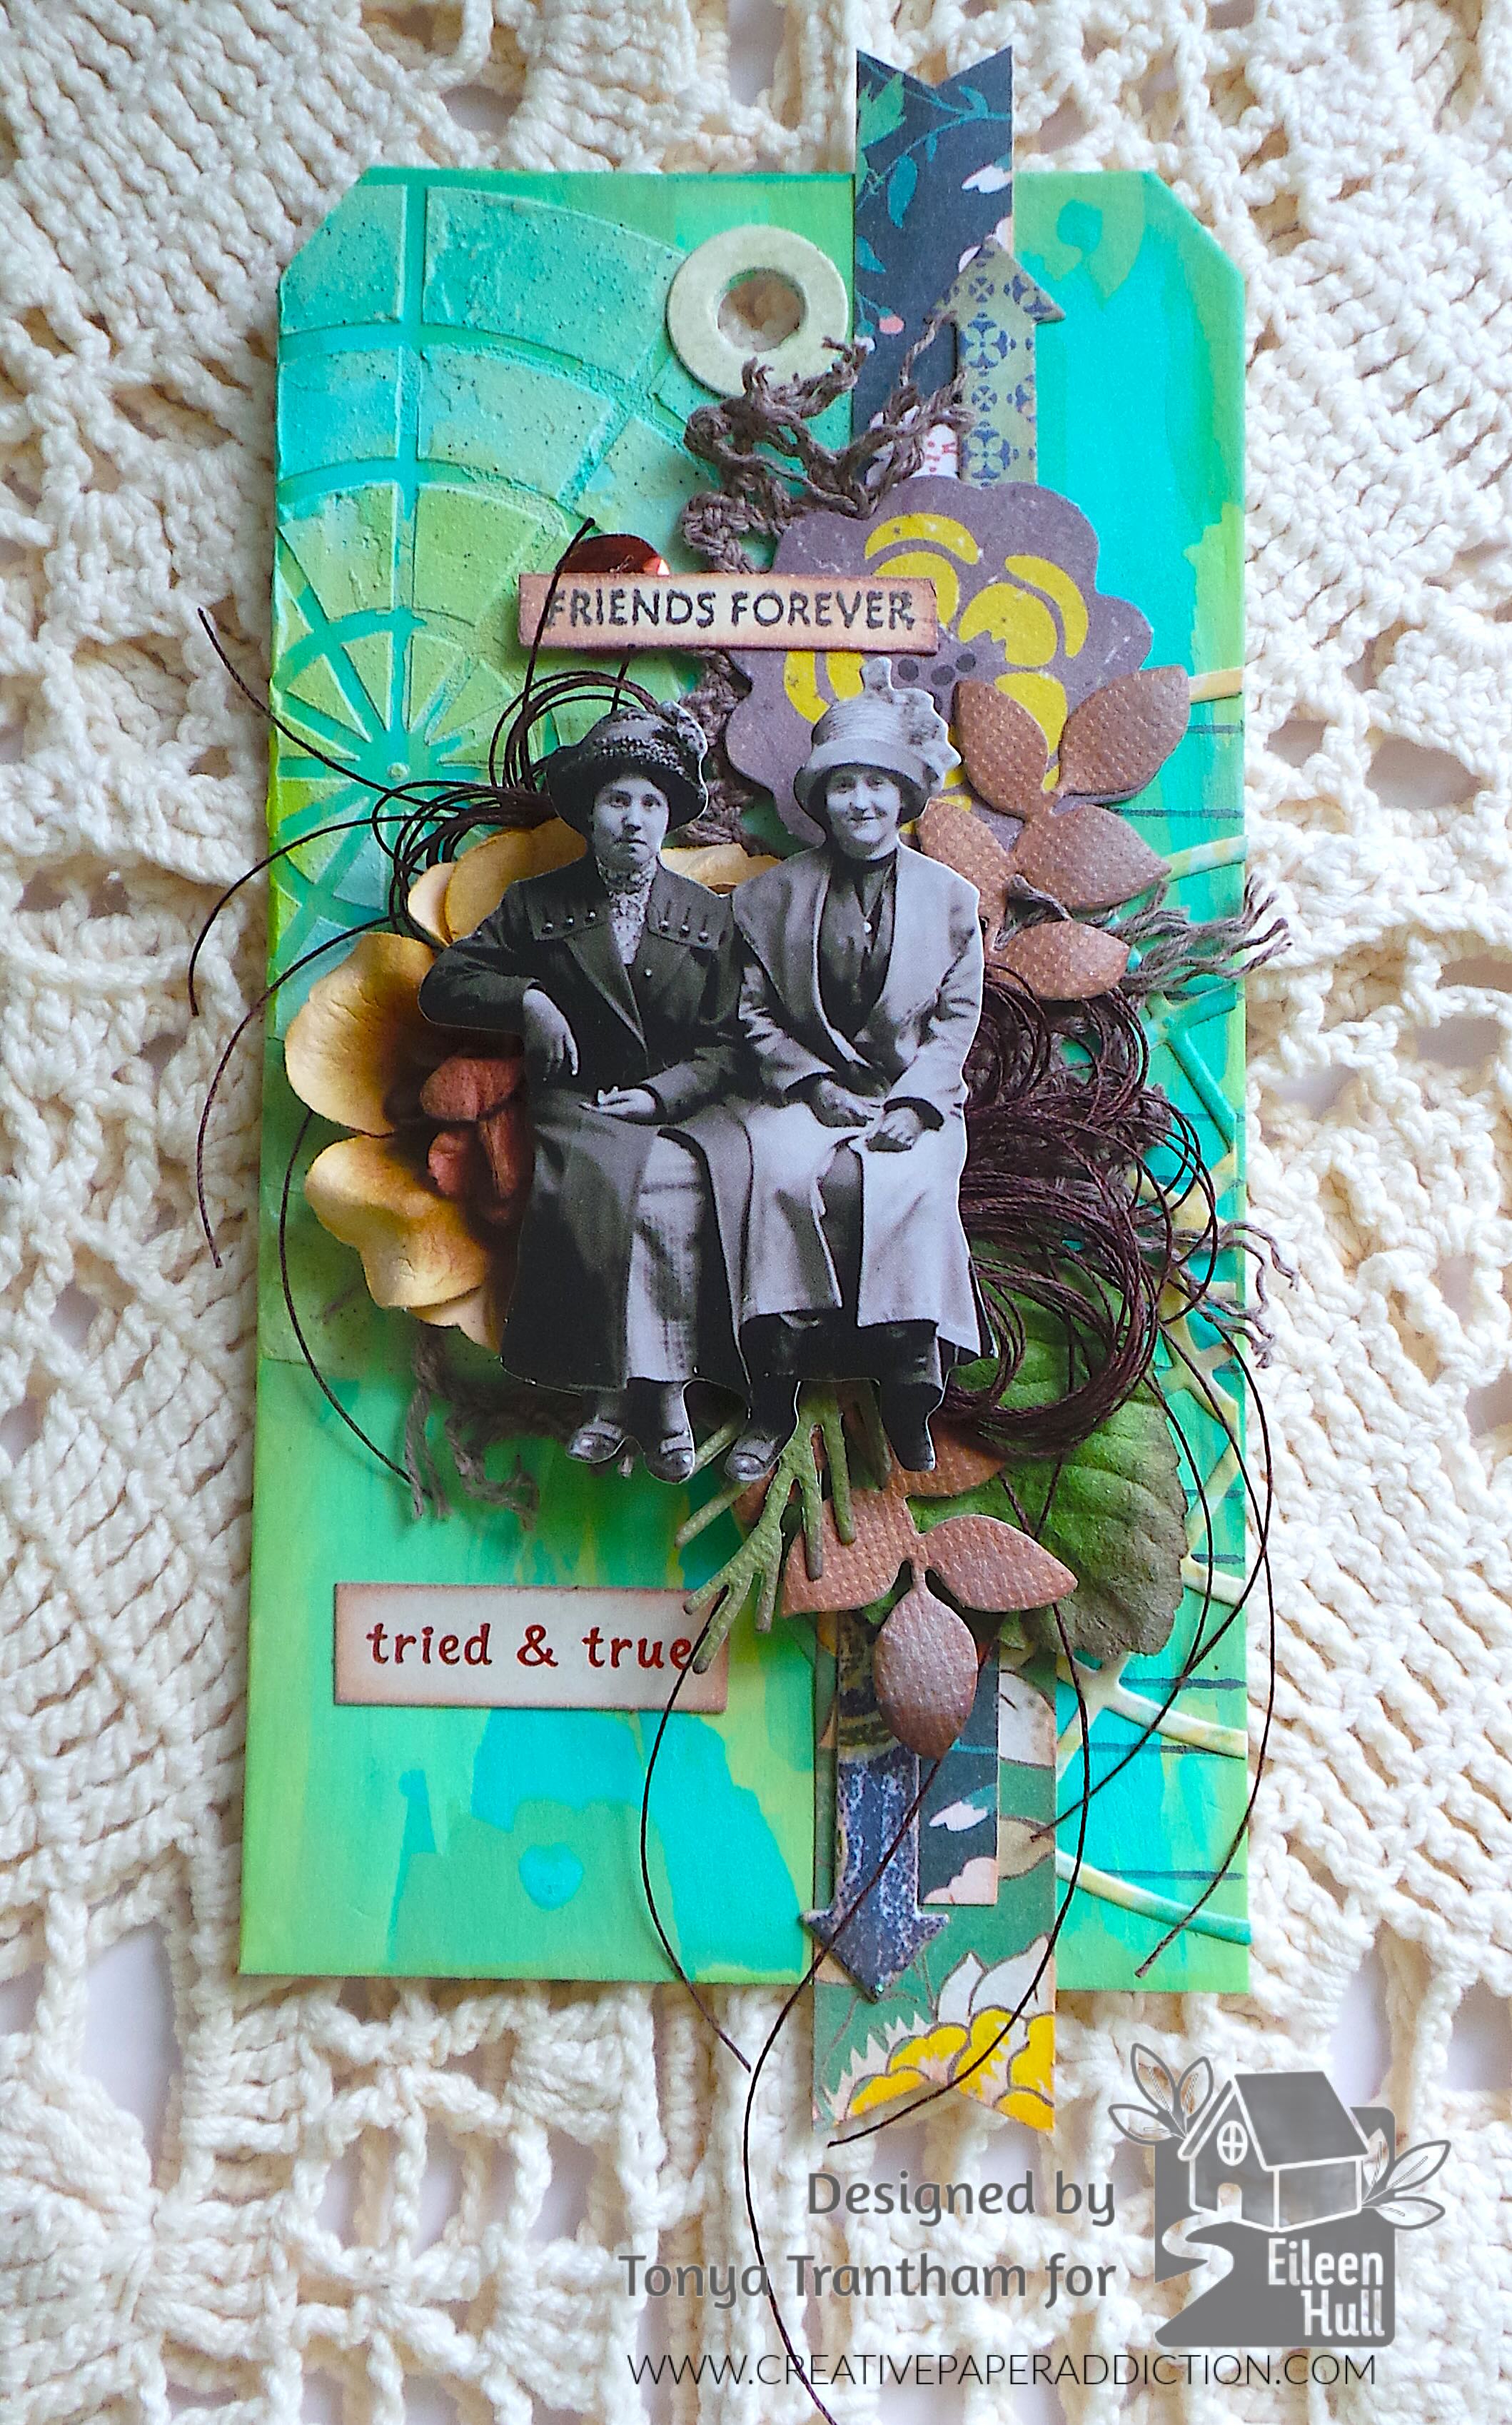
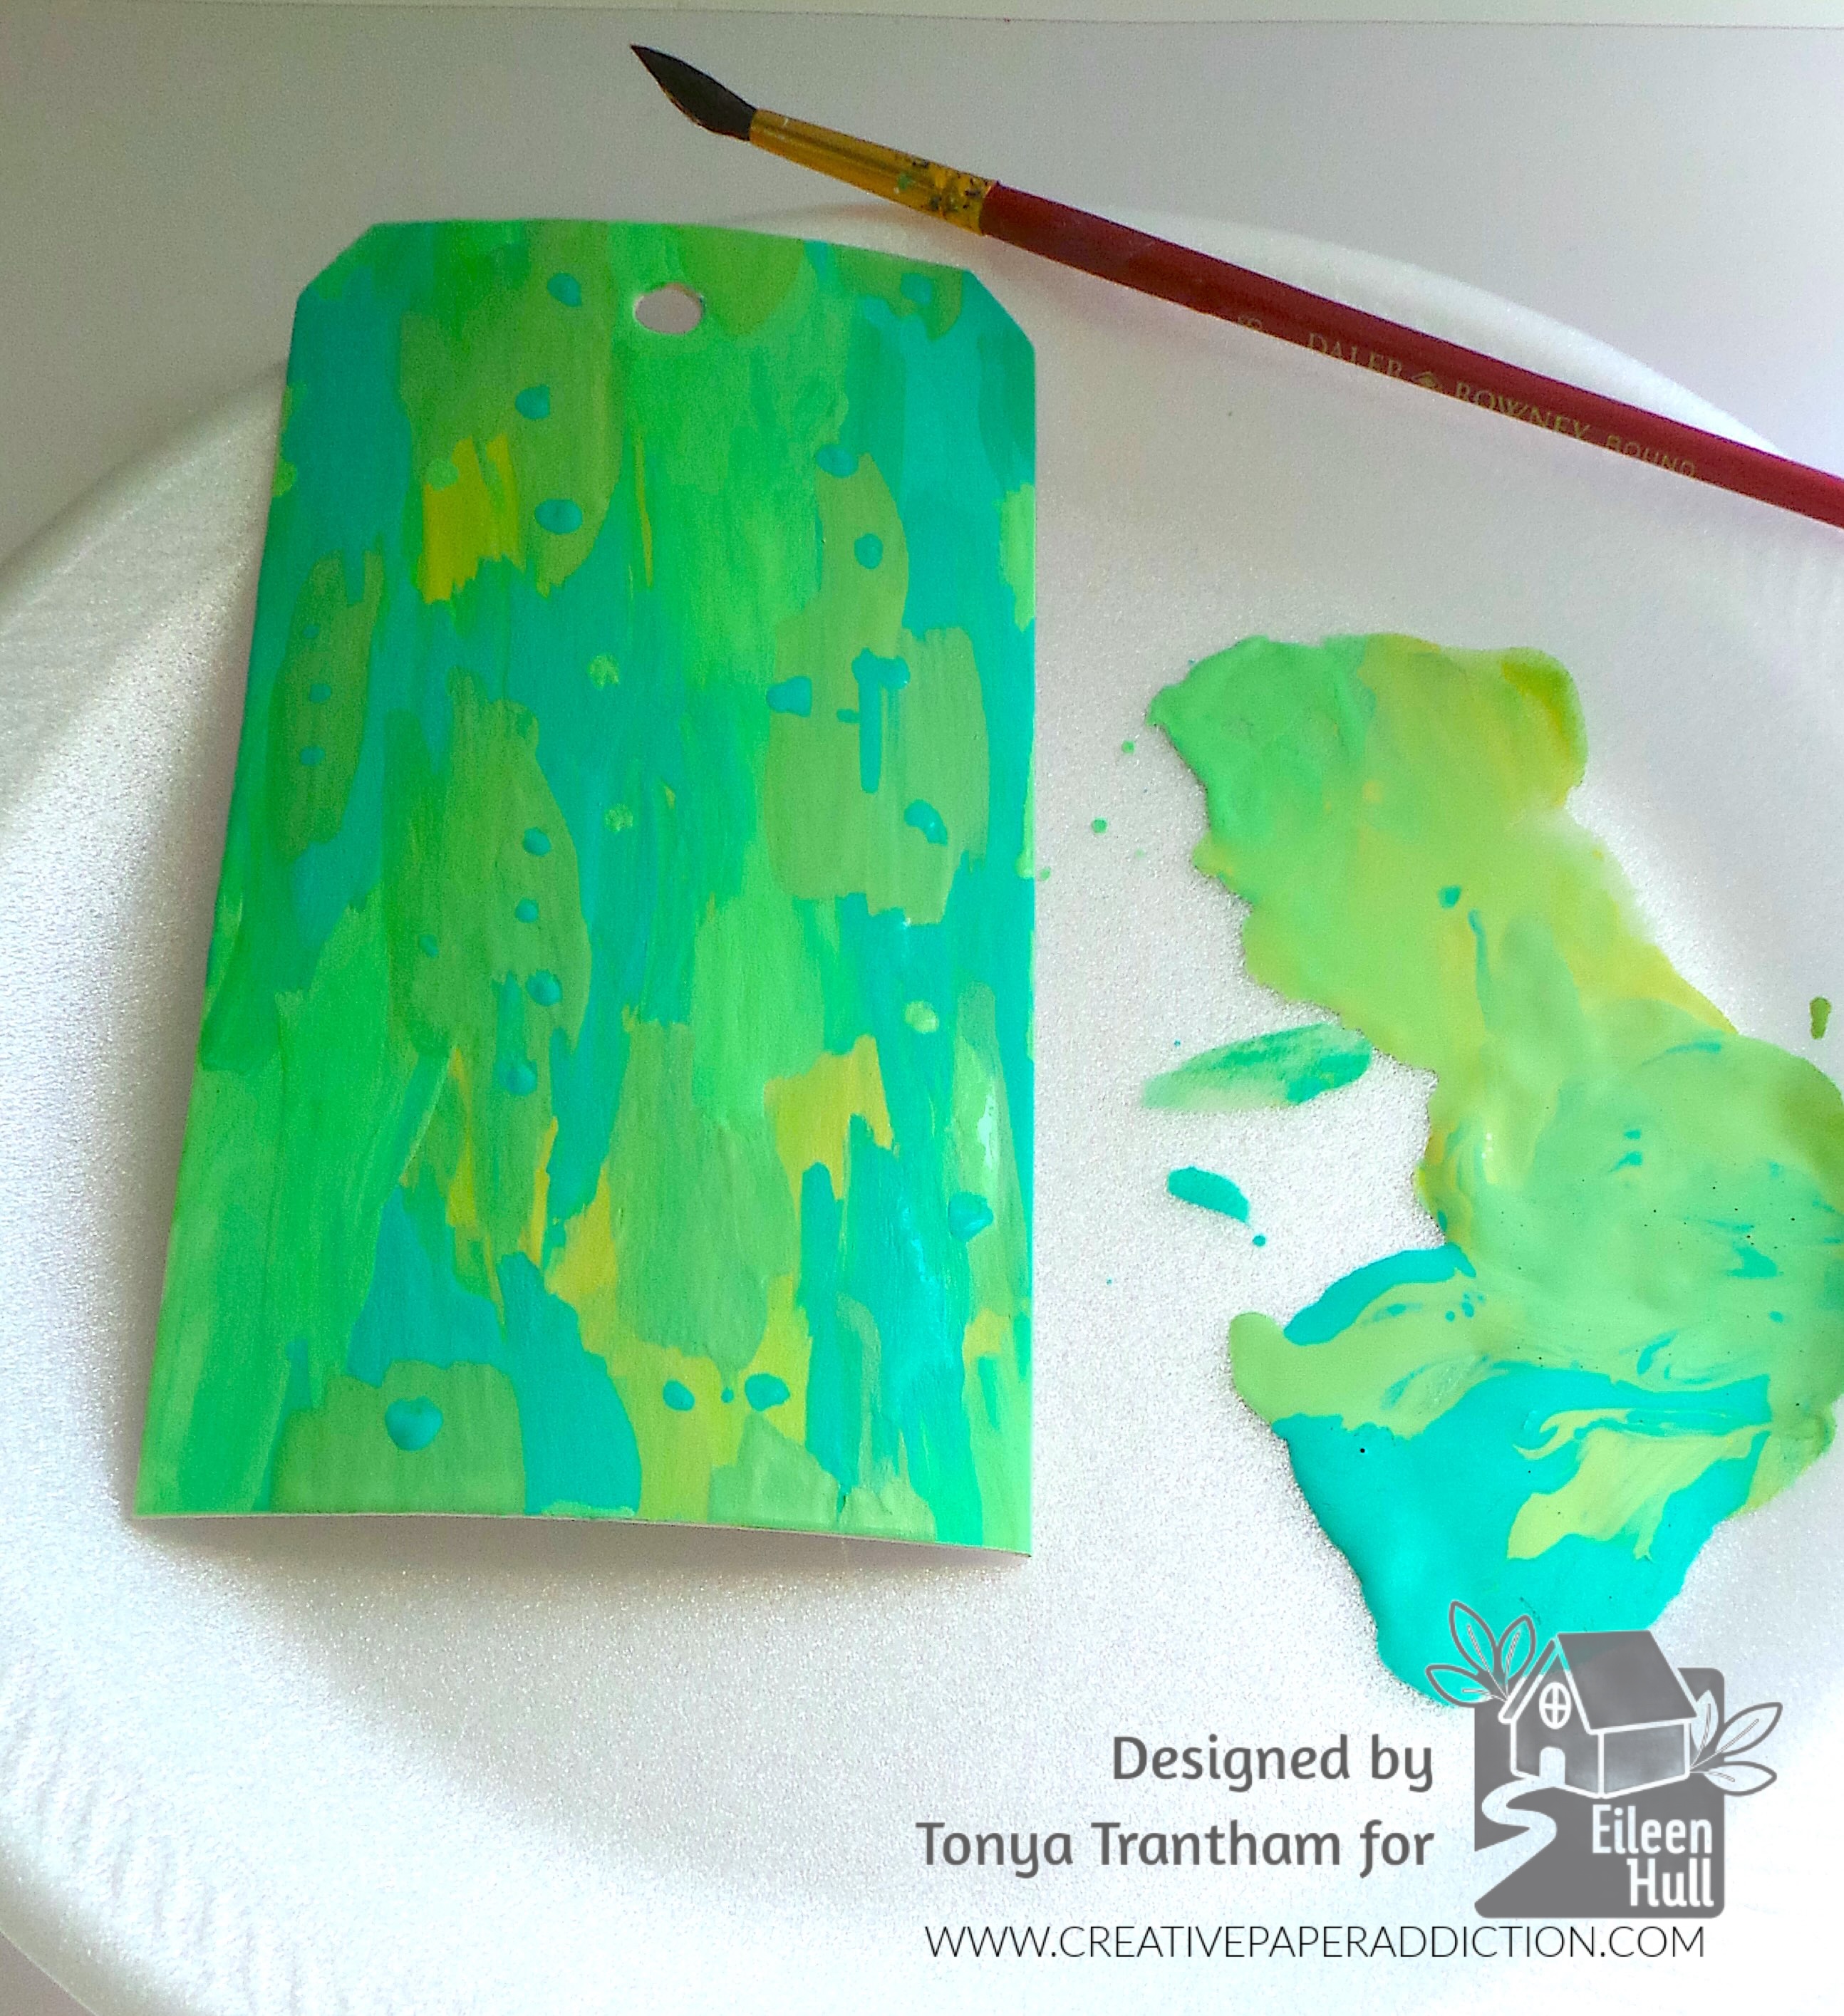
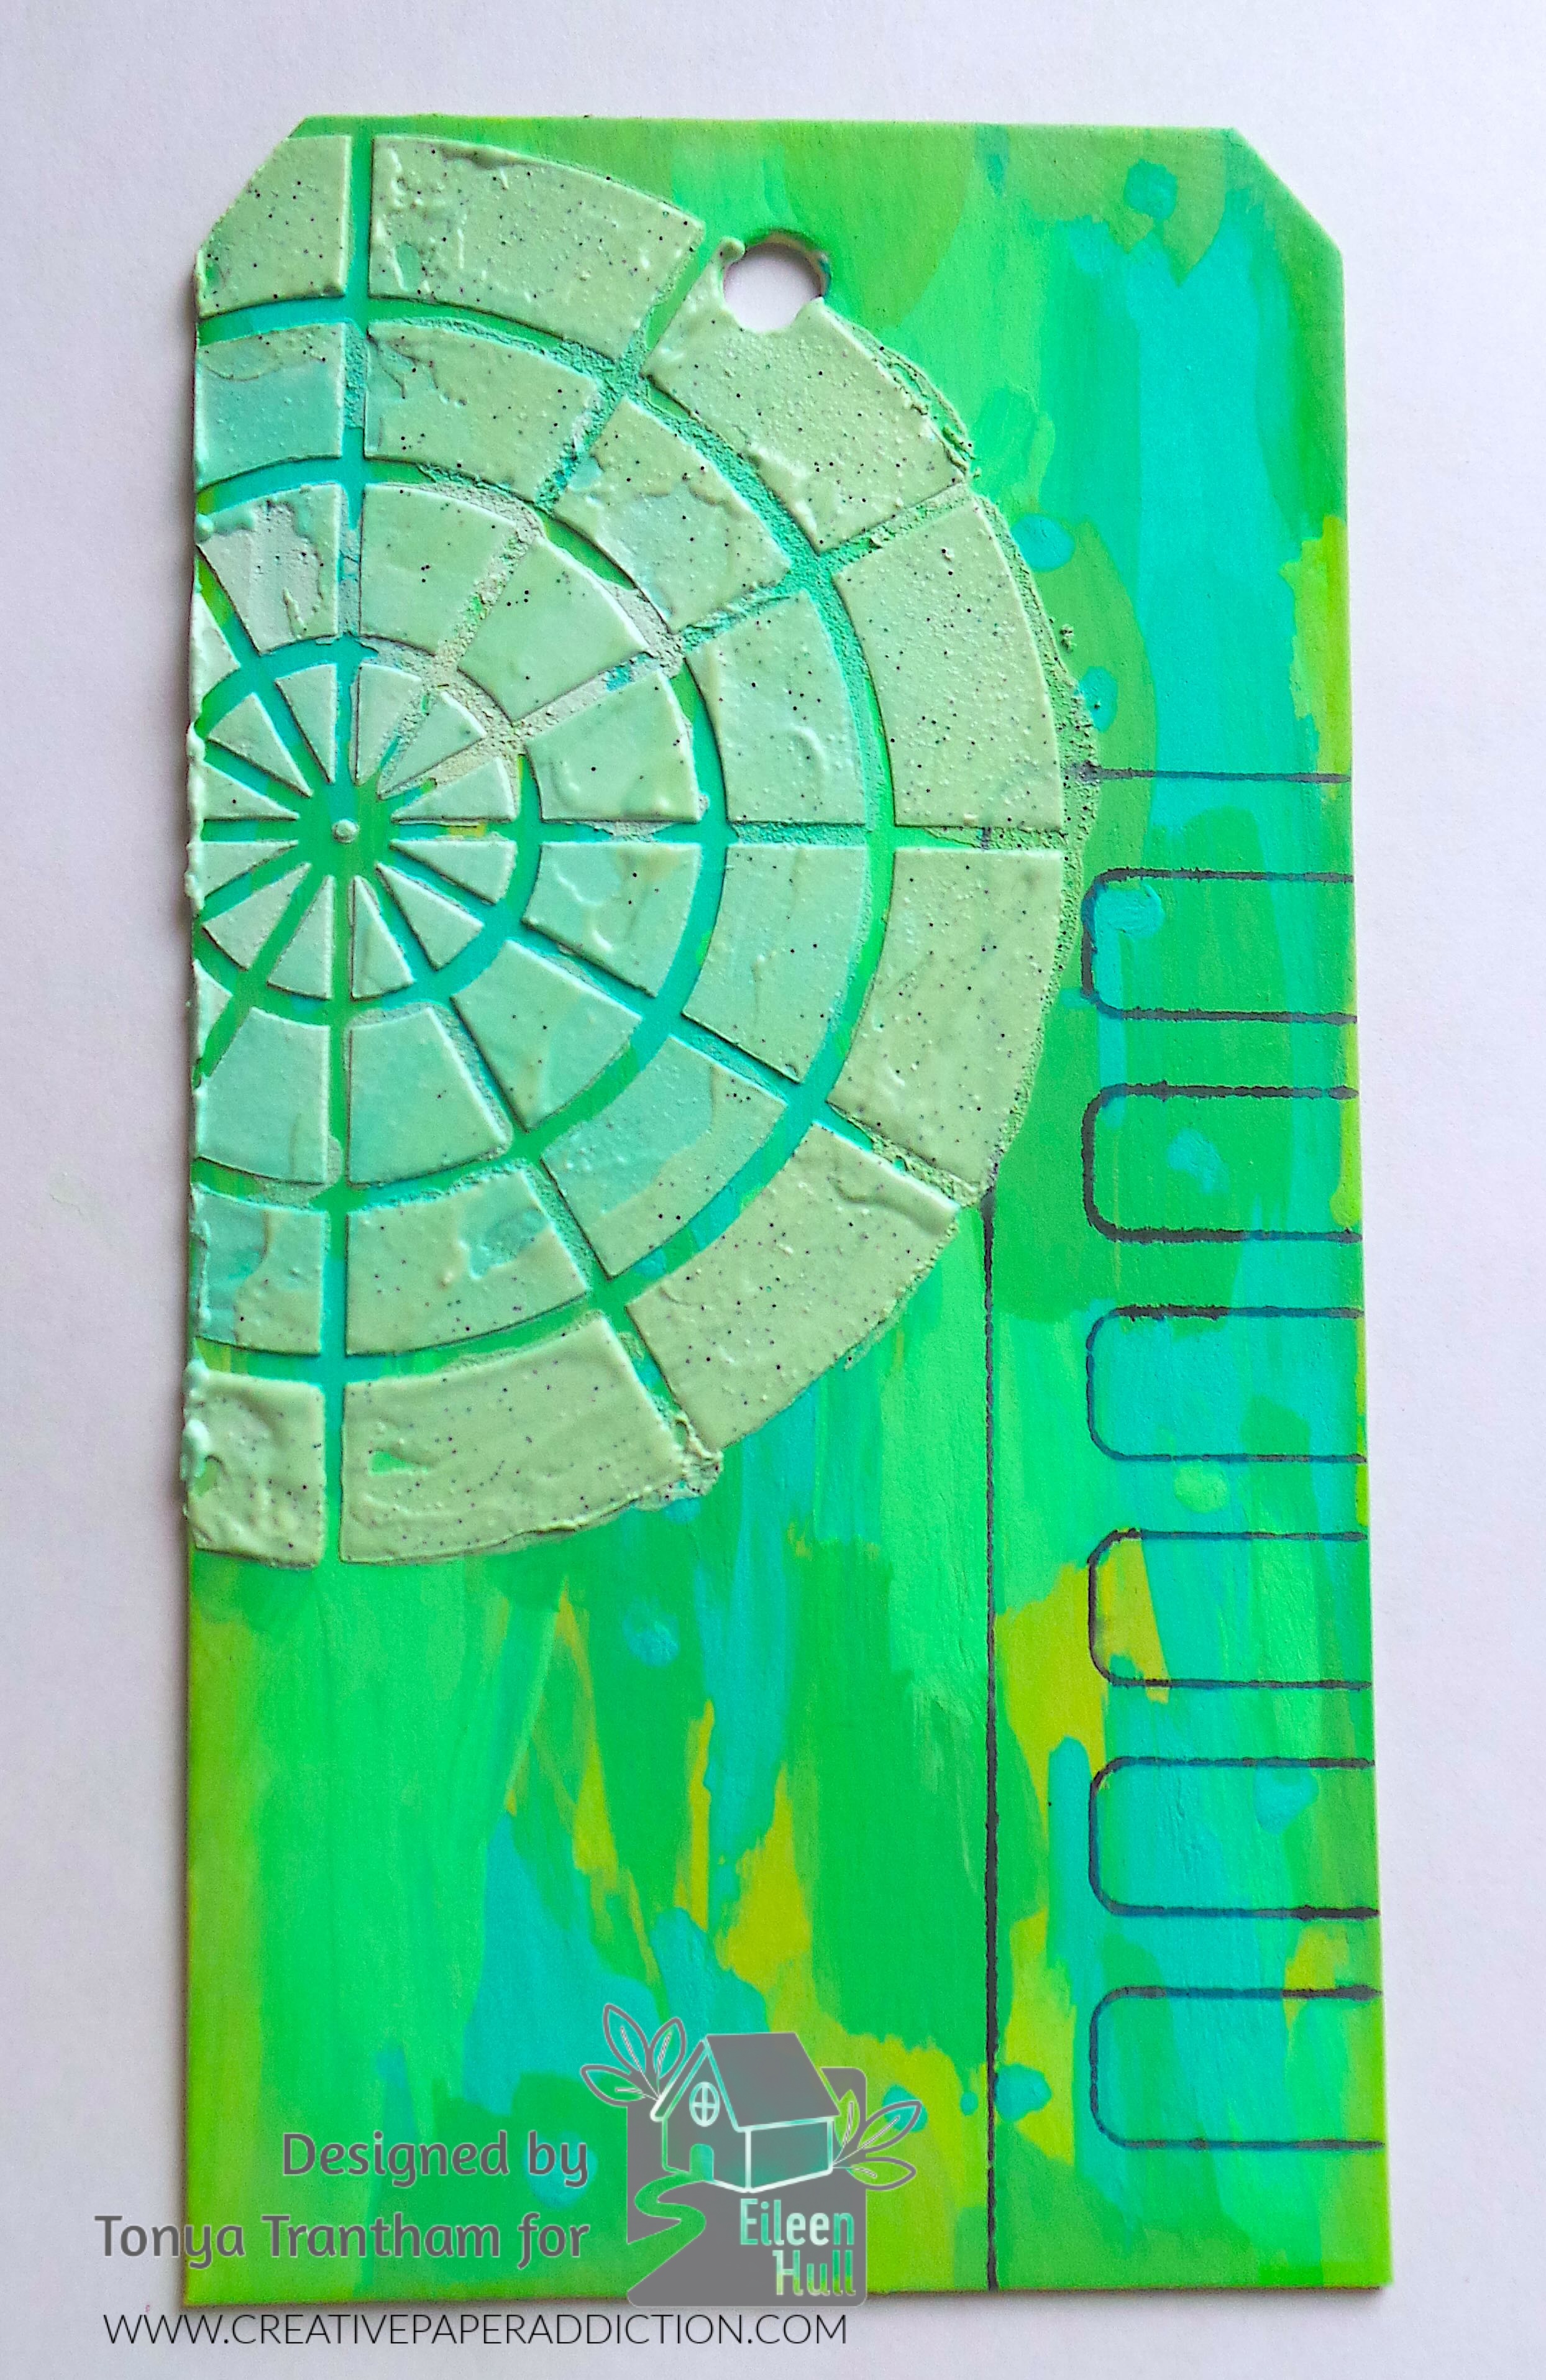
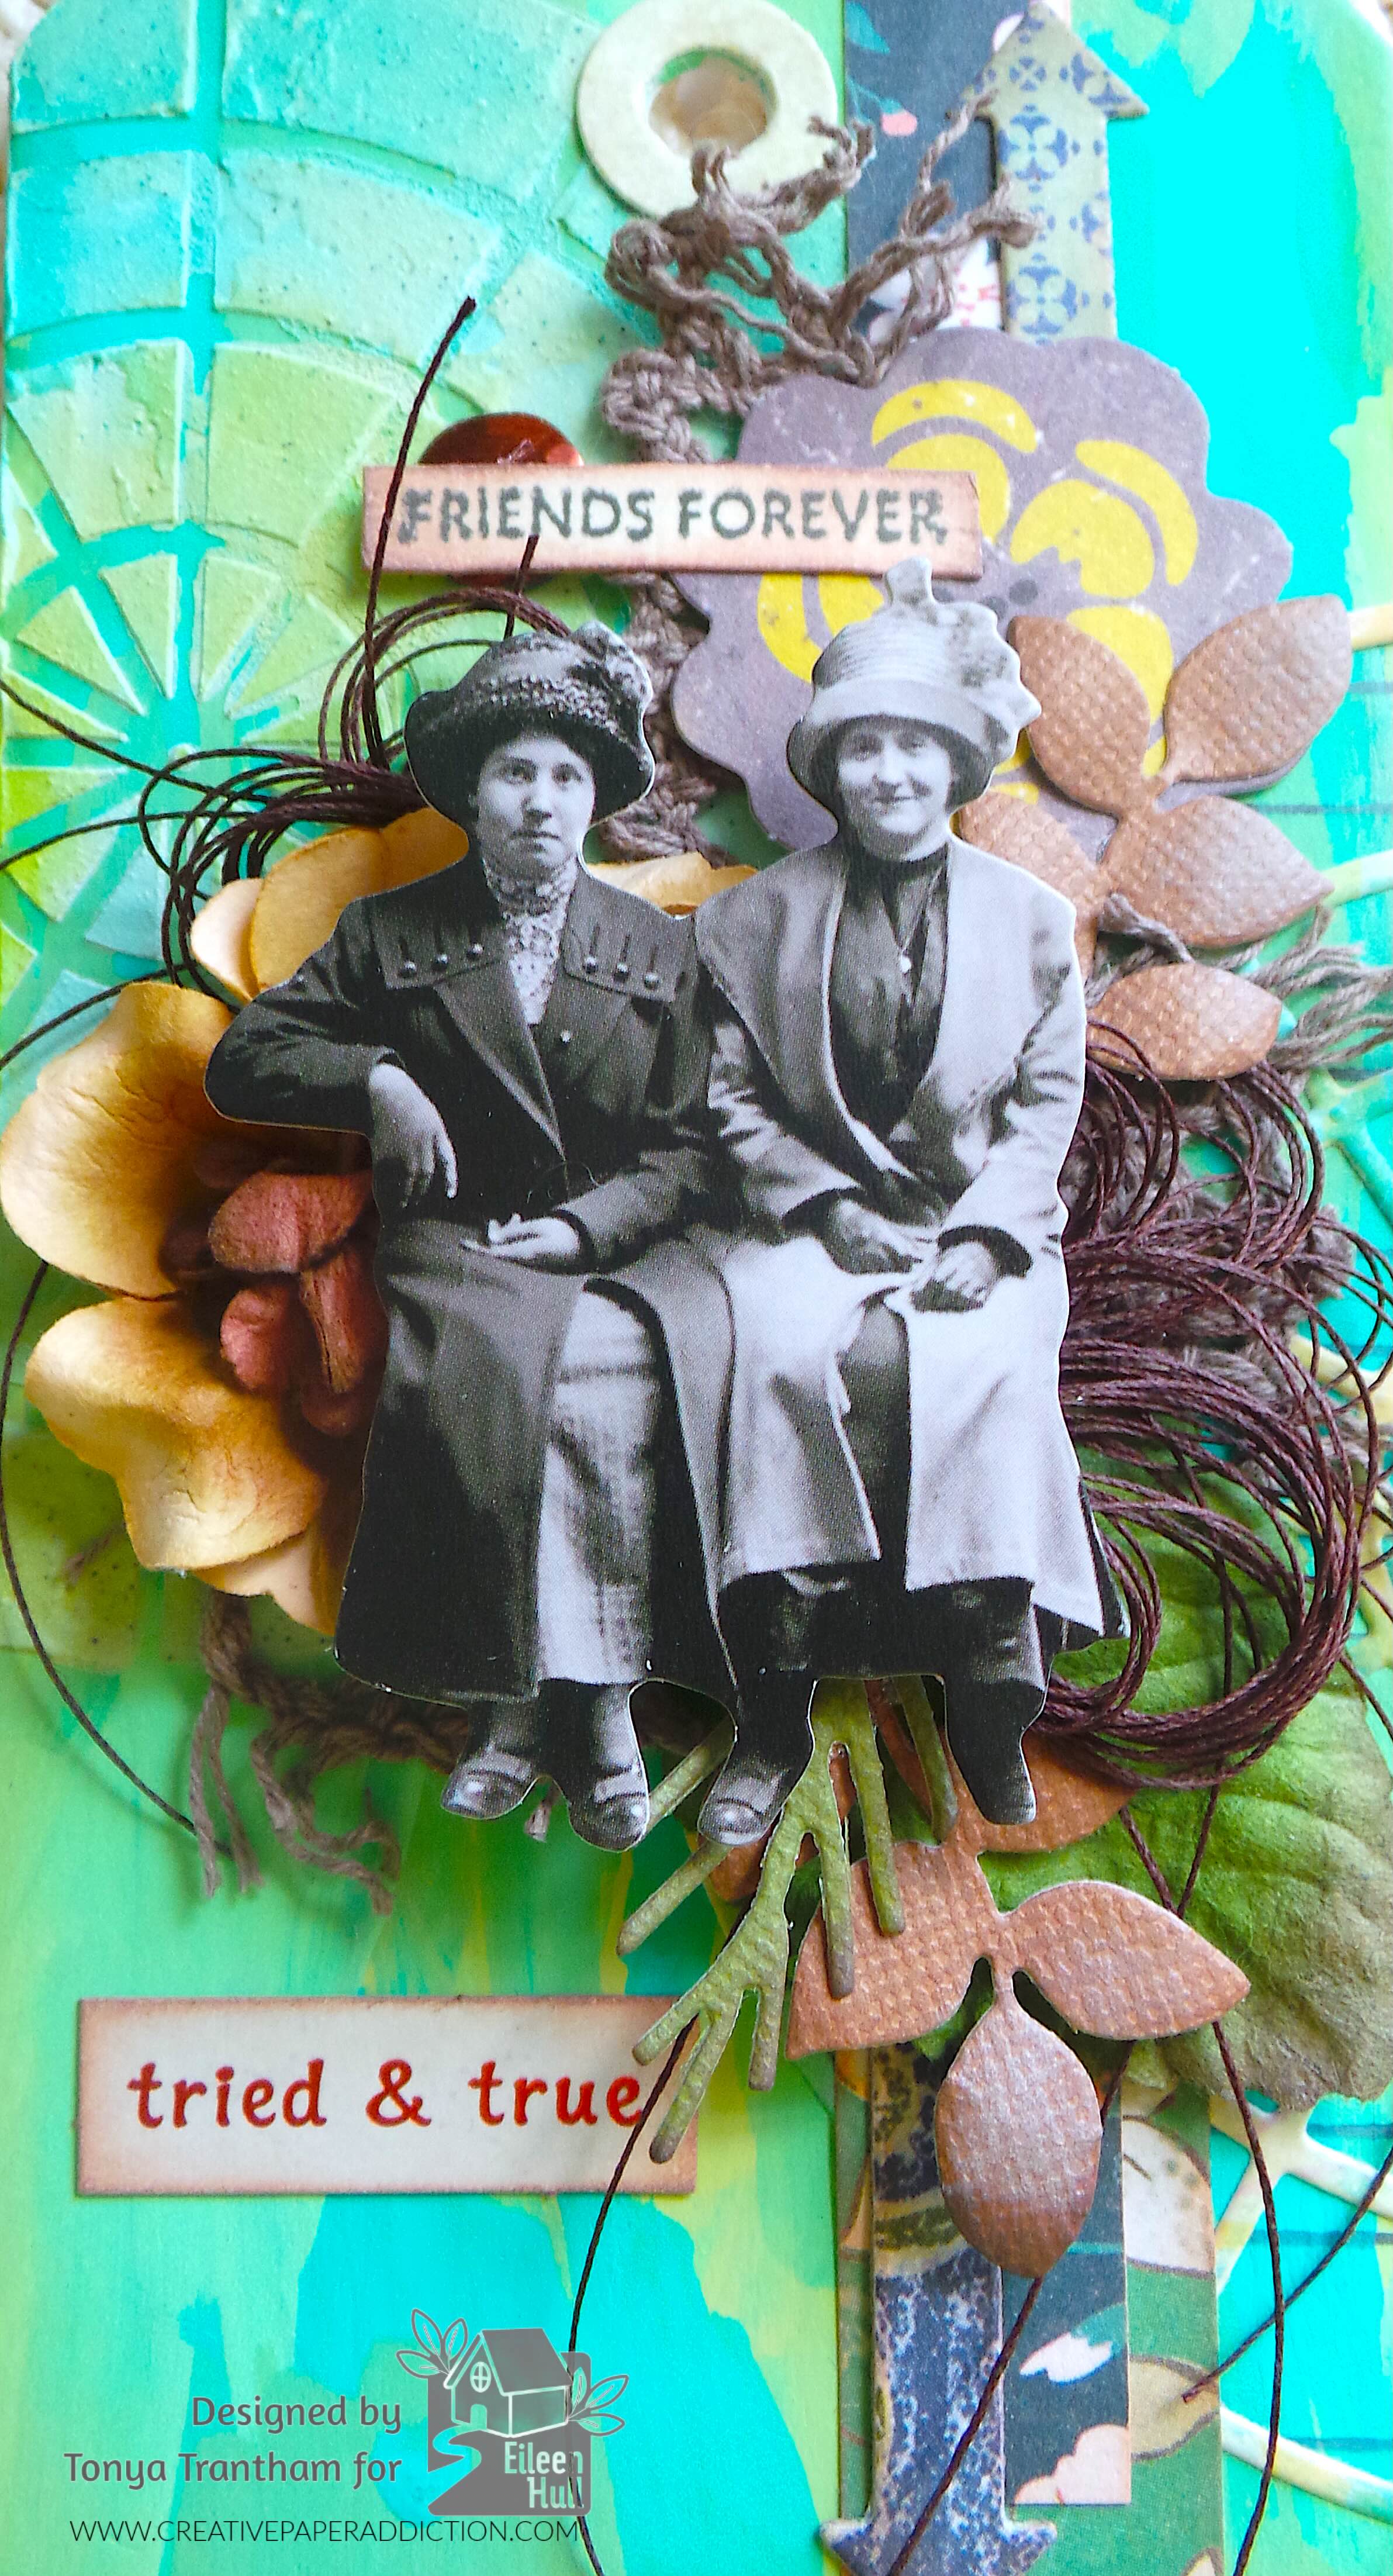
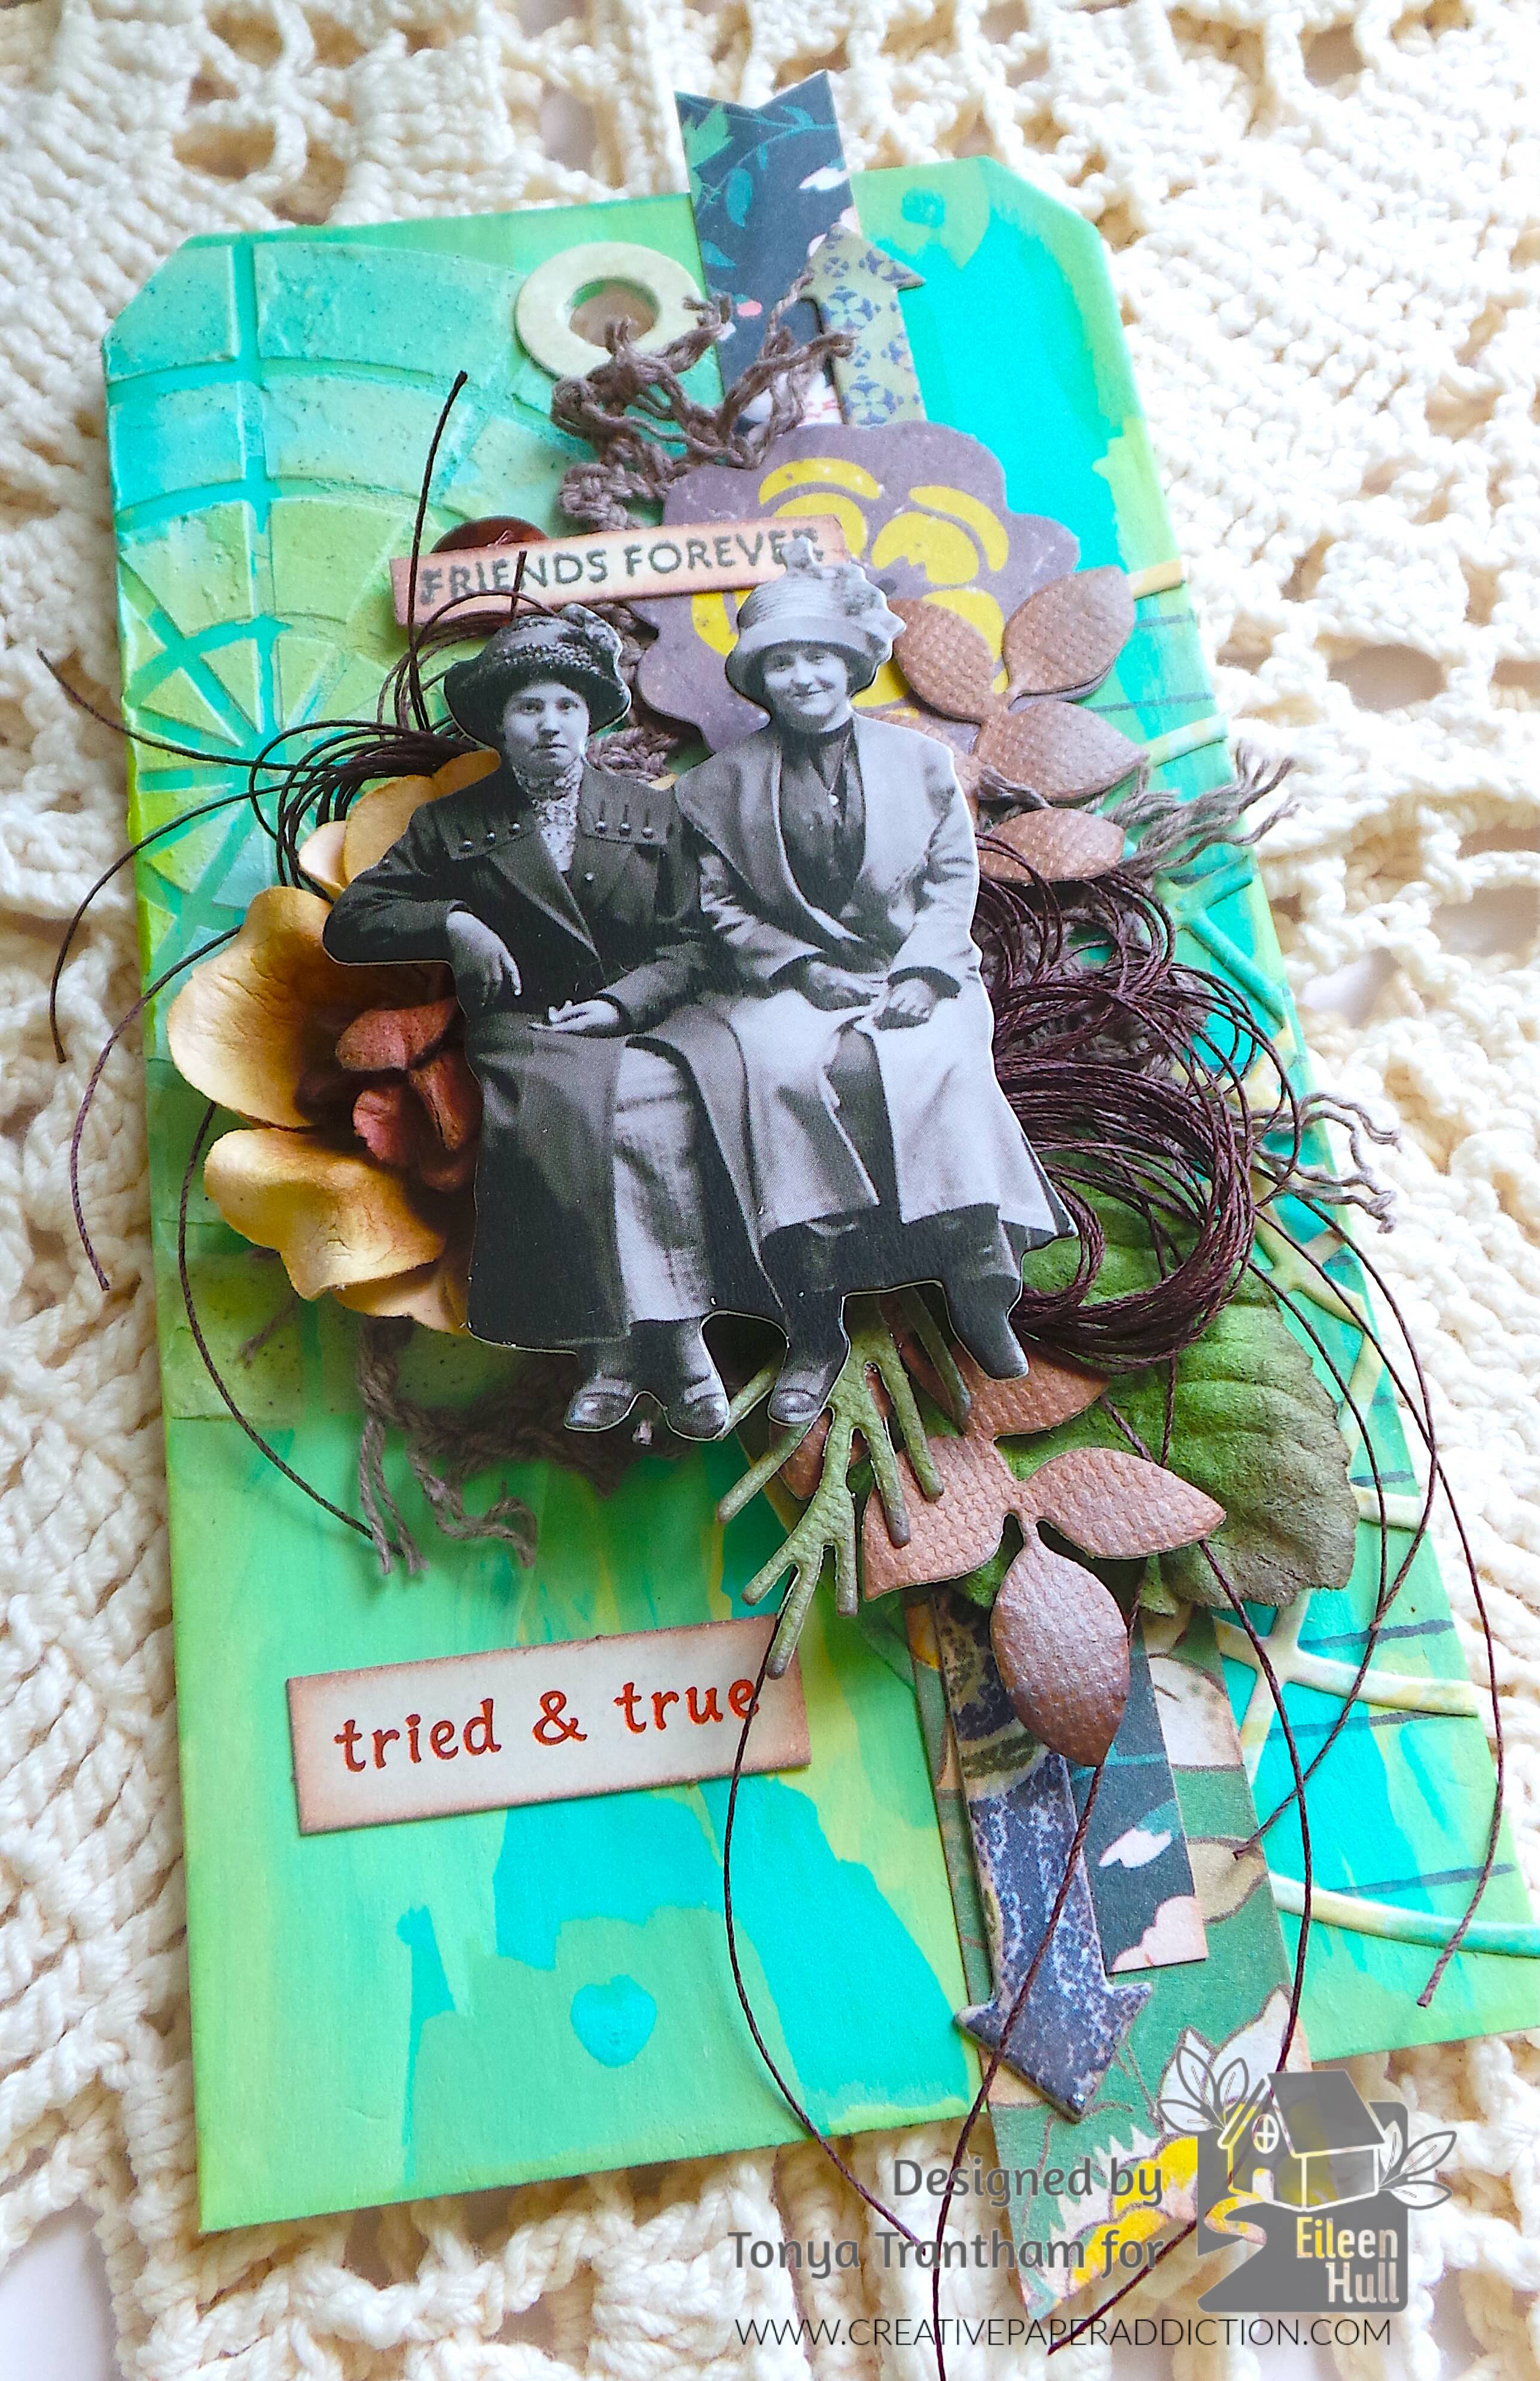
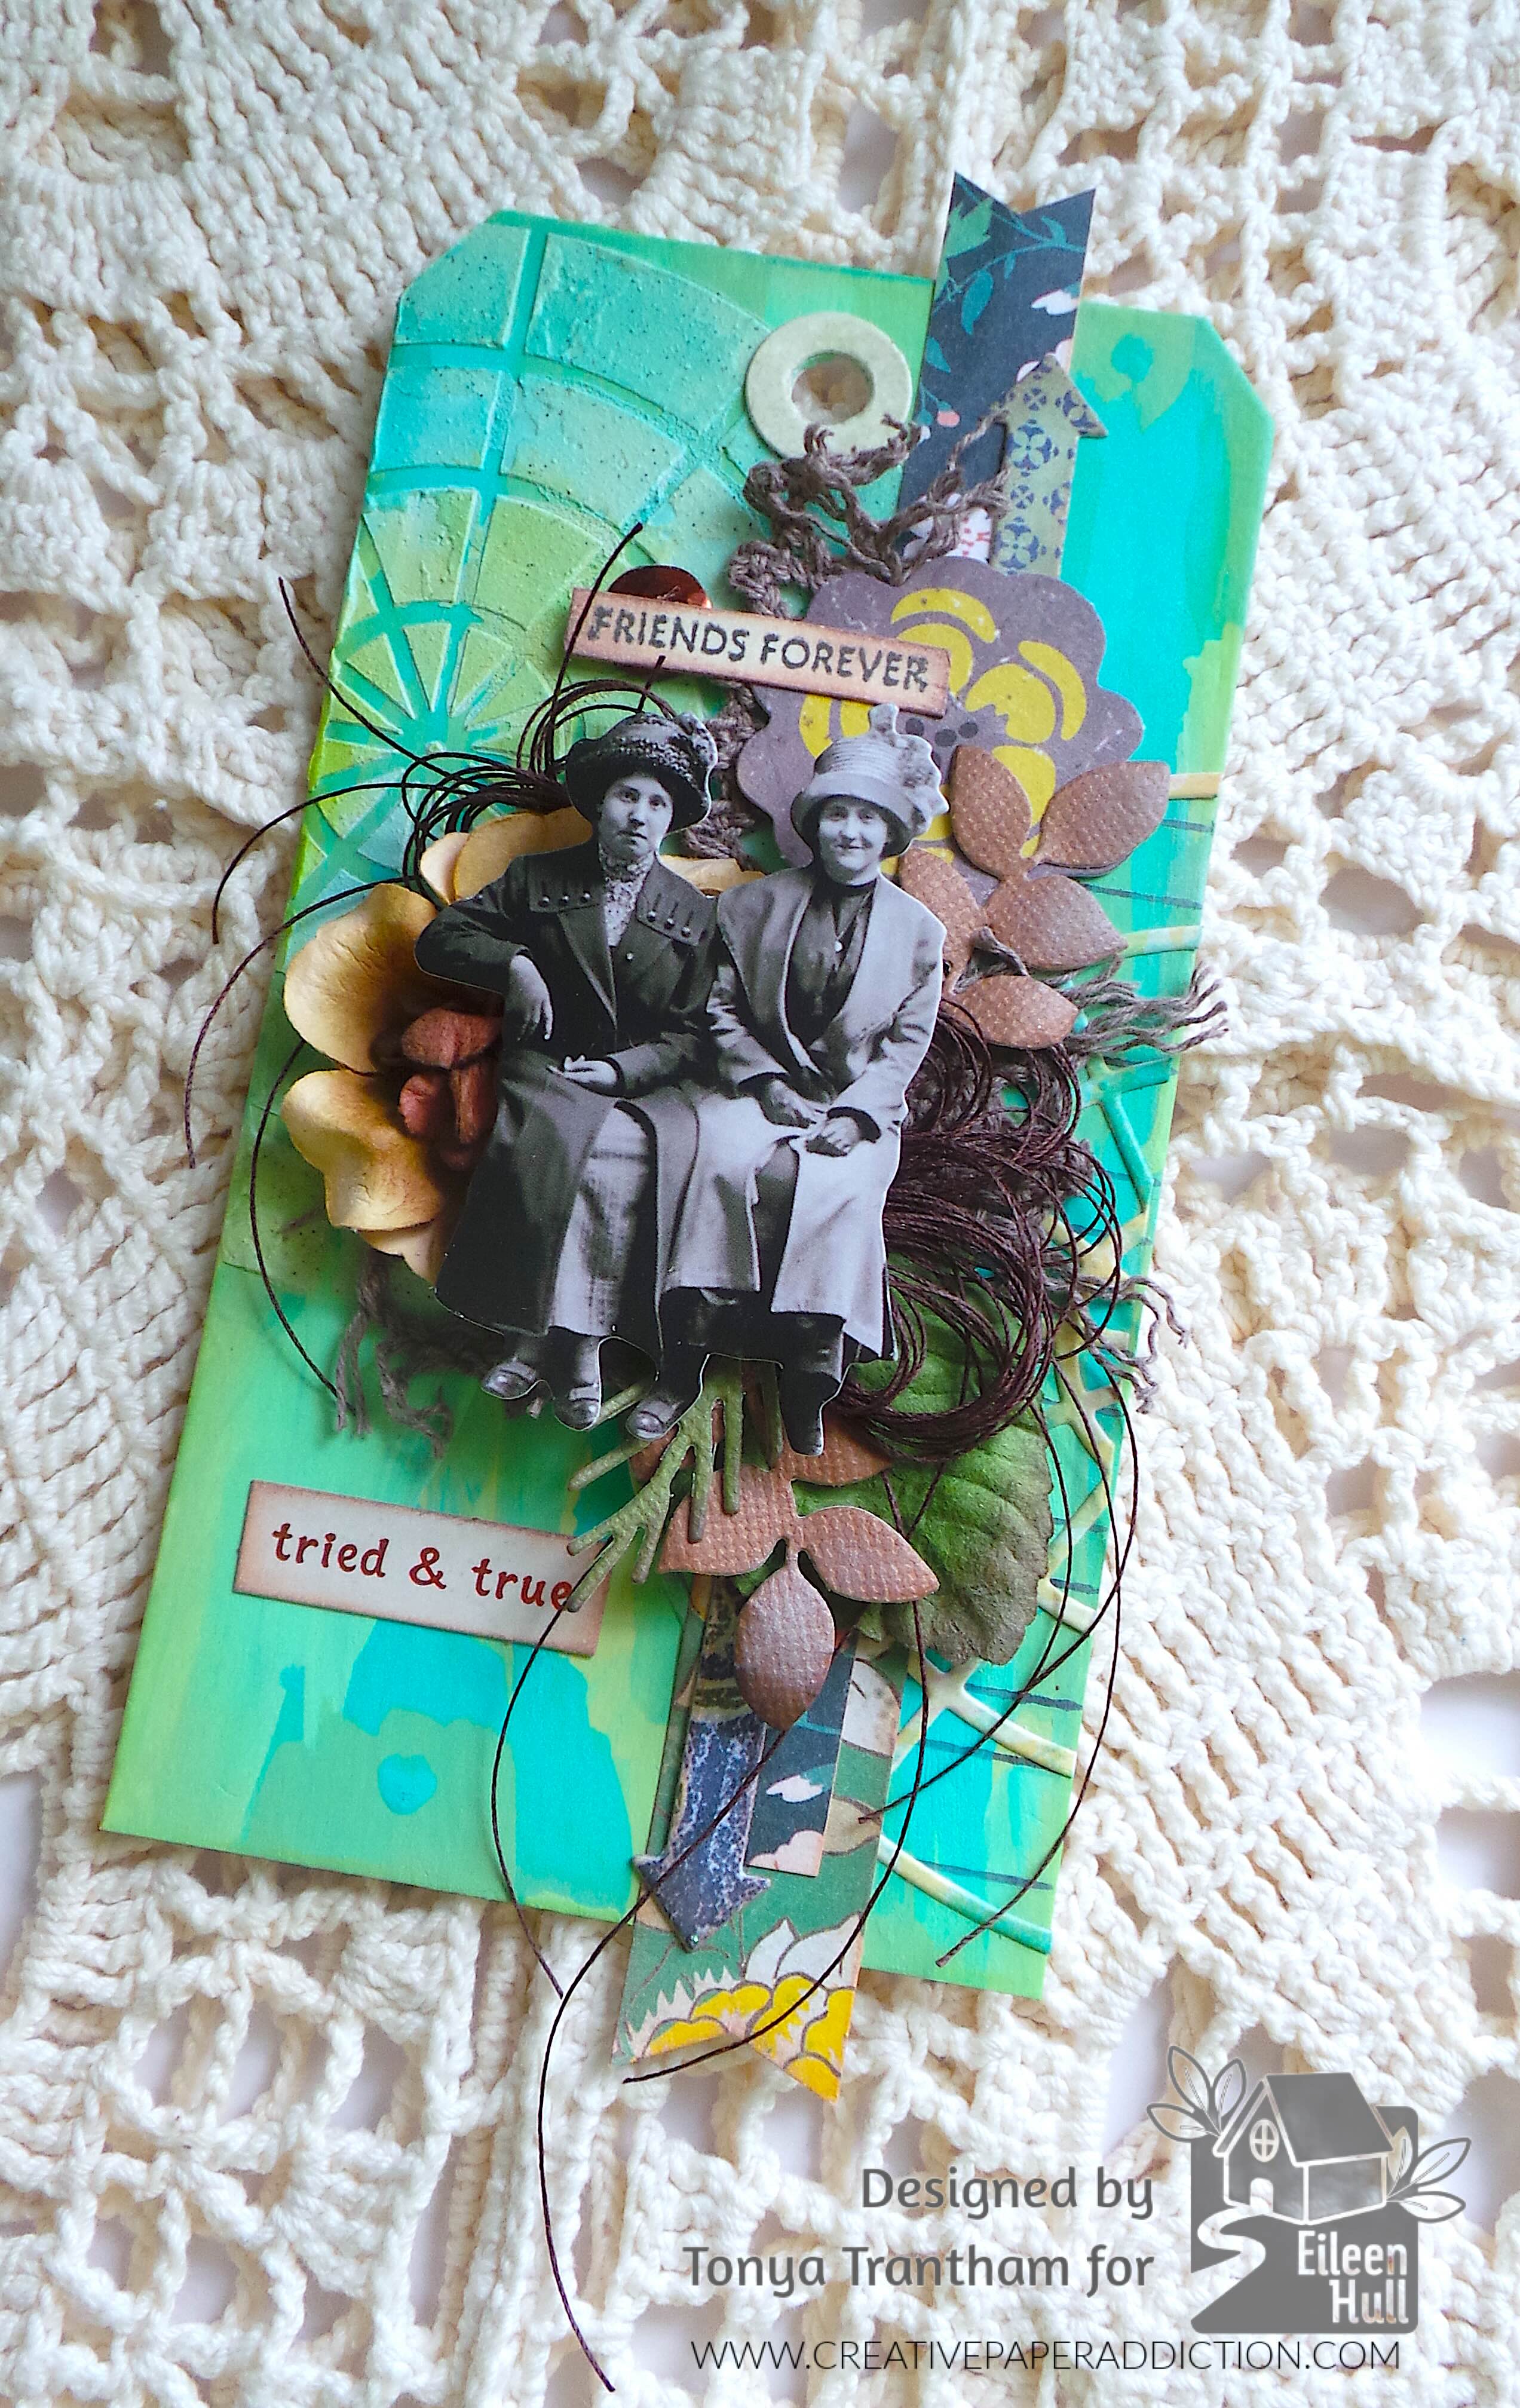
I found in my stash a tag I had cut from the Tag and Bookplates Diecut (retired). I had cut it out of Mat Board. Since it was a sturdy base I decided to use paint to cover the tag. I used an assortment of Ocean Breeze, Bright Mint and Celery acrylic paints.
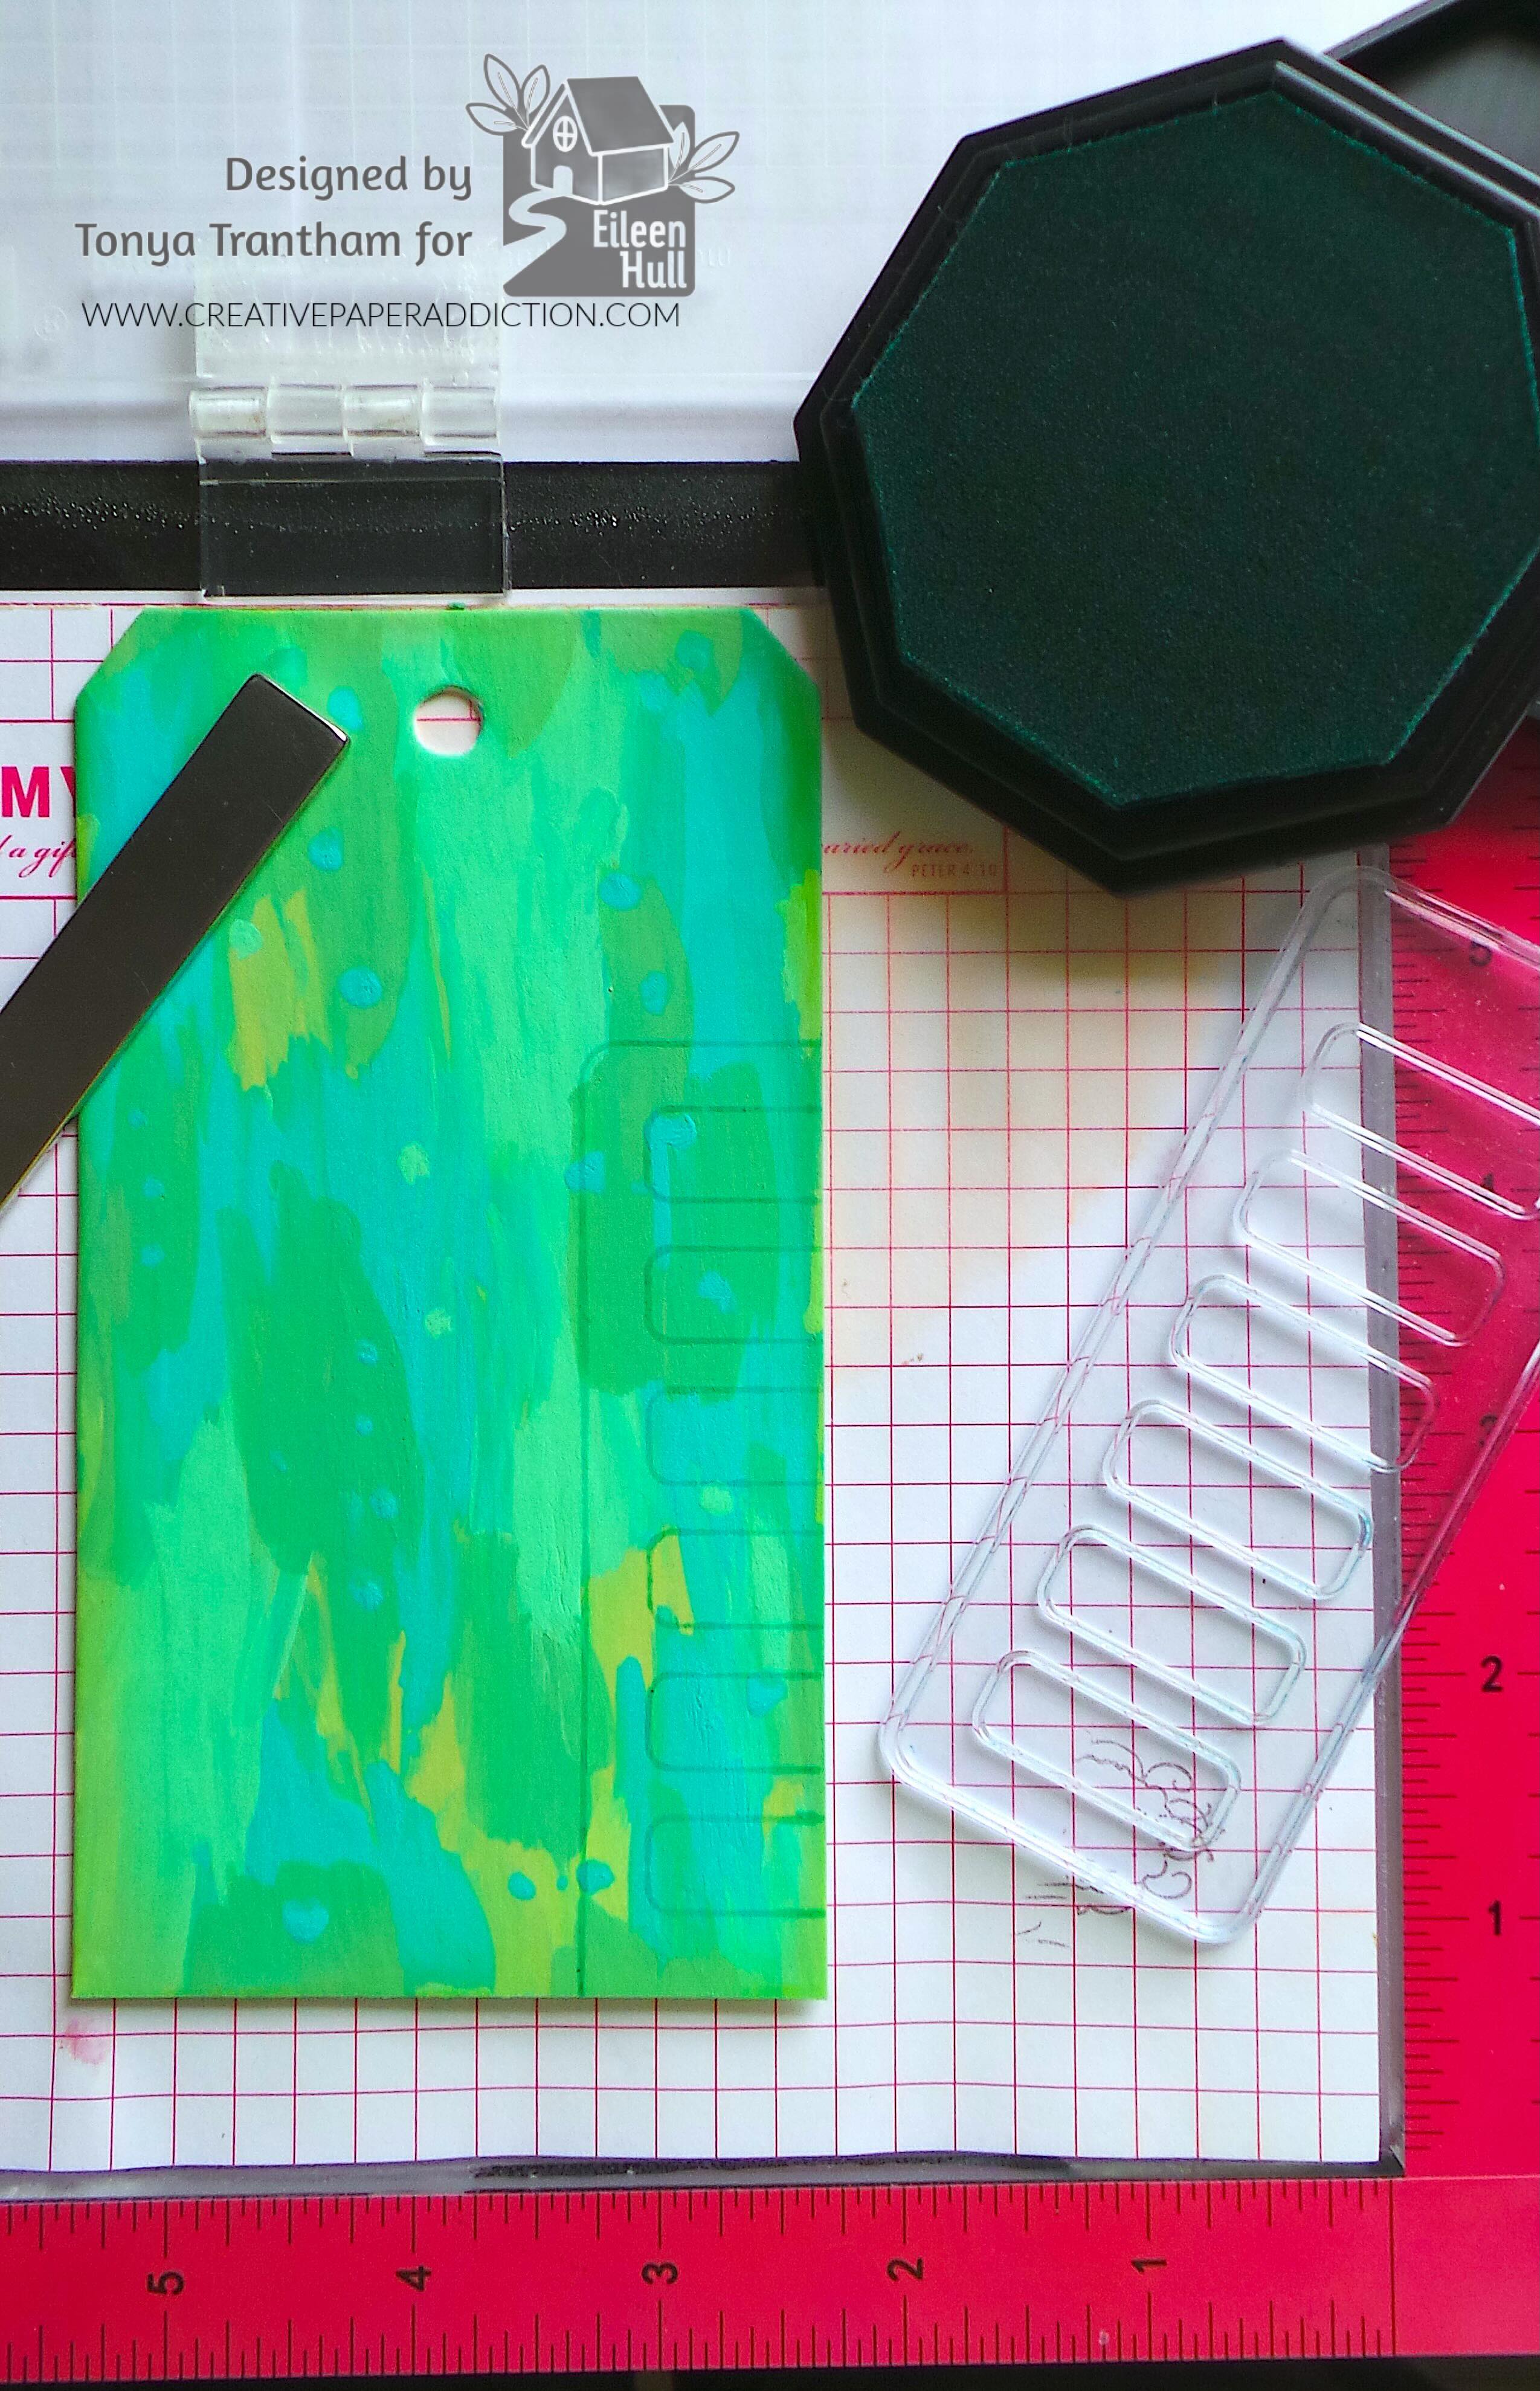
Once dry I stamped the tag with the swatch stamp from the Swatch Cards Stamp Set. I used a blue ink to stamp onto the corner of the tag but the color started to disappear. I was able to reposition the stamp onto the MISTI Stamping Tool. I re-inked the stamp with a Black Ink and re-stamped the tag.
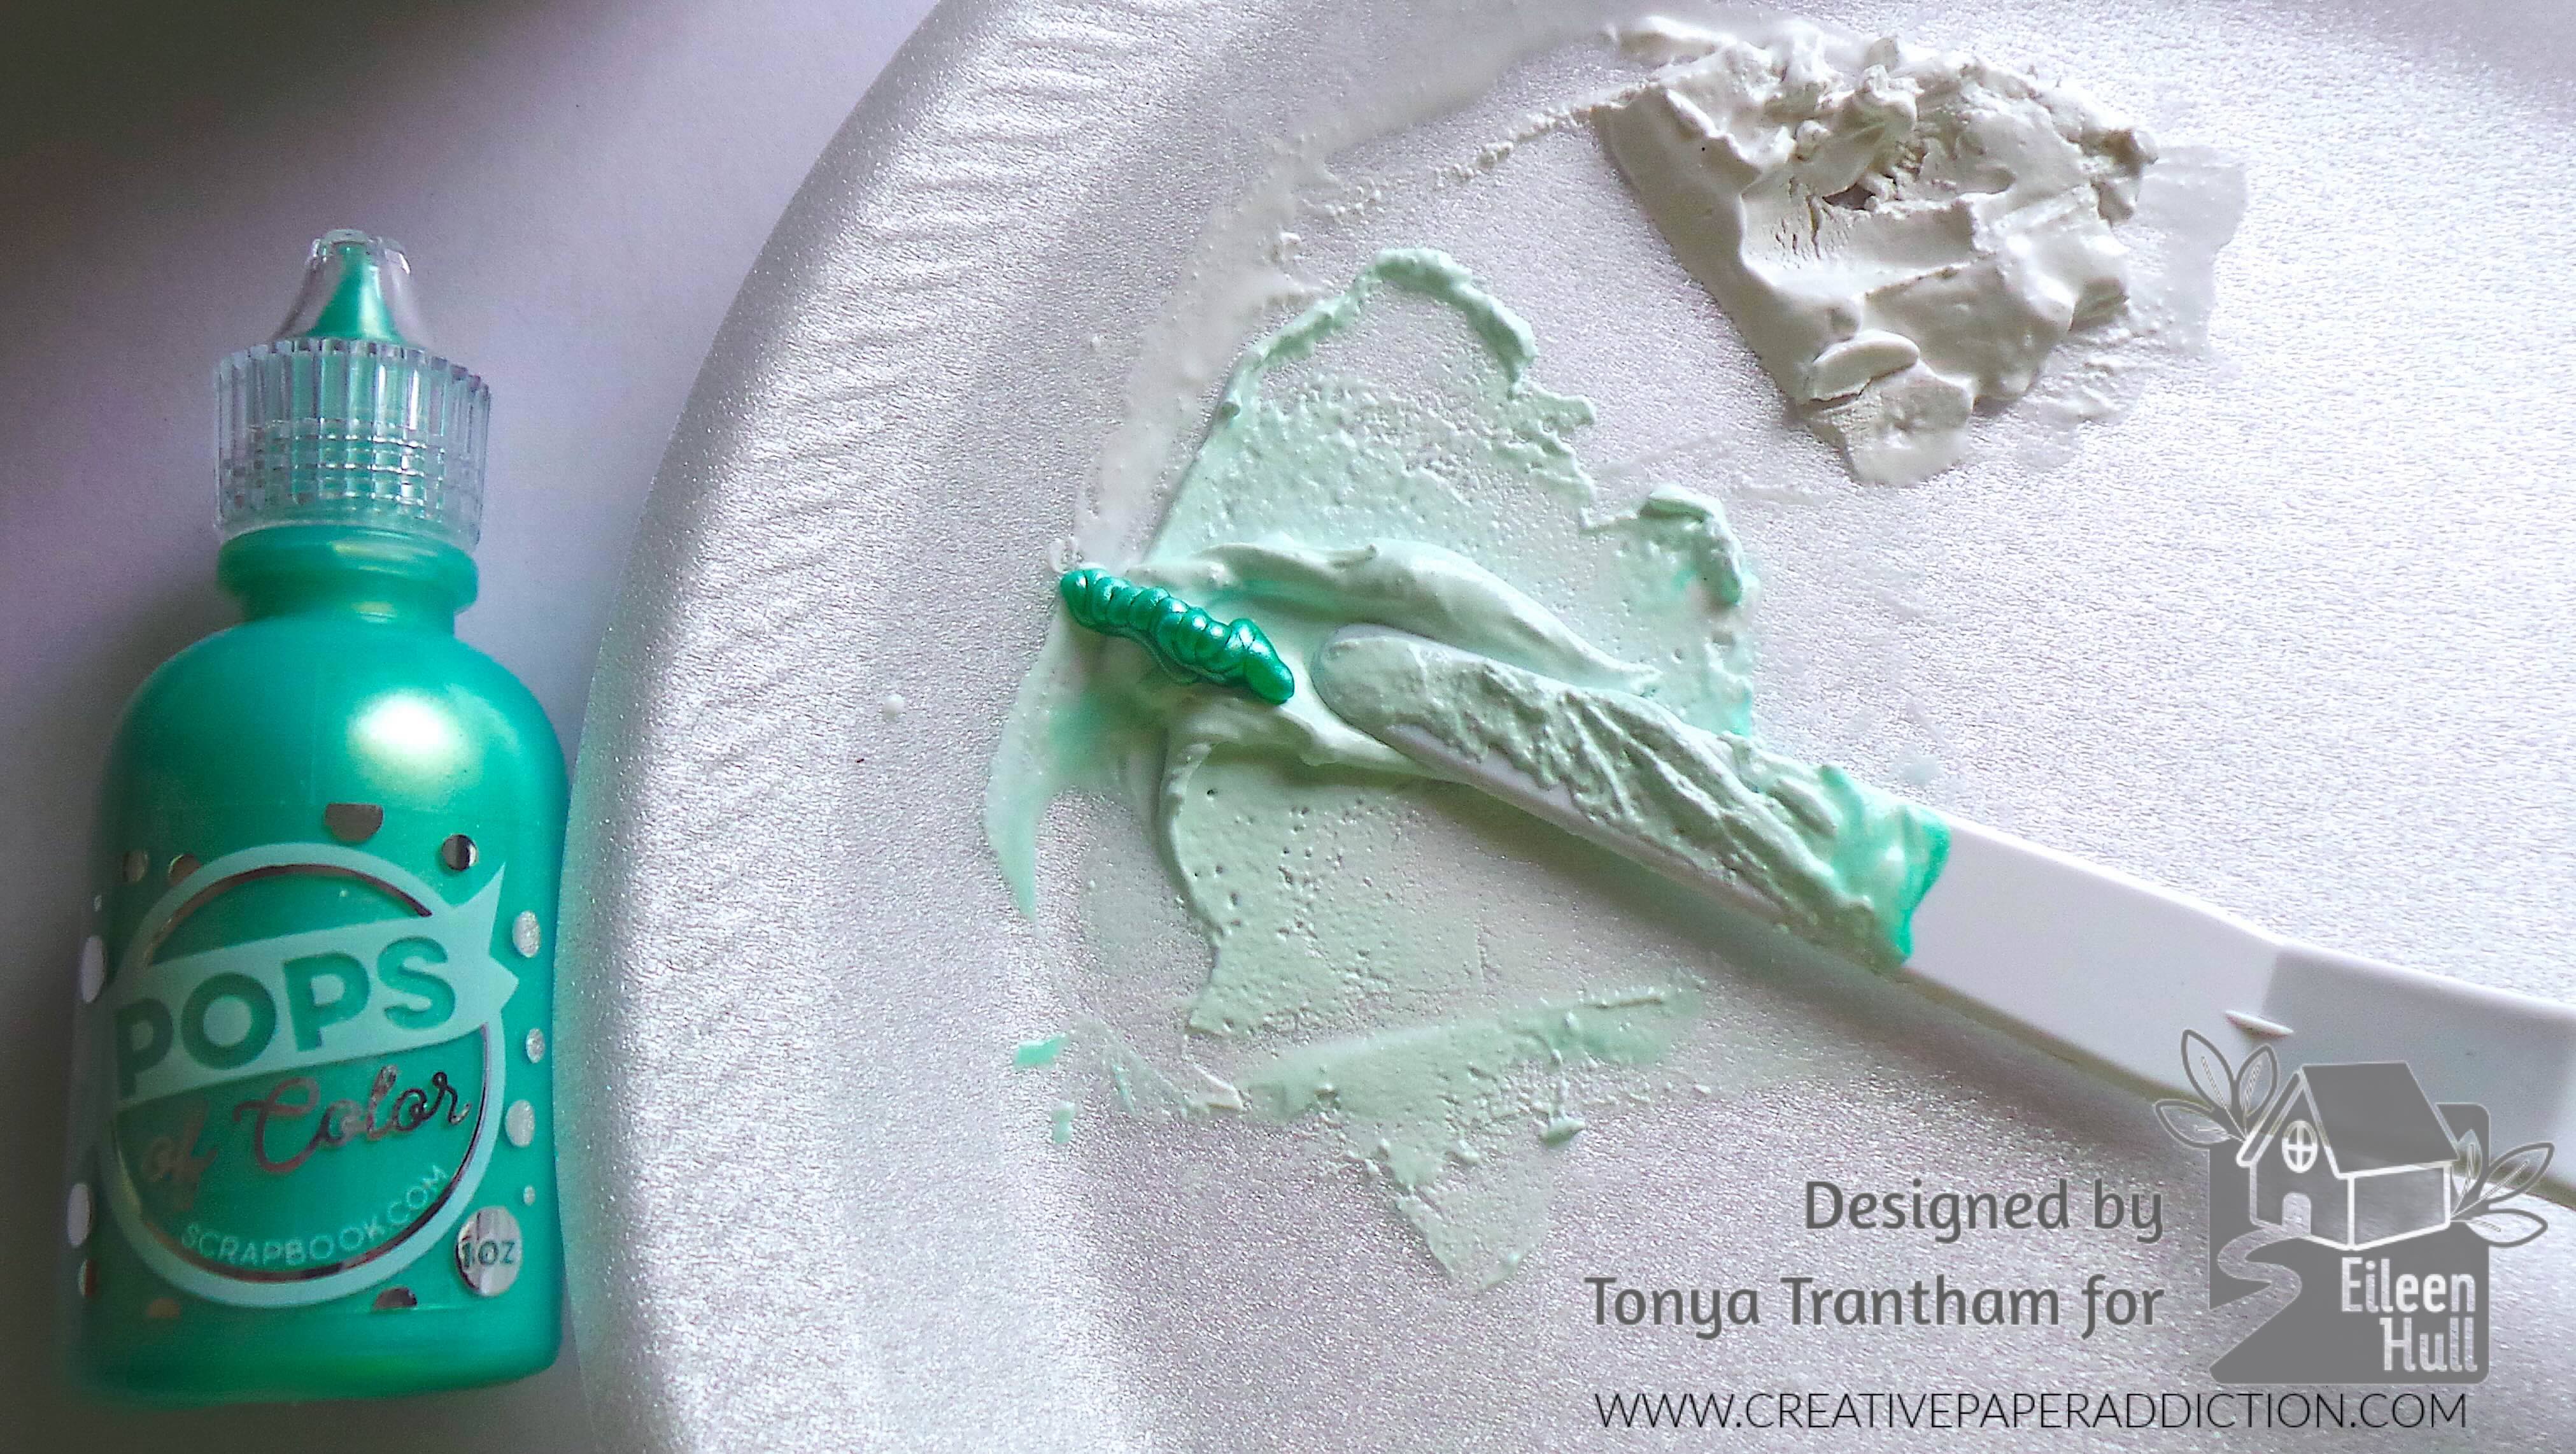
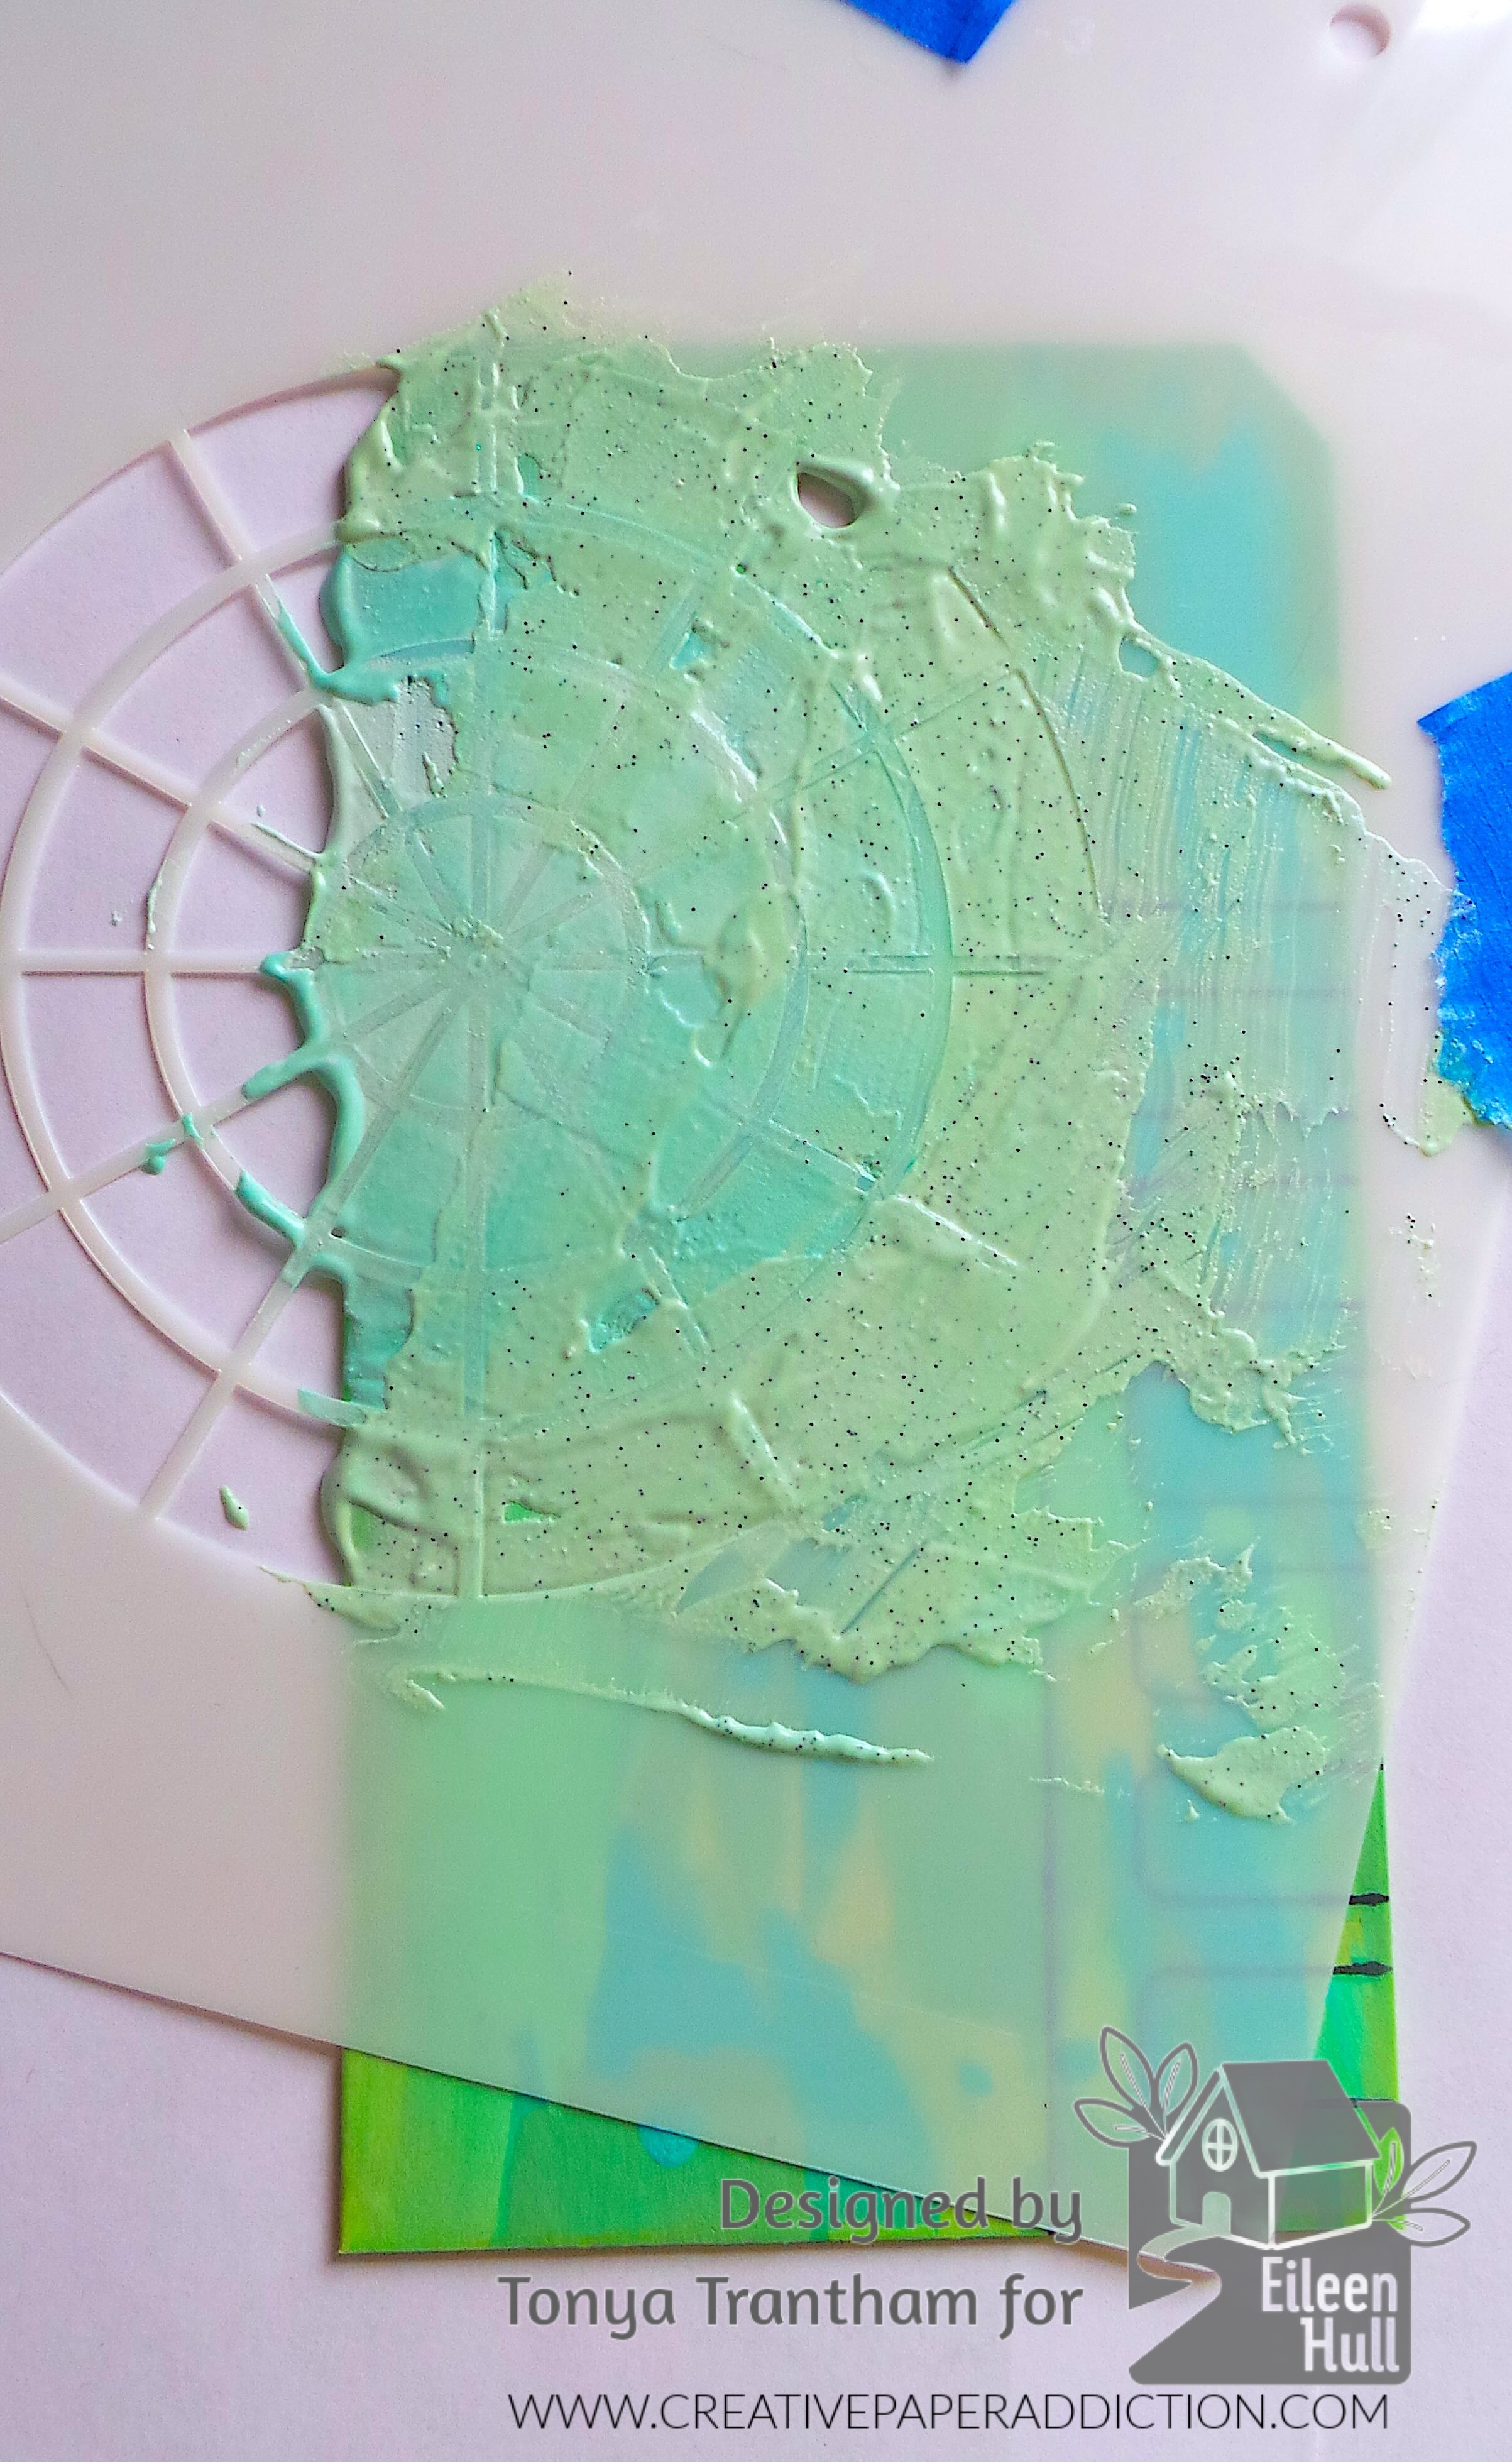
I used a Spatula and added a little Cloud Whip to a Styrofoam plate. I added a little water first to the Cloud Whip to thin it down. Next, I added Honeydew Pops of Colors to the cloud whip and mixed with the spatula.
I taped the third stencil from the Color Wheel Stencils over the tag. I applied the Honeydew Cloud Whip mixture to a portion of the stencil. I added Sea Foam Pops of Color to the Cloud whip that was still in the plate and mixed. I applied that to a portion of the stencil. I did the same steps with the Olive, and Holly Green Pops of Color until the stencil was completed covered.
I carefully removed the stencil and let it dry.
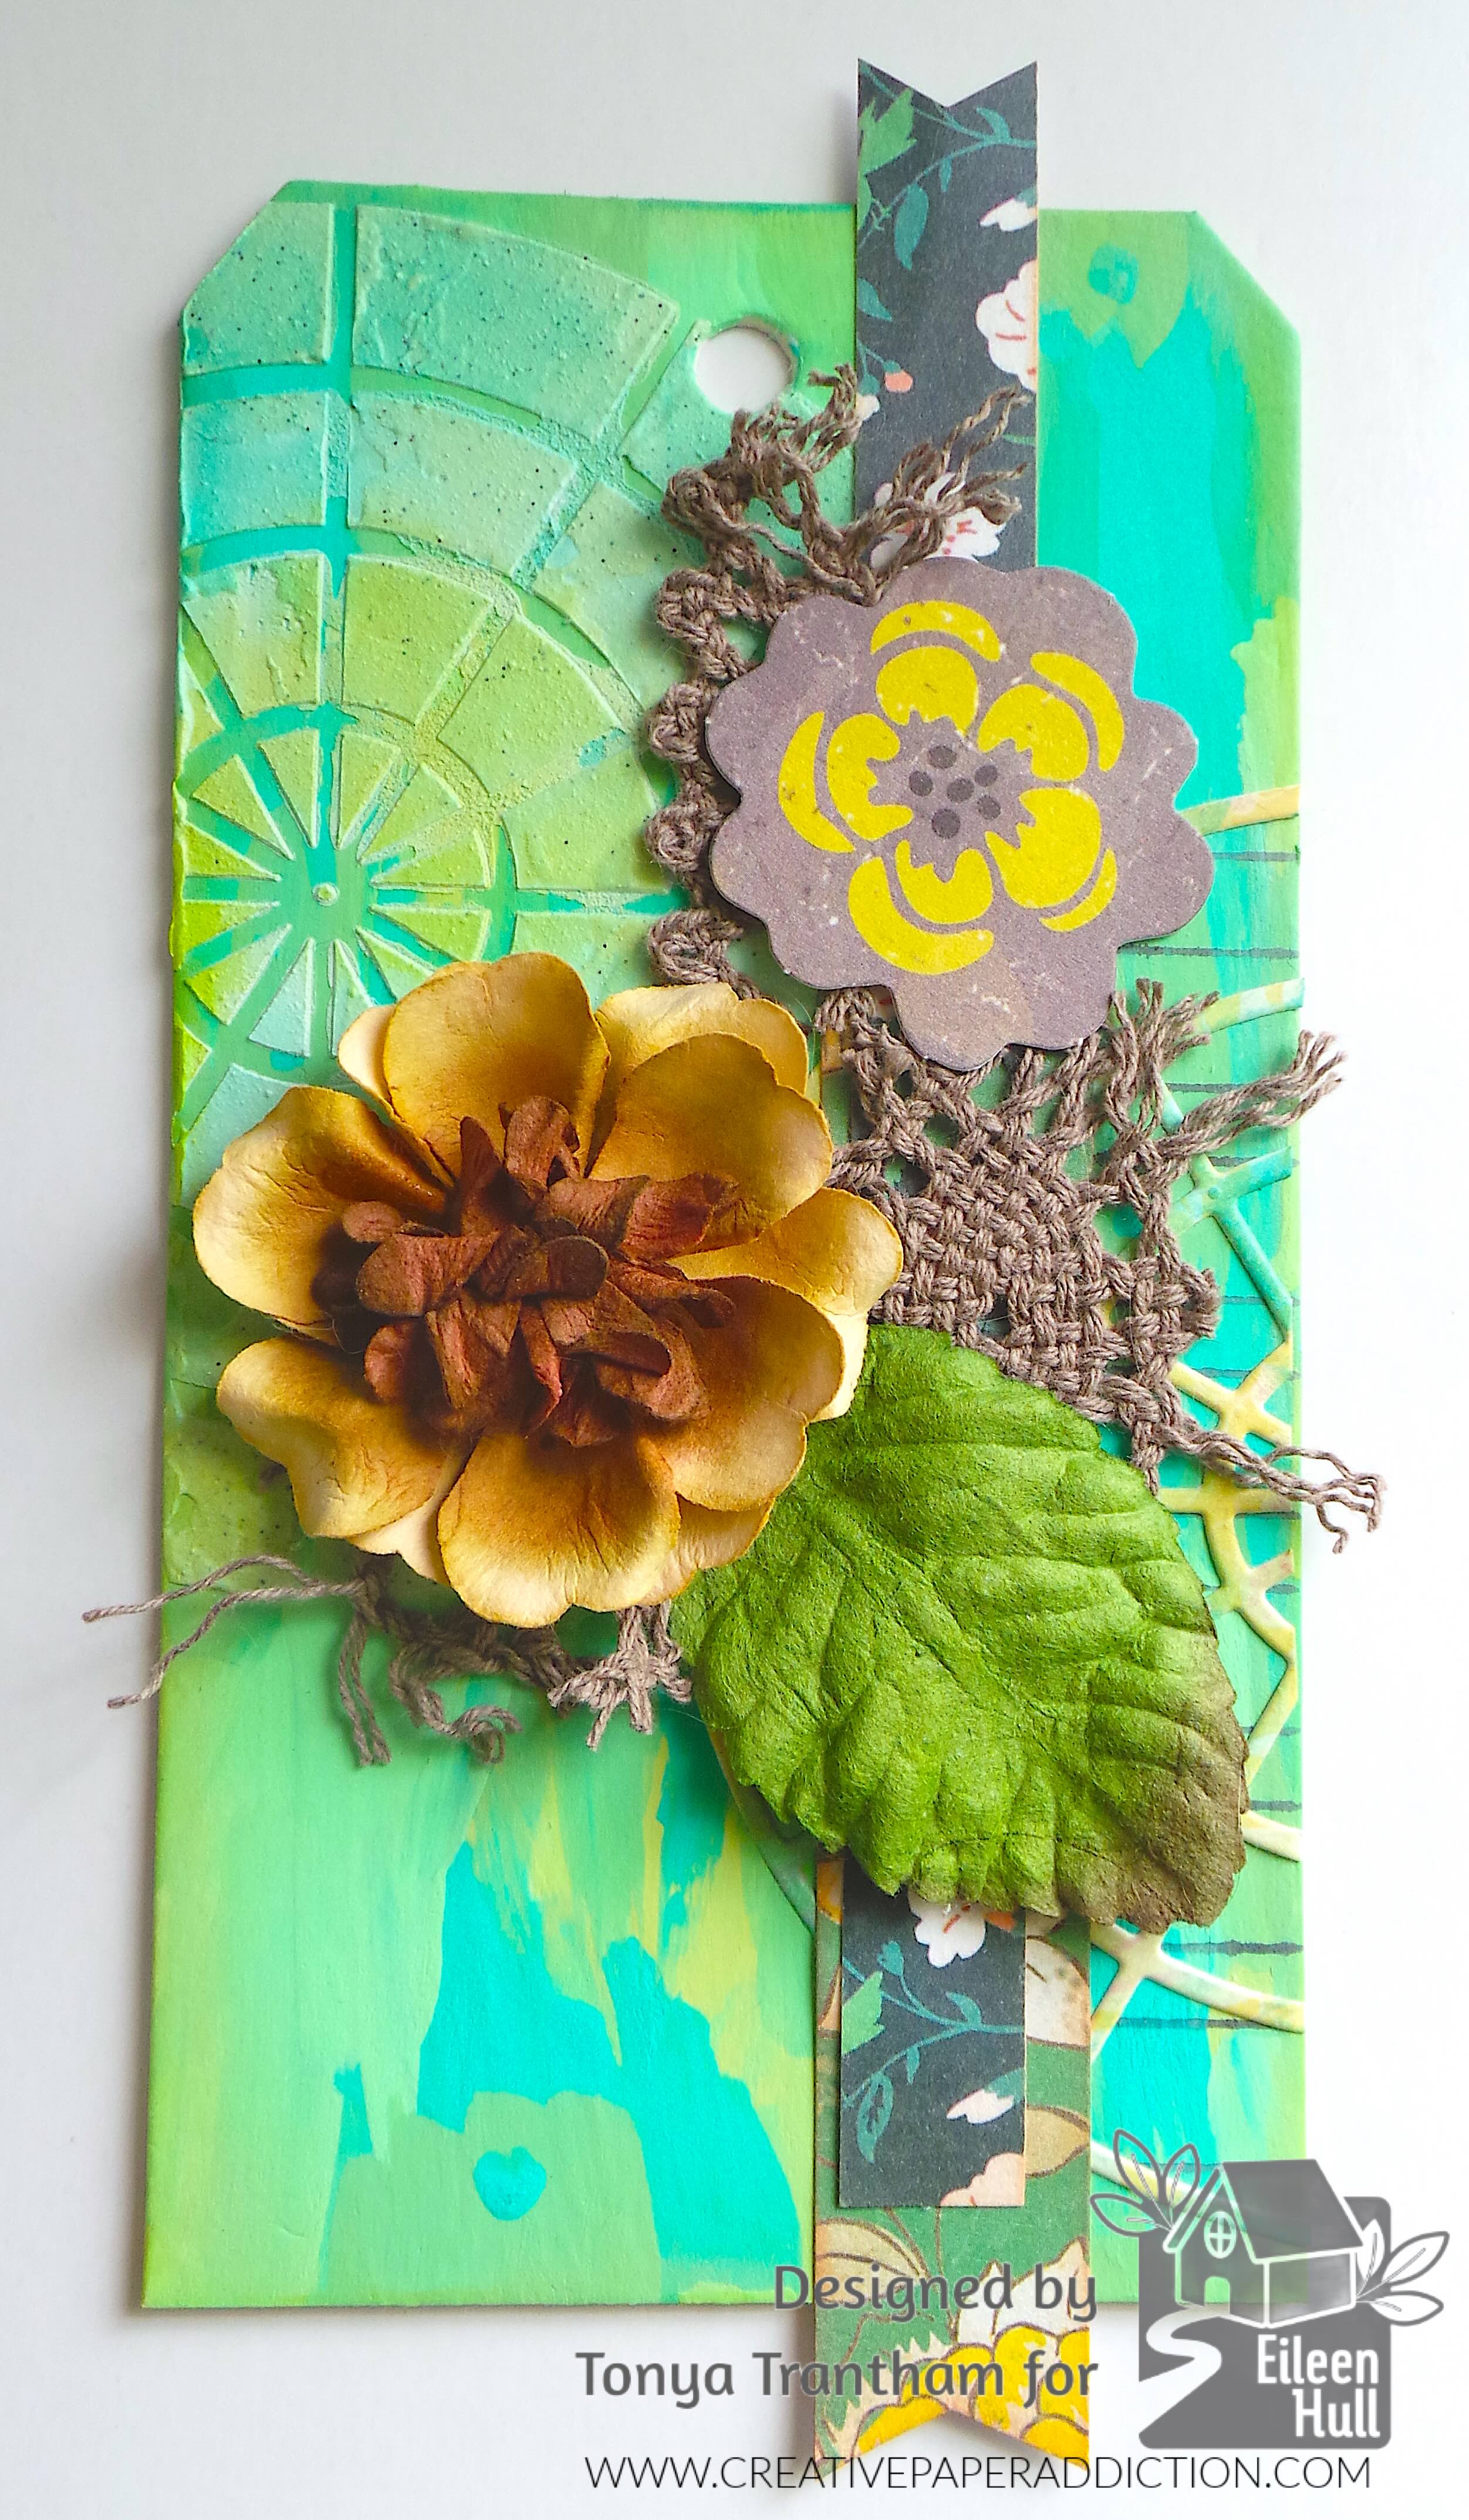
I lightly inked over the edges of the tag and the stenciled area with the green and blue Chalk Ink. I applied Adhesive to the back of a piece of cardstock. I cut a color wheel from the Rainbow Wheels Thinlits. I removed the backing from the adhesive and placed the color wheel onto the tag. I cut the excess off.
I cut a “v” in the ends of two strips of patterned cardstock and glued to the tag. I cut up some brown lace and added to the tag. Next I dug into my stash and found a flower chipboard piece, paper flower and leaf. I adhered all to the tag.
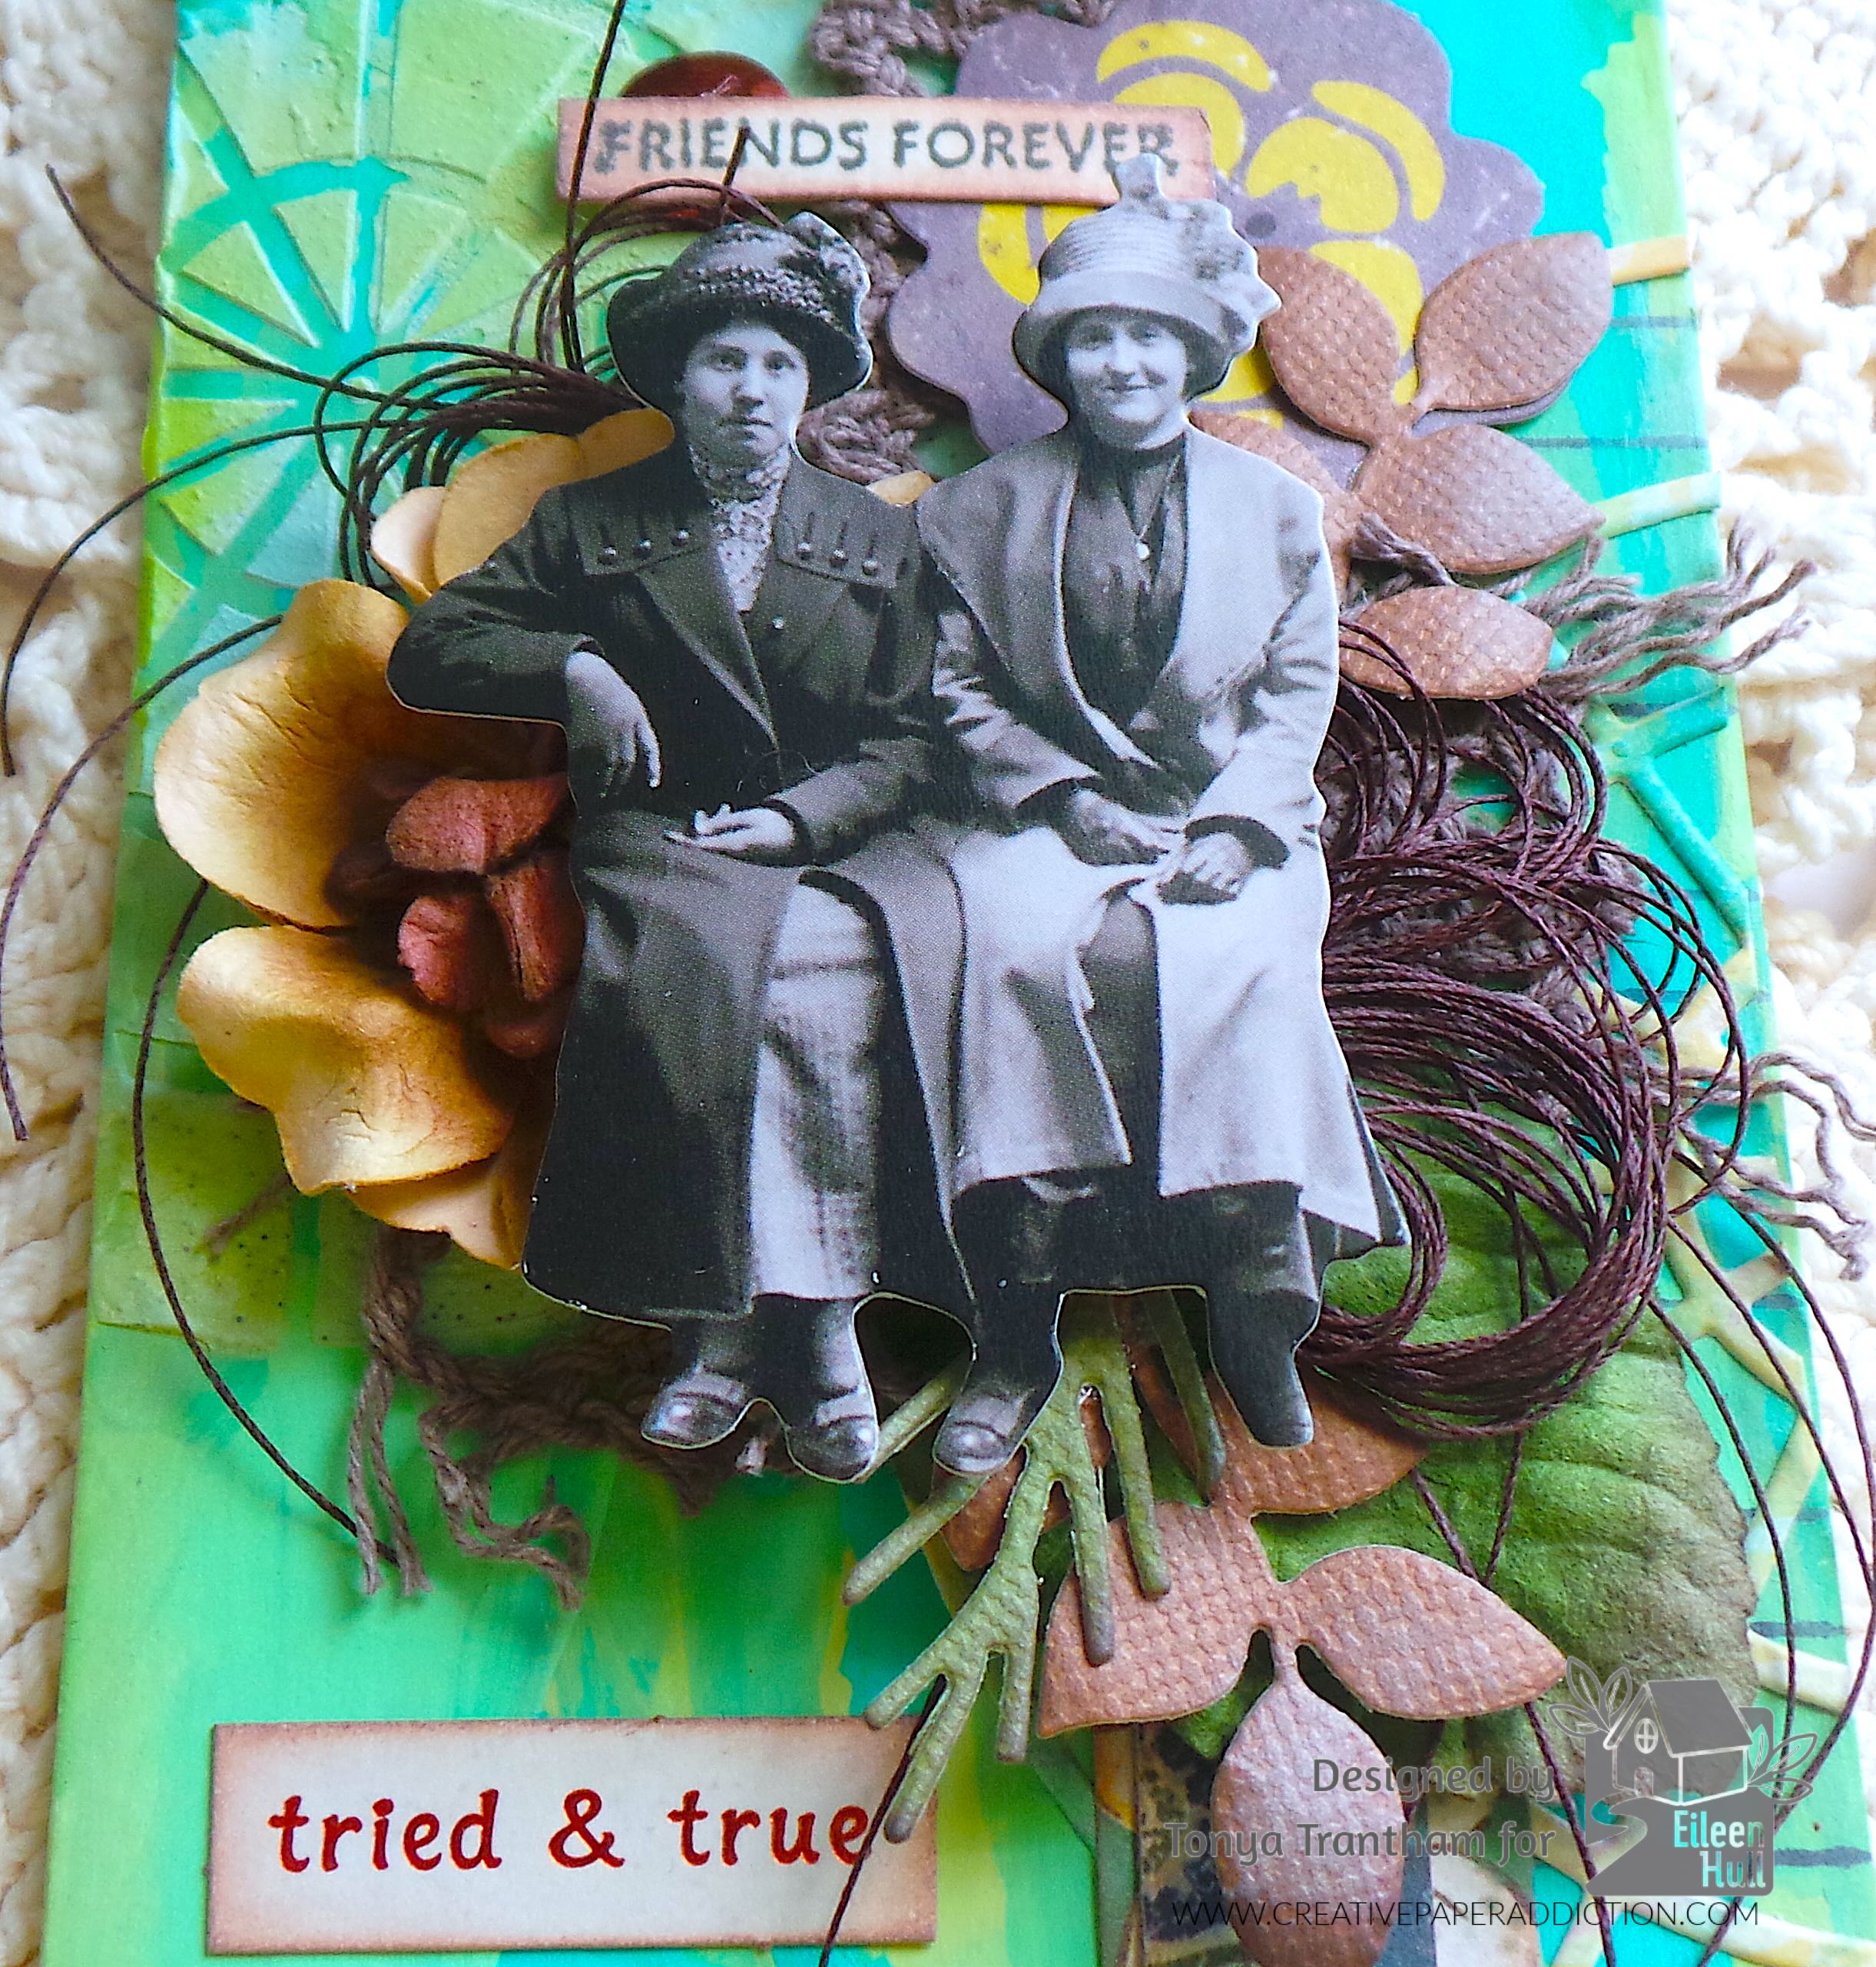
I dug into my Mini Paper Dolls and selected these women and glued onto the paper flower. I picked the “Friends Forever” stamp, inked up and stamped onto a piece of cardstock. I went over the edges of the sentiment with a brown Chalk Ink. I adhered to the chipboard flower and I added a sequin under one edge of the sentiment.
I found in my stash the “tried and true” sentiment, leaf sprigs and an evergreen sprig. I glued all to the tag.
I made bows from thread and added. I cut two of the arrows from the Rainbow Wheels Thinlitsand glued to the tag to finish.
I want to share a little. I struggle with stencils and I had put off using them. I think this tag turned out decent. Hopefully I will get over my fear of using them and will improve. What are your thoughts on stencils? Do you incorporate them in your projects? Let me know in the comments below.
If you haven’t been by Eileen’s blog lately, you might want to check it out. You can see what her creative team has been up to and find that latest post HERE.
(Products listed above are Affiliated Links for your convenience)
DISCLAIMERS
This blog is compensated to provide opinion on products, services, websites, and various other topics. Even though the owner(s) of this blog receives compensation for our posts or advertisements. I always give my honest opinions, findings, beliefs, or experiences on those topics or products. The views and opinions expressed on this blog are purely my own. Any product claim, statistic, or quote should be checked with each manufacturer. Verify other representations about a product or service with the provider or party in question.This blog contains affiliate links. Clicking these links helps to support Tonya Trantham Designs – Creative Paper Addiction. It’s at no additional cost to you.Today’s features are Sizzix, Eileen Hull and Scrapbook.com Products.
Thanks for stopping by, I hope your Wednesday is wonderful and enjoy creating!
Hi everyone! It’s that time again and the May Release by Eileen Hull is here! I will be sharing sneak peeks of my projects and will do blog posts later.
The Handbound Journal is a ScoreBoards XL die designed to cut and score thick materials like matboard, leather, and felt. It includes built-in score lines, holes, a spine piece, and large labels—no measuring needed! The book measures 6″ x 5″. You can customize its thickness. You can also choose hand or quick binding. It comes with a pretty scalloped edge. One of the most versatile designs yet.
The Bigz Journal Hardware Die offers latches, hinges, and pen loops. These components are perfectly sized to coordinate with the journal. It also cuts a variety of materials.
The Color Wheel Stencil is a three-layer stencil that creates a continuous color wheel—use traditional ROYGBIV or customize your palette. Pair it with the Rainbow Wheel Die, which cuts the framework, segmented circle, and arrows for a functional color wheel.
The Swatch Card Stamp Set includes a round palette, rectangular and pie-shaped swatch cards. Plus color-themed phrases perfect for cards or journals.
(Products listed above are Affiliated Links for your convenience)
DISCLAIMERS
This blog is compensated to provide opinion on products, services, websites, and various other topics. Even though the owner(s) of this blog receives compensation for our posts or advertisements. I always give my honest opinions, findings, beliefs, or experiences on those topics or products. The views and opinions expressed on this blog are purely my own. Any product claim, statistic, or quote should be checked with each manufacturer. Verify other representations about a product or service with the provider or party in question.This blog contains affiliate links. Clicking these links helps to support Tonya Trantham Designs – Creative Paper Addiction. It runs at no additional cost to you.Today’s features are Sizzix, Eileen Hull and Scrapbook.com Products.
Thanks for stopping by, I hope your Thursday is great and enjoy creating!
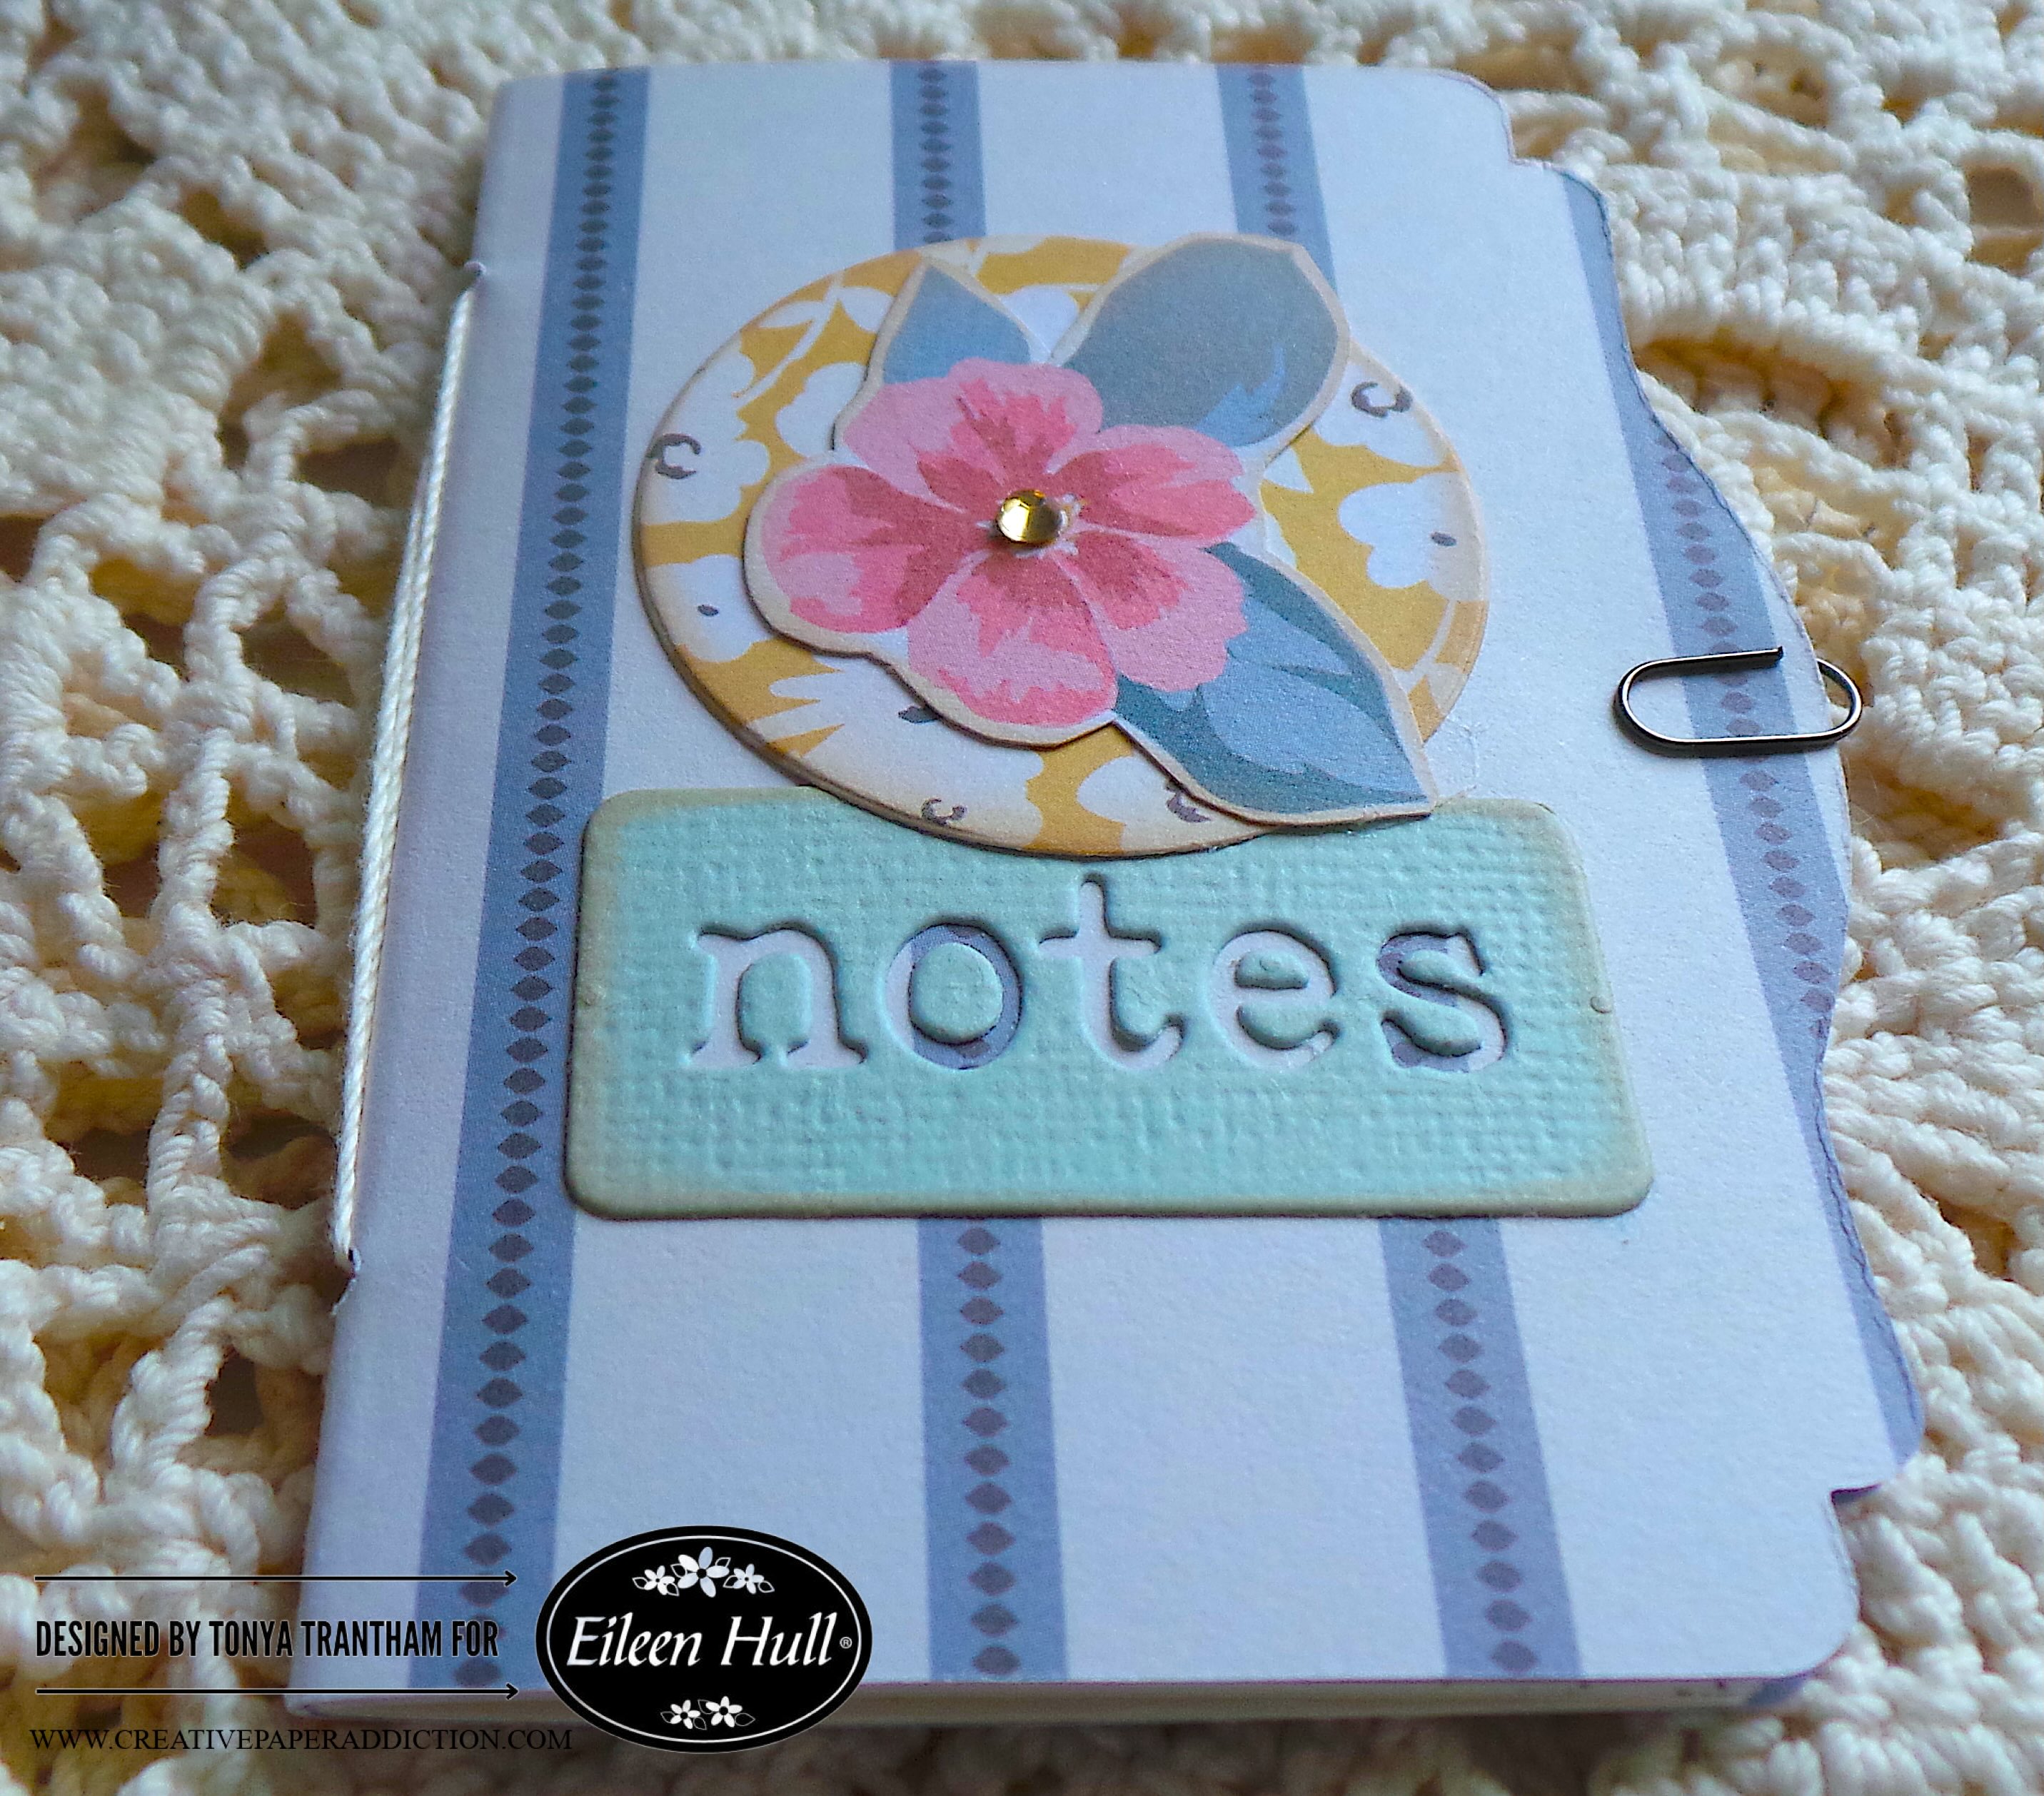
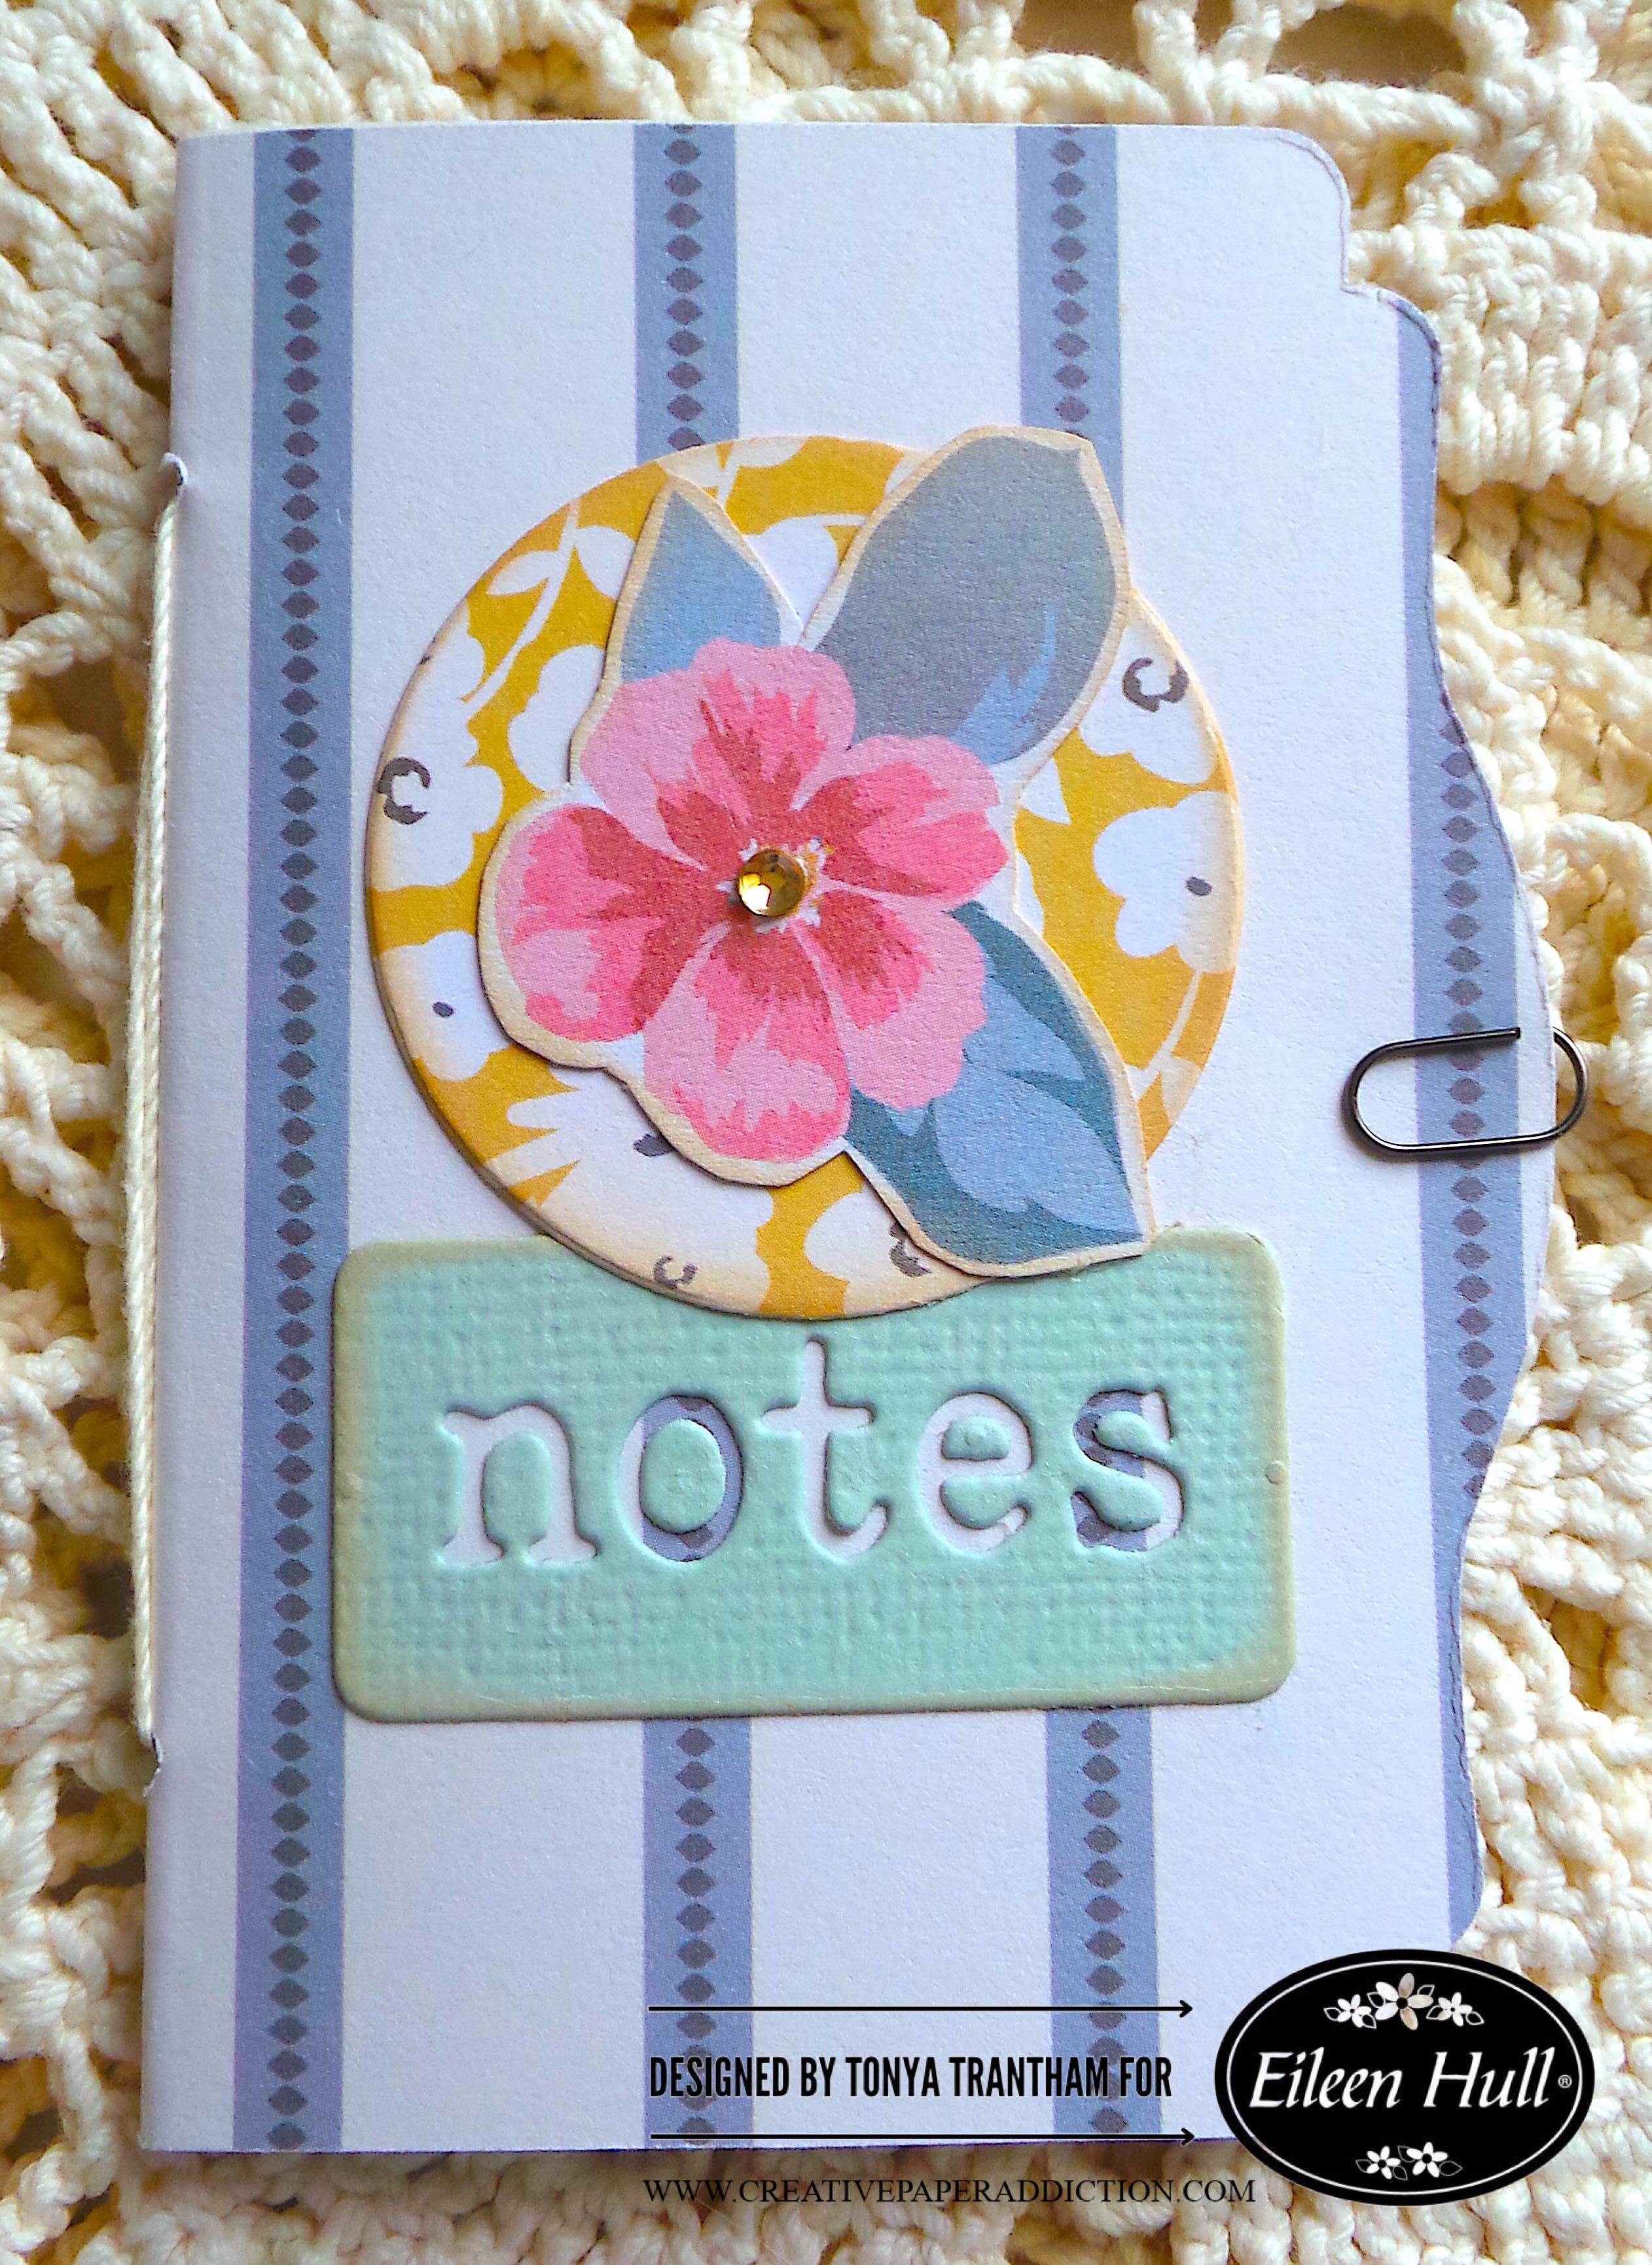
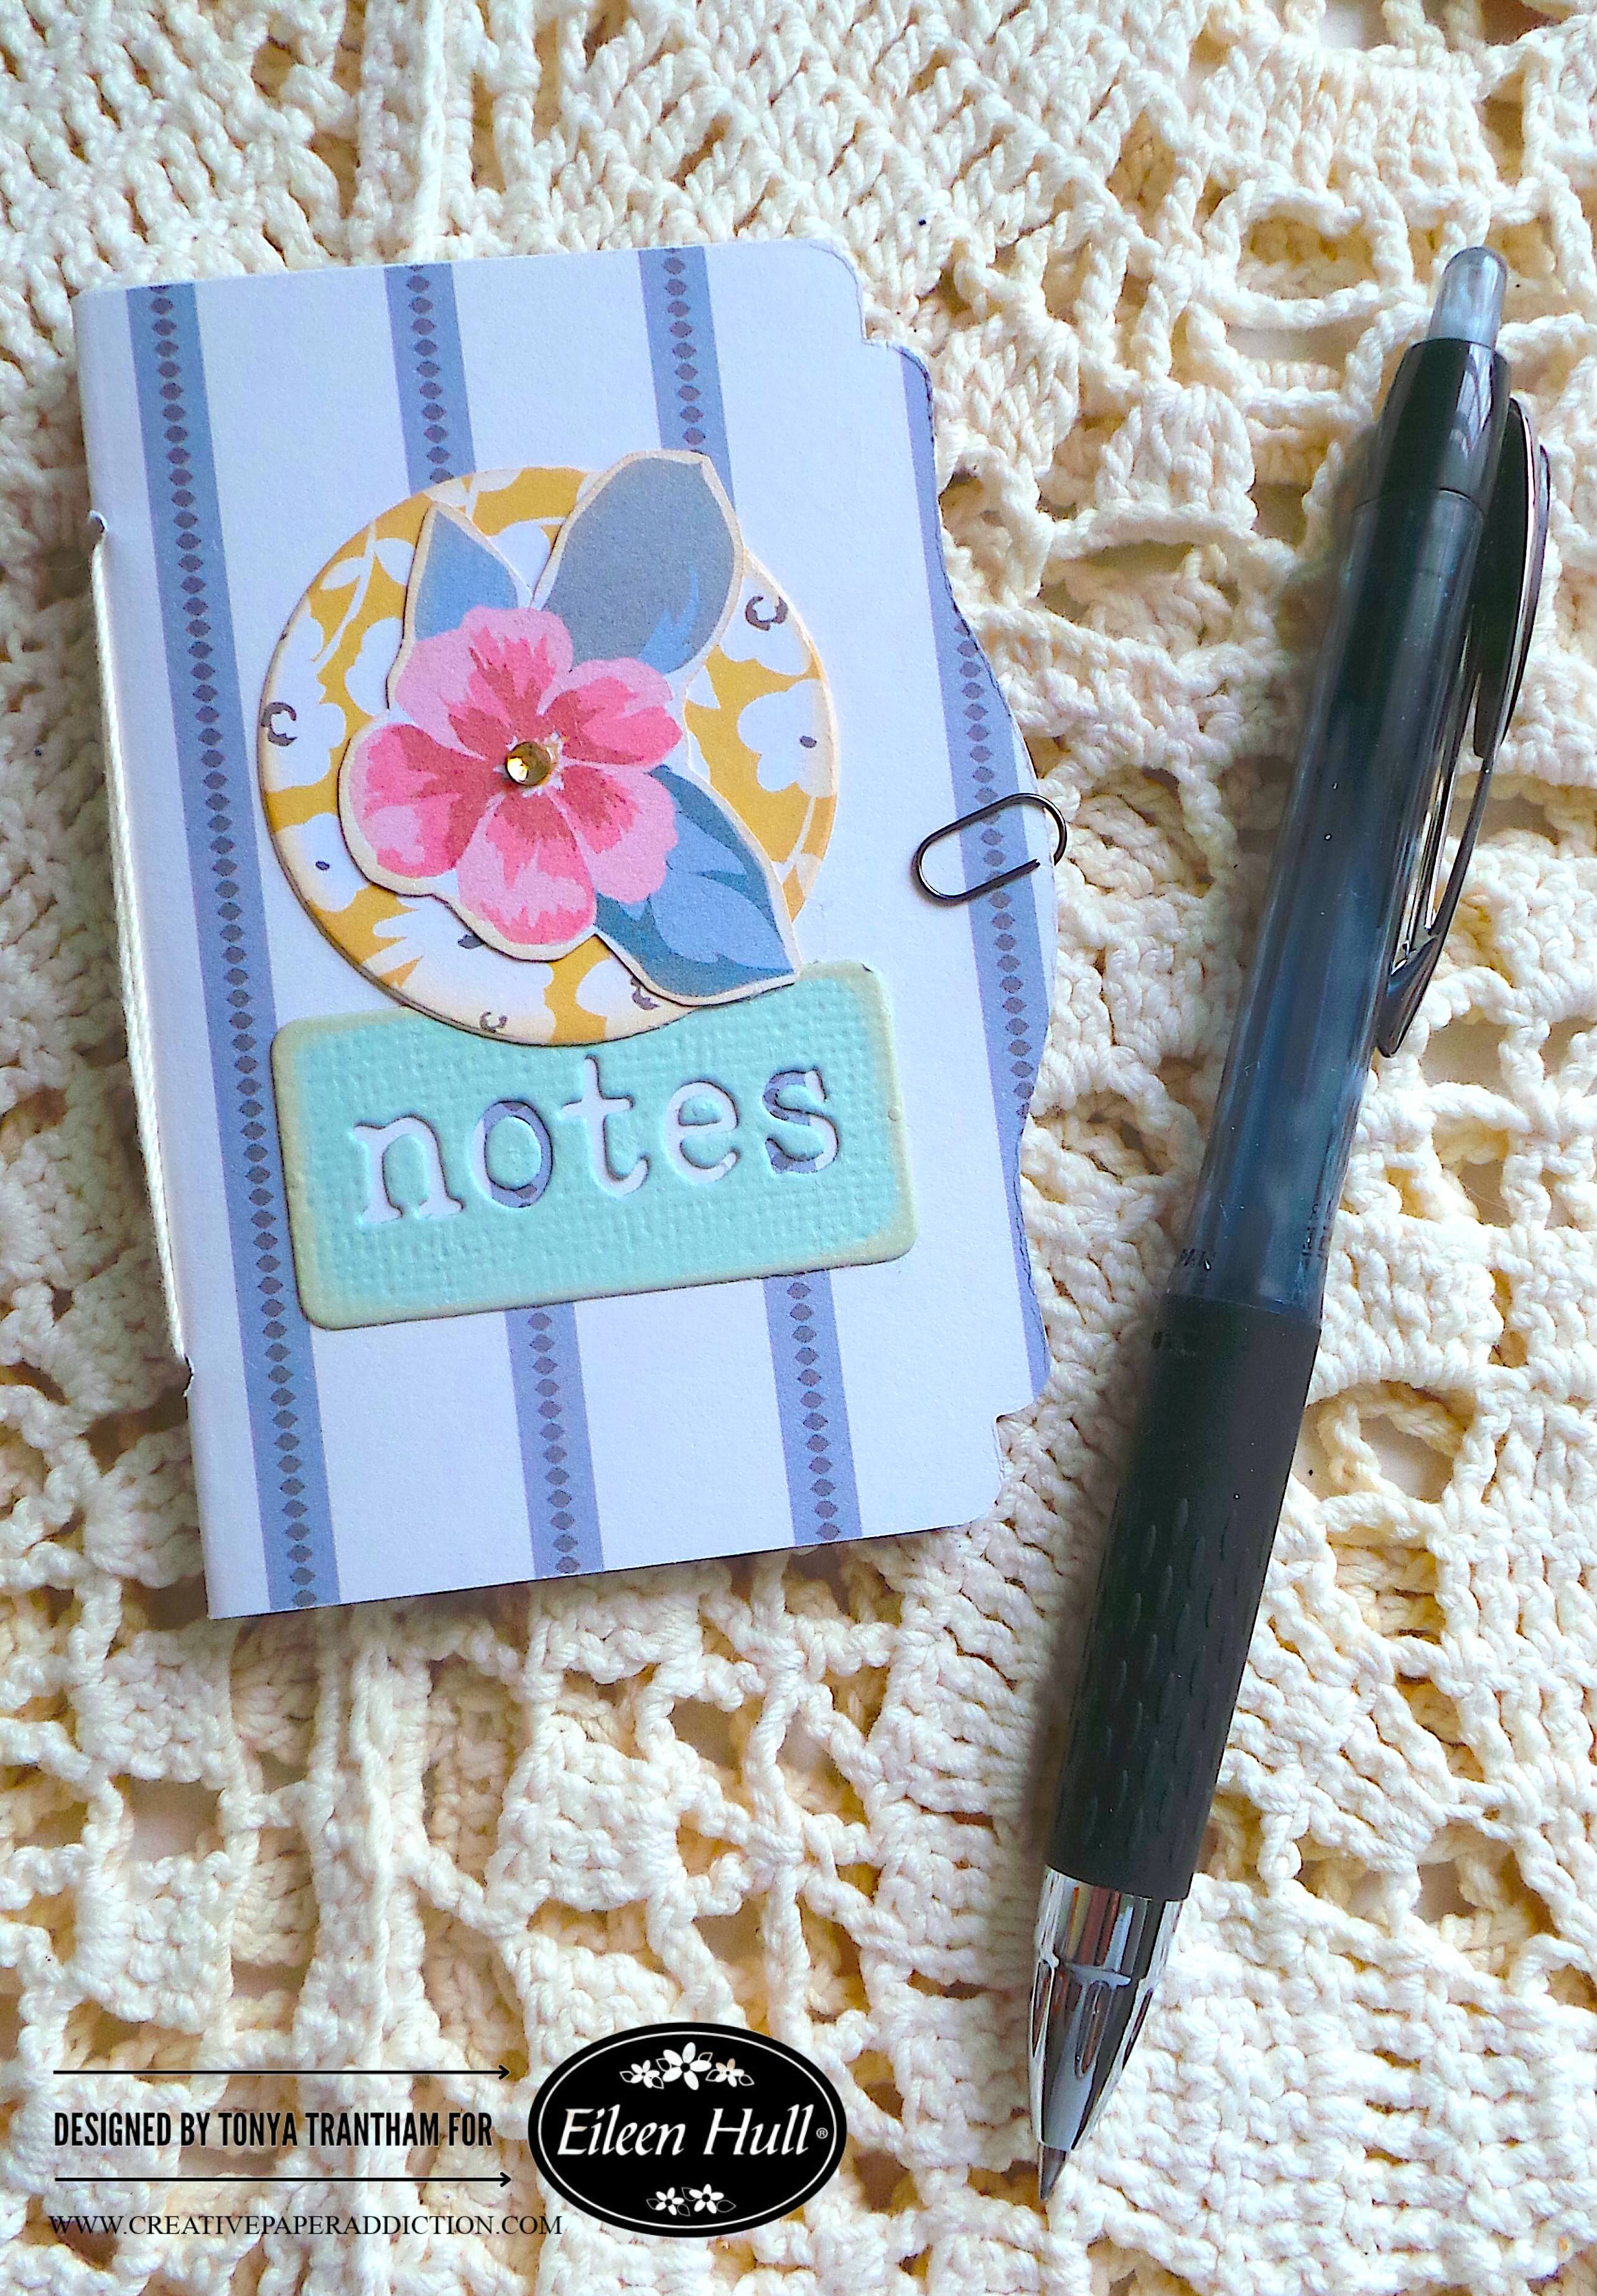
Hi everyone! I know it has been a while since I have made a post. I’ve been working on much needed home projects, gardening and now Eileen Hull’s newest release. But I’m back with a quick and easy project using the Mini Book Diecut and Bookmark, Pockets and Toppers Thinlits. I also used the notes diecut from the Floral Pocket and Paperclips Thinlits. All these dies are by Eileen Hull. Anyways, let get started!
I cut out the notebook cover from the Mini Book Diecut. I also cut four dotted pages to fit inside the notebook. I applied a double sided Adhesive to the back of a piece of cardstock. I placed the “notes” diecut onto the cardstock and run through the Diecut Machine. I also cut out a circle from the Bookmark, Pockets and Toppers Thinlits. Now that I have everything cut out I’m ready to put the notebook together.
I lightly inked the edges of the notebook cover, circle, flower and notes dies. I folded the mini book die and dotted notebook paper in half. I punched two holes in the spine of the mini book and spine of the pages. I threaded a needle with thread. I sewed the pages and covers together and tied off on the inside of the notebook.
I peeled the backing off the adhesive of the notes die and placed onto the cover. Next, I glued the circle and flower slightly above the notes dies.
I have a “bigger” project that I’m working on that this notebook will be eventually be a part of. Hopefully I will be able to share it sooner rather than later.
Also if you haven’t be by Eileen Hull’s blog lately you can find the latest HERE. For the latest happenings sign up for her news letter which can be found on her blog.
(Products listed above are Affiliated Links for your convenience)
DISCLAIMERS
This blog is compensated to provide opinion on products, services, websites, and various other topics. Even though the owner(s) of this blog receives compensation for our posts or advertisements. I always give my honest opinions, findings, beliefs, or experiences on those topics or products. The views and opinions expressed on this blog are purely my own. Any product claim, statistic, or quote should be checked with each manufacturer. Verify other representations about a product or service with the provider or party in question.This blog contains affiliate links. Clicking these links helps to support Tonya Trantham Designs – Creative Paper Addiction. It runs at no additional cost to you.Today’s features are Sizzix, Eileen Hull and Scrapbook.com Products.
Thanks for stopping by, I hope your Monday is great and enjoy creating!