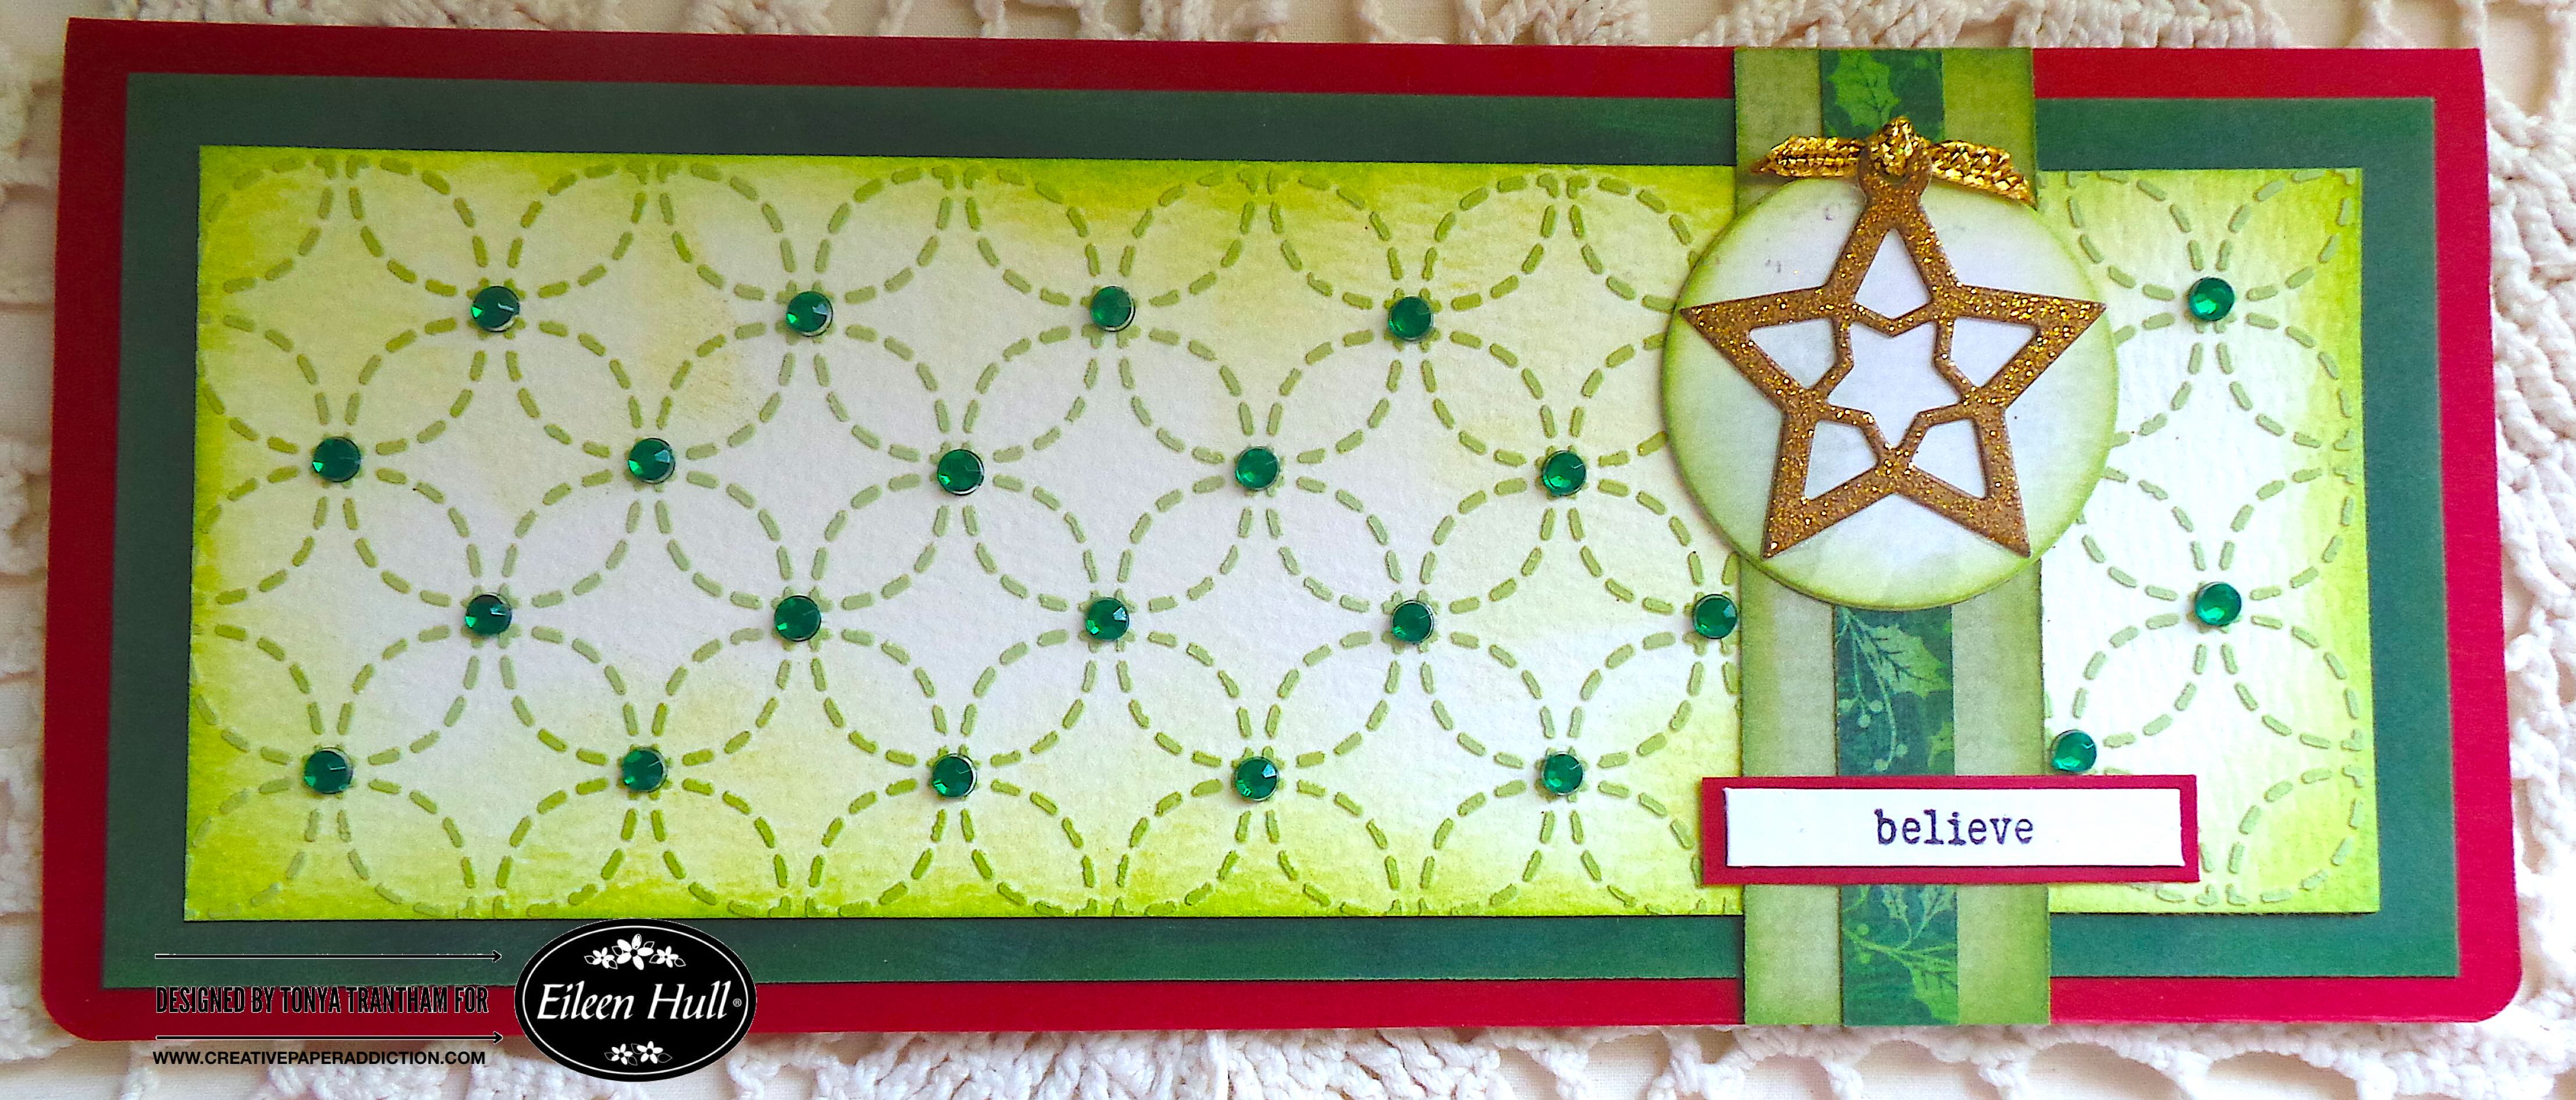
Create Stunning Christmas Slimline Cards

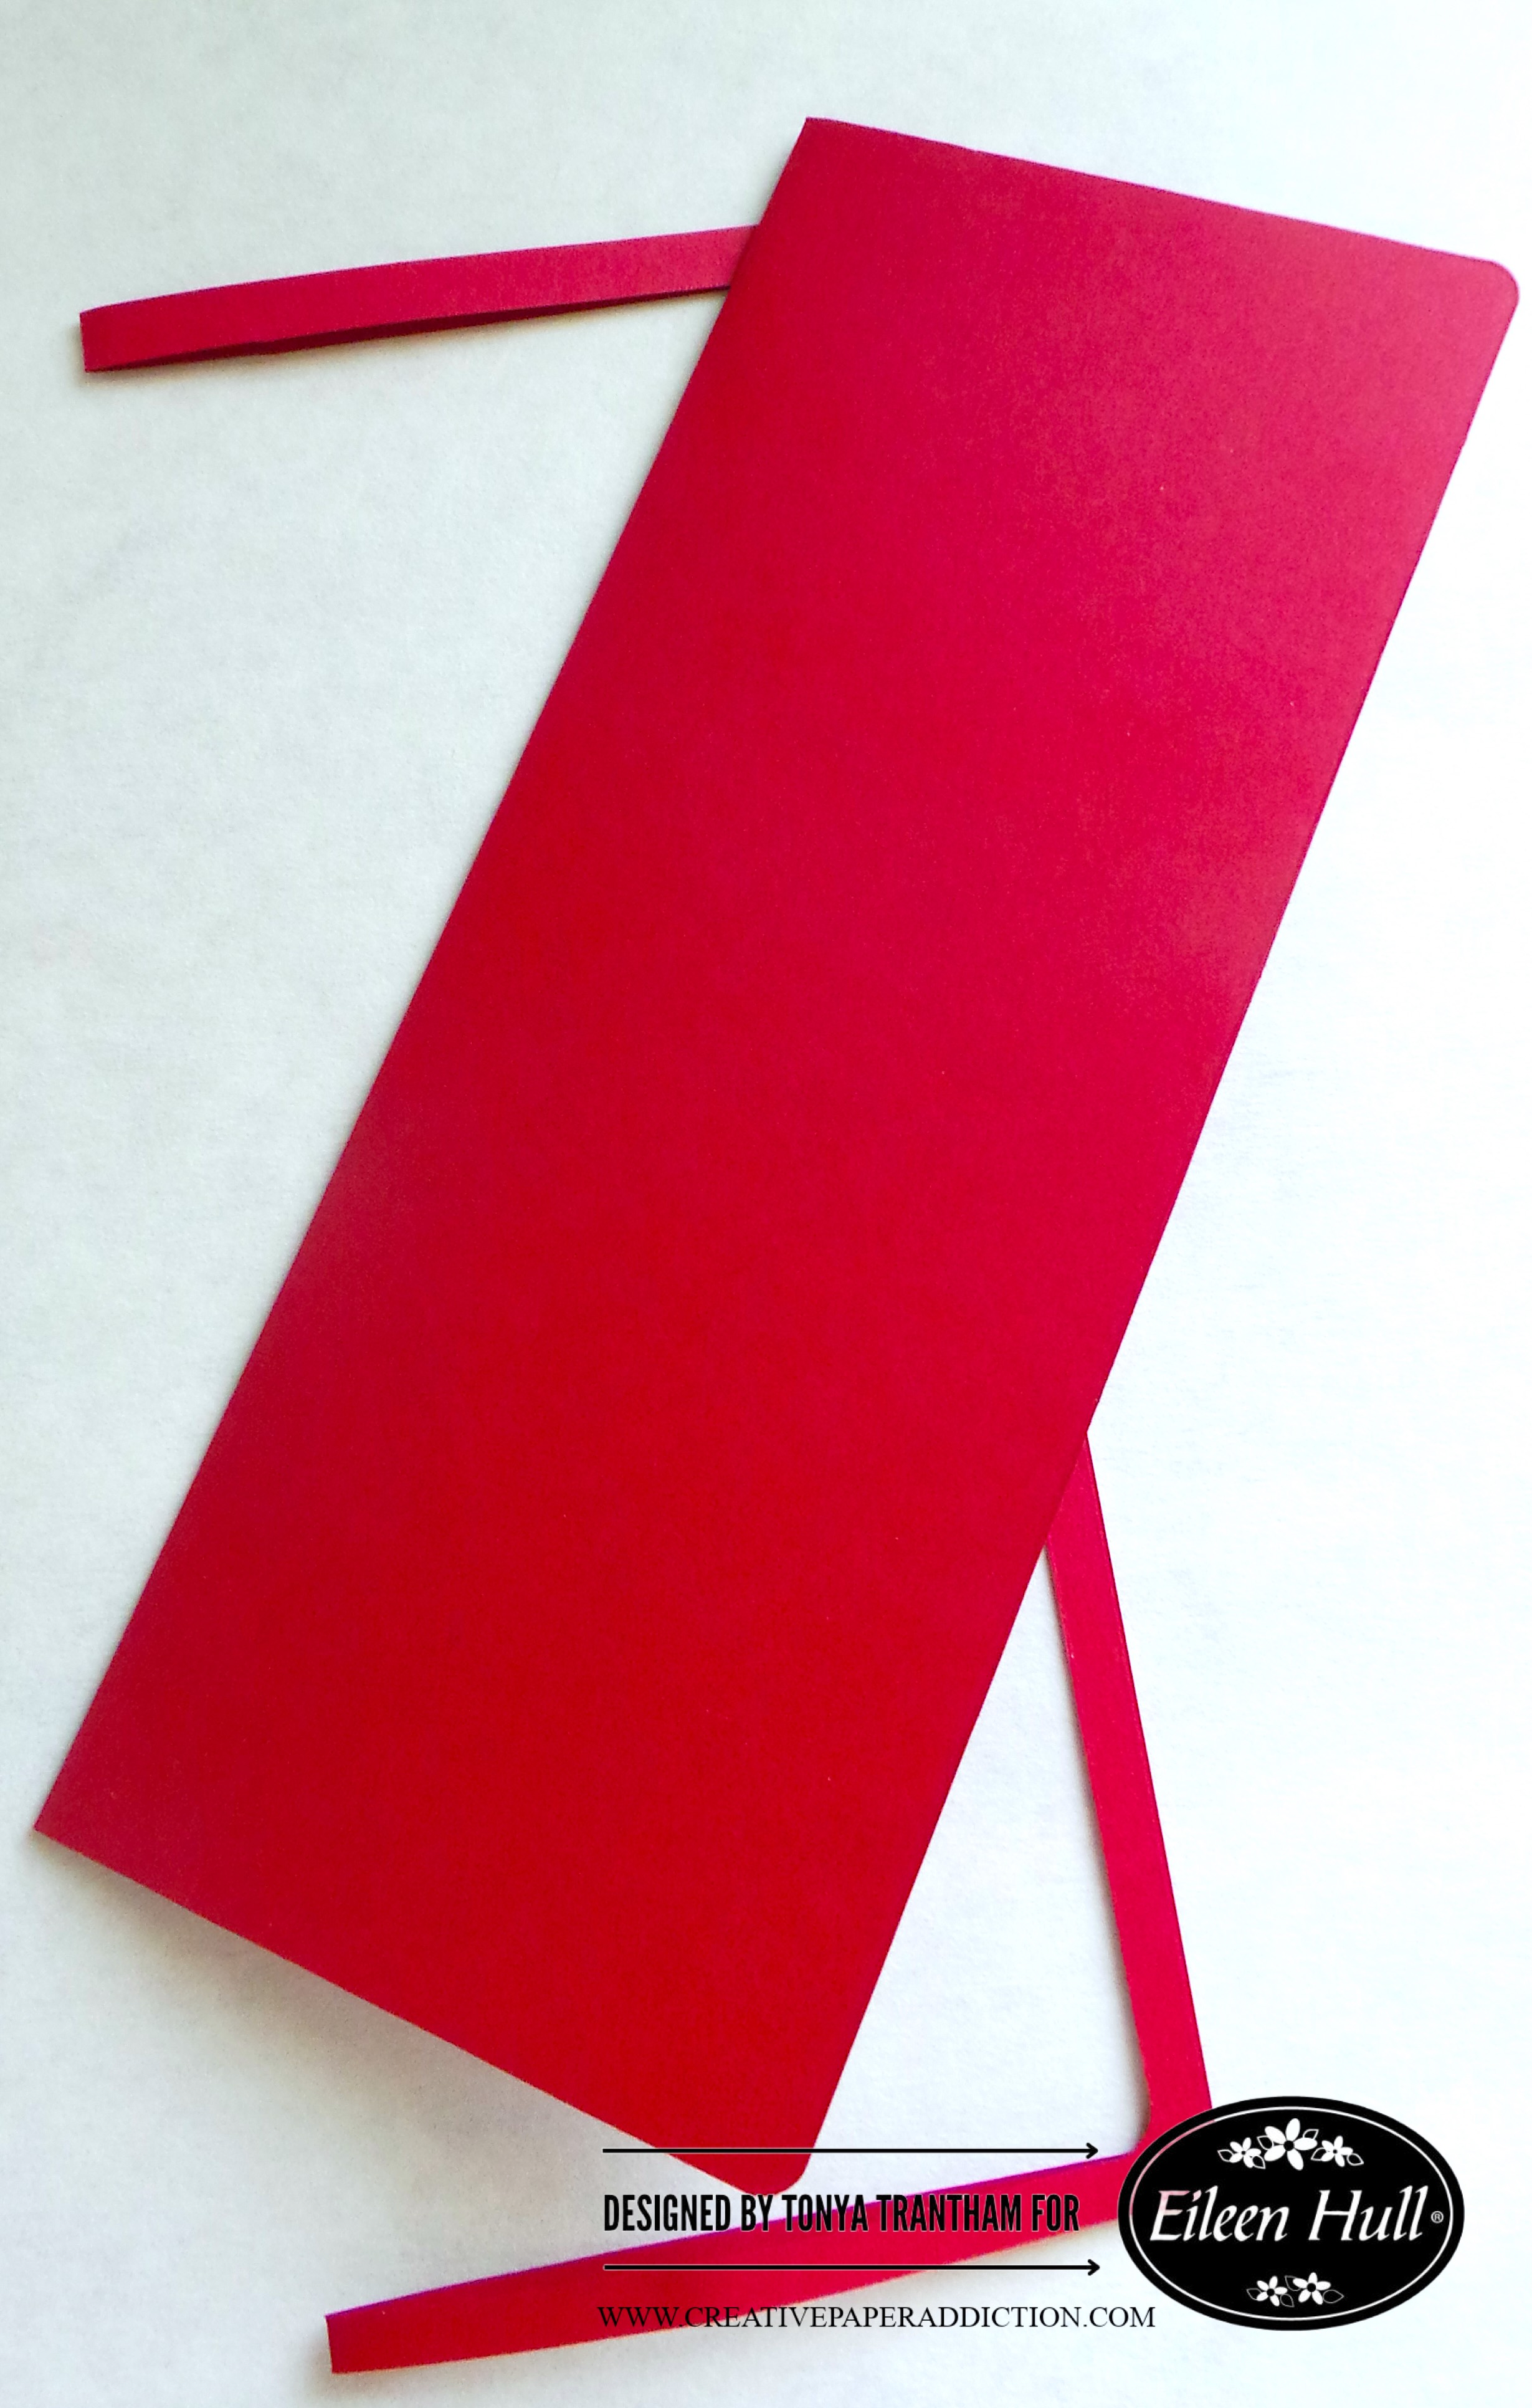
Hi everyone! December is finally here! And whether you like it or not Christmas is only a couple of weeks away. Today I want to share a Christmas slimline card I created. You ask “what is a slimline card”? It’s a long skinny card and the measures are, 3.5″x8.5″. For the base of the card I created, I used the Journal Diecut (retired) which is by Eileen Hull. Let’s get started!

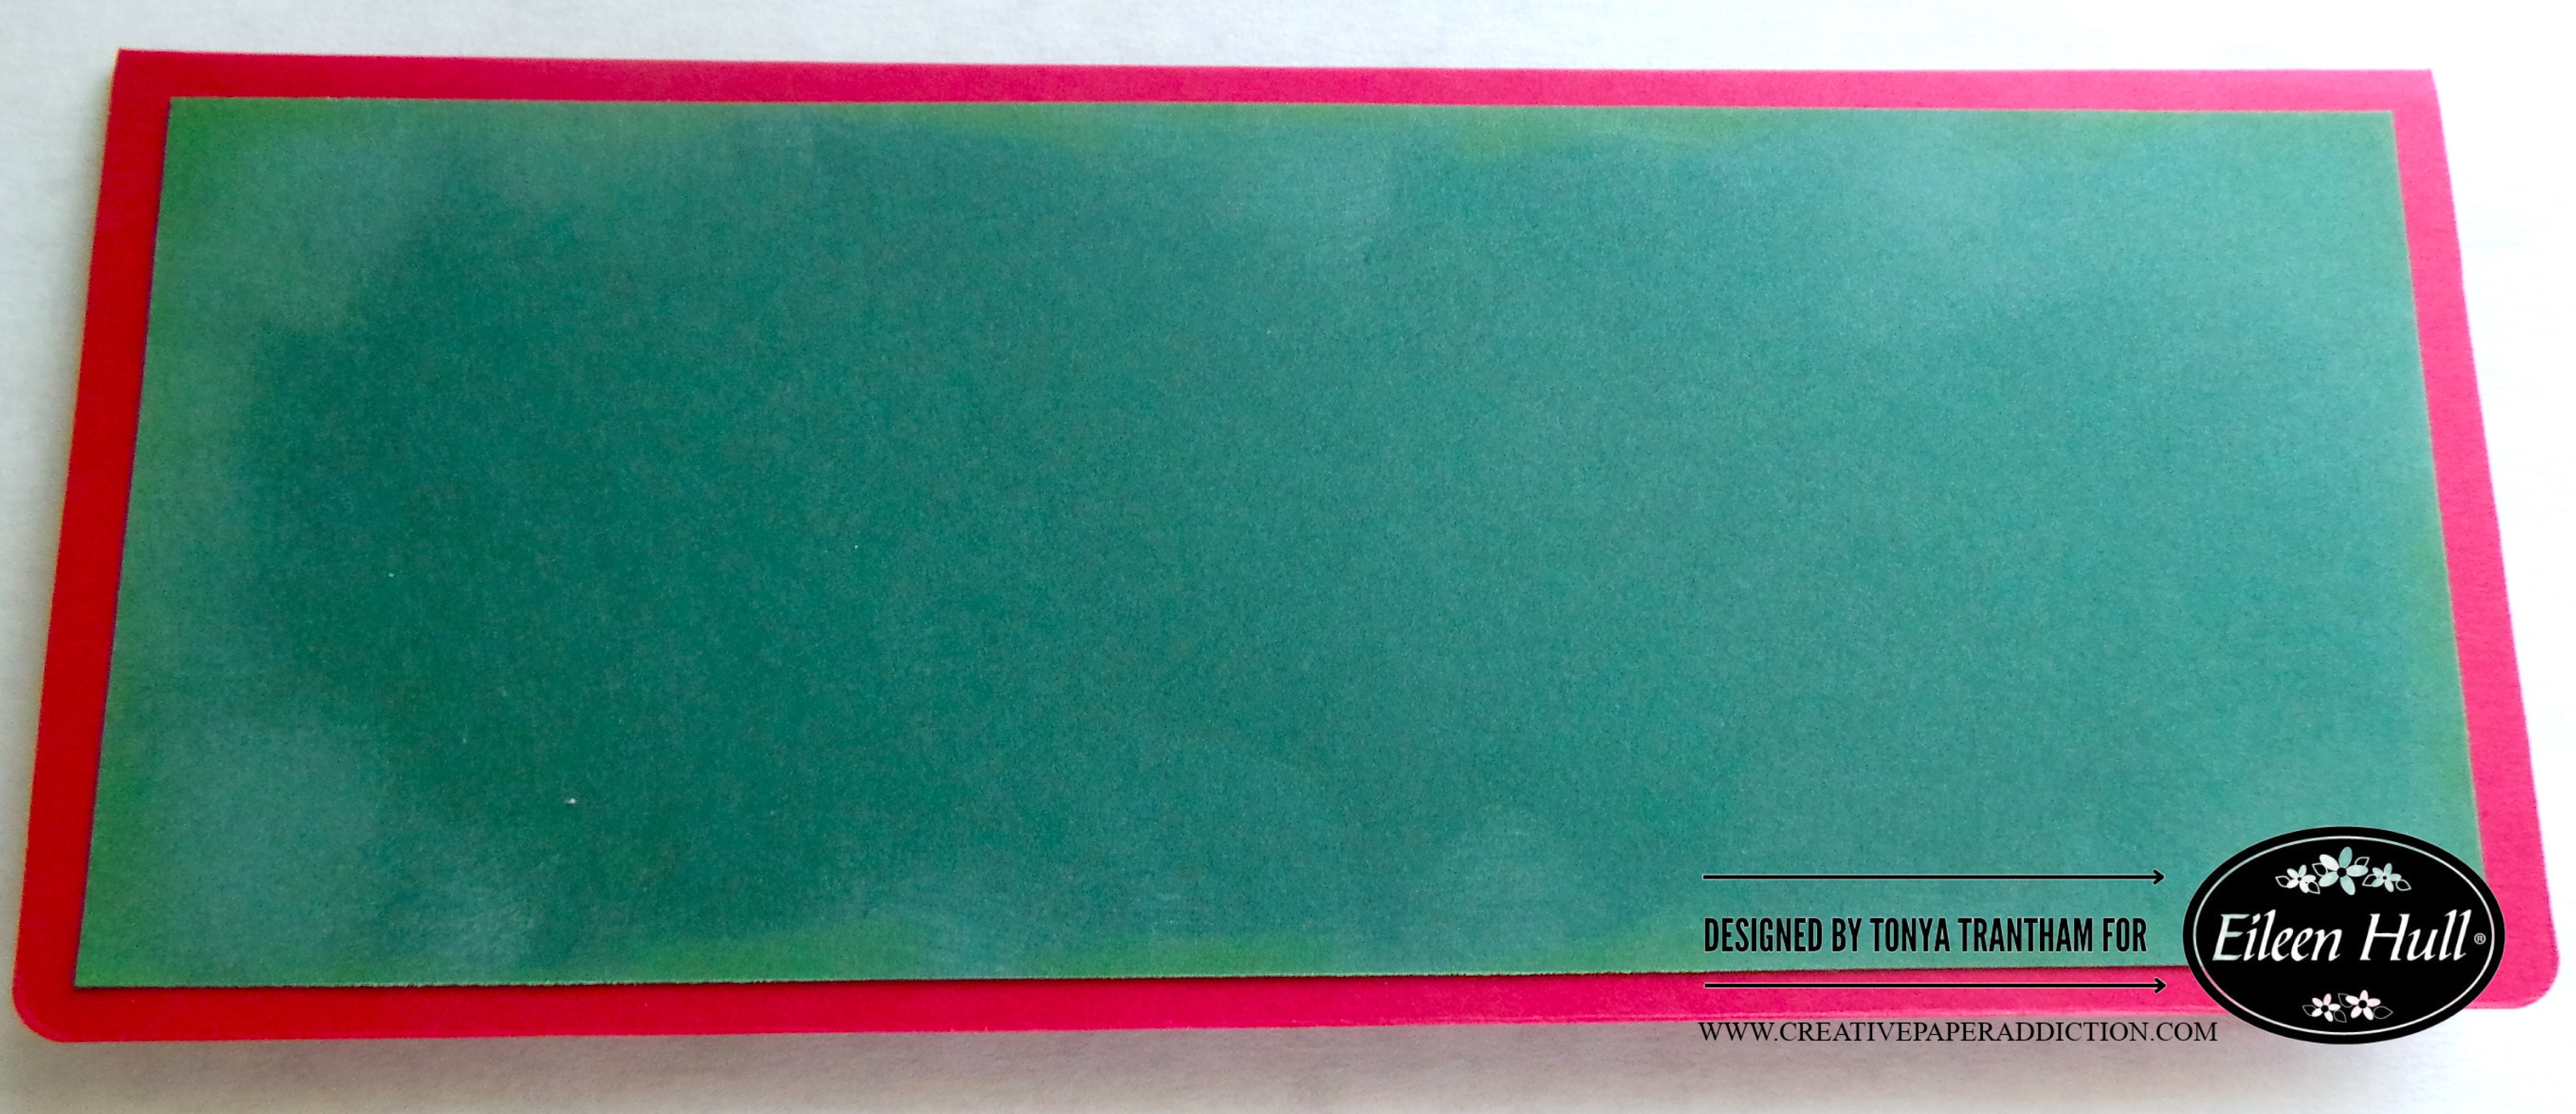
I folded a piece of cardstock in half and I placed it onto the Journal Diecut. The placement was slightly below the cut line of the spine. Then, I ran it through the Diecut Machine.

I added a dollop of Cloud Whip to a paper plate. Then, I slowly added Olive Pops of Color. I mixed it with a Mix Media Spatula until I got the right shade of green.

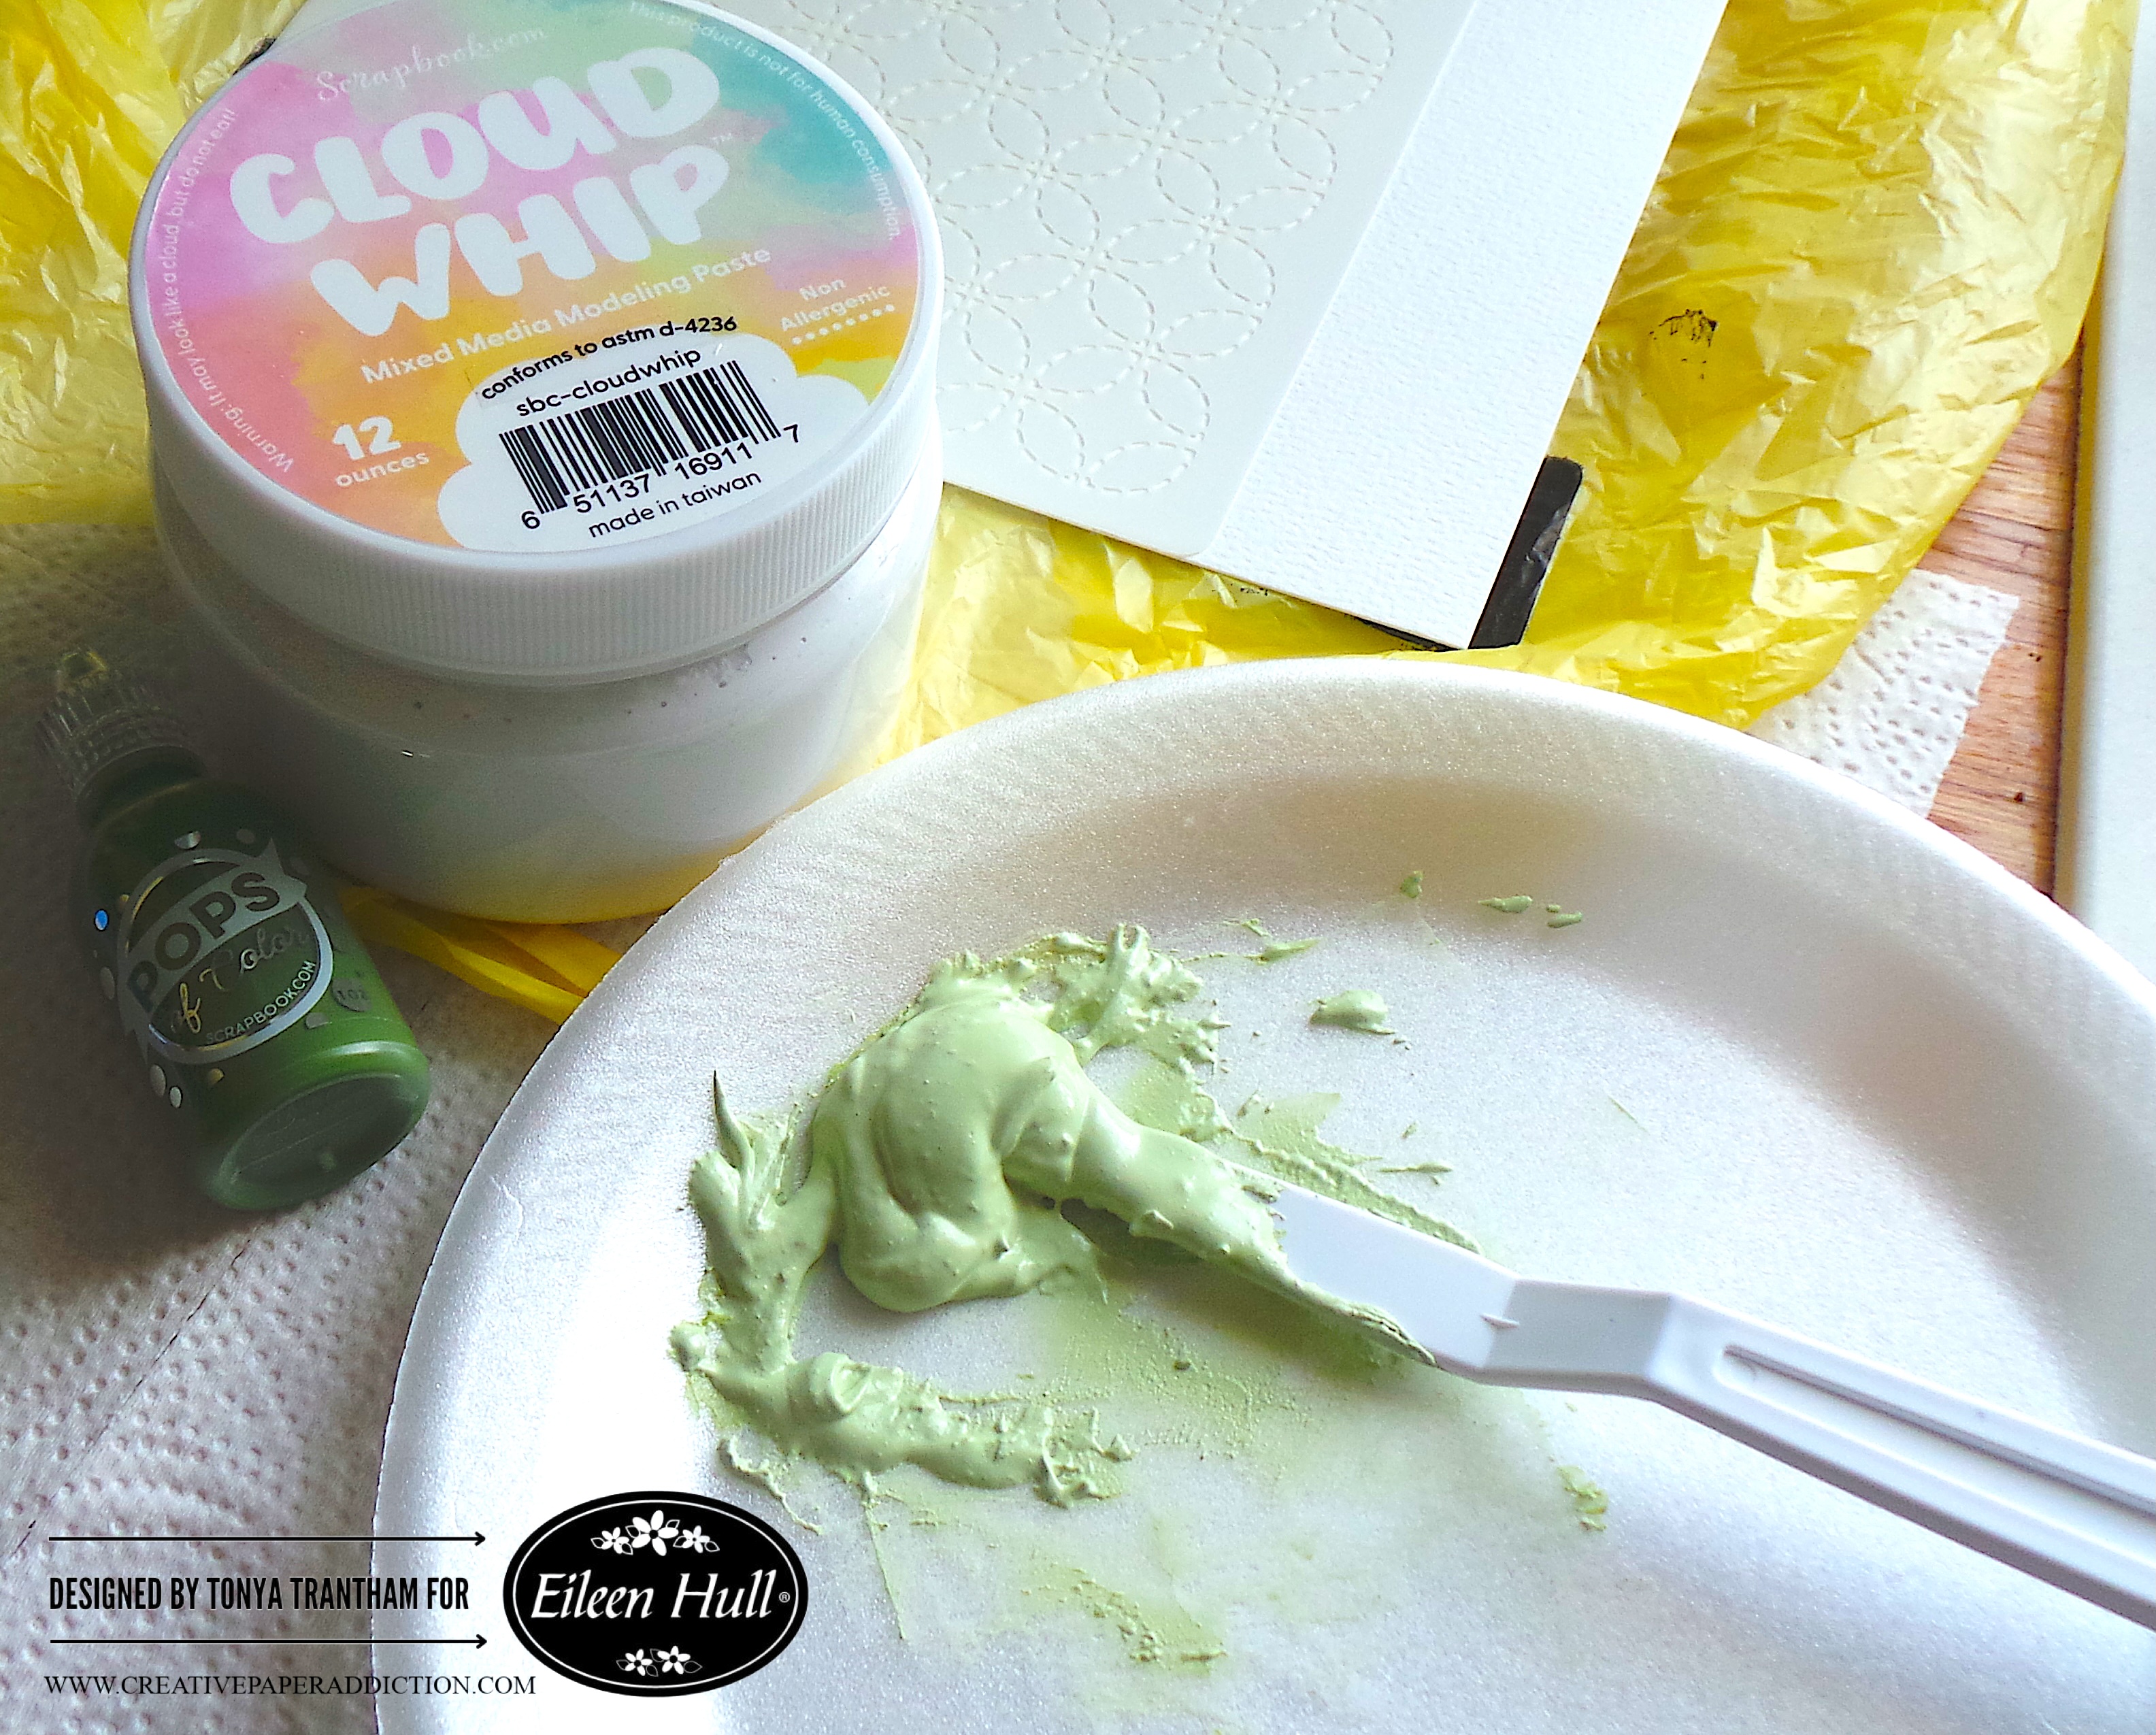
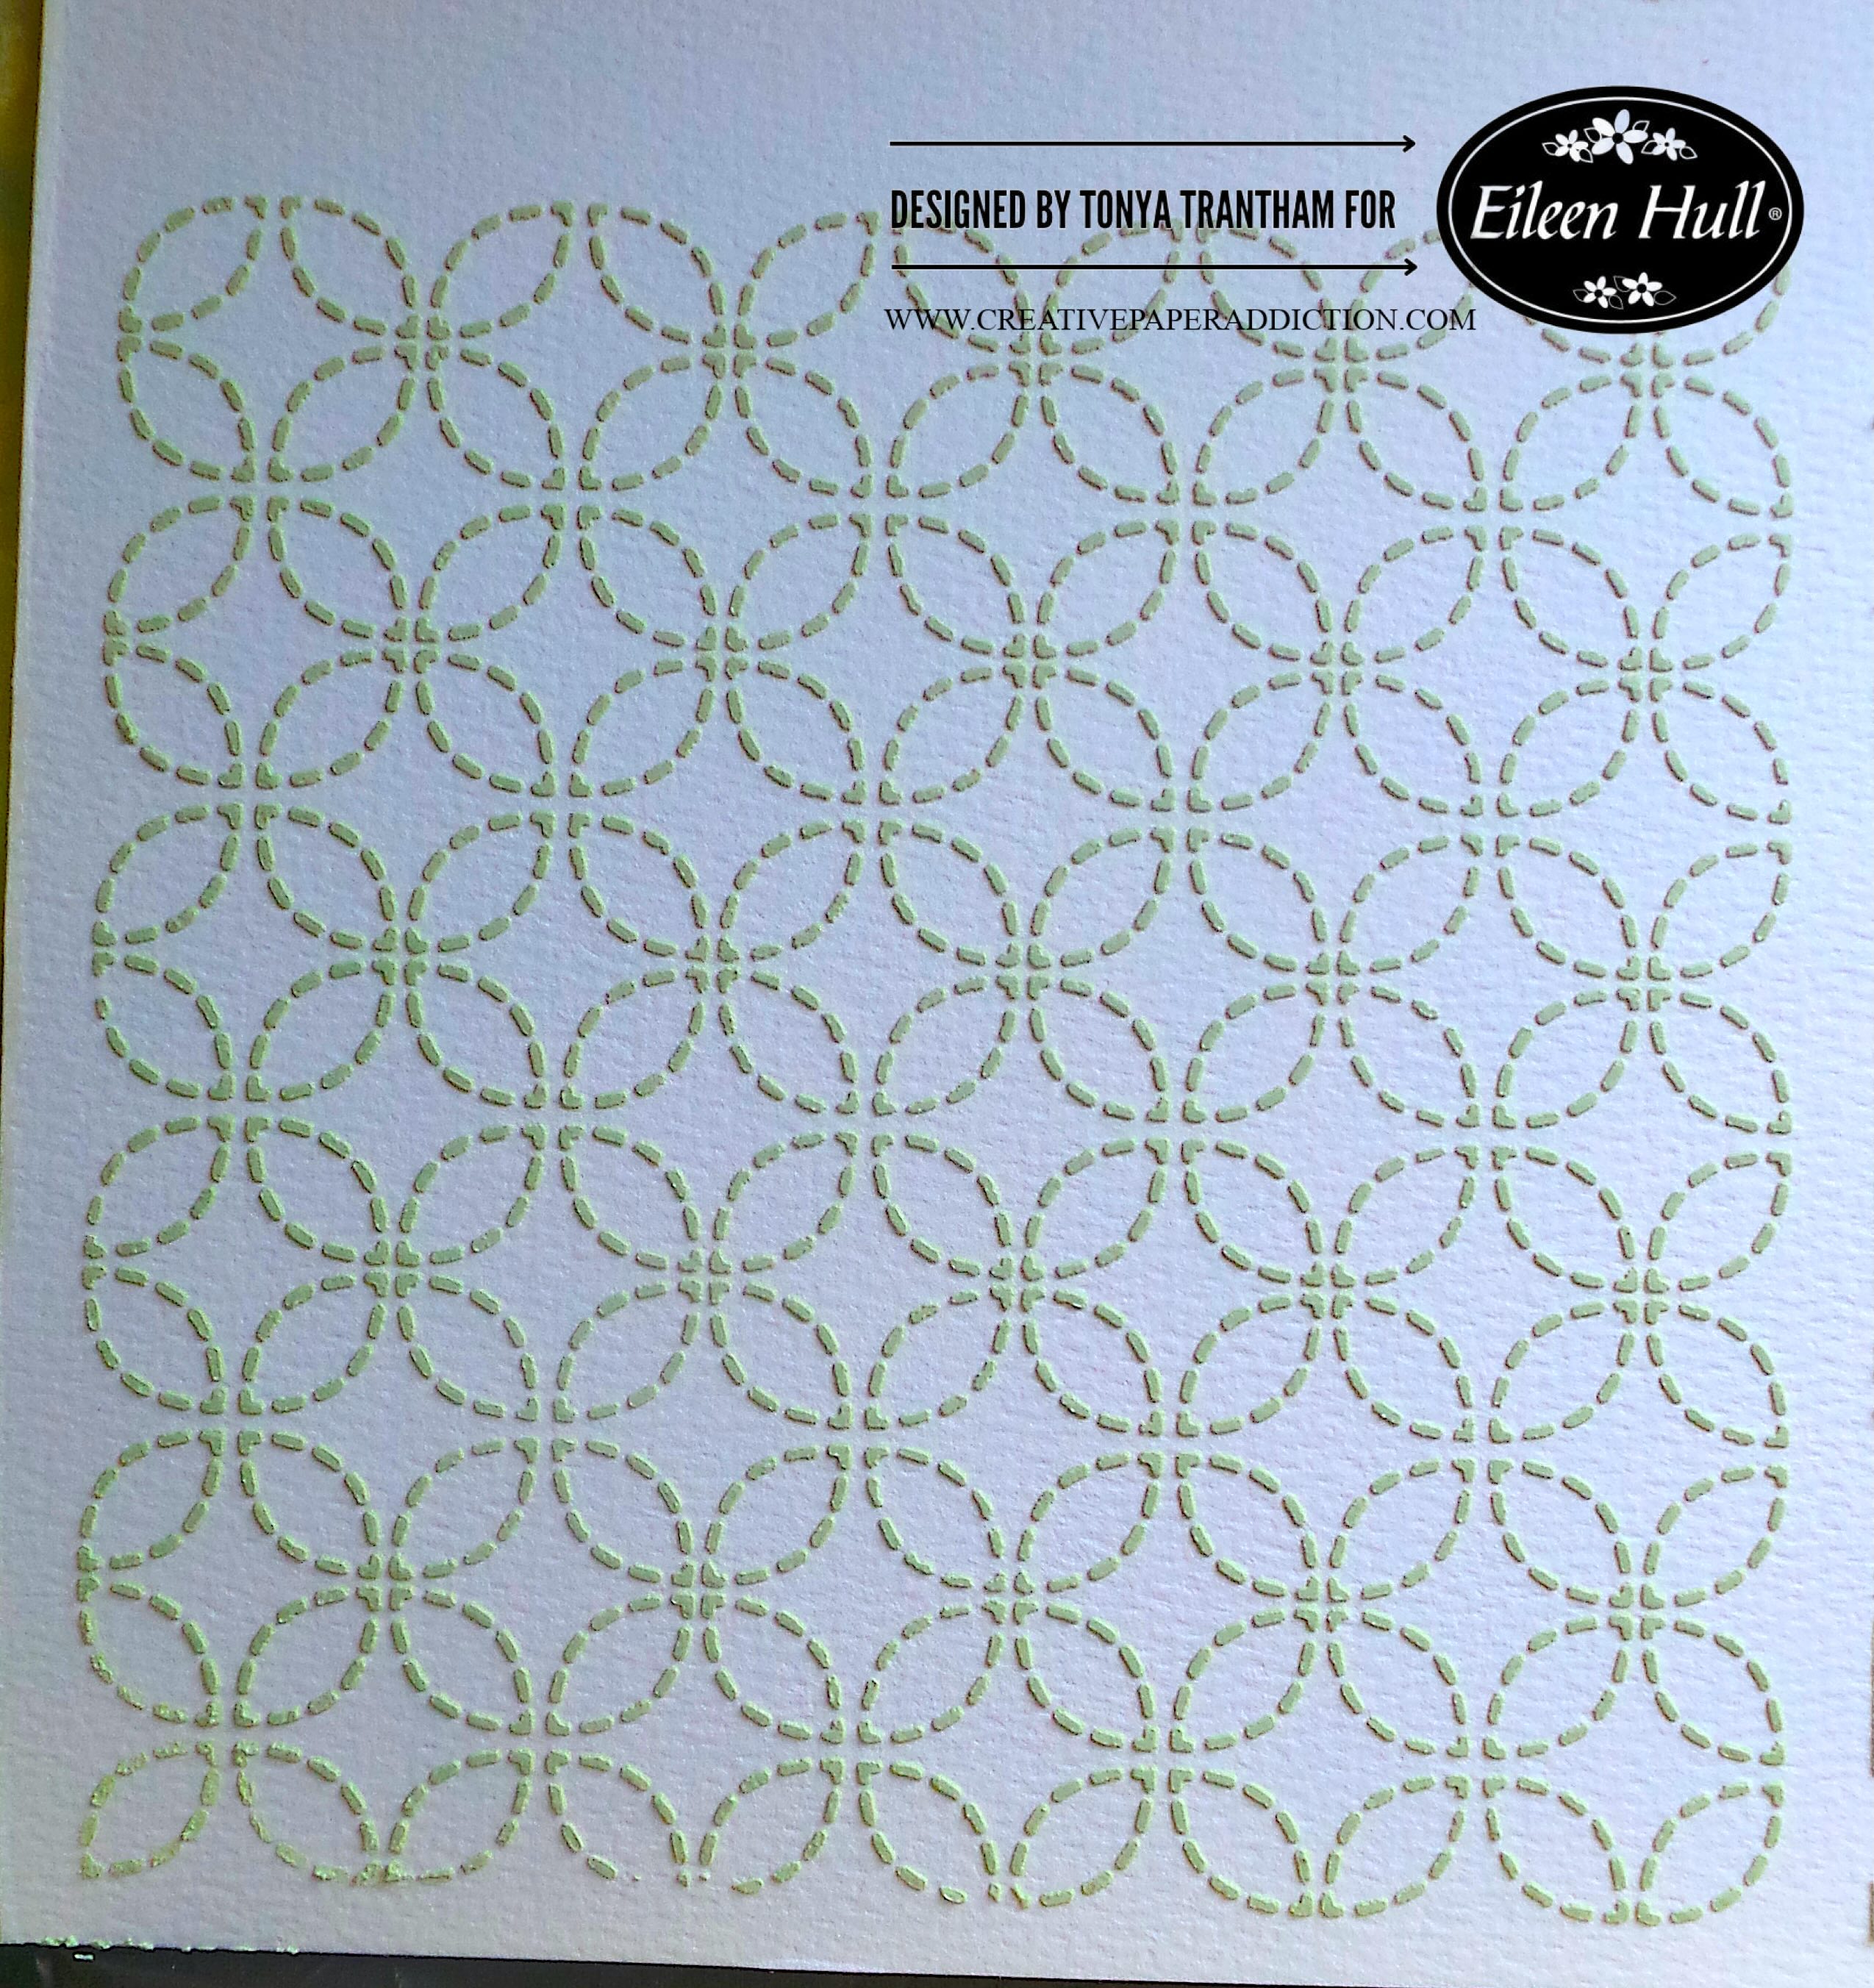
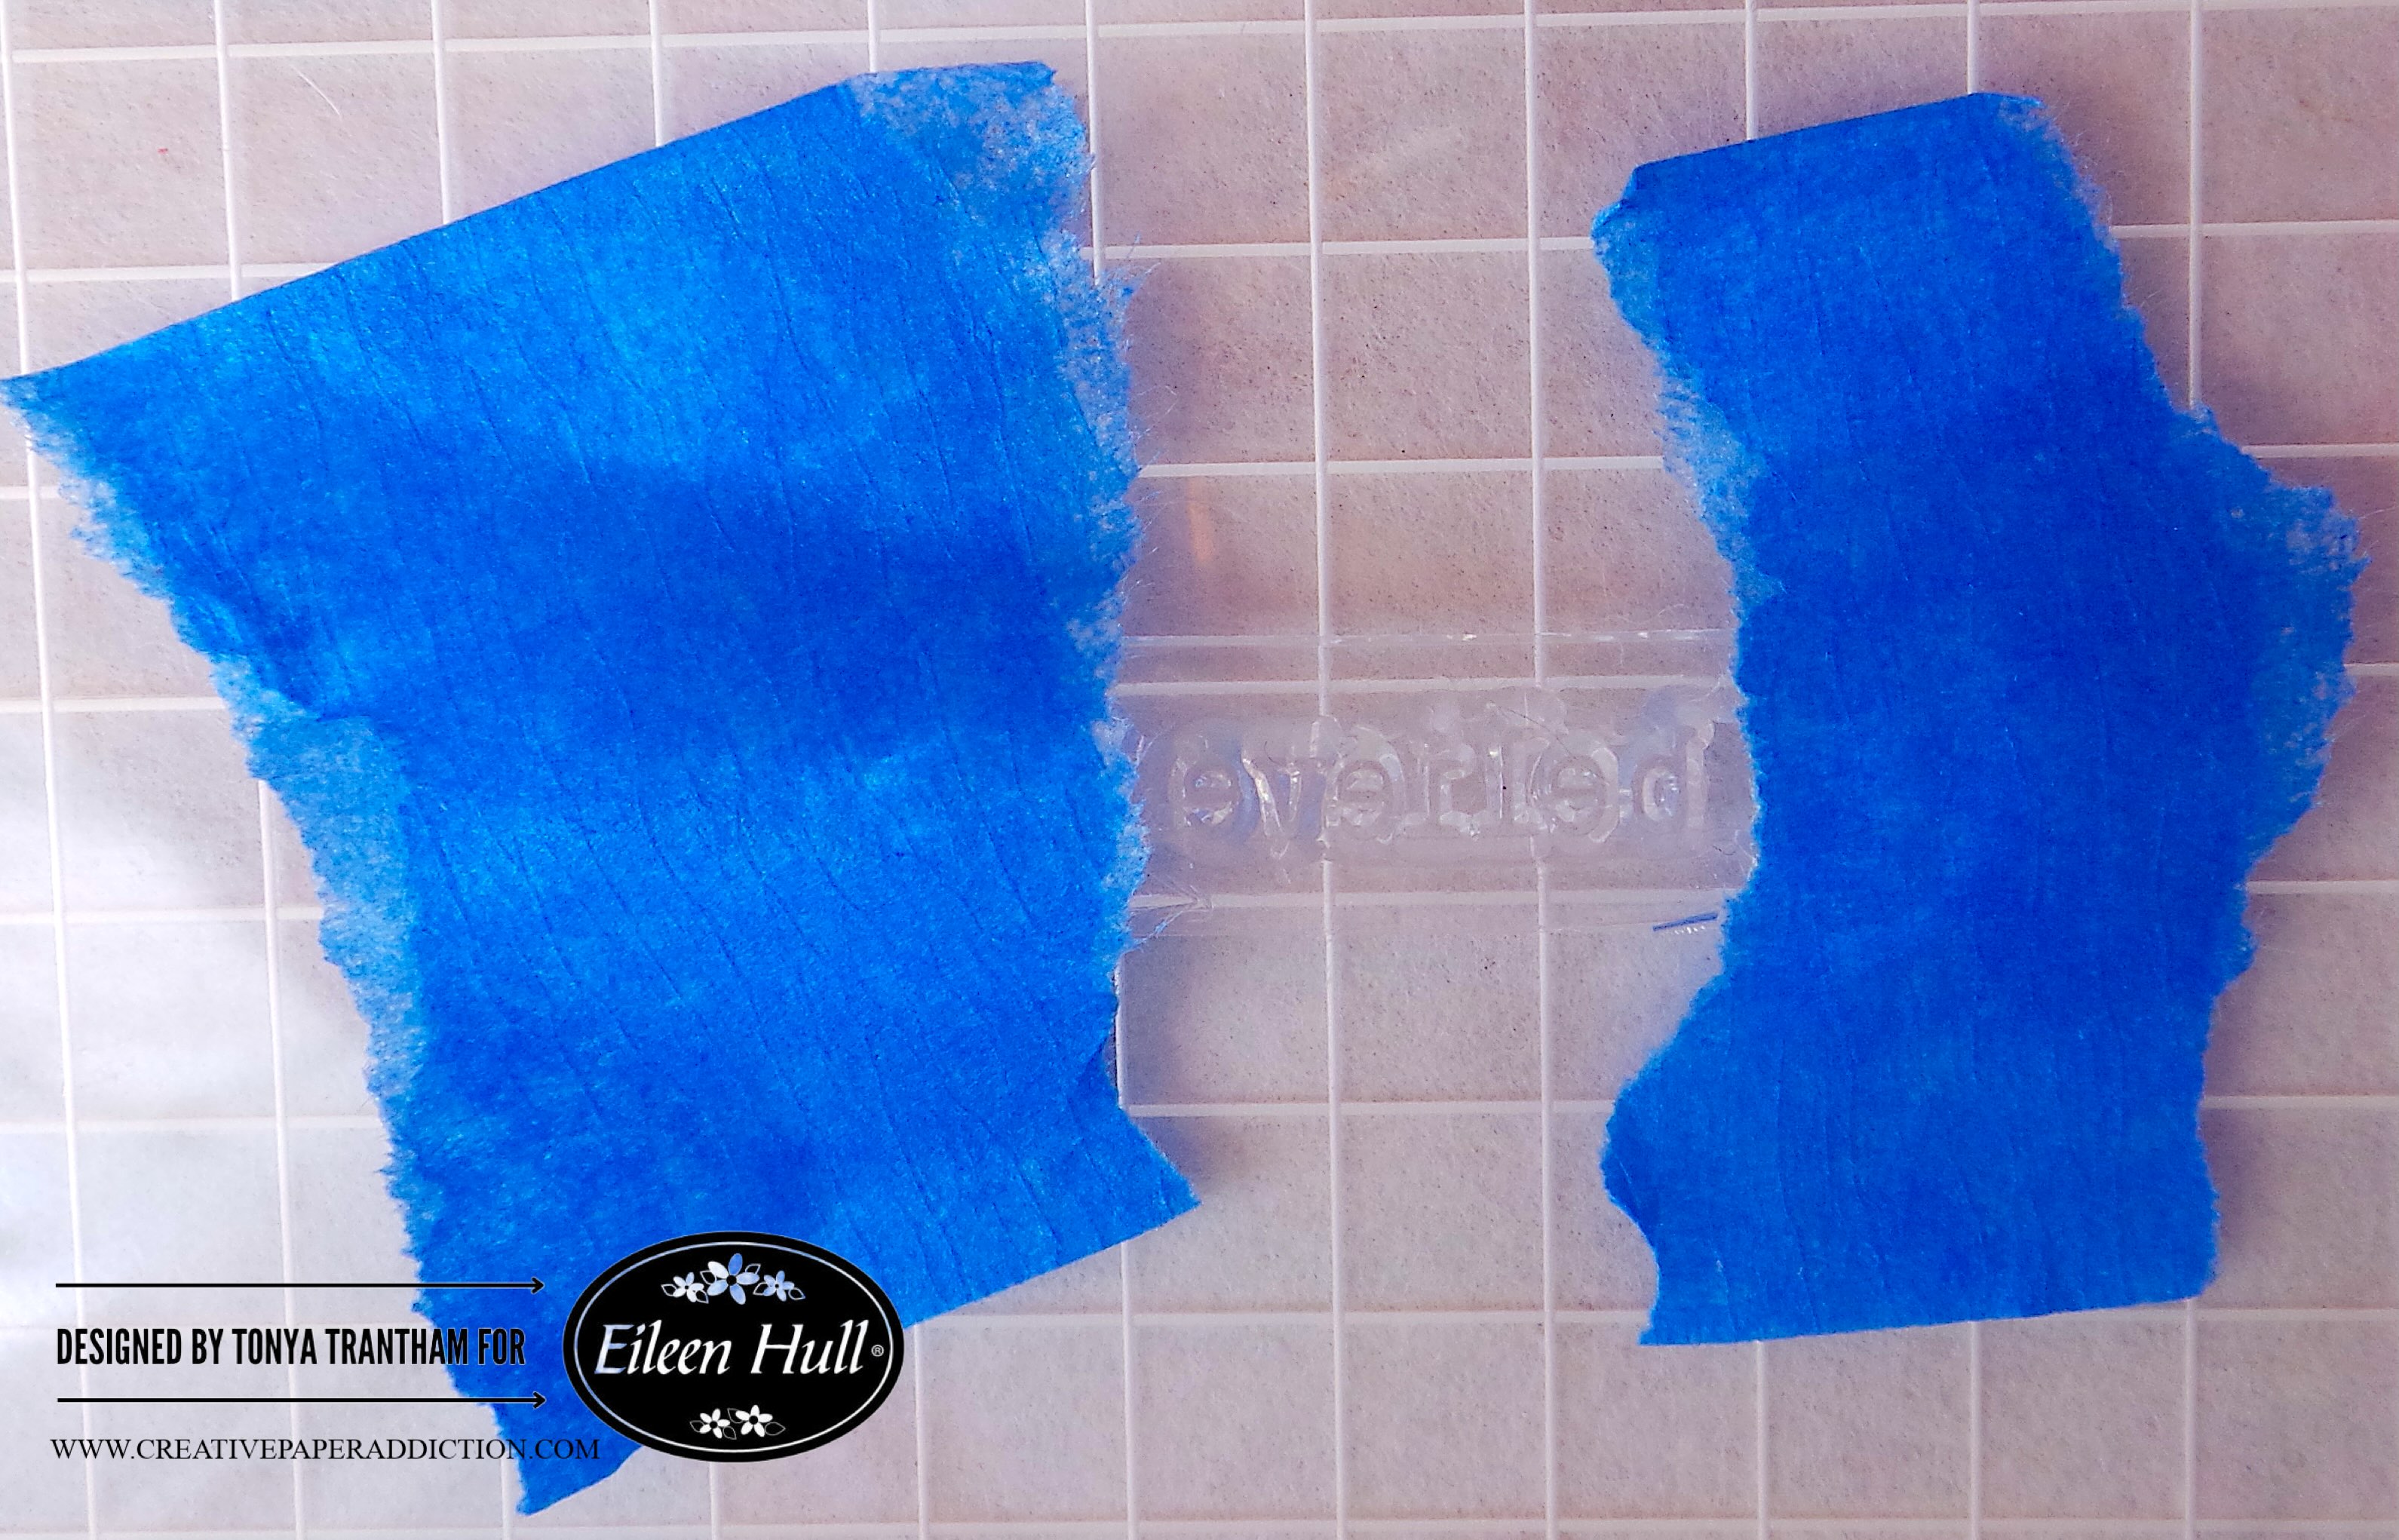
I used painters tape to hold the Plate and Pattern Layered Stencils (stencil 2) onto a piece of White Cardstock. I applied Cloud Whip with the Mix Media Spatula over the stencil.

I removed the stencil and let the raised image set.

Next, I cut a mat from green cardstock. I lightly inked the edges before adhering to the base of the card.

Since the stenciled image wasn’t as long as the card base. I cut to fit, lightly inked the edges with a green chalk ink before gluing to the card.

I cut two strips of cardstock to cover where I pieced together the stencil image.

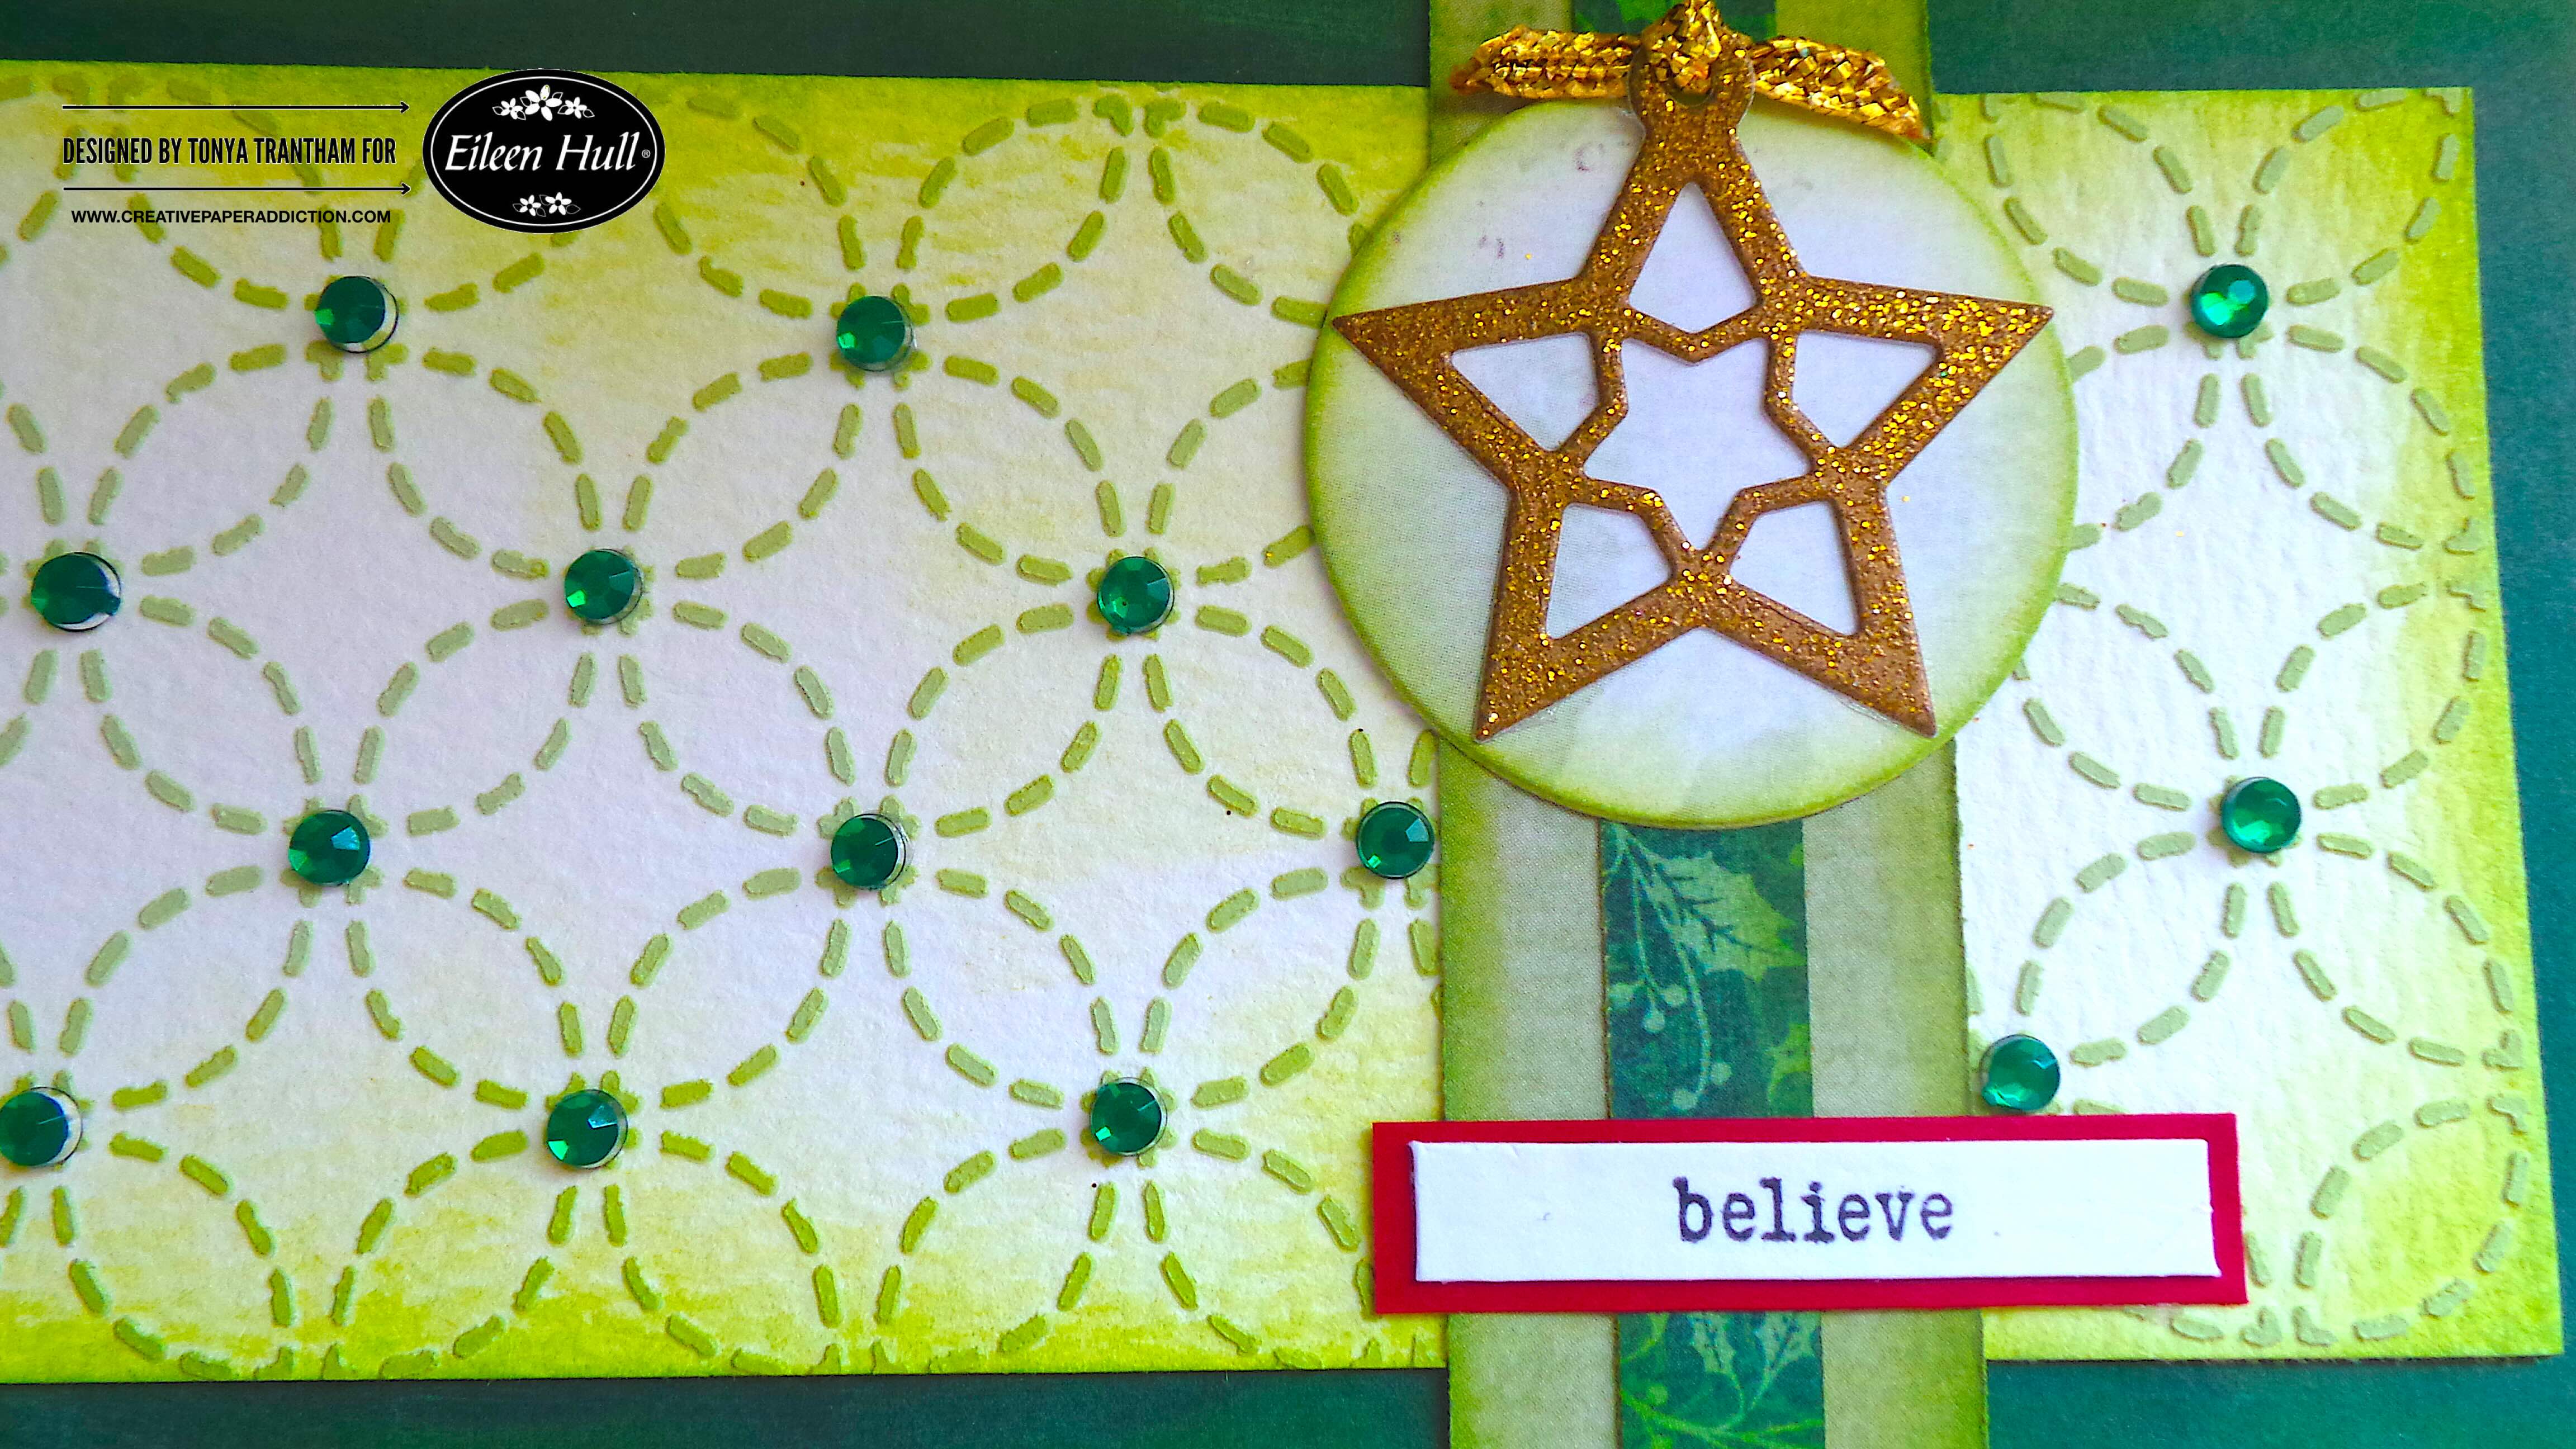
I added green gems to the stenciled image. I also cut a circle from the Bookmark, Pockets and Toppers Thinlits and adhered to the card.

I placed the “I believe in you” sentiment from Fan Favorites Clear Stamps onto the MISTI Stamping Tool .

I placed painters tape over the “I” and the “in you” of the stamp. I inked the stamp, removed the painters tape and stamped onto a piece of cardstock.

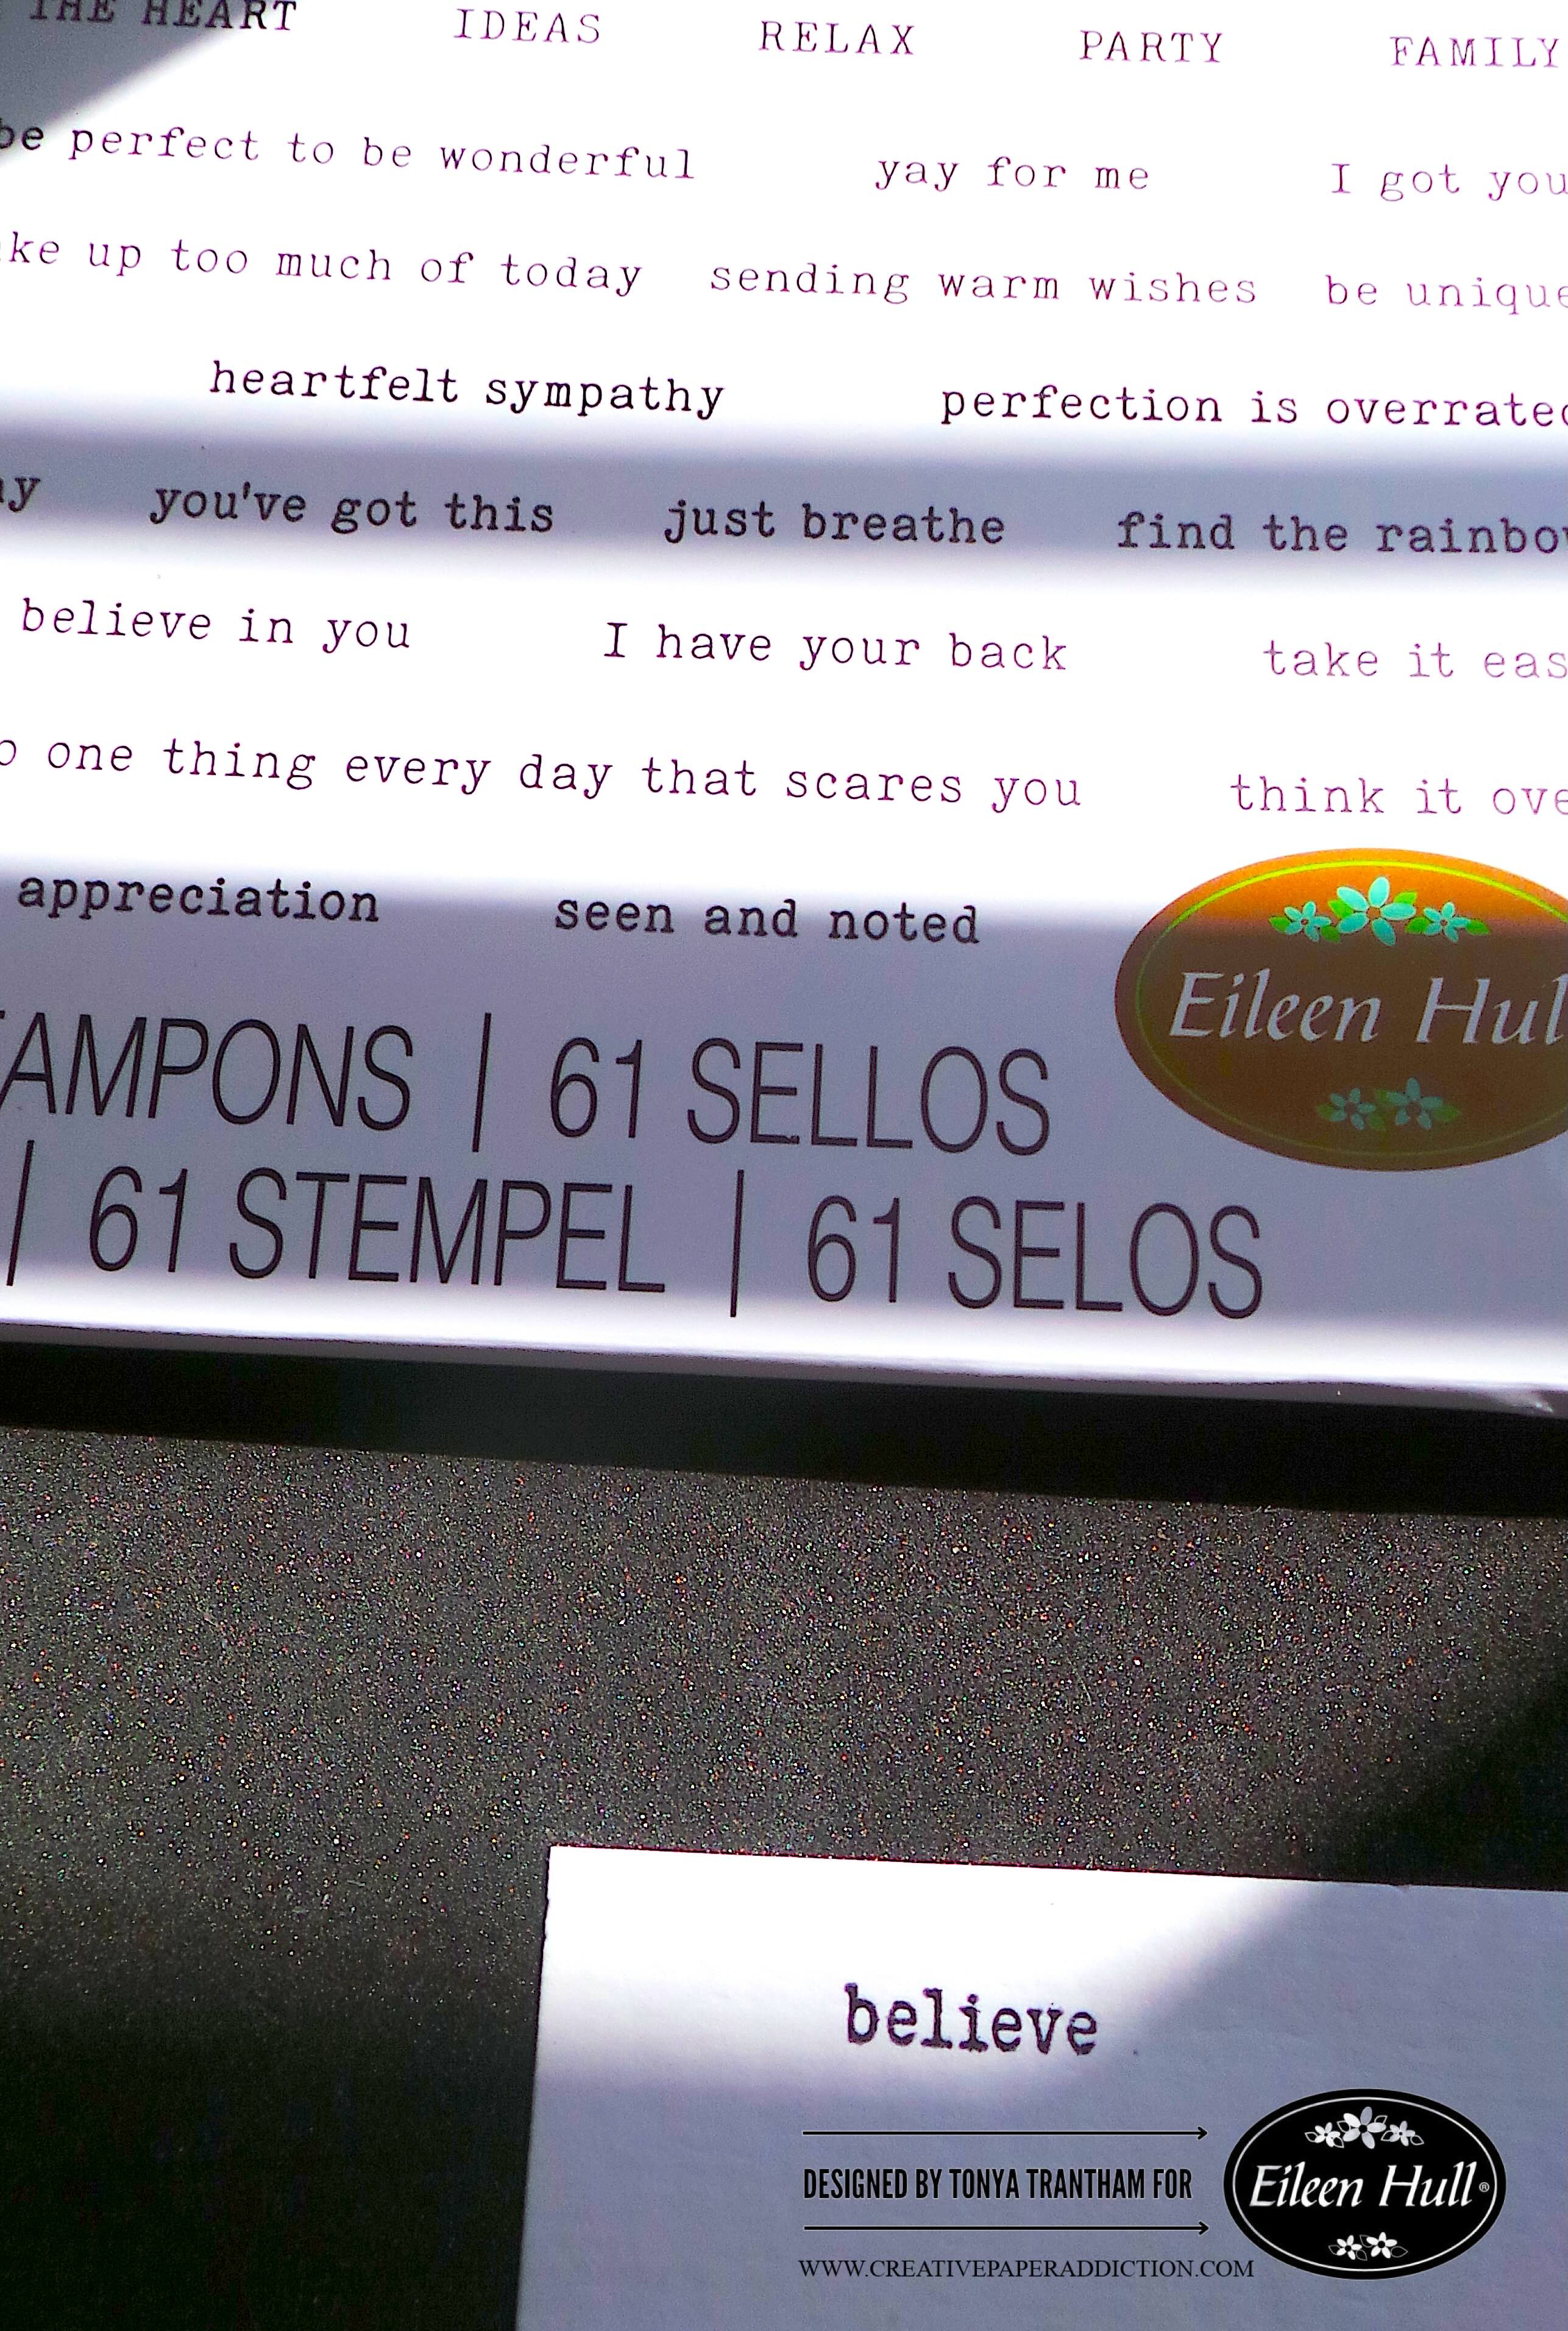
I cut and added a mat to the believe sentiment and glued to the card. I cut a star charm from the Charms Thinlits. Then, I added a piece of gold ribbon to the top of the star. Finally, I adhered it to the circle on the card.

Question, do you make cards or do you give store bought cards at Christmas time? Let me know in the comment section below. Also If you have any questions about this card leave a comment.

Supply List

Sizzix/Eileen Hull: Journal Diecut (retired)

Sizzix/Eileen Hull: Charms Thinlits

Sizzix/Eileen Hull: Fan Favorites Clear Stamps

Sizzix/Eileen Hull: Plate and Pattern Layered Stencils

Sizzix/Eileen Hull: Bookmark, Pockets and Toppers Thinlits

Diecut Machine

Cloud Whip

Mix Media Spatula

Olive Pops of Color

Gems

Red Cardstock

Gold Cardstock

White Cardstock

Various Green Cardstocks

Black Ink

MISTI Stamping Tool

Gold Ribbon

Paper Cutter

Scissors

Green Chalk Ink

Beacon Adhesives: Zip Dry Adhesive

(Products listed above are Affiliated Links for your convenience)

DISCLAIMERS

This blog is compensated to provide opinion on products, services, websites, and various other topics. Even though the owner(s) of this blog receives compensation for our posts or advertisements. I always give my honest opinions, findings, beliefs, or experiences on those topics or products. The views and opinions expressed on this blog are purely my own. Any product claim, statistic, quote or other representation about a product or service should be verified with each manufacturer, provider, or party in question.This blog contains affiliate links, clicking and shopping through these links helps to support and run Tonya Trantham Designs – Creative Paper Addiction at no additional cost to you. Today’s features are Sizzix, Eileen Hull and Scrapbook.com Products. 

Thanks for stopping by, hope your Sunday is wonderful and enjoy creating!

Birthday Slimline Card with Journal Diecut and Faux Postage Thinlits

Hi there! I’m back this week with a birthday slimline card I made. I used the Journal Diecut by Eileen Hull to create the base of the card. I also used the Faux Postage Thinlits, by Eileen, and the bear from Doodle Christmas Thinlits by Olivia Rose. Anyways, let’s get started!

First, I folded a piece of White Cardstock in half, placed slightly inside the cut line of the Journal Diecut and secured with washi tape before placing in between the cutting plates and running through the Diecut Machine. This will create the base for the slimline card.

Second, I cut one of the Faux Postage Thinlits.

Third, I cut two cardstocks, one plain slightly larger than the patterned piece of cardstock and adhered both the card base.

Next I cut the Faux Postage Thinlits a part. Since the postage stamp pieces aren’t the same height of the card I “pieced” those together and I will cover the gap with a sentiment.

Fifth, I placed the label stamp from the Simple Sayings Stamps Set onto the MISTI Stamping Tool, inked with Black Ink and stamped onto a piece of cardstock. I followed the same steps for the “Just Celebrate” stamp and stamped inside the label image.

Sixth, I fussy cut the sentiment out and matted with two different colors of cardstock and glued to the card. I also added a few sequins to the sentiment.

Seventh, I cut out the bear, snoot, nose, cheeks, hat, present and bow from the Doodle Christmas Thinlits. Who says you have to use a Christmas set of dies for Christmas? I changed up the colors for something cheery and fun.

Eighth, I lightly inked over the bear with chalk ink and put together. Side note, I did use an adhesive sheet on the tiny pieces so it would make it easier to put together.

Also I did cut the hat down to make it look more like a “party hat” and added a pom pom to the top. I folded the arms of the bear so it’s holding the present. I glued the bear to a double matted cardstock and glued to the card. I finished by adding a couple of sequins.

This card was easy to put together and it will fit into a number 10 (business size) envelope. If you have any questions about this card please leave a comment below.

Also if you haven’t been by Eileen Hull’s blog lately you can find the latest post HERE.

Supplies

Sizzix/Eileen Hull: Journal Diecut

Sizzix/Eileen Hull: Faux Postage Thinlits

Sizzix/Olivia Rose: Doodle Christmas Thinlits

Diecut Machine

Washi Tape

Tim Holtz: Simple Sayings Stamps Set

Black Ink

MISTI Stamping Tool

White Cardstock

Various Plain and Patterned Cardstocks

Sequins and Mini White Pom Pom

Tan Chalk Ink

Paper Cutter

Scissors

Beacon Adhesives: Zip Dry Adhesive

(Products listed above are Affiliated Links for your convenience)

DISCLAIMERS

This blog is compensated to provide opinion on products, services, websites, and various other topics. Even though the owner(s) of this blog receives compensation for our posts or advertisements. I always give my honest opinions, findings, beliefs, or experiences on those topics or products. The views and opinions expressed on this blog are purely my own. Any product claim, statistic, quote or other representation about a product or service should be verified with each manufacturer, provider, or party in question.This blog contains affiliate links, clicking and shopping through these links helps to support and run Tonya Trantham Designs – Creative Paper Addiction at no additional cost to you. Today’s features are Sizzix, Eileen Hull, Amazon, Scrapbook.com and A Cherry on Top Store Products. 

Thanks for stopping by, hope your Thursday is great and enjoy creating!

Happy Holidays Snowflake Mini Slimline Card

Hi everyone! I’m back with a very quick card I created. I was in the “moment” of making this card that I completely forgot to take any step out photos of the process. This card centers on a leftover “Happy Holidays” sentiment from my Holiday Snowman Mini Slimline Card I posted about a few days ago. Anyways, let’s get started!

First, I folded a piece of 6″x6″ snowflake patterned cardstock in half to create the base of the card. I cut the “Happy Holidays” sentiment down and inked the edges with a chalk ink. Also the sentiment is from my Sparkle Snowman Stamp Set which can be found at Blank Page Muse.

Second, I cut two labels and two snowflakes from the Everyday Tags and Labels Thinlits. I embossed the smaller label with the Tablecloth Embossing Folder, lightly inked with a chalk ink before gluing with the sentiment on top of the larger labels.

Third, I glued the first snowflake die to the corner of the label. The second snowflake I added a Foam Pop Dot to the back before placing on top of the other snowflake. I finished by adding a flat back pearl to the center of the snowflake and a couple of sequins to the card base.

If you have any questions or comments about this card please leave it in the comment section below. Also if you aren’t following Blank Page Muse on their social media site you can find them: Facebook. Instagram, Pinterest, Blank Page Muse Website and Blank Page Muse Blog.

Supplies

Blank Page Muse/Tonya Trantham: Sparkle Snowman Stamp Set

Sizzix/Eileen Hull: Everyday Tags and Labels Thinlits

Sizzix/Eileen Hull: Tablecloth Embossing Folder

Foam Pop Dot

MISTI Stamping Tool

Diecut Machine

Scissors

Black Ink

Various Plain and Patterned Cardstocks

Chalk Ink

Sequins and Flat Back Pearl

Paper Cutter

Beacon Adhesives: Zip Dry Adhesive

(Products listed above are Affiliated Links for your convenience)

DISCLAIMERS

This blog is compensated to provide opinion on products, services, websites, and various other topics. Even though the owner(s) of this blog receives compensation for our posts or advertisements. I always give my honest opinions, findings, beliefs, or experiences on those topics or products. The views and opinions expressed on this blog are purely my own. Any product claim, statistic, quote or other representation about a product or service should be verified with each manufacturer, provider, or party in question.This blog contains affiliate links, clicking and shopping through these links helps to support and run Tonya Trantham Designs – Creative Paper Addiction at no additional cost to you. Today’s features are Blank Page Muse, Sizzix, Eileen Hull, Scrapbook.com and A Cherry on Top Store Products. 

Thanks for stopping by, hope your Tuesday is great and enjoy creating!

Warm Wishes Slimline Card

Hi everyone! I’m back with my project for Eileen Hull and this month’s theme is anything Halloween or Fall. I choose to do something Fall because I had a card base already cut out and it was screaming at me to make a card. I used the Journal Diecut and the Floral Silhouette Thinlits (only on Scrapbook.com) to create this card. So let’s get started!

I know I’ve shared the dimensions of a slimline card before but I will share again a traditional slimline card measures 3 5/8″x8 5/8″ which is about the size of the Journal Diecut.

I folded a piece of Kraft Cardstock in half and place slightly below the cutline. I also used wash tape to hold the cardstock in place as I run it through the diecut machine.

I’m a firm believer in using up what you have and since I had a pile of cardstock scraps I dug through those and came up with some that had the “look” of fall. I arranged and adhered layers of patterned cardstocks to the base of the card.

I had a 12″x12″ sheet of floral cut a parts with an assortment of sentiments and I picked the “Warm Wishes” sentiment because it had the look of Fall. I cut a piece of cardstock slightly larger than the sentiment and glued both together before adding Foam Pop Dots to the back and placing onto the card base.

From the Floral Silhouette Thinlits I cut out three of the larger, two middle and four small flowers along with five centers and three of the leaf sprigs. I shaped the larger flowers with a Stylus and added adhesive to the back and layered on top of each other. I shaped three of the smallest and one of the middle flowers, gluing one of the smallest flowers on the middle flower before adding all around the larger flower. I finished by adding the centers to each flower, leaf sprigs and a bow made from cording.

I had a leftover middle and small sized flowers which I glued together, added a center and leaf sprig to complete the card.

I plan on making more slimline cards and using up the cut a parts so I will have a stash of cards on hand for different occasions.

If you haven’t been by Eileen Hull’s blog lately you can find the latest project by her teams HERE and HERE.

Supplies

Sizzix/Eileen Hull: Journal Diecut

Sizzix/Eileen Hull: Floral Silhouette Thinlits (only on Scrapbook.com)

Kraft Cardstock

Foam Pop Dots

Stylus

Diecut Machine

Paper Cutter

Various Patterned Cardstocks

Cording

Beacon Adhesive: Zip Dry Adhesive

(Products listed above are Affiliated Links for your convenience)

DISCLAIMERS

This blog is compensated to provide opinion on products, services, websites, and various other topics. Even though the owner(s) of this blog receives compensation for our posts or advertisements. I always give my honest opinions, findings, beliefs, or experiences on those topics or products. The views and opinions expressed on this blog are purely my own. Any product claim, statistic, quote or other representation about a product or service should be verified with each manufacturer, provider, or party in question.This blog contains affiliate links, clicking and shopping through these links helps to support and run Tonya Trantham Designs – Creative Paper Addiction at no additional cost to you. Today’s features are Sizzix, Eileen Hull, Scrapbook.com and A Cherry on Top Crafts Products. 

Thanks for stopping by, hope your Tuesday is wonderful and enjoy creating!

Slimline Winter Wishes Snowflake Card

Hi everyone! I know it is still over four months until Christmas but I wanted to share a quick card I created for the holiday season using the Journal Diecut , Wreath and Snowflake Thinlits and Ornament Box Diecut. Also I used the new thinlits sets, Everyday Tags and Labels Thinlits and Starlit Village and Card Panel Thinlits that can only be found at Scrapbook.com. All these dies and thinlits are by Eileen Hull and I love how versatile they all are. Who would have thought to use a journal diecut to create the base of the card?!? Anyways, let’s get started!

First, I placed a piece of folded cardstock slightly below the cut line of the Journal Diecut, sandwiched in-between plates and run through the Diecut Machine. The size of the slimline card is 3.5″x8.5″ for reference. I cut another piece of cardstock slightly smaller than the card base and placed the star thinlit from the Starlit Village and Card Panel Thinlits onto the cardstock and proceeded run through the diecut machine several times until it looked like a night full of stars. I adhered the star panel onto the card base.

I cut both the larger circle from the Ornament Box Diecut and the smaller circle tag from the Everyday Tags and Labels Thinlits.

I cut one large snowflake from the Wreath and Snowflake Thinlits and four small snowflakes from the Starlit Village and Card Panel Thinlits.

I glued both the larger and smaller circles to one side of the card base. Next I added the larger snowflake to the larger circle and two of the smaller snowflakes I glued together. I made sure that between both size of snowflakes that it covered the small hole that’s in the circle tag.

The other two snowflakes I glued together and placed in the upper corner on the other side of the card base. I placed a piece of an Adhesive Sheet onto the piece of cardstock and cut out the “Warm Wishes” sentiment. I also cut a piece of white cardstock slightly larger than the sentiment and placed both sentiment and cardstock beneath the snowflake.

I randomly added clear sequins onto the card to finish. This card takes no time to create and you could cut out all diecuts first and mass product all your cards at once to make the creative process go quicker.

Also if you haven’t been by Eileen Hull’s blog lately you can the latest post HERE.

Supplies

Scrapbook.com/Eileen Hull: Everyday Tags and Labels Thinlits

Scrapbook.com/Eileen Hull: Starlit Village and Card Panel Thinlits

Sizzix/Eileen Hull: Journal Diecut

Sizzix/Eileen Hull: Wreath and Snowflake Thinlits

Sizzix/Eileen Hull: Ornament Box Diecut

Adhesive Sheet

Diecut Machine

Scissors

Paper Cutter

Various Plain and Pattern Cardstocks

Sequins

Beacon Adhesives: Zip Dry Adhesive

(Products listed above are Affiliated Links for your convenience)

DISCLAIMERS

This blog is compensated to provide opinion on products, services, websites, and various other topics. Even though the owner(s) of this blog receives compensation for our posts or advertisements. I always give my honest opinions, findings, beliefs, or experiences on those topics or products. The views and opinions expressed on this blog are purely my own. Any product claim, statistic, quote or other representation about a product or service should be verified with each manufacturer, provider, or party in question.This blog contains affiliate links, clicking and shopping through these links helps to support and run Tonya Trantham Designs – Creative Paper Addiction at no additional cost to you. Today’s features are Sizzix, Eileen Hull, Scrapbook.com and A Cherry on Top Store Products. 

Thanks for stopping by, hope your Friday is great and enjoy creating!

Spring into Eileen Hull’s Chapter 2 Collection and Slimline Card Project

Hi everyone! It’s that time again to share with everyone Eileen Hull’s Chapter Two Collection!

You will love this set of dies! It is so versatile and works side by side your other journal dies and may be combined in endless combinations. There are three dies in the set: the Card Case, Mini-Slimline & Tickets and Journaling Card, Envelope & Windows. Buy all three dies and get FREE SHIPPING on your order in the US PLUS save an additional $10! Cost to buy dies individually is $122- buy the bundle and pay only $112. Outside US, $10 will be deducted from shipping. You can find the bundle HERE.

The Card Case is a Bigz XL ScoreBoards die. This die is specially designed to cut and score thick material up to 1/16″ like matboard, chipboard, leather, felt and fabric so your finished project is nice and sturdy. The finished Card Case die measures 4 1/2″ x 3 1/2″ and has an adjustable spine that goes from 1/2″ to 2 1/2″. This is the perfect size journal to hold your 3″ x 4″ journaling cards, as well as other small items like wallet photos, ATCs and ephemera. There is a swing out flap on each side where you can add pockets or small insert books- you decide what combination you want to do. Make the spine thick or thin- your choice!

The Journaling Card, Envelope & Windows die has 6 pieces- an envelope, 3″ x 4″ Journaling Card, three window cutouts (use with envelope to remove and back with glassine like a window envelope) and a tab. The Envelope measures 4 1/2″ x 3 1/2″ and fits perfectly inside the Journal! Or use it by itself and add your favorite ephemera pieces.

The Mini-Slimline & Tickets die design is similar to the Snail Mail die, which was very popular for creating faux postage stamps. There are four dies in the set- one is the size of a mini slimline card and one is a mat that may be placed behind the perforated piece. The other two pieces are a row of tickets and mat that goes behind that. When you fold over each perforated piece and tear it, it creates individual faux postage stamps and tickets! Die cut the piece from patterned paper for an amazing background- just add a sentiment and let the paper do the work.

There’s a giveaway too! Comment in the Facebook and YouTube streams and tell us which of Eileen’s other dies would work well with this collection. You have until April 10 to post your comments.

I also would like to share a quick card I made using the Mini Slimline and Tickets Thinlits Set and a few other of Eileen’s dies. So let’s get started!

First, I folded and placed a piece of Blue Cardstock slightly below the cut line of the Journal Diecut and run through the Diecut Machine. I used a 6″x6″ piece of patterned cardstock from my friend Pam Bray’s Cyan Consortium Paper Pack. Since the cardstock wouldn’t cover the card base I had the bright idea to piece together what had been cut and covered with the tickets that I had cut from the Mini Slimline and Tickets Thinlits. I also embossed some of the tickets with the Crochet Mandala 3D Embossing Folder.

I also dug into my stash and pulled out vintage tickets by 49 and Market (discontinued) and a sheet of cut a parts by Maggie Holmes. I fussy cut the little bunny from one of the cards in the cut a part, placed a wreath that I had cut from the Wreath and Snowflake Thinlits around it and adhered all the bits and pieces onto the card base.

I placed the “think happy” and “be happy” stickers (Maggie Holmes Garden Party) above and below the bunny and wreath.

I cut flowers and leaf sprigs from the Folio Page Pocket and Flowers Thinlits. I shaped with a Stylus, layered, added gems and a bow made out of cording to complete the card.

Be sure to watch Eileen Hull’s YouTube channel, you can find the link HERE, to see die assembly and project ideas! Eileen also does two livestreams each week on Facebook and YouTube-sharing more ideas on how to to use these dies in lots of different ways. You are invited to join our creative community Facebook group, the Eileen Hull Fan Club, you can find the link HERE, where we have special events and exclusive content. Follow Eileen on Instagram at @eileenhull!

Supplies

Sizzix/Eileen Hull: Chapter 2 Diecut Bundle

Sizzix/Eileen Hull: Mini Slimline and Tickets Thinlits

Sizzix/Eileen Hull: Card Case Diecut

Sizzix/Eileen Hull: Journaling Card Envelope and Window Thinlits

Sizzix/Eileen Hull: Journal Diecut

Sizzix/Eileen Hull: Crochet Mandala 3D Embossing Folder

Sizzix/Eileen Hull: Wreath and Snowflake Thinlits

Sizzix/Eileen Hull: Folio Page Pocket and Flowers Thinlits

Blue Cardstock

Diecut Machine

Pam Bray: Cyan Consortium Paper Pack

Stylus

Various Embellishments, Gems, Stickers, Cording

Scissors

Paper Cutter

Beacon Adhesives: Zip Dry Adhesive

(Products listed above are Affiliated Links for your convenience)

DISCLAIMERS

This blog is compensated to provide opinion on products, services, websites, and various other topics. Even though the owner(s) of this blog receives compensation for our posts or advertisements. I always give my honest opinions, findings, beliefs, or experiences on those topics or products. The views and opinions expressed on this blog are purely my own. Any product claim, statistic, quote or other representation about a product or service should be verified with each manufacturer, provider, or party in question.This blog contains affiliate links, clicking and shopping through these links helps to support and run Tonya Trantham Designs – Creative Paper Addiction at no additional cost to you. Today’s features are Sizzix, Eileen Hull, Scrapbook.com and A Cherry on Top Crafts Products. 

Thanks for stopping by, hope your Monday is great and enjoy creating!

Sparkles Sparkly Snowflake Slimline Card

Hi everyone! I’m back this month with another card using my Sparkles Snowman Happy Holidays Clear Stamp Set! I would have had this blog post out sooner but came down with a nasty cold that took forever to get over and a wedding album to finish while not feeling my best. UGH! But anyway, I’m back and getting better each day.

I started by placing the snowman face stamp onto the MISTI Stamping Tool, inking with Black Ink (waterproof) and stamping an assortment of images onto Cardstock and Watercolor Paper so I could work on projects as I found time. Also some of the images didn’t stamp clean but, no problem, I made them work for each project I created (more projects to come later). A side note I forgot to use the magnet to hold the paper down and that is how I didn’t get a clear image…totally my fault.

This image was one that it didn’t stamp clean so I decided to to use pastels to add “smudges” around the eyes, nose and mouth so the image wasn’t a complete loss. I hate wasting the watercolor and cardstock! I filled in eyes, nose and mouth with chalk pastels and Colored Pencils.

I used the Journal Diecut to cut the card base for a regular slimline card. I folded a piece of cardstock in half and used Washi tape to hold in place on the diecut. I made sure the card was 3 1/2″ across when I placed on the diecut before running through the Diecut Machine. A regular slimline card measures 3 1/2″x 8 1/2″ and will fit into a #10 size envelope. I added a snowflake patterned piece of cardstock, a stripe of patterned cardstock to the card base, matted the snowman image, added Foam Pop Dots to the back before adding to one end of the base.

I stamped the sentiment and matted to a piece of cardstock before gluing both, sentiment and snowflake ornament, to the base. I have a box of these snowflake ornaments that I got for dirt cheap so I use them regularly in various projects. All I do is cut off the “hanger” if I’m going to use it in a project like this.

I forgot to add that I applied glitter glue to the eyes of the snowman and there you have it! Also if you aren’t following Blank Page Muse on their social medias you can find them on:

Facebook, Instagram, Pinterest, Twitter, Blank Page Muse Blog and their Website

If you would like to purchase this set of stamps or any others from Blank Page Muse site please be sure to use BPMTonya at checkout to get 15% off your total purchase.

Supplies

Blank Page Muse/Tonya Trantham: Sparkles Snowman Happy Holidays Clear Stamp Set

MISTI Stamping Tool

Black Ink

Watercolor Paper

Patterned and Plain Cardstocks

Colored Pencils

Chalk Pastels

Sizzix/Eileen Hull: Journal Diecut

Diecut Machine

Paper Cutter

Scissors

Zip Dry Adhesives

Foam Pop Dots

Snowflake Ornament

Glitter Glue

(Products listed above are Affiliated Links for your convenience)

DISCLAIMERS

This blog is compensated to provide opinion on products, services, websites, and various other topics. Even though the owner(s) of this blog receives compensation for our posts or advertisements. I always give my honest opinions, findings, beliefs, or experiences on those topics or products. The views and opinions expressed on this blog are purely my own. Any product claim, statistic, quote or other representation about a product or service should be verified with each manufacturer, provider, or party in question.This blog contains affiliate links, clicking and shopping through these links helps to support and run Tonya Trantham Designs – Creative Paper Addiction at no additional cost to you. Today’s features are Blank Page Muse, Tonya Trantham Designs and Scrapbook.com Products. 

Thanks for stopping by, hope your Friday is wonderful and enjoy creating!

Here’s to a New Year Card

Hi everyone! Did you celebrate the new year with family or just kept it low key? I spent the day with my son, daughter in law, grandson and other family members doing a late Christmas. We watched my two year old grandson get excited about presents and it was nice just to be around family for the day. Anyway, I wanted to share a quick card I created for the new year. I used Eileen Hull’s Journal Diecut to create the slimline card base and Authentique Calendar Collection Paper Pad (January set).

I placed a folded Solid Colored Cardstock from the Paper Pad slightly below the score line on the diecut and run through the Diecut Machine. I adhered a mat along with a strip of patterned cardstock and a lace shaped diecut to the base of the card. I matted two of the cut a parts from the paper pad with glittered cardstock. The sentiment I glued to the one side of the card and the angel cut a part I added Foam Pop Dots to the back before placing at an angle next to the sentiment.

I cut several of the Wreath with vines and flowers Diecuts (Spellbinder retired), shaped and adhered under and around the angel image. I also added flat back pearls to the center of the flowers, gold leaves and thread to the card. I finished by matting the Happy New Year sentiment with glitter cardstock and adhering above the angel. I used the seal diecut from the Bookplate, Hinge and Label Diecuts (retired) and cut out in glitter cardstock I also cut the number one out of off white cardstock from the Number Cut and Emboss Diecuts. The number I cut the bottom off and a little of the top before adhering to seal and adding next to the Happy New Year sentiment. I hope this has inspired you to get out your supplies and create something today and as always if you have questions about this project please let me know.

Supplies

Sizzix/Eileen Hull: Journal Diecut

Sizzix/Eileen Hull: Bookplate, Hinge and Label Diecuts (retired)

Authentique: Calendar Collection Paper Pad

Diecut Machine

Foam Pop Dots

Spellbinders: Wreath Diecuts (retired)

Momenta: Number Cut and Emboss Diecuts

Various Scraps of Cardstock and Glitter Cardstock

Gold Thread

Flat Back Pearls

Scissors

Beacon Adhesive: Zip Dry Adhesive

Paper Cutter

(Products listed above are Affiliated Links for your convenience)

DISCLAIMERS

This blog is compensated to provide opinion on products, services, websites, and various other topics. Even though the owner(s) of this blog receives compensation for our posts or advertisements. I always give my honest opinions, findings, beliefs, or experiences on those topics or products. The views and opinions expressed on this blog are purely my own. Any product claim, statistic, quote or other representation about a product or service should be verified with each manufacturer, provider, or party in question.This blog contains affiliate links, clicking and shopping through these links helps to support and run Tonya Trantham Designs – Creative Paper Addiction at no additional cost to you. Today’s features are Sizzix, Eileen Hull and Scrapbook.com Products. 

Thanks for stopping by, hope your Wednesday is wonderful and enjoy creating!

Thinking of You Slimline Card

Hey everyone! I know it has been a minute since my last post but I am back with a quick card I created. Have you seen and heard of slimline cards? It apparently the newest thing to create or I’m just now seeing them (I’m always late to the party) and I thought why not try to make one myself?

The slimline card measures 3.5″x8.5″ (folded) and will fit into a number 10 size envelope ( business size). Instead of measuring and cutting the cardstock to the exact measurements I used Eileen Hull’s Journal Diecut to cut out the base of the card. All I did was fold the cardstock in half and place it where the indention in the diecut that creates the spine wouldn’t cut into the paper. (I used a different cardstock to practice on in the photo below) I used a little washi tape to hold the cardstock in place while I ran it through the Diecut Machine.

I stamped onto a piece of Watercolor Paper the butterfly from the Tim Holtz’s Perspective Stamp Set and the Thinking of You and label stamps from the Simple Sayings Stamp Set in a water proof Black Ink. I used an assortment of inks from my stash to watercolor the butterfly and once dry I fussy cut the butterfly and sentiment out. I used an oval shaped embossing folder on a piece of cardstock (this is from Brenda Walton and is retired) and two other pieces of cardstock that I adhered together to mat the butterfly. I added Foam Pop Dots to the back before placing on the card base. I also matted the sentiment with a scrap piece of cardstock and glued underneath the butterfly.

I think I will have to make more of these! They are so easy to create using the Journal Diecut to make the card base with! As always if you have any questions about this project please let me know.

Supplies

Sizzix/Eileen Hull: Journal Diecut

Diecut Machine

Watercolor Paper

Tim Holtz: Perspective Stamp Set

Tim Holtz: Simple Sayings Stamp Set

Beacon Adhesive: Zip Dry Adhesive

Paper Cutter

Scissors

Watercolor Brush

Foam Pop Dots

Various Patterned Cardstocks

Black Ink

Various Inks or Watercolors

MISTI Stamping Tool

(Products listed above are Affiliated Links for your convenience)

DISCLAIMERS

This blog is compensated to provide opinion on products, services, websites, and various other topics. Even though the owner(s) of this blog receives compensation for our posts or advertisements. I always give my honest opinions, findings, beliefs, or experiences on those topics or products. The views and opinions expressed on this blog are purely my own. Any product claim, statistic, quote or other representation about a product or service should be verified with each manufacturer, provider, or party in question.This blog contains affiliate links, clicking and shopping through these links helps to support and run Tonya Trantham Designs – Creative Paper Addiction at no additional cost to you. Today’s features are Scrapbook.com Products. 

Thanks for stopping by, hope your Wednesday is wonderful and enjoy creating!