Cotton Candy Mini Junk Journal

Hi everyone! I’m back this week with my project for Eileen Hull and this month’s theme is “Colors of Spring”. I choose soft pastel colors as the pallet for my journal using the Mini Book Diecut along with a few other dies by Eileen. Be forewarned, this is a long post so grab a snack and beverage and enjoy! Anyways, let’s get started!

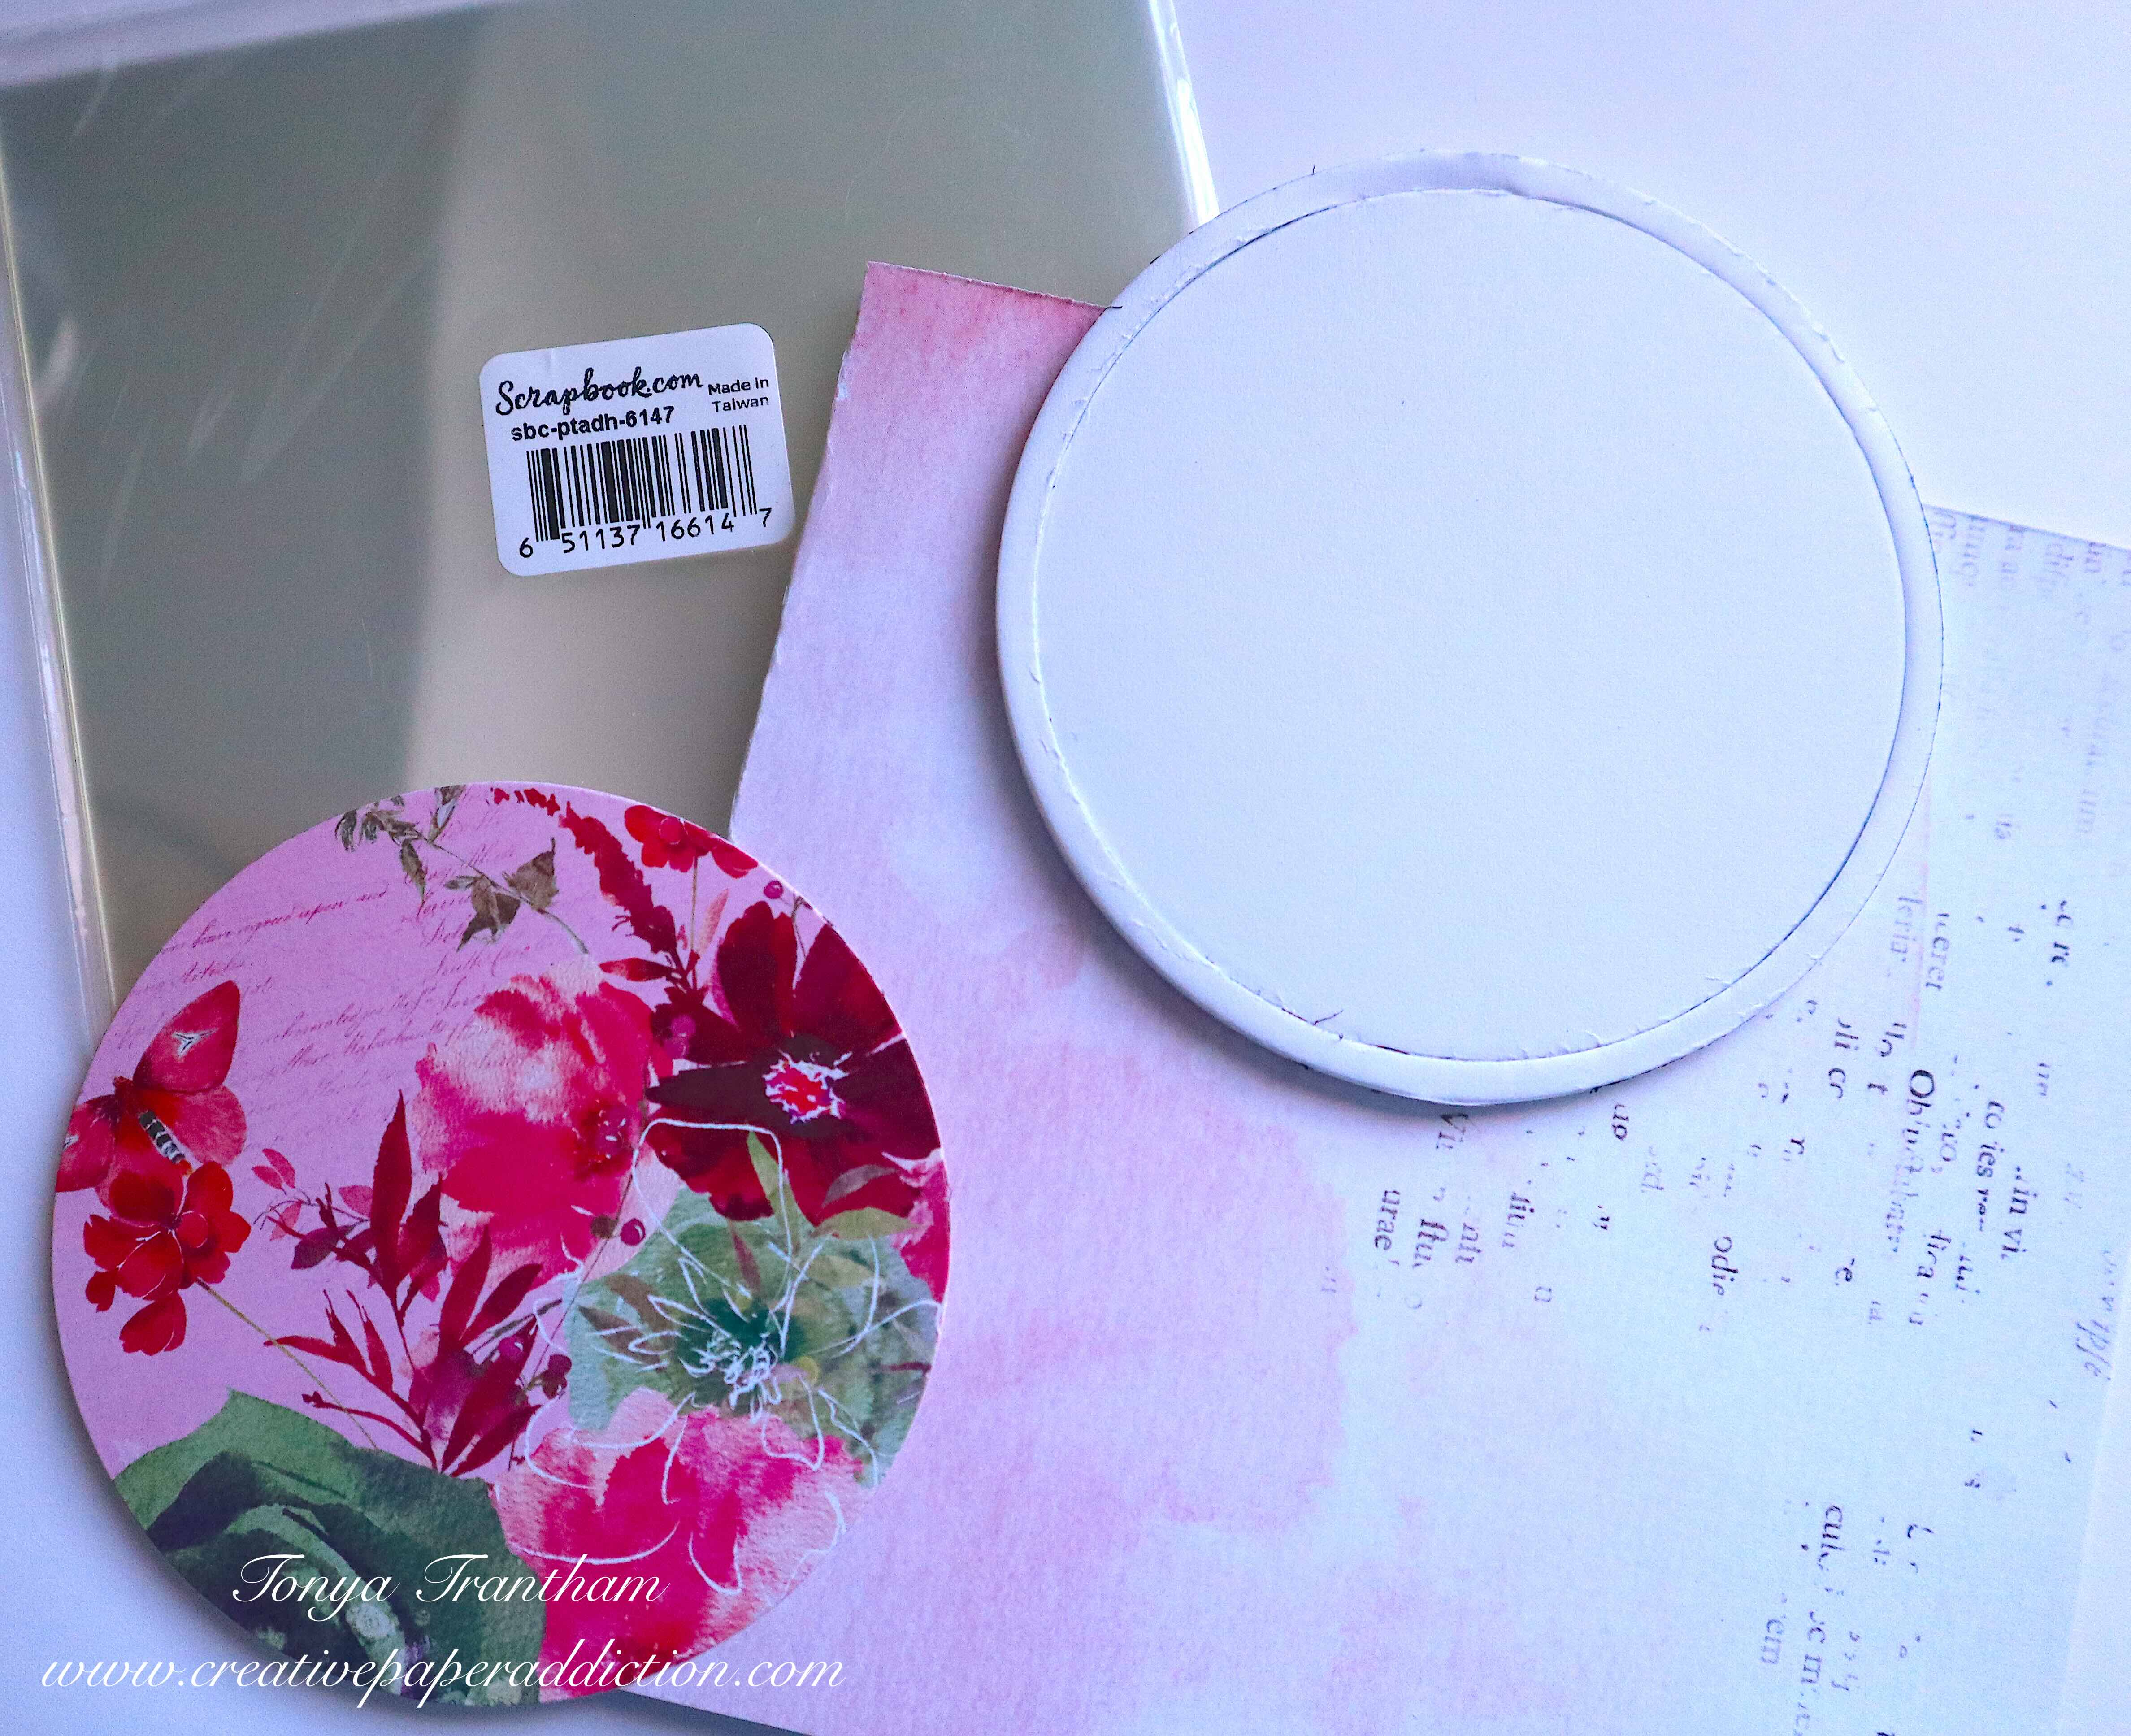
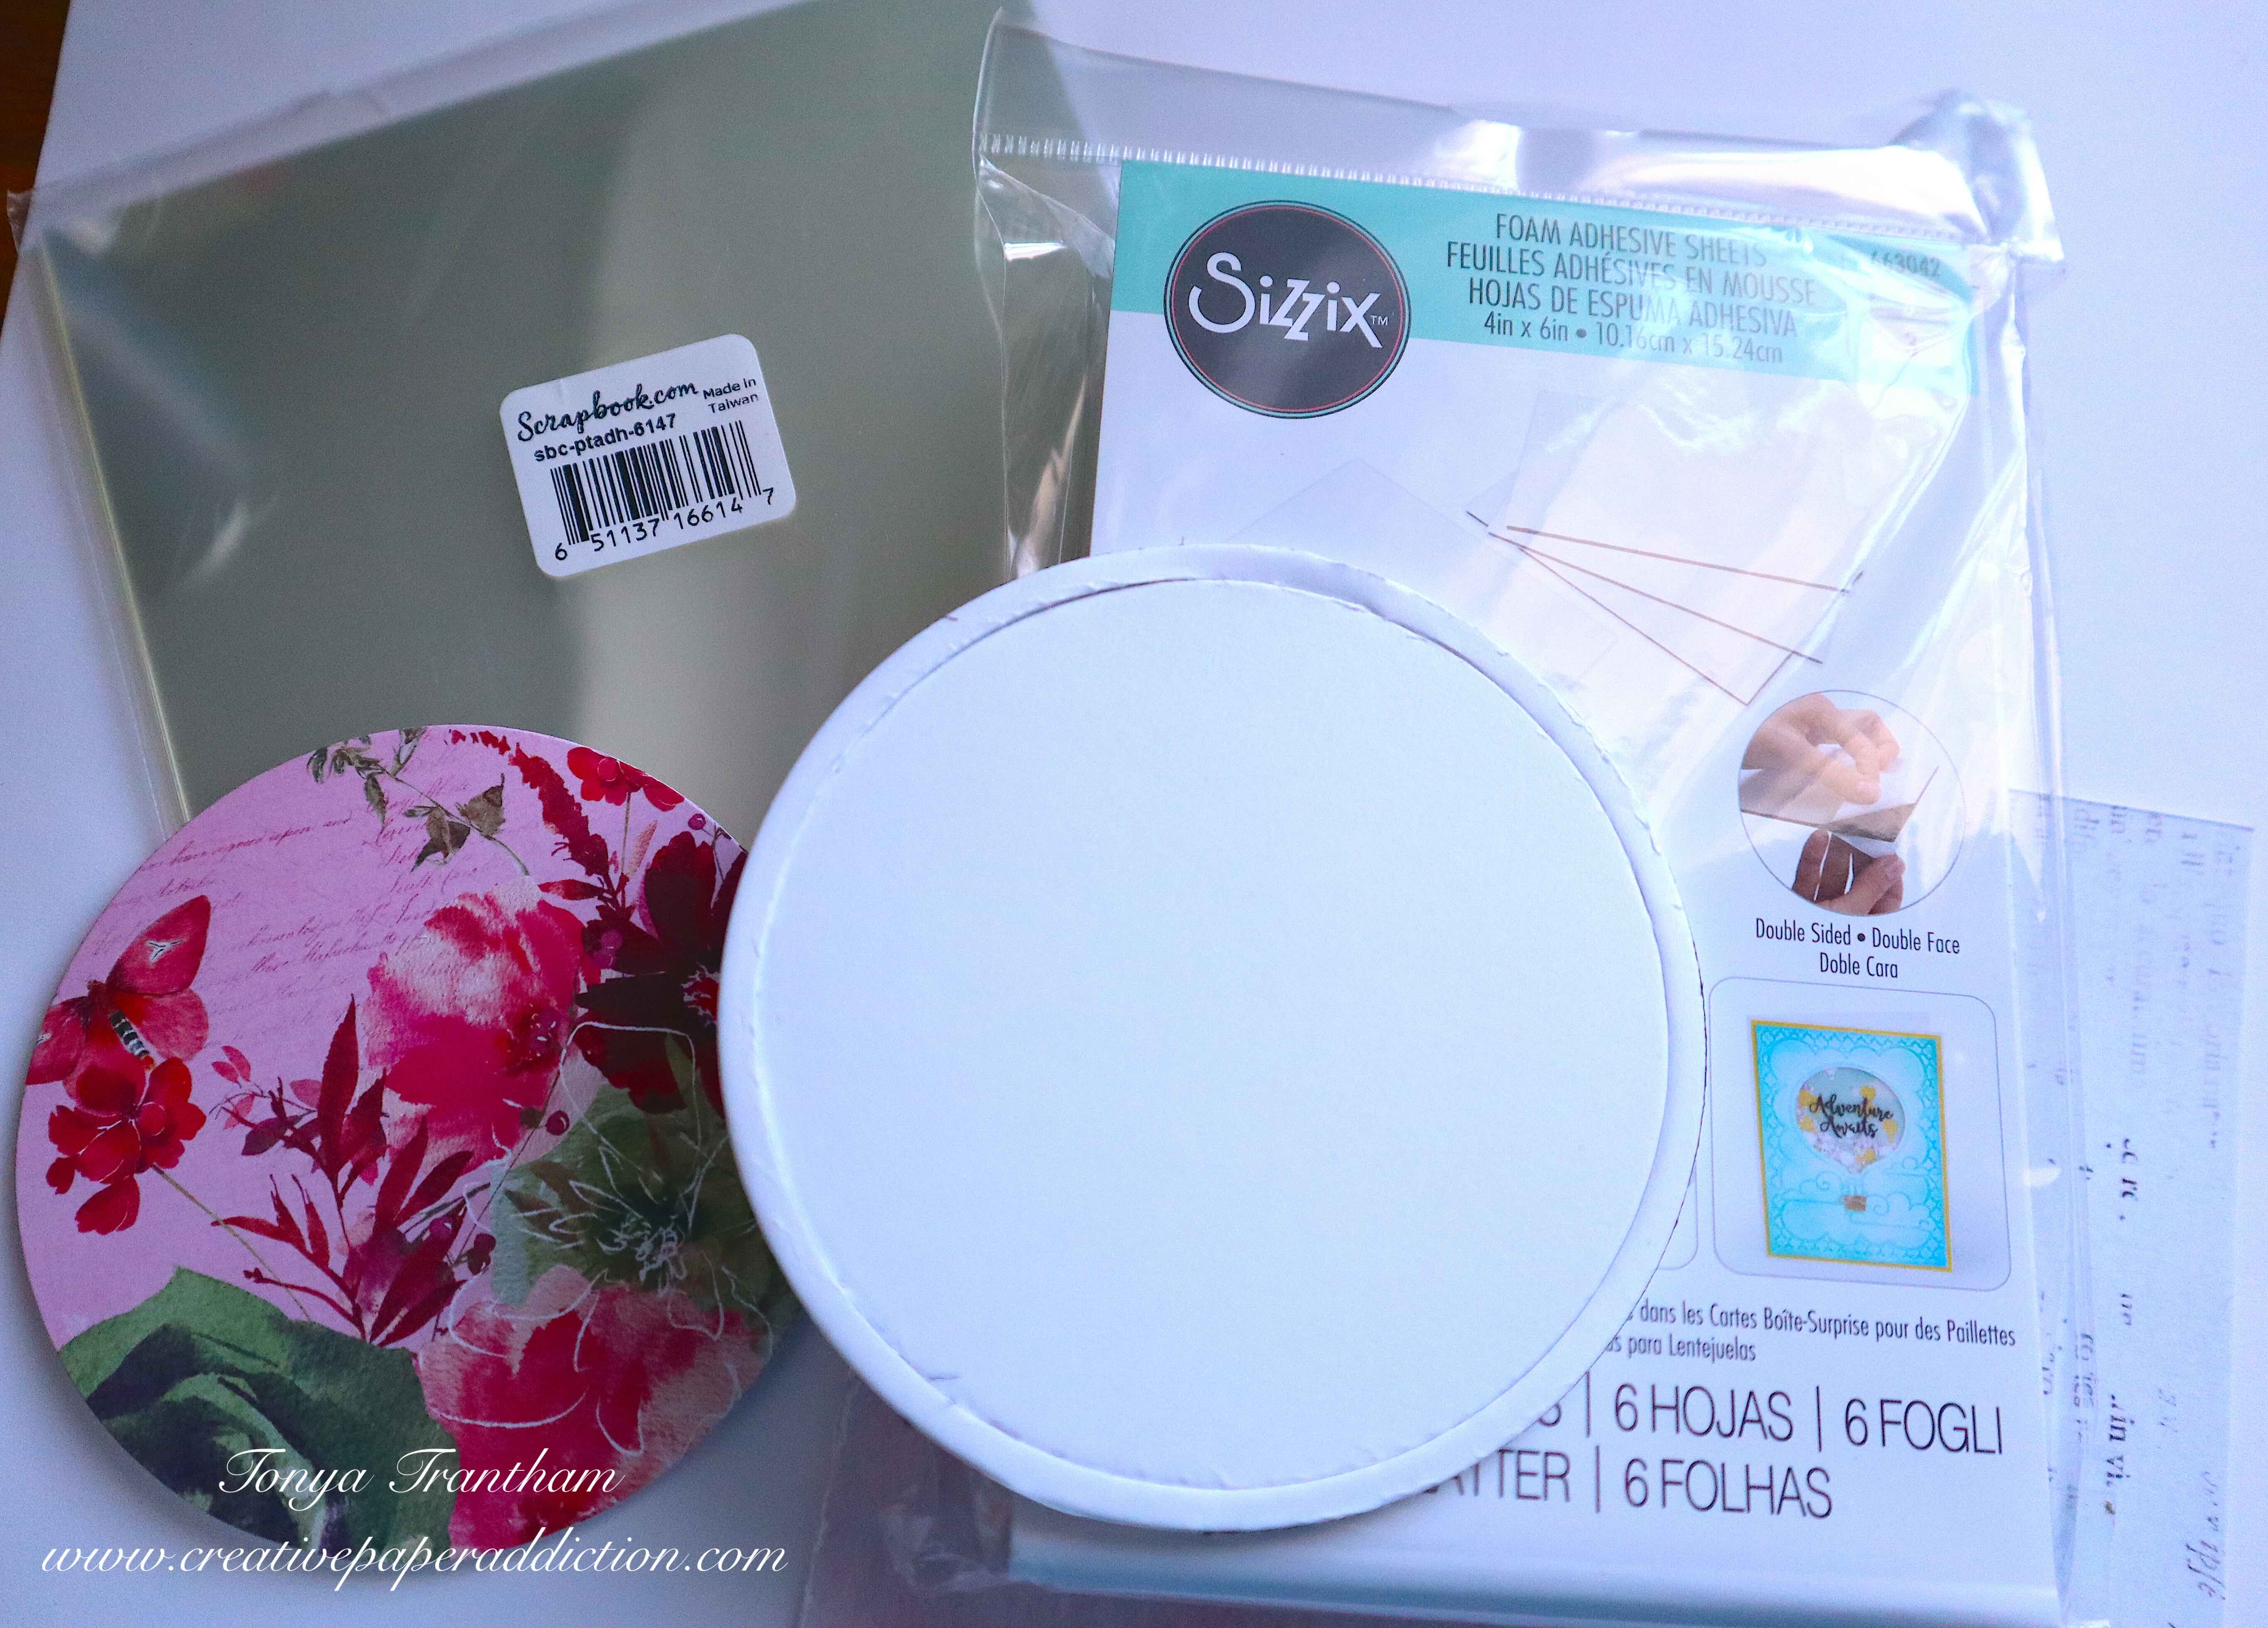
First, I applied Adhesive Sheets to both sides of a piece of Mat Board. I placed cardstock from Prima Dulce 6″x6″ Paper Pad (retired) to the mat board, placed the Mini Book Diecut onto the mat board, sandwiched between the two cutting plates and run through the Diecut Machine.

Second, for the inside pages, I used the same paper pad along with an old book page with a total of four papers and a mini envelope to create a signature. I cut a file folder and envelope from the Envelope, Folder and Flowers Thinlits and one of the pages I cut with the Faux Postage Thinlits. I did cut it down to fit inside the journal.

Third, I used a Crop A Dile to punch holes in the spine and all the papers.

Fourth, I sewed them into the journal and tied off “inside” the envelope. I then glued together the envelope which hide where I tied everything into the spine.

Fifth, I cut a piece of ribbon as a closure and adhered to the center of the spine.

Sixth, I glued the label and the handle from the Mini Book Die to the spine, it covered the stitching and made it look neat. I added two buttons and Pearls to the spine.

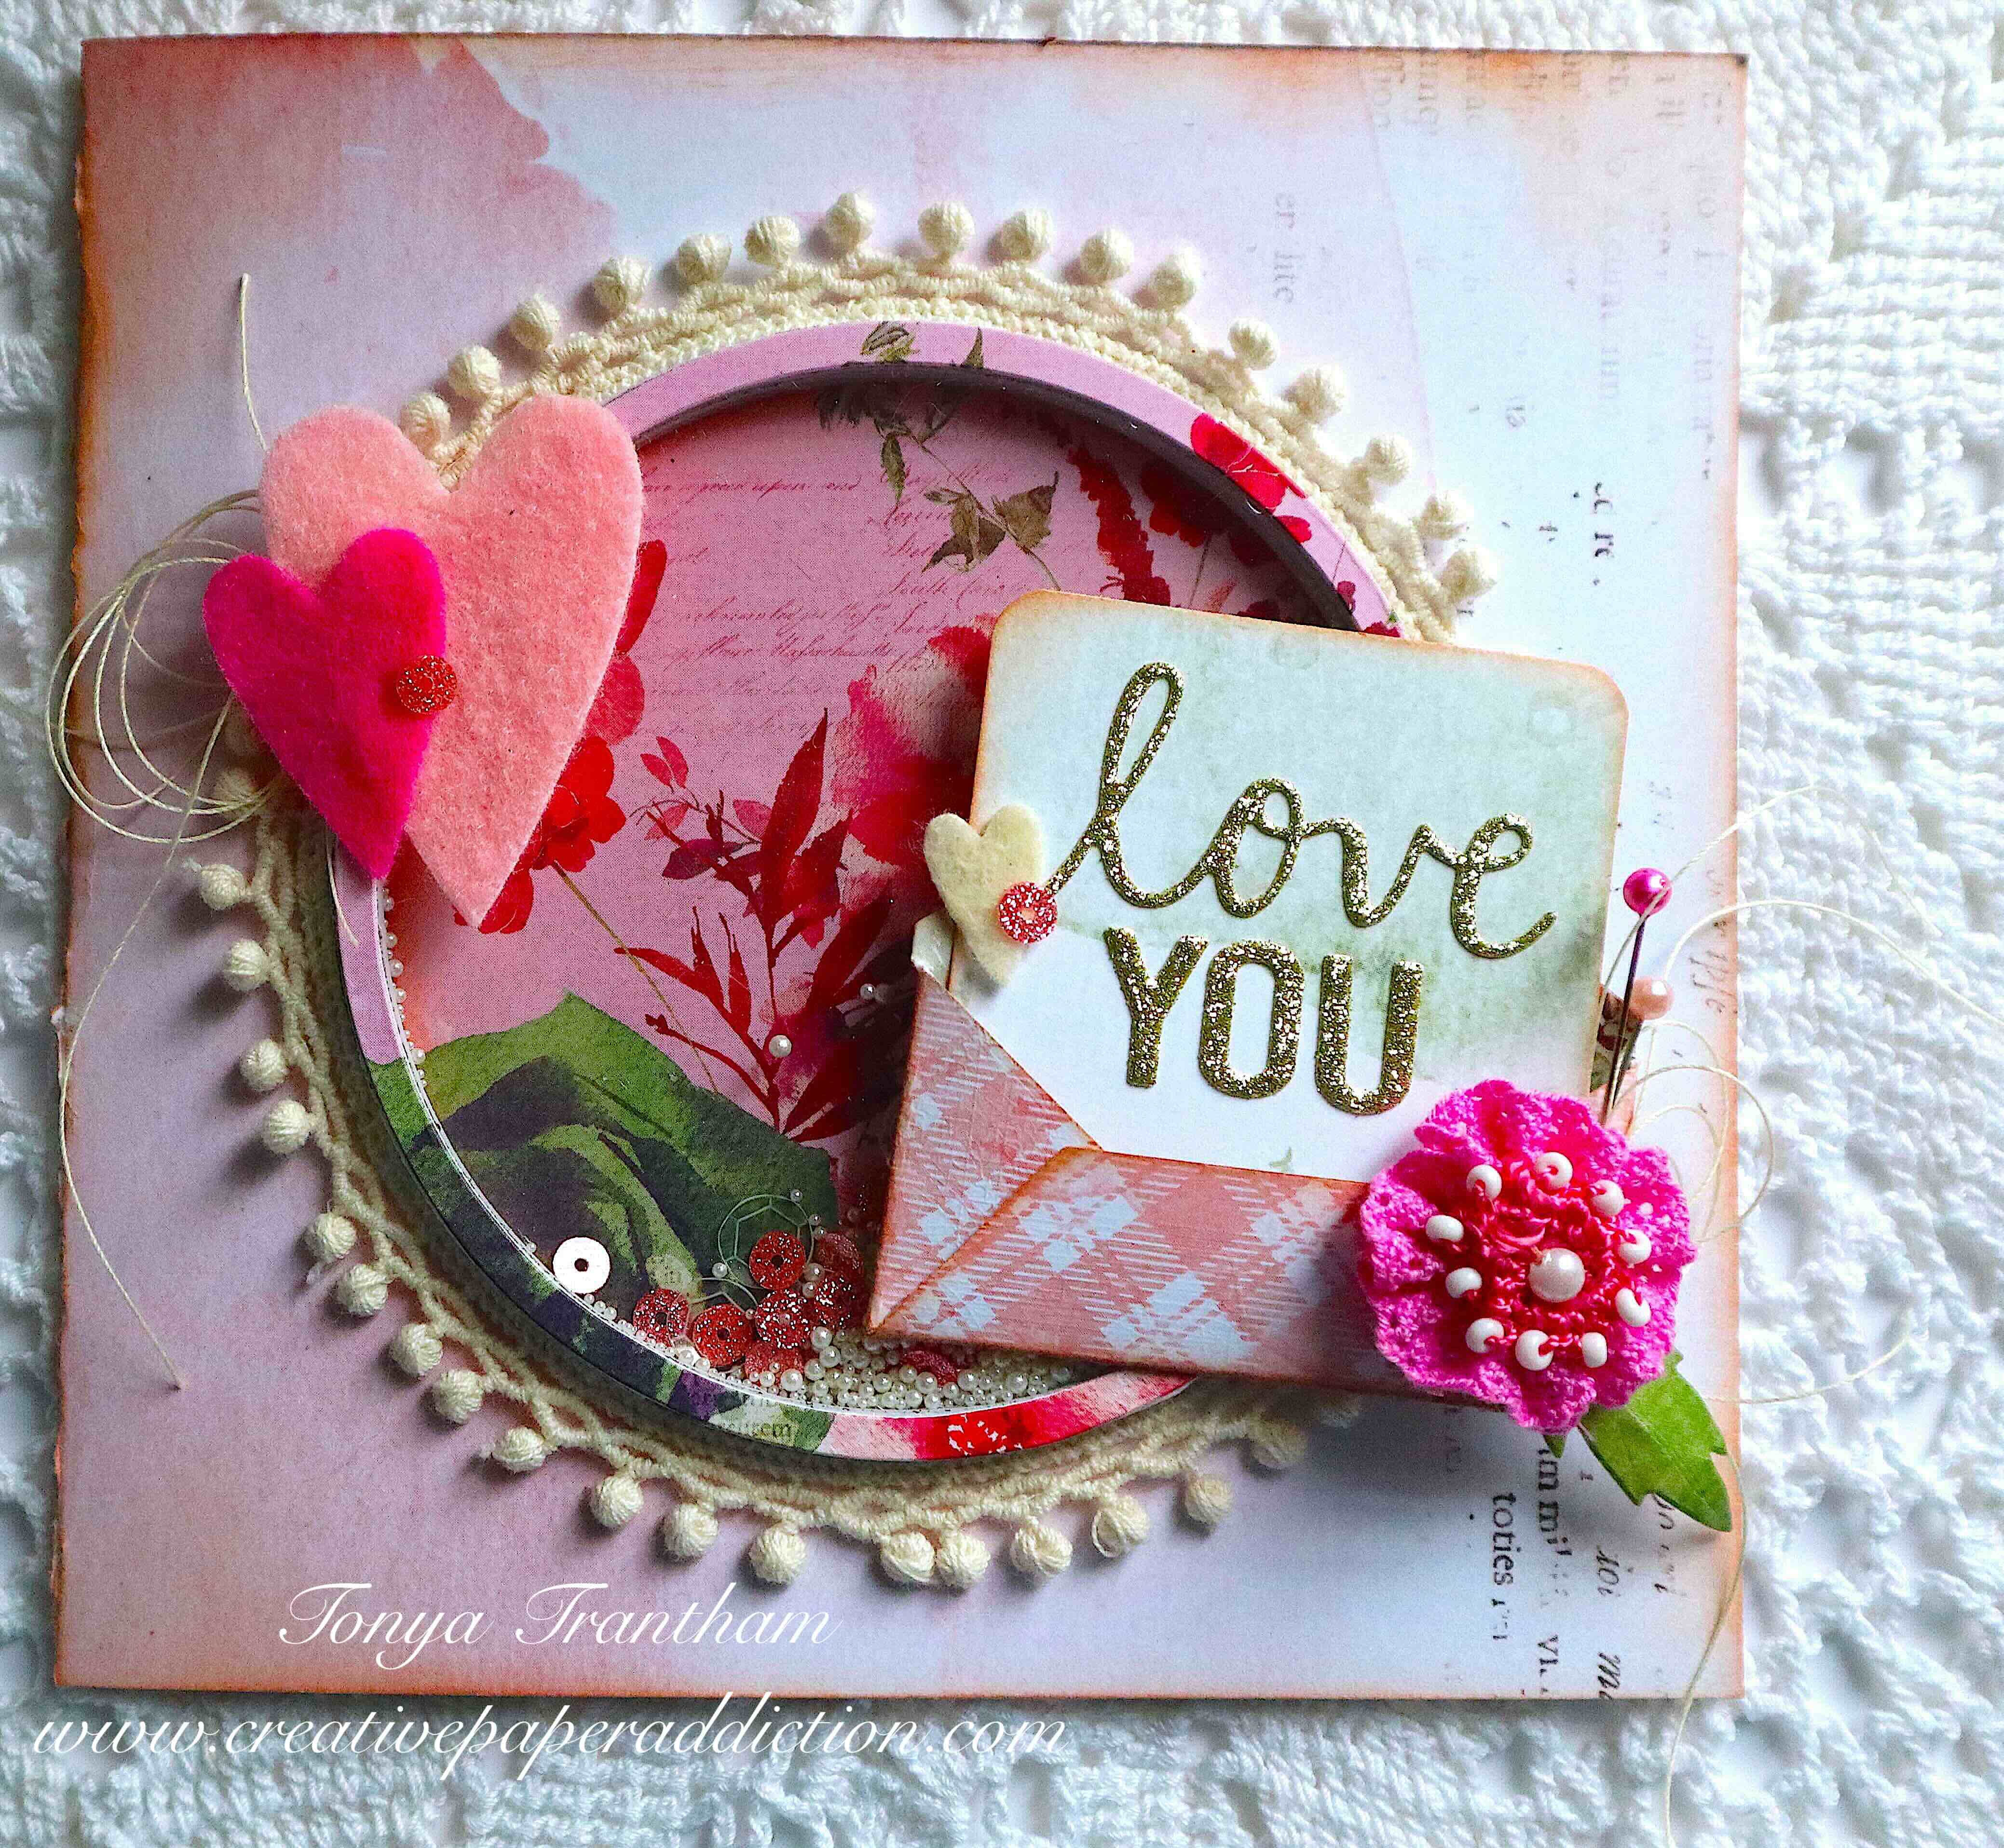
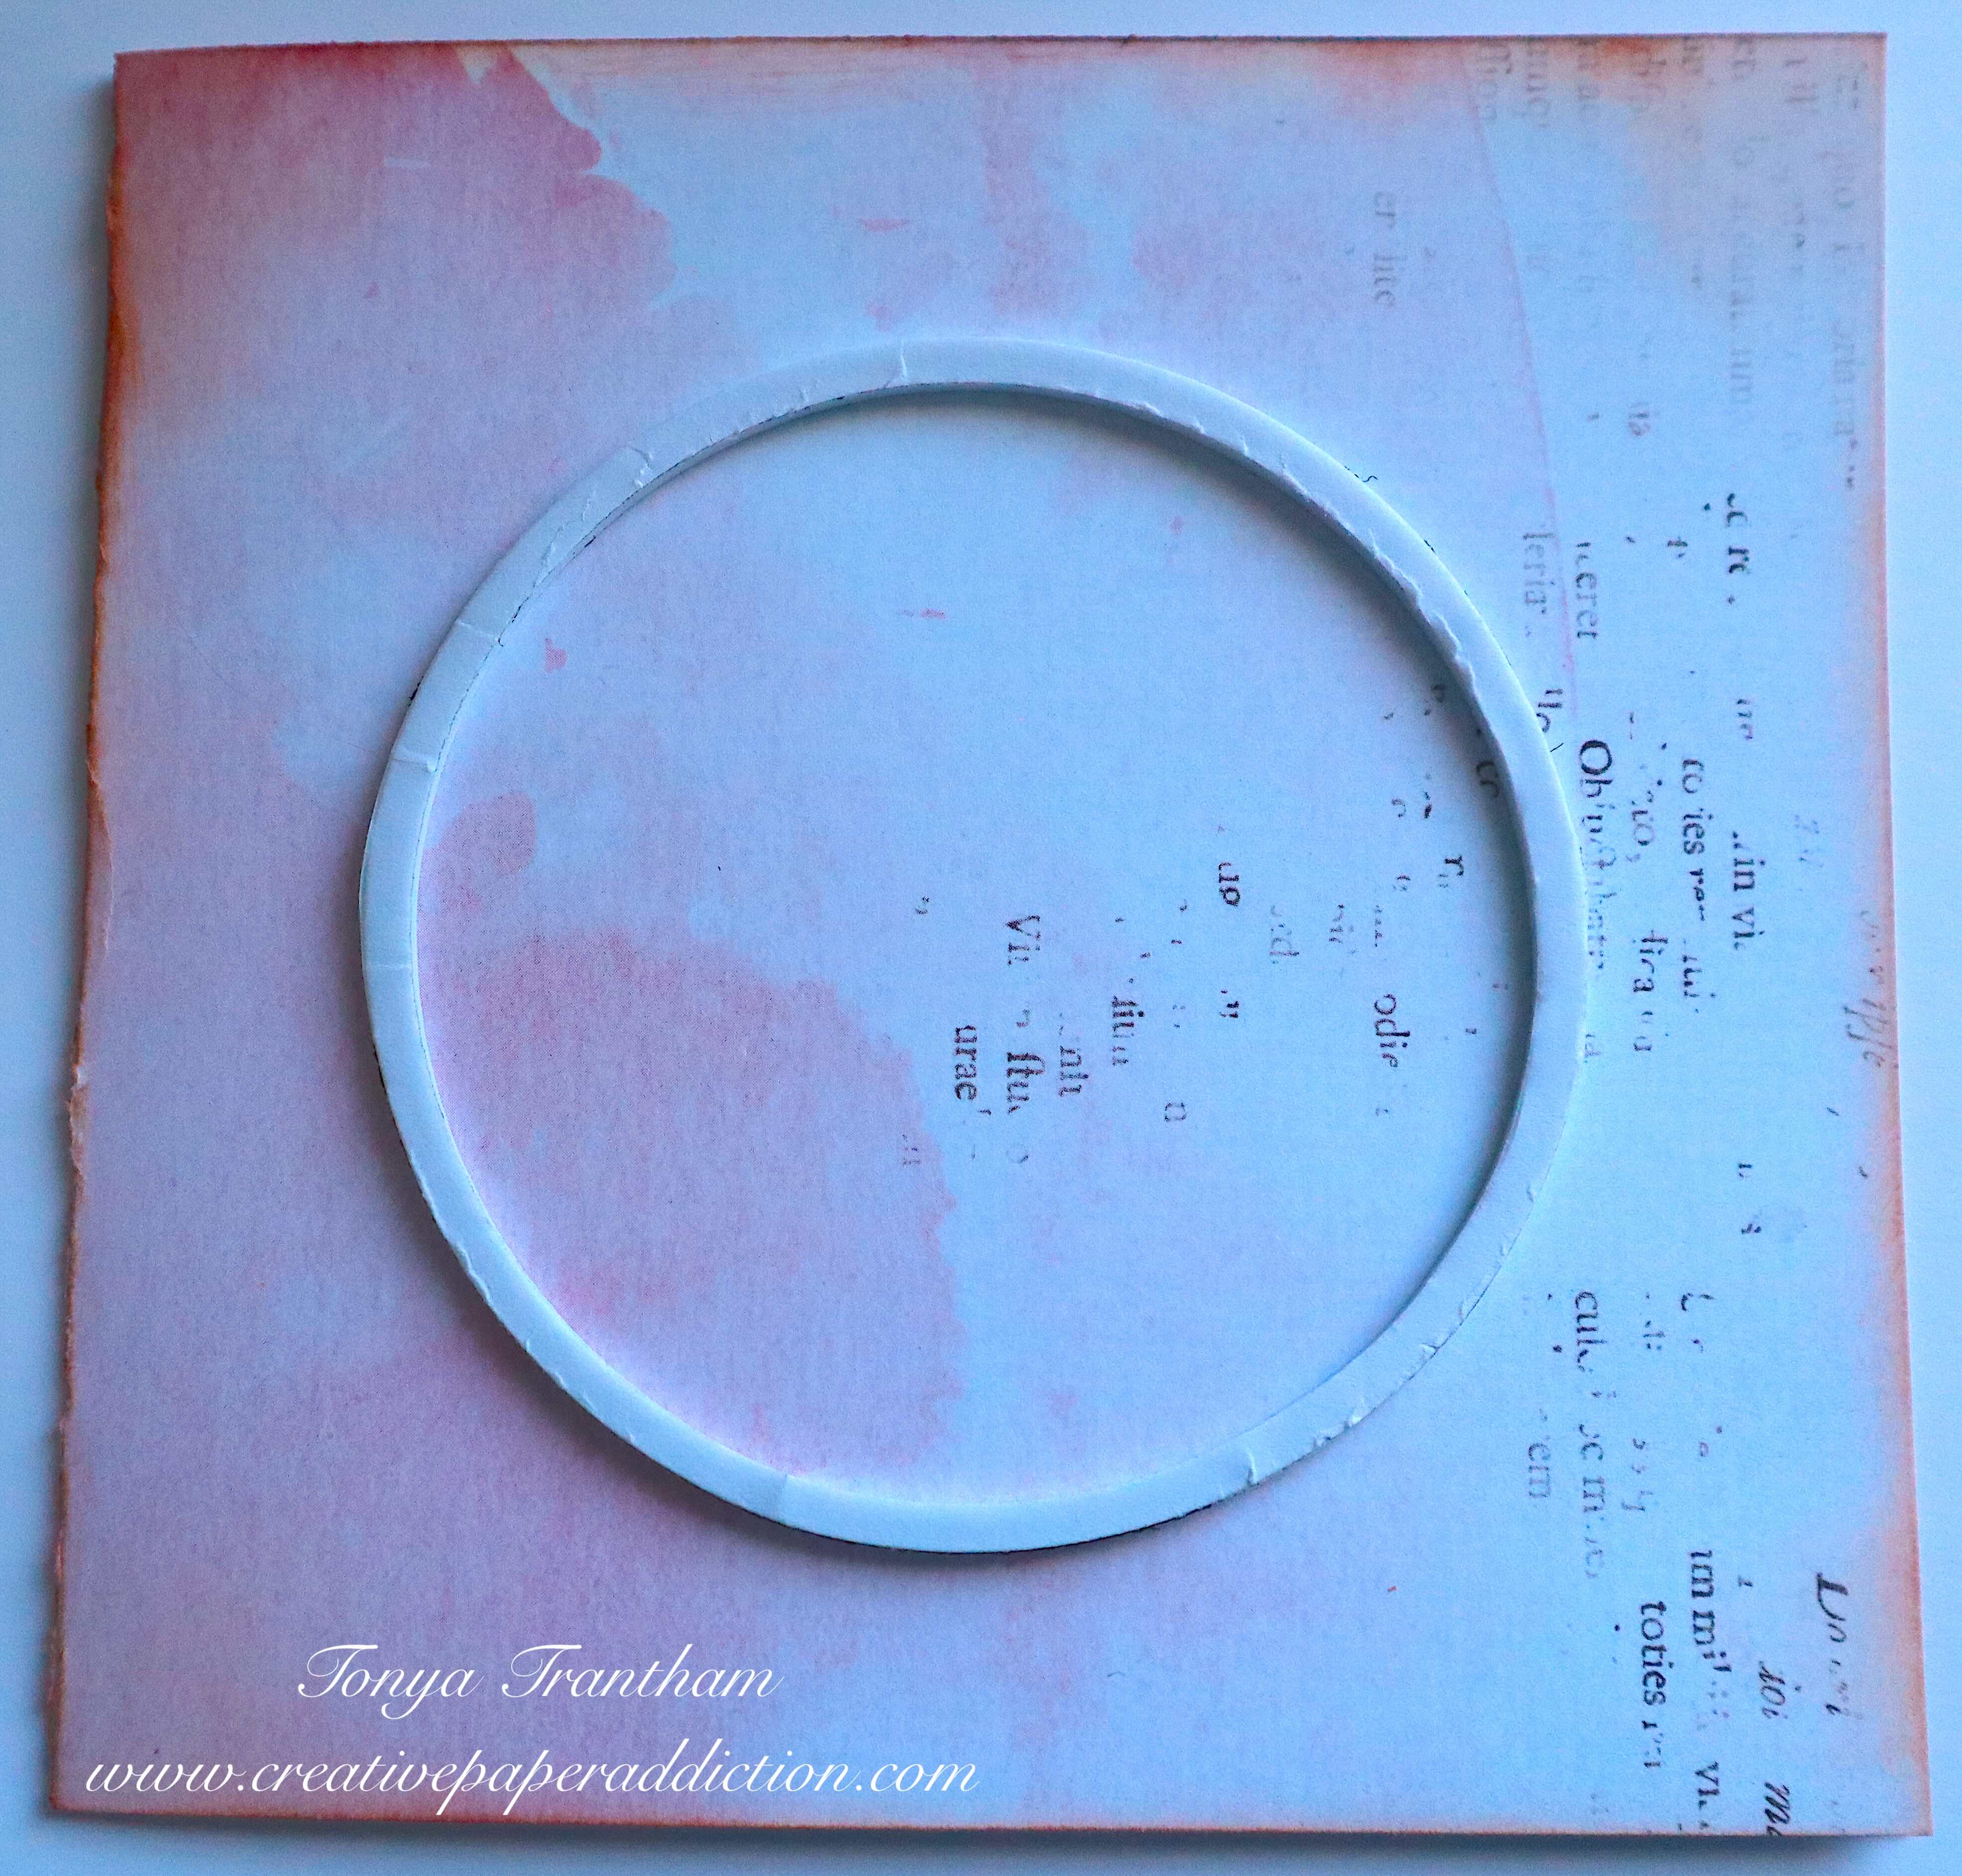
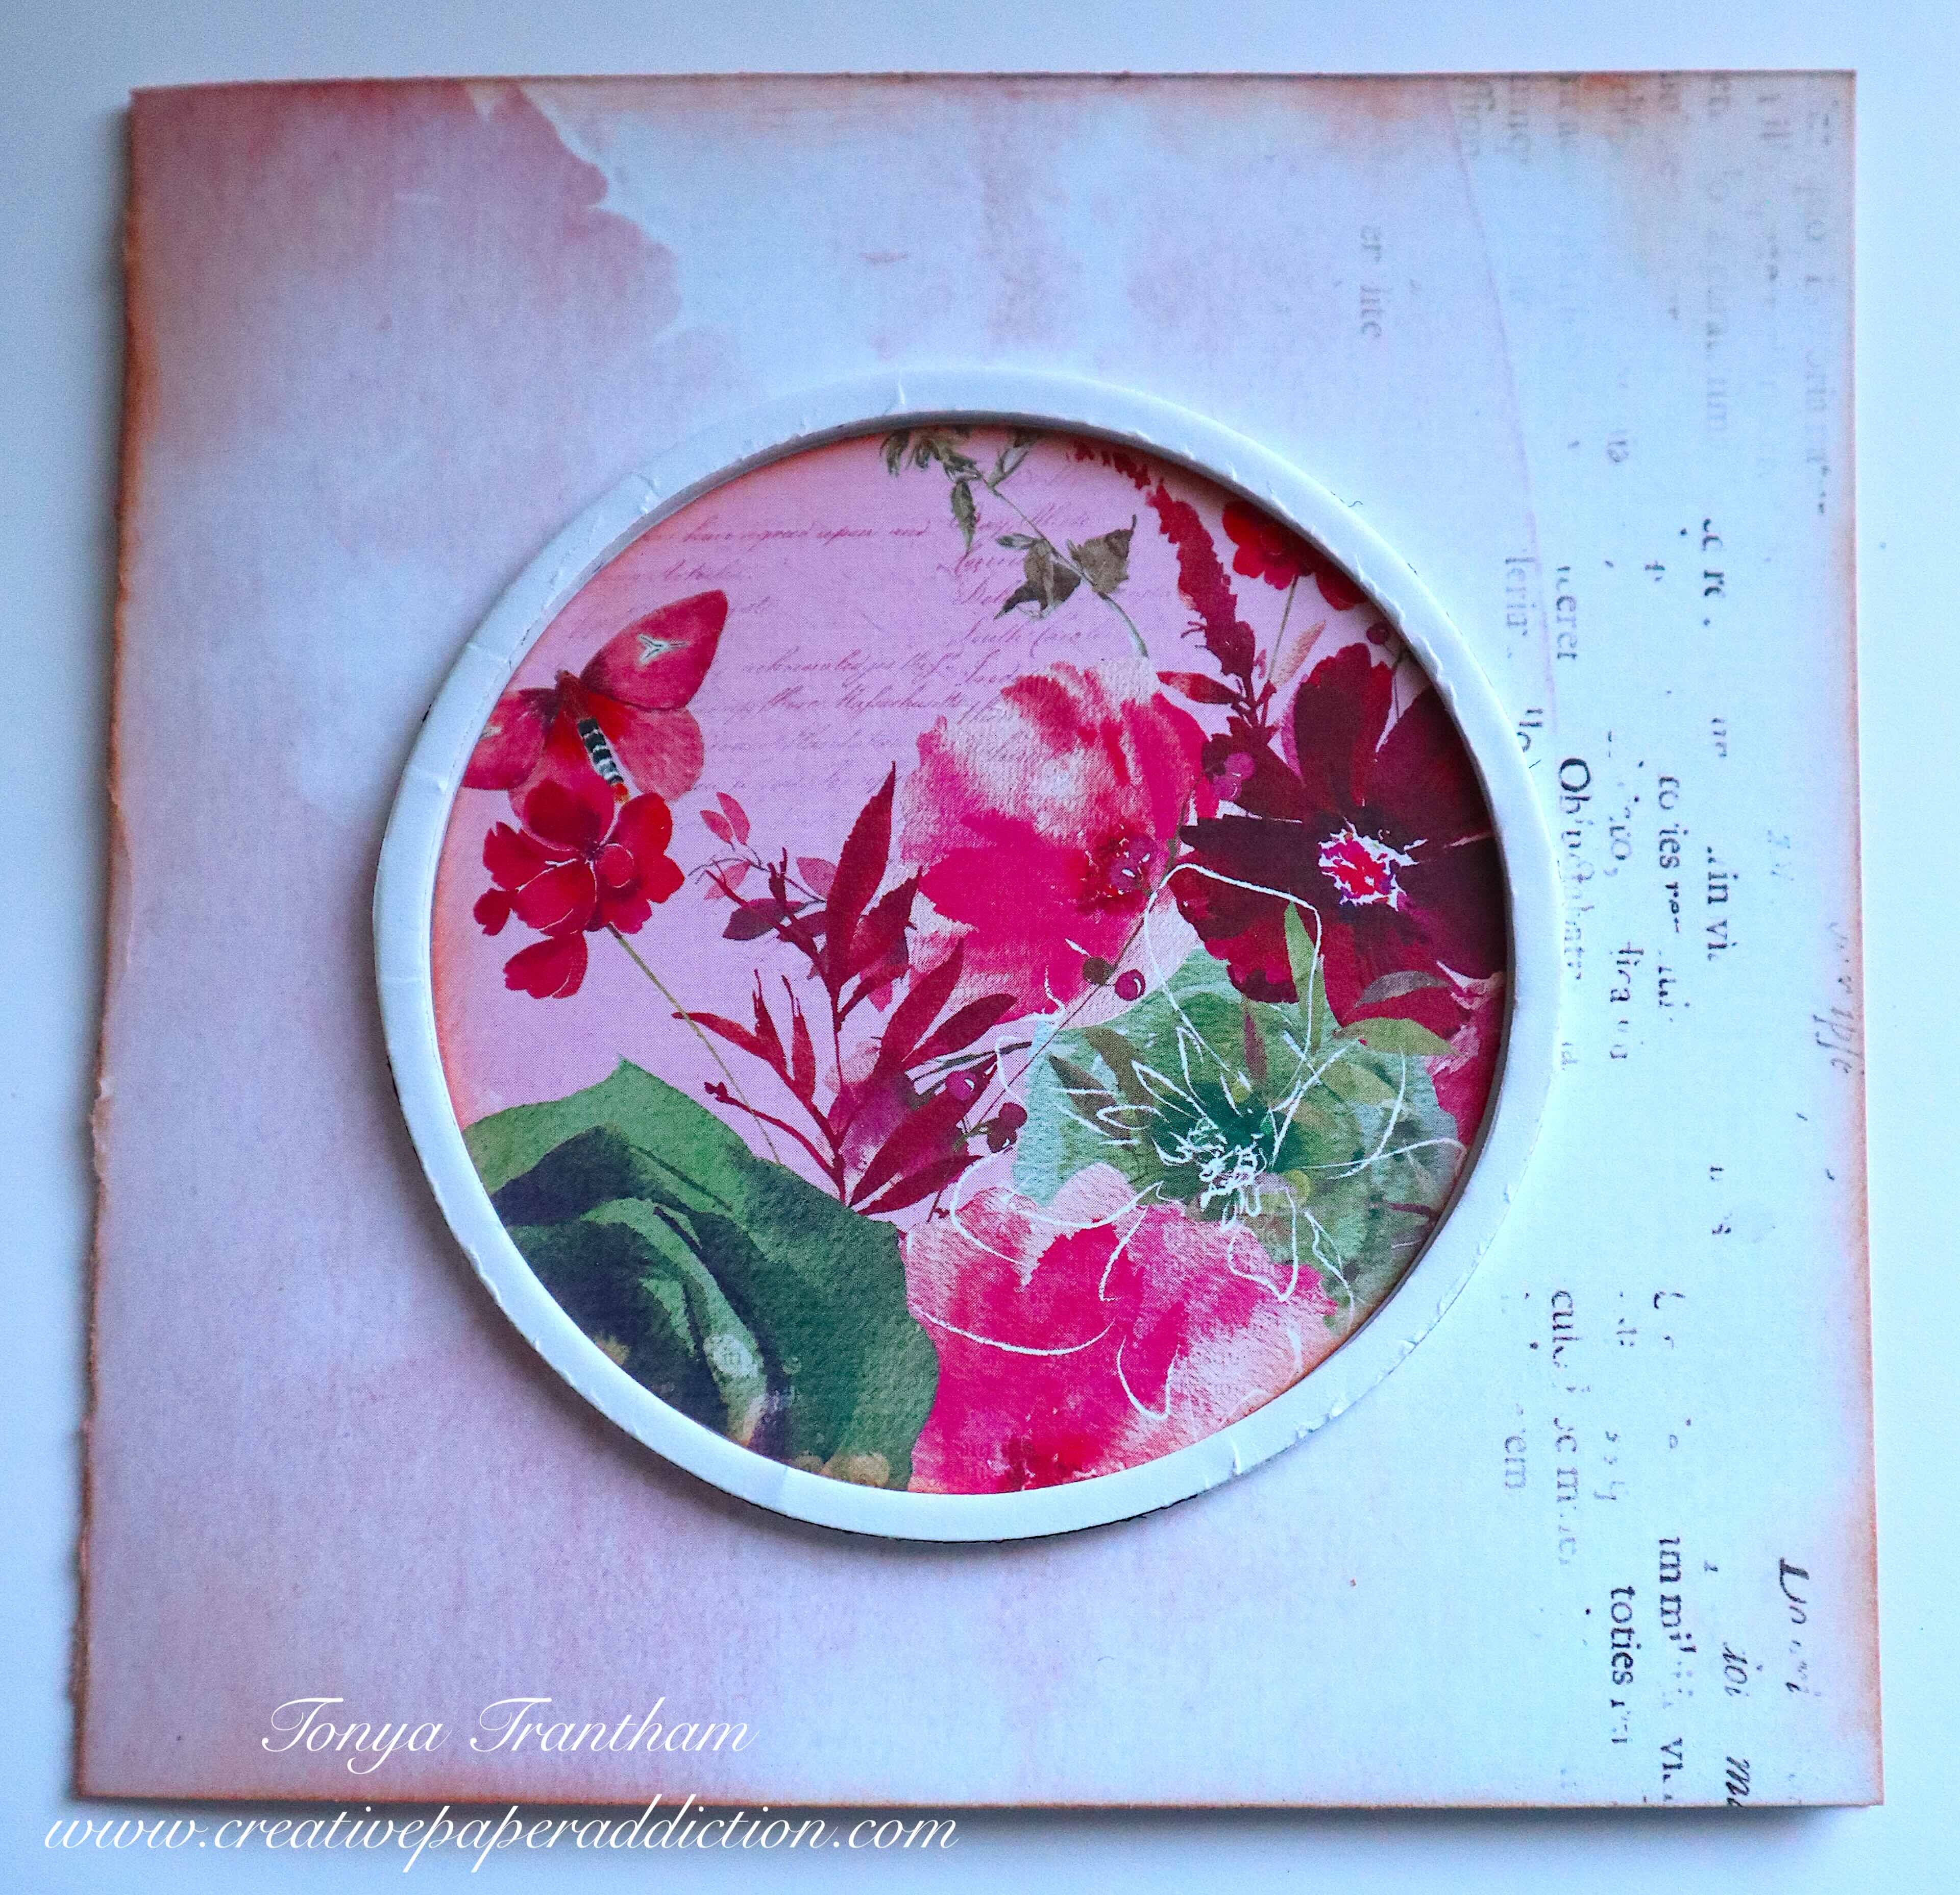
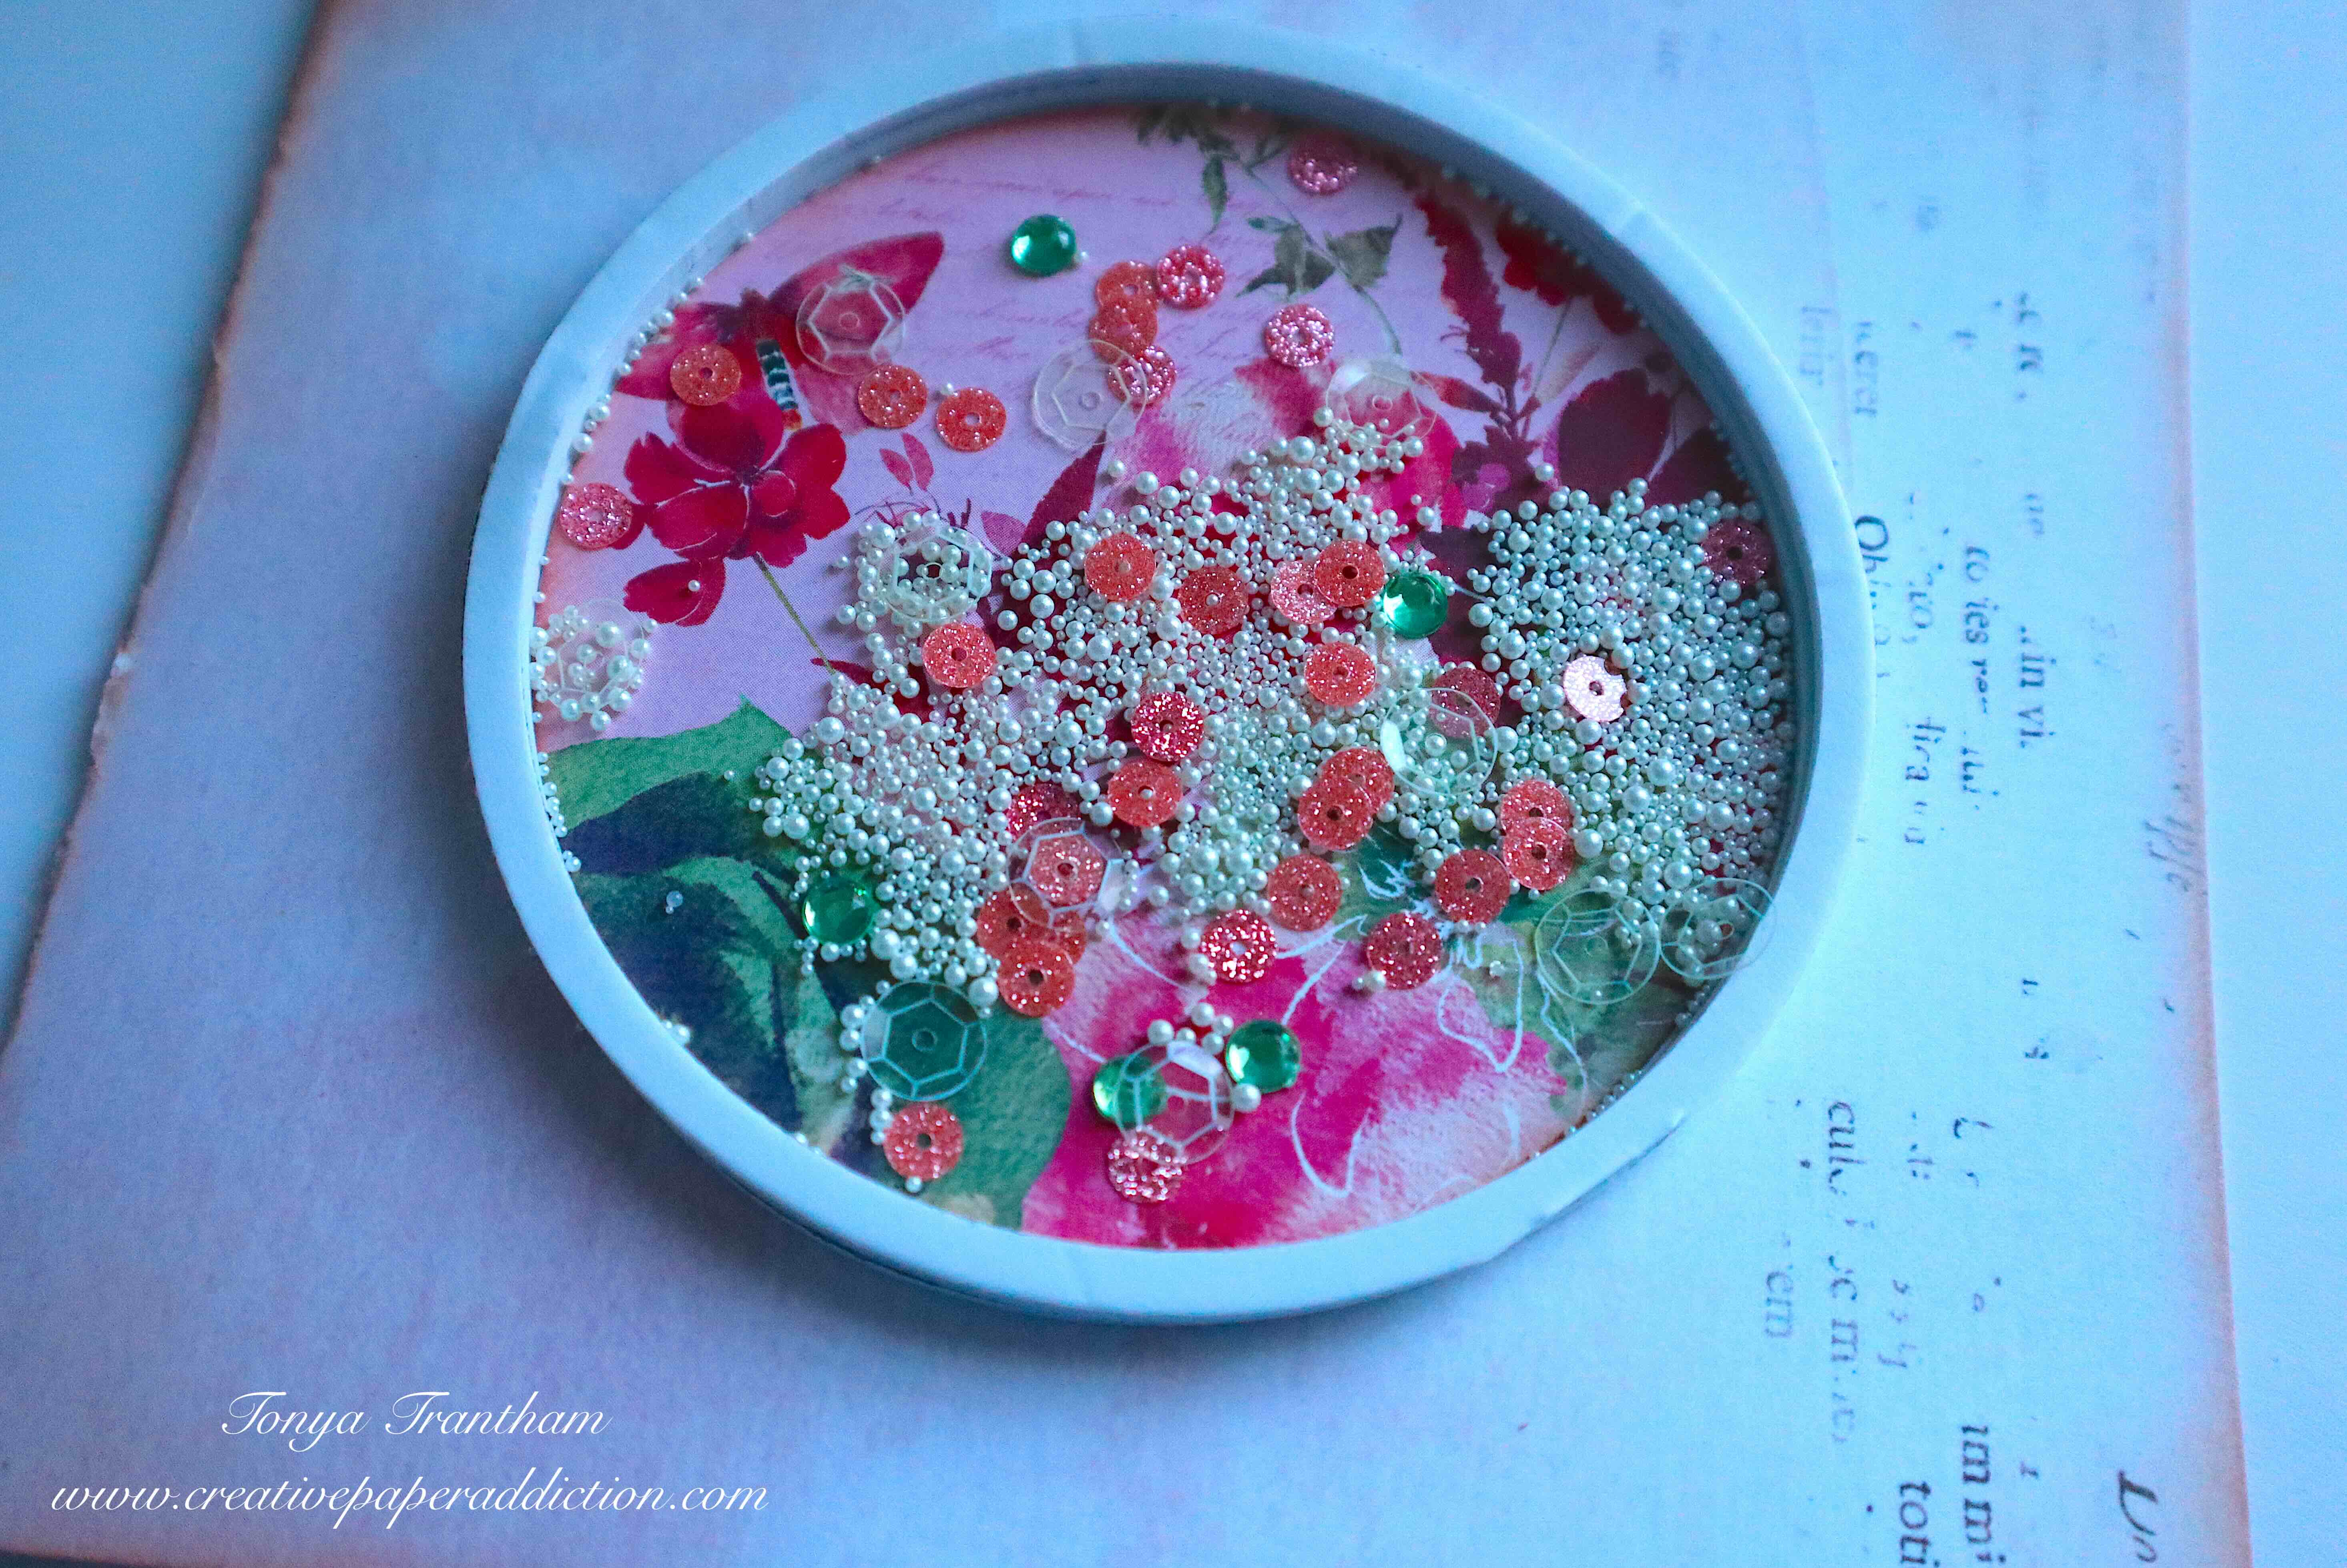
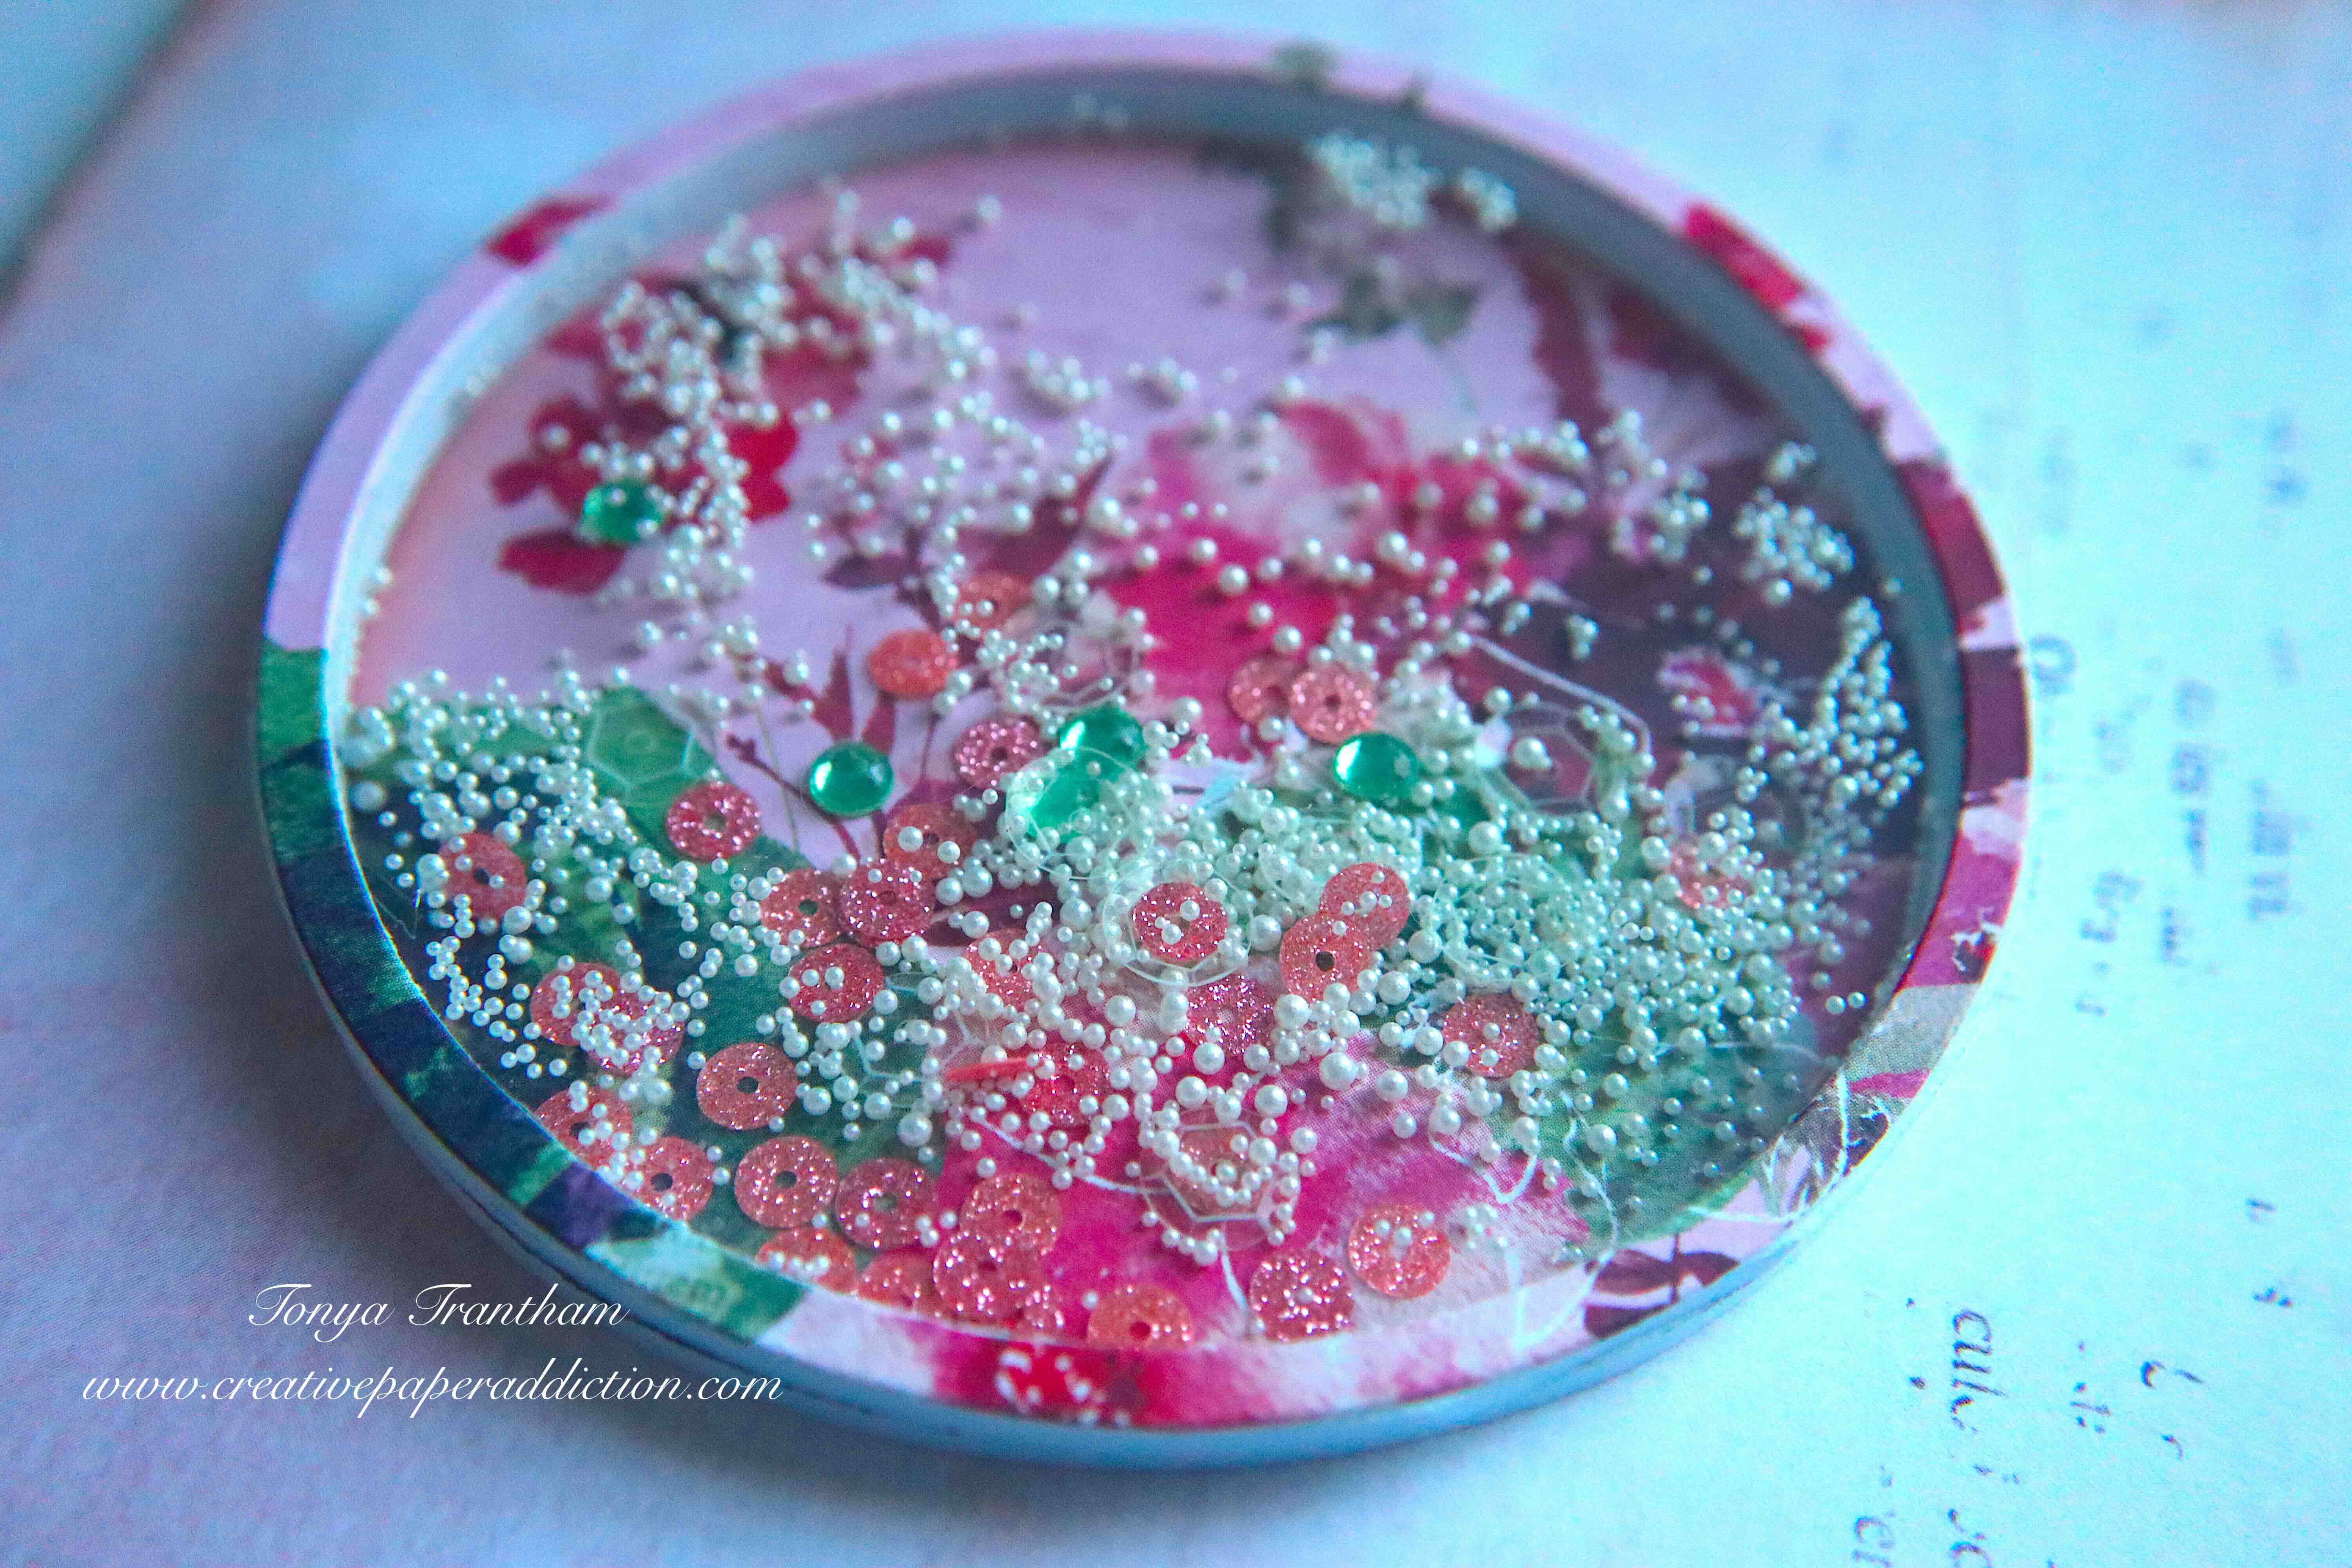
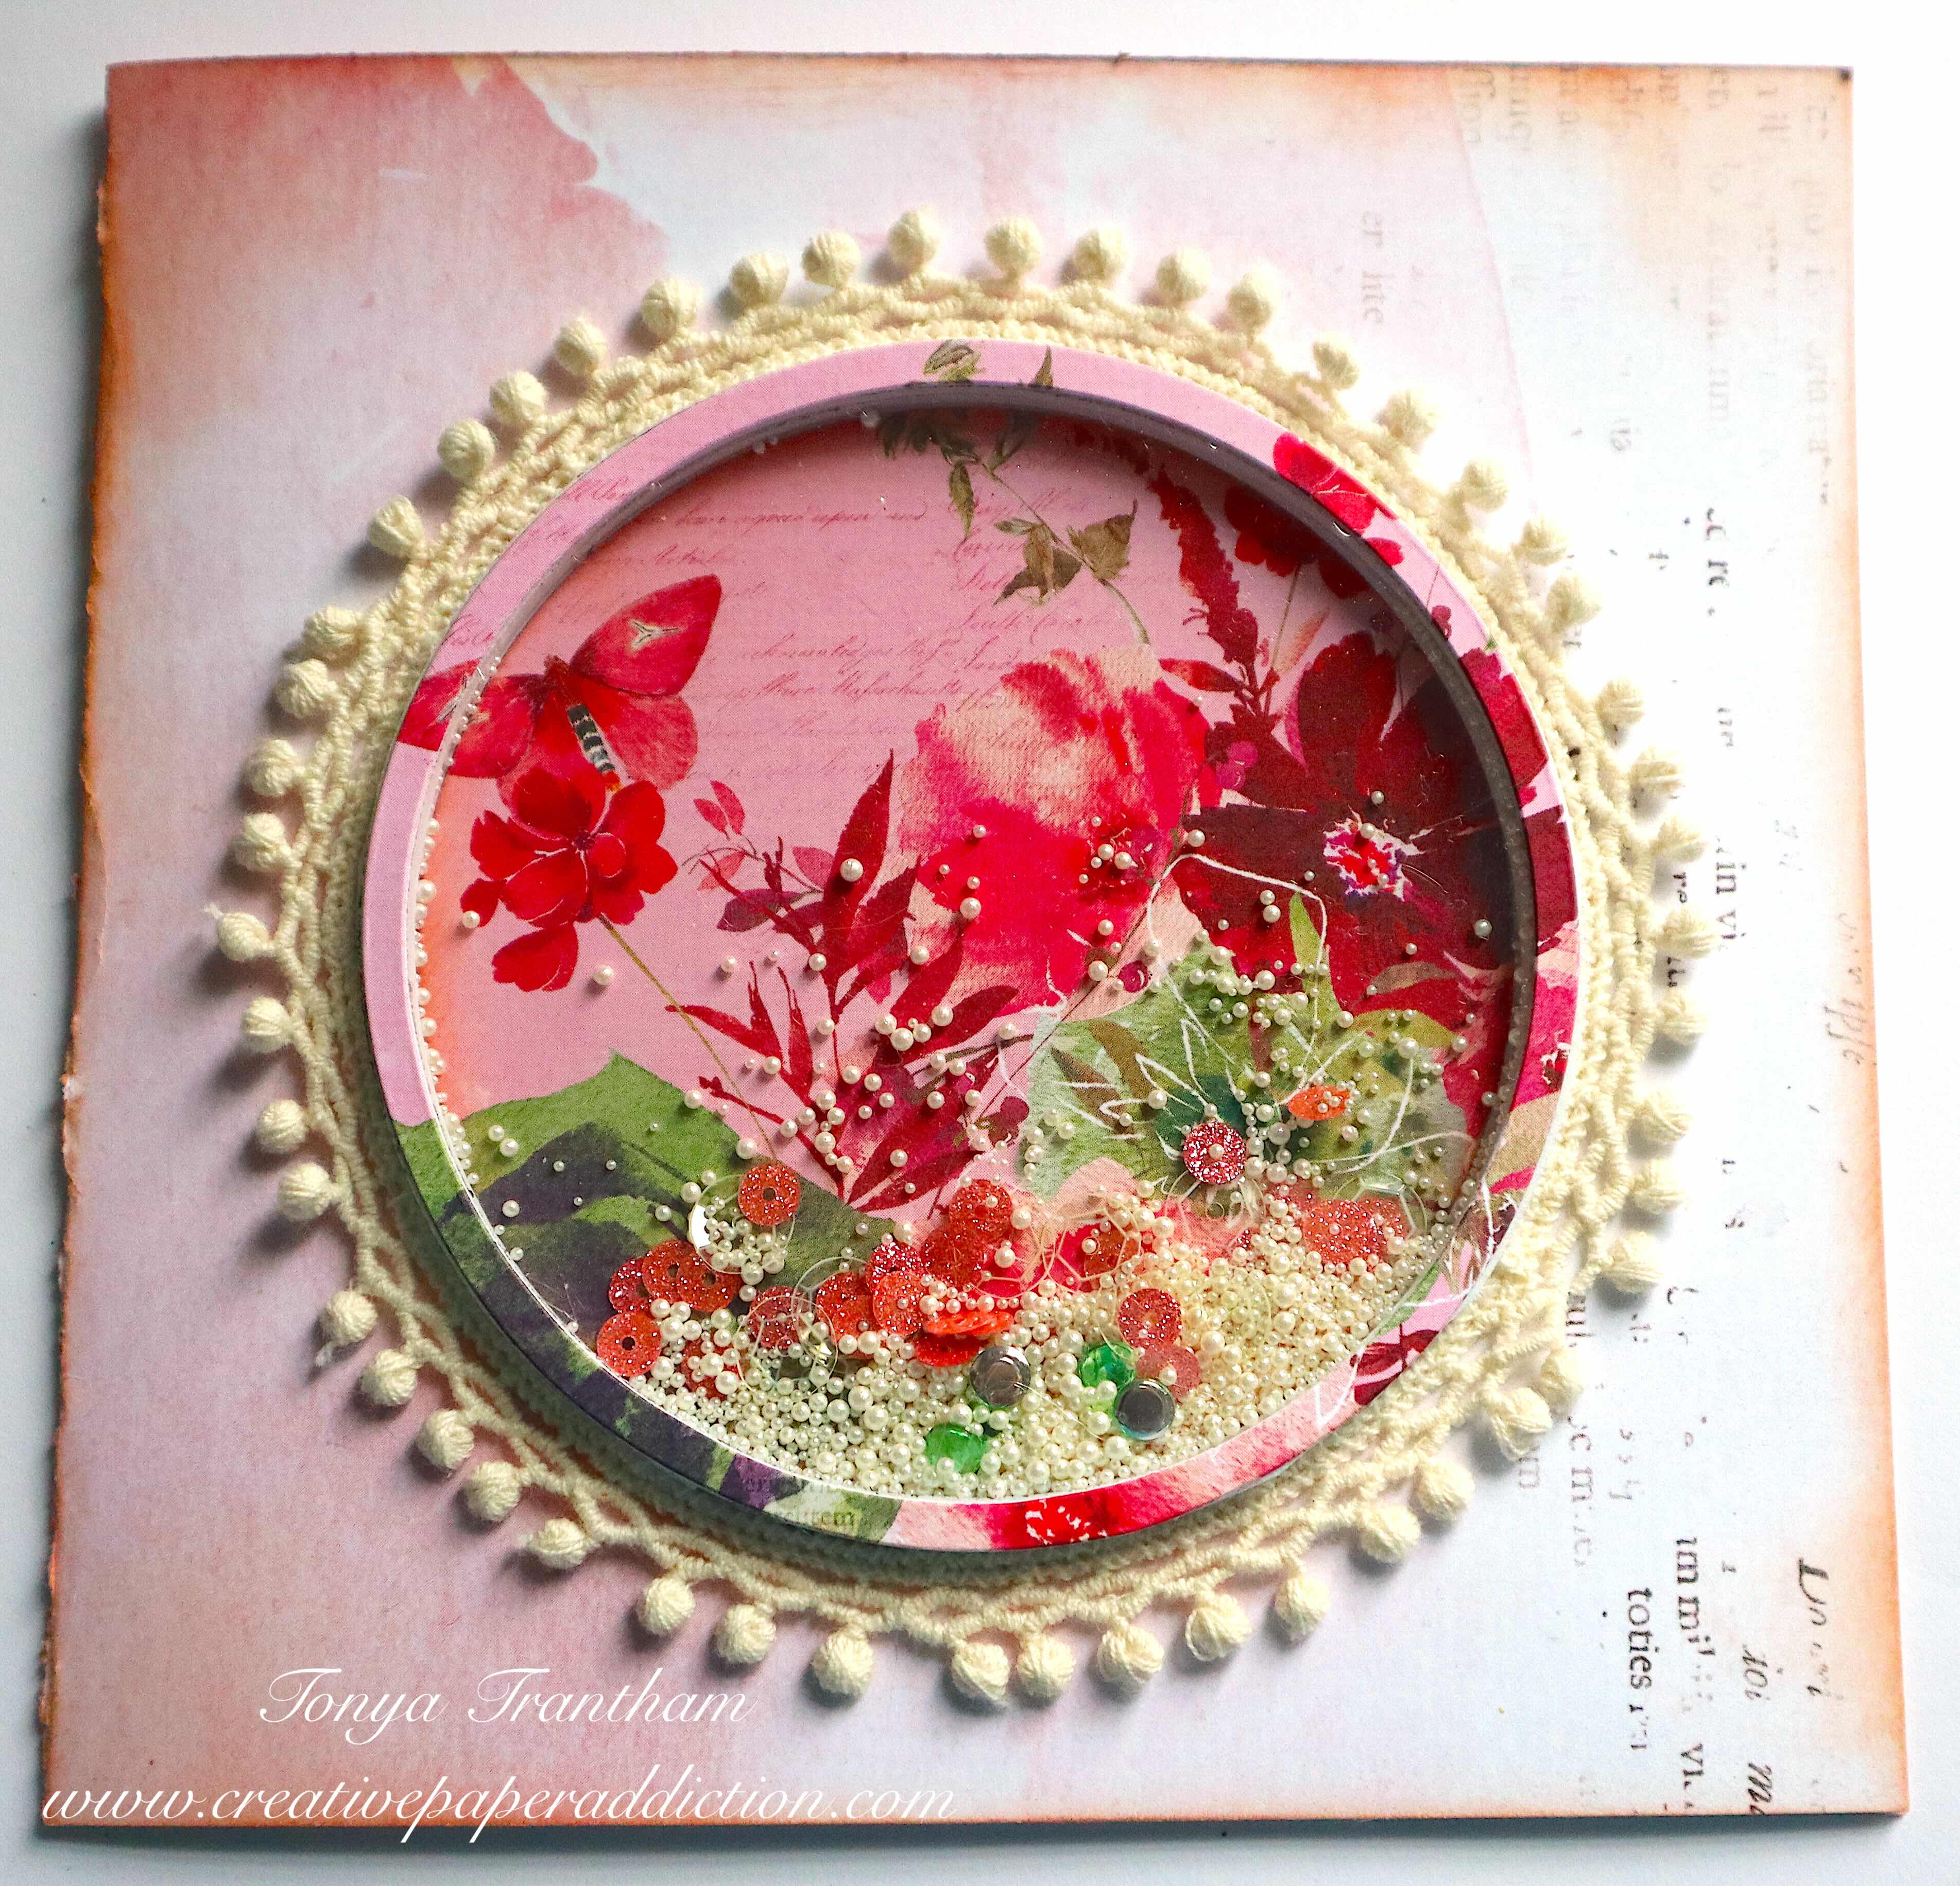
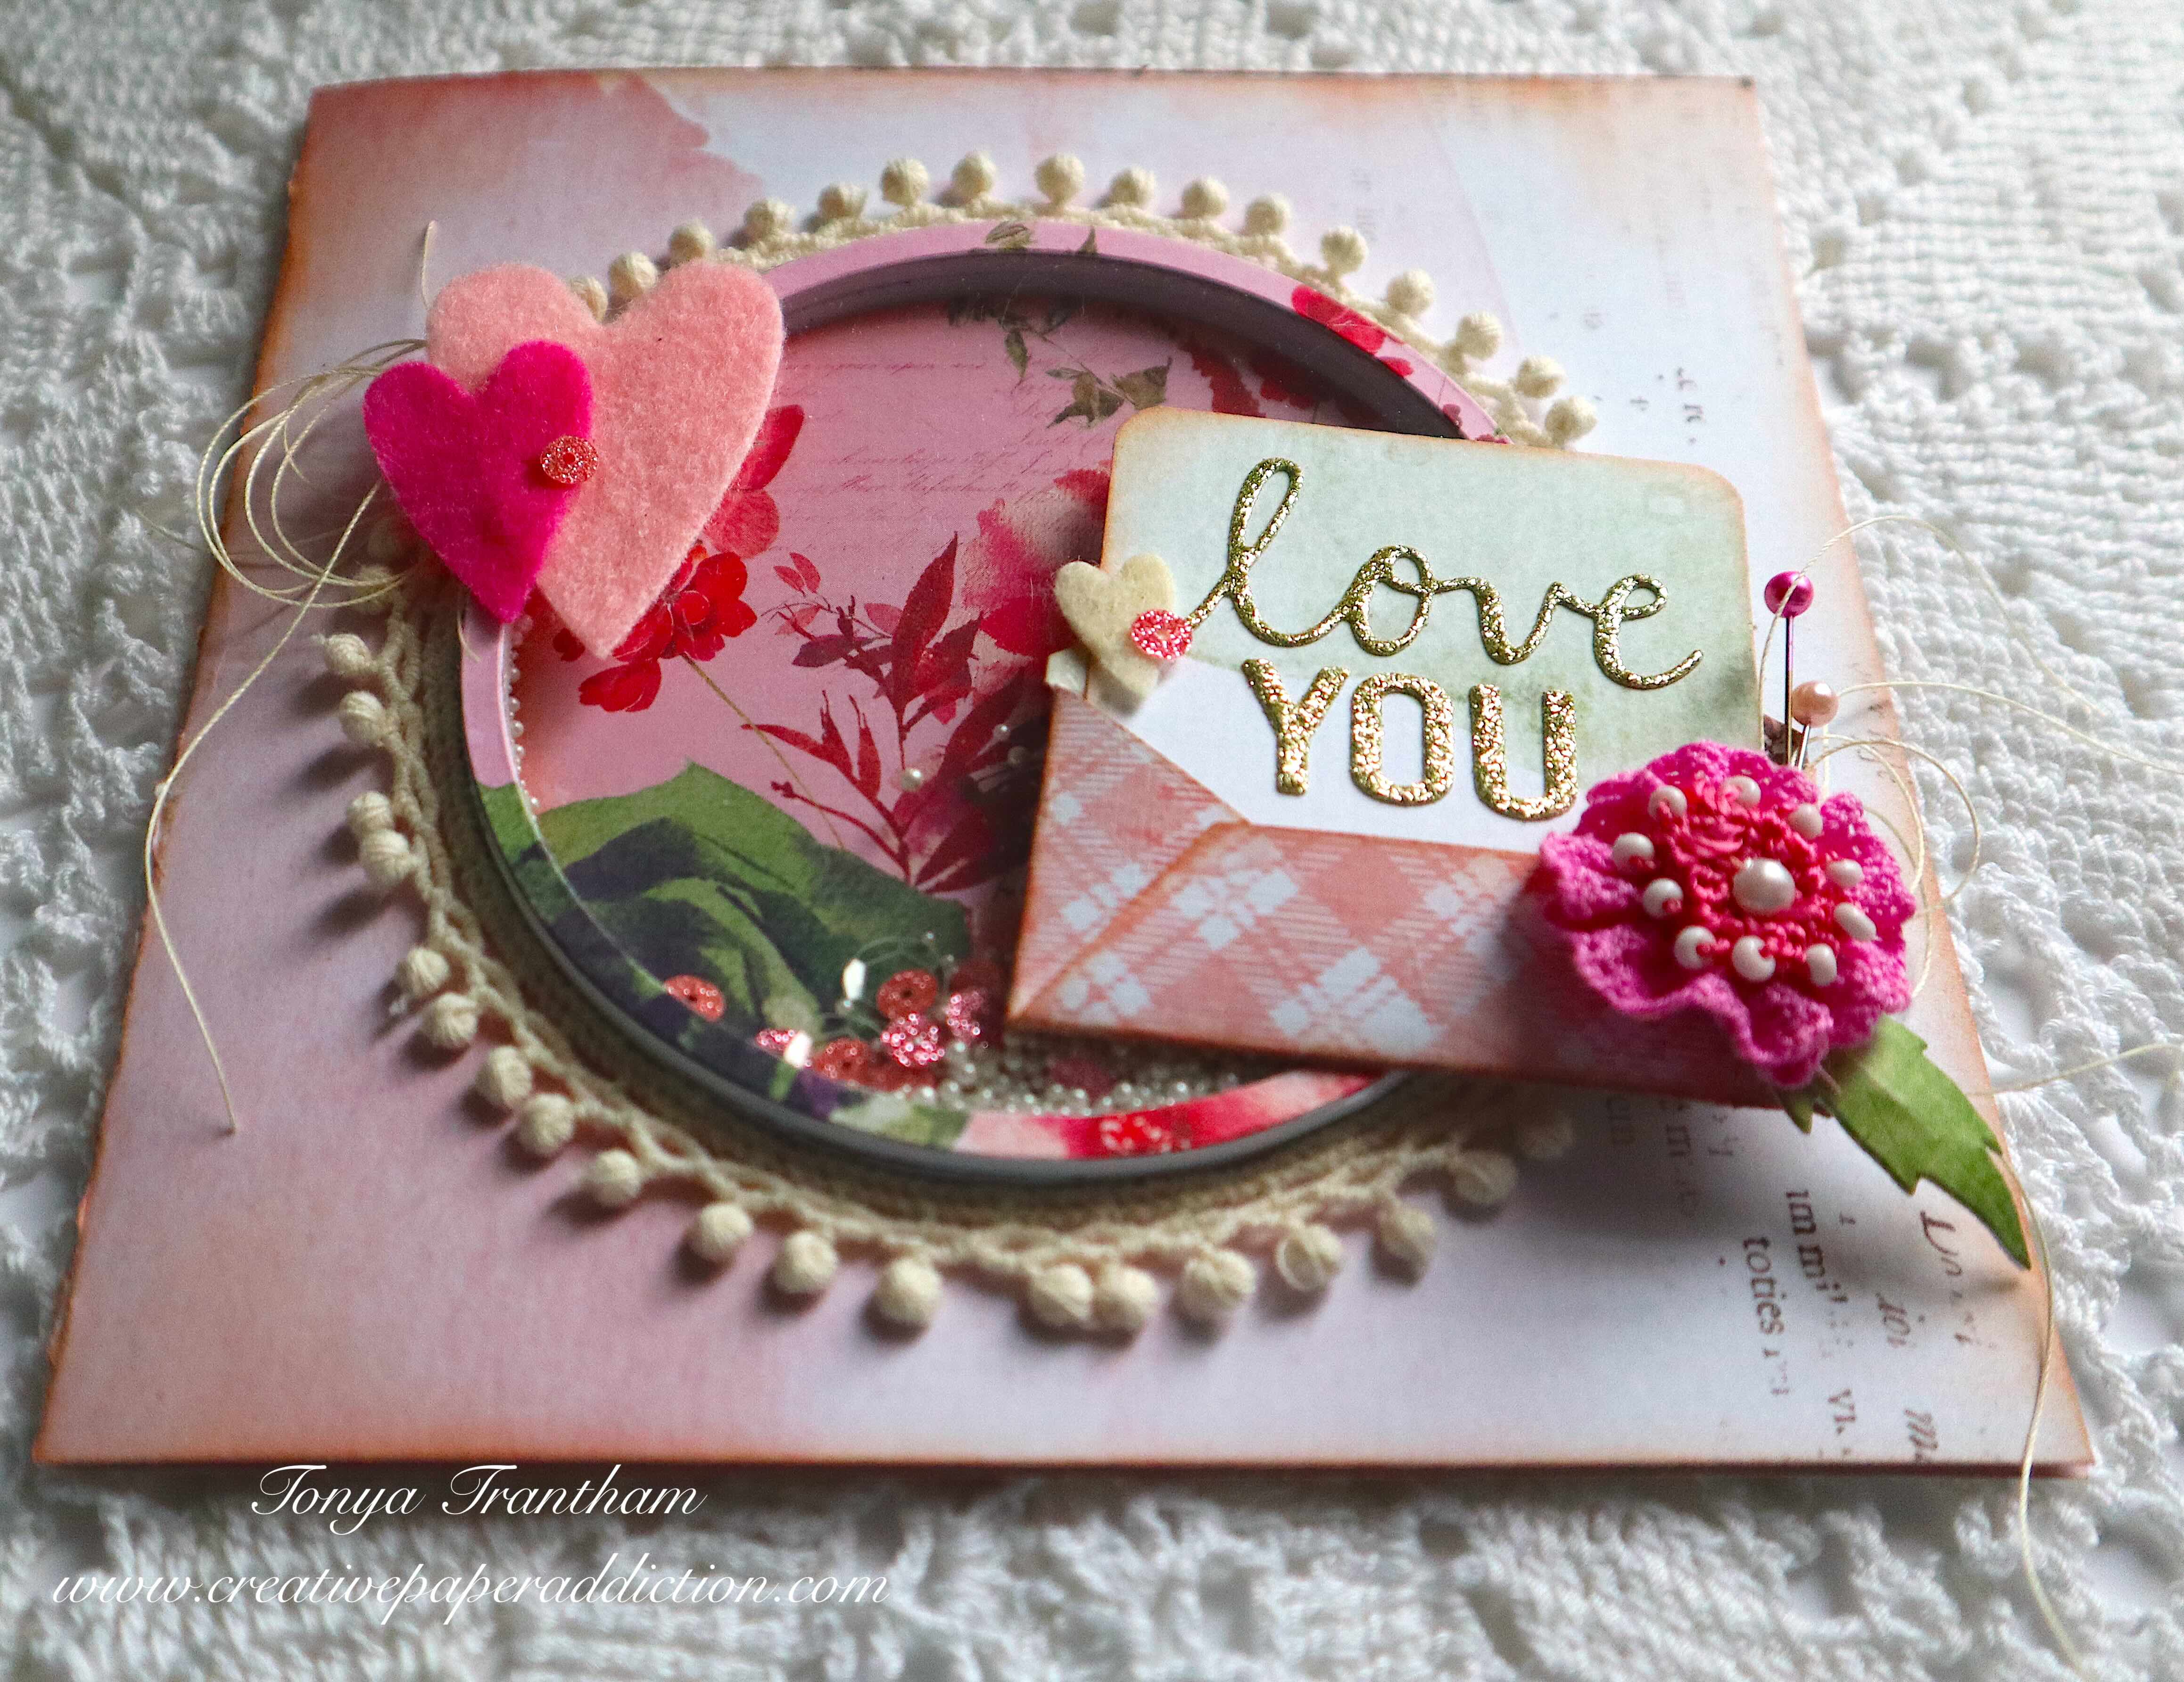
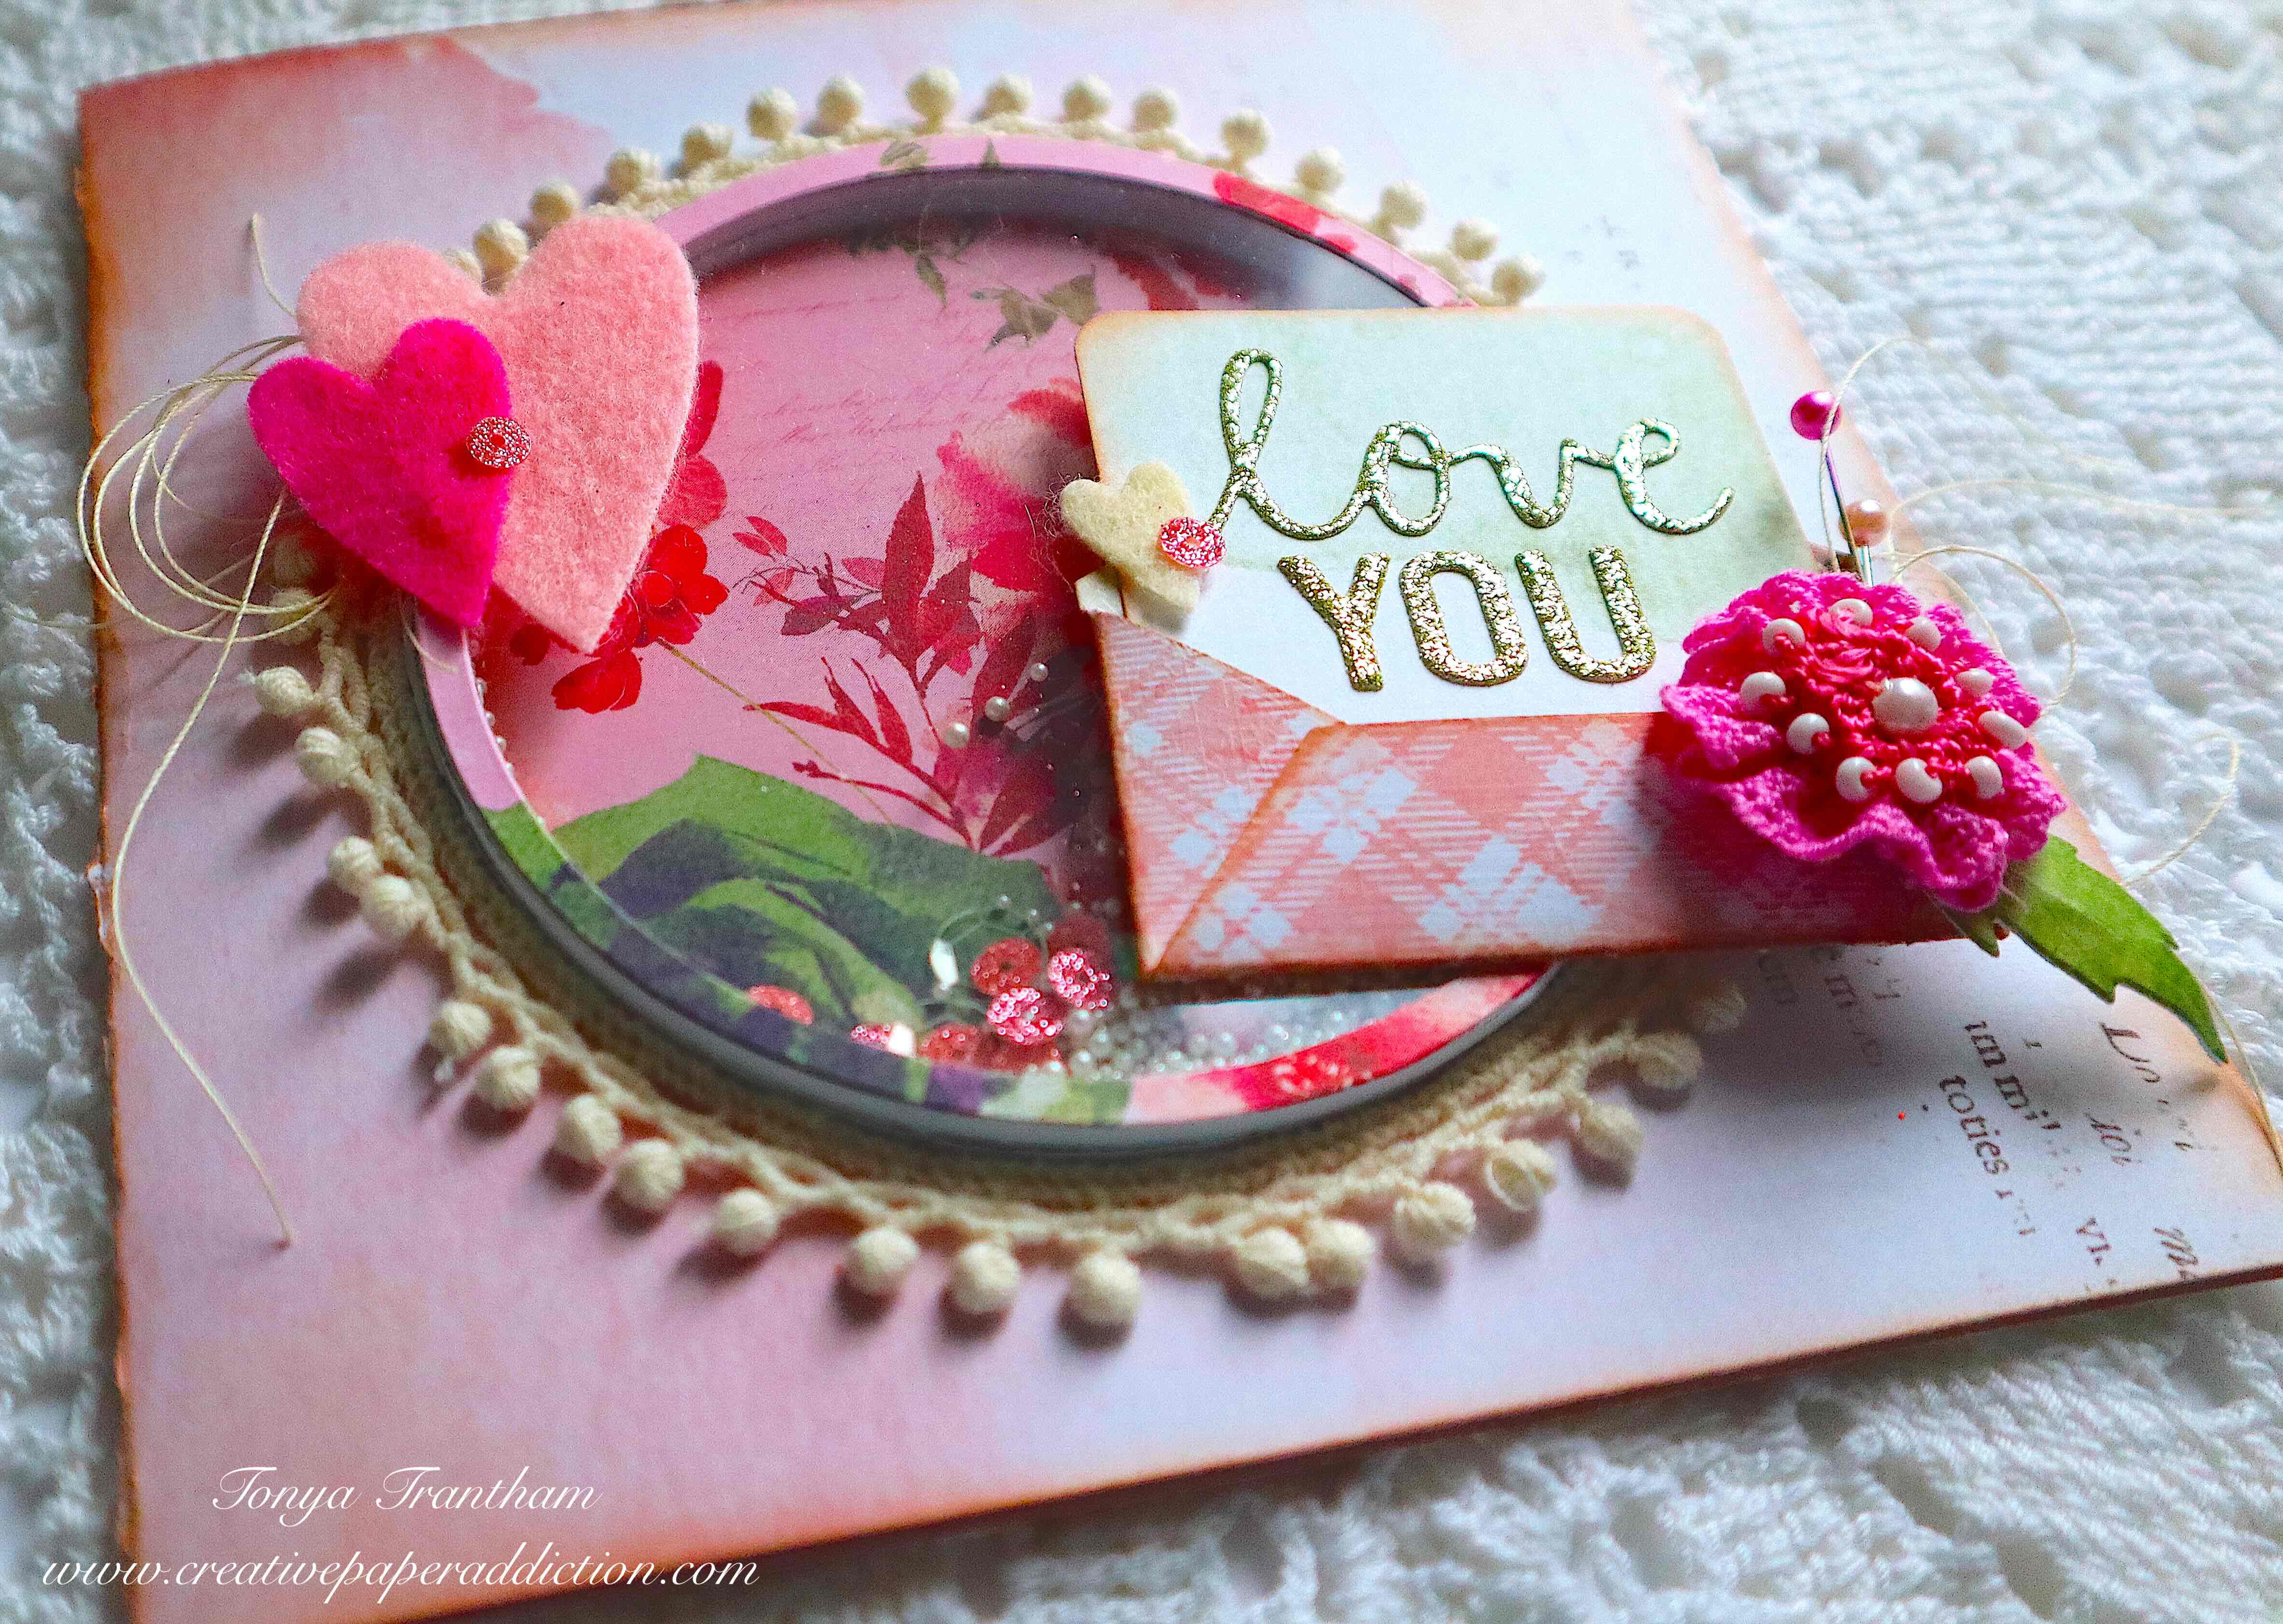
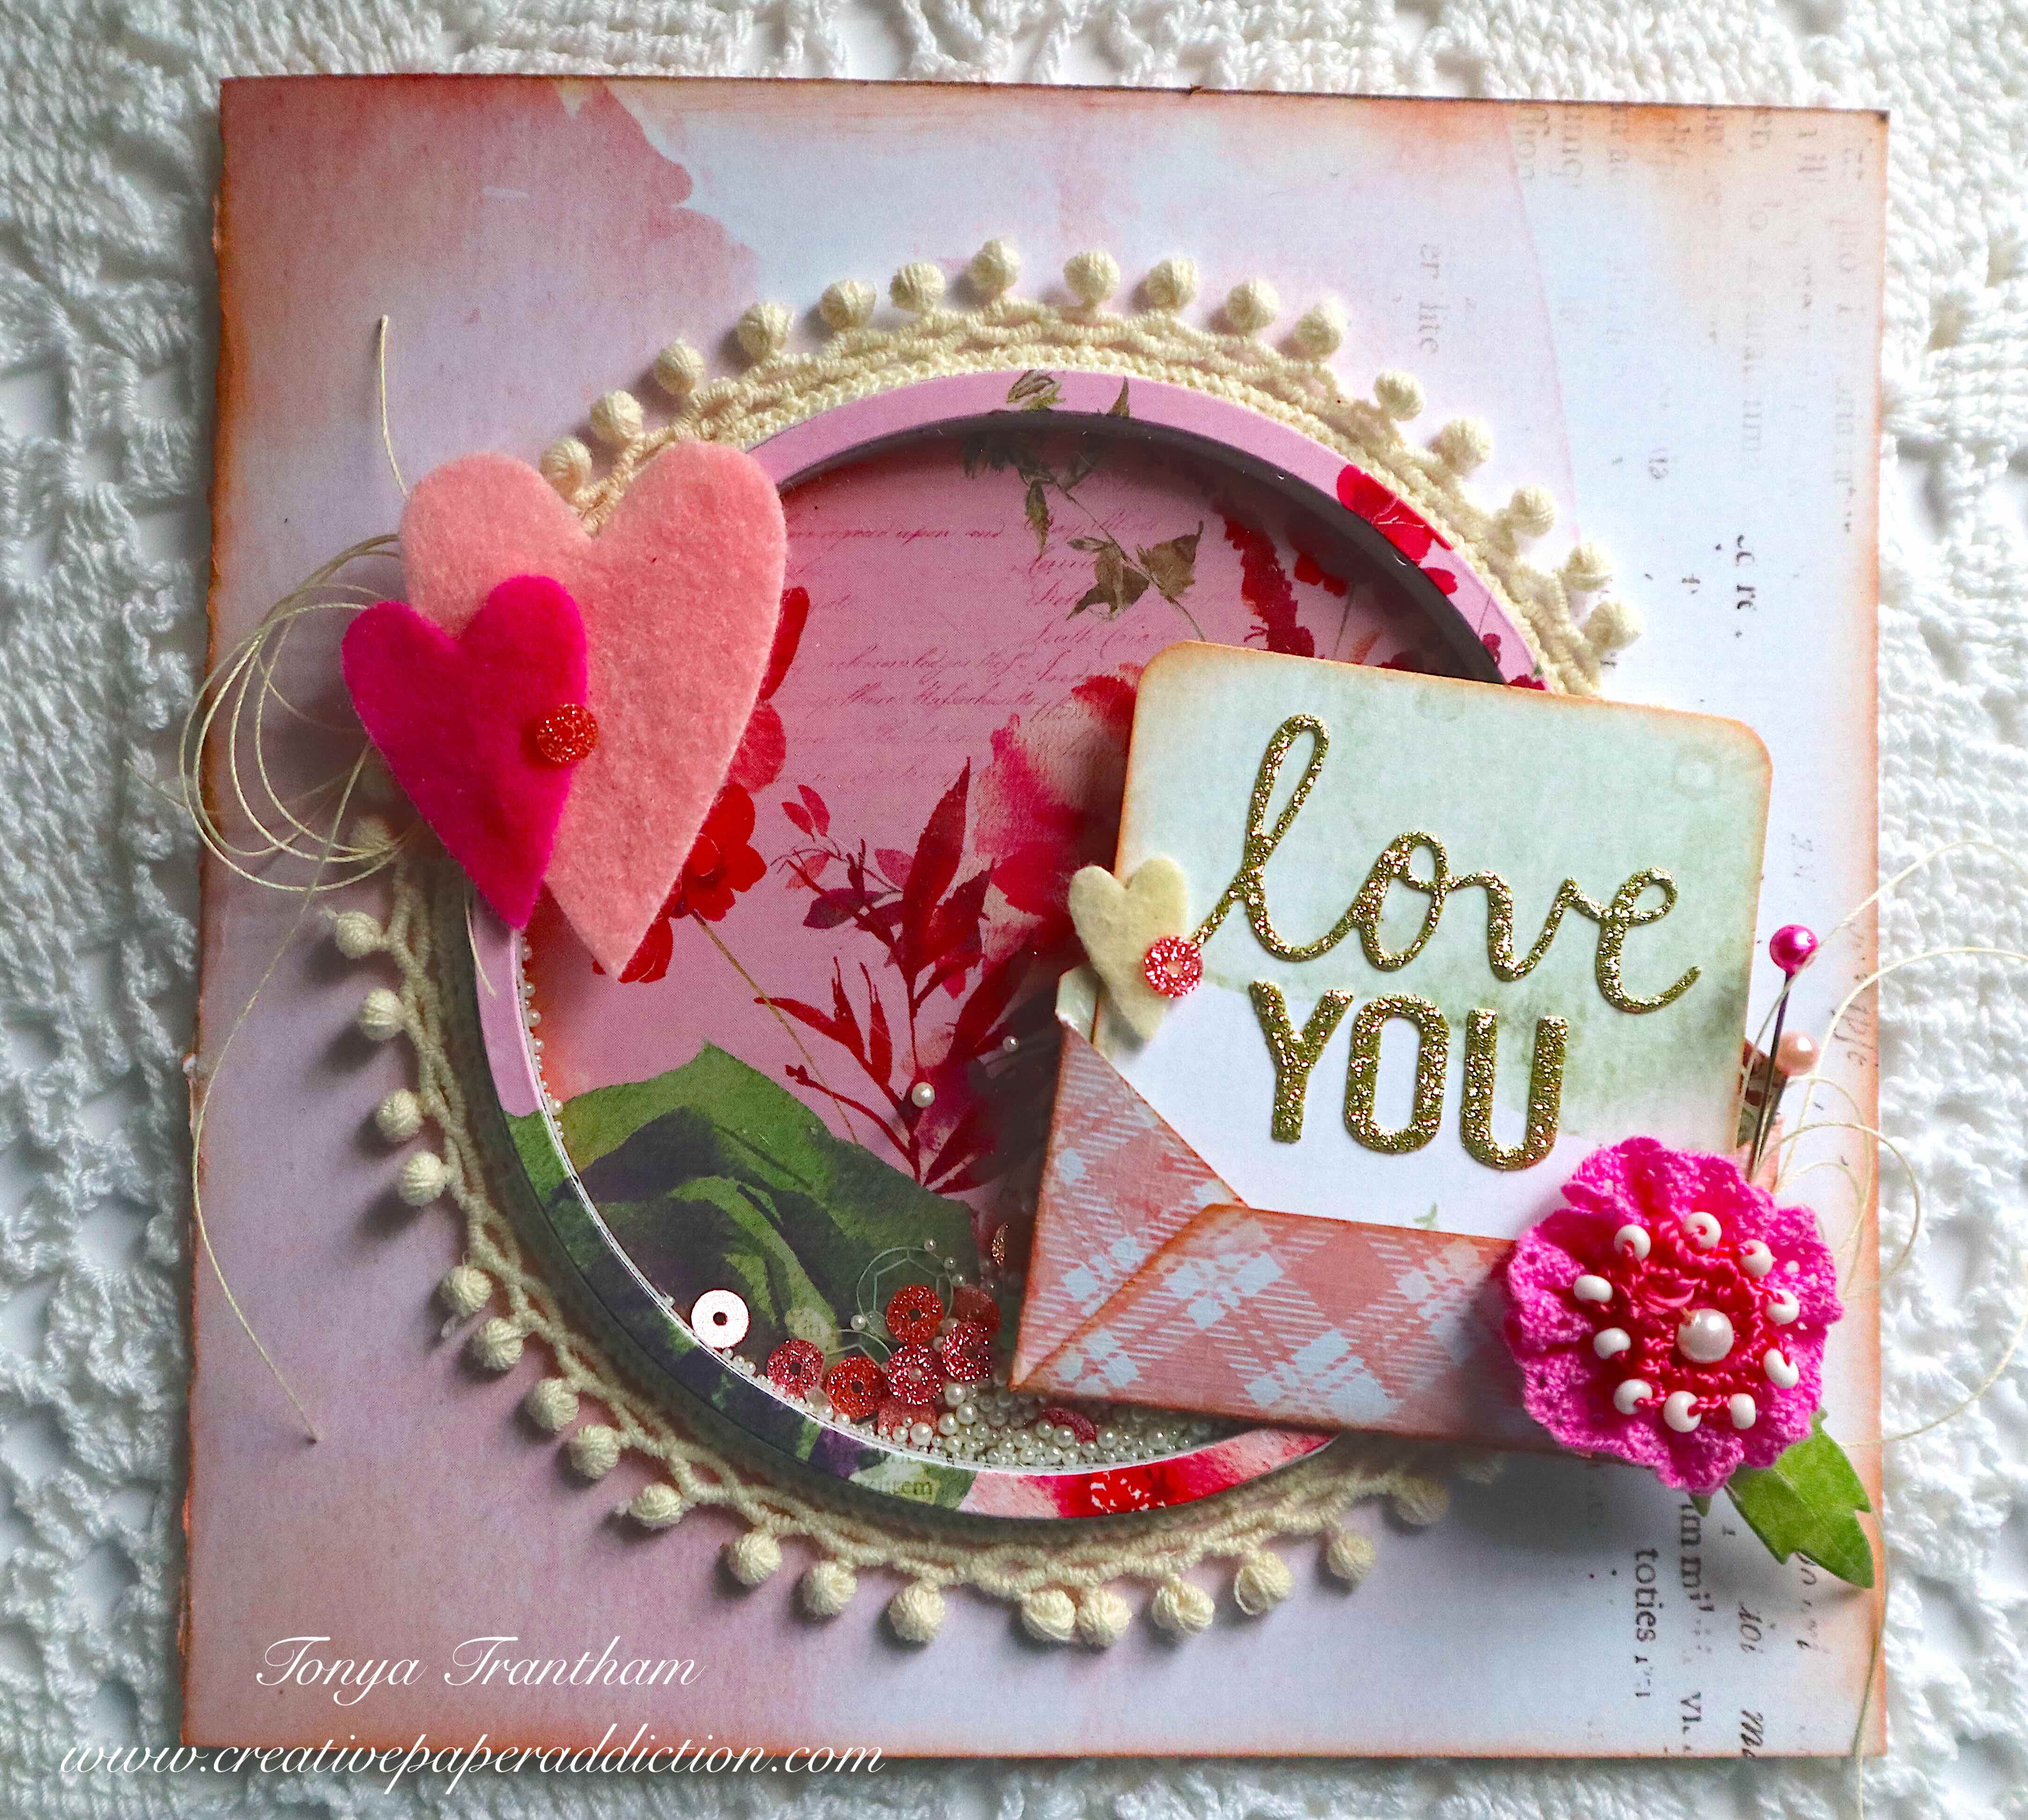
Seventh, for the cover I cut an oval from the Journaling Card, Envelope and Windows Thinlits and glued to the cover. Side note, I made sure the ribbon was glued under the oval.

Eighth, I cut the box/oval from the Faux Postage Thinlits. I did remove the oval from the box before placing over the other oval.

Ninth, I selected a scrap of cardstock that had a tea cup and cupcake and adhered in the center of the box/oval. I finished by gluing two sequins and a leaf to the cover. Now for all the little details on the inside the journal!

Tenth, I added a belly band to the inside cover and cover that with a bit of trim. I cut the middle size tag from the Waterfall Card and Tags Thinlits and placed under the belly band. The opposite page is actually the file folder and I didn’t add any embellishments since I didn’t want to cover the images on that page.

Eleventh, for this set of pages, the first page is the back side of the file folder and on the opposite page I used the oval that I had removed from the box that is on the cover and glued to the page along with a bit of cardstock and a butterfly that I had fussy cut from the paper pad. I added a sequin to finish the page.

Twelfth, since my clip wasn’t long enough to hold the Faux Postage page, you can see a part of the book page which I didn’t add embellishments to. But the opposite page from the Faux Postage page is another book page. I used a Mini Paper Clip to hold a cut a part to the page.

Thirteen, on this set of pages, I fussy cut images from the paper pad, added part of a postage die and sequins to that page. The envelope is from Envelope, Folder and Flowers Thinlits.

I added the leftover bits of Faux Postage dies inside the envelope and used a mini paperclip to hold it closed. I also added lace to the paperclip.

Fourteen, for this set of pages, I cut a heart from the Envelope, Folder and Flowers Thinlits and adhered it to the back of the envelope. The opposite page I glued a bit of mini Pom Pom trim to the page.

Fifteen, on these set of pages I added no embellishments. A side note, the Faux Postage Thinlits was easy to stitch it into the journal since the holes were already there.

Sixteen, this set of pages, is the backside of the Faux Postage page.

The opposite page I fussy cut the Farris wheel out from the paper pad and adhered two of the corners to the page to create a pocket. I added a cut a part to the pocket.

Seventeen, this set of pages, I glued lace to the page and the opposite page is the other half of the file folder. I added the tiny “thoughts” sticker that I had found in my planner stuff to the tab.

Eighteen, this set of pages, I left plain and the back inside cover I added another belly band with trim and a tag to finish the journal.

Whew! That was a lot of photos and info to write about and I’m sure a lot for you to take in but I hope it inspired you to create your own. Also if you haven’t been by Eileen’s blog lately to see what her teams have been up to you can find the latest post HERE.

Supplies

Sizzix/Eileen Hull: Mini Book Diecut

Sizzix/Eileen Hull: Faux Postage Thinlits

Sizzix/Eileen Hull: Journaling Card, Envelope and Windows Thinlits

Sizzix/Eileen Hull: Envelope, Folder and Flowers Thinlits

Sizzix/Eileen Hull: Waterfall Card and Tags Thinlits

Diecut Machine

Adhesive Sheets

Scissors

Mat Board

Prima Dulce 6″x6″ Paper Pad (retired)

Various Cardstocks and Vintage Book Page

Ribbon, Lace and Trim

Pearls

Sequins and Buttons

Mini Paper Clips

Crop A Dile

Paper Cutter

Beacon Adhesives: Zip Dry Adhesive

(Products listed above are Affiliated Links for your convenience)

DISCLAIMERS

This blog is compensated to provide opinion on products, services, websites, and various other topics. Even though the owner(s) of this blog receives compensation for our posts or advertisements. I always give my honest opinions, findings, beliefs, or experiences on those topics or products. The views and opinions expressed on this blog are purely my own. Any product claim, statistic, quote or other representation about a product or service should be verified with each manufacturer, provider, or party in question.This blog contains affiliate links, clicking and shopping through these links helps to support and run Tonya Trantham Designs – Creative Paper Addiction at no additional cost to you. Today’s features are Sizzix, Eileen Hull, Scrapbook.com and A Cherry on Top Store Products. 

Thanks for stopping by, hope your Monday is great and enjoy creating!

Family and Flowers Tag

Hi everyone! I’m back with another quick and easy tag this week. I used scraps I had laying on my desk and the Waterfall Card and Tags Thinlits by Eileen Hull and a few other dies by her as well to create this tag. So let’s get started!

First, since the cardstock I used was double sided I only cut one tag from Waterfall Card and Tags Thinlits using the largest tag thinlit. I gathered a couple of patterned scraps of cardstock and glued to the front of the tag.

Second, I had cut the envelope, three flowers, center to the flower and the smallest leaf out from the Envelope, Folder and Flowers Thinlits. I adhered the envelope together before gluing to the tag. I dug into a packet of Mini Paper Dolls and selected a family which I placed inside of the envelope.

Third, I shaped the three flowers, flower center and leaf with a Stylus. I adhered the three flowers on top of each other along with the center and the leaf to the back of the flower before gluing to the corner of the envelope.

Fourth, I dug into my stash of flowers and leaf sprigs that I had already cut out. These are from the Folio Page, Pocket and Flower Thinlits and the Shadow Box Elements Thinlits and I always try and have some extra cut out and on hand to use in projects.

I shaped the flowers and leaf sprigs with a stylus before adding around the layered flower. I finished off this side of the tag by adding Pearls to the center of the flowers, shredded cheese cloth and a bow made out of thread.

Fifth, the back side of the tag I kept simple. I used leftover printables from a tag I shared earlier, you can find that post HERE, and more scraps of cardstock. I glued the layers to the tag and added a fussy cut vine on top of the layers.

Sixth, I had this leftover button diecut that didn’t make it onto a pervious project. I had cut that from the Card Case Diecut. I tied thread through the button holes and adhered to the tag along with sequins. I finished by adding some Liquid Gloss to the leaves on the vine.

I am really excited that I’m building a nice jump ring of tags and can’t wait to create one for next week!

Also have you been by Eileen Hull’s blog to see the latest projects her teams have made? If you haven’t you can find the latest post HERE.

Supplies

Sizzix/Eileen Hull: Waterfall Card and Tags Thinlits

Sizzix/Eileen Hull: Envelope, Folder and Flowers Thinlits

Sizzix/Eileen Hull: Folio Page, Pocket and Flower Thinlits

Sizzix/Eileen Hull: Shadow Box Elements Thinlits

Sizzix/Eileen Hull: Card Case Diecut

Diecut Machine

Stylus

Mini Paper Dolls

Pearls

Liquid Gloss

Various Cardstocks and Printables

Thread, Cheese Cloth and Sequins

Scissors

Paper Cutter

Beacon Adhesives: Zip Dry Adhesive

(Products listed above are Affiliated Links for your convenience)

DISCLAIMERS

This blog is compensated to provide opinion on products, services, websites, and various other topics. Even though the owner(s) of this blog receives compensation for our posts or advertisements. I always give my honest opinions, findings, beliefs, or experiences on those topics or products. The views and opinions expressed on this blog are purely my own. Any product claim, statistic, quote or other representation about a product or service should be verified with each manufacturer, provider, or party in question.This blog contains affiliate links, clicking and shopping through these links helps to support and run Tonya Trantham Designs – Creative Paper Addiction at no additional cost to you. Today’s features are Sizzix, Eileen Hull, Scrapbook.com and A Cherry on Top Store Products. 

Thanks for stopping by, hope your Thursday is awesome and enjoy creating!

Lace, Hearts and a Fairy Tag

Hi everyone! It’s a new month and I would love to share a tag I created using Eileen Hull’s Lace 3D Embossing Folder and the Faux Postage Thinlits, along with a few other dies, from her newest collection. I absolutely LOVE this embossing folder! It’s 6″x8 1/2″ so you can embossing those journal covers or even extra large cards. Anyways, let’s get started!

First, I had a scrap of Mat Board that was leftover from another project. I cut that from the Tag and Book Plates Diecut (retired) and embossed with the Lace 3D Embossing Folder. The mat board was shorter than the actual tag on the diecut, so the measurements wound up being approximately 3 1/4″x5 7/8″.

Second, I lightly inked the raised edges with a combo of two different shades of pink chalk ink. I then rubbed Ivory Luster Wax over the entire tag and once I was happy with the way it looked a lightly hit the raised areas with a tan chalk ink.

Third, I only needed the oval section of the Faux Postage Thinlits and I wanted to highlight the fairy. I cut cardstock larger than the oval area, placed onto the thinlits and run through the Diecut Machine. I know some people like to tear these dies but I used the Scissors to carefully cut out the oval and the excess.

Fourth, I cut two wreaths and leaf sprig from the Wreath and Snowflake Thinlits. I layered the wreaths on top of each other and glued to the tag. I lightly inked the edges of both the oval and negative part of the postage stamp die and adhered to the bottom edge of the wreaths. I placed Foam Pop Dots to the back of the oval before lining up and placing inside of the negative part.

Fifth, I cut two flowers from the Bookmark, Tag and Pocket Thinlits (retired), shaped with a Stylus, glued on top of each other and added a gem to the center. I cut two leaves from the leaf sprig, shaped and placed on the back of the flower. I made a bow with thread and adhered to the edge of the oval along with the flower.

Sixth, I cut the small and medium size hearts from the Envelope, Folder and Flowers Thinlits, inked with chalk ink and glued both onto the upper corner of the wreath and added a few sequins to finish the tag.

Have you had a chance to look at Eileen Hull’s newest dies, thinlits and embossing folder? If you have which is your favorite? Let me know in the comments below.

Also if you haven’t been Eileen’s blog lately to see what her teams have created you can find the latest posts HERE and HERE.

Supplies

Sizzix/Eileen Hull: Lace 3D Embossing Folder

Sizzix/Eileen Hull: Faux Postage Thinlits

Sizzix/Eileen Hull: Bookmark, Tag and Pocket Thinlits (retired)

Sizzix/Eileen Hull: Wreath and Snowflake Thinlits

Sizzix/Eileen Hull: Envelope, Folder and Flowers Thinlits

Sizzix/Tim Holtz: Tag and Book Plates Diecut (retired)

Mat Board

Ivory Luster Wax

Tan and Different Shades of Pink Chalk Inks

Diecut Machine

Scissors

Stylus

Foam Pop Dots

Gem, Sequins and Thread

Prima: Dulce Paper Collection

Various Patterned Cardstocks

Paper Cutter

Beacon Adhesives: Zip Dry Adhesive

(Products listed above are Affiliated Links for your convenience)

DISCLAIMERS

This blog is compensated to provide opinion on products, services, websites, and various other topics. Even though the owner(s) of this blog receives compensation for our posts or advertisements. I always give my honest opinions, findings, beliefs, or experiences on those topics or products. The views and opinions expressed on this blog are purely my own. Any product claim, statistic, quote or other representation about a product or service should be verified with each manufacturer, provider, or party in question.This blog contains affiliate links, clicking and shopping through these links helps to support and run Tonya Trantham Designs – Creative Paper Addiction at no additional cost to you. Today’s features are Sizzix, Eileen Hull, Scrapbook.com and A Cherry on Top Store Products. 

Thanks for stopping by, hope your Tuesday is awesome and enjoy creating!

B is for Bird Tag

Hi everyone! I’m back this week with another quick and easy tag I created using more leftover scraps from my desk and Eileen Hull‘s Waterfall Card and Tags Thinlits. So let’s get started!

First, I cut two of the largest and one of the medium size tags from the Waterfall Card and Tags Thinlits. I glued the two largest tags together since the back of one of the cardstocks was white and I was going to decorate both sides. I lightly inked the edges with a brown chalk ink. I adhered a scrap of patterned cardstock, along with the medium size tag on to the larger tag.

Second, I had a leftover wreath that I had cut from the Wreath and Snowflake Thinlits that I added to the tag. I layered two scraps of cardstock on top of each other and glued slightly off one side of the tag and folded and glued to the other side of the tag. I had a cut a part of “b is for bird” card that I cut down further and adhered the bird in the lower corner and the sentiment in the upper corner of the tag to finish the front of the tag.

Third, the other side of the tag I used several cut a parts along with a vintage looking man from the Mini Paper Dolls and a sequin and a gem to finish the tag. I told you it was quick and easy!

Also if you don’t know, Eileen Hull is having a release party this Friday, March 1st, and can be found on YouTube, Instagram and her Eileen Hull Fan Club Facebook Page. All times are listed below and there will be a giveaway too! I hope to see you there!

Supplies

Sizzix/Eileen Hull: Waterfall Card and Tags Thinlits

Sizzix/Eileen Hull: Wreath and Snowflake Thinlits

Diecut Machine

Various Patterned Cardstocks

Tim Holtz: Mini Paper Dolls

Sequins and Gems

Brown Chalk Ink

Paper Cutter

Scissors

Beacon Adhesives: Zip Dry Adhesive

(Products listed above are Affiliated Links for your convenience)

DISCLAIMERS

This blog is compensated to provide opinion on products, services, websites, and various other topics. Even though the owner(s) of this blog receives compensation for our posts or advertisements. I always give my honest opinions, findings, beliefs, or experiences on those topics or products. The views and opinions expressed on this blog are purely my own. Any product claim, statistic, quote or other representation about a product or service should be verified with each manufacturer, provider, or party in question.This blog contains affiliate links, clicking and shopping through these links helps to support and run Tonya Trantham Designs – Creative Paper Addiction at no additional cost to you. Today’s features are Sizzix, Eileen Hull, Scrapbook.com and A Cherry on Top Store Products. 

Thanks for stopping by, hope your Wednesday is great and enjoy creating!

Love You Shaker Card

Hi everyone! Since Valentine’s Day is only a day away I want to share a shaker card I created using Eileen Hull’s Embroidery Hoop Diecut and a few of her other thinlits. So let’s get started!

First, I placed the Embroidery Hoop Diecut onto a piece of cardstock from the Rouge 6″x8″ Paper Collection and did the same steps for a piece of Matboard. I cut the top part off each hoop.

Second, I cut two of the hoops from Foam Adhesive Sheets and cut the top off both hoops.

Third, I cut a 6″x12″ piece of cardstock from the Foundation 1 Rouge Cardstock and folded in half to create a 6″x6″ card base. I removed the backing from the adhesive foam and placed on top of each other and placed onto the card.

Fourth, I adhered the inner circle of the hoop inside of the outer hoop.

Fifth, I placed an assortment of sequins, gems and Micro Beads within the foam hoop. Next, trace the outer circle of the hoop onto a piece of Acetate and cut out. Remove the backing from the foam hoop and place the circle acetate onto the hoop.

Sixth, apply adhesive and place the circle from the hoop, that’s cut from patterned cardstock over the foam hoop.

Seventh, I cut to fit a fancy pom pom trim to fit around the hoop and adhered.

Eighth, I cut an envelope and smaller leaf (Rouge Paper Collection) and the small, medium and large size hearts (felt) from the Envelope, Folder and Flowers Thinlits. I lightly inked the edges of the envelope and glued together and adhered to the corner of the hoop.

Ninth, I cut another piece of cardstock slightly smaller than the envelope, used a Corner Rounder on the top since it will be seen and lightly inked the edges. I cut the “love” sentiment from the Journaling Words Thinlits (retired) and the letters “Y”, “O” and “U” from the Tiled Alphanumeric Thinlits and placed onto the card and then placed in the envelope.

Tenth, I glued the medium and large size hearts to the upper side of the hoop and the small heart to the corner of the envelope. I added sequins, loops of thread, pearl top pins and a crocheted flower with the leaf from the Envelope, Folder and Flowers Thinlits to finish the card.

This shaker card the theme can easily be changed to suit any occasion, birthday, get well, thinking of you, just because, etc. Question, do you make cards to give? If you do or don’t why? Leave your comment below.

If you haven’t been by Eileen Hull’s blog lately you can find the latest post HERE.

Supplies

Sizzix/Eileen Hull: Eileen Hull’s Embroidery Hoop Diecut

Sizzix/Eileen Hull: Tiled Alphanumeric Thinlits

Sizzix/Eileen Hull: Envelope, Folder and Flowers Thinlits

Sizzix/Eileen Hull: Journalling Words Thinlits (retired)

49 and Market: Rouge 6″x8″ Paper Collection

49 and Market: Foundation 1 Rouge Cardstock

Matboard

Foam Adhesive Sheets

Acetate

Micro Beads

Sequins and Gems

Corner Rounder

Scissors

Paper Cutter

Beacon Adhesives: Zip Dry Adhesive

(Products listed above are Affiliated Links for your convenience)

DISCLAIMERS

This blog is compensated to provide opinion on products, services, websites, and various other topics. Even though the owner(s) of this blog receives compensation for our posts or advertisements. I always give my honest opinions, findings, beliefs, or experiences on those topics or products. The views and opinions expressed on this blog are purely my own. Any product claim, statistic, quote or other representation about a product or service should be verified with each manufacturer, provider, or party in question.This blog contains affiliate links, clicking and shopping through these links helps to support and run Tonya Trantham Designs – Creative Paper Addiction at no additional cost to you. Today’s features are Sizzix, Eileen Hull, Scrapbook.com and A Cherry on Top Store Products. 

Thanks for stopping by, hope your Tuesday is great and enjoy creating!

Roses and Hearts Envelope Journal

Hi everyone! I’m back this week with a journal I created. I had actually started this journal last year but the month of February and Valentine’s Day slipped by quickly on me and I didn’t finish it. So needless to say, I was able to finish it this year. I used envelopes, an assortment of different types of cardstocks, embellishments and a few diecuts and thinlits by Eileen Hull to complete this journal. Anyways, let’s get started!

First, I started with an envelope that had “junk mail” in it. I was able to open it without ripping up the flap on the back . I glued the flap down and folded in half.

Second, I cut to fit patterned cardstock to fit the front and back of the cover and the inside of both sides of the cover. Side note, this will make it easier to stitch in the pages.

Third, I gathered an envelope, which I sealed the flap before cutting an opening in the end to created a “pocket, patterned cardstocks and dotted writing paper for the inside pages. I punched two holes into the spine before stitching with a needle and thread all the pages to the inside of the cover. I tied off on the outside spine. I cut a piece of flat lace the length of the spine, centering the lace to either side of the front and back covers before adhering in place.

Fourth, I decorated the cover first. I know some crafters like to save the cover for last but for me if I can get the cover squared away/finished or close to finished it sets the theme for the inside of the journal.

I used an assortment of embellishments that I have had for years in my stash on the cover, such as the Ric Rac, lace, the lace flower and the chipboard roses piece along with a chipboard frame and a oversized floral postage stamp that I had purchased a couple of months ago. I cut the smallest and middle size hearts from the Envelope, Folder and Flowers Thinlits and inked the edges with a hot pink chalk ink. I layered those on top of each other and slightly under the chipboard roses. I also cut the largest leave from the same set of thinlits and shaped with a Stylus before gluing under the lace flower. I finished by adding a bow made of thread under the flower.

Fifth, I used a cut a part to create a pocket on the inside cover which I added a couple of flowers and another cut a part over the flowers. I used a bit of trim to dress up the top of the pocket. The opposite page I covered with a patterned cardstock.

I cut from a patterned piece of cardstock the decorative number 14, inked the edges before adding glue to two sides and placing on the corner of the page to create a pocket. I used a mix of cut a parts, scraps of patterned cardstock and a piece of grid paper as tags to fill the pockets. Side note, I dressed up the grid paper with a rub on and lightly inking the edges to give it an aged old.

Sixth, the next set of pages I kept the decoration to those pages to a minimum. I added a patterned cardstock to the back of the smaller page along with pom pom trim. The opposite page I found these felt pieces in my stash. I adhered to the upper corner of the page, added the “sweetheart” sentiment and sequins over the heart.

Seventh, this set of pages I added two cut a parts and a staple with my Tiny Attacher.

The opposite page I fussy cut the children out and added glue to the bottom and to the corner of the heart and placed on to the page to create a pocket. I cut down a piece of 6″x6″ patterned cardstock, folded in half and placed in the pocket.

Eighth, these two page I kept simple and added lace to the dotted paper. The opposite page I adhered the tab I had cut off from a file folder to that page along with Ric Rac.

Ninth, I adhered a piece of patterned cardstock to the back of the tab. Also you can see where I stitched the pages into the cover.

Tenth, the next set of pages I used a piece of washing tape to secure the “love you” cut a part to the page to create a tip in/flap. I adhered heart ribbon down the side of the page and I added a button to the flap. The opposite page, I cut a library pocket from Library Pocket ATC Card and Tabs Thinlits from Vellum and put together. I added glue to the bottom and one side of the pocket and placed on the bottom corner of the page.

I glued a label to the pocket. The open circle is actually the tire that was leftover from the a project I made with the Vintage Truck Box Diecut. I glued onto the label and added a chipboard heart and two sequins to complete the pocket. I placed cut a parts and folded pieces of patterned cardstock to the pocket.

Eleventh, the next set of pages, the dotted paper I cut two banners and added adhesive to the top of each and placed in the top corner of the page and a circle punch and a scrap of cardstock. The banner can be used as tuck spots for tags.

The opposite page I added two cut a parts and another staple to finish the page.

Twelfth, the next set of pages I glued two strips of cardstock, one slightly smaller than the other, together before adding adhesive to the top and bottom of the strip before placing onto the page. I embellished with a felt heart and a “love you” sentiment. I also cut a piece of notebook paper down and folded in half. I lightly inked with chalk ink and added a “us forever” rub on the paper before sliding under the belly band.

The smaller page I added patterned cardstock to the envelope and glued a flower and a cut a part to the upper corner of the page. I added two tags to the pocket.

Thirteen, I cut a waterfall card from the Waterfall Card and Tags Thinlits, added a “love” rub on to the card, folded the flap and adhered the smaller flap to the inside of the pocket.

I glued a small tab to the top of the card and a decorative piece of cardstock to the page. The back of the inside cover I used a decorative diecut from my stash and a “happiest day ever” sentiment to complete the inside of the journal.

It felt great to use what I had in my massive amount of supplies to create this journal. Don’t get me wrong I love buying new craft supplies but I am trying to use more of my supplies instead of hoarding them. 

Question, do you hoard your craft supplies or do you use them? Let me know in the comments below if you do or if you don’t.

If you haven’t been by Eileen Hull’s blog lately to see what her teams have been up to you can find the latest post HERE.

Supplies

Sizzix/Eileen Hull: Envelope, Folder and Flowers Thinlits

Sizzix/Eileen Hull: Library Pocket ATC Card and Tabs Thinlits

Sizzix/Eileen Hull: Vintage Truck Box Diecut

Sizzix/Eileen Hull: Waterfall Card and Tags Thinlit

Diecut Machine

Stylus

Tiny Attacher

Tiny Attacher Refills

Vellum

Washi Tape

Lace, Pom Pom Trim, Ric Rac and Trim

Chalk Ink

Various Embellishments

Various Patterned Cardstocks

Notebook and Dotted Paper

Needle, Thread, Button and Sequins

Scissors

Paper Cutter

Beacon Adhesives: Zip Dry Adhesive

(Products listed above are Affiliated Links for your convenience)

DISCLAIMERS

This blog is compensated to provide opinion on products, services, websites, and various other topics. Even though the owner(s) of this blog receives compensation for our posts or advertisements. I always give my honest opinions, findings, beliefs, or experiences on those topics or products. The views and opinions expressed on this blog are purely my own. Any product claim, statistic, quote or other representation about a product or service should be verified with each manufacturer, provider, or party in question.This blog contains affiliate links, clicking and shopping through these links helps to support and run Tonya Trantham Designs – Creative Paper Addiction at no additional cost to you. Today’s features are Sizzix, Eileen Hull, Scrapbook.com and A Cherry on Top Store Products. 

Thanks for stopping by, hope your Wednesday is wonderful and enjoy creating!

Love You Heart Card

Hi everyone! Valentine’s Day is right around the corner and I would like to share a quick card I created using scraps I had laying on my craft table and the small and medium hearts from Eileen Hull’s Envelope, Folder and Flowers Thinlits. So, let’s get started!

First, I gathered up an assortment of scraps of cardstocks. I also had this scalloped card base that I found in my stash. I had cut it from a diecut by Sizzix but can’t remember the actually name of the die and I can’t find it on Sizzix’s website so I am assuming it is a retired diecut.

Second, I cut the pink piece of cardstock down to fit the base of the card. I placed in it in the Doily 3D Embossing Folder and run through the Diecut Machine. Next, I lightly inked over the raised areas of the embossed cardstock with a hot pink chalk ink and applied Ivory Luster Wax over the inked areas to tone down the hot pink.

Third, I glued the embossed image to the card base. I lightly inked the edges of the scallops with a dark brown chalk ink.

Fourth, I cut two strips of cardstock, one slightly smaller than the other, the width of the embossed image and adhered both into the card base. I cut the smallest and medium size hearts from the Envelope, Folder and Flowers Thinlits. I lightly inked around the edges of the hearts with the hot pink ink and glued both onto the strips of cardstock.

Fifth, I cut the “love you” sentiment from a cut a part, inked the edges and adhered to the hearts along with a sequin to finish the card.

Now how easy was that? Will you be making Valentine’s Day cards to give or not? Let me know in the comments below. Also if you haven’t been by Eileen Hull’s blog lately to see what her teams has been up to you can find the latest post HERE.

Supplies

Sizzix/Eileen Hull: Envelope, Folder and Flowers Thinlits

Sizzix/Tim Holtz: Doily 3D Embossing Folder

Sizzix: Scalloped Card Diecut (retired)

Diecut Machine

Ivory Luster Wax

Hot Pink and Dark Brown Chalk Inks

Various Scraps of Plain and Patterned Cardstocks

Sequin

Scissors

Paper Cutter

Beacon Adhesives: Zip Dry Adhesive

(Products listed above are Affiliated Links for your convenience)

DISCLAIMERS

This blog is compensated to provide opinion on products, services, websites, and various other topics. Even though the owner(s) of this blog receives compensation for our posts or advertisements. I always give my honest opinions, findings, beliefs, or experiences on those topics or products. The views and opinions expressed on this blog are purely my own. Any product claim, statistic, quote or other representation about a product or service should be verified with each manufacturer, provider, or party in question.This blog contains affiliate links, clicking and shopping through these links helps to support and run Tonya Trantham Designs – Creative Paper Addiction at no additional cost to you. Today’s features are Sizzix, Eileen Hull, Scrapbook.com and A Cherry on Top Store Products.

Thanks for stopping by, hope your Tuesday is awesome and enjoy creating!

Altered Tissue Box Polar Bear Folio

Hi everyone! The month of December is moving right along and I have another project this time using the Folio Journal Diecut by Eileen Hull. You can say it is an “abbreviated” smaller version of the actual diecut.

A little side story about this project, I had bought this container of Kleenex and after emptying it I thought wouldn’t that make a cute journal? So I saved it for later.

First, I carefully took a part the container and this is what it looked like.

Second, I cut the piece in half before cutting the edge and tabs off to make it look neater.

Third, I applied Adhesive Sheets to either side of a piece of Mat Board before placing both cut pieces onto the mat board along with cardstock.

Fourth, I placed the mat board onto the Folio Journal Diecut, sandwiched between the two plated and run through the Diecut Machine. I glued both sides together at the spine to create the cover of the journal. Since you could still see part of the Kleenex logo on the spine I cut cardstock for the inside and a leftover piece of the Kleenex box to cover the spine.

Fifth, I run elastic cording in the holes of the journal and tied off.

Sixth, I had 8″x8″ journals in my stash that I cut down to fit the inside of the journal. I placed those under the elastic cording. I also cut and glued Pom Pom Trim on the inside of both covers.

Seventh, I had a leftover label from the Full Size Journal Diecut that the end had been accidentally cut off. I had saved it for a future project and after digging in my stash I found it and thought this would be perfect for the cover. I placed onto the bottom corner of the journal and added a strip of patterned cardstock.

Eighth, I cut the “believe” sentiment from the Christmas Phrases Thinlits (retired) , small snowflake die from Doodle Christmas Thinlits and two of the larger snowflakes from Starlit Village and Card Panel Thinlits (only at Scrapbook.com). I did add a Foam Pop Dot to the back of the larger snowflake before stacking on top of the other snowflake. I finished by adding sequins to the cover , gems to the center of each snowflake and mini pom pom trim to the edge of the cover and spine.

Have you ever come across something that you thought you could up-cycle or give it new life as something else? If you have please let me know in the comments or if you have questions about this project please let me know.

Supplies

Sizzix/Eileen Hull: Folio Journal Diecut

Sizzix/Eileen Hull: Starlit Village and Card Panel Thinlits (only at Scrapbook.com)

Sizzix/Eileen Hull: Full Size Journal Diecut

Sizzix/Jen Long: Christmas Phrases Thinlits (retired)

Sizzix/Olivia Rose: Doodle Christmas Thinlits

Adhesive Sheets

Mat Board

Diecut Machine

Foam Pop Dot

Various Plain and Patterned Cardstocks

Elastic Cording

Pom Pom Trim

Scissors

Paper Cutter

Beacon Adhesives: Zip Dry Adhesive

(Products listed above are Affiliated Links for your convenience)

DISCLAIMERS

This blog is compensated to provide opinion on products, services, websites, and various other topics. Even though the owner(s) of this blog receives compensation for our posts or advertisements. I always give my honest opinions, findings, beliefs, or experiences on those topics or products. The views and opinions expressed on this blog are purely my own. Any product claim, statistic, quote or other representation about a product or service should be verified with each manufacturer, provider, or party in question.This blog contains affiliate links, clicking and shopping through these links helps to support and run Tonya Trantham Designs – Creative Paper Addiction at no additional cost to you. Today’s features are Sizzix, Eileen Hull, Scrapbook.com and A Cherry on Top Store Products. 

Thanks for stopping by, hope your Saturday is awesome and enjoy creating!

Happy Holidays Snowflake Mini Slimline Card

Hi everyone! I’m back with a very quick card I created. I was in the “moment” of making this card that I completely forgot to take any step out photos of the process. This card centers on a leftover “Happy Holidays” sentiment from my Holiday Snowman Mini Slimline Card I posted about a few days ago. Anyways, let’s get started!

First, I folded a piece of 6″x6″ snowflake patterned cardstock in half to create the base of the card. I cut the “Happy Holidays” sentiment down and inked the edges with a chalk ink. Also the sentiment is from my Sparkle Snowman Stamp Set which can be found at Blank Page Muse.

Second, I cut two labels and two snowflakes from the Everyday Tags and Labels Thinlits. I embossed the smaller label with the Tablecloth Embossing Folder, lightly inked with a chalk ink before gluing with the sentiment on top of the larger labels.

Third, I glued the first snowflake die to the corner of the label. The second snowflake I added a Foam Pop Dot to the back before placing on top of the other snowflake. I finished by adding a flat back pearl to the center of the snowflake and a couple of sequins to the card base.

If you have any questions or comments about this card please leave it in the comment section below. Also if you aren’t following Blank Page Muse on their social media site you can find them: Facebook. Instagram, Pinterest, Blank Page Muse Website and Blank Page Muse Blog.

Supplies

Blank Page Muse/Tonya Trantham: Sparkle Snowman Stamp Set

Sizzix/Eileen Hull: Everyday Tags and Labels Thinlits

Sizzix/Eileen Hull: Tablecloth Embossing Folder

Foam Pop Dot

MISTI Stamping Tool

Diecut Machine

Scissors

Black Ink

Various Plain and Patterned Cardstocks

Chalk Ink

Sequins and Flat Back Pearl

Paper Cutter

Beacon Adhesives: Zip Dry Adhesive

(Products listed above are Affiliated Links for your convenience)

DISCLAIMERS

This blog is compensated to provide opinion on products, services, websites, and various other topics. Even though the owner(s) of this blog receives compensation for our posts or advertisements. I always give my honest opinions, findings, beliefs, or experiences on those topics or products. The views and opinions expressed on this blog are purely my own. Any product claim, statistic, quote or other representation about a product or service should be verified with each manufacturer, provider, or party in question.This blog contains affiliate links, clicking and shopping through these links helps to support and run Tonya Trantham Designs – Creative Paper Addiction at no additional cost to you. Today’s features are Blank Page Muse, Sizzix, Eileen Hull, Scrapbook.com and A Cherry on Top Store Products. 

Thanks for stopping by, hope your Tuesday is great and enjoy creating!

Comfort and Joy Mini Holiday House

Hi everyone! This is the fourth year for Comfort and Joy Event hosted by Eileen Hull. You can find lots of fun projects by the Inspiration and Educator Teams over in Eileen’s Fan Club which can be found HERE. If you aren’t a member, fill out the questionnaire to join. Also there is a twist to this month’s theme and it’s all about recipes…not food related but technique recipes.

I created a mini house using the Shadow Box Frames Set 2 Thinlits, Sunflower Diecut, Shadow Box Elements Thinlits and Wreath and Snowflake Thinlits. You can add twine or ribbon to the top to tie to a present or hang on a tree but I chose to leave that off and so I could use it as a home decor piece on one of my shelf. Anyways, let’s get started!

Step One

The first thing I did was cut out two of the houses from the Shadow Box Elements Thinlits and two pieces of cardstock that I adhered to the back side to cover the windows and door in both houses. Also I cut the roofs off of both houses. Side note, this house is the only one that perfectly fits the Shadow Box Frame without any adjustments.

Step Two

I measured and cut a piece of patterned cardstock using the roof line as a guide for the “walls” of the house. I placed the cut piece of cardstock onto the Shadow Box Frames Set 2 Thinlits and run through the Diecut Machine. I folded and glued together.

Step Three

I adhered the houses onto the “walls” and glued two strips of cardstock at the roof line. I cut a piece of brown cardstock slightly larger than the width of the house, folded and glued the roof onto the two strips at the roof line.

Step Four

I cut out a center from the Sunflower Diecut to use as a base for the house to sit on. I also cut and shaped with a Stylus two flowers from the Shadow Box Elements Thinlits and a sprig of berries from the Wreath and Snowflake Thinlits. I added sequins to the sprig and flowers along with a few loops of thread to finish this miniature house.

This is so easy to make and is a great way to use up scraps of cardstock. If you have any questions please let me know.

Also if you haven’t been by Eileen’s blog lately you can find the latest post HERE.

Supplies

Sizzix/Eileen Hull: Shadow Box Frames Set 2 Thinlits

Sizzix/Eileen Hull: Sunflower Diecut

Sizzix/Eileen Hull: Shadow Box Elements Thinlits

Sizzix/Eileen Hull: Wreath and Snowflake Thinlits

Diecut Machine

Various Cardstocks

Sequins and Thread

Stylus

Paper Cutter

Beacon Adhesive: Zip Dry Adhesive

(Products listed above are Affiliated Links for your convenience)

DISCLAIMERS

This blog is compensated to provide opinion on products, services, websites, and various other topics. Even though the owner(s) of this blog receives compensation for our posts or advertisements. I always give my honest opinions, findings, beliefs, or experiences on those topics or products. The views and opinions expressed on this blog are purely my own. Any product claim, statistic, quote or other representation about a product or service should be verified with each manufacturer, provider, or party in question.This blog contains affiliate links, clicking and shopping through these links helps to support and run Tonya Trantham Designs – Creative Paper Addiction at no additional cost to you. Today’s features are Sizzix, Eileen Hull, Scrapbook.com and A Cherry on Top Store Products. 

Thanks for stopping by, hope your Thursday is wonderful and enjoy creating!