Using Diecuts in Ways Not Intended for Cards

Hi everyone! I’m back with my first Eileen Hull project of the month. I used the Handbound Journal Diecut and Rainbow Wheels Thinlits, along with a few other products all by Eileen to create a card. Anyways, let’s get started!

A handmade card featuring a layered design with various patterned yellow cardstocks. The card includes an oval shape with the phrase 'GO FOR IT!' in the center, and three golden embossed pie/wedge shapes adorned with sequins.

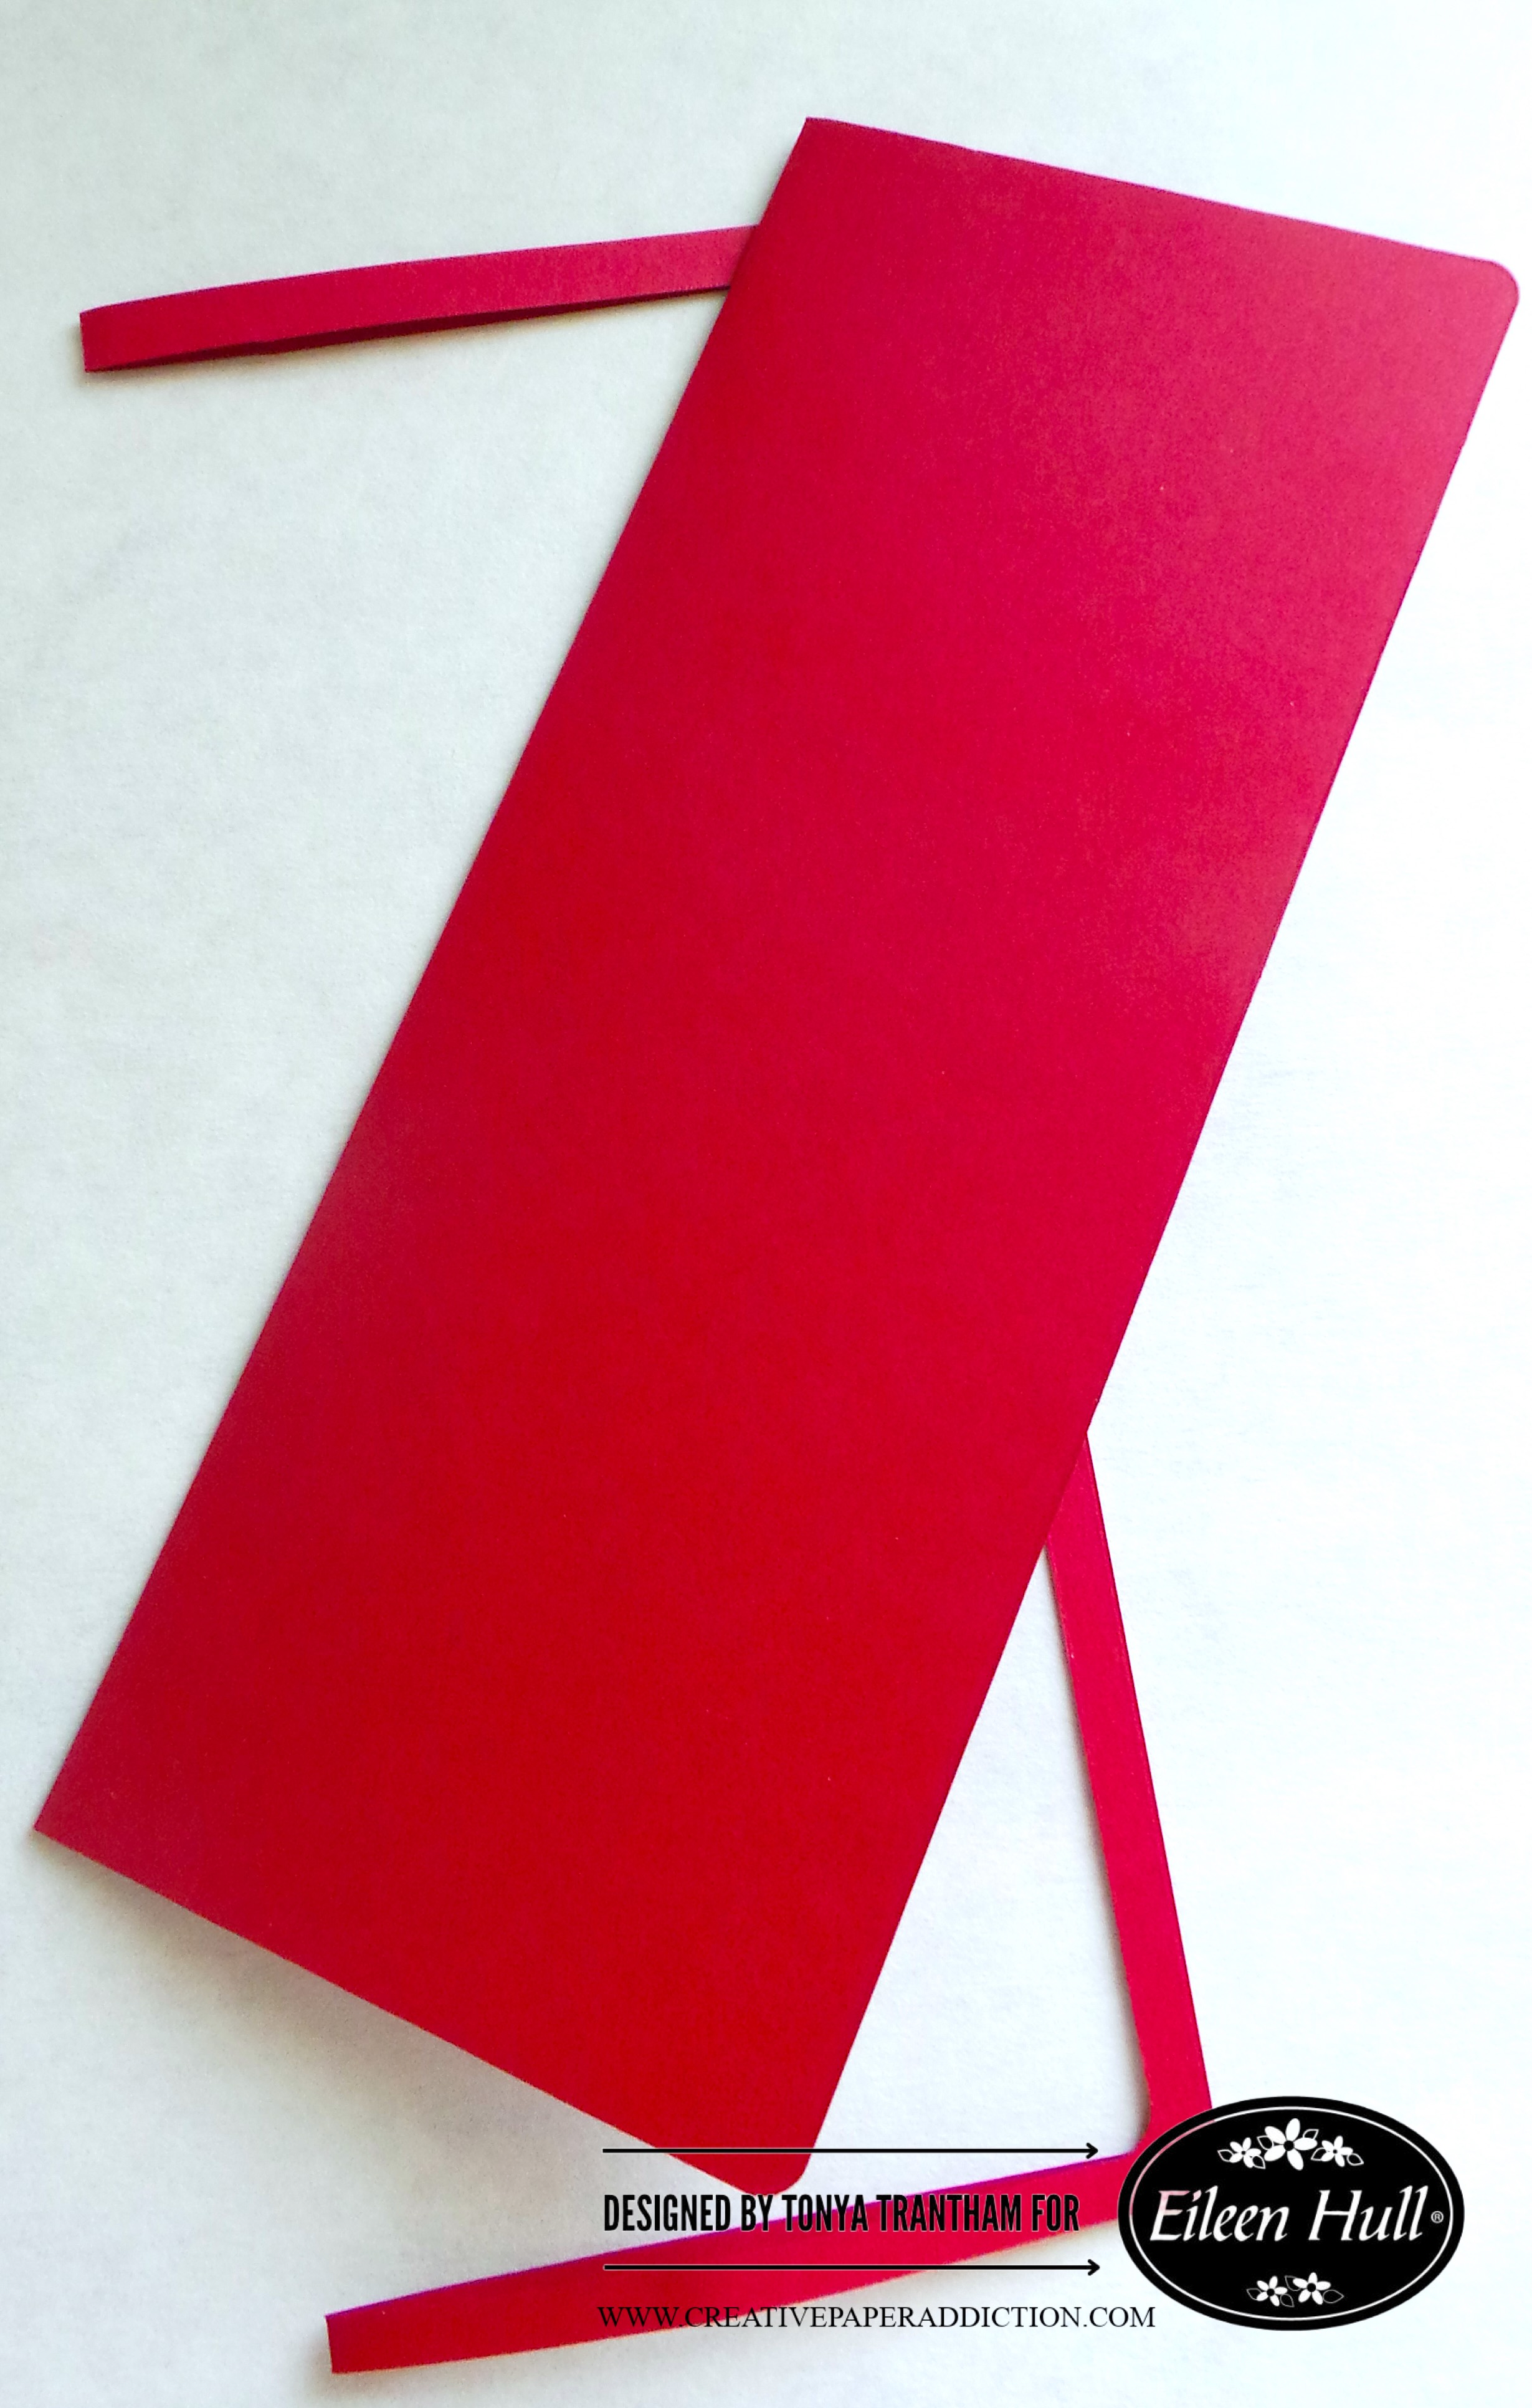
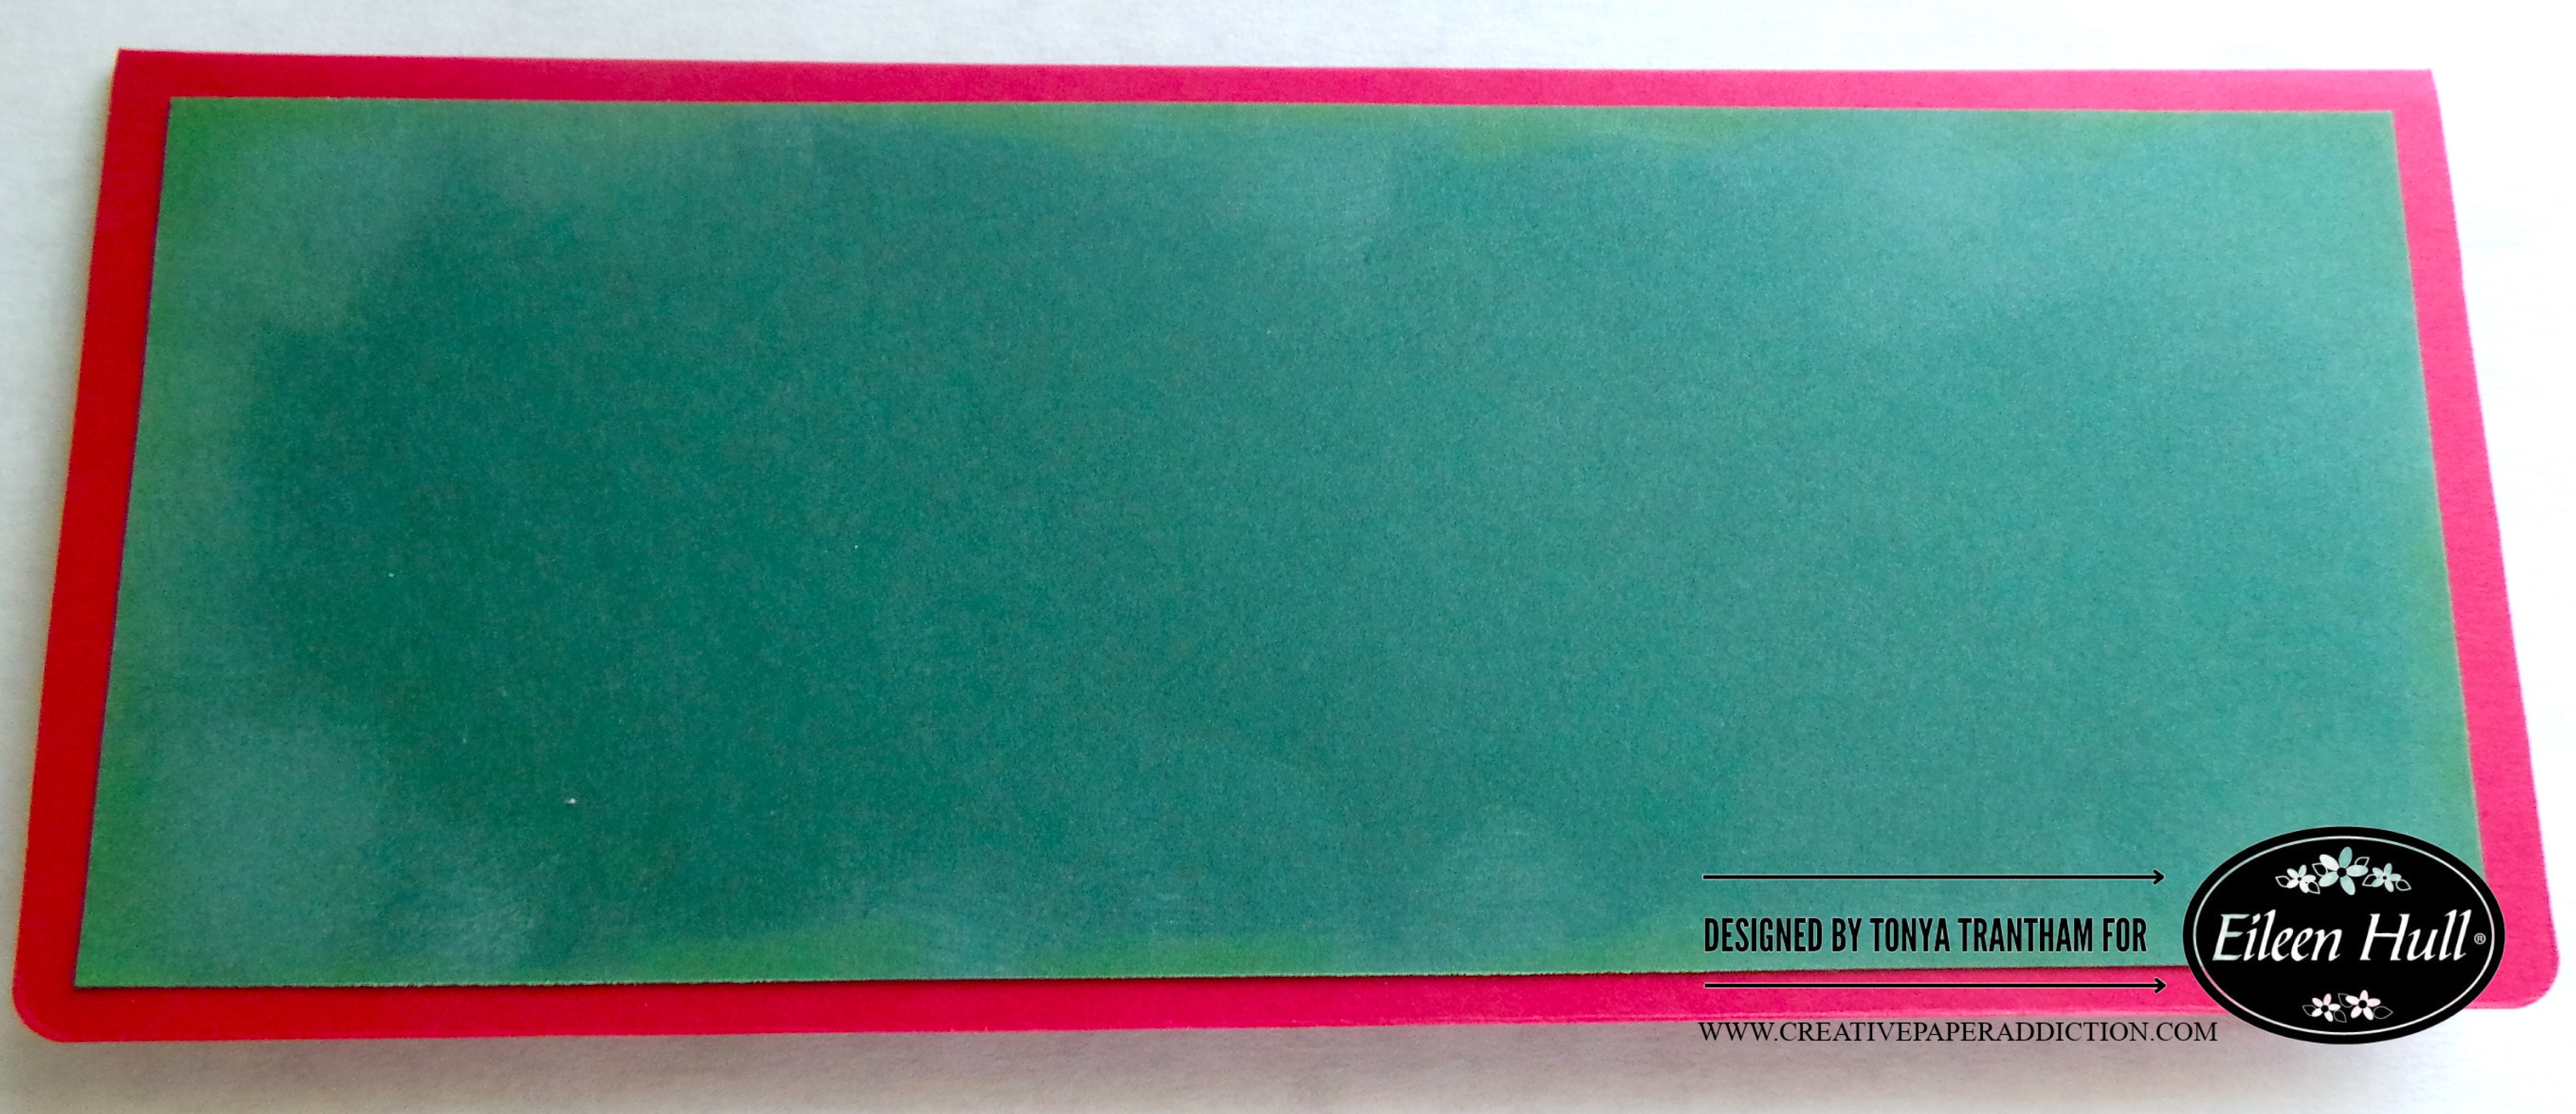
I folded a piece of Kraft Cardstock in half. I placed it slightly below the cut line of the spine of the Handbound Journal Diecut. Then, I ran it through the Diecut Machine.

A handmade card featuring a layered design with yellow and patterned cardstock, three triangular die-cut embellishments, and the text 'GO FOR IT!'

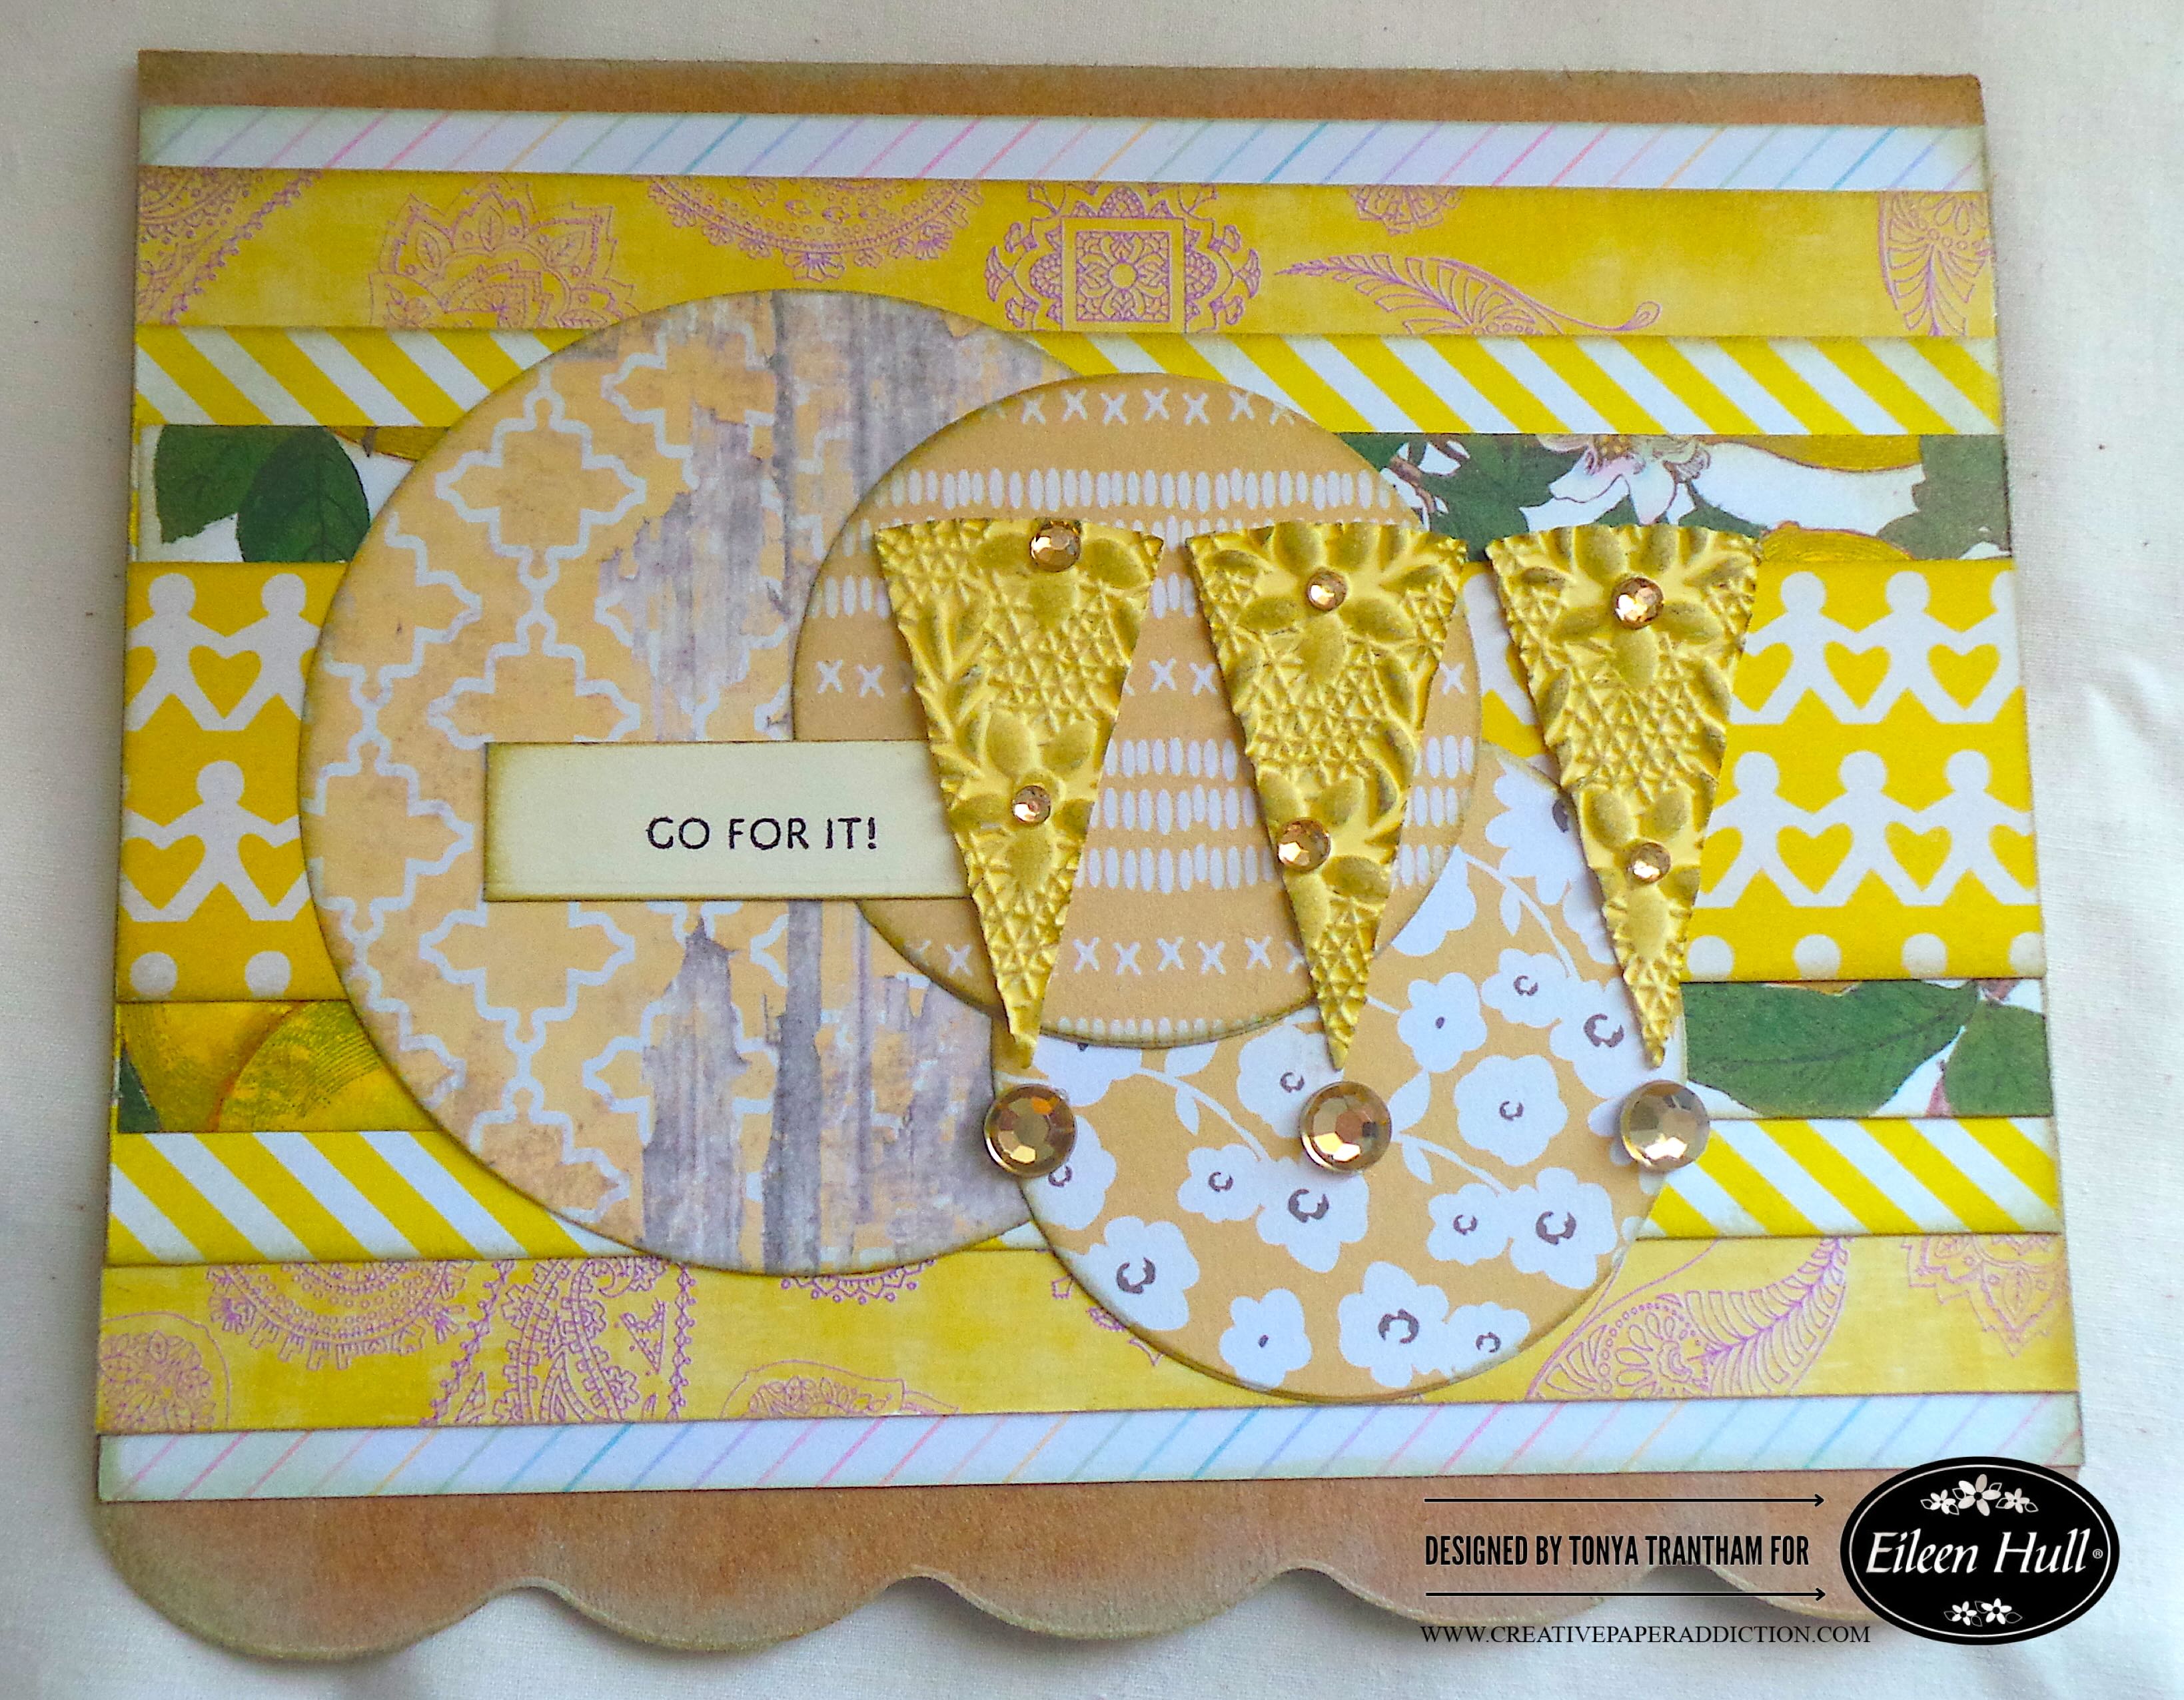
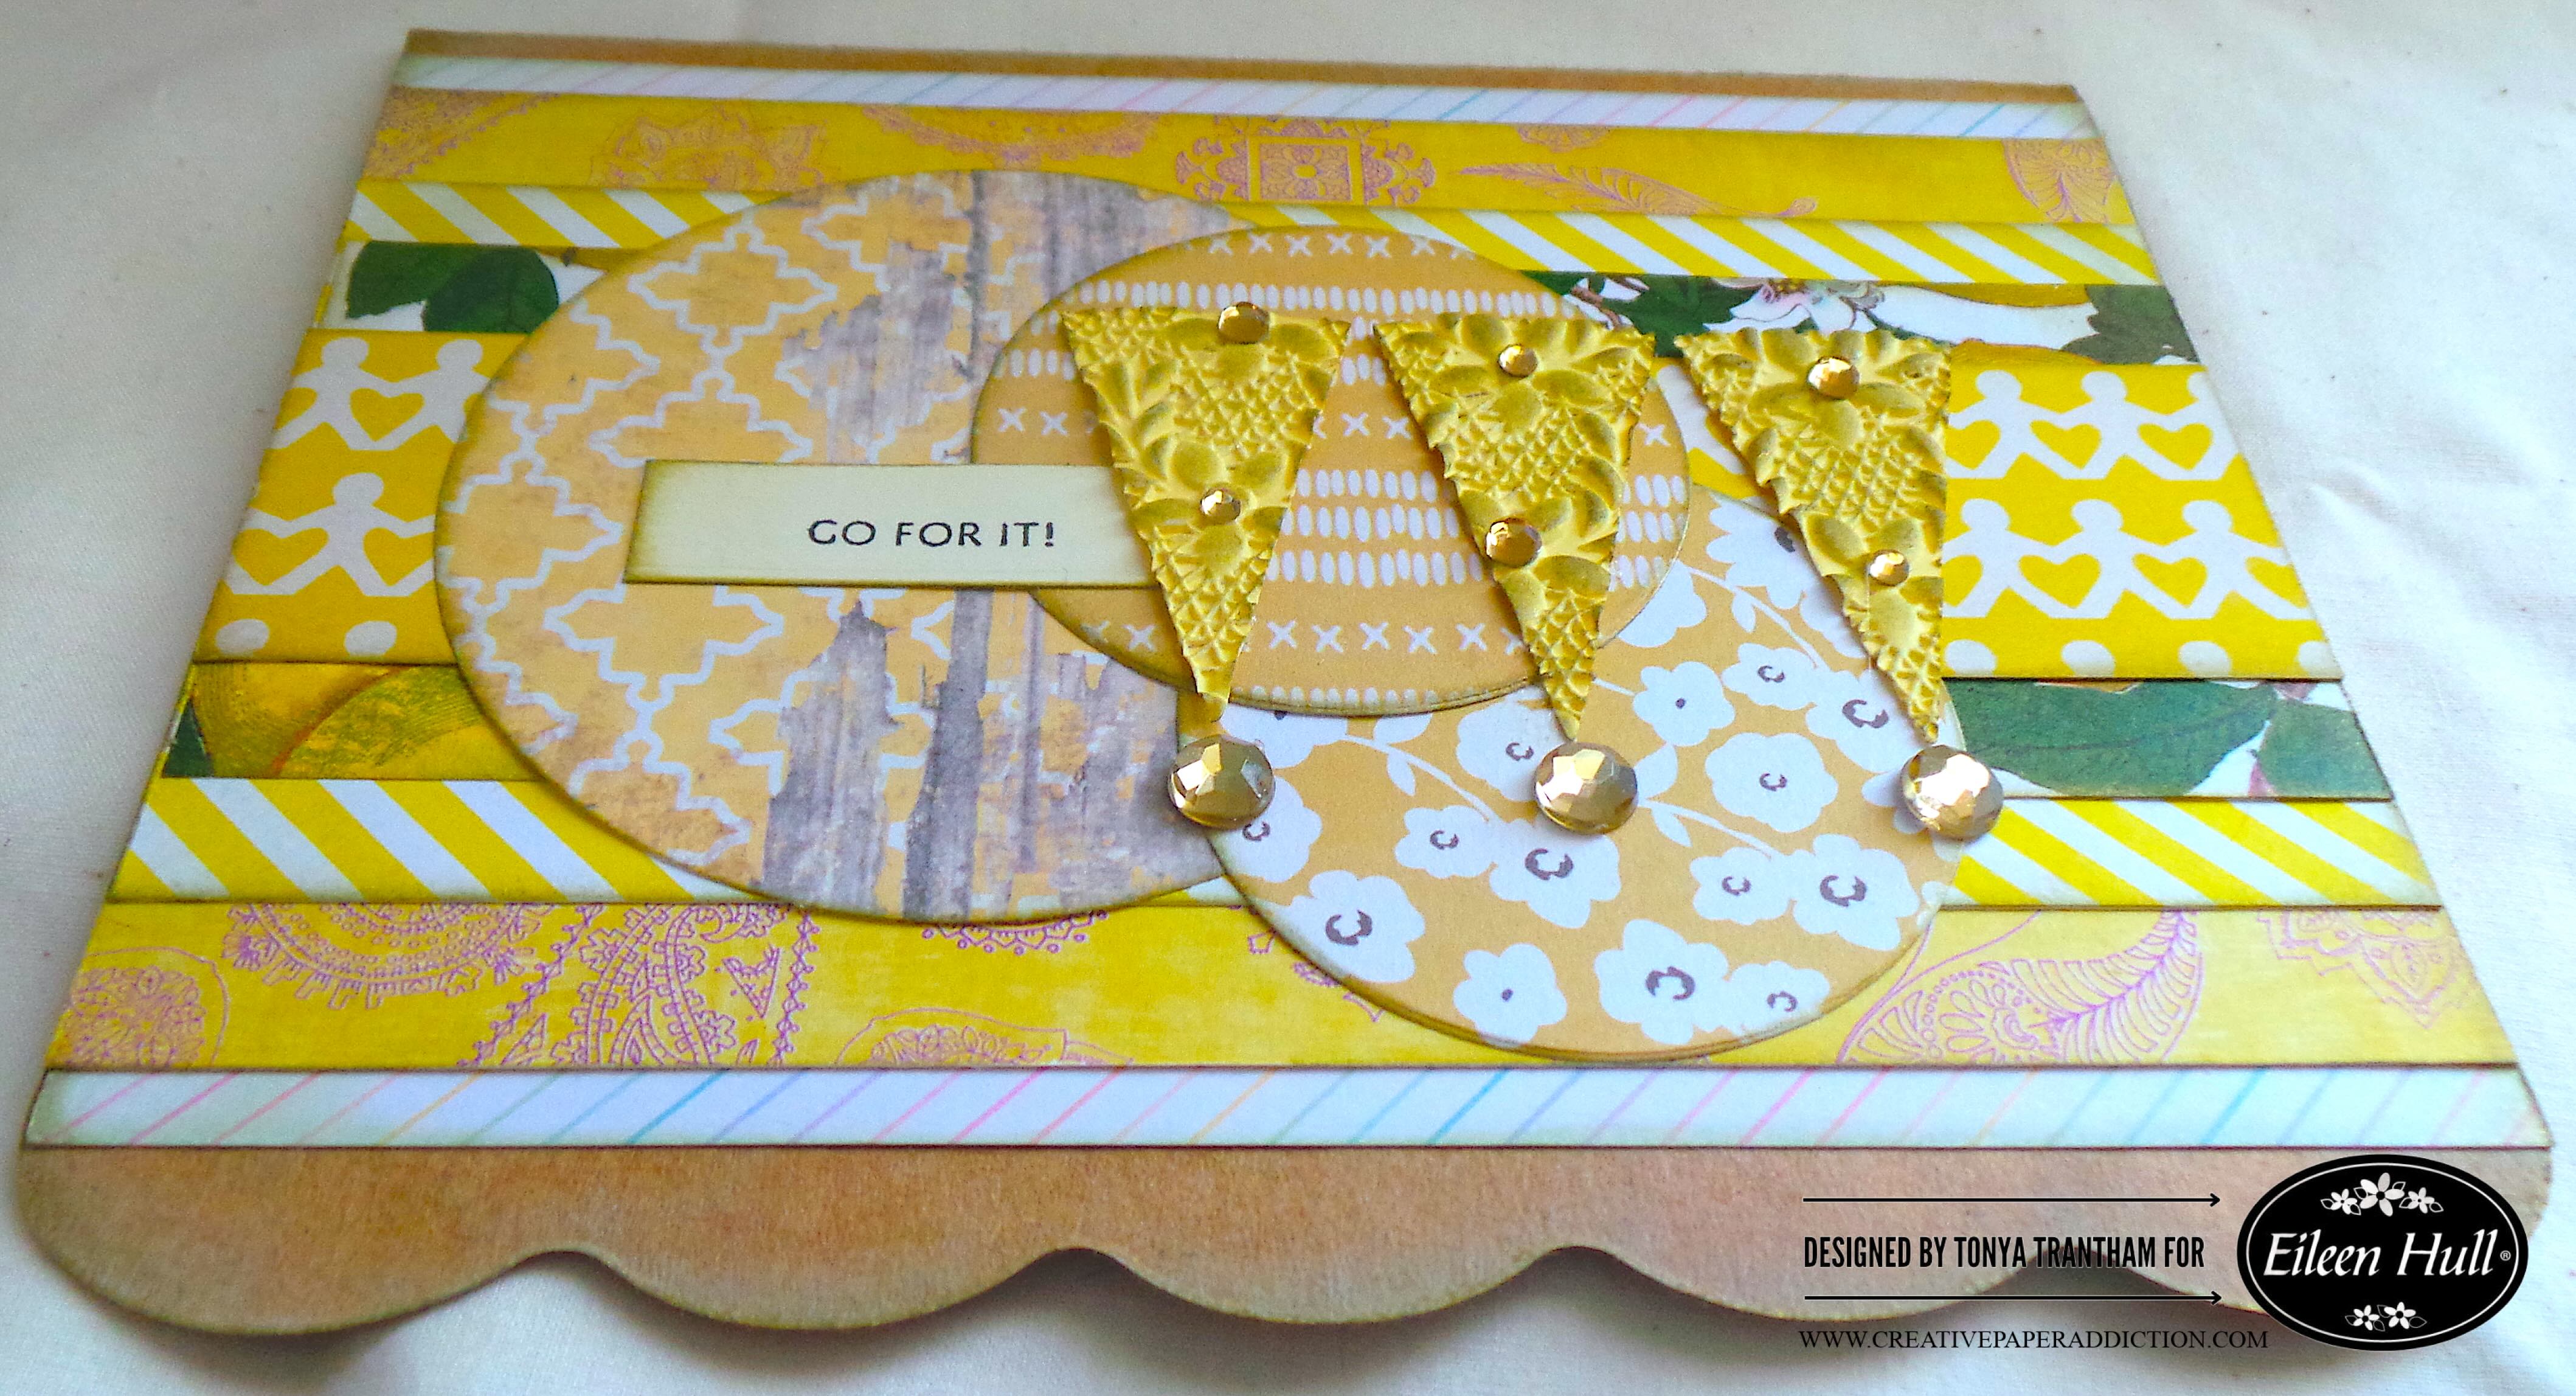
I gathered an assortment of yellow and one rainbow patterned cardstocks. I cut five strips in different sizes to fit the base of the card. I glued all in place.

A card decorated with patterned yellow cardstocks, featuring a large circular shape and three wedge-shaped diecuts with gold gems, and a stamped message that says 'GO FOR IT!'

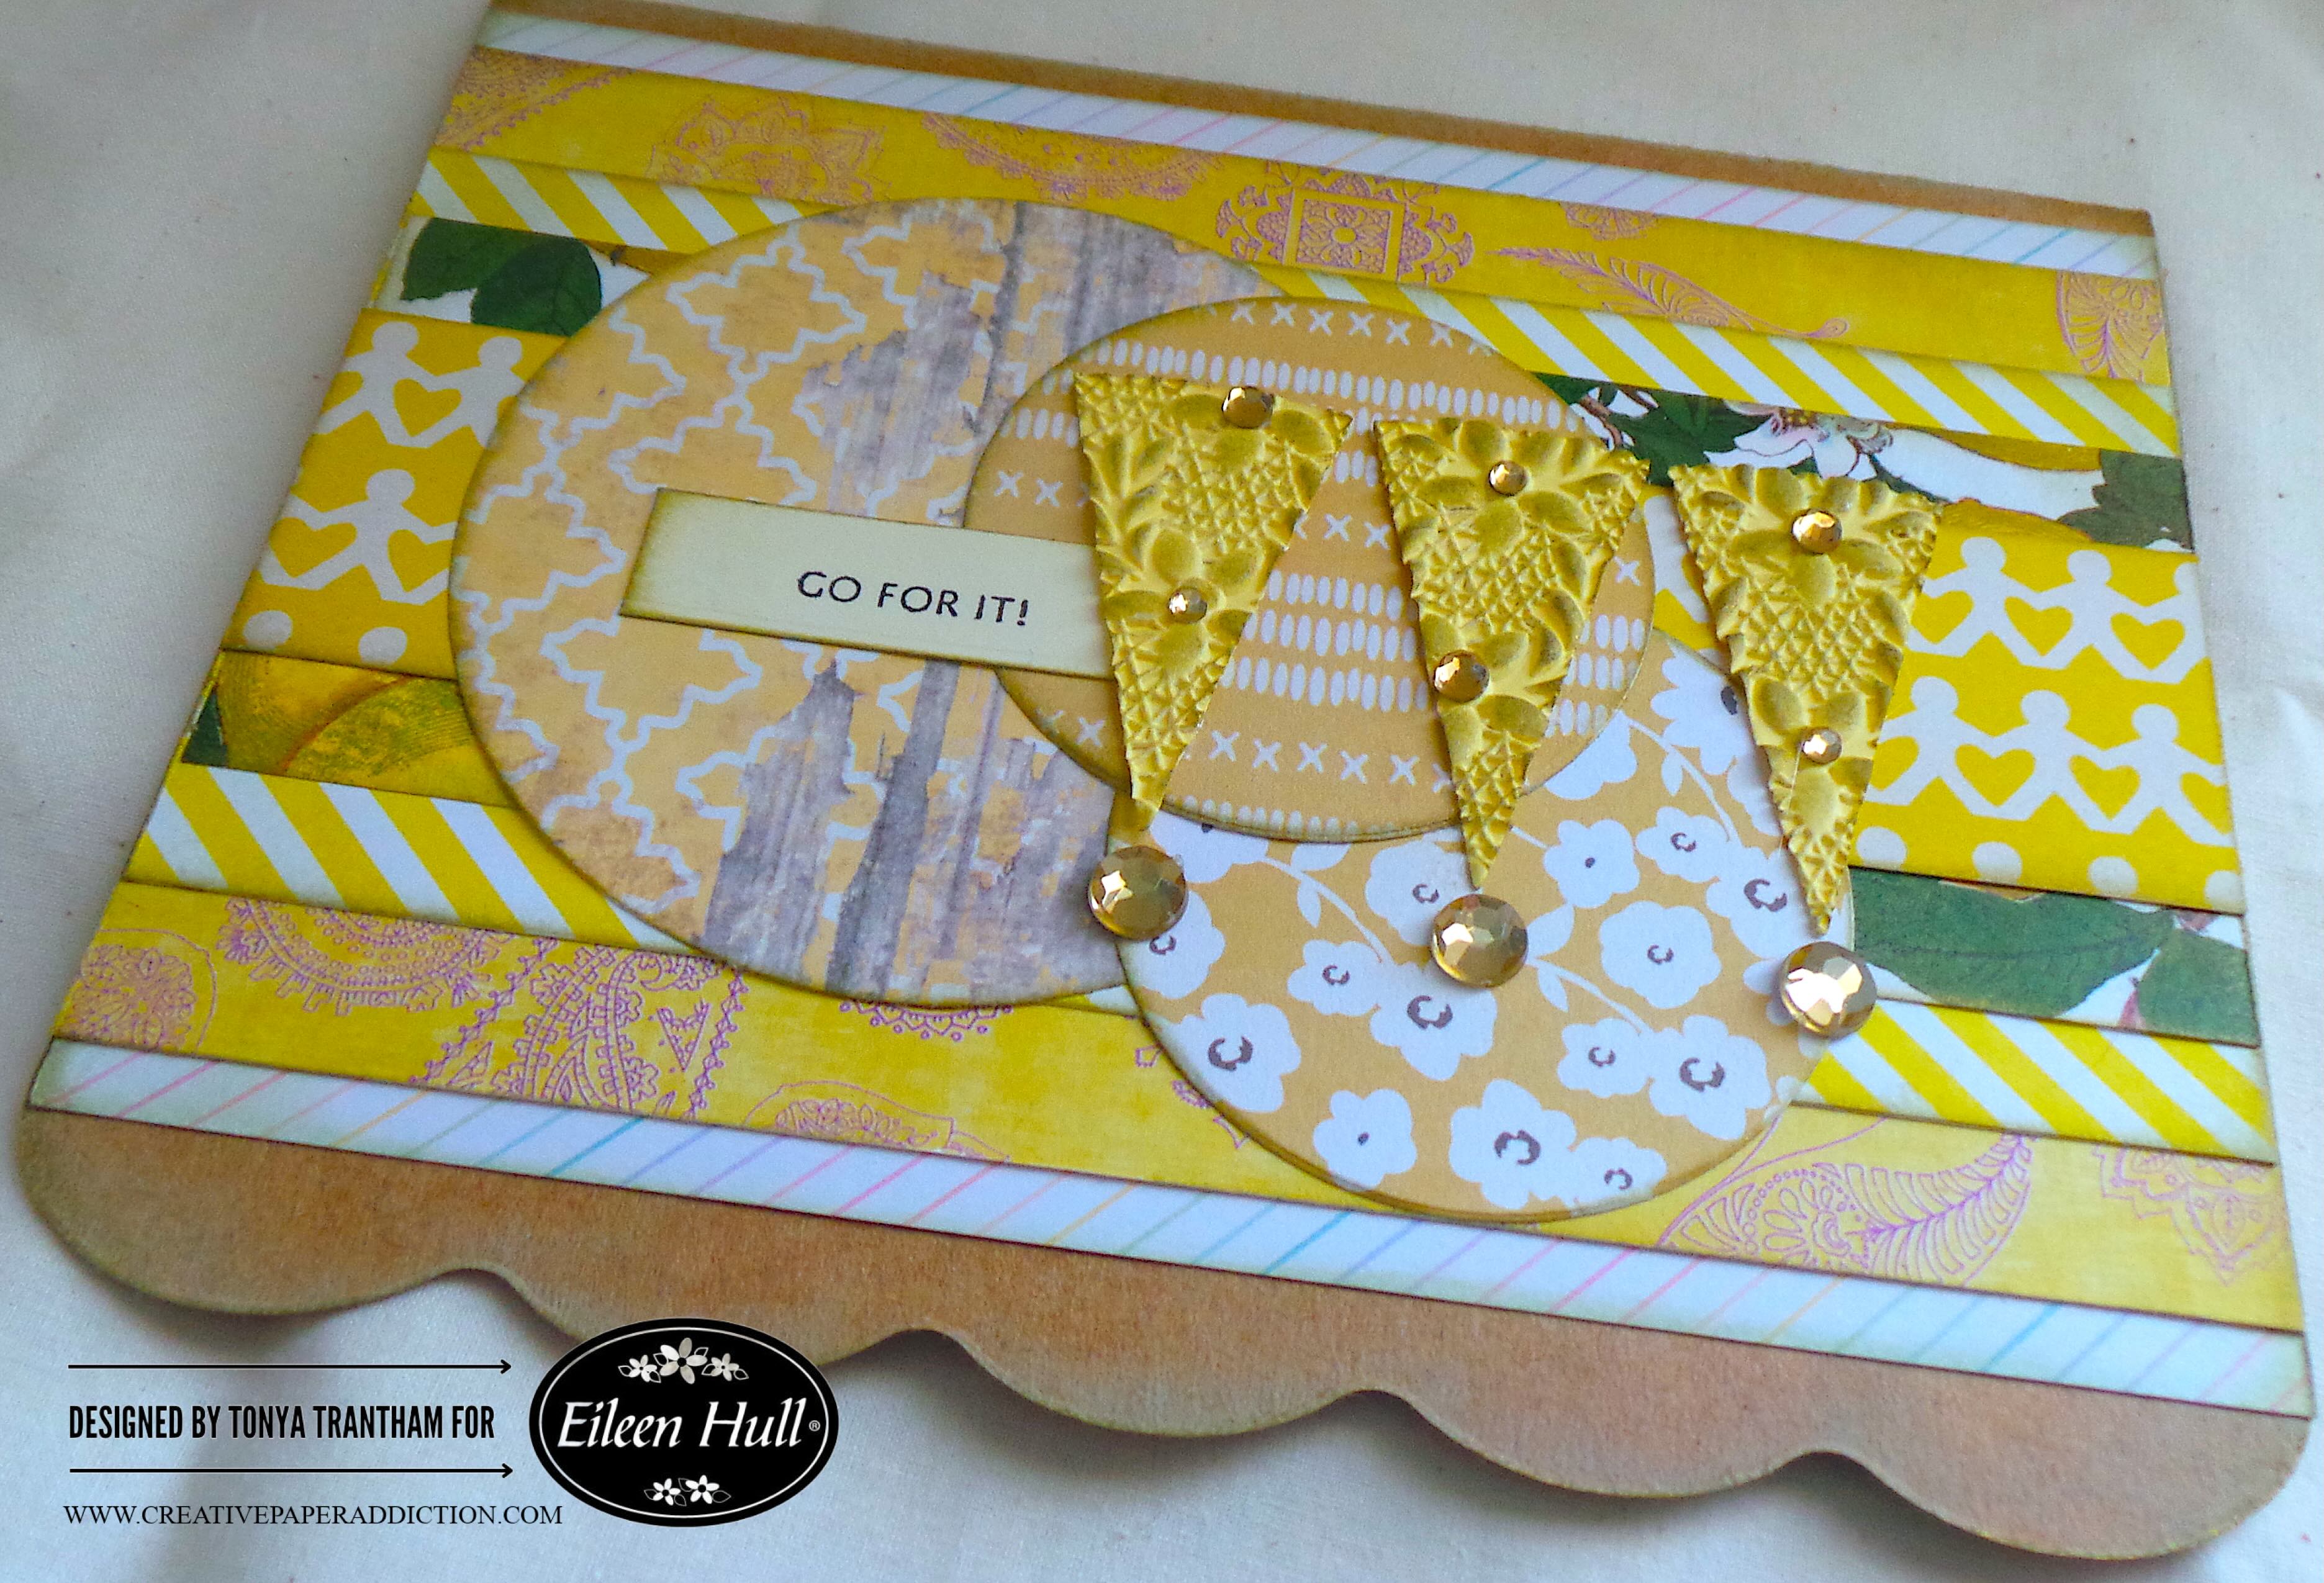
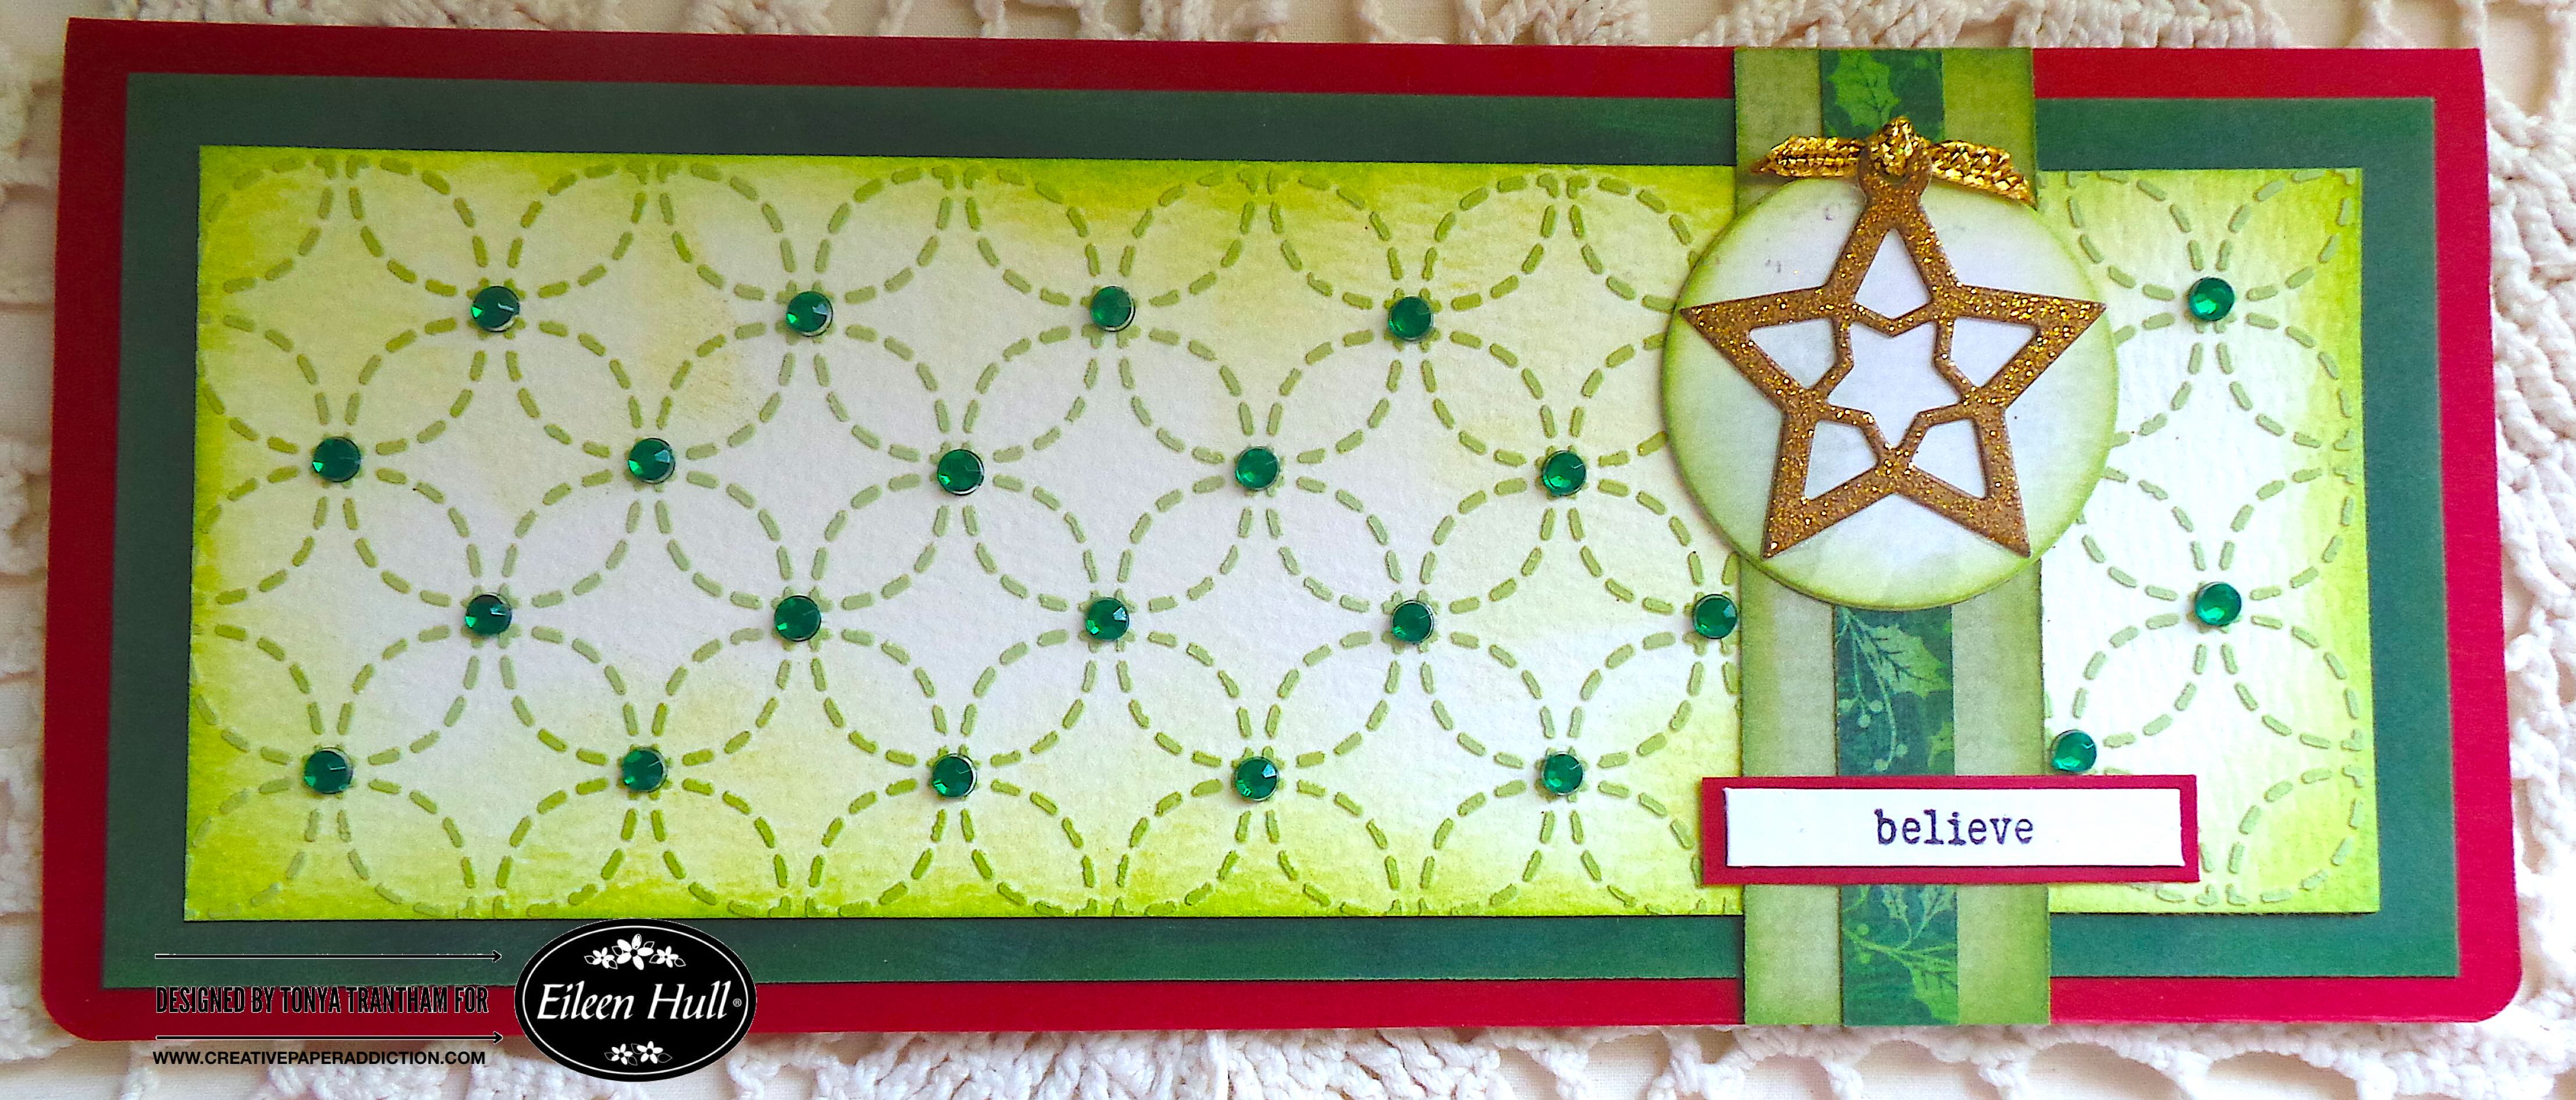
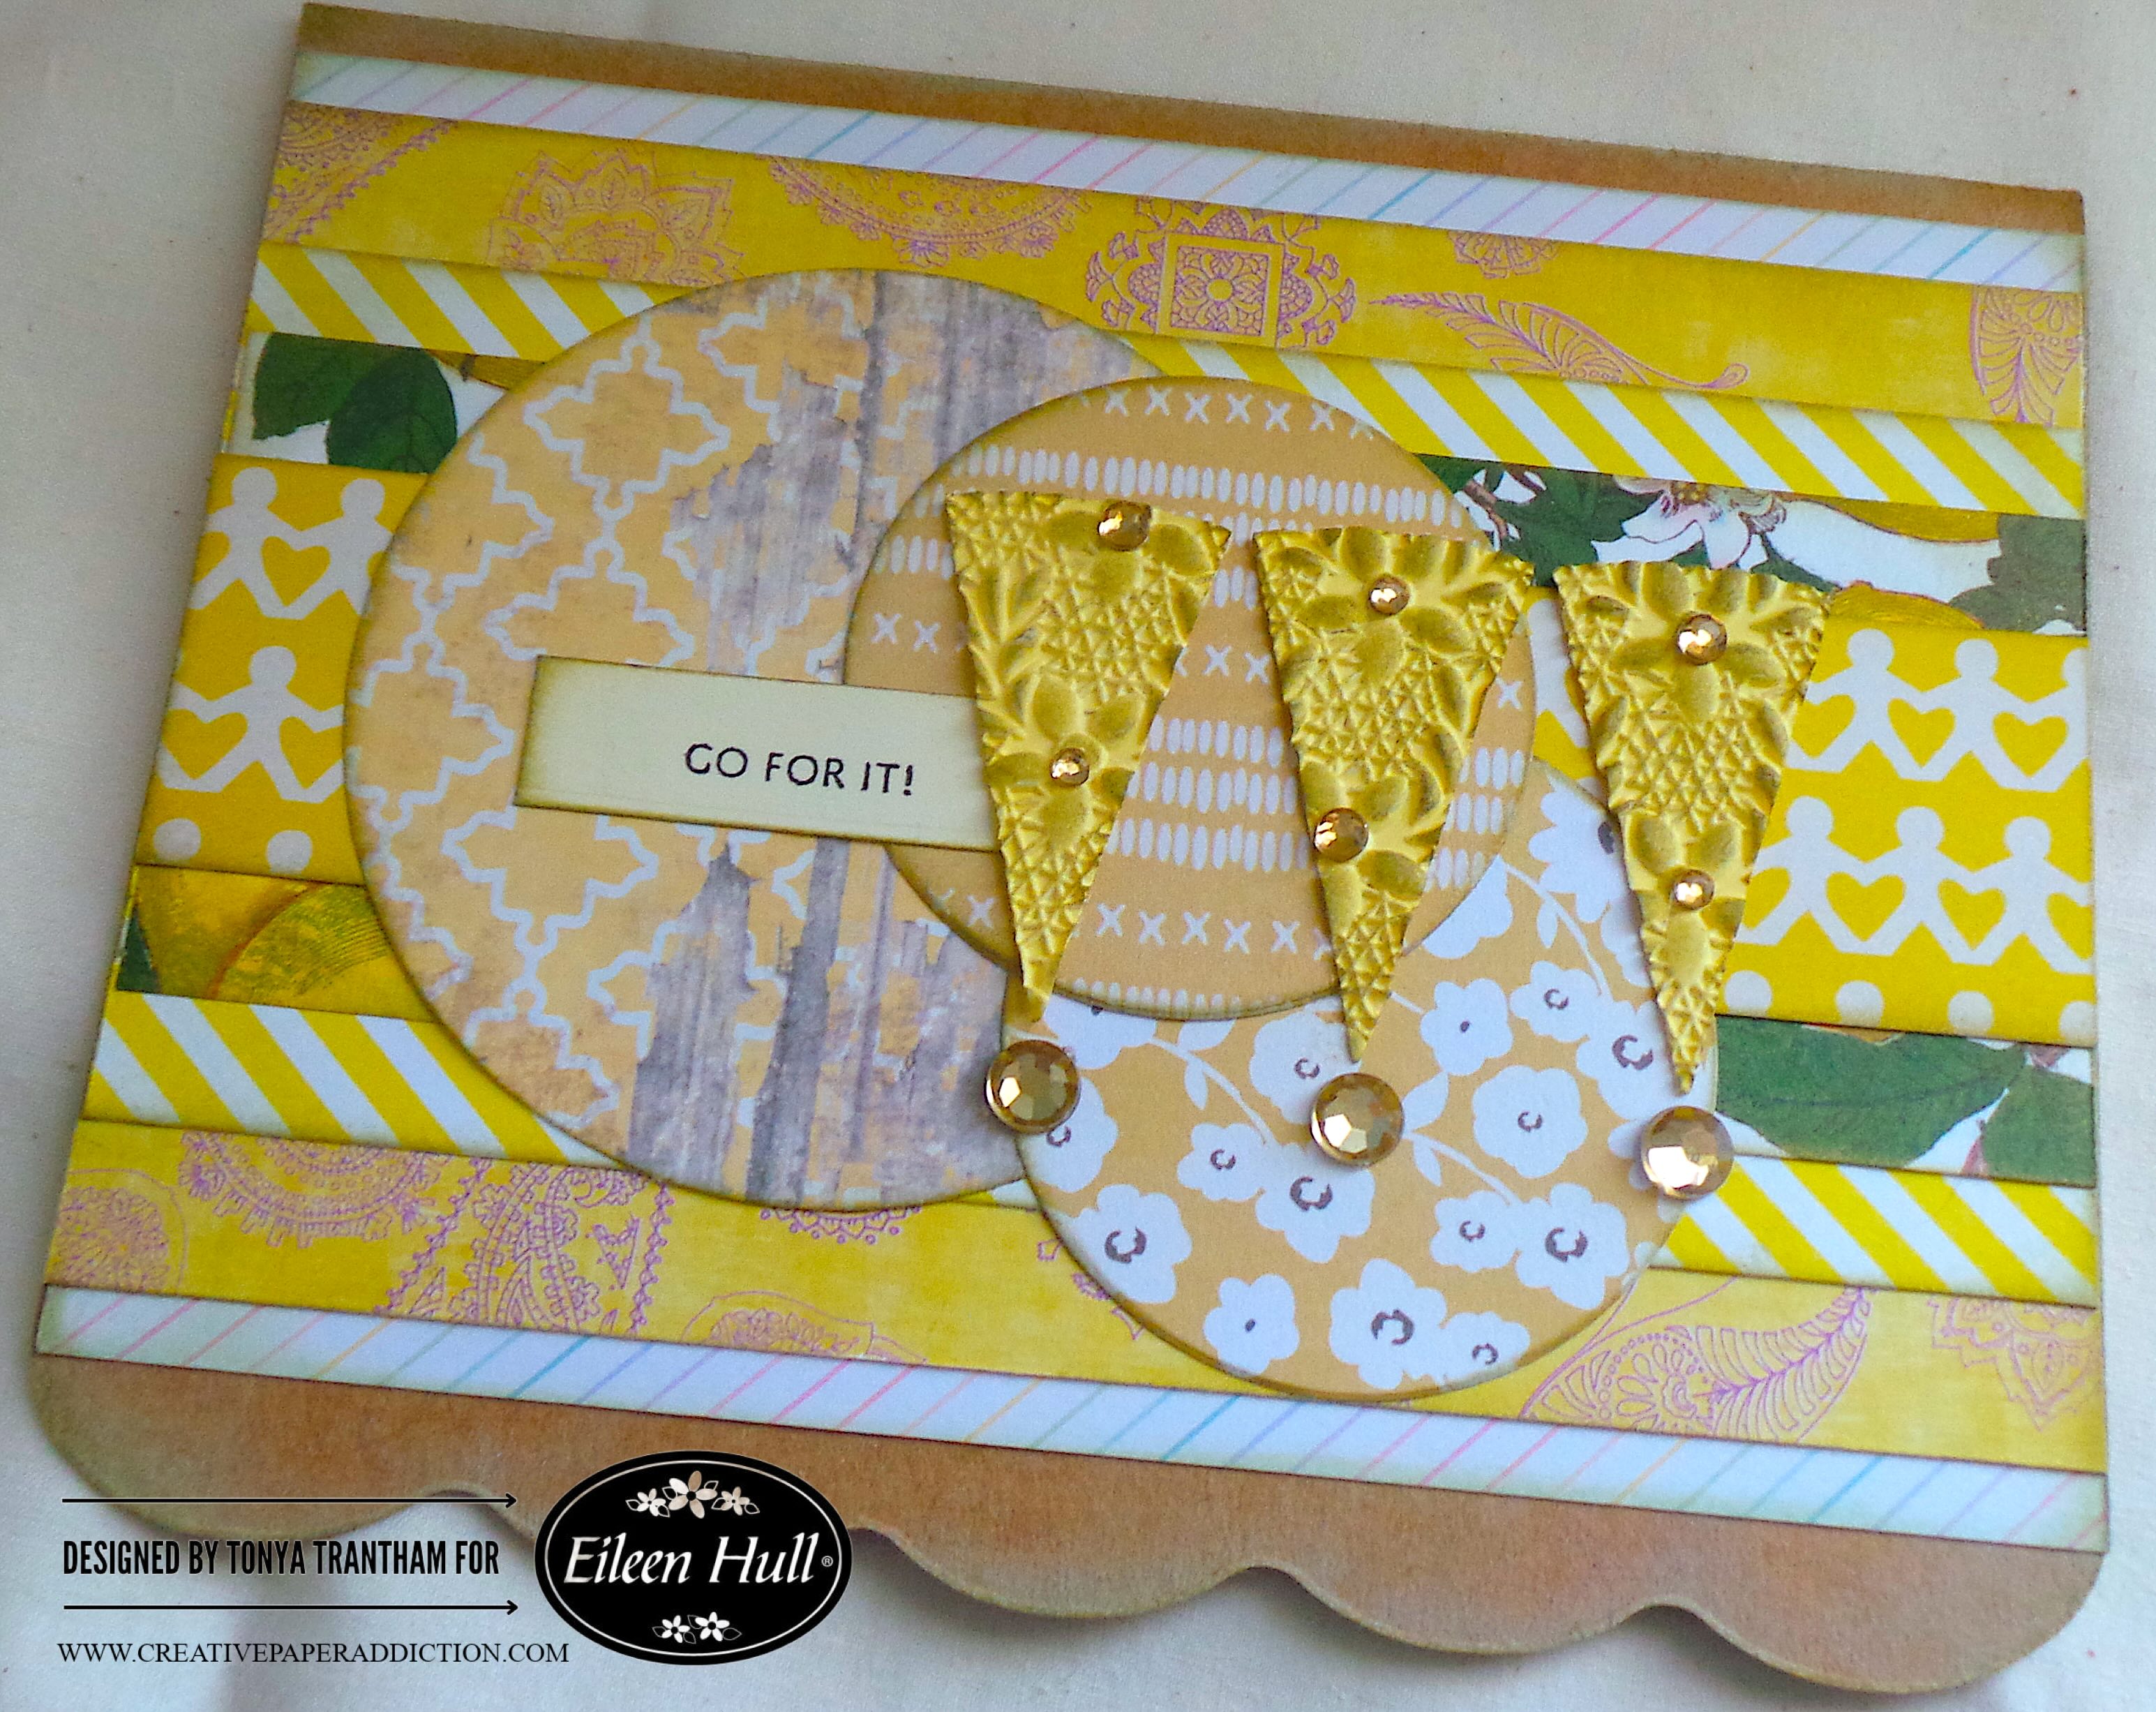
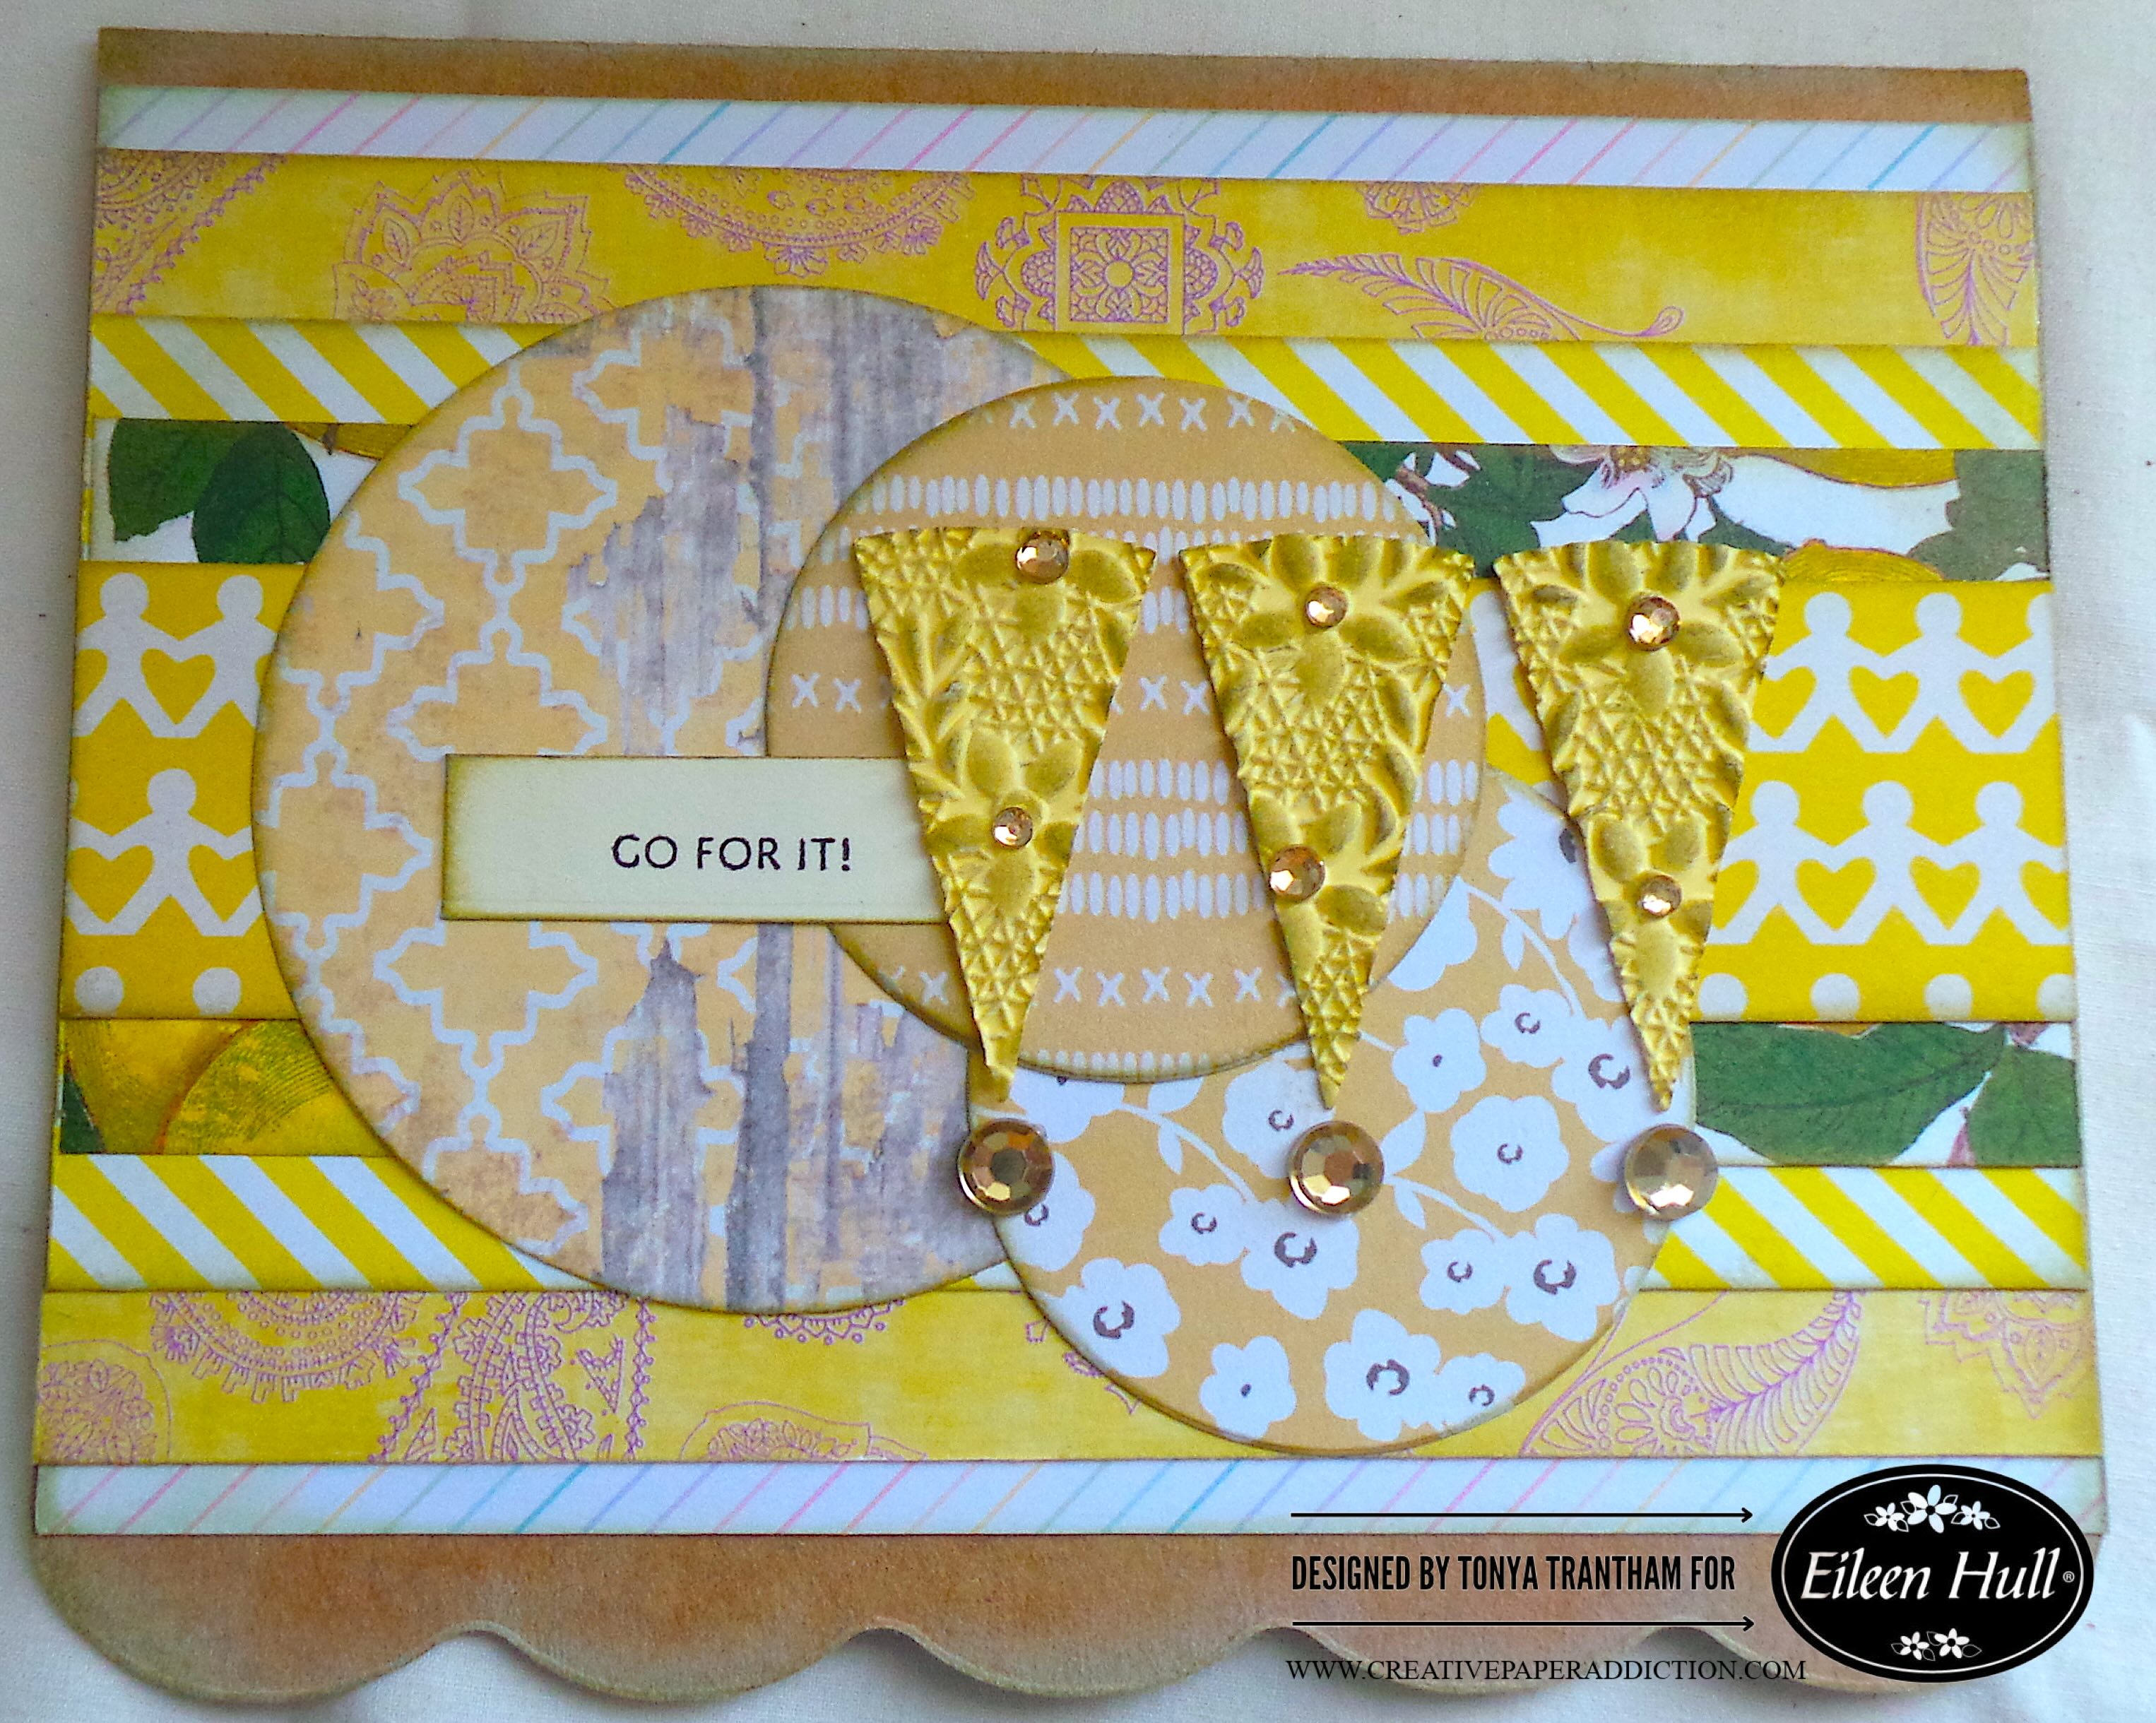
I cut one large and two small circles from the Rainbow Wheels Thinlits and adhered to the card. Side note, the pie/wedge shape diecut looks like an explanation point…if you add a dot to it. I thought it would be the perfect addition to the “Go For It!” stamp that I will be using.

A handmade card featuring layered yellow patterned cardstocks, an oval focal point with the text 'GO FOR IT!', and three embossed pie/wedge shaped elements adorned with gold gems.

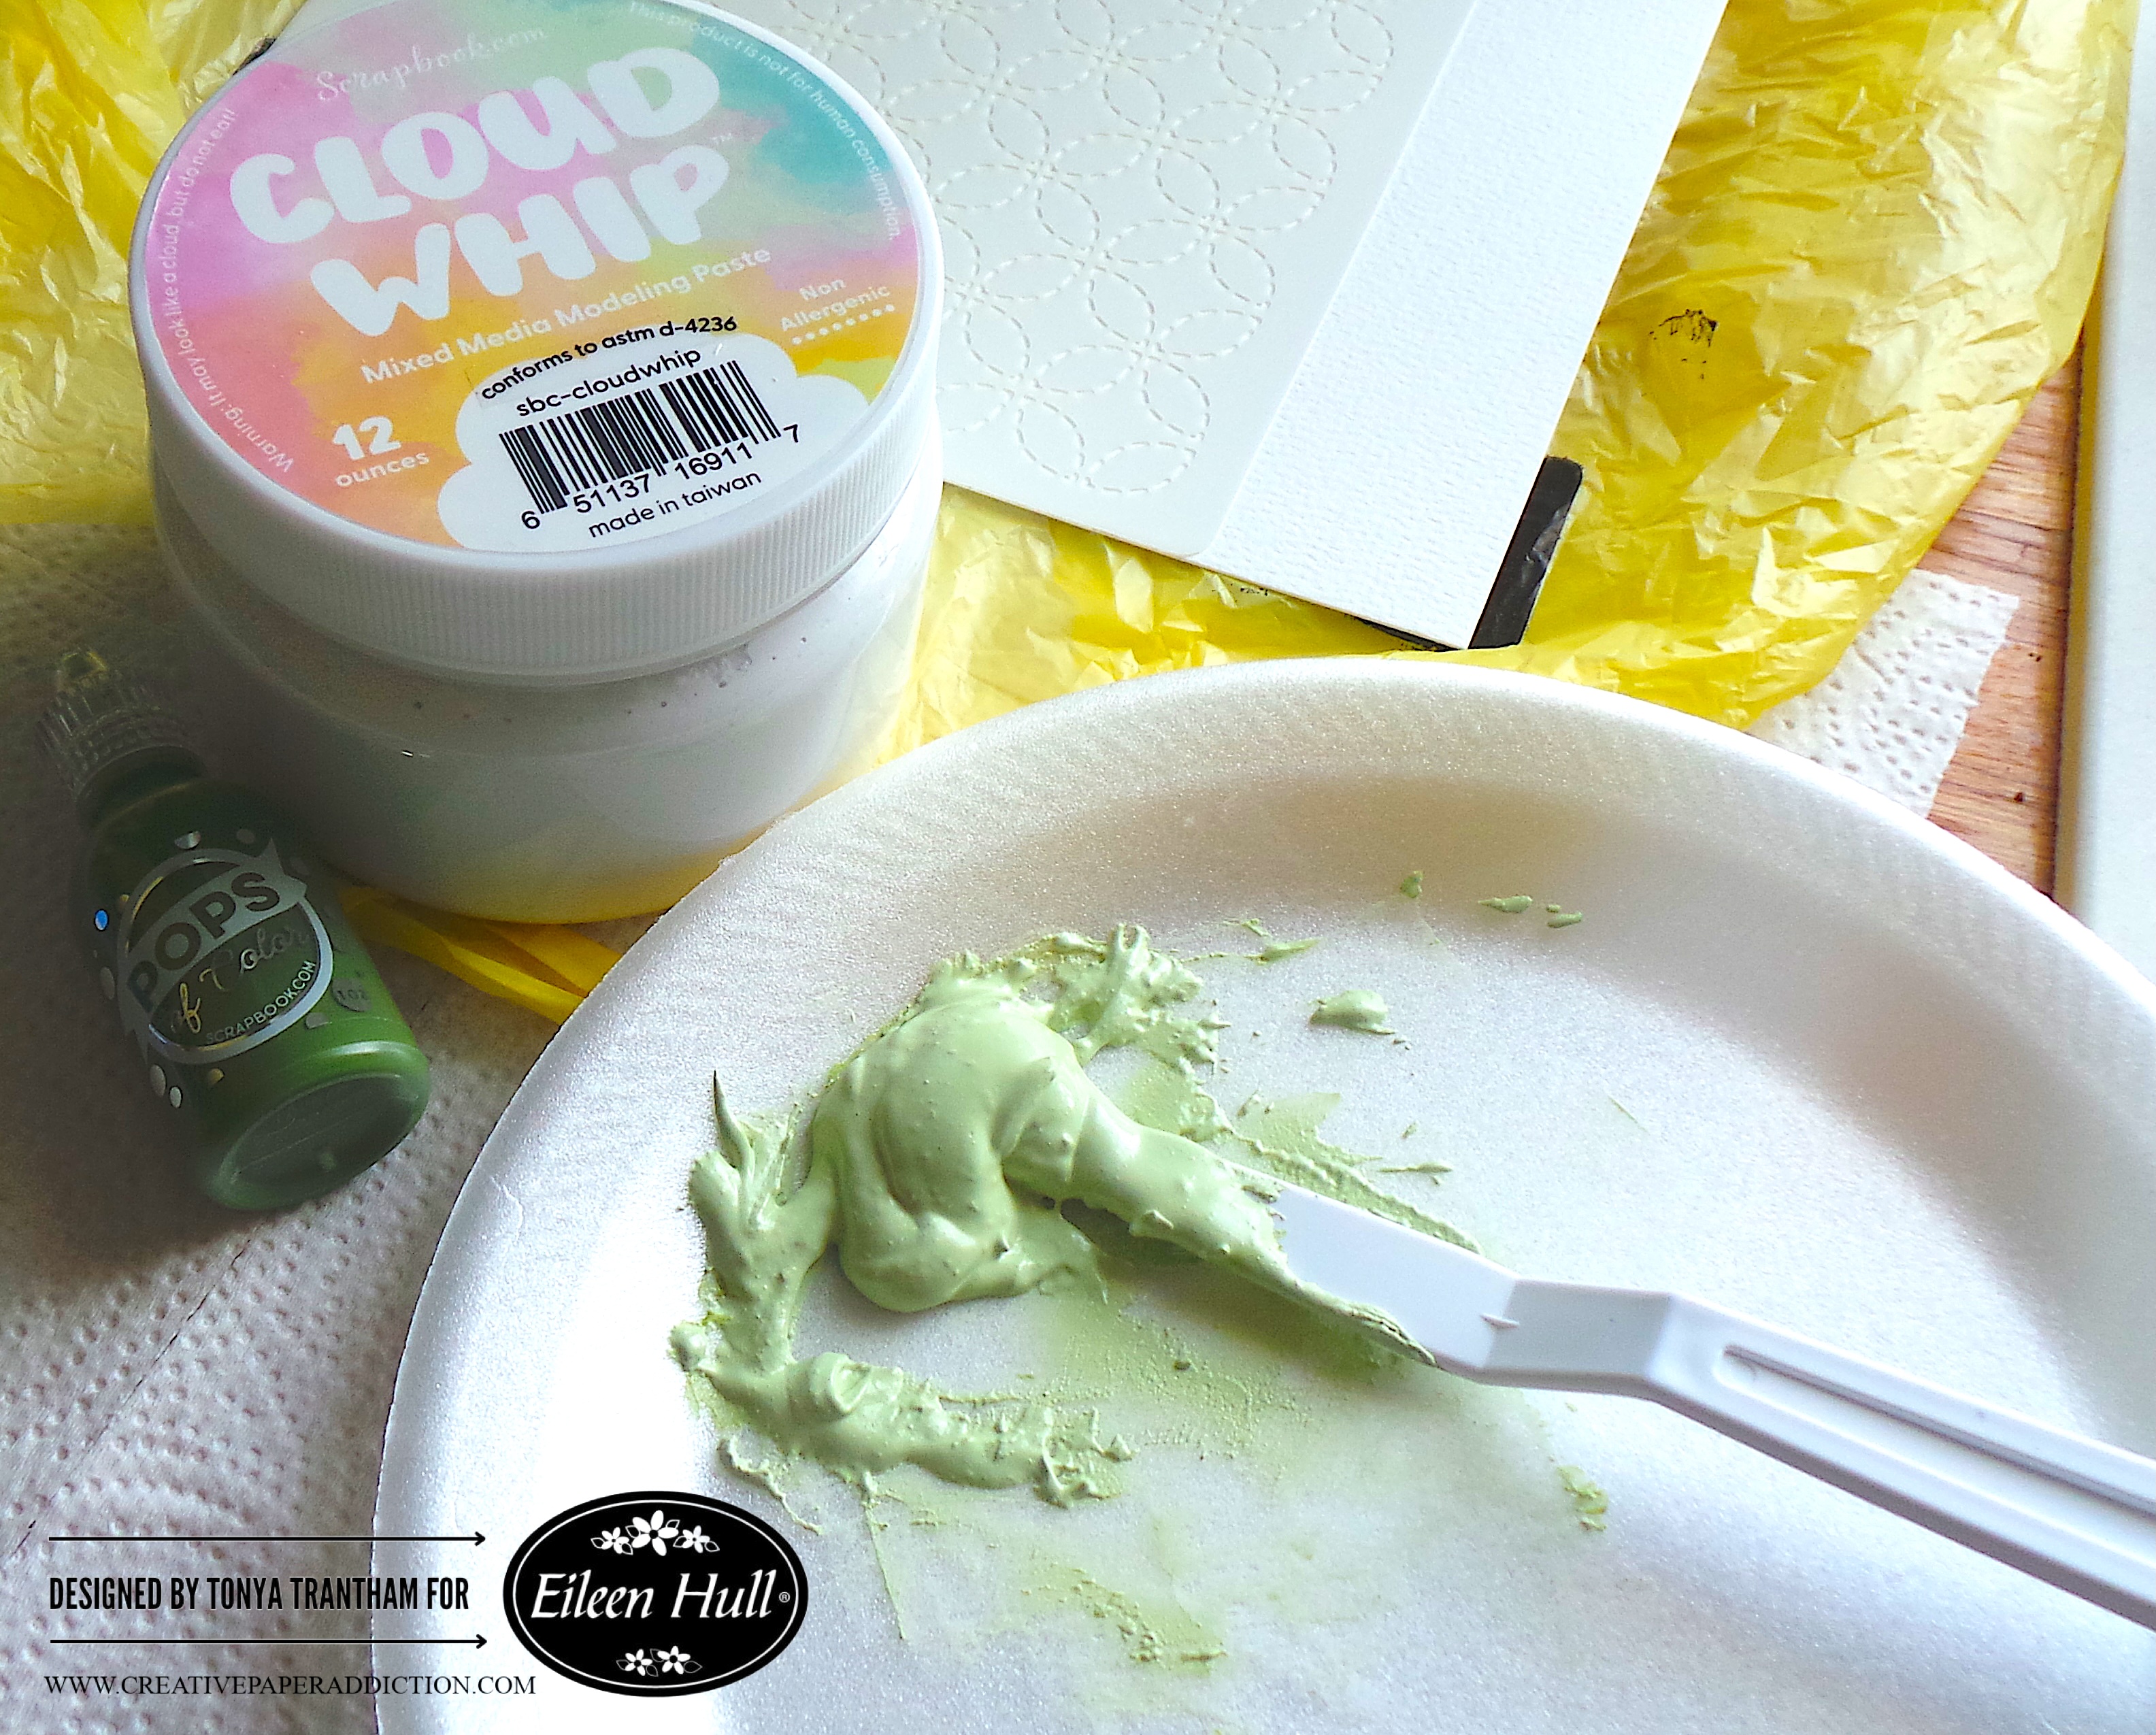
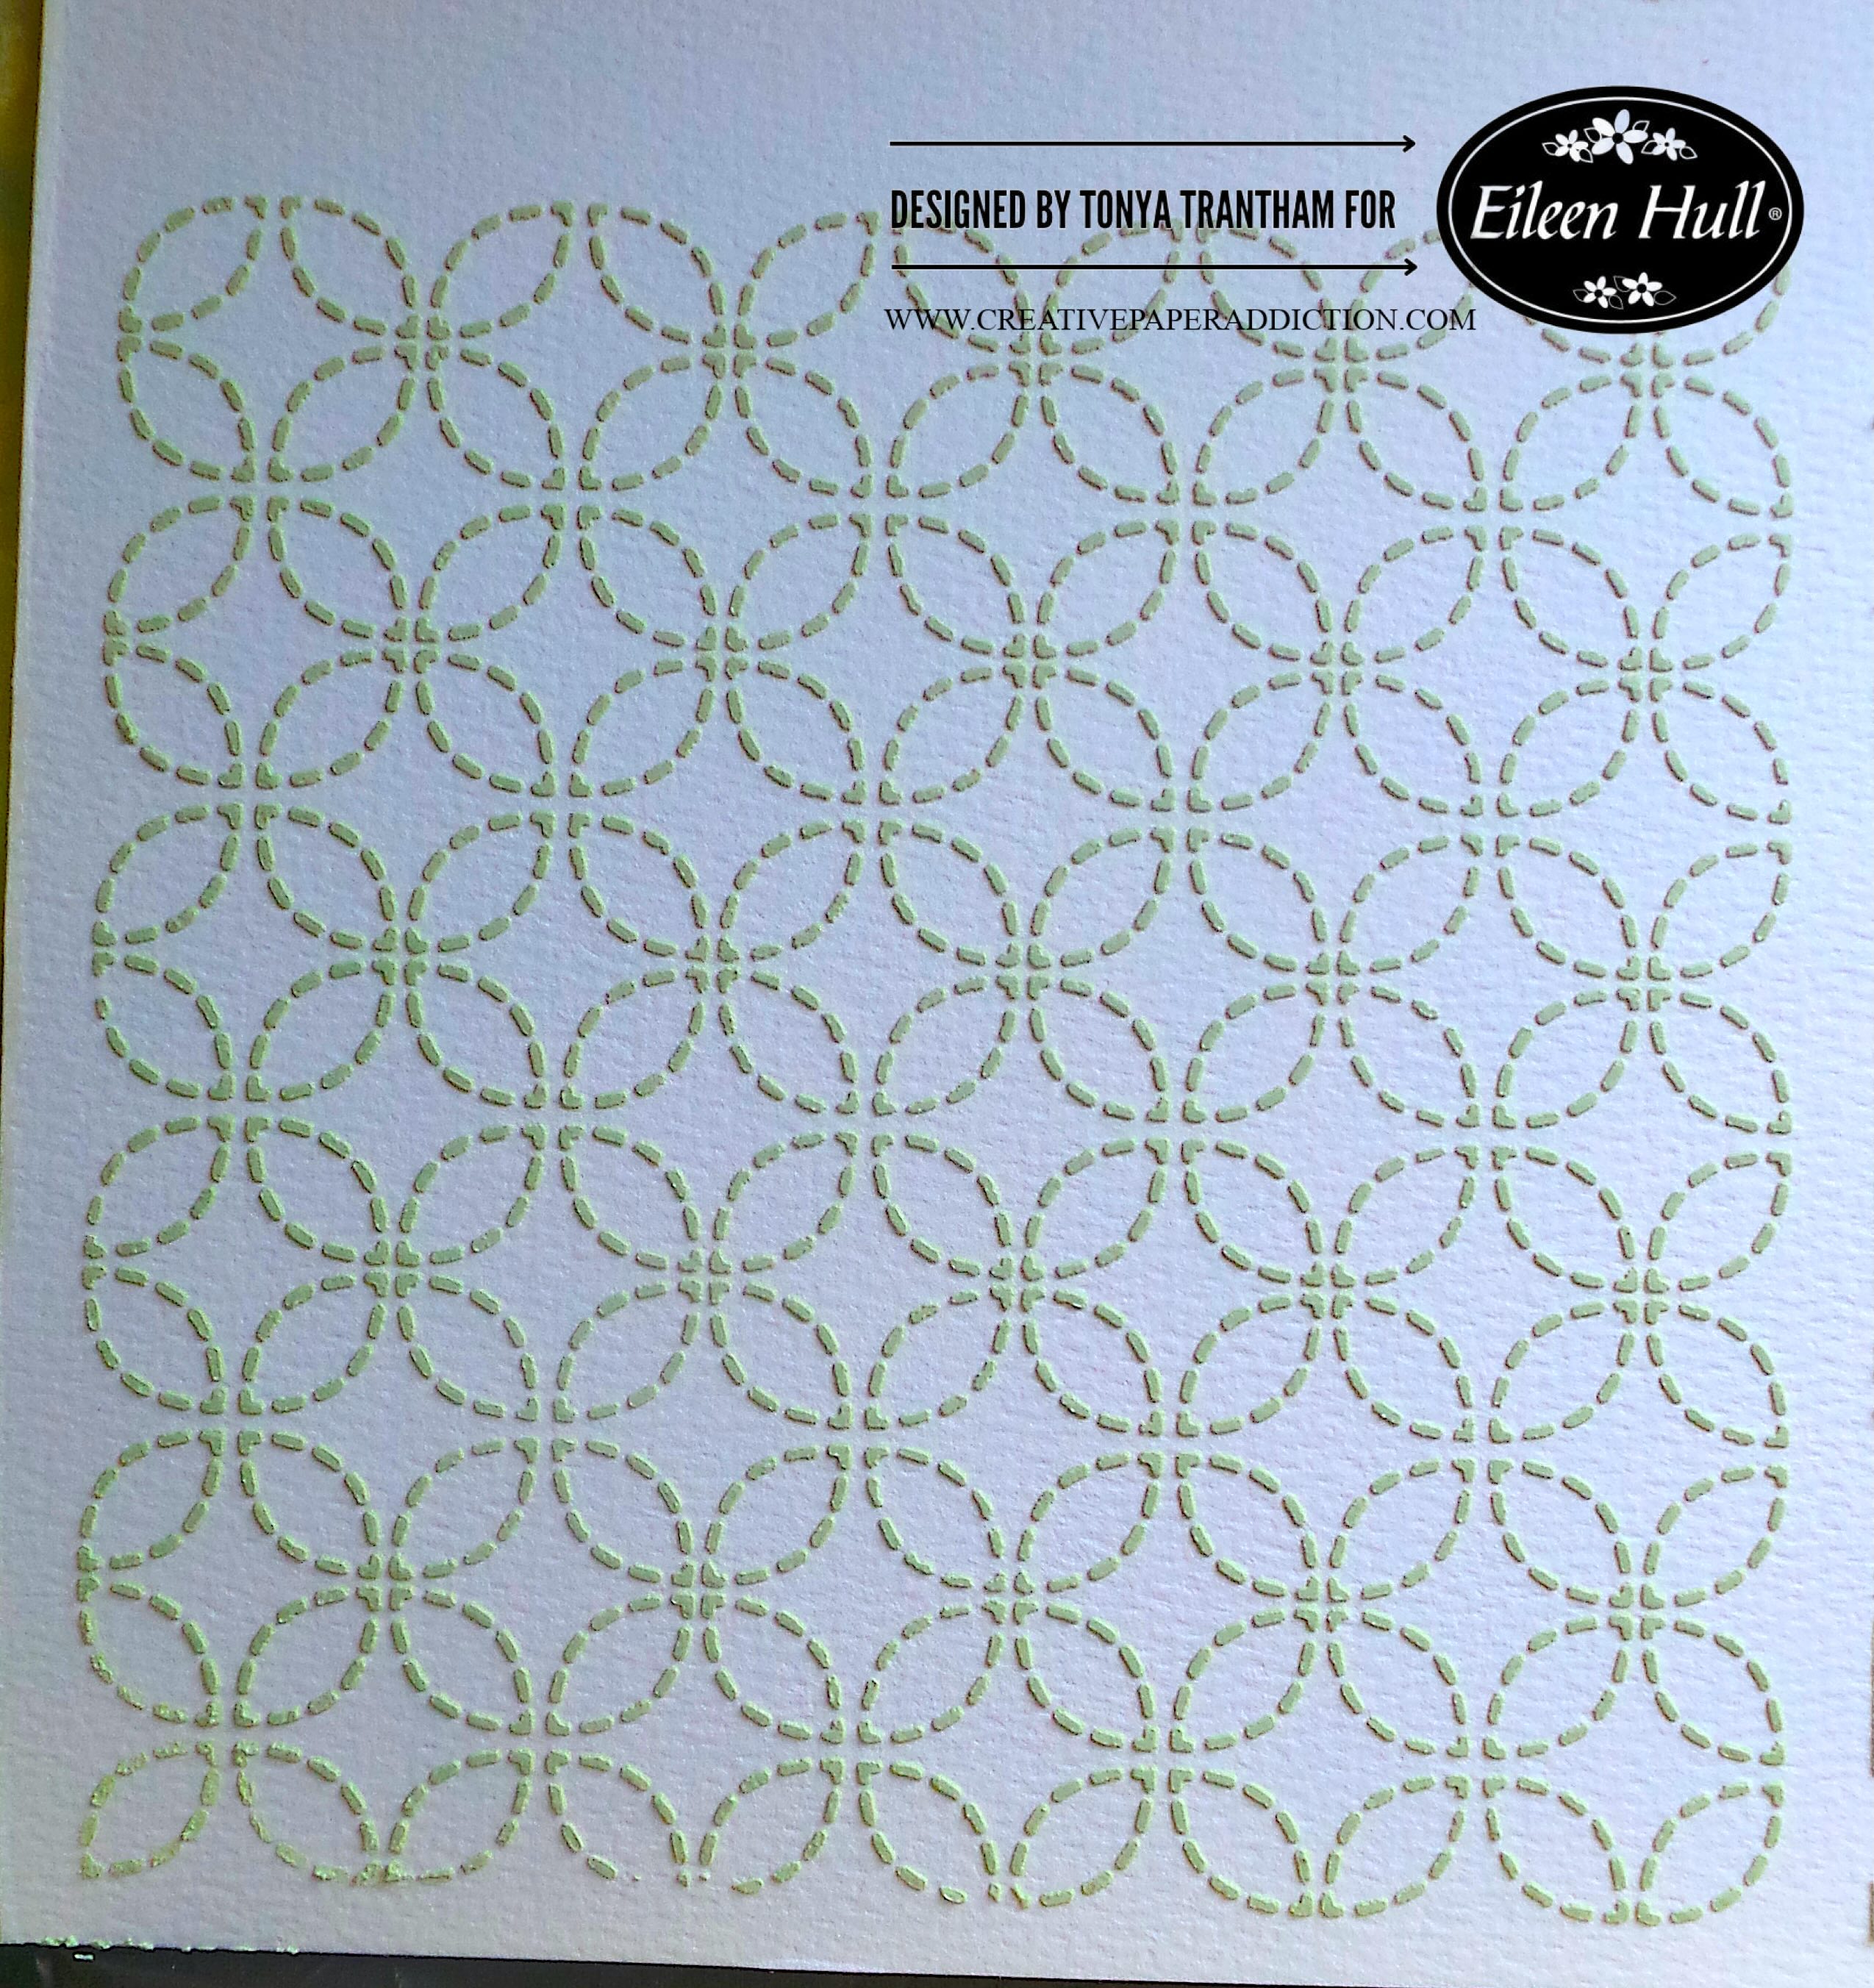
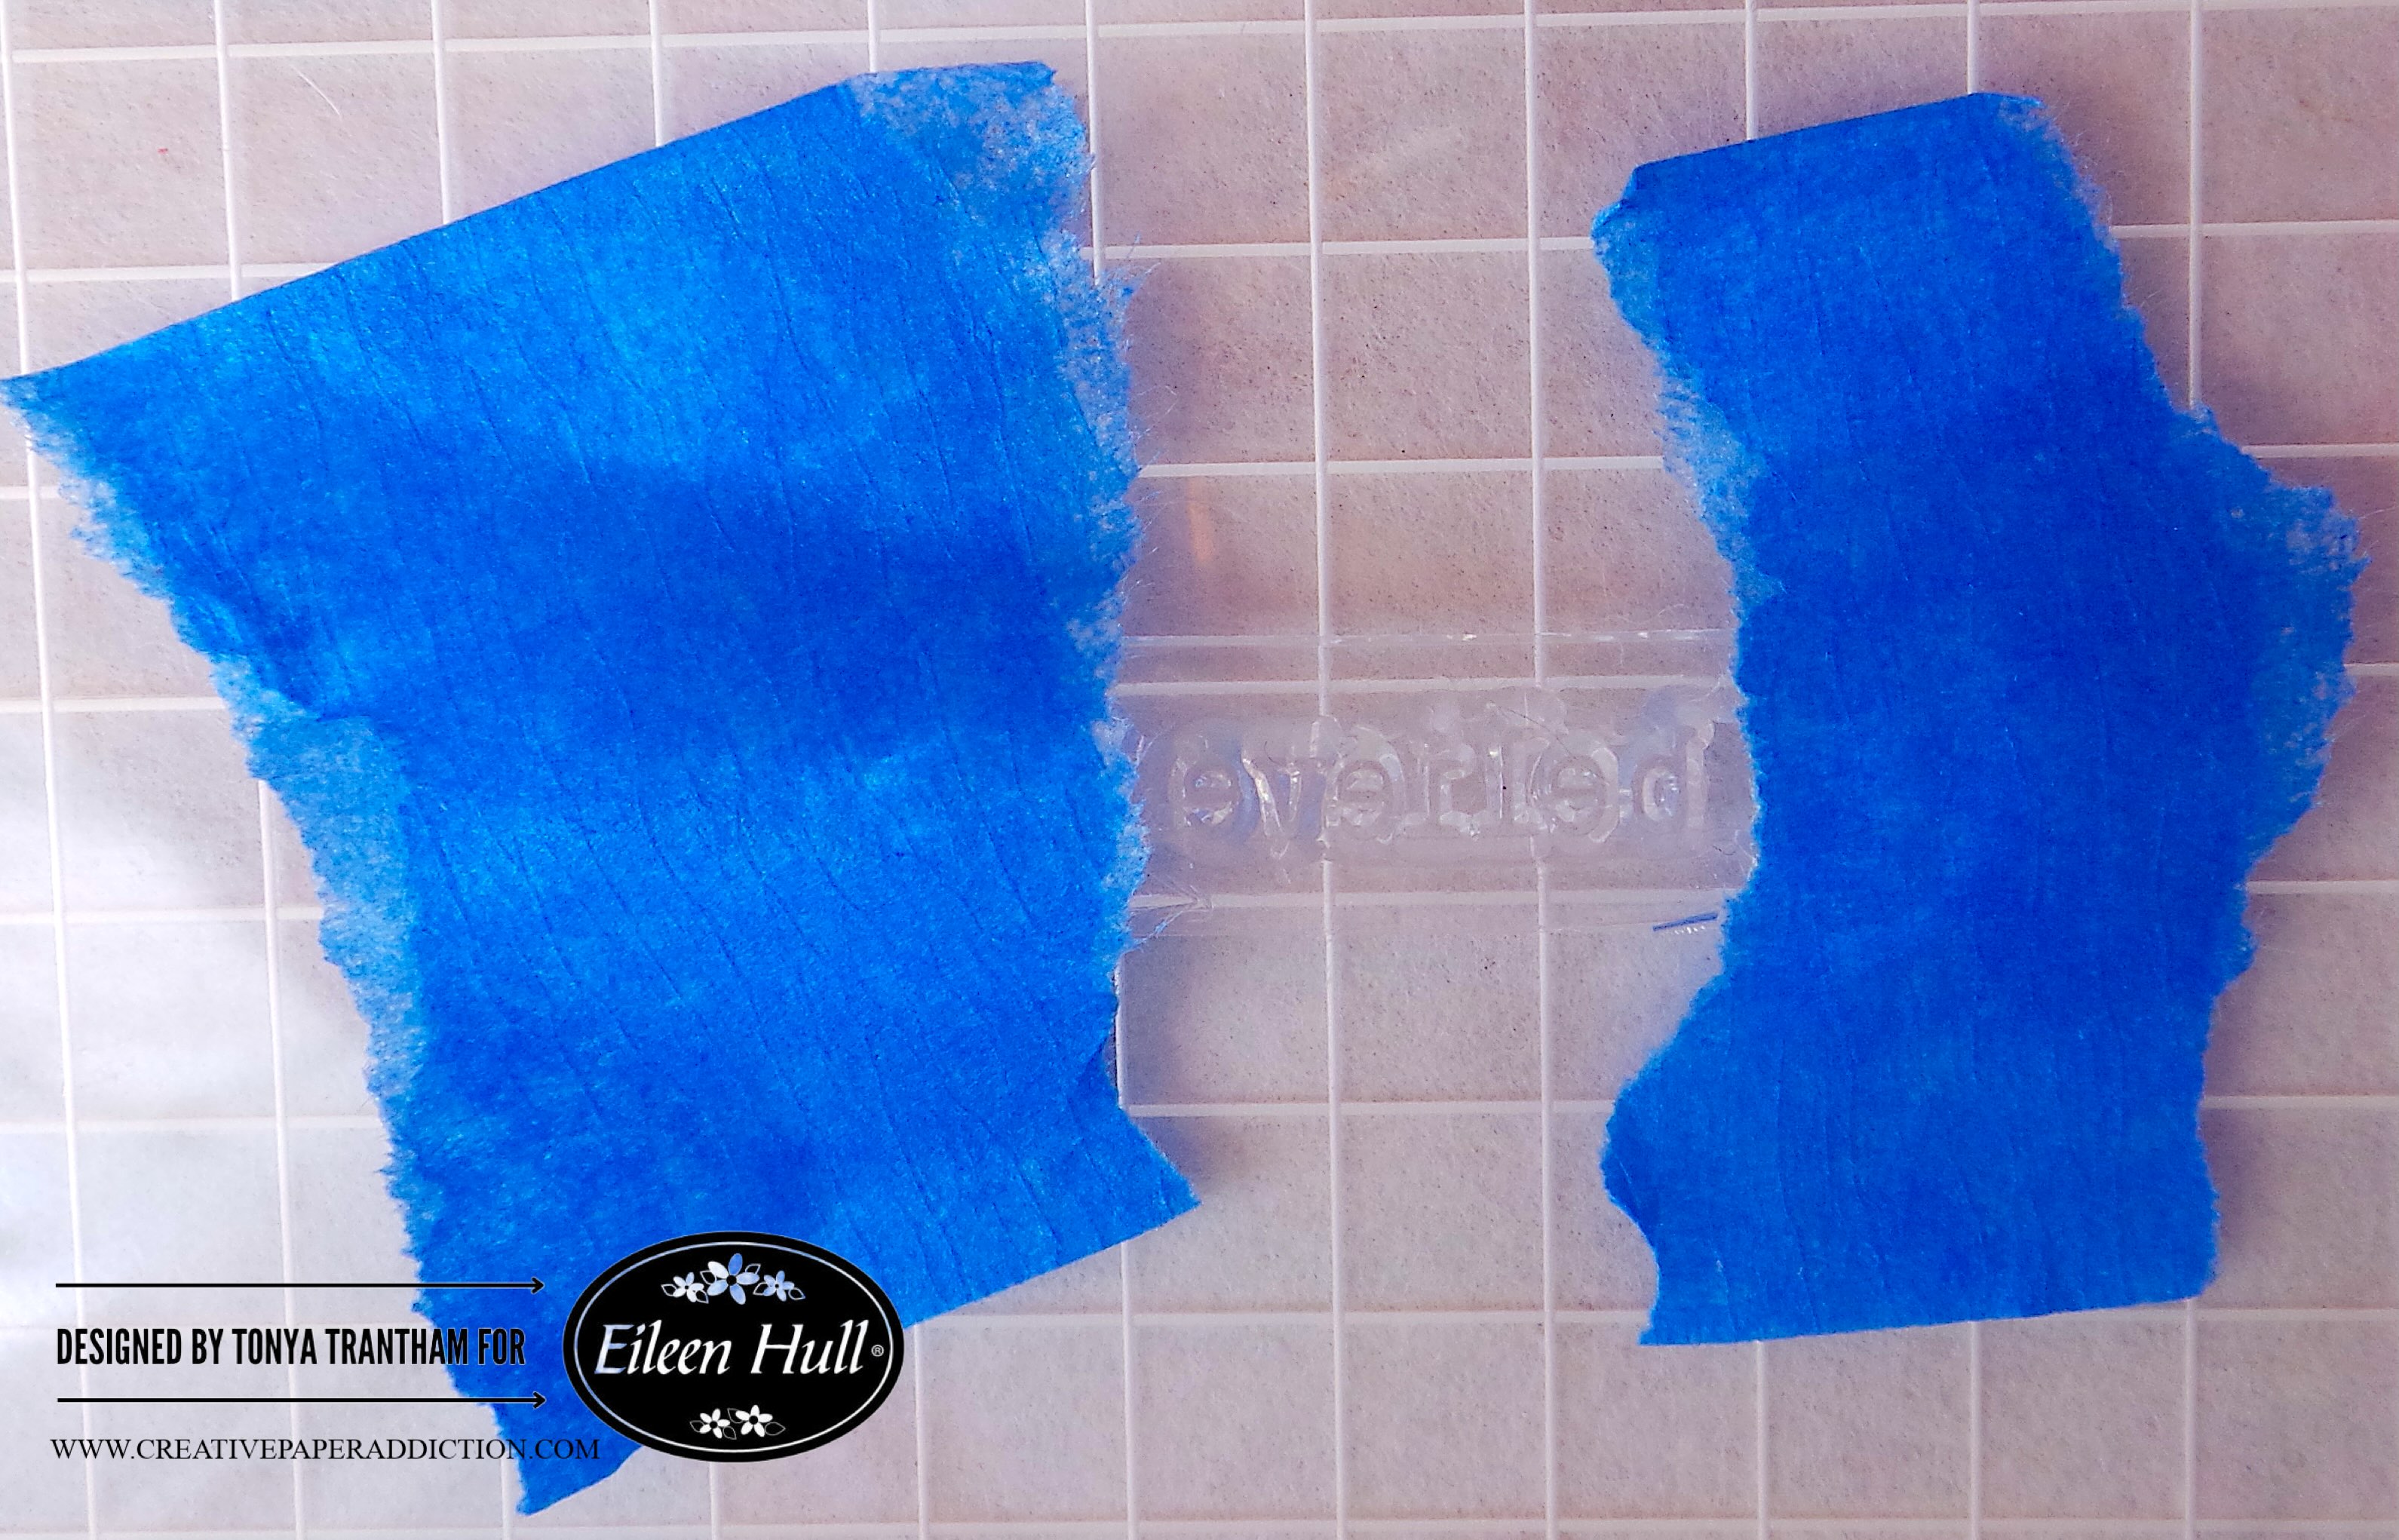
I cut three of the pie/wedge shaped dies from the Rainbow Wheels Thinlits. I embossed all three with the Lace Embossing Folder. I lightly applied Gold Luster Wax over the embossed areas.

A handmade card featuring yellow and patterned cardstocks, with a large circular base, three pie/wedge shapes, and a stamped message that reads 'GO FOR IT!' adorned with gold gems.

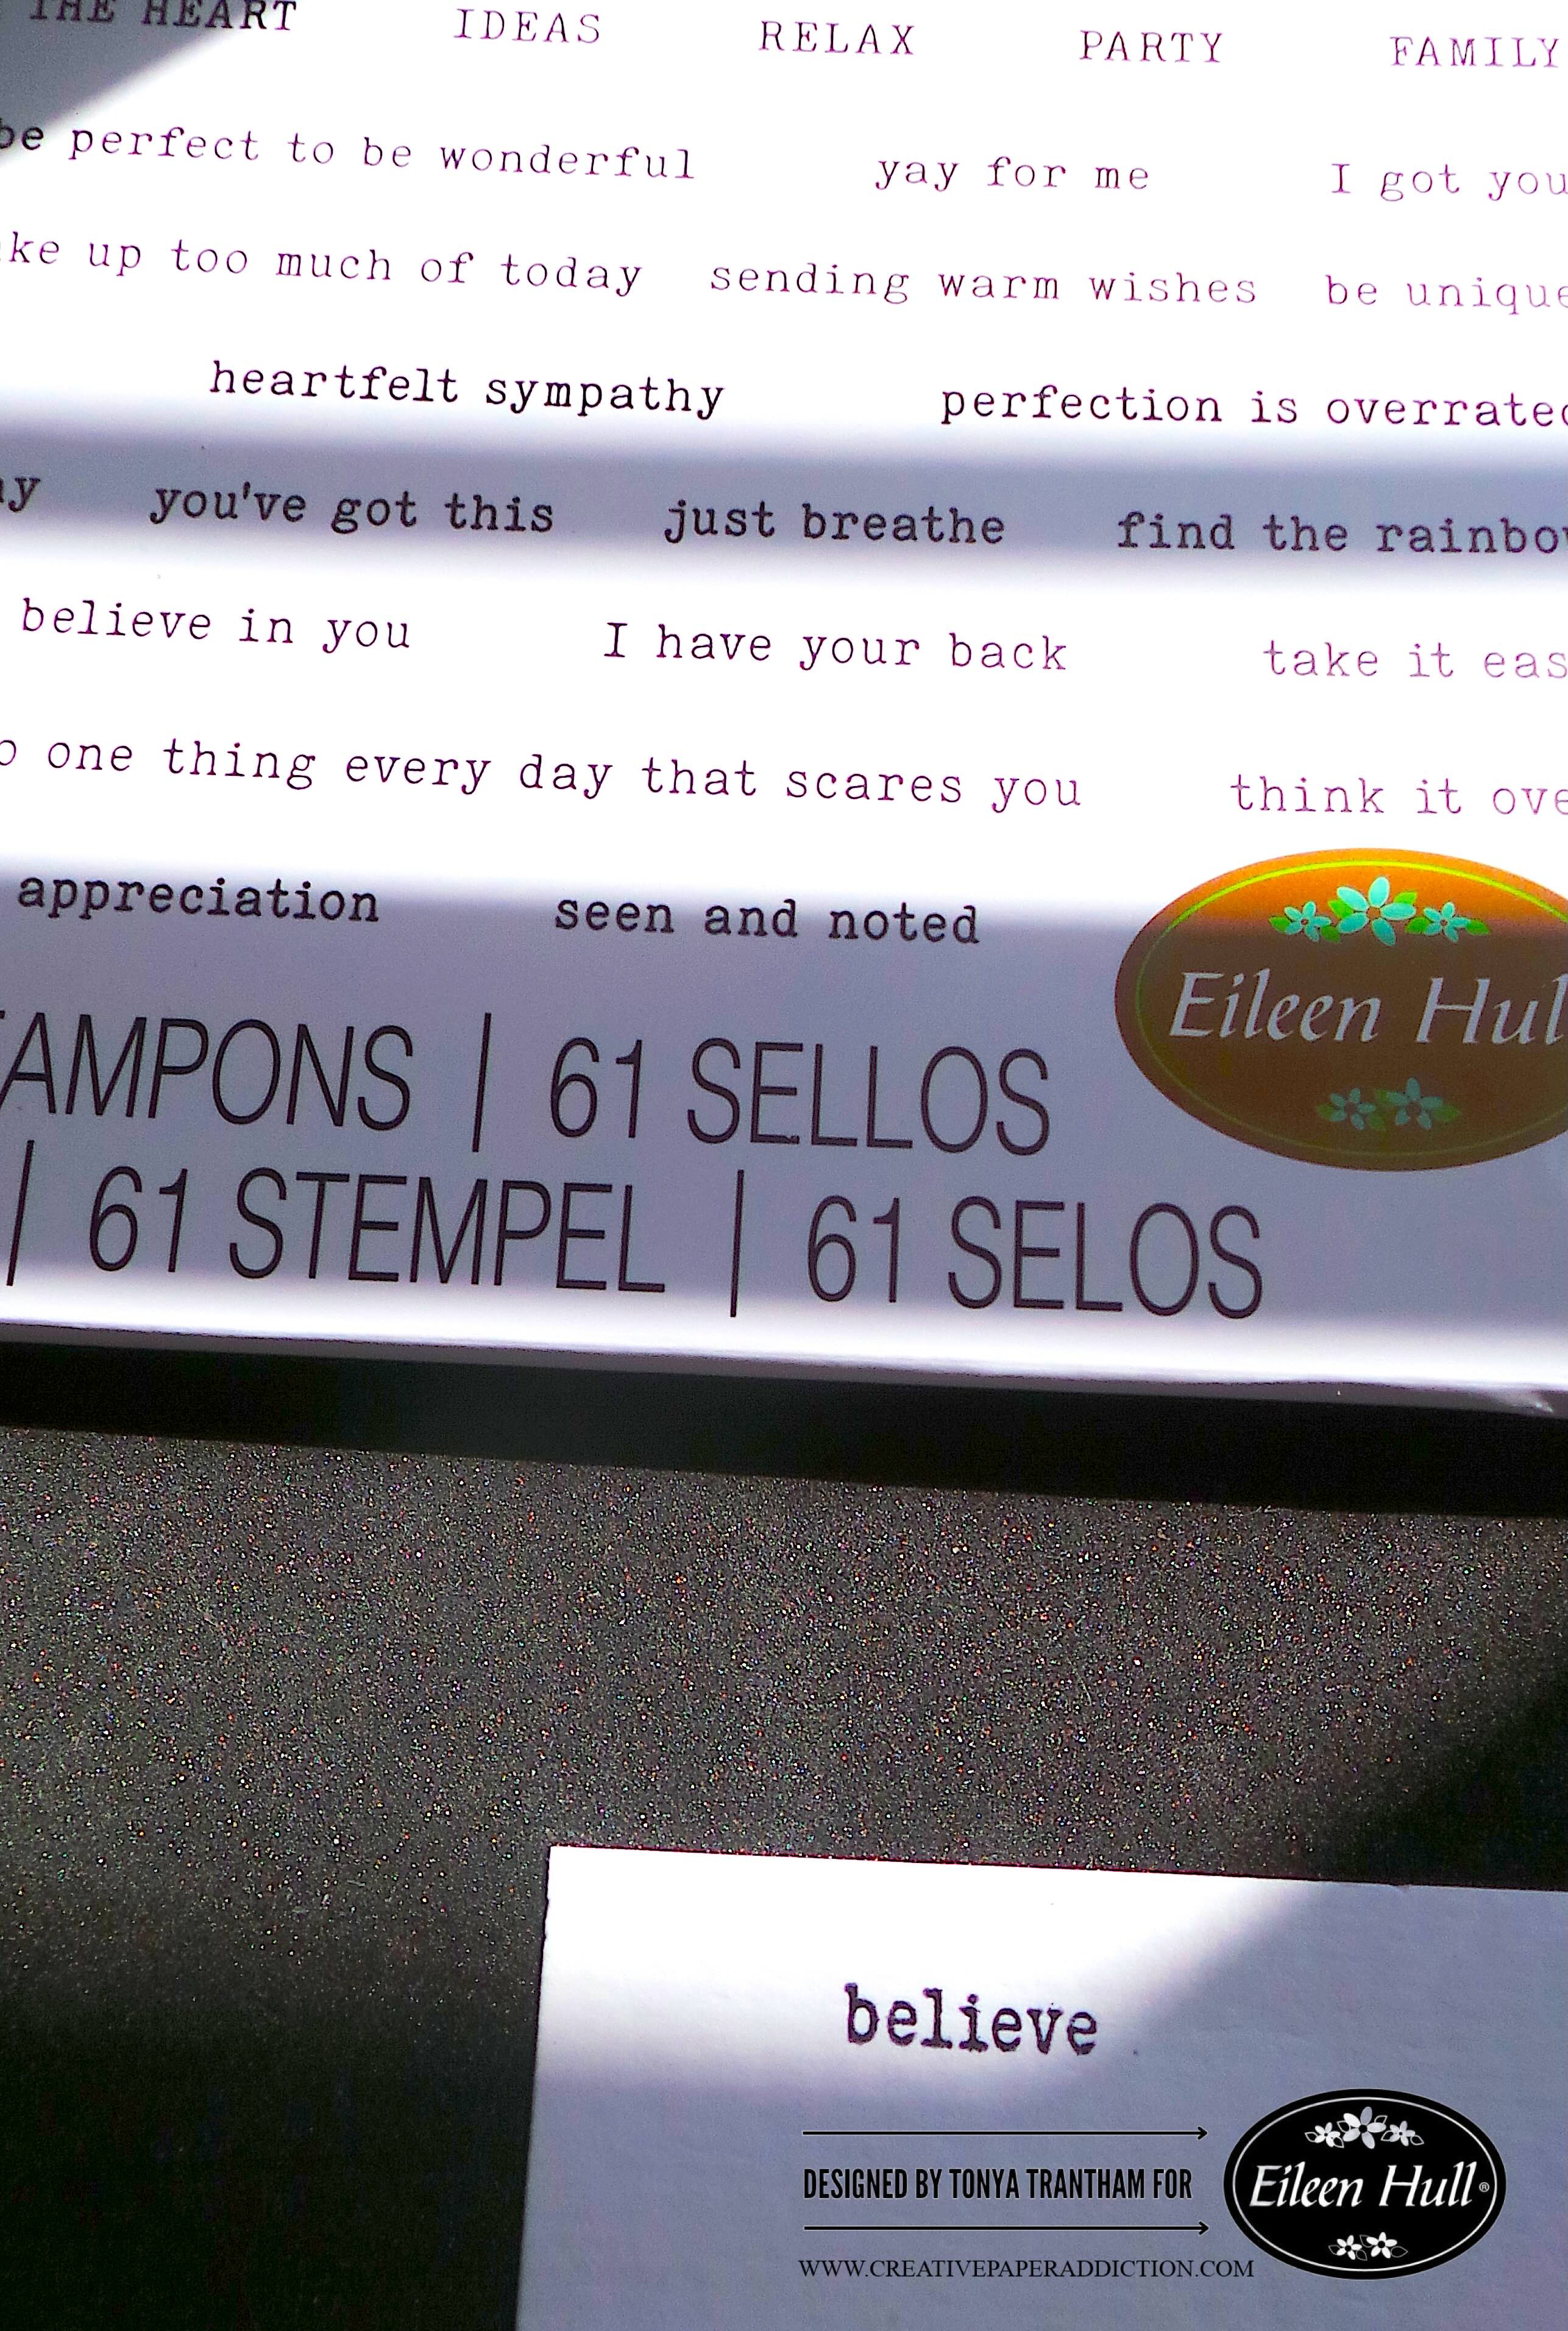
I placed the “Go For It!” stamp from the Swatch Cards Stamp Set onto the MISTI Stamping Tool. I inked the stamp with Black Ink and stamped onto a piece of cardstock. I used the Gold Luster Wax and lightly inked the edges of the saying.

Close-up of a handmade card featuring embossed yellow pie/wedge shapes, gold gems, and the phrase 'GO FOR IT!' on a colorful background.

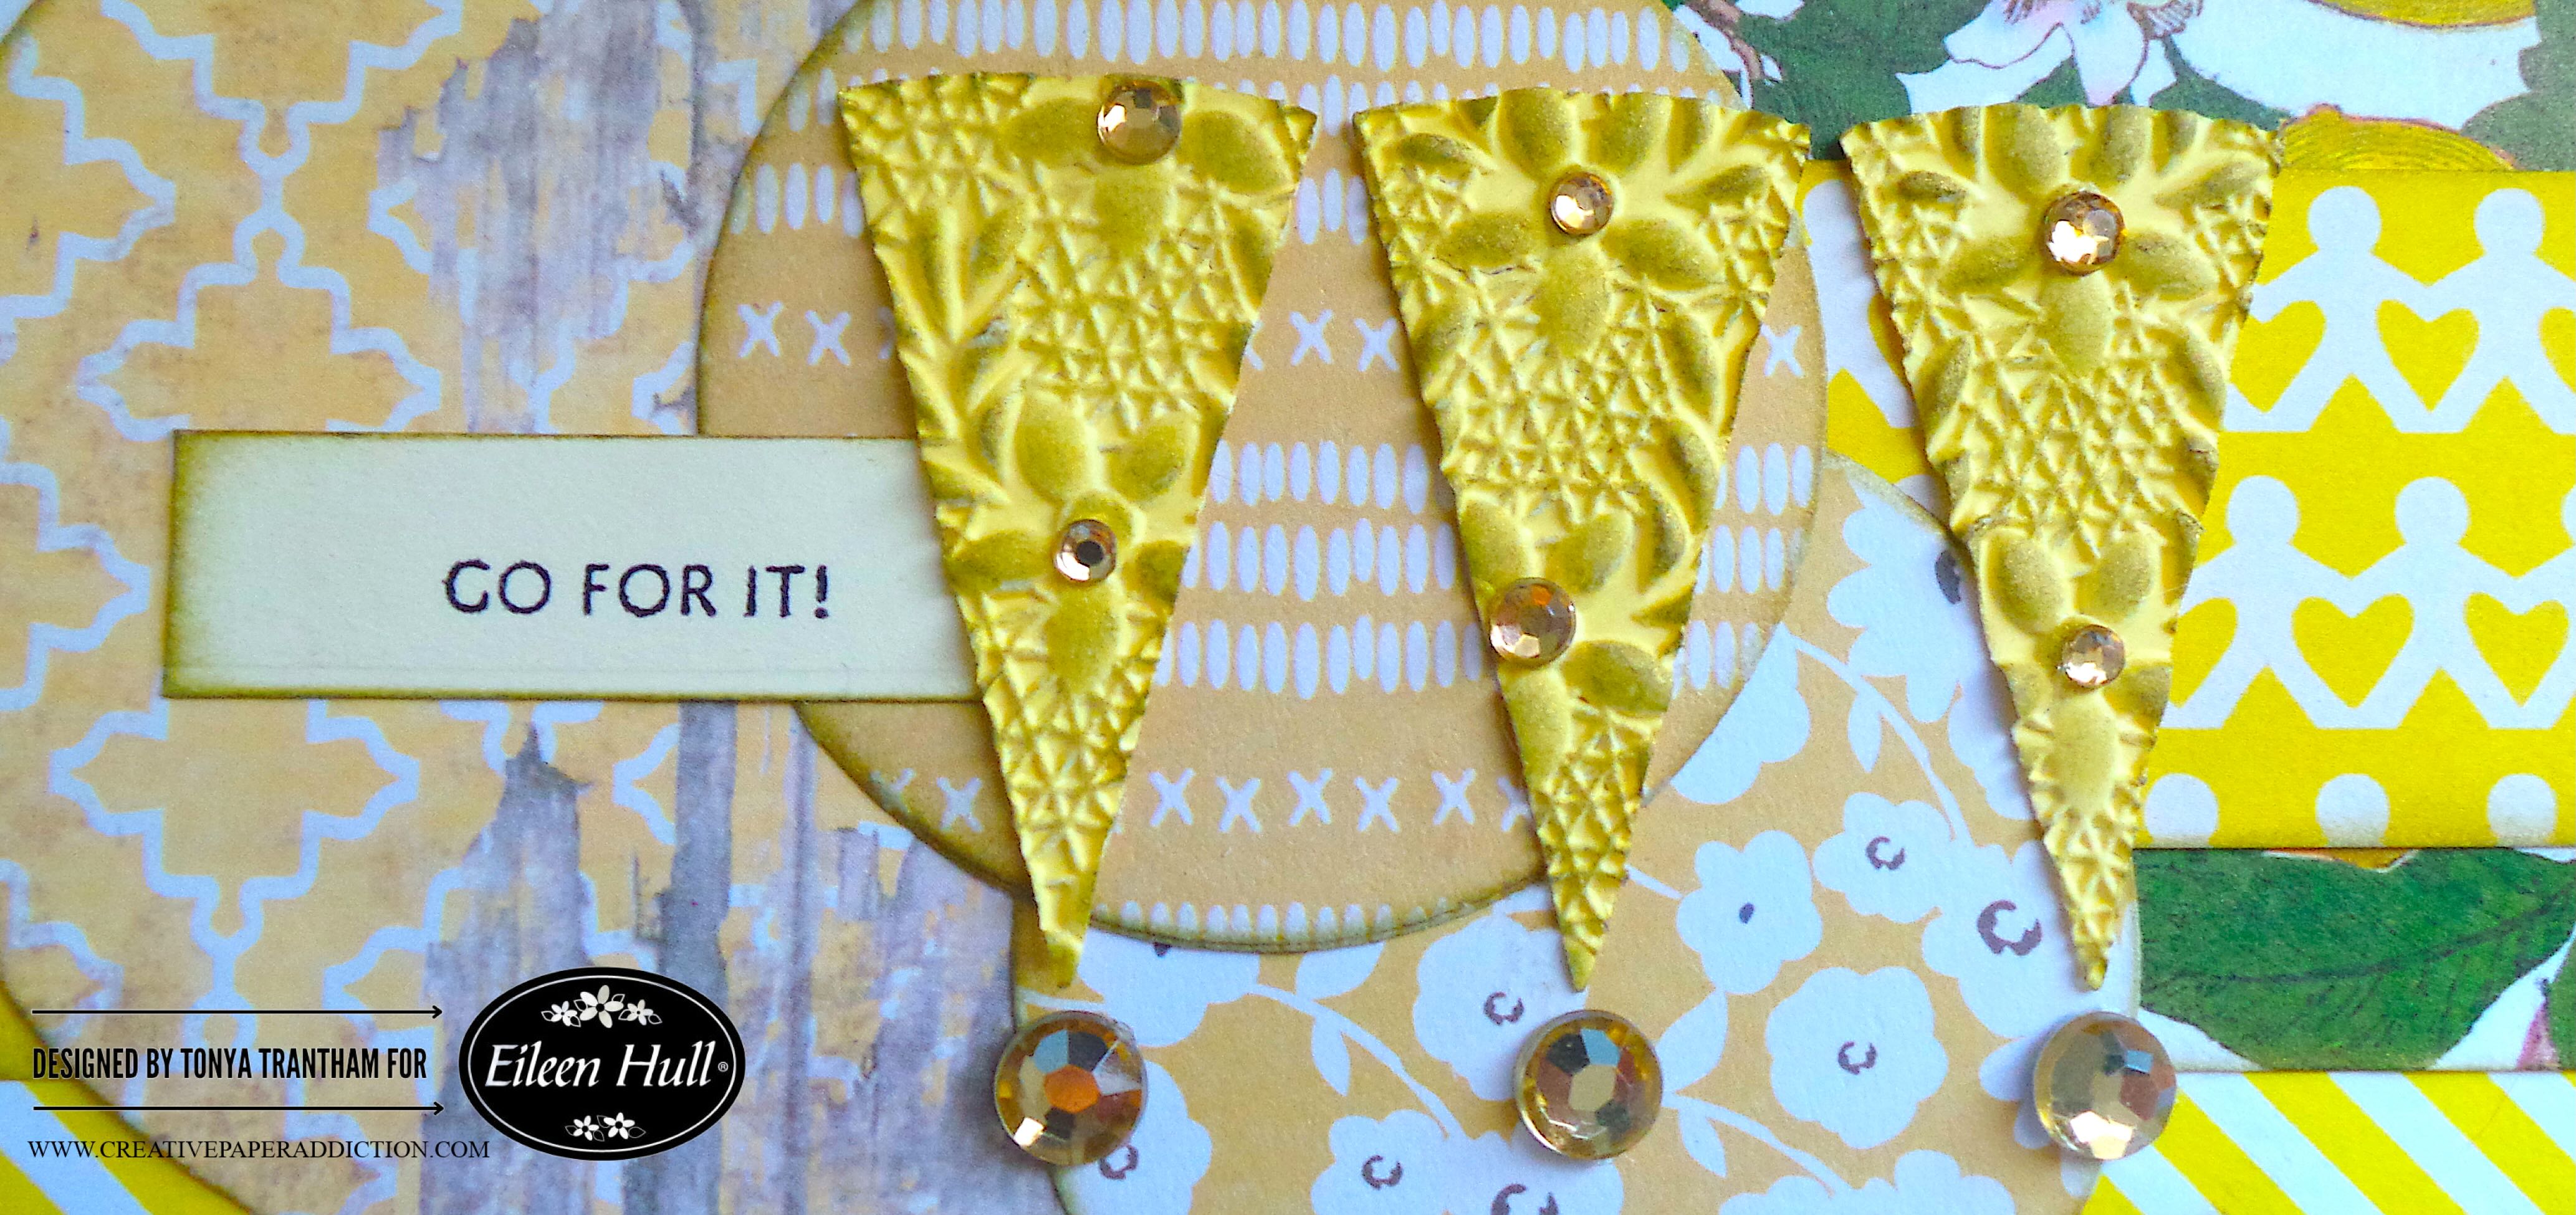
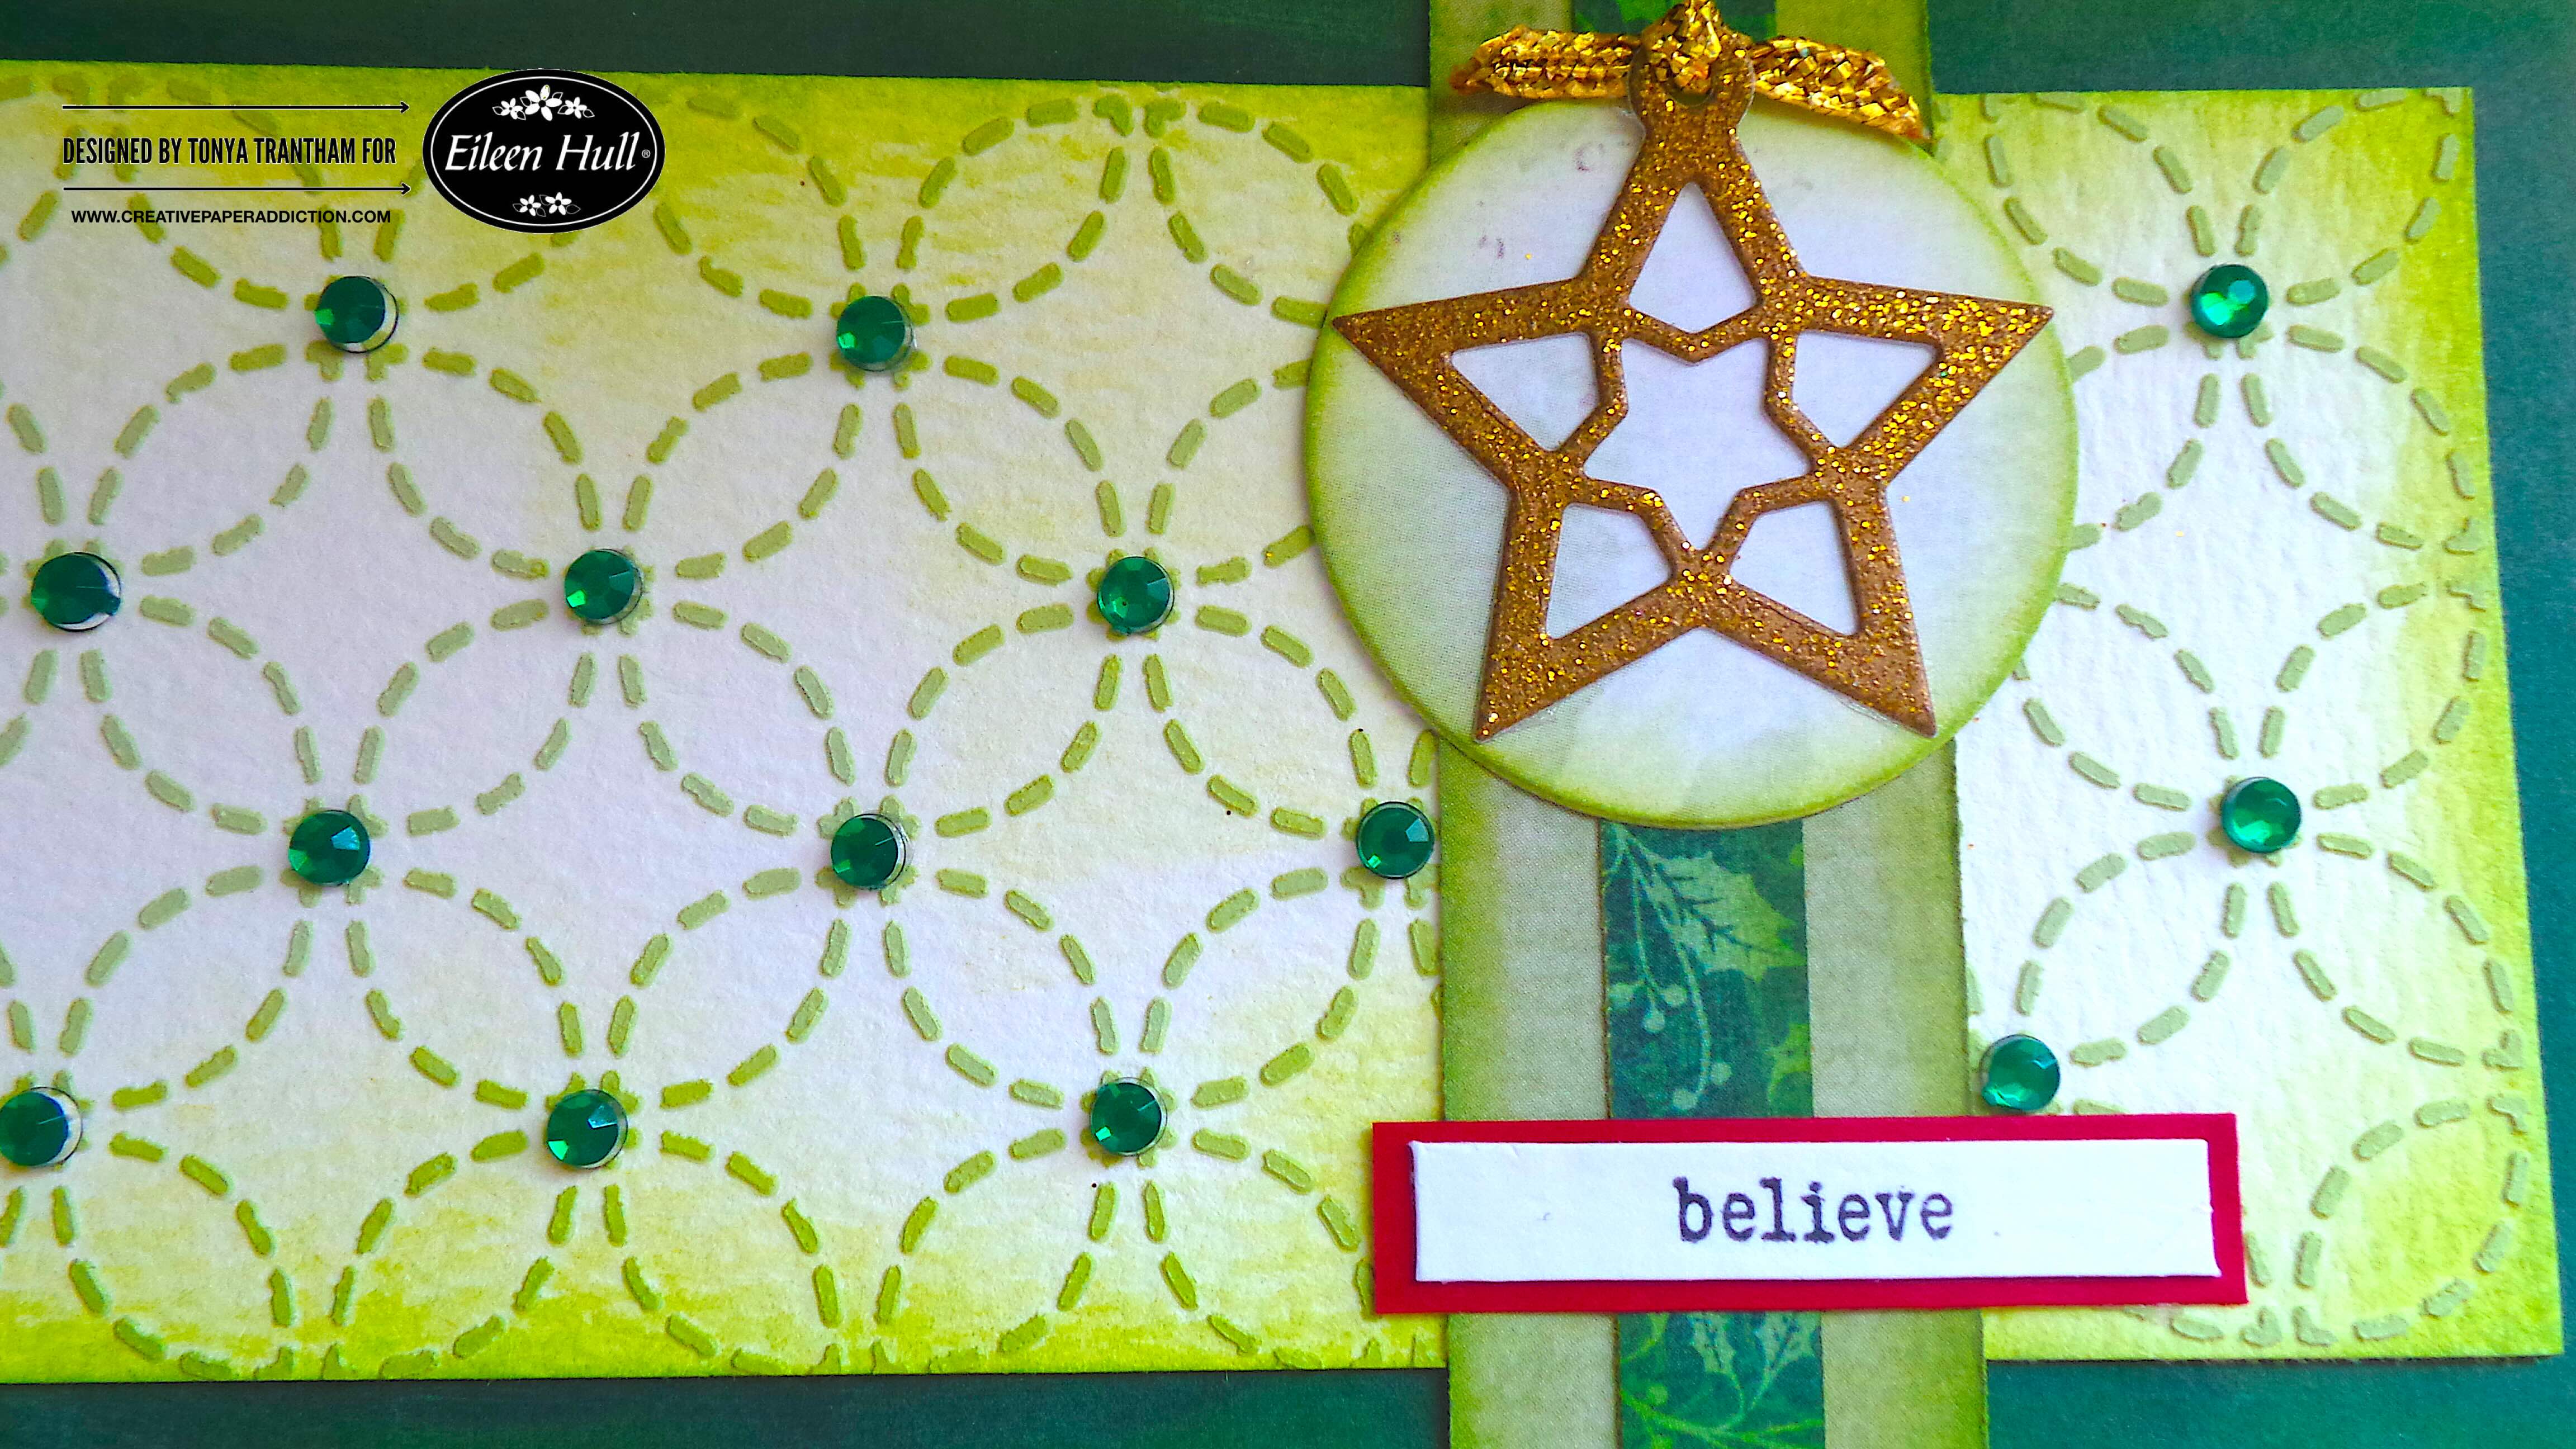
I adhered the pie/wedges dies and sentiment to the card. I added Gold Gems to the bottom of each pie/wedge. I also added smaller gold gems to the center of each embossed flower.

I can’t wait to make more cards with these dies and stamp set. If you haven’t been by Eileen’s blog lately you can find the latest post HERE.

If you have any questions or comments about this card, please leave them below.

A handmade card featuring a circular design with a 'Go For It!' sentiment, adorned with yellow pie-shaped diecuts and gold gems on a patterned cardstock background.

Supplies

Sizzix/Eileen Hull: Handbound Journal Diecut

Sizzix/Eileen Hull: Rainbow Wheels Thinlits

Sizzix/Eileen Hull: Lace Embossing Folder

Sizzix/Eileen Hull: Swatch Cards Stamp Set

Diecut Machine

MISTI Stamping Tool

Black Ink

Paper Cutter

Scissors

Various Patterned Cardstocks

Kraft Cardstock

Gold Gems

Gold Luster Wax

Beacon Adhesives: Zip Dry Adhesive

(Products listed above are Affiliated Links for your convenience)

DISCLAIMERS

This blog is compensated to provide opinion on products, services, websites, and various other topics. Even though the owner(s) of this blog receives compensation for our posts or advertisements. I always give my honest opinions, findings, beliefs, or experiences on those topics or products. The views and opinions expressed on this blog are purely my own. Any product claim, statistic, or quote should be checked with each manufacturer. Verify other representations about a product or service with the provider or party in question.This blog contains affiliate linksClicking these links helps to support Tonya Trantham Designs – Creative Paper Addiction. It runs at no additional cost to you. Today’s features are Sizzix, Eileen Hull and Scrapbook.com Products. 

A colorful handmade card featuring layered yellow and patterned cardstock, a circular element, and a sentiment that reads 'GO FOR IT!' with decorative pie-shaped embellishments.

Thanks for stopping by, I hope your Monday is wonderful and enjoy creating!

A stylized graphic featuring a bird and colorful floral elements with the name 'Tonya' prominently displayed in green, against a soft blue background.

Spellbinders Crafty Tools Dies: Color Me Happy Card Tutorial

Hi everyone! I’m back with a quick and easy card I created. I used the paint brush from the Crafty Tools Etched Diecuts. This set of dies are from the Spellbinders and Simple Stories Crafty Babe Diecut Bundle and Crafty Babe Collection. Anyways, let’s get started!

A handmade card featuring five colorful paintbrushes and a sentiment that says 'you color me happy' centered on a white panel, framed by a navy blue card base.

First, I cut a piece of Blue Cardstock in half. I folded what I had cut in half, 4 1/4″x 5 1/2″, to create the base of the card. I cut a piece of White Cardstock slightly smaller than the base and glued to the card. I cut out five individual paint brushes and five different paint drips.Side note…I applied Adhesive Roll to all the different pieces of cardstock before cutting out all.

A colorful greeting card featuring cut-out paint brushes in various colors, with the phrase 'you color me happy' prominently displayed in the center.

I put each paint brush together and placed on the card. I used the “you color me happy” stamp from the Typewriter Adventure Sentiments Stamp Set. I placed the stamp onto the MISTI Stamping Tool. Then, I inked with Black Ink. Finally, I stamped onto a piece of White Cardstock.

A handmade card featuring five painted brushes in various colors arranged vertically, with a sentiment in the center that reads 'you color me happy'.

I cut a mat for the sentiment from Blue Cardstock and glued both together. I placed Foam Pop Dots to the back before placing onto the card to finish. If you have any questions or comments please leave them below.

A handmade greeting card featuring five colorful paint brushes arranged horizontally, with a stamped sentiment 'you color me happy' in the center.

Supplies

Spellbinders/Simple Stories: Crafty Tools Etched Diecuts

Spellbinders/Simple Stories: Crafty Babe Diecut Bundle

Spellbinders: Typewriter Adventure Sentiments Stamp Set

Diecut Machine

Simple Stories: Crafty Babe Collection

Simple Stories: Color Vibe Bright Paper Pad

Foam Pop Dots

White Cardstock

Blue Cardstock

Black Cardstock

Silver Cardstock

Scraps of Tan Cardstock

Adhesive Roll

MISTI Stamping Tool

Black Ink

Beacon Adhesives: Zip Dry Adhesive

(Products listed above are Affiliated Links for your convenience)

DISCLAIMERS

This blog is compensated to provide opinion on products, services, websites, and various other topics. Even though the owner(s) of this blog receives compensation for our posts or advertisements. I always give my honest opinions, findings, beliefs, or experiences on those topics or products. The views and opinions expressed on this blog are purely my own. Any product claim, statistic, or quote should be checked with each manufacturer. Verify other representations about a product or service with the provider or party in question.This blog contains affiliate links. Clicking these links helps to support Tonya Trantham Designs – Creative Paper Addiction. It runs at no additional cost to you. Today’s features are Spellbinders and Scrapbook.com Products. 

A handmade card featuring five paintbrushes with colorful bristles and a sentiment that reads 'you color me happy' against a white background.

Thanks for stopping by, I hope your Tuesday is great and enjoy creating!

A colorful digital artwork featuring a bird perched among vibrant flowers, with the name 'Tonya' elegantly written in stylized letters.

Easy Snowflake Card Tutorial Using Notebook Diecut

Hi everyone! I’m back today with another quick and easy card. I used a few leftover pieces from past projects and the Notebook Diecut to create this. Anyways, let’s get started!

I cut the card out of the Notebook Diecut. I folded in half to create the card base.

These are the pieces I had leftovers. The seal is from the Seal Switchlits Embossing Folder and Thinlits. The snowflake is from the Snowflake Impresslits (retired). And the circle is from the Bookmark, Pocket and Toppers Thinlits. I lightly inked the seal with a chalk ink and adhered each piece on top of each other.

I glued the seal to the base of the card and added a pearl to the center of the snowflake. I added an Adhesive Sheet to the back of a piece of white cardstock.

I placed “warm” and “wishes” thinlits, from the Starlit Village Thinlits (retired) on top of the cardstock. I ran through the Diecut Machine. I removed the backing from the Adhesive Sheet and placed the sentiment onto the card to finish. This card came together so quickly!

If you have any comments or questions about this project please leave it below.

Supply List

Sizzix/Eileen Hull: Notebook Diecut

Sizzix/Eileen Hull: Bookmark, Pocket and Toppers Thinlits

Scrapbook.com/Eileen Hull: Starlit Village Thinlits (retired)

Sizzix/Tim Holtz: Seal Switchlits Embossing Folder and Thinlits

Sizzix/Tim Holtz: Snowflake Impresslits (retired)

Diecut Machine

Paper Cutter

Scissors

Adhesive Sheets

Pearl

Various Cardstock

Beacon Adhesives: Zip Dry Adhesive

(Products listed above are Affiliated Links for your convenience)

DISCLAIMERS

This blog is compensated to provide opinion on products, services, websites, and various other topics. Even though the owner(s) of this blog receives compensation for our posts or advertisements. I always give my honest opinions, findings, beliefs, or experiences on those topics or products. The views and opinions expressed on this blog are purely my own. Any product claim, statistic, or quote should be checked with each manufacturer. Verify other representations about a product or service with the provider or party in question.This blog contains affiliate linksClicking these links helps to support Tonya Trantham Designs – Creative Paper Addiction. It runs at no additional cost to you. Today’s features are Sizzix, Eileen Hull and Scrapbook.com Products. 

Thanks for stopping by, hope your Tuesday is great and enjoy creating!

Create Stunning Christmas Slimline Cards

Hi everyone! December is finally here! And whether you like it or not Christmas is only a couple of weeks away. Today I want to share a Christmas slimline card I created. You ask “what is a slimline card”? It’s a long skinny card and the measures are, 3.5″x8.5″. For the base of the card I created, I used the Journal Diecut (retired) which is by Eileen Hull. Let’s get started!

I folded a piece of cardstock in half and I placed it onto the Journal Diecut. The placement was slightly below the cut line of the spine. Then, I ran it through the Diecut Machine.

I added a dollop of Cloud Whip to a paper plate. Then, I slowly added Olive Pops of Color. I mixed it with a Mix Media Spatula until I got the right shade of green.

I used painters tape to hold the Plate and Pattern Layered Stencils (stencil 2) onto a piece of White Cardstock. I applied Cloud Whip with the Mix Media Spatula over the stencil.

I removed the stencil and let the raised image set.

Next, I cut a mat from green cardstock. I lightly inked the edges before adhering to the base of the card.

Since the stenciled image wasn’t as long as the card base. I cut to fit, lightly inked the edges with a green chalk ink before gluing to the card.

I cut two strips of cardstock to cover where I pieced together the stencil image.

I added green gems to the stenciled image. I also cut a circle from the Bookmark, Pockets and Toppers Thinlits and adhered to the card.

I placed the “I believe in you” sentiment from Fan Favorites Clear Stamps onto the MISTI Stamping Tool .

I placed painters tape over the “I” and the “in you” of the stamp. I inked the stamp, removed the painters tape and stamped onto a piece of cardstock.

I cut and added a mat to the believe sentiment and glued to the card. I cut a star charm from the Charms Thinlits. Then, I added a piece of gold ribbon to the top of the star. Finally, I adhered it to the circle on the card.

Question, do you make cards or do you give store bought cards at Christmas time? Let me know in the comment section below. Also If you have any questions about this card leave a comment.

Supply List

Sizzix/Eileen Hull: Journal Diecut (retired)

Sizzix/Eileen Hull: Charms Thinlits

Sizzix/Eileen Hull: Fan Favorites Clear Stamps

Sizzix/Eileen Hull: Plate and Pattern Layered Stencils

Sizzix/Eileen Hull: Bookmark, Pockets and Toppers Thinlits

Diecut Machine

Cloud Whip

Mix Media Spatula

Olive Pops of Color

Gems

Red Cardstock

Gold Cardstock

White Cardstock

Various Green Cardstocks

Black Ink

MISTI Stamping Tool

Gold Ribbon

Paper Cutter

Scissors

Green Chalk Ink

Beacon Adhesives: Zip Dry Adhesive

(Products listed above are Affiliated Links for your convenience)

DISCLAIMERS

This blog is compensated to provide opinion on products, services, websites, and various other topics. Even though the owner(s) of this blog receives compensation for our posts or advertisements. I always give my honest opinions, findings, beliefs, or experiences on those topics or products. The views and opinions expressed on this blog are purely my own. Any product claim, statistic, quote or other representation about a product or service should be verified with each manufacturer, provider, or party in question.This blog contains affiliate links, clicking and shopping through these links helps to support and run Tonya Trantham Designs – Creative Paper Addiction at no additional cost to you. Today’s features are Sizzix, Eileen Hull and Scrapbook.com Products. 

Thanks for stopping by, hope your Sunday is wonderful and enjoy creating!

Birthday Slimline Card with Journal Diecut and Faux Postage Thinlits

Hi there! I’m back this week with a birthday slimline card I made. I used the Journal Diecut by Eileen Hull to create the base of the card. I also used the Faux Postage Thinlits, by Eileen, and the bear from Doodle Christmas Thinlits by Olivia Rose. Anyways, let’s get started!

First, I folded a piece of White Cardstock in half, placed slightly inside the cut line of the Journal Diecut and secured with washi tape before placing in between the cutting plates and running through the Diecut Machine. This will create the base for the slimline card.

Second, I cut one of the Faux Postage Thinlits.

Third, I cut two cardstocks, one plain slightly larger than the patterned piece of cardstock and adhered both the card base.

Next I cut the Faux Postage Thinlits a part. Since the postage stamp pieces aren’t the same height of the card I “pieced” those together and I will cover the gap with a sentiment.

Fifth, I placed the label stamp from the Simple Sayings Stamps Set onto the MISTI Stamping Tool, inked with Black Ink and stamped onto a piece of cardstock. I followed the same steps for the “Just Celebrate” stamp and stamped inside the label image.

Sixth, I fussy cut the sentiment out and matted with two different colors of cardstock and glued to the card. I also added a few sequins to the sentiment.

Seventh, I cut out the bear, snoot, nose, cheeks, hat, present and bow from the Doodle Christmas Thinlits. Who says you have to use a Christmas set of dies for Christmas? I changed up the colors for something cheery and fun.

Eighth, I lightly inked over the bear with chalk ink and put together. Side note, I did use an adhesive sheet on the tiny pieces so it would make it easier to put together.

Also I did cut the hat down to make it look more like a “party hat” and added a pom pom to the top. I folded the arms of the bear so it’s holding the present. I glued the bear to a double matted cardstock and glued to the card. I finished by adding a couple of sequins.

This card was easy to put together and it will fit into a number 10 (business size) envelope. If you have any questions about this card please leave a comment below.

Also if you haven’t been by Eileen Hull’s blog lately you can find the latest post HERE.

Supplies

Sizzix/Eileen Hull: Journal Diecut

Sizzix/Eileen Hull: Faux Postage Thinlits

Sizzix/Olivia Rose: Doodle Christmas Thinlits

Diecut Machine

Washi Tape

Tim Holtz: Simple Sayings Stamps Set

Black Ink

MISTI Stamping Tool

White Cardstock

Various Plain and Patterned Cardstocks

Sequins and Mini White Pom Pom

Tan Chalk Ink

Paper Cutter

Scissors

Beacon Adhesives: Zip Dry Adhesive

(Products listed above are Affiliated Links for your convenience)

DISCLAIMERS

This blog is compensated to provide opinion on products, services, websites, and various other topics. Even though the owner(s) of this blog receives compensation for our posts or advertisements. I always give my honest opinions, findings, beliefs, or experiences on those topics or products. The views and opinions expressed on this blog are purely my own. Any product claim, statistic, quote or other representation about a product or service should be verified with each manufacturer, provider, or party in question.This blog contains affiliate links, clicking and shopping through these links helps to support and run Tonya Trantham Designs – Creative Paper Addiction at no additional cost to you. Today’s features are Sizzix, Eileen Hull, Amazon, Scrapbook.com and A Cherry on Top Store Products. 

Thanks for stopping by, hope your Thursday is great and enjoy creating!

Thinking of You Peacock Card

Hi everyone and Happy 1st of May! As the weather starts warming up and my time indoors is less, you know gardening and time in the pool, I wanted to share a quick and easy card I created. I used Eileen Hull‘s Faux Postage Thinlits and the Floral Silhouettes Thinlits (only at Scrapbook.com) to create this card in under 15 minutes. So let’s get started!

First, I folded a piece of Blue Cardstock in half and placed the “fold line” slightly inside of the of the rectangle thinlit from the Faux Postage Thinlits before running through the Diecut Machine. Side note, I did use wash tape to hold the thinlit in place while running through the diecut machine. This keeps the thinlit from shifting.

Second, I selected the peacock cardstock from the Flourish 6″x6″ Paper Pad (retired). I had already cut off a portion of the cardstock to create a journaling spot and the cardstock didn’t completely cover all of the Faux Postage Thinlit so I centered the image onto the thinlit and ran through the diecut machine.

Third, I cut a mat from White Cardstock and adhered to the back of the peacock image.

Fourth, I glued the peacock image to the card base.

Fifth, I used a scrap of Watercolor Paper, placed onto the MISTI Stamping Tool, placed the journaling box stamp from Simple Sayings Stamps Set, inked with Black Ink and stamped onto the watercolor paper.

I removed the journaling box and placed the “Thinking of You” stamp sentiment onto the MISTI Stamping Tool, inked with Black Ink and stamped inside of the journaling box image.

Sixth, I fussy cut the image with Scissors and adhered to the bottom corner of the card. I cut three flowers and two leaf sprigs from the Floral Silhouettes Thinlits (only at Scrapbook.com), shaped the flowers with a Stylus and glued two together and adhered one leaf sprig to the back before placing it to the lower corner of the sentiment. The other flower I cut one of the leaves off from the leaf sprig and glued to the back of the flower before adding to upper corner of the sentiment. I glued two gems to the center of each flower to finish.

The Faux Postage Thinlits can take any large graphic image on a piece of cardstock, you know the ones that you really aren’t sure what to do with it, and and turn it into a simple card. Or you can remove a few of the “postage stamps” and replace them for a completely different look. So many possibilities!

Also if you haven’t been by Eileen Hull’s blog lately to see what her team has been up to you can find the latest post HERE.

Supplies

Sizzix/Eileen Hull: Faux Postage Thinlits

Scrapbook.com/Eileen Hull: Floral Silhouettes Thinlits (only at Scrapbook.com)

Diecut Machine

Tim Holtz: Simple Sayings Stamps Set

MISTI Stamping Tool

Black Ink

Watercolor Paper

Stylus

Blue Cardstock

White Cardstock

Maggie Holmes: Flourish 6″x6″ Paper Pad (retired)

Gems

Paper Cutter

Scissors

Beacon Adhesives: Zip Dry Adhesive

(Products listed above are Affiliated Links for your convenience)

DISCLAIMERS

This blog is compensated to provide opinion on products, services, websites, and various other topics. Even though the owner(s) of this blog receives compensation for our posts or advertisements. I always give my honest opinions, findings, beliefs, or experiences on those topics or products. The views and opinions expressed on this blog are purely my own. Any product claim, statistic, quote or other representation about a product or service should be verified with each manufacturer, provider, or party in question.This blog contains affiliate links, clicking and shopping through these links helps to support and run Tonya Trantham Designs – Creative Paper Addiction at no additional cost to you. Today’s features are Sizzix, Eileen Hull, Scrapbook.com and A Cherry on Top Store Products. 

Thanks for stopping by, hope your Wednesday is awesome and enjoy creating!

Happy Holidays Snowflake Mini Slimline Card

Hi everyone! I’m back with a very quick card I created. I was in the “moment” of making this card that I completely forgot to take any step out photos of the process. This card centers on a leftover “Happy Holidays” sentiment from my Holiday Snowman Mini Slimline Card I posted about a few days ago. Anyways, let’s get started!

First, I folded a piece of 6″x6″ snowflake patterned cardstock in half to create the base of the card. I cut the “Happy Holidays” sentiment down and inked the edges with a chalk ink. Also the sentiment is from my Sparkle Snowman Stamp Set which can be found at Blank Page Muse.

Second, I cut two labels and two snowflakes from the Everyday Tags and Labels Thinlits. I embossed the smaller label with the Tablecloth Embossing Folder, lightly inked with a chalk ink before gluing with the sentiment on top of the larger labels.

Third, I glued the first snowflake die to the corner of the label. The second snowflake I added a Foam Pop Dot to the back before placing on top of the other snowflake. I finished by adding a flat back pearl to the center of the snowflake and a couple of sequins to the card base.

If you have any questions or comments about this card please leave it in the comment section below. Also if you aren’t following Blank Page Muse on their social media site you can find them: Facebook. Instagram, Pinterest, Blank Page Muse Website and Blank Page Muse Blog.

Supplies

Blank Page Muse/Tonya Trantham: Sparkle Snowman Stamp Set

Sizzix/Eileen Hull: Everyday Tags and Labels Thinlits

Sizzix/Eileen Hull: Tablecloth Embossing Folder

Foam Pop Dot

MISTI Stamping Tool

Diecut Machine

Scissors

Black Ink

Various Plain and Patterned Cardstocks

Chalk Ink

Sequins and Flat Back Pearl

Paper Cutter

Beacon Adhesives: Zip Dry Adhesive

(Products listed above are Affiliated Links for your convenience)

DISCLAIMERS

This blog is compensated to provide opinion on products, services, websites, and various other topics. Even though the owner(s) of this blog receives compensation for our posts or advertisements. I always give my honest opinions, findings, beliefs, or experiences on those topics or products. The views and opinions expressed on this blog are purely my own. Any product claim, statistic, quote or other representation about a product or service should be verified with each manufacturer, provider, or party in question.This blog contains affiliate links, clicking and shopping through these links helps to support and run Tonya Trantham Designs – Creative Paper Addiction at no additional cost to you. Today’s features are Blank Page Muse, Sizzix, Eileen Hull, Scrapbook.com and A Cherry on Top Store Products. 

Thanks for stopping by, hope your Tuesday is great and enjoy creating!

Holiday Snowman Mini Slimline Card

Hi everyone! I’m back with a mini slimline card I created using my very own Sparkles Snowman Stamp Set which can be found over at Blank Page Muse. A mini slimline card measures 3 1/4″x6 1/4″ but I have always used a 6″x6″ piece of folded cardstock to create a 3″x6″ card base. This is a lot easier and you can get four cards out of one sheet of 12″x12″ cardstock or you can use a 6″x6″ pack of cardstock like I did. Anyways, let’s get started!

First, I placed the snowman image onto the MISTI Stamping Tool, inked with water proof Black Ink and stamped onto a piece of Watercolor Paper.

Second, I used an assortment of watercolors, inks, pastels and colored pencils to fill in the face of the snowman and once dry I cut out. I added a white diamond dot to each eye.

Third, I folded a piece of cardstock in half from the Cyan Consortium Paper Pack and cut another piece down as a mat for the snowman.

Fourth, I placed the “Happy Holiday” sentiment onto the MISTI Stamping Tool, inked with Black Ink and stamped onto a piece of watercolor paper.

I also cut a piece of the blue cardstock that I matted the snowman image to mat the sentiment and placed Foam Pop Dots on the back before placing slightly off the upper edge of the card.

I added snowflake dies, with a sequin and a gem to each, to the sentiment and face of the snowman. I finished by placing clear sequins in random spots on the card.

I’ll be creating more projects with this stamp set so be sure to come back.

As always if you have any questions about this project leave a comment below. Or if you have used this stamp set please share your projects over on Blank Page Muse’s Facebook Group. I would love to see them. Also if you aren’t following Blank Page Muse on their other social medias you can find them on:

Facebook, Instagram, Pinterest and their Website and Blog.

Supplies

Blank Page Muse/Tonya Trantham: Sparkles Snowman Stamp Set

Blank Page Muse/Pam Bray: Cyan Consortium Paper Pack

MISTI Stamping Tool

Black Ink

Watercolor Paper

Foam Pop Dots

Various Watercolors, Pastels, Colored Pencils and Inks

Watercolor Brush

White Diamond Dots

Snowflake Diecuts

Diecut Machine

Scissors

Paper Cutter

Beacon Adhesives: Zip Dry Adhesive

(Products listed above are Affiliated Links for your convenience)

DISCLAIMERS

This blog is compensated to provide opinion on products, services, websites, and various other topics. Even though the owner(s) of this blog receives compensation for our posts or advertisements. I always give my honest opinions, findings, beliefs, or experiences on those topics or products. The views and opinions expressed on this blog are purely my own. Any product claim, statistic, quote or other representation about a product or service should be verified with each manufacturer, provider, or party in question.This blog contains affiliate links, clicking and shopping through these links helps to support and run Tonya Trantham Designs – Creative Paper Addiction at no additional cost to you. Today’s features are Blank Page Muse, Scrapbook.com and A Cherry on Top Store Products. 

Thanks for stopping by, hope your Saturday is great and enjoy creating!

Making Plans Release Party with Eileen Hull

Hi everyone! I’m back with a project I created using Eileen Hull’s newest stamp set called Making Plans with Maker Forte! This set of stamps has so many possibilities! From cards, tags, journals and so much more! I used these stamps on the cover of an unfinished album from a tutorial that Eileen shared on one of her Facebook Lives. Anyways, let’s get started!

I placed an assortment of the label stamps onto the MISTI Stamping Tool, inked and stamped onto Cream Cardstock and various patterned scraps of cardstock. I also inked up the “dream a little” sentiment stamp and stamped onto one of the labels I had already stamped. I fussy cut all of the labels out and what I don’t use now will be used in finishing the inside…the plan is to do a part two blog post later…so stay tuned!

I also used an assortment of diecuts/thinlits to decorate the cover: Shadow Box Frames Set 02 Thinlits, Shadow Box Frames Set 01 Thinlits, Shadow Box Elements Thinlits, Mandala Thinlit, Folio Page Pocket and Flowers Thinlits and Full Size Journal Diecut. Can you spot the diecuts I used?

The label stamps are so fun to layer! I had a “partial” label diecut from the Extra Large Journal Diecut that I layered with a bookplate and the “dream a little” sentiment, used water splatter rub ons (49 and Market) and more label stamps along with several flowers, leaves gems and thread loops to finish the cover.

Be sure to stop by Eileen’s blog for more creativity from the Inspiration and Educator Teams and details on how you can purchase this stamp set. You can find the blog HERE.

Supplies

Maker Forte/Eileen Hull: Making Plans Stamp Set

Sizzix/Eileen Hull: Shadow Box Frames Set 02 Thinlits

Sizzix/Eileen Hull: Shadow Box Frames Set 01 Thinlits

Sizzix/Eileen Hull: Shadow Box Elements Thinlits

Sizzix/Eileen Hull: Mandala Thinlit

Sizzix/Eileen Hull: Folio Page Pocket and Flowers Thinlits

Sizzix/Eileen Hull: Full Size Journal Diecut

MISTI Stamping Tool

Brown Ink

Cream Cardstock

Various Patterned Cardstocks

Diecut Machine

Gems, Sequins, Thread

Stylus

Paper Cutter

Scissors

itKuPiLLiimaginarium: Bunny Boys Dolls Printables

Beacon Adhesives: Zip Dry Adhesive

(Products listed above are Affiliated Links for your convenience)

DISCLAIMERS

This blog is compensated to provide opinion on products, services, websites, and various other topics. Even though the owner(s) of this blog receives compensation for our posts or advertisements. I always give my honest opinions, findings, beliefs, or experiences on those topics or products. The views and opinions expressed on this blog are purely my own. Any product claim, statistic, quote or other representation about a product or service should be verified with each manufacturer, provider, or party in question.This blog contains affiliate links, clicking and shopping through these links helps to support and run Tonya Trantham Designs – Creative Paper Addiction at no additional cost to you. Today’s features are Makers Forte, Eileen Hull, Sizzix and Scrapbook.com Products. 

Thanks for stopping by, hope your Tuesday is wonderful and enjoy creating!

Vintage Inspired Button Decor Piece

Hi everyone! For the month of March Eileen Hull’s Inspiration and Educator Teams have been challenged to create something using felt, fabric and fiber and this is what I came up with!

I had fun, for the most part, altering an empty Laughing Cow container and turning it into a fun home decor piece. Originally I was going to create the container where it opened and things could be stored inside but the project went side ways. UGH! I completely abandoned that idea when I couldn’t get the inside of the container fixed the way I wanted it to look.

First off, I placed the container on top of a piece of cardstock and drew around the container (twice, one each for the top and bottom of the container) and cut both circles out. I placed the circles into the 3D Vintage Button Embossing Folder and ran through the Diecut Machine. Next, I applied Gold Luster Wax lightly over the embossed button images.

I adhered the top and bottom of the container together before adding the embossed images, lace and Pom Pom trim.

I cut two Mandala Thinlits from tissue paper and folded to create a lace like trim for the top of the container.

I placed two of the button card stamps from the Button Cards #2 Stamp Set onto the MISTI Stamping Tool, inked with Brown Ink and stamped onto a piece of Cream Cardstock. I cut both images out, roughed up and added ink around the edges.

The Mandala Thinlits I had cut out earlier I glued to the container.

The button cards I adhered the bottom of each to the container and placed Foam Pop Dots at the top of cards. I dug into my stash of old buttons (that had been cut off whatever that had been sewn onto) and glued to the smaller button card.

I once again dug into my stash and this time I used flowers and leaves that I had cut out from the Flowers and Leaves Journaling Cards Thinlits (retired). All I had to do was ink and shape before adding to the top of the container.

I finished off the piece by adding cording and thread bows, loose buttons, pearl sprays and a pearl top pin. I love the fact that I was able to up-cycle the cheese container and turn it into something to be used as decor in the home.

Be sure to stop by Eileen’s blog for more inspiration for both of her teams! You can find the latest posts HERE and HERE.

Supplies

Maker Forte/Eileen Hull: Button Cards #2 Stamp Set

Sizzix/Eileen Hull: 3D Vintage Button Embossing Folder

Sizzix/Eileen Hull: Mandala Thinlits

Sizzix/Eileen Hull: Leaves Journaling Cards Thinlits (retired)

Diecut Machine

Sizzix: Gold Luster Wax

MISTI Stamping Tool

Brown Ink

Cream Cardstock

Foam Pop Dots

Empty Cheese Container

Plain and Patterned Cardstocks

Lace, Pom Pom Trim, Cording and Thread

Crinoline

Buttons

Pearl Sprays

Pearl Top Pin

Paper Cutter

Scissors

Beacon Adhesives: Zip Dry Adhesive

(Products listed above are Affiliated Links for your convenience)

DISCLAIMERS

This blog is compensated to provide opinion on products, services, websites, and various other topics. Even though the owner(s) of this blog receives compensation for our posts or advertisements. I always give my honest opinions, findings, beliefs, or experiences on those topics or products. The views and opinions expressed on this blog are purely my own. Any product claim, statistic, quote or other representation about a product or service should be verified with each manufacturer, provider, or party in question.This blog contains affiliate links, clicking and shopping through these links helps to support and run Tonya Trantham Designs – Creative Paper Addiction at no additional cost to you. Today’s features are Sizzix, Maker Forte, Eileen Hull and Scrapbook.com Products. 

Thanks for stopping by, hope your Monday is great and enjoy creating!