Mom’s Little Book of Recipes

Hi everyone! Can you believe Christmas Day is only a week away? If you are still searching for gift ideas I would like to share a recipe book I created!


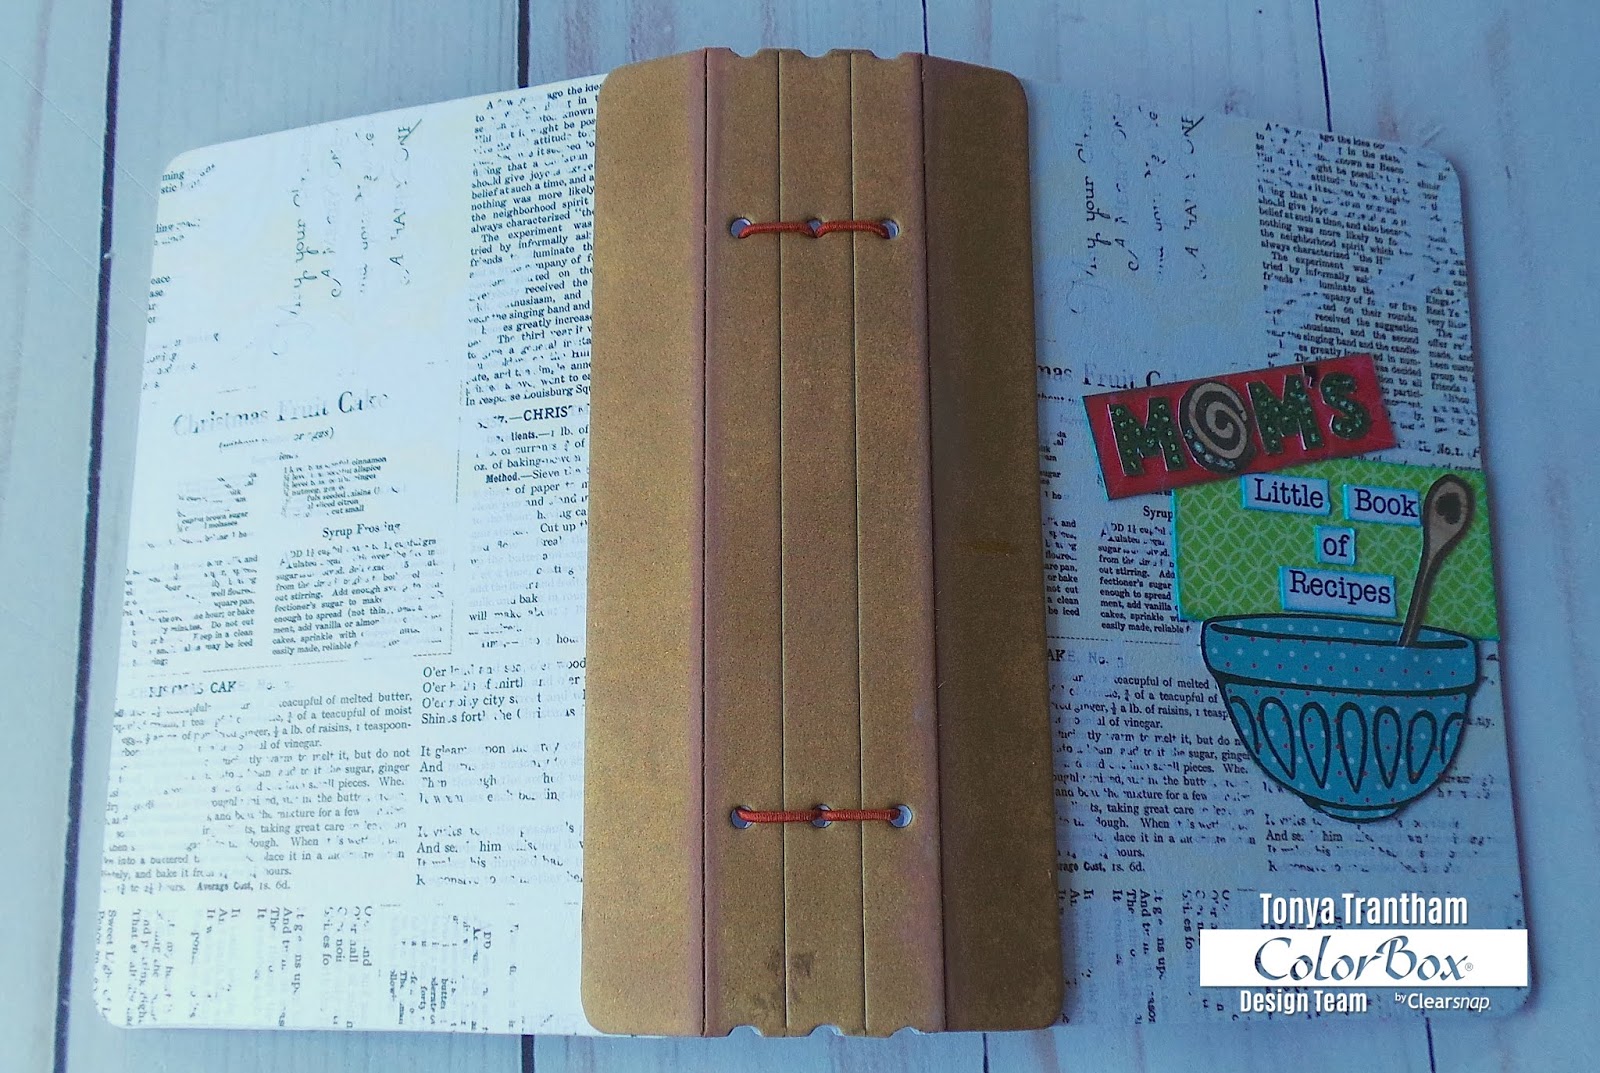
I started by placing  Mat Board on top of the Passport Diecut and place between two plate and run through Diecut Machine. I cut the front/back cover twice and cut a total of four covers from patterned cardstock and adhered those to the front and inside covers. Next I loaded an Art Dauber with Cattail Dyestress Blendable Dye Ink and inked the spine of recipe book and let dry. I adhered the front and back covers to the spine.


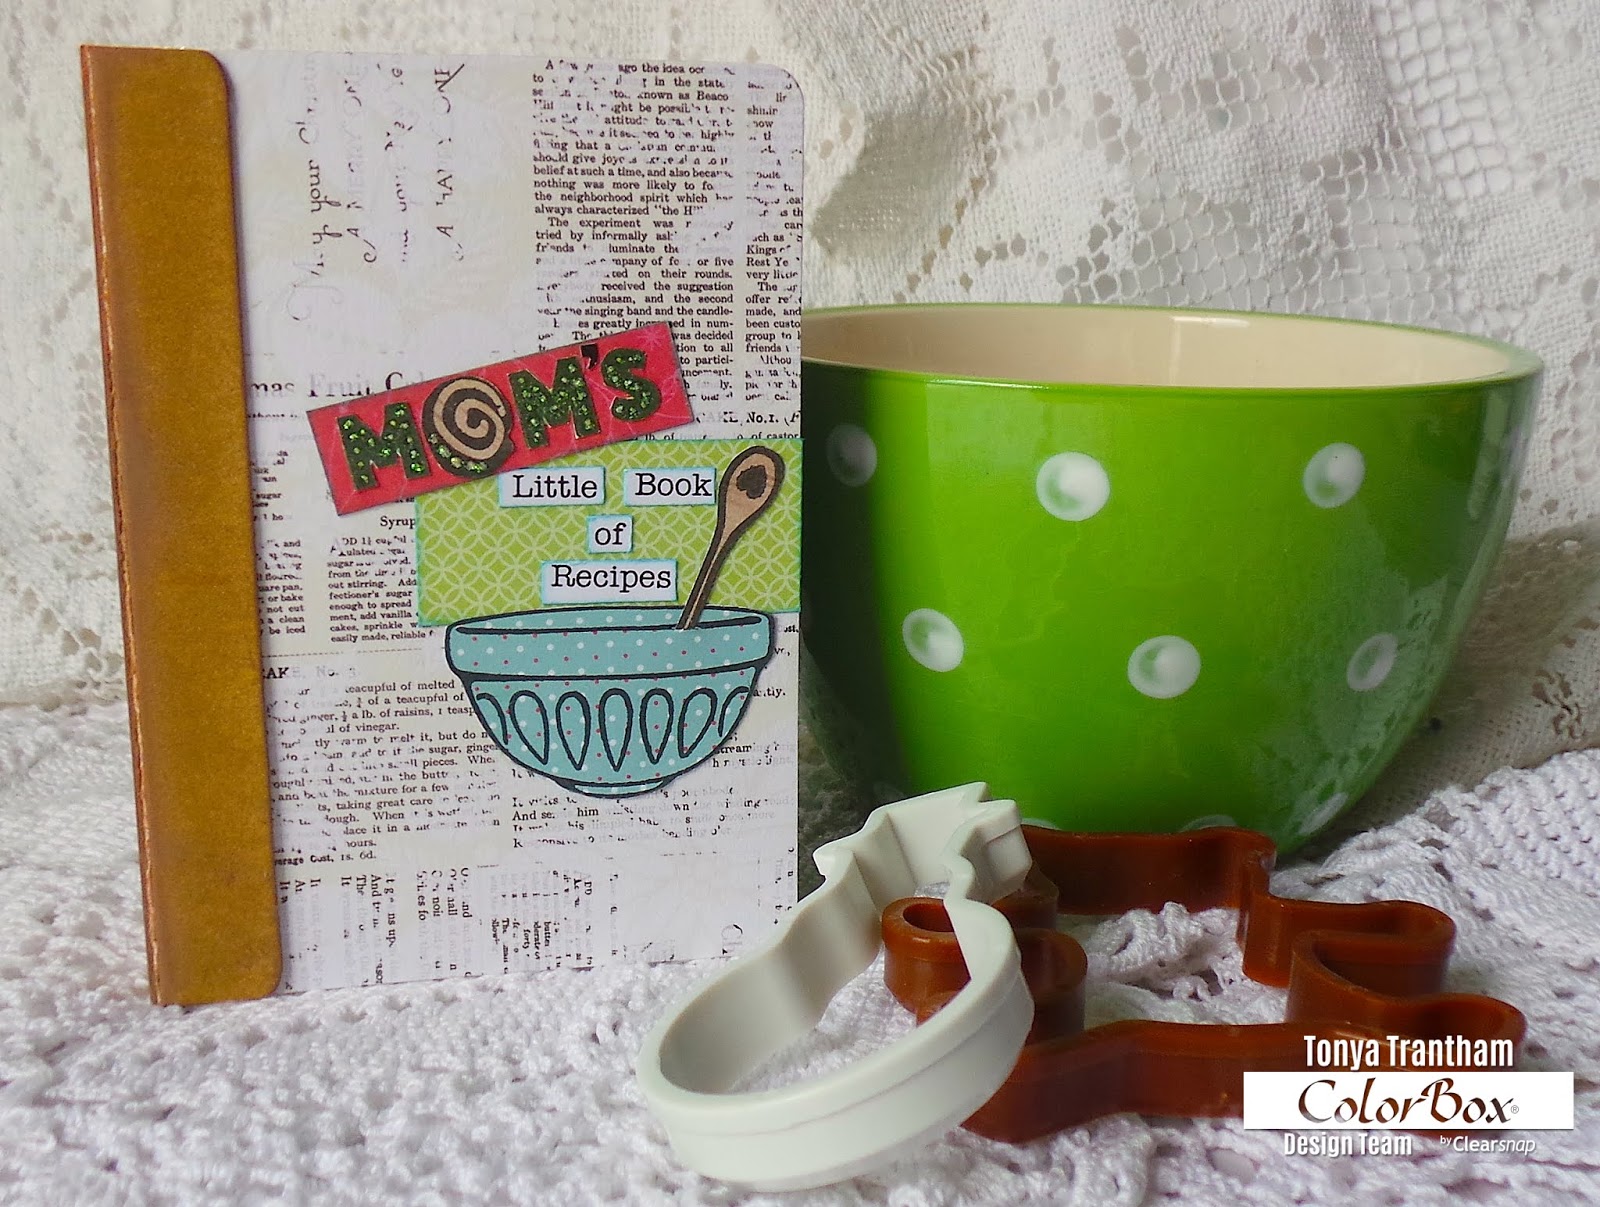
I placed the following stamps from the Cookies Clear Stamp Set onto an acrylic block: Mixing Bowl (stamp twice), Wooden Spoon (stamp twice) and ink with Wicked Black Archival Dye Ink, stamped onto various patterned cardstock and fussy cut all  images out. I placed the”Merry”, Cookies, and Swirl Cookie onto an acrylic block. Ink the “M” (stamp twice), “S” (stamp once) and Swirl Cookie with Wicked Black Archival Dye Ink onto patterned cardstock and fussy cut both “M”s, “S” and Swirl Cookie out.


I printed from the computer “Little Book of Recipes” and cut each word and ink edges with Scuba Dyestress Blendable Dye Ink along with two scraps of patterned cardstock. I adhered the scraps of cardstock, the letters and swirl cookie to spell out Mom’s Little Book of Recipes and Mixing Bowl and Wooden Spoon image on the cover. Next I embellished the “M”‘s and “S” and Swirl Cookie with Clear Glitter Glue.


I strung and tie off elastic cording in the spine.


I cut patterned cardstock to fit the fronts and backs of three notebooks and adhered. I placed the doily stamp from the Cookie Clear Stamp Set onto an acrylic block and ink with Wicked Black Archival Dye Ink and stamped onto a piece of patterned cardstock. I stamped the doily three times and fussy cut each doily out and adhered to the front of each notebook. I placed the Cookies stamp onto an acrylic block, inked with Wicked Black Archival Dye Ink and stamp onto a piece of patterned cardstock and cut out.  


I also stamped the heart and gingerbread man stamps onto a piece of kraft cardstock with Leather Archival Dye Ink and fussy cut both images out. I adhered the gingerbread man to the front of the “Cookies” notebook. I forgot to mention that before adhering one of the doily to the cover I stamped the “Baked with Love” sentiment onto the doily. I adhered the heart to the corner of the sentiment and embellished both the gingerbread and heart with clear glitter glue. I adhered one mixing bowl and wooden spoon images to the center of the doily of the last notebook.


I placed each recipe book underneath elastics cording and if I wanted to I could add a couple of my favorite recipes and a few cookies cutters before giving as a gift. 

If you do have any questions about this project please let me know.


Thanks for stopping by, hope your Tuesday is wonderful and enjoy creating!


Micro Paisley and Pink Planner and Goodies

Hi everyone! I am back with a quick post about a micro planner I created for a swap I was in. I used Eileen Hull’s Passport Diecut to create this micro planner for my swap partner Nancy. The swap was a color crush swap and we had to put together a collection of items in our swap partner’s favorite colors and Nancy’s favorite colors are soft pink and sage green…I had problems finding sage green items. 😞

I created the micro planner from fabric and fusible webbing. If you missed my how to post on how I made the Fabric Travel journal with the Journal Diecut you can find that post HERE.

I added pockets to the inside covers using lace and I added two micro notebooks, a micro scrapbook that I created from 4″x6″ journaling cards and a place to hold sticky notes. This gave Nancy plenty of goodies to have a hand when she is on the go. 😀

I found this fun pen and butterfly charm on clearance at Hobby Lobby. It sure added the right touches to finish off the micro planner.

I also put together an assortment of goodies to use with the planner or use in other craft projects.

I had a few canvas make up bags that I bought from Target with the intent of decorating and giving as gifts at Christmas time…which didn’t happen. So I decorated one of those to give Nancy more storage for her craft supplies.
I cut fabric flowers from the Stitchy Flowers & Leaf Dieuts, frayed the edges of the flowers and added a button along with cording and lace and adhered to the corner of the bag. 

Here are some of the goodies I included inside of the bag. If you have any questions about this project please let me know.

I would also like to submit this project for the following challenge:
Word Art Wednesday: Challenge #292-#293

Thanks for stopping by, hope your Monday is awesome and enjoy creating!

Butterfly Angel Journal Part One

Hi everyone! I am here today to share my project this month using Eileen Hull’s ColorBox Blends with the Passport Diecut. The Inspiration Team has shown several different ways to use the ColorBox Blends and you can find those post HERE, HERE and HERE.


For my project I cut the Passport Diecut from Mat Board. I have a large piece of glass that I use as a pallet (very easy to clean afterwards) and I applied Tutu and Wildberry Blends and watered both colors down. Next I taped a doily stencil to the front cover of my book and applied both colors. Once it was dry I removed the stencil and then applied Sunshine Blends to my pallet, watered down and applied a wash to the cover.


The back cover I embossed with the Lace Medallions Embossing Folder. I watered down Wildberry and Sunshine blends and painted the cover.


While letting the covers dry I embossed the spine with Waffle Embossing Folder and inked over it with the Leaf Blends.


Before adhering the covers and spine together I added Stickles over the doily image on the front cover and once dry I splattered with Coconut and Nutmeg Blends. Adhered all pieces together and glued Ric Rac to dress up the edge of the spine.


I had made several frozen Charlotte dolls with Makers Mix but hadn’t found the right project to use them in so I thought this project would be the right time to add one to the cover of my journal. I watered down the Coconut Blends and painted the first coat over the whole doll.


Once the first coat was dry I watered down Nutmeg Blends and applied randomly to the doll and once that was dry I sealed it with Fast Finish Decoupage.


I added fussy cut roses printables, twine and metallic thread to the front cover. Next I adhered butterfly wings to the back of the doll along with a bookplate to finish off the cover.


I tied three papers per signature to the inside of the journal and finished off the spine with a variety of seam binding, ribbon, lace, etc. Later this week I will be sharing the inside of my journal. So be sure to keep an eye out for that blog post. 😊
As always if you have any questions about this project please let me know.


Also I would like to submit this project for the following challenges:
Word Art Wednesday: Challenge Weeks #270-271
Happy Little Stampers: Anything Goes with Dies Challenge
Simon Says Wednesday Challenge: Fantastic Florals


 Thanks for stopping by, hope your Tuesday is awesome and enjoy creating!

Tsunami Rose Designs: A Rose by any Other Name Junk Journal

Hi everyone! I am back with a little junk journal I created for my design team project for Tsunami Rose Designs. I used the Pass Port Book diecut to cut the covers, spine and pages bases which are coffee dyed paper. 


I used a variety of printables from the shop and are as listed: Ephemera Set 2 30 PagesBig Elements 11 English Cards 3 PagesDecoupage Flowers Set 1 4 PagesVintage Shipping Tag Collection 1 5 PagesVintage Shipping Tag Collection 5 3 Page and Big Elements 13 B&W 2 4 Page. Along with some freebie printables that can be found on the Tsunami Rose Design blog. 🙂 Also for more photos of my project you can see it HERE.


Also you still have a week left to get printables at $2.50 each on the Tsunami Rose Designs etsy shop and that does include kits too!!! This sale ends September 1st so be sure to hop over there!
If you aren’t a part of the TsunamiRose FB Group be sure to join. There are so many talented folks in this group that are sure to inspire along with the awesome group of ladies that are part of TsunamiRose Blog design team.
If you have any questions about this little junk journal please let me know.


Thanks for stopping by, hope your Friday is awesome and enjoy creating!

Create to Remember Journal

Hi everyone! I am here to share a quick little journal I created for Eileen Hull’s Inspiration Team. I used the Passport Book Diecut and cut the spine and covers from Mat Board. Then from patterned cardstock I cut four covers for the insides and outsides of the journal, embossed and painted the spine and then adhered everything together.

Also the team is collaborating with Crescent Products this month and I used Rendr Paper for the inside pages on my little journal. 

This paper you can paint on both sides and there is no bleed thru on either side of the paper.

Each of the three signatures has five papers per signature. I used twine to sew in the pages.

The spine I tied off  ribbon, trim and fiber to each of the twine that is holding the pages in the journal.

Now if I want to draw or play with my watercolors I can. The journal doesn’t take up a lot of room and will be easy to carry.

Be sure to hop on over to Eileen’s blog to see the rest of the Inspiration Teams project and if you have any questions about this projects please let me know.

Thanks for stopping by, hope your Tuesday is awesome and enjoy creating!

Rosebud Journal

Hi everyone! It been awhile since my last post but I started phase four of remodeling. First I had to move furniture around and then cover everything in plastic before I could start scraping popcorn off of the ceiling in the den/breakfast nook/kitchen. I would have been finished but I came down with sinus/cold crud and I spent three days very medicated and sleeping on and off but I’m finally feeling better even though I don’t sound it…imagine man voice…ick. 😦

Anyway I had started and finished this little journal last month but hadn’t got around to photographing it until today so I thought I would share. 🙂


I started with Eileen Hull’s Passport Diecut which I cut both covers from Matboard.
I wanted six signatures for my journal instead of three like was on the diecut so I created a pattern and used that to cut a spine from the Grey Paper Leather.


I punched holes for the signatures in the Paper Leather and then embossed with Brenda Walton’s Floral Tapestry embossing folder (retired) and lightly inked it with chalk ink to bring out the embossing.


I keep the cover simple by only adding some Ric Rac, patterned cardstock and diecuts and the journal sentiment which I printed from the computer.


There are six papers per signature which I used a mix of scrapbook paper, doilies, mini paper bags, envelopes and cards. I used grey cording to attach the papers to the spine.


Now this little journal is ready for journaling, doodles and photos ( perfect size for Instax photos). 


If you have any questions about this project let me know. Now back to working on these ceilings. :-p

Thanks for stopping by, hope your Monday is awesome and enjoy creating!