Create Stunning Christmas Slimline Cards

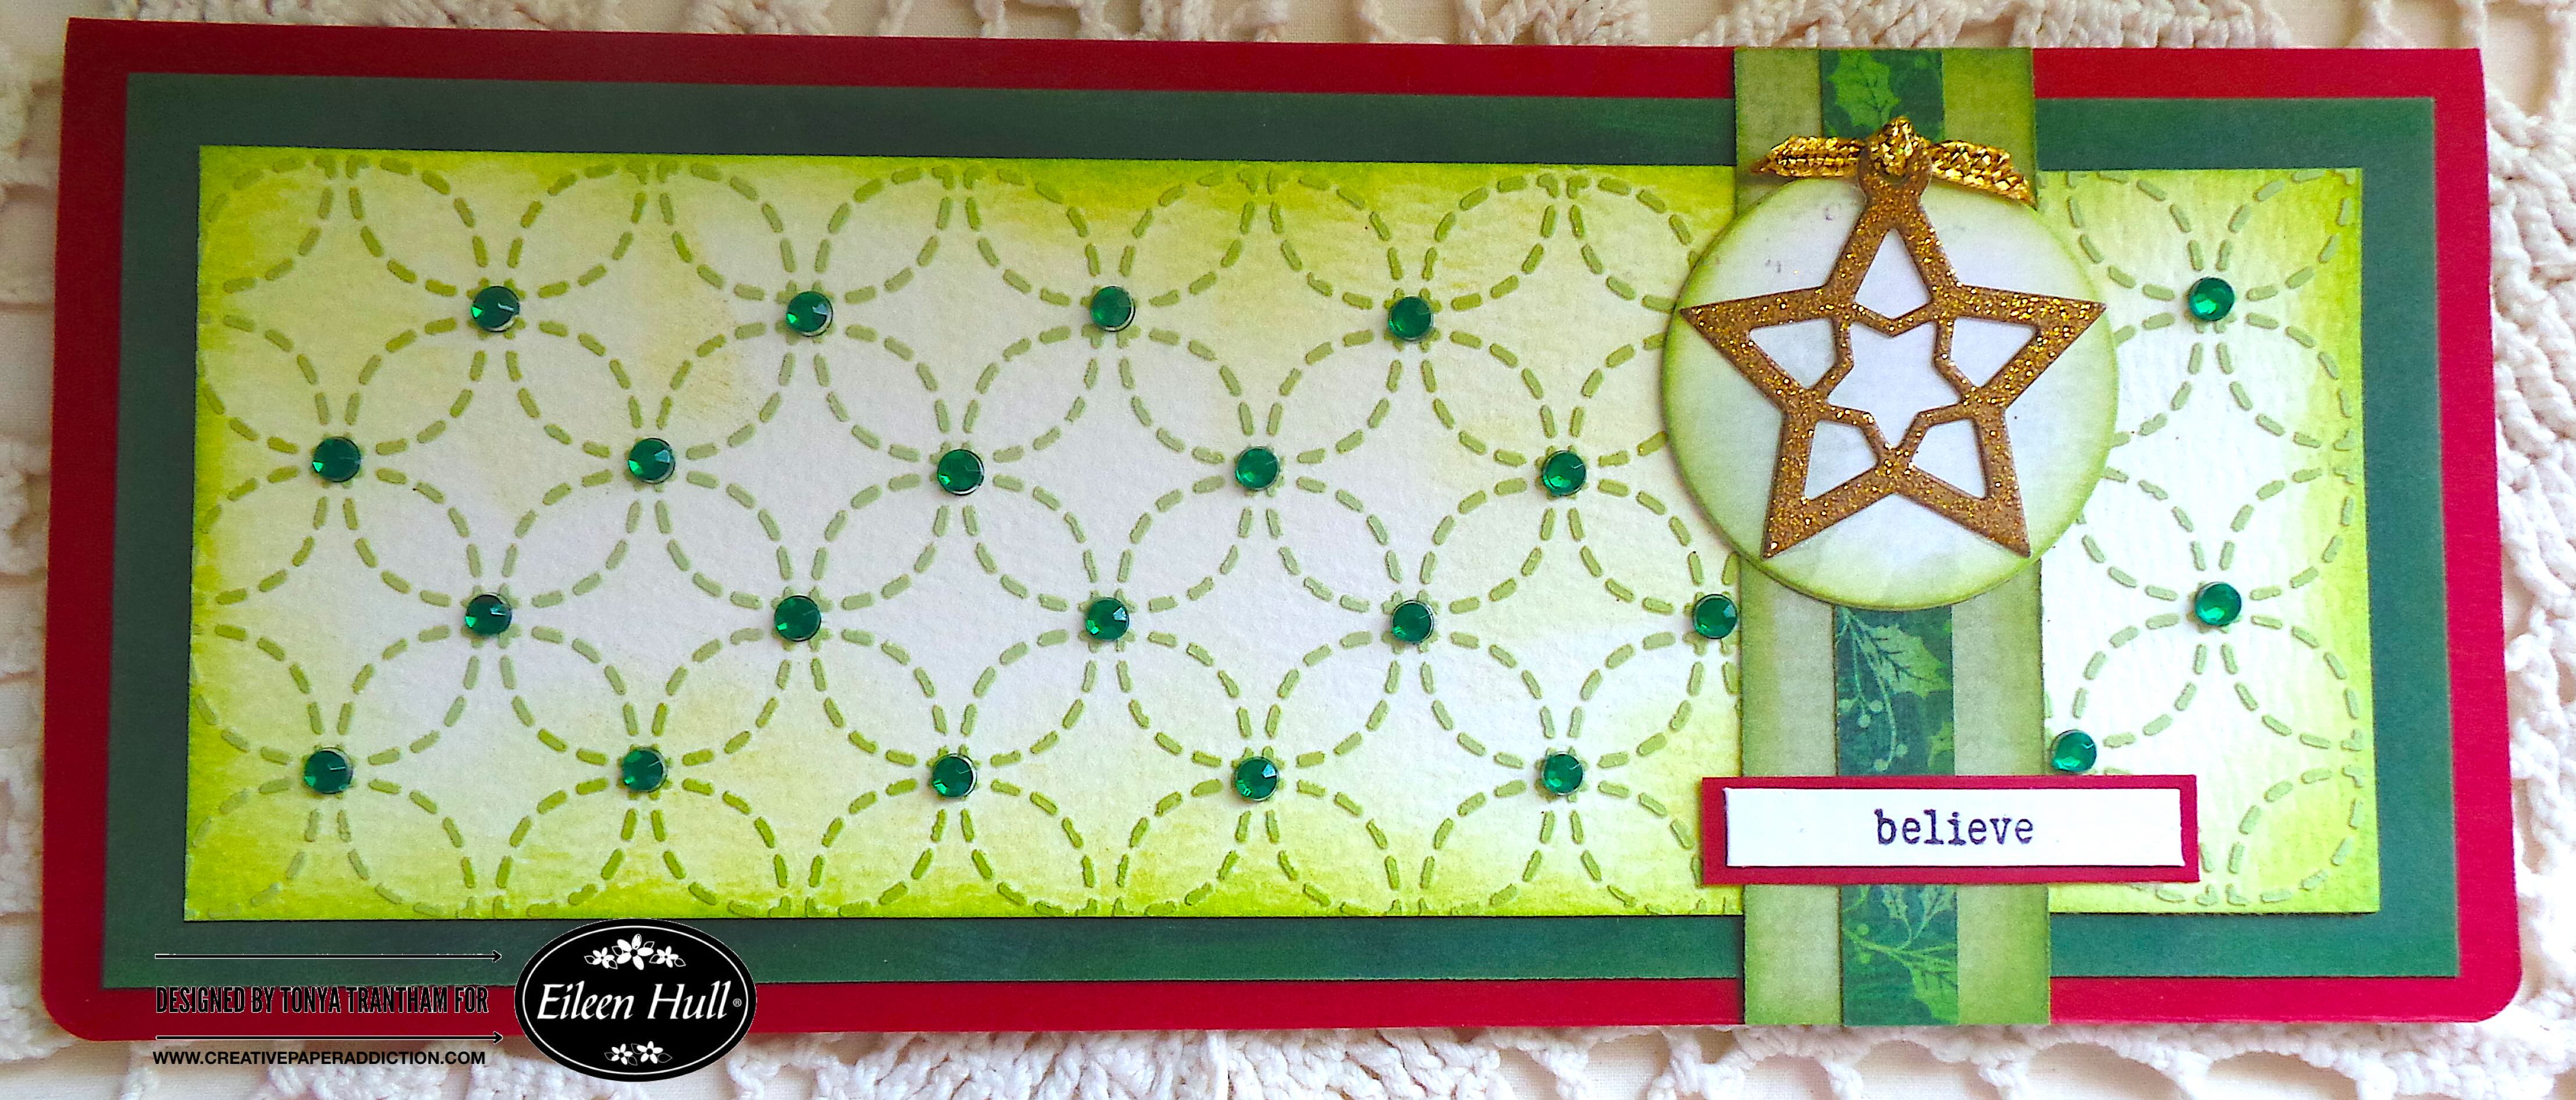
Hi everyone! December is finally here! And whether you like it or not Christmas is only a couple of weeks away. Today I want to share a Christmas slimline card I created. You ask “what is a slimline card”? It’s a long skinny card and the measures are, 3.5″x8.5″. For the base of the card I created, I used the Journal Diecut (retired) which is by Eileen Hull. Let’s get started!
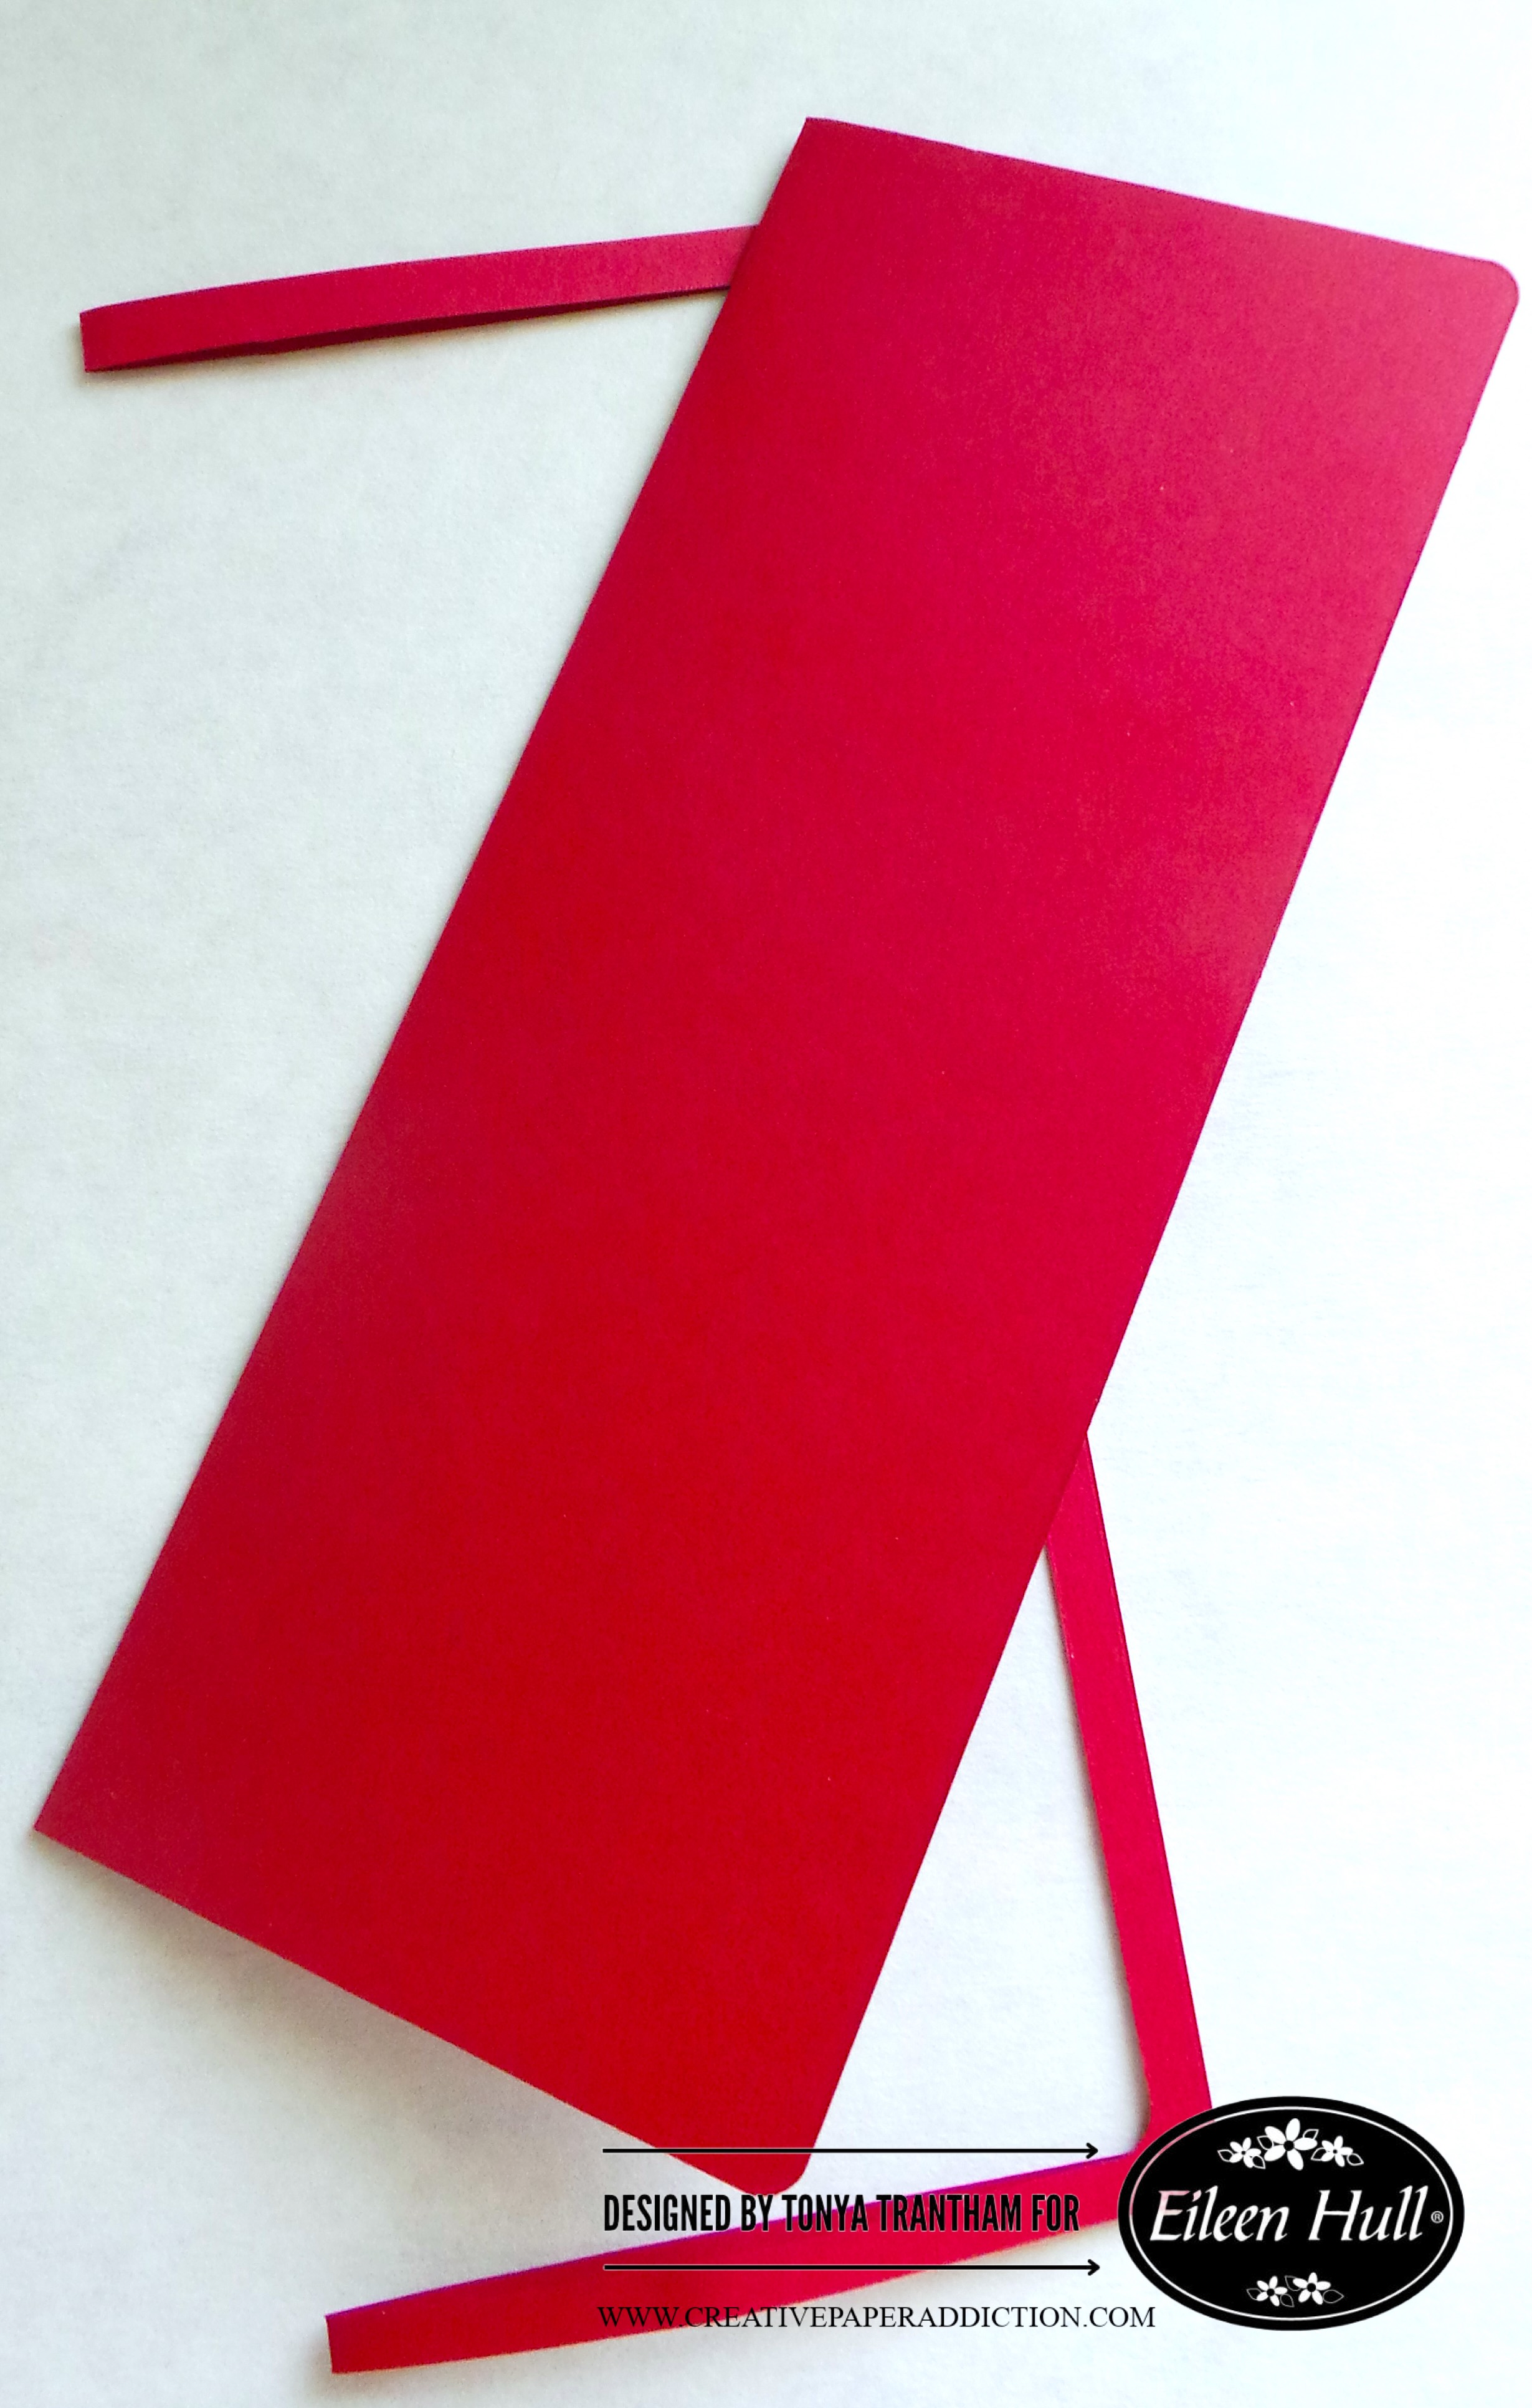
I folded a piece of cardstock in half and I placed it onto the Journal Diecut. The placement was slightly below the cut line of the spine. Then, I ran it through the Diecut Machine.
I added a dollop of Cloud Whip to a paper plate. Then, I slowly added Olive Pops of Color. I mixed it with a Mix Media Spatula until I got the right shade of green.
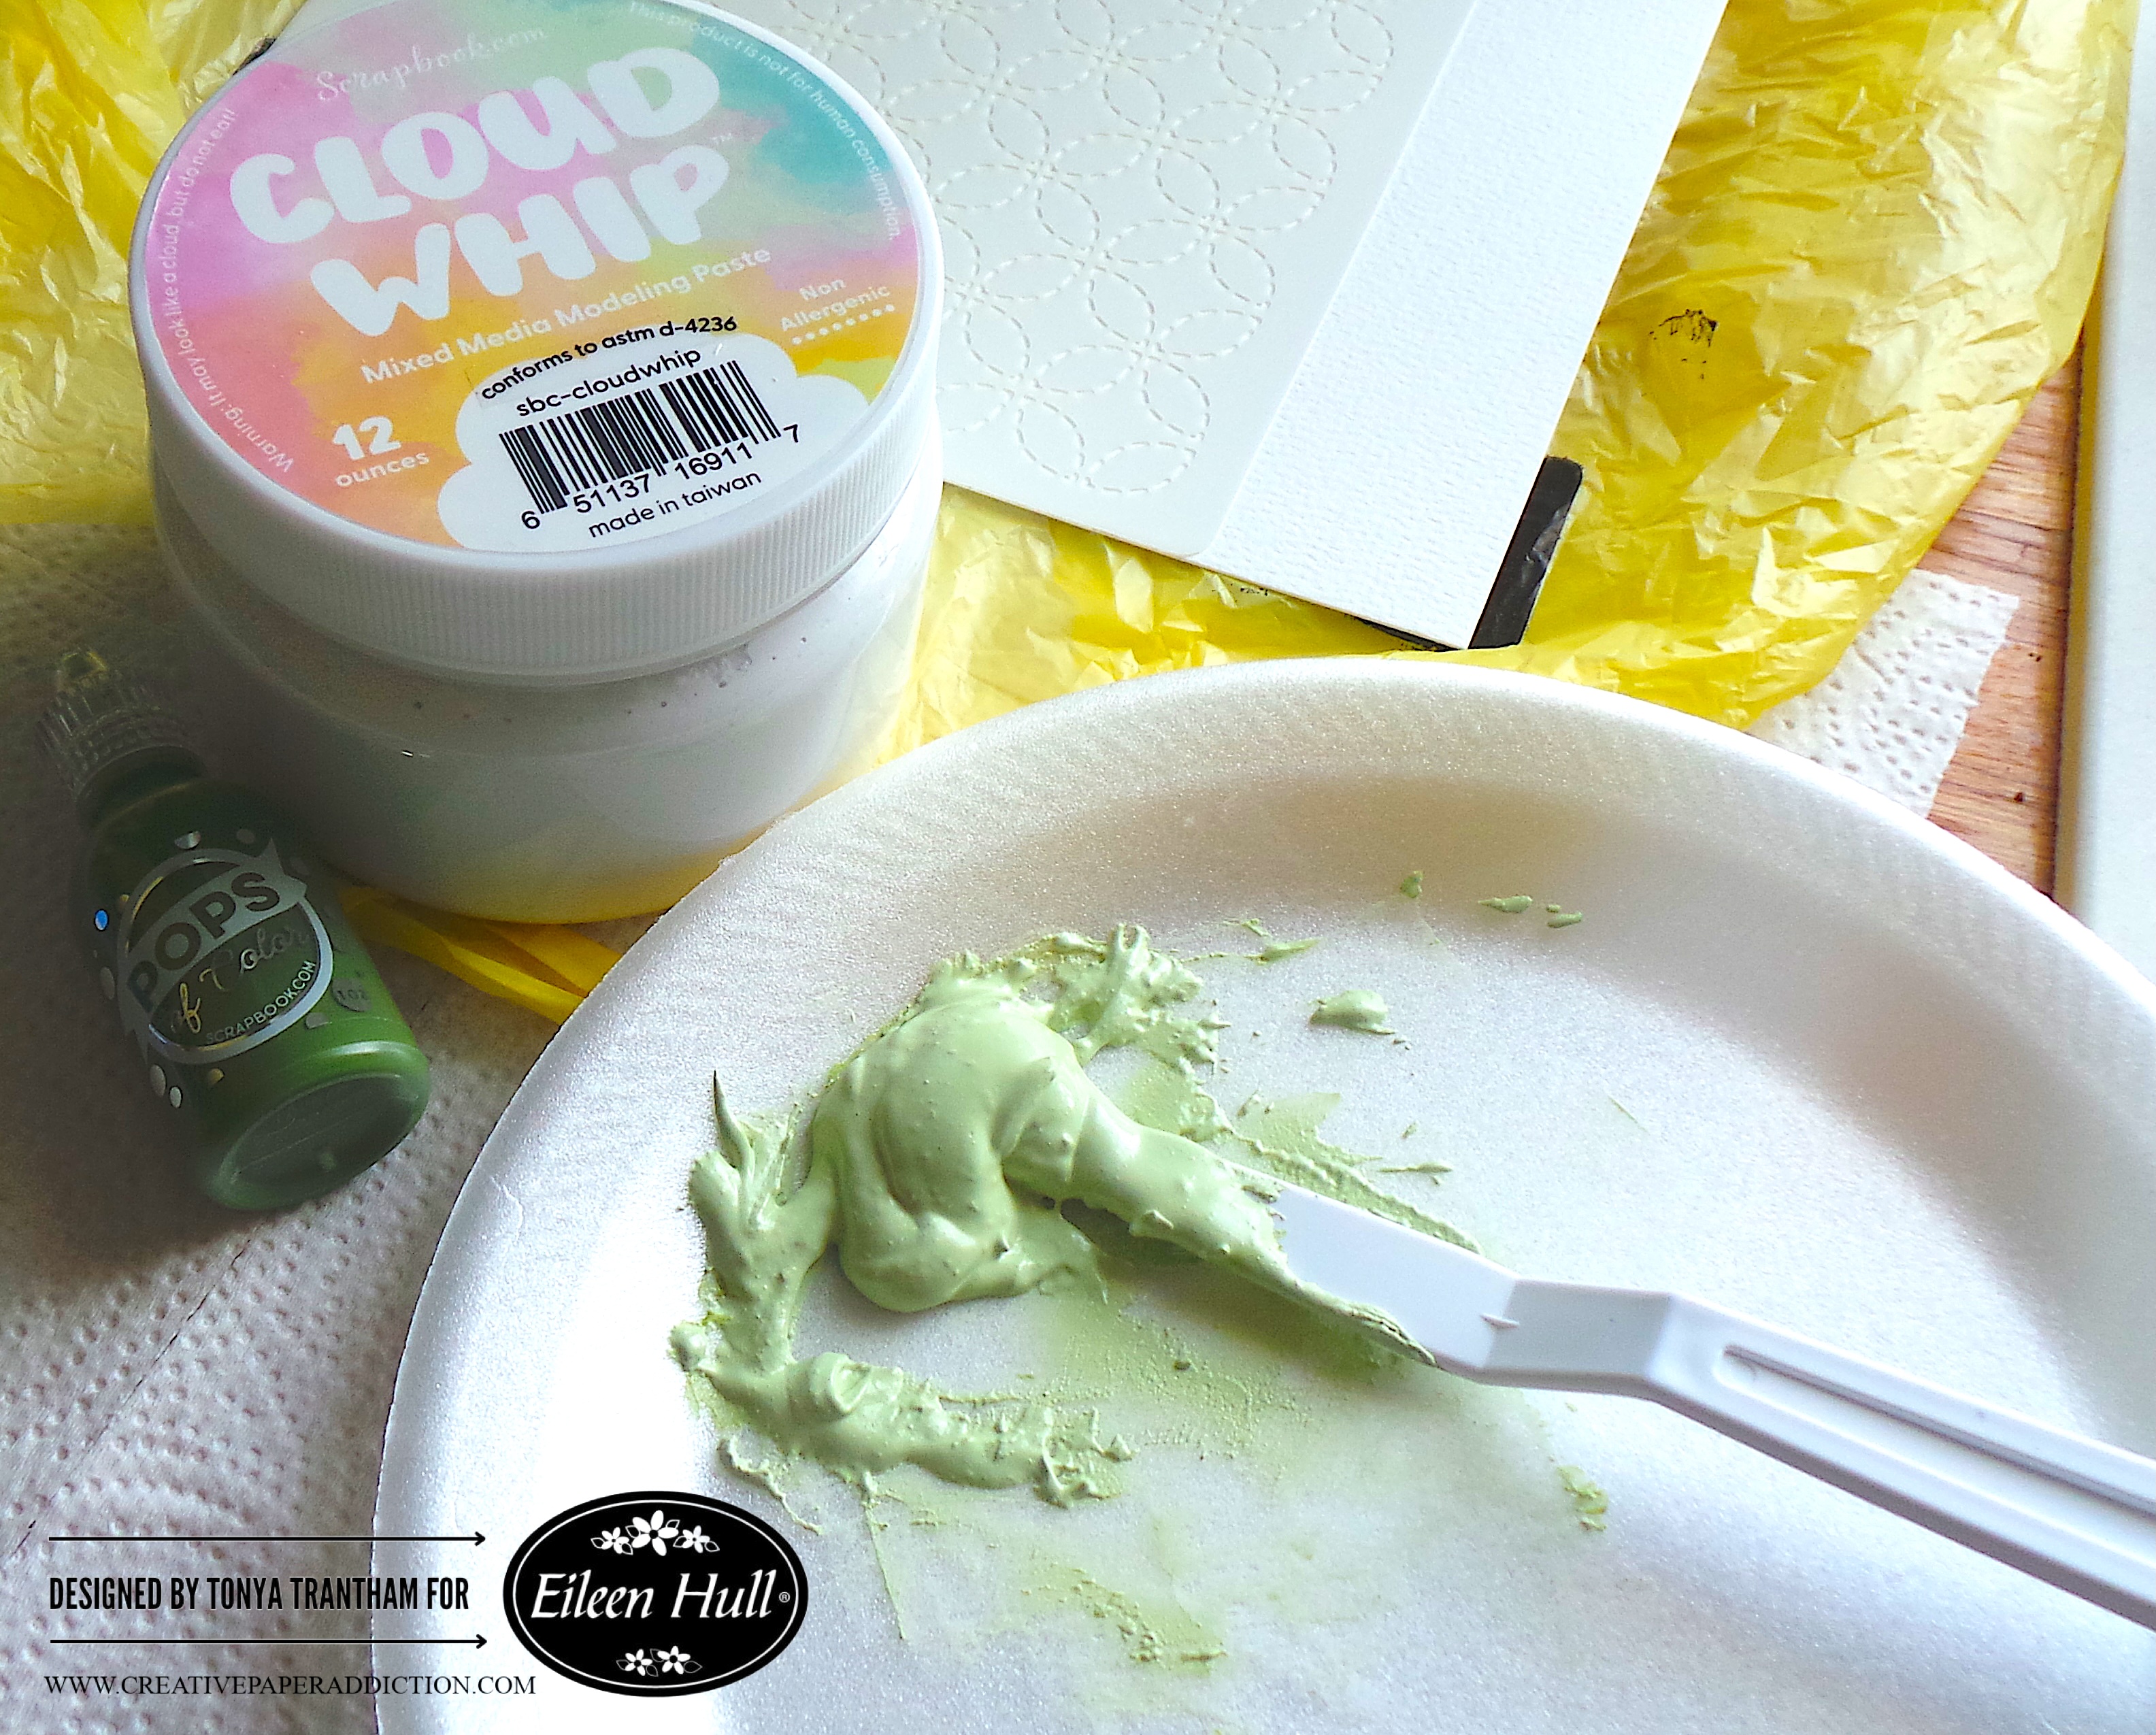
I used painters tape to hold the Plate and Pattern Layered Stencils (stencil 2) onto a piece of White Cardstock. I applied Cloud Whip with the Mix Media Spatula over the stencil.
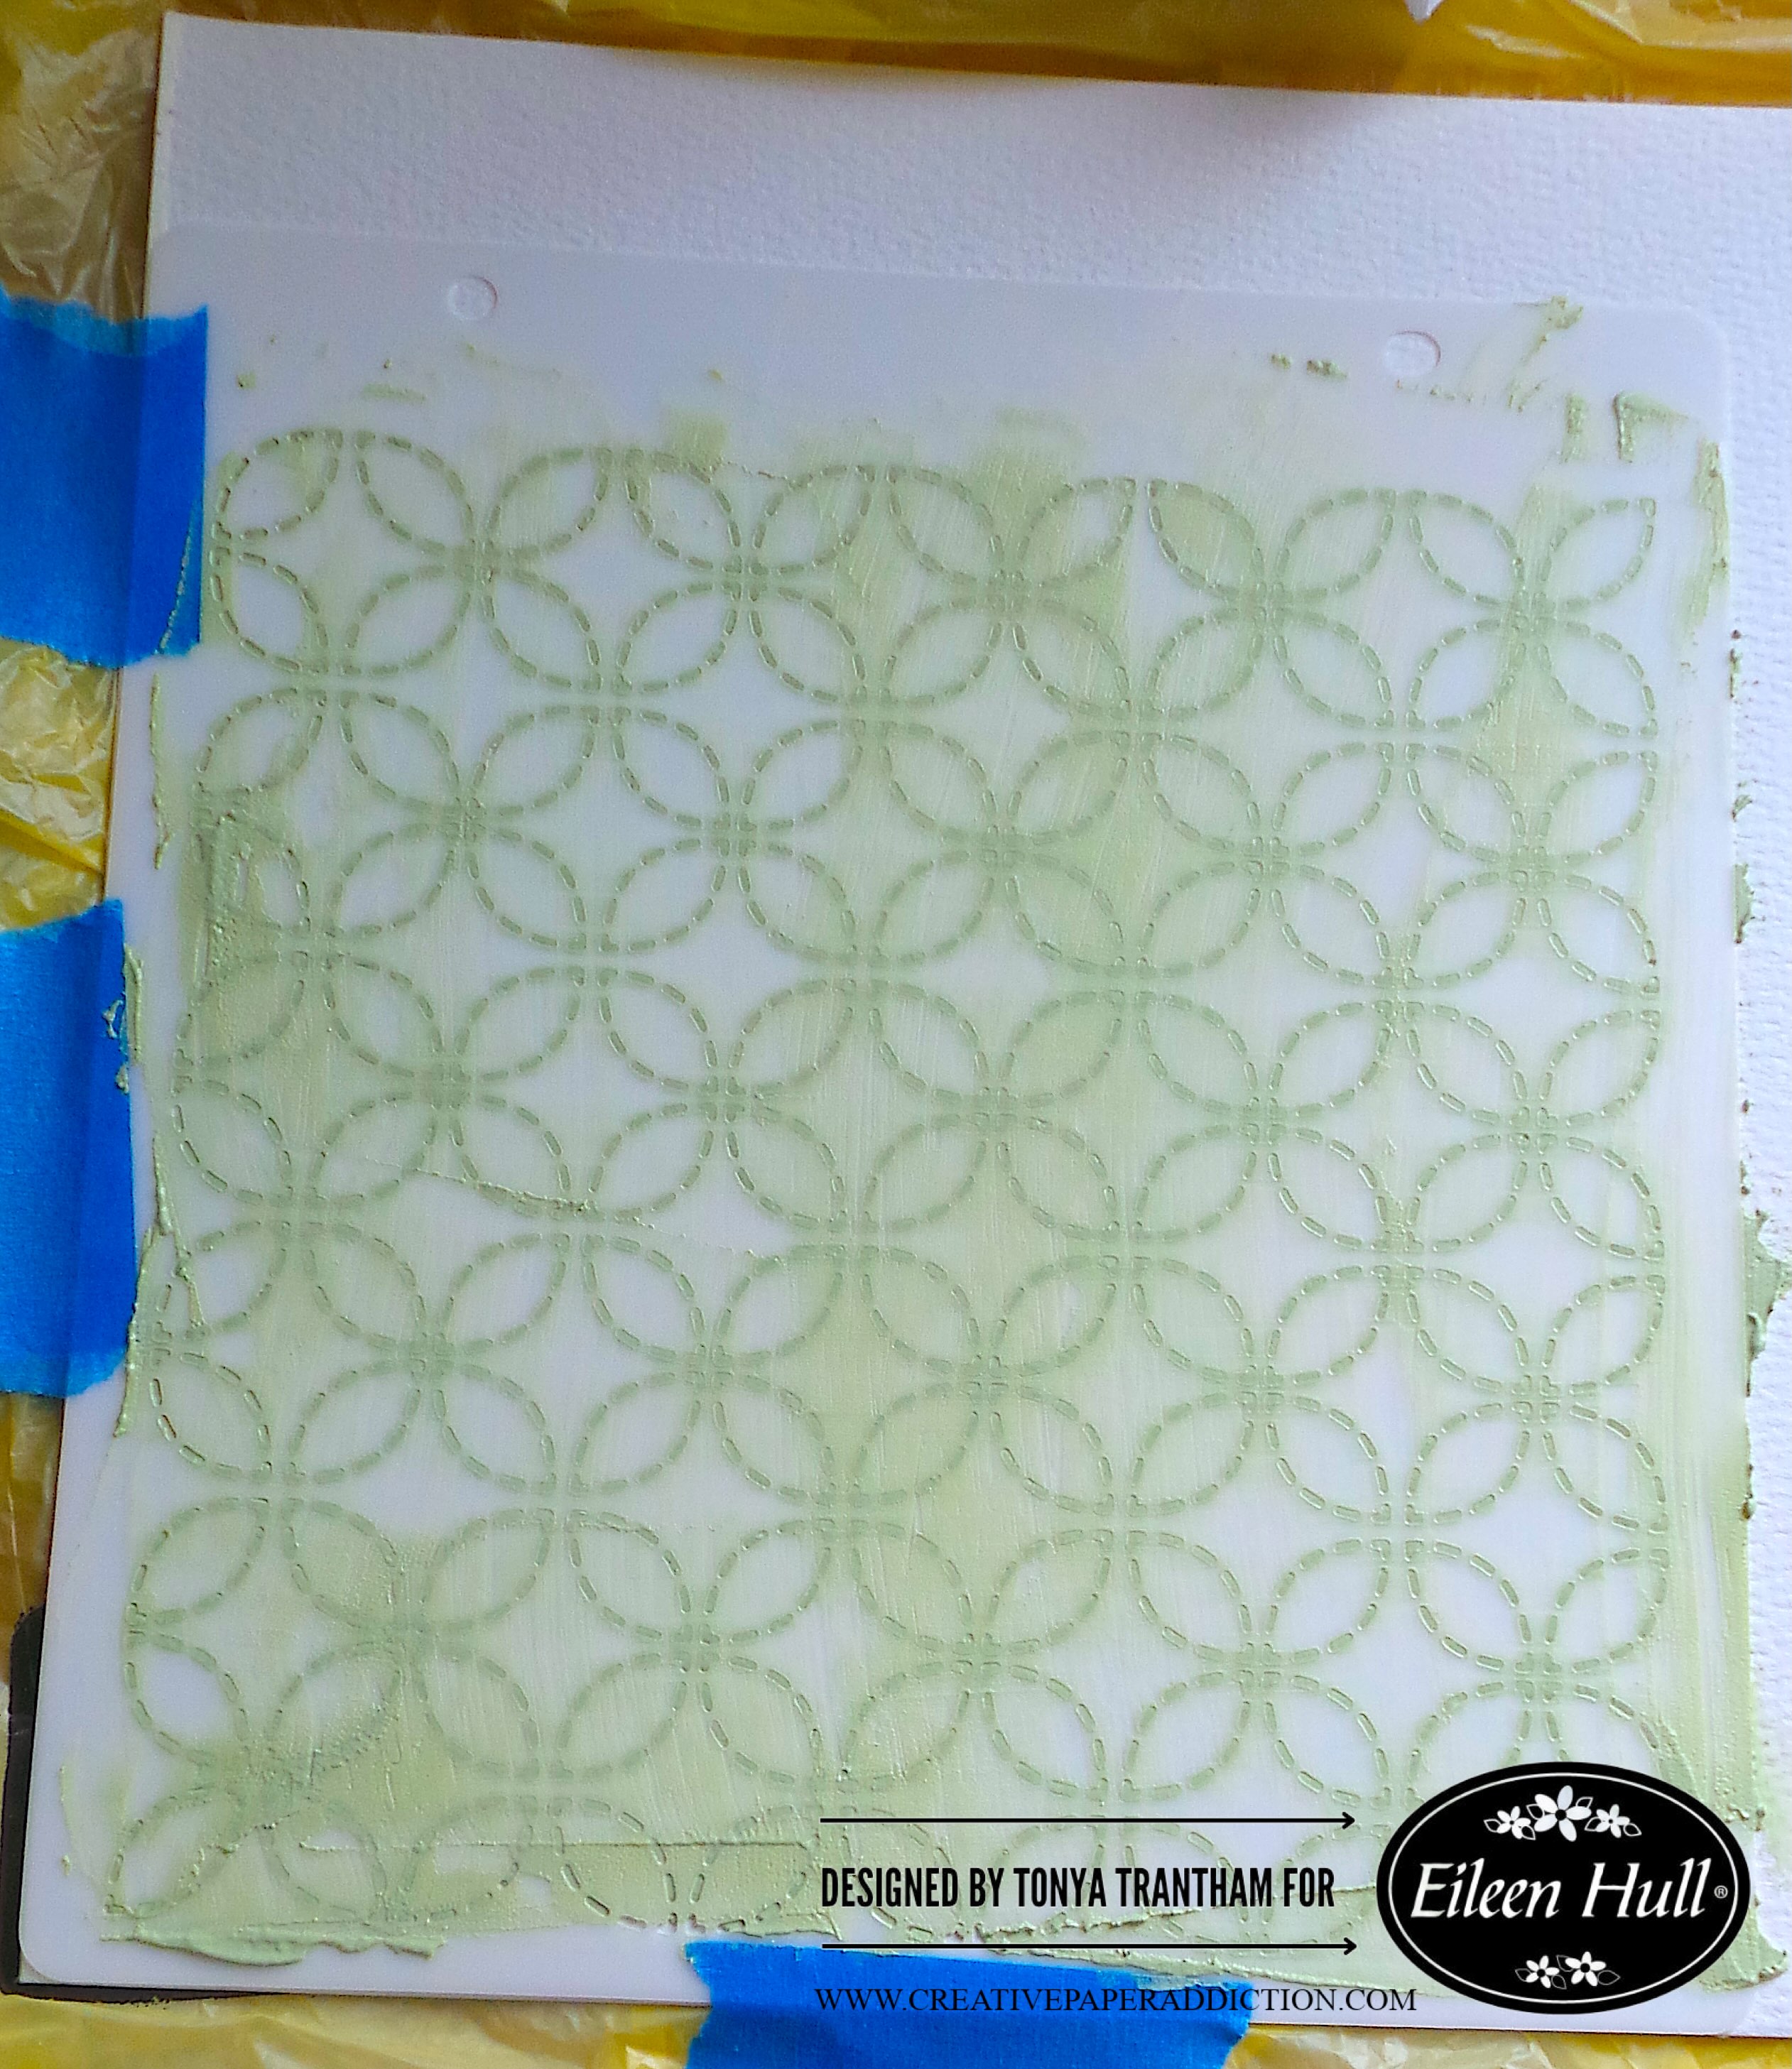
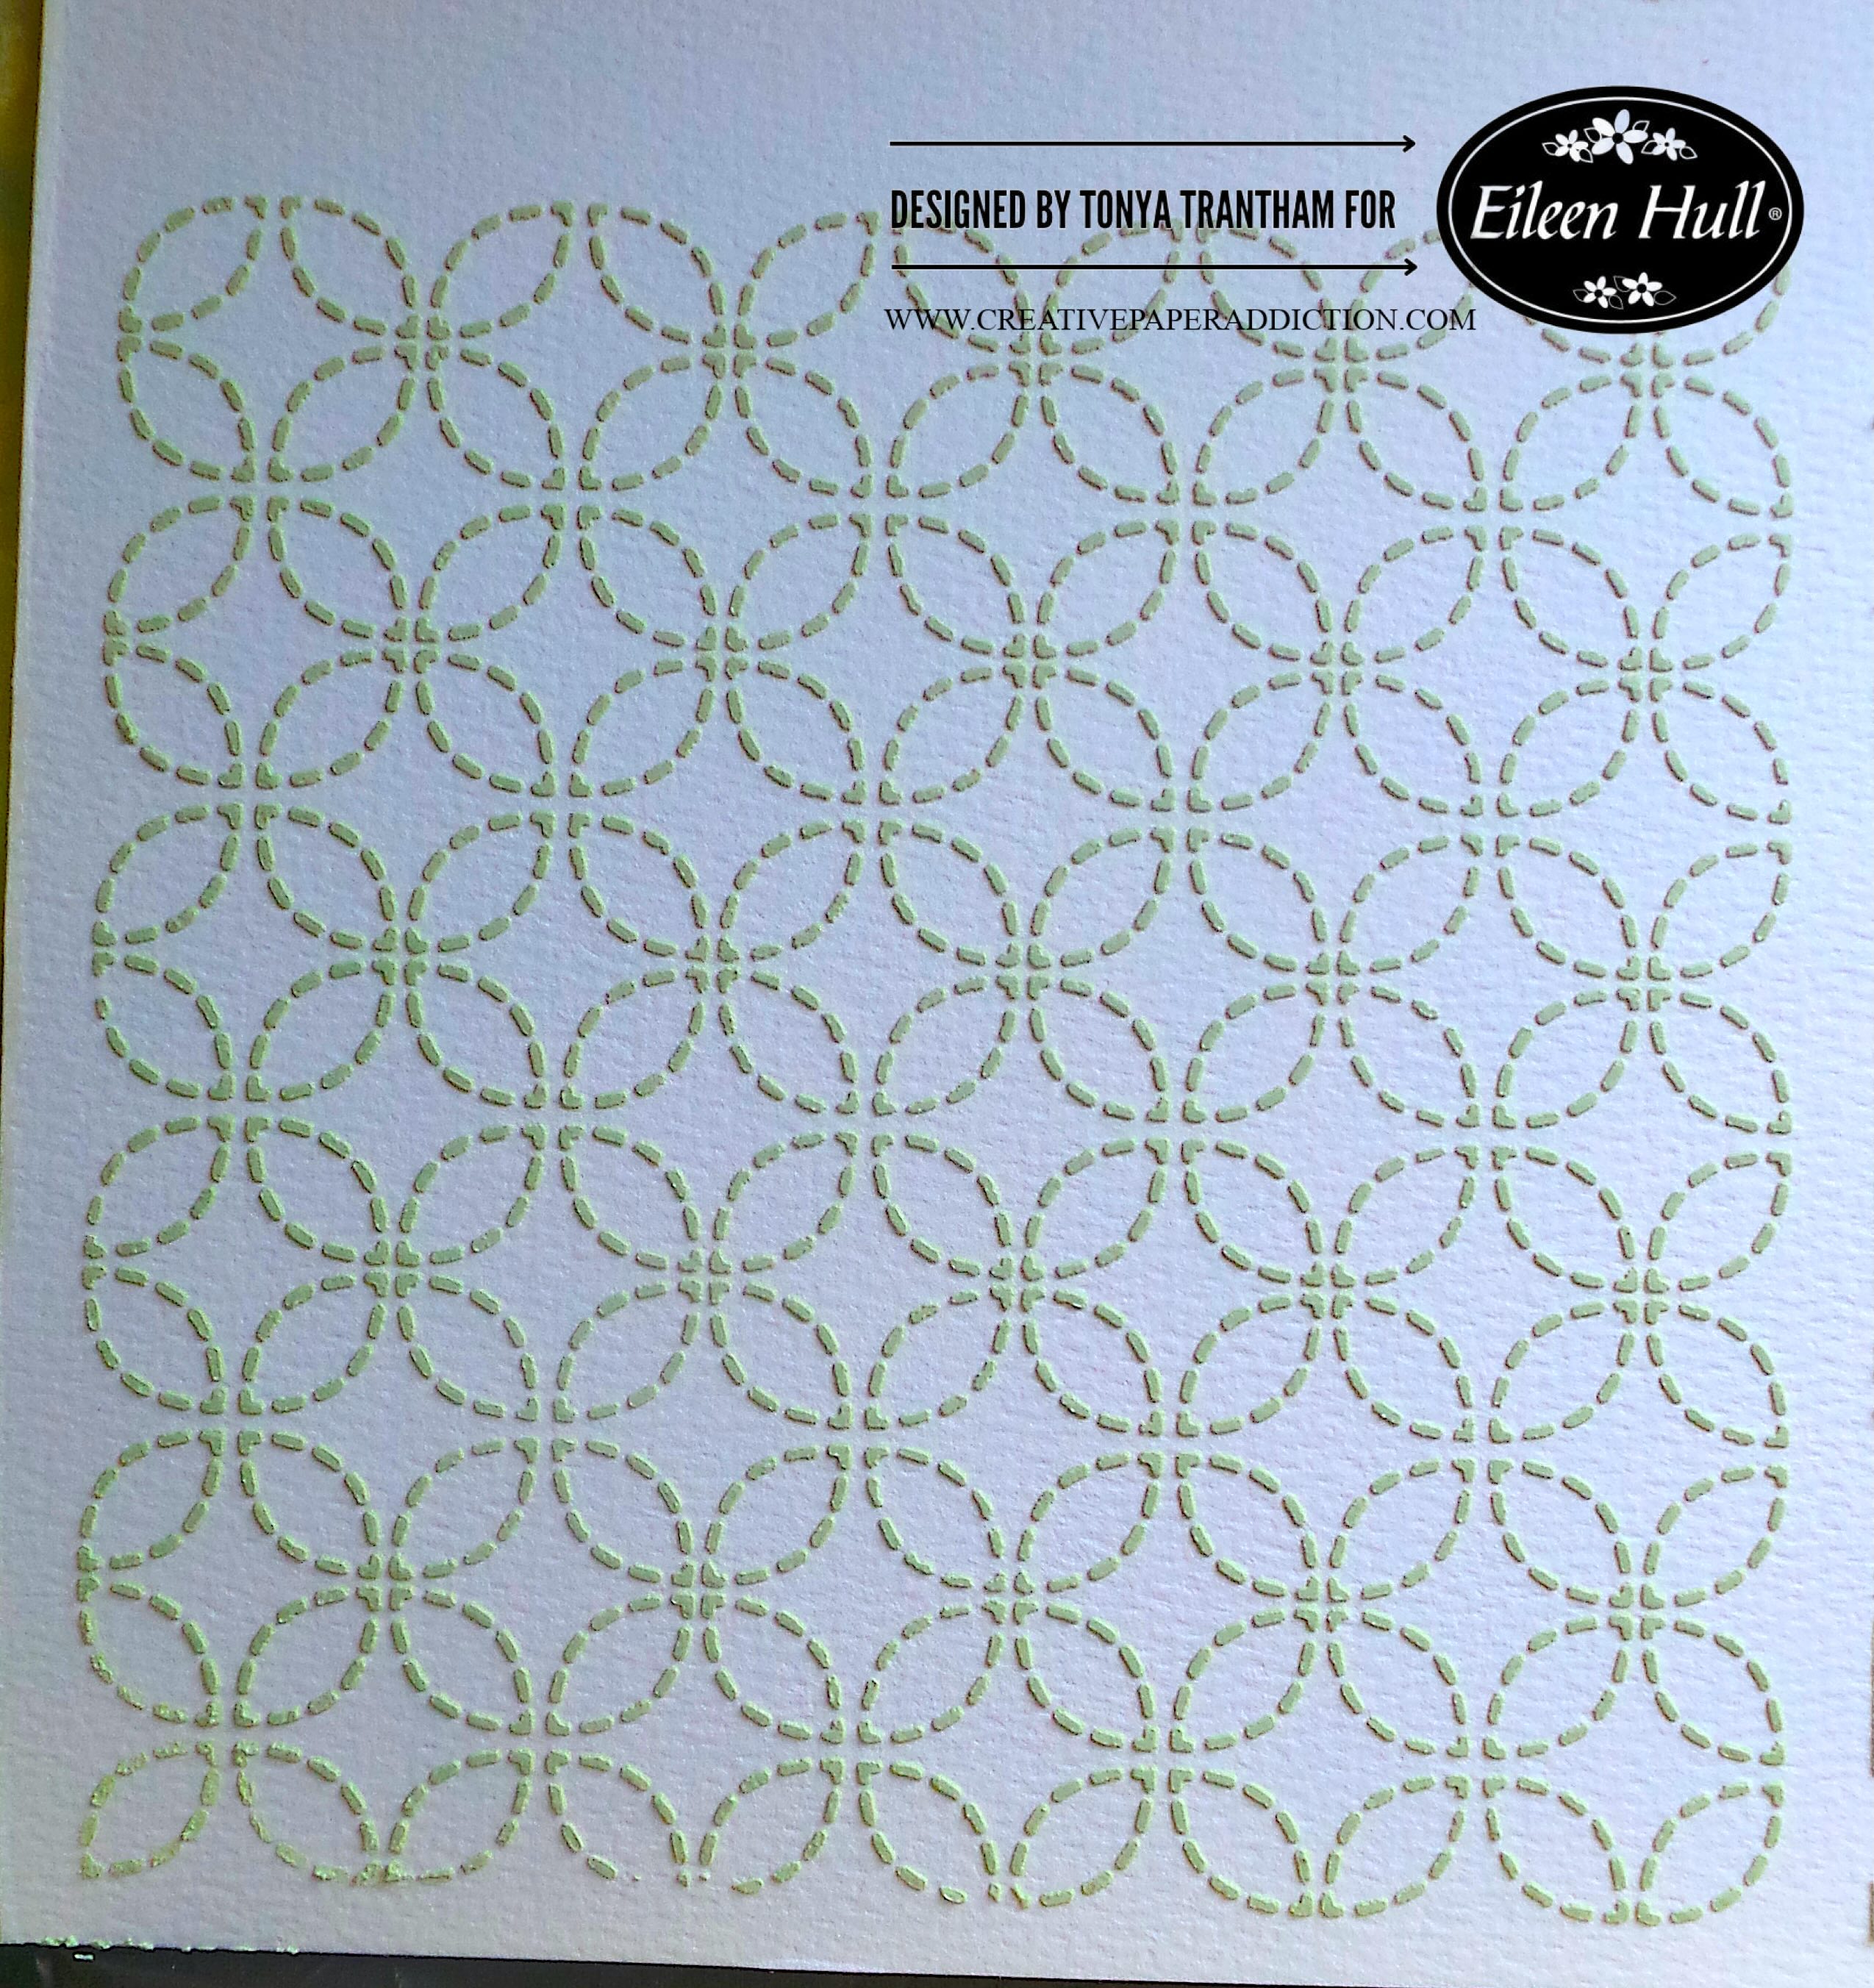
I removed the stencil and let the raised image set.
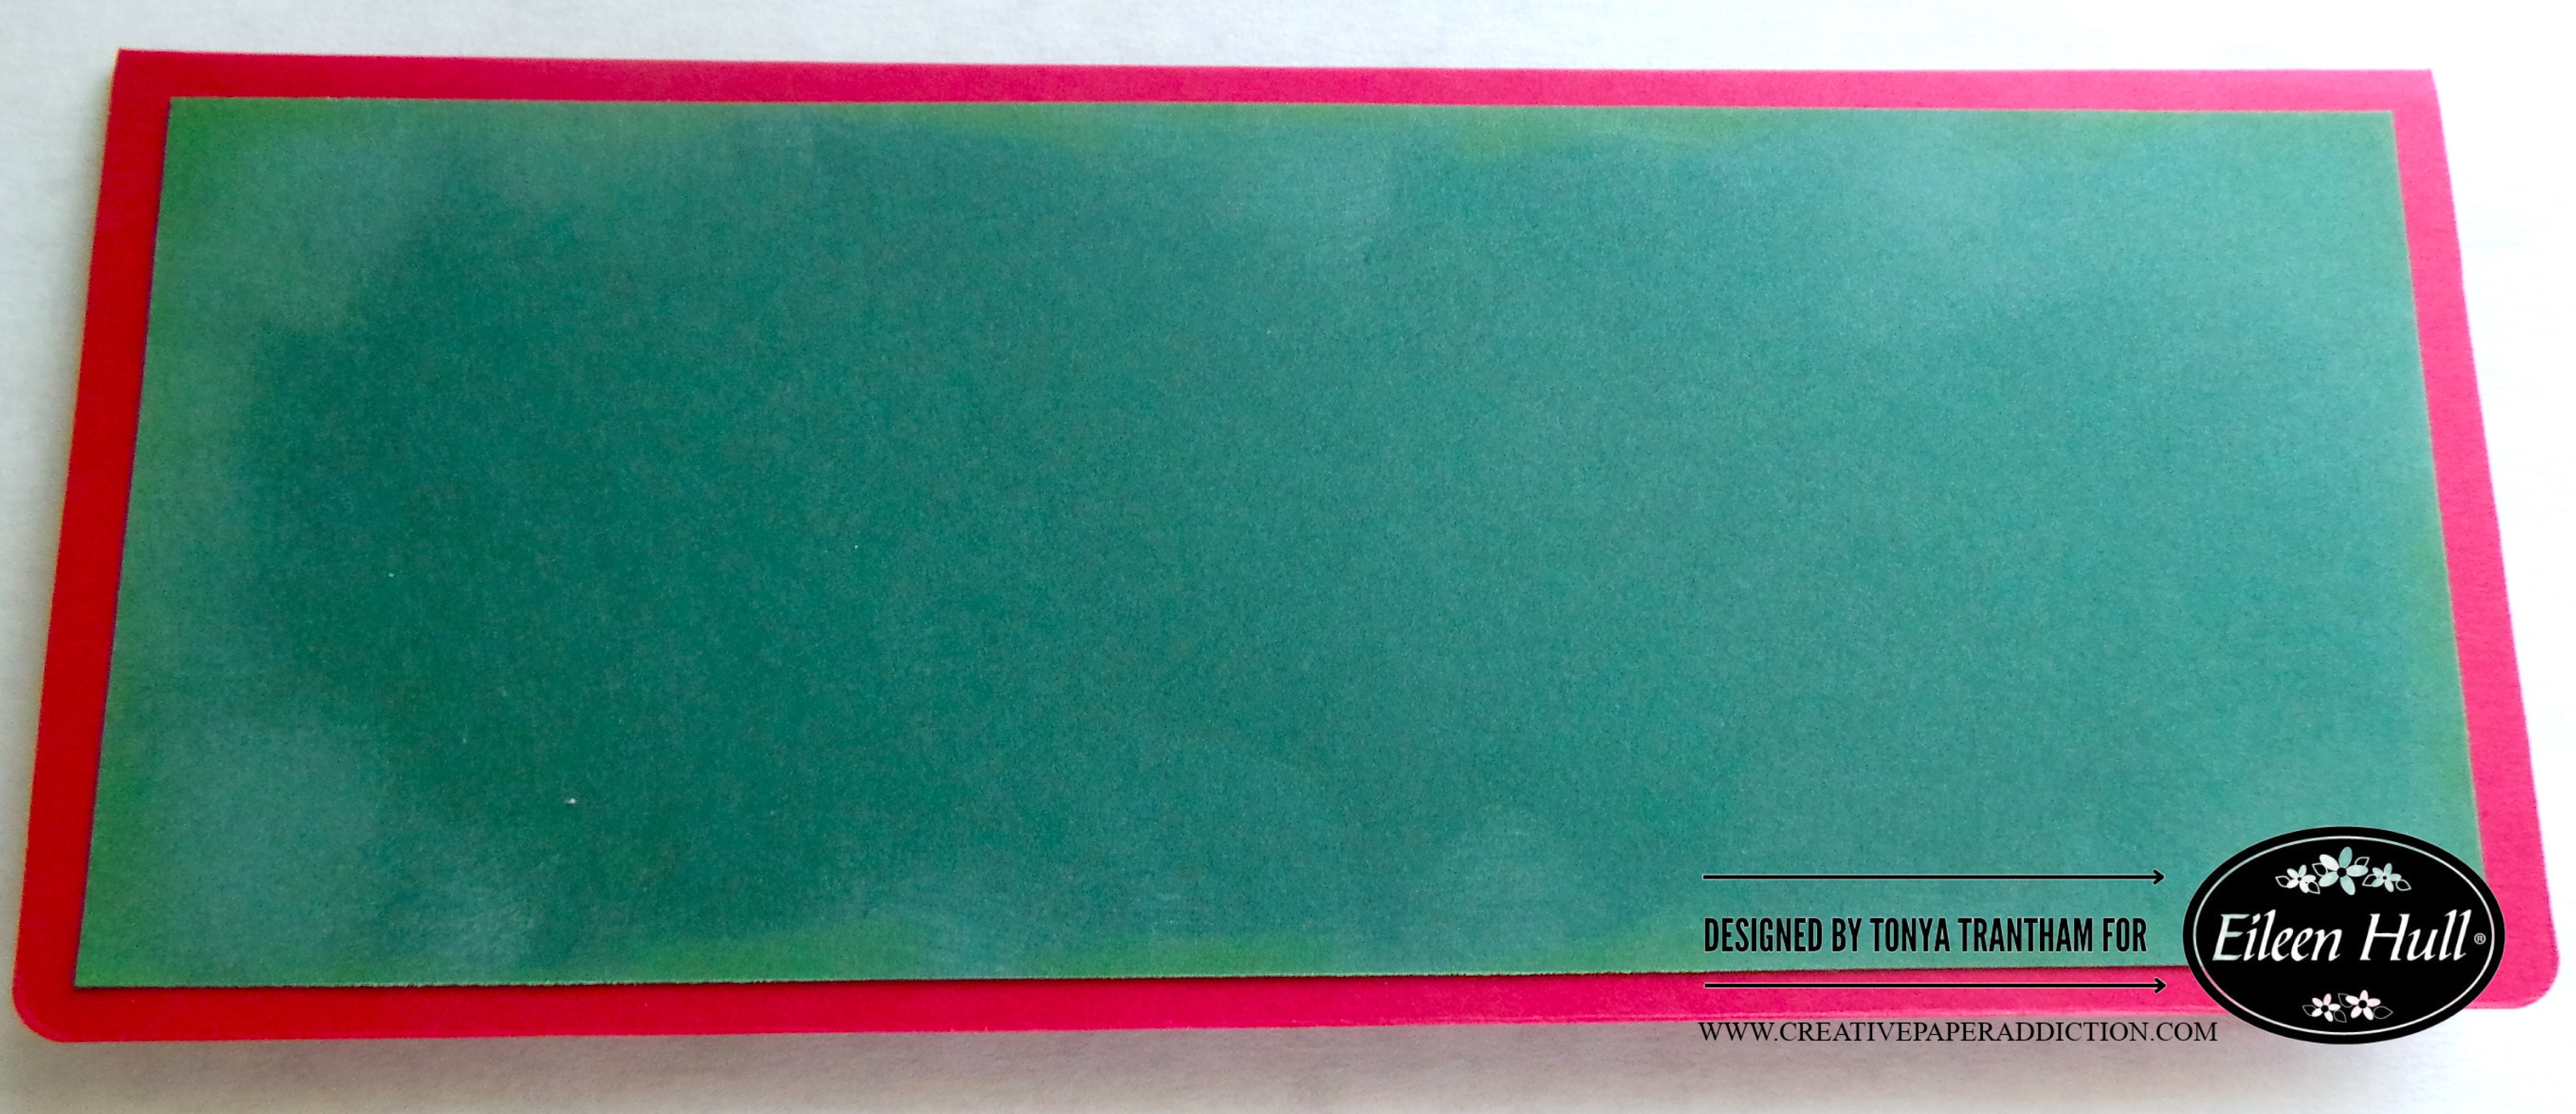
Next, I cut a mat from green cardstock. I lightly inked the edges before adhering to the base of the card.
Since the stenciled image wasn’t as long as the card base. I cut to fit, lightly inked the edges with a green chalk ink before gluing to the card.

I cut two strips of cardstock to cover where I pieced together the stencil image.

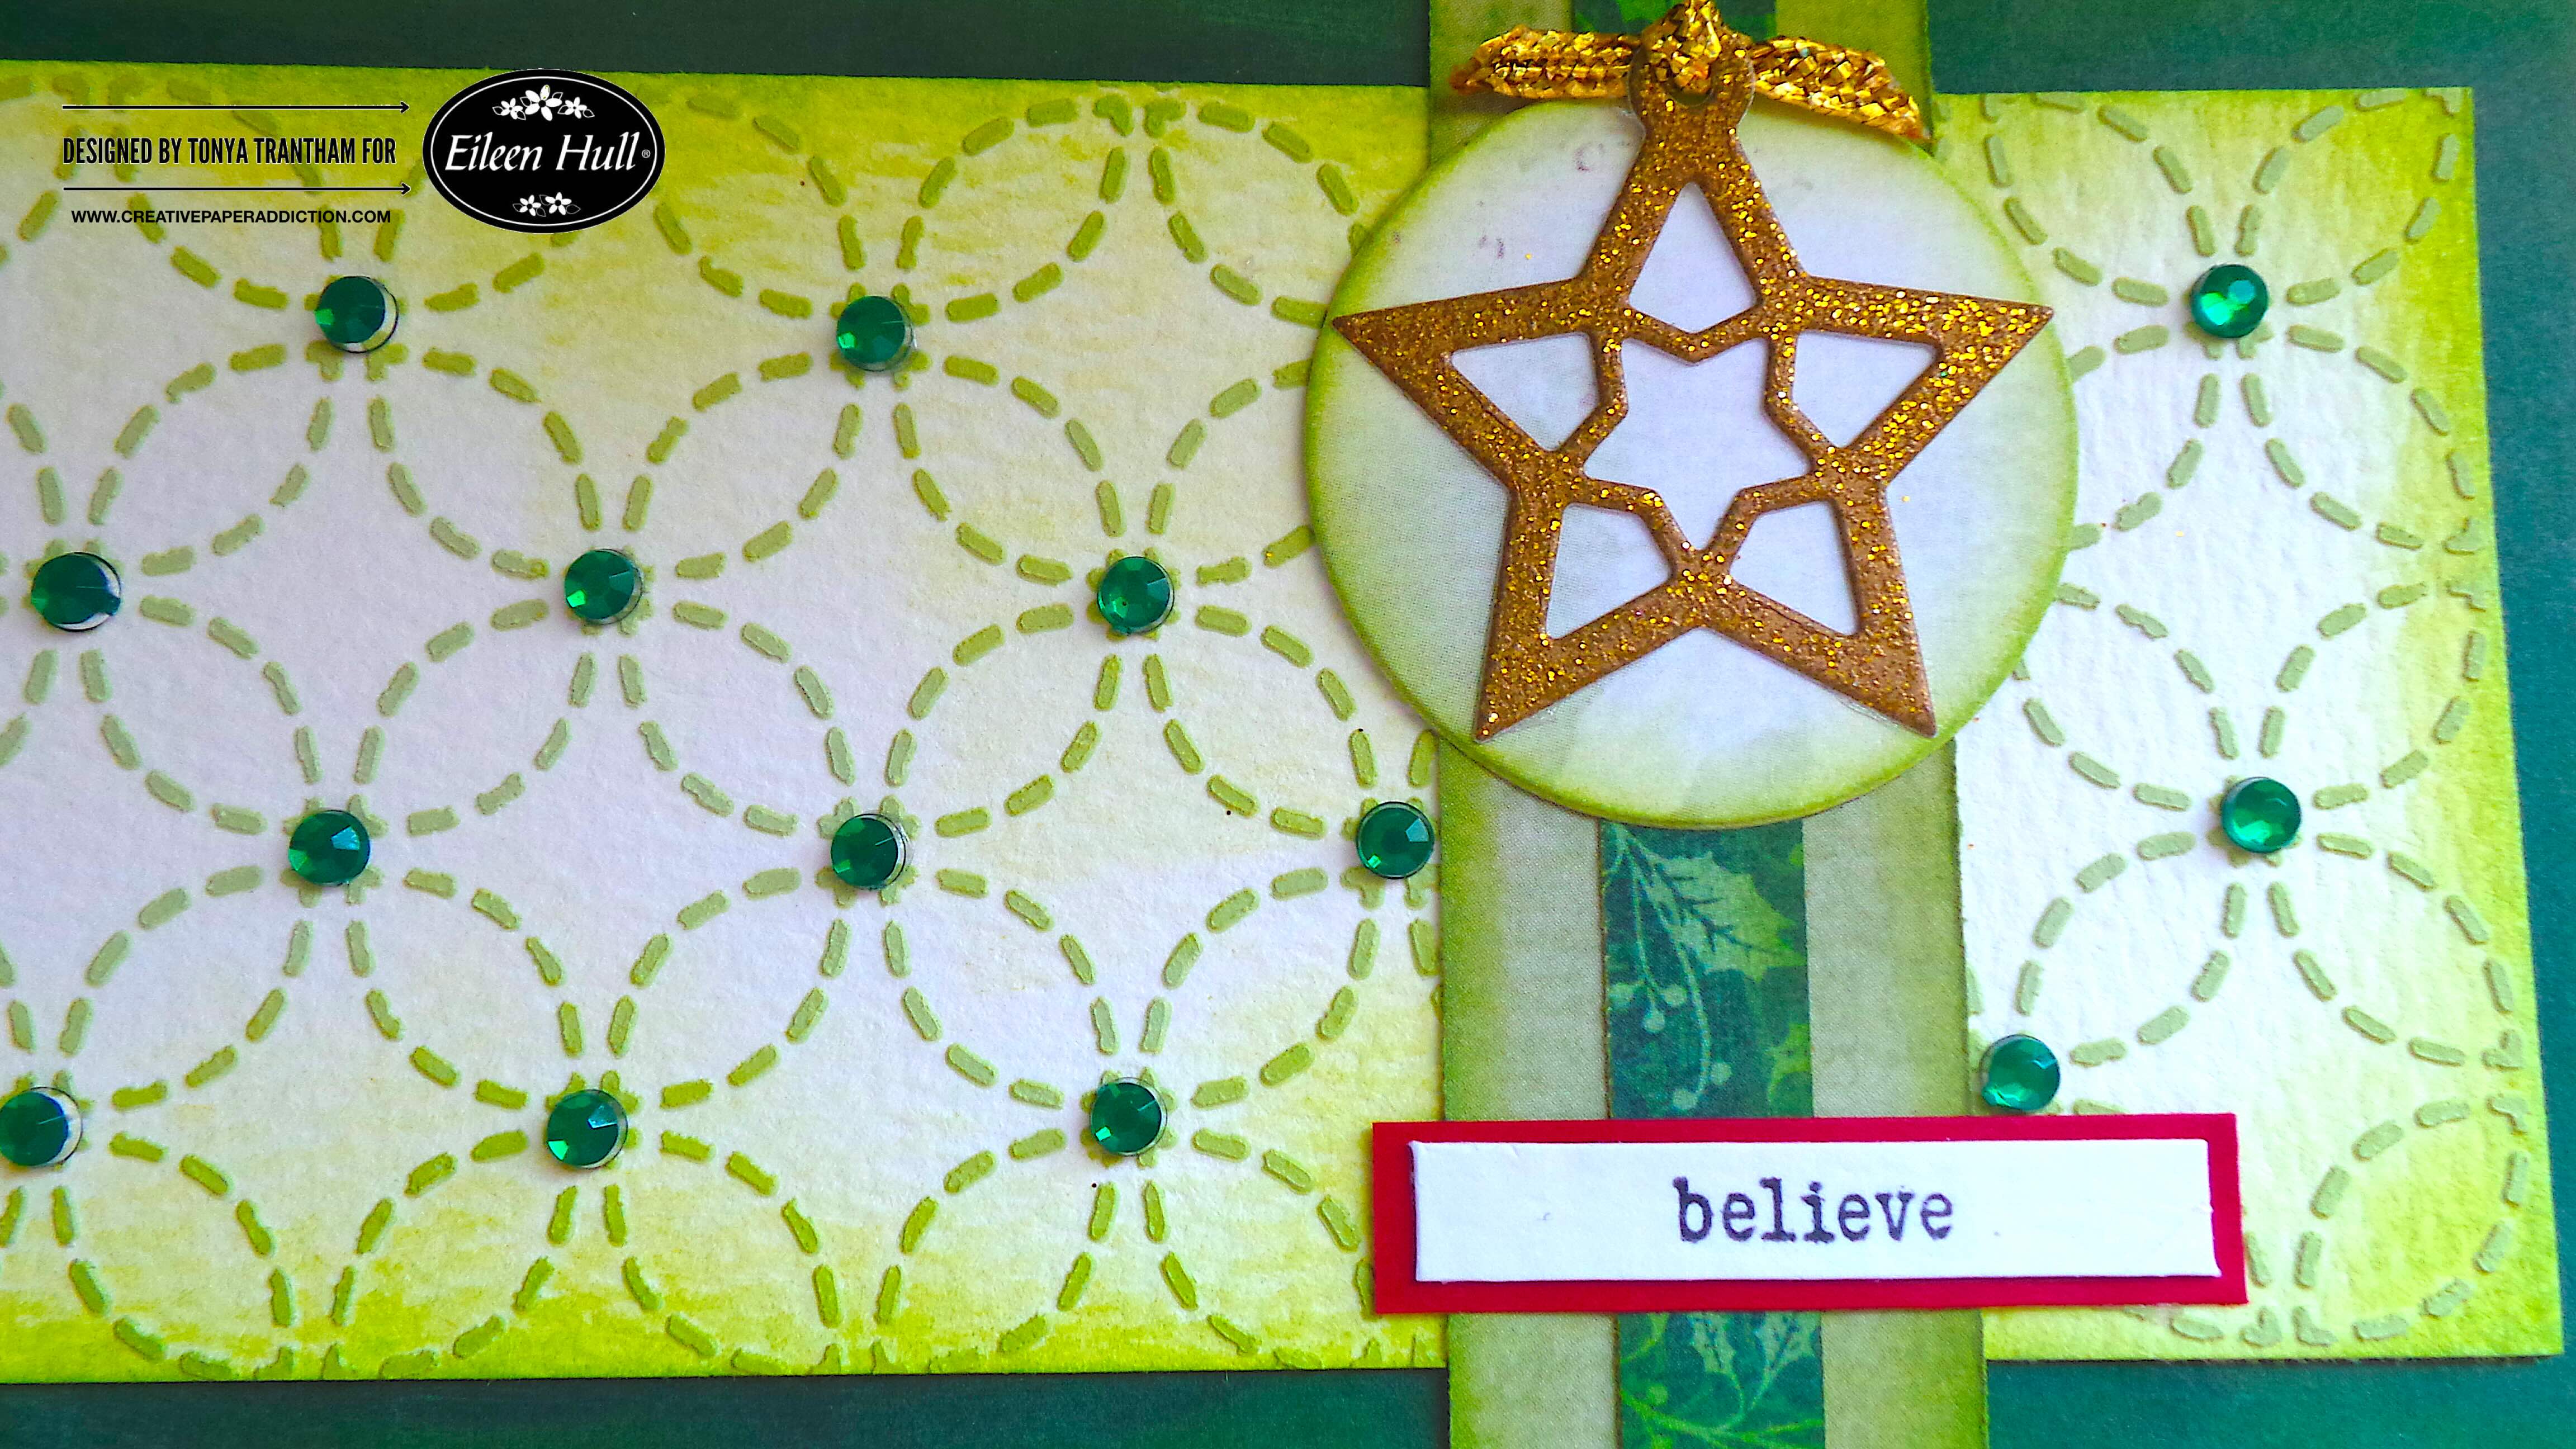
I added green gems to the stenciled image. I also cut a circle from the Bookmark, Pockets and Toppers Thinlits and adhered to the card.

I placed the “I believe in you” sentiment from Fan Favorites Clear Stamps onto the MISTI Stamping Tool .
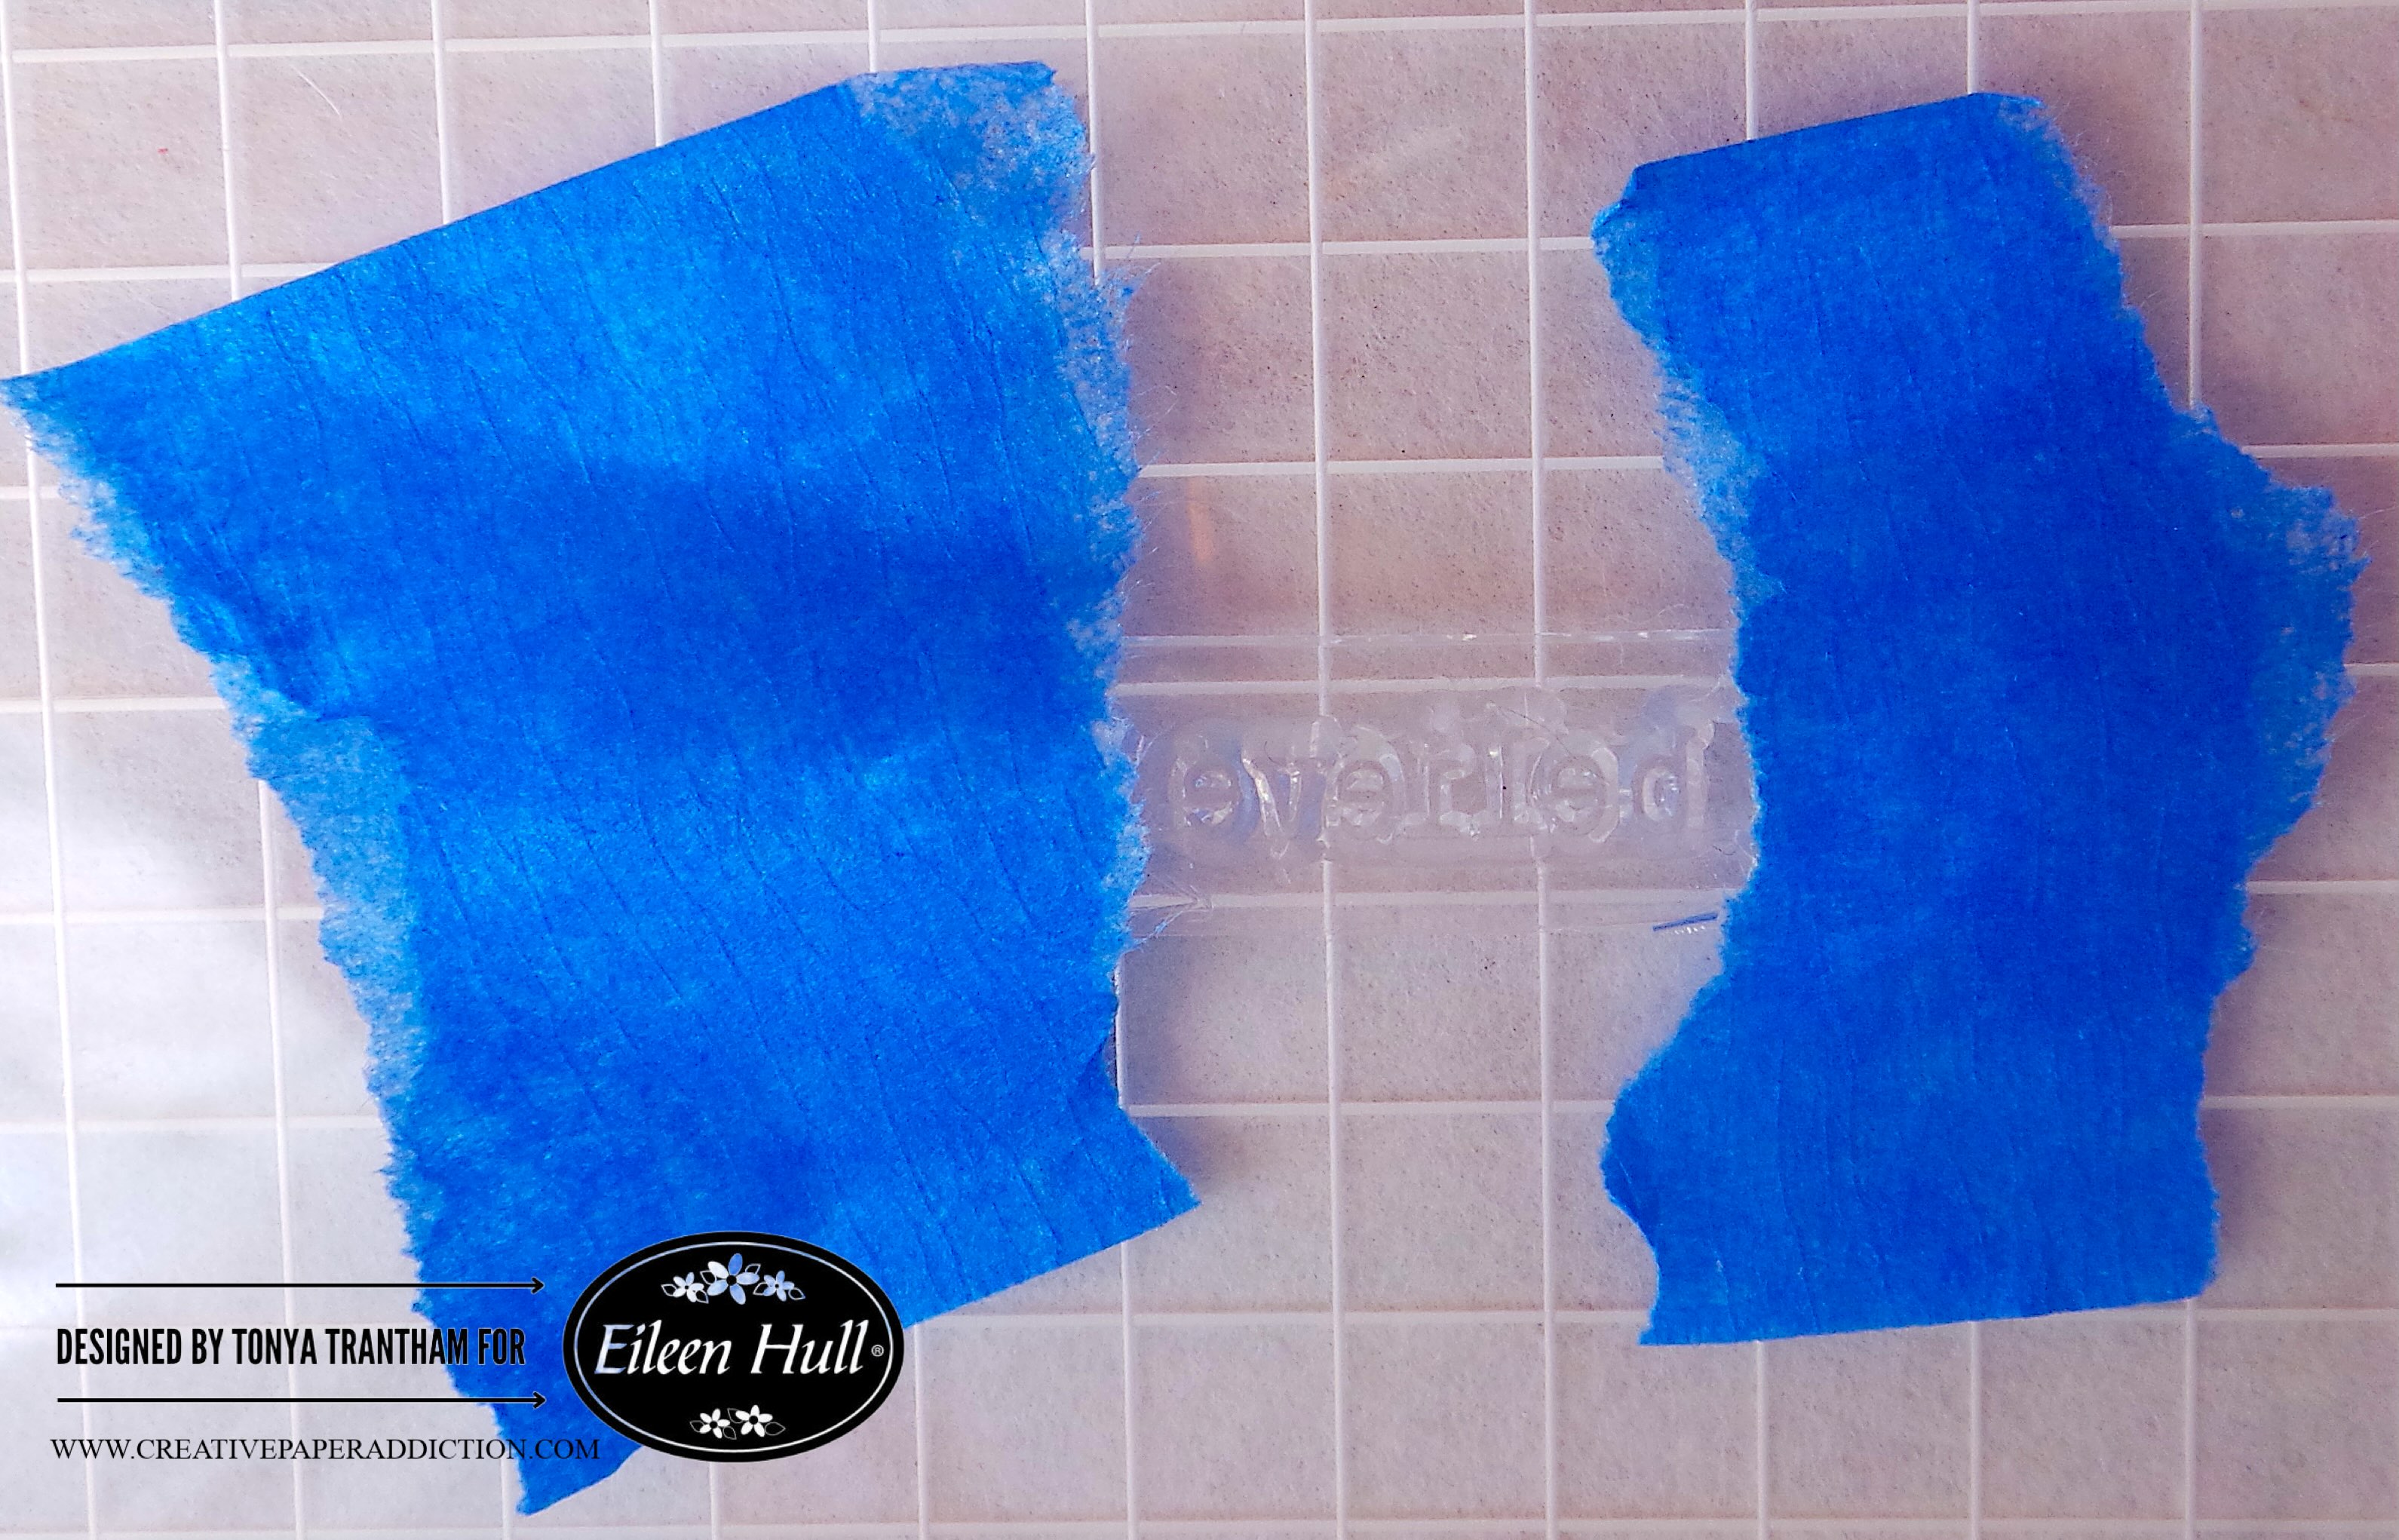
I placed painters tape over the “I” and the “in you” of the stamp. I inked the stamp, removed the painters tape and stamped onto a piece of cardstock.

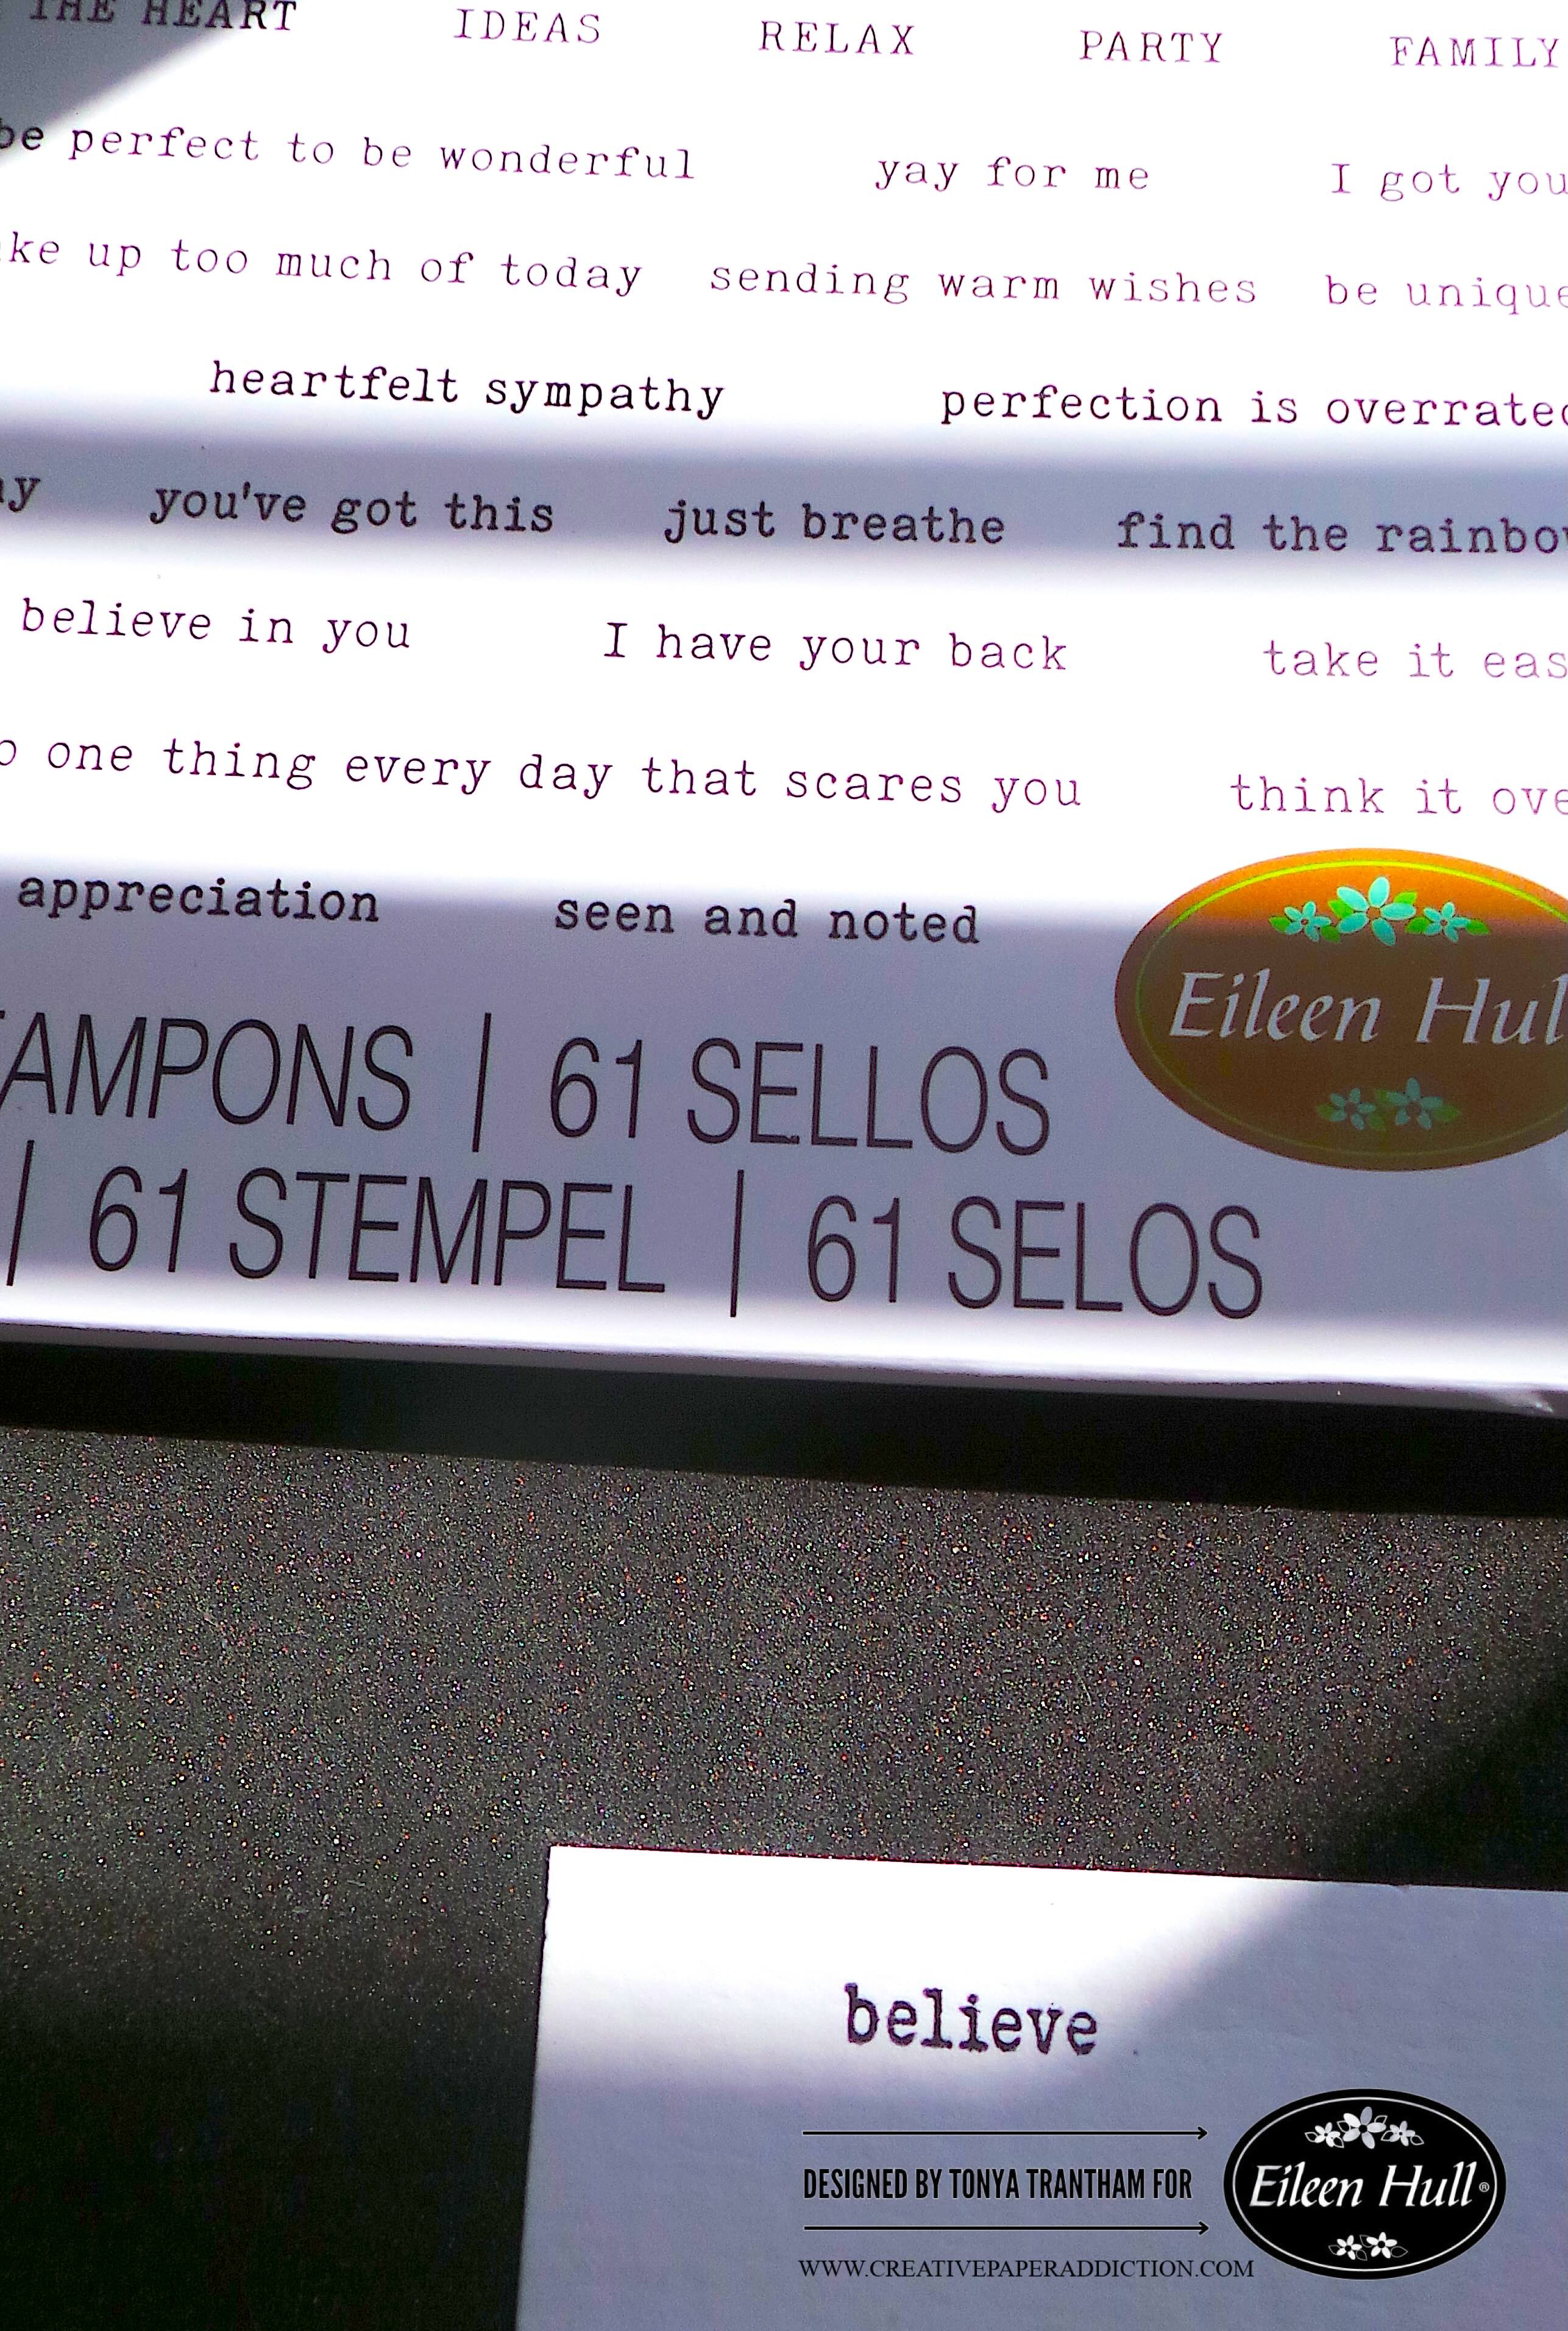
I cut and added a mat to the believe sentiment and glued to the card. I cut a star charm from the Charms Thinlits. Then, I added a piece of gold ribbon to the top of the star. Finally, I adhered it to the circle on the card.
Question, do you make cards or do you give store bought cards at Christmas time? Let me know in the comment section below. Also If you have any questions about this card leave a comment.

Supply List

Sizzix/Eileen Hull: Journal Diecut (retired)

Sizzix/Eileen Hull: Charms Thinlits

Sizzix/Eileen Hull: Fan Favorites Clear Stamps

Sizzix/Eileen Hull: Plate and Pattern Layered Stencils

Sizzix/Eileen Hull: Bookmark, Pockets and Toppers Thinlits

Diecut Machine

Cloud Whip

Mix Media Spatula

Olive Pops of Color

Gems

Red Cardstock

Gold Cardstock

White Cardstock

Various Green Cardstocks

Black Ink

MISTI Stamping Tool

Gold Ribbon

Paper Cutter

Scissors

Green Chalk Ink

Beacon Adhesives: Zip Dry Adhesive

(Products listed above are Affiliated Links for your convenience)

DISCLAIMERS

This blog is compensated to provide opinion on products, services, websites, and various other topics. Even though the owner(s) of this blog receives compensation for our posts or advertisements. I always give my honest opinions, findings, beliefs, or experiences on those topics or products. The views and opinions expressed on this blog are purely my own. Any product claim, statistic, quote or other representation about a product or service should be verified with each manufacturer, provider, or party in question.This blog contains affiliate links, clicking and shopping through these links helps to support and run Tonya Trantham Designs – Creative Paper Addiction at no additional cost to you. Today’s features are Sizzix, Eileen Hull and Scrapbook.com Products. 

Thanks for stopping by, hope your Sunday is wonderful and enjoy creating!

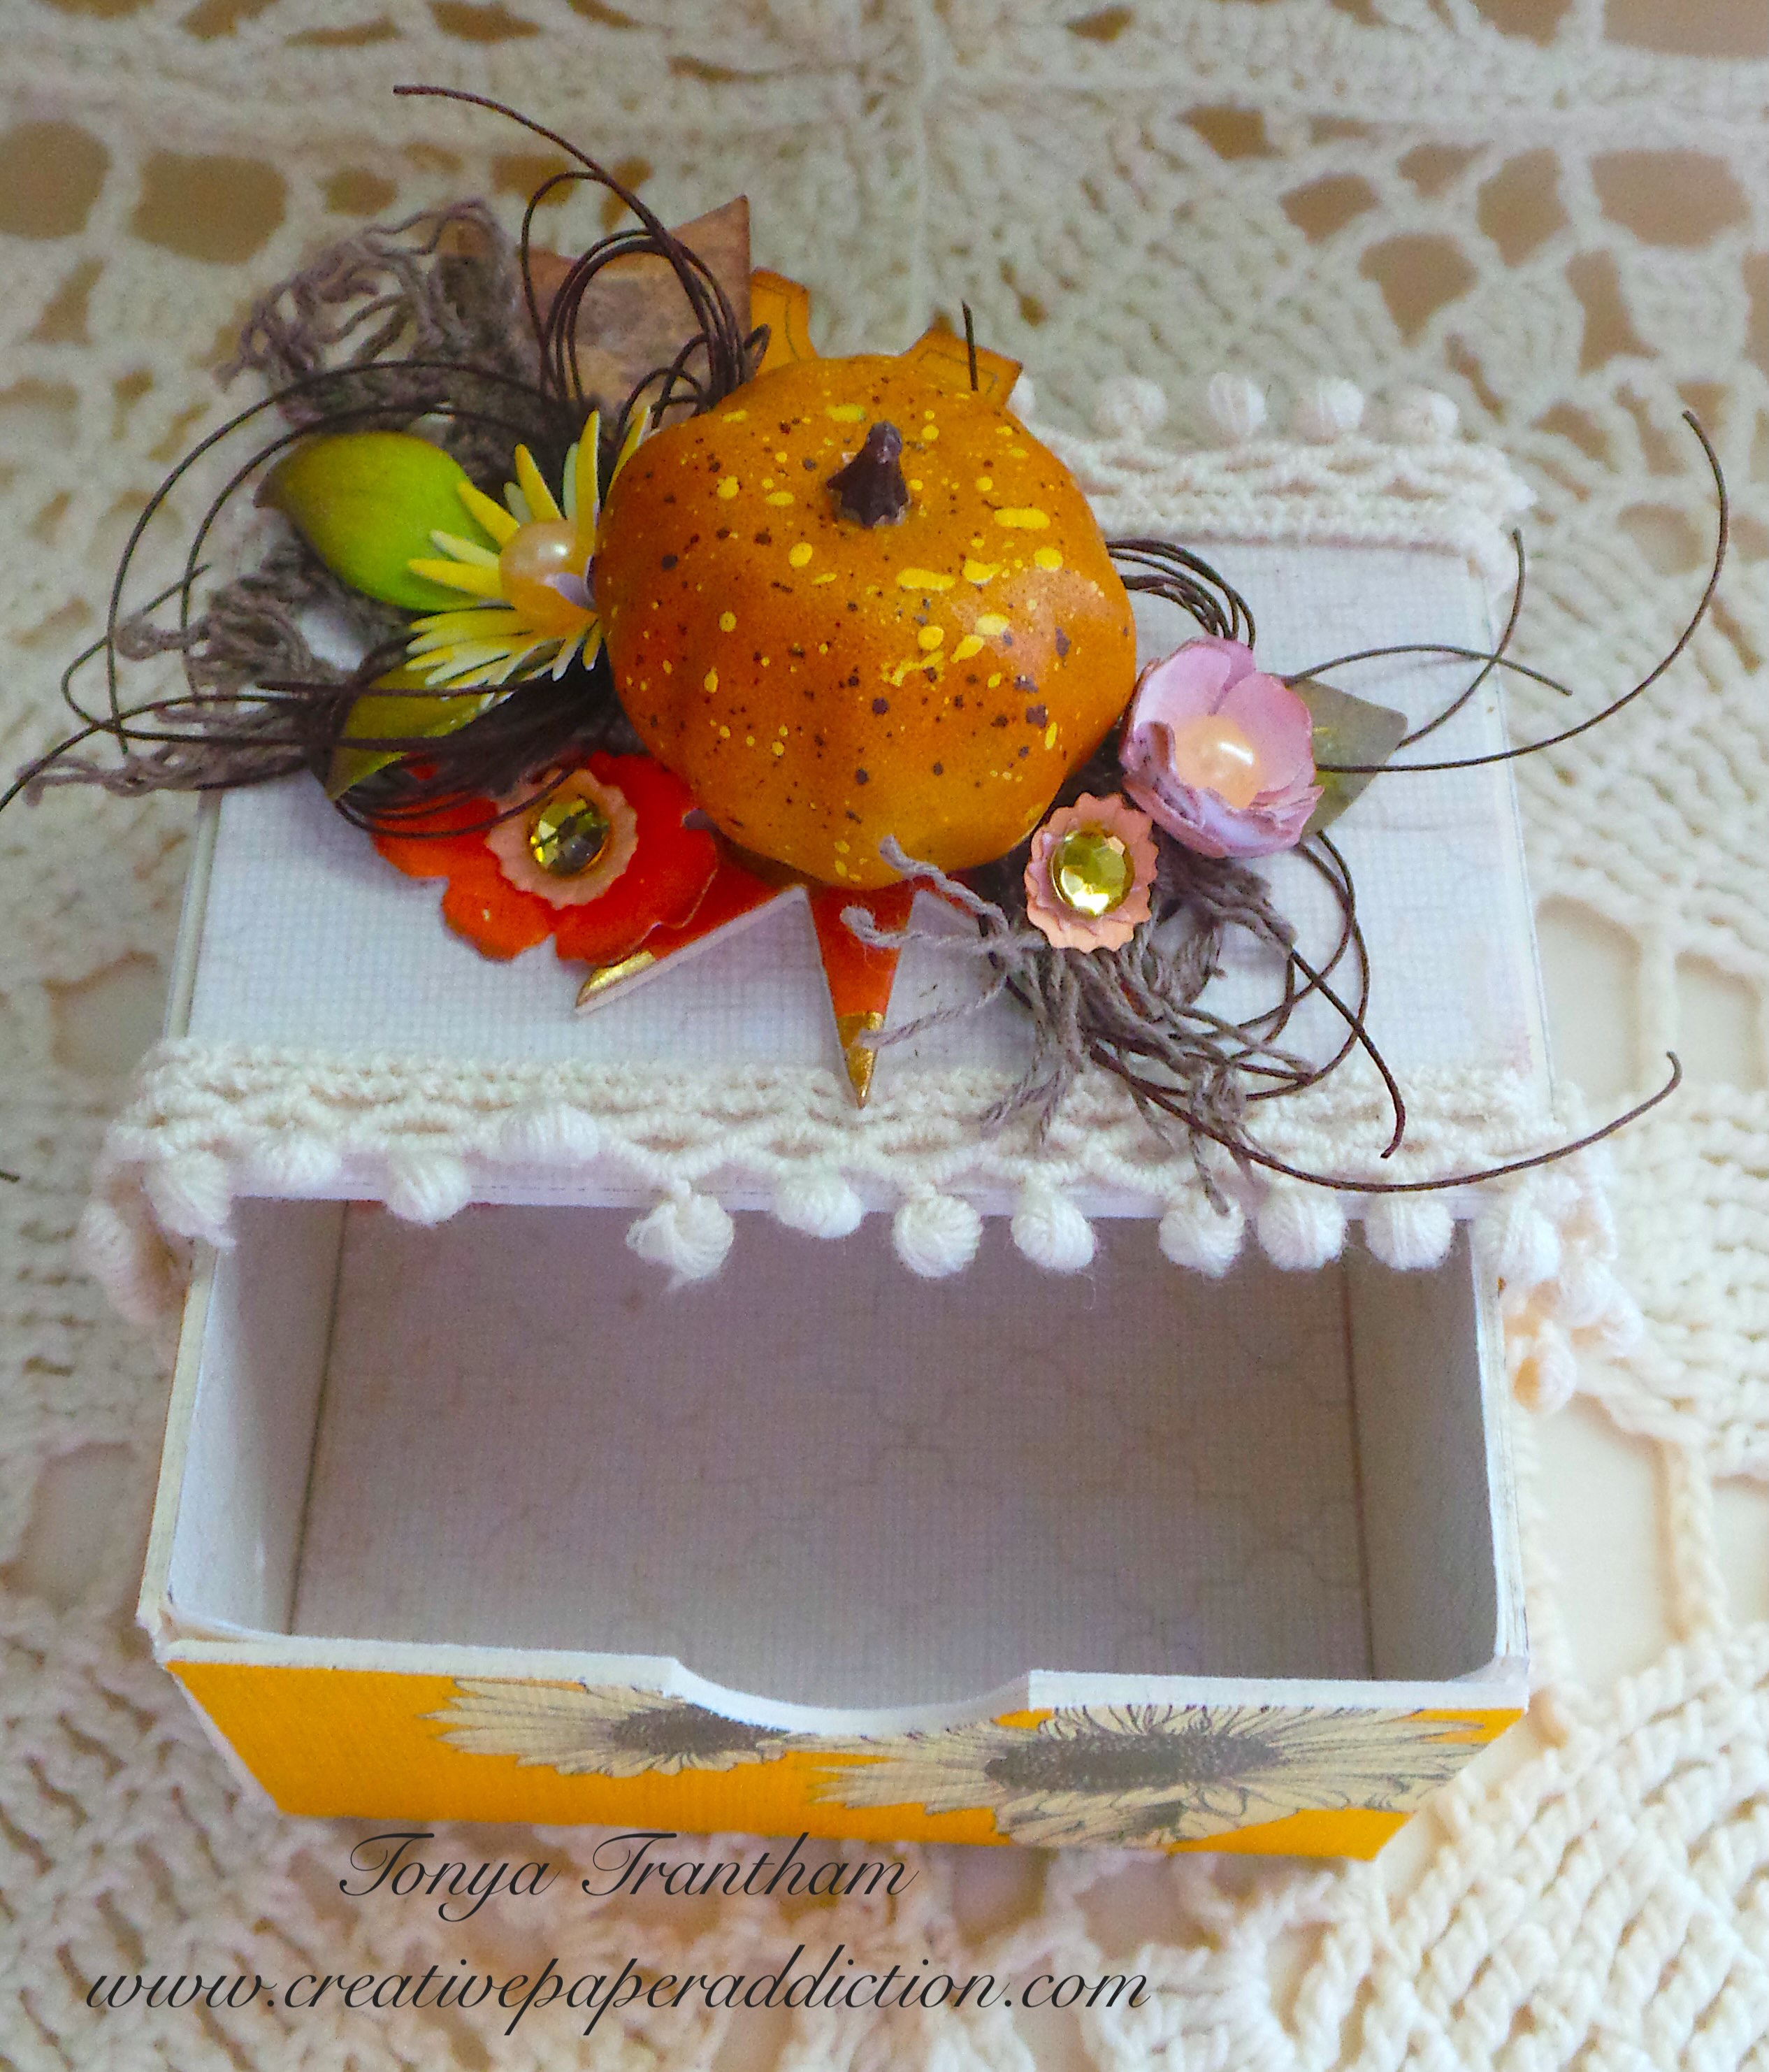
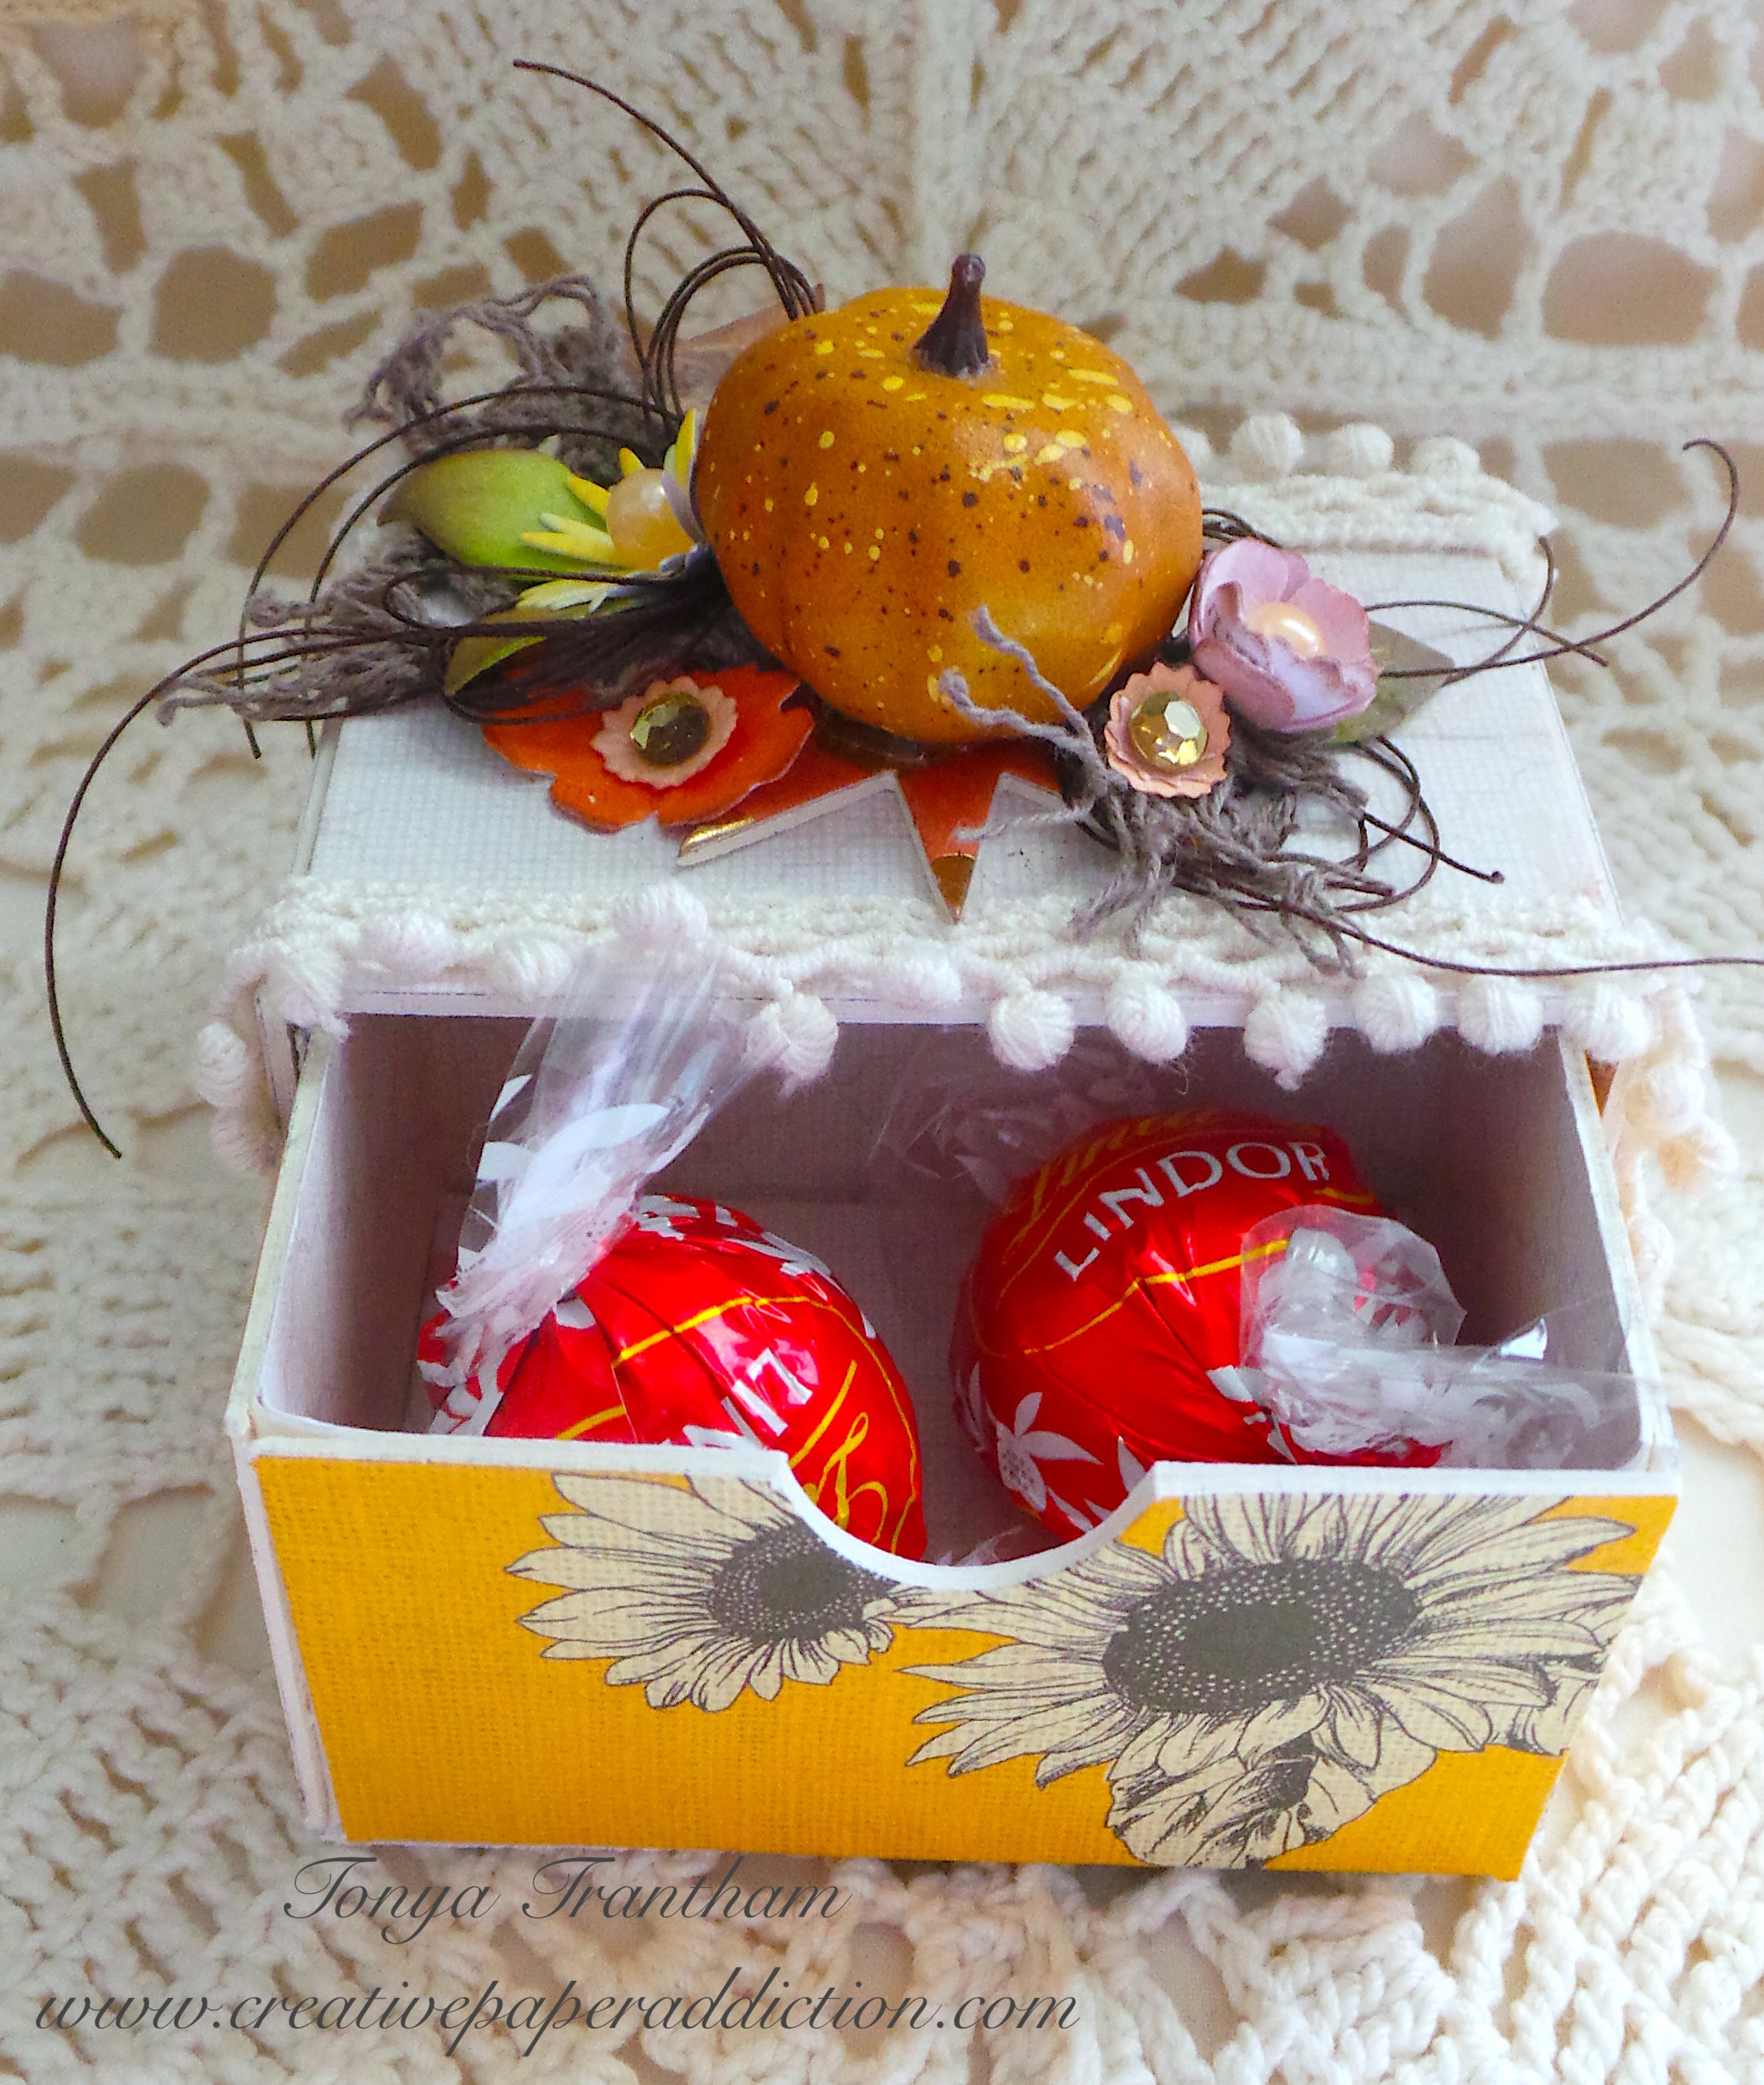
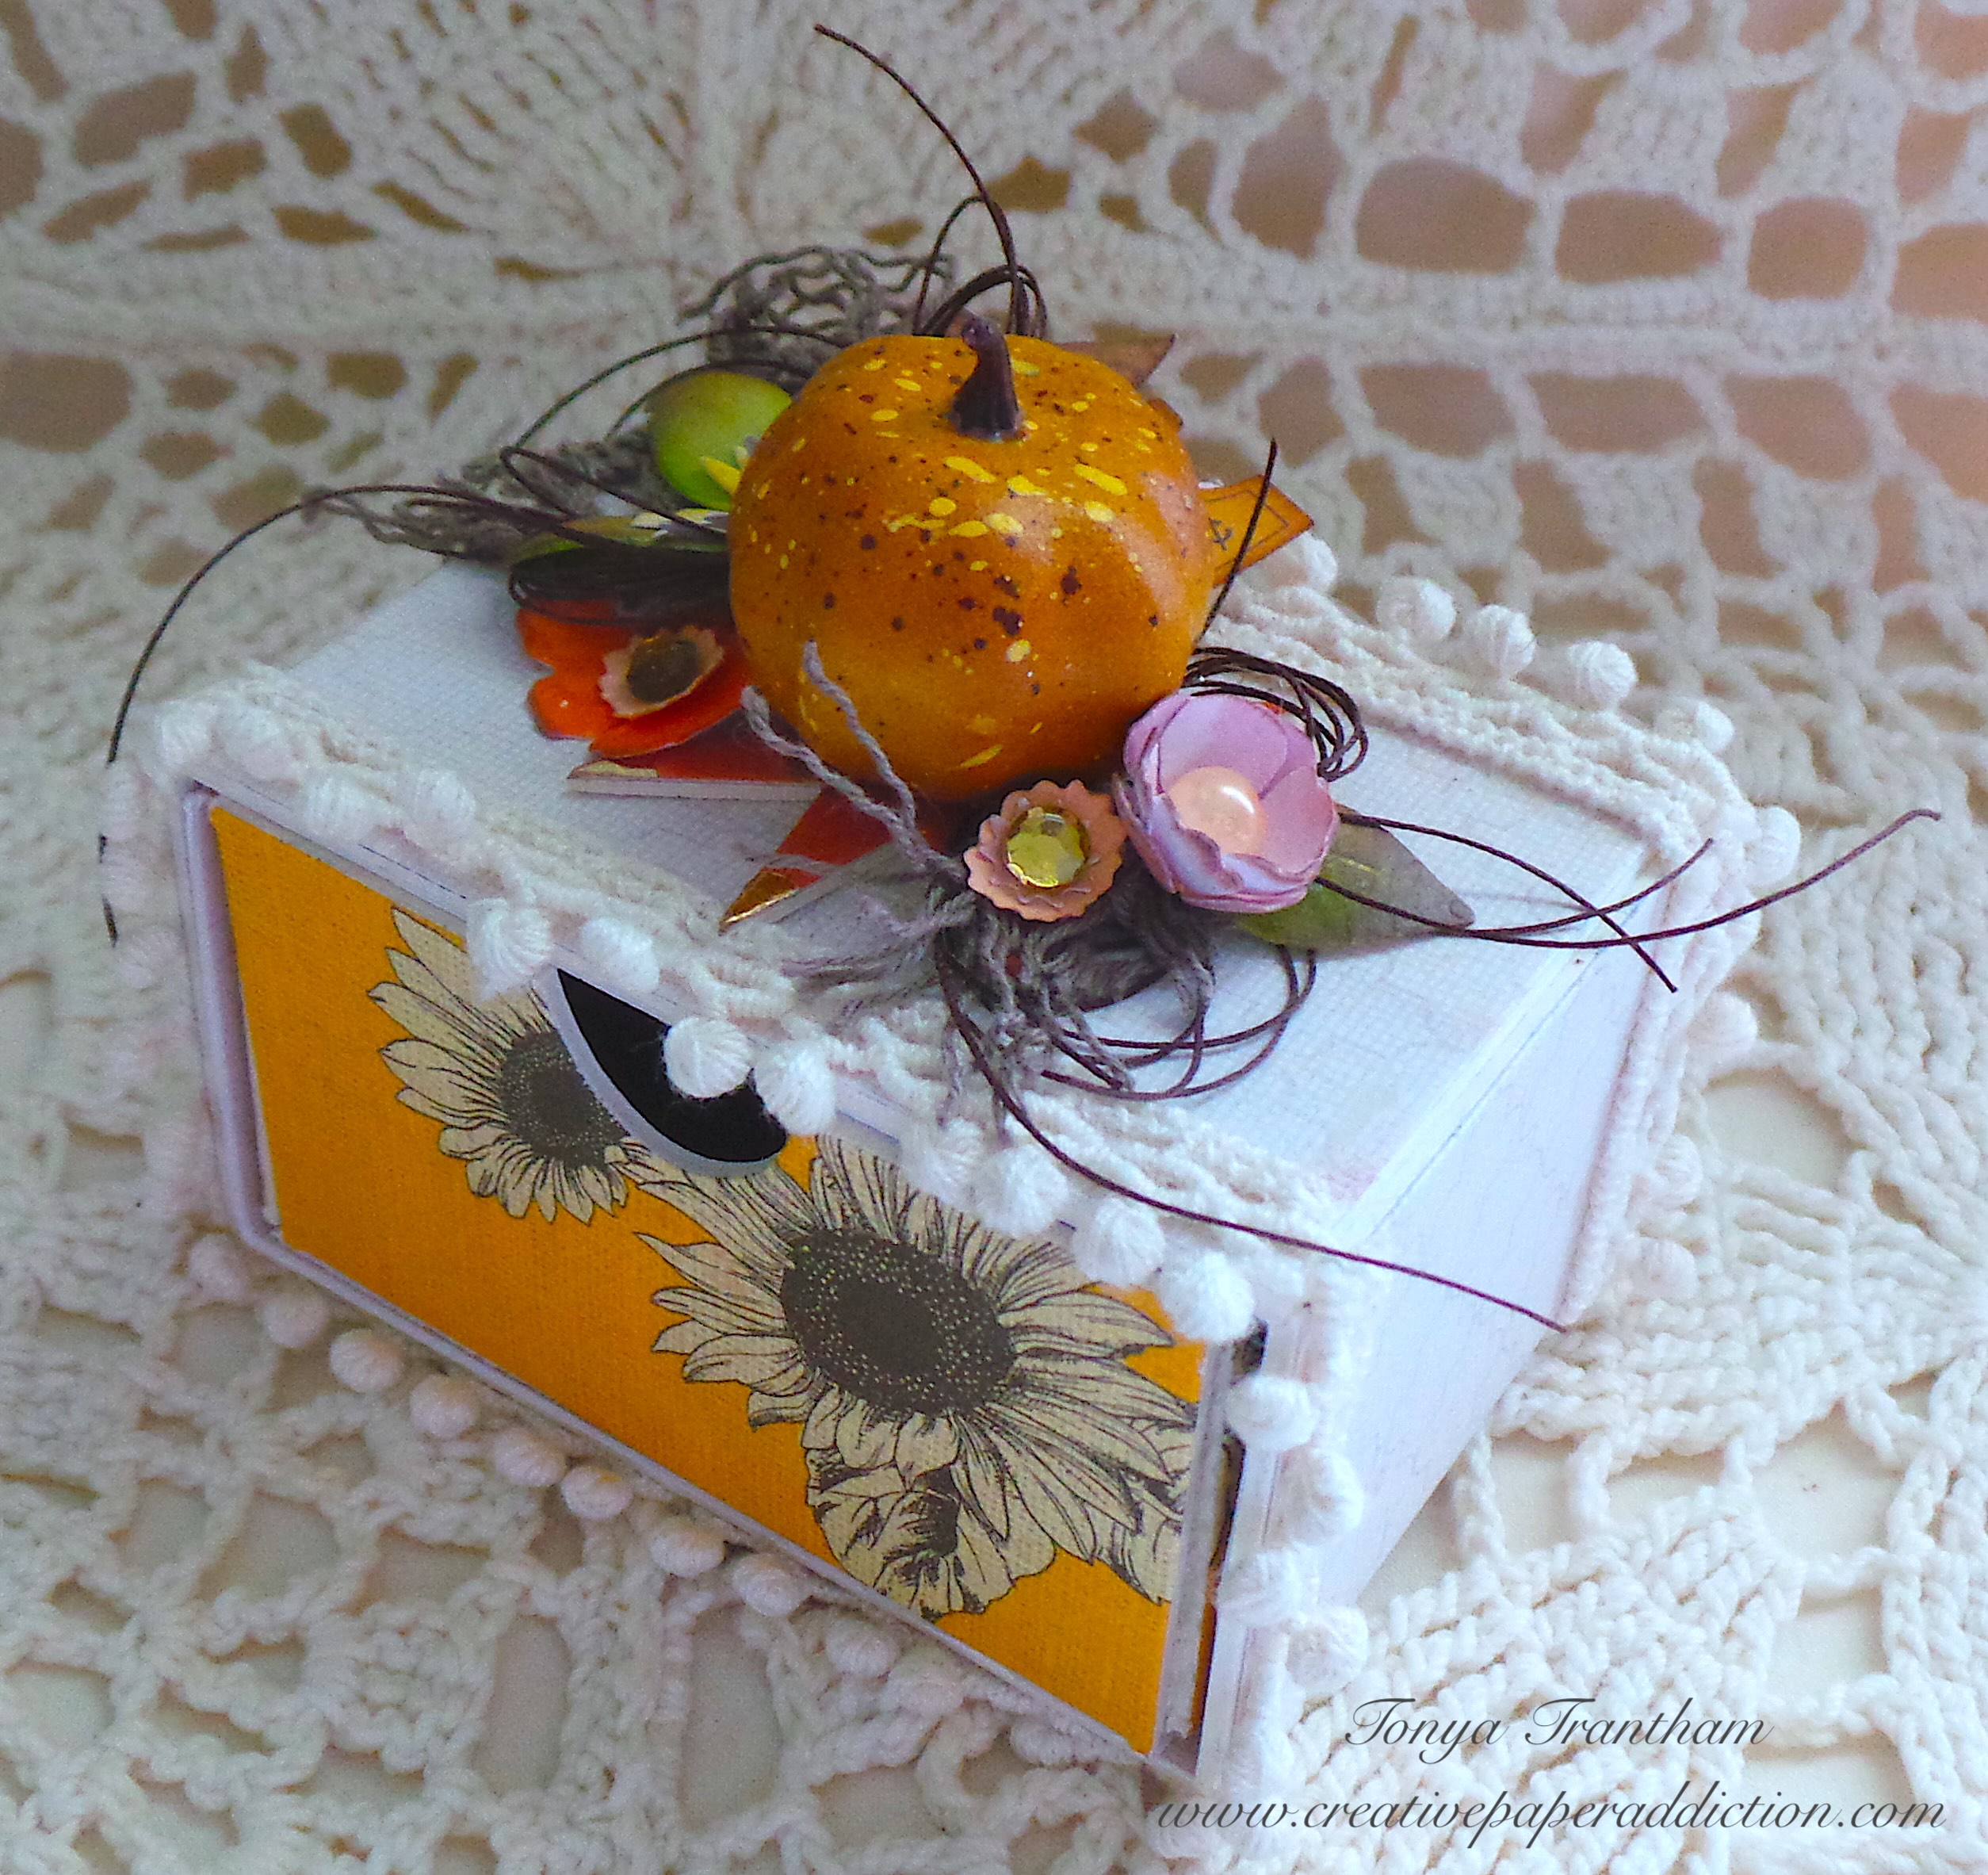
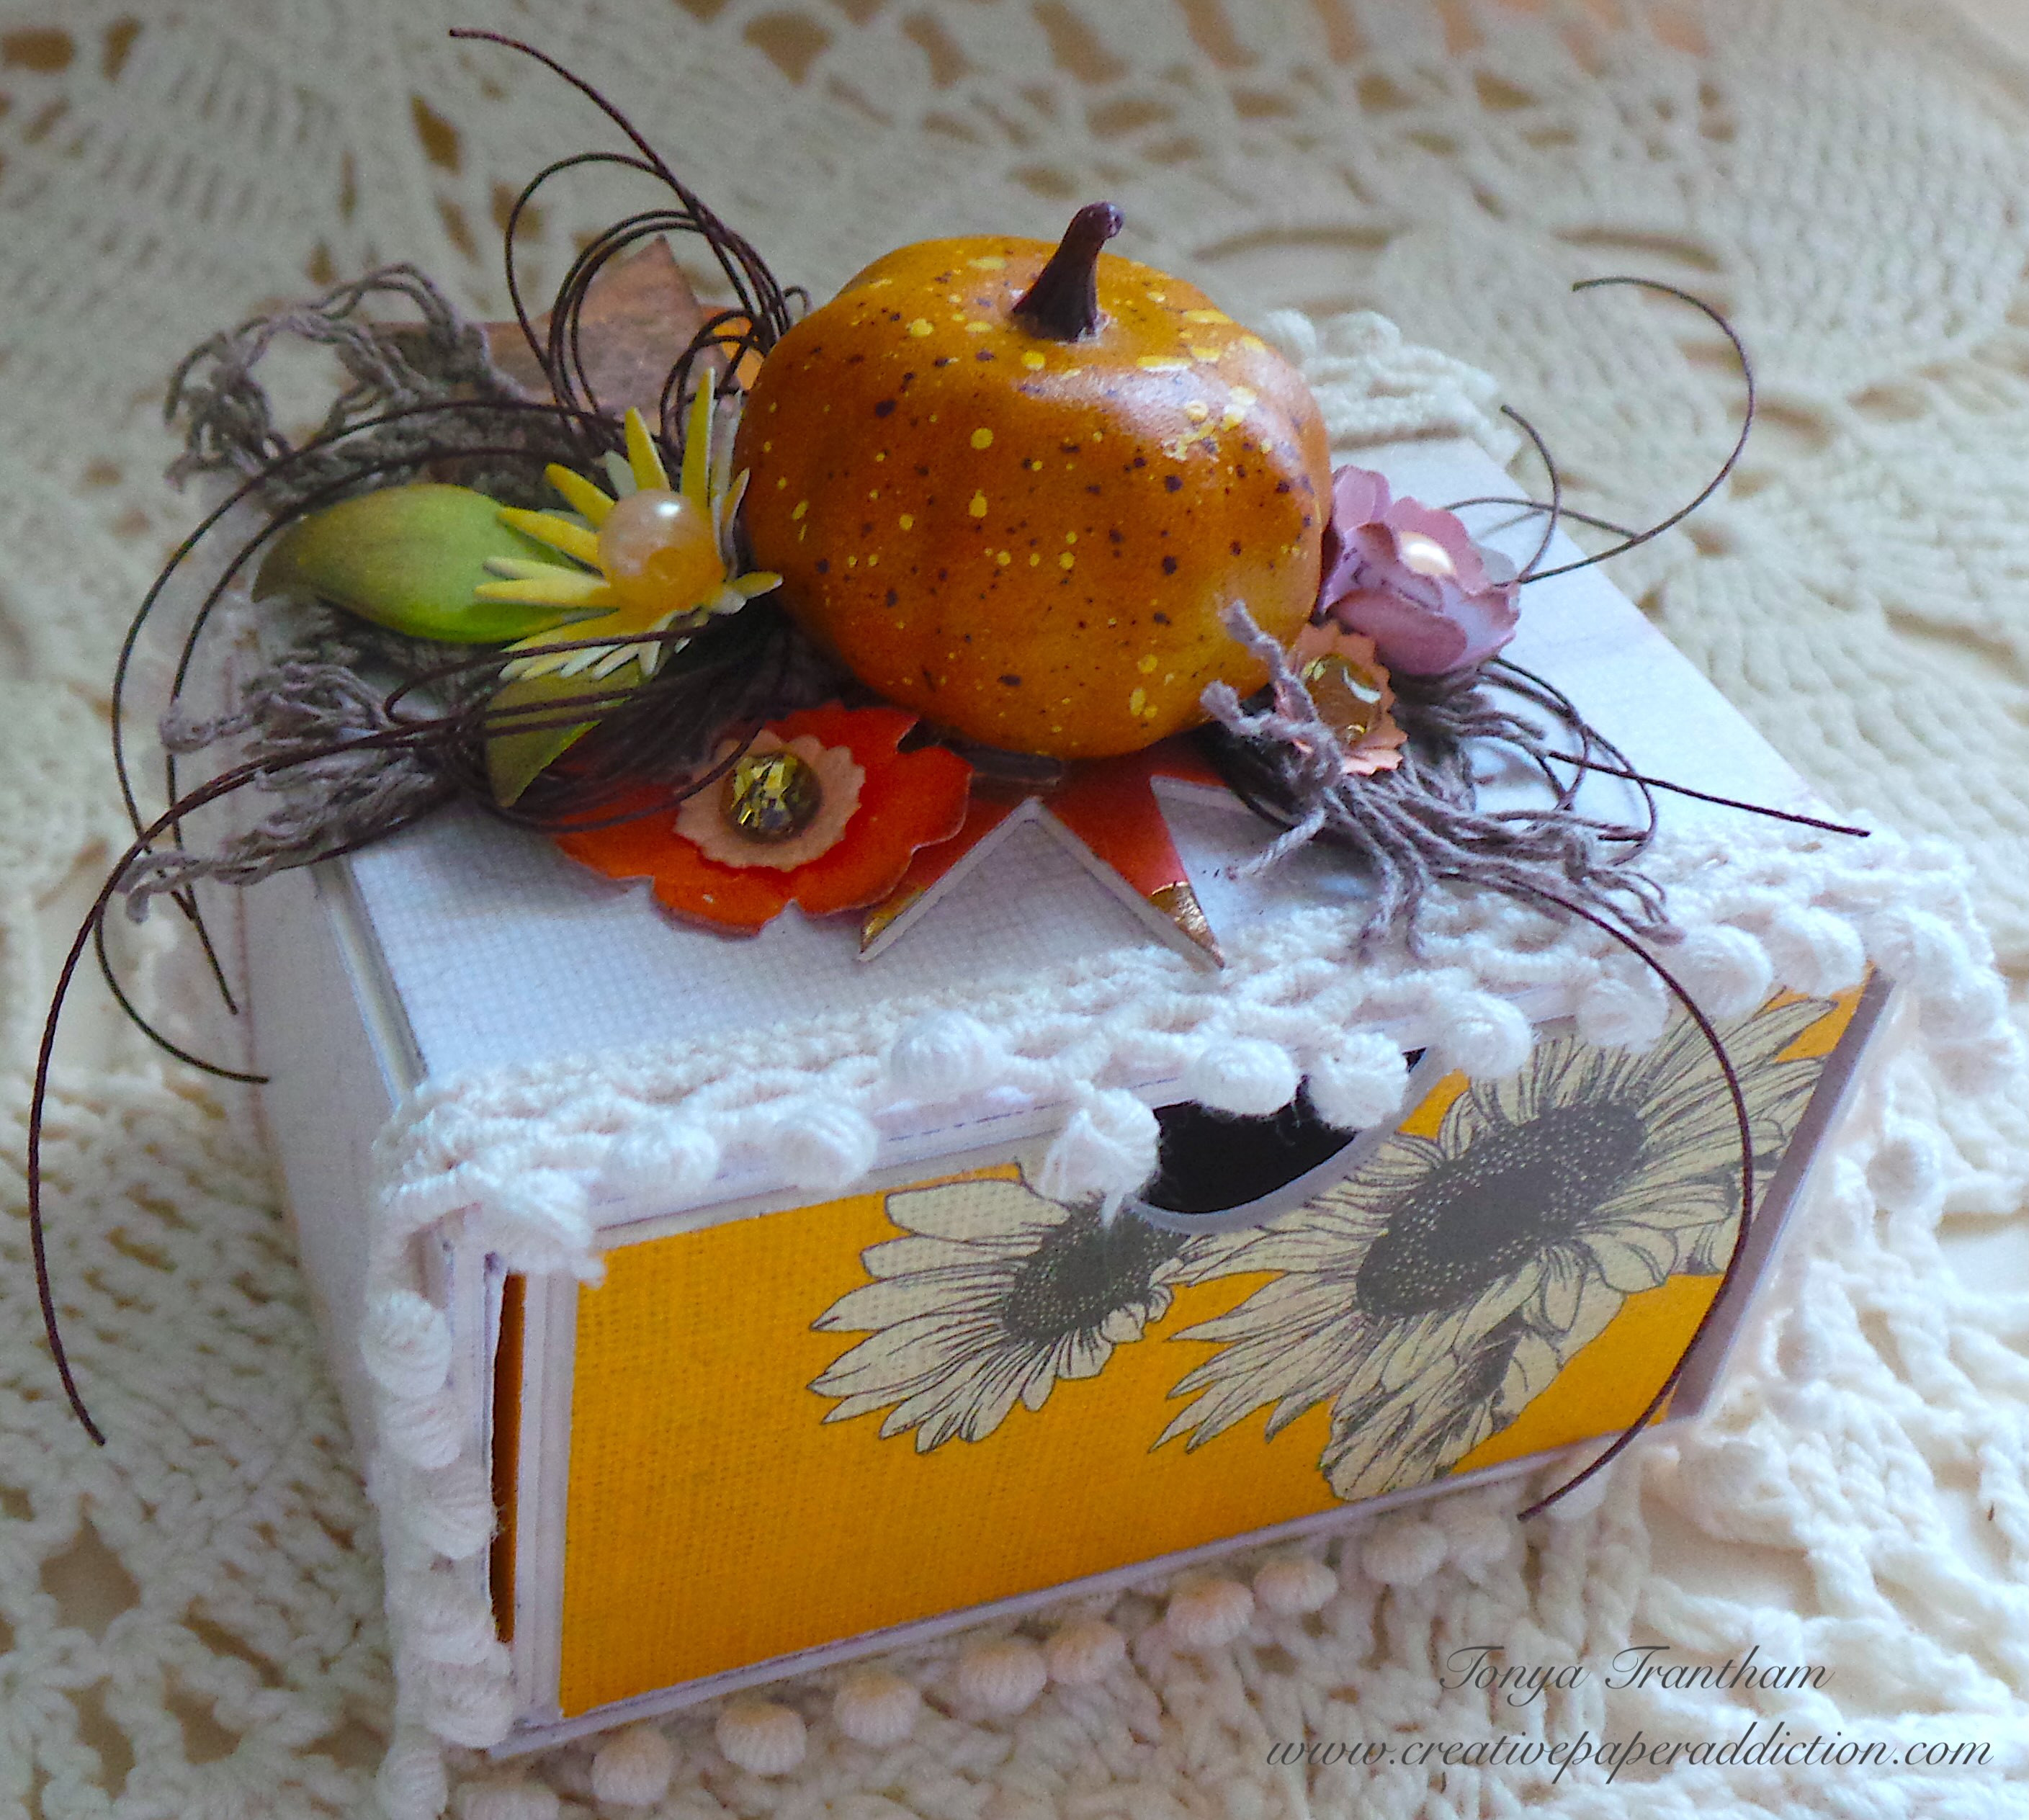
DIY Autumn Stacking Drawer Project

Hi everyone! I’ve been very busy behind the scenes doing things with family and working on upcoming projects for the Christmas season. I wanted to share a quick Autumn/Thanksgiving project. I created it using the Stacking Drawer Diecut and a few other dies by Eileen Hull. So let’s get started!

I covered a piece of Mat Board with some Adhesive. Then, I placed cardstock onto both sides of the mat board. I placed on top of the Stacking Drawers Diecut, sandwiched between the cutting plates and run through the Diecut Machine. I put it together with Zip Dry Adhesive and added Pom Pom trim to the sleeve of the drawer.

I used an assortment of flowers and foliage from the following thinlits: Painterly Blooms and Background Thinlits. I also used Folio Page, Pocket and Flowers Thinlits and Bookmark, Pockets and Toppers Thinlits. Additionally, I used Envelope, Folder and Flowers Thinlits and shaped them with a Stylus.

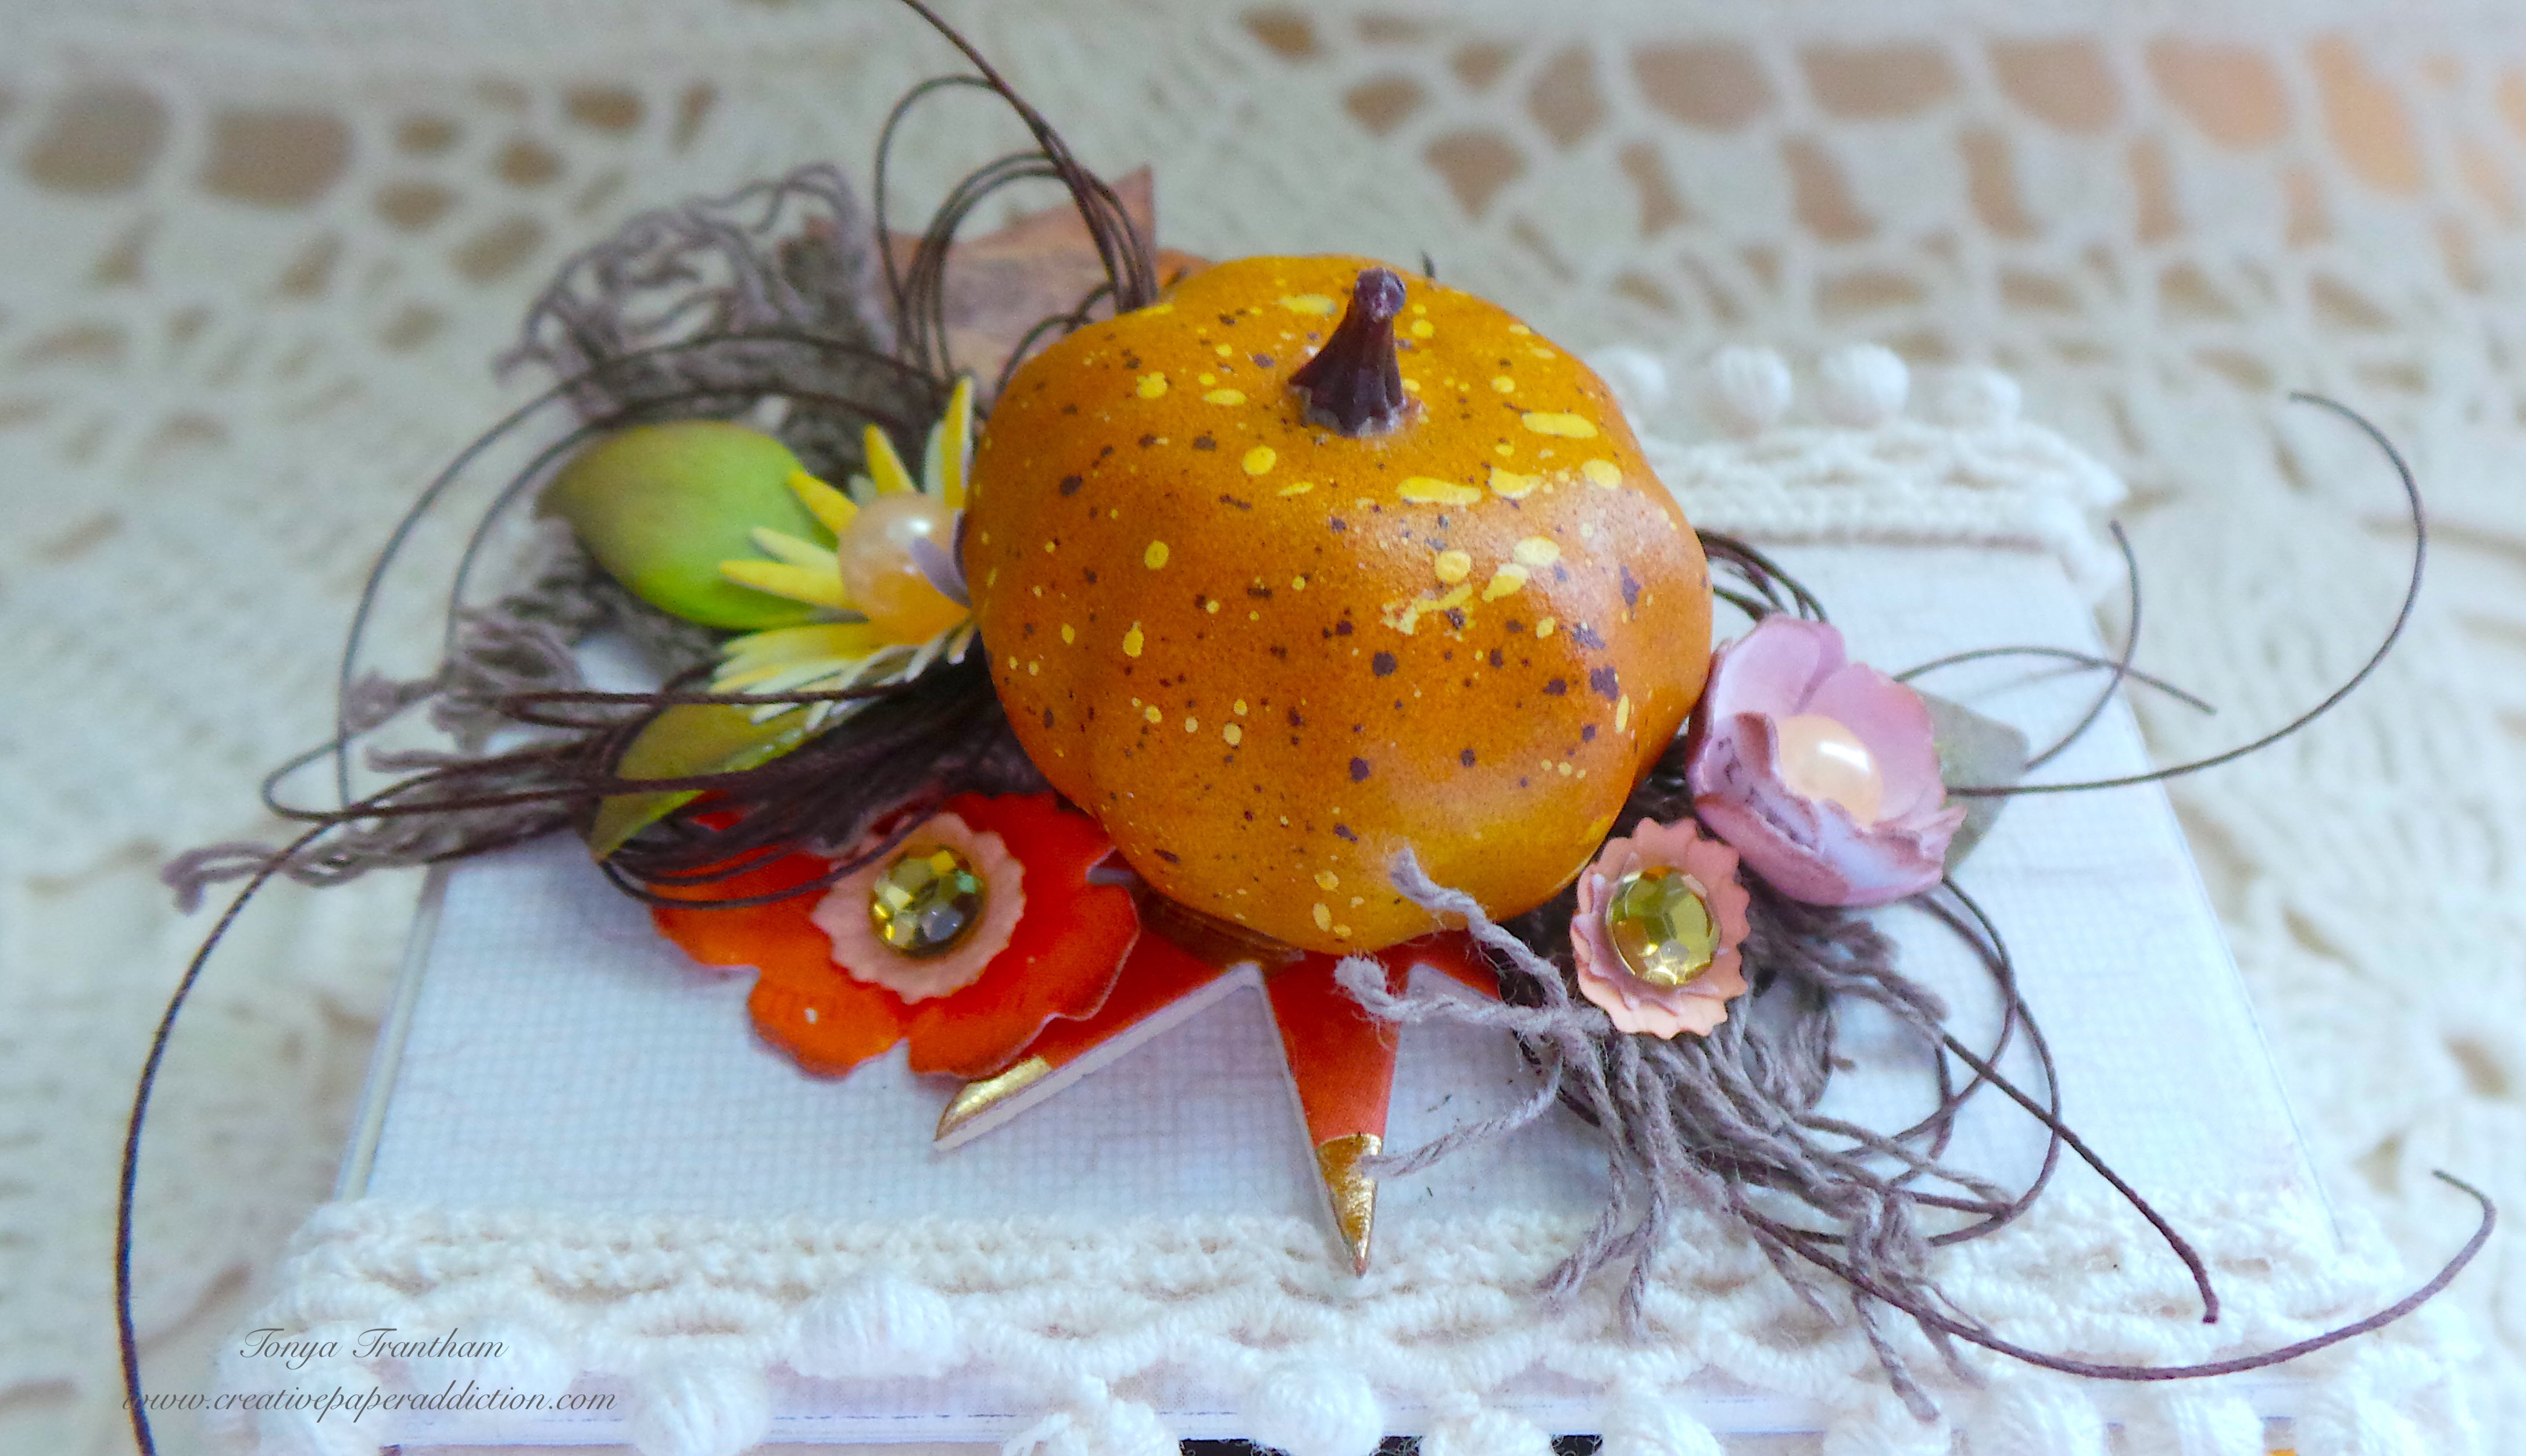
I glued the flowers and leaves together. I added a pronged diecut from the Geometric Box Diecut. Then, I adhered all flowers, leaves, lace, and thread to the top of the sleeves. I added gems and pearls to the center of each flower and a paper banner and ticket.

I added a tiny pumpkin from my stash to finish the sleeve.

It is the perfect size to add candy or other little goodies. It will look great as a place setting at a get together too.

This drawer is versatile and you can make these for any holiday or special occasion. If you have any questions or comments please leave them below.

Supplies

Sizzix/Eileen Hull: Stacking Drawer Diecut

Sizzix/Eileen Hull: Painterly Blooms and Background Thinlits

Sizzix/Eileen Hull: Geometric Box Diecut

Sizzix/Eileen Hull: Folio Page, Pocket and Flowers Thinlits

Sizzix/Eileen Hull: Bookmark, Pockets and Toppers Thinlits

Sizzix/Eileen Hull: Envelope, Folder and Flowers Thinlits

Diecut Machine

Mat Board

Paper Cutter

Scissors

Adhesive Roll

Stylus

Various Plain and Patterned Cardstocks

Thread, Pom Pom Trim and Lace

Gems and Pearls

Beacon Adhesives: Zip Dry Adhesive

(Products listed above are Affiliated Links for your convenience)

DISCLAIMERS

This blog is compensated to provide opinion on products, services, websites, and various other topics. Even though the owner(s) of this blog receives compensation for our posts or advertisements. I always give my honest opinions, findings, beliefs, or experiences on those topics or products. The views and opinions expressed on this blog are purely my own. Any product claim, statistic, quote or other representation about a product or service should be verified with each manufacturer, provider, or party in question.This blog contains affiliate links, clicking and shopping through these links helps to support and run Tonya Trantham Designs – Creative Paper Addiction at no additional cost to you. Today’s features are Sizzix, Eileen Hull and Scrapbook.com Products. 

Thanks for stopping by, hope your Monday is awesome and enjoy creating!

Family and Flowers Tag

Hi everyone! I’m back with another quick and easy tag this week. I used scraps I had laying on my desk and the Waterfall Card and Tags Thinlits by Eileen Hull and a few other dies by her as well to create this tag. So let’s get started!

First, since the cardstock I used was double sided I only cut one tag from Waterfall Card and Tags Thinlits using the largest tag thinlit. I gathered a couple of patterned scraps of cardstock and glued to the front of the tag.

Second, I had cut the envelope, three flowers, center to the flower and the smallest leaf out from the Envelope, Folder and Flowers Thinlits. I adhered the envelope together before gluing to the tag. I dug into a packet of Mini Paper Dolls and selected a family which I placed inside of the envelope.

Third, I shaped the three flowers, flower center and leaf with a Stylus. I adhered the three flowers on top of each other along with the center and the leaf to the back of the flower before gluing to the corner of the envelope.

Fourth, I dug into my stash of flowers and leaf sprigs that I had already cut out. These are from the Folio Page, Pocket and Flower Thinlits and the Shadow Box Elements Thinlits and I always try and have some extra cut out and on hand to use in projects.

I shaped the flowers and leaf sprigs with a stylus before adding around the layered flower. I finished off this side of the tag by adding Pearls to the center of the flowers, shredded cheese cloth and a bow made out of thread.

Fifth, the back side of the tag I kept simple. I used leftover printables from a tag I shared earlier, you can find that post HERE, and more scraps of cardstock. I glued the layers to the tag and added a fussy cut vine on top of the layers.

Sixth, I had this leftover button diecut that didn’t make it onto a pervious project. I had cut that from the Card Case Diecut. I tied thread through the button holes and adhered to the tag along with sequins. I finished by adding some Liquid Gloss to the leaves on the vine.

I am really excited that I’m building a nice jump ring of tags and can’t wait to create one for next week!

Also have you been by Eileen Hull’s blog to see the latest projects her teams have made? If you haven’t you can find the latest post HERE.

Supplies

Sizzix/Eileen Hull: Waterfall Card and Tags Thinlits

Sizzix/Eileen Hull: Envelope, Folder and Flowers Thinlits

Sizzix/Eileen Hull: Folio Page, Pocket and Flower Thinlits

Sizzix/Eileen Hull: Shadow Box Elements Thinlits

Sizzix/Eileen Hull: Card Case Diecut

Diecut Machine

Stylus

Mini Paper Dolls

Pearls

Liquid Gloss

Various Cardstocks and Printables

Thread, Cheese Cloth and Sequins

Scissors

Paper Cutter

Beacon Adhesives: Zip Dry Adhesive

(Products listed above are Affiliated Links for your convenience)

DISCLAIMERS

This blog is compensated to provide opinion on products, services, websites, and various other topics. Even though the owner(s) of this blog receives compensation for our posts or advertisements. I always give my honest opinions, findings, beliefs, or experiences on those topics or products. The views and opinions expressed on this blog are purely my own. Any product claim, statistic, quote or other representation about a product or service should be verified with each manufacturer, provider, or party in question.This blog contains affiliate links, clicking and shopping through these links helps to support and run Tonya Trantham Designs – Creative Paper Addiction at no additional cost to you. Today’s features are Sizzix, Eileen Hull, Scrapbook.com and A Cherry on Top Store Products. 

Thanks for stopping by, hope your Thursday is awesome and enjoy creating!

Blooms and Bunny Tag

Hi everyone! It’s a new month and a new, quick and easy tag I would like to share with you! I didn’t do step by step photos since I was in the moment of creating. But I used the Waterfall Card and Tag Thinlits and a few other dies by Eileen Hull. So let’s get started!

First, I cut out only one of the largest tags (since the cardstock is double sided) from the Waterfall Card and Tag Thinlits and went through my scrap bag and gathered cardstock and cut parts for the front and back of the tag.

Second, I had a label from the Everyday Tags and Labels Thinlits (only at Scrapbook.com) in my stash so I adhered that along with the scraps of cardstock and a cut a part to the tag. I also had a bunny, that never made it into a project, that I had cut out from the Doodle Christmas Thinlits. I lightly inked it was a white chalk ink to give dimension.

Third, I cut two of the larger flowers and the smaller flower from the Shadow Box Elements Thinlits and the leaf sprig, which I used as the “veins” for the leaf from the Folio, Page, Pocket and Flowers Thinlits and the leaf from the Bookmark, Tag and Pocket Thinlits (retired). I shaped all the flowers and the leaf with a Stylus. I glued all the flowers on top of each and added the leaf sprig onto the leaf before placing all onto the tag.

I finished the front of the tag by adding a Pearl to the center of the flower and loops of thread.

Fourth, I adhered more scraps to the back of the tag. The square and circle was from a leftover project that I had cut from the Faux Postage Thinlits.

I turned the circle over since it is white and would make the rose stand out. The rose and “bloom” sentiment are from the Garden Party Collection by Maggie Holmes. As you can see this side of the tag came together quickly.

I have been challenging myself to make at least one tag a week and, so far, I’ve managed to do so for a whole month. YAY! Question…have you completed a challenge where you make something each week? If you haven’t I would like to challenge you to start creating a tag or some type of small project each week. Let me know in the comments below if you have or are planning to.

Supplies

Sizzix/Eileen Hull: Waterfall Card and Tag Thinlits

Sizzix/Eileen Hull: Everyday Tags and Labels Thinlits

Sizzix/Eileen Hull: Shadow Box Elements Thinlits

Sizzix/Eileen Hull: Folio, Page, Pocket and Flowers Thinlits

Sizzix/Eileen Hull: Bookmark, Tag and Pocket Thinlits (retired)

Sizzix/Eileen Hull: Faux Postage Thinlits

Sizzix/Olivia Rose: Doodle Christmas Thinlits

Diecut Machine

White Chalk Ink

Stylus

Pearl and Thread

Maggie Holmes: Garden Party Thickers

Paper Cutter

Scissors

Beacon Adhesives: Zip Dry Adhesive

(Products listed above are Affiliated Links for your convenience)

DISCLAIMERS

This blog is compensated to provide opinion on products, services, websites, and various other topics. Even though the owner(s) of this blog receives compensation for our posts or advertisements. I always give my honest opinions, findings, beliefs, or experiences on those topics or products. The views and opinions expressed on this blog are purely my own. Any product claim, statistic, quote or other representation about a product or service should be verified with each manufacturer, provider, or party in question.This blog contains affiliate links, clicking and shopping through these links helps to support and run Tonya Trantham Designs – Creative Paper Addiction at no additional cost to you. Today’s features are Sizzix, Eileen Hull, Scrapbook.com and A Cherry on Top Store Products. 

Thanks for stopping by, hope your Friday is awesome and enjoy creating!

Happily Ever After Tag

Hi everyone! I’m back this week with another tag I created using scraps and bits of cardstock, leftover Mat Board and the Lace 3D Embossing Folder by Eileen Hull. If you remember earlier this month I shared another tag using the same embossing folder but had turned the tag a different way than this tag for a completely different look. If you are interested in that post you can find it HERE. Anyways, let’s get started!

First, I had cut out a tag from a leftover scrap of Mat Board using the Tag and Bookplates Diecut (retired). As with the other tag I made earlier this month the mat board was shorter than the actual tag on the diecut and the approximate size of the tag came to 3 1/4″x5 7/8″. I embossed the tag with the Lace 3D Embossing Folder and lightly went over the embossed areas with an aqua/teal chalk ink.

Second, I lightly applied Ivory Luster Wax over the embossed area.

Third, I lightly hit areas of the tag with brown chalk ink. It gave it a nice vintage look.

Fourth, I gathered up scraps of different patterned cardstocks, cut a parts, a “Happily Ever After” sentiment, a couple from the Minis Paper Dolls, chipboard “x” piece and a flower.

Fifth, I added layers of scraps and the sentiment to the tag. I also had this leftover bit of cardstock that I had embossed with the Crochet Mandala 3D Embossing Folder. I was happy that piece complemented what I had already added to the tag.

Sixth, I added flat back pearls to the sentiment, adhered a couple from the Minis Paper Dolls onto the tag. Next I placed a Foam Pop Dot to the back of a flower and an “x” chipboard piece to the center before placing onto the tag.

Seventh, I cut a medium and large heart and the smaller leaf from the Envelope, Folder and Flowers Thinlits. I shaped the leaf with a Stylus and adhered under the flower. The hearts I placed on the tag and added a bow and loops made of thread to finish this side of the tag.

Eighth, I covered the back of the tag by cutting out another tag to cover the not so “pretty” side. I glued that to the back.

Ninth, I kept this side of the tag simple and put together an assortment of diecuts from various collections that I’ve “hoarded” through the years. I am trying hard to use what I have instead of going out and buying more supplies.

Eleventh, I layered and adhered all the diecuts, along with a piece of lace and another couple from the Minis Paper Dolls to the tag.

Twelfth, I added a bow made of thread and a gem to the center of the gauge to finish the tag.

What do you do with all your leftover scraps and diecut embellishments? Do you use them or collect (hoard) them? Let me know in the comments below.

Supplies

Sizzix/Eileen Hull: Lace 3D Embossing Folder

Sizzix/Eileen Hull: Crochet Mandala 3D Embossing Folder

Sizzix/Eileen Hull: Envelope, Folder and Flowers Thinlits

Sizzix/Tim Holtz: Tag and Bookplates Diecut (retired)

Mat Board

Diecut Machine

Ivory Luster Wax

Aqua, Teal and Brown Chalk Inks

Various Plain and Patterned Cardstocks

Various Chipboard and Diecut Embellishments

Thread, Lace, Pearl, Paper Flower and Gems

Scissors

Tim Holtz: Minis Paper Dolls

Stylus

Foam Pop Dots

Paper Cutter

Beacon Adhesives: Zip Dry Adhesive

(Products listed above are Affiliated Links for your convenience)

DISCLAIMERS

This blog is compensated to provide opinion on products, services, websites, and various other topics. Even though the owner(s) of this blog receives compensation for our posts or advertisements. I always give my honest opinions, findings, beliefs, or experiences on those topics or products. The views and opinions expressed on this blog are purely my own. Any product claim, statistic, quote or other representation about a product or service should be verified with each manufacturer, provider, or party in question.This blog contains affiliate links, clicking and shopping through these links helps to support and run Tonya Trantham Designs – Creative Paper Addiction at no additional cost to you. Today’s features are Sizzix, Eileen Hull, Scrapbook.com and A Cherry on Top Store Products. 

Thanks for stopping by, hope your Tuesday is great and enjoy creating!

Shades of Green Tag

Hi everyone! I’m back this week with a quick and easy Saint Patrick’s Day tag I created. I know Saint Patty’s Day is over but I’ve been a little under the weather and I’m now getting around to sharing. My go to thinlit for this project is the Waterfall Card and Tags Thinlits by Eileen Hull. Anyways, let’s get started!

First, I cut out two of the largest tags from the Waterfall Card and Tags Thinlits since the backs of both cardstocks were white and glued them back to back. I fussy cut all the images out from the free printable that I had downloaded from the Graphic Fairy. It was a free printable that was offered on their instagram page so I’m not sure if it’s still available or not? But you can find other images on their site for free or they have a paid membership option also.

Second, I used two different size circle punches to punch out two of the images but the other images were fussy cut. Before adding all the images to the tag I lightly inked the edges of the tag with a light green chalk ink.

The butterfly I applied adhesive to the center part and bent the wings upwards before placing onto the tag. I used Gold Stickles on the wings of the butterfly and I added Liquid Gloss to the berries of the leaves and branch to finish this side of the tag.

Third, I lightly inked this side of the tag with the light green chalk ink along with a few of the fussy cut images. I layered, distressed and adhered the images to the tag. The image of the woman I added Foam Pop Dots to the back before placing onto the tag.

Fourth, I added gems to the hat and added Liquid Gloss to the center of each flower before calling it finished. I really enjoyed using the printable along with the scraps that I used for the tags. I have leftovers from the printable so I’m sure those images with end up in another project down the road.

If you have any questions or comments about this tag please leave them below.

Supplies

Sizzix/Eileen Hull: Waterfall Card and Tags Thinlits

Graphic Fairy: Printables

Diecut Machine

Paper Cutter

Scissors

Various Plain and Patterned Cardstocks

Circle Punches

Foam Pop Dots

Gold Stickles

Liquid Gloss

Light Green Chalk Ink

Gems

Beacon Adhesives: Zip Dry Adhesive

(Products listed above are Affiliated Links for your convenience)

DISCLAIMERS

This blog is compensated to provide opinion on products, services, websites, and various other topics. Even though the owner(s) of this blog receives compensation for our posts or advertisements. I always give my honest opinions, findings, beliefs, or experiences on those topics or products. The views and opinions expressed on this blog are purely my own. Any product claim, statistic, quote or other representation about a product or service should be verified with each manufacturer, provider, or party in question.This blog contains affiliate links, clicking and shopping through these links helps to support and run Tonya Trantham Designs – Creative Paper Addiction at no additional cost to you. Today’s features are Sizzix, Eileen Hull, Scrapbook.com and A Cherry on Top Store Products. 

Thanks for stopping by, hope your Thursday is great and enjoy creating!

Lace, Hearts and a Fairy Tag

Hi everyone! It’s a new month and I would love to share a tag I created using Eileen Hull’s Lace 3D Embossing Folder and the Faux Postage Thinlits, along with a few other dies, from her newest collection. I absolutely LOVE this embossing folder! It’s 6″x8 1/2″ so you can embossing those journal covers or even extra large cards. Anyways, let’s get started!

First, I had a scrap of Mat Board that was leftover from another project. I cut that from the Tag and Book Plates Diecut (retired) and embossed with the Lace 3D Embossing Folder. The mat board was shorter than the actual tag on the diecut, so the measurements wound up being approximately 3 1/4″x5 7/8″.

Second, I lightly inked the raised edges with a combo of two different shades of pink chalk ink. I then rubbed Ivory Luster Wax over the entire tag and once I was happy with the way it looked a lightly hit the raised areas with a tan chalk ink.

Third, I only needed the oval section of the Faux Postage Thinlits and I wanted to highlight the fairy. I cut cardstock larger than the oval area, placed onto the thinlits and run through the Diecut Machine. I know some people like to tear these dies but I used the Scissors to carefully cut out the oval and the excess.

Fourth, I cut two wreaths and leaf sprig from the Wreath and Snowflake Thinlits. I layered the wreaths on top of each other and glued to the tag. I lightly inked the edges of both the oval and negative part of the postage stamp die and adhered to the bottom edge of the wreaths. I placed Foam Pop Dots to the back of the oval before lining up and placing inside of the negative part.

Fifth, I cut two flowers from the Bookmark, Tag and Pocket Thinlits (retired), shaped with a Stylus, glued on top of each other and added a gem to the center. I cut two leaves from the leaf sprig, shaped and placed on the back of the flower. I made a bow with thread and adhered to the edge of the oval along with the flower.

Sixth, I cut the small and medium size hearts from the Envelope, Folder and Flowers Thinlits, inked with chalk ink and glued both onto the upper corner of the wreath and added a few sequins to finish the tag.

Have you had a chance to look at Eileen Hull’s newest dies, thinlits and embossing folder? If you have which is your favorite? Let me know in the comments below.

Also if you haven’t been Eileen’s blog lately to see what her teams have created you can find the latest posts HERE and HERE.

Supplies

Sizzix/Eileen Hull: Lace 3D Embossing Folder

Sizzix/Eileen Hull: Faux Postage Thinlits

Sizzix/Eileen Hull: Bookmark, Tag and Pocket Thinlits (retired)

Sizzix/Eileen Hull: Wreath and Snowflake Thinlits

Sizzix/Eileen Hull: Envelope, Folder and Flowers Thinlits

Sizzix/Tim Holtz: Tag and Book Plates Diecut (retired)

Mat Board

Ivory Luster Wax

Tan and Different Shades of Pink Chalk Inks

Diecut Machine

Scissors

Stylus

Foam Pop Dots

Gem, Sequins and Thread

Prima: Dulce Paper Collection

Various Patterned Cardstocks

Paper Cutter

Beacon Adhesives: Zip Dry Adhesive

(Products listed above are Affiliated Links for your convenience)

DISCLAIMERS

This blog is compensated to provide opinion on products, services, websites, and various other topics. Even though the owner(s) of this blog receives compensation for our posts or advertisements. I always give my honest opinions, findings, beliefs, or experiences on those topics or products. The views and opinions expressed on this blog are purely my own. Any product claim, statistic, quote or other representation about a product or service should be verified with each manufacturer, provider, or party in question.This blog contains affiliate links, clicking and shopping through these links helps to support and run Tonya Trantham Designs – Creative Paper Addiction at no additional cost to you. Today’s features are Sizzix, Eileen Hull, Scrapbook.com and A Cherry on Top Store Products. 

Thanks for stopping by, hope your Tuesday is awesome and enjoy creating!

March Release Party with Eileen Hull!

Hi everyone! It’s that time again for another wonderful release from Eileen Hull! I’m so excited to introduce this brand new collection by Eileen from Sizzix! As always, these designs may be used together but also stand alone. There are four pieces in this set. Also I will be sharing a sneak peek of each project I created and will do a complete blog post of each later.

The Storage Box is an XL ScoreBoard die measuring 4” square, the largest square box yet!

This box is constructed with a removable top and may be used in many ways, such as organizing desk and office supplies, as a gift box, storing craft supplies and packaging for baked treats.

The Mini Book is a great way to create a book in just one an evening, and using up all those scraps you have lying around in the process.

This book measures 3 3/4” x 2 1/4” and comes with a strap/handle and tiny label for the book cover. It also makes a great bag topper if you fold it in the middle and also will hold a business card. Die cut it from felt and stitch up a tiny wallet!

There is a new Thinlits called Faux Postage– the full panel is designed to fit on a 5” x 7” card and creates a fun postage stamp effect. You can also cut (or tear) each stamp apart and use the individual pieces as a miniature work of art! These dies coordinate with similar dies: Snail Mail (A-2 card size) and Mini Slimline (6” x 3”).

The Lace 3D Embossing Folder is so amazing! It’s a new LARGE size measuring 8 1/2” x 5 3/4”. It works great on bigger journal covers, card backgrounds and on home decor pieces. This is created from vintage lace that Eileen has collected. I used the embossing folder and faux postage thinlit together to create this!

Check out this collection and see lots of ideas from Eileen’s fantastic team! The Release Party will be held on Friday, March 1 at noon Eastern on Eileen’s YouTube, Facebook and Instagram channels.

There’s a giveaway too- join us on the live and hear how you can win…

You can find these dies in your local scrapbook stores- if they don’t carry them, ask them to order. Eileen also carry them in her Etsy Shop and would love your support!

Supplies

Sizzix/Eileen Hull: Storage Box Diecut

Sizzix/Eileen Hull: Mini Box Diecut

Sizzix/Eileen Hull: Faux Postage Thinlits

Sizzix/Eileen Hull: Lace 3D Embossing Folder

Diecut Machine

(Products listed above are Affiliated Links for your convenience)

DISCLAIMERS

This blog is compensated to provide opinion on products, services, websites, and various other topics. Even though the owner(s) of this blog receives compensation for our posts or advertisements. I always give my honest opinions, findings, beliefs, or experiences on those topics or products. The views and opinions expressed on this blog are purely my own. Any product claim, statistic, quote or other representation about a product or service should be verified with each manufacturer, provider, or party in question.This blog contains affiliate links, clicking and shopping through these links helps to support and run Tonya Trantham Designs – Creative Paper Addiction at no additional cost to you. Today’s features are Sizzix, Eileen Hull and Scrapbook.com Products. 

Thanks for stopping by, hope your Friday is wonderful and enjoy creating!

B is for Bird Tag

Hi everyone! I’m back this week with another quick and easy tag I created using more leftover scraps from my desk and Eileen Hull‘s Waterfall Card and Tags Thinlits. So let’s get started!

First, I cut two of the largest and one of the medium size tags from the Waterfall Card and Tags Thinlits. I glued the two largest tags together since the back of one of the cardstocks was white and I was going to decorate both sides. I lightly inked the edges with a brown chalk ink. I adhered a scrap of patterned cardstock, along with the medium size tag on to the larger tag.

Second, I had a leftover wreath that I had cut from the Wreath and Snowflake Thinlits that I added to the tag. I layered two scraps of cardstock on top of each other and glued slightly off one side of the tag and folded and glued to the other side of the tag. I had a cut a part of “b is for bird” card that I cut down further and adhered the bird in the lower corner and the sentiment in the upper corner of the tag to finish the front of the tag.

Third, the other side of the tag I used several cut a parts along with a vintage looking man from the Mini Paper Dolls and a sequin and a gem to finish the tag. I told you it was quick and easy!

Also if you don’t know, Eileen Hull is having a release party this Friday, March 1st, and can be found on YouTube, Instagram and her Eileen Hull Fan Club Facebook Page. All times are listed below and there will be a giveaway too! I hope to see you there!

Supplies

Sizzix/Eileen Hull: Waterfall Card and Tags Thinlits

Sizzix/Eileen Hull: Wreath and Snowflake Thinlits

Diecut Machine

Various Patterned Cardstocks

Tim Holtz: Mini Paper Dolls

Sequins and Gems

Brown Chalk Ink

Paper Cutter

Scissors

Beacon Adhesives: Zip Dry Adhesive

(Products listed above are Affiliated Links for your convenience)

DISCLAIMERS

This blog is compensated to provide opinion on products, services, websites, and various other topics. Even though the owner(s) of this blog receives compensation for our posts or advertisements. I always give my honest opinions, findings, beliefs, or experiences on those topics or products. The views and opinions expressed on this blog are purely my own. Any product claim, statistic, quote or other representation about a product or service should be verified with each manufacturer, provider, or party in question.This blog contains affiliate links, clicking and shopping through these links helps to support and run Tonya Trantham Designs – Creative Paper Addiction at no additional cost to you. Today’s features are Sizzix, Eileen Hull, Scrapbook.com and A Cherry on Top Store Products. 

Thanks for stopping by, hope your Wednesday is great and enjoy creating!

You and Me Tag

Hi everyone! I’m back this week with a quick little tag I created using an assortment of scraps and tags from the Waterfall Card and Tags Thinlits by Eileen Hull. So let’s get started!

First, I cut two of the largest tags, one medium tag and a small tag using the Waterfall Card and Tags Thinlits. I glued the two large tags back to back because there wasn’t a design/patterned on the back side of the patterned green tag. Plus I generally decorate the other side of the tag.

Second, I adhered one of the medium tags slightly off one side of the large tag and the other medium tag I added Foam Pop Dots to the back before placing onto the tag. I also lightly inked all the tags with a chalk ink in either tan or brown.

Third, I selected an image of a couple from the Mini Paper Dolls Pack and glued onto the raised tag. I also added the You and Me chipboard piece behind the image and adhered bits of patterned cardstock onto and behind the raised tag.

Fourth, I cut two medium, one small flower and one leaf sprig from the Everyday Tags and Labels Thinlits (only at Scrapbook.com and on clearance), shaped with a Stylus and adhered all three flowers on top of each other along with the leaf sprig which I added to the back of the flower. I made a bow from thread which I placed under the flower and added an Enamel Dot to the center of the flower to finish the front of the tag.

Fifth, I kept the back side of the tag fairly simple. I placed the medium size tag from the Waterfall Card and Tags Thinlits over the tag which is on the front to cover the exposed back of the tag. I glued a small banner at the top of the tag and the “love” chipboard sentiment over that.

Sixth, the flowers, I think, are strawberry blossoms that I had received in a swap. So no idea the name of the printables or where they came from…sorry. I fussy cut the flowers and adhered them to the tag along with the “life is grand” sentiment. I finished by adding Liquid Gloss on random areas of the blossoms and leaves and two gold dots that was leftover from a package of thickers. I would like to mention I added ring protecter to each hole on each tag.

There you have it! Tags are a great way to challenge yourself in using what’s on your desk and supplies you haven’t touched in forever. Besides the obvious reason of just making to be making these can be made to add to presents or mini albums. Can you think of other ways to use these besides what I suggested? Leave a comment below.

Also if you haven’t been by Eileen Hull’s blog lately to see what her teams have been up to you can find her latest post HERE.

Supplies

Sizzix/Eileen Hull: Waterfall Card and Tags Thinlits

Sizzix/Eileen Hull: Everyday Tags and Labels Thinlits (only at Scrapbook.com)

Diecut Machine

Foam Pop Dots

Tim Holtz: Mini Paper Dolls Pack

Enamel Dot

Various Plain and Patterned Cardstocks

Stylus

Paper Cutter

Chipboard Embellishments and Printables

Thread

Tan and Brown Chalk Inks

Liquid Gloss

Adhesive Sheets

Scissors

Beacon Adhesives: Zip Dry Adhesive

(Products listed above are Affiliated Links for your convenience)

DISCLAIMERS

This blog is compensated to provide opinion on products, services, websites, and various other topics. Even though the owner(s) of this blog receives compensation for our posts or advertisements. I always give my honest opinions, findings, beliefs, or experiences on those topics or products. The views and opinions expressed on this blog are purely my own. Any product claim, statistic, quote or other representation about a product or service should be verified with each manufacturer, provider, or party in question.This blog contains affiliate links, clicking and shopping through these links helps to support and run Tonya Trantham Designs – Creative Paper Addiction at no additional cost to you. Today’s features are Sizzix, Eileen Hull, Scrapbook.com and A Cherry on Top Store Products. 

Thanks for stopping by, hope your Tuesday is great and enjoy creating!