How to Make a Diecut Holder with the Frame Pocket Journal Diecut

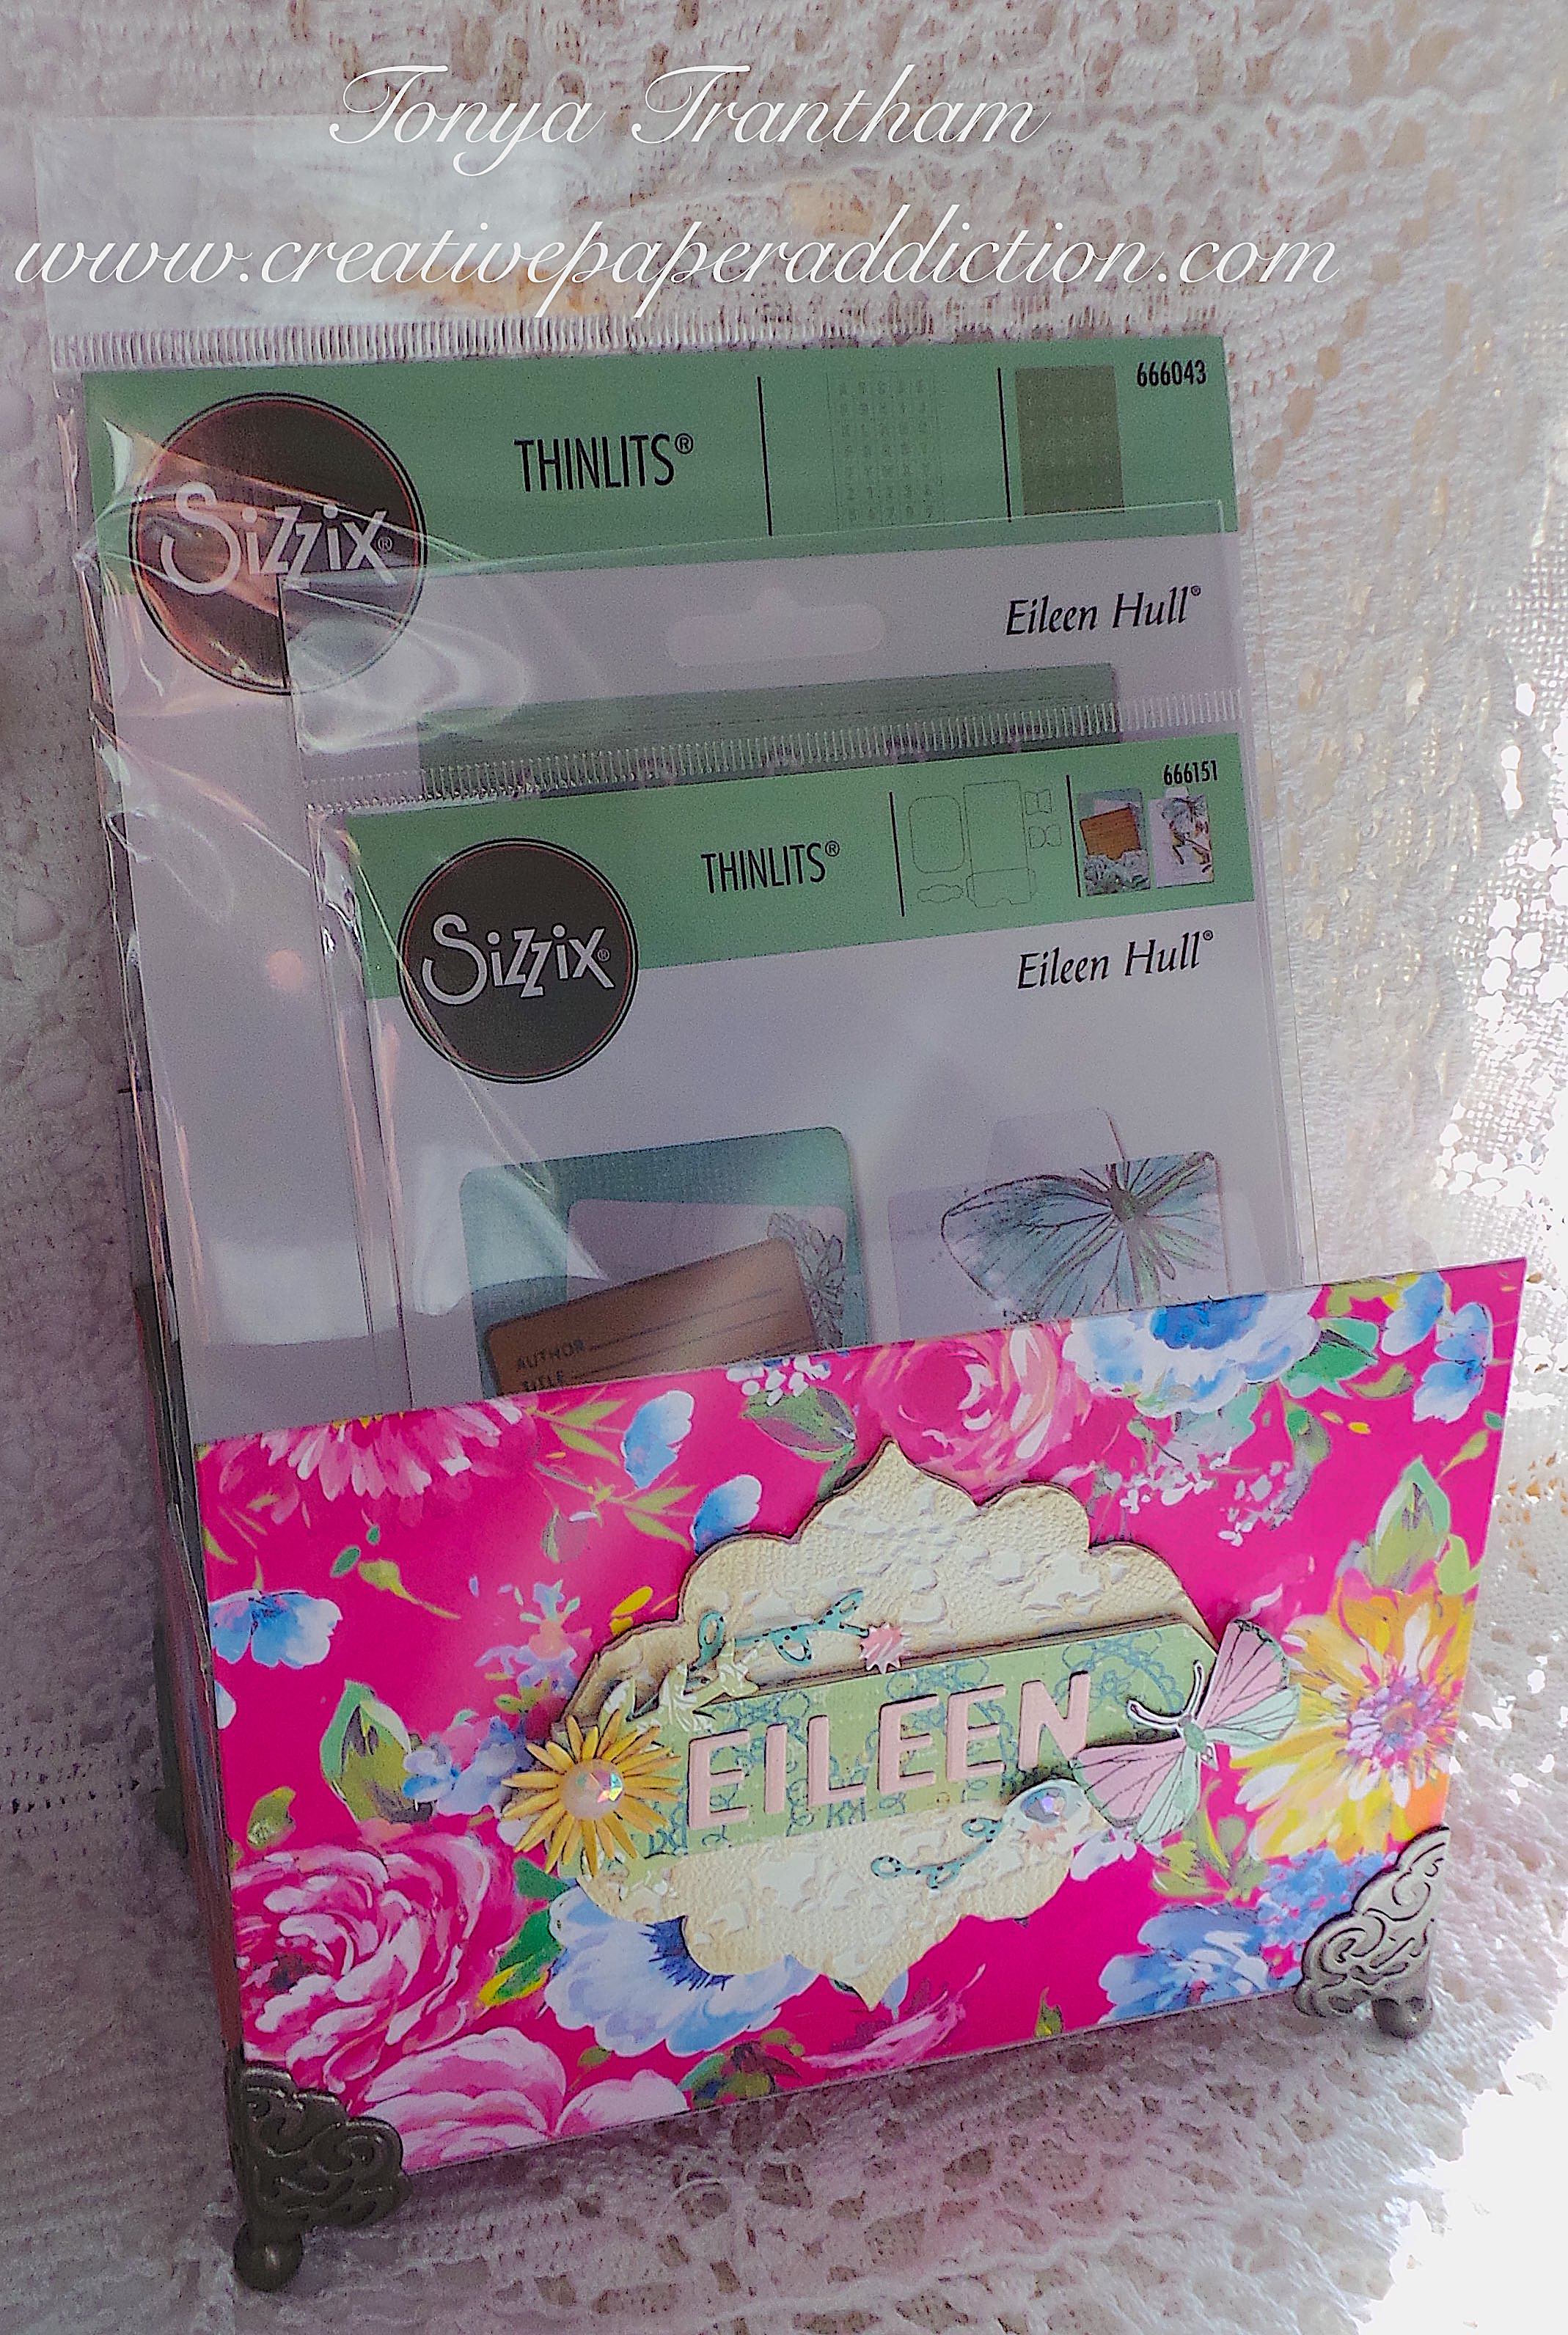
Hi everyone! I’m back with the full reveal of the sneak peek I shared last week for Eileen Hull’s Chapter One Release Party. Details from that release can be found on Eileen’s blog HERE with a video showing all of the teams projects. Instead of going the normal route and creating a journal with the Scoreboards Frame Pocket Journal Diecut I noted that this die would make a nice holder for thinlits, 6″x6″ or 6″x8″ paper pads. So let’s get started!

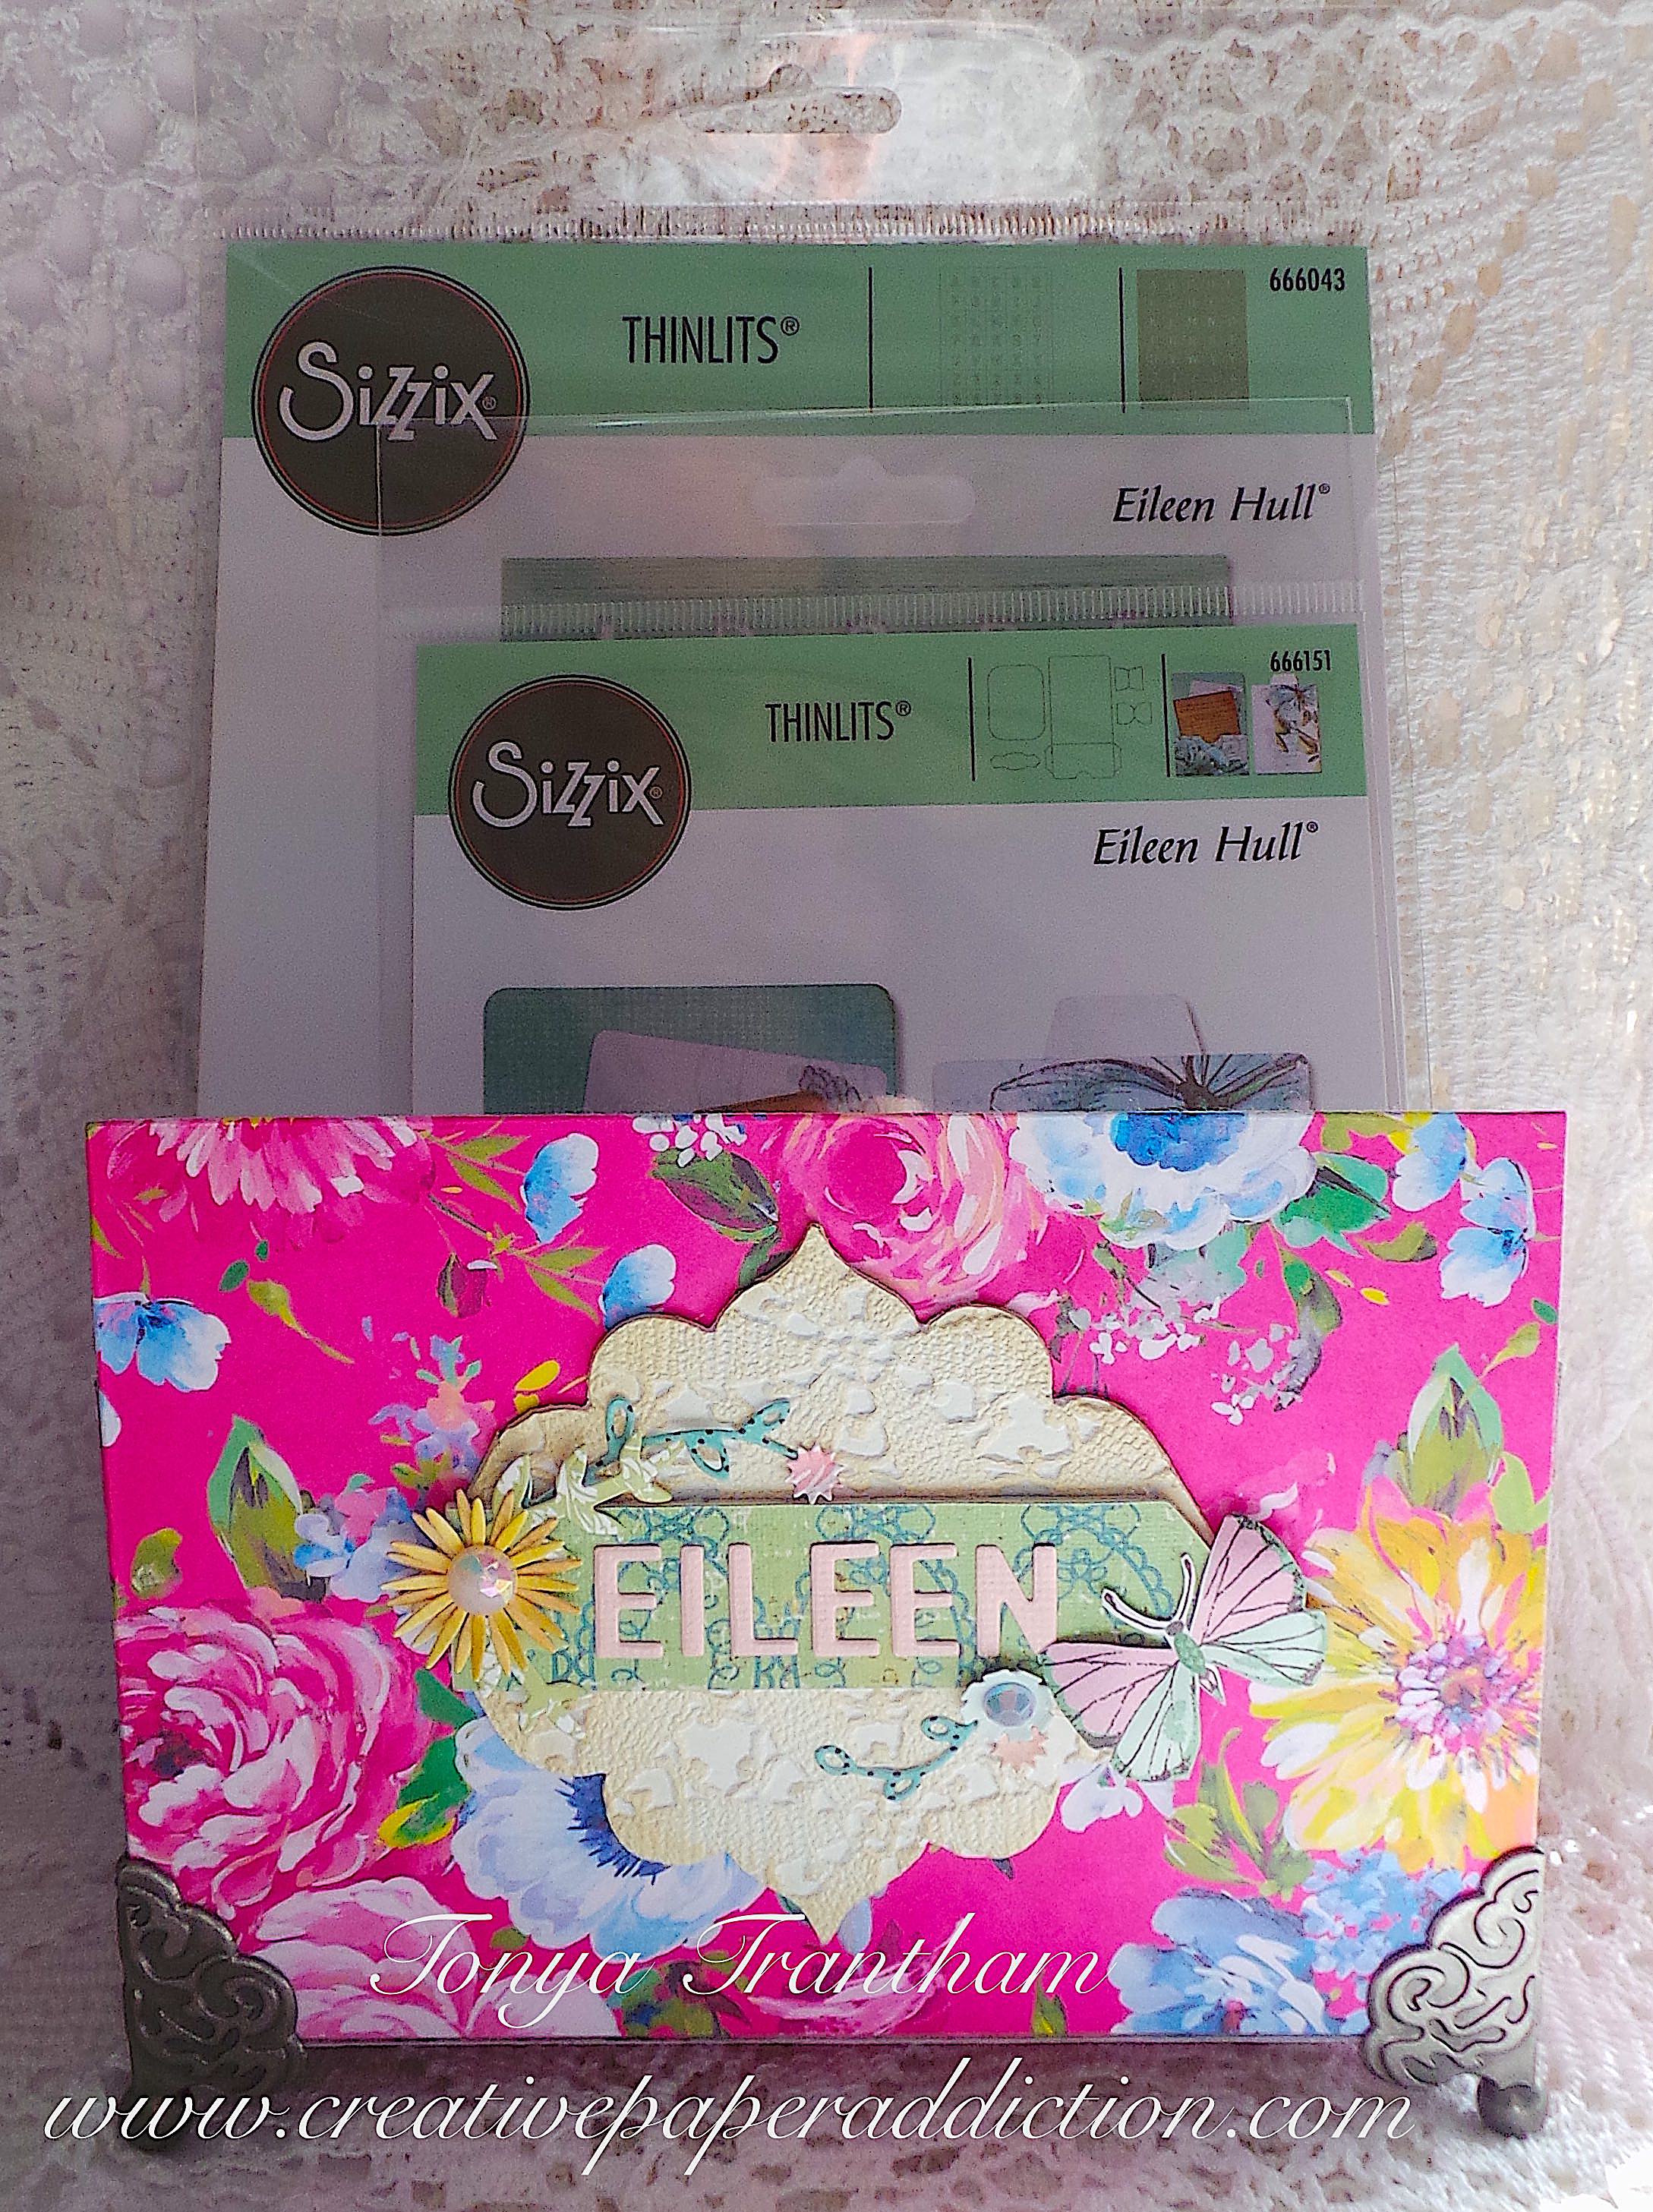
I applied Adhesive Sheets to both sides of Chipboard and placed patterned cardstock into the chipboard. I cut two covers and two side panels from the Scoreboards Frame Pocket Diecut. I folded the “spine” of both covers and the flaps of the panels. I “peeled”some of the chipboard from the flaps off (this helps the flaps to lay flatter) before adhering to each side of the journal. Since the “bottom” of the holder doesn’t butt up against each other I measured and cut a piece of chipboard and another piece of patterned cardstock and glued to the bottom inside. This adds re-enforcement to the bottom if added weight such as thinlits or paper pads are placed inside.

To decorate the outside of the holder I pulled a decorative chipboard shape from my stash and placed into the Tablecloth 3D Embossing Folder and run through the Diecut Machine. I lightly inked over the embossed area with a tan chalk ink. I used the “closure” from the Full Size Journal Diecut as a label. I adhered both to the front of the holder. I placed an adhesive sheet onto a piece of cardstock and cut out the letters to spell “Eileen” from the Alphanumeric Thinlit and placed onto the label. I cut, shaped and put together flowers, leaves and vines from the following thinlits: Folio Page Pocket and Flowers and Shadow Box Elements Thinlits.

I added gems to the center of each flowers and adhered to onto the label along with leaves, vines and a butterfly that I had fussy cut from a patterned piece of cardstock.

I glued decorative “feet’ to the bottom of the holder to finish. It’s perfect to hold ALL the Eileen Hull thinlits so they are all in one place.

If you haven’t been by Eileen’s blog lately to see what her team has been up to you can find her latest post HERE.

Supplies

Sizzix/Eileen Hull: Scoreboards Frame Pocket Journal Diecut

Sizzix/Eileen Hull: Tablecloth 3D Embossing Folder

Sizzix/Eileen Hull: Full Size Journal Diecut

Sizzix/Eileen Hull: Alphanumeric Thinlit

Sizzix/Eileen Hull: Folio Page Pocket and Flowers Thinlits

Sizzix/Eileen Hull: Shadow Box Elements Thinlits

Adhesive Sheets

Chipboard

Diecut Machine

Patterned and Plain Cardstocks

Chalk Ink

Stylus

Scissors

Paper Cutter

Beacon Adhesives: Zip Dry Adhesive

Beacon Adhesives: 3 in 1 Adhesive

(Products listed above are Affiliated Links for your convenience)

DISCLAIMERS

This blog is compensated to provide opinion on products, services, websites, and various other topics. Even though the owner(s) of this blog receives compensation for our posts or advertisements. I always give my honest opinions, findings, beliefs, or experiences on those topics or products. The views and opinions expressed on this blog are purely my own. Any product claim, statistic, quote or other representation about a product or service should be verified with each manufacturer, provider, or party in question.This blog contains affiliate links, clicking and shopping through these links helps to support and run Tonya Trantham Designs – Creative Paper Addiction at no additional cost to you. Today’s features are Sizzix, Eileen Hull, Scrapbook.com and A Cherry on Top Crafts Products. 

Thanks for stopping by, hope your Wednesday is great and enjoy creating!

Here’s the “Skinny” on Eileen Hull’s Chapter Three Release

“I am so excited to share Eileen Hull’s Chapter 3 Sizzix die collection! Each piece in the set stands alone but also coordinates with the others to make a truly versatile and valuable addition to your collection.

The Card Caddy Diecut can hold cards or can be turned into a unique journal. I love the shape of this box and it goes together so quickly- also fun to decorate! It will hold cards up to 5 1/4″ wide.

The ScoreBoards Skinny Mini Book Box is a really great size- it measures 6 3/4″ x 4″ with an adjustable built in spine from 3/8″ to 2 1/4″. This die may be used to create a book by die cutting two covers OR a box if you add the side pieces to the covers. If you add the box supports, it will hold mini-slimline size cards.

The Skinny Mini Elements Thinlits will cut a cool star pattern that perfectly covers the front of the Skinny Mini book or the front of a slimline card. And you can also expand the size of the design to create a whole page pattern.

The 3D folder is called Woven Leather and it looks so realistic! Makes a great background for cards, journal pages or covers.

Below I’m sharing a sneak peek of my upcoming project with the complete reveal later on in the month. Can you tell what was used from the Chapter 3 release?

The Inspiration and Educator teams has been busy creating lots of samples so please make sure to read the Eileen Hull’s blog (which you can find HERE) and be watching social media to see their makes!

Also there will be prizes! Make sure to post your answer in the comments on the Facebook/YouTube live. Are you ready? Here’s the question: “Which is your favorite Ch. 3 die and what would you make with it?” Be specific- inquiring minds want to know!

Chapter 3 Release

Sizzix/Eileen Hull: Skinny Mini Book Box Diecut

Sizzix/Eileen Hull: Card Caddy Diecut

Sizzix/Eileen Hull: Skinny Mini Elements Thinlits

Sizzix/Eileen Hull: Woven Leather 3D Embossing Folder

(Products listed above are Affiliated Links for your convenience)

DISCLAIMERS

This blog is compensated to provide opinion on products, services, websites, and various other topics. Even though the owner(s) of this blog receives compensation for our posts or advertisements. I always give my honest opinions, findings, beliefs, or experiences on those topics or products. The views and opinions expressed on this blog are purely my own. Any product claim, statistic, quote or other representation about a product or service should be verified with each manufacturer, provider, or party in question.This blog contains affiliate links, clicking and shopping through these links helps to support and run Tonya Trantham Designs – Creative Paper Addiction at no additional cost to you. Today’s features are Sizzix, Eileen Hull and Scrapbook.com Products. 

Thanks for stopping by, hope your Tuesday is wonderful and enjoy creating!

Floral Phone Stand with a Twist

Hi everyone! I’m back with the full reveal of my project that I shared a peek at a couple of weeks ago for the Eileen Hull Chapter one Release Party. You can find that post HERE. Instead of creating just a phone stand I took it one step further with the Phone Stand Diecut and created a small desk top organizer.

I applied Adhesive Sheets to both sides of the Mat Board, placed patterned cardstock onto both sides of the adhesive mat board, placed on top of the Phone Stand Diecut and run through the Diecut Machine.

For the “pocket” on the organizer I used the “pocket/bed” of the Vintage Truck Diecut (using the same steps as above), cut in half and cut each side at an angle.

I put the stand together according to the directions but the bottom piece with the prongs I did not fold according to the direction but left flat and adhered to the bottom of the stand. I glued each piece (pocket/bed diecut) to the bottom on either side of the stand.

From the Phone Stand Diecut I cut a smaller piece, at the fold on the diecut, to create the pocket and adhered to either side of the “pocket/bed diecut”. I also used cloths pins to hold the pieces together until it completely dried. The flap underneath was glued to the bottom of the organizer to create the pocket.

From a previous project I had a leftover label from the Full Size Journal Diecut that I added to the pocket. A goal I have for this year is to use what I have in my massive stash of crafts so I dug out a Prima flower, which I embellished with a flatback pearl, cardstock leave diecuts, loops of thread and pearl spays to finish this project.

You can fit a small planner and ink pen in it perfectly!

If you haven’t checked out Eileen Hull’s blog to see what her Inspiration and Educator Teams have been unto you can find the latest blog posts HERE and HERE.

Supplies

Sizzix/Eileen Hull: Phone Stand Diecut

Sizzix/Eileen Hull: Vintage Truck Diecut

Sizzix/Eileen Hull: Full Size Journal Diecut

Diecut Machine

Adhesive Sheets

Mat Board

Paper Cutter

Scissors

Various Patterned Cardstocks

Flowers and Cardstock Leaves Diecuts

Flatback Pearl

Thread

Pearl Sprays

Beacon Adhesives: Zip Dry Adhesives

(Products listed above are Affiliated Links for your convenience)

DISCLAIMERS

This blog is compensated to provide opinion on products, services, websites, and various other topics. Even though the owner(s) of this blog receives compensation for our posts or advertisements. I always give my honest opinions, findings, beliefs, or experiences on those topics or products. The views and opinions expressed on this blog are purely my own. Any product claim, statistic, quote or other representation about a product or service should be verified with each manufacturer, provider, or party in question.This blog contains affiliate links, clicking and shopping through these links helps to support and run Tonya Trantham Designs – Creative Paper Addiction at no additional cost to you. Today’s features are Sizzix, Eileen Hull and Scrapbook.com Products. 

Thanks for stopping by, hope your Tuesday is wonderful and enjoy creating!

From Post Box Diecut to Desktop Organizer

Hi everyone! I’m back with this month’s project for Eileen Hull! I’d started my Post Box project last month but decided I really didn’t like how it looked. (Raise your hand if have several unfinished projects laying in your craft room that you weren’t feeling it or it wasn’t going the way you envisioned it?) I wanted to take the Post Box Diecut in a different direction than what it was originally made for and this is what I came up with.

I started by measuring and cutting a piece of Mat Board to only cover the box part and a tiny part of the flap of the Post Box Diecut. I applied a piece of Adhesive Sheet to the mat board, placed patterned cardstock on top of the adhesive sheet along with the diecut and run through the Diecut Machine. The excess piece of mat board I did the same steps with the adhesive sheet and patterned cardstock but this time I place in the center of what is considered the bottom of the box (I rarely measure I’m a “eye baller”) and run through the diecut machine.

I cut the tiny part of the flap off.

Then I used a strong adhesive to glue both boxes together.

I adhered the smaller box to the lower half of the larger box.

I fussy cut some of the foliage and flowers out from a scrap of the patterned cardstock I used. I wrapped cording around both boxes and adhered a pre-made flower, bows made from cording and thread and the fussy cut images to the box.

Be sure to stop by Eileen Hull’s blog to see what the Inspiration and Educator Teams have created! You can find those posts HERE and HERE. Also if you have any questions about this project please let me know.

Supplies

Sizzix/Eileen Hull: Post Box Diecut

Mat Board

Adhesive Sheet

Diecut Machine

Paper Cutter

Scissors

Beacon Adhesive: Zip Dry Adhesive

Cording and Thread

Pre-made Flower

Patterned Cardstock

(Products listed above are Affiliated Links for your convenience)

DISCLAIMERS

This blog is compensated to provide opinion on products, services, websites, and various other topics. Even though the owner(s) of this blog receives compensation for our posts or advertisements. I always give my honest opinions, findings, beliefs, or experiences on those topics or products. The views and opinions expressed on this blog are purely my own. Any product claim, statistic, quote or other representation about a product or service should be verified with each manufacturer, provider, or party in question.This blog contains affiliate links, clicking and shopping through these links helps to support and run Tonya Trantham Designs – Creative Paper Addiction at no additional cost to you. Today’s features are Eileen Hull, Sizzix and Scrapbook.com Products. 

Thanks for stopping by, hope your Tuesday is wonderful and enjoy creating!

Vintage Floral Caddy Organizer

Hi everyone! This has been one busy month and I’m just now finishing and able to share my project this month for Eileen Hull’s Inspiration Team! The team has been sharing some creative organizing tutorials using Eileen’s diecuts. You can find the past posts for the month HERE, HERE and HERE.


For my project I decided I wanted to create something that could hold all the little booklets of journaling cards that I had accumulated. I added Adhesive Sheets to Mat Board and applied patterned cardstock to the mat board prior to cutting five pockets and two sides from Caddy Bag Diecut.

I adhered all the pockets to each other and the last pocket that would be glued to the side I “flipped” so it would mirror the other side. I covered a piece of mat board with patterned cardstock to fit underneath the bottom of the caddy. This makes it more sturdy.

I covered both sides of the pockets with patterned cardstock, added some decorative diecuts and box corners and it’s finished!

I’ve added some of my journaling cards, couple of pencils and jumbo paper clips and I am ready to create! As always if you have questions about this projects please let me know.

I would also like to submit this project for the following challenges:
Word Art Wednesday: Challenge #326-#327


 Thanks for stopping by, hope your Tuesday is awesome and enjoy creating!