Discover the Grafix and Eileen Hull Collaboration Part One
Hi everyone! I am back with my project for Eileen Hull this month. The team is also collaborating with Grafix. I’ll be using an assortment of dies, thinlits, embossing folders and Grafix Dura-lar Prints to dress up the Journal Diecut .
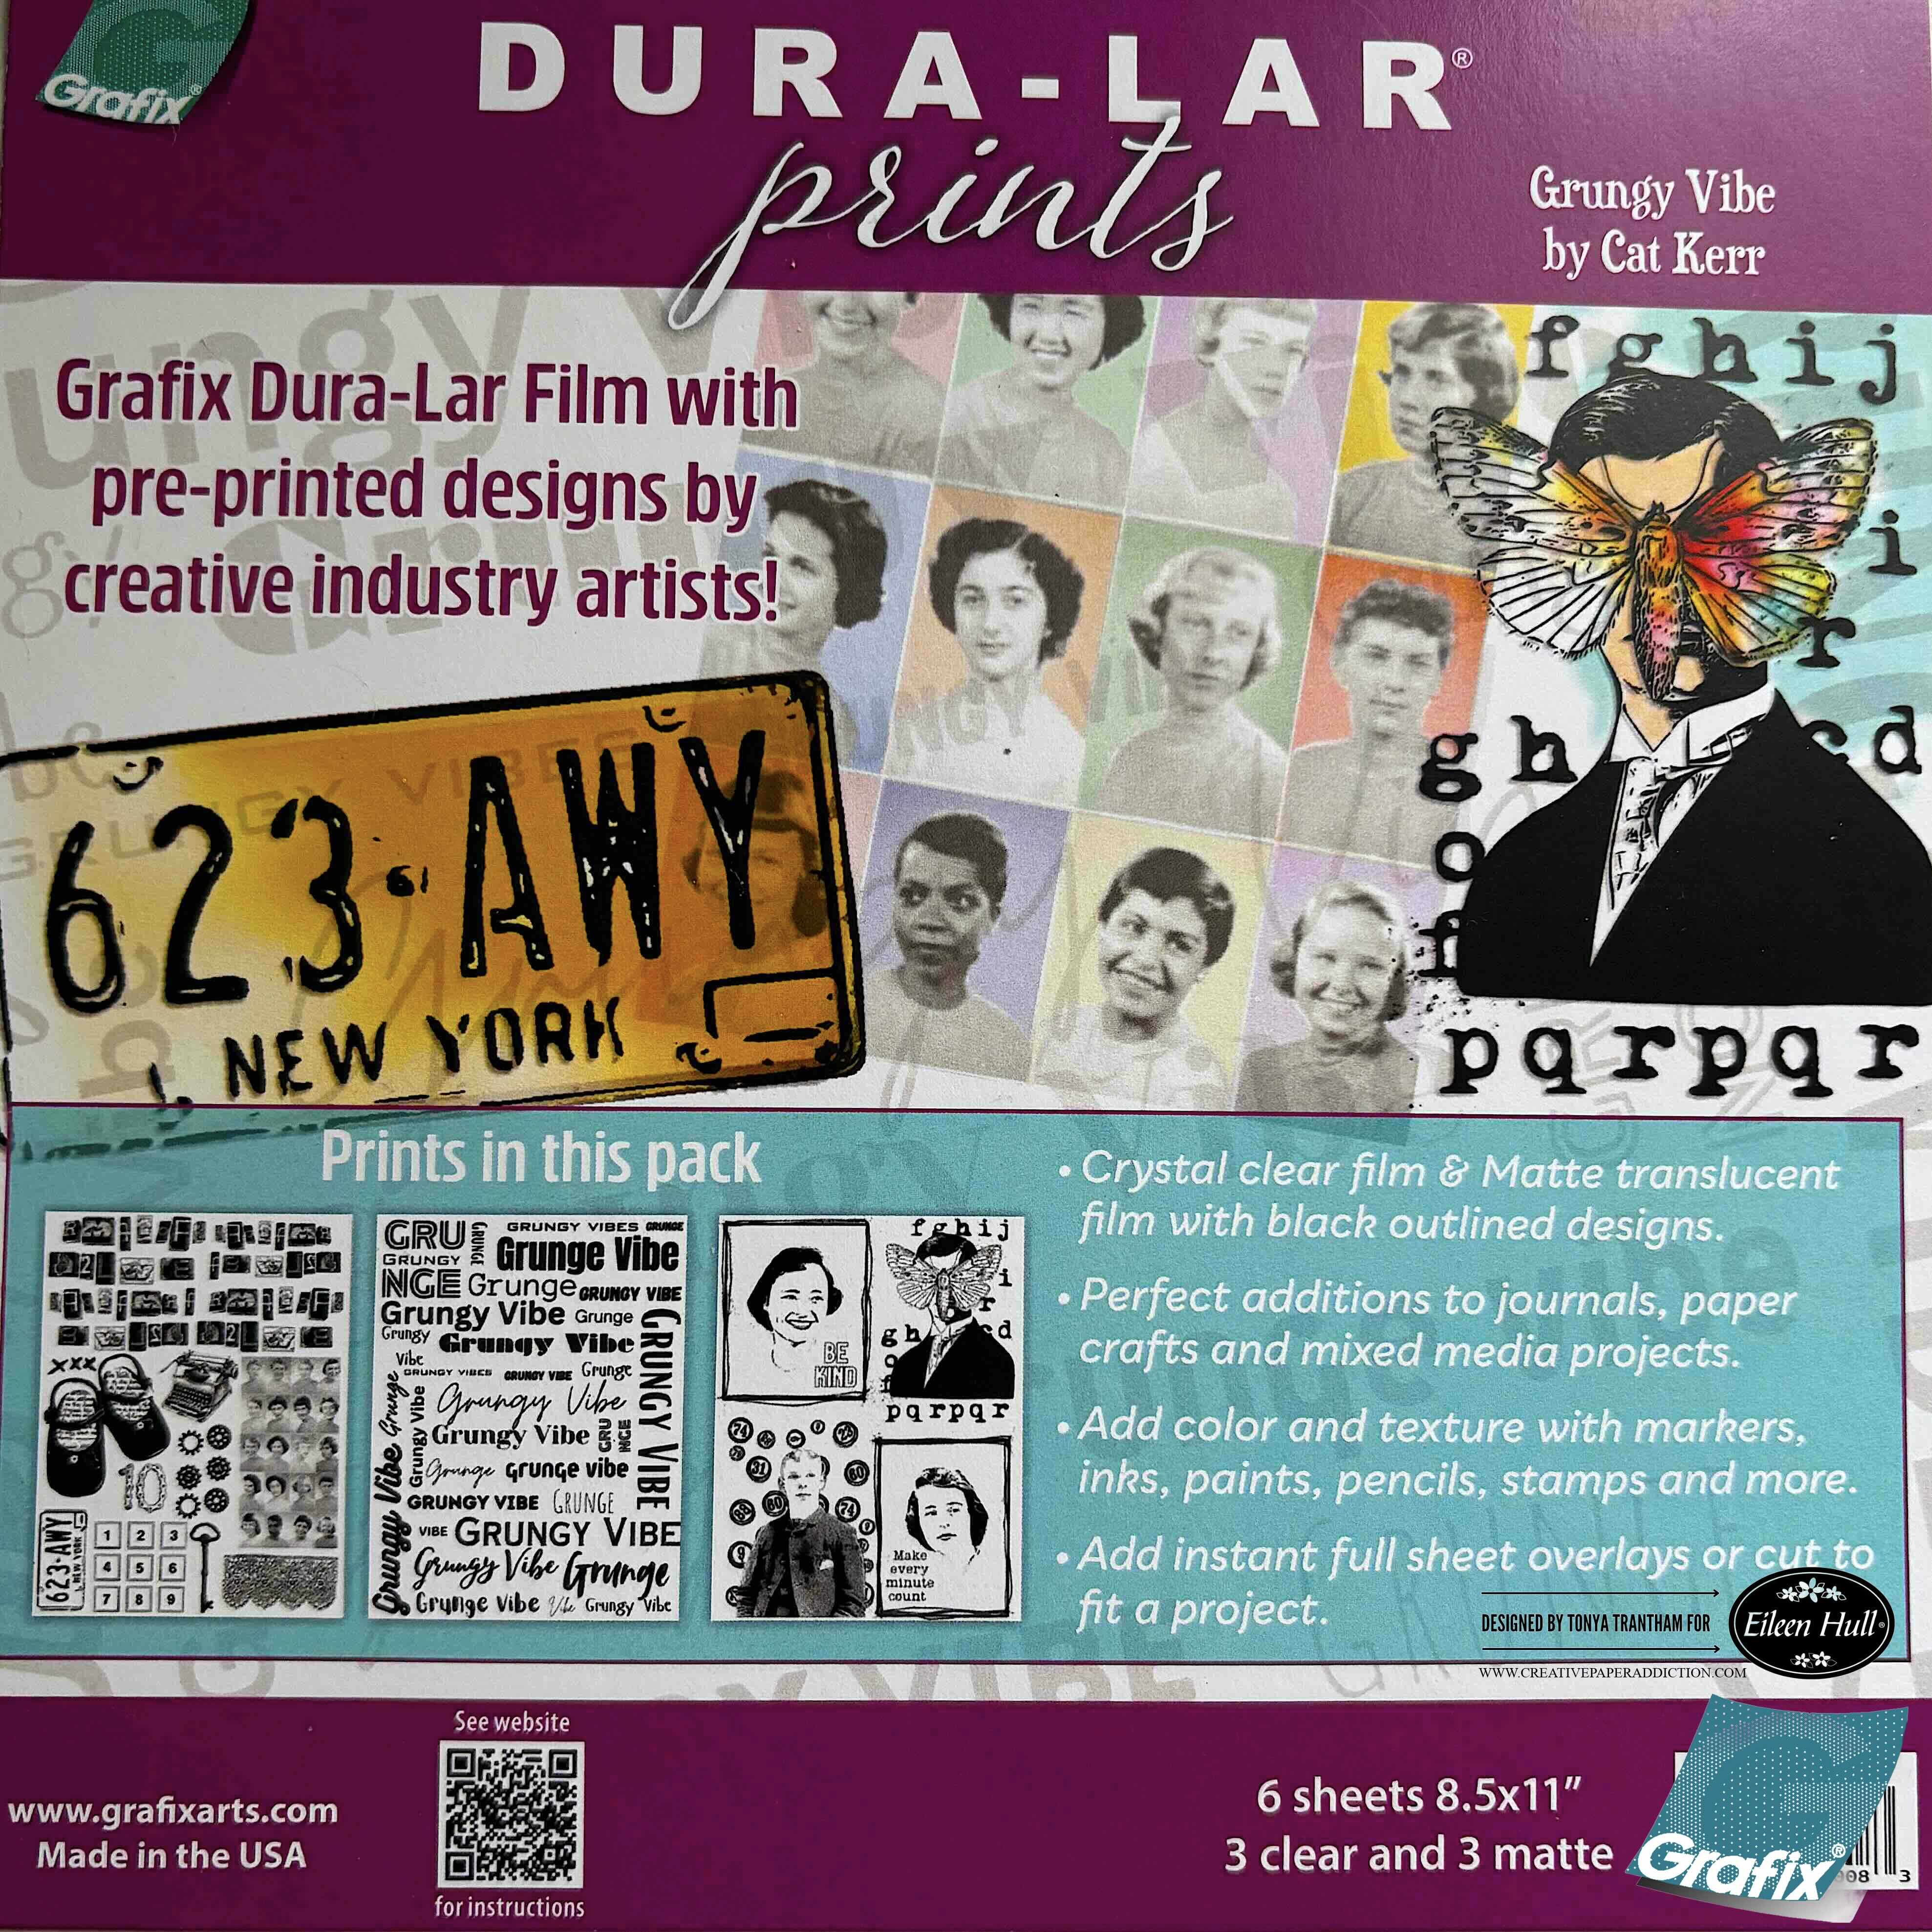
I received the Grungy Vibe by Cat Kerr to incorporate in my journal. There’s a crystal clear film and a matte translucent film of each design for a total of six sheets in the package. Anyways, let’s get started!
I placed Adhesive Sheets on both sides of a piece of Chipboard (I did this step twice). I added patterned cardstock to both sides of the chipboard, placed the chipboard onto the Journal Diecut, sandwiched between the two cutting plates and run through the Diecut Machine.
I lightly inked the cover with Brown Chalk Ink. I cut off the excess spine and peeled one side of the remaining spine so when glued together it will lay flat.

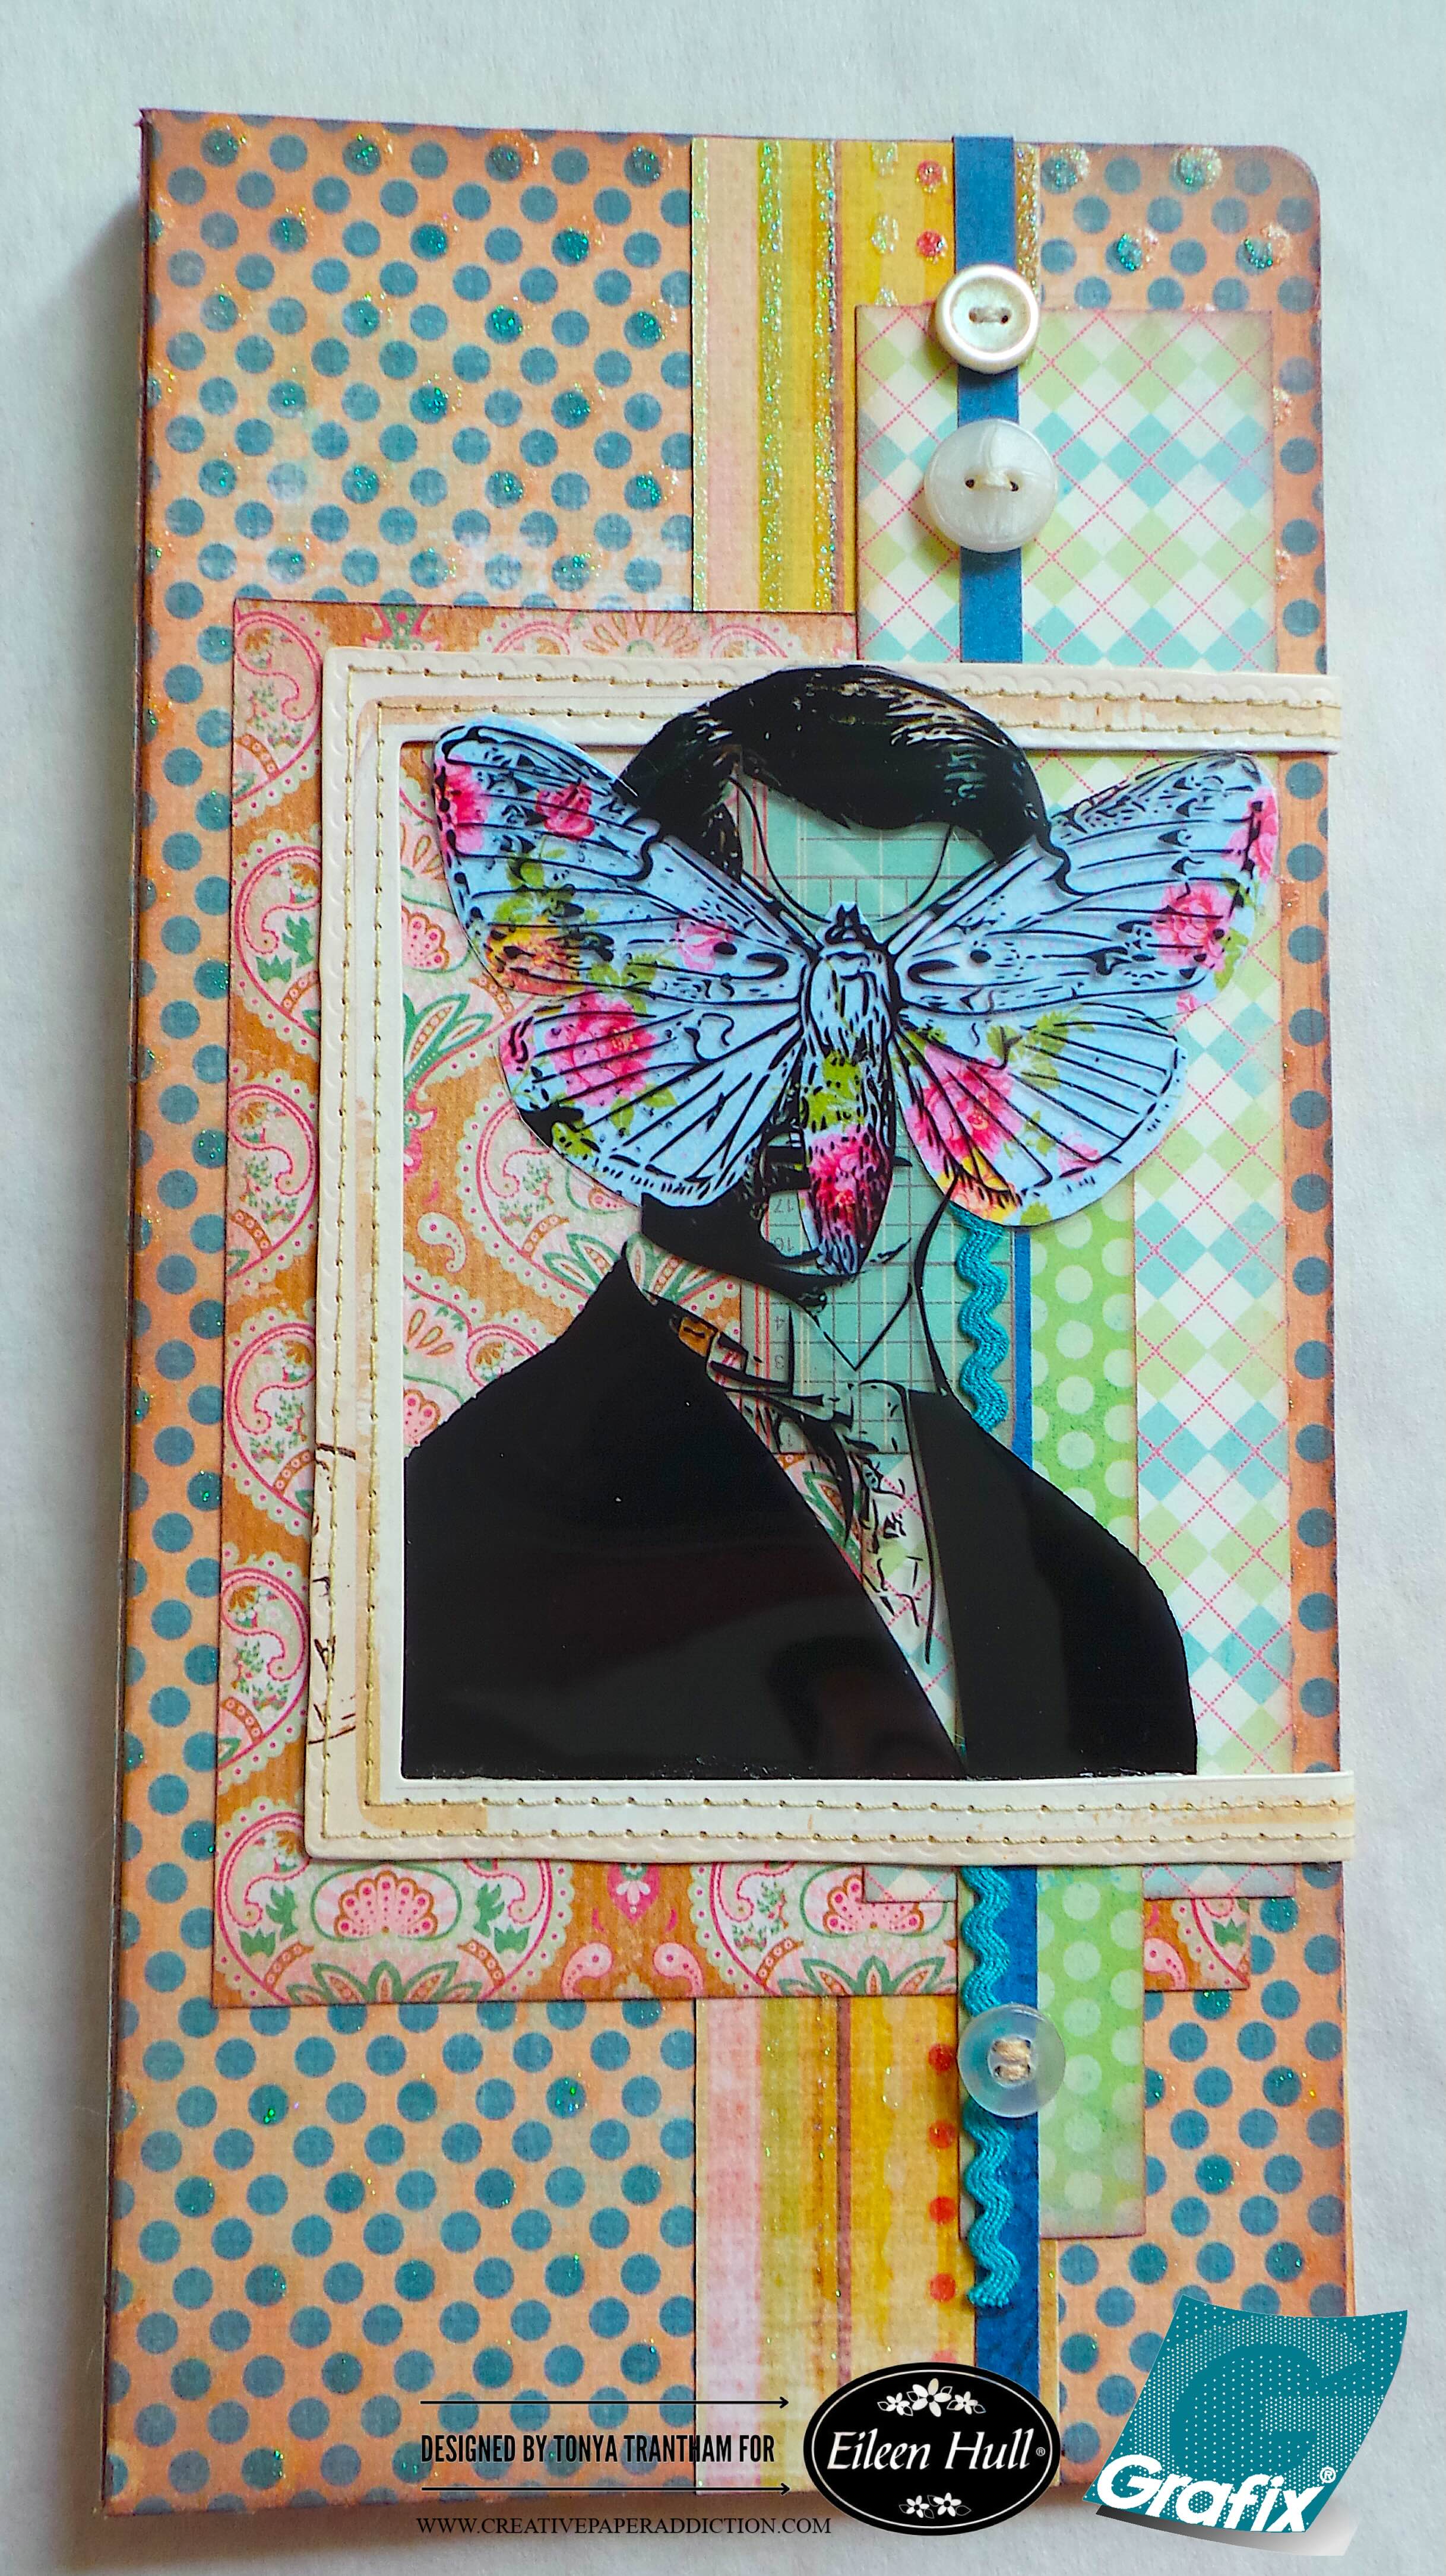
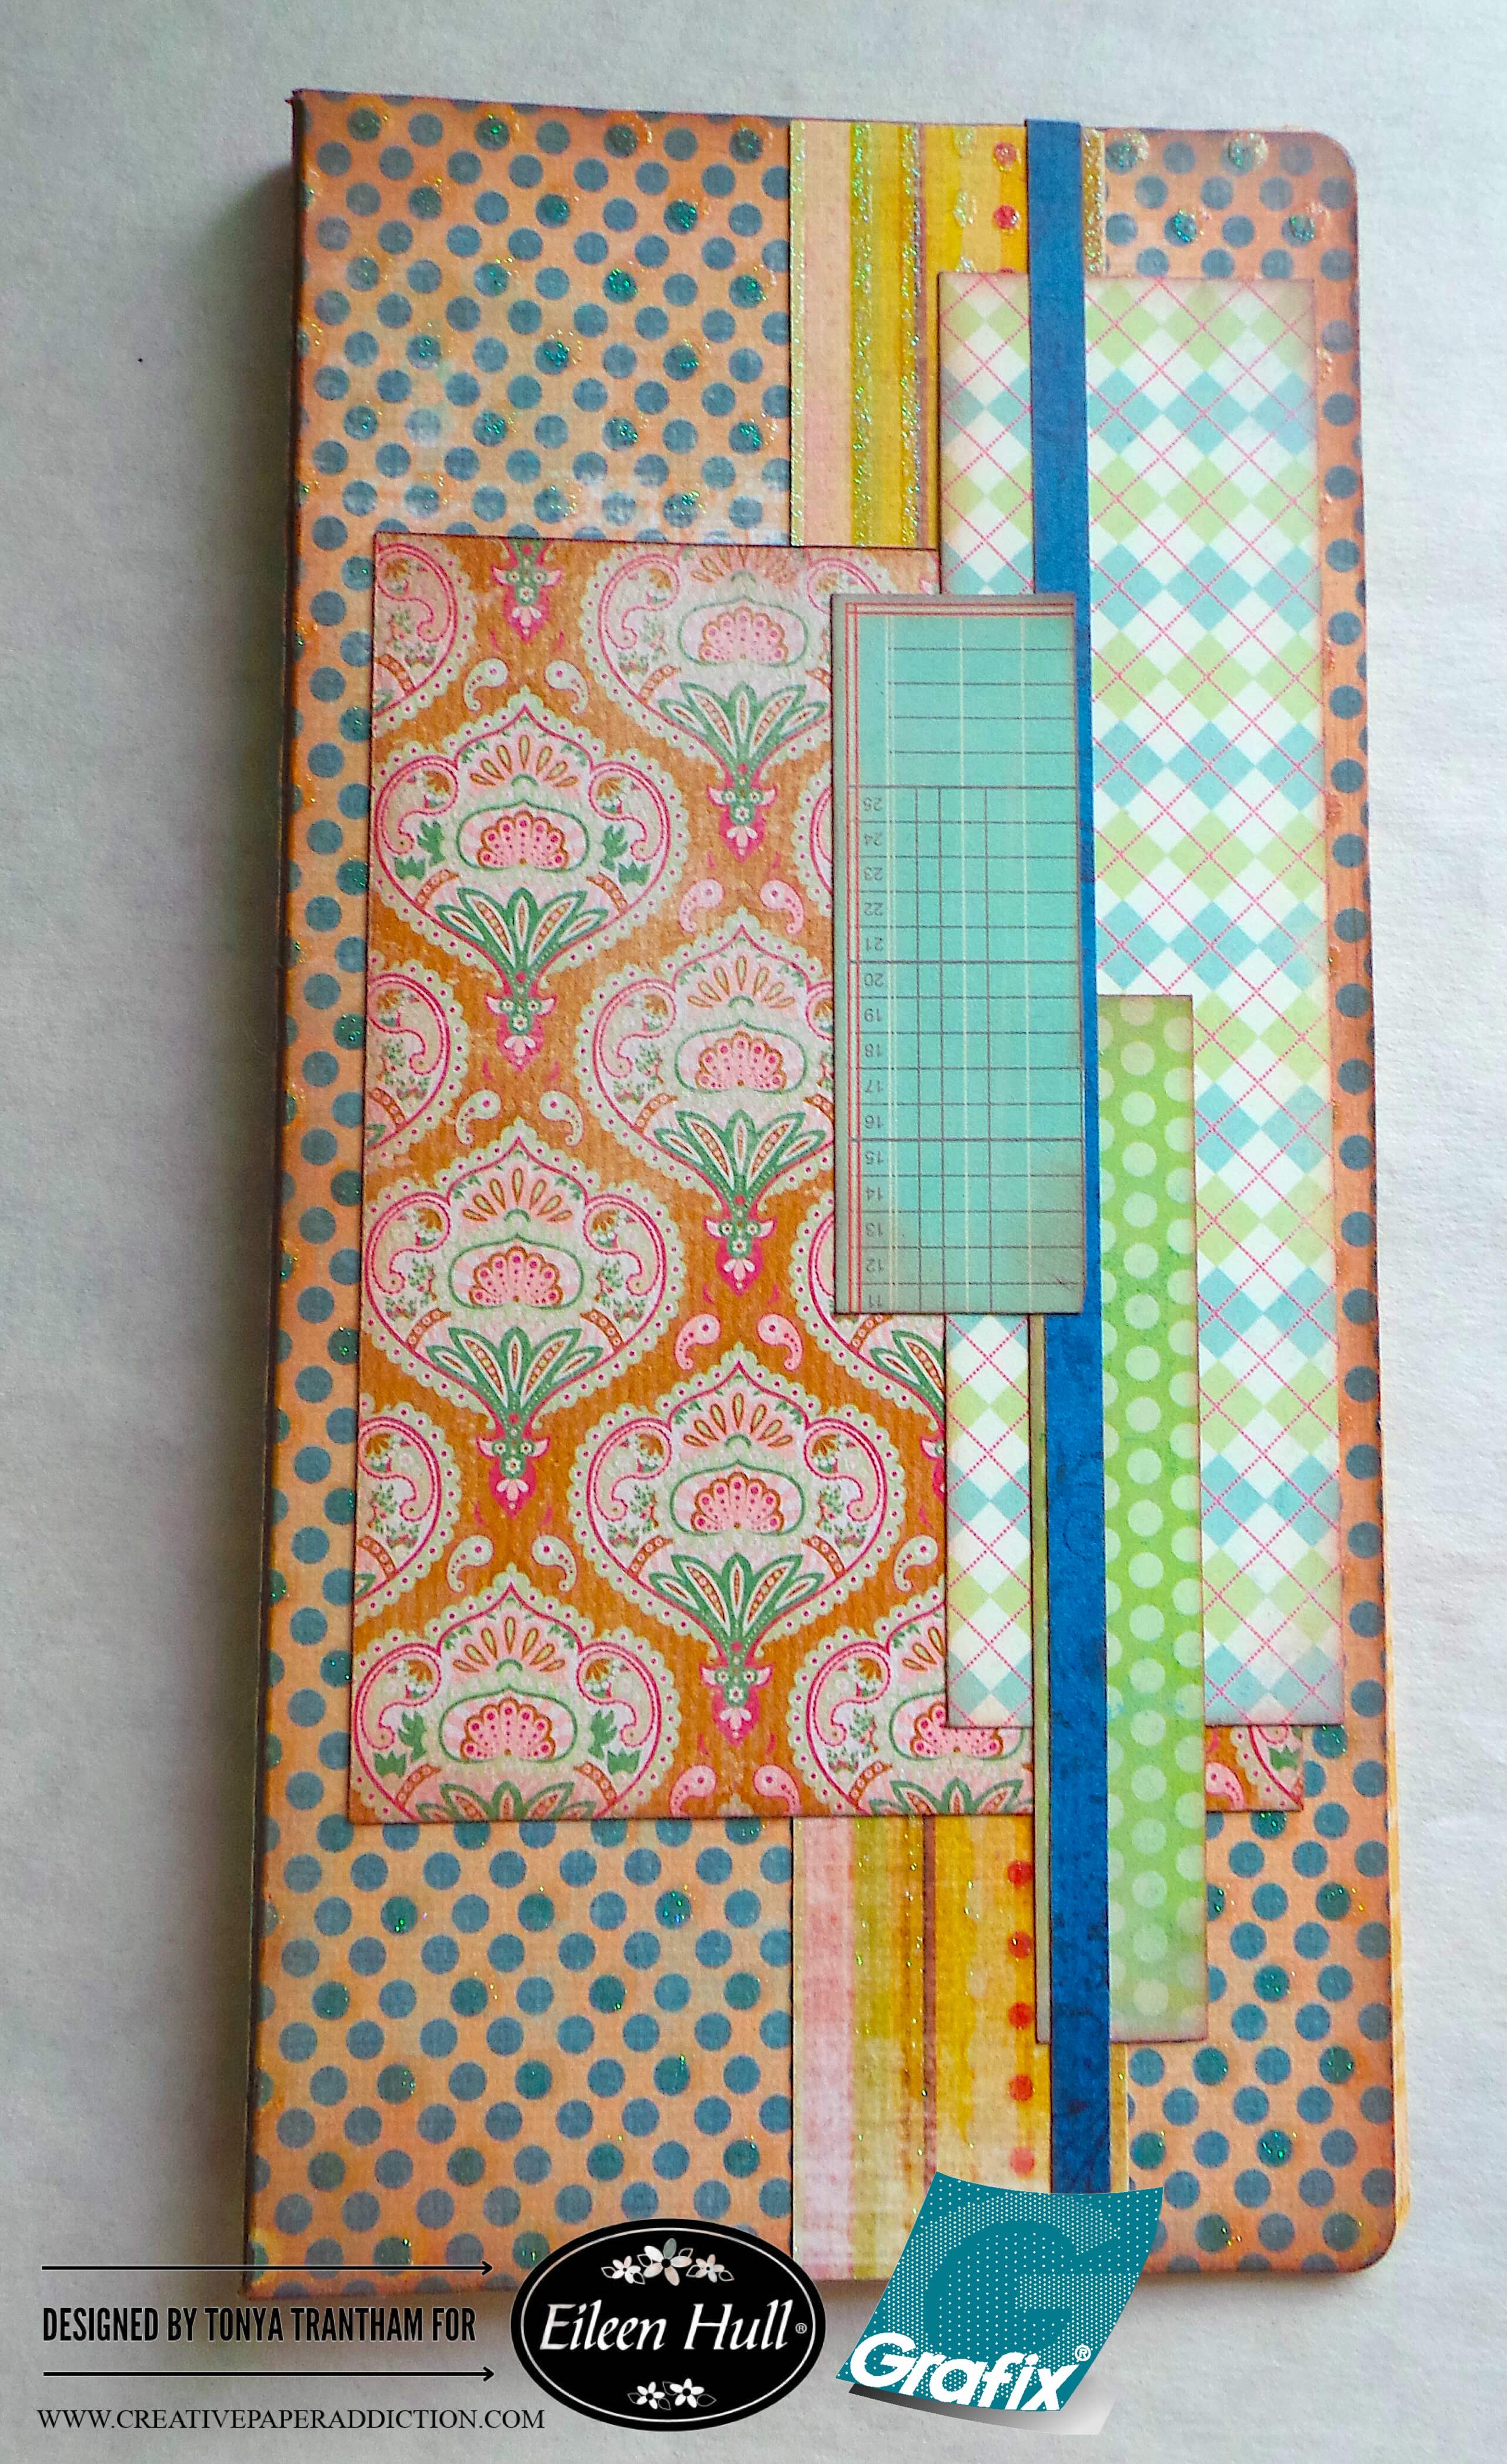
I adhered scraps of patterned cardstock to the cover of the journal.
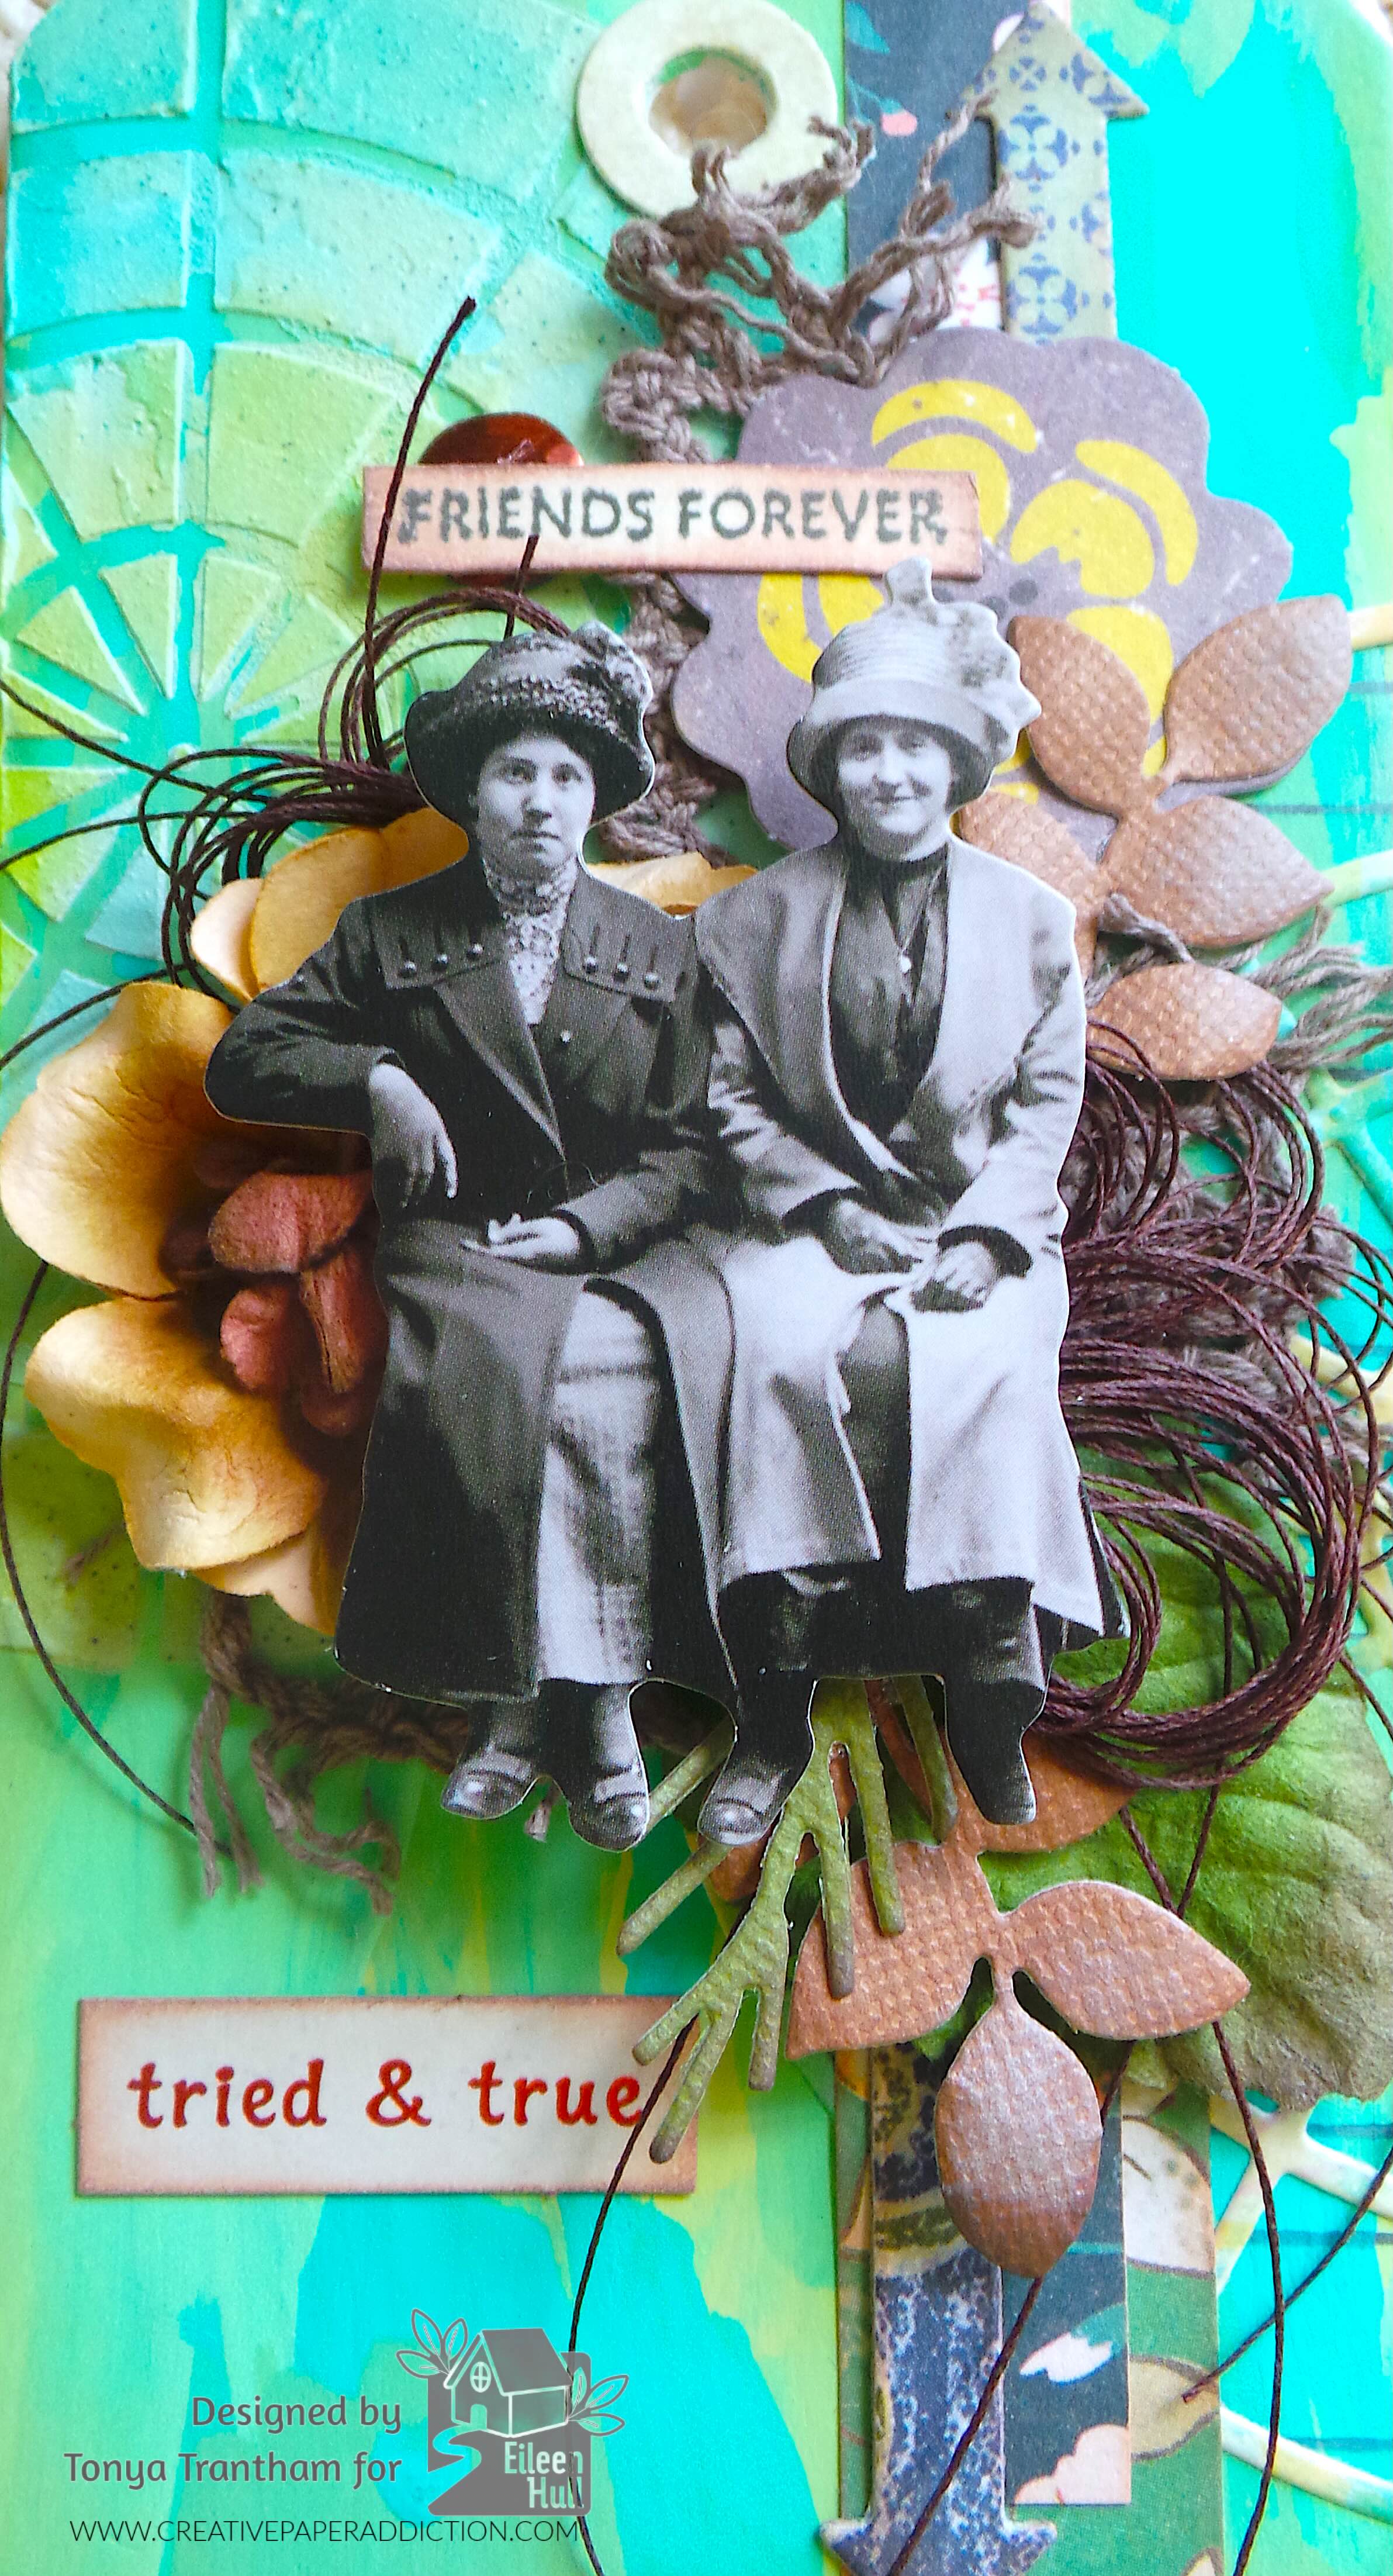
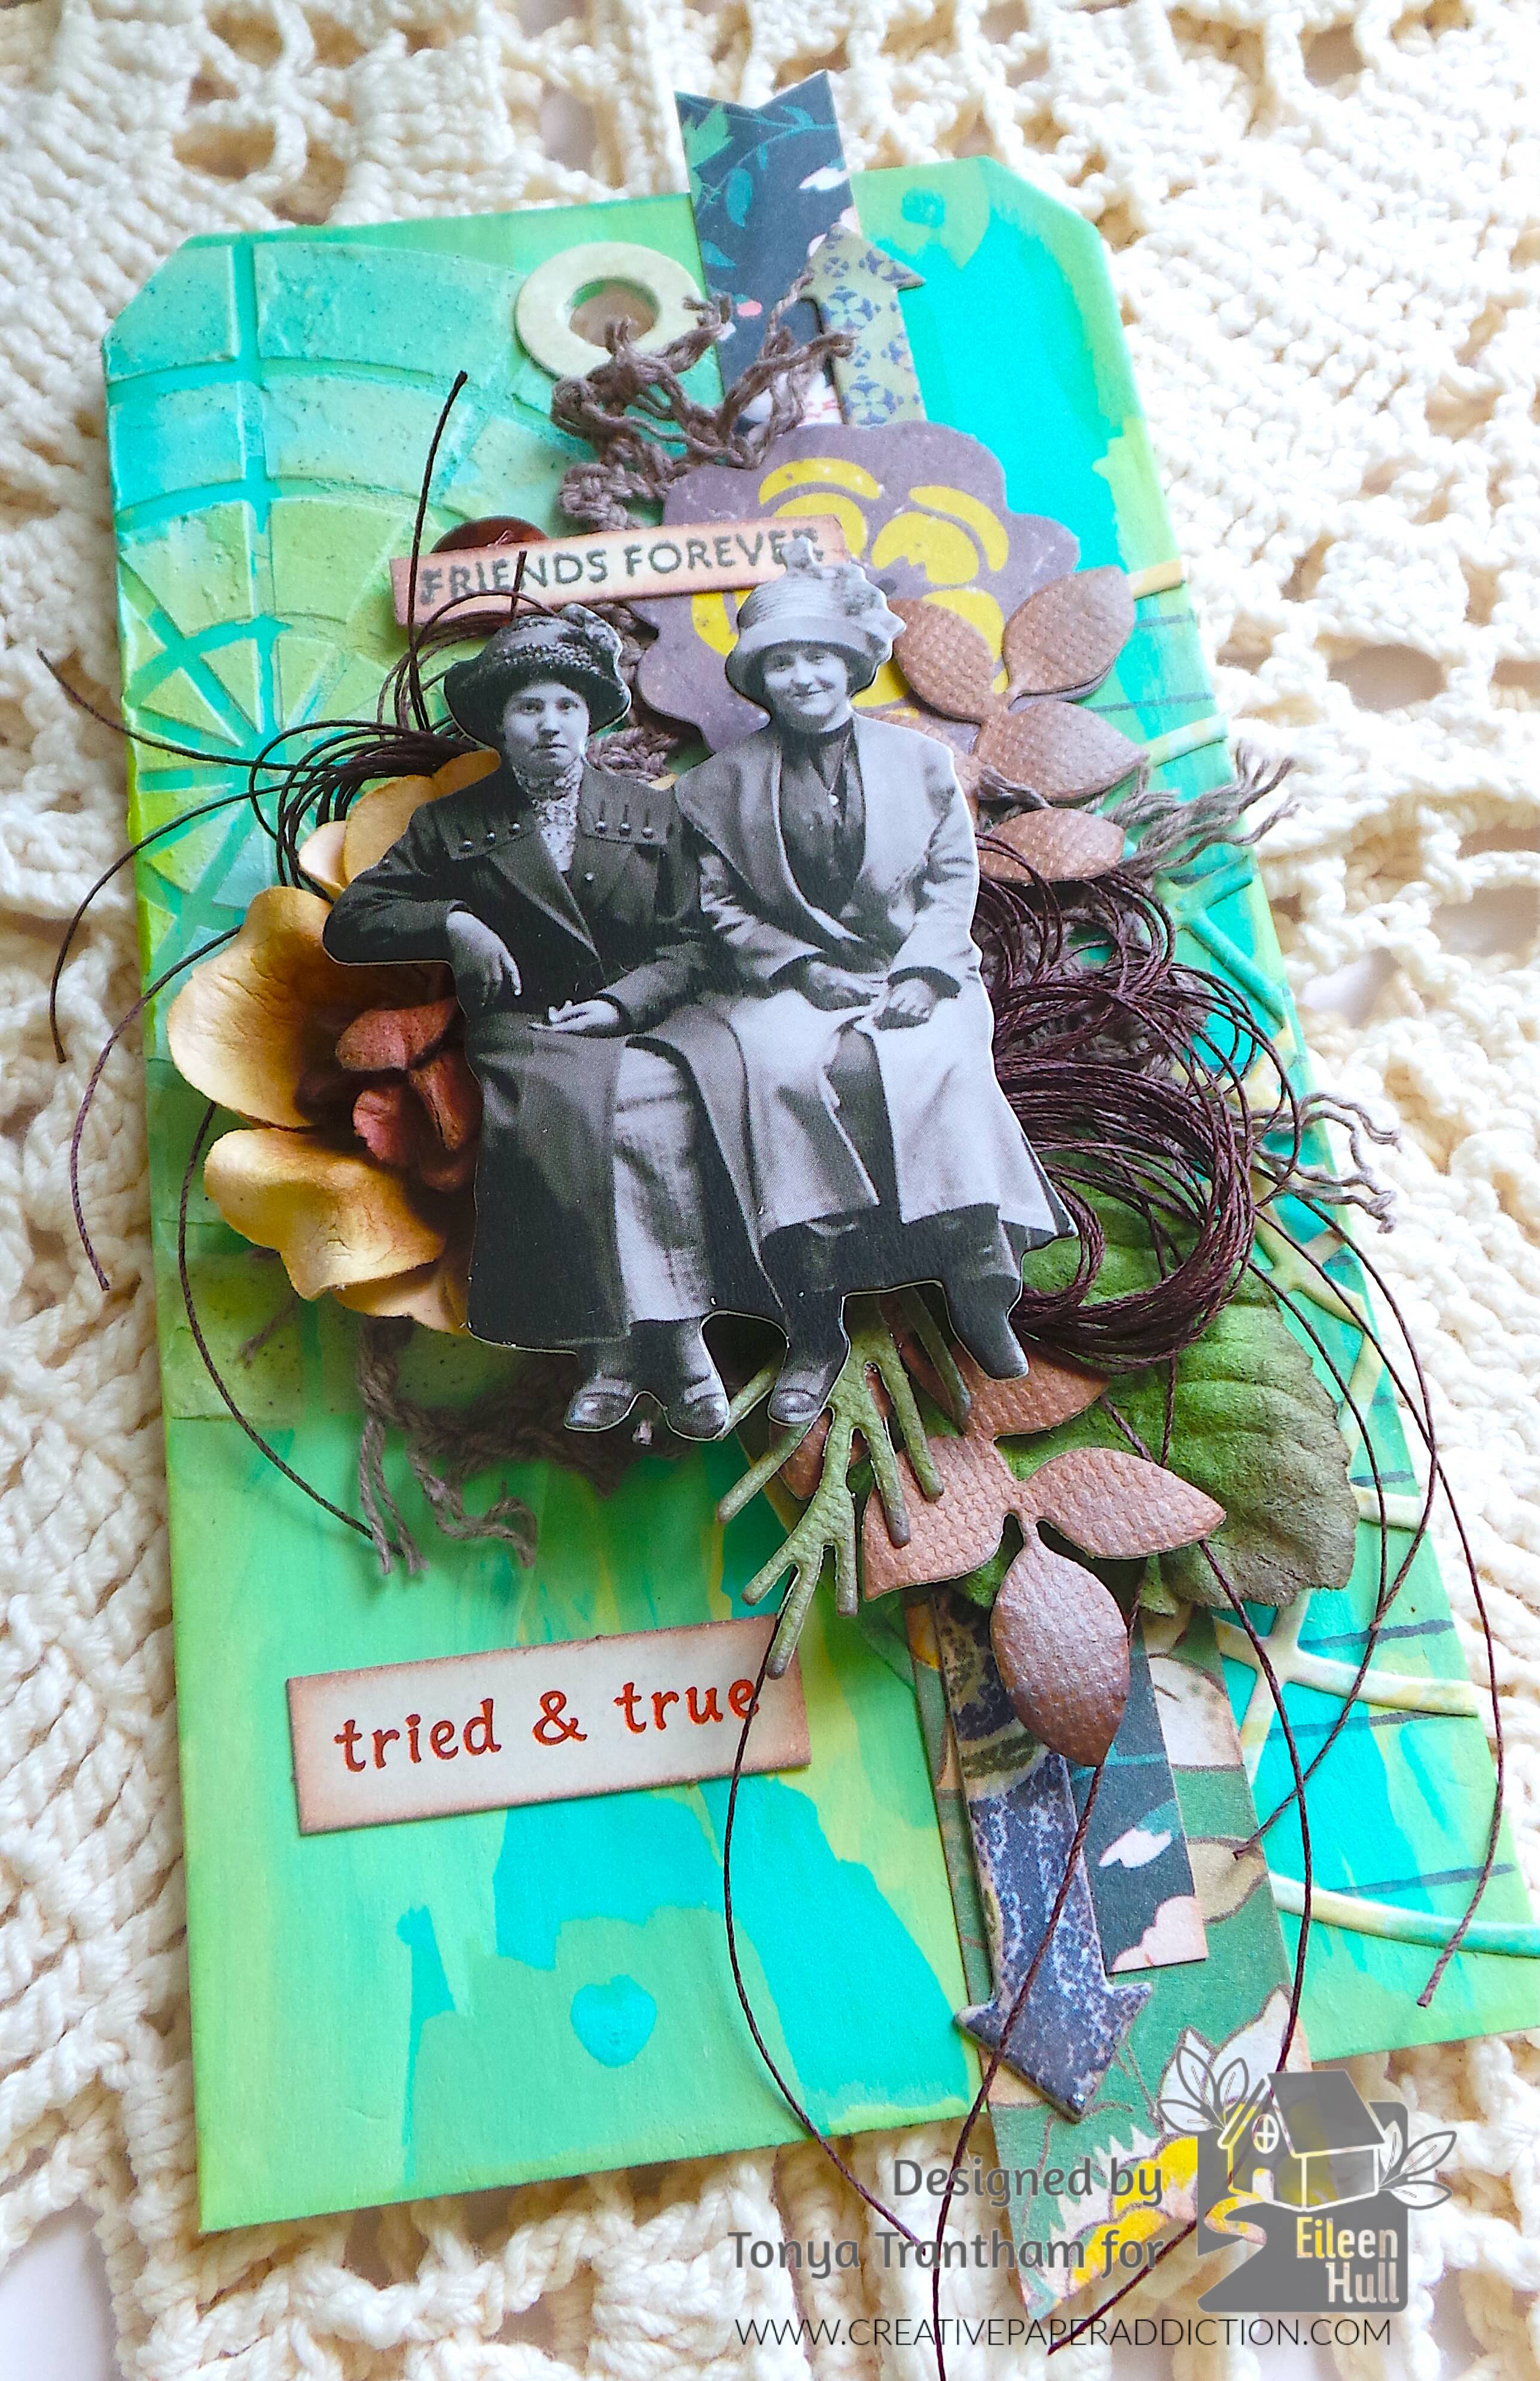
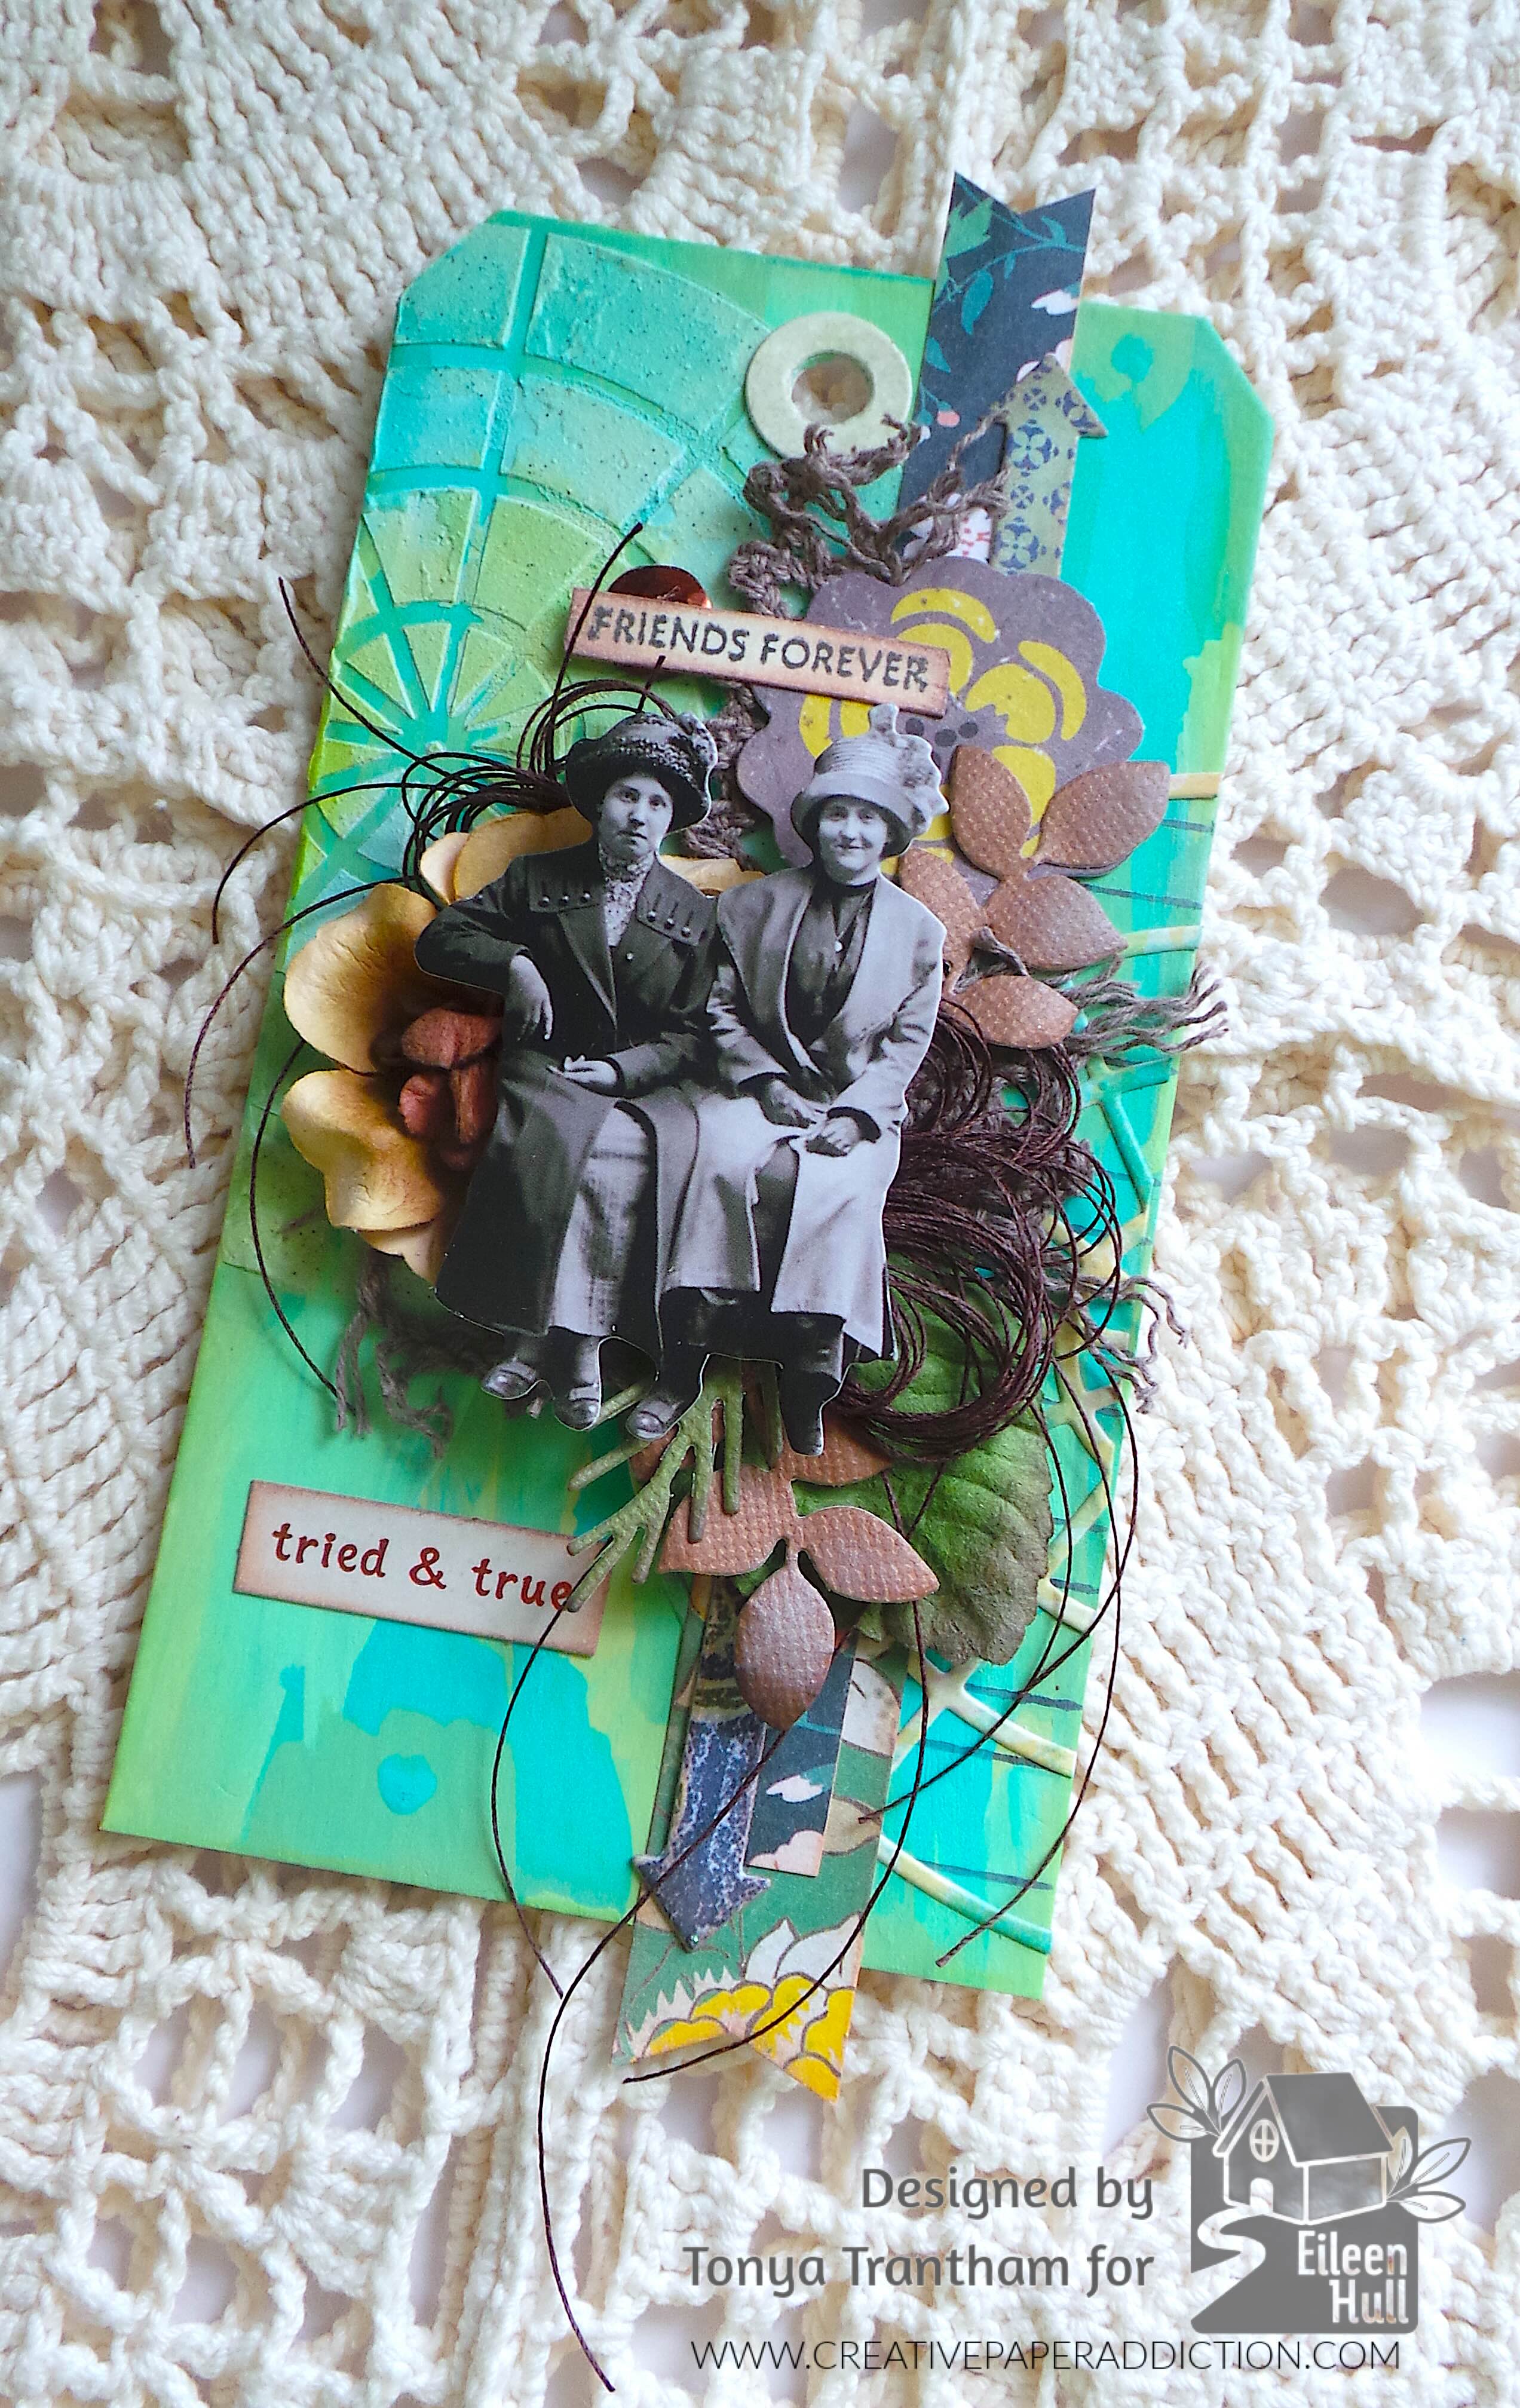
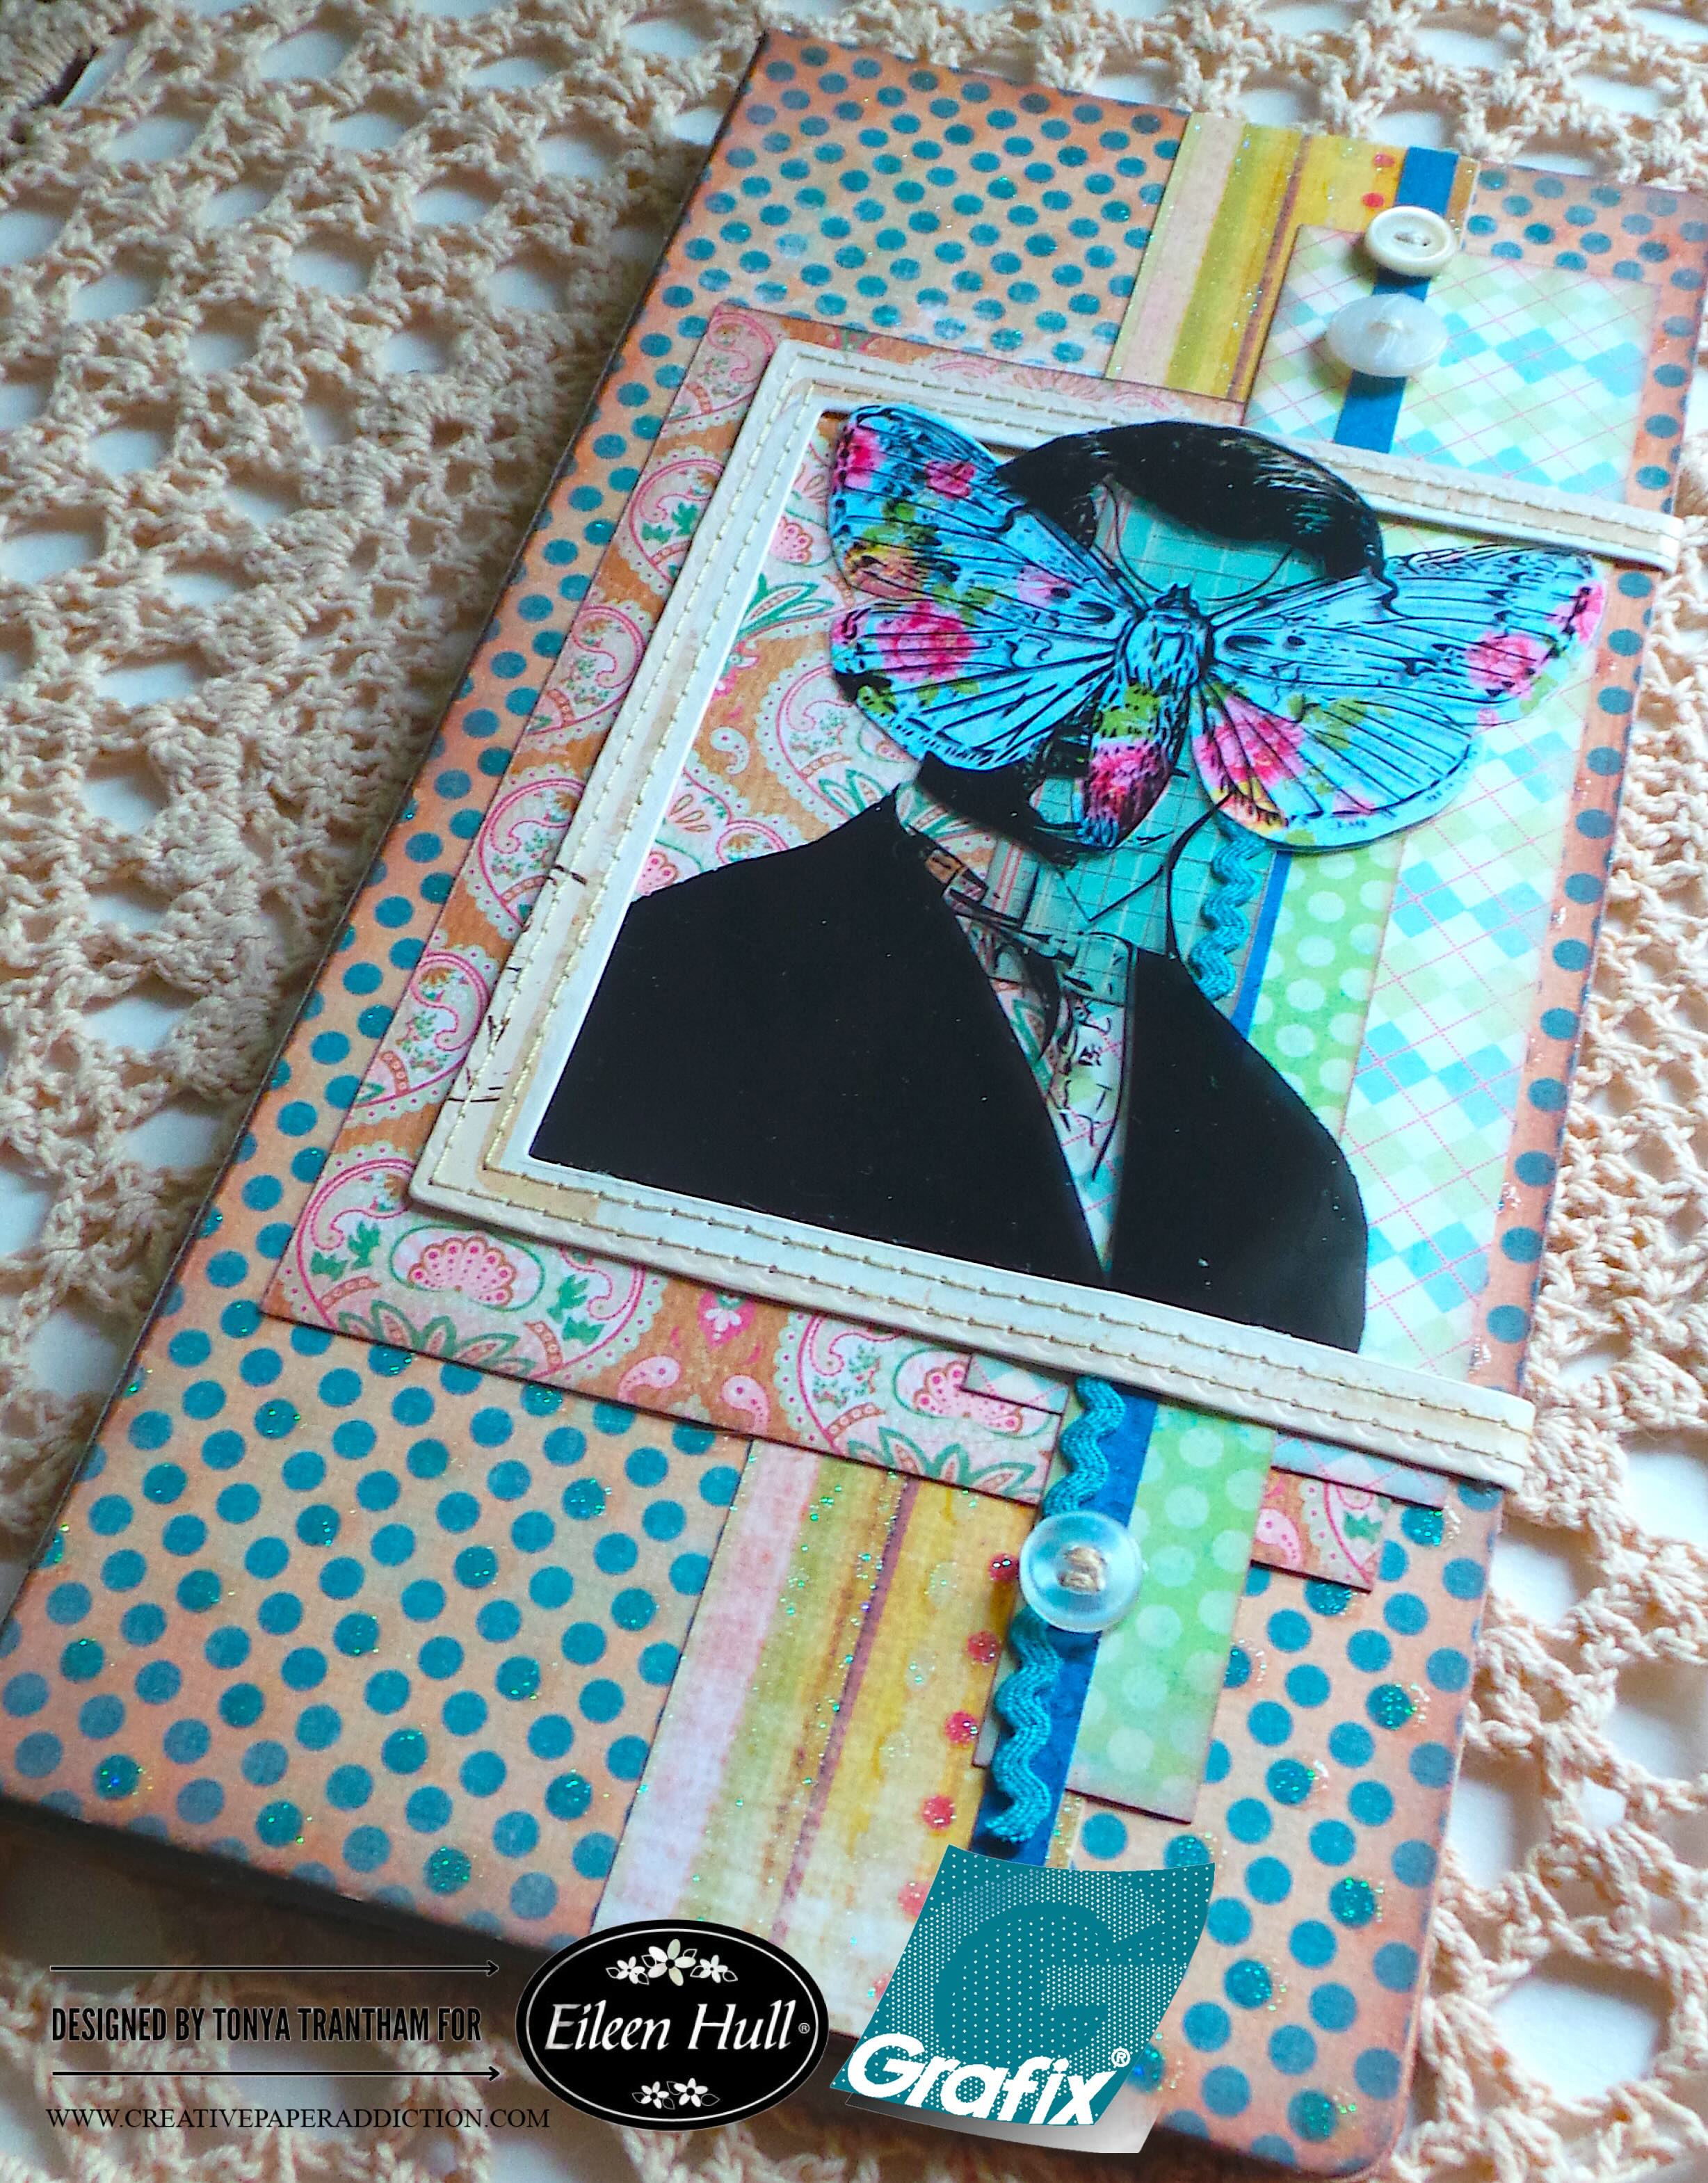
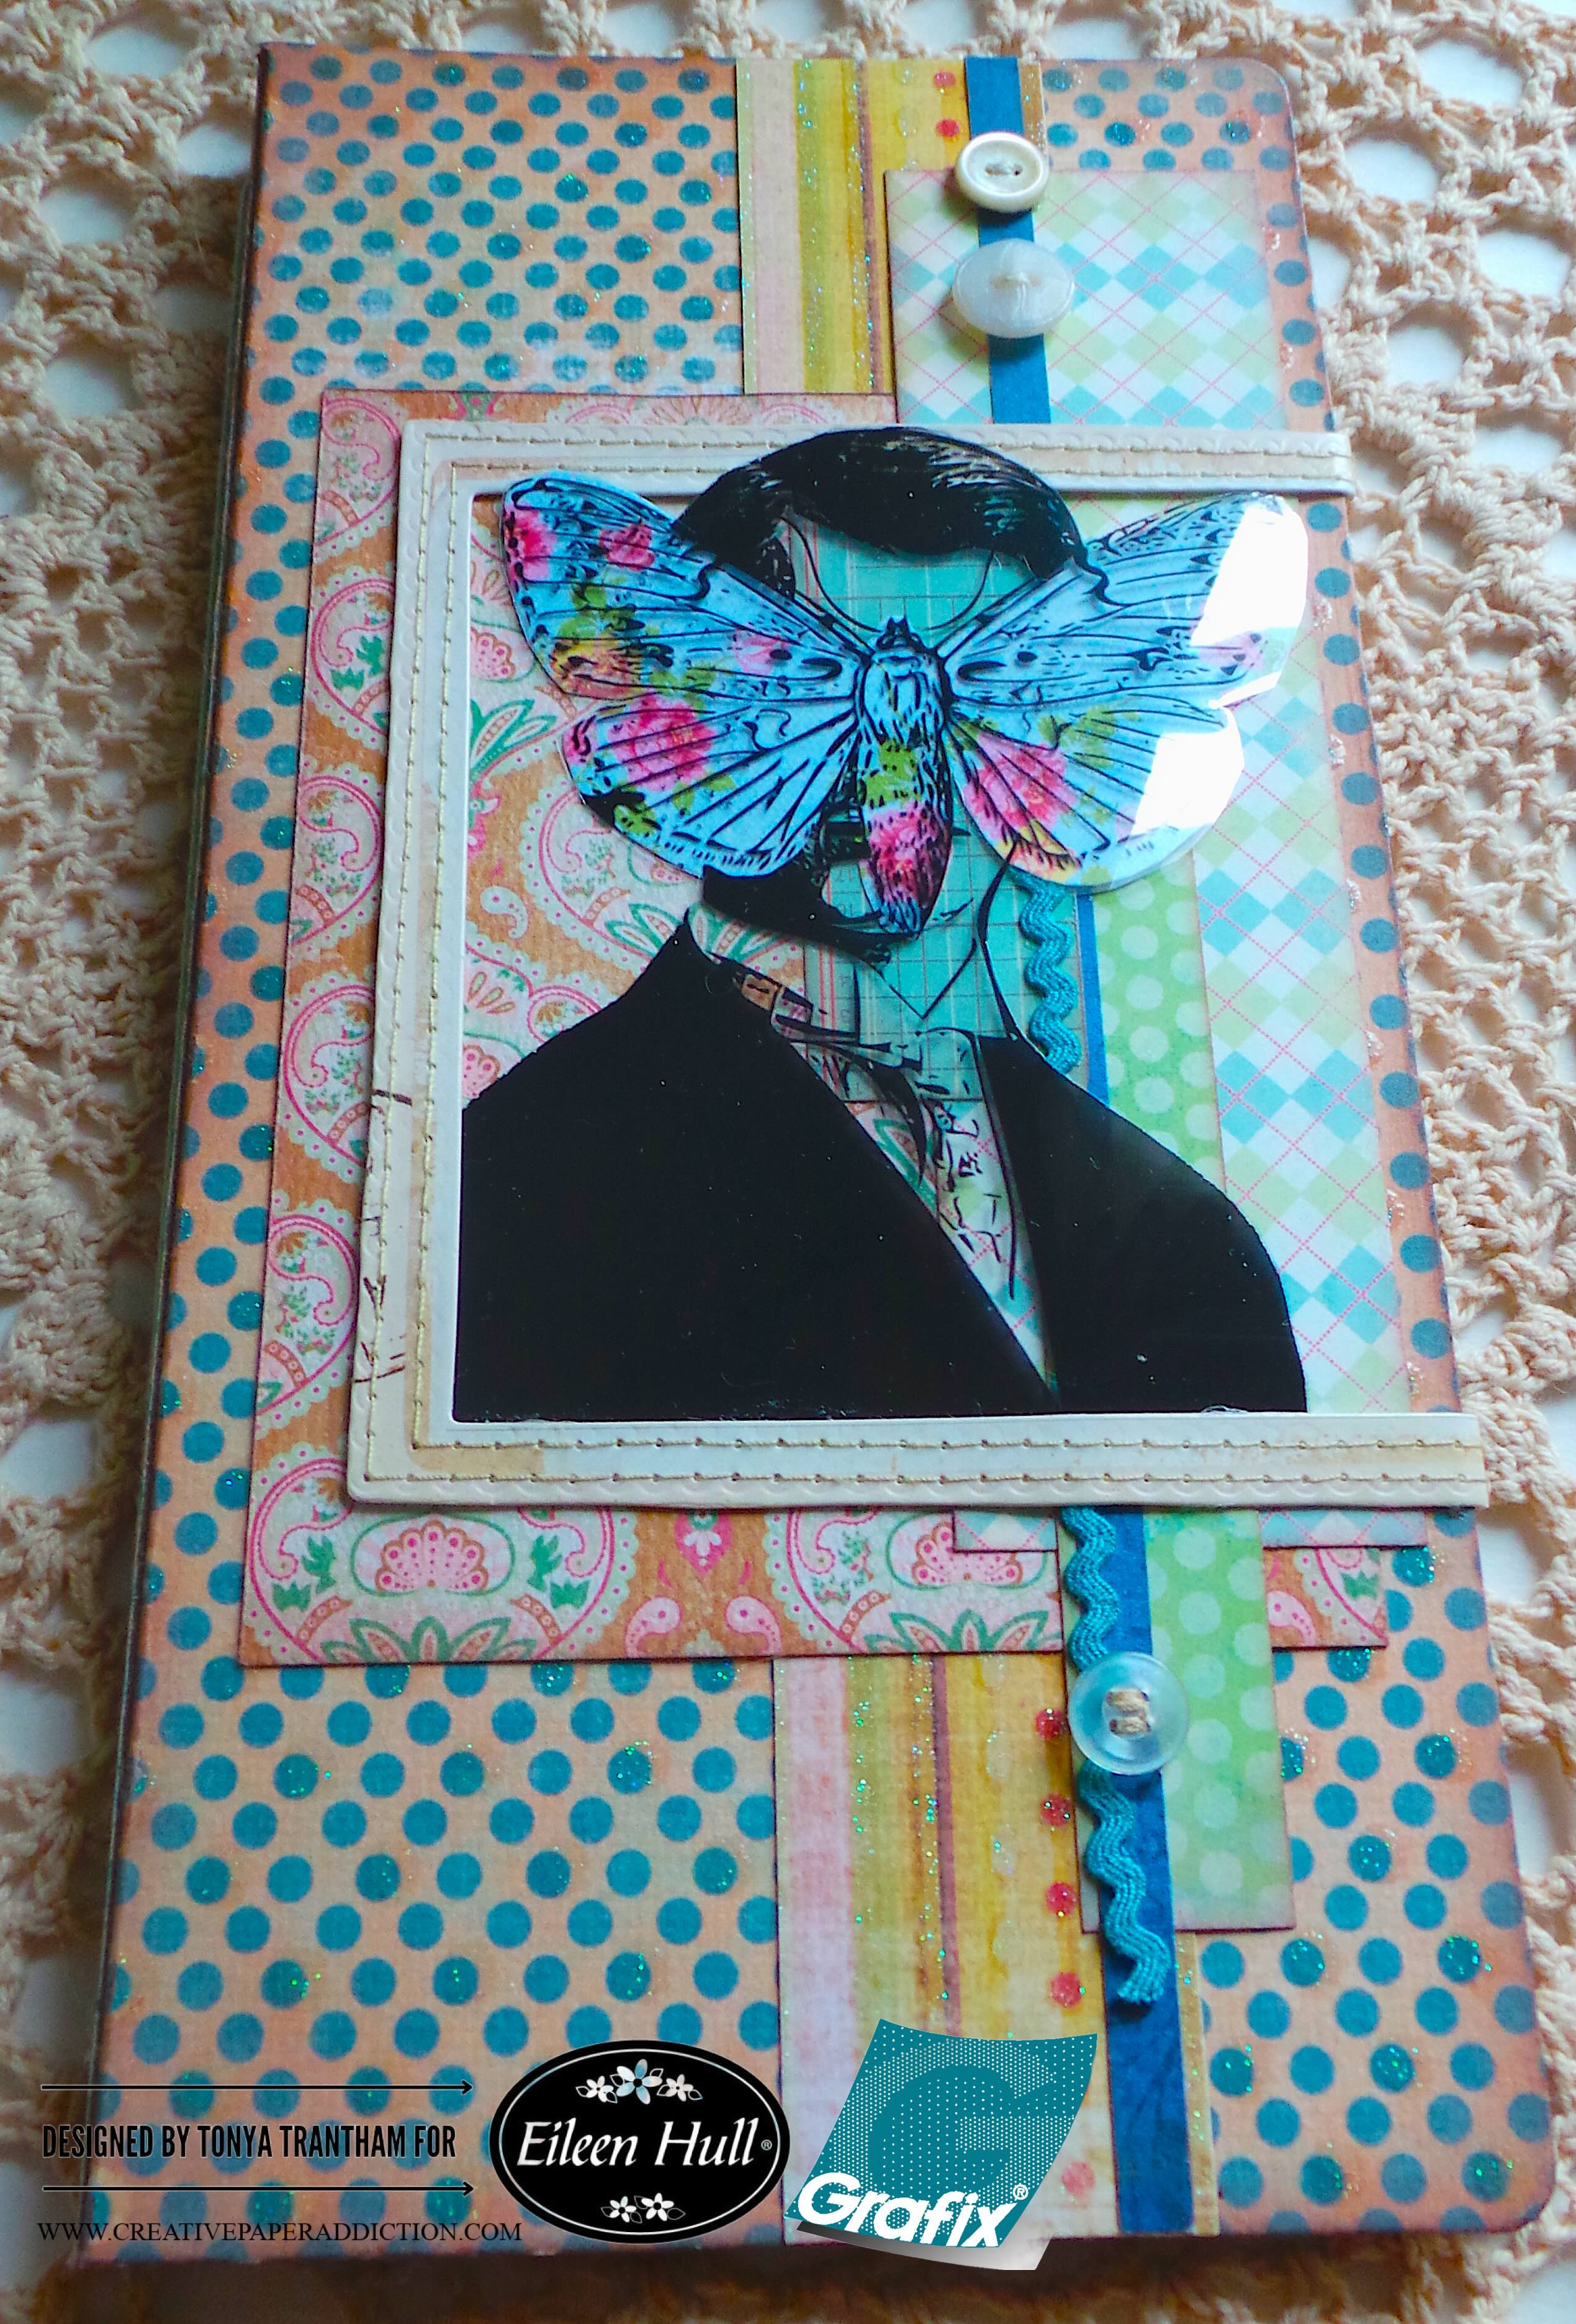
I dug into the packet of Grungy Vibe by Cat Kerr and pulled out both the clear and matte translucent images of the man with a butterfly over his face. The clear image, I cut out only the man with the butterfly. The matte image I only cut out the butterfly to use as a template to trace onto a piece of patterned cardstock and cut out. I adhered the patterned butterfly to the back side of the clear image.

I dug into my stash of embellishments and found this stitched frame (I think it is from 49 & Market). I glued the bottom edge of the clear image and the top of the man’s head to the frame. I scored the outer edge of frame since it is larger than the journal cover. I wrapped around and adhere to the inside of the cover.

I added ric rac and buttons before gluing the frame to the cover.

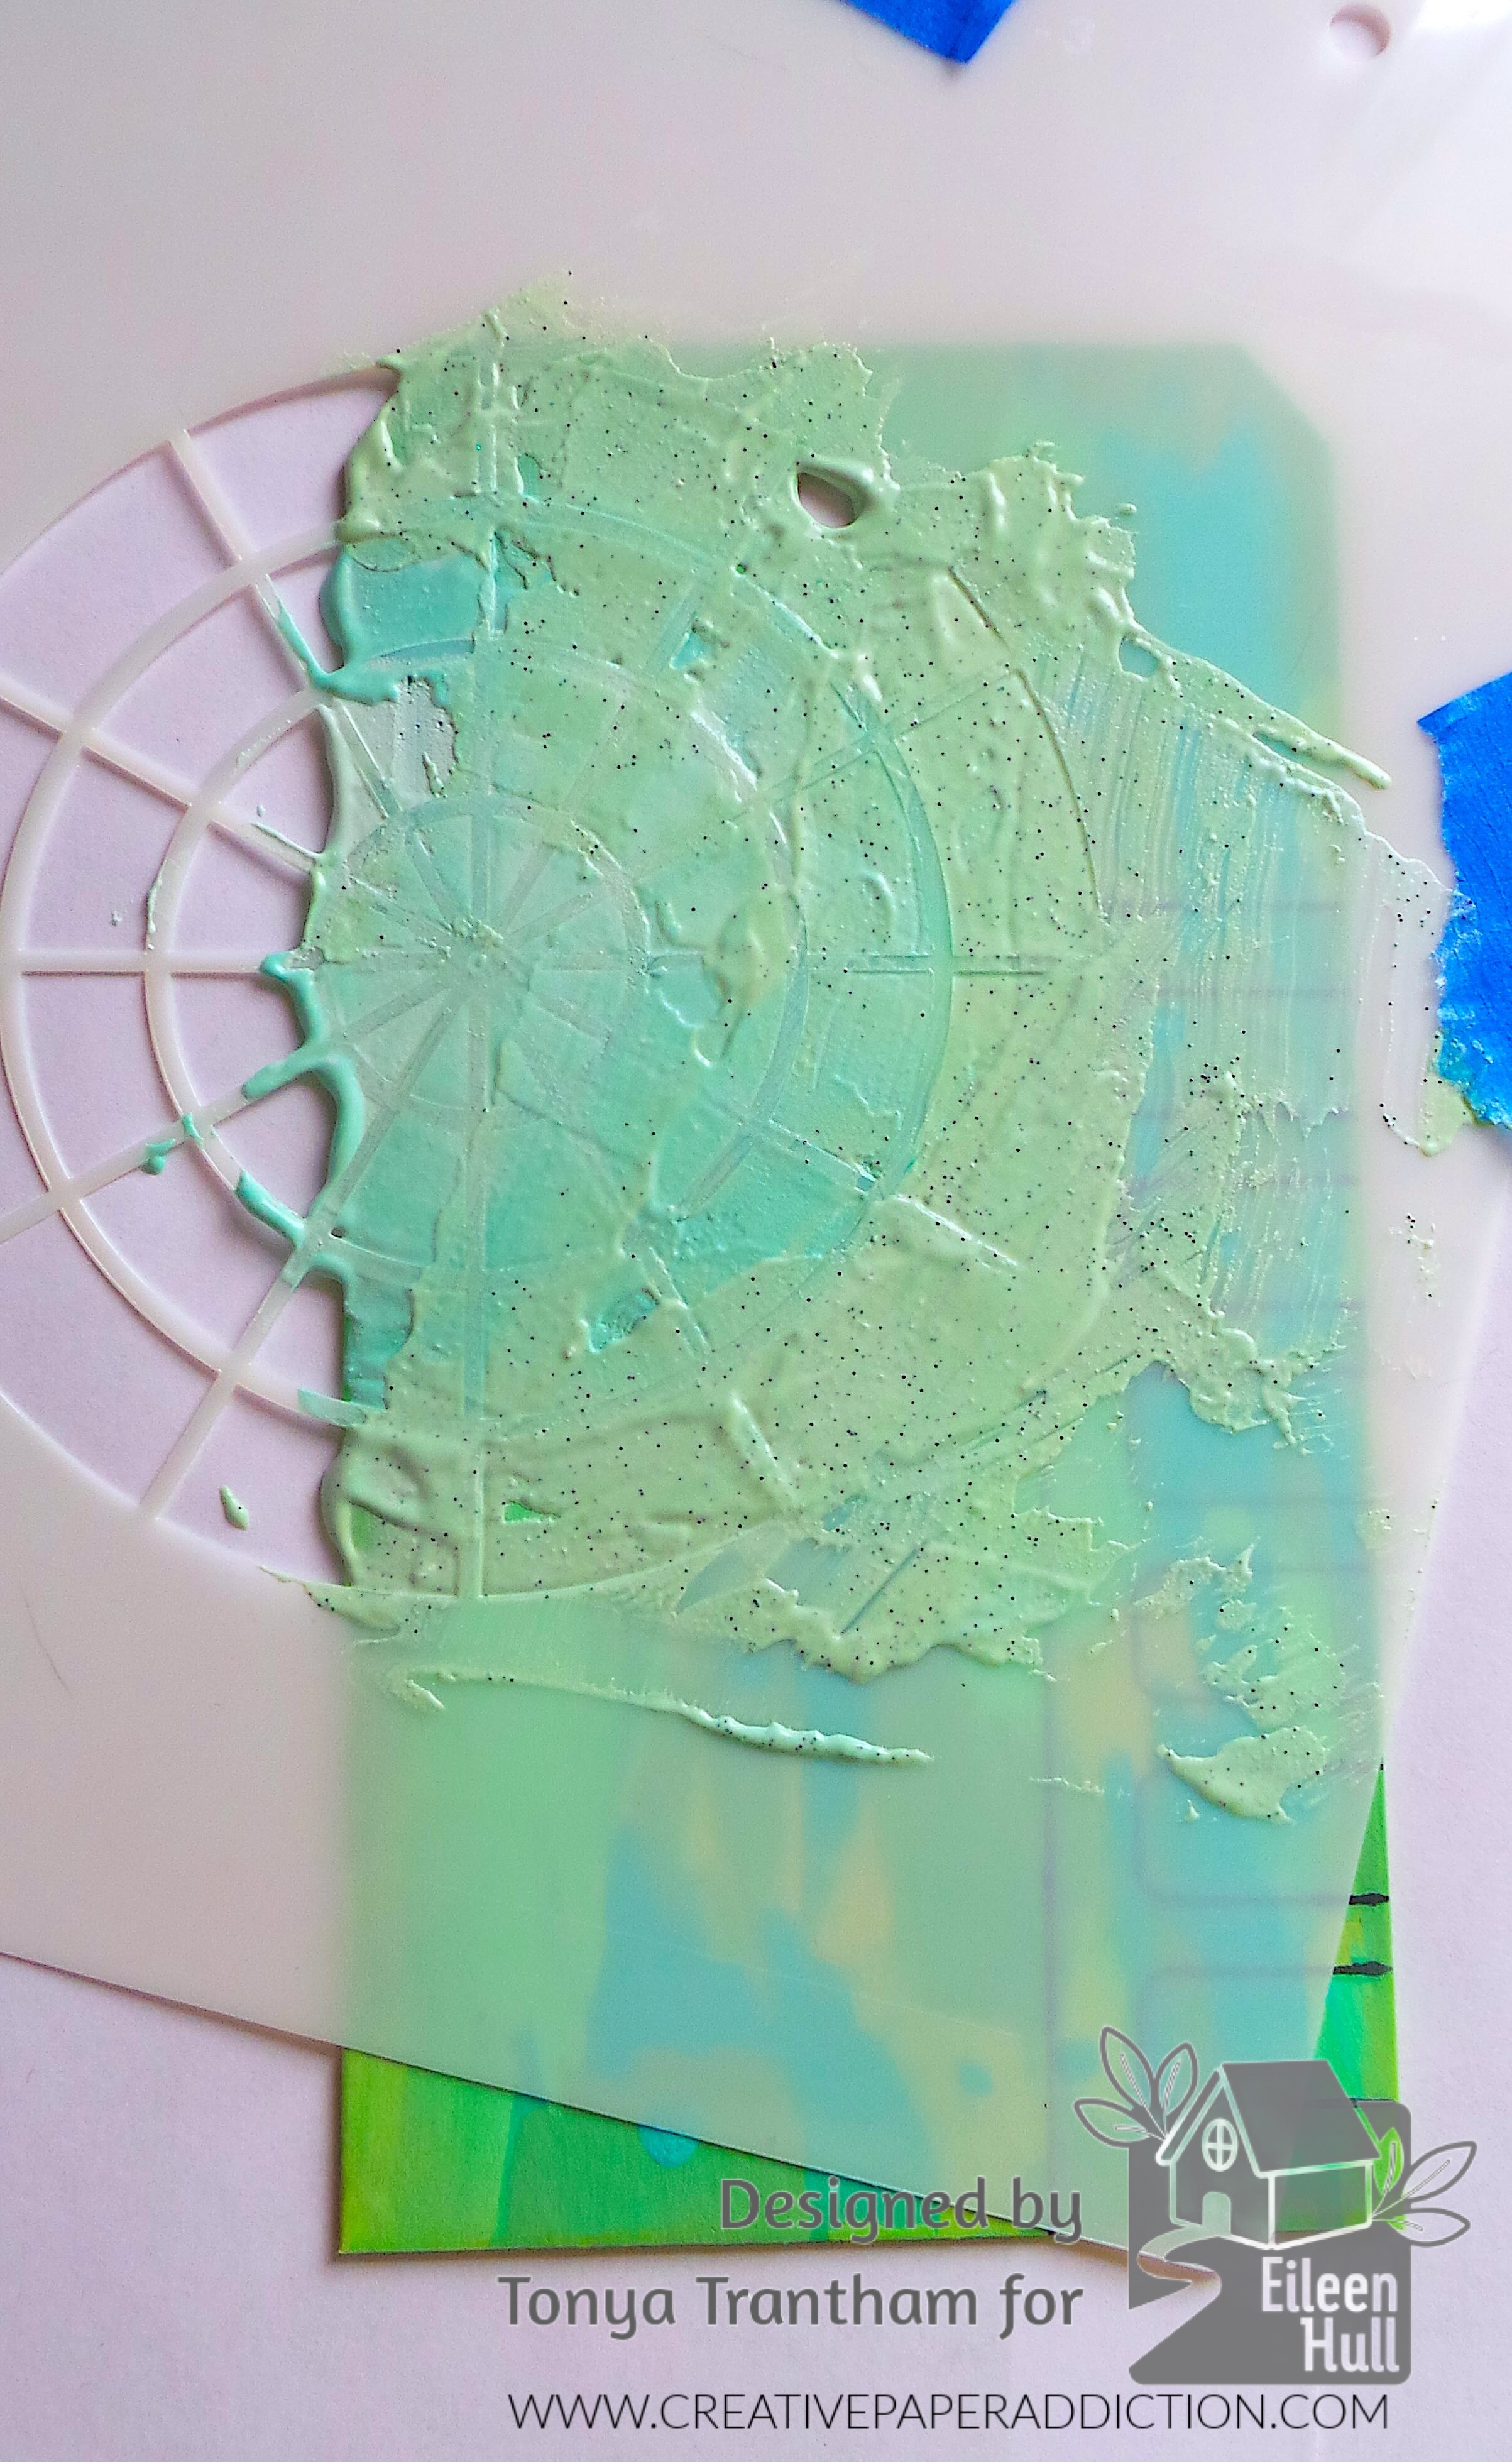
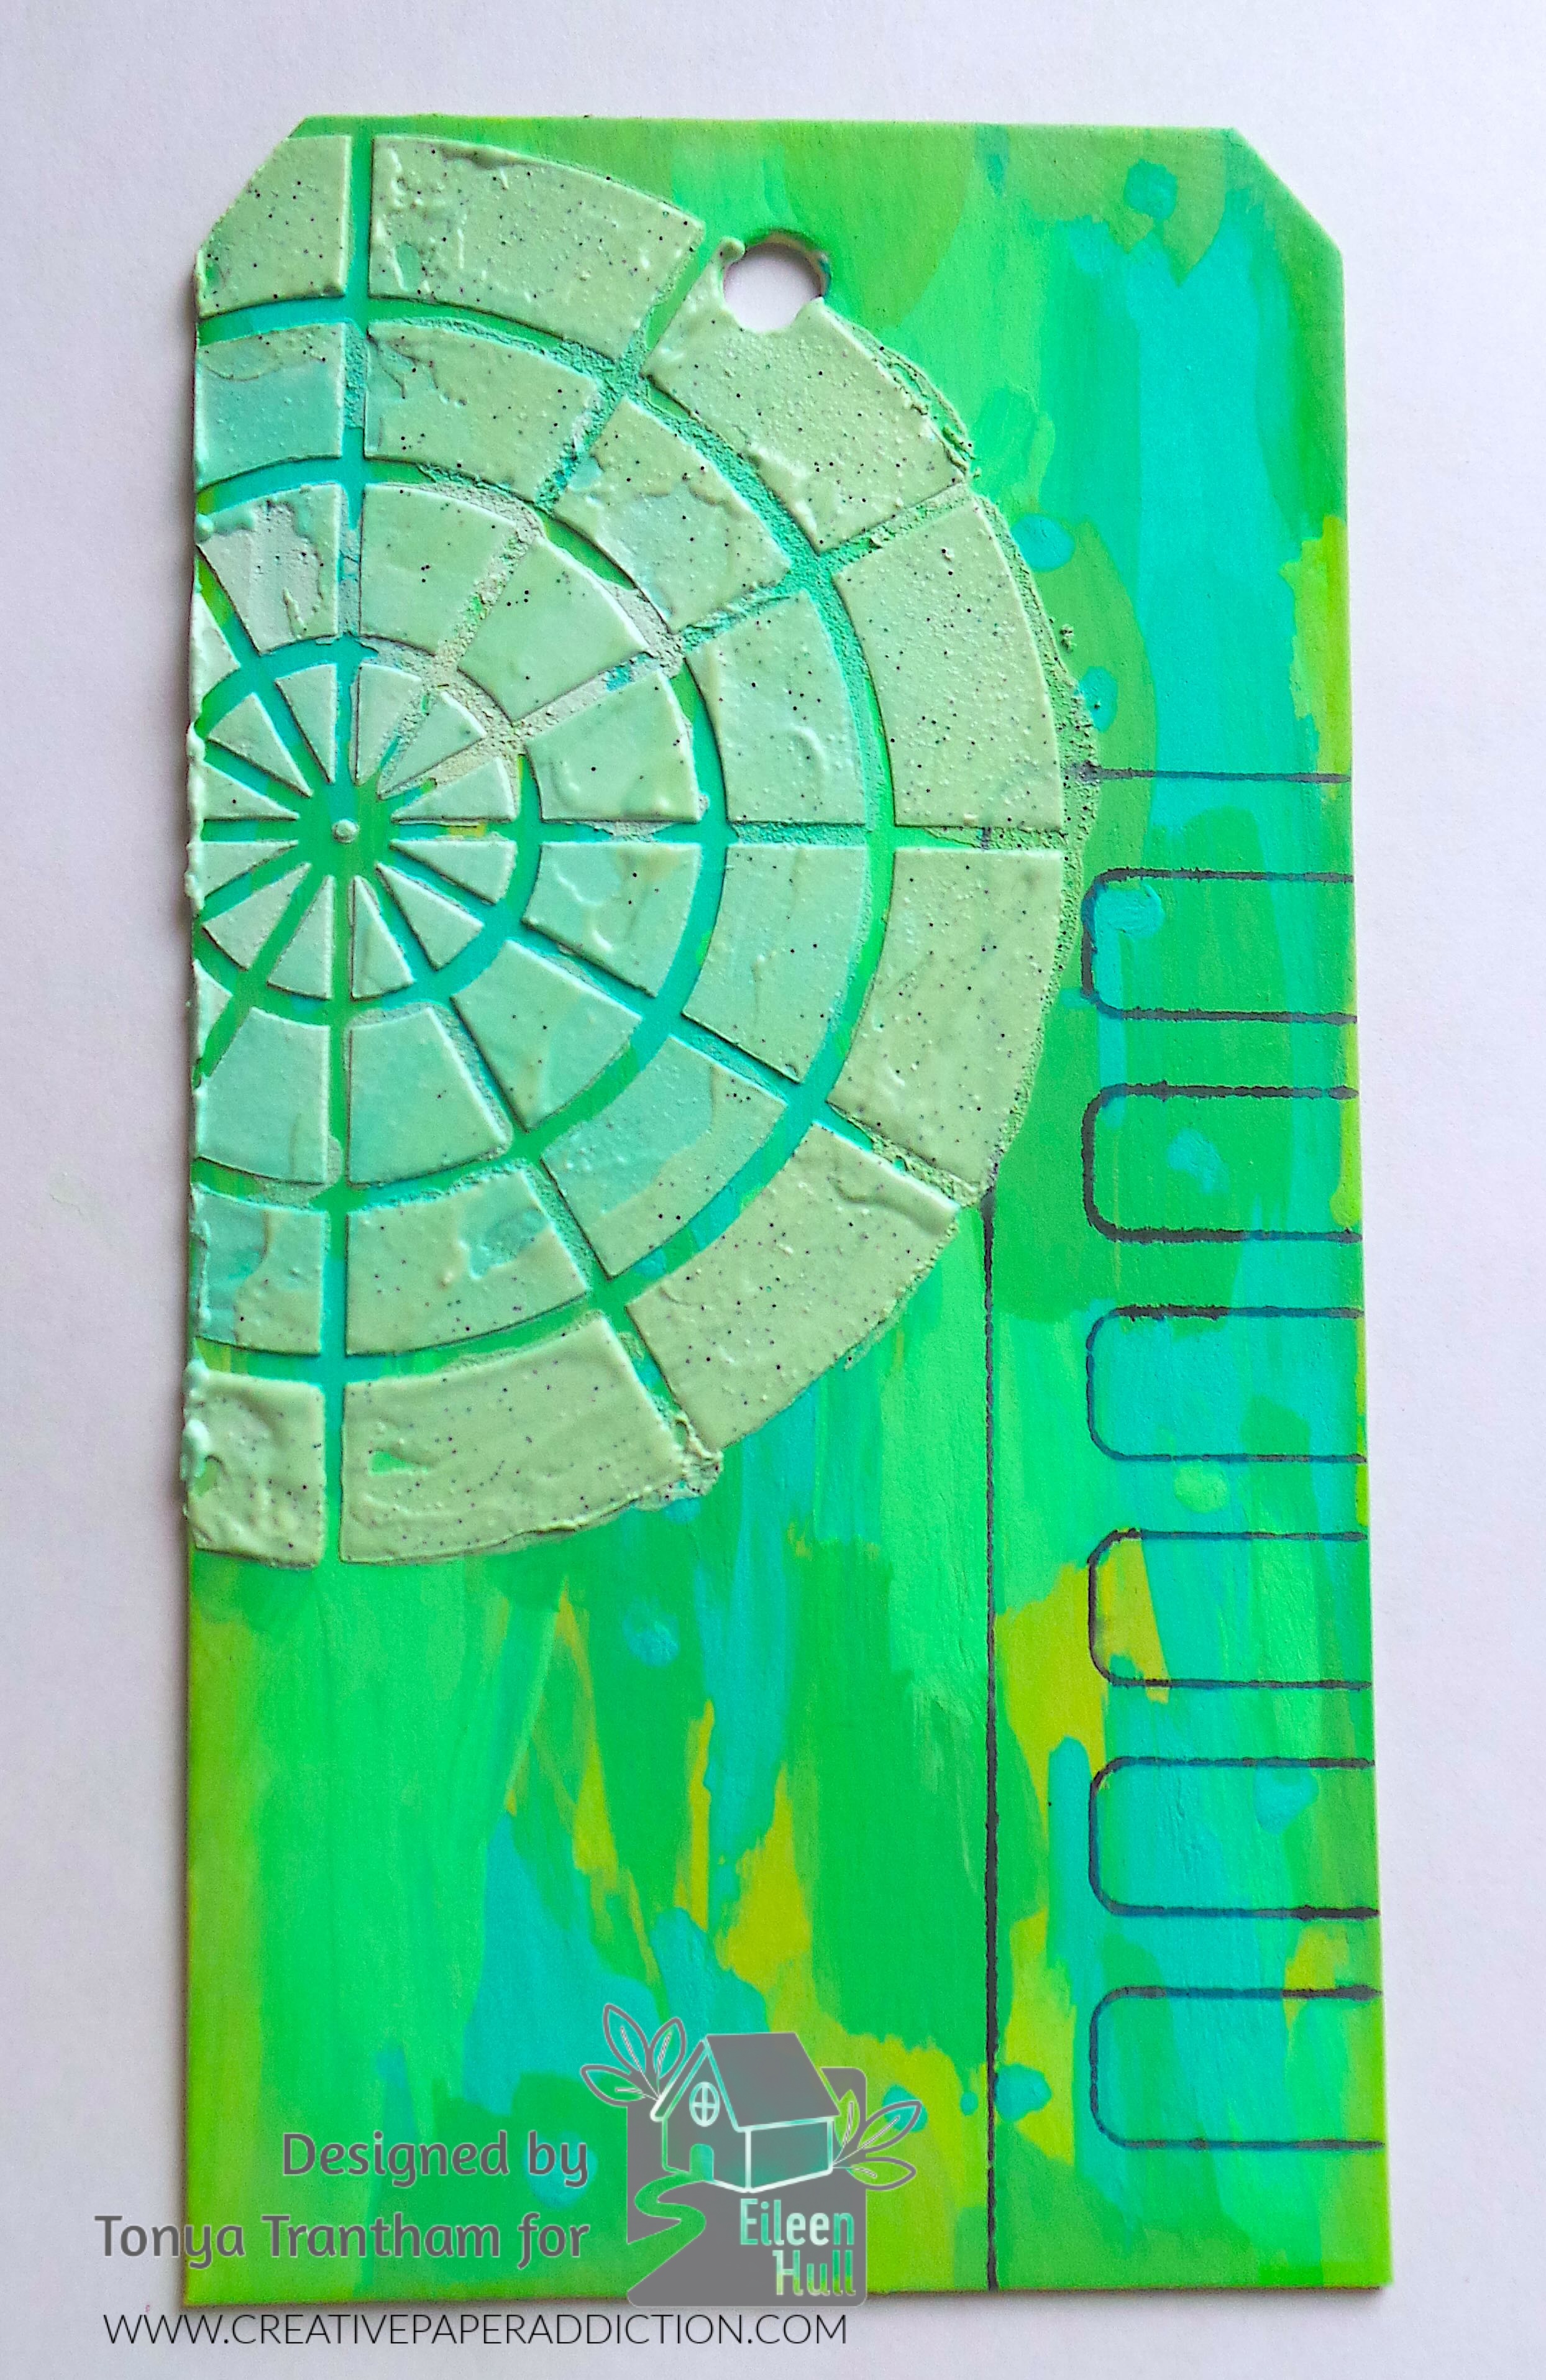
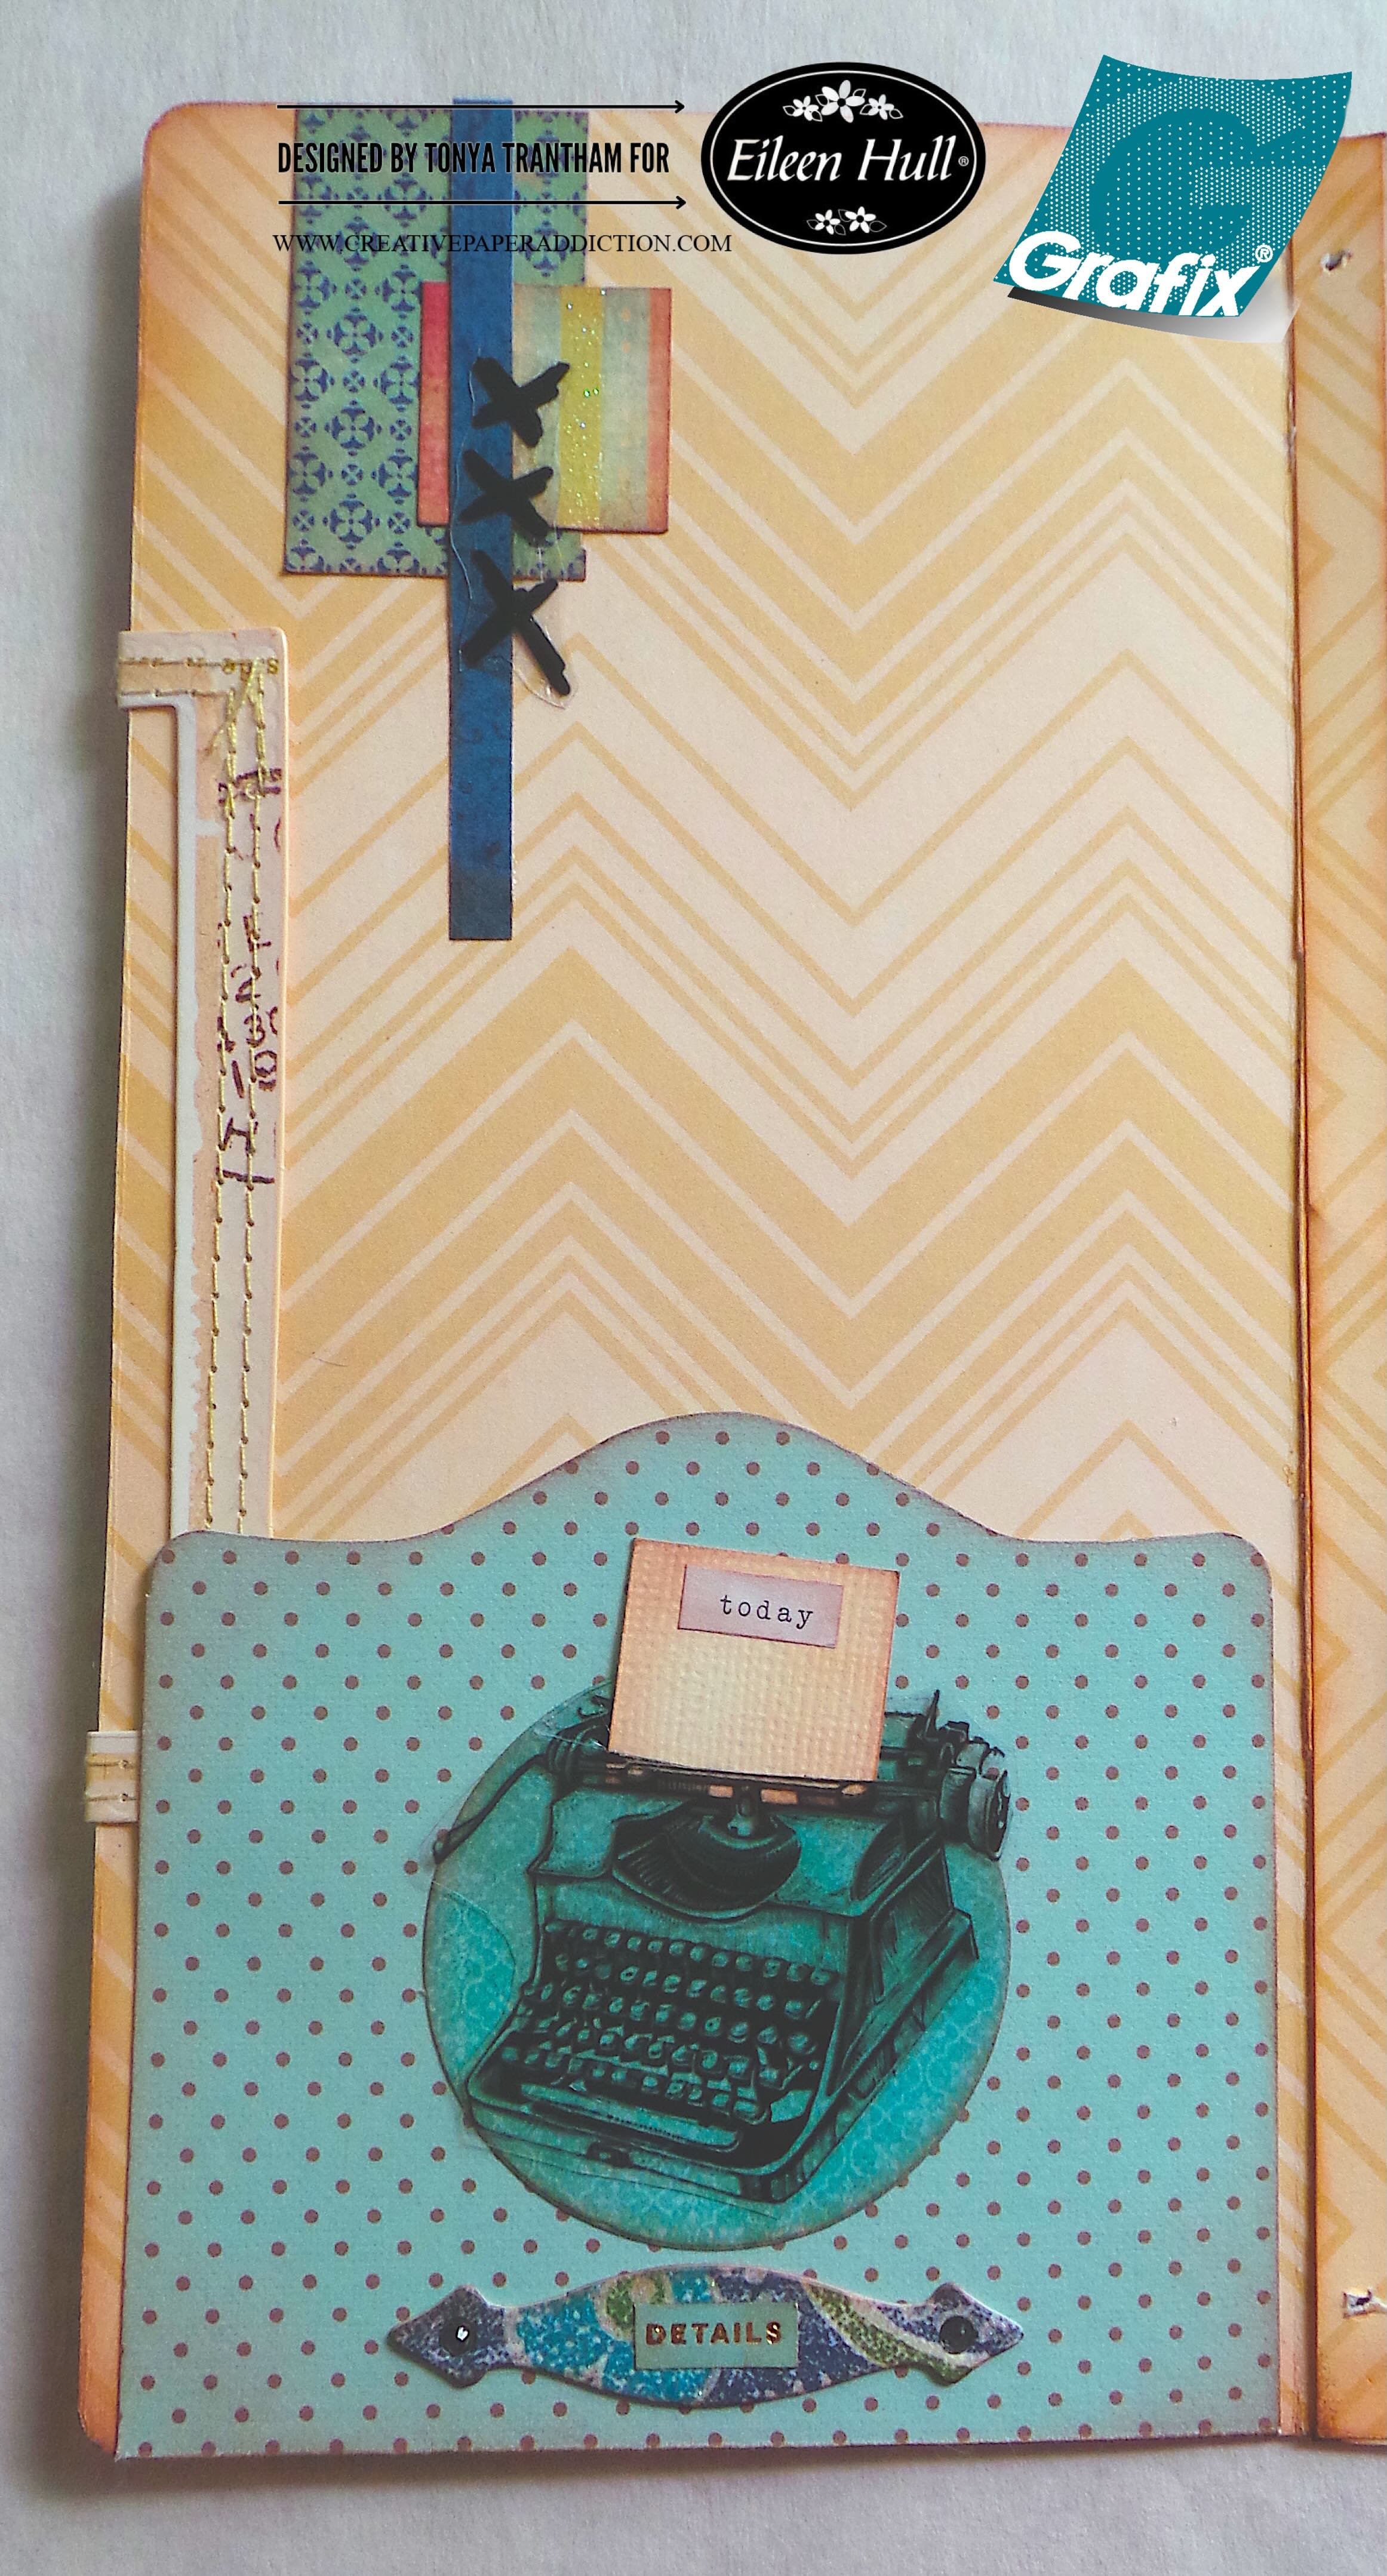
The inside front cover I cut a pocket from a portion of the Field Notes and Specimen Card Diecut. I did cut down the sides so it would fit on the inside cover of the journal. I lightly inked the edges and added glue to three sides before placing on the inside cover. I added scraps of patterned cardstock to the upper corner of the inside cover. I cut out a label from the Journal Hardware Diecut and the middle size circle from the Rainbow Wheels Thinlits. I inked the edges of both dies before adhering to the pocket.
I cut out the three stitches and the typewriter from the clear film. The typewriter I used a Knife and cut a slit in the top of it. I cut a piece of plain cardstock to fit into the slit of the typewriter. I lightly inked the edges and glued inside the slit of the typewriter. I dug into my stash of stickers and added the “today” to the paper in the typewriter and “details” to the label. I placed two Black Gems in the holes of the label.
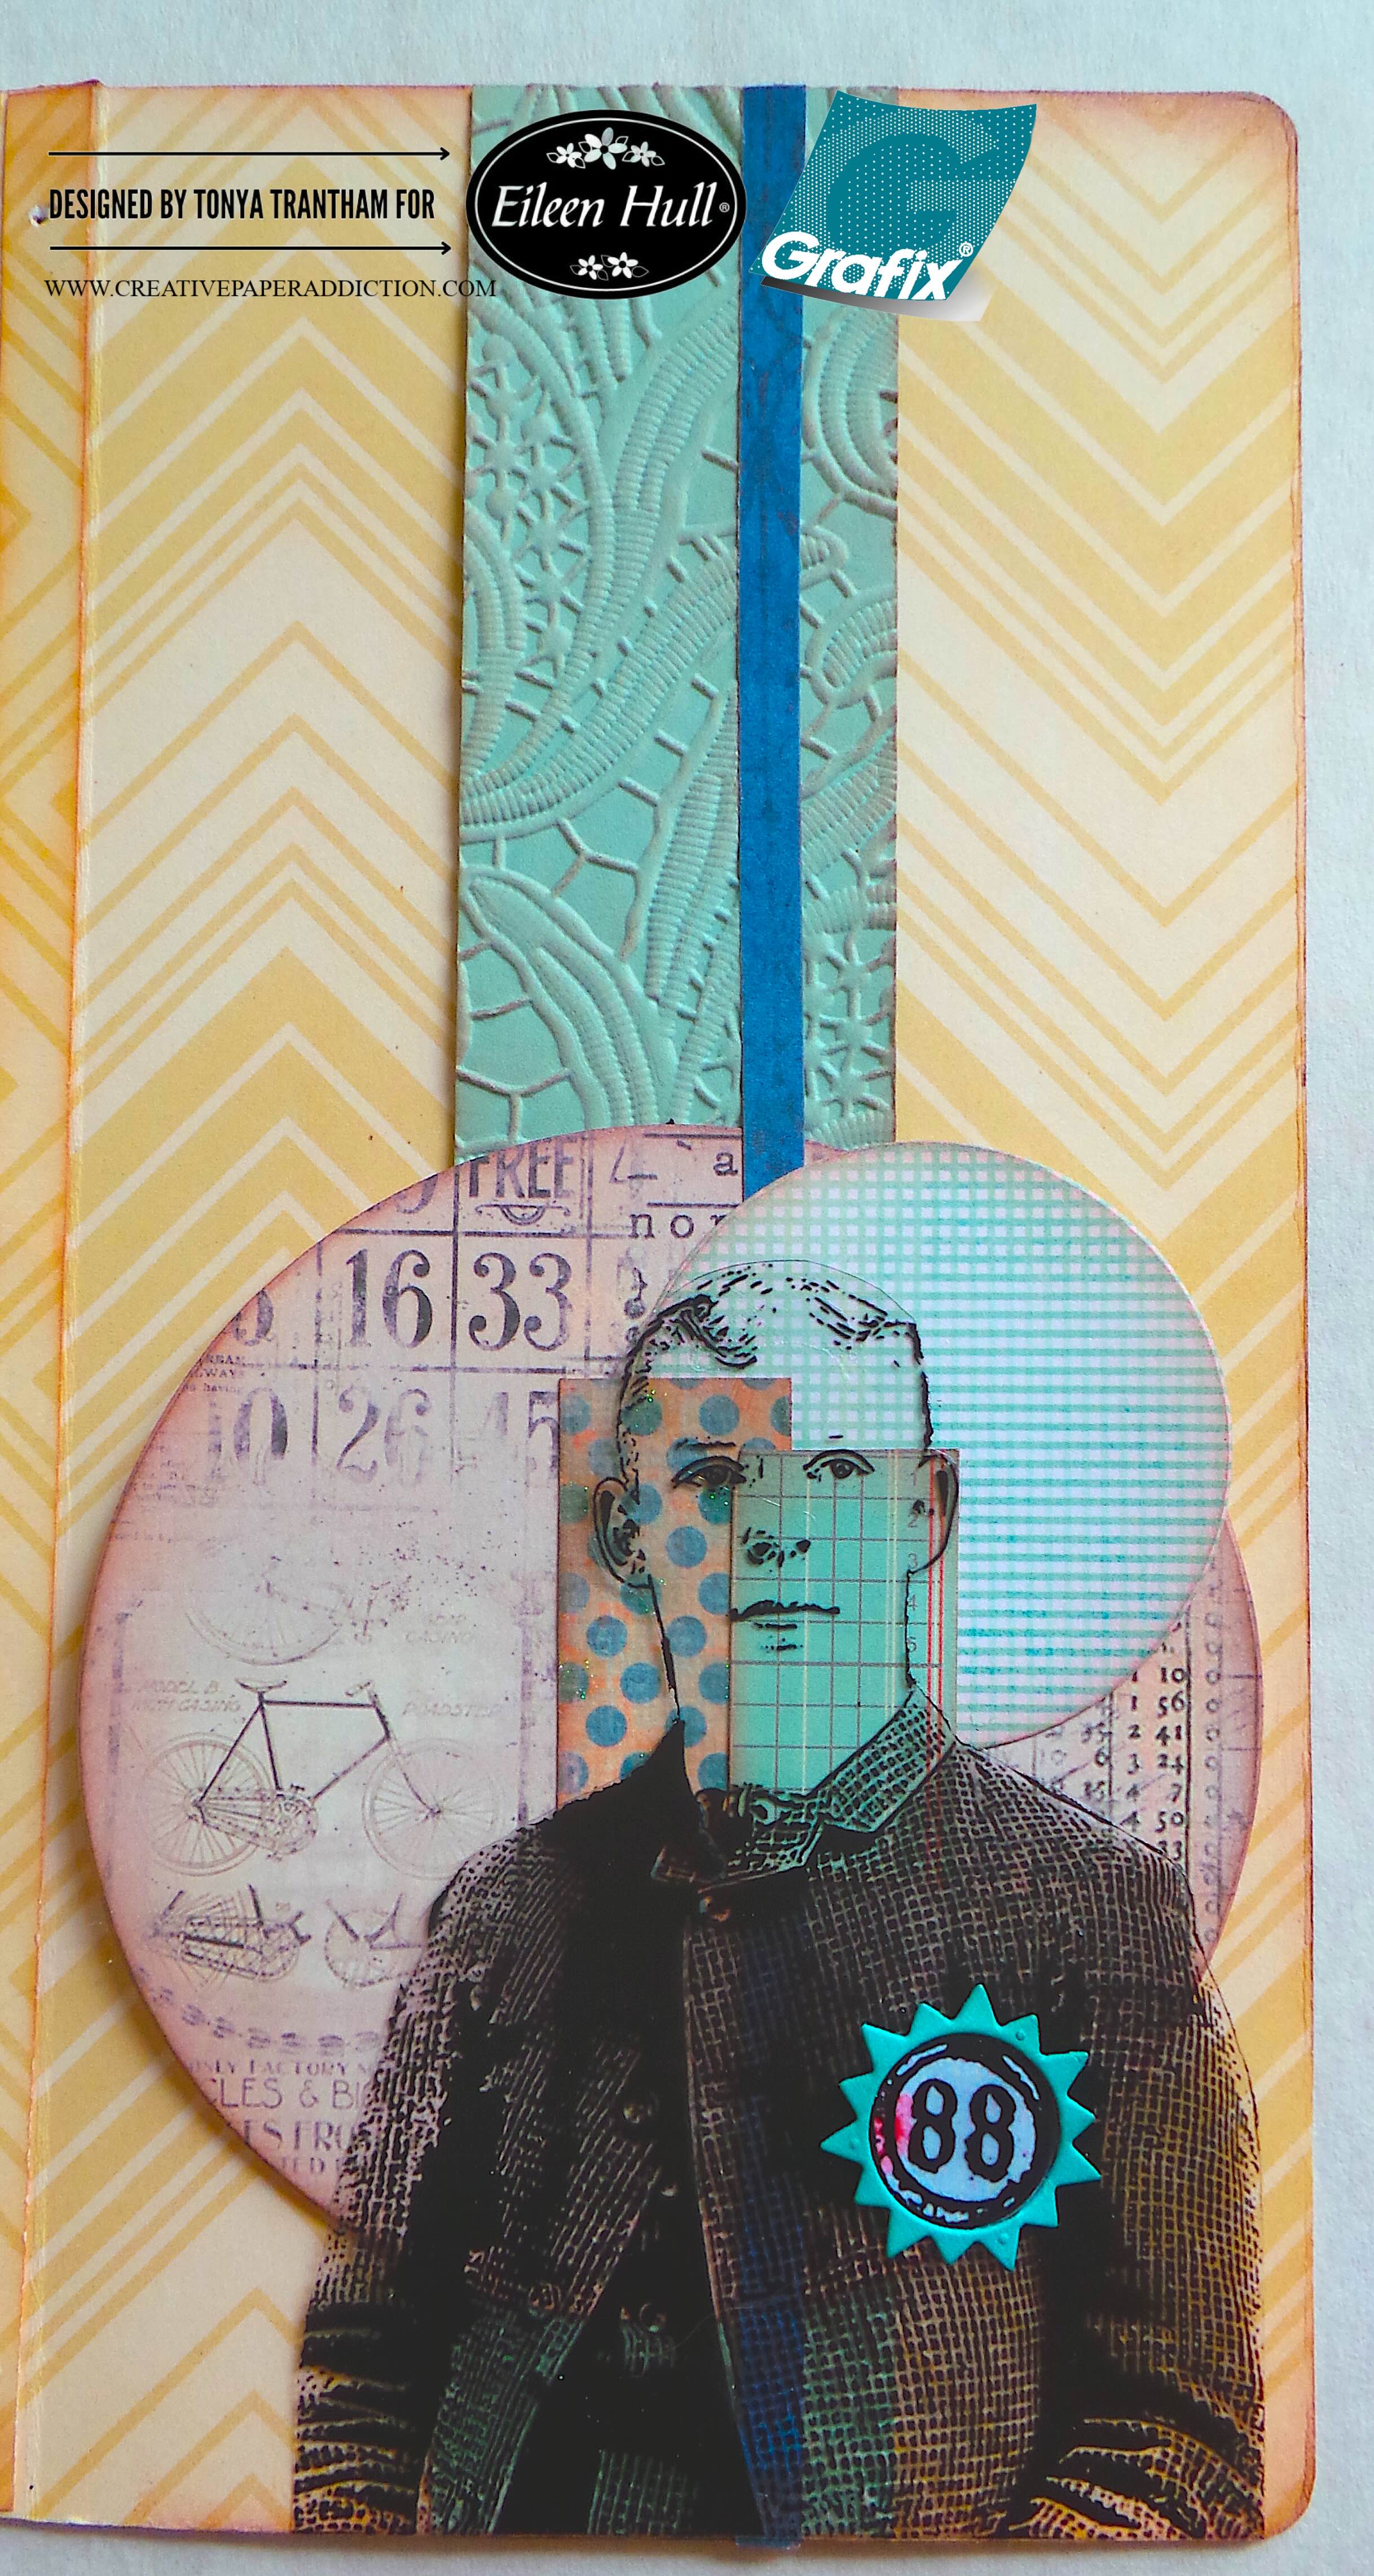
The back inside cover I embossed a piece of cardstock with the Lacy Leaves A5 Embossing Folder. I cut a strip of cardstock to fit the back of the journal and lightly inked with chalk ink. I added glue to each end of the cardstock and placed onto the inside cover. This creates a belly band to hold tags, journaling cards, etc. I cut the largest and middle size circles from the Rainbow Wheels Thinlits. I inked the edges with chalk ink along with a strip of blue cardstock and adhered onto the belly band. I added a couple scraps of patterned cardstock on top of the circles. I cut out the man from the clear film. I adhered on top of the circles. Next, I cut the sunshine from the Home Sweet Home Thinlits twice. One of each in plain and patterned cardstocks. I placed the outer part of the sunshine die over the coat pocket of man. I cut out the number “88” from the clear translucent. I glued on top of the inner circle from the sunshine and added to the center of the sunshine.
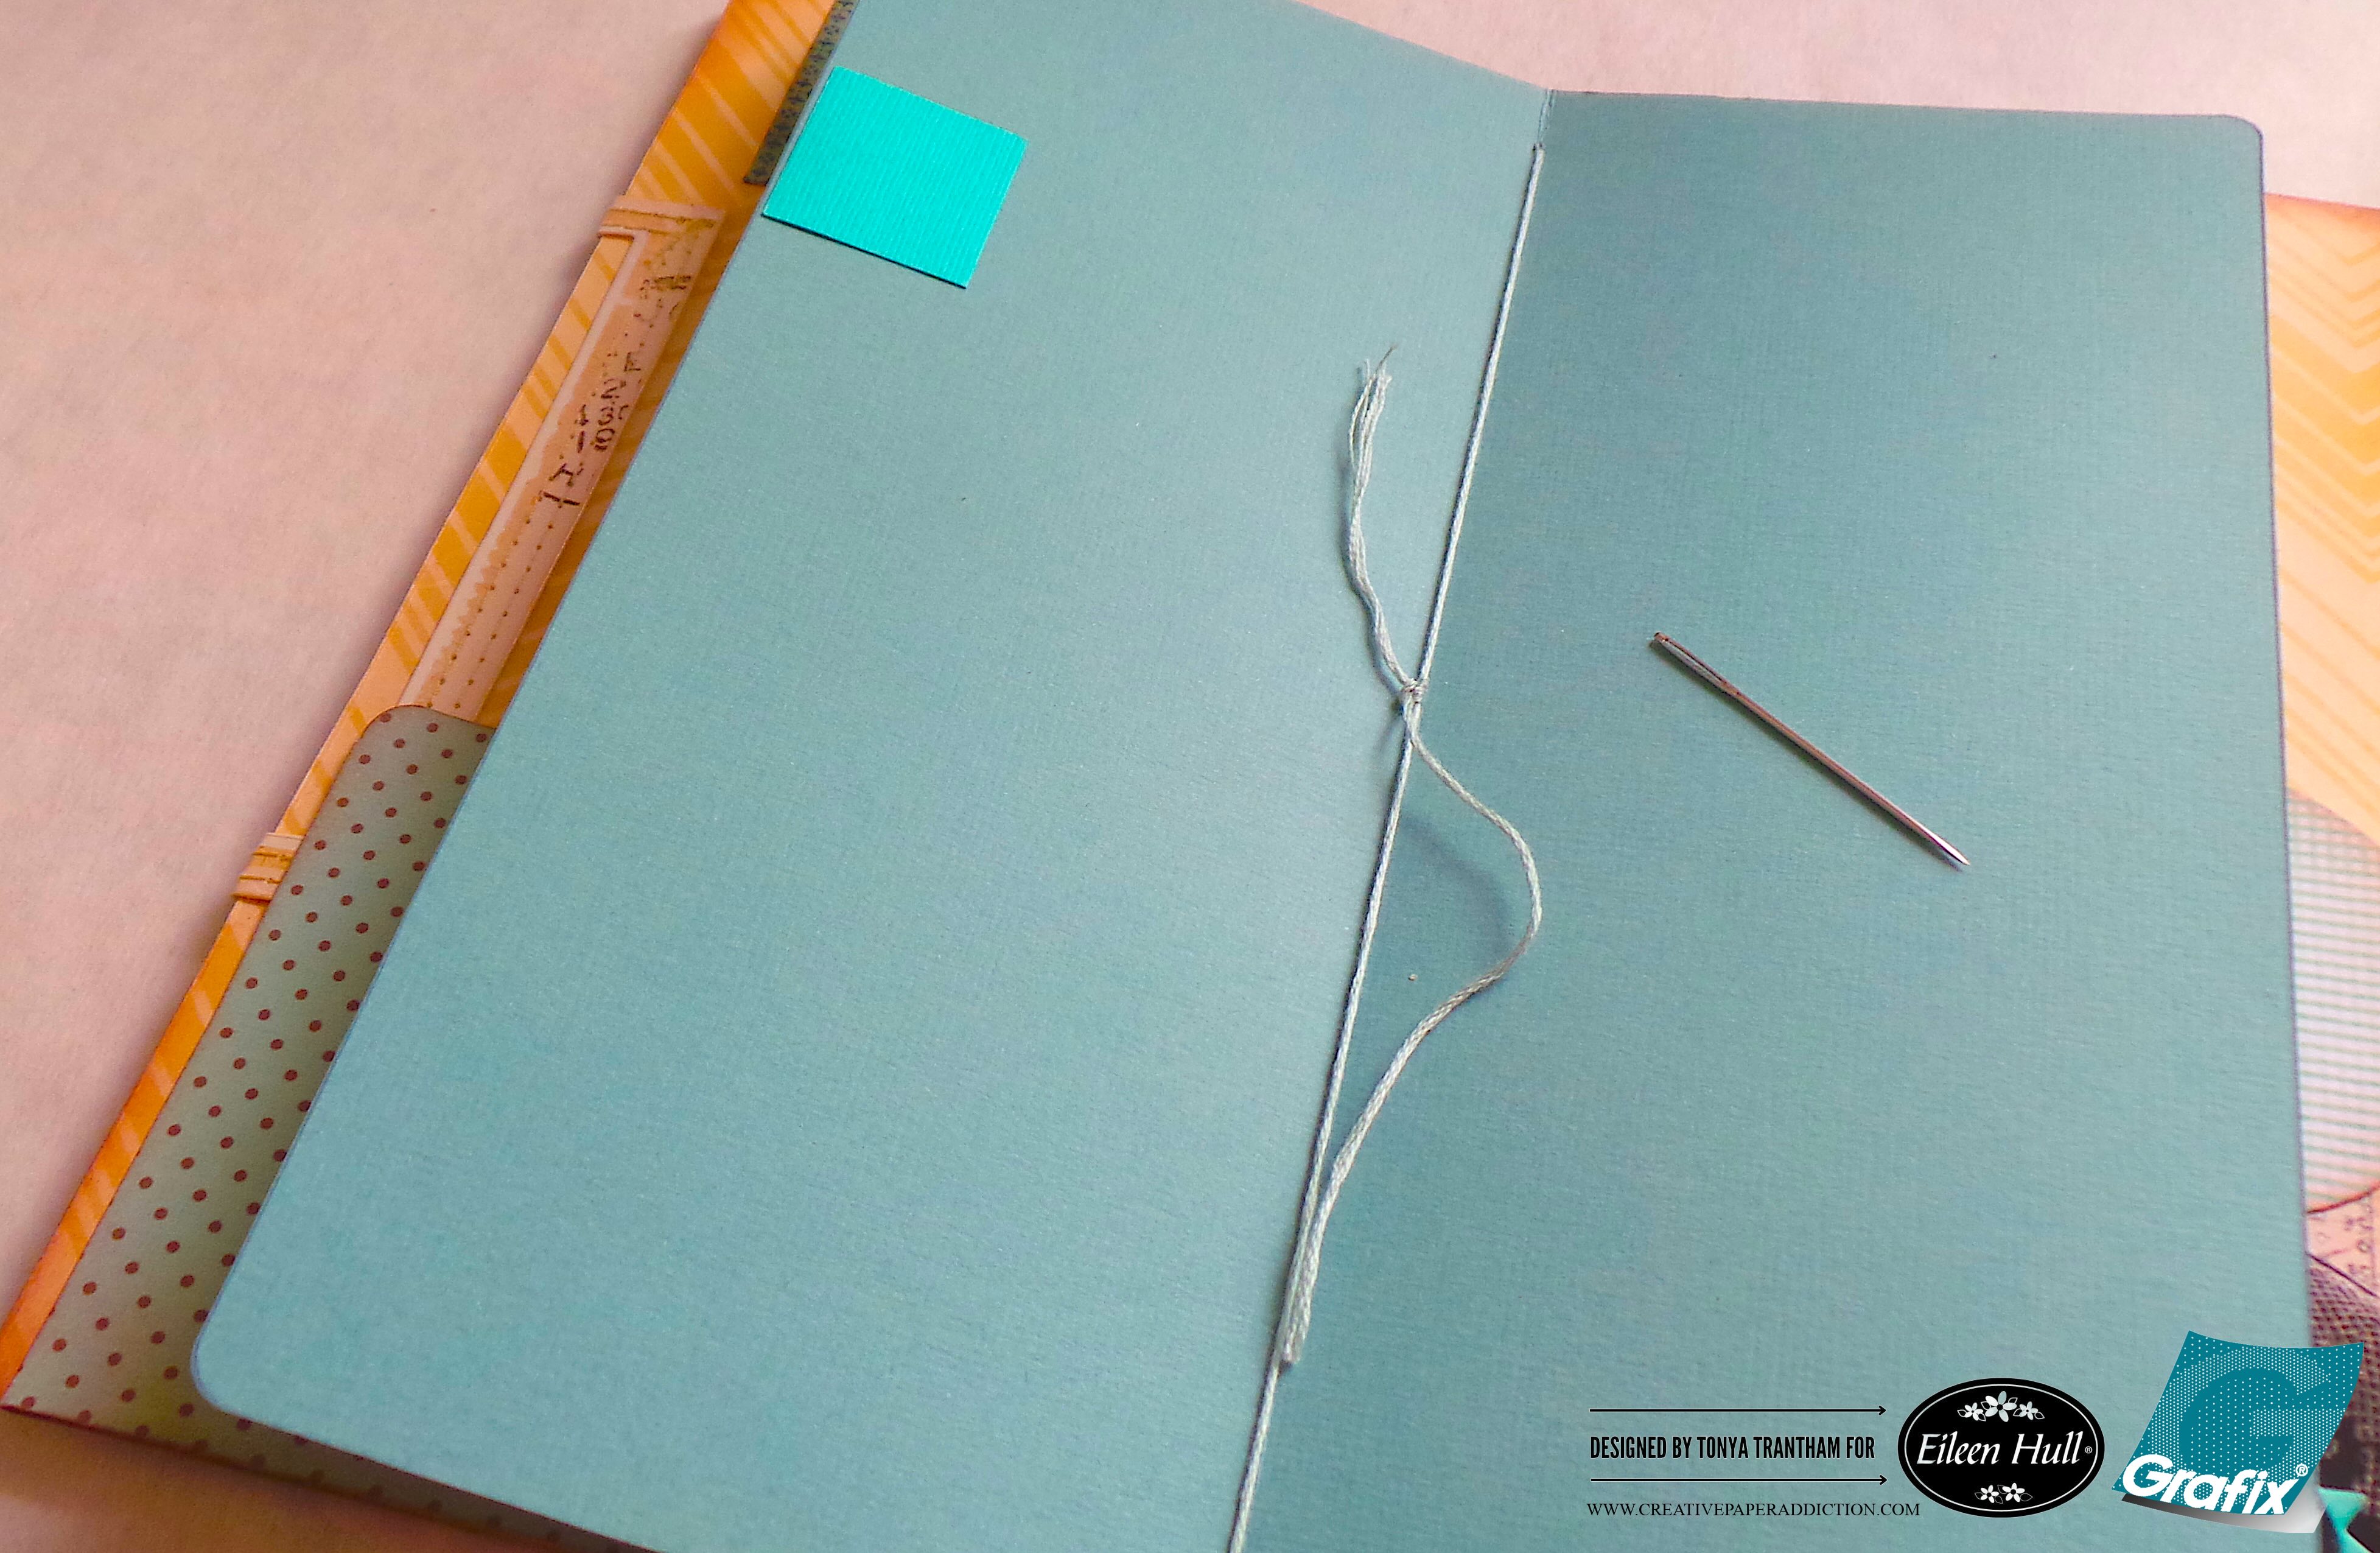
For the inside pocket I folded a piece of cardstock in half and placed below the cut lines of the spine of the Journal Diecut. I marked the holes on the inside of pocket and used the needle to poke holes in the spine. I threaded the needle with thread and stitched the pocket onto the spine of the journal. I added glue at each end to create the pocket.
I added the extra piece of Lacy Leaves A5 Embossing Folder to the outside of the pocket along with some strips of patterned cardstock. I cut a piece of patterned cardstock slightly smaller and glued to the back side of the pocket. I also added a few strips of cardstock to the back. Next I cut out two of the largest Tunnel Arches Thinlits. I cut out the windowsill from the Windowsill Flowers and Vase Thinlits. I folded a piece of cardstock to create a hinge.
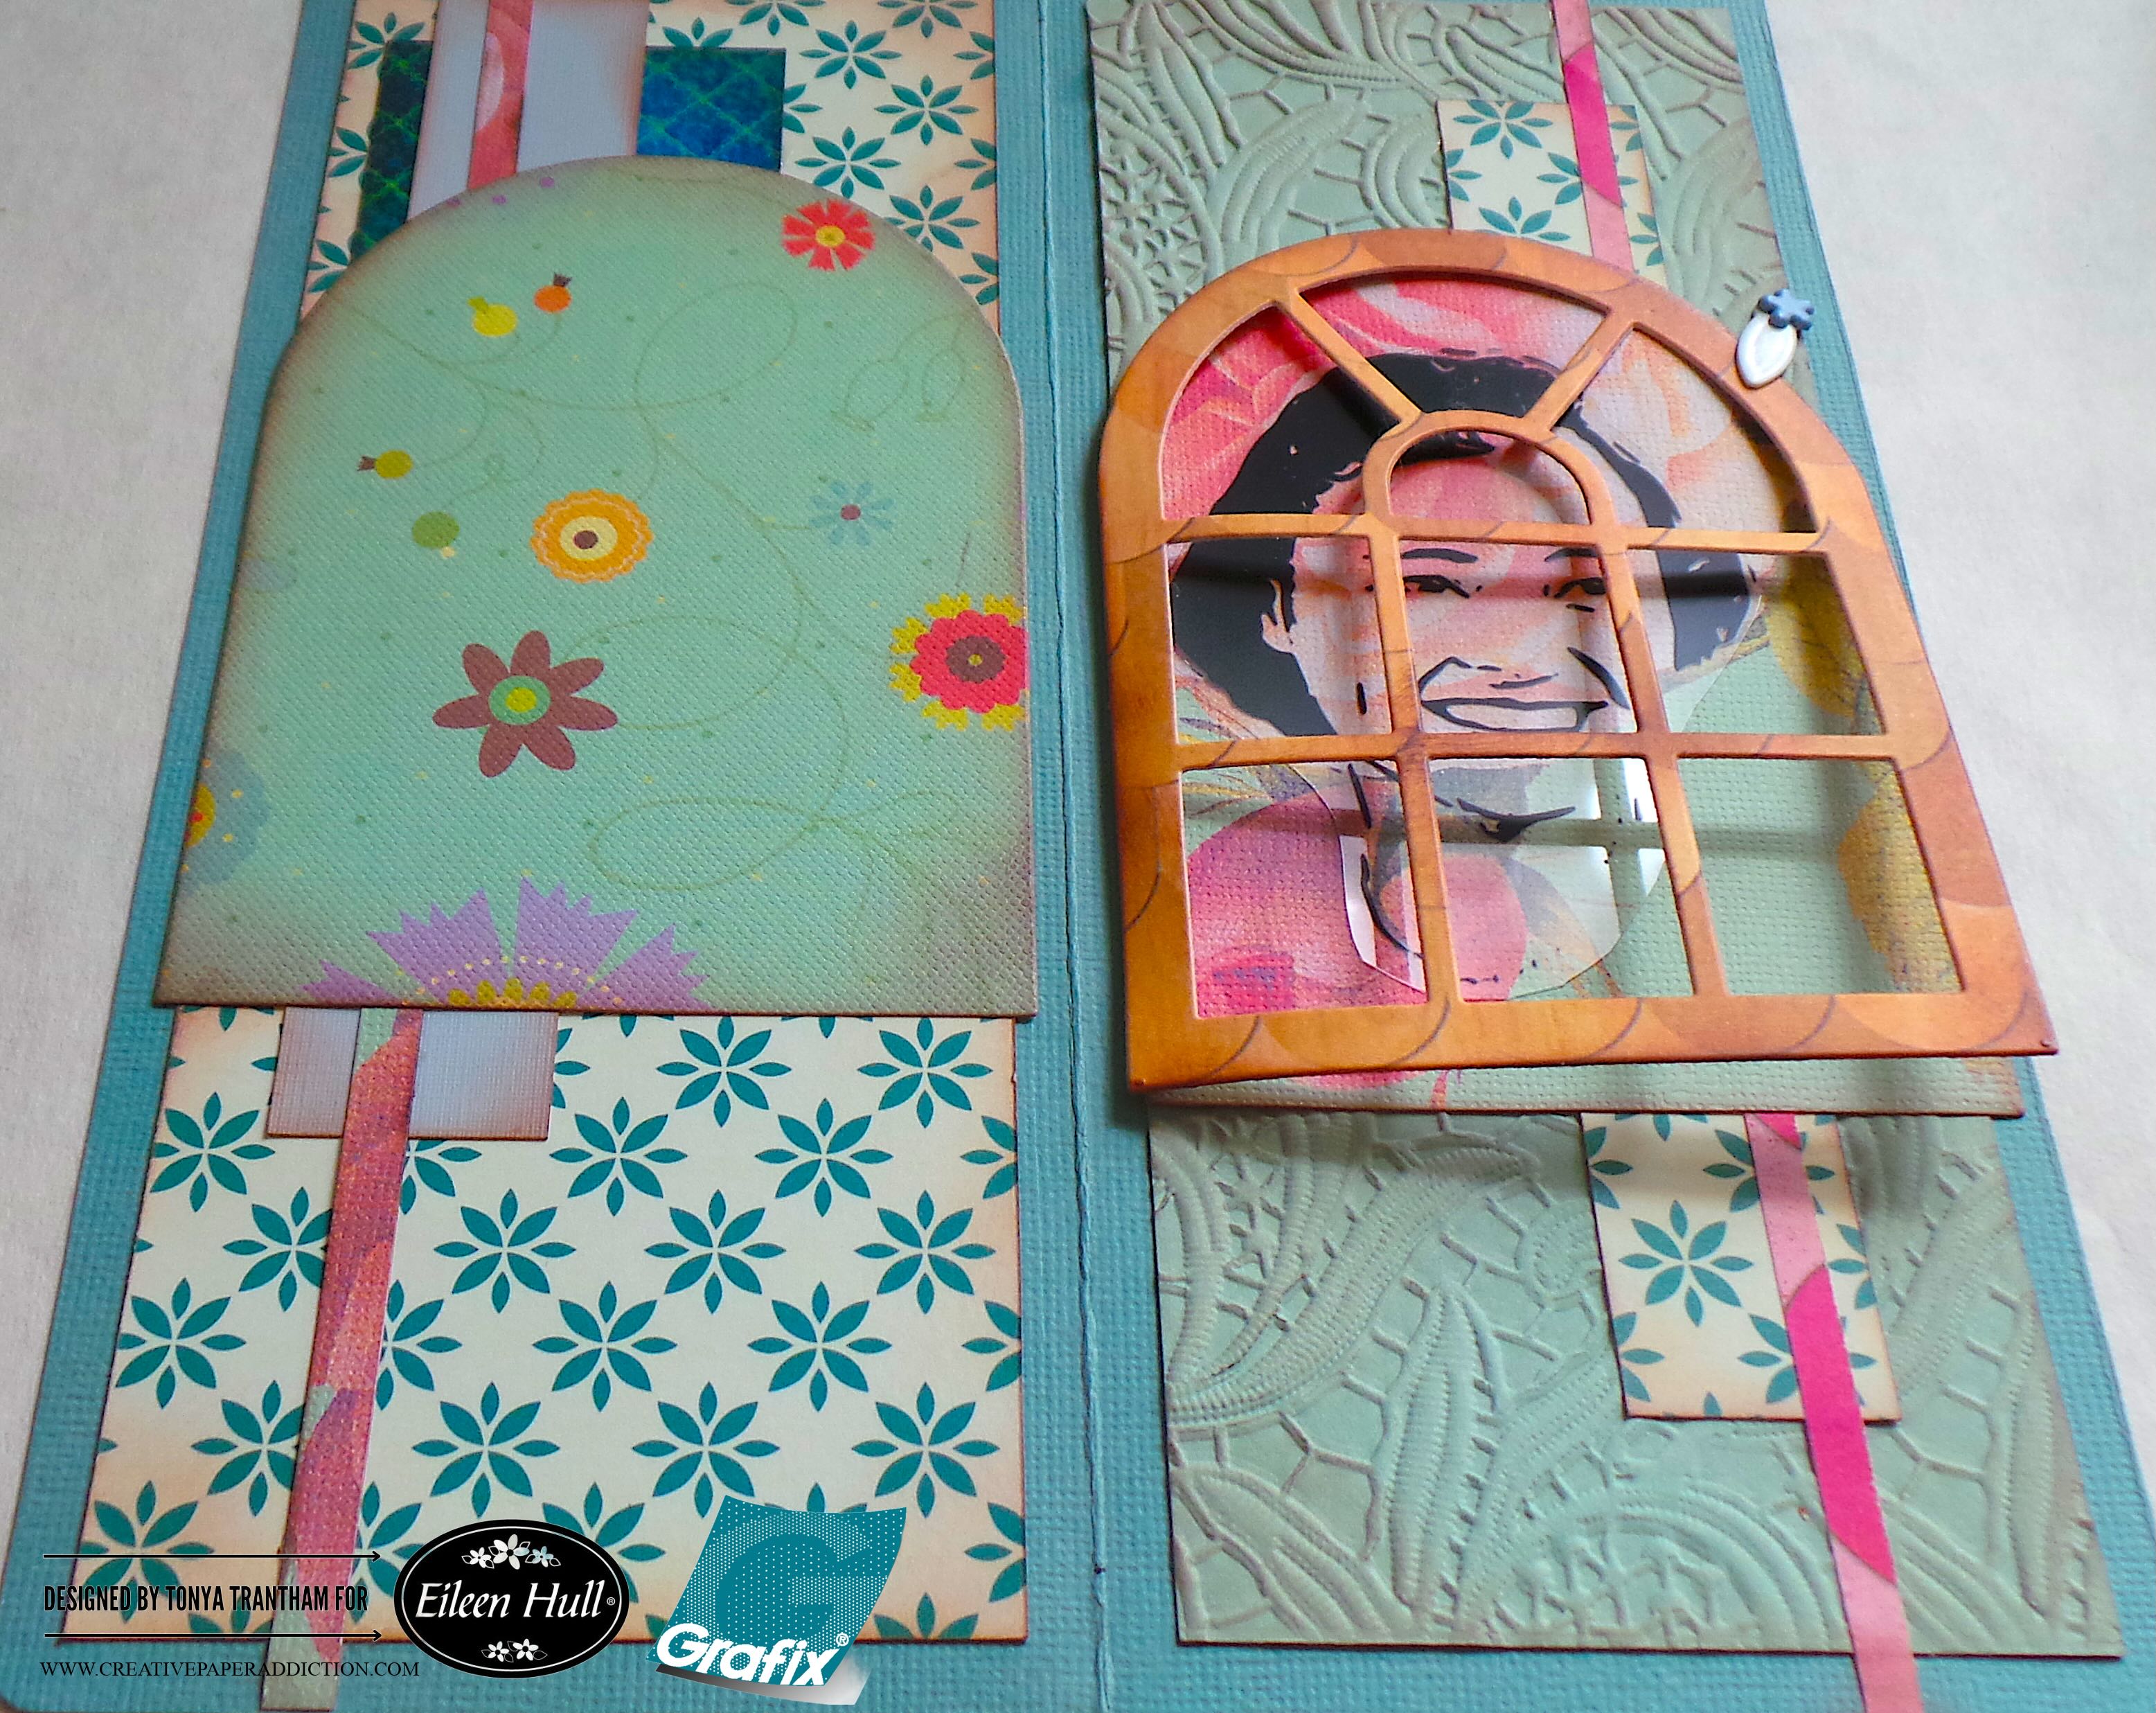
I adhered to the windowsill and the back of the tunnel arch. I glued to the pocket. I cut out the clear film of the woman and adhered to the tunnel arch. Next I punched a hole next to the tunnel arch and attached a closure with a flower brad.
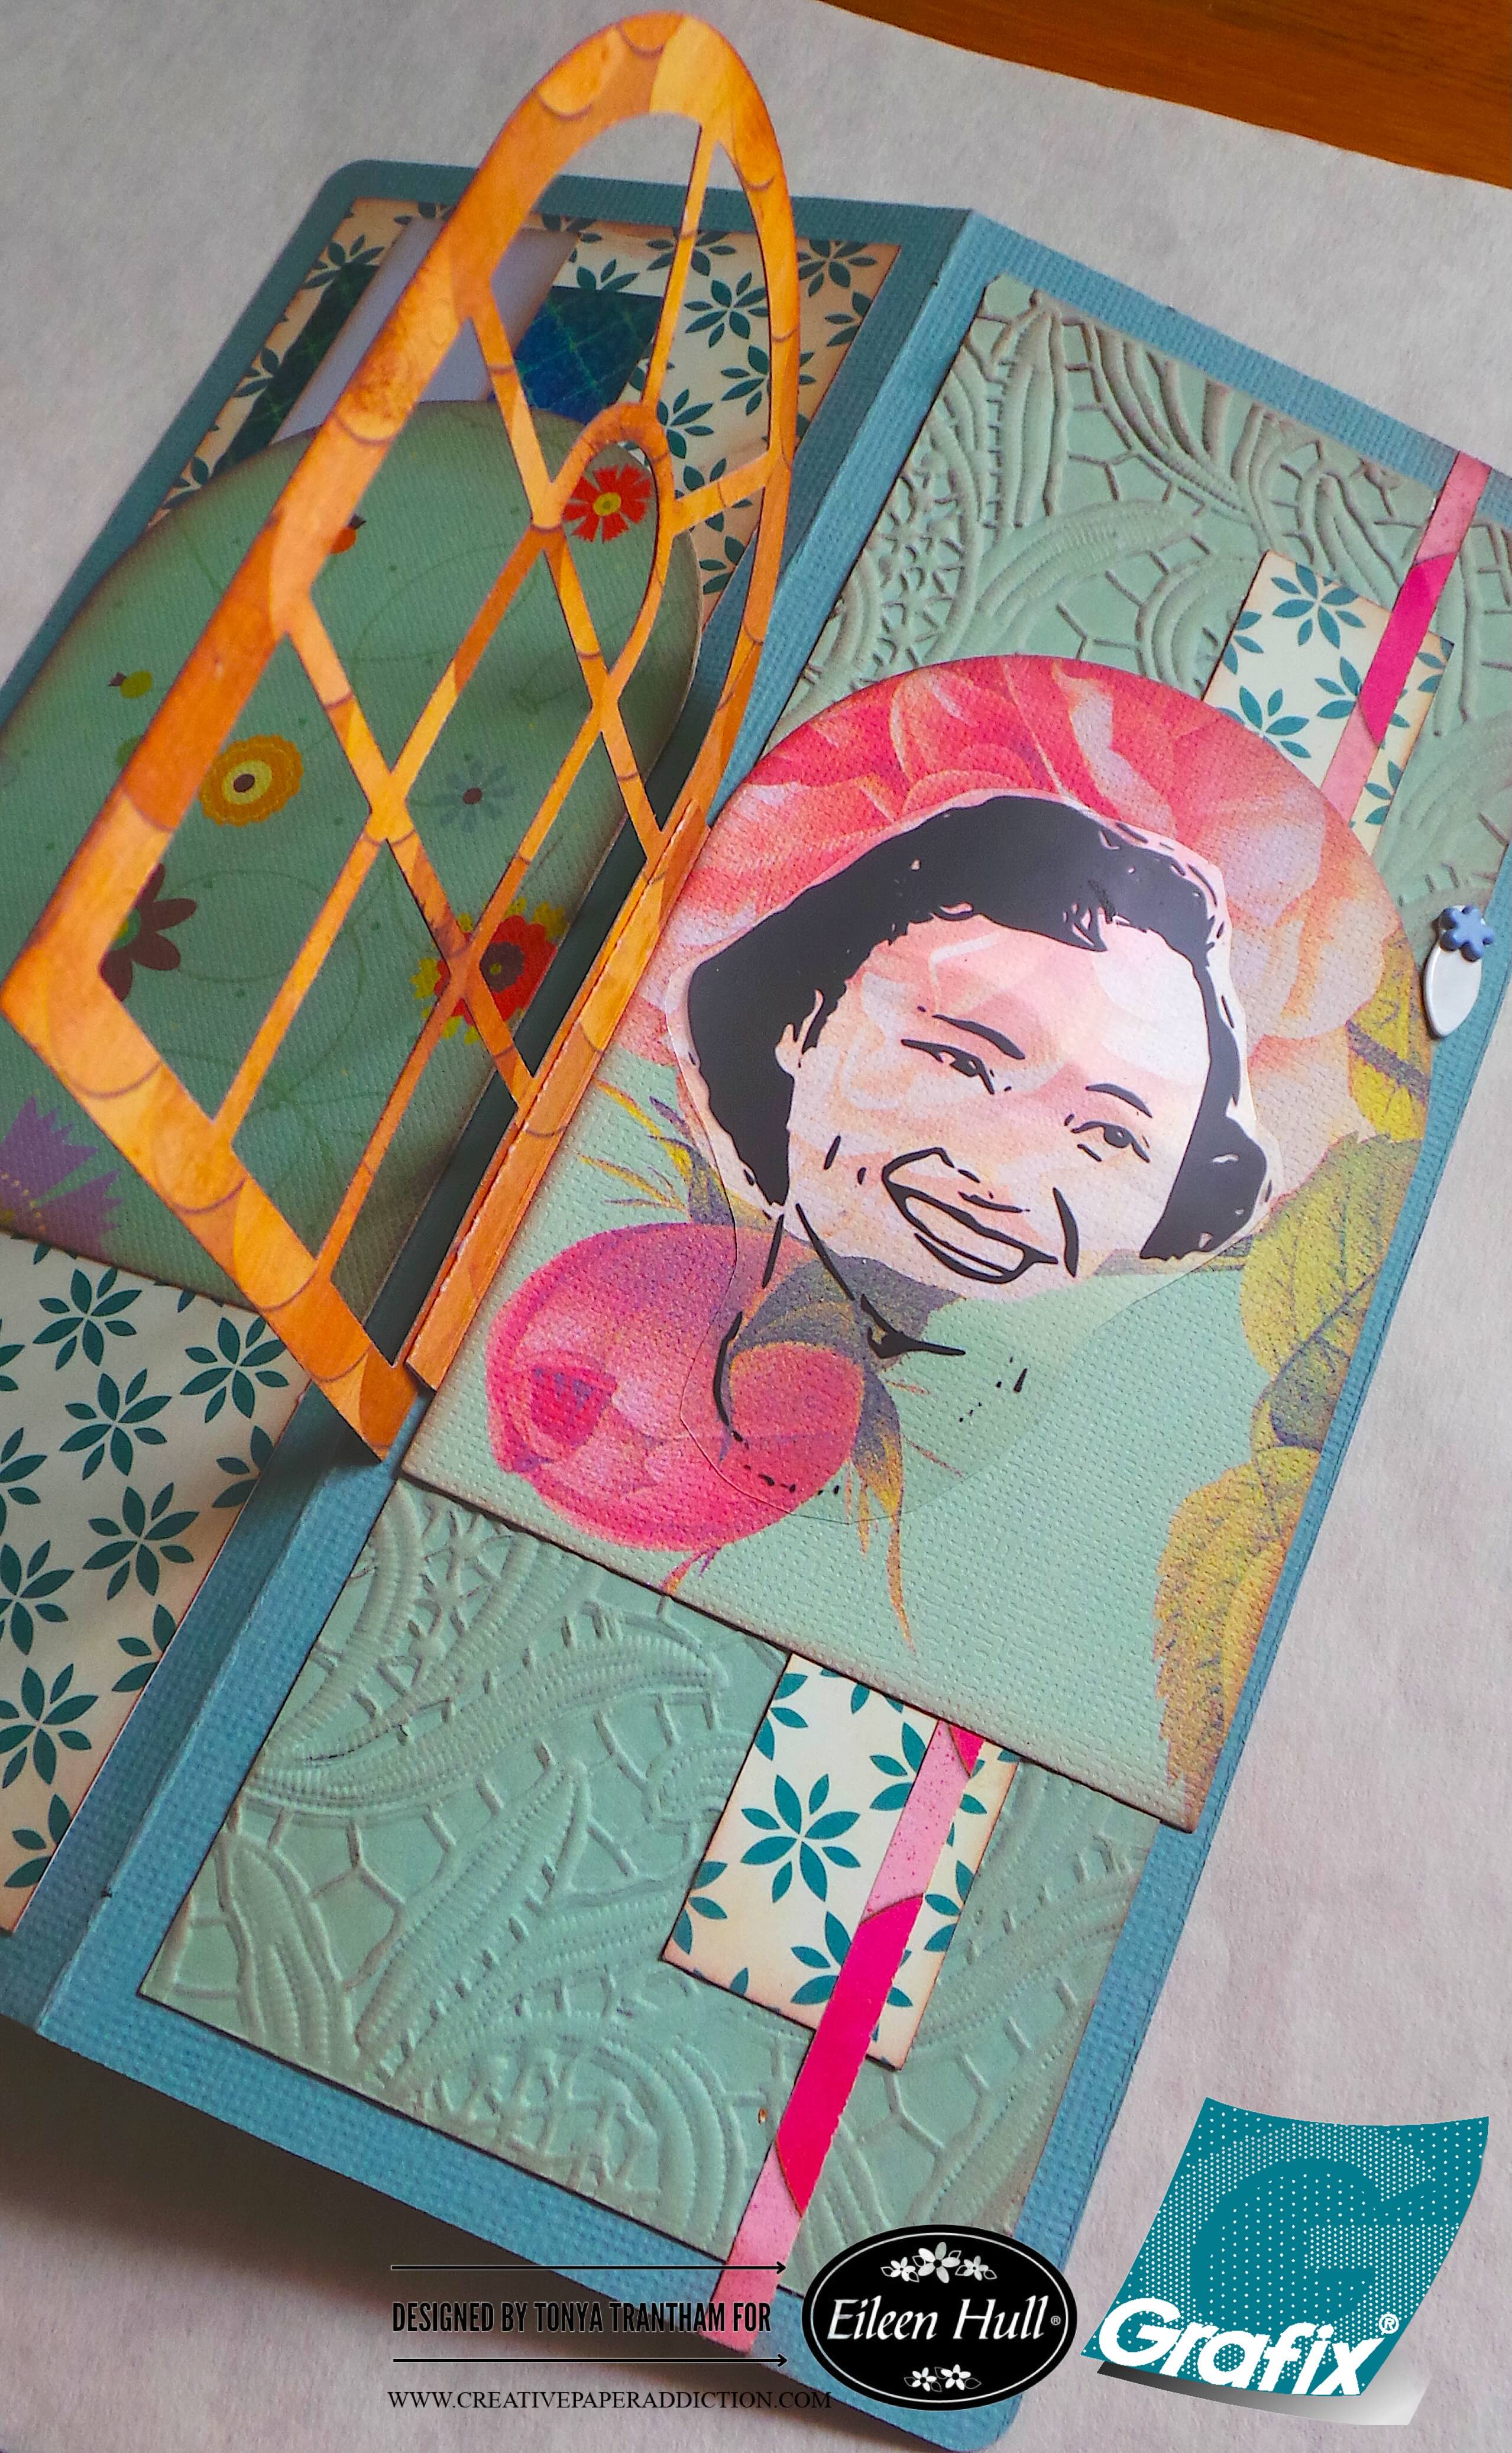
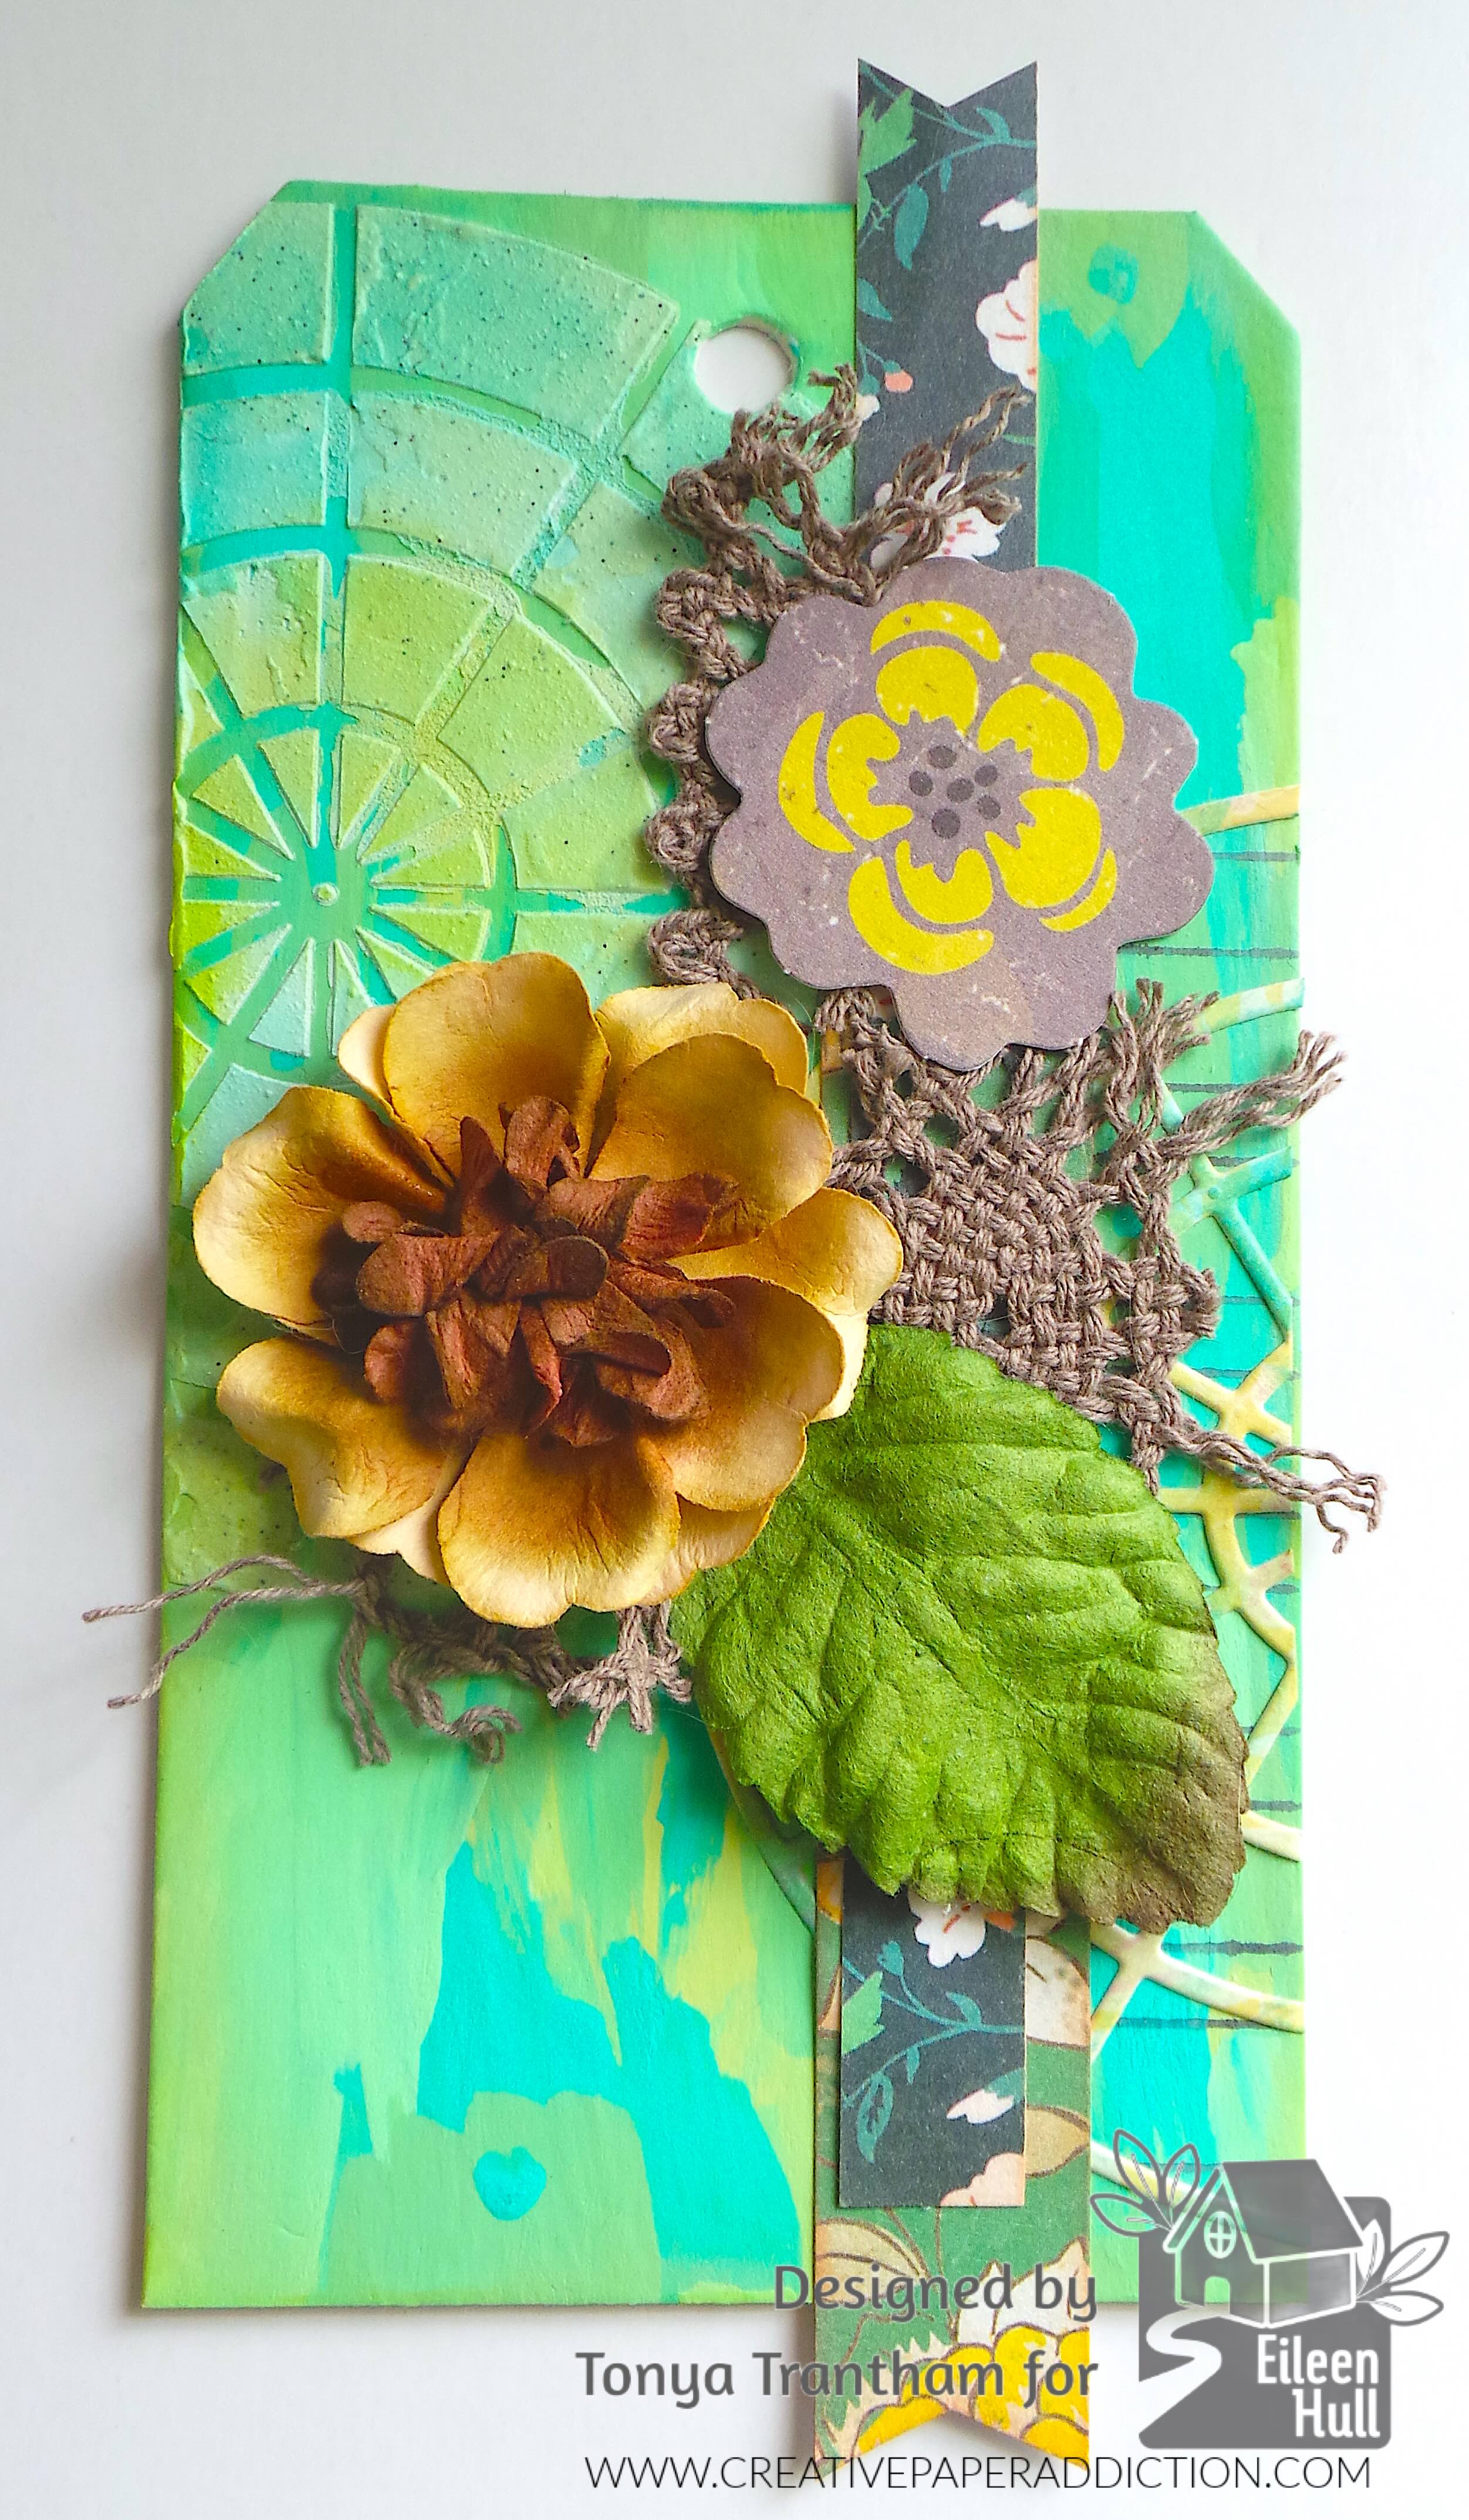
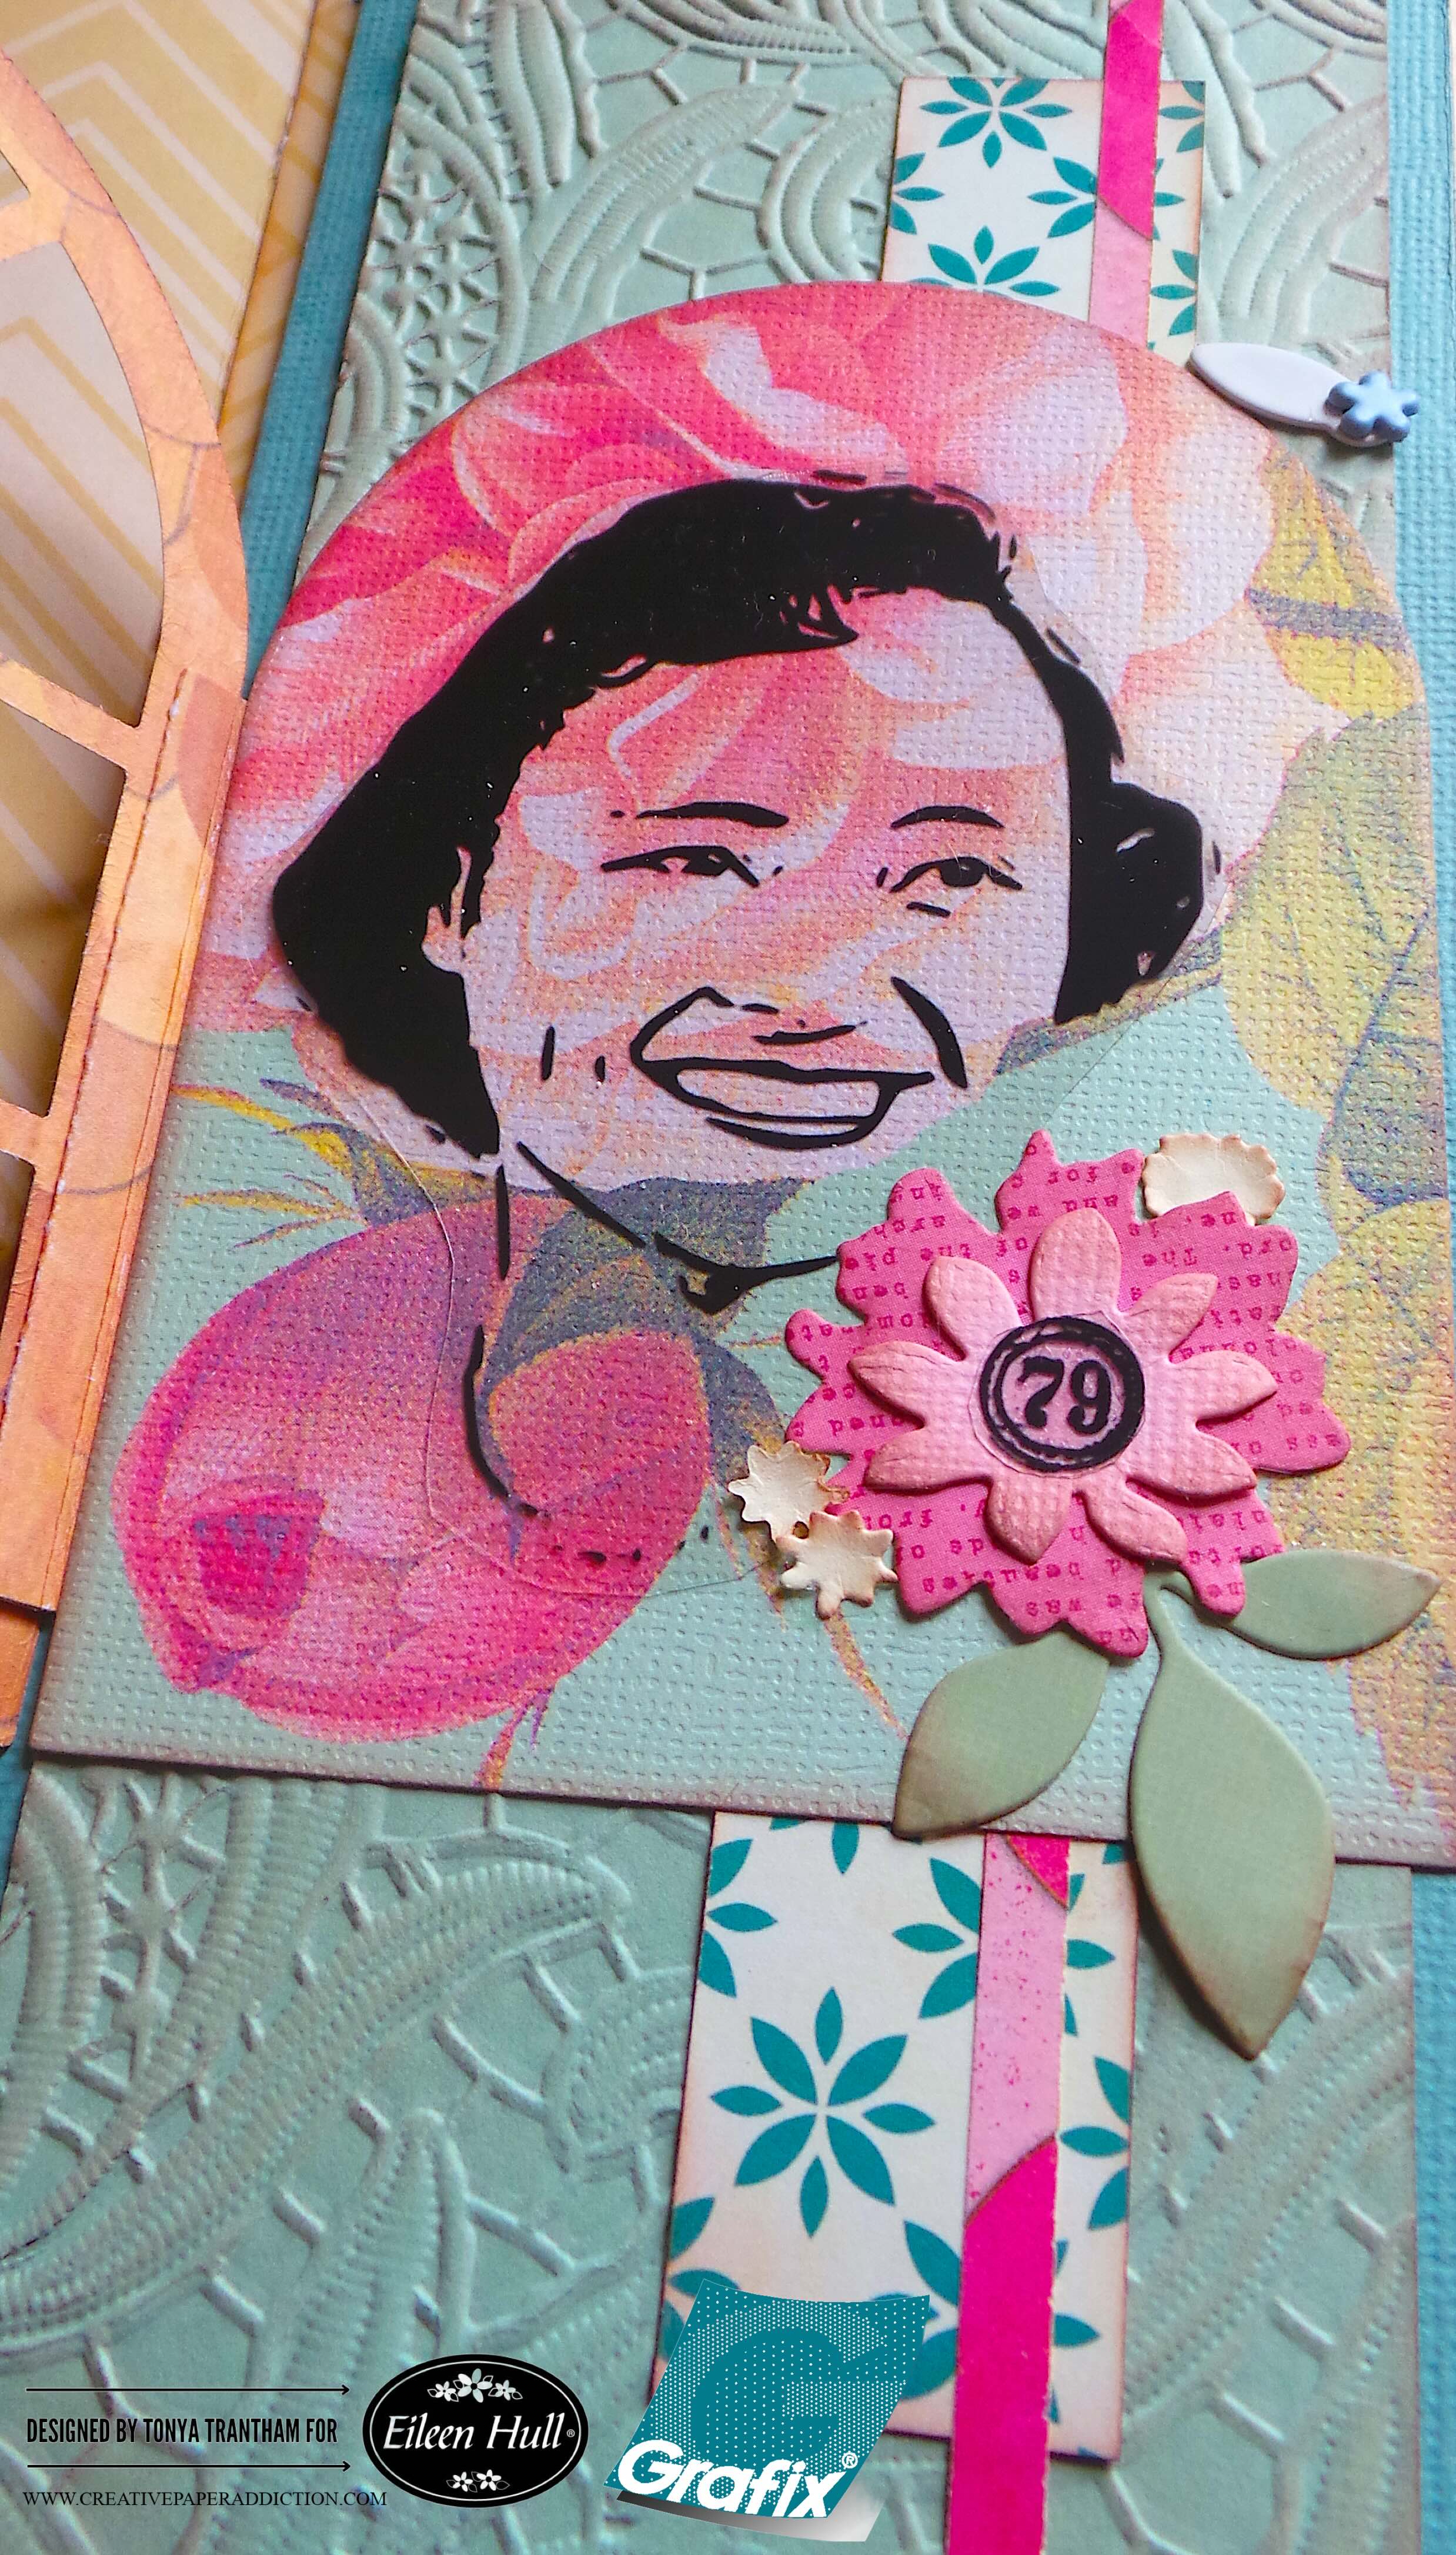
I cut out the following dies: Floral Pocket and Paperclips Thinlits, two of the largest flowers and a leaf sprig. Windowsill Flowers and Vase Thinlits, two large flowers and five of the smaller flowers. Home Sweet Home Thinlits, three leaf sprigs. I used one of the largest flower, one large flower, three of the small flowers and a leaf sprig and placed next to the woman and bottom corner. I cut the number “79” from the clear film and added to the center of the flower.
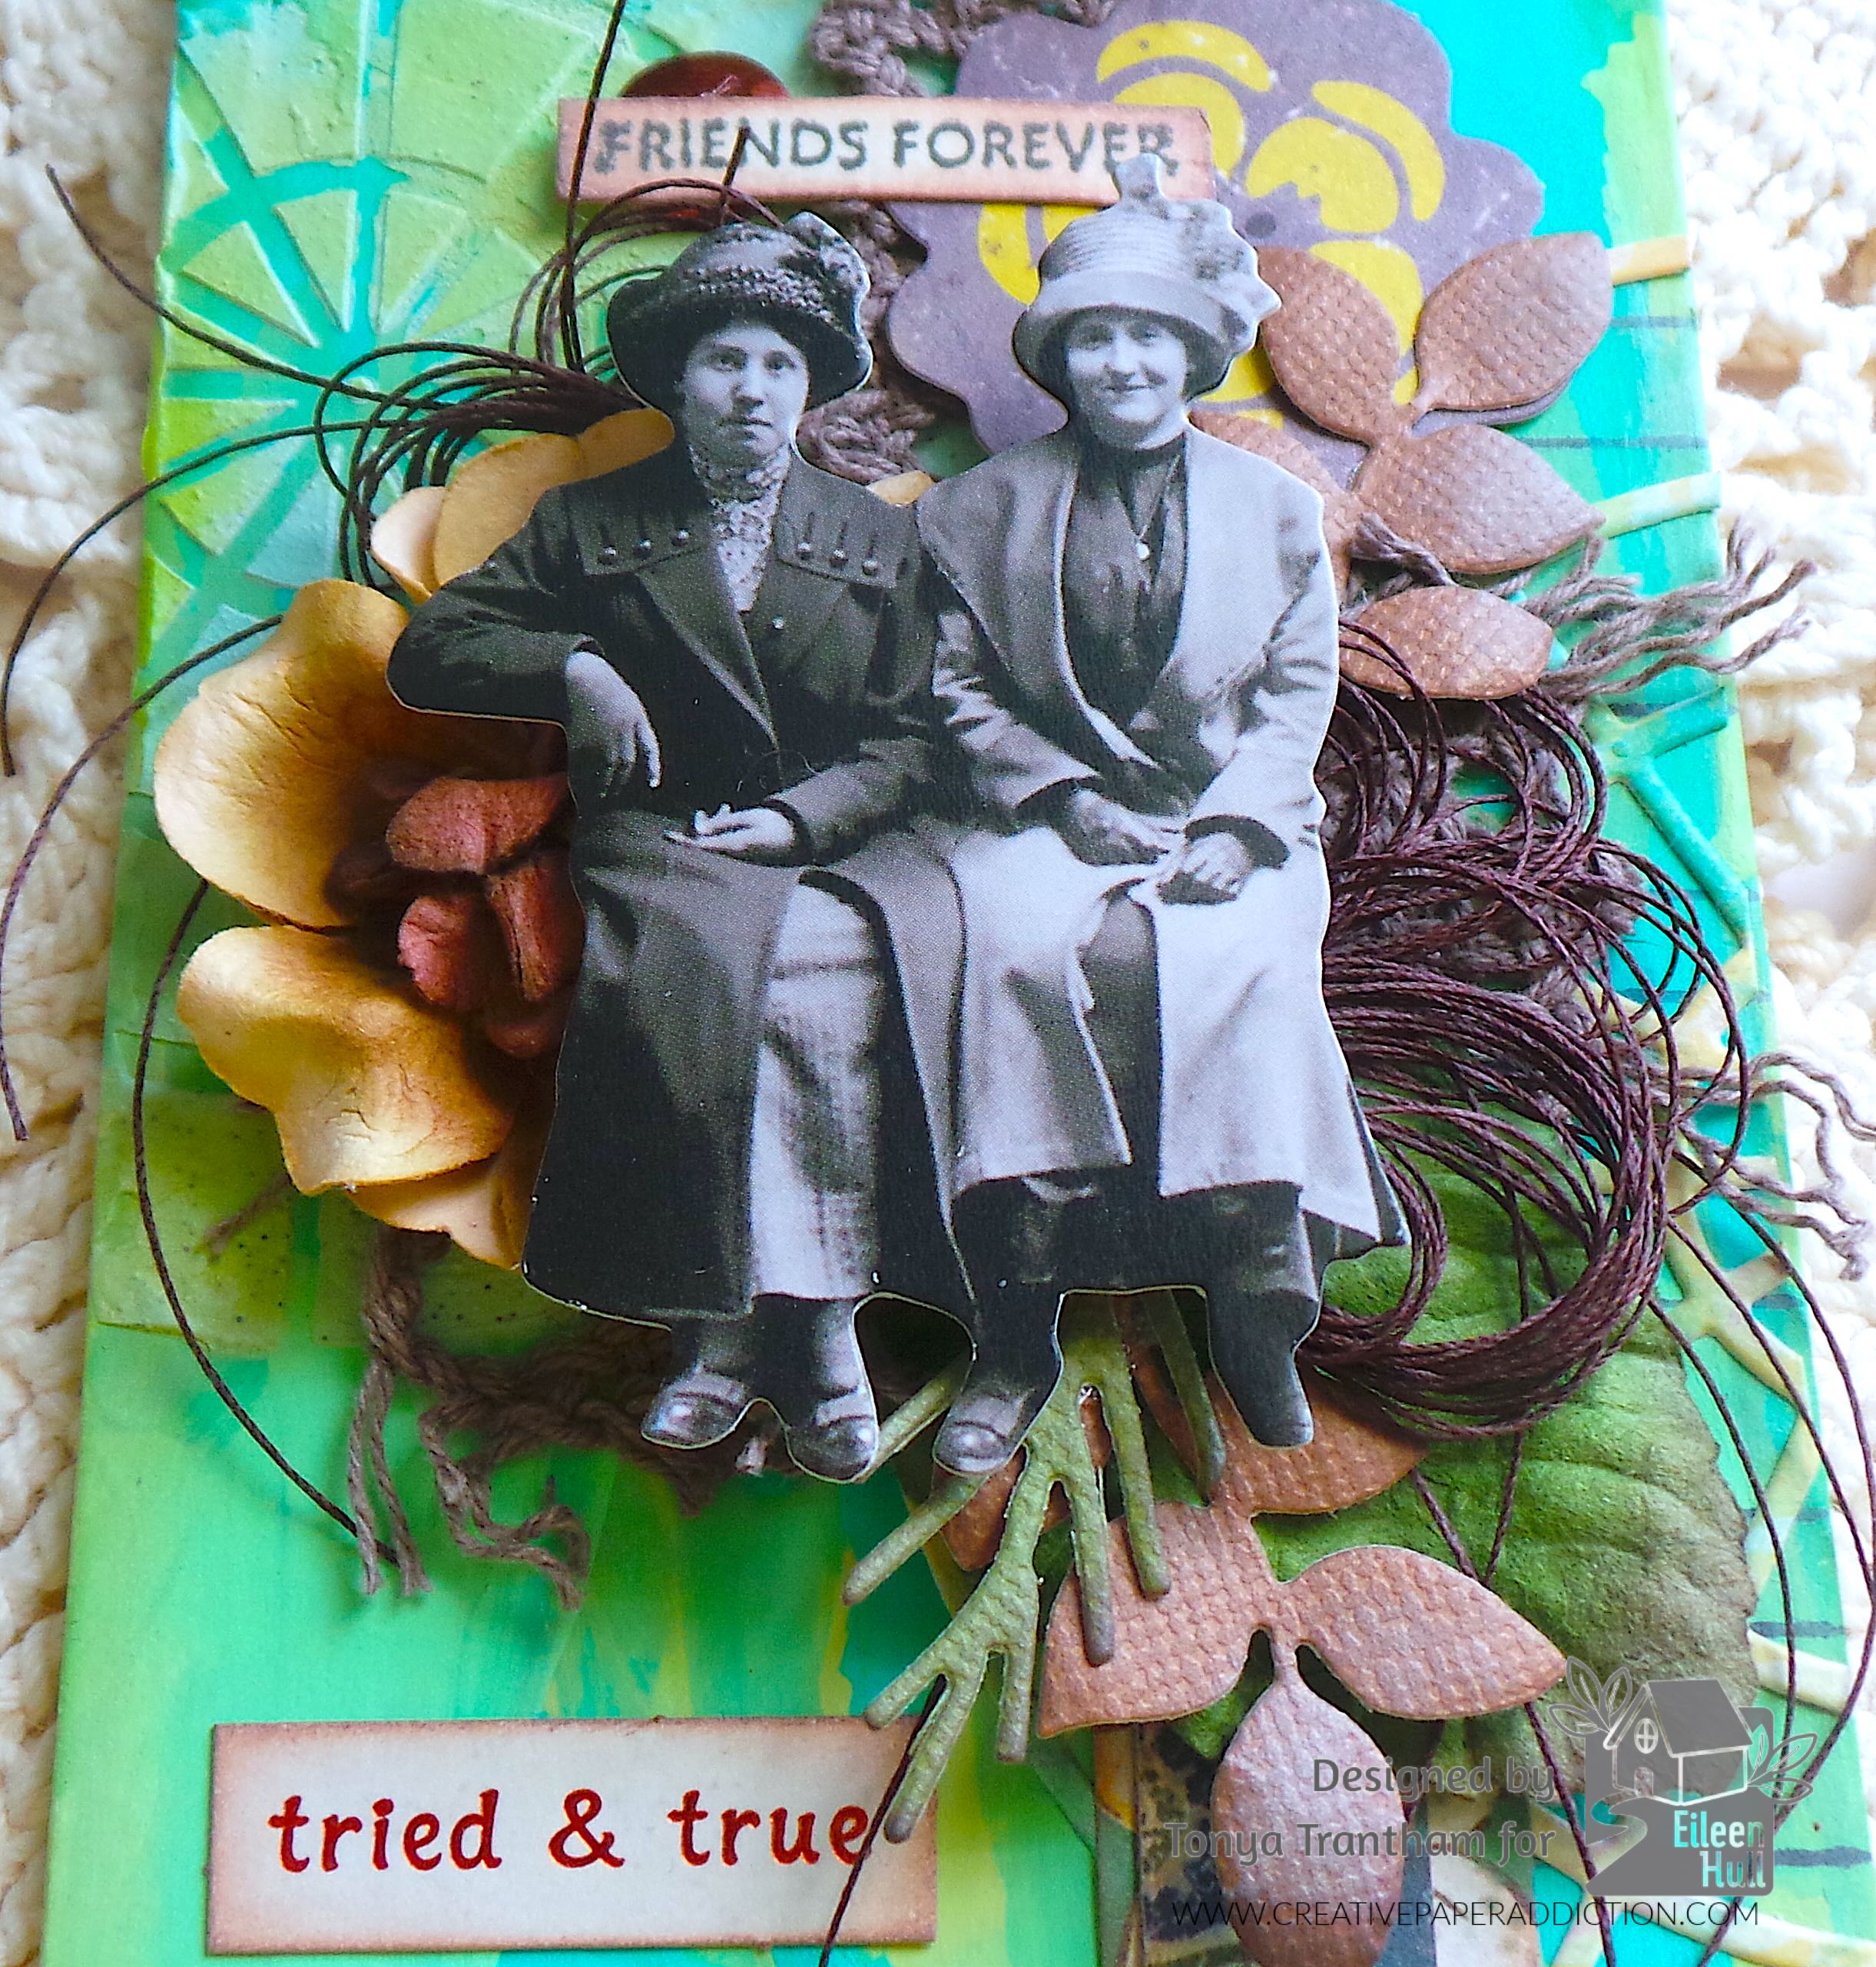
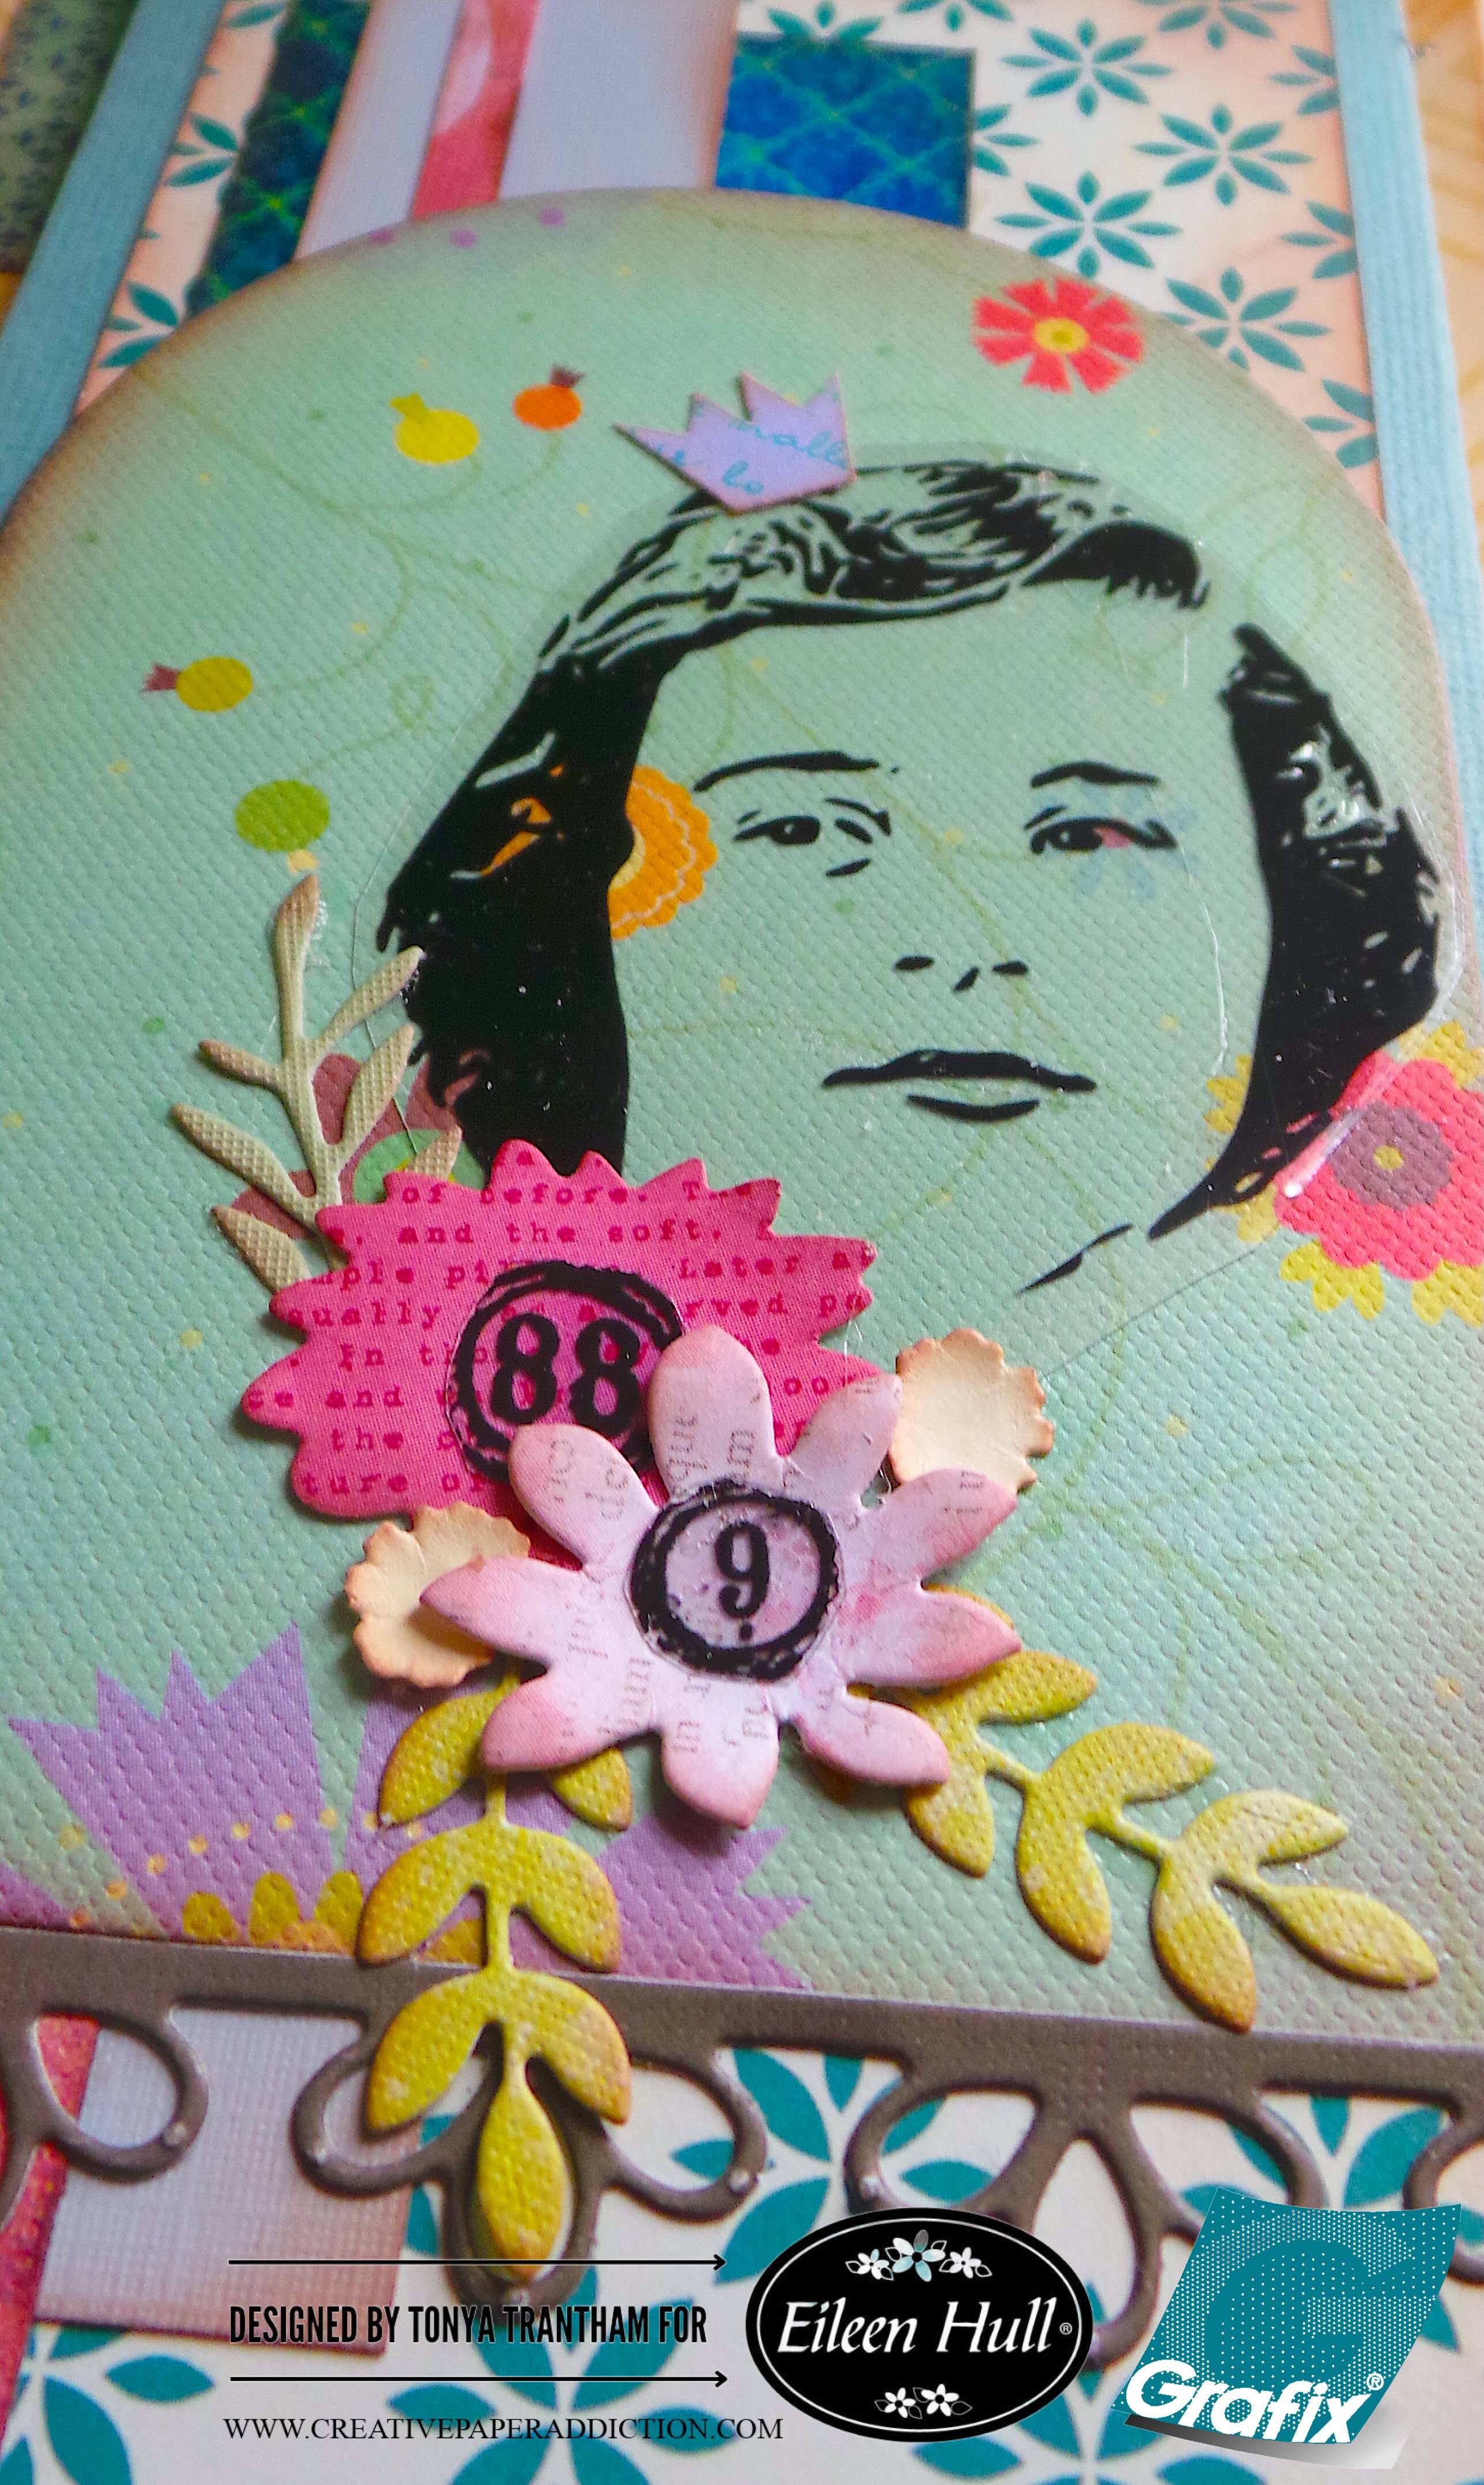
I adhered the largest tunnel arch to the back of the pocket. I added the decorative trim from the Windowsill Flowers and Vase Thinlits to the bottom of the tunnel arch. I cut out the other woman from the clear film and glued to the tunnel arch. From my stash of embellishments I added a crown to the woman’s head. I adhered the largest, large, two small flowers along with three leaf sprigs next to the woman’s face. I cut a number “9” and a number “88” from the clear film and glued to the center of the flowers.
I absolutely love these images from Grafix! They are fun to work with and really dress up any type of project. I will be share a part two blog post later this week/early next week using the Grafix film along with Eileen Hull’s dies. So be sure to keep an eye out for that post.
If you haven’t been by Eileen’s blog to see what the team has been up to you can find the latest post HERE. If you have any questions or comments about this project please leave them below.
Supplies
Sizzix/Eileen Hull: Journal Diecut
Sizzix/Eileen Hull: Field Notes and Specimen Card Diecut
Sizzix/Eileen Hull: Journal Hardware Diecut
Sizzix/Eileen Hull: Rainbow Wheels Thinlits
Sizzix/Eileen Hull: Home Sweet Home Thinlits
Sizzix/Eileen Hull: Lacy Leaves A5 Embossing Folder
Sizzix/Eileen Hull: Tunnel Arches Thinlits
Sizzix/Eileen Hull: Floral Pocket and Paperclips Thinlits
Sizzix/Eileen Hull: Windowsill Flowers and Vase Thinlits
Grafix: Grungy Vibe by Cat Kerr
Brown Chalk Ink
Needle and Thread
Closure and Flower Brad
Plain and Patterned Cardstocks
Ric Rac and Buttons
Beacon Adhesives: Zip Dry Adhesive
(Products listed above are Affiliated Links for your convenience)
DISCLAIMERS
This blog is compensated to provide opinion on products, services, websites, and various other topics. Even though the owner(s) of this blog receives compensation for our posts or advertisements. I always give my honest opinions, findings, beliefs, or experiences on those topics or products. The views and opinions expressed on this blog are purely my own. Any product claim, statistic, or quote should be checked with each manufacturer. Verify other representations about a product or service with the provider or party in question.This blog contains affiliate links. Clicking these links helps to support Tonya Trantham Designs – Creative Paper Addiction. It’s at no additional cost to you. Today’s features are Sizzix, Eileen and Grafix Products.
Thanks for stopping by, I hope your Tuesday is wonderful and enjoy creating!