How to Create a Tag with Color Wheel Stencils
Hi everyone! I’m back this week with a mix media tag I created using the Color Wheel Stencils by Eileen Hull. I used dies from the Rainbow Wheels Thinlits. Stamps from the Swatch Cards Stamp Set were also employed to complete this tag. Anyways, let’s get started!
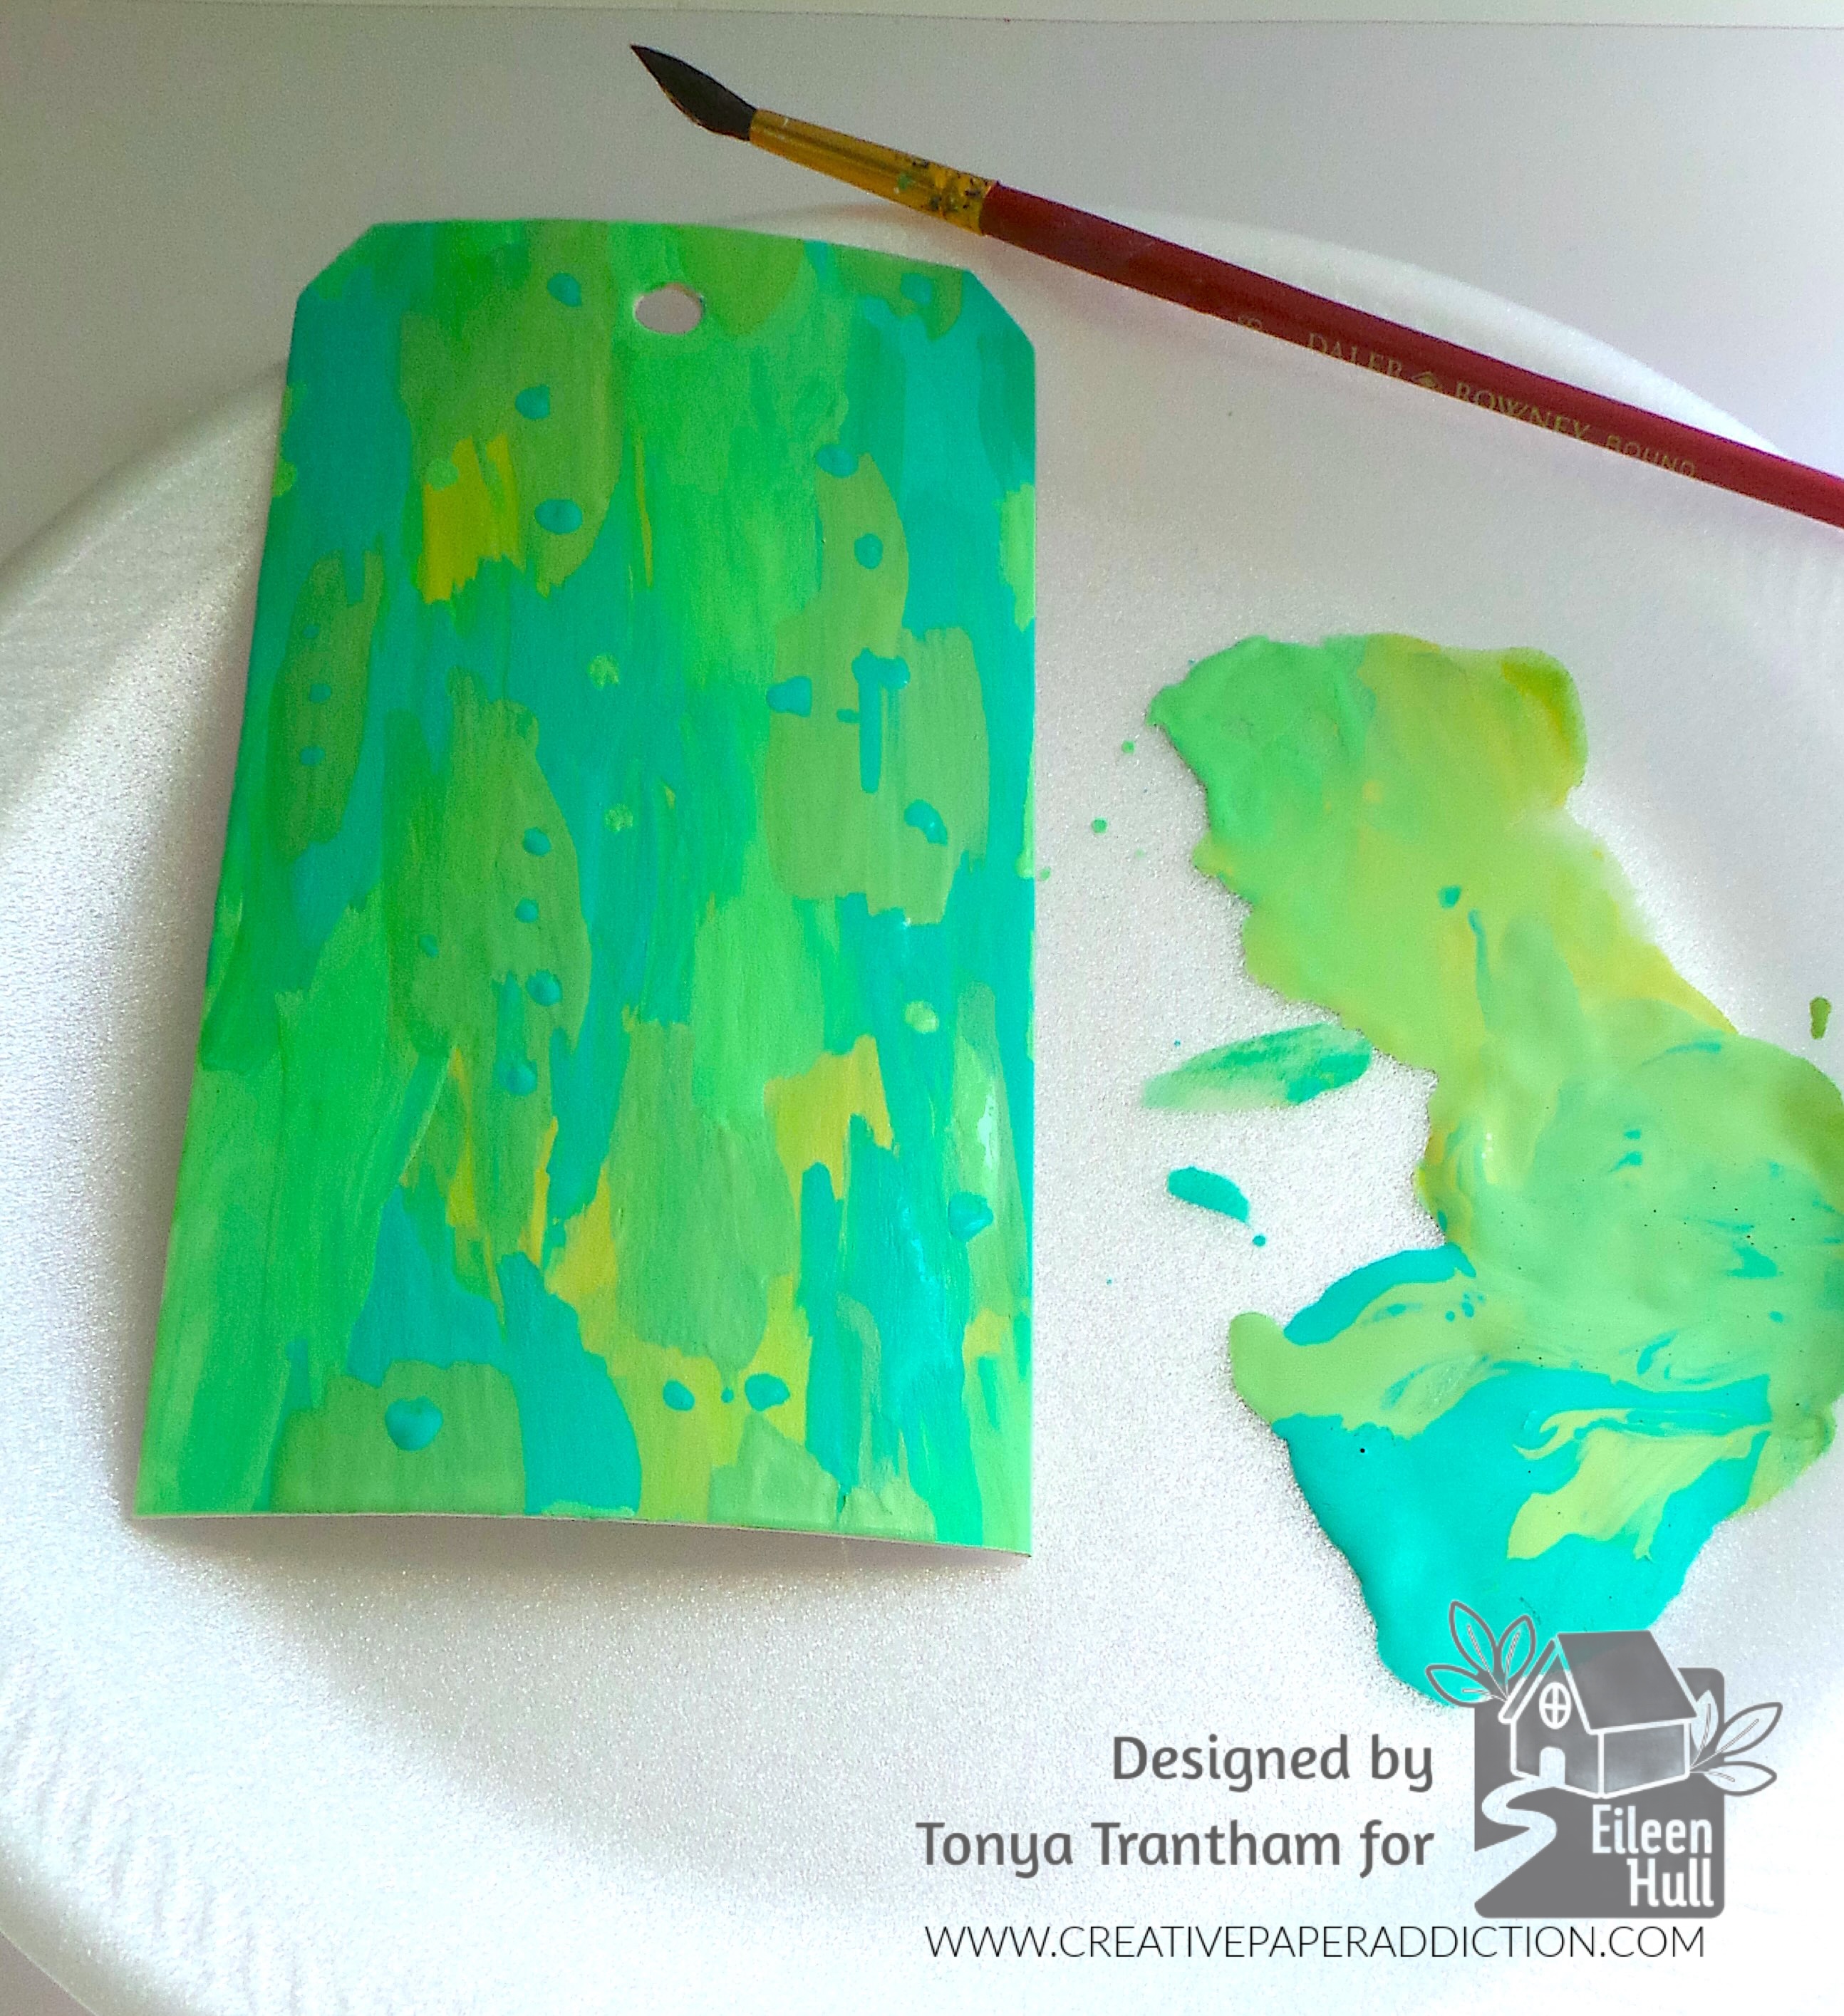
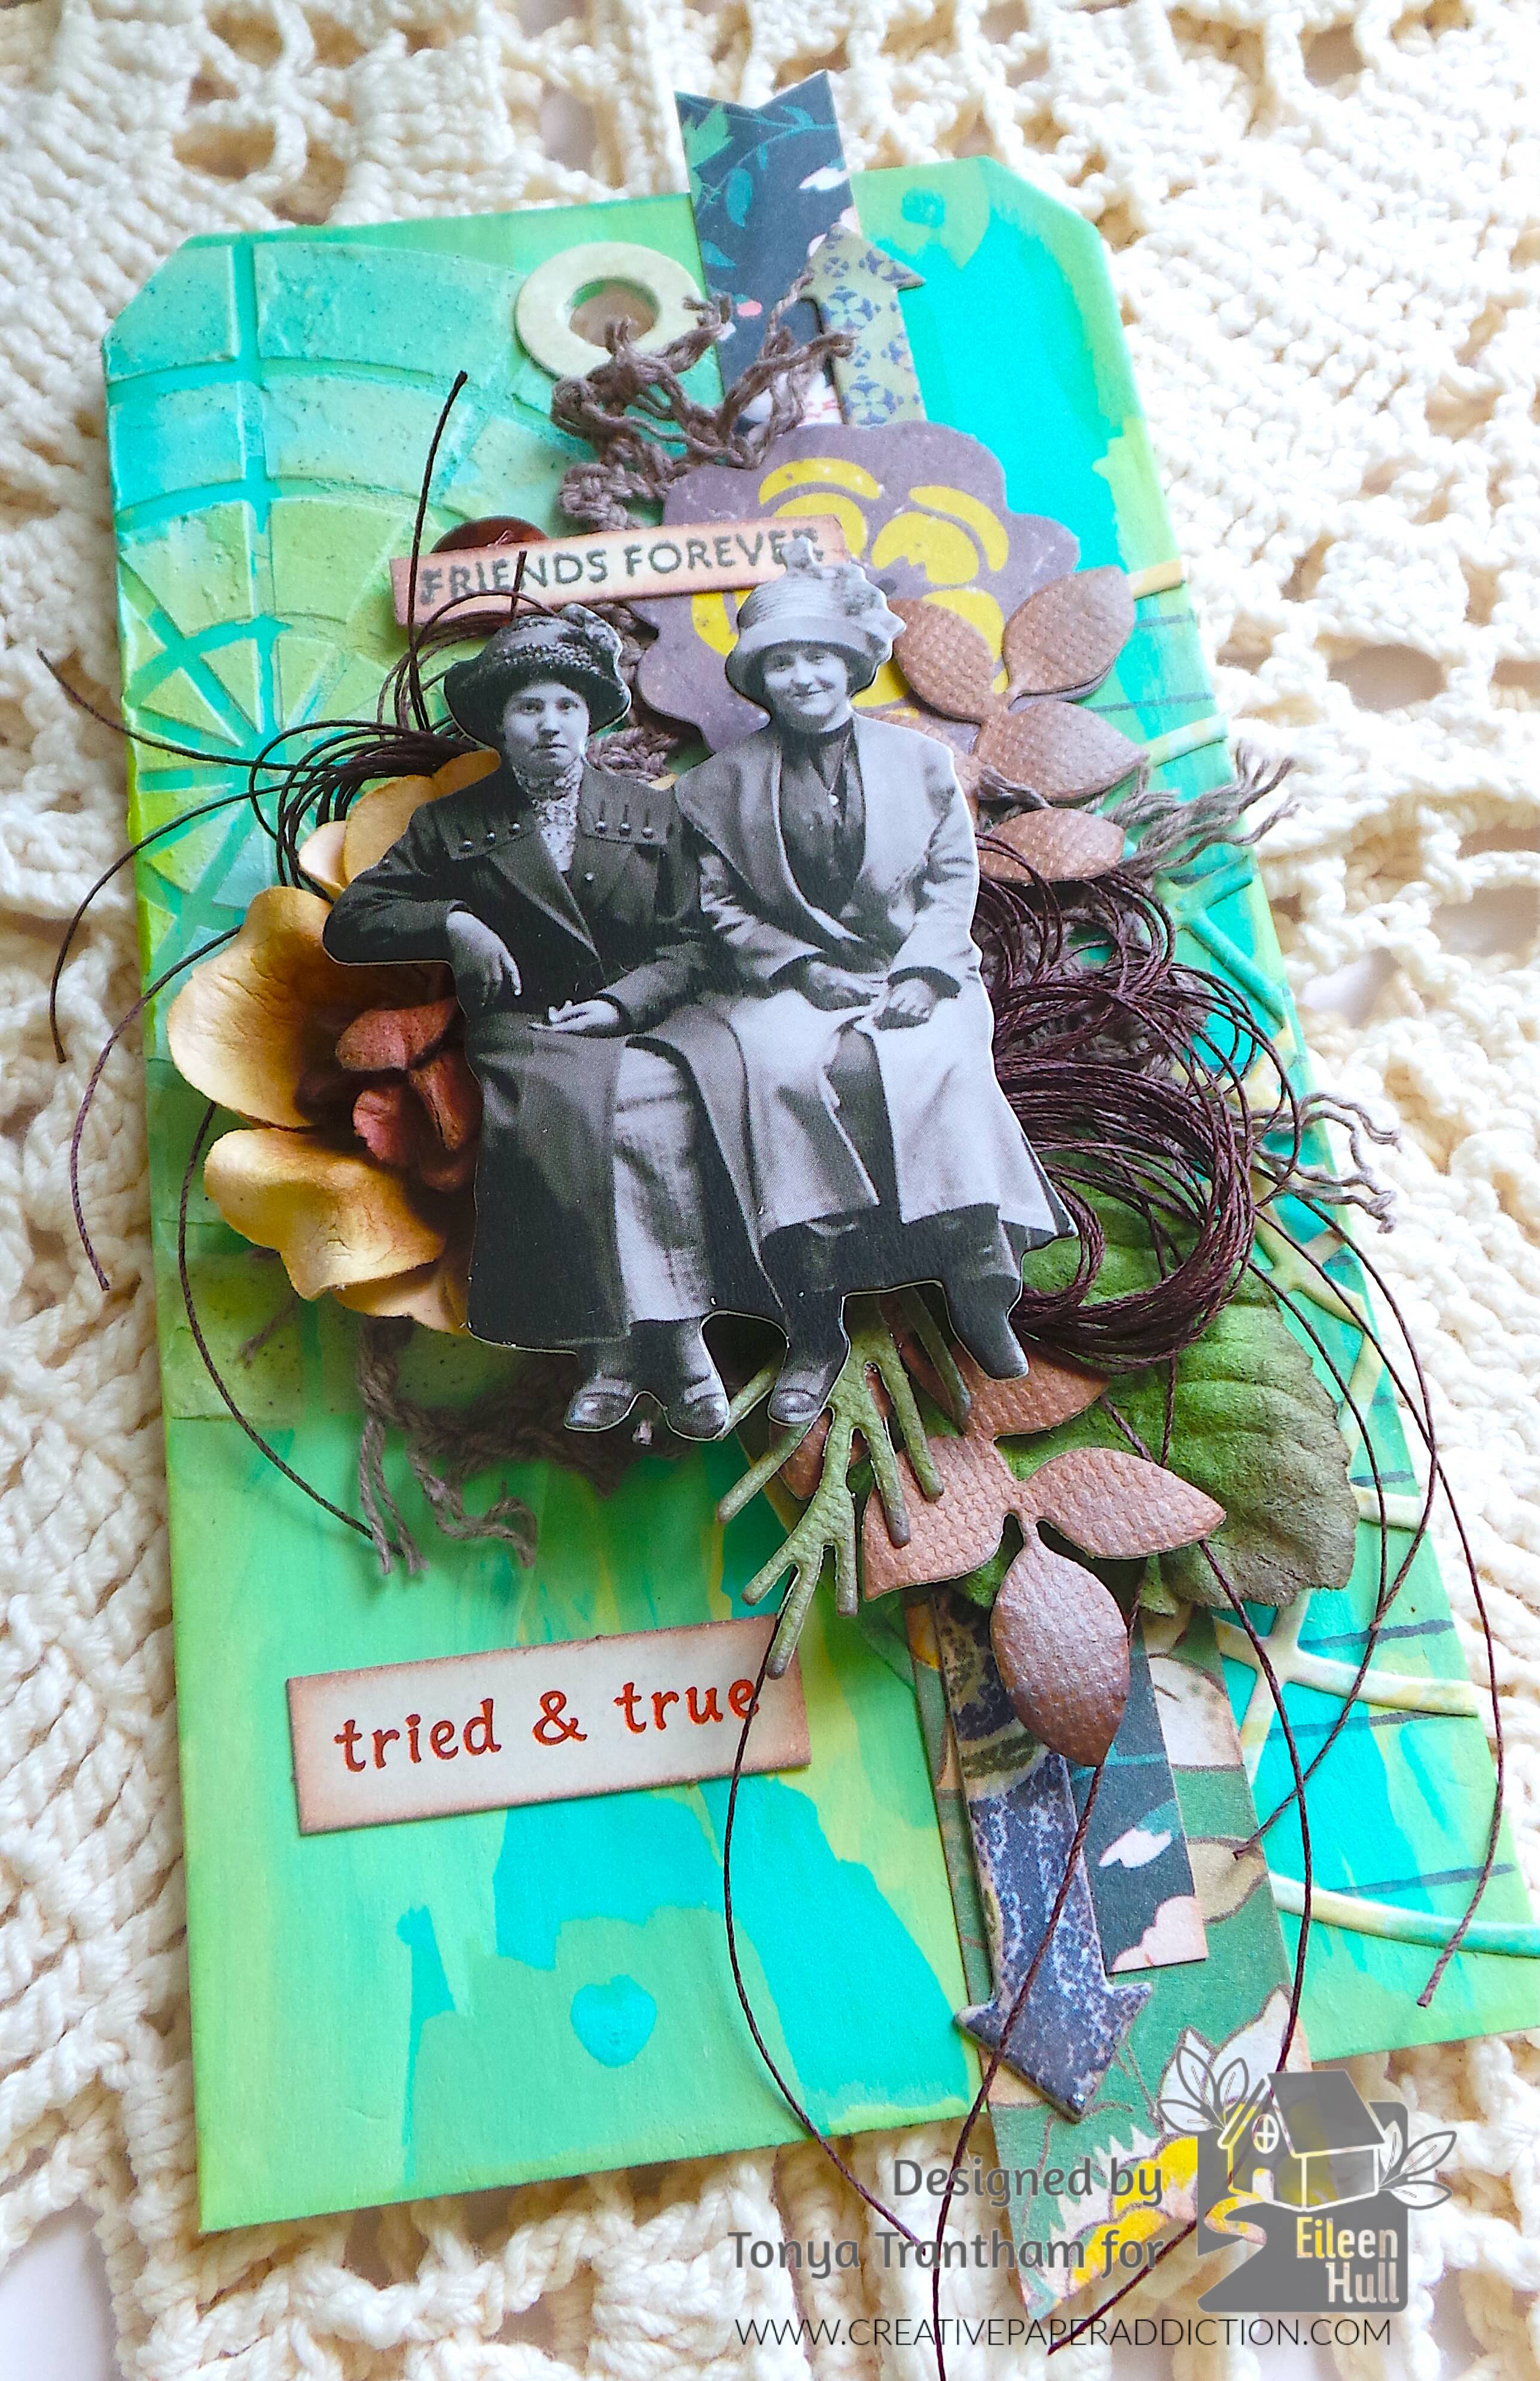
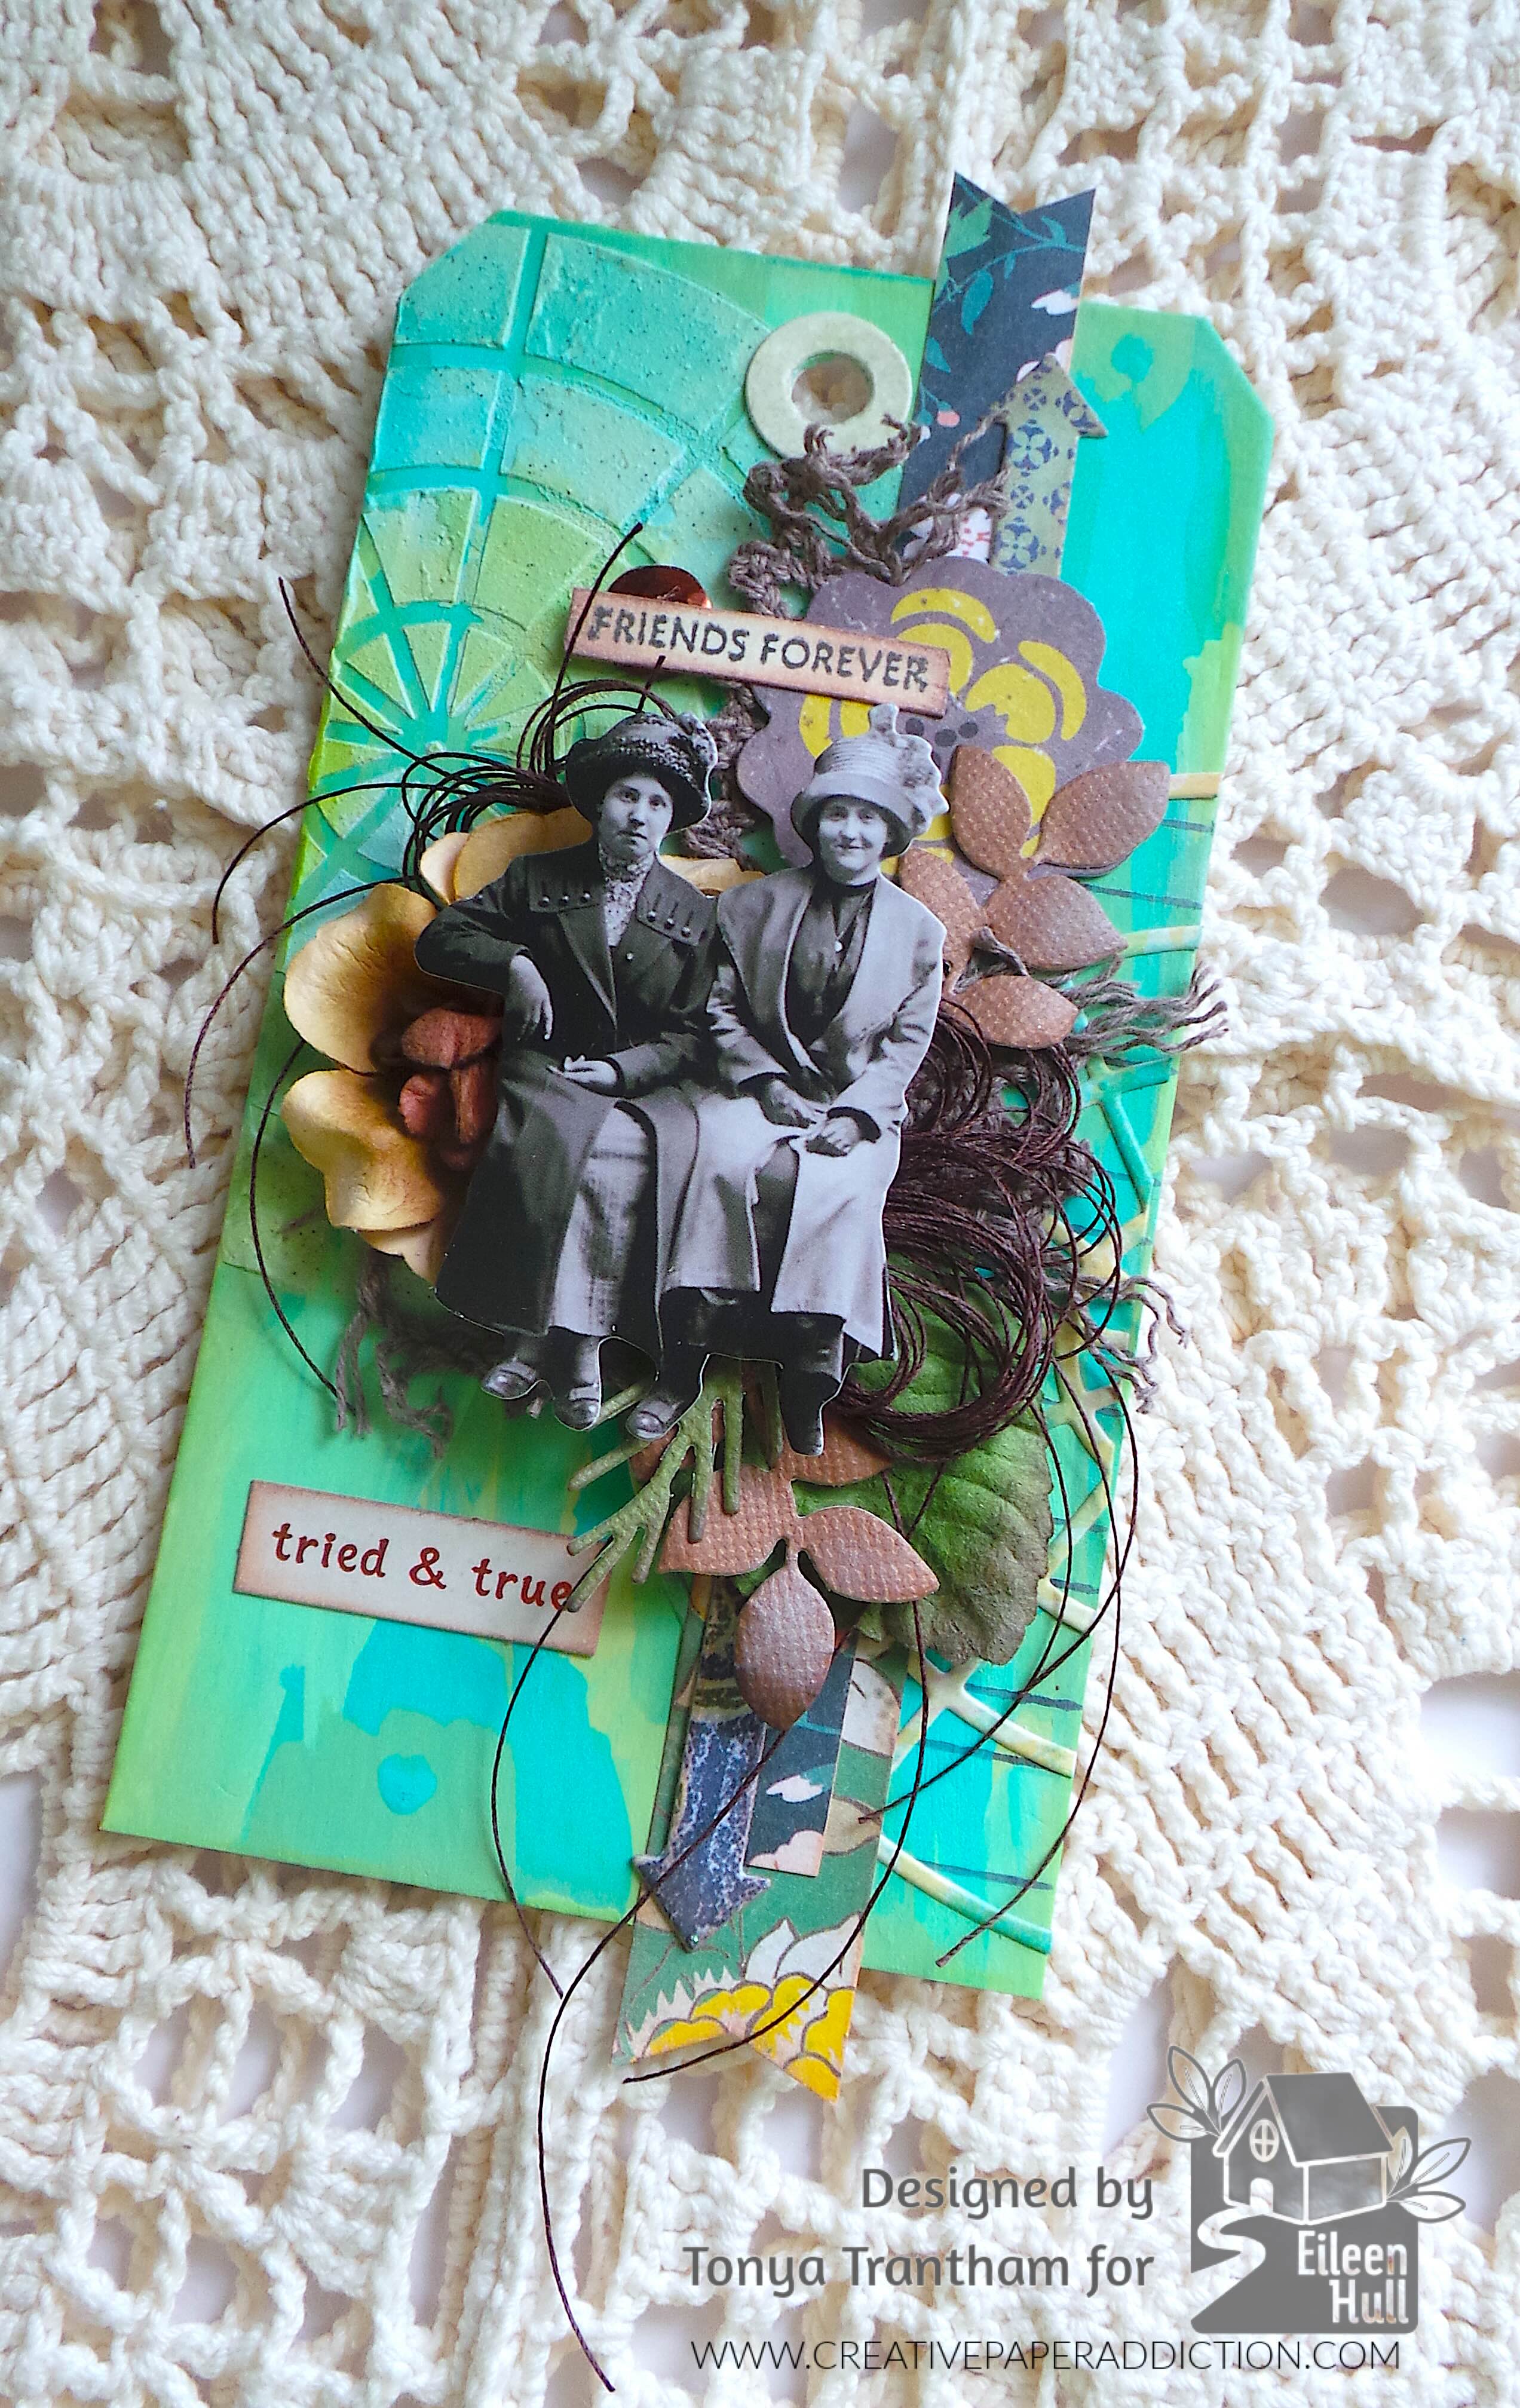
I found in my stash a tag I had cut from the Tag and Bookplates Diecut (retired). I had cut it out of Mat Board. Since it was a sturdy base I decided to use paint to cover the tag. I used an assortment of Ocean Breeze, Bright Mint and Celery acrylic paints.
Once dry I stamped the tag with the swatch stamp from the Swatch Cards Stamp Set. I used a blue ink to stamp onto the corner of the tag but the color started to disappear. I was able to reposition the stamp onto the MISTI Stamping Tool. I re-inked the stamp with a Black Ink and re-stamped the tag.
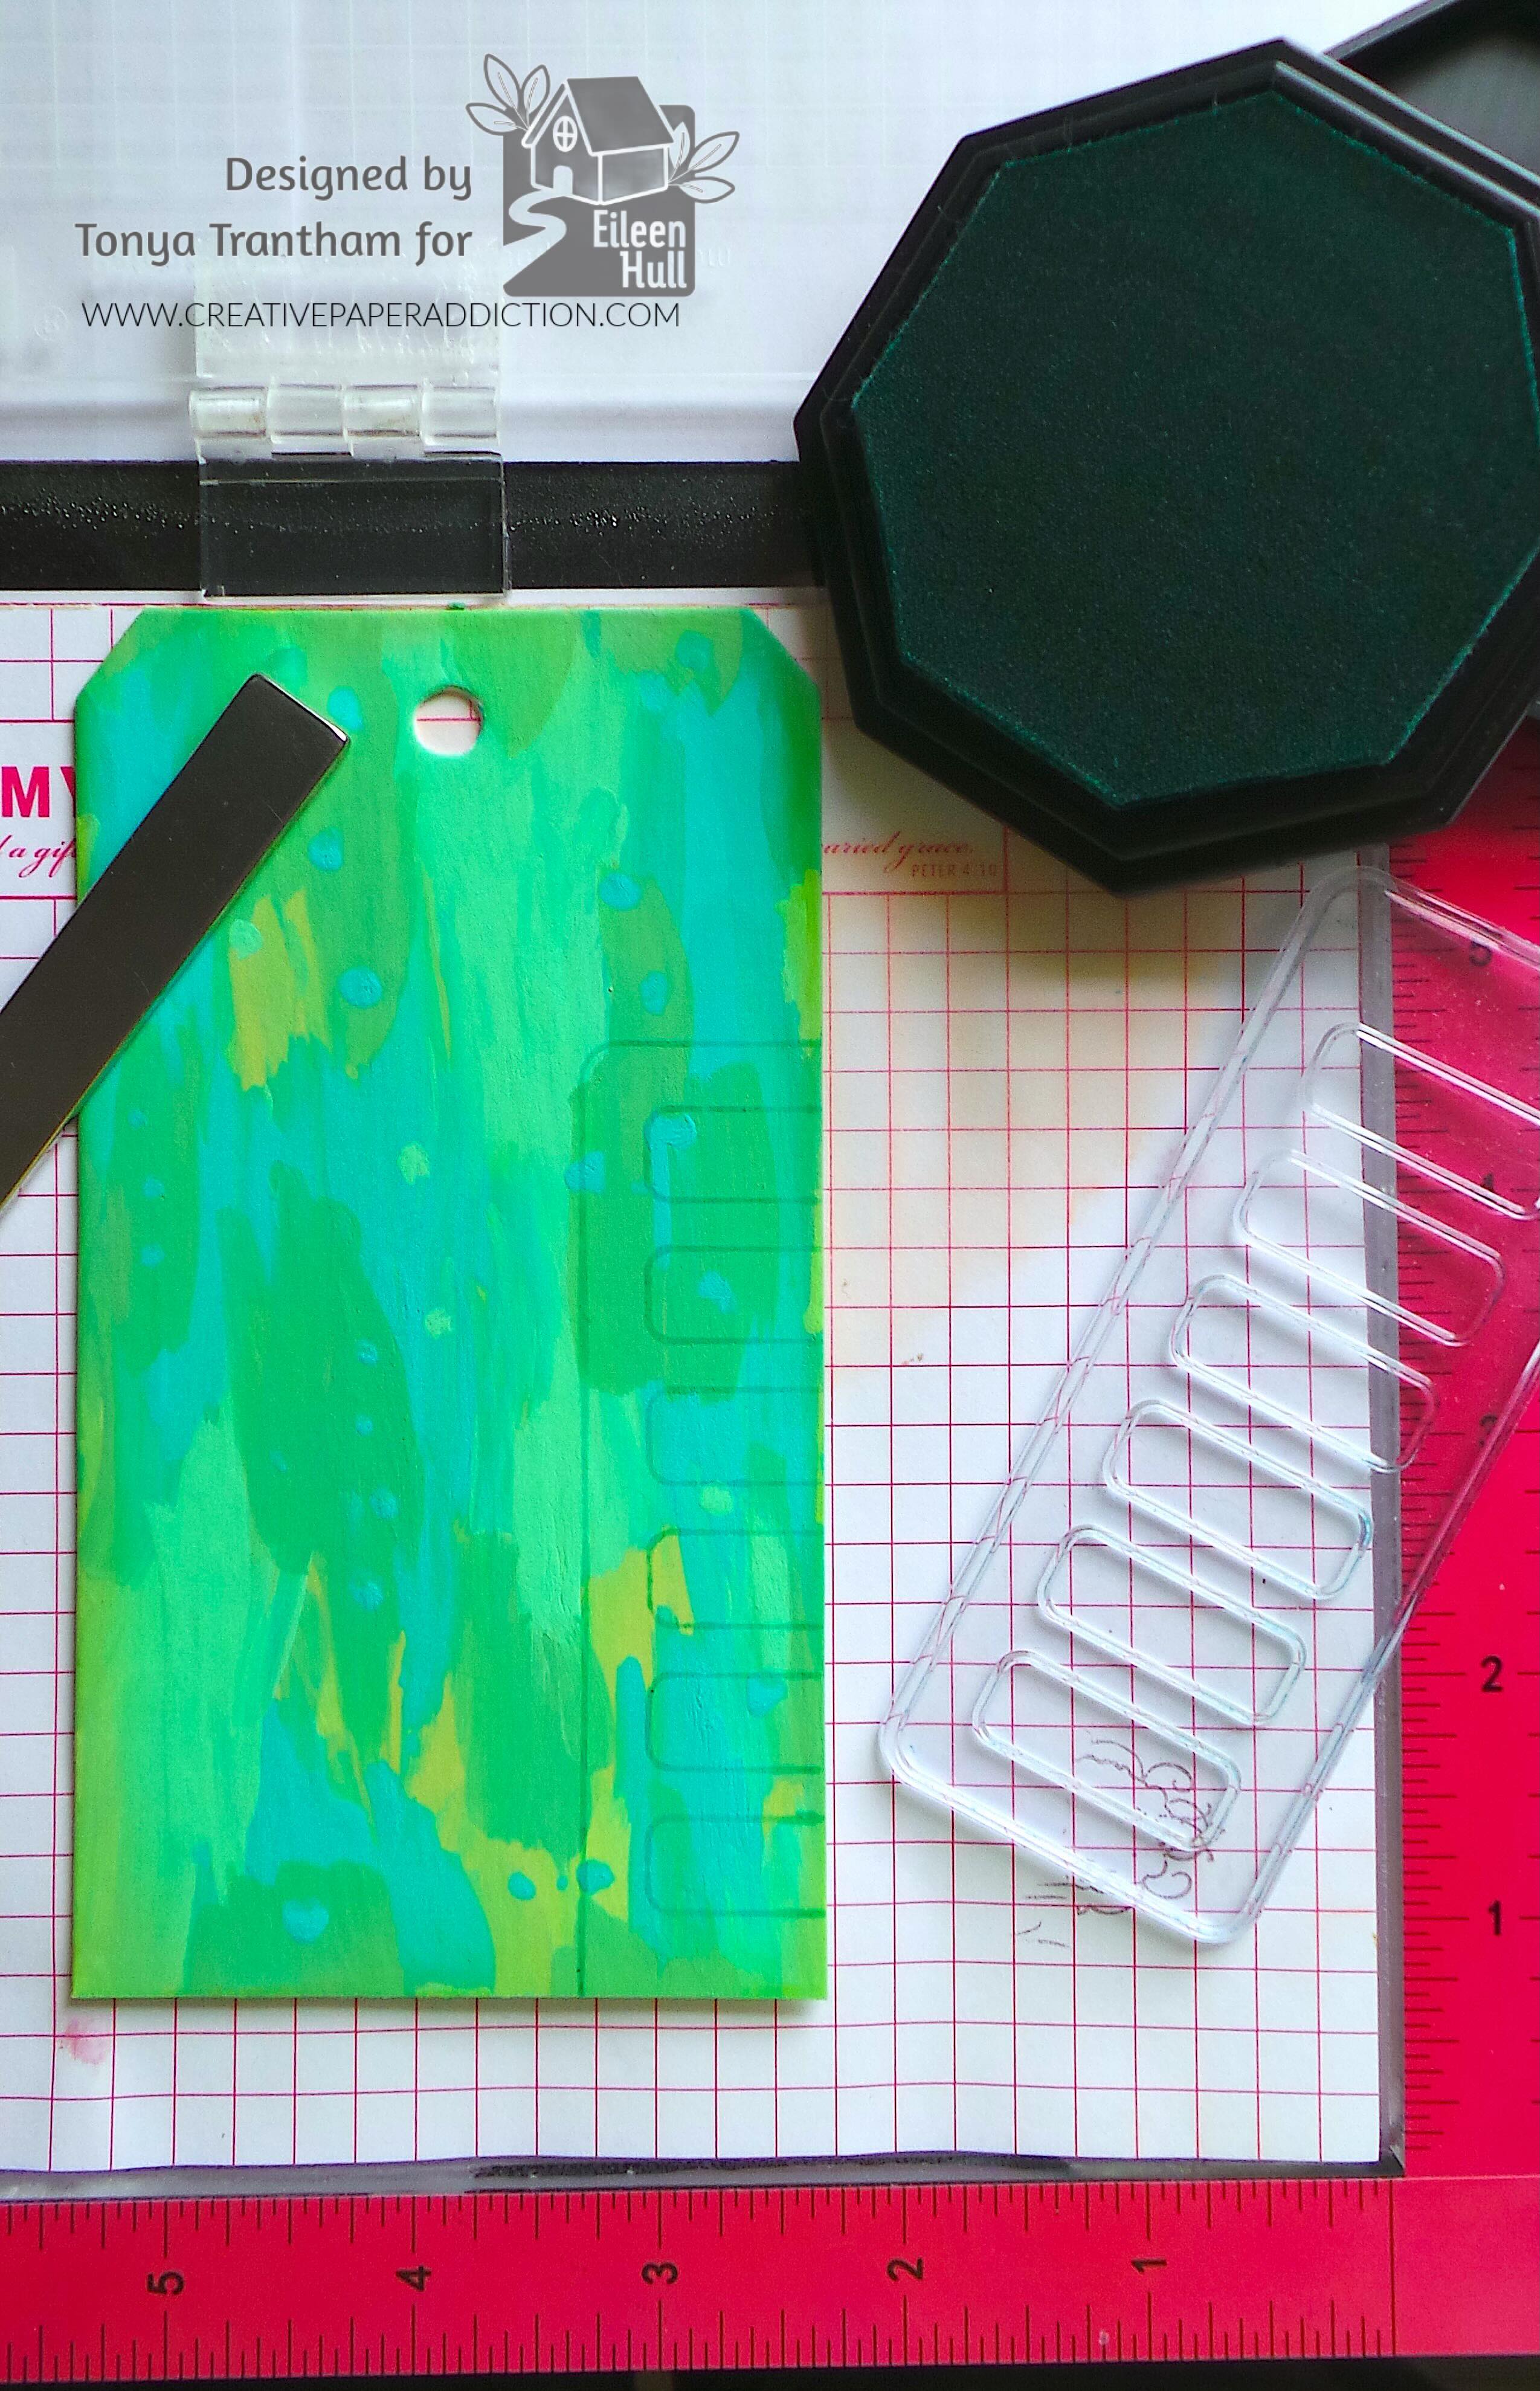
I used a Spatula and added a little Cloud Whip to a Styrofoam plate. I added a little water first to the Cloud Whip to thin it down. Next, I added Honeydew Pops of Colors to the cloud whip and mixed with the spatula.
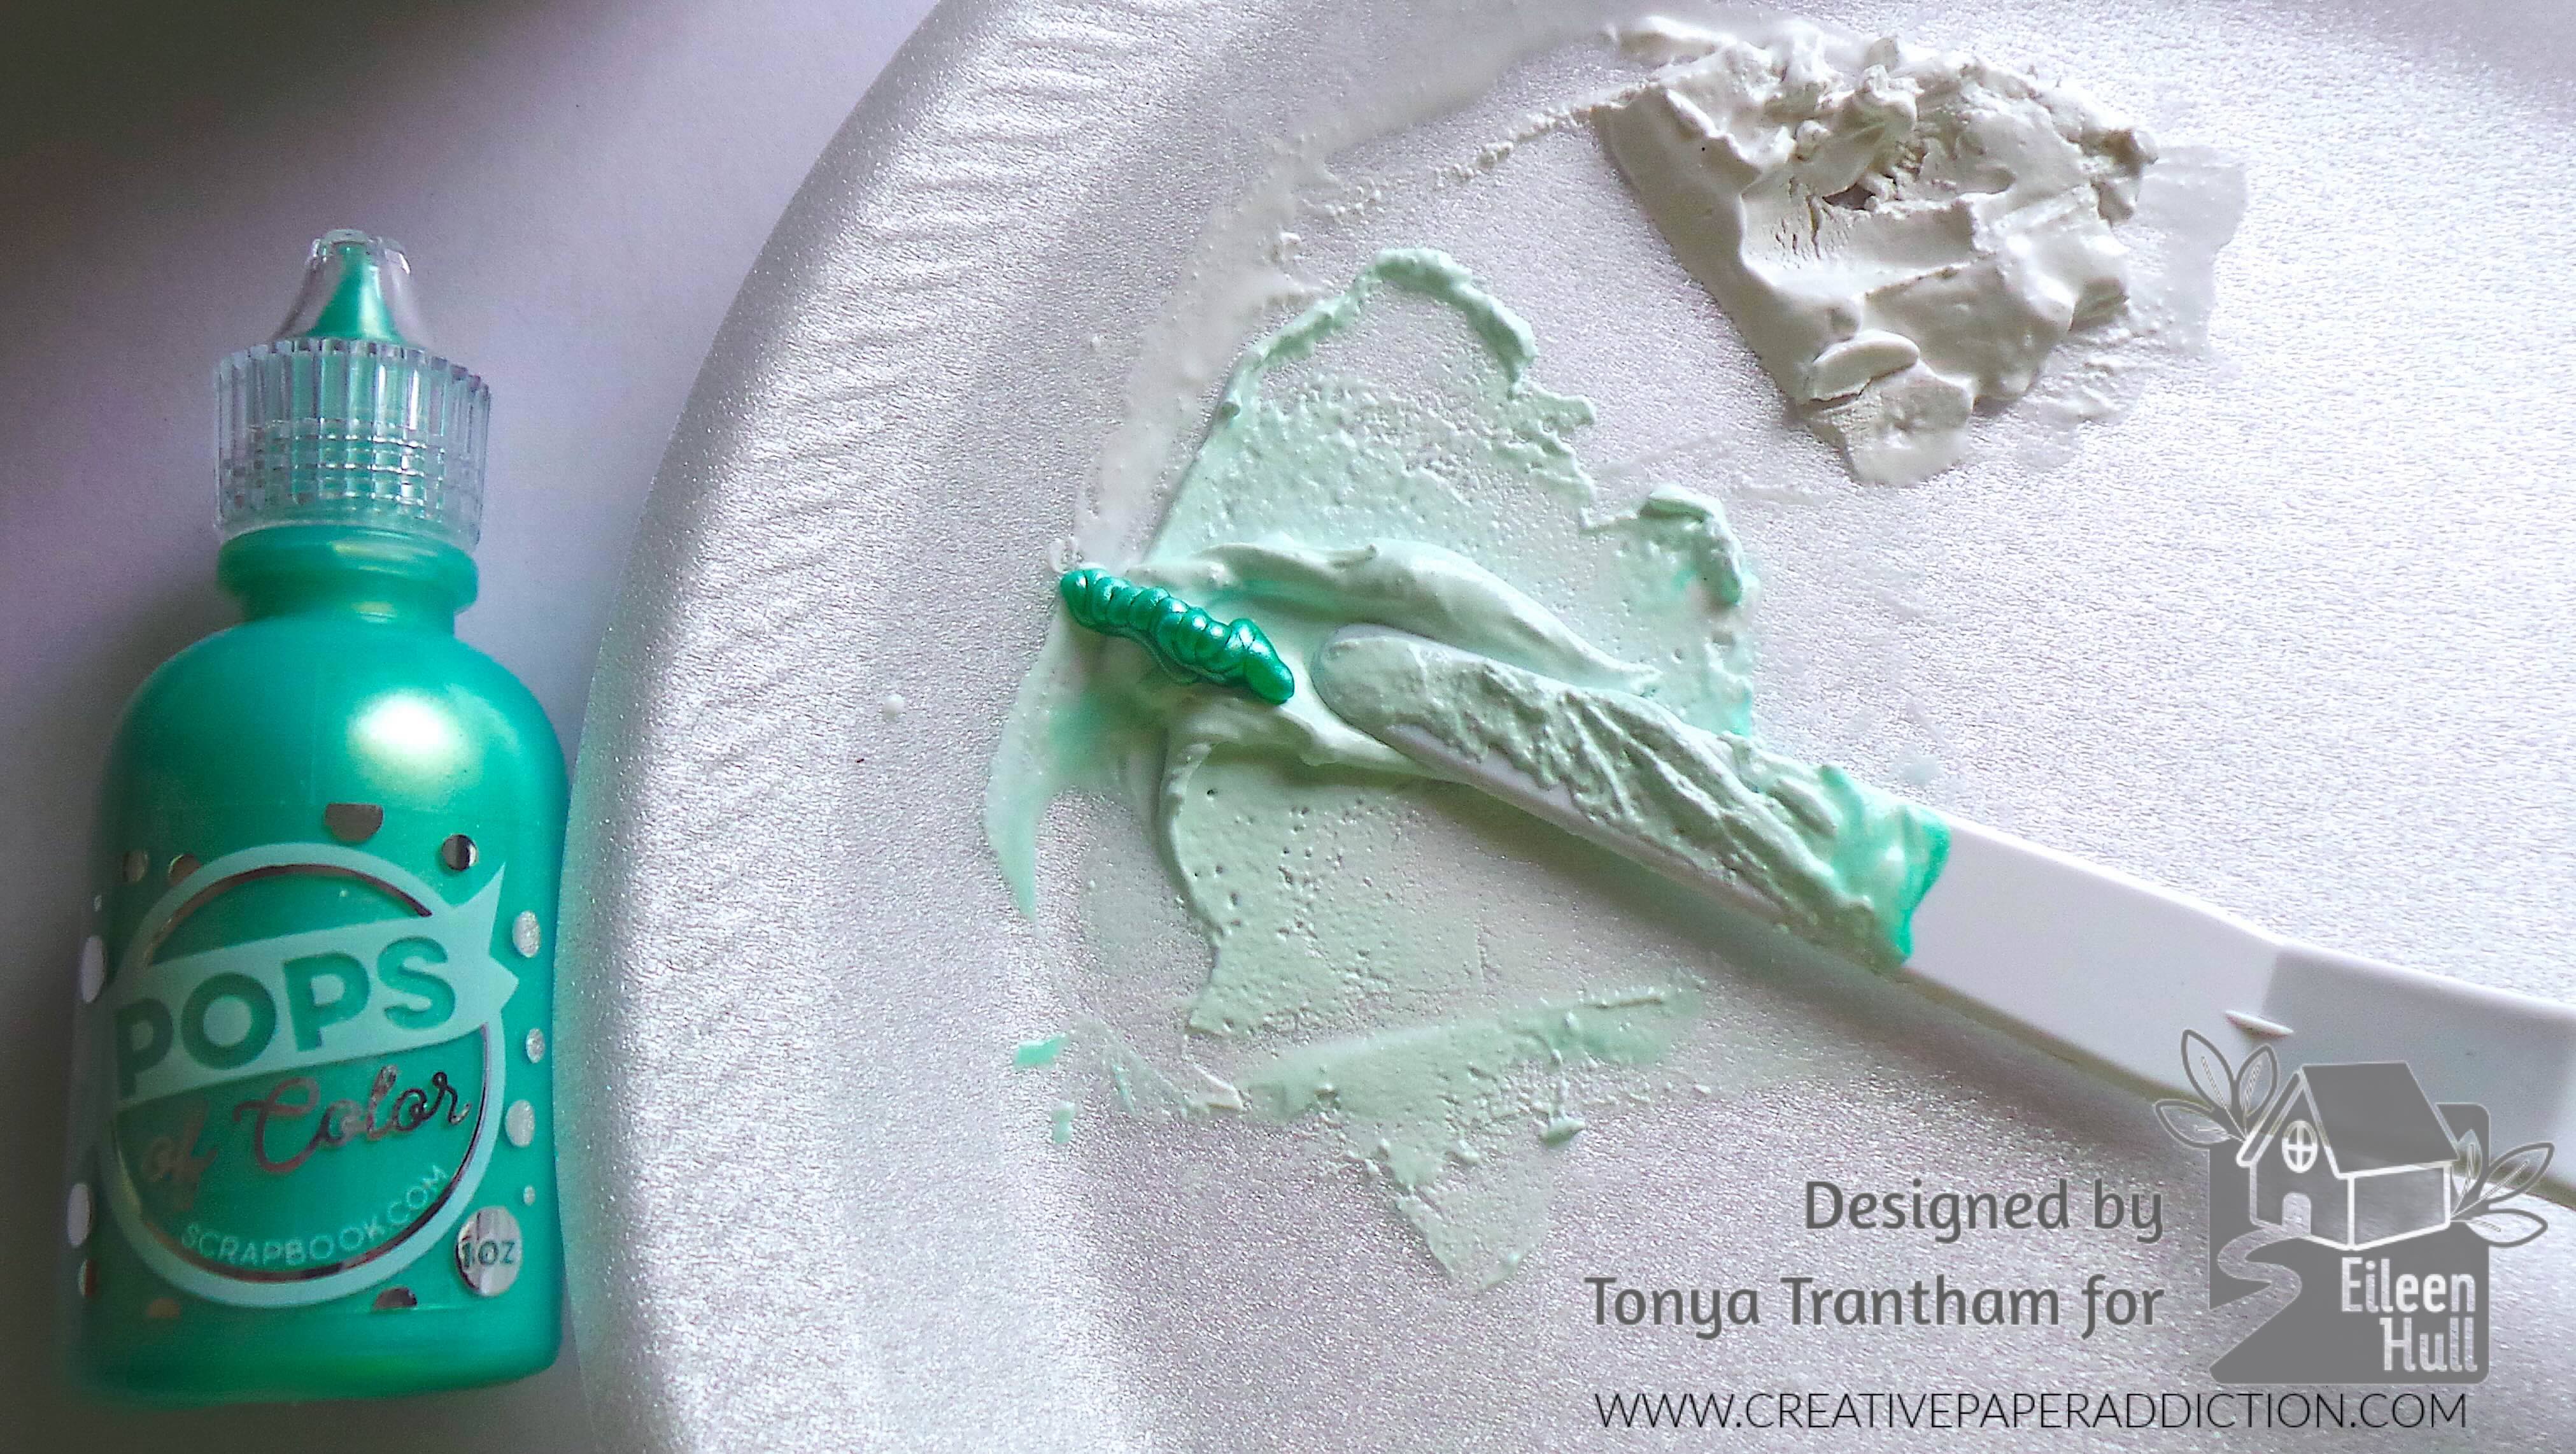
I taped the third stencil from the Color Wheel Stencils over the tag. I applied the Honeydew Cloud Whip mixture to a portion of the stencil. I added Sea Foam Pops of Color to the Cloud whip that was still in the plate and mixed. I applied that to a portion of the stencil. I did the same steps with the Olive, and Holly Green Pops of Color until the stencil was completed covered.
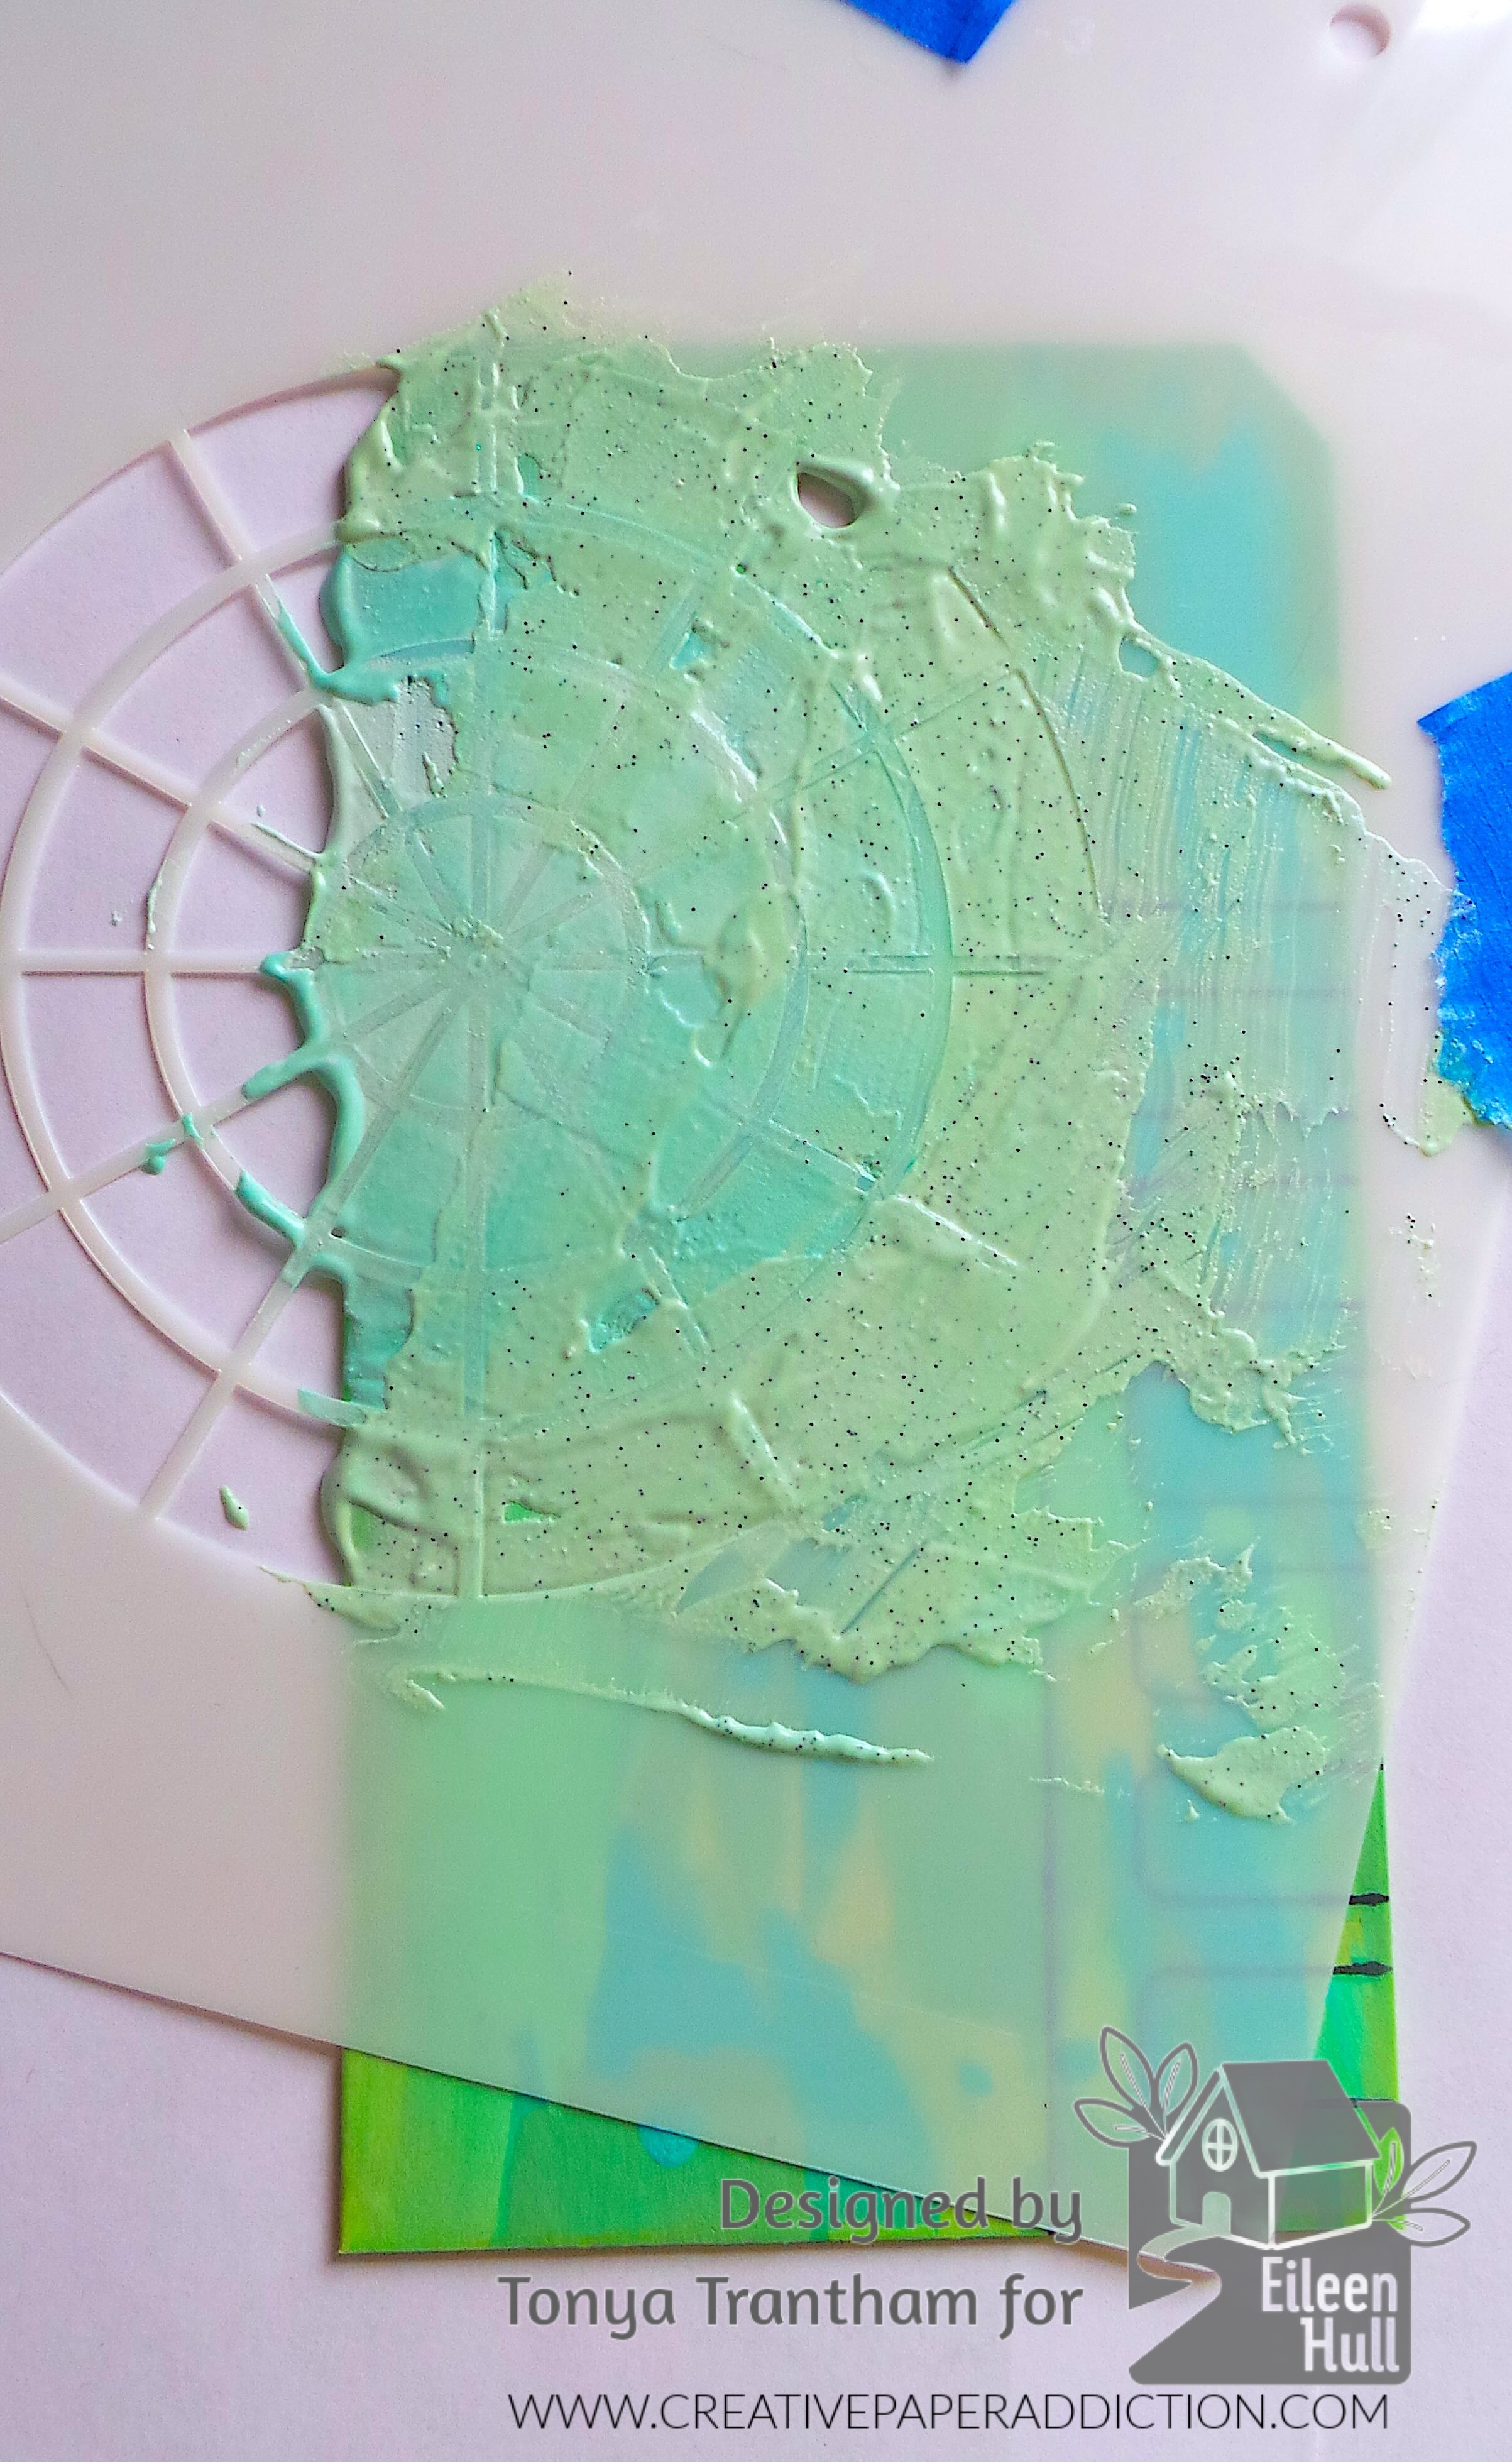
I carefully removed the stencil and let it dry.
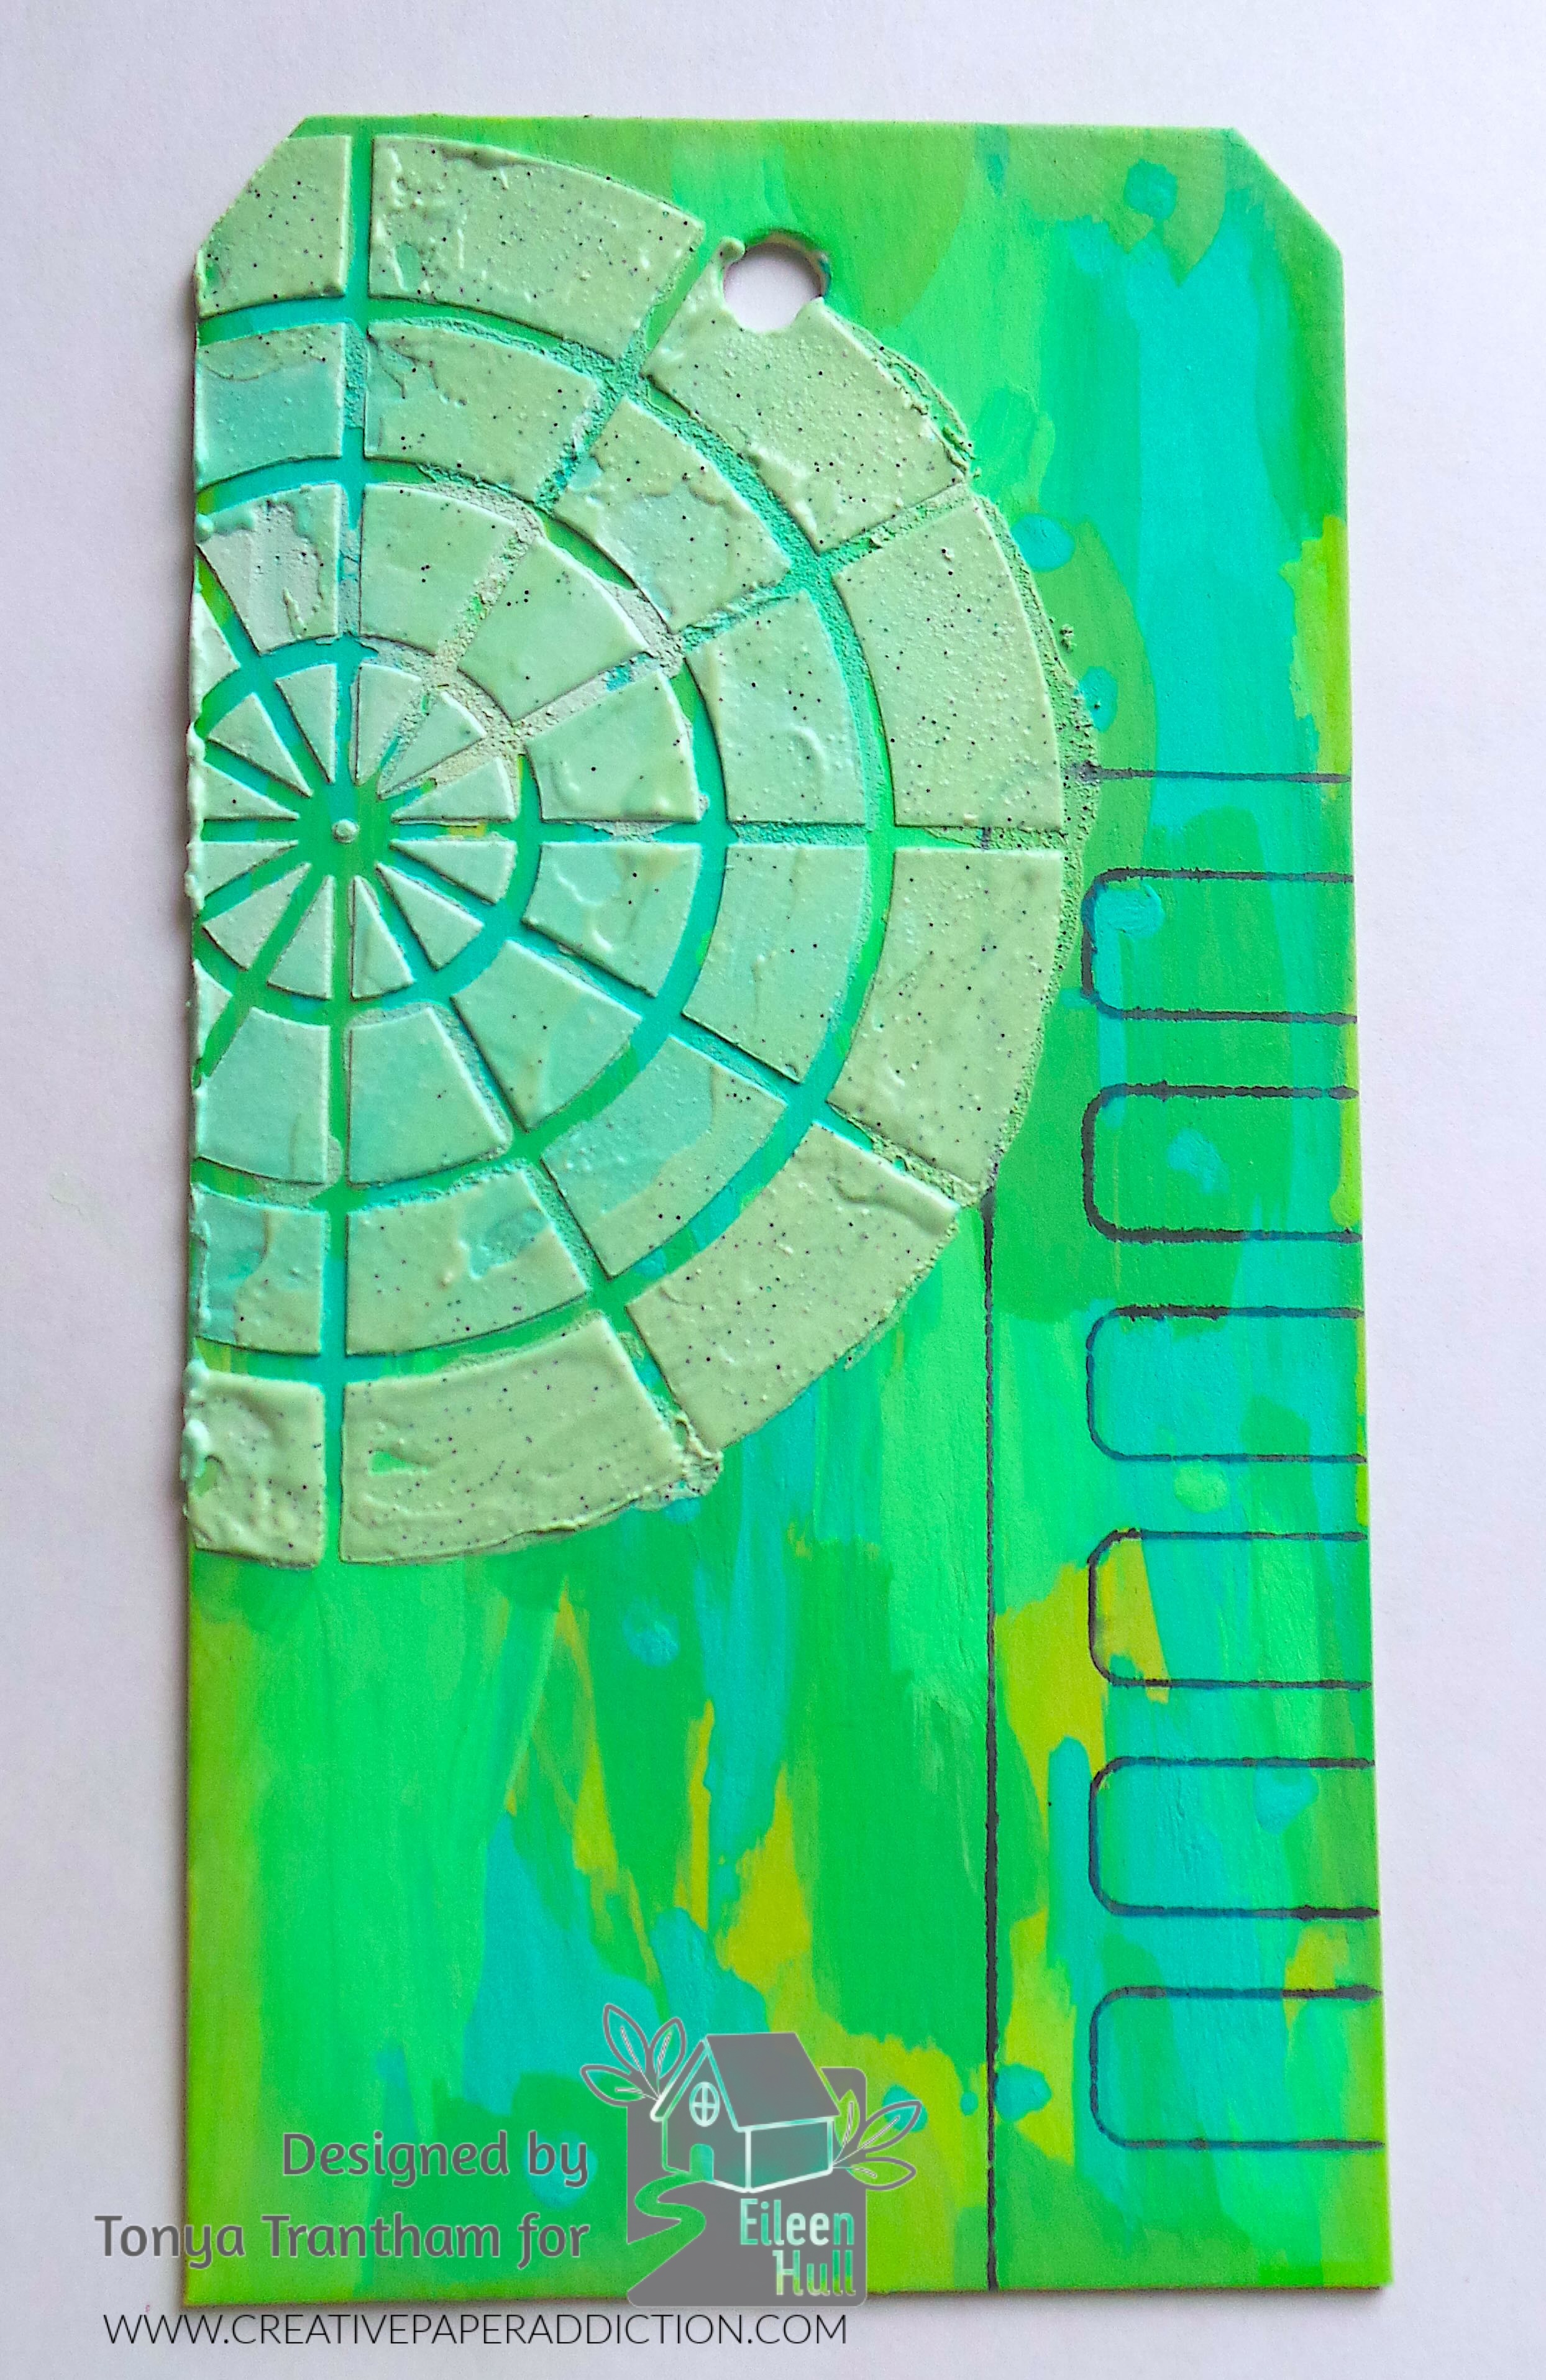
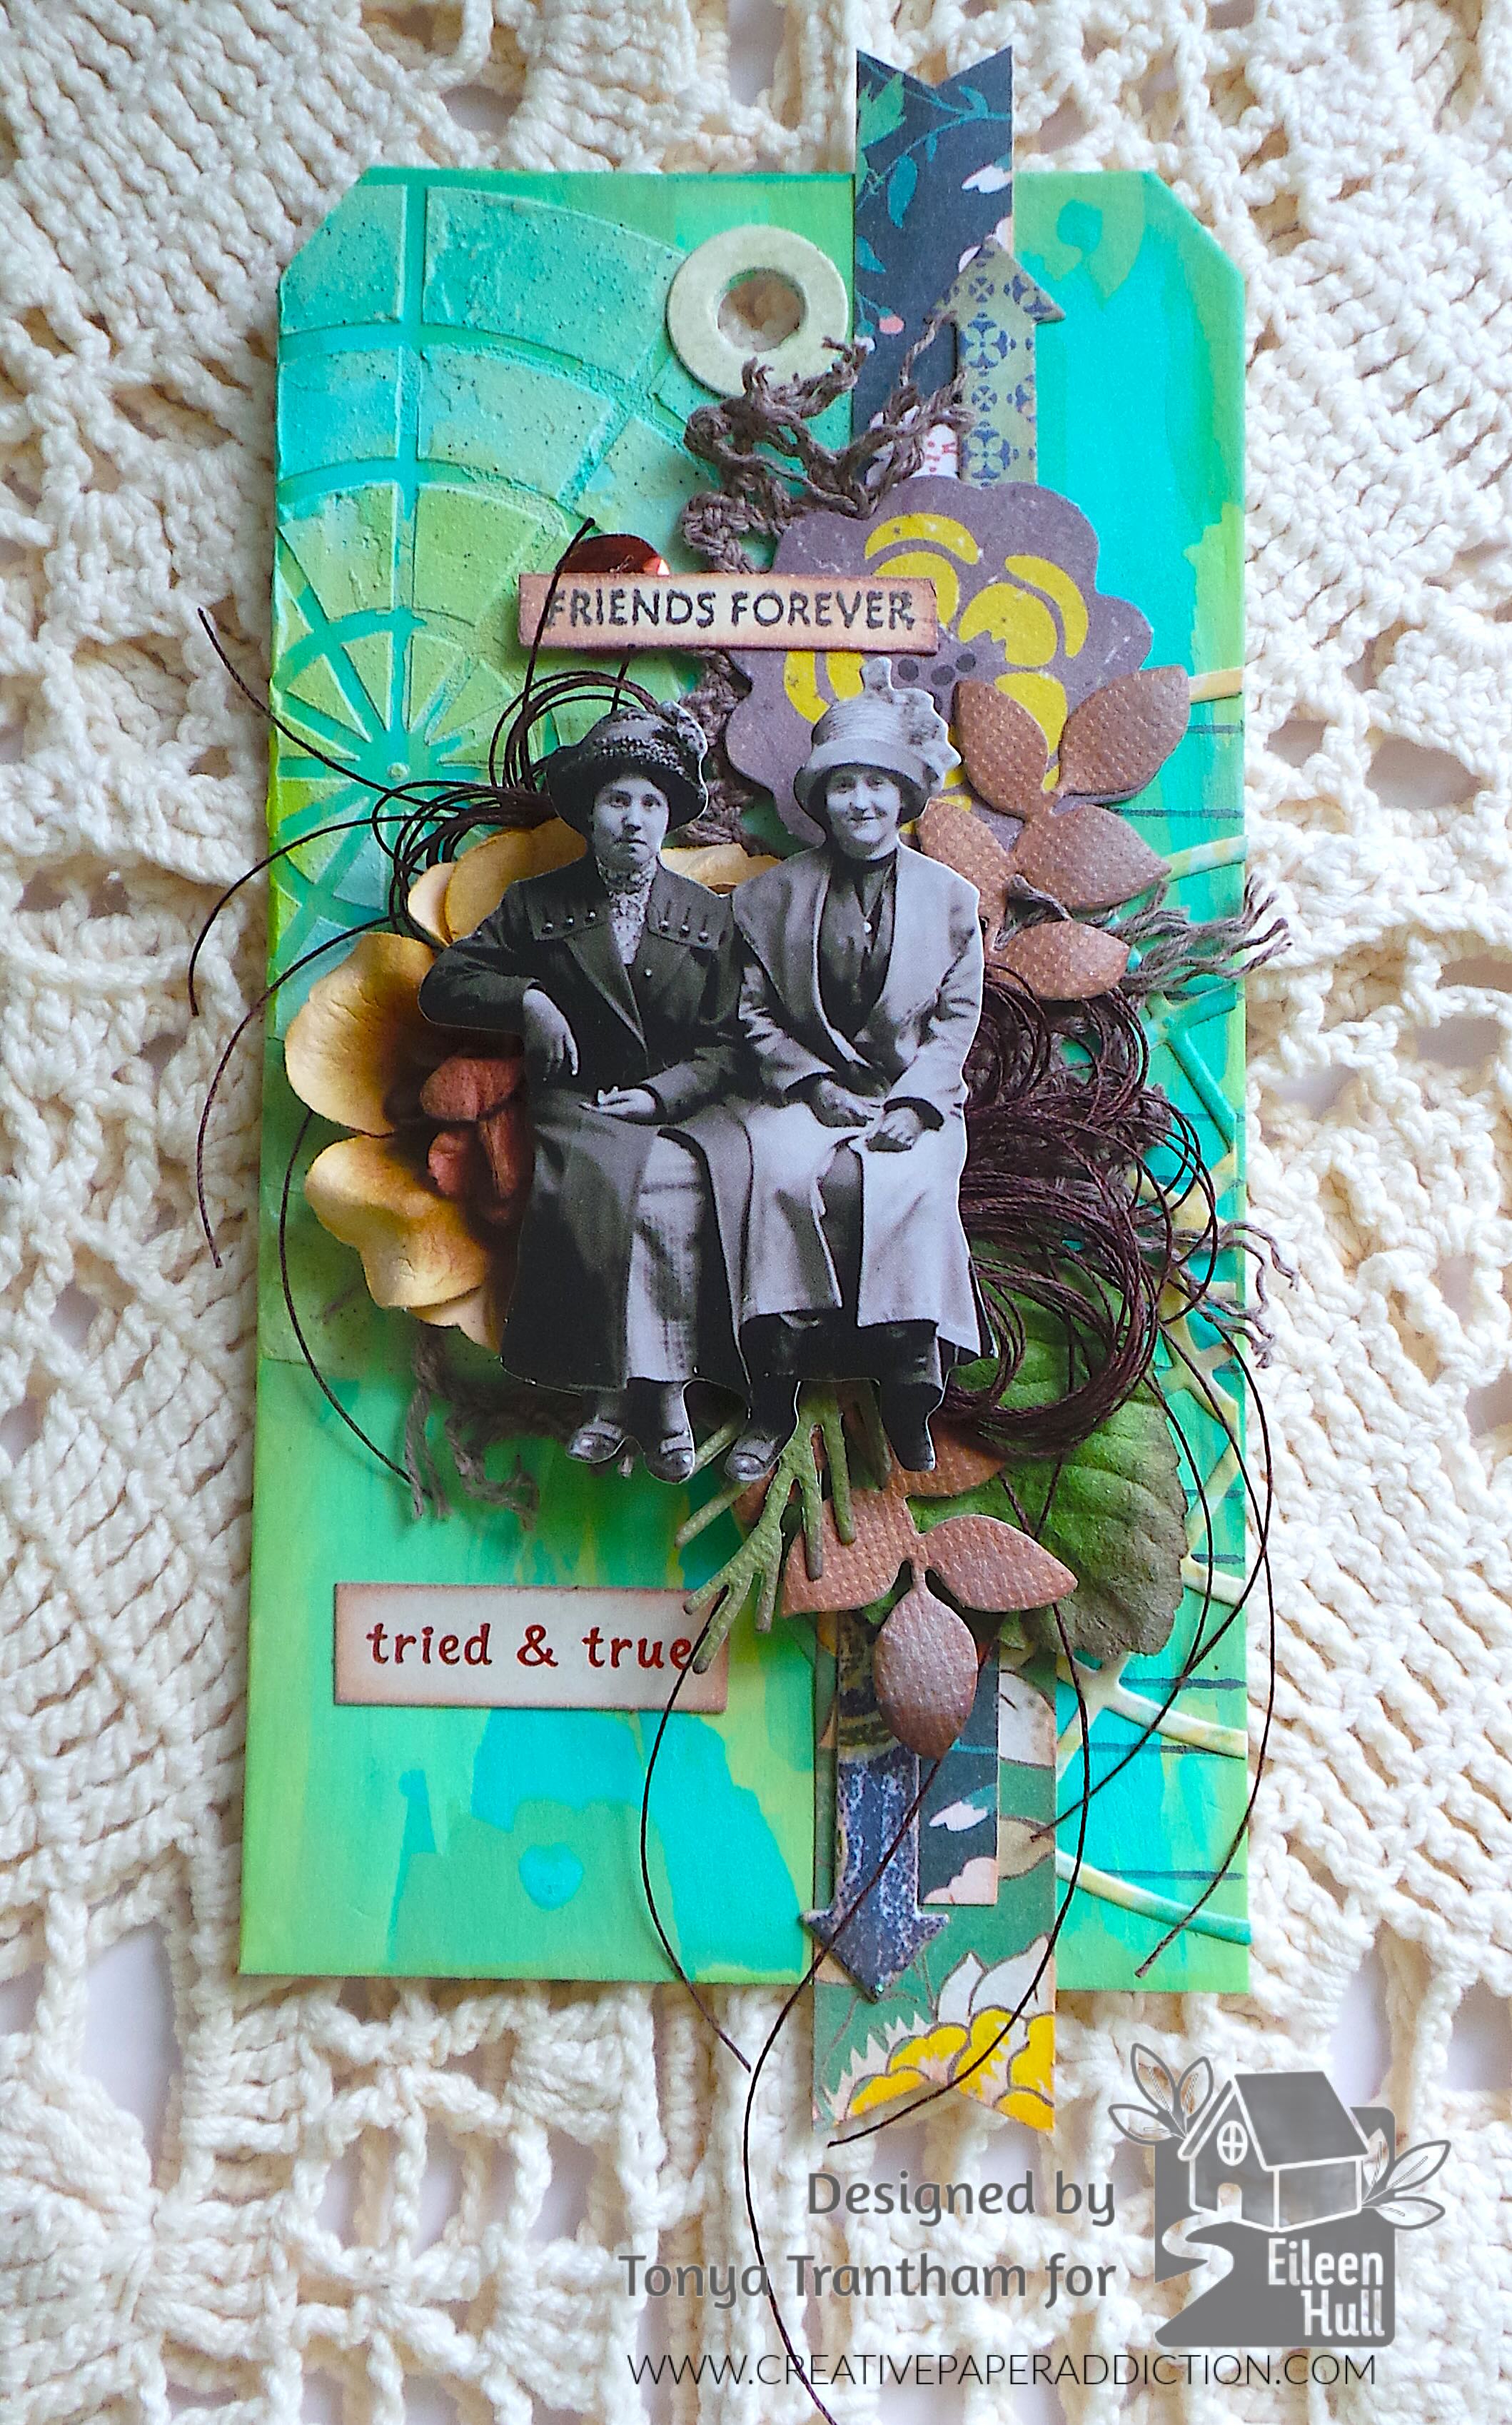
I lightly inked over the edges of the tag and the stenciled area with the green and blue Chalk Ink. I applied Adhesive to the back of a piece of cardstock. I cut a color wheel from the Rainbow Wheels Thinlits. I removed the backing from the adhesive and placed the color wheel onto the tag. I cut the excess off.

I cut a “v” in the ends of two strips of patterned cardstock and glued to the tag. I cut up some brown lace and added to the tag. Next I dug into my stash and found a flower chipboard piece, paper flower and leaf. I adhered all to the tag.
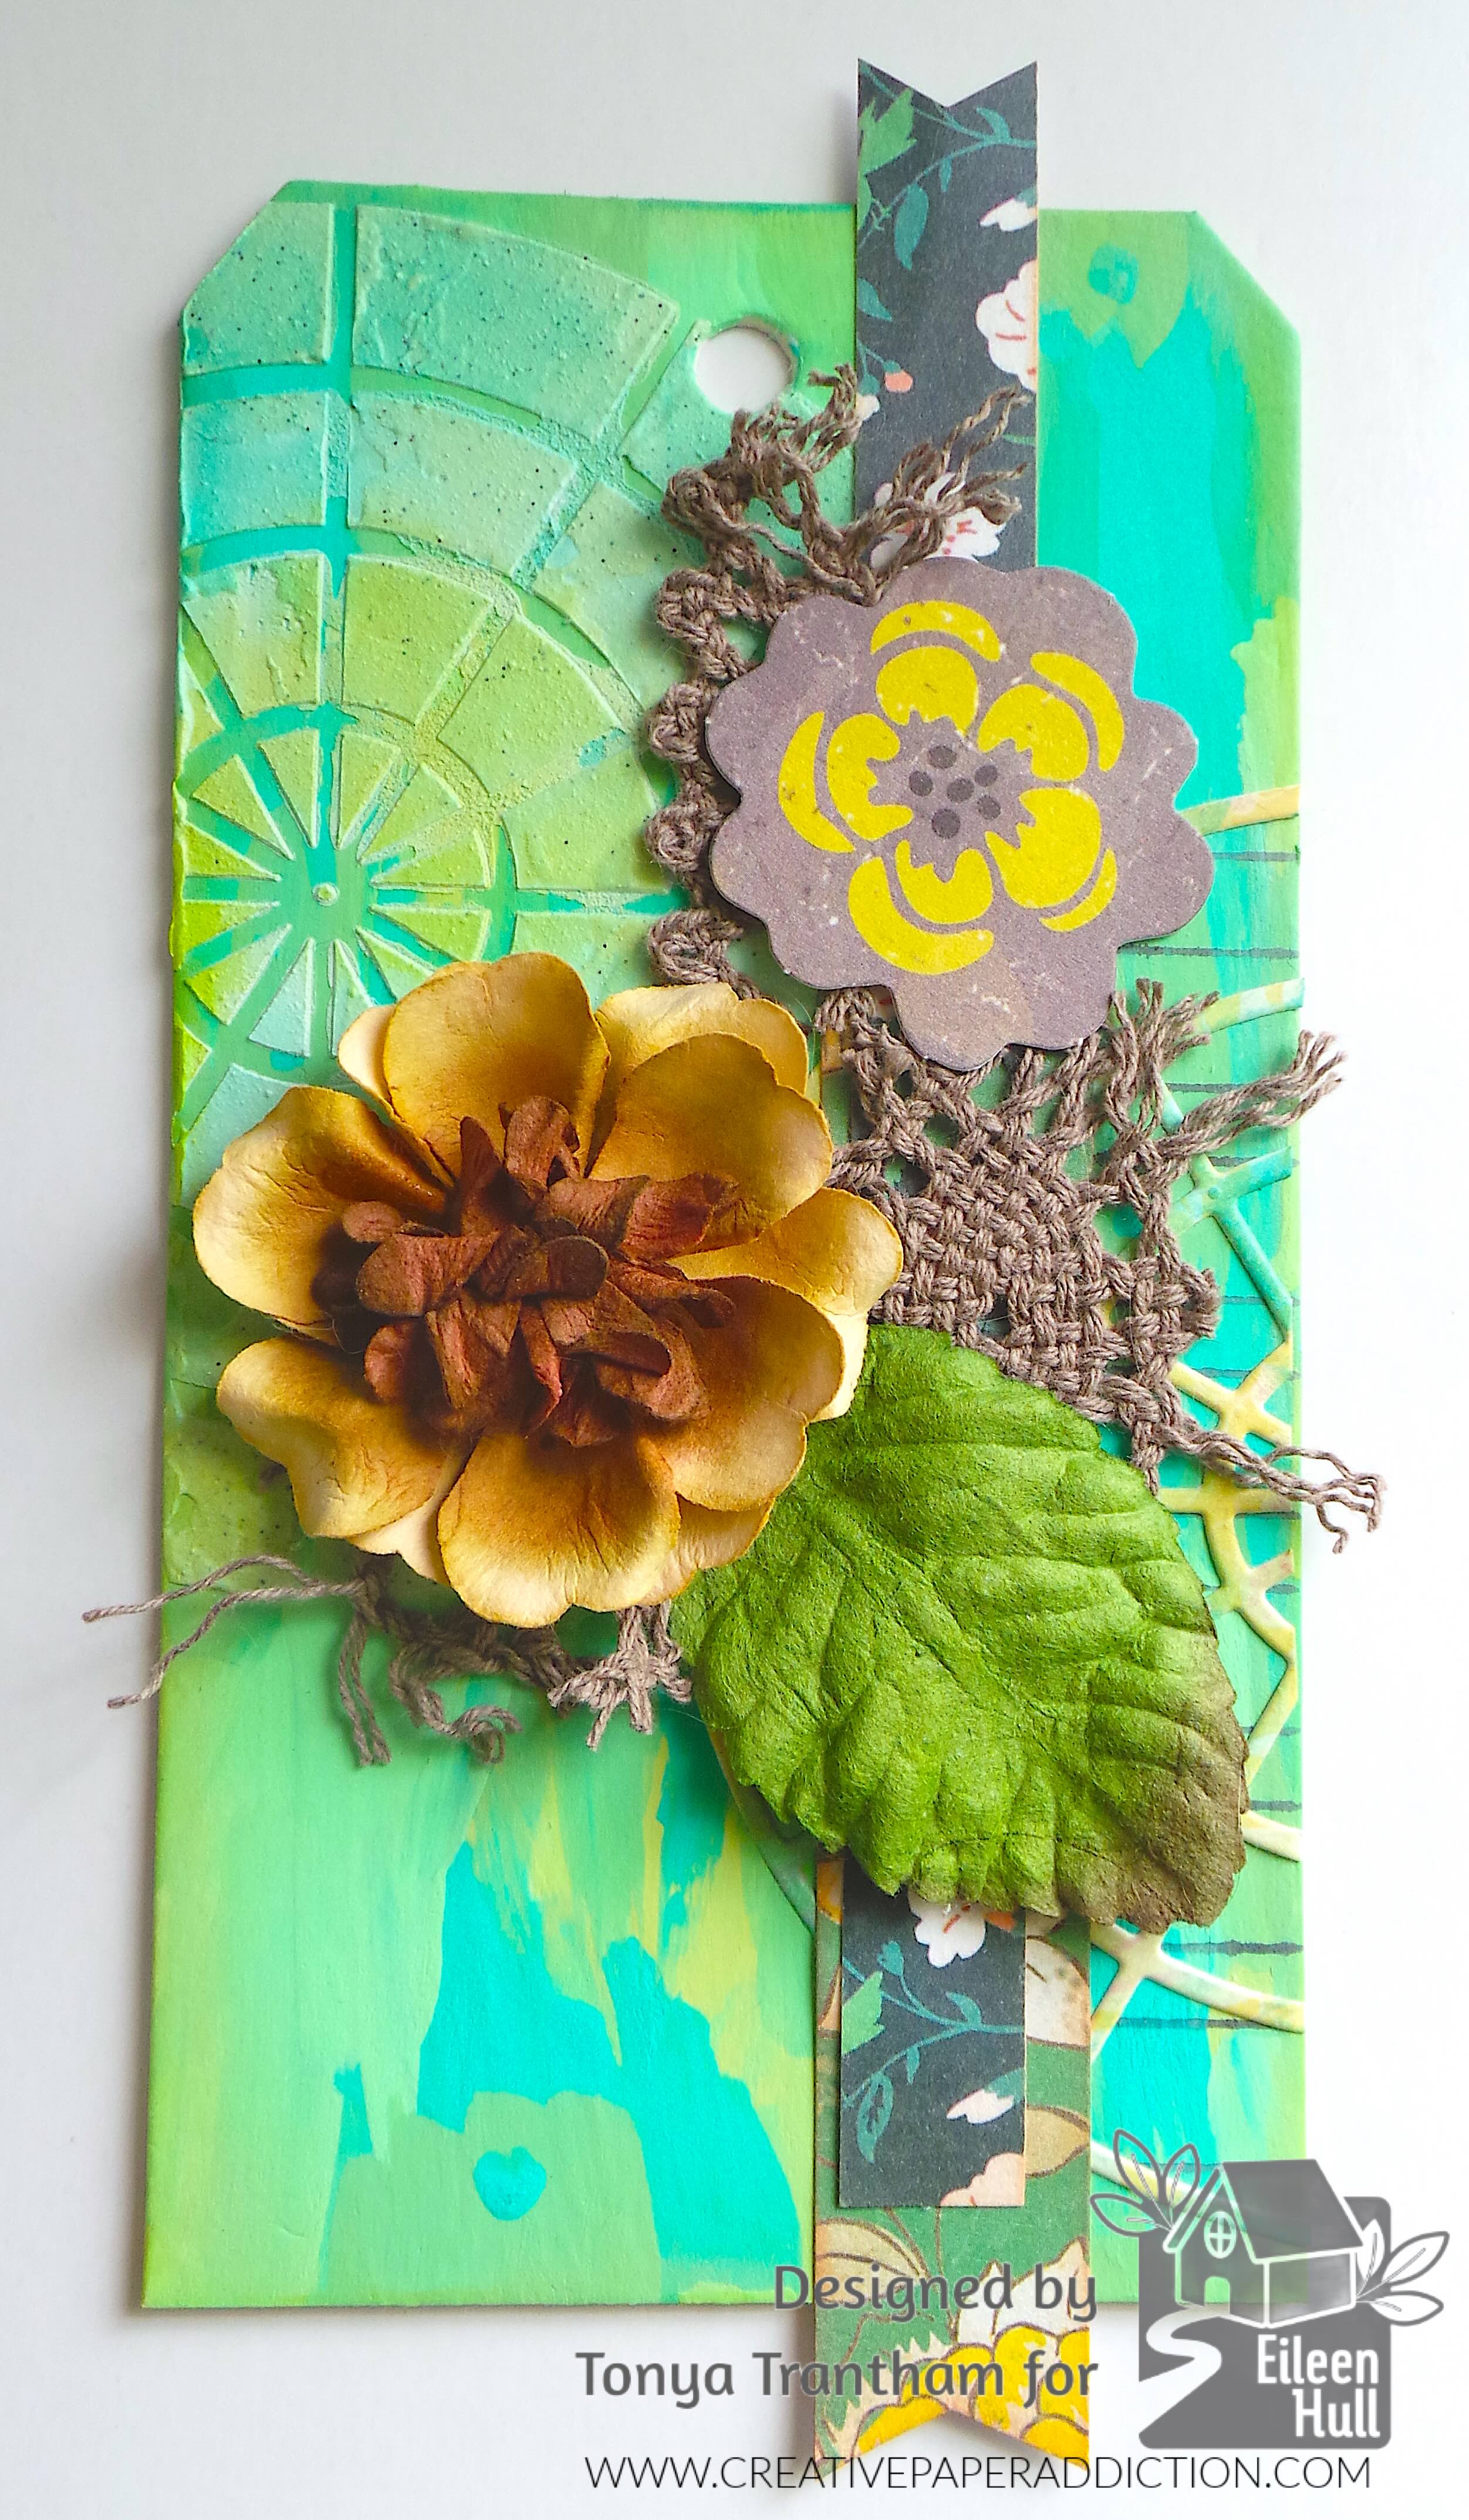
I dug into my Mini Paper Dolls and selected these women and glued onto the paper flower. I picked the “Friends Forever” stamp, inked up and stamped onto a piece of cardstock. I went over the edges of the sentiment with a brown Chalk Ink. I adhered to the chipboard flower and I added a sequin under one edge of the sentiment.
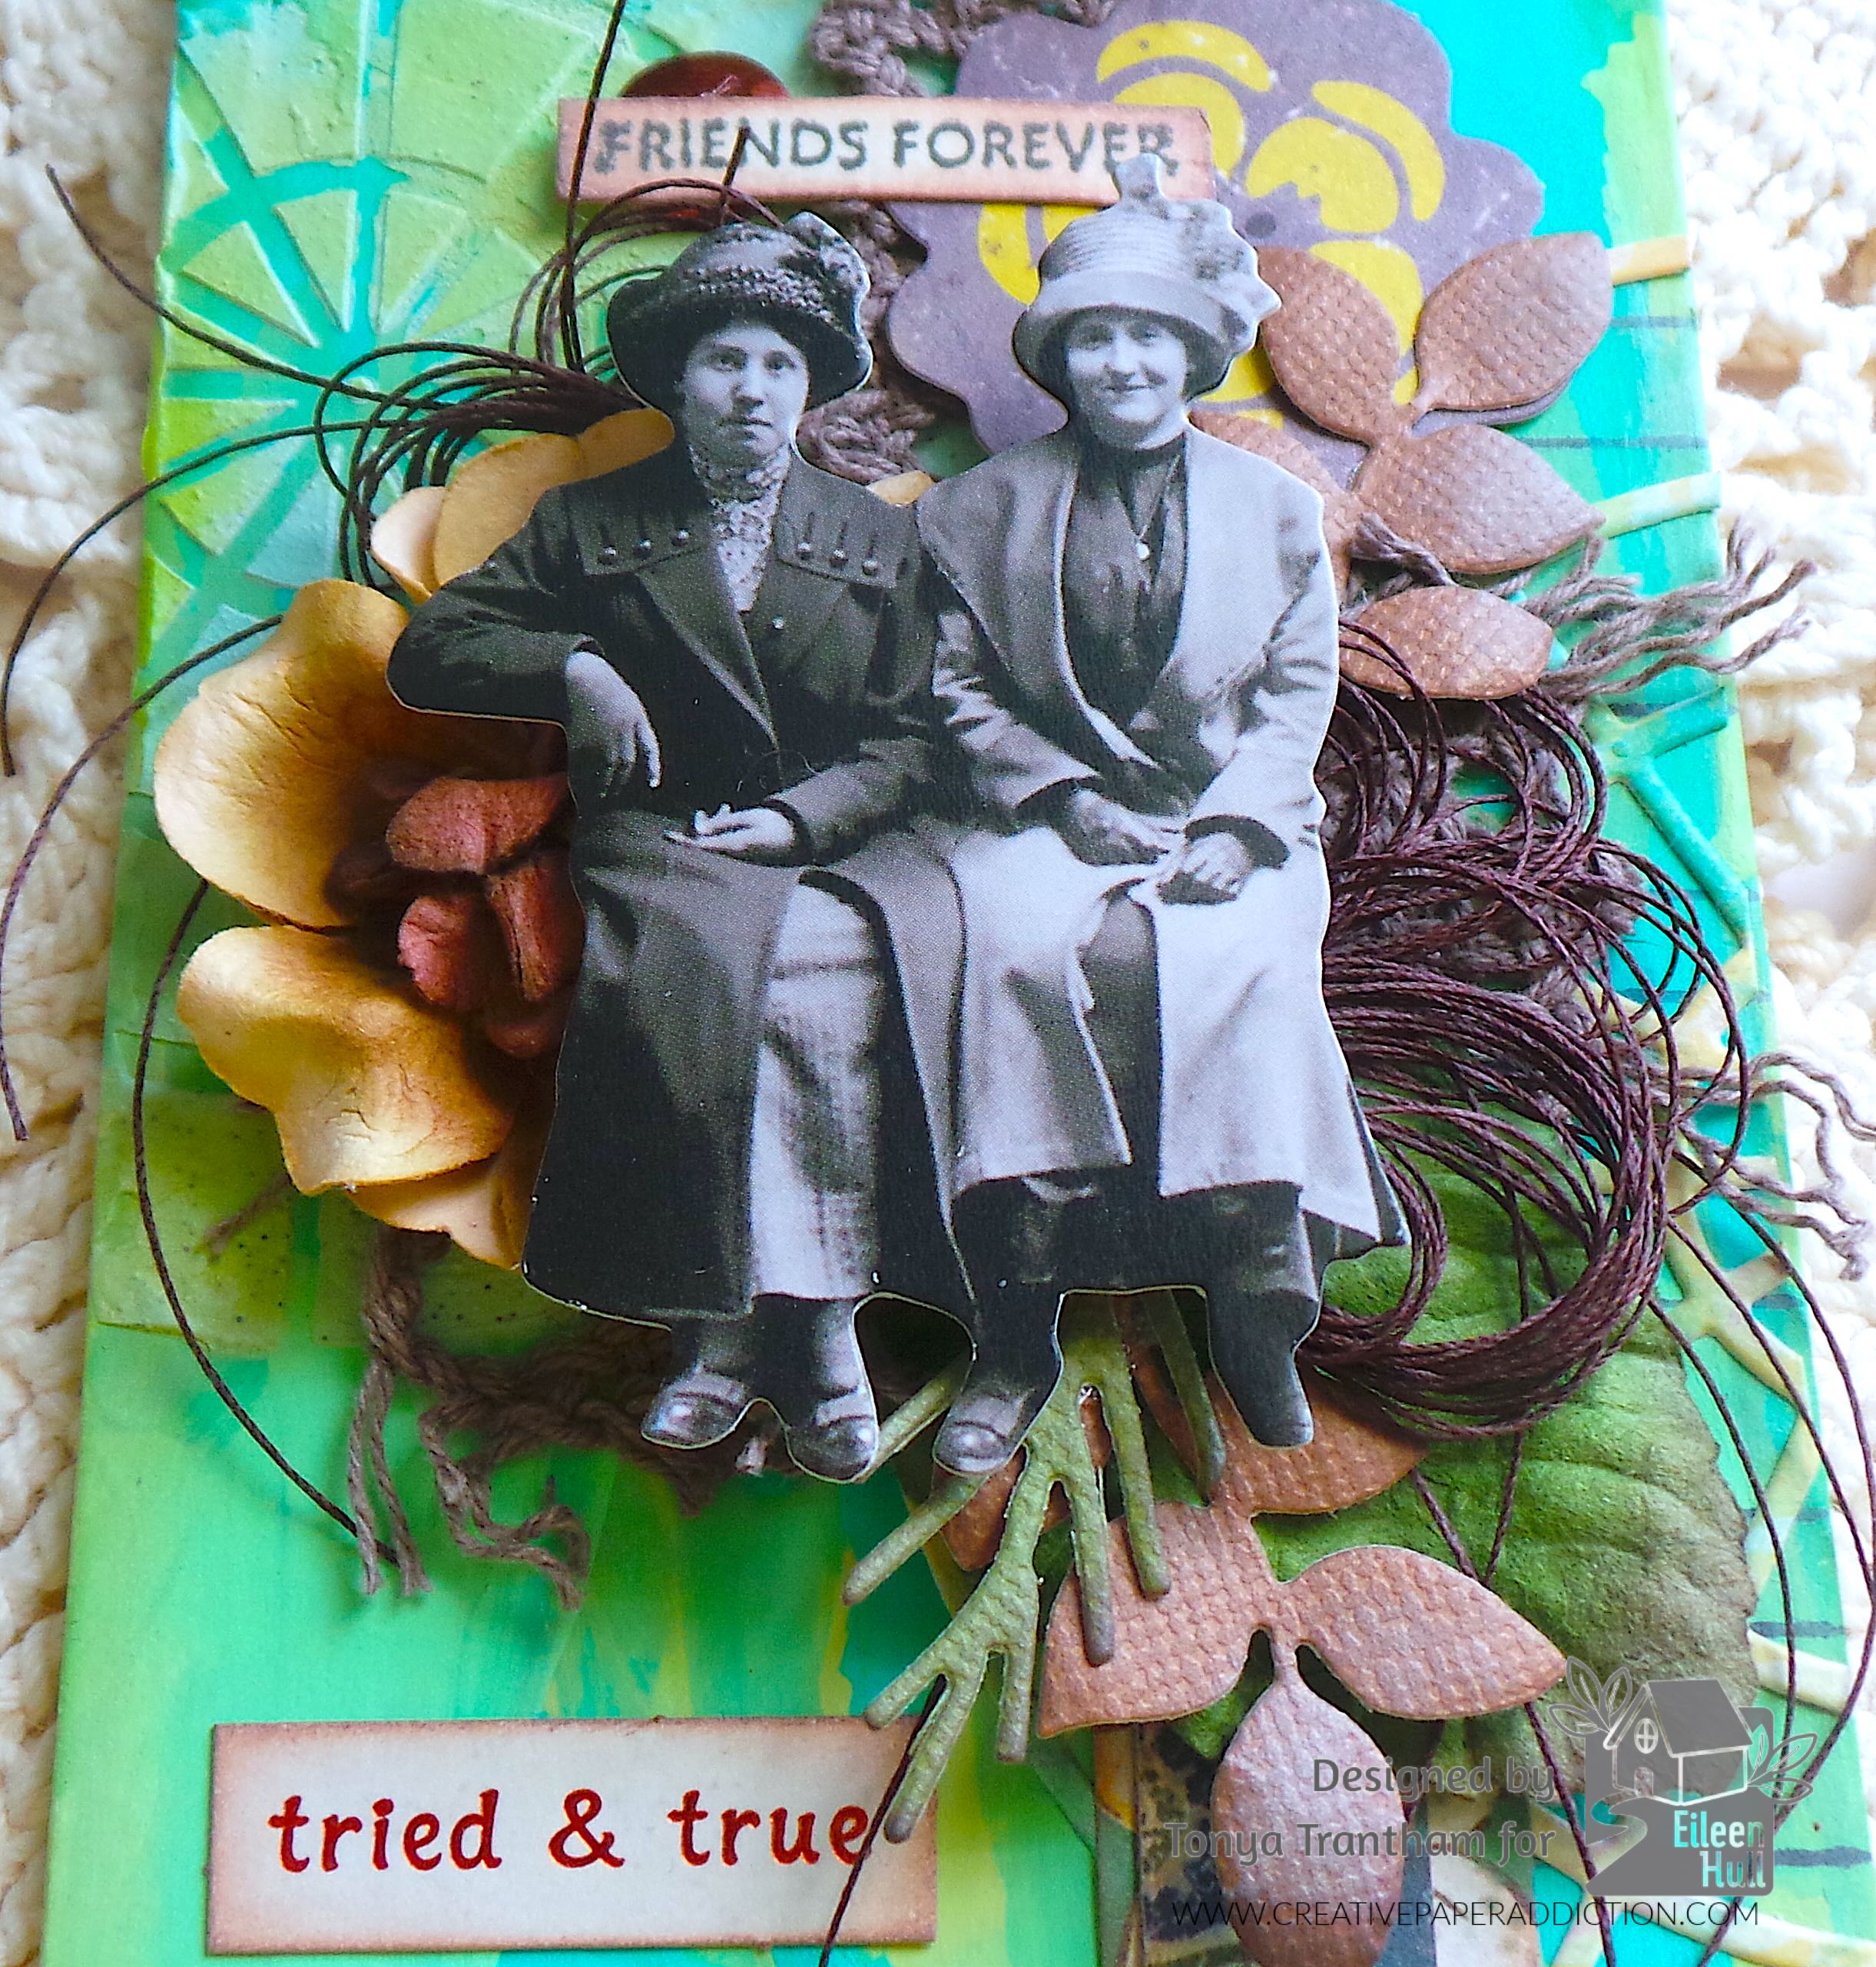
I found in my stash the “tried and true” sentiment, leaf sprigs and an evergreen sprig. I glued all to the tag.
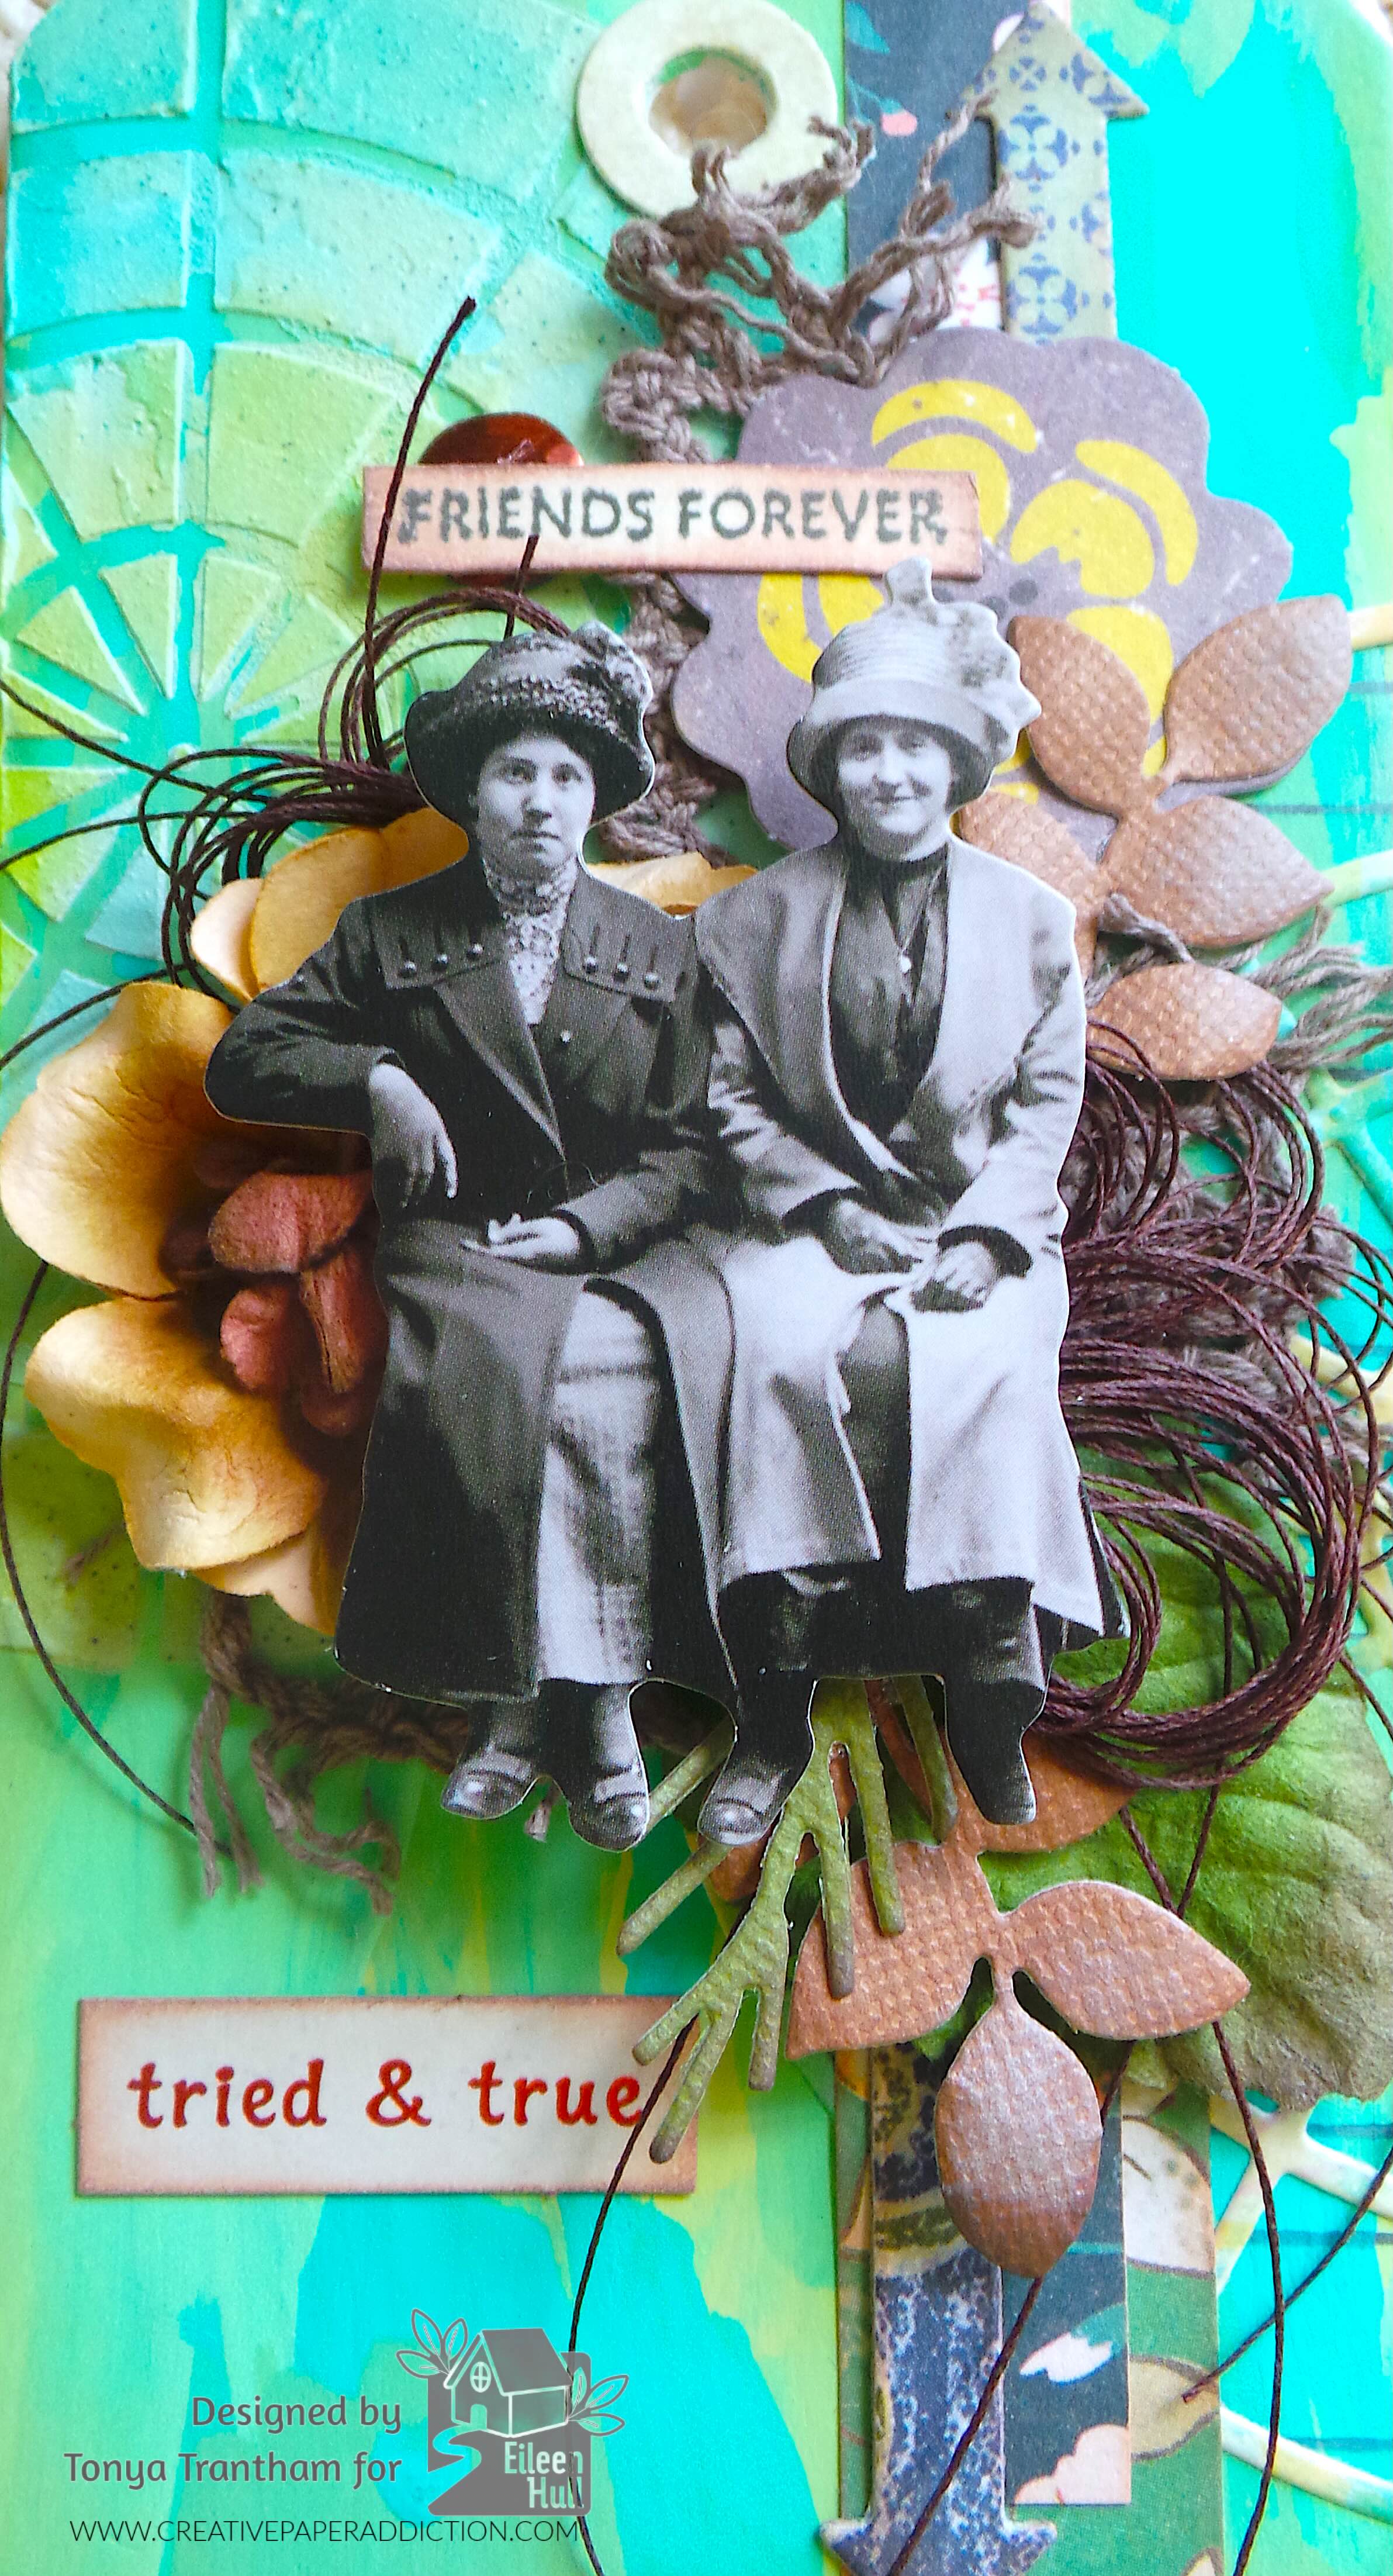
I made bows from thread and added. I cut two of the arrows from the Rainbow Wheels Thinlits and glued to the tag to finish.
I want to share a little. I struggle with stencils and I had put off using them. I think this tag turned out decent. Hopefully I will get over my fear of using them and will improve. What are your thoughts on stencils? Do you incorporate them in your projects? Let me know in the comments below.
If you haven’t been by Eileen’s blog lately, you might want to check it out. You can see what her creative team has been up to and find that latest post HERE.
Supplies
Sizzix/Eileen Hull: Color Wheel Stencils
Sizzix/Eileen Hull: Rainbow Wheels Thinlits
Sizzix/Eileen Hull: Swatch Cards Stamp Set
Sizzix/Tim Holtz: Tag and Bookplates Diecut (retired)
Pops of Color: Honeydew, Sea Foam, Olive, and Holly Green
Various Patterned Cardstocks
Lace, Brown Thread and One Sequin
Paper Flower, Leaf Sprigs and Greenery Diecuts
Craft Smart Acrylic Paints: Ocean Breeze, Bright Mint and Celery
Beacon Adhesives: Zip Dry Adhesive
(Products listed above are Affiliated Links for your convenience)
DISCLAIMERS
This blog is compensated to provide opinion on products, services, websites, and various other topics. Even though the owner(s) of this blog receives compensation for our posts or advertisements. I always give my honest opinions, findings, beliefs, or experiences on those topics or products. The views and opinions expressed on this blog are purely my own. Any product claim, statistic, or quote should be checked with each manufacturer. Verify other representations about a product or service with the provider or party in question.This blog contains affiliate links. Clicking these links helps to support Tonya Trantham Designs – Creative Paper Addiction. It’s at no additional cost to you. Today’s features are Sizzix, Eileen Hull and Scrapbook.com Products.
Thanks for stopping by, I hope your Wednesday is wonderful and enjoy creating!