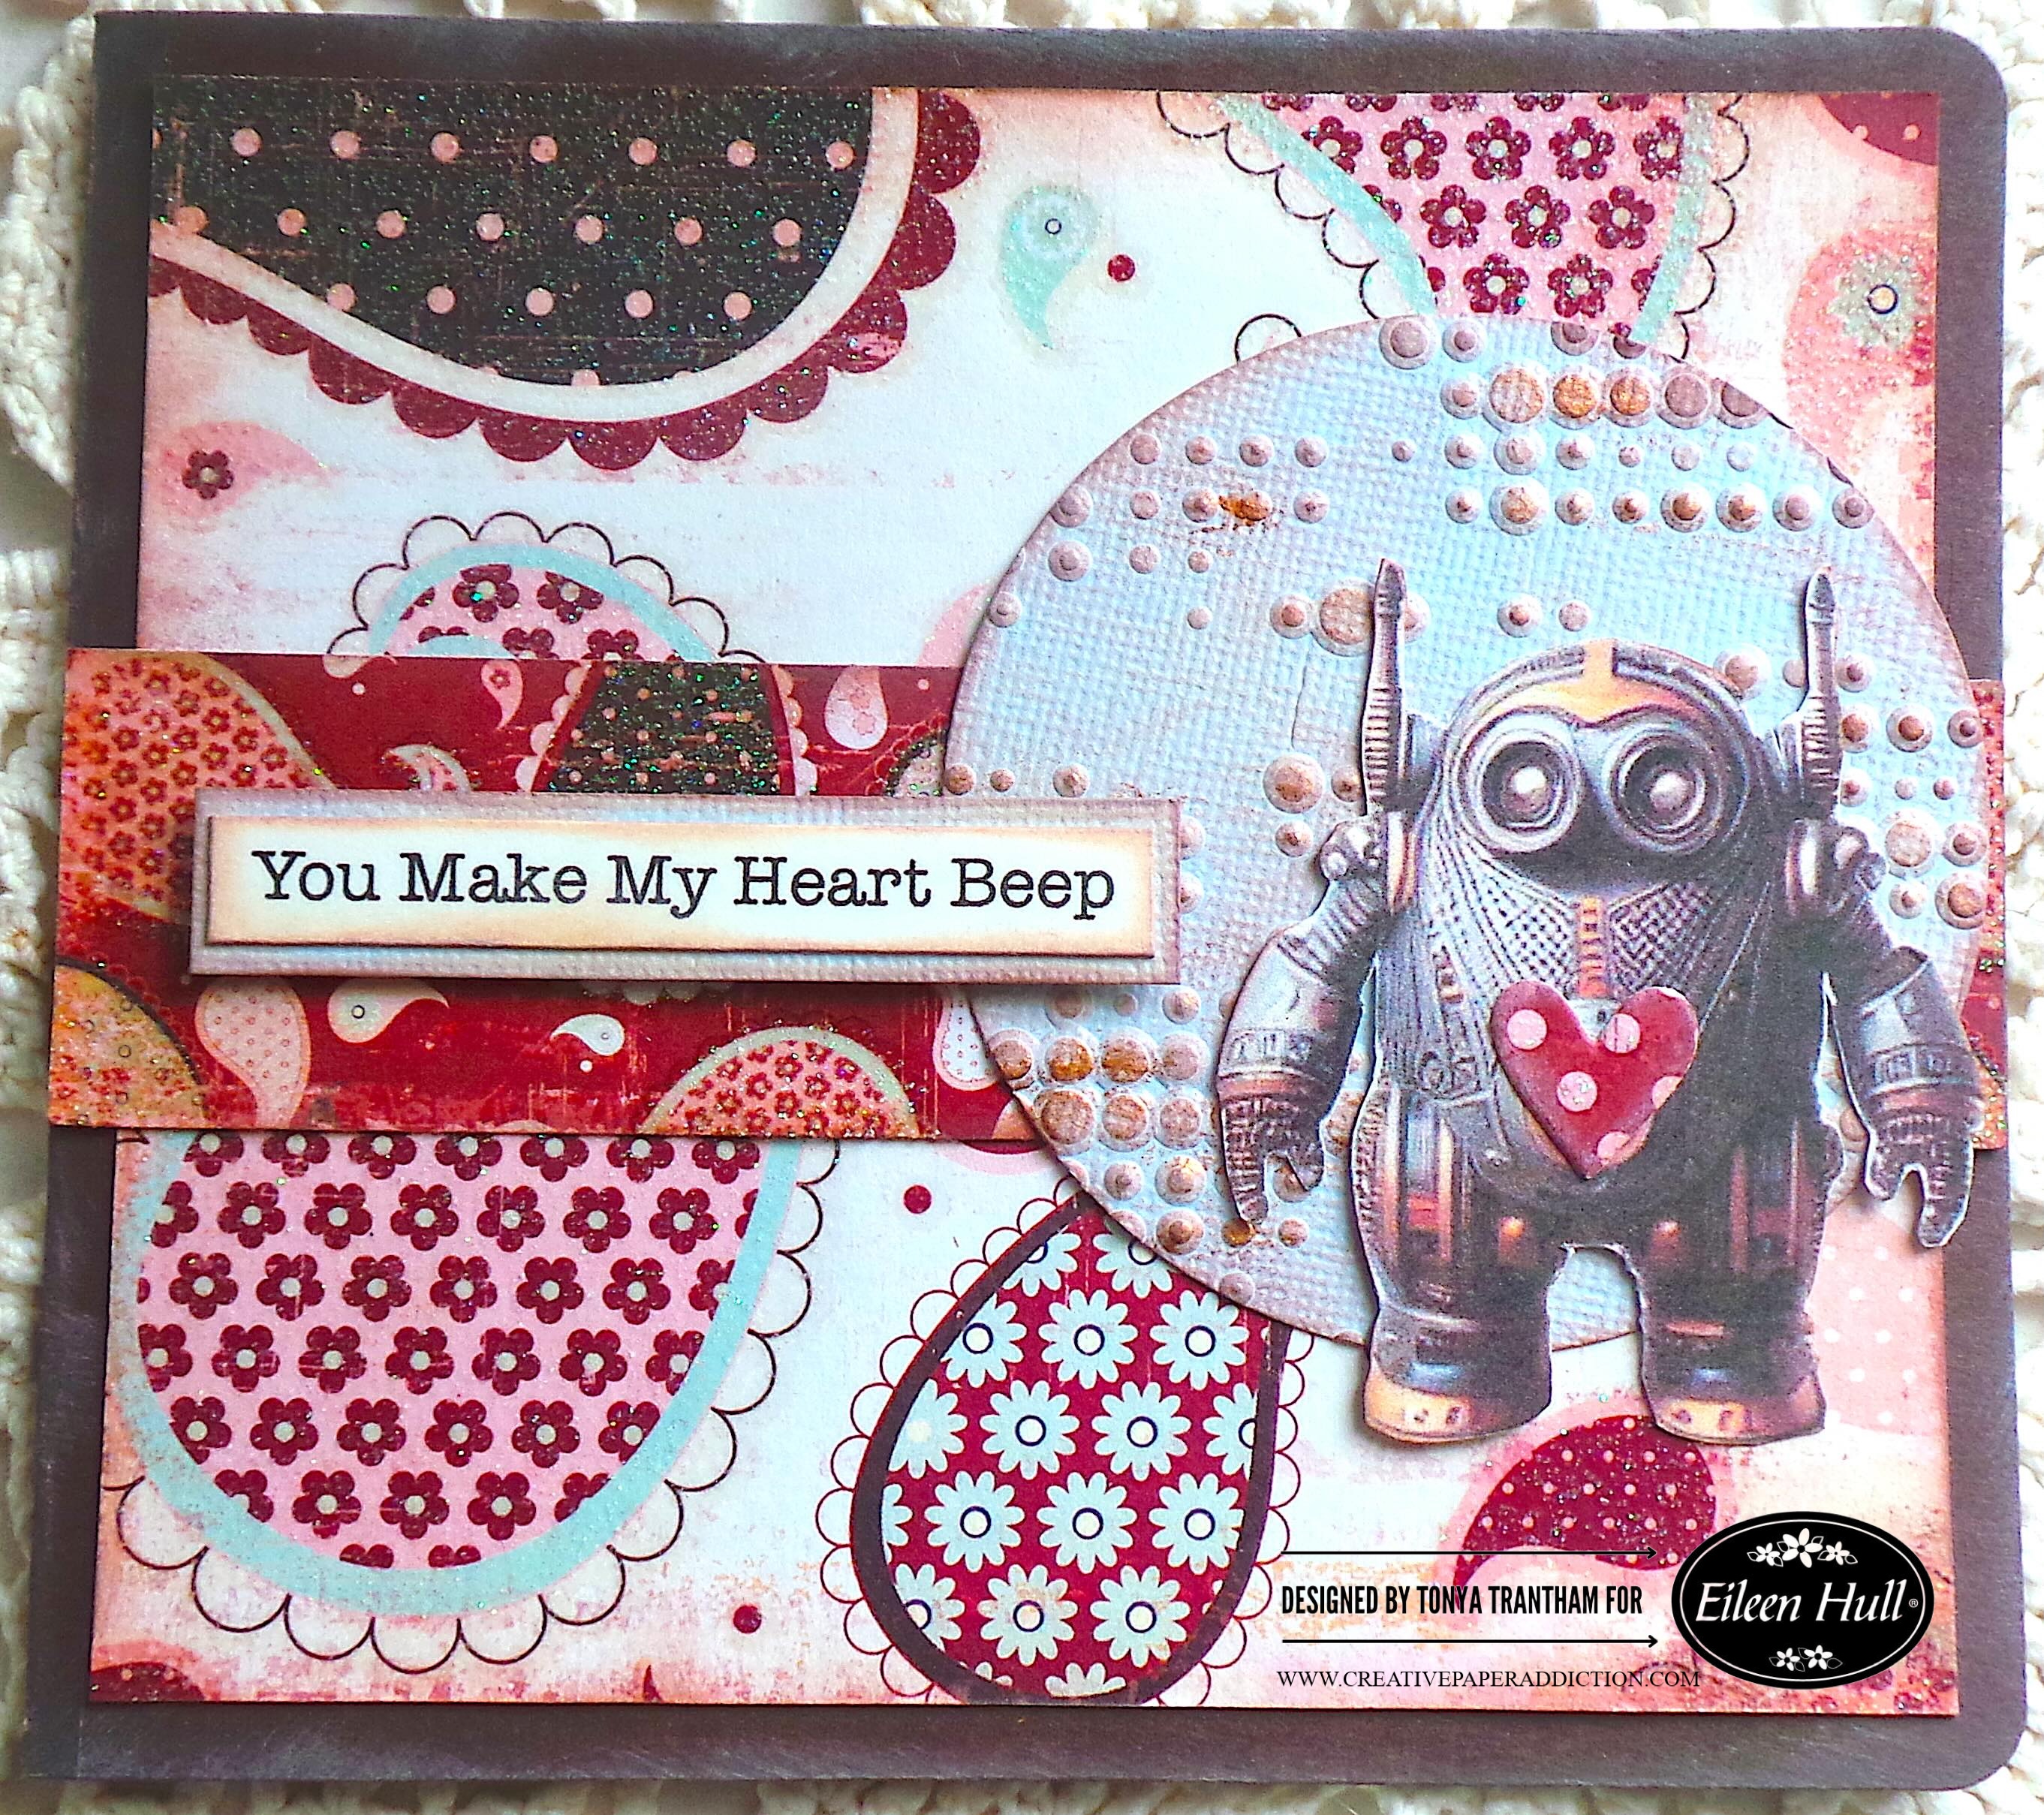
Robot Valentine’s Day Card: You Make My Heart Beep

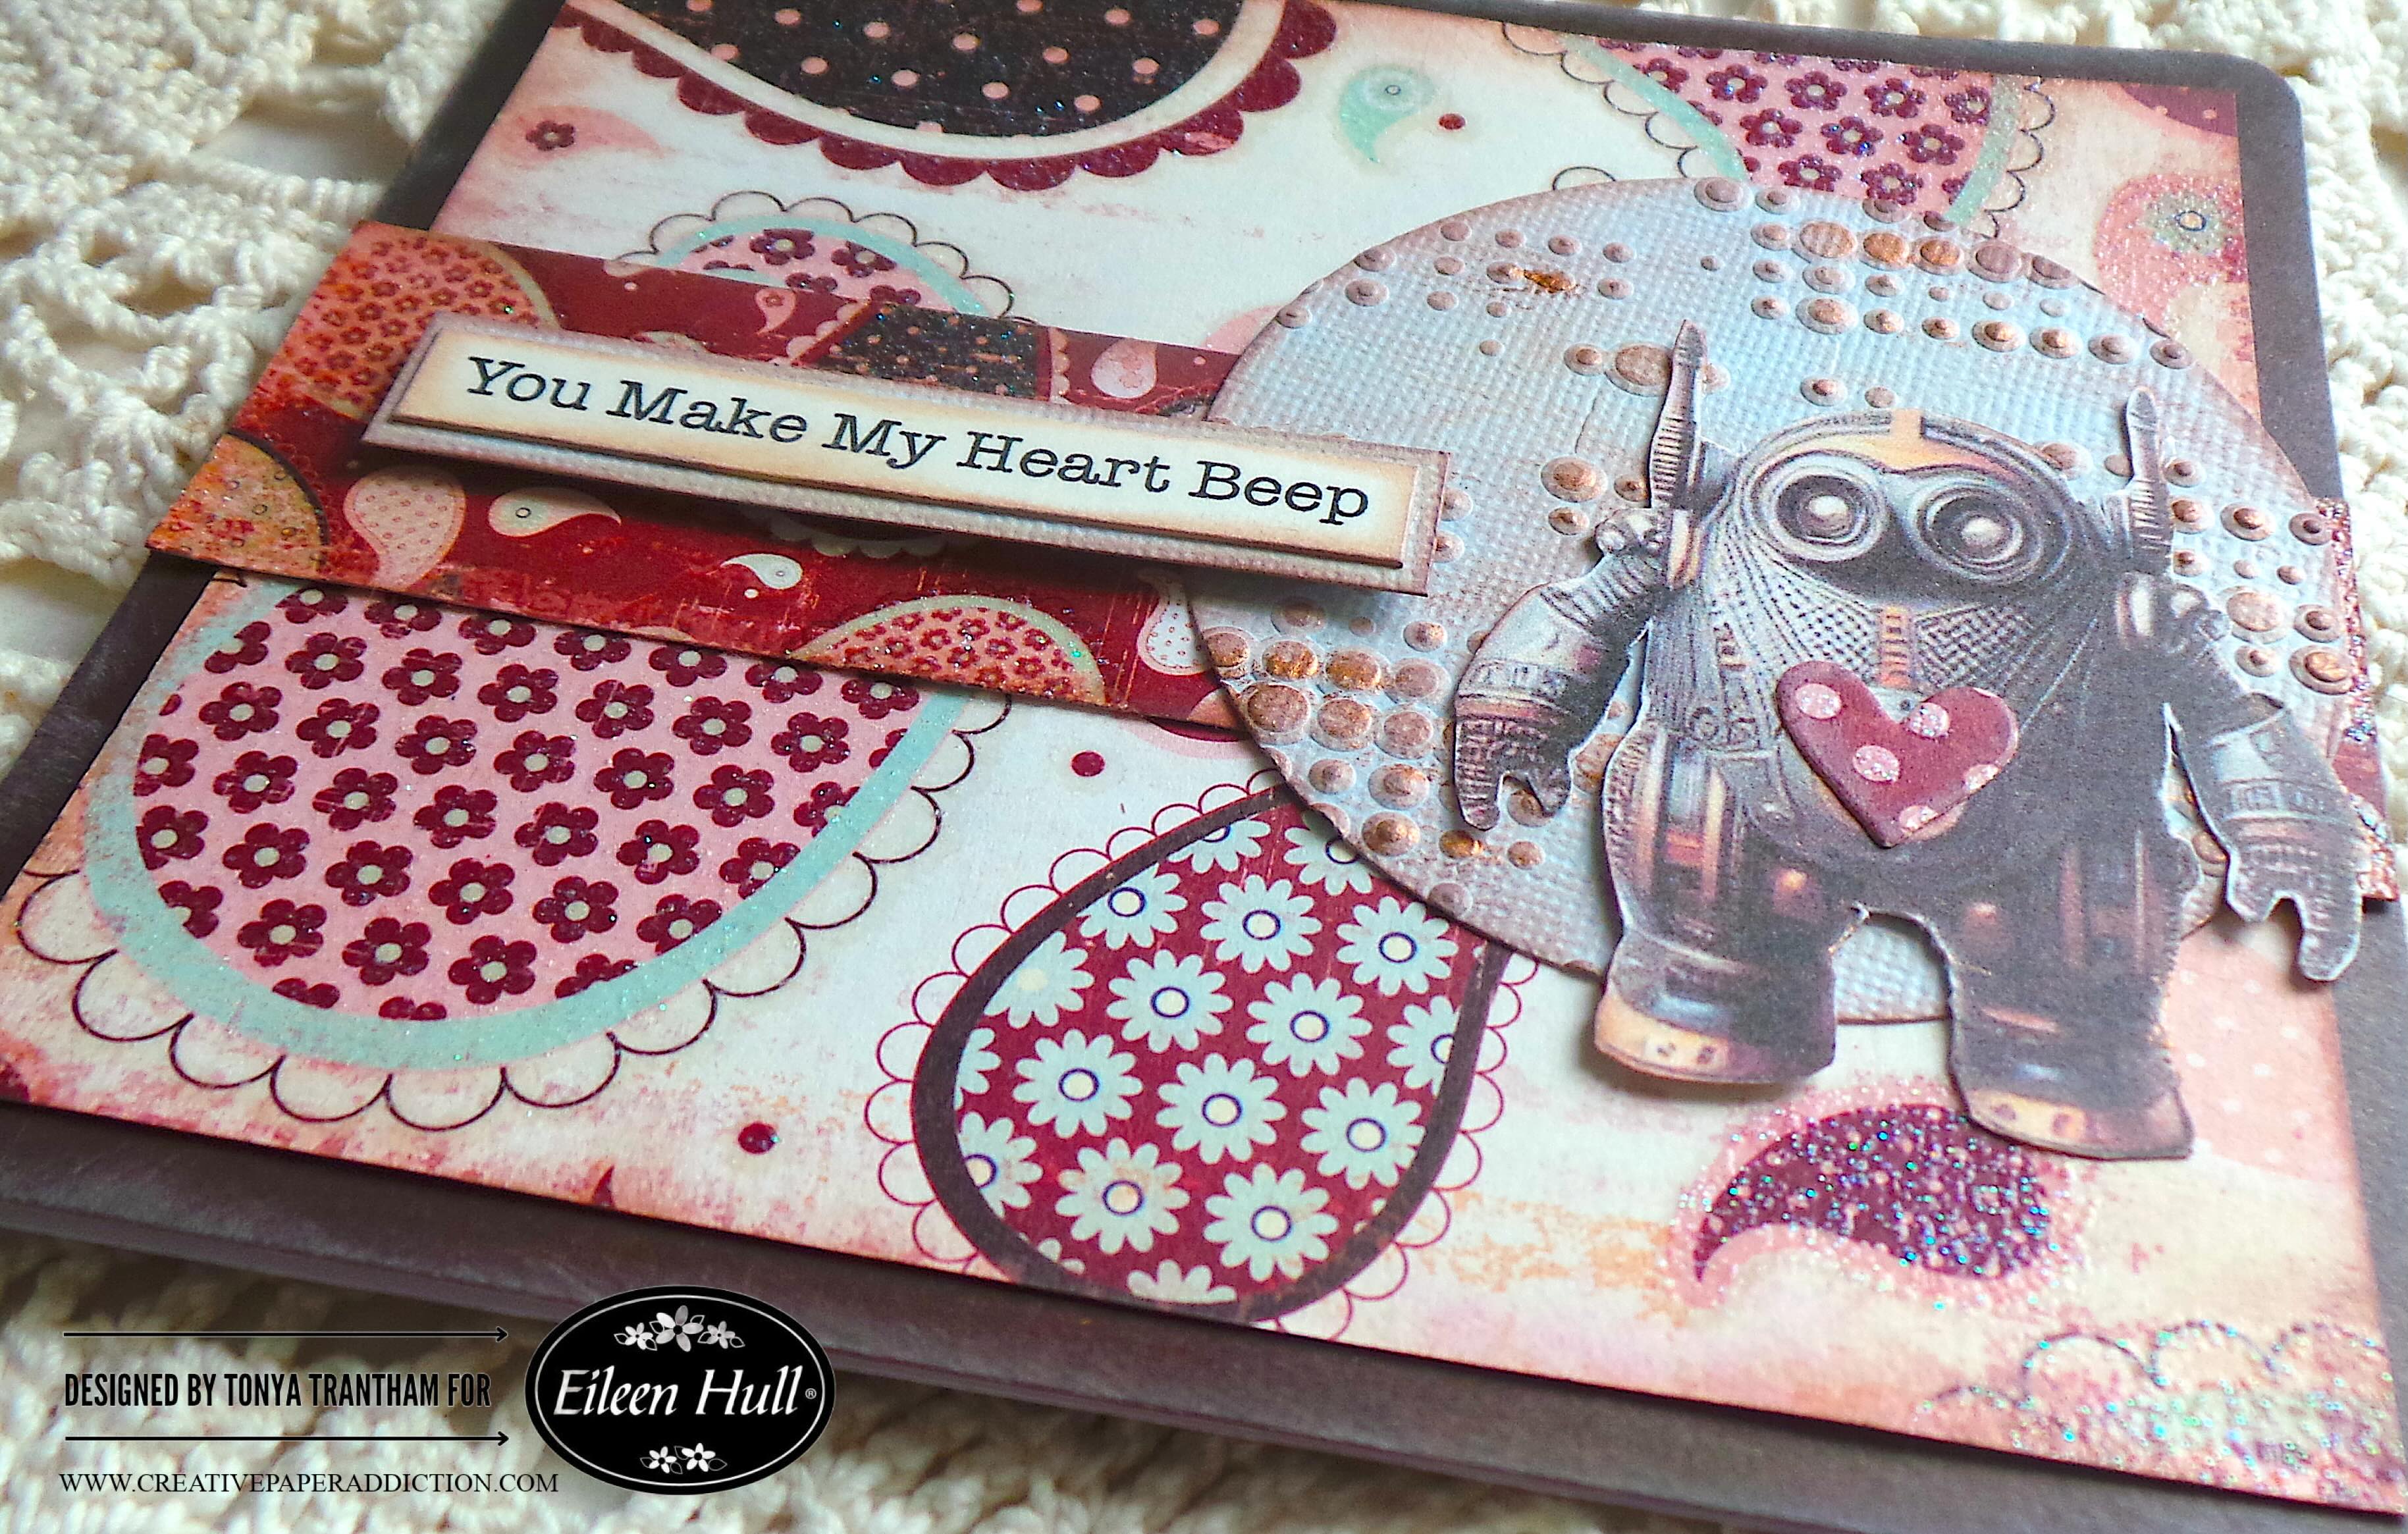
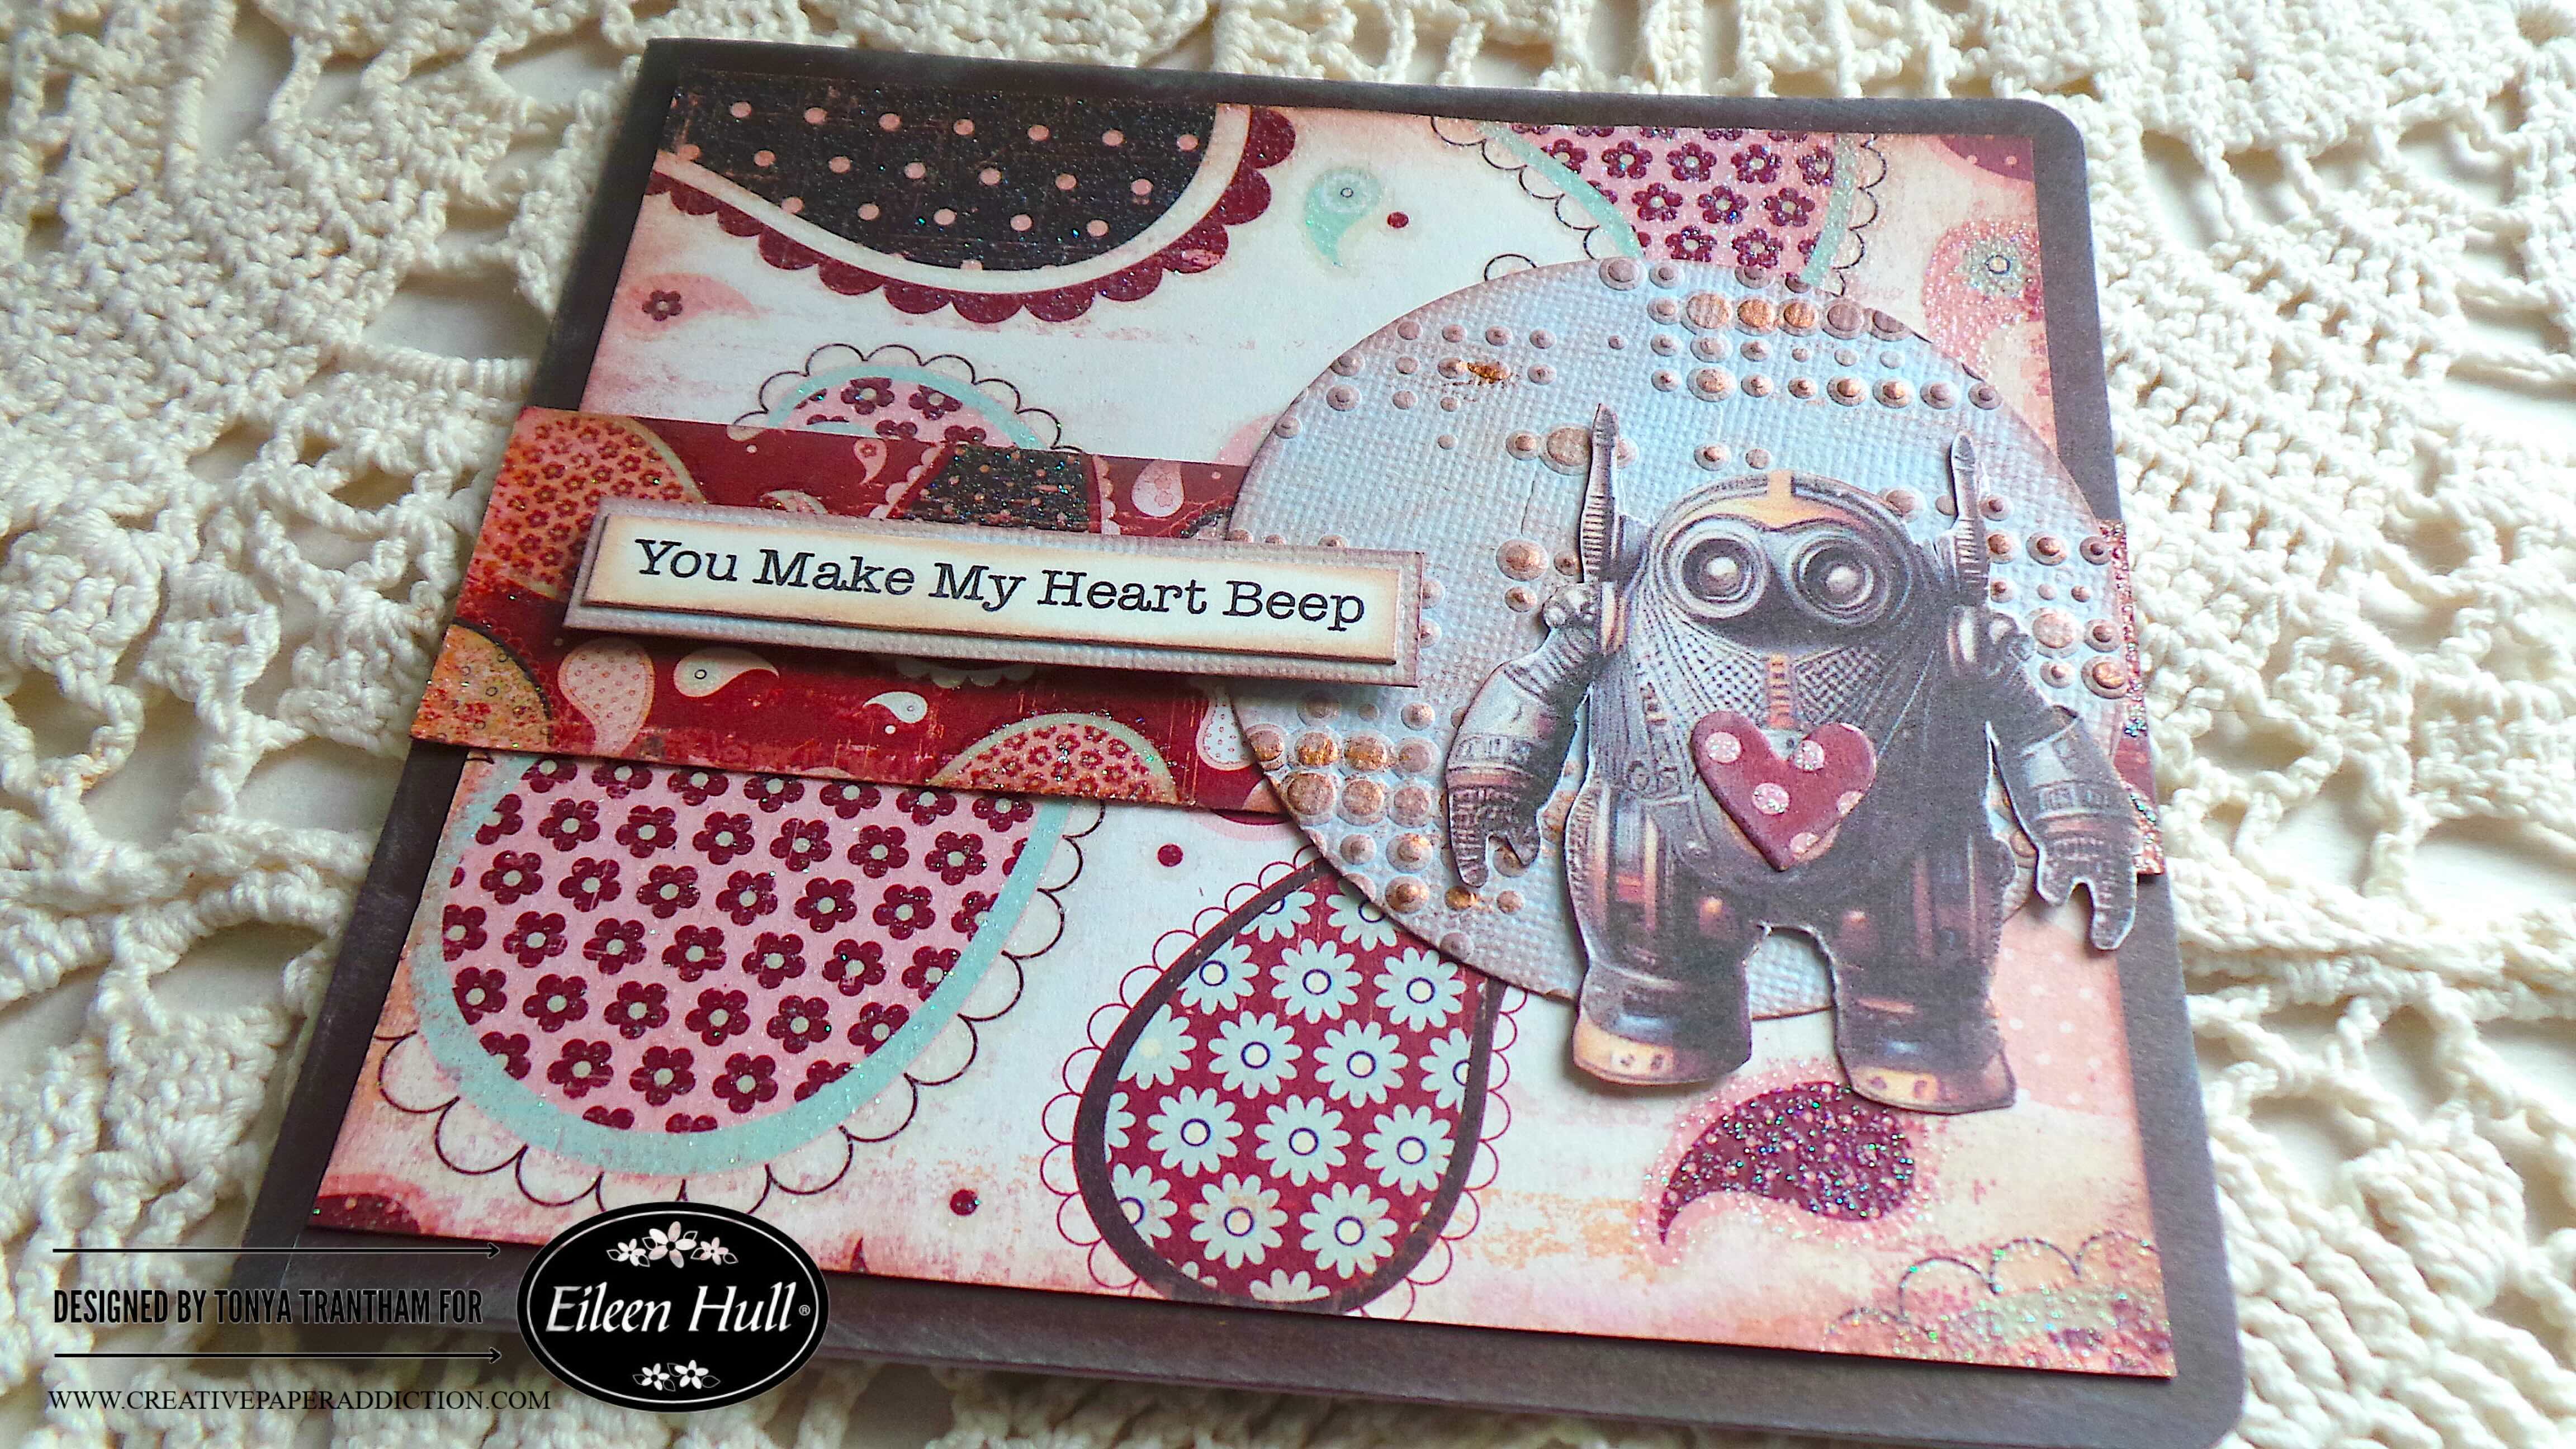
Hi everyone! Valentine’s Day is only a couple of days away and I want to share a quick card I made. I used the Mini Album Diecut as the base for the card. I used a few other dies and thinlits by Eileen Hull. Also this month it’s “Anything Goes” with Eileen Hull’s Inspiration Team. Anyways, let’s get started!
First, I would like to share a side note about the robot printable I used. I had been fooling around on AI creating images and I came up with these fat, steampunk and vintage robots. I thought this would be perfect to use on a card.

Anyways, I placed a piece of brown cardstock onto the Mini Album Diecut. It was sandwiched between cutting plates. Then, I ran it through the Diecut Machine. I folded in half to create the base of the card.
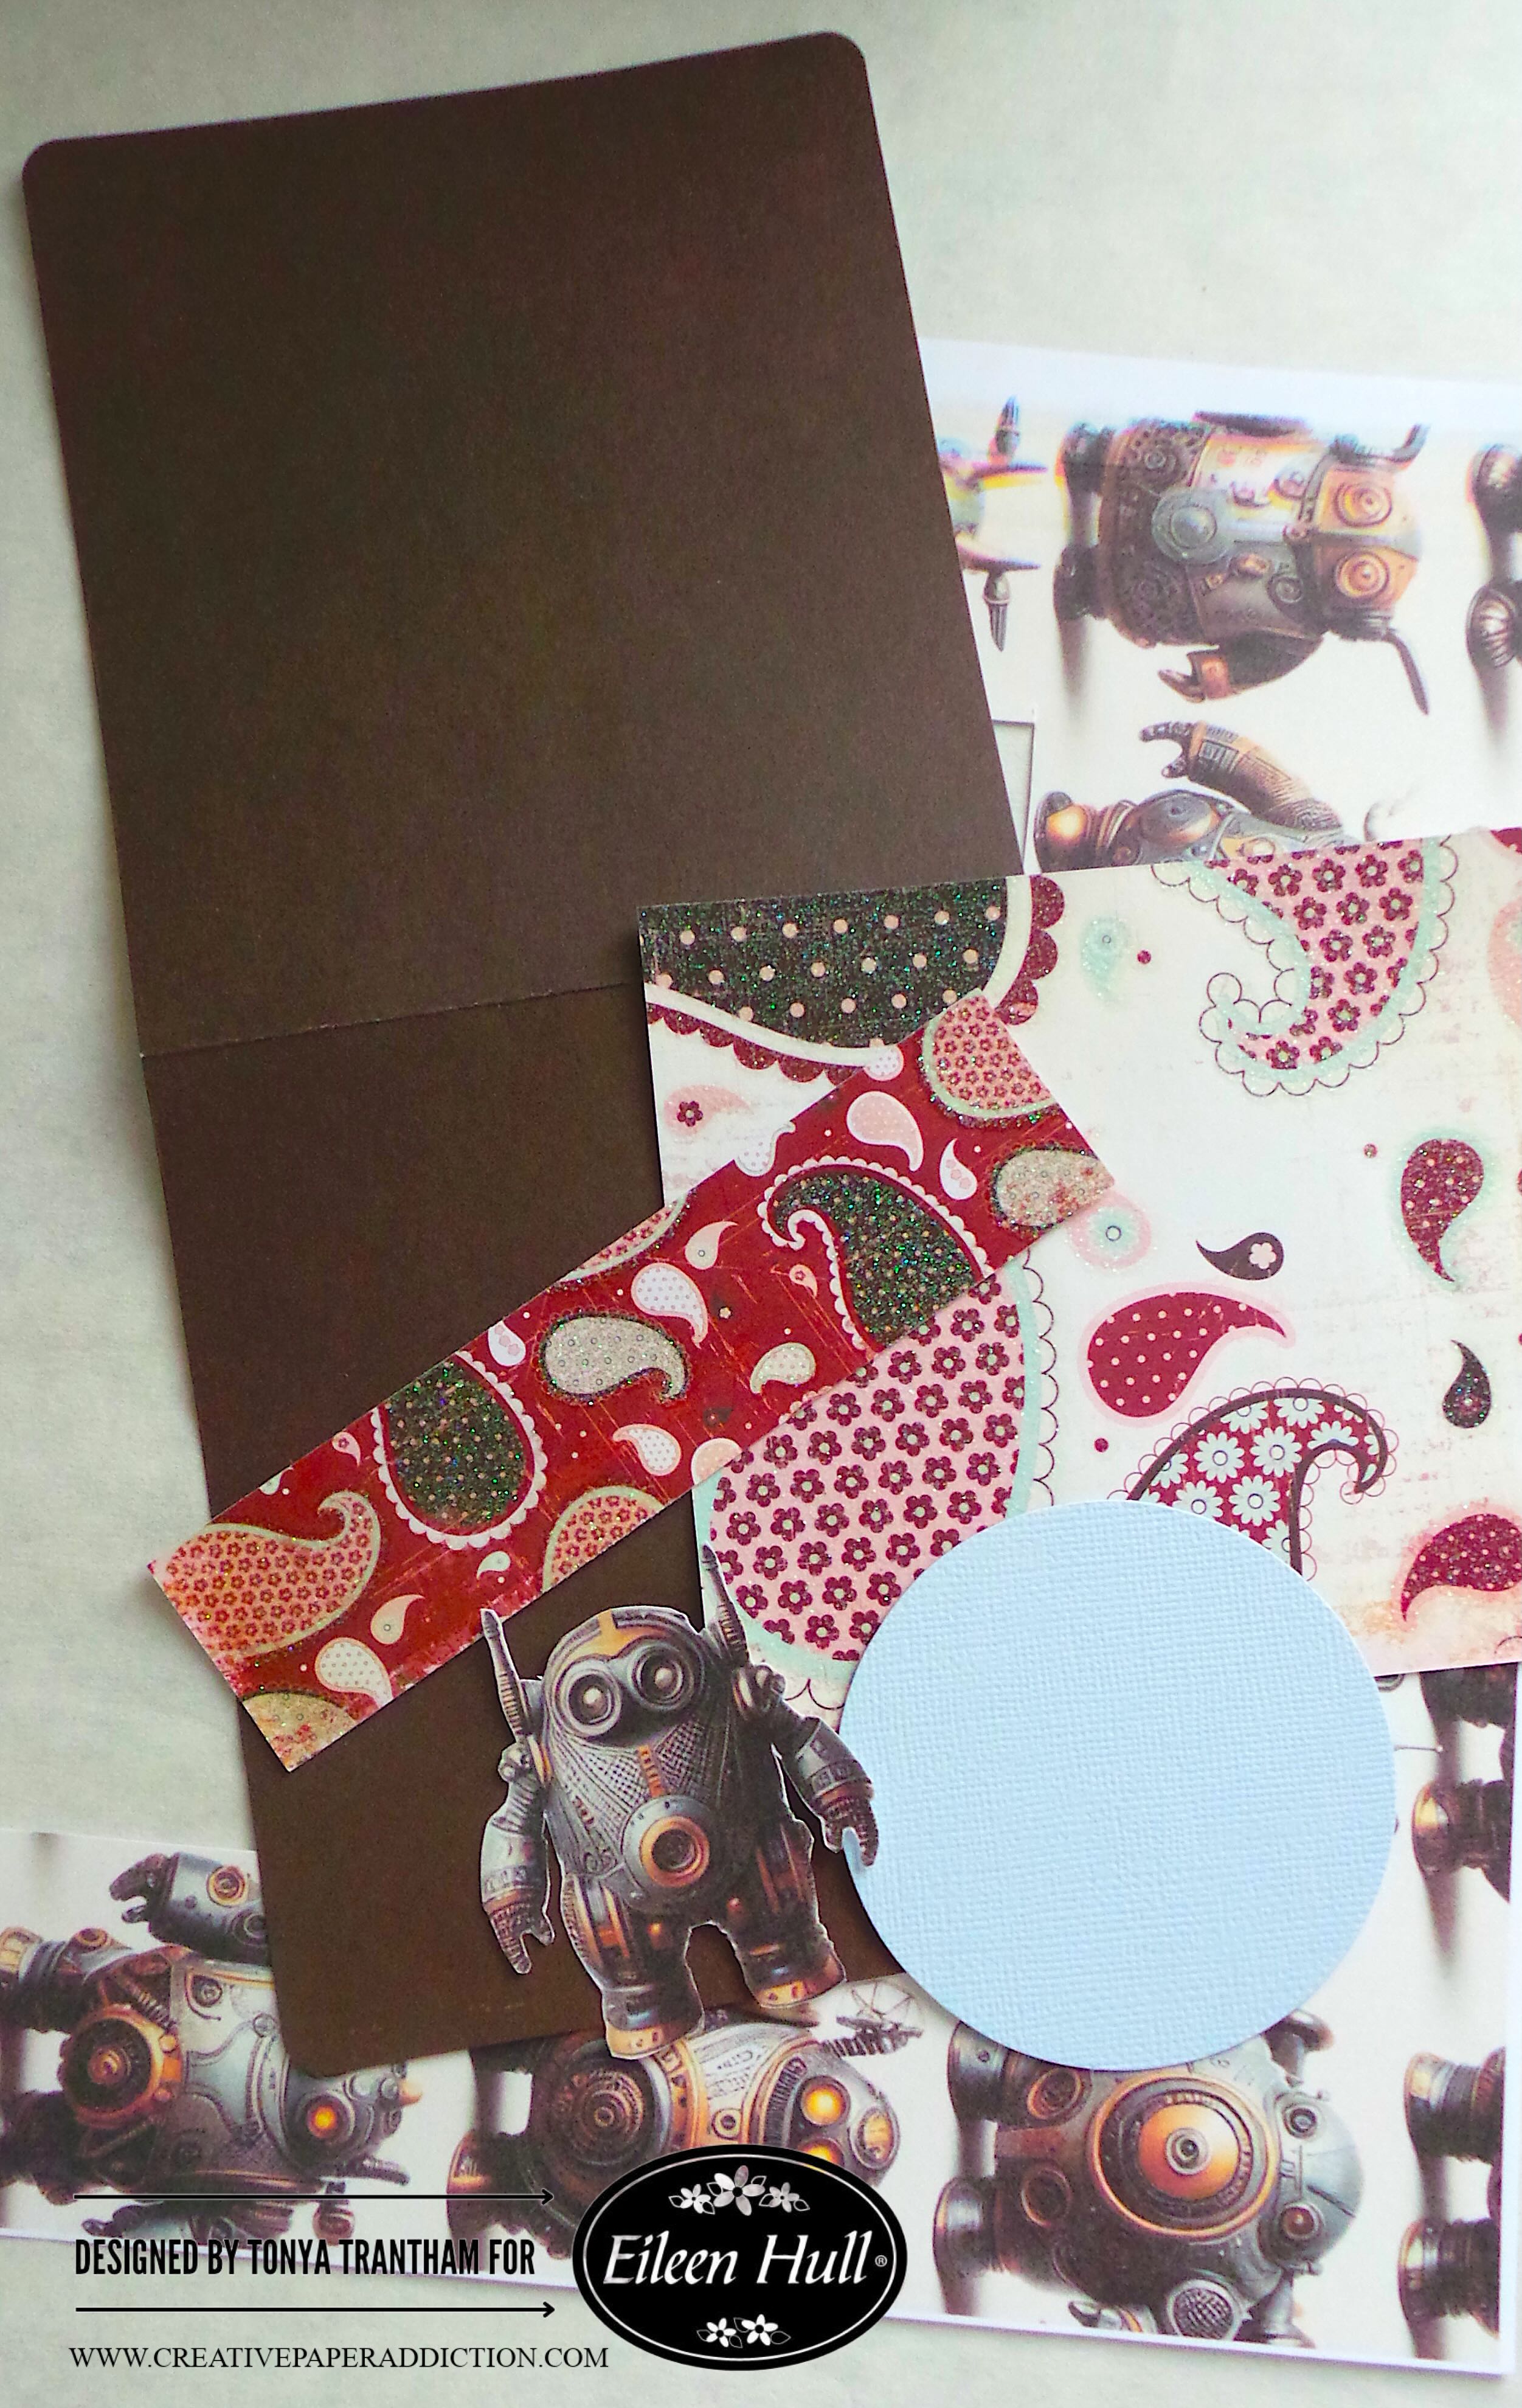
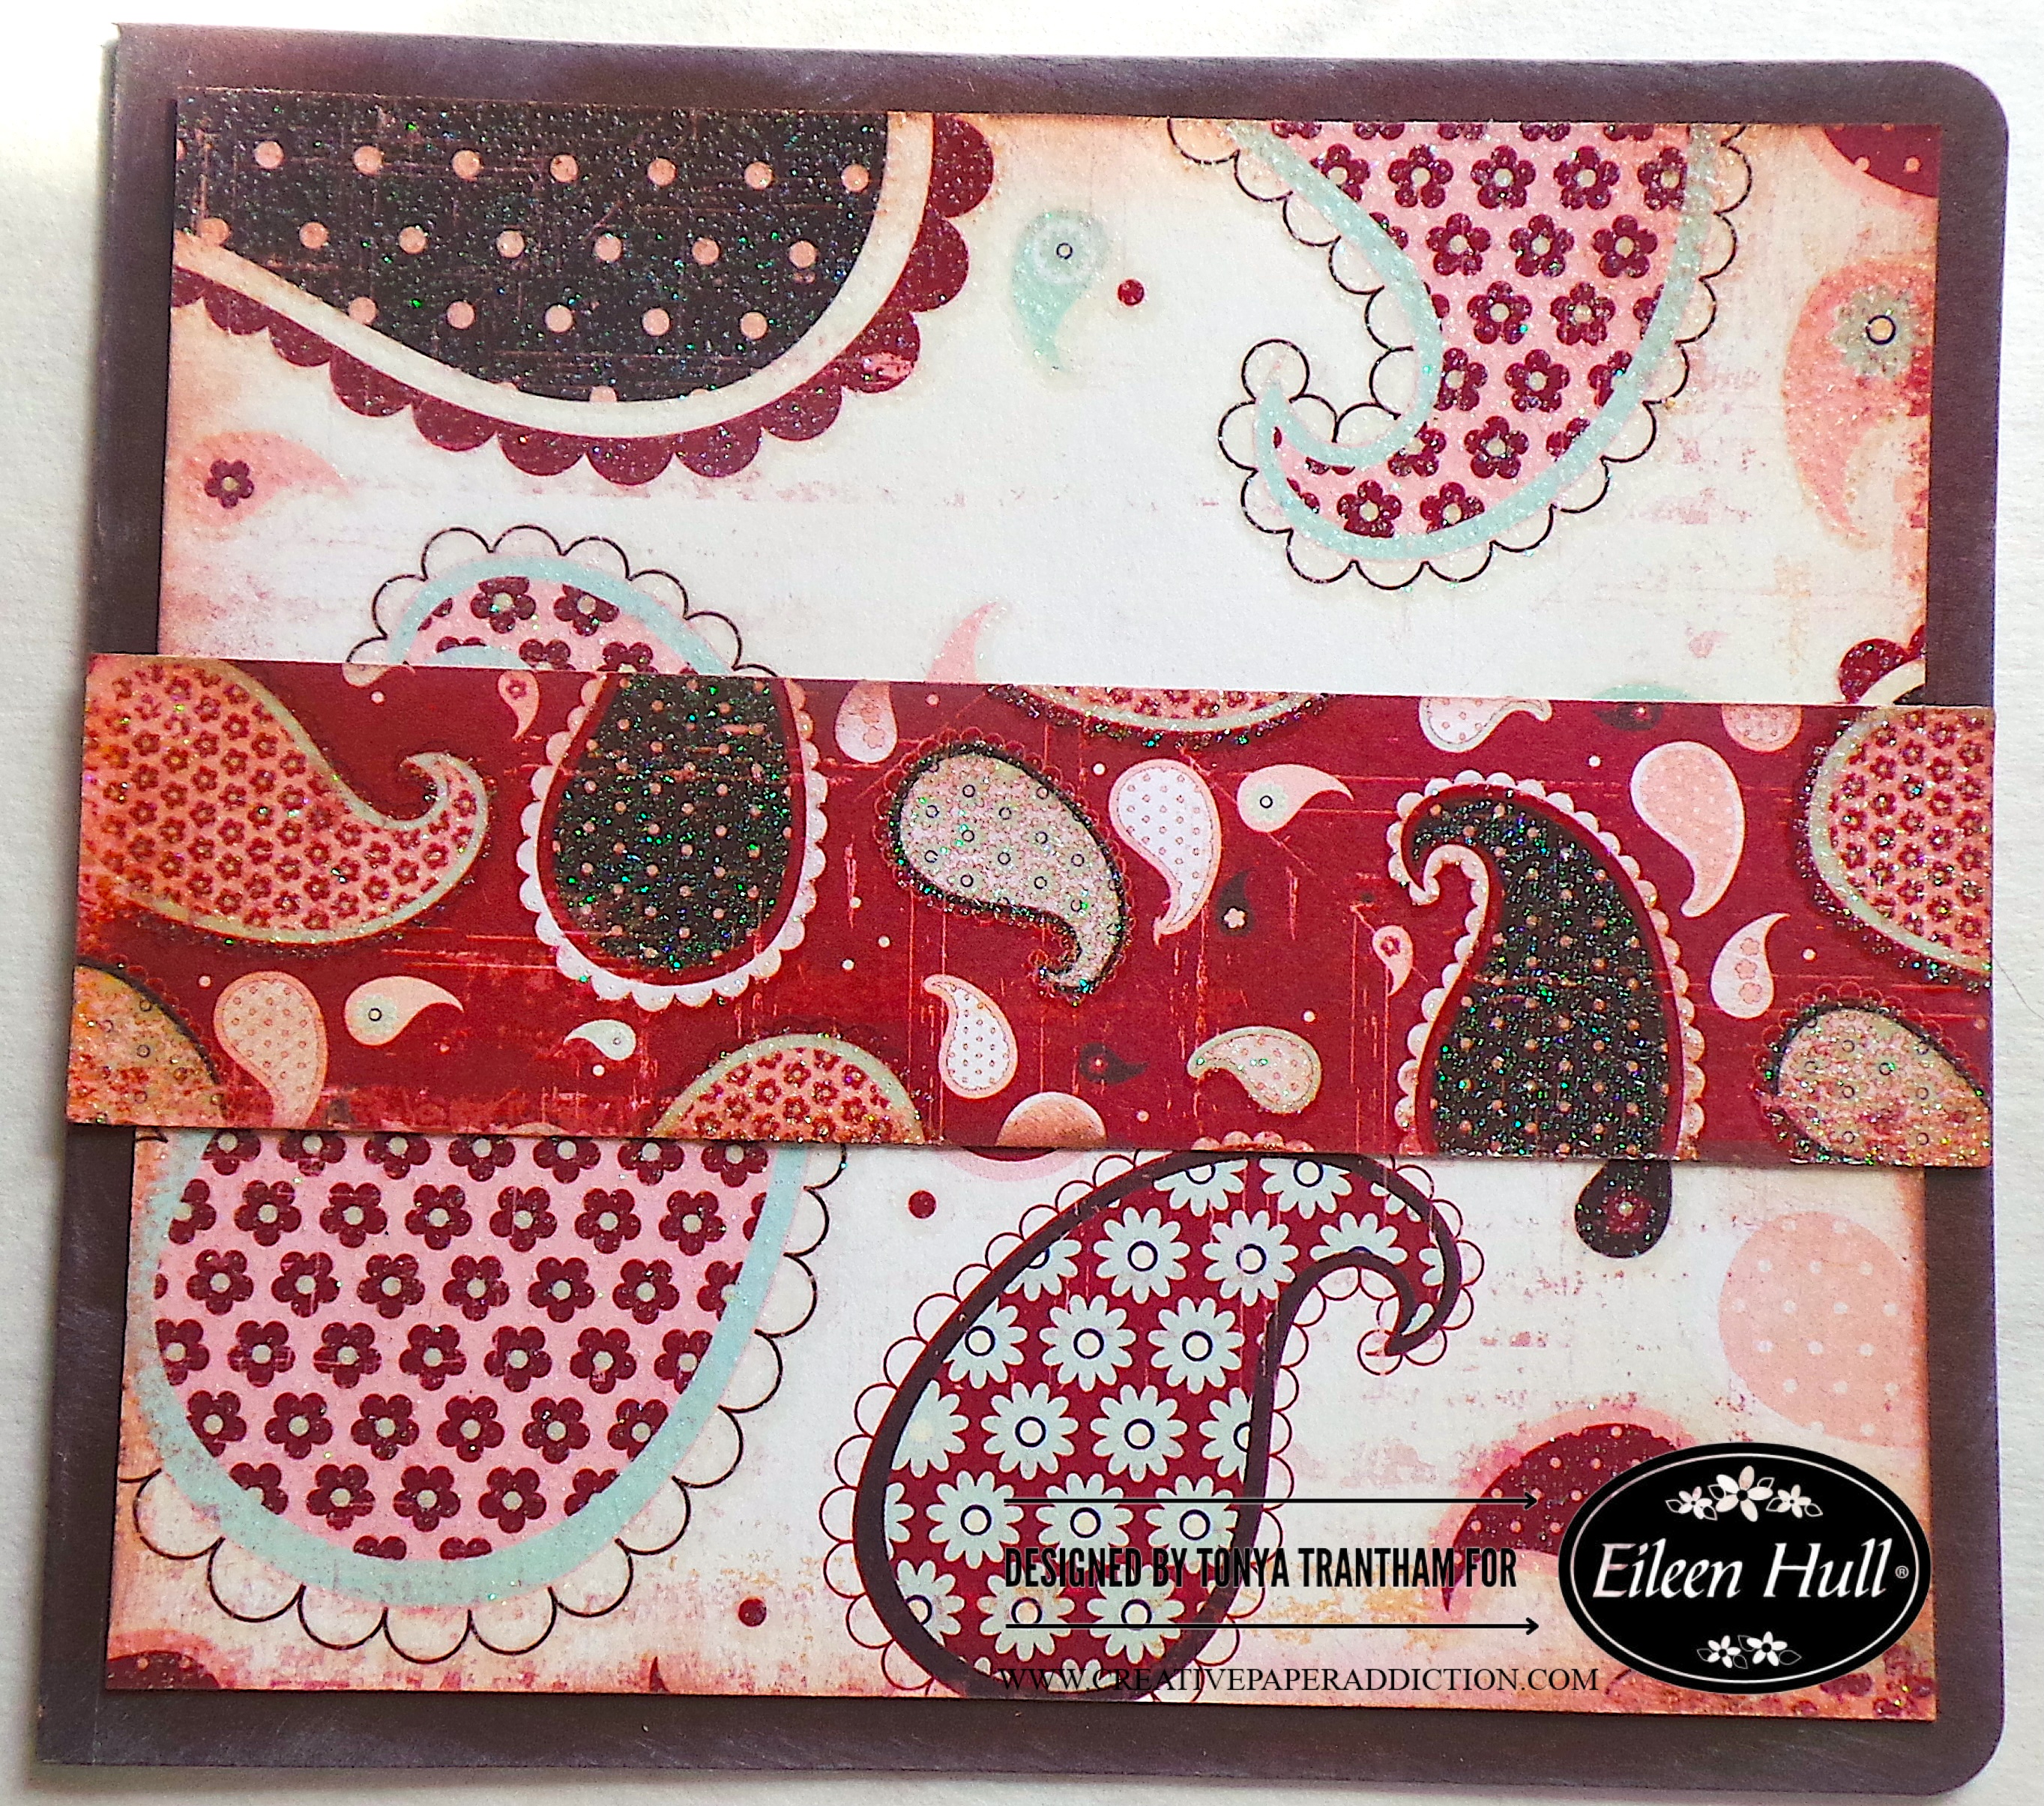
I cut a piece of cardstock slightly smaller than the base of the card.I also cut a strip of cardstock and inked both pieces with Brown Chalk Ink. I glued both to the card base.
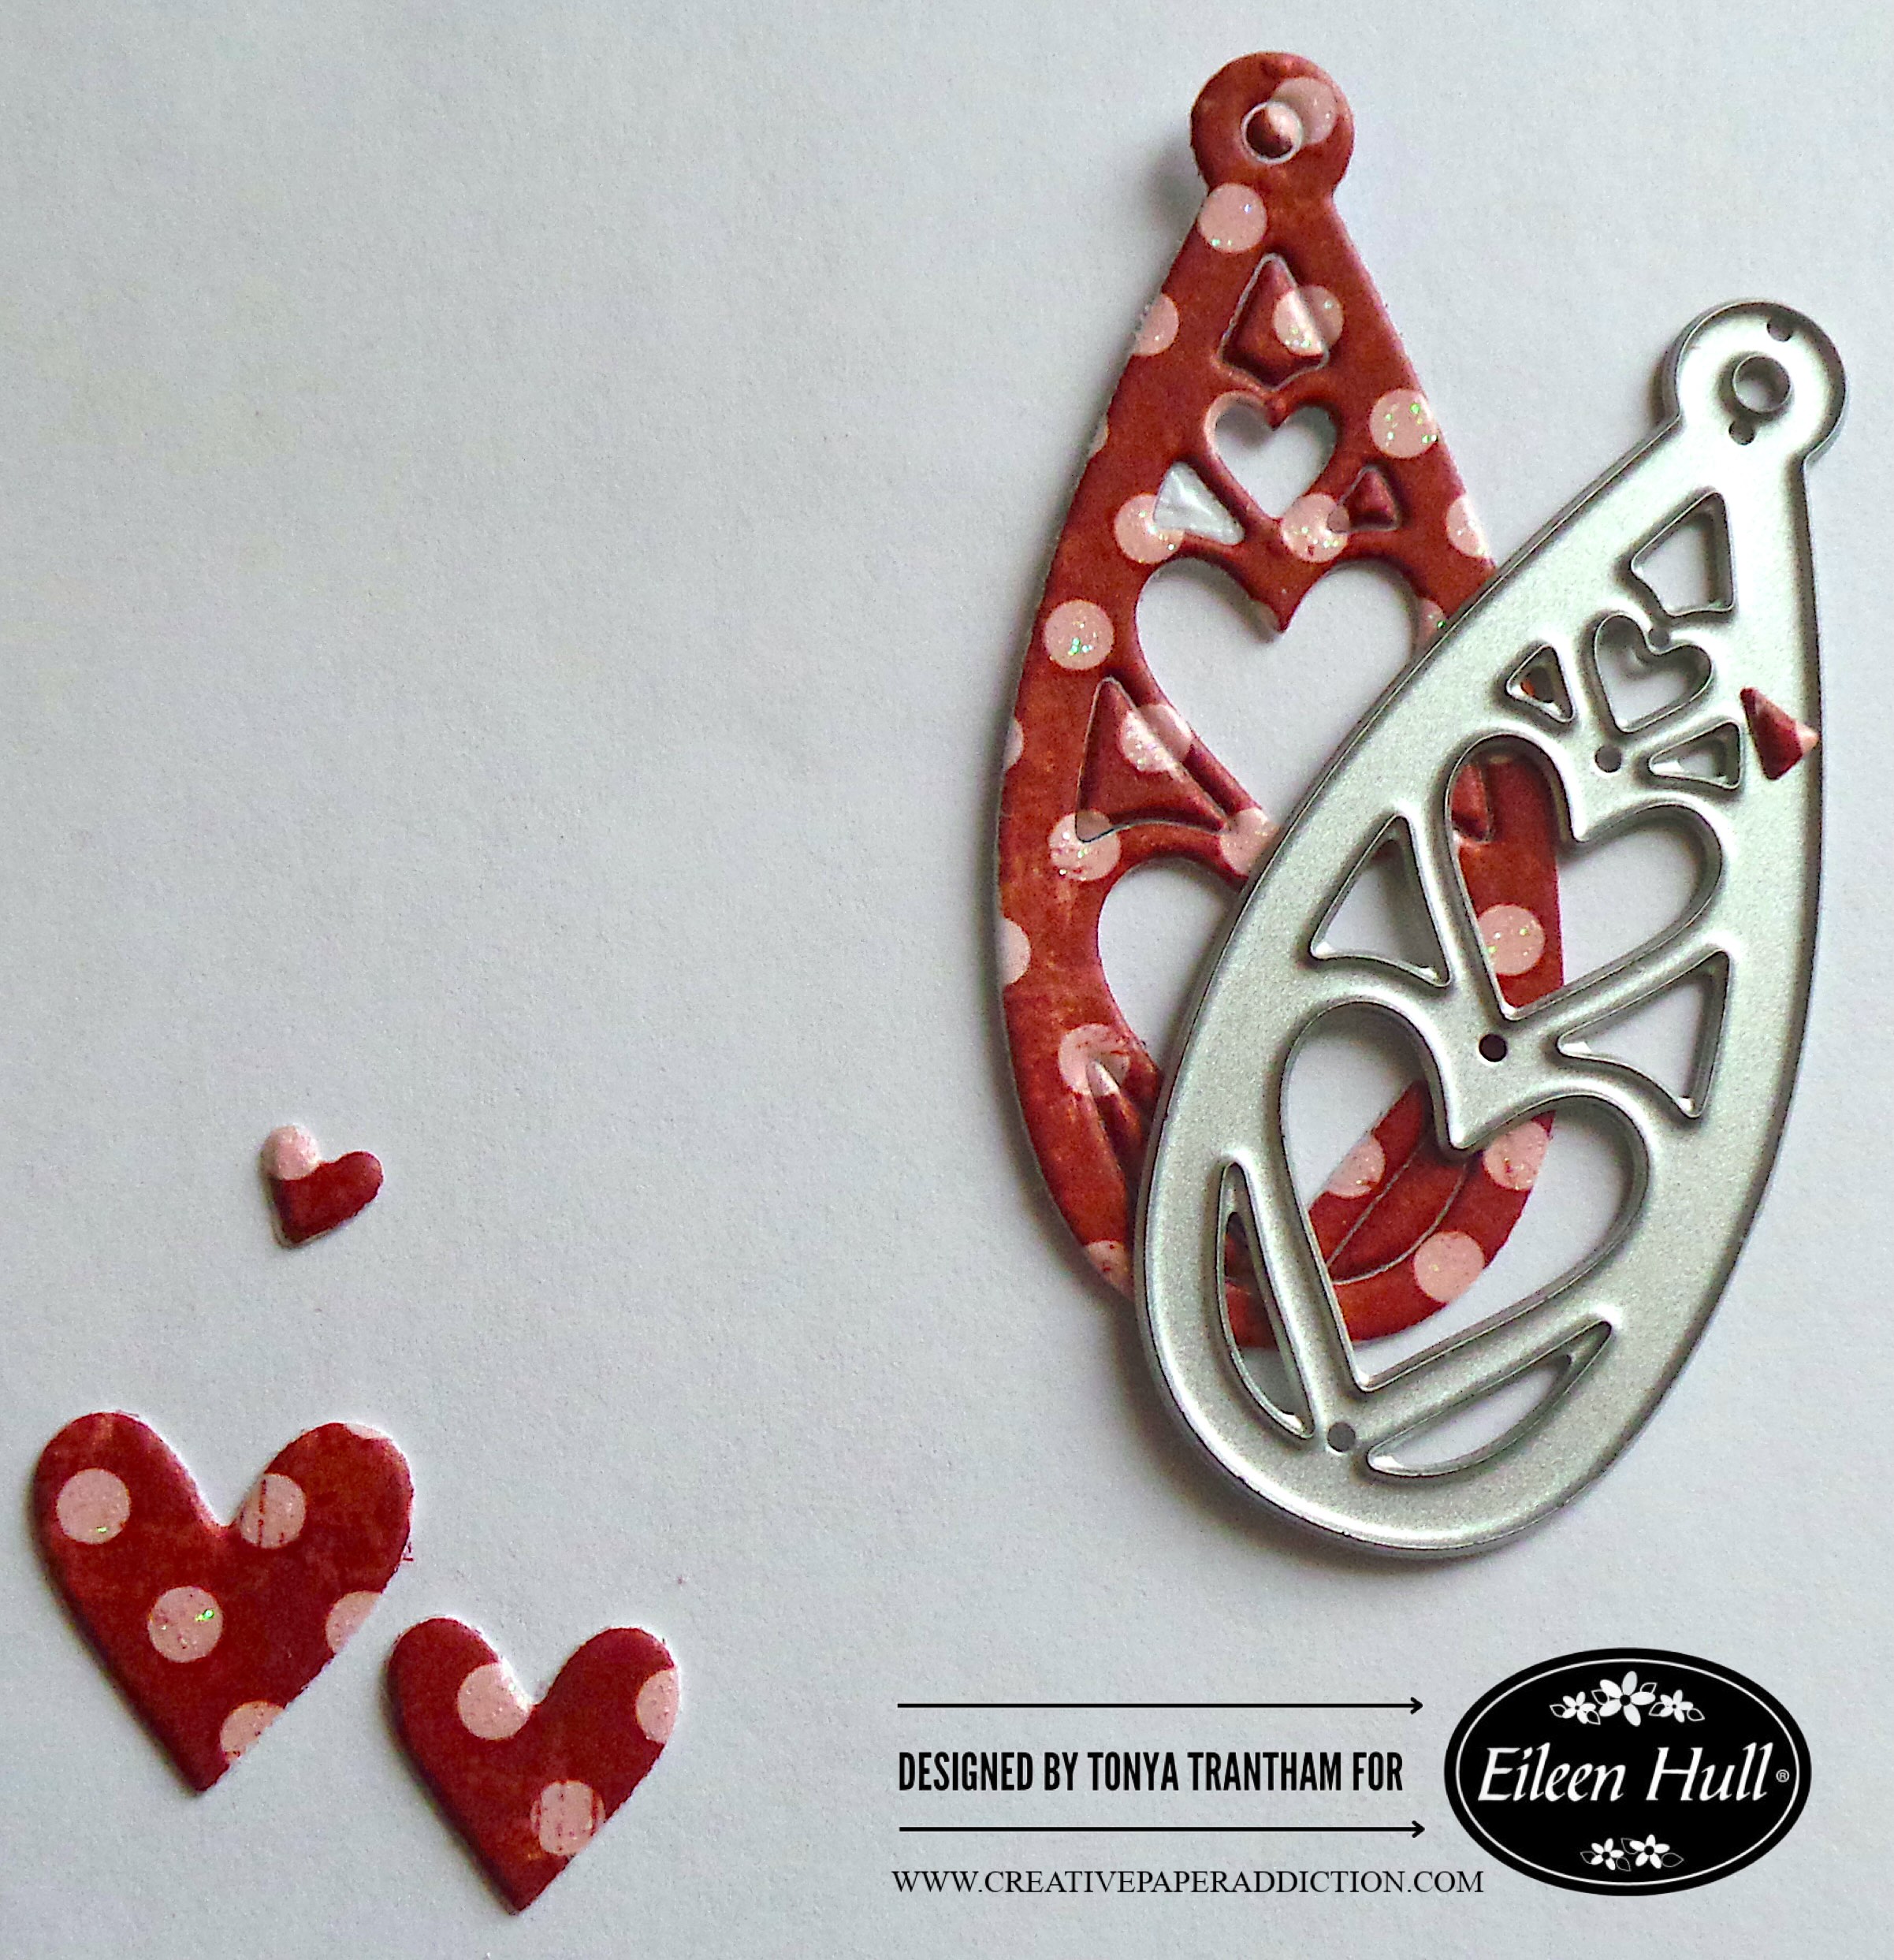
I cut out the teardrop heart from the Charms Thinlits. I will be using the largest heart from the teardrop.
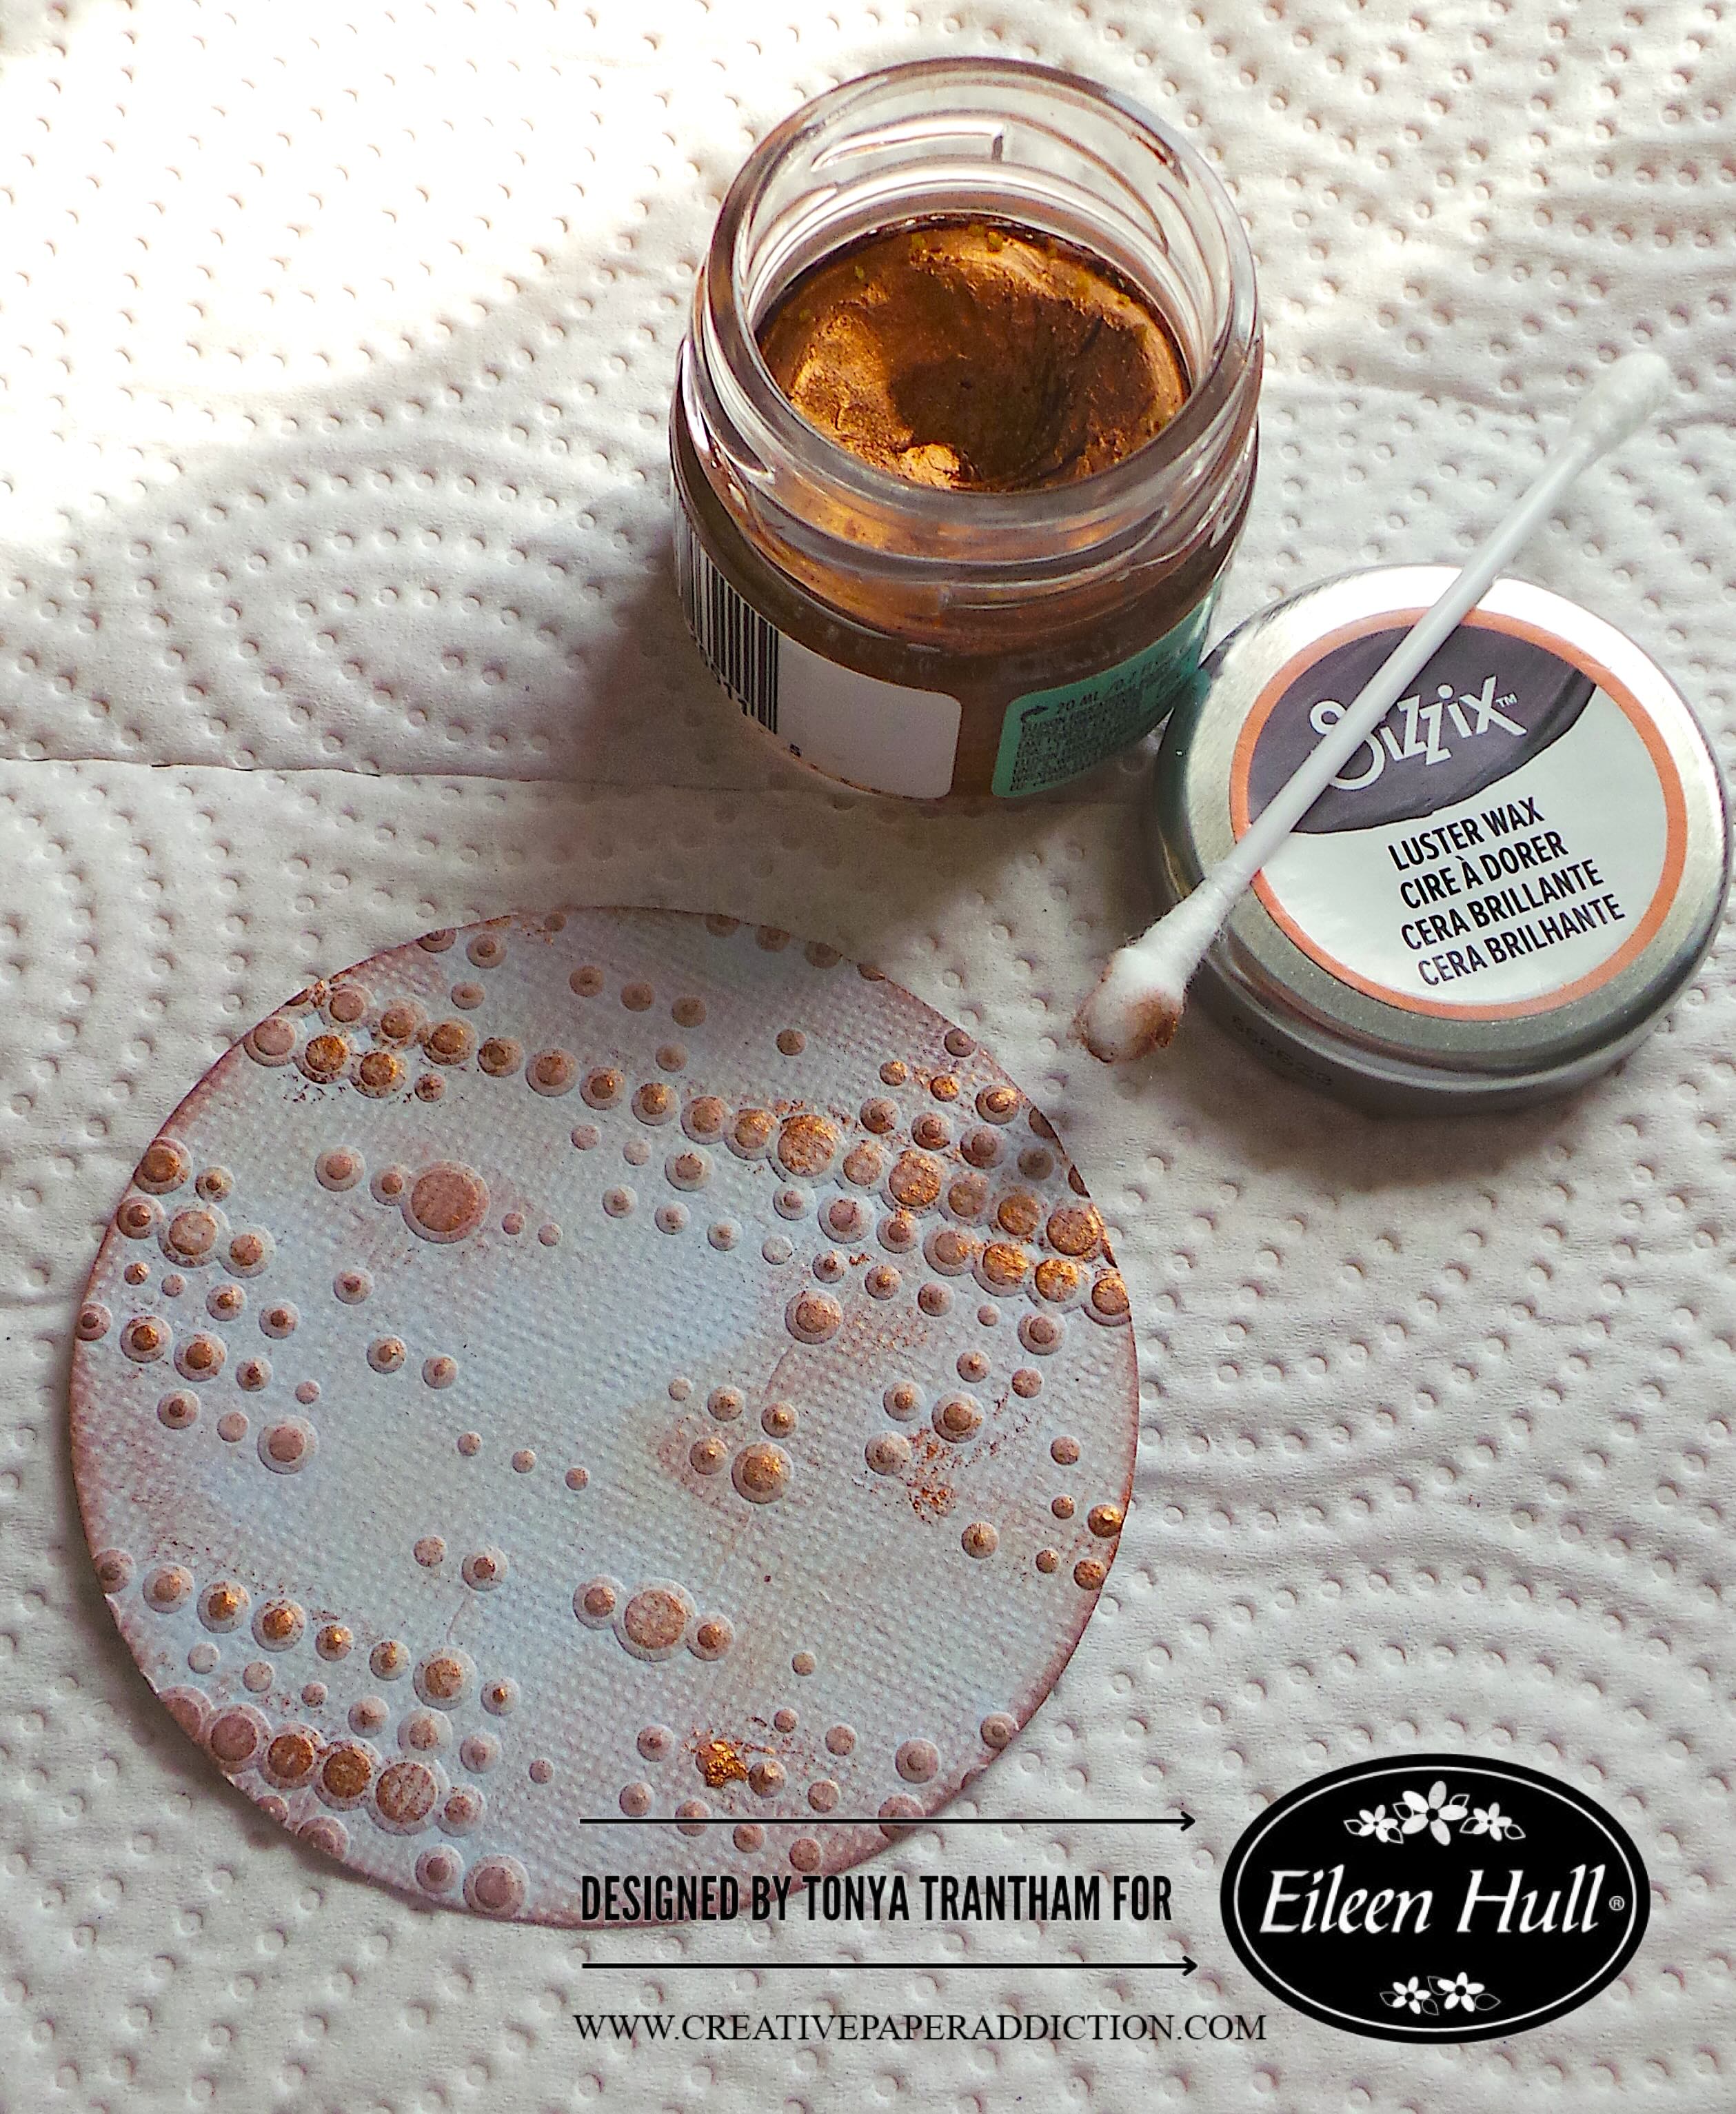
Next, I cut out the circle from the Ornament Box Diecut (retired). I embossed the circle with the Dotted Embossing Folder. I lightly applied Rose Gold Luster Wax over the embossed area of the circle.
I adhered the circle to the edge of the card. I printed the “You Make my Heart Beep” sentiment from my computer. I cut out a mat to frame the sentiment. I inked the edges and glued both together. I added Foam Pop Dots to the back before placing on the card.
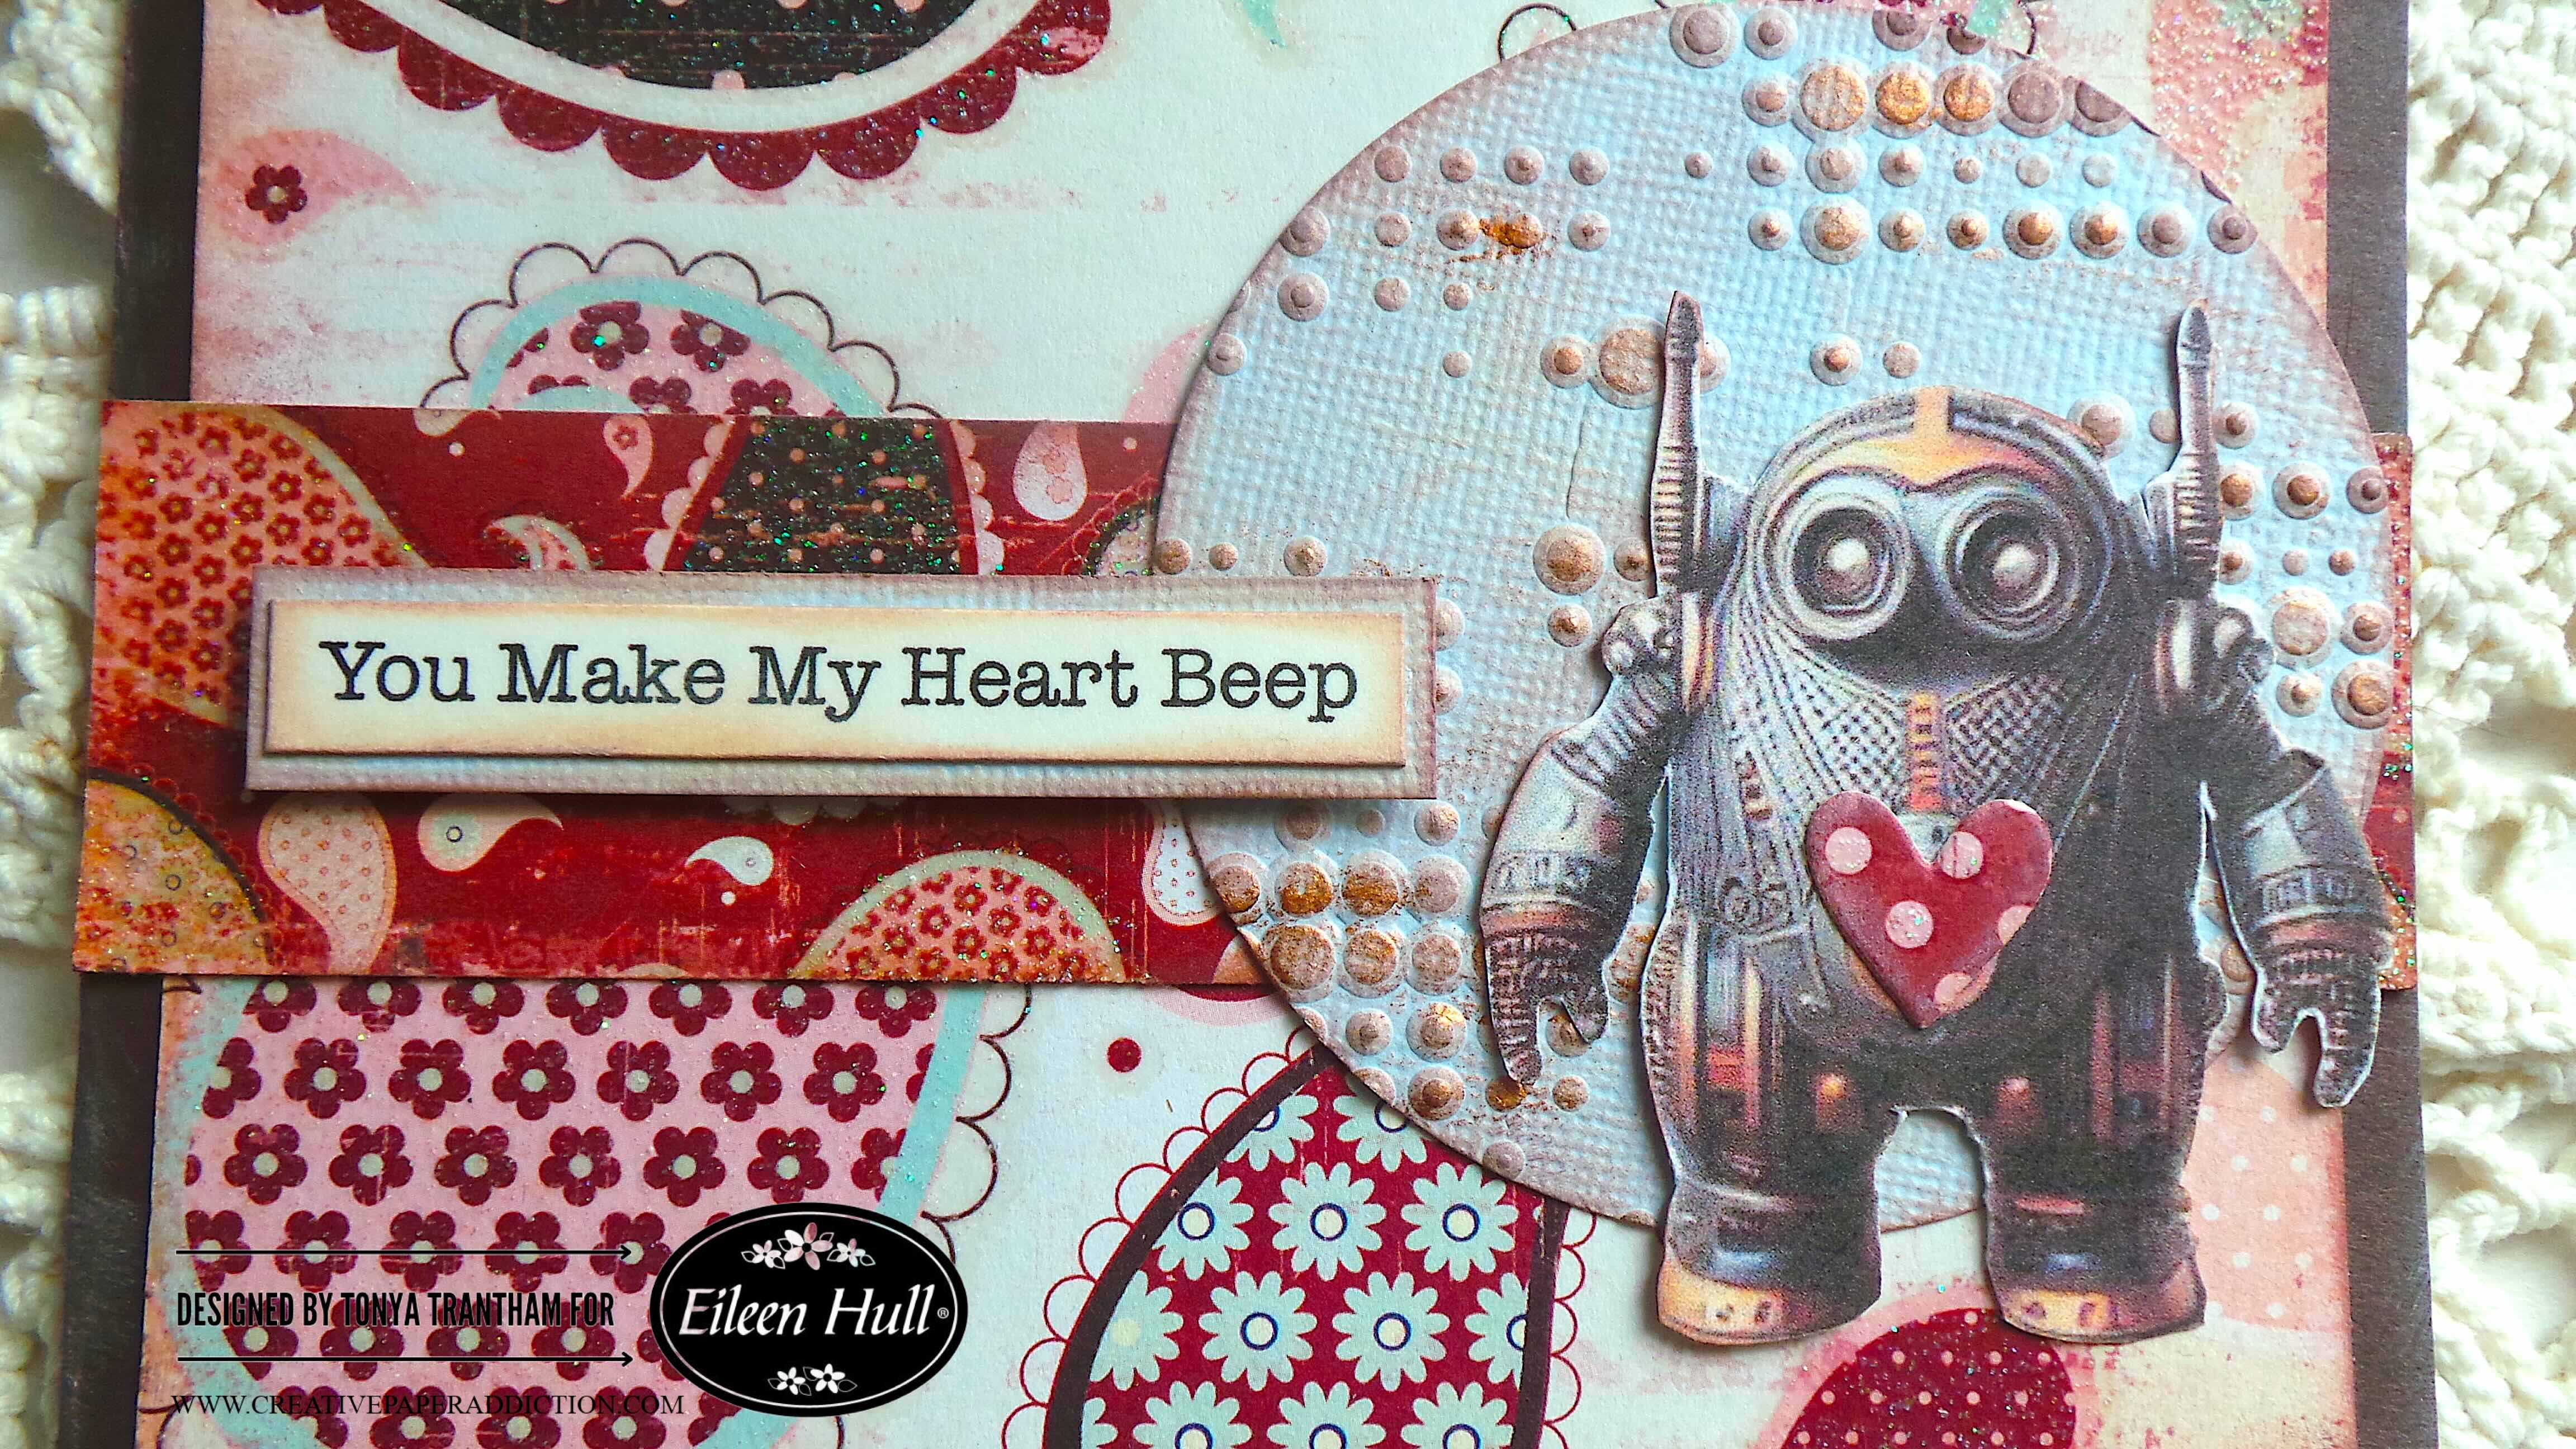
I fussy cut a robot from the printable. I placed it off center of the circle and glued the largest heart to the center of its chest.

Make sure you visit Eileen Hull‘s blog for inspiration. You can also find more details there on other ways to follow and keep up with her and her team.

Also I have a question, would you be interested in me sharing the robot printable I created? Let me know below.
Supplies

Sizzix/Eileen Hull: Mini Album Diecut

Sizzix/Eileen Hull: Charms Thinlits

Sizzix/Eileen Hull: Ornament Box Diecut ( retired)

Sizzix/Tim Holtz: Dotted Embossing Folder

Diecut Machine

Various Patterned Cardstocks

Sizzix: Black, White and Ivory Smooth Cardstock

Rose Gold Luster Wax

Brown Chalk Ink

Paper Cutter

Scissors

Foam Pop Dots

Robot Printable

Beacon Adhesives: Zip Dry Adhesive

(Products listed above are Affiliated Links for your convenience)

DISCLAIMERS

This blog is compensated to provide opinion on products, services, websites, and various other topics. Even though the owner(s) of this blog receives compensation for our posts or advertisements. I always give my honest opinions, findings, beliefs, or experiences on those topics or products. The views and opinions expressed on this blog are purely my own. Any product claim, statistic, or quote should be checked with each manufacturer. Verify other representations about a product or service with the provider or party in question.This blog contains affiliate linksClicking these links helps to support Tonya Trantham Designs – Creative Paper Addiction. It runs at no additional cost to you. Today’s features are Sizzix, Eileen Hull, Tim Holtz and Scrapbook.com Products. 
Thanks for stopping by, I hope your Monday is wonderful and enjoy creating!

Step-by-Step Guide to a Friendship-Themed Craft

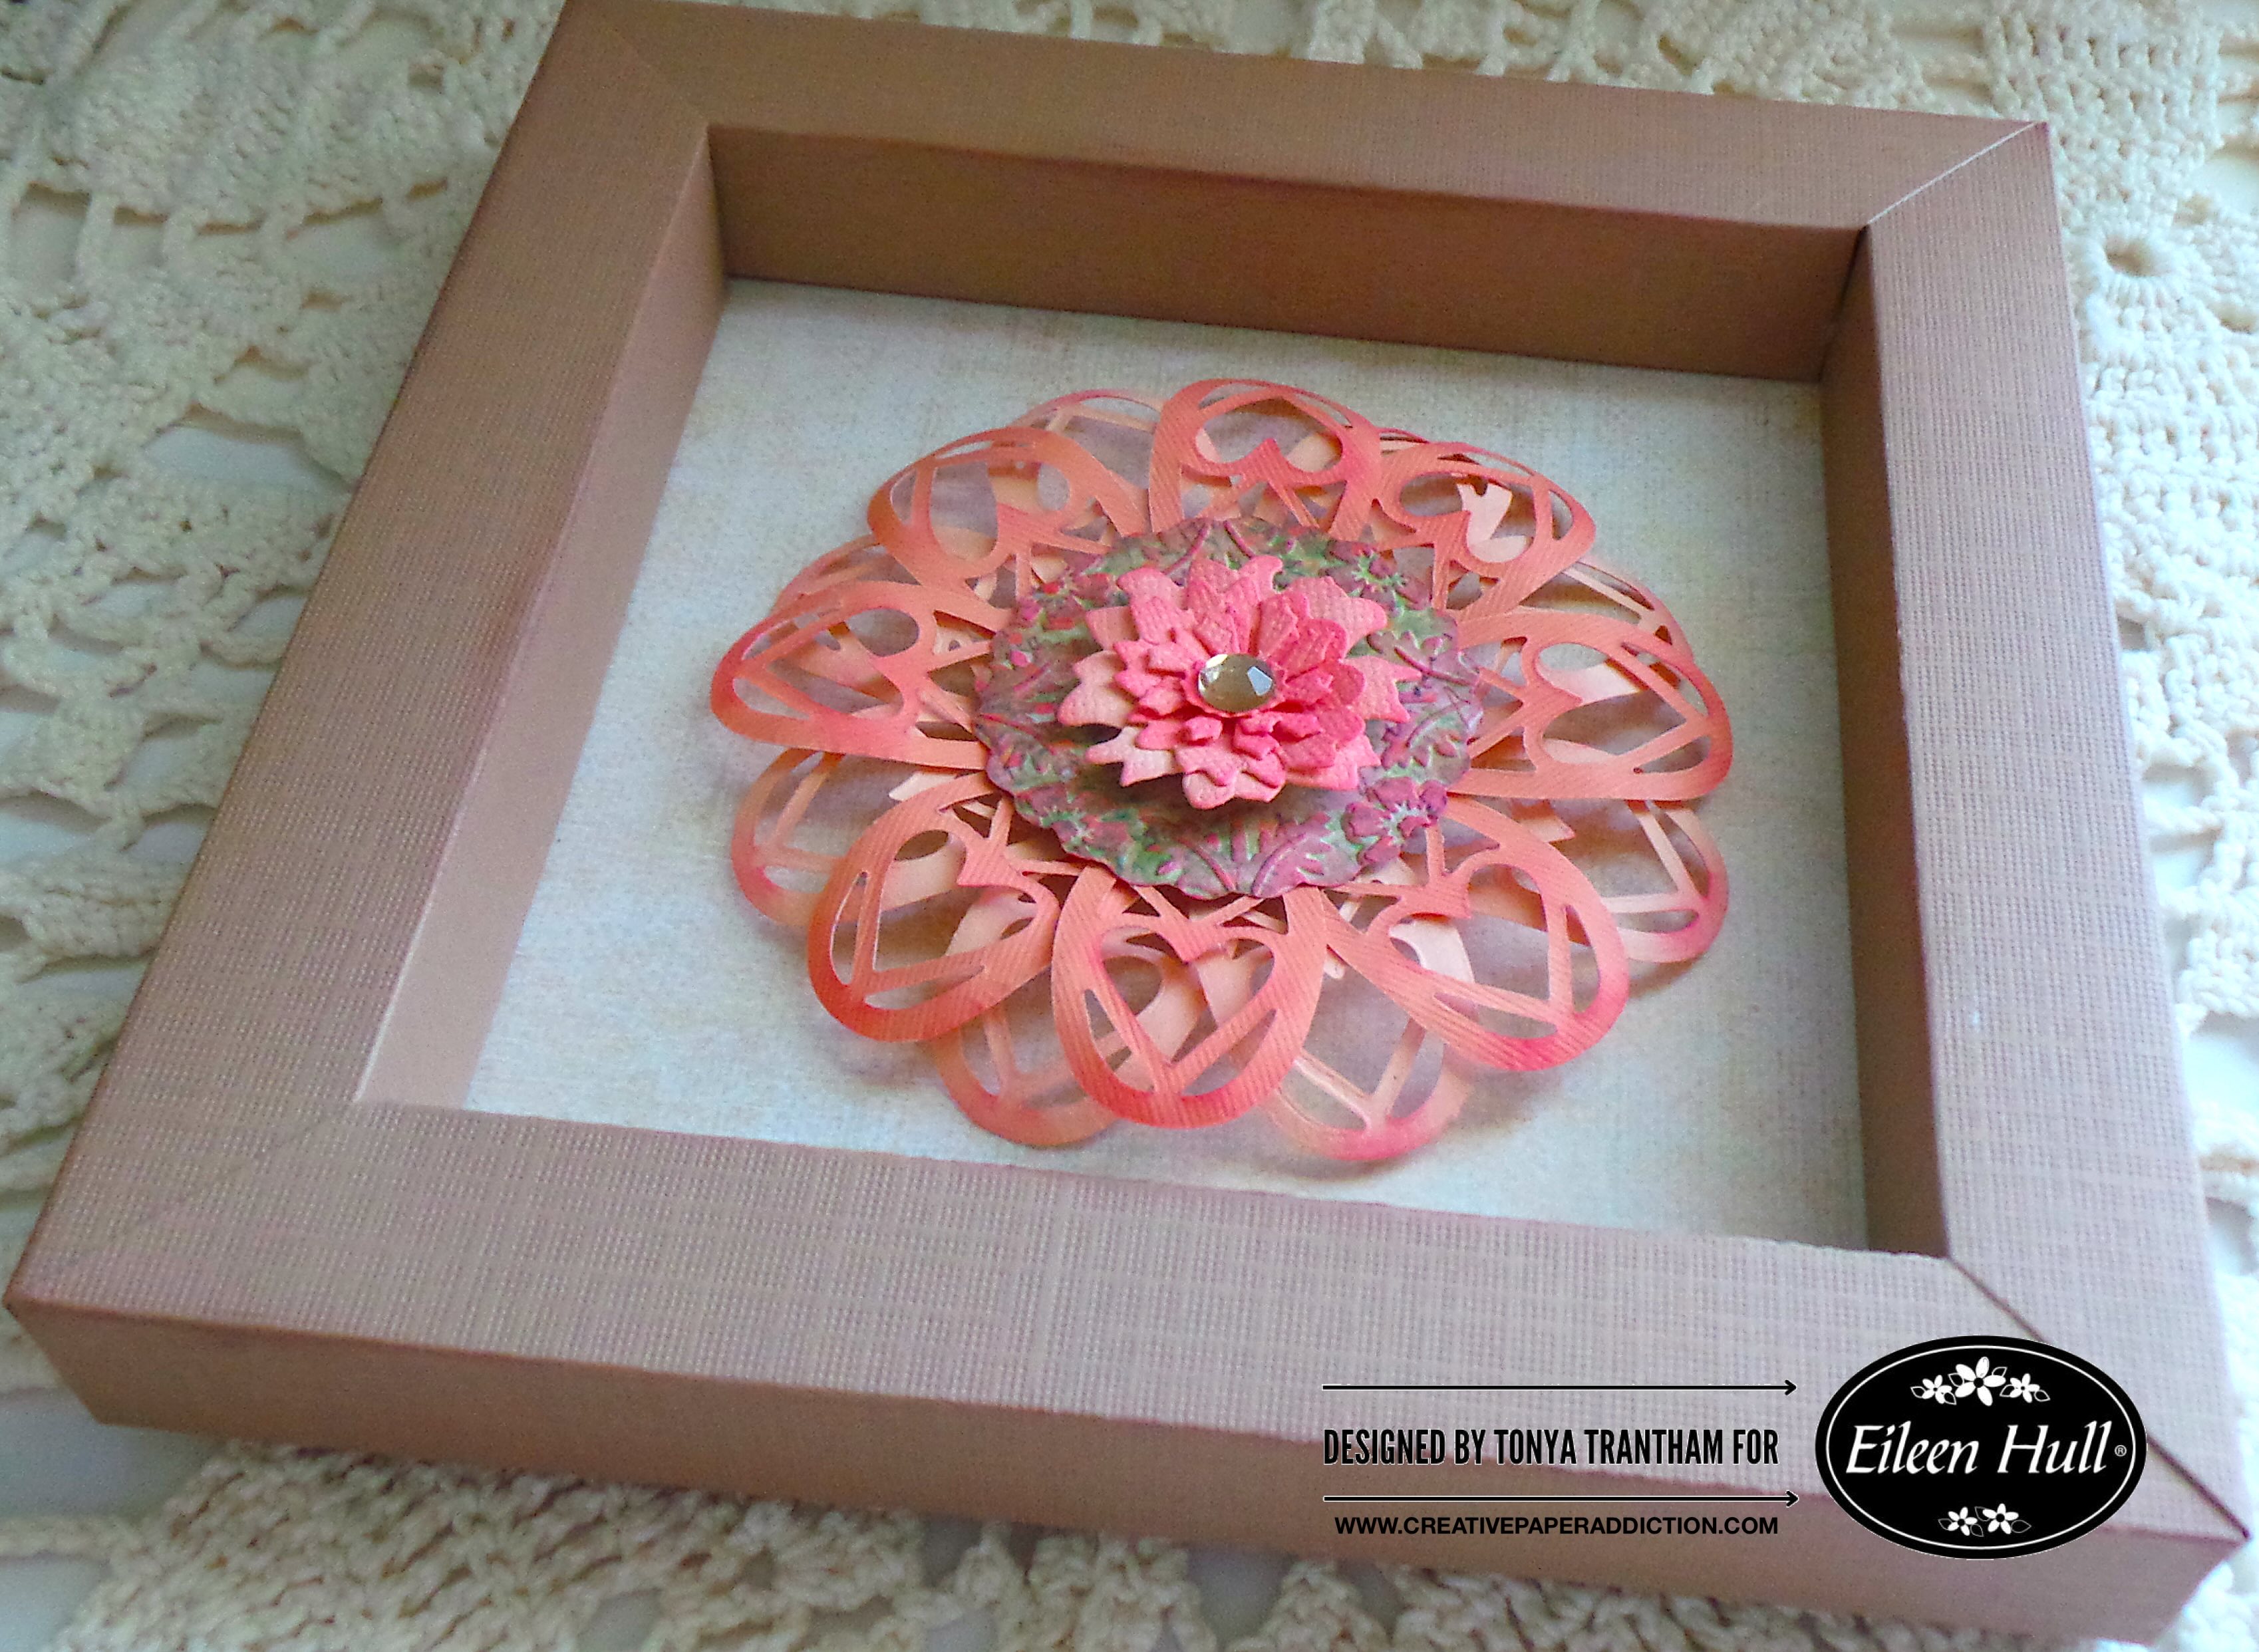
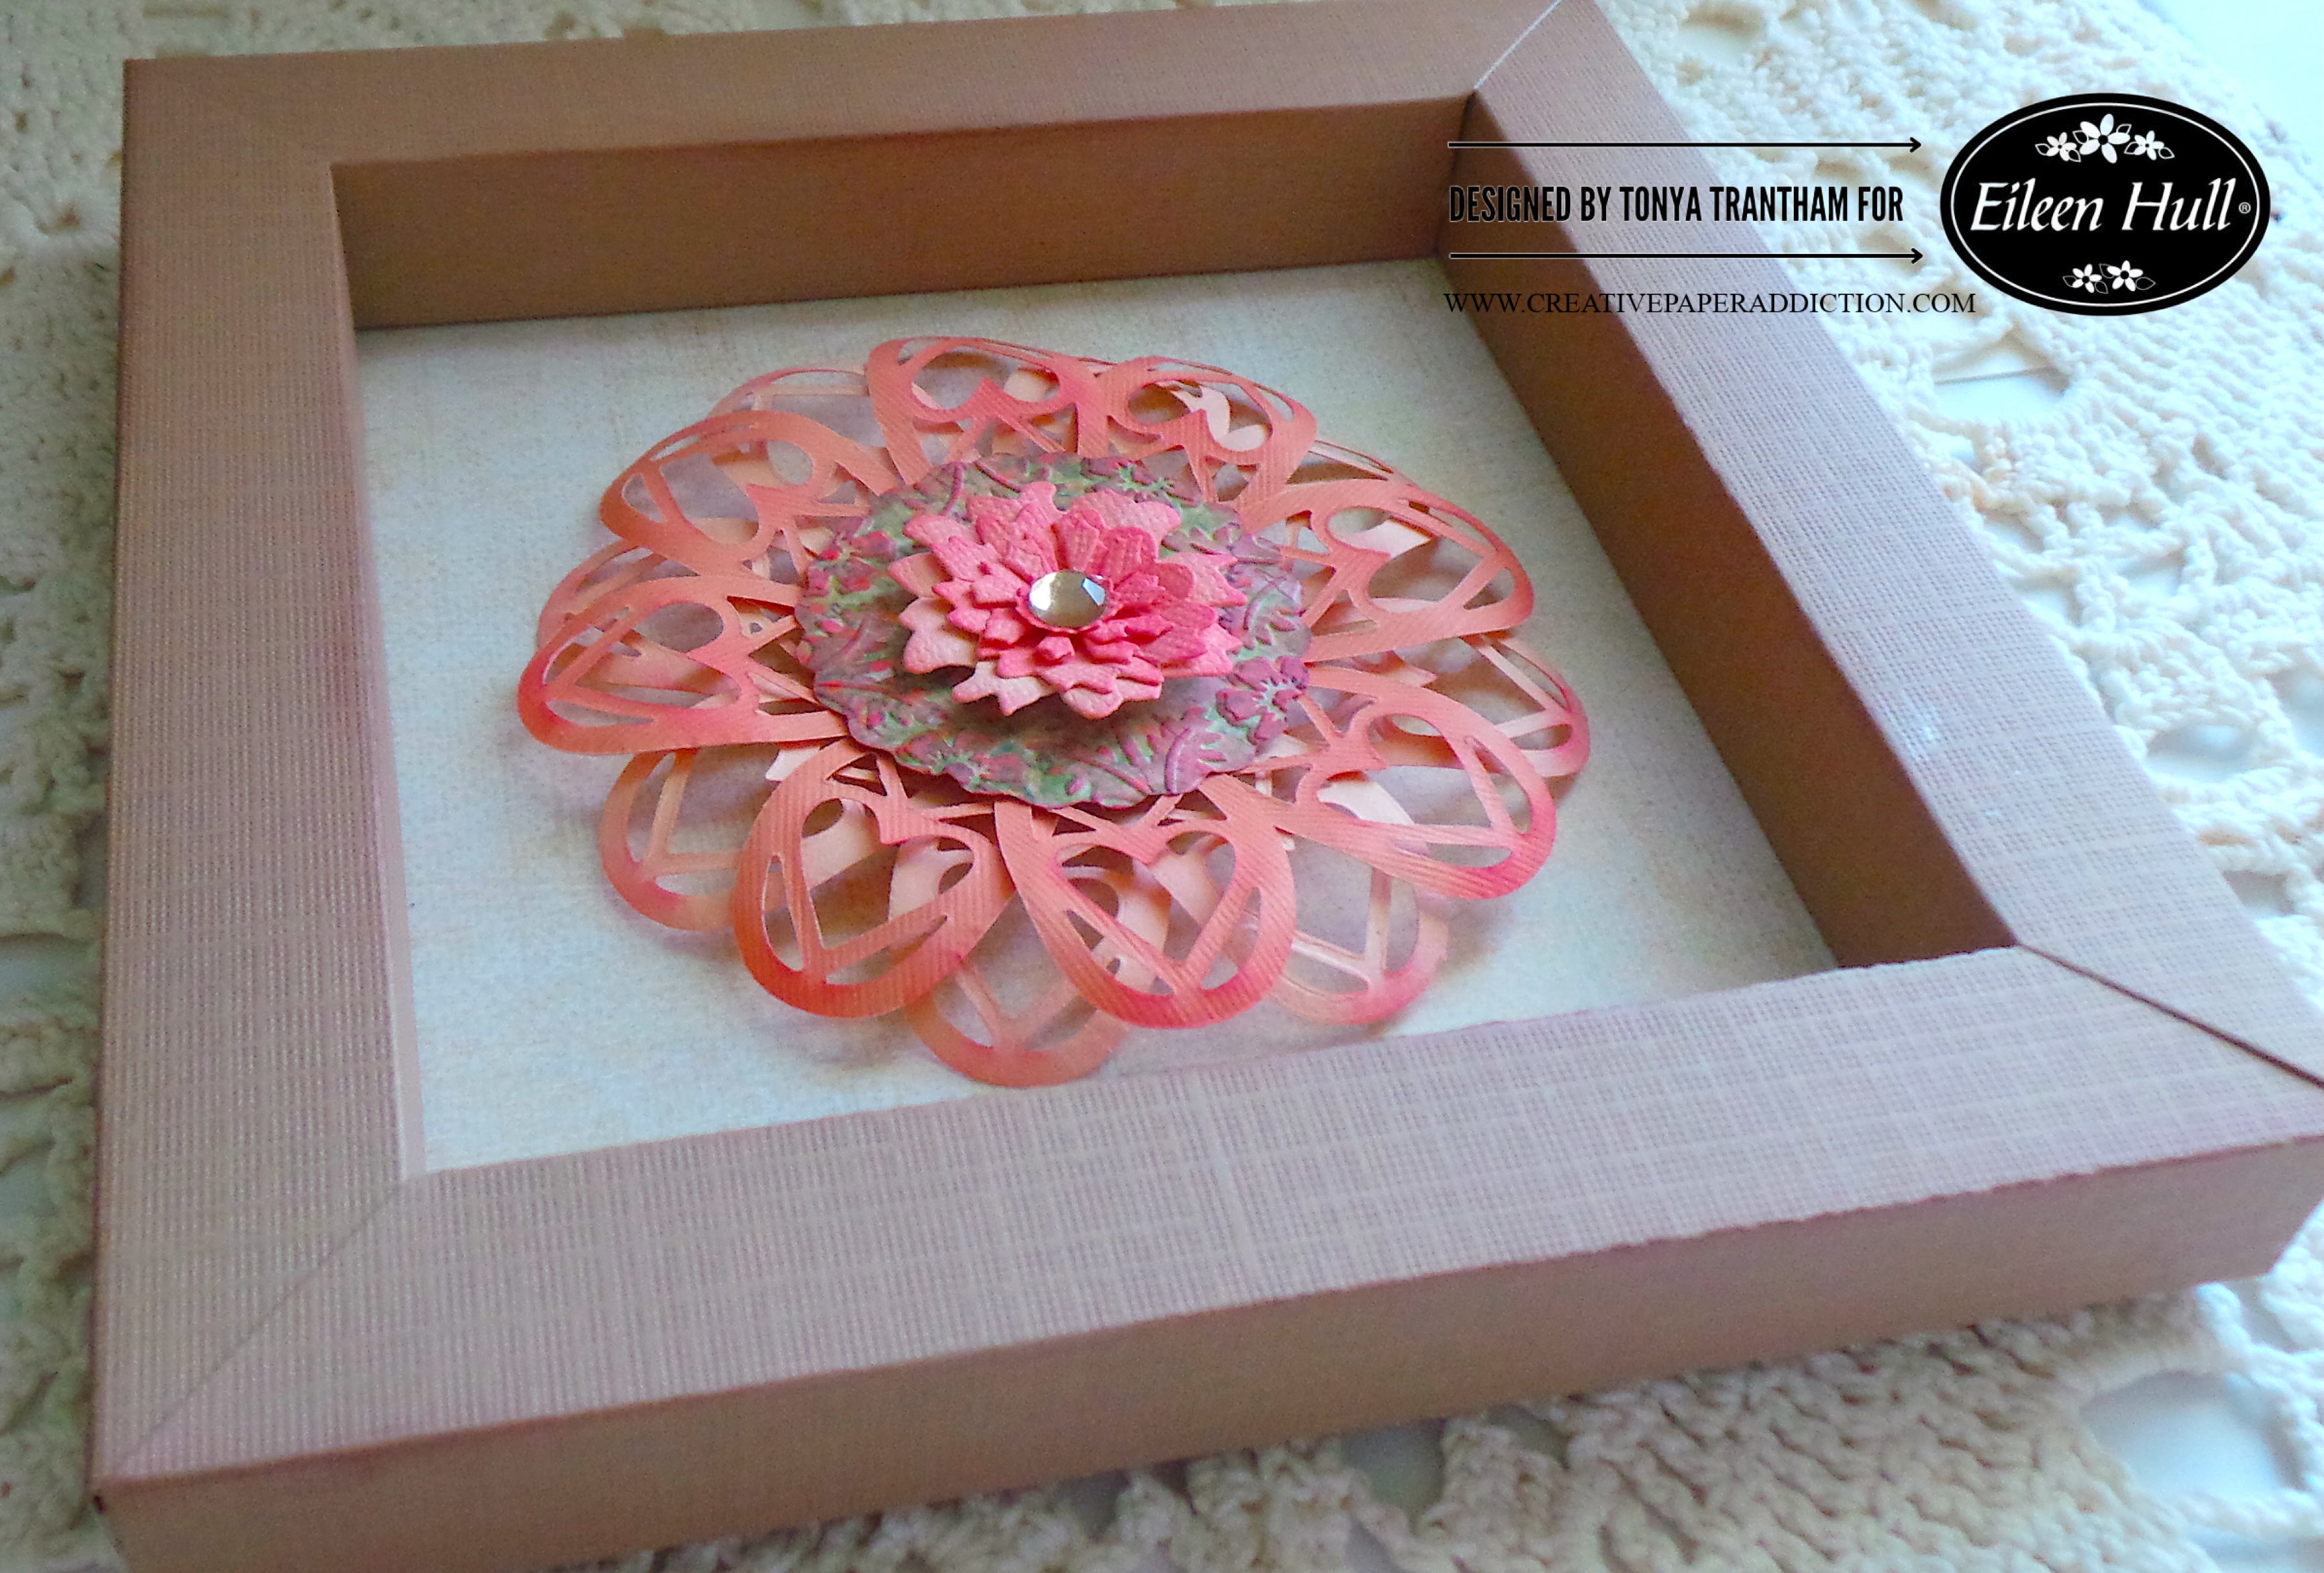
Hi everyone! I am back after a break from the holidays and ready to share my first Eileen Hull project of 2025. This month’s theme is friendship. For this post I’ll be sharing how to create this floral frame using the Charms Thinlits. Along with several of Eileen’s dies and embossing folder. Anyways, let’s get started!

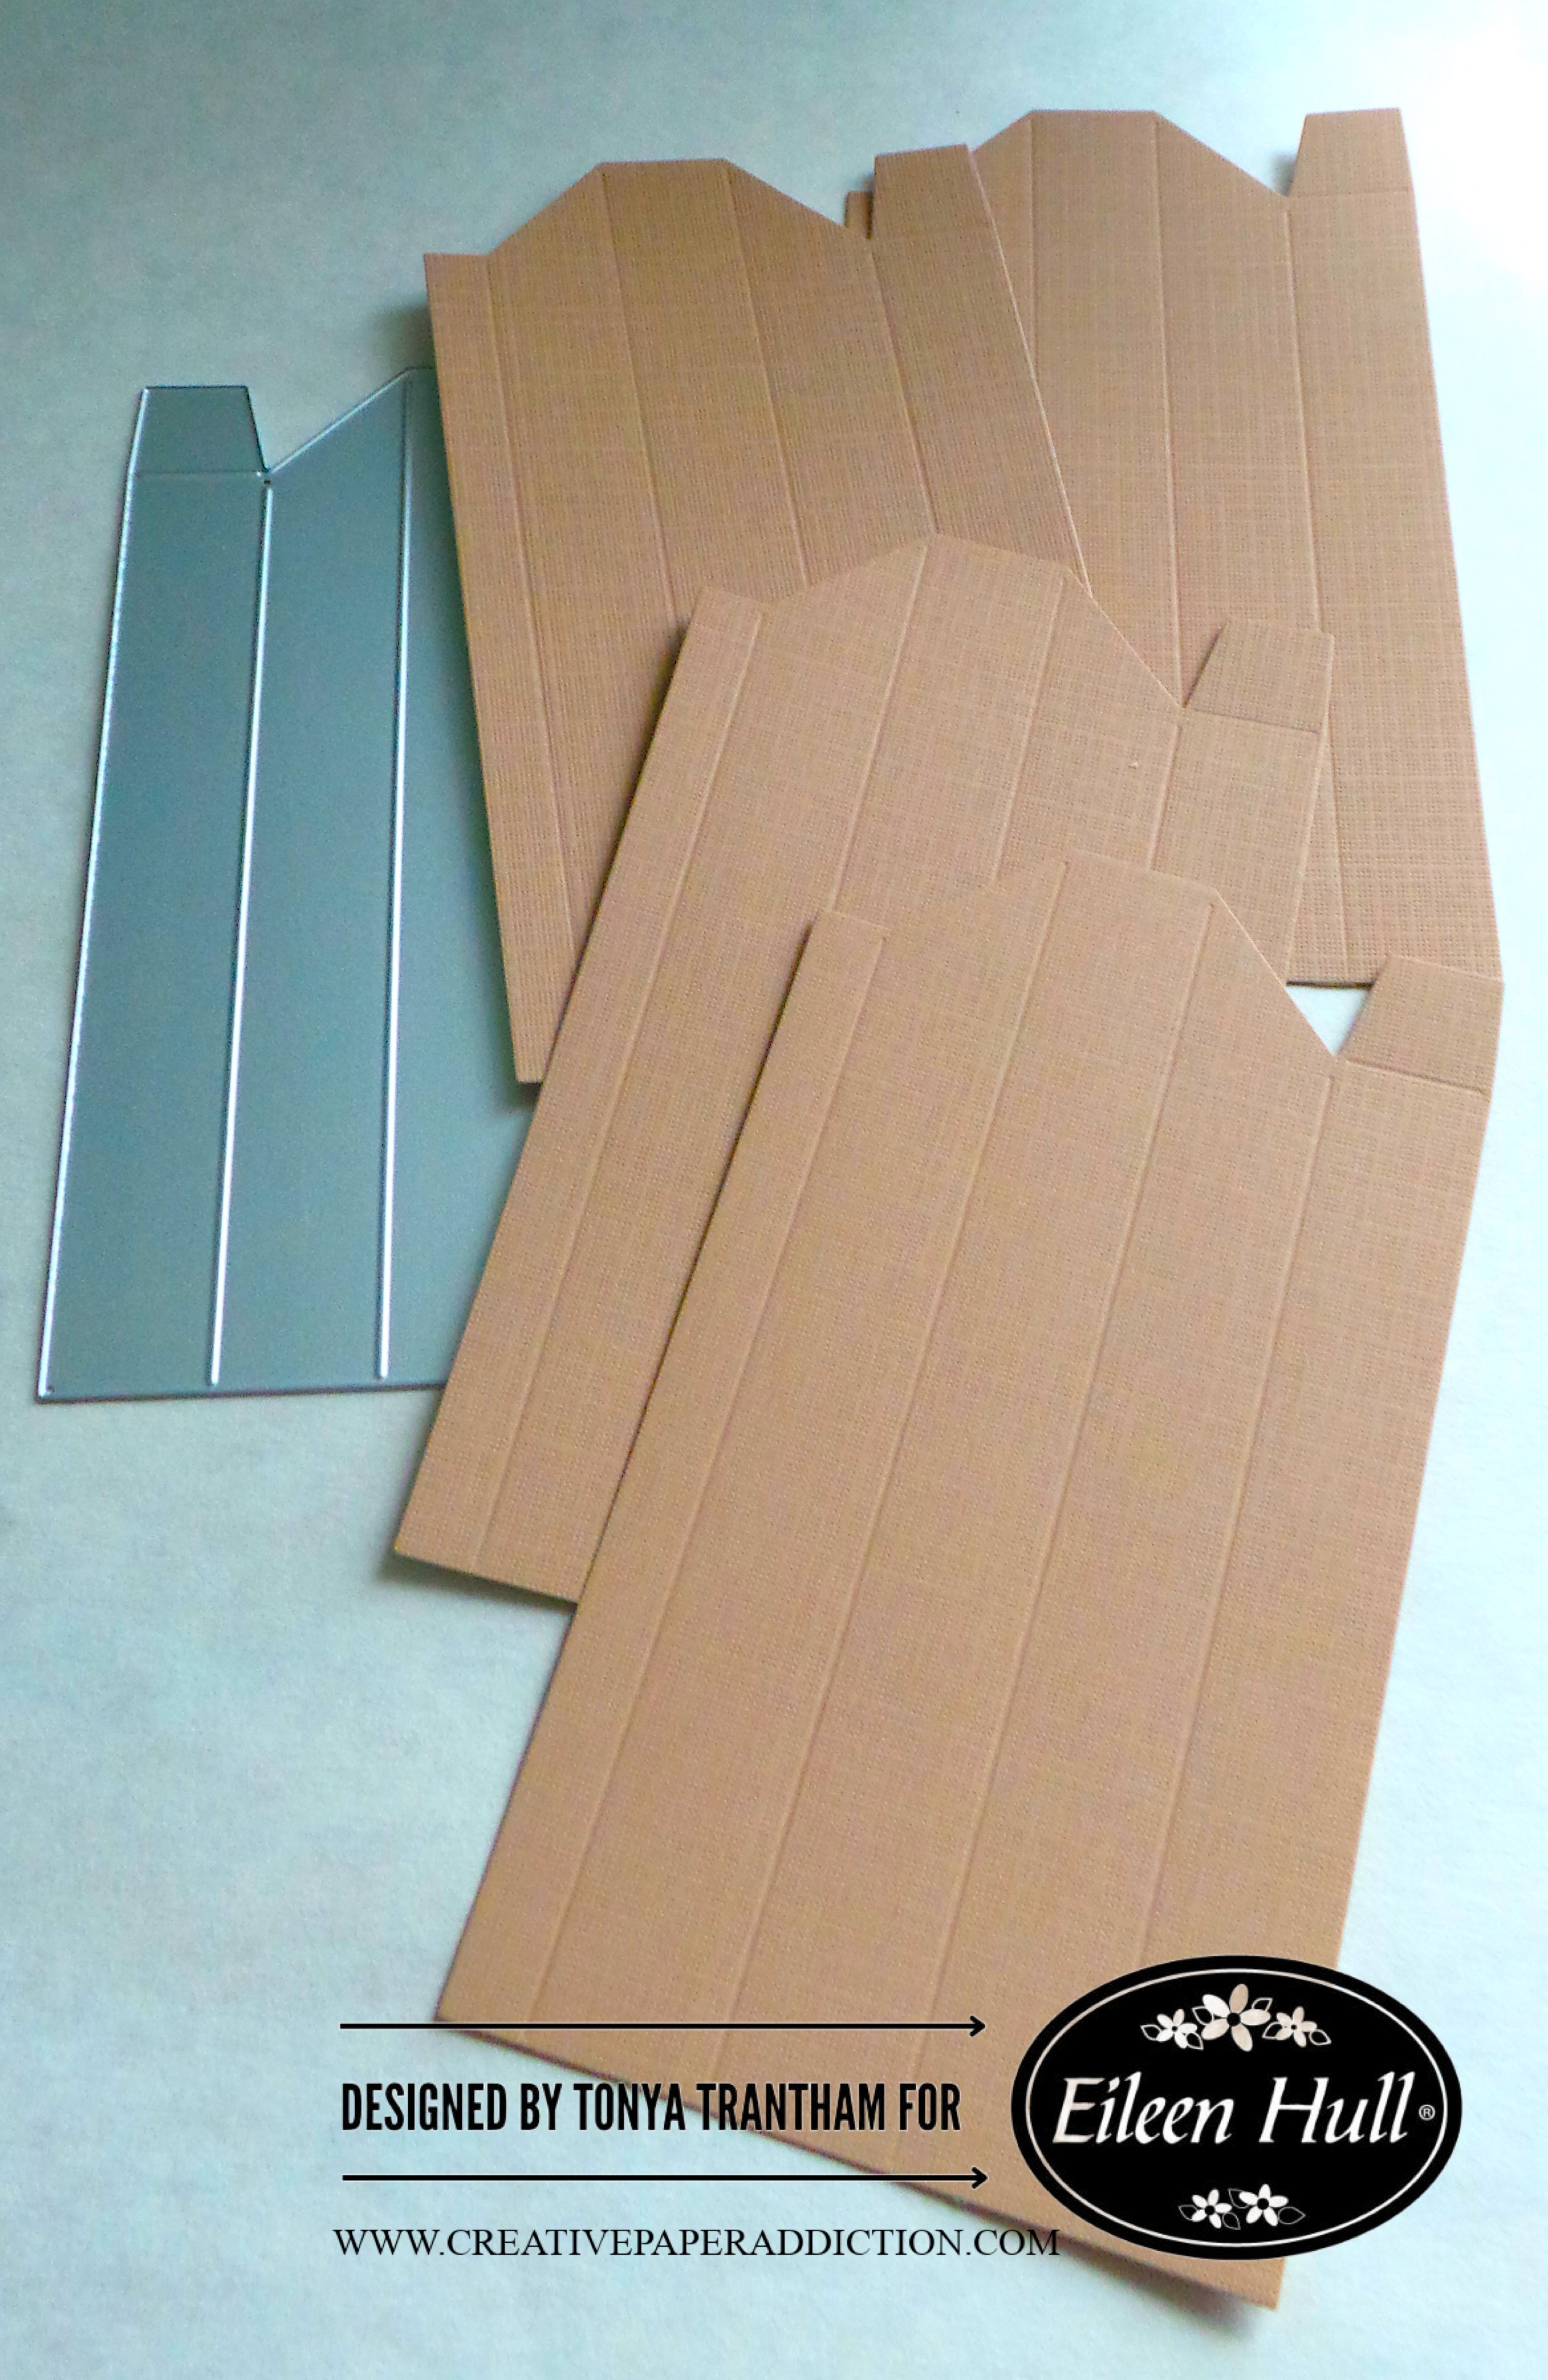
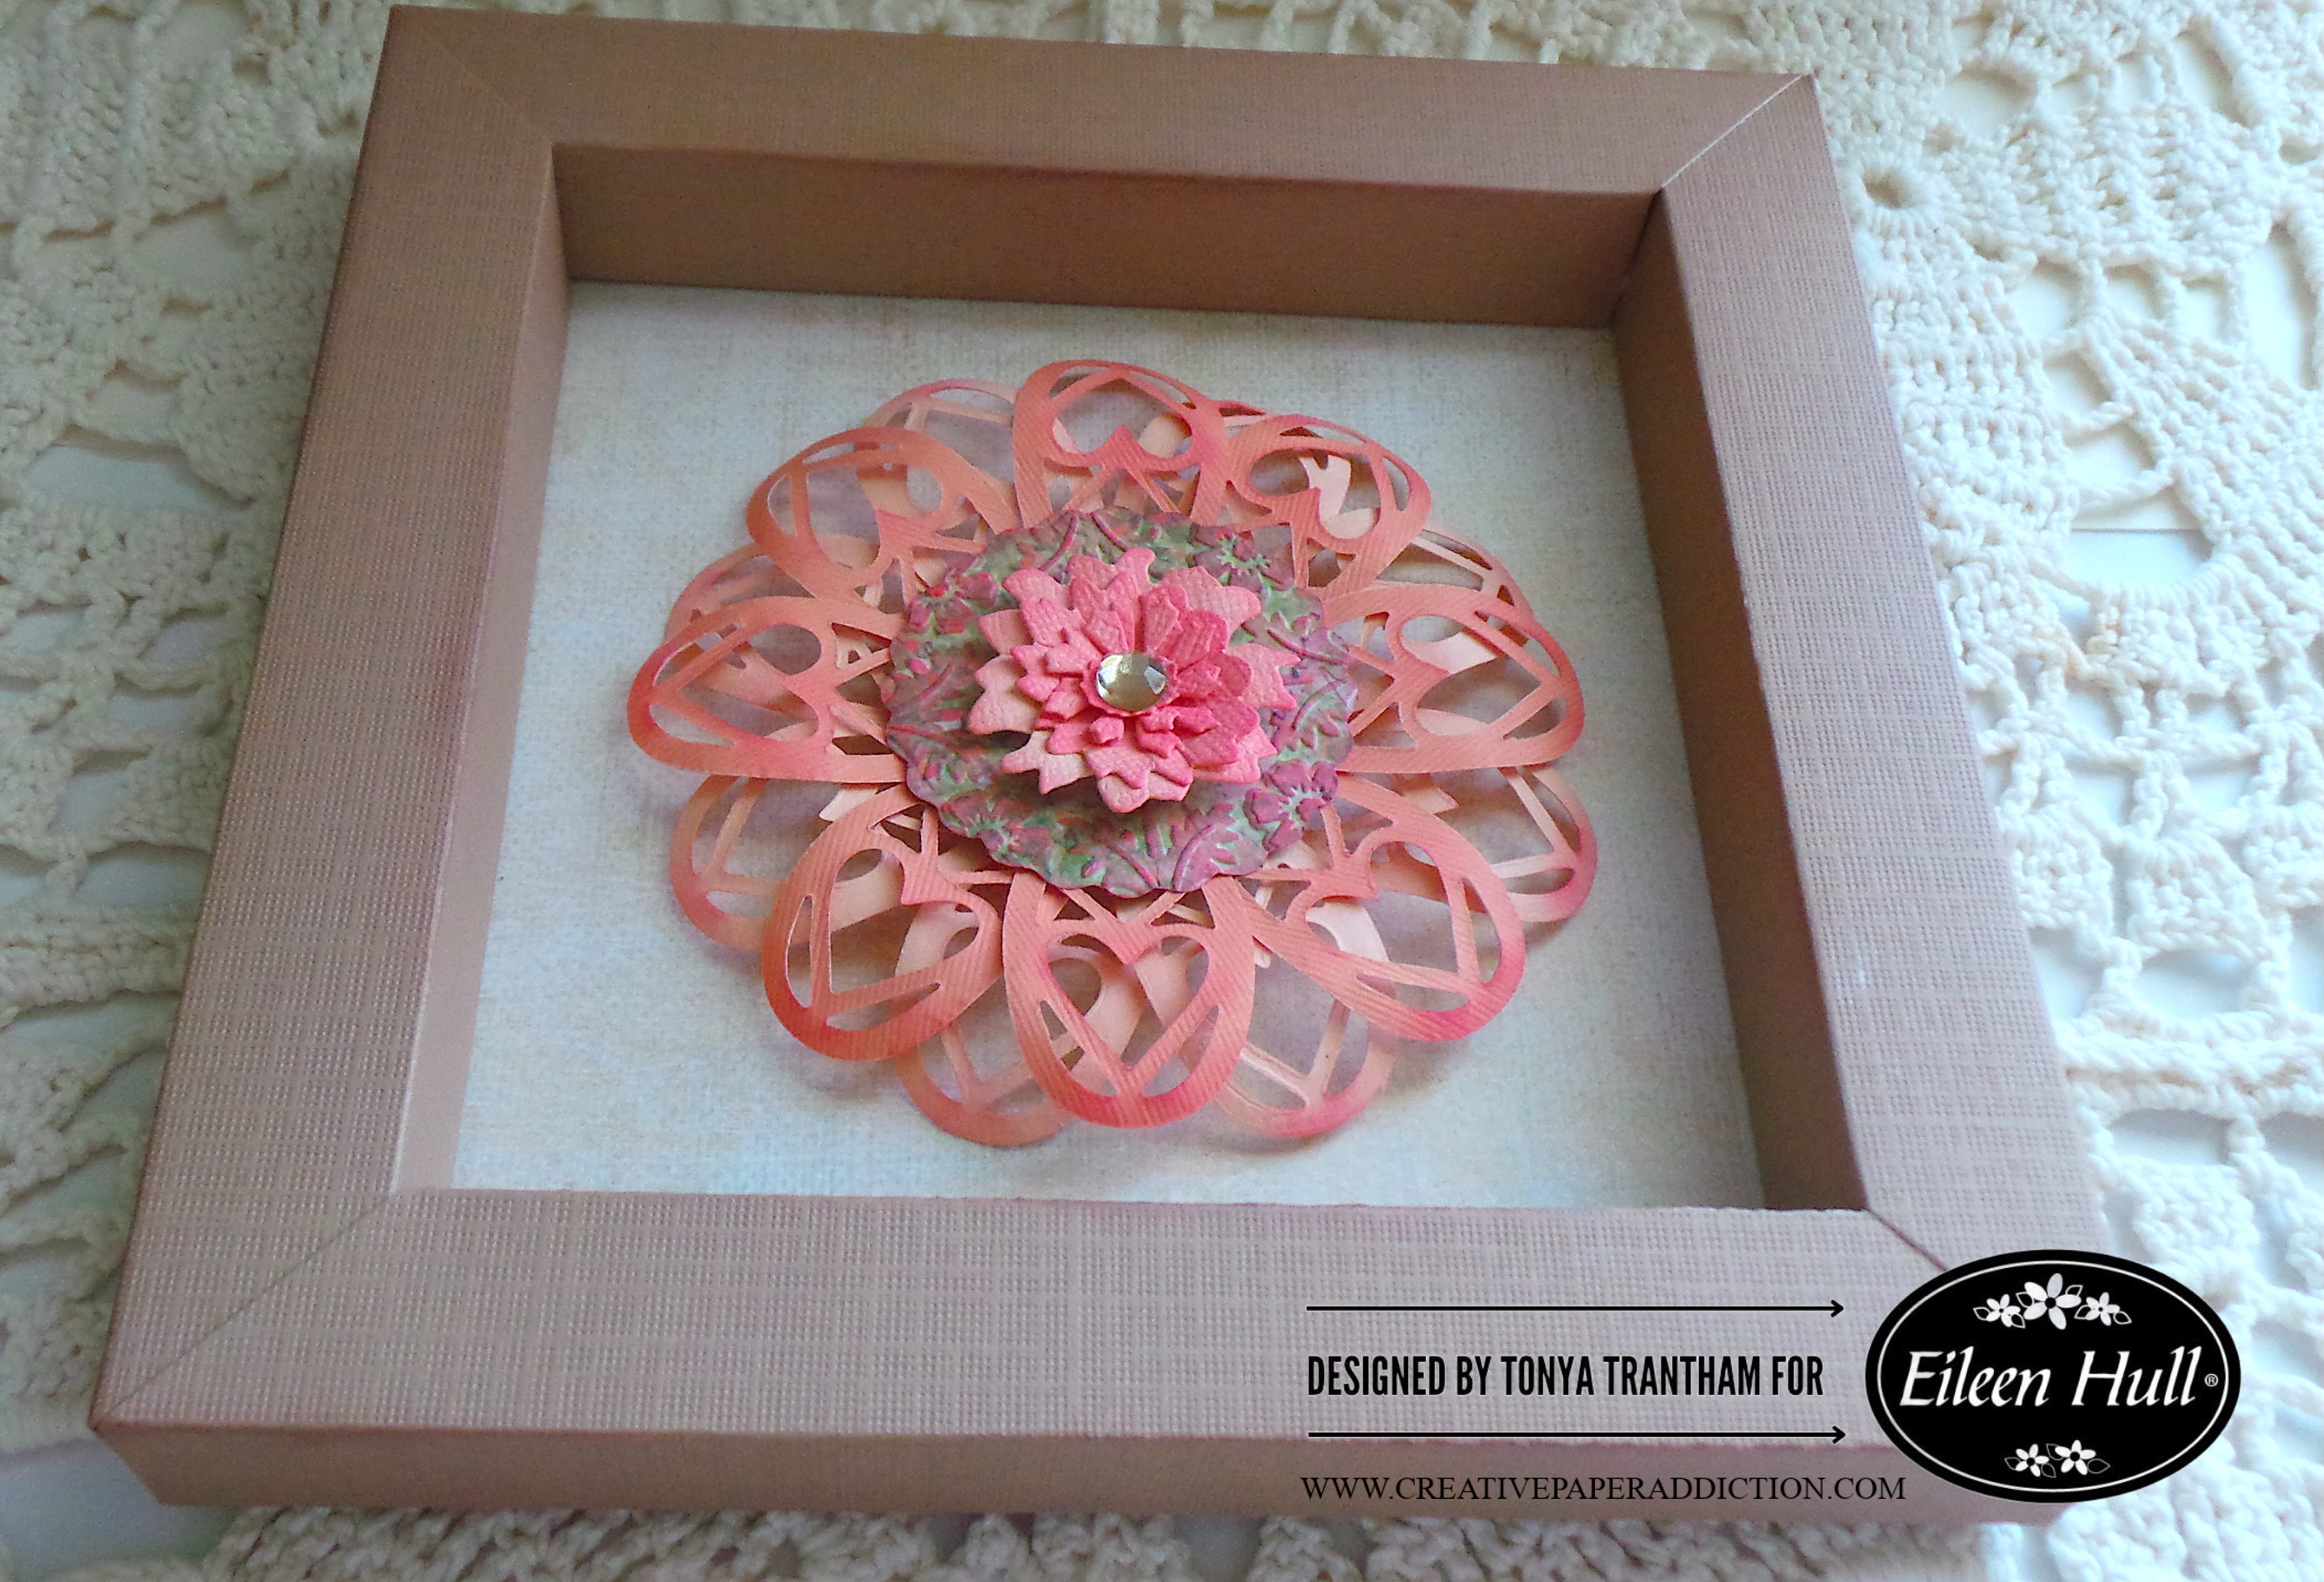
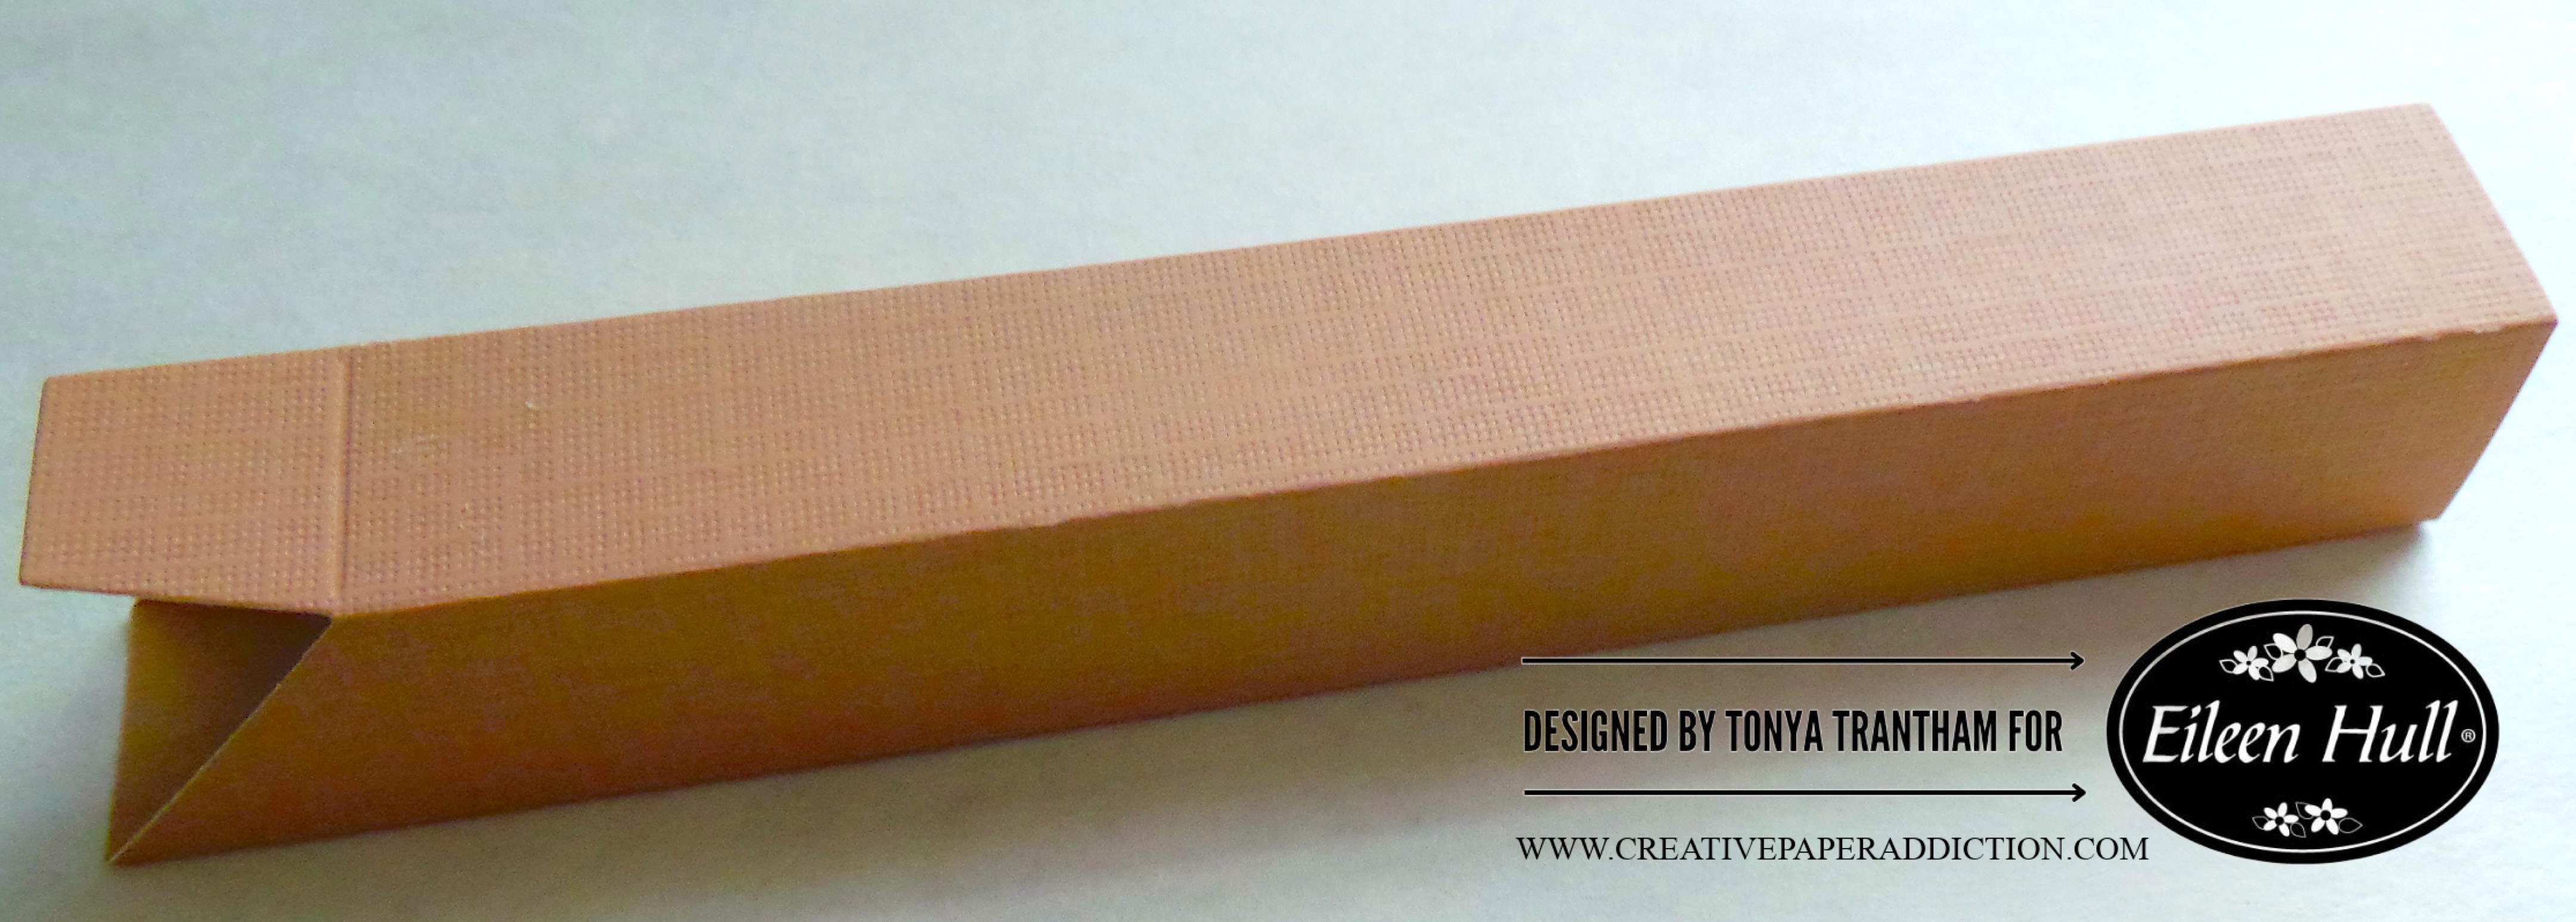
First, I picked out the brown cardstock from the Sizzix Making Essentials Cardstock for the frame. And I cut four frames from the Shadow Box Frames Set 02 Thinlits.

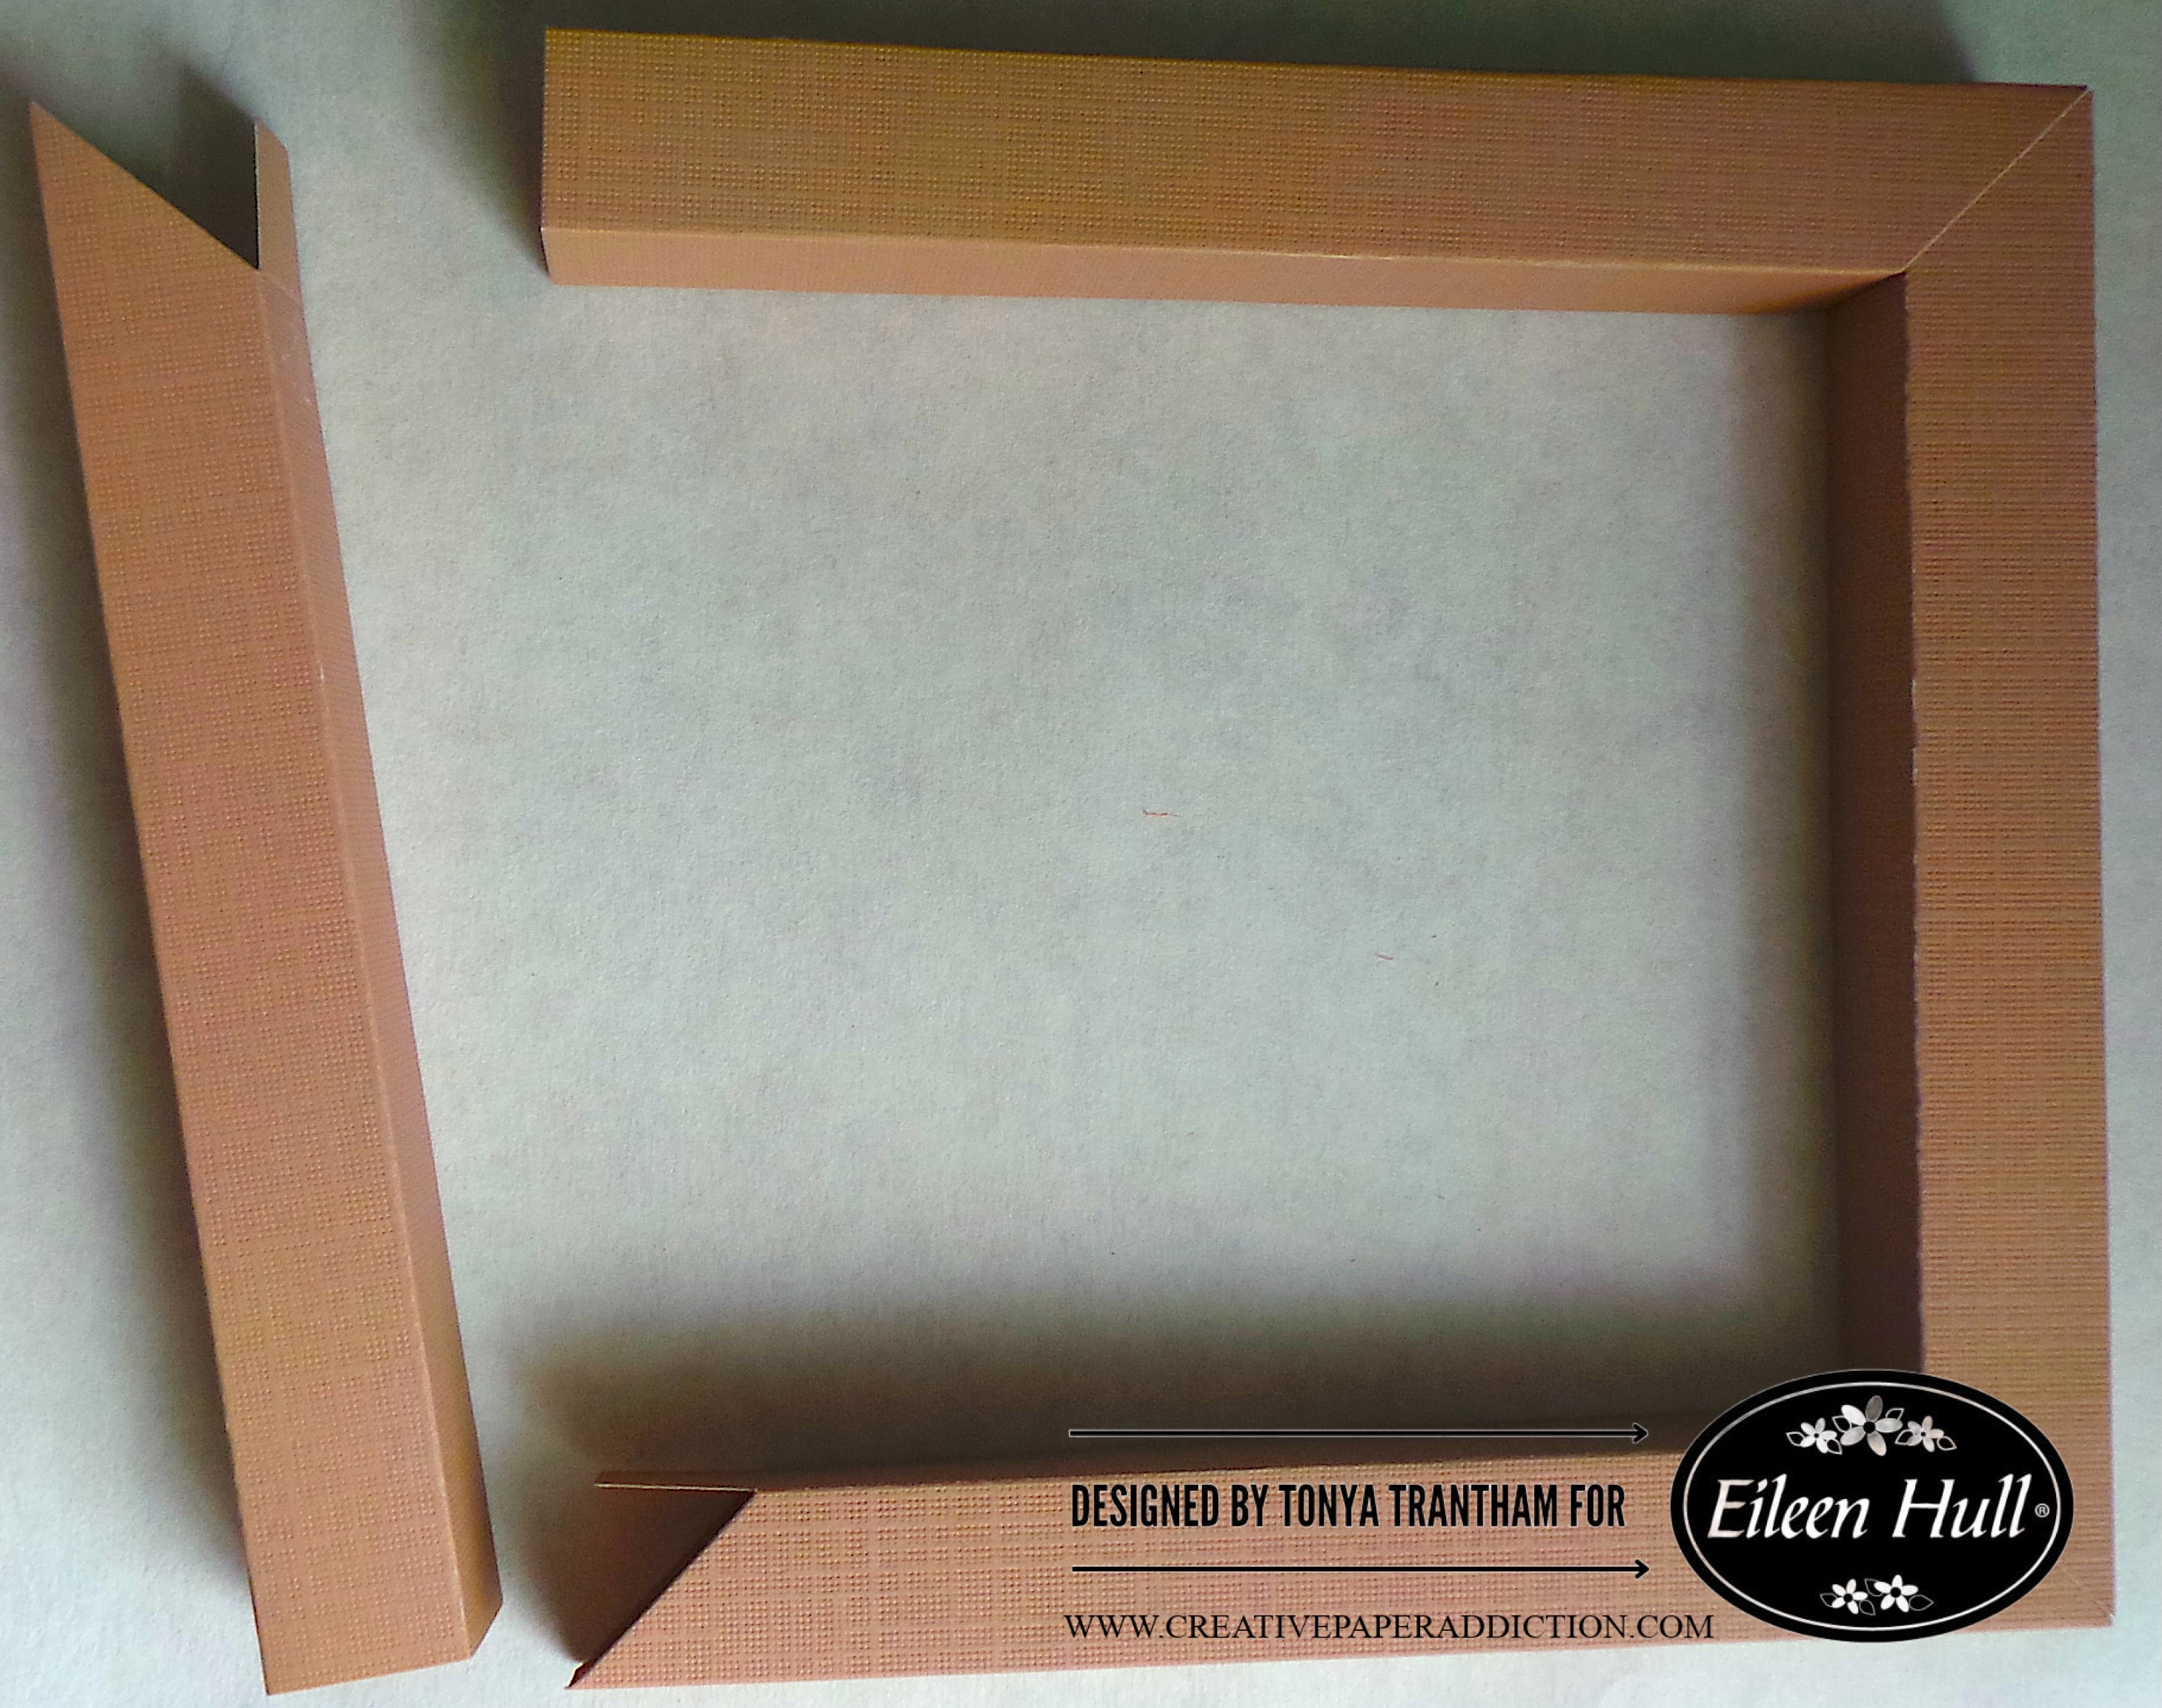
I folded and glued each frame.

I added adhesive inside the opening that has a tab. And placed it into the straight edge of the next frame. I did hold these while the glue set before adding glue to the next one. I cut and adhered a piece of cardstock to the back of the frame to give the frame stability.

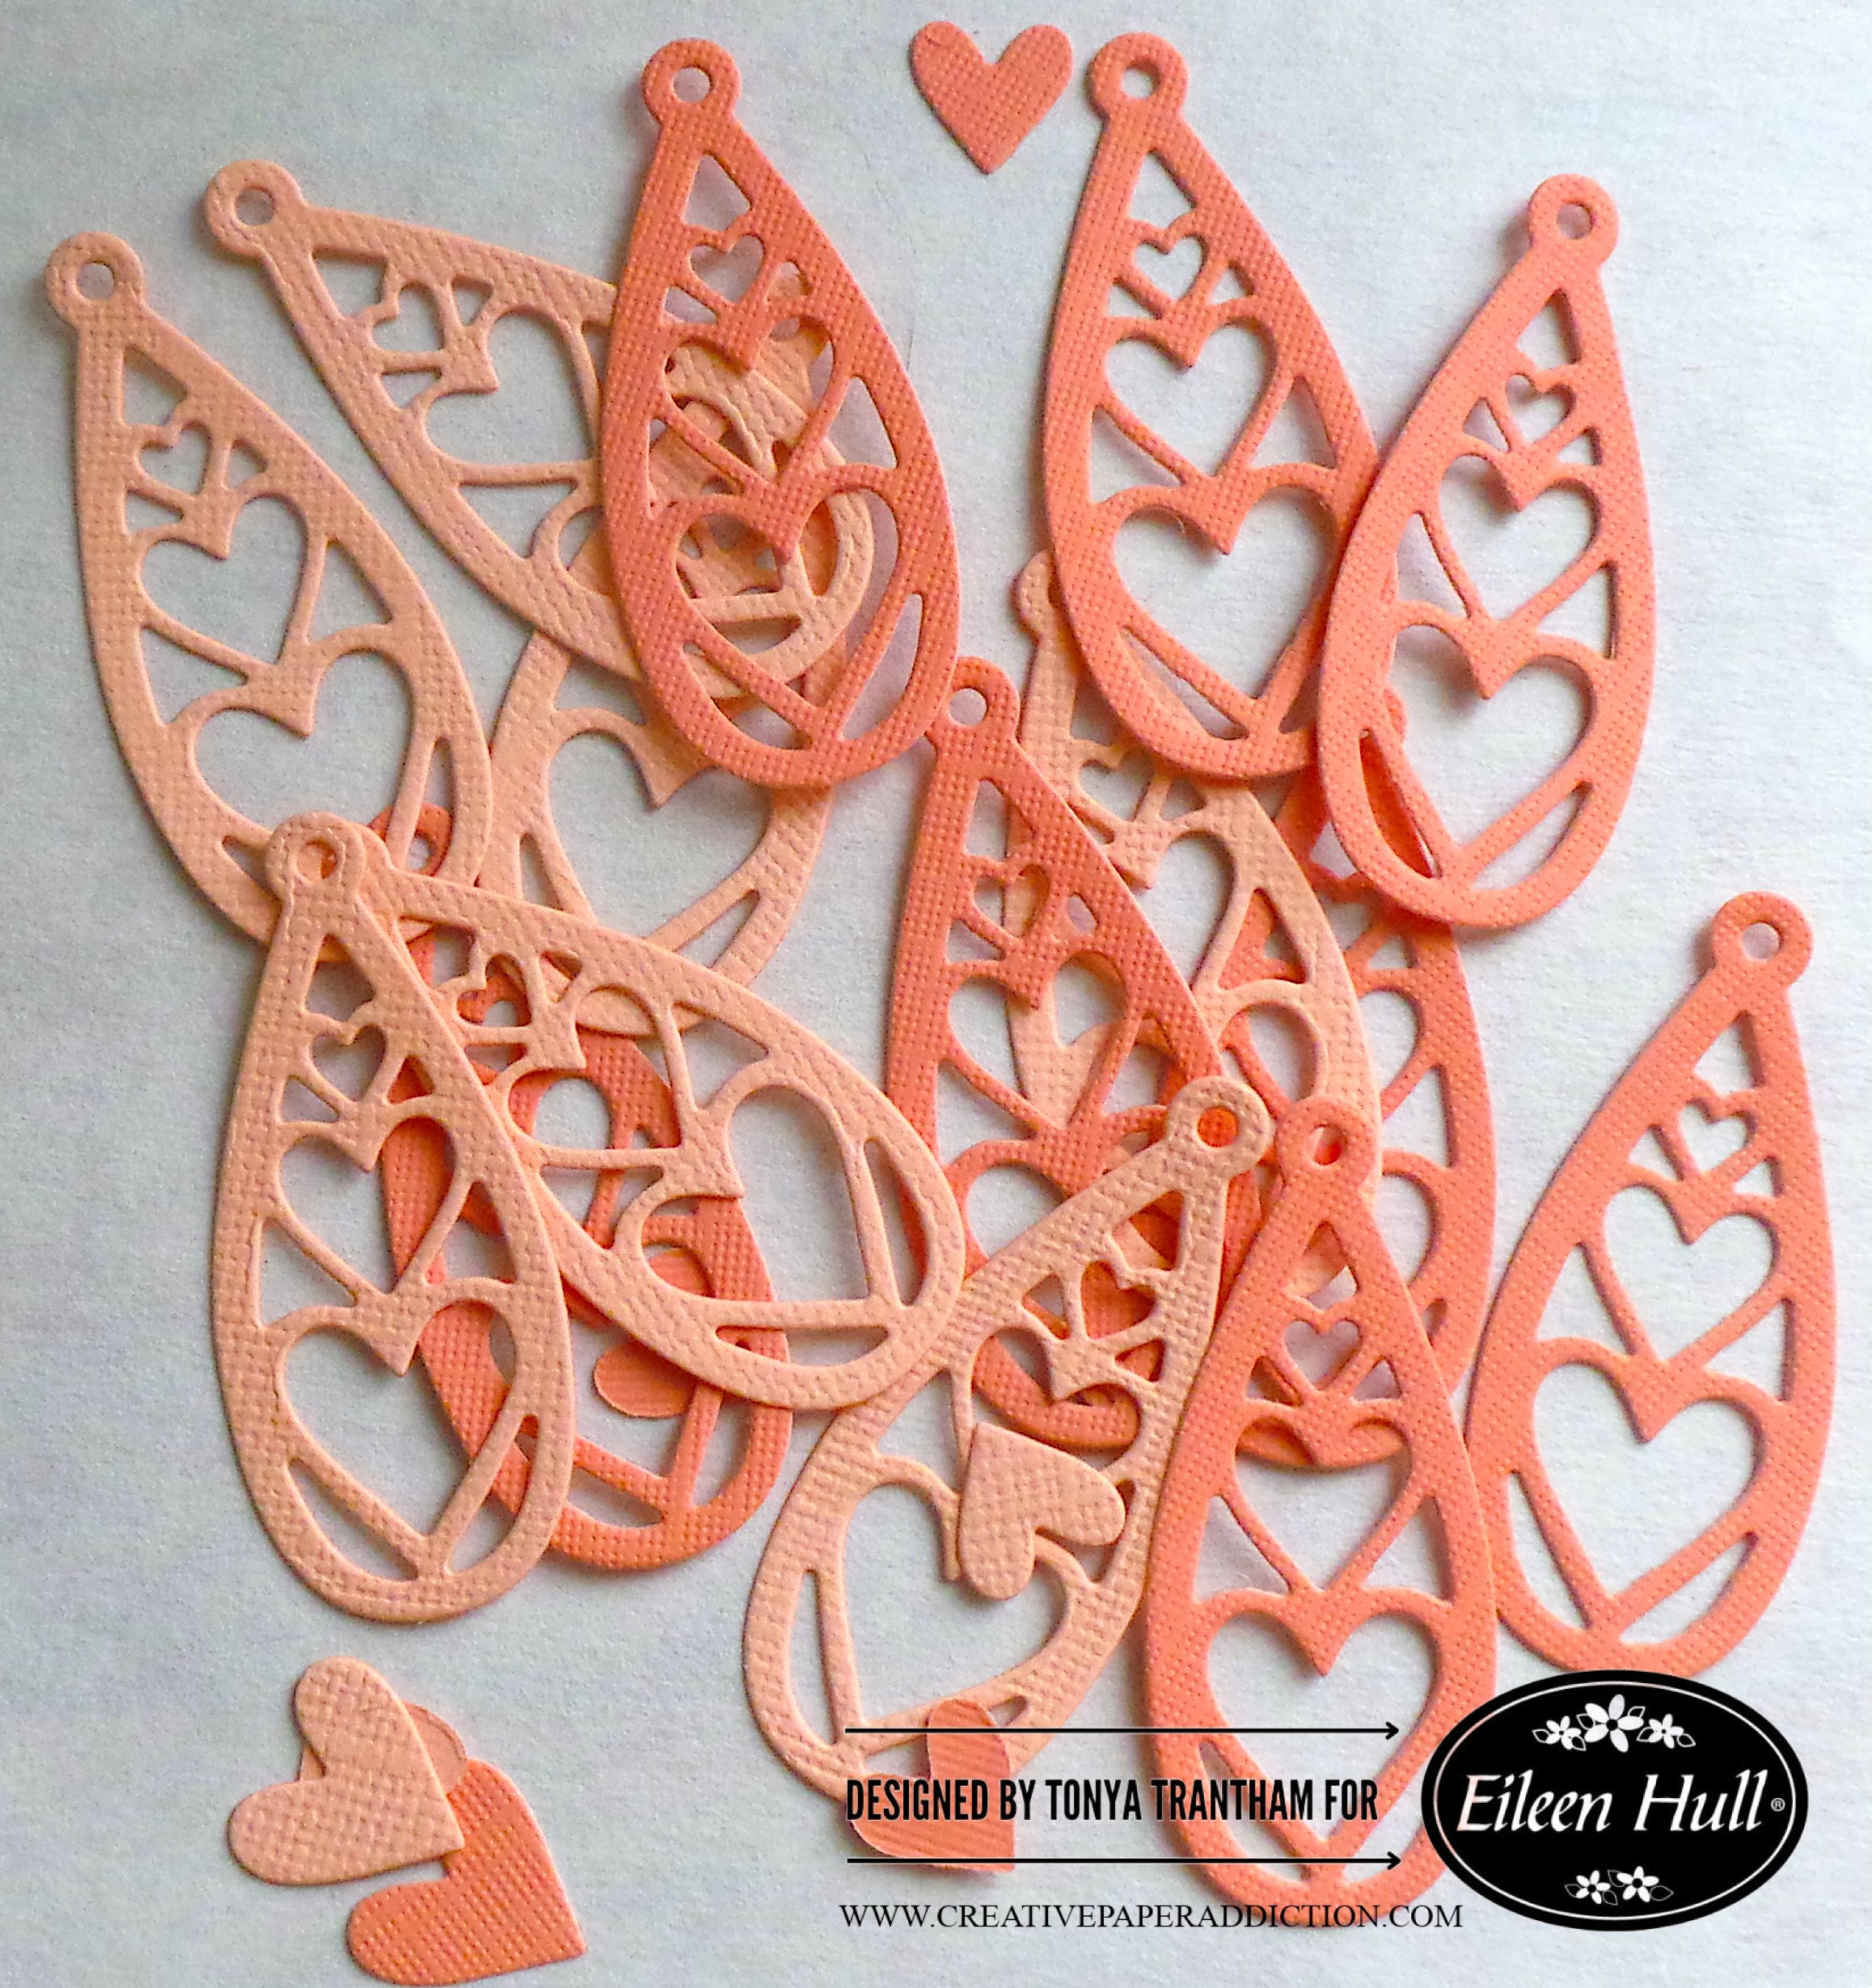
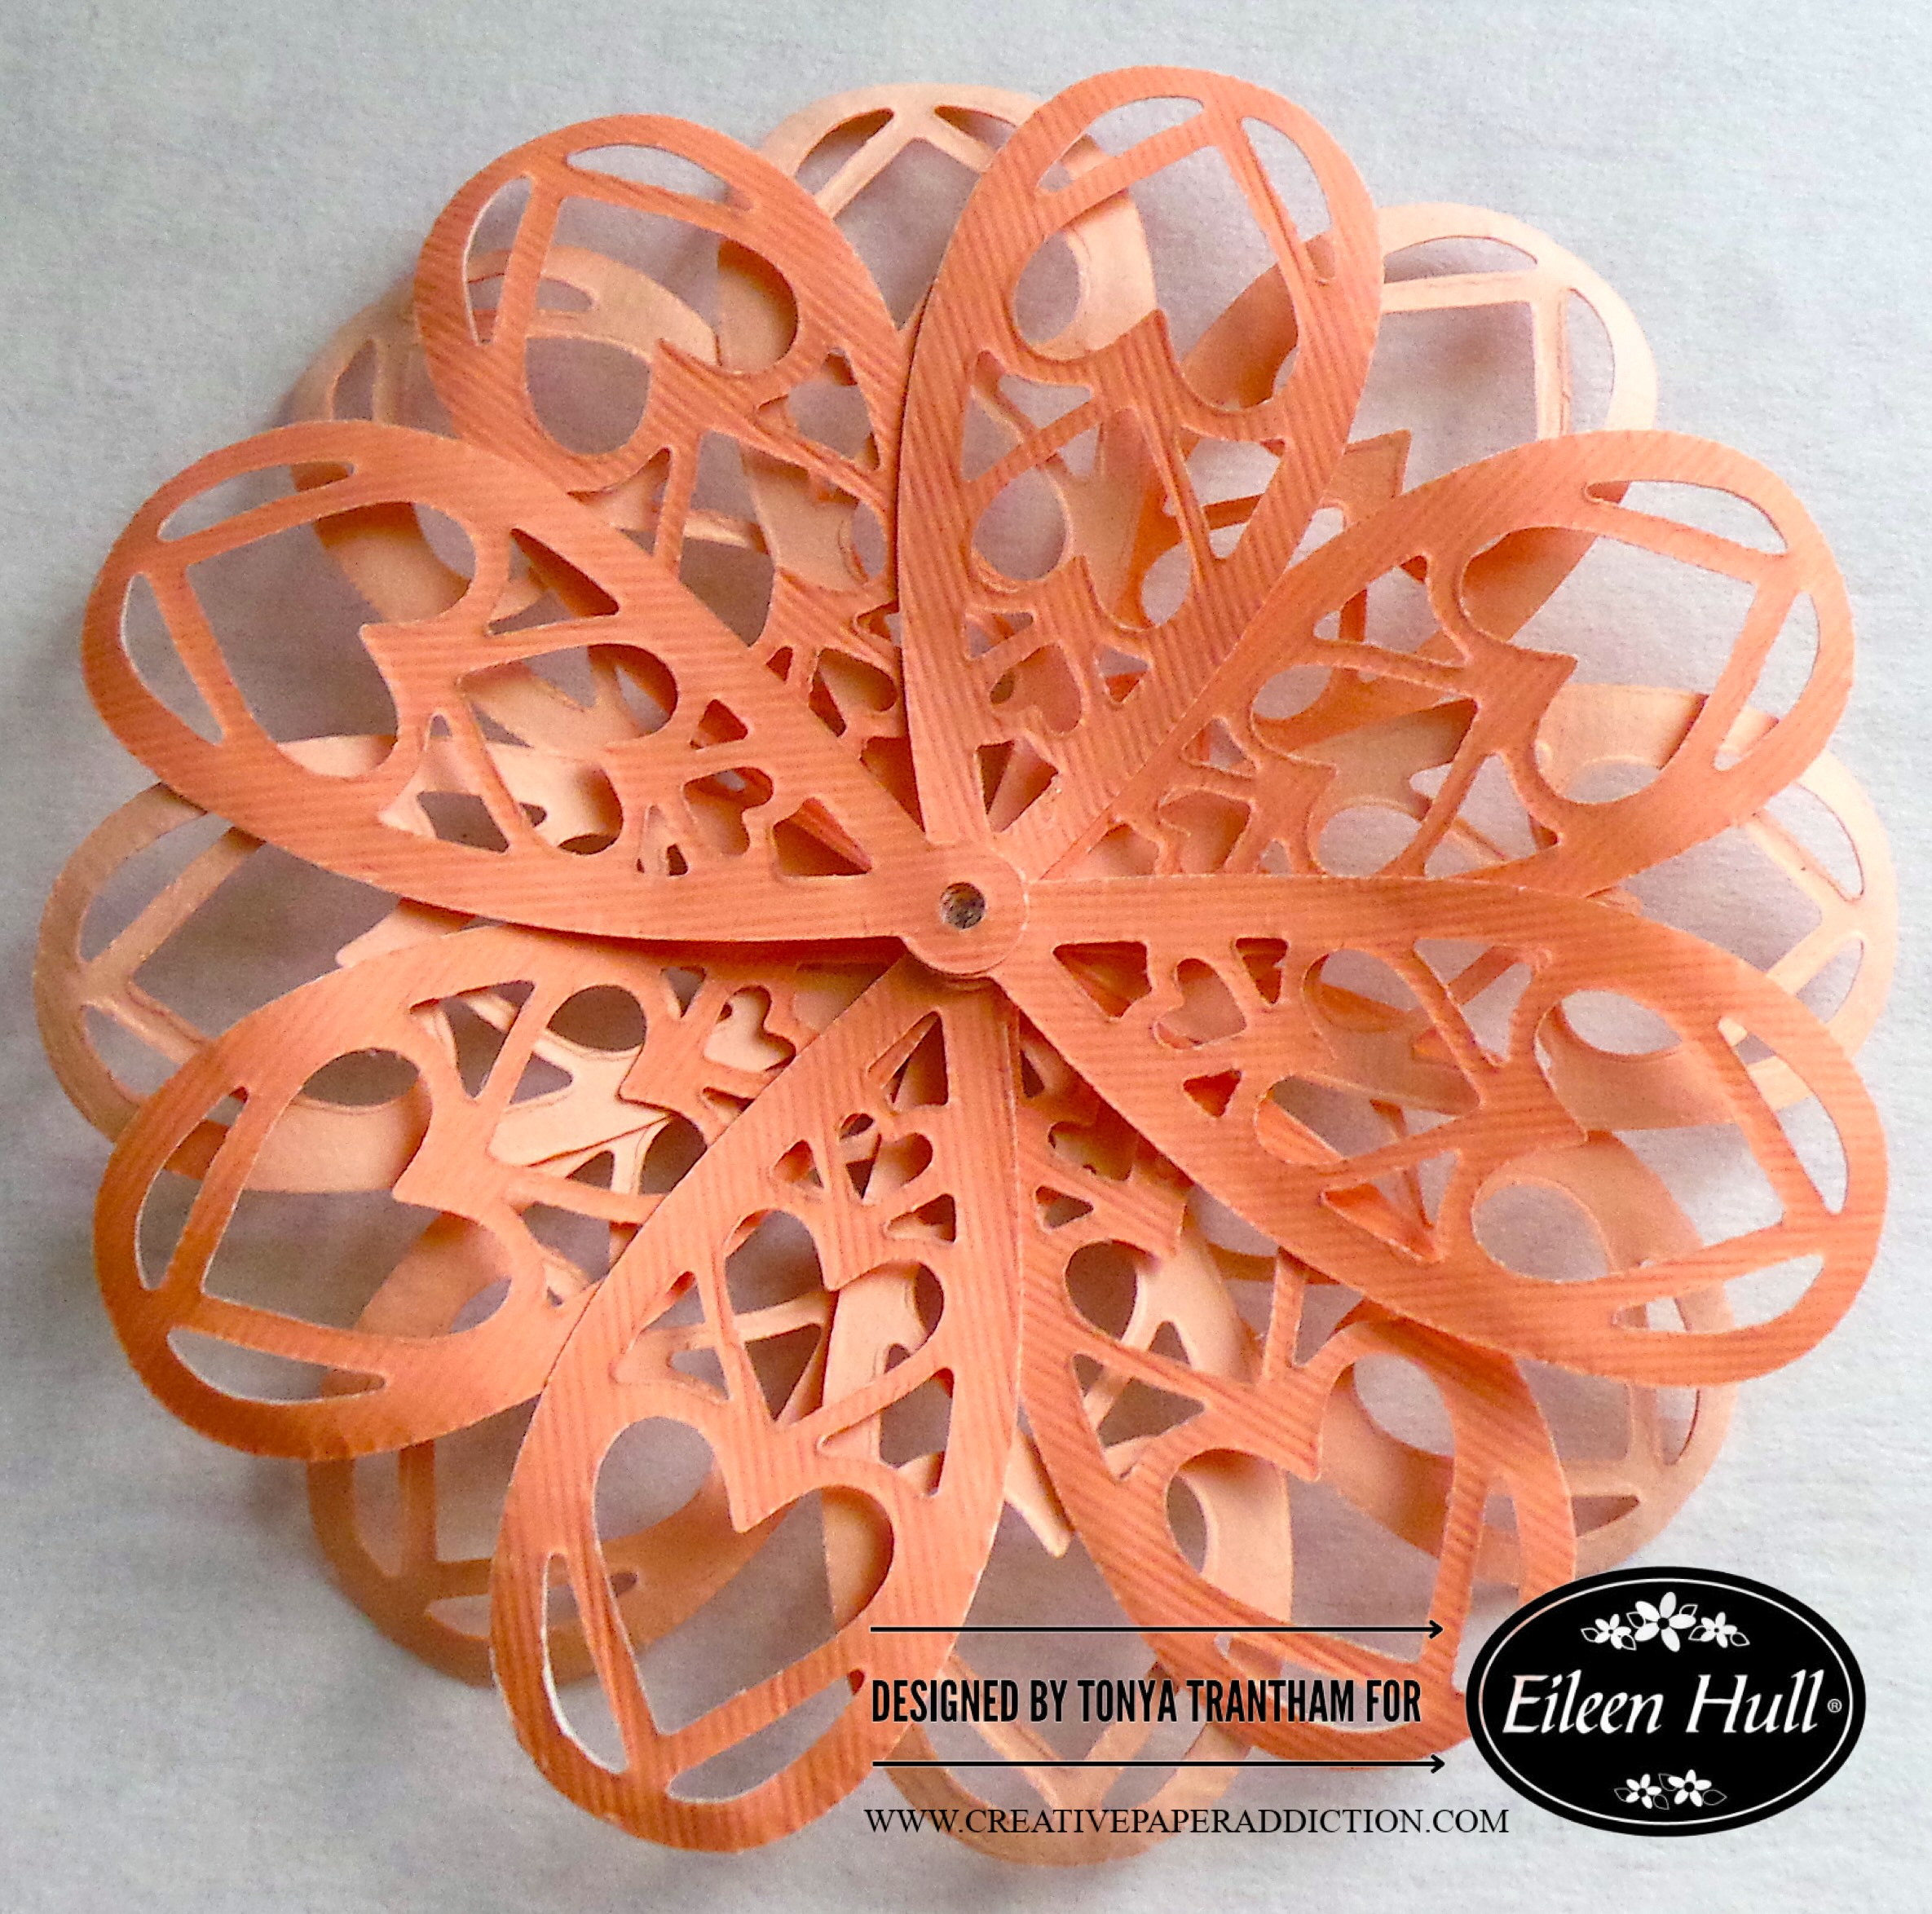
I cut out fifteen of the teardrop heart charms from the Charms Thinlits.

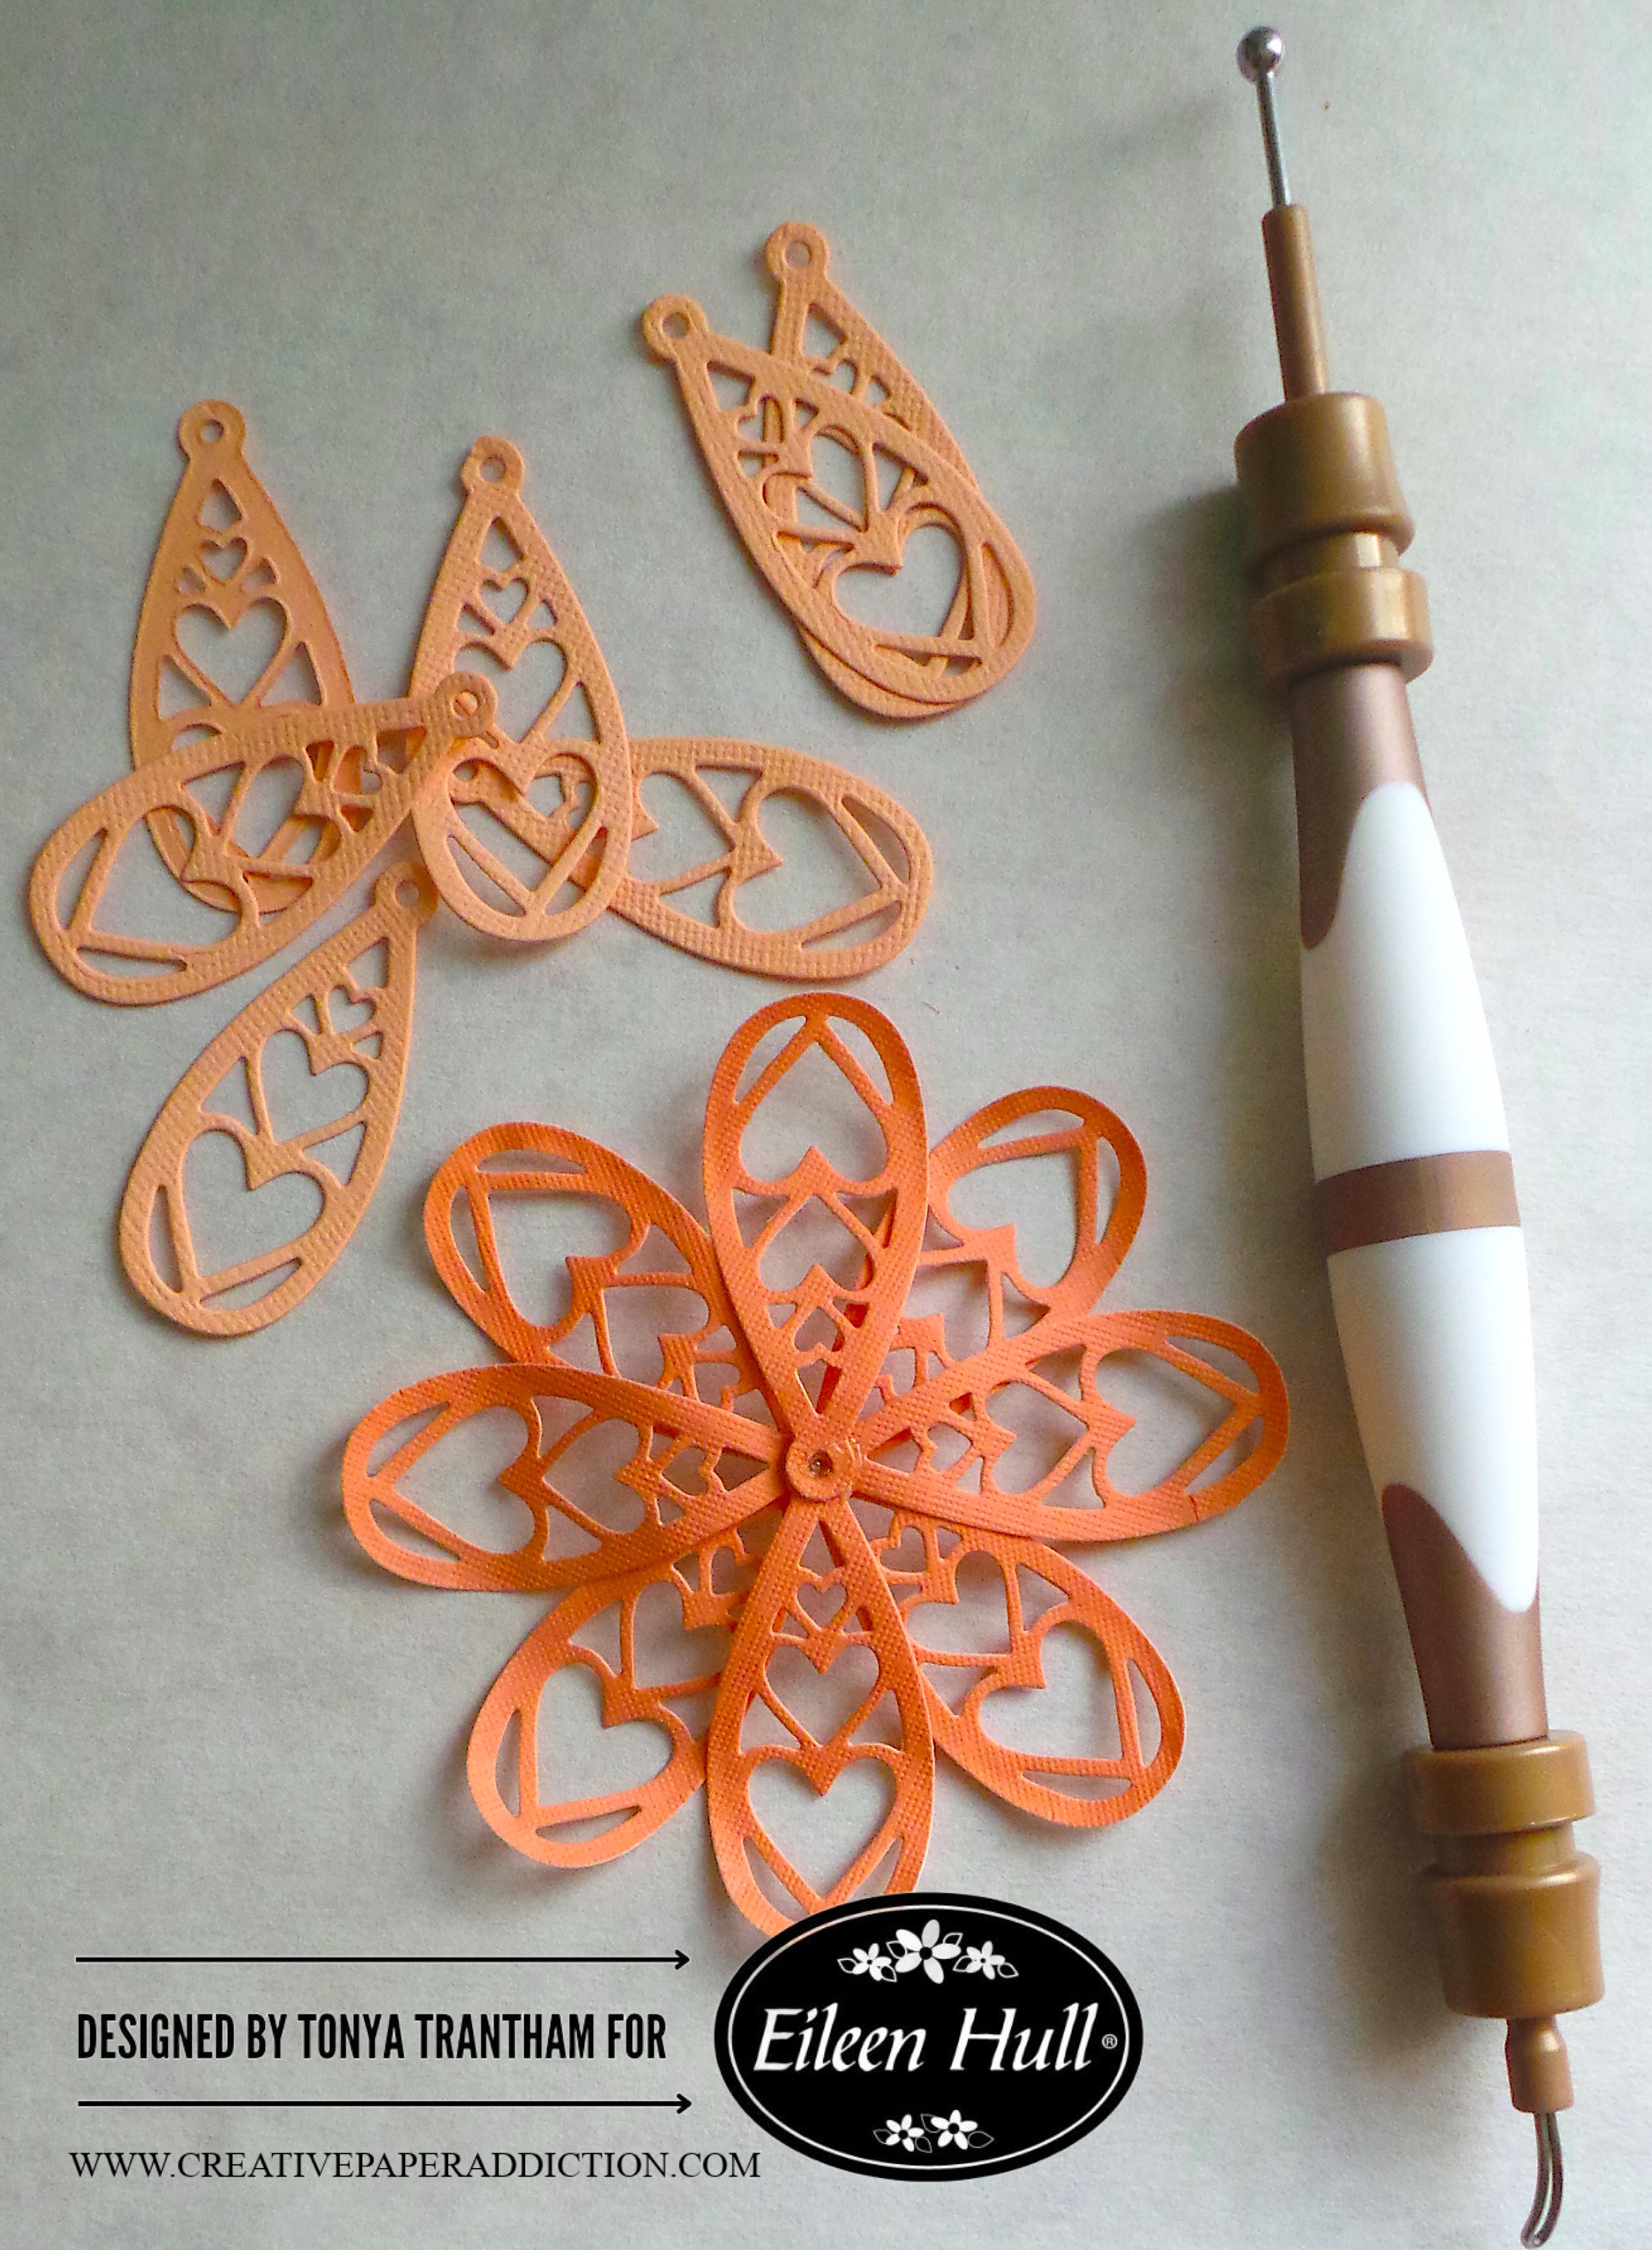
I shaped each teardrop charm with a Stylus.

I glued the center of each teardrop charm on top of each other.

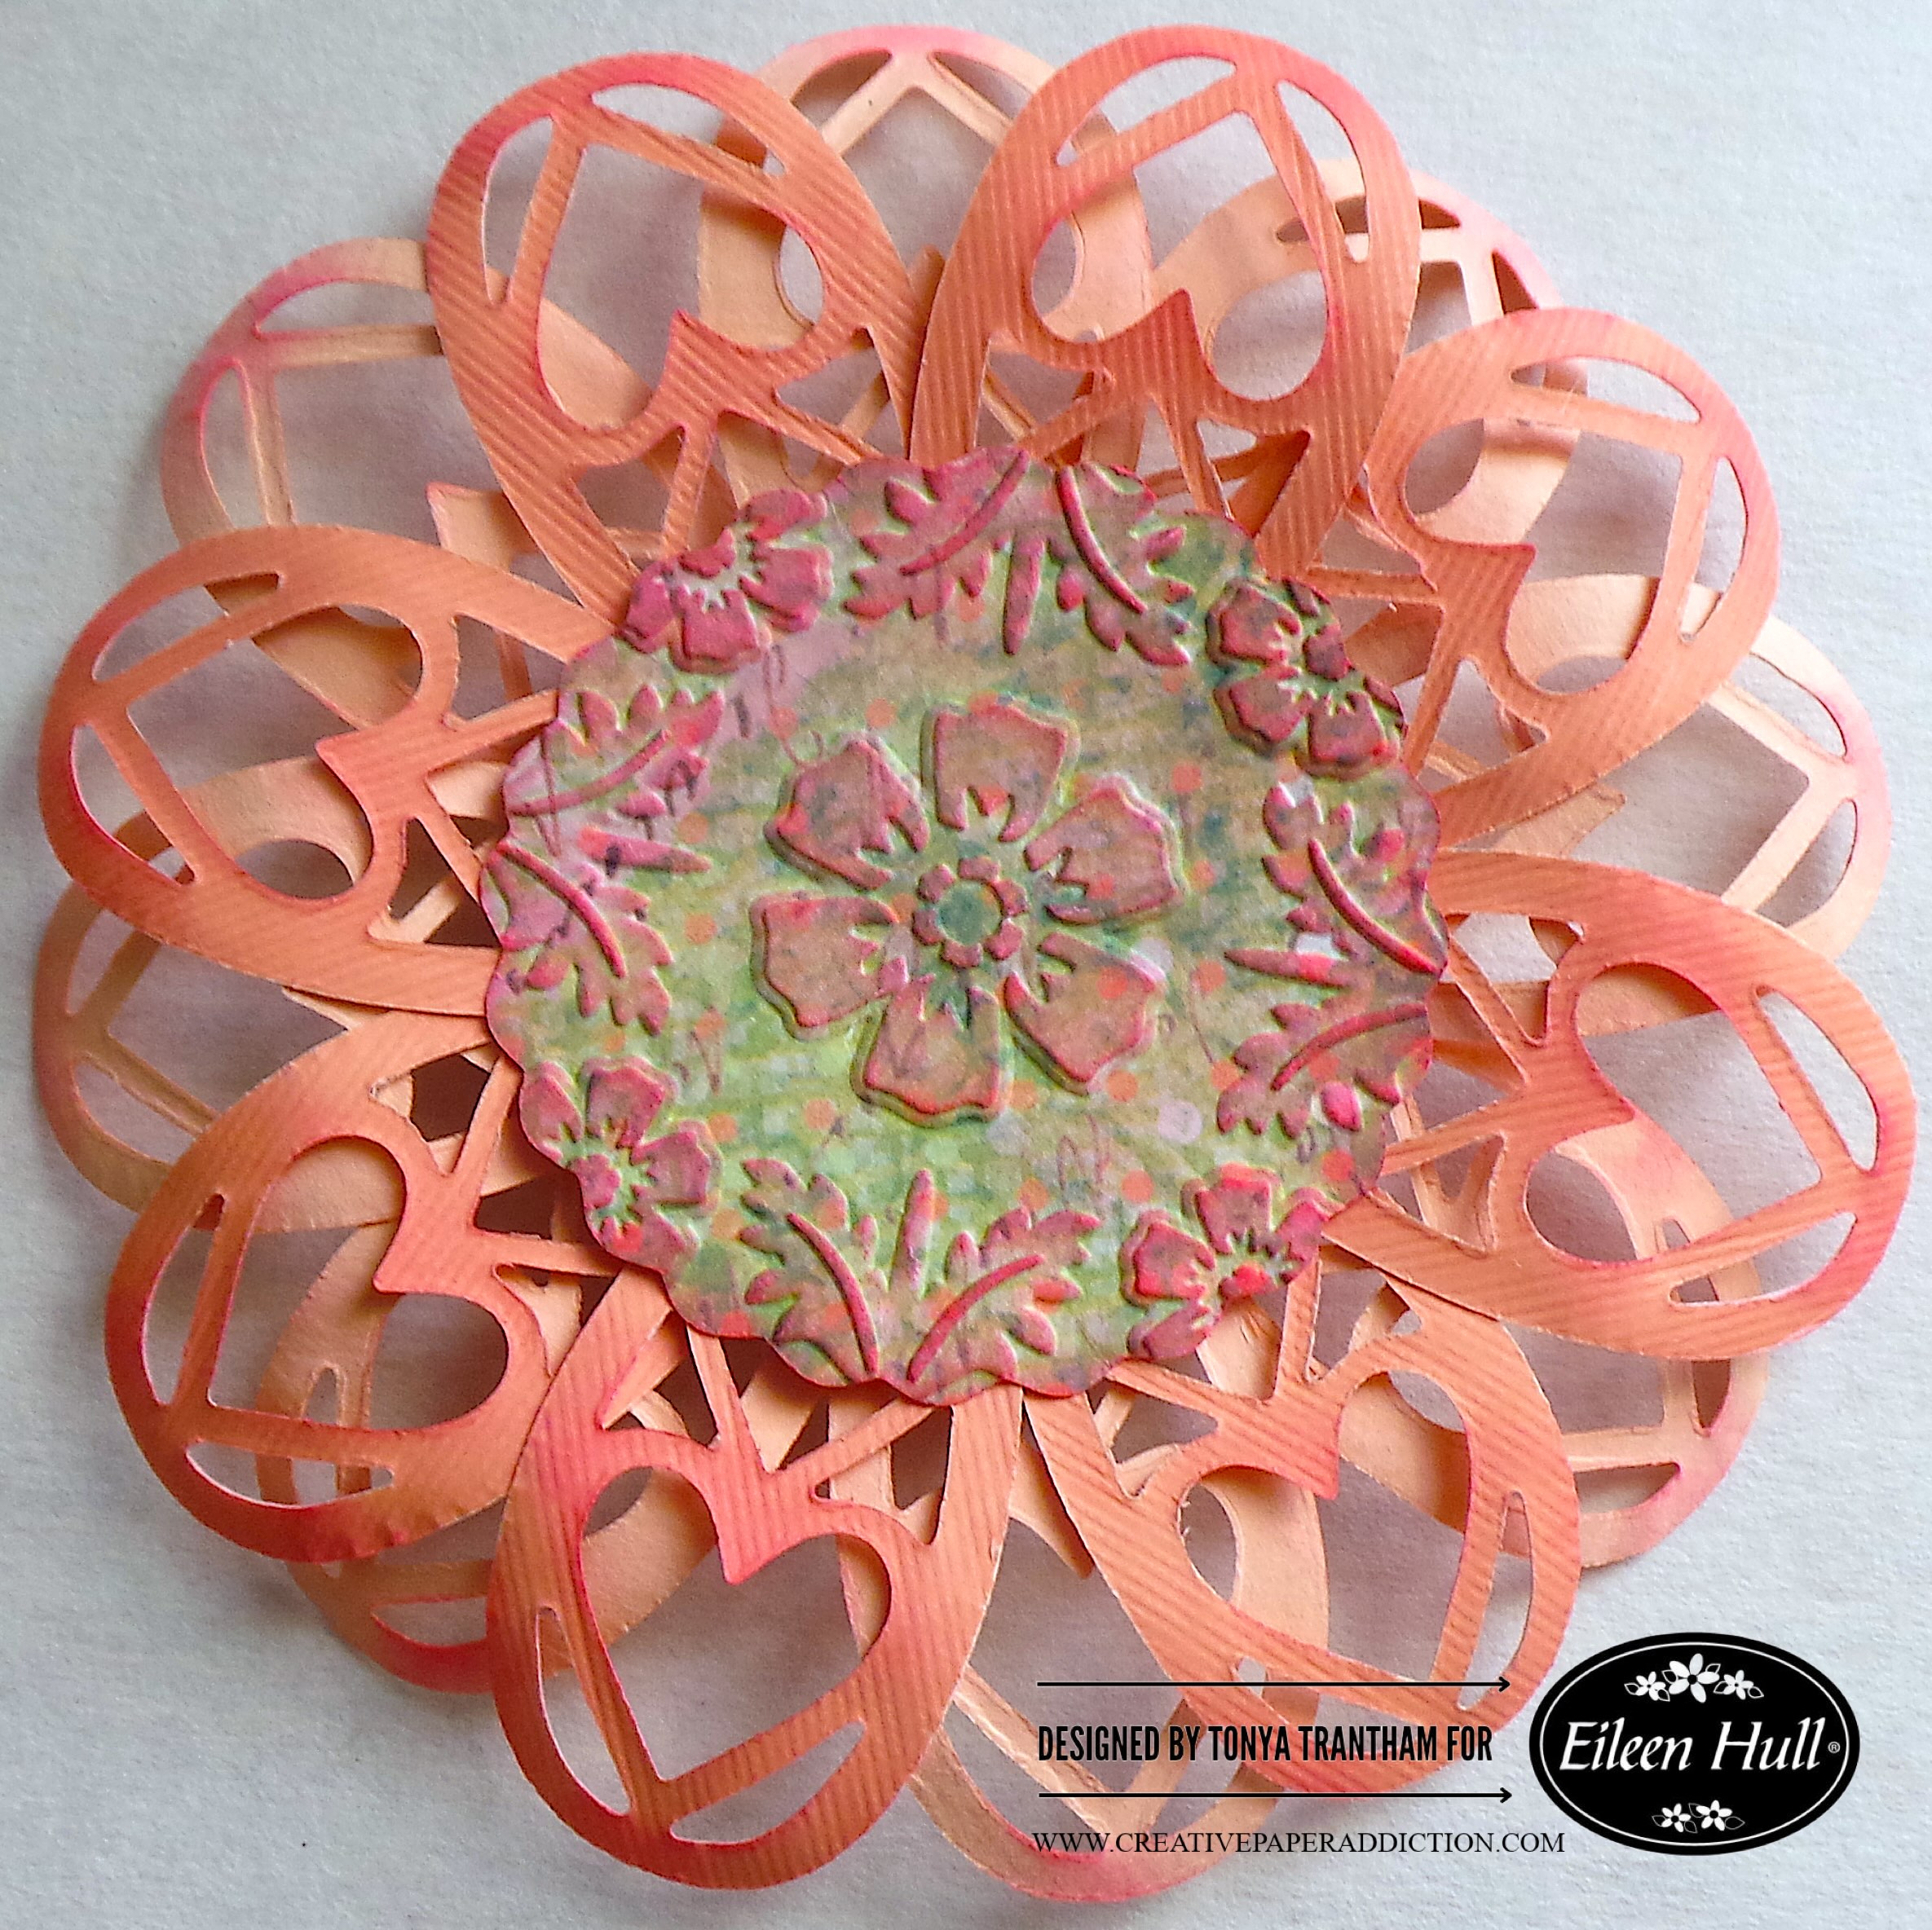
I cut a center from the Sunflower Diecut and embossing that with the Floral Damask Embossing Folder. I inked the center and petals with a Pink Chalk Ink.

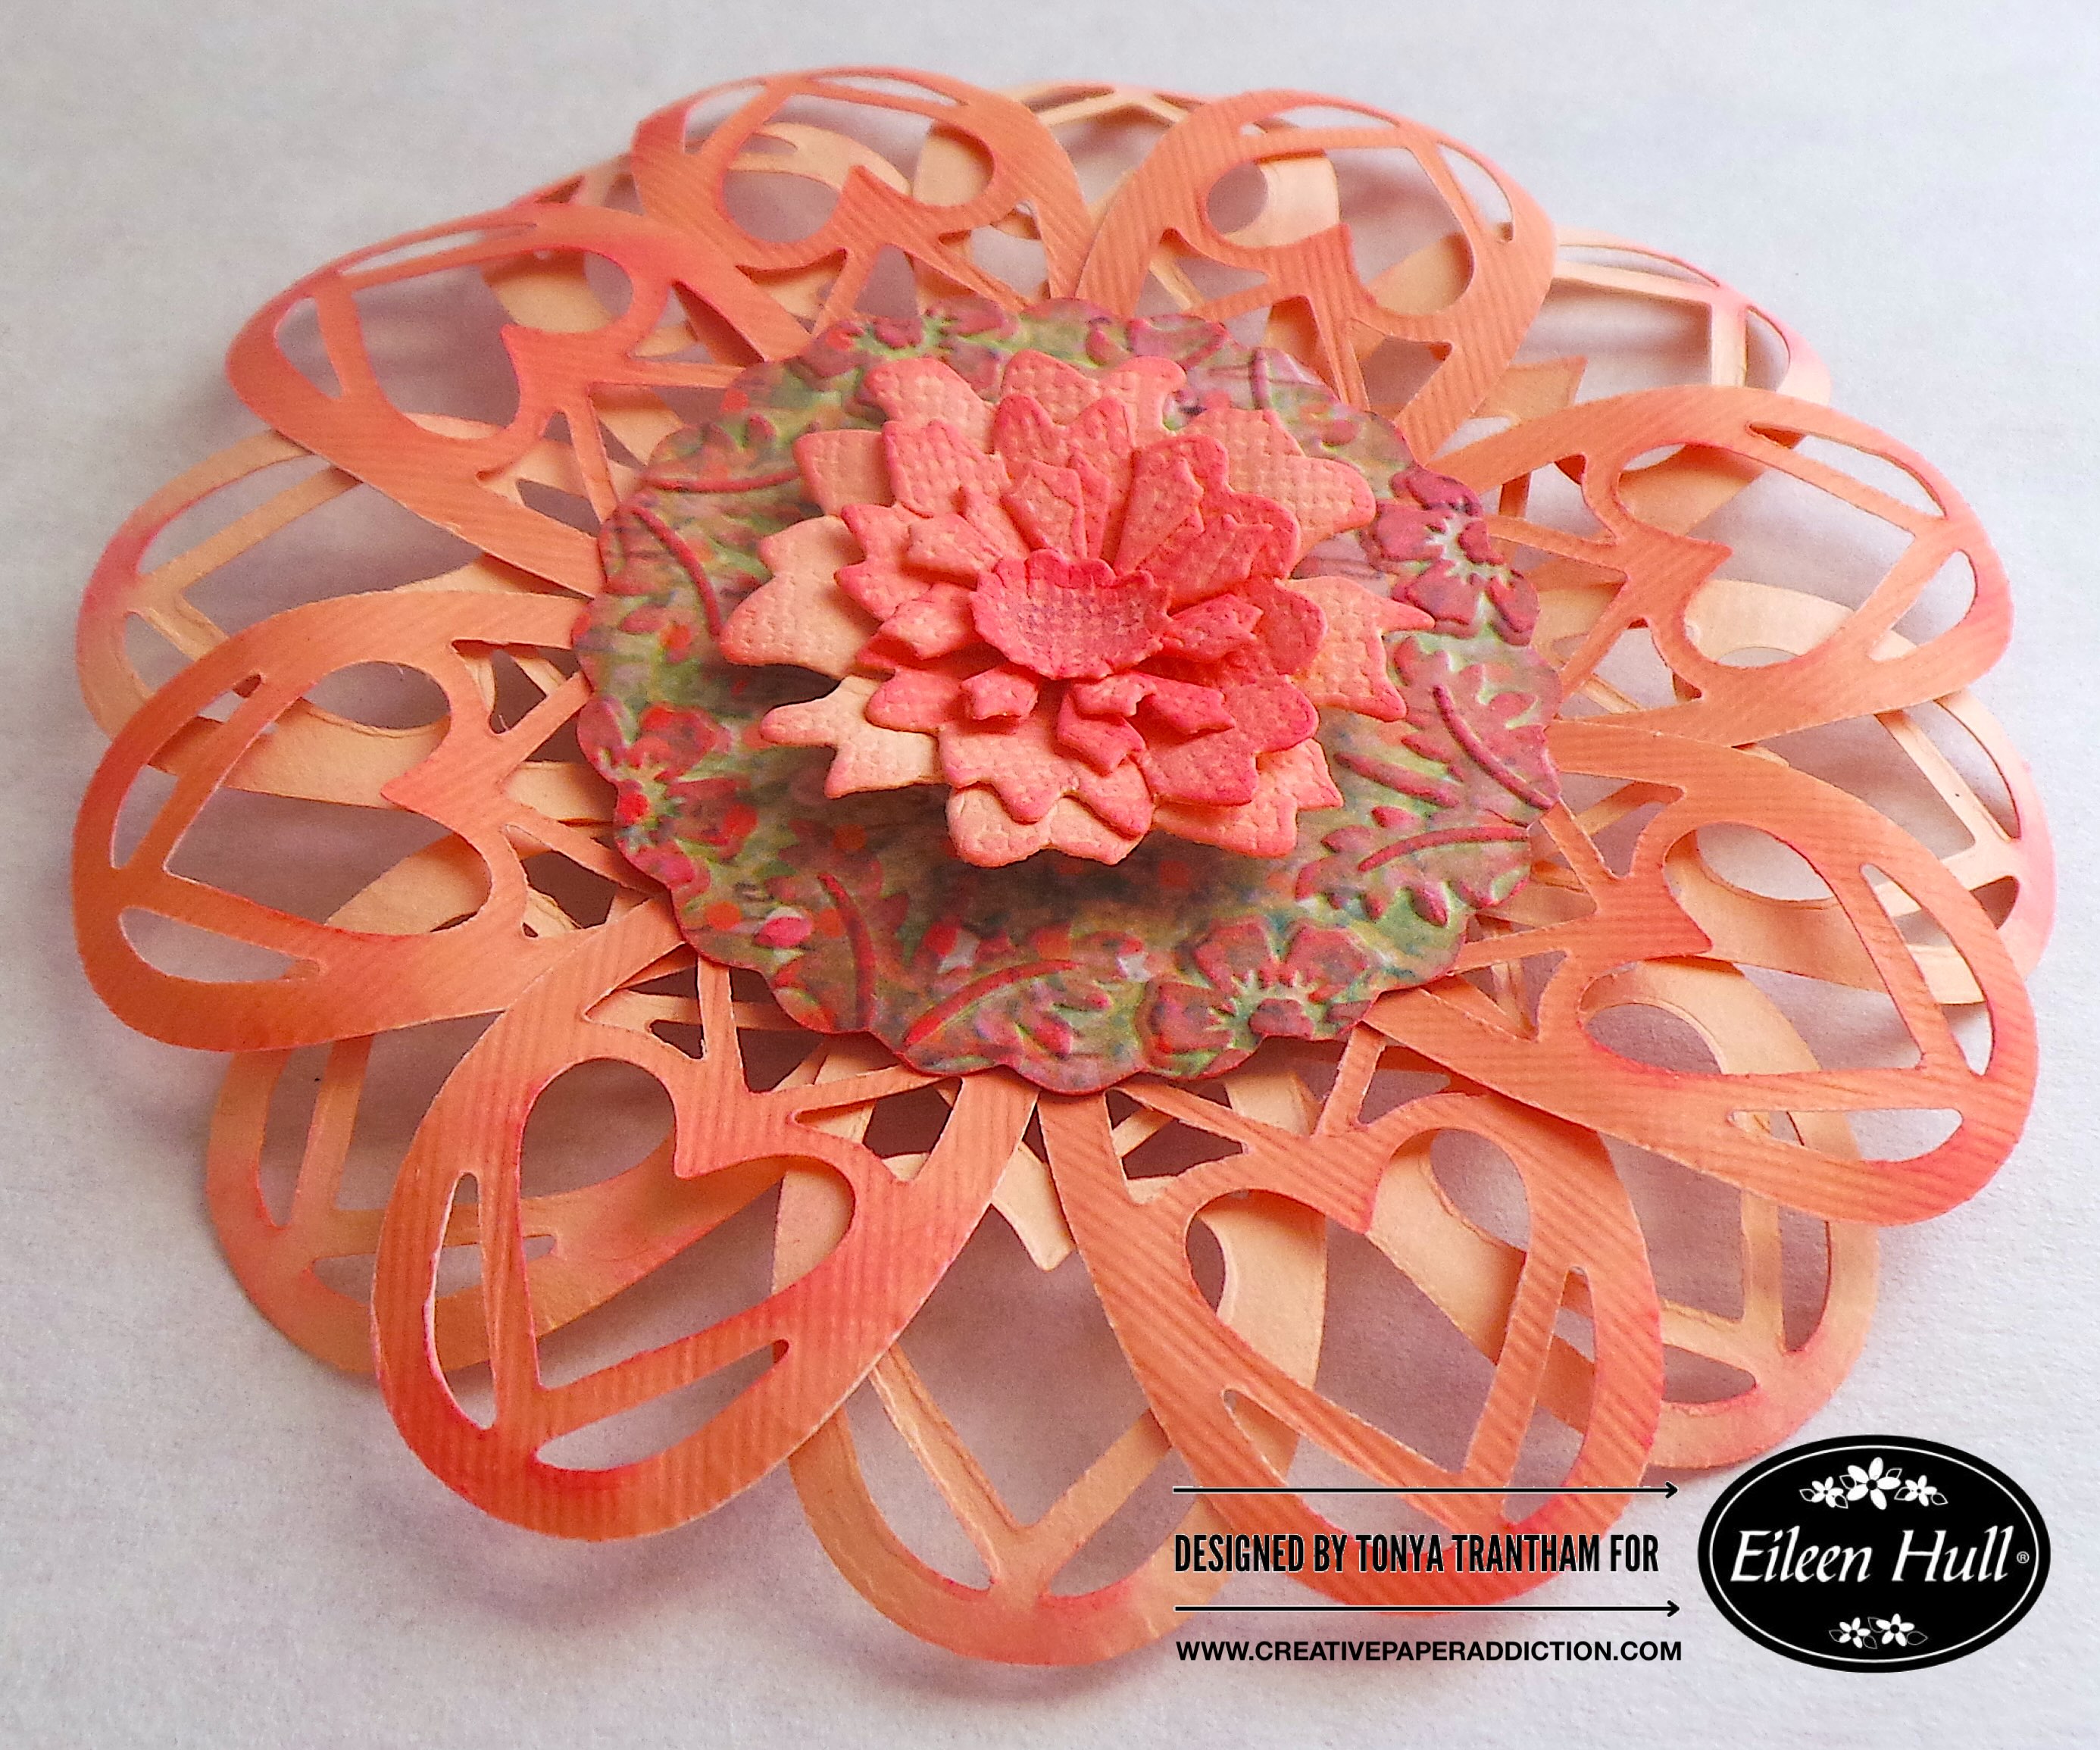
I cut an assortment of flowers from the Bookmark, Pockets and Topper Thinlits. I shaped and inked each flower. I adhered on top of each other before gluing to the center of the teardrop flower.

I added two Foam Pop Dots to the back of the flower. I also added a Green Gem to the center of the flower. I placed the flower in the center of the frame. This would make a great gift for a special friend. It can also be displayed as a home decor piece.

If you have any questions or comments about this project please leave them below.

Supplies

Sizzix/Eileen Hull: Charms Thinlits

Sizzix/Eileen Hull: Floral Damask Embossing Folder

Sizzix/Eileen Hull: Bookmark, Pockets and Topper Thinlits

Sizzix/Eileen Hull: Shadow Box Frames Set 02 Thinlits

Sizzix/Eileen Hull: Sunflower Diecut

Diecut Machine

Sizzix Making Essentials Cardstock

Paper Cutter

Scissors

Stylus

Scraps of Cardstock

Foam Pop Dots

Green Gem

Pink Chalk Ink

Beacon Adhesives: Zip Dry Adhesive

(Products listed above are Affiliated Links for your convenience)

DISCLAIMERS

This blog is compensated to provide opinion on products, services, websites, and various other topics. Even though the owner(s) of this blog receives compensation for our posts or advertisements. I always give my honest opinions, findings, beliefs, or experiences on those topics or products. The views and opinions expressed on this blog are purely my own. Any product claim, statistic, or quote should be checked with each manufacturer. Verify other representations about a product or service with the provider or party in question.This blog contains affiliate linksClicking these links helps to support Tonya Trantham Designs – Creative Paper Addiction. It runs at no additional cost to you. Today’s features are Sizzix, Eileen Hull and Scrapbook.com Products. 

Thanks for stopping by, hope your Monday is great and enjoy creating!

Creative Tag Making with Eileen Hull Silverware 3D Embossing Folder

Hi everyone! I’m back with another tag. I had actually created this last week but I had family obligations that kept me away from blogging. So I’m sharing a week late and hopefully next week I can double up and do two posts instead of one.

Anyways, I used the Waterfall Card and Tags Thinlits, Silverware 3D Embossing Folder and the Faux Postage Thinlits, all by Eileen Hull, to create this tag. So let’s get started!

First, I cut two of the largest tags from the Waterfall Card and Tags Thinlits since I will have to glue these back to back. I placed the aqua color tag into the Silverware 3D Embossing Folder, place between one of the plates and platform and run through the Diecut Machine.

I lightly inked the raised edges with a green chalk ink. Next I applied Rose Gold Luster Wax over random areas of the tag. I also adhered both tags back to back before jumping into decorating the embossed side.

Second, I went through my pile of scraps and came across two partials of the Faux Postage Thinlits, a circle punch, “delicious” sentiment and a few long skinny scraps of cardstock. I adhered all those to the base of the tag.

Third, I stamped an image of silverware onto a piece of cardstock but I only fussy cut the spoon out and lightly inked with a brown chalk ink. The stamp set I used is from Tim Holtz: Nature Cling Stamps which is retired.

I fussy cut an image of a woman with a rabbit head from a itKuPiLLimaginarium Printable. I also used a box cutter and cut around the hand so I could place the spoon in the hand before gluing to the tag to finish this side.

Fourth, for the other side of the tag I used the negative of a circle that I had punched out, seven image and several scraps of patterned cardstock and glued to the tag.

Fifth, I picked a woman image from the Mini Paper Dolls and adhered to the tag. I dug into my stash flowers and glued to the skirt of the woman. I also added a button and thread to the center of the flower to finish.

If you have any questions or comments please leave them below. Also if you haven’t been by Eileen Hull’s blog lately you can find the latest post HERE.

Supplies

Sizzix/Eileen Hull: Waterfall Card and Tags Thinlits

Sizzix/Eileen Hull: Silverware 3D Embossing Folder

Sizzix/Eileen Hull: Faux Postage Thinlits

Diecut Machine

Tom Holtz: Mini Paper Dolls

itKuPiLLimaginarium Printable

Stampers Anonymous/Tim Holtz: Nature Cling Stamps (retired)

MISTI Stamping Tool

Black Ink

Green and Brown Chalk Inks

Rose Gold Luster Wax

Various Plain and Patterned Cardstocks

Paper Flower, Thread and Button

Scissors

Paper Cutter

Beacon Adhesives: Zip Dry Adhesive

(Products listed above are Affiliated Links for your convenience)

DISCLAIMERS

This blog is compensated to provide opinion on products, services, websites, and various other topics. Even though the owner(s) of this blog receives compensation for our posts or advertisements. I always give my honest opinions, findings, beliefs, or experiences on those topics or products. The views and opinions expressed on this blog are purely my own. Any product claim, statistic, quote or other representation about a product or service should be verified with each manufacturer, provider, or party in question.This blog contains affiliate links, clicking and shopping through these links helps to support and run Tonya Trantham Designs – Creative Paper Addiction at no additional cost to you. Today’s features are Sizzix, Eileen Hull, Scrapbook.com and A Cherry on Top Store Products. 

Thanks for stopping by, hope your Thursday is wonderful and enjoy creating!
Vintage Buttons Tag

Hi everyone! I’m back with my tag for the week. I used leftover scraps from pervious projects and used Eileen Hull’s Vintage Buttons 3D Embossing Folder and the Tag and Bookplate Diecut (retired) by Tim Holtz. Anyways, let’s get started!

First, I had leftover scraps of Mat Board that I cut a tag from using the Tag and Bookplate Diecut (retired). Since the piece of mat board was shorter than the actual tag die I have a “short” version of the tag.

I placed the tag into the Vintage Buttons 3D Embossing Folder and run through the Diecut Machine.

I lightly inked the tag with a few different shades of blue inks.

Second, I really didn’t like the how the blue looked “flat” so I lightly inked over the raised areas with a green chalk ink. Then, I applied Rose Gold Luster Wax over the raised areas of the tag. You can use a Blending Tool to apply the wax but I chose to use my finger.

Third, I gathered up my cardstock scraps, these are from 7 Gypsies… I miss this company so much, I added those to the tag. I cut a a crochet piece from the Crochet #2 Thinlits, inked with a brown chalk ink and glued to the tag. The button card piece I did add thread to each button hole before adding to the tag.

Fourth, I dug into my stash of flowers and found this vintage looking flower and glued it onto the tag.

Fifth, I finished this side of the tag with bows made from thread and lace and a button.

Sixth, I covered the back of the tag with a polkadot cardstock. I kept this side simple by adding a few scraps of cardstock to the tag.

Seventh, the little boy image and butterfly wings was already fussy cut and ready in my stash. This printable is from the Steampunk Fairy Boys Paper Dolls. I glued another piece of the crochet diecut to the tag along with the butterfly boy, a bit of lace and a button to finish this side of the tag.

If you have any questions about this tag or comments in general please leave them below. Also if you haven’t been by Eileen Hull’s blog for the latest from her teams you can find the post HERE.

Supplies

Sizzix/Eileen Hull: Vintage Buttons 3D Embossing Folder

Sizzix/Tim Holtz: Tag and Bookplate Diecut (retired)

Sizzix/Tim Holtz:

Rose Gold Luster Wax

Mat Board

Diecut Machine

Various Shades of Blue Inks

Green and Brown Chalk Ink

Blending Tool

Flower and Leaf

Thread, Needle and Buttons

Various Cardstocks

itKupilli imagenarium: Steampunk Fairy Boys Paper Dolls Printables

Scissors

Paper Cutter

Beacon Adhesives: Zip Dry Adhesive

(Products listed above are Affiliated Links for your convenience)

DISCLAIMERS

This blog is compensated to provide opinion on products, services, websites, and various other topics. Even though the owner(s) of this blog receives compensation for our posts or advertisements. I always give my honest opinions, findings, beliefs, or experiences on those topics or products. The views and opinions expressed on this blog are purely my own. Any product claim, statistic, quote or other representation about a product or service should be verified with each manufacturer, provider, or party in question.This blog contains affiliate links, clicking and shopping through these links helps to support and run Tonya Trantham Designs – Creative Paper Addiction at no additional cost to you. Today’s features are Sizzix, Eileen Hull, Scrapbook.com and A Cherry on Top Store Products. 

Thanks for stopping by, hope your Friday is wonderful and enjoy creating!
Love You Heart Card

Hi everyone! Valentine’s Day is right around the corner and I would like to share a quick card I created using scraps I had laying on my craft table and the small and medium hearts from Eileen Hull’s Envelope, Folder and Flowers Thinlits. So, let’s get started!

First, I gathered up an assortment of scraps of cardstocks. I also had this scalloped card base that I found in my stash. I had cut it from a diecut by Sizzix but can’t remember the actually name of the die and I can’t find it on Sizzix’s website so I am assuming it is a retired diecut.

Second, I cut the pink piece of cardstock down to fit the base of the card. I placed in it in the Doily 3D Embossing Folder and run through the Diecut Machine. Next, I lightly inked over the raised areas of the embossed cardstock with a hot pink chalk ink and applied Ivory Luster Wax over the inked areas to tone down the hot pink.

Third, I glued the embossed image to the card base. I lightly inked the edges of the scallops with a dark brown chalk ink.

Fourth, I cut two strips of cardstock, one slightly smaller than the other, the width of the embossed image and adhered both into the card base. I cut the smallest and medium size hearts from the Envelope, Folder and Flowers Thinlits. I lightly inked around the edges of the hearts with the hot pink ink and glued both onto the strips of cardstock.

Fifth, I cut the “love you” sentiment from a cut a part, inked the edges and adhered to the hearts along with a sequin to finish the card.

Now how easy was that? Will you be making Valentine’s Day cards to give or not? Let me know in the comments below. Also if you haven’t been by Eileen Hull’s blog lately to see what her teams has been up to you can find the latest post HERE.

Supplies

Sizzix/Eileen Hull: Envelope, Folder and Flowers Thinlits

Sizzix/Tim Holtz: Doily 3D Embossing Folder

Sizzix: Scalloped Card Diecut (retired)

Diecut Machine

Ivory Luster Wax

Hot Pink and Dark Brown Chalk Inks

Various Scraps of Plain and Patterned Cardstocks

Sequin

Scissors

Paper Cutter

Beacon Adhesives: Zip Dry Adhesive

(Products listed above are Affiliated Links for your convenience)

DISCLAIMERS

This blog is compensated to provide opinion on products, services, websites, and various other topics. Even though the owner(s) of this blog receives compensation for our posts or advertisements. I always give my honest opinions, findings, beliefs, or experiences on those topics or products. The views and opinions expressed on this blog are purely my own. Any product claim, statistic, quote or other representation about a product or service should be verified with each manufacturer, provider, or party in question.This blog contains affiliate links, clicking and shopping through these links helps to support and run Tonya Trantham Designs – Creative Paper Addiction at no additional cost to you. Today’s features are Sizzix, Eileen Hull, Scrapbook.com and A Cherry on Top Store Products.

Thanks for stopping by, hope your Tuesday is awesome and enjoy creating!

Blue Delft Box with Greeting Cards

Hi everyone! This month it’s a big box bonanza over on Eileen Hull’s blog! I had two 8.5″x11″ sheets of this blue and white floral cardstock that I wanted to make something with and I thought the Card Caddy Diecut and an assortment of thinlits by Eileen would make the perfect gift box of cards. I limited the color pallet of the embellishments on the cards to shades of light green and different shades of blue since the base of each card is white. Anyways, this is my take for this month’s challenge. So let’s get started!

I cut a piece of Mat Board down since my cardstock was smaller than the mat board, applied Adhesive Sheets to both sides and placed the patterned cardstock on what will be the front and a solid cardstock on what will be the inside of the box. I placed the larger piece of mat board between the plates and run through the Diecut Machine. I did the same steps for the two smaller pieces which are the sides of the box.

The flaps/tabs on the sides and bottom I “peeled” some of the cardstock and mat board off before adhering both to either side of the box. Side note, this makes the flaps/tabs lay flatter when gluing to the box.

I cut out labels and flowers from the Everyday Tags and Labels Thinlits. I layered the labels and adhered to the center of the box. I shaped the flowers and leaves with a Stylus before adhering all to the center of the label.

I folded White Cardstock in half and placed slightly below the cutline of the panel thinlit, this die can be found in the Starlit Village and Card Panel Thinlits, and cut out a total of four cards.

I used the Crochet Mandala Embossing Folder and embossed strips of cardstock for each of the cards. For the first card I used the tag, labels, leaves and flowers from the Everyday Tags and Labels Thinlits and cut out the word “hello” from the Alphanumeric Thinlit. I also used the oval die from the Journaling Card, Envelope and Windows Thinlits to decorate the card base.

For the second card I used the same supplies with a slightly different layout but used a “hi” sentiment instead.

The third card I changed it up a bit and used the negative parts of the letters to spell “hi” and the floral and circle tags. I also shaped the small flowers and leaves and adhered to the sentiment.

The fourth and final card I used the same supplies as the third card but I used the negative letters that spell “hey” and glued to the base of the card.

The cards fit perfectly inside the box laying down.

Or standing up.

If you haven’t been by Eileen’s blog lately to see what her teams have been up to you can find the latest posts HERE and HERE.

Supplies

Sizzix/Eileen Hull: Card Caddy, Everyday Tags, Labels Diecut & Thinlits (only at Scrapbook.com)

Sizzix/Eileen Hull: Starlit Village and Card Panel Thinlits (only at Scrapbook.com)

Sizzix/Eileen Hull: Crochet Mandala Embossing Folder

Sizzix/Eileen Hull: Alphanumeric Thinlit

Sizzix/Eileen Hull: Journaling Card, Envelope and Windows Thinlits

Stylus

White Cardstock

Diecut Machine

Various Patterned and Solid Cardstocks

Gems

Scissors

Paper Cutter

Beacon Adhesives: Zip Dry Adhesive

(Products listed above are Affiliated Links for your convenience)

DISCLAIMERS

This blog is compensated to provide opinion on products, services, websites, and various other topics. Even though the owner(s) of this blog receives compensation for our posts or advertisements. I always give my honest opinions, findings, beliefs, or experiences on those topics or products. The views and opinions expressed on this blog are purely my own. Any product claim, statistic, quote or other representation about a product or service should be verified with each manufacturer, provider, or party in question.This blog contains affiliate links, clicking and shopping through these links helps to support and run Tonya Trantham Designs – Creative Paper Addiction at no additional cost to you. Today’s features are Sizzix, Eileen Hull, Scrapbook.com and A Cherry on Top Store Products. 

Thanks for stopping by, hope your Tuesday is awesome and enjoy creating!

You are the Sweetest Slimline Card

Hi everyone! I want to share a quick and cheery slimline card I created using Eileen Hull’s Journal Diecut, Mini Slimline and Tickets Thinlits, Ornament Box Diecut and Tablecloth Embossing Folder. So let’s get started!

First, I placed a folded piece of cardstock slightly below the cut line of the Journal Diecut, sandwiched between the plates and run through the Diecut Machine. A side note the slimline card size is 3 1/2″x8 1/2″ and the Journal Diecut is the perfect size to create this size card.

I cut a piece of patterned cardstock slightly smaller than the card base, rounded the corner with a Corner Punch before adhering to the base. I cut a polk-a-dot strip of cardstock the length of the base and glued onto the front.

I placed the Mini Slimline and Tickets Thinlits onto a piece of patterned cardstock and run through the Diecut Machine. I glued off center of the base. From another project I had leftover tickets that I added. I cut a circle from the Ornament Box Diecut and embossed with the Tablecloth Embossing Folder I placed slightly off center of the tickets, added a lemon image I had fussy cut from cardstock and a “You are the Sweetest” sentiment from Simple Stories: Lemon Twist to finish the card.

If you haven’t been by Eileen’s blog lately you can find her latest post HERE.

Supplies

Sizzix/Eileen Hull: Journal Diecut

Sizzix/Eileen Hull: Mini Slimline and Tickets Thinlits

Sizzix/Eileen Hull: Ornament Box Diecut

Sizzix/Eileen Hull: Tablecloth Embossing Folder

Diecut Machine

Scissors

Corner Punch

Simple Stories: Lemon Twist

Paper Cutter

Beacon Adhesive: Zip Dry Adhesive

(Products listed above are Affiliated Links for your convenience)

DISCLAIMERS

This blog is compensated to provide opinion on products, services, websites, and various other topics. Even though the owner(s) of this blog receives compensation for our posts or advertisements. I always give my honest opinions, findings, beliefs, or experiences on those topics or products. The views and opinions expressed on this blog are purely my own. Any product claim, statistic, quote or other representation about a product or service should be verified with each manufacturer, provider, or party in question.This blog contains affiliate links, clicking and shopping through these links helps to support and run Tonya Trantham Designs – Creative Paper Addiction at no additional cost to you. Today’s features are Sizzix, Eileen Hull, Scrapbook.com and A Cherry on Top Store Products. 

Thanks for stopping by, hope your Monday is awesome and enjoy creating!

Partying with Eileen Hull’s Chapter 3 Release!

Hi everyone! It’s that time again for another amazing release by Eileen Hull! I want to share each of the diecuts, embossing folder and thinlits with you. So let’s get started!

First off, is the Bigz Plus Slotted Treat Box measures 6 1/2” x 5” x 3 1/2” and can hold so many things- a set of cards, journals, doll clothes, ephemera storage or you can even use it as a gift box! This is a Scoreboards die which is specially designed to cut and score thick material like matboard, chipboard, leather, felt, fabric and metal. *A 9” wide machine (Big Shot Plus) is required to cut this die.

The Field Notes and Specimen Card Die is a Bigz XL die that holds 5” x 7” pages or photos- a new orientation! The Specimen Card may be used to hold photos, as a journaling card or a shaker. Holes are pre-cut into the book spine which is adjustable from 1/2” to 1 1/2 in width. *XL Cutting Pads will be needed to cut the book cover.

The Envelope, Folder & Flowers Thinlits dies is made up of nine dies- an adorable mini envelope, file folder, set of small, medium and large hearts, and a large and small flower and leaf set. This die set will be perfect to create ephemera using your scraps!

The Keys 3D Embossing Folder is special to Eileen. The keys all came from her Dad’s house. The names on the keys had to be removed because of possible copyright issues, but I love the idea of stamping or writing words on them. The detail on this is beautiful and I can’t wait to add Luster Wax to make the design pop!

Join us for our Chapter 3 Release Party on Tuesday, July 11 at 12:00 pm ET! It will be streamed on Eileen Hull Designs on Facebook and Eileen’s YouTube Channel. Meet the team and see their fantastic makes using these dies and make sure to follow our blog hop. We have prizes! Just comment in the Release Party chat and let us know which is your new favorite die or folder and what you would make with it and be eligible to win something from this collection!

Also I would like to share a sneak peek of my project that I will be sharing the full reveal later.

Supplies

Eileen Hull’s ETSY Shop

Sizzix/Eileen Hull: Slotted Treat Box Diecut

Sizzix/Eileen Hull: Field Notes and Specimen Card Diecut

Sizzix/Eileen Hull: Envelope, Folder & Flowers Thinlits

Sizzix/Eileen Hull: Keys 3D Embossing Folder

Big Shot Plus Diecut Machine

(Products listed above are Affiliated Links for your convenience)

DISCLAIMERS

This blog is compensated to provide opinion on products, services, websites, and various other topics. Even though the owner(s) of this blog receives compensation for our posts or advertisements. I always give my honest opinions, findings, beliefs, or experiences on those topics or products. The views and opinions expressed on this blog are purely my own. Any product claim, statistic, quote or other representation about a product or service should be verified with each manufacturer, provider, or party in question.This blog contains affiliate links, clicking and shopping through these links helps to support and run Tonya Trantham Designs – Creative Paper Addiction at no additional cost to you. Today’s features are ( Fill in with company name) Products. 

Thanks for stopping by, hope your Tuesday is great and enjoy creating!

Sweet Lemons Card Case

Hi everyone! I’m back today with a cheery project I created using the Card Case Diecut by Eileen Hull. There’s an endless sort of creative possibilities with this diecut…which I love. But I just stuck to the basic design (nothing elaborate unlike some projects…wink wink) and created a case to hold tags so let’s get started!

First, I applied Adhesive Sheets to both sides of the Mat Board, cut to fit patterned cardstock and placed onto both sides of the mat board. Placed the mat board onto the Card Case Diecut and sandwiched in-between cutting plates before running through the Diecut Machine.

Here’s a little tip when using mat board or even chip board incase you need to glue pockets or the spine together using Eileen’s dies. You can “peel” the mat board/chip board to get a thinner flap or spine which in turn will lay flush when all is put together.

I adhered the pockets to either side of the case before gluing the spine together.

I had a sheet of cut a parts that I punched a hole in the top of each tag, lightly decorated with embellishments and tying together with cording.

I decorated each pocket with a bit of lace and an embellishment and placed the tags in each pocket.

I embossed a piece of black mat board with the Crochet Mandala Embossing Folder. I double a piece of cording and glued the embossed mat board over the piece of cording. I cut a couple of the perforated tickets with the Mini Slimline Tickets Thinlits, embossed with Crochet Mandala Embossing Folder and lightly inked with chalk ink before adhering to the cover along with lace and a scrap piece of patterned cardstock. I finished the cover off by adding a few sequins and chipboard pieces from the Lemon Twist Chipboard Stickers. I also added mini gems to the center of each flower of one of the chipboard pieces.

The cording I measured about three inches from the end of the cording and strung three beads. I tied a knot in the end to keep them in place. I wrapped the cording around the case and looped the end with the beads under the cording to keep it closed.

If you haven’t been by Eileen’s blog to see what her teams have been up to you can find the latest posts HERE and HERE.

Supples

Sizzix/Eileen Hull: Card Case Diecut

Sizzix/Eileen Hull: Crochet Mandala Embossing Folder

Sizzix/Eileen Hull: Mini Slimline Tickets Thinlits

Adhesive Sheets

Mat Board

Diecut Machine

Lemon Twist Chipboard Stickers

Various Patterned Cardstock

Lace, Gems, Sequins, Beads and Cording

Scissors

Crop-A-Dile

Paper Cutter

Beacon Adhesives: Zip Dry Adhesive

(Products listed above are Affiliated Links for your convenience)

DISCLAIMERS

This blog is compensated to provide opinion on products, services, websites, and various other topics. Even though the owner(s) of this blog receives compensation for our posts or advertisements. I always give my honest opinions, findings, beliefs, or experiences on those topics or products. The views and opinions expressed on this blog are purely my own. Any product claim, statistic, quote or other representation about a product or service should be verified with each manufacturer, provider, or party in question.This blog contains affiliate links, clicking and shopping through these links helps to support and run Tonya Trantham Designs – Creative Paper Addiction at no additional cost to you. Today’s features are Sizzix, Eileen Hull, A Cherry on Top Crafts and Scrapbook.com Products. 

Thanks for stopping by, hope your Friday is great and enjoy creating!

Happy Day Swan Card

Hi everyone! I’m back with a mini slimline card that I created using Eileen Hull’s new Mini Slimline and Tickets Thinlits and a few other of her other products. So let’s get started!

First, I folded a piece of 6″x6″ White Cardstock in half to create a card base. Next I cut a piece of white cardstock slightly smaller than the base of the card, placed into the Tablecloth 3D Embossing Folder and run through the Diecut Machine. I lightly inked the raised embossed areas, placed Foam Pop Dots to the back before placing onto the card base.

I cut one strip of tickets and one background from the Mini Slimline and Tickets Thinlits and adhered the tickets on top of the background.

Next, I glued the tickets onto the card base.

I had received this swan medallion in a swap I had participated a couple of years ago and instead of hoarding it I decided I would use it on the card. I did change the sentiment that was on it by placing a “happy day” sticker over the other sentiment. I glued the medallion off center of the card.

I dug into my stash of flowers and leaves, I had cut these from the Folio Page Pocket and Flowers Thinlits, I shaped and glued two of the flowers on top of each other along with a sequin and a gem and added leaf sprigs before adhering to the corner of the medallion. Side note…why does it seem like when you photograph something you never see if there is a piece of fussy or in this case a hair attached until after all photos are taken and you are editing and you can’t do anything about it? Why?

But anyways, there you have it! A finished card! If you haven’t been by Eileen’s blog lately to see what her teams have been up to you can find the latest post HERE.

Supplies

Sizzix/Eileen Hull: Mini Slimline and Tickets Thinlits

Sizzix/Eileen Hull: Tablecloth 3D Embossing Folder

Sizzix/Eileen Hull: olio Page Pocket and Flowers Thinlits

White Cardstock

Diecut Machine

Foam Pop Dots

Stylus

Paper Cutter

Various Cardstocks, Sequin, Gems, Chalk Ink

Beacon Adhesives: Zip Dry Adhesives

(Products listed above are Affiliated Links for your convenience)

DISCLAIMERS

This blog is compensated to provide opinion on products, services, websites, and various other topics. Even though the owner(s) of this blog receives compensation for our posts or advertisements. I always give my honest opinions, findings, beliefs, or experiences on those topics or products. The views and opinions expressed on this blog are purely my own. Any product claim, statistic, quote or other representation about a product or service should be verified with each manufacturer, provider, or party in question.This blog contains affiliate links, clicking and shopping through these links helps to support and run Tonya Trantham Designs – Creative Paper Addiction at no additional cost to you. Today’s features are Sizzix, Eileen Hull, Scrapbook.com and A Cherry on Top Crafts Products. 

Thanks for stopping by, hope your Thursday is great and enjoy creating!