Step-by-Step Upcycled Phone Box Using Eileen Hull Diecuts

Hi everyone! I’m back with my project for Eileen Hull this month. This month theme is mix and match and I’ve definitely used an assortment of dies for this project. Anyways, let’s get started!

A colorful gift box adorned with large paper flowers in shades of red and cream, featuring green leaves and a decorative floral tag, set against a textured teal background with golden accents.

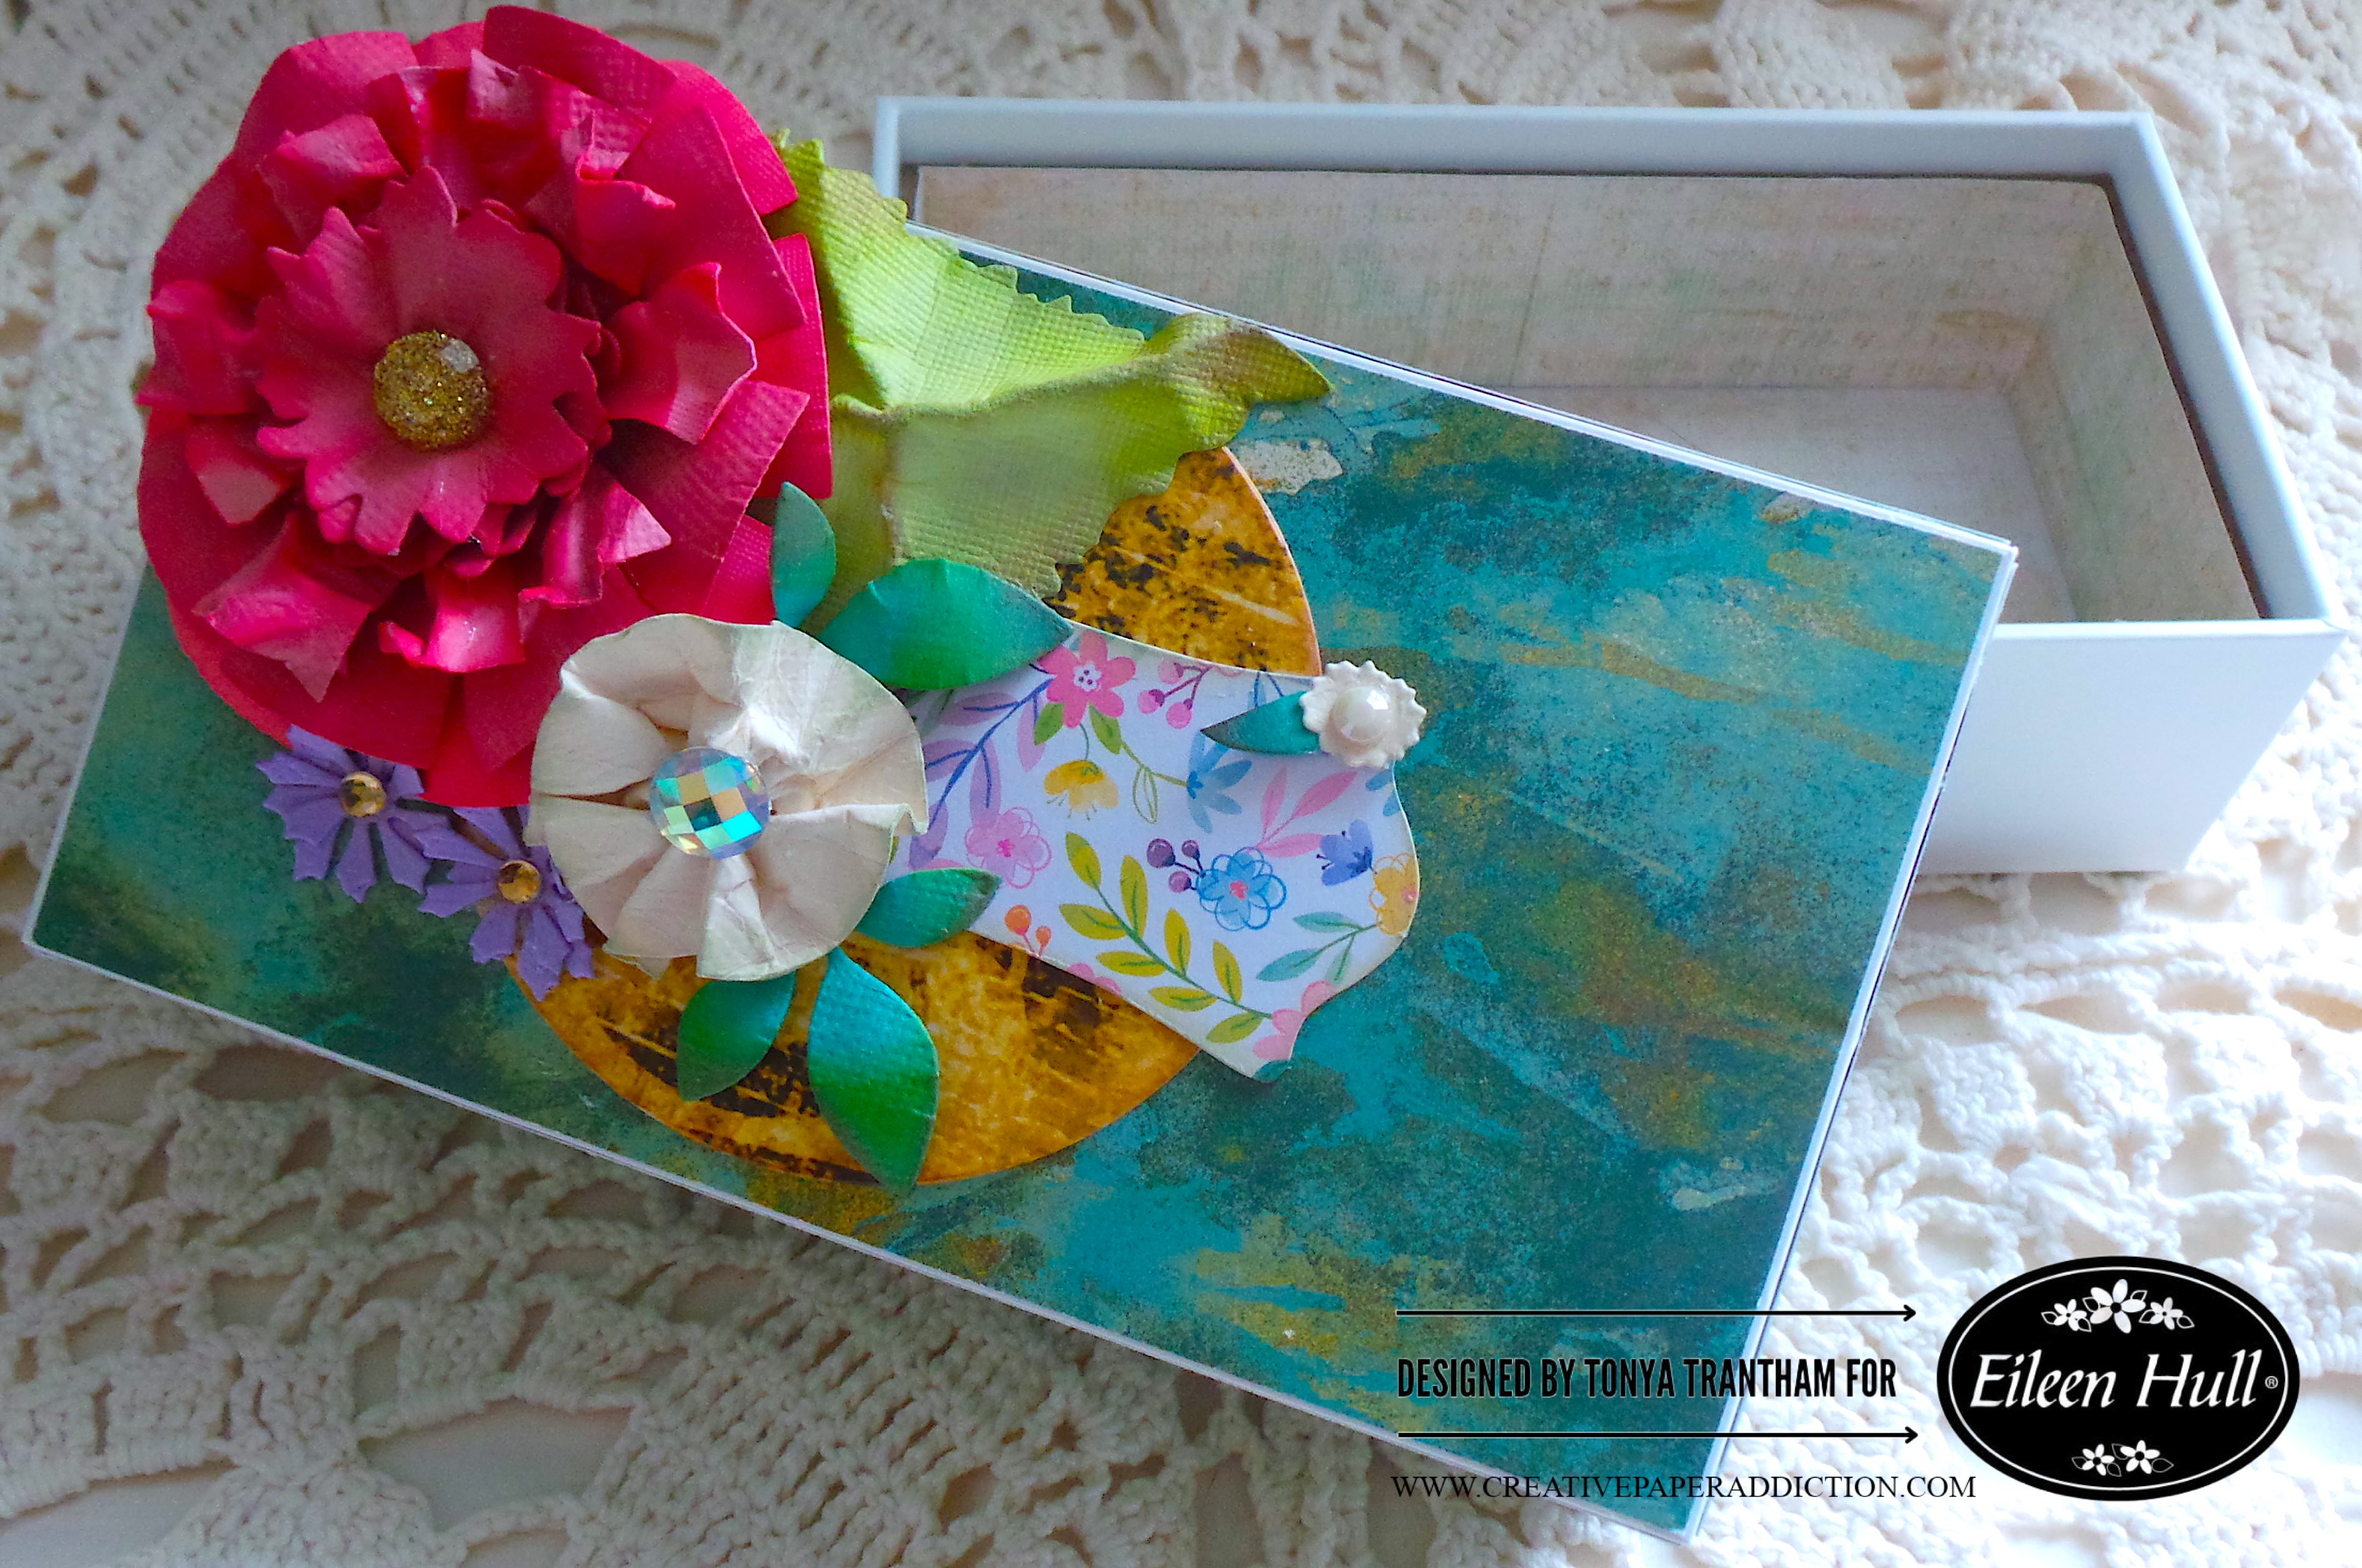
I have a collection of phone boxes in my stash. Since they are sturdy I decided to up-cycle and turn one into a gift box. The first thing I did was remove the plastic piece that is in the bottom of the box.

An empty white phone box on a wooden surface, with the lid removed, showcasing its interior.

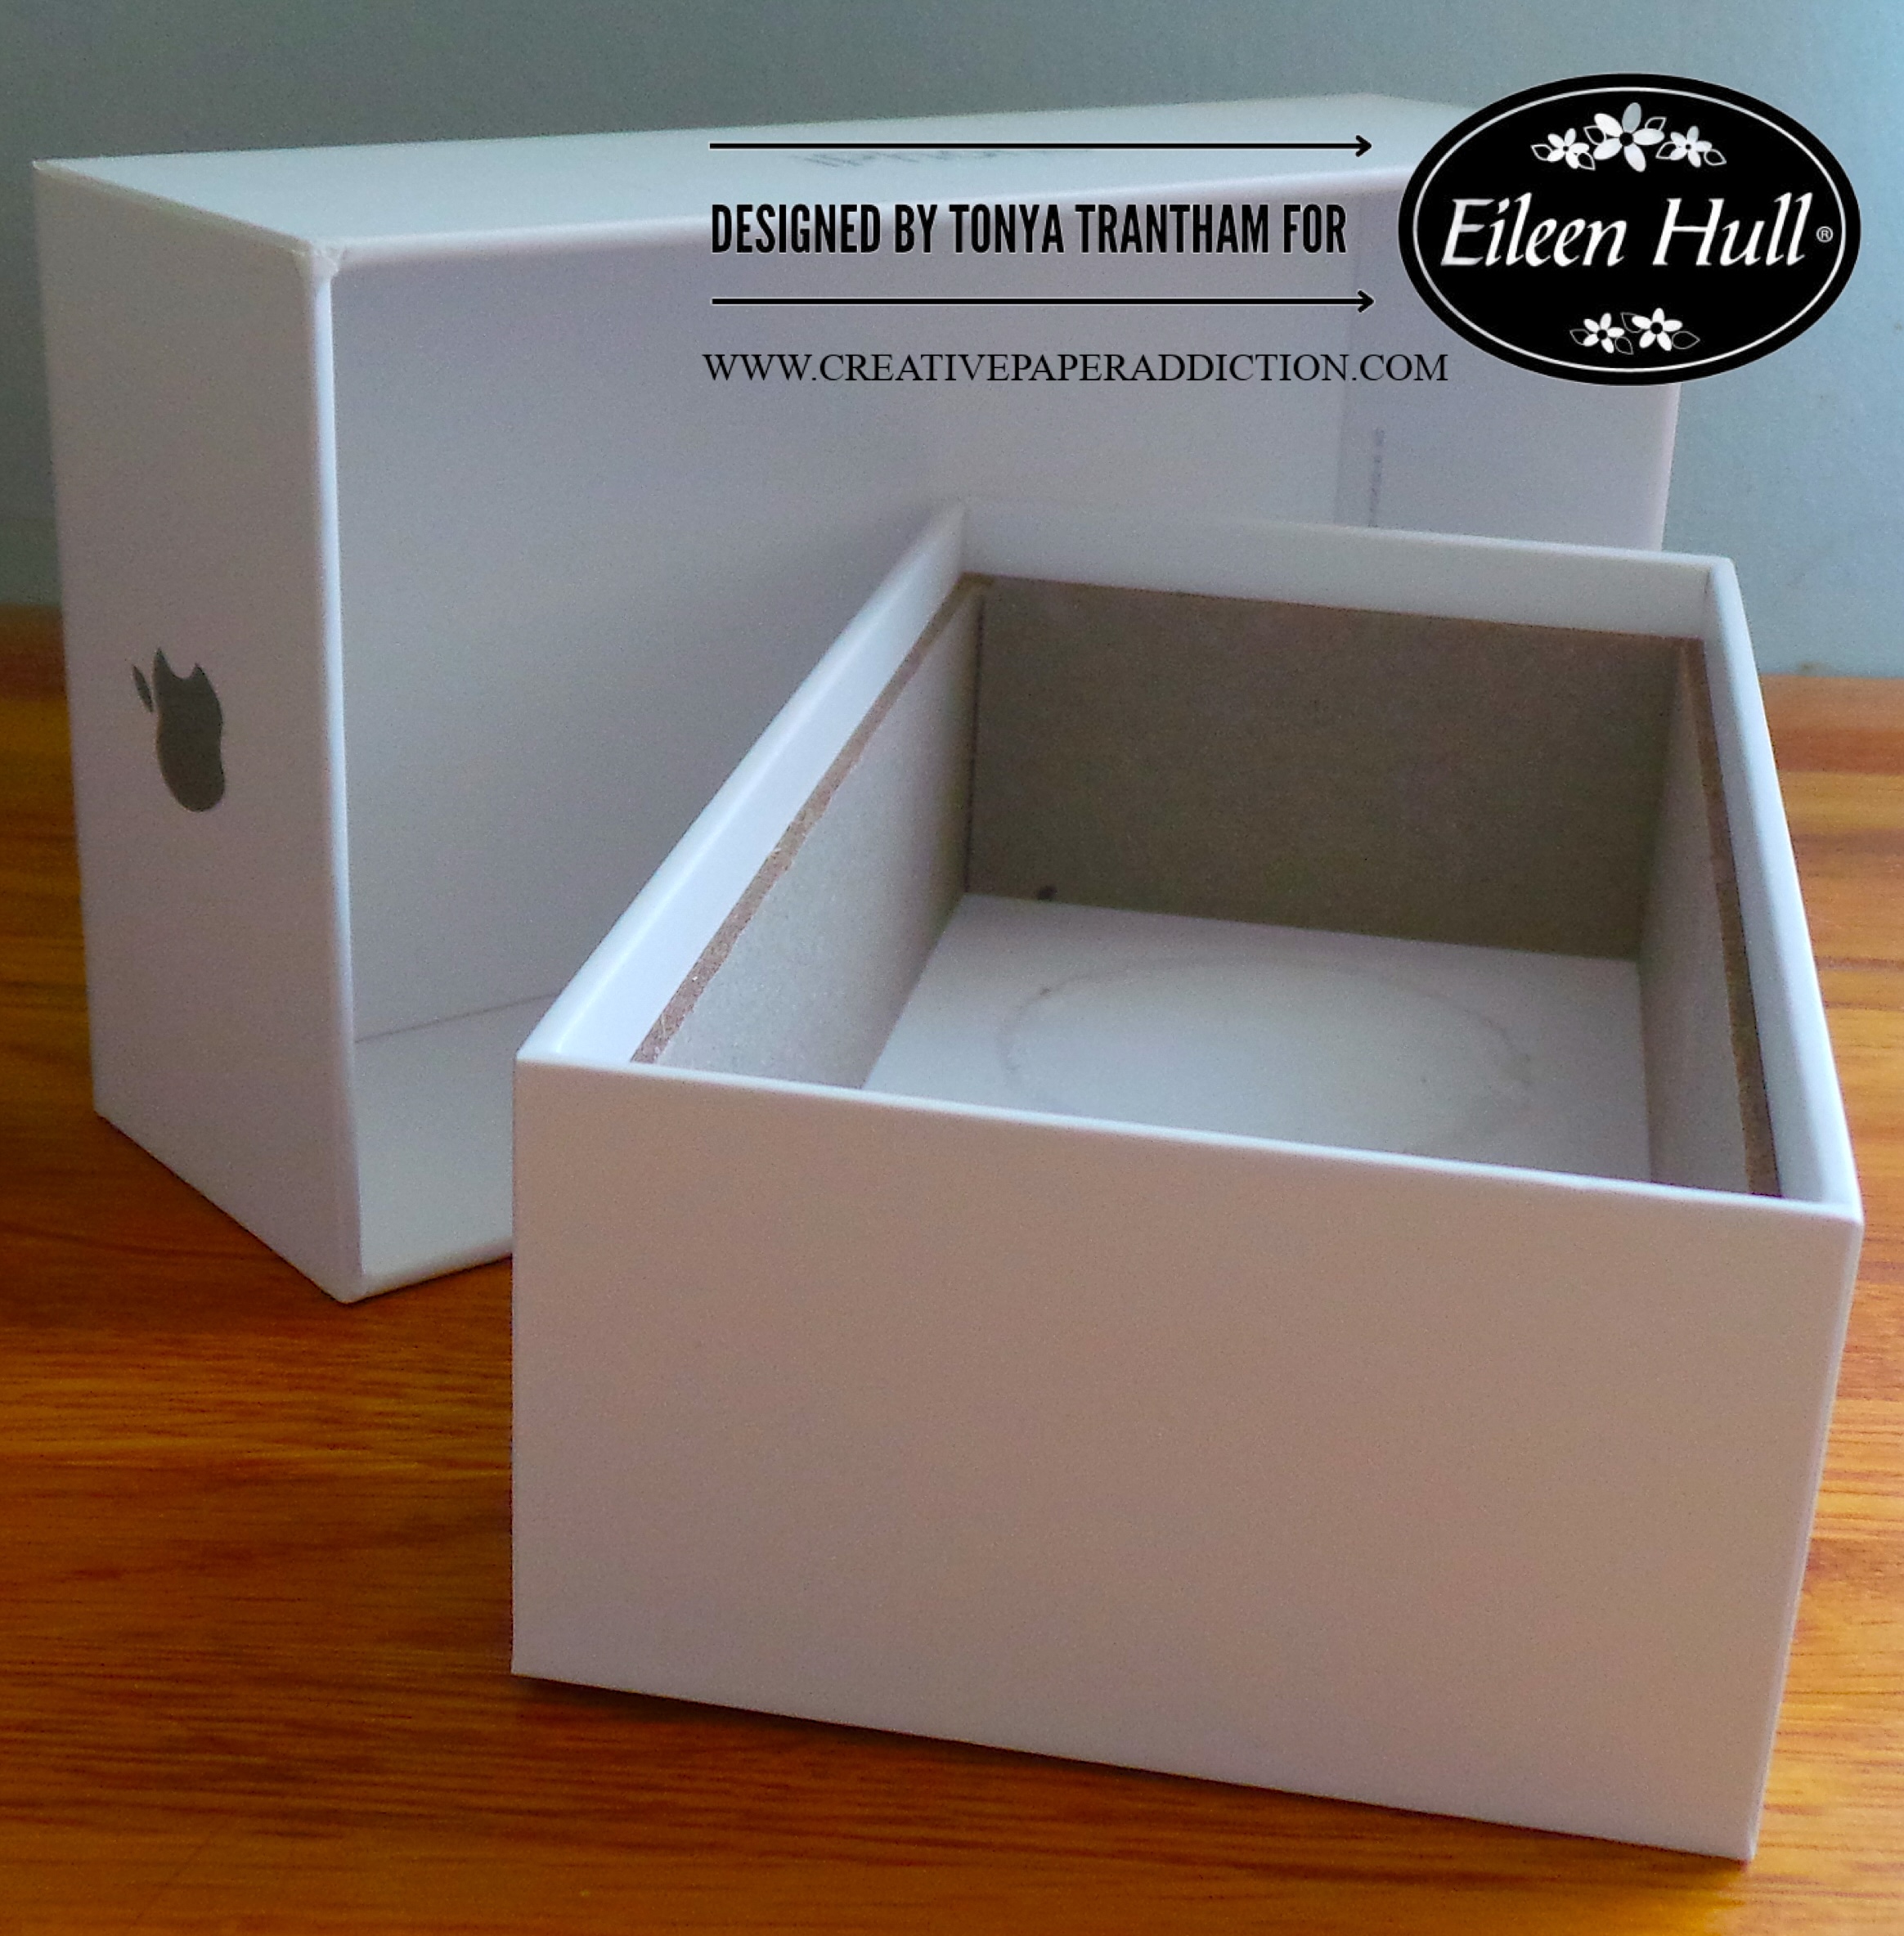
Next I cut and covered the outside of the box with a patterned cardstock. I also cut and covered the inside of the box to cover up where I removed the plastic.

A decorated gift box with a colorful, textured lid, featuring shades of blue, green, and gold. The box is open to reveal a simple interior.

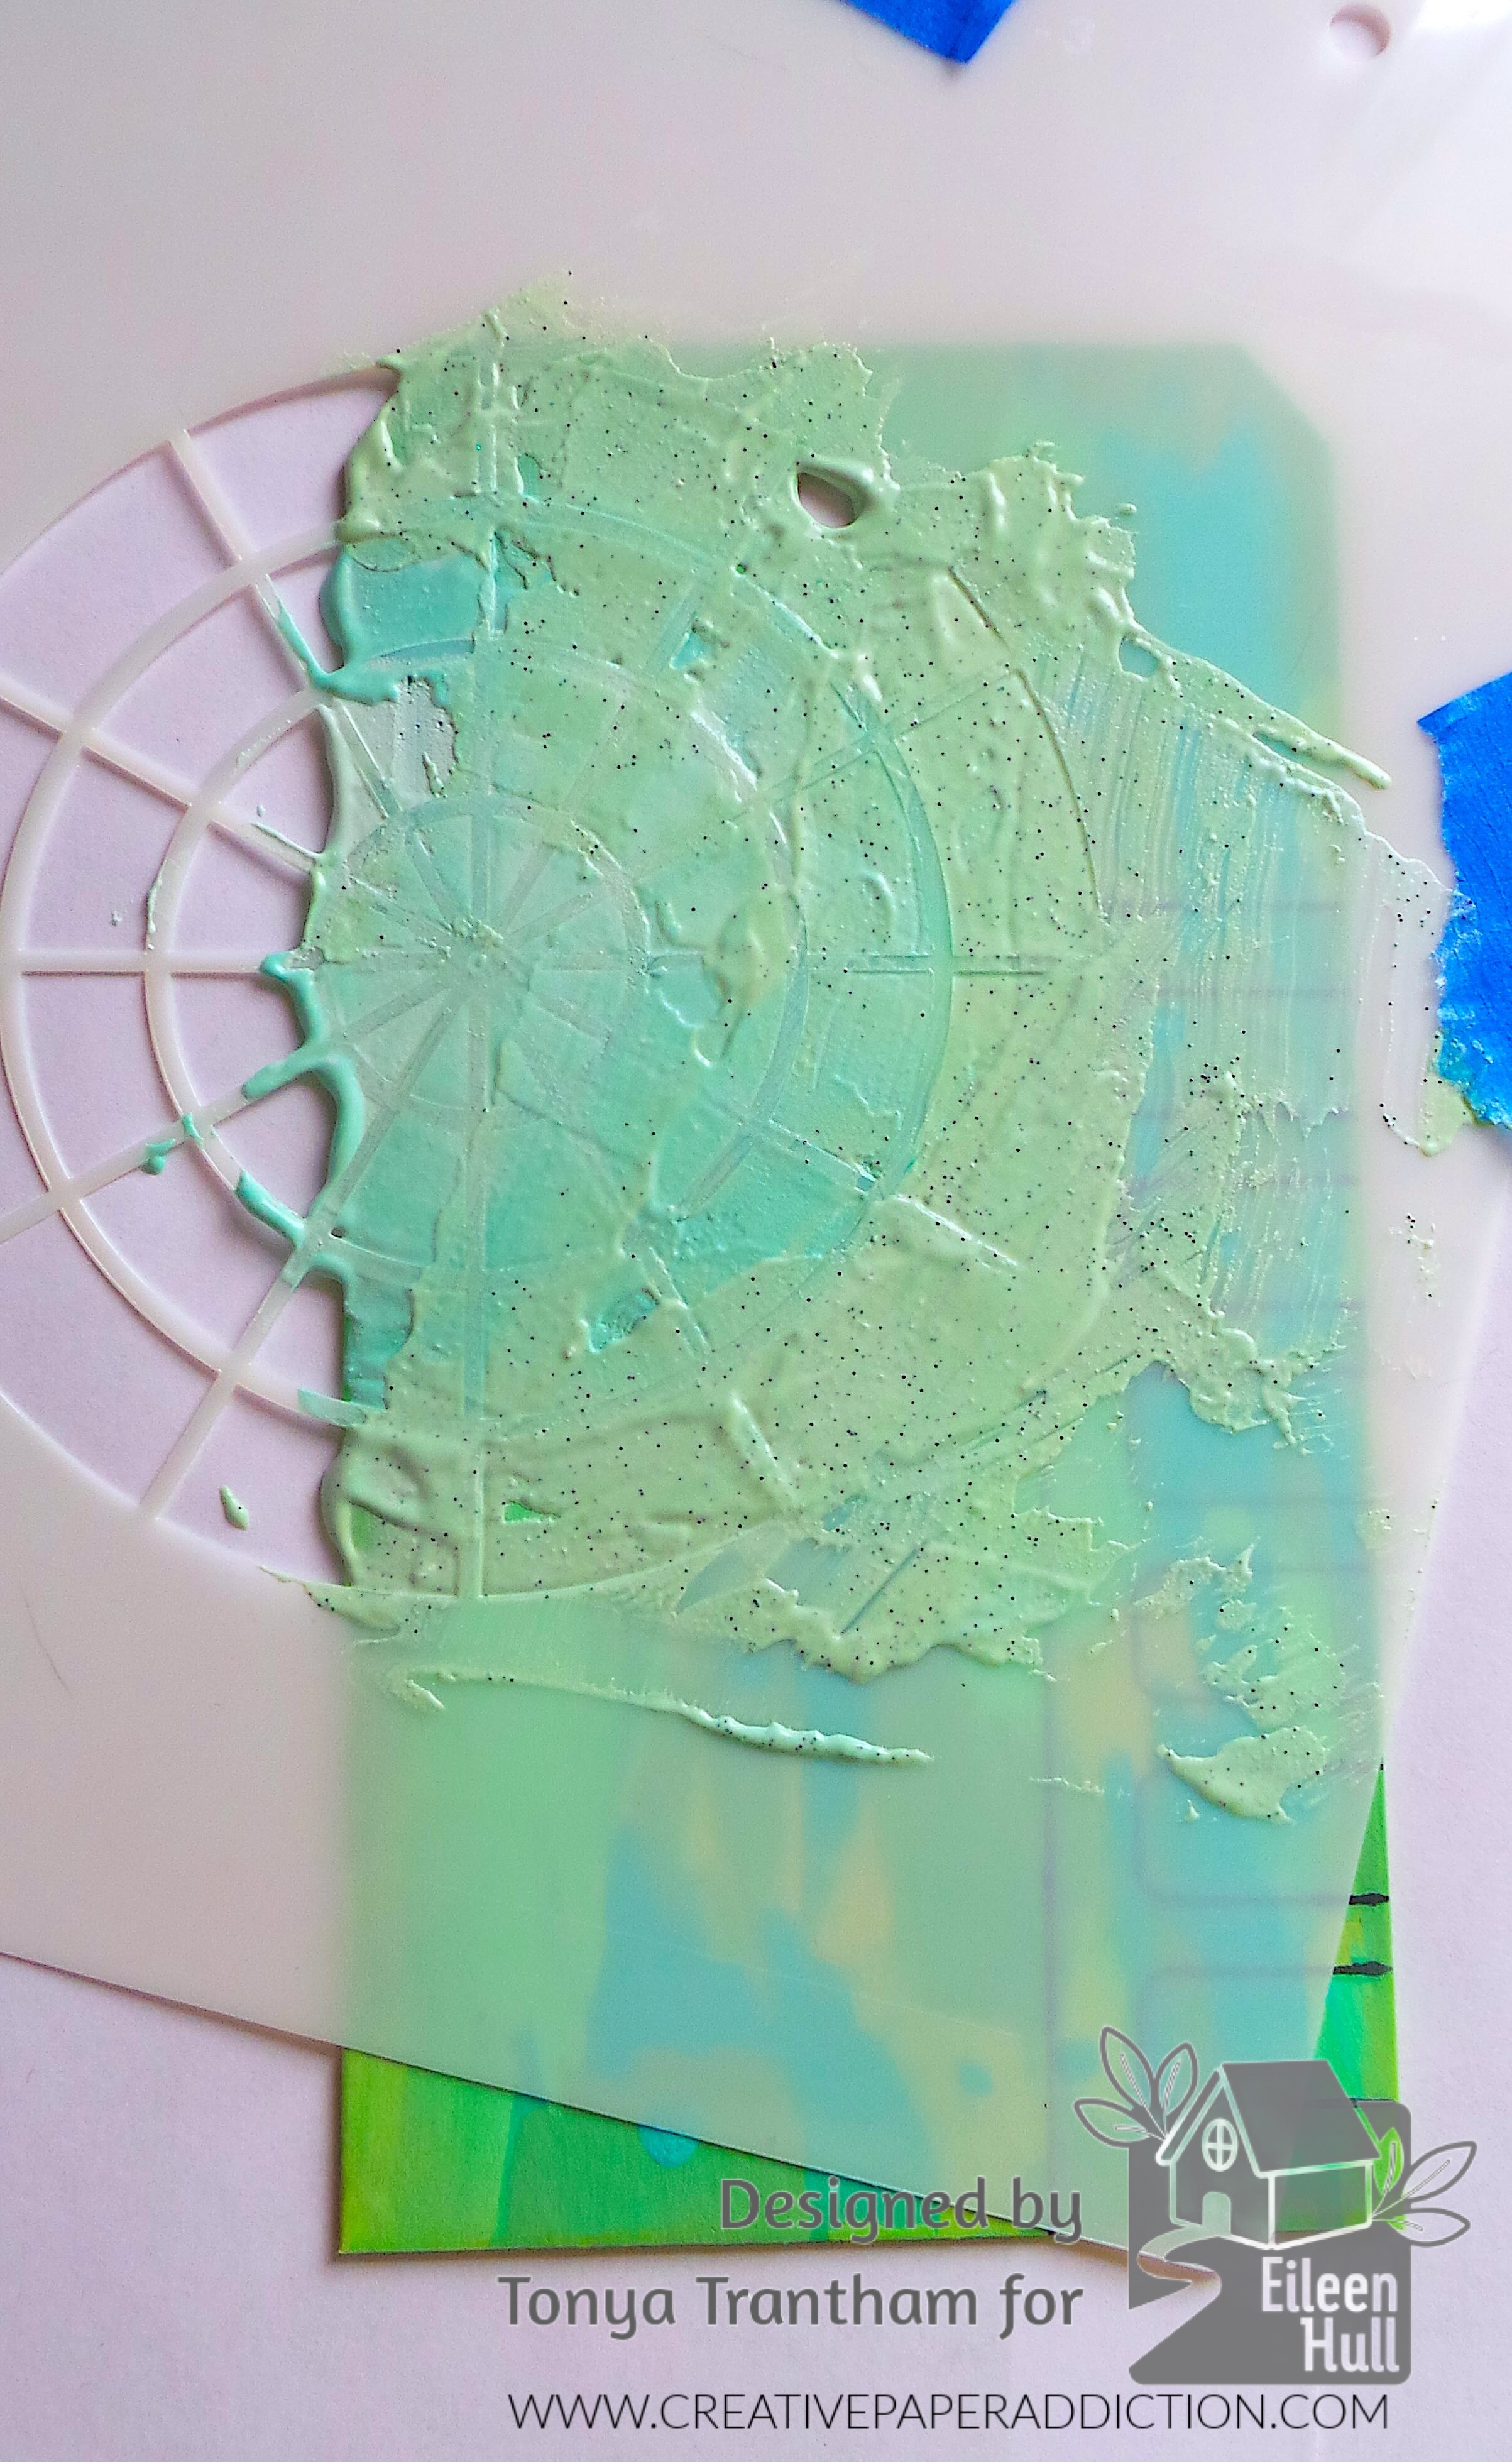
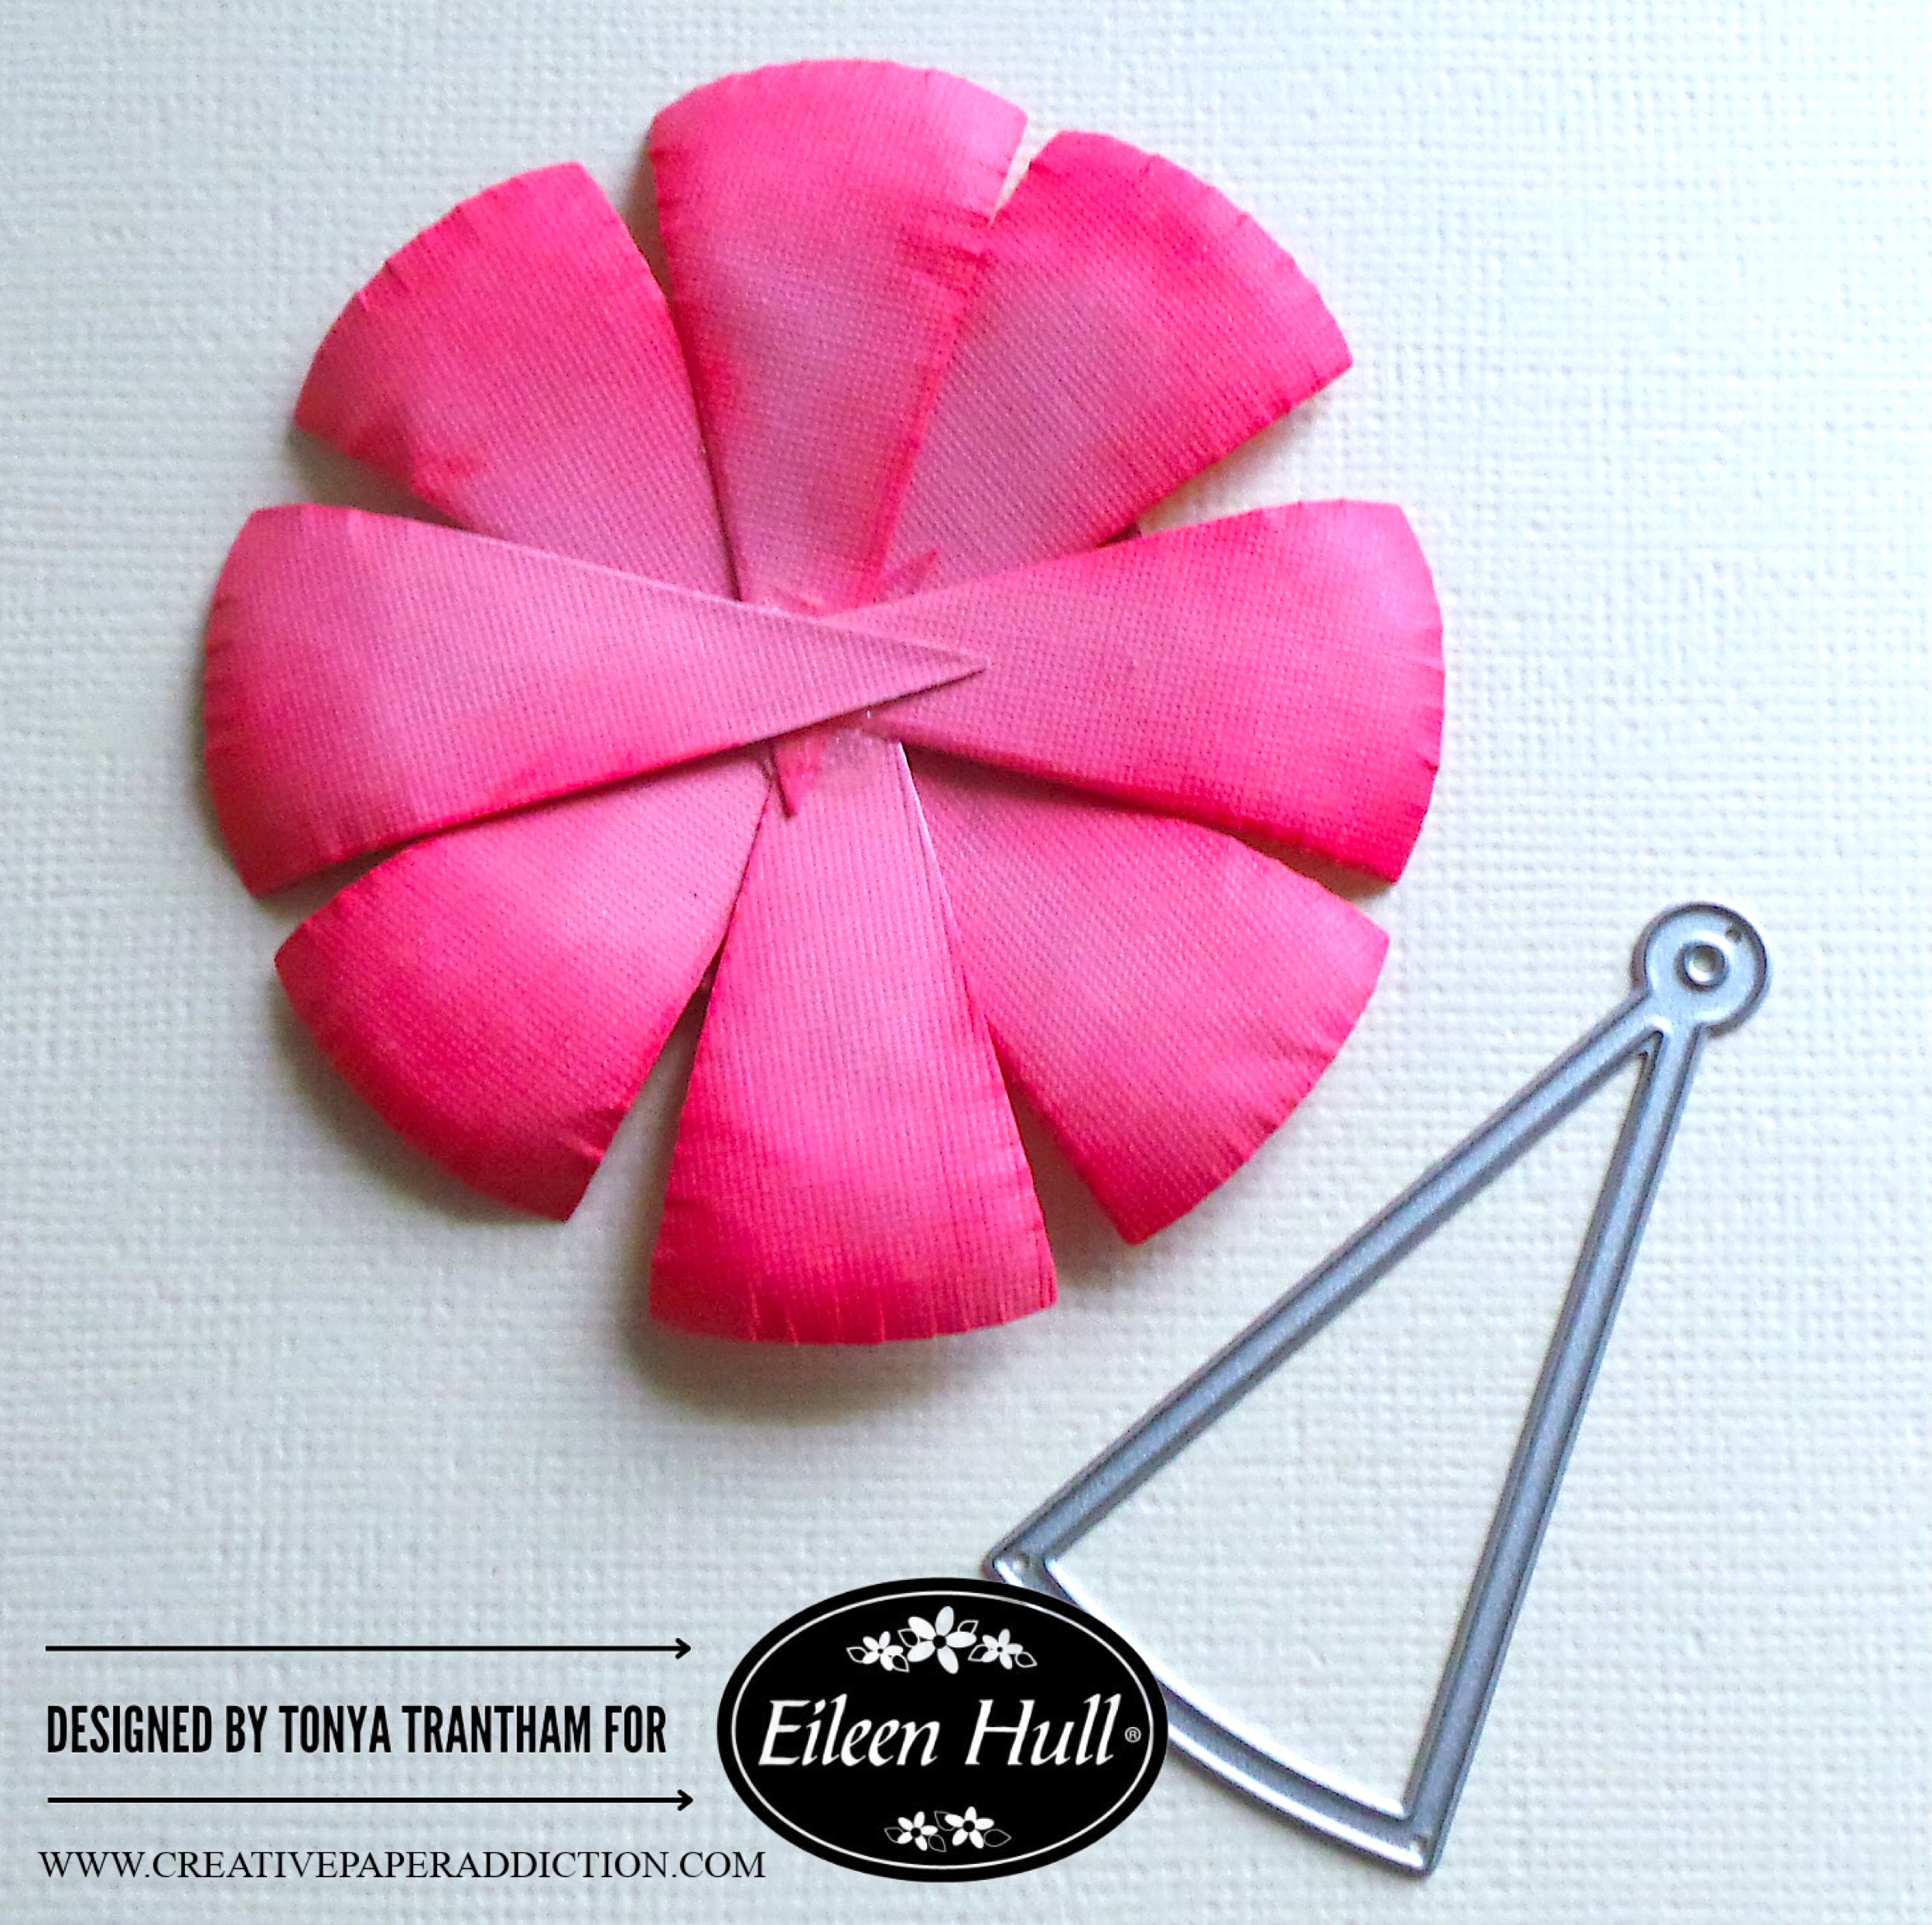
To create the largest flower on the box I cut over twenty of the triangles from the Rainbow Wheels Thinlits. I lightly inked the edges with a pink chalk ink and shaped with a Stylus.

A layered pink paper flower made from various sized petals, next to a metal die cut in the shape of a triangle, on a textured background.

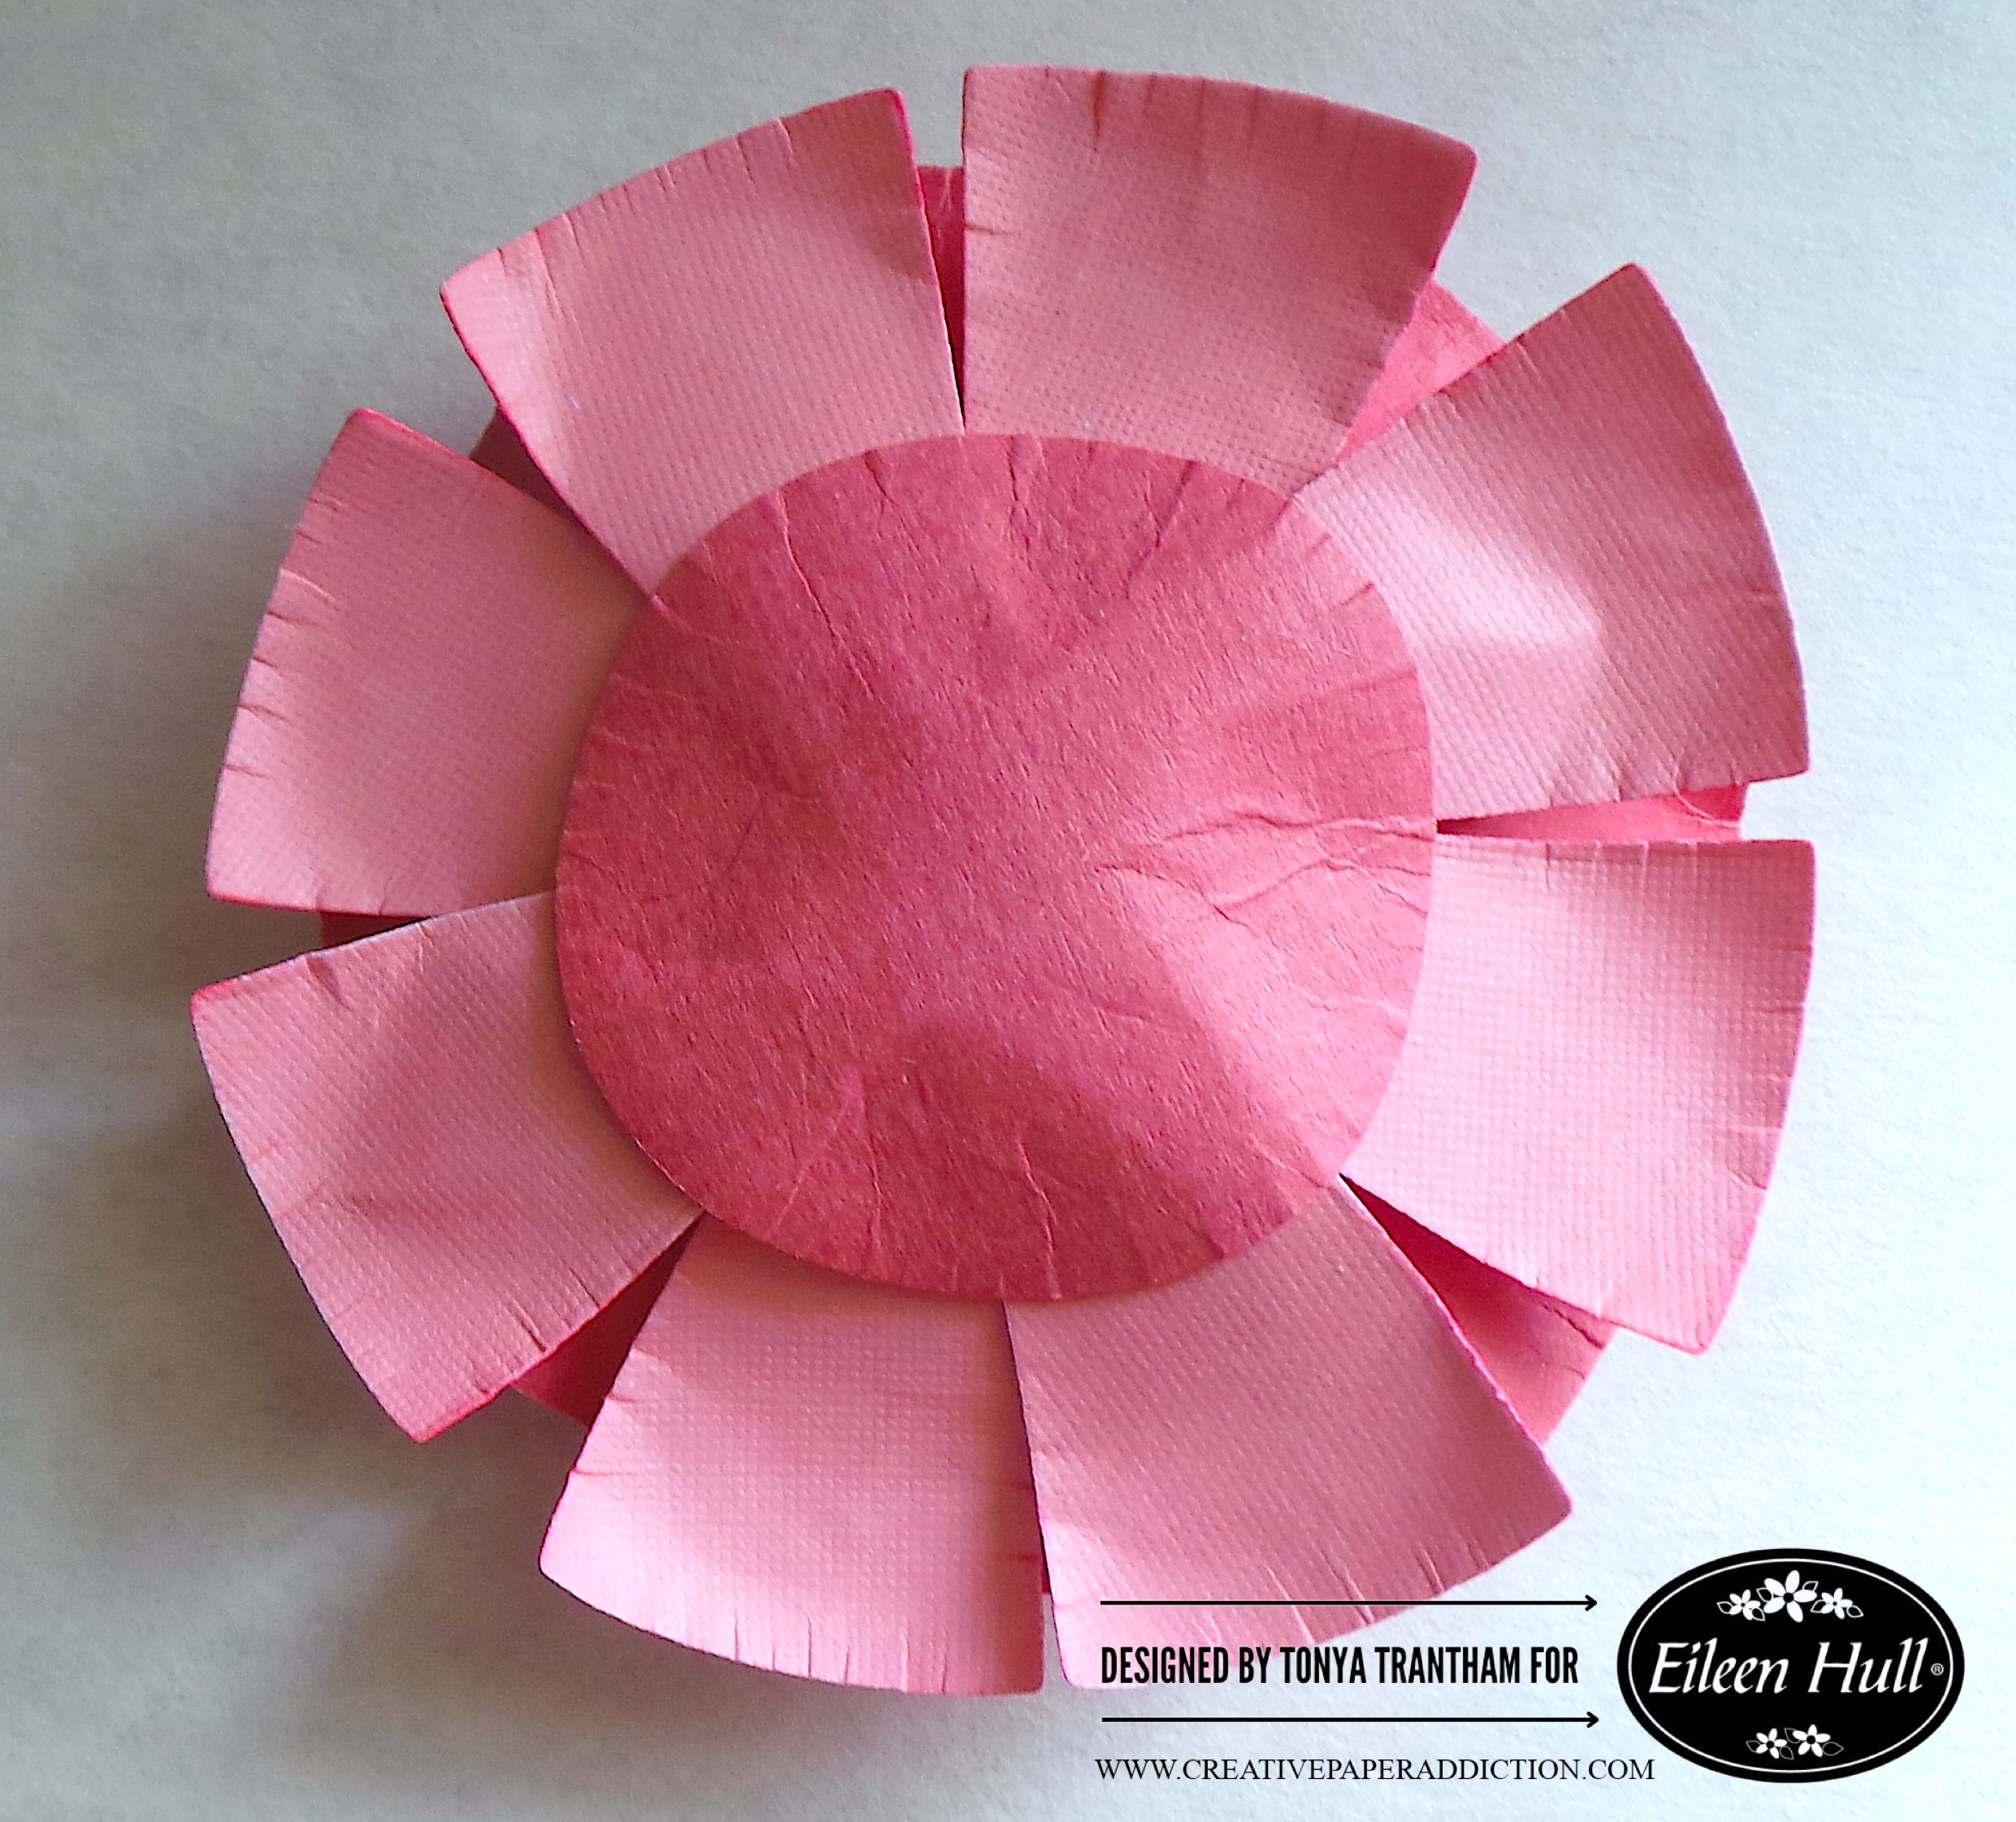
I also cut the smallest circle from the Rainbow Wheels Thinlits and shaped with a Stylus. I started adhering the triangles to the circle. I added two layers of the regular size triangles dies to the circle.

A handcrafted pink flower made from paper, featuring layered petals and a textured center.

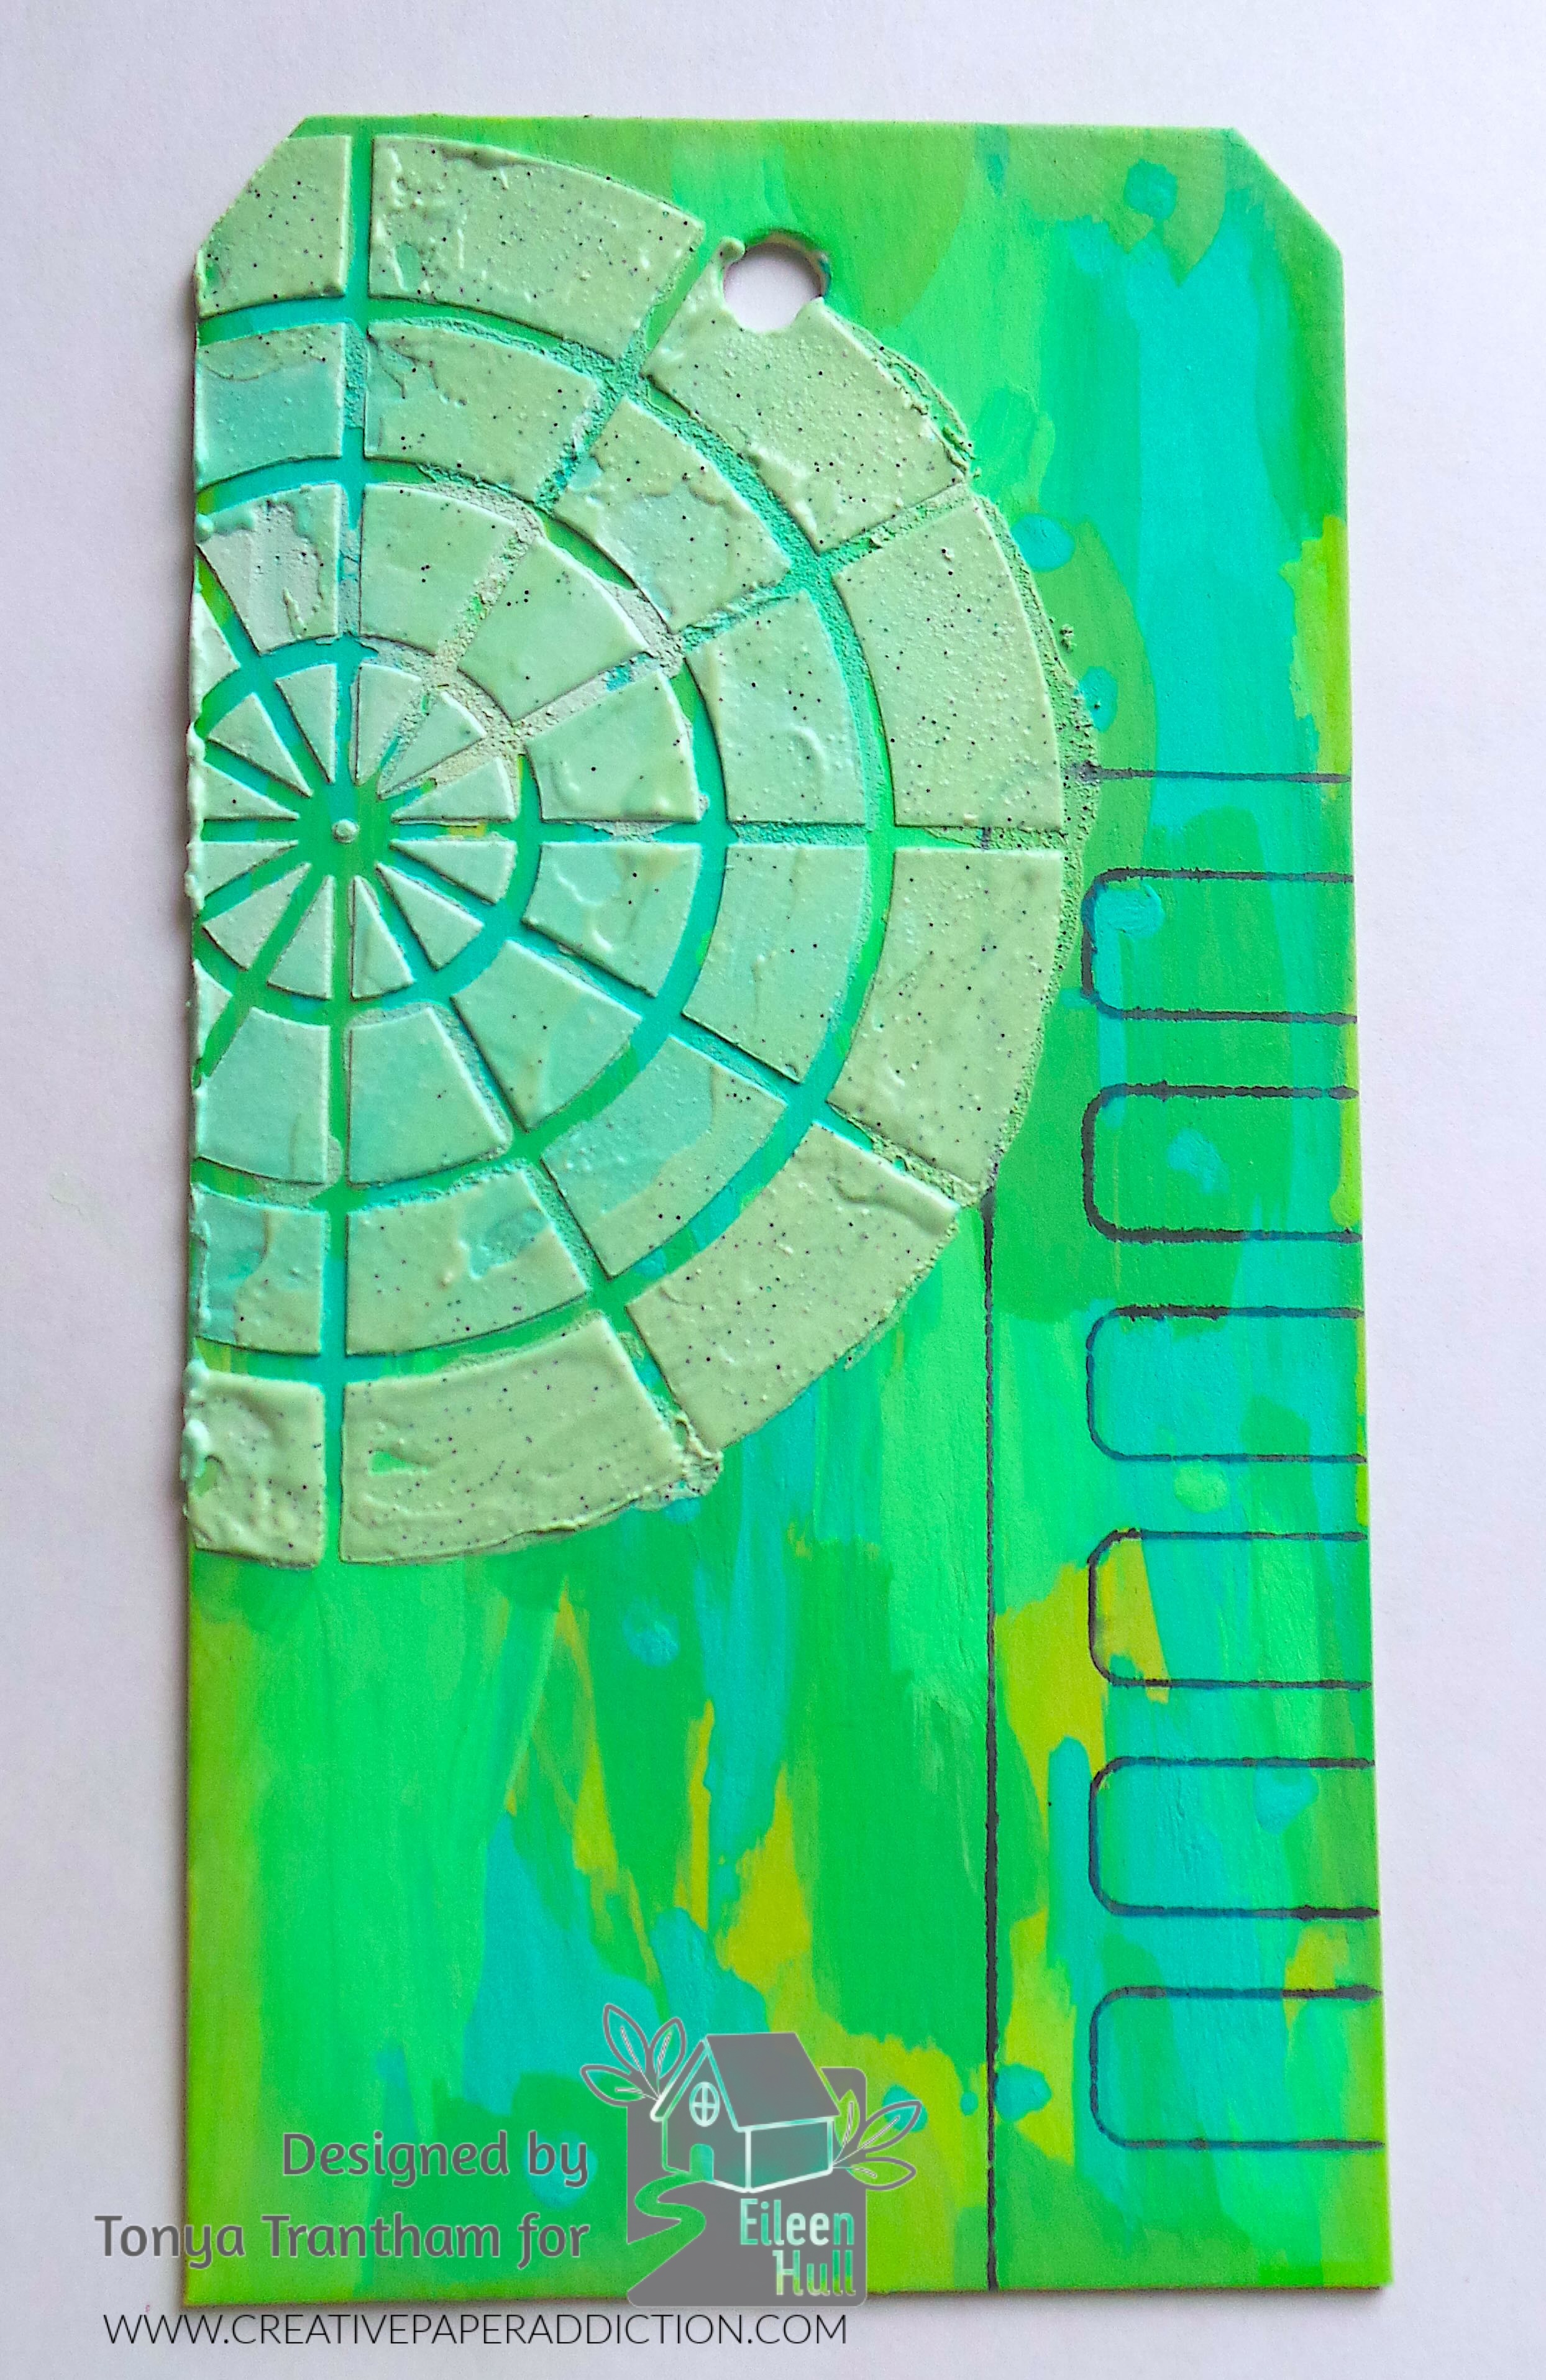
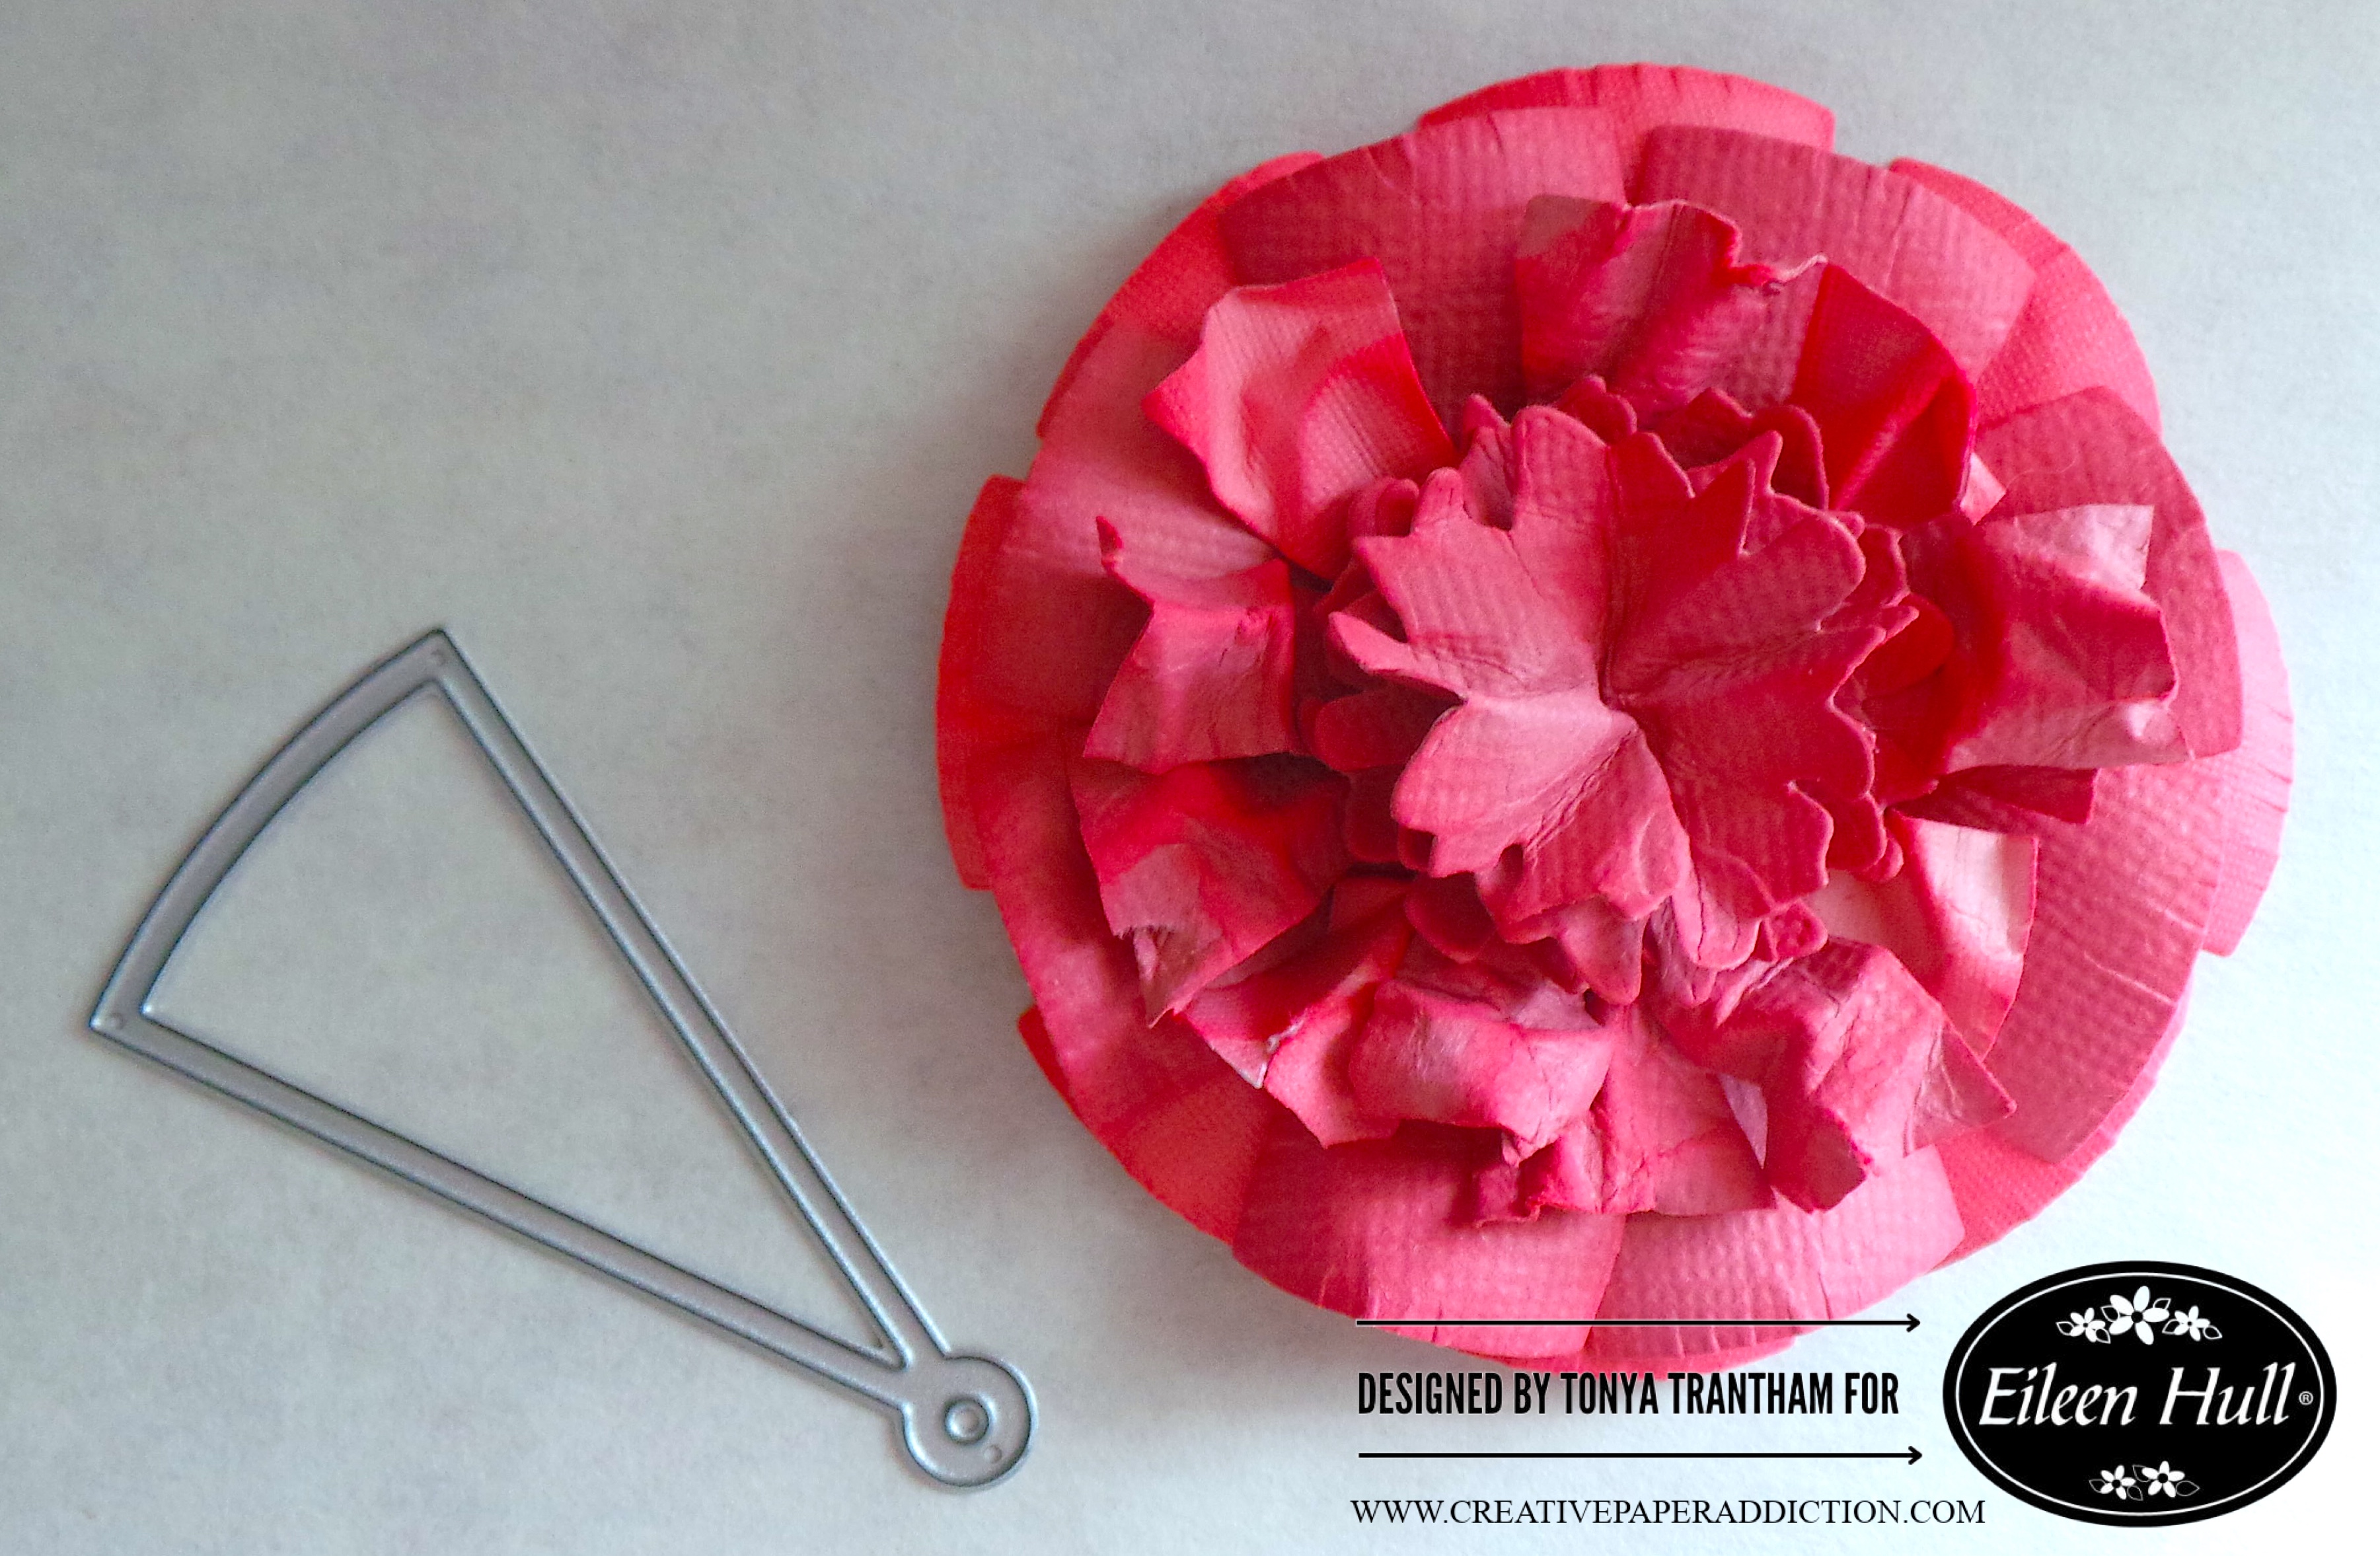
I cut the “v” end off ten triangle dies and crunched up in my hand before adding to the flower. I cut out three flowers from the Bookmark, Pockets and Topper Thinlits. I inked with pink chalk ink and shaped with a Stylus and my hand. I glued each on top of each other before adding to the flower.

A layered paper flower in shades of pink alongside a metal die cut in a semi-circle shape, designed by Tonya Trantham for Eileen Hull.

I cut the smallest circle from the Rainbow Wheels Thinlits. I lightly wet the circle with water and crunched, shaped in my hand and let it dry.

A circular piece of off-white cardstock alongside a silver die-cutting ring and a crumpled, light-colored paper flower, designed for a crafting project.

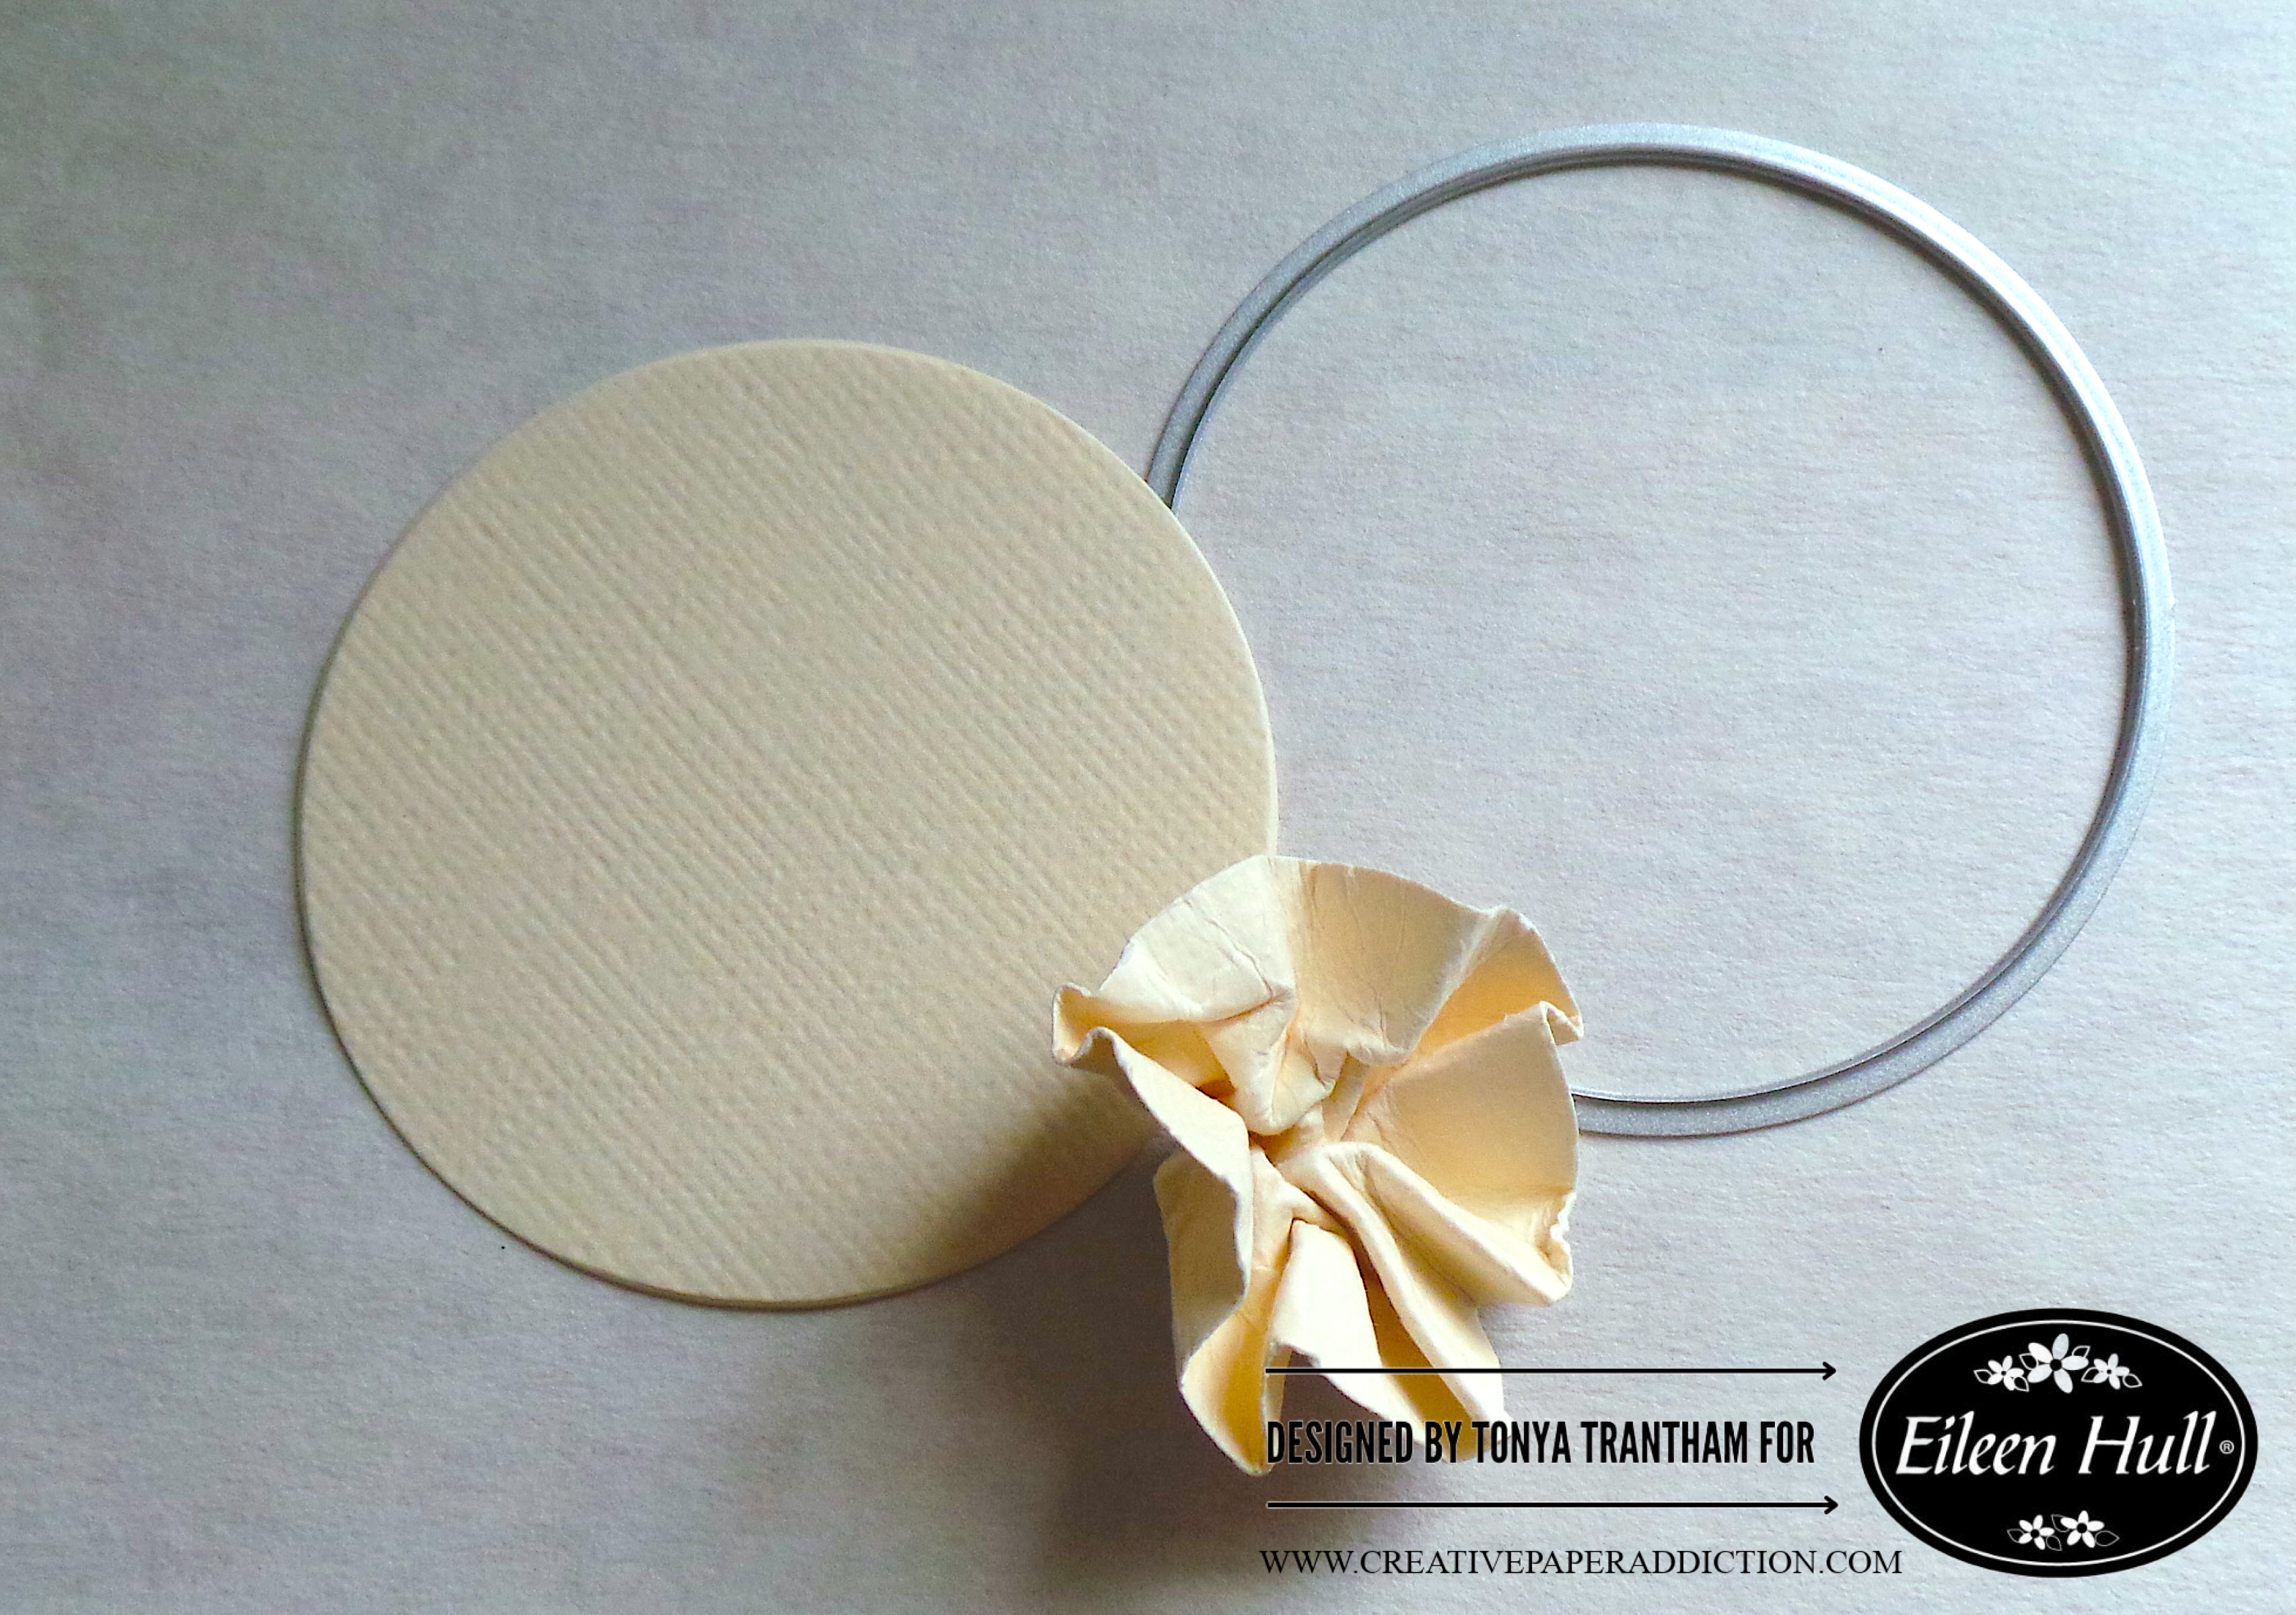
I cut the largest circle from the Rainbow Wheels Thinlits and adhered to the center of the box. I cut one of the labels from the Journal Hardware Diecut and glued onto the large circle.

Close-up of a decorated gift box featuring large multicolored flowers, green leaves, and embellishments.

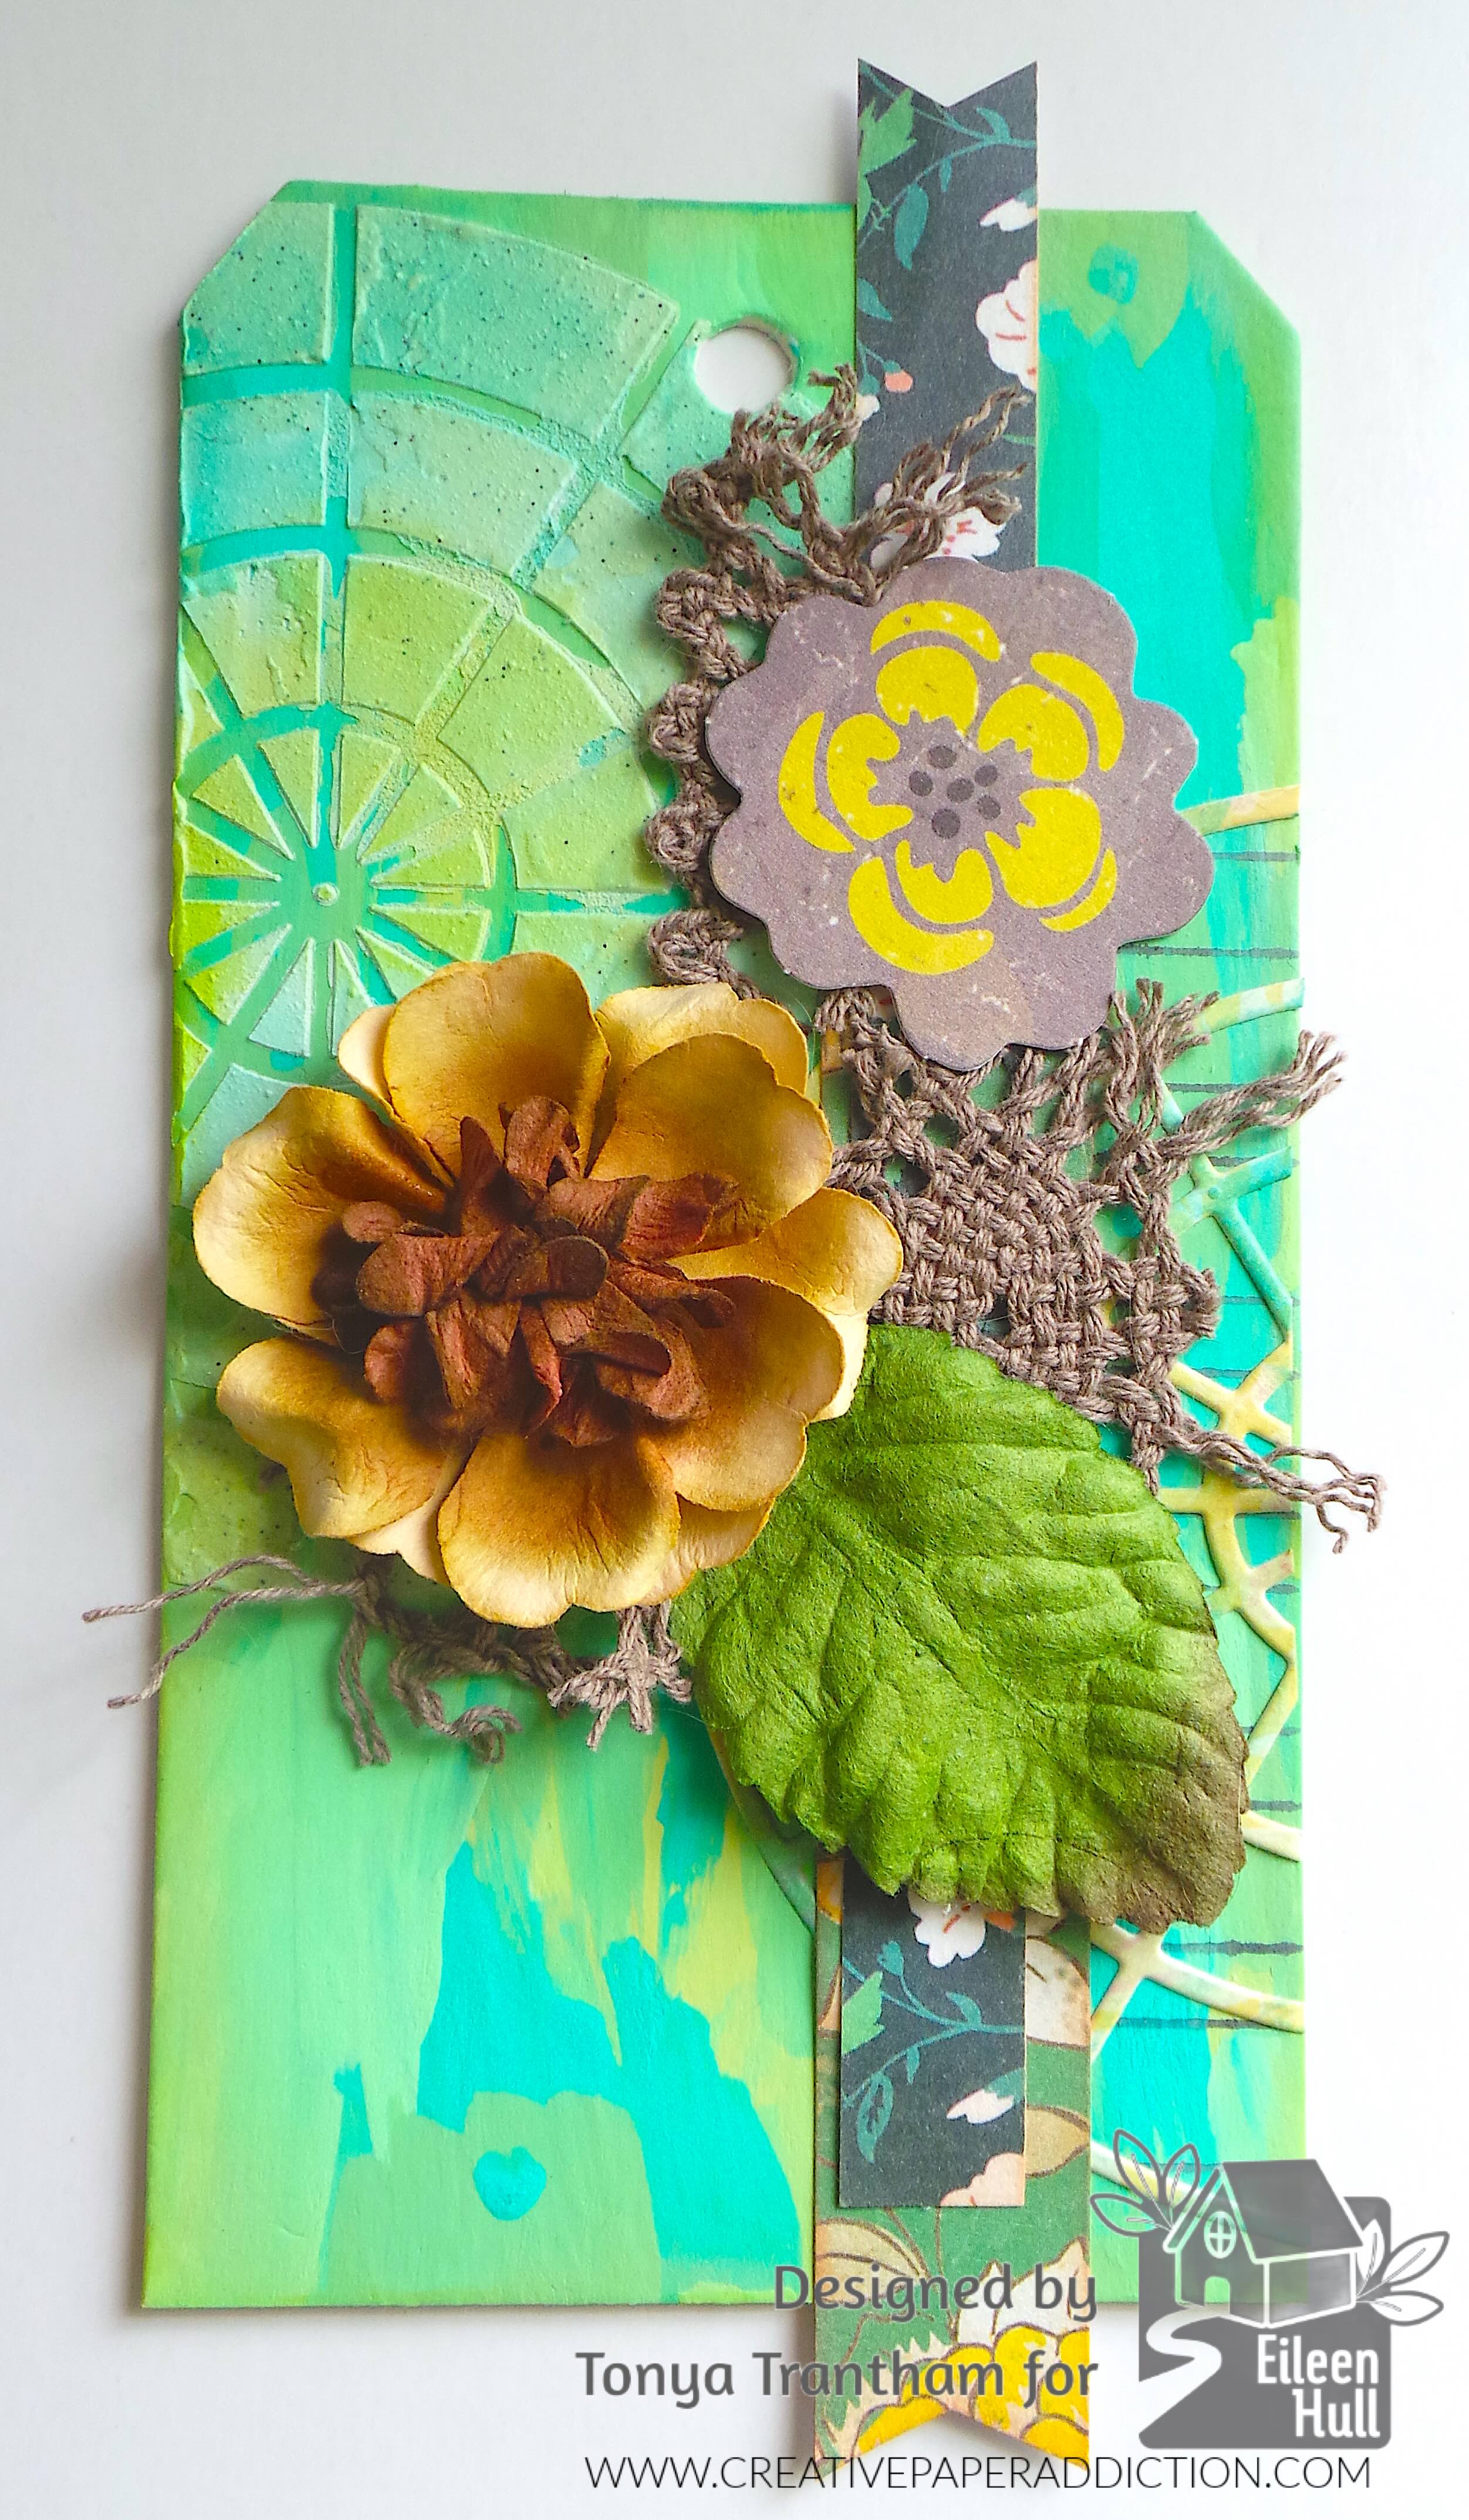
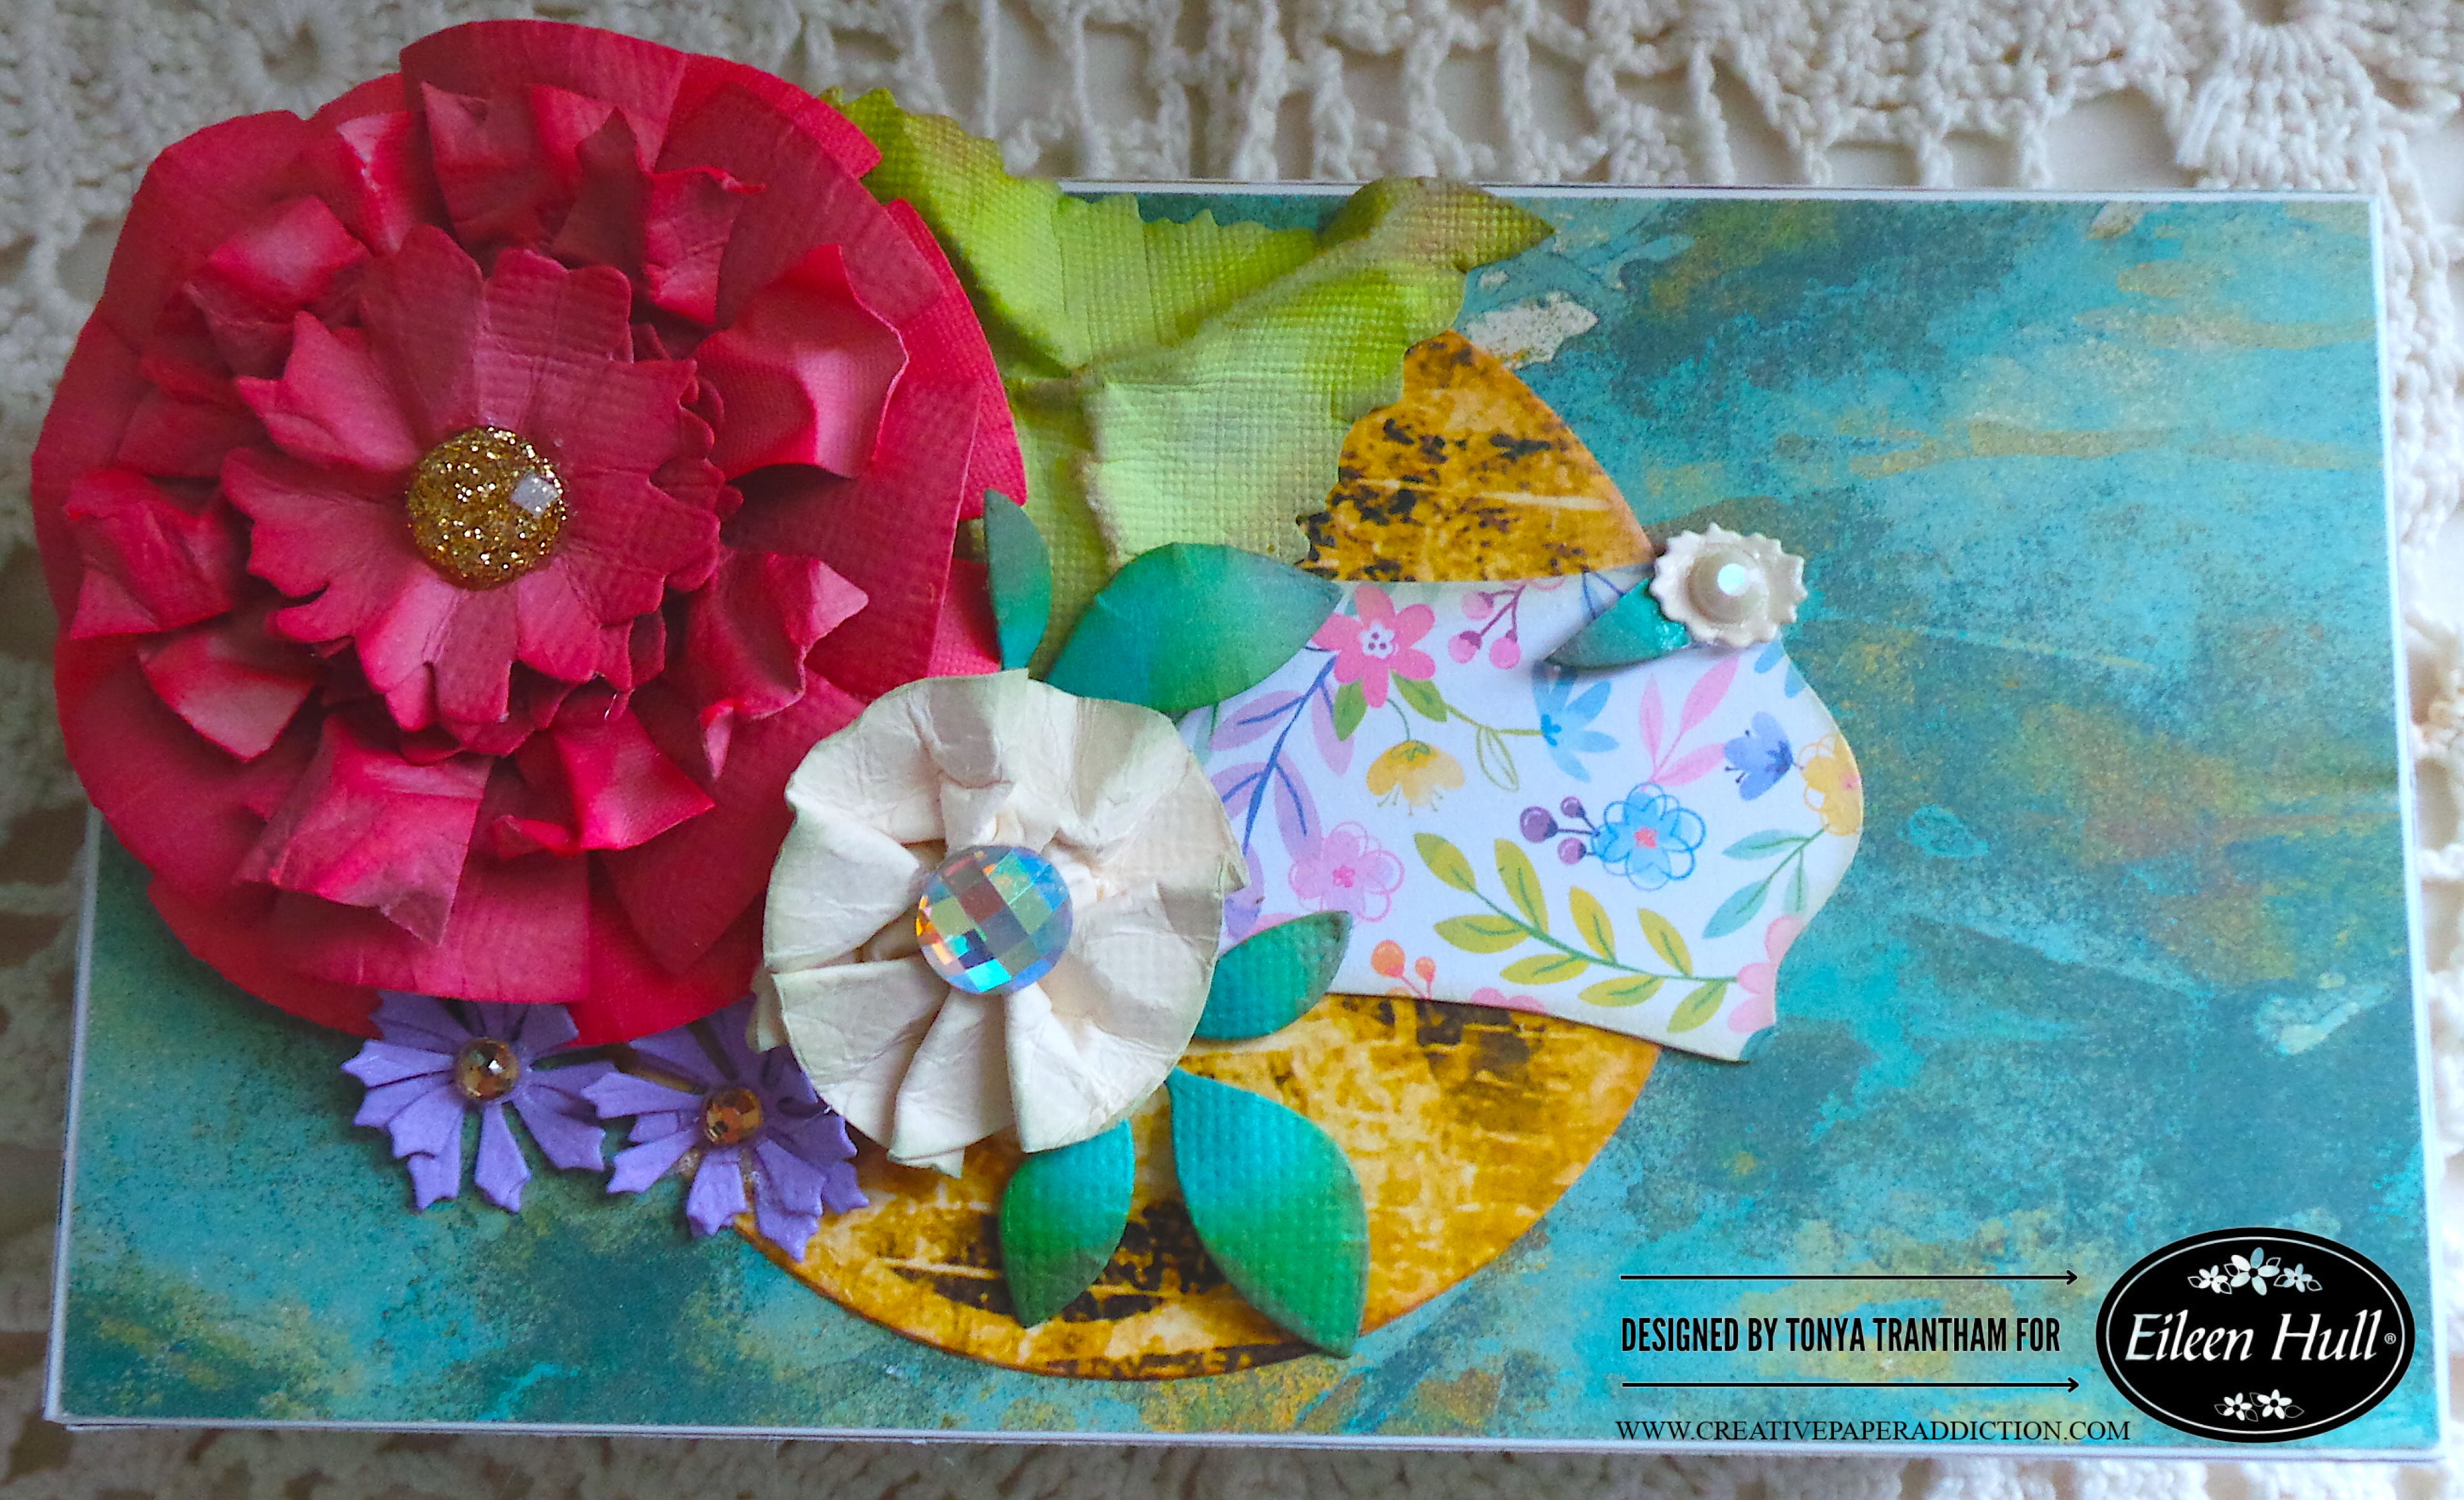
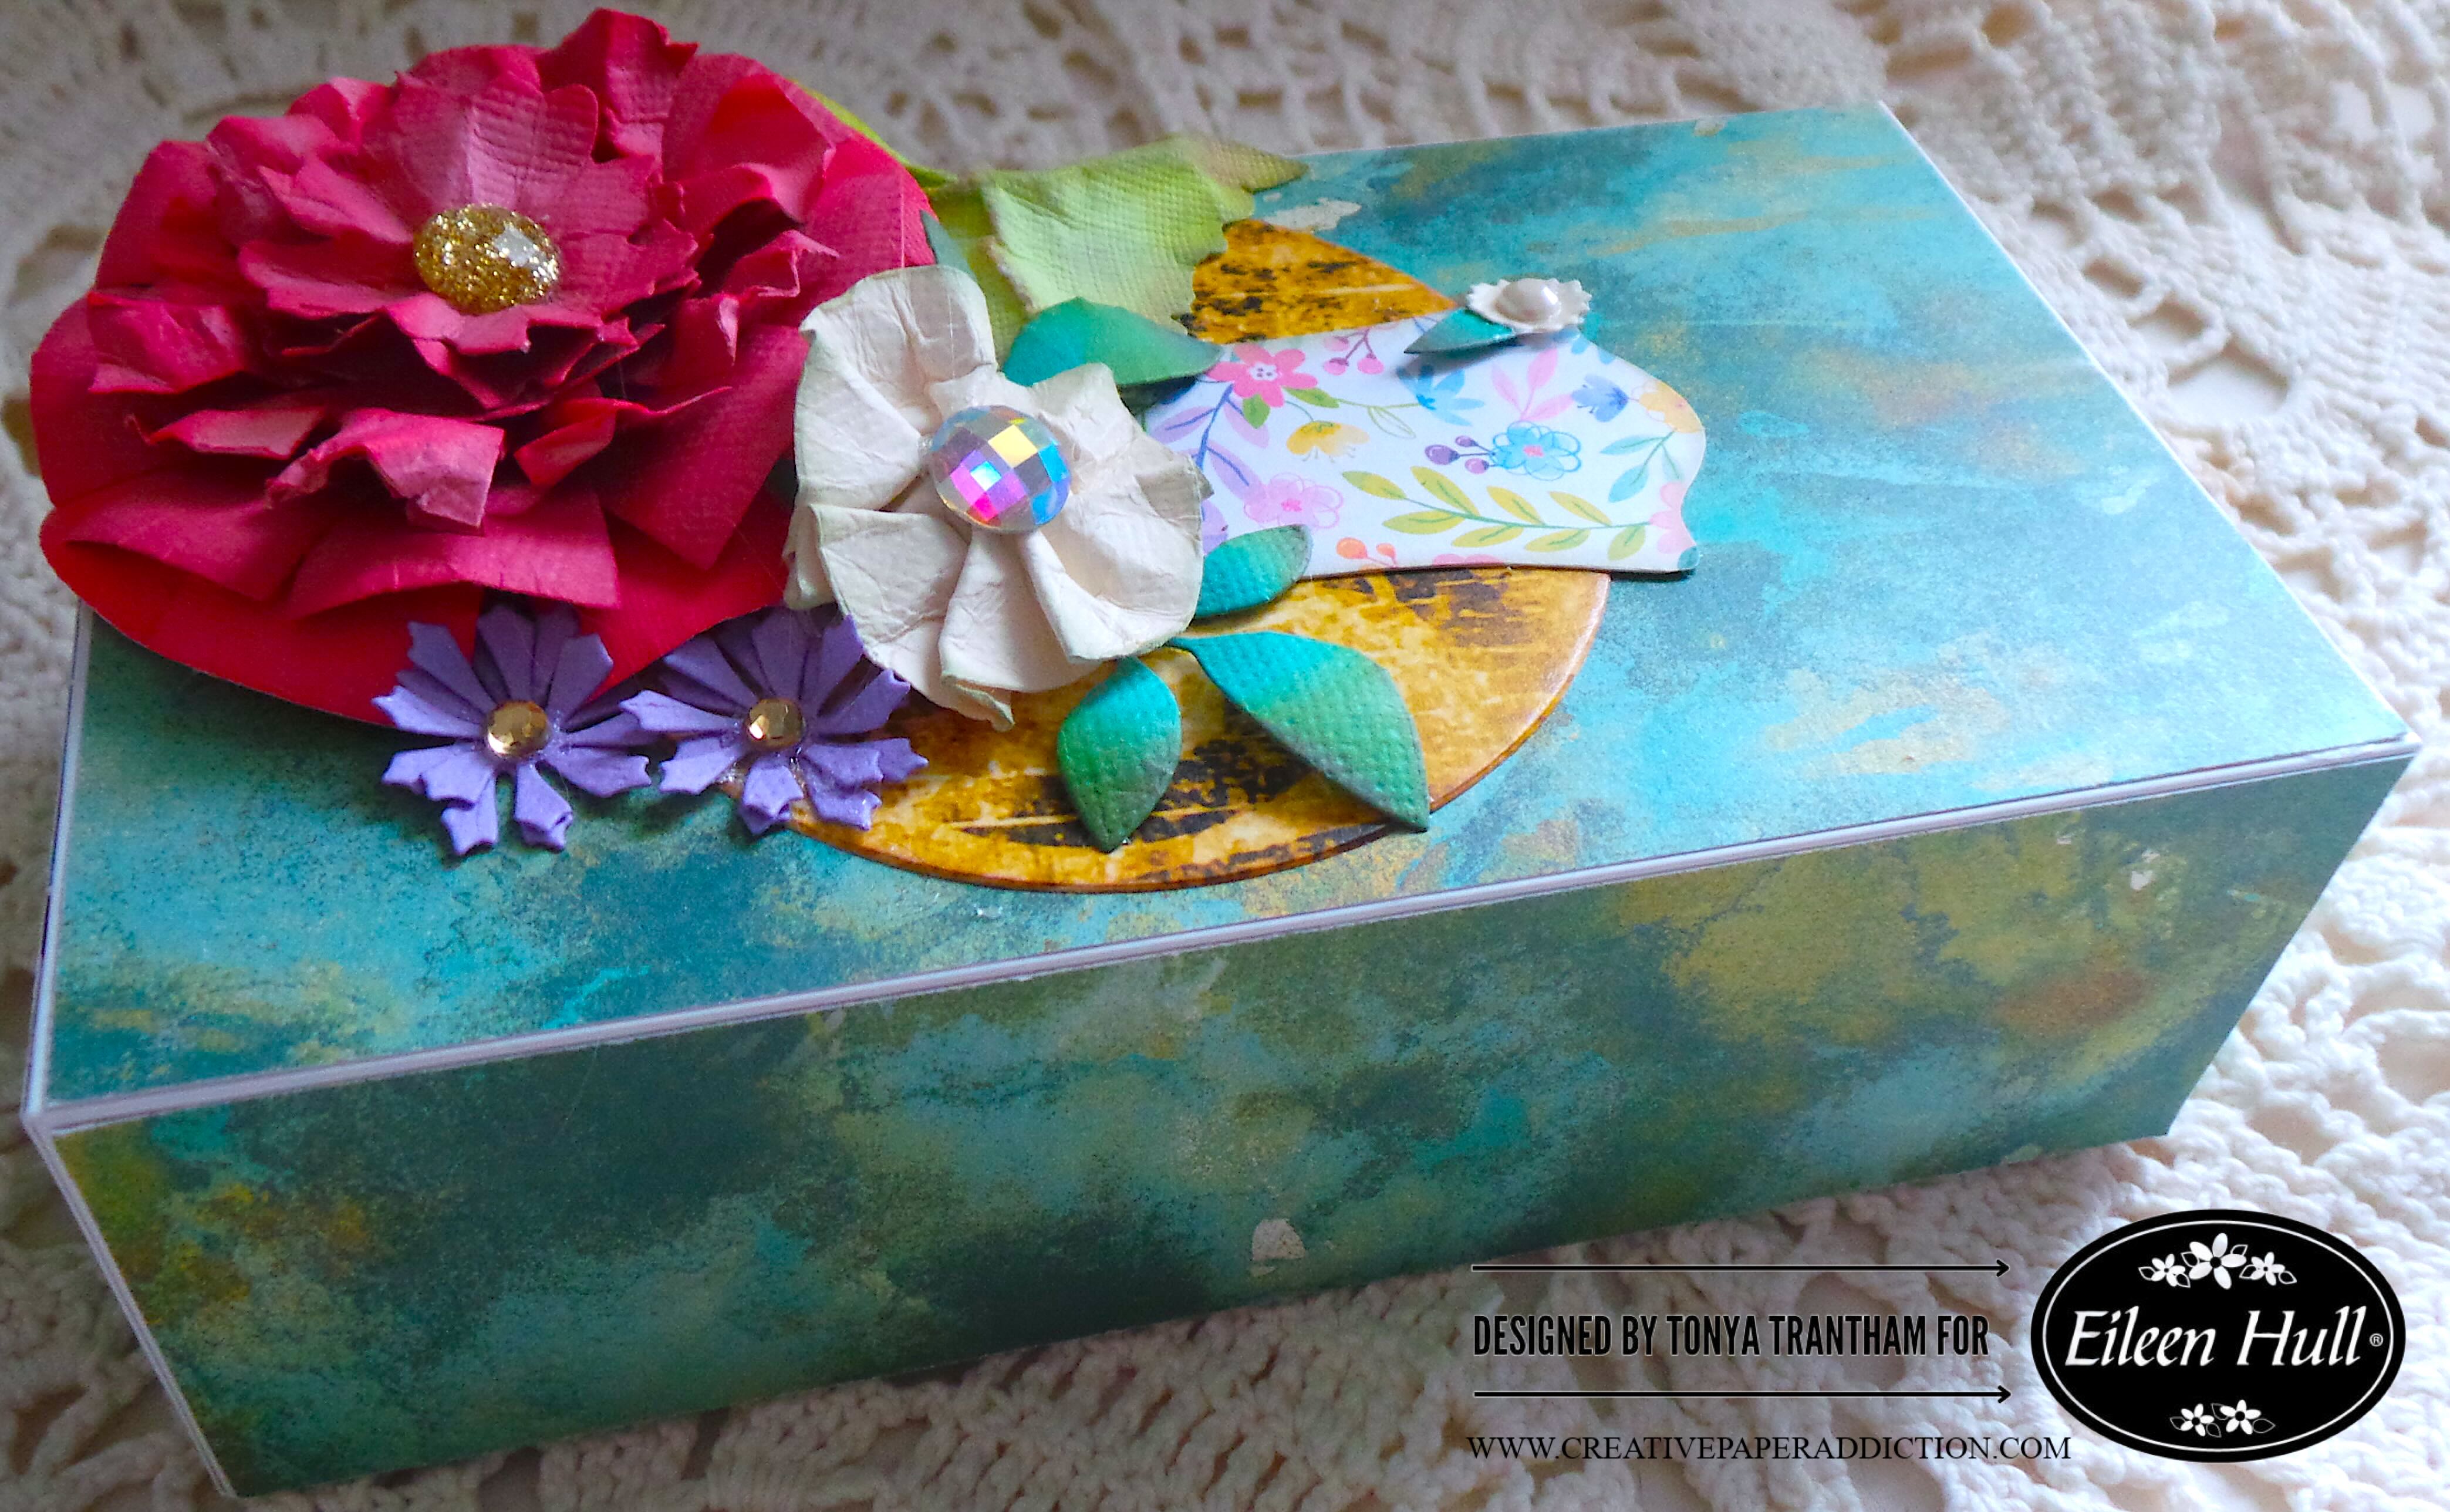
I glued the largest flower to the upper corner of the lid. Next I dug into my stash and found a leaf from the Sunflower Diecut (retired). I inked, shaped and adhered underneath the larger flower. I glued the white flower next to the large flower. I cut and shaped two leaf sprigs from the Bookmark, Pockets and Topper Thinlits and adhered underneath the white flower.

A decorated gift box featuring colorful paper flowers in red, pink, white, and purple on a textured teal background.

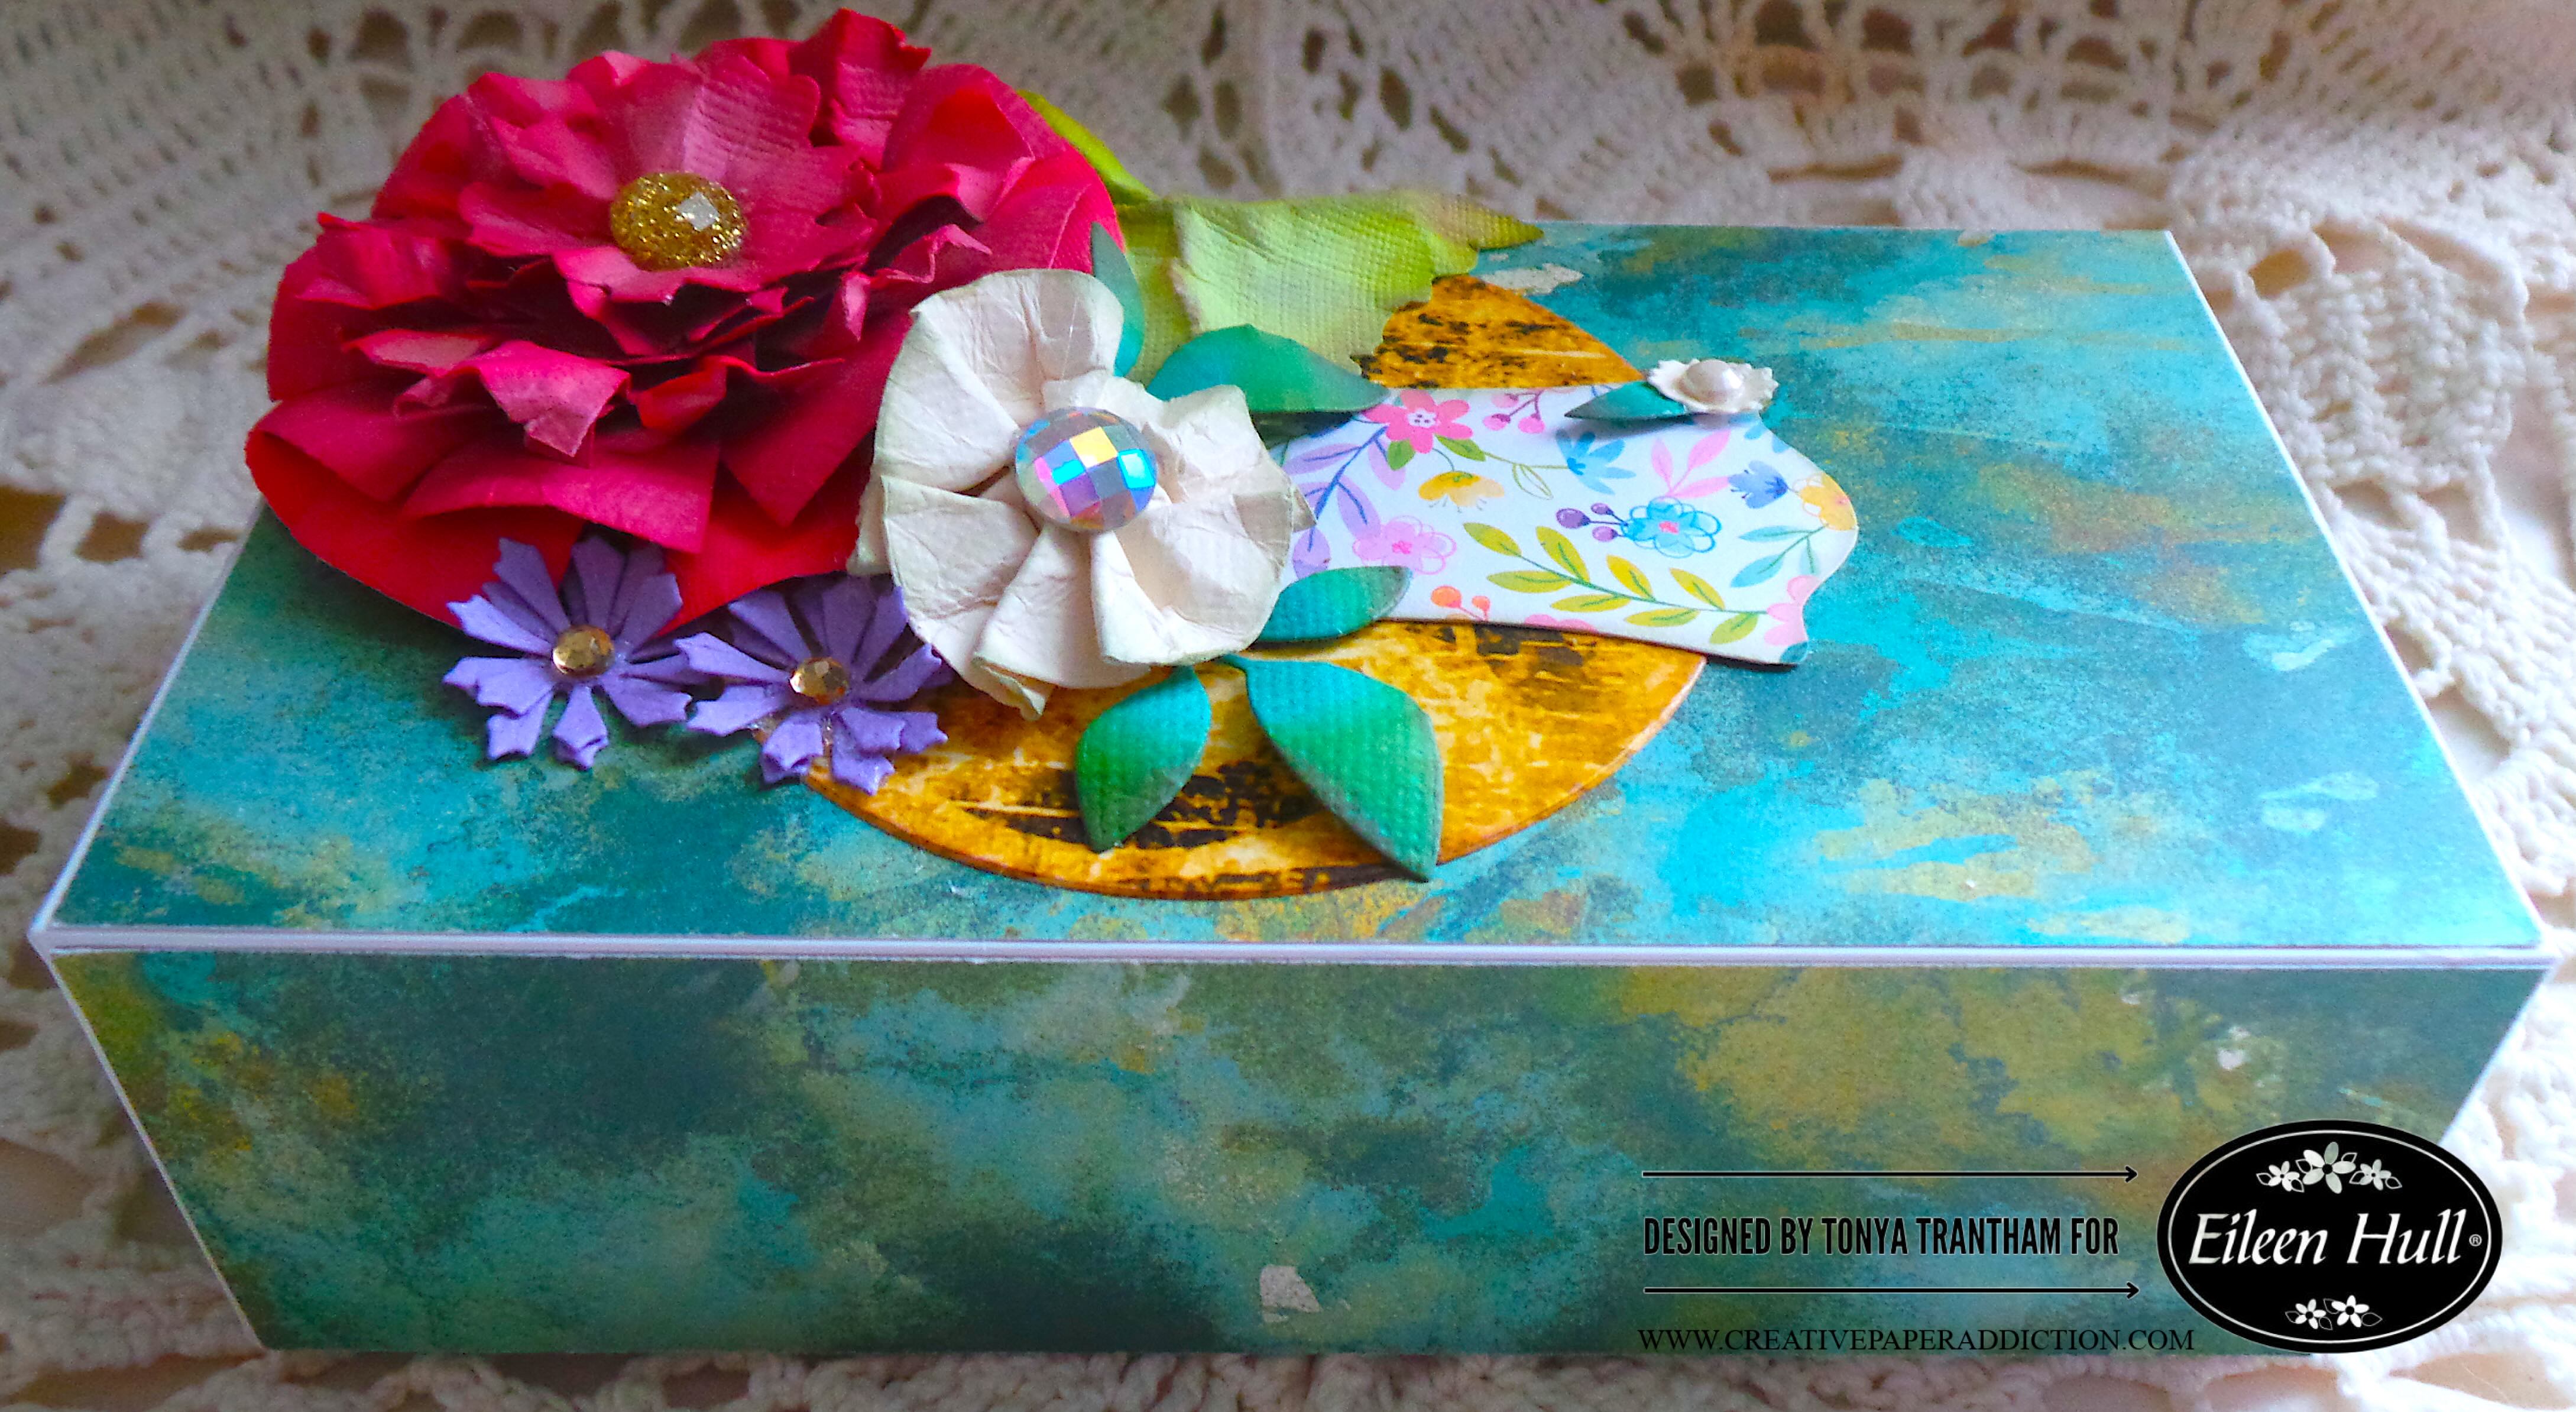
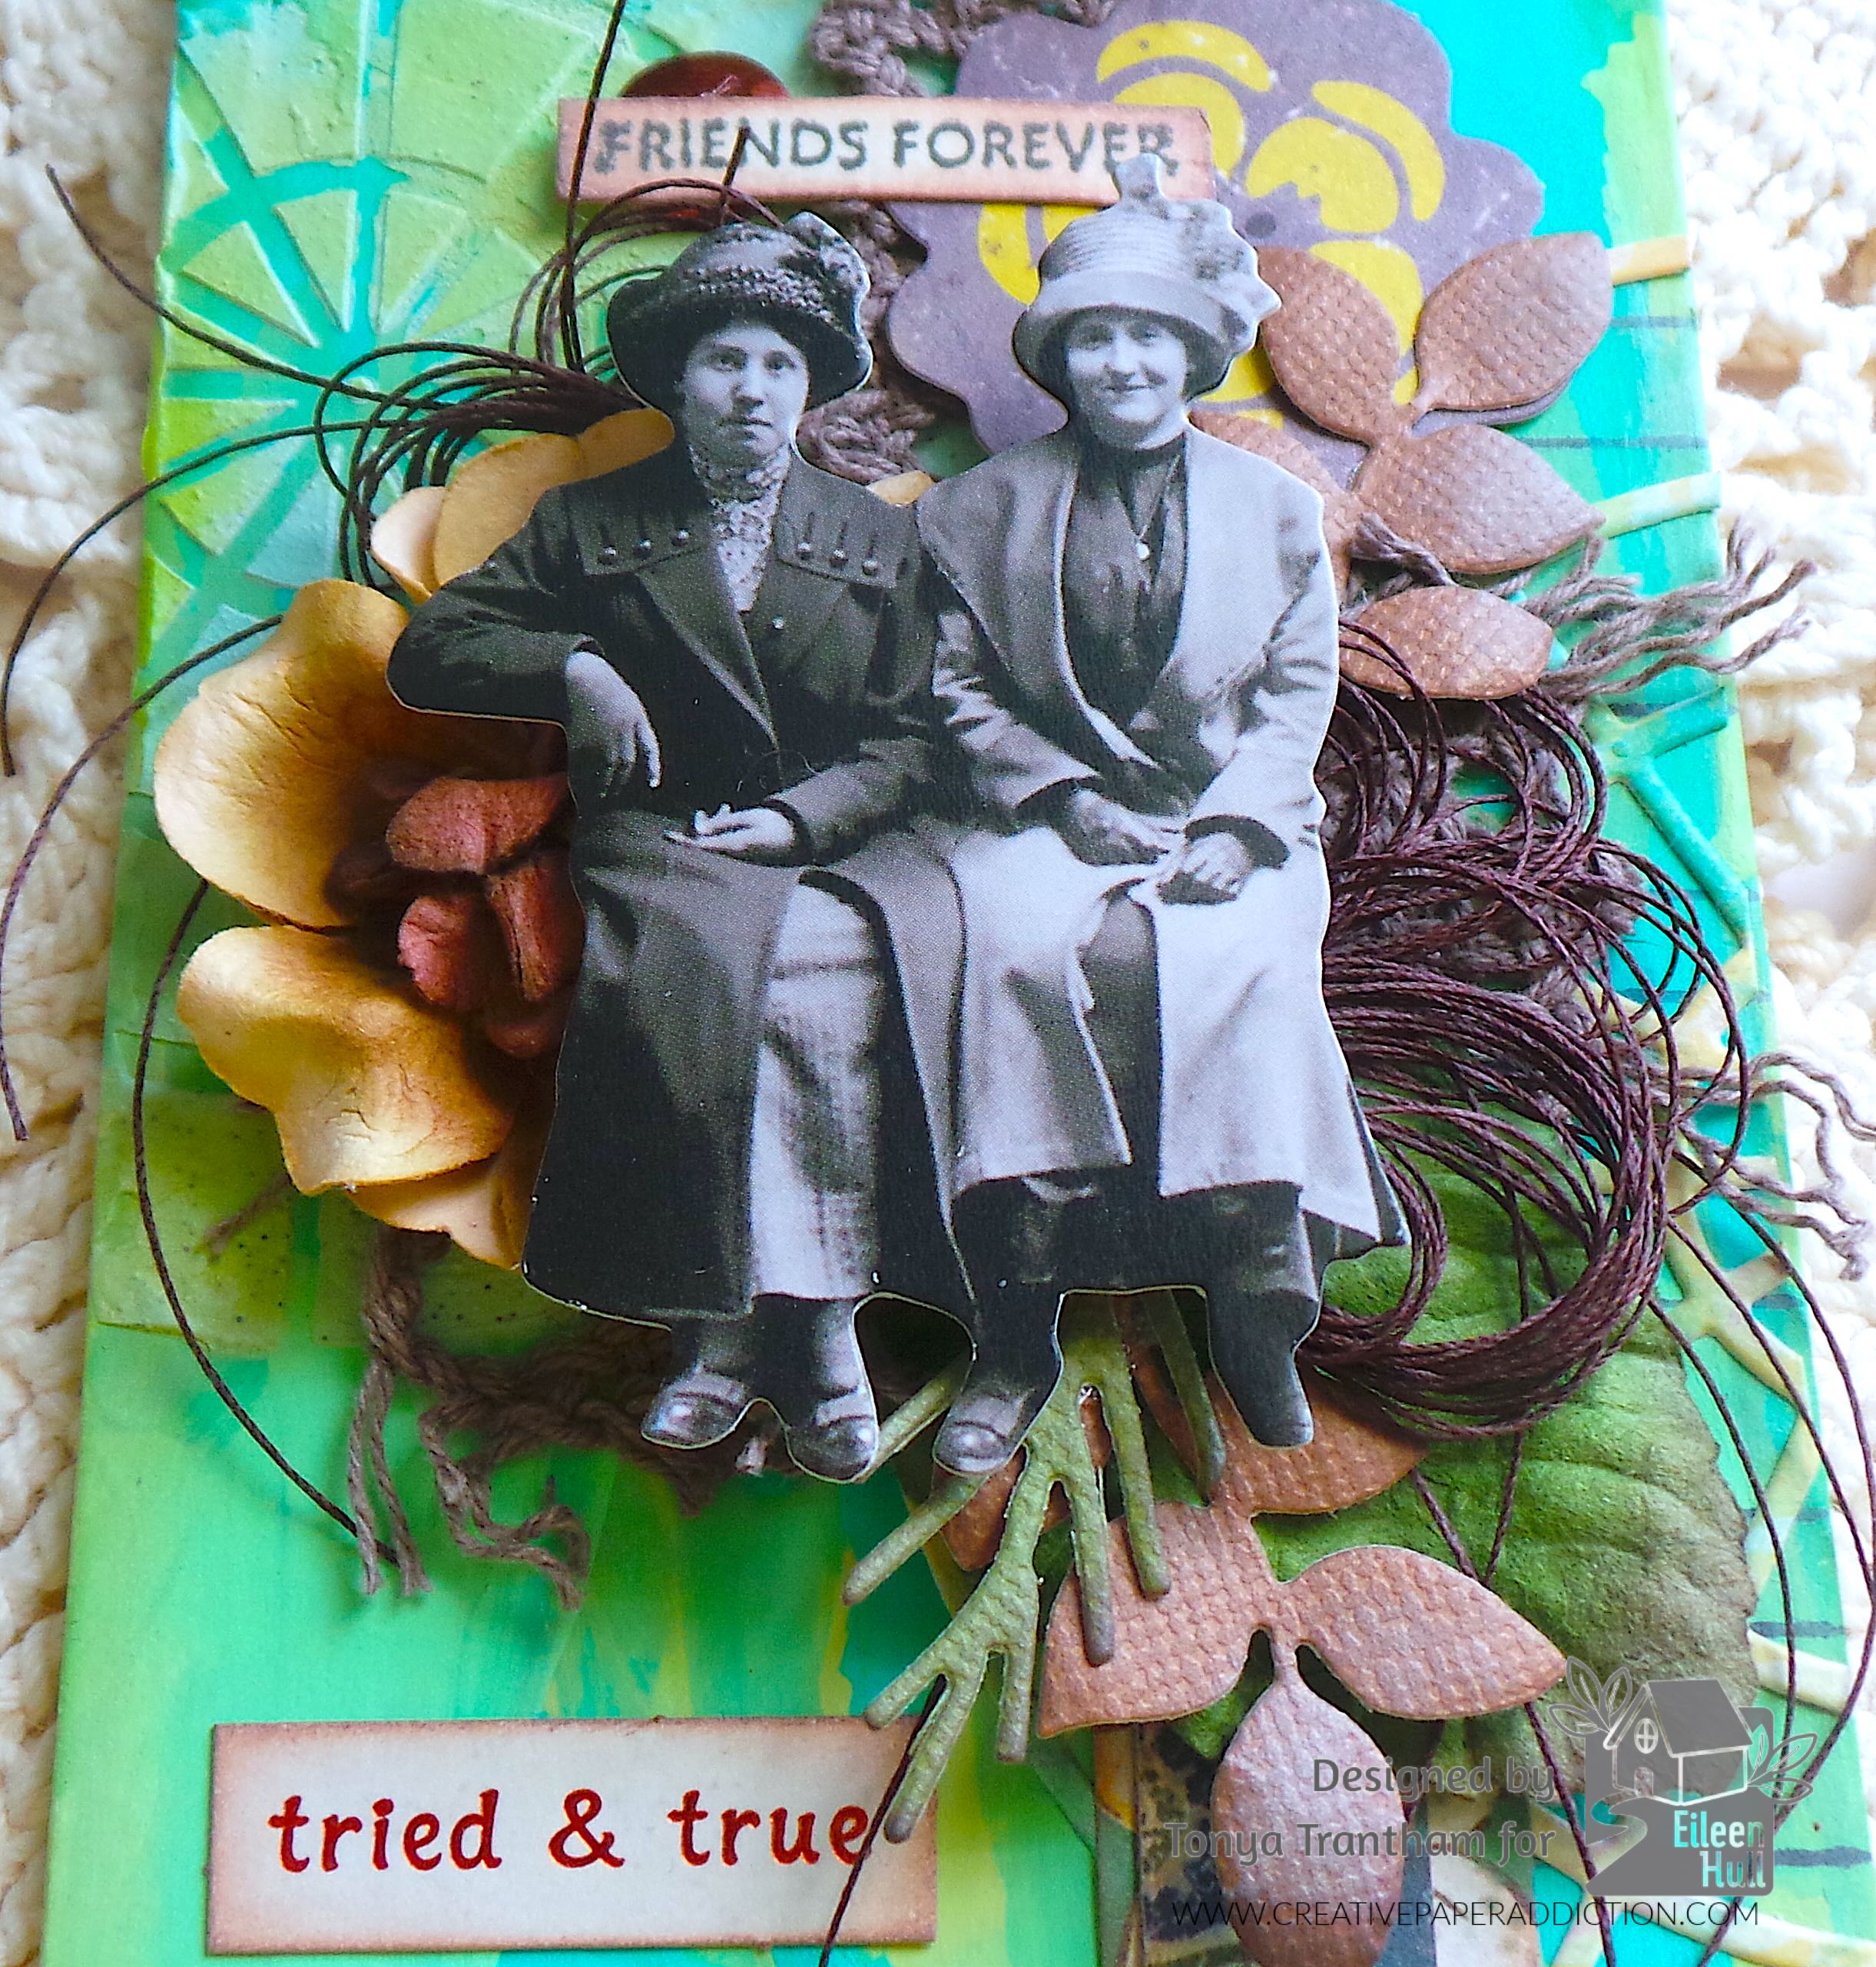
I cut four of the purple and one small flowers from the Bookmark, Pockets and Topper Thinlits. I shaped all flower with a Stylus. I glued a purple flower on top of each other and added to the lid. The white flower I adhered to the corner of the label along with a single leaf from a leaf sprig.

Close-up of a decorated gift box featuring various paper flowers, including a large red flower, a white flower, and purple accents, alongside green leaves and a floral patterned piece.

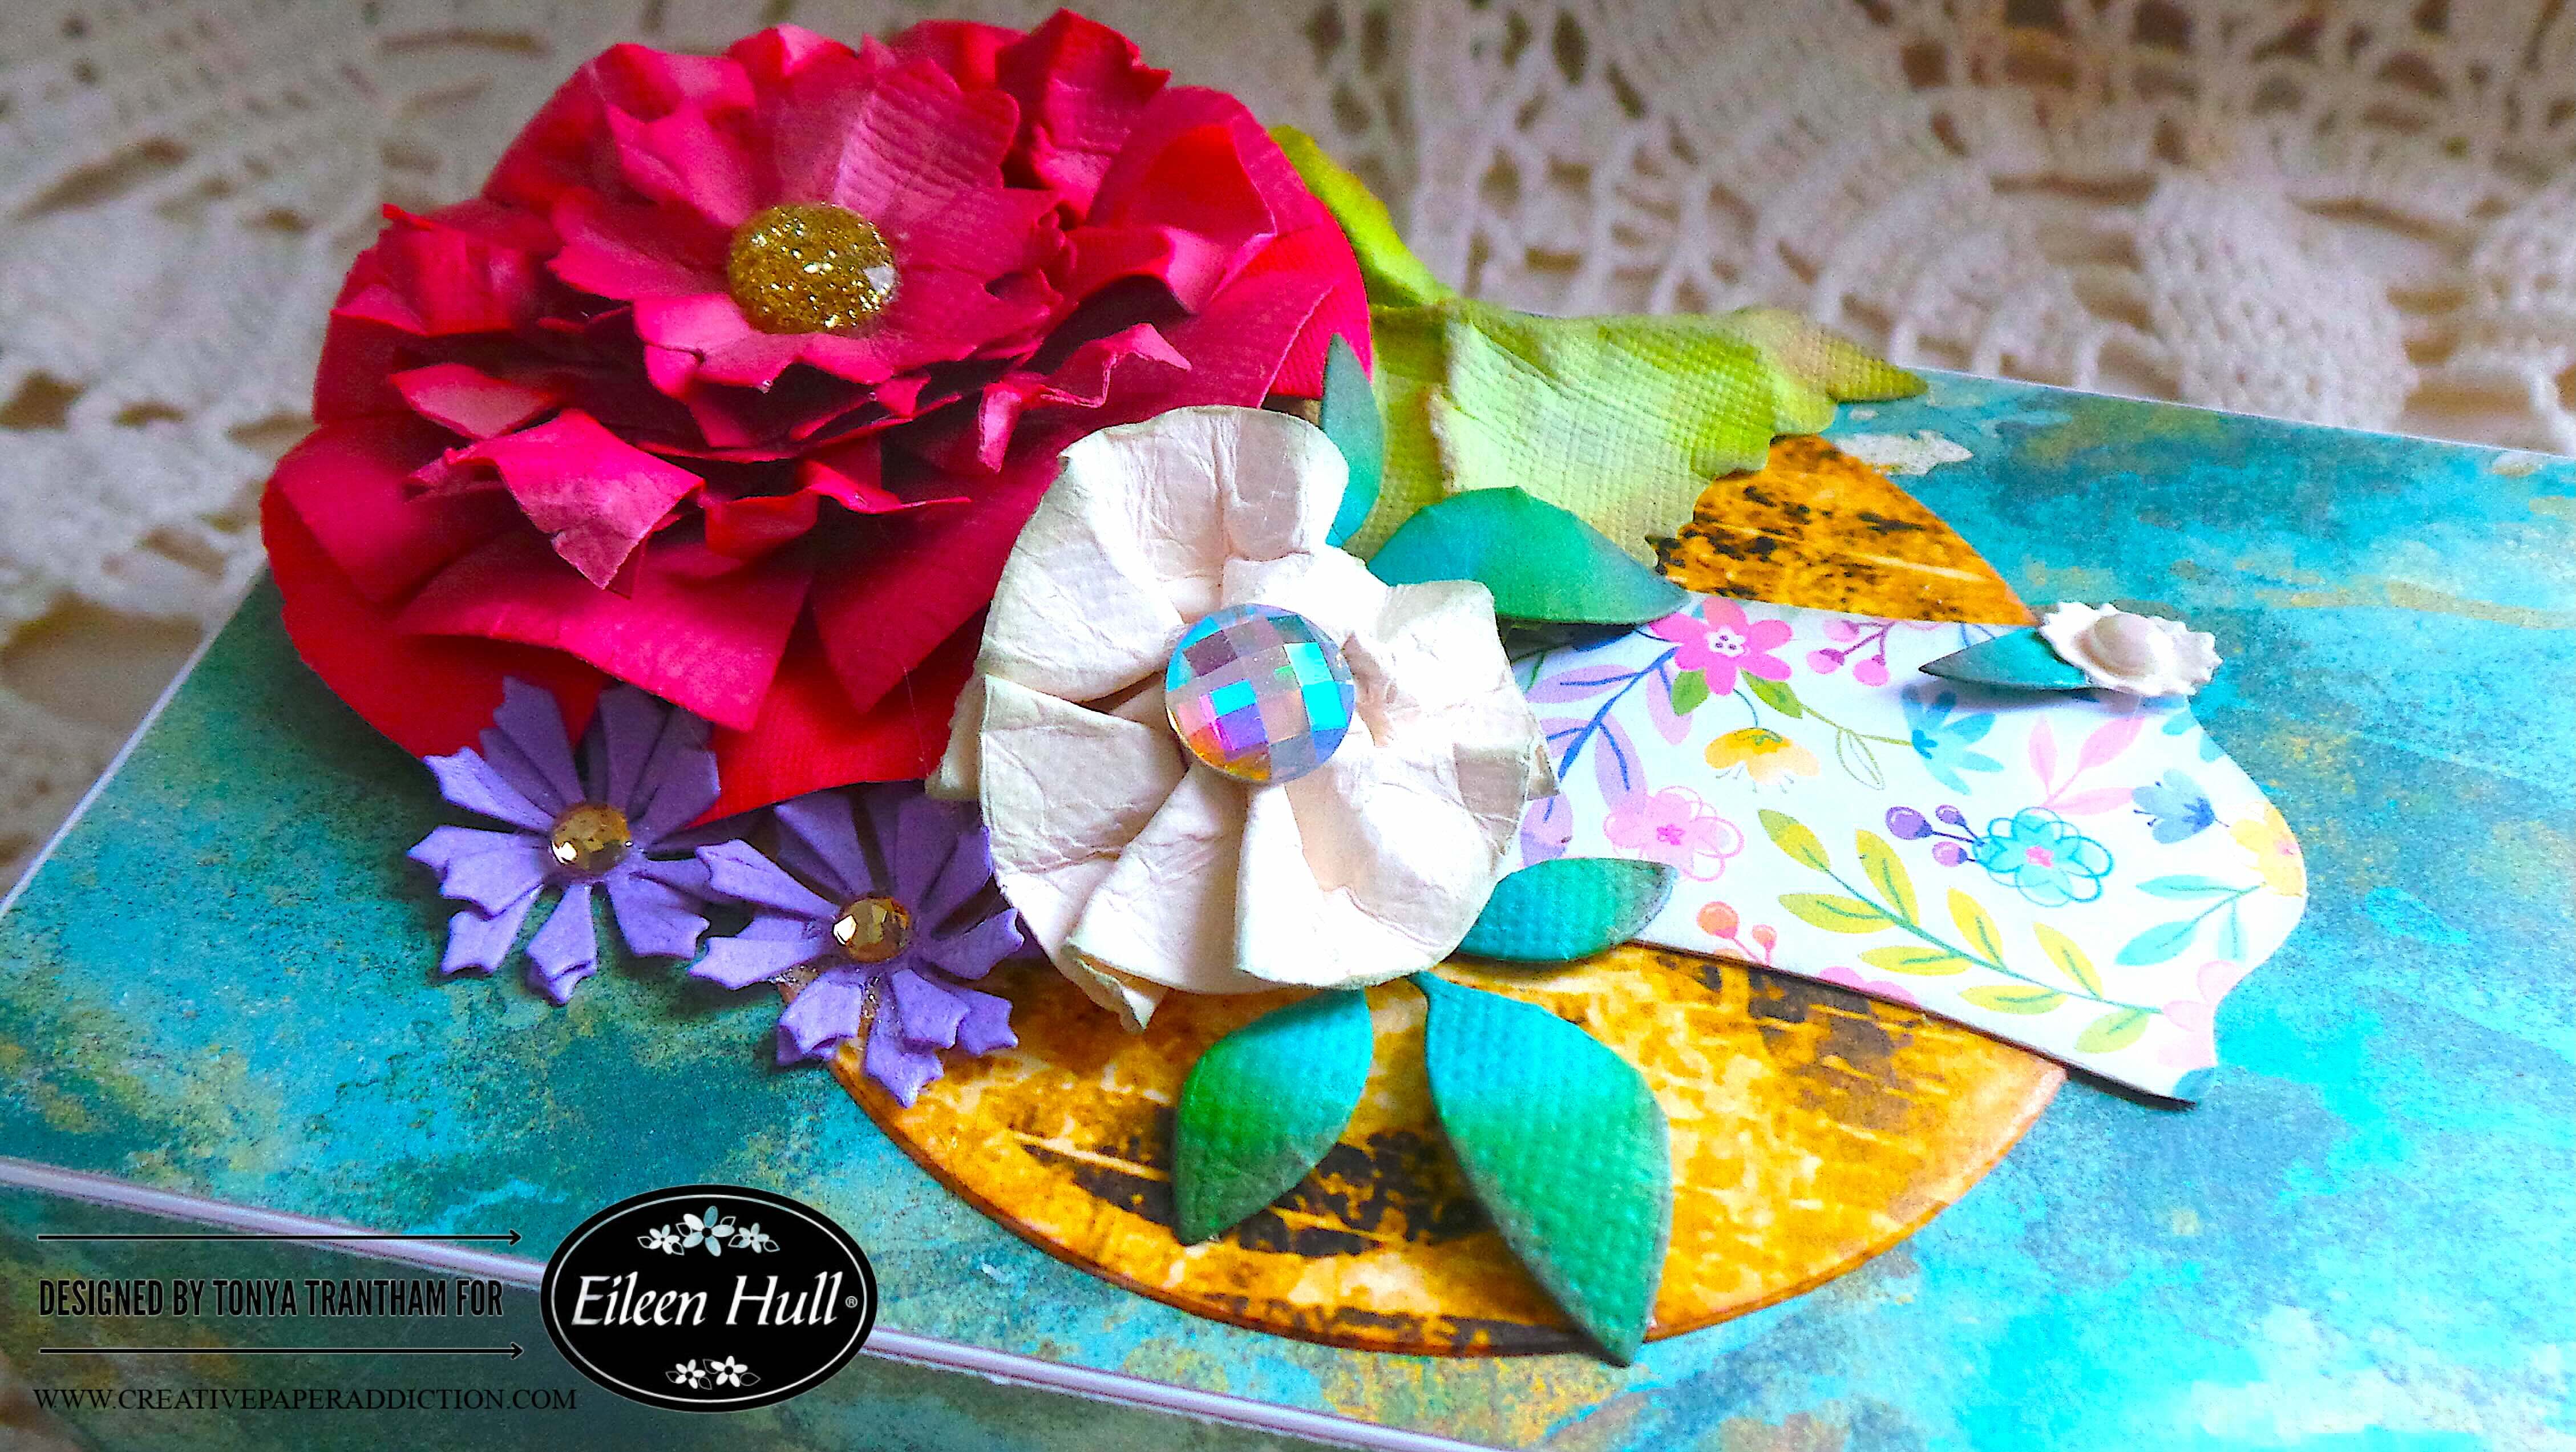
I added Gold and White Gems to the center of each flower to finish. This box makes a beautiful home decor piece or a gift to a special someone.

If you haven’t been by Eileen Hull’s blog lately you can find the latest post HERE. Also if you have any questions or comments please leave them below.

Colorful decorated gift box featuring various paper flowers, including a large pink flower, with a floral design on the box and a plain white interior.

Supplies

Sizzix/Eileen Hull: Rainbow Wheels Thinlits

Sizzix/Eileen Hull: Journal Hardware Diecut

Sizzix/Eileen Hull: Bookmark, Pockets and Topper Thinlits

Sizzix/Eileen Hull: Sunflower Diecut (retired)

Various Plain and Patterned Cardstocks

Empty Phone Box

Pink and Green Chalk Ink

Diecut Machine

Paper Cutter

Scissors

Gold and White Gems

Stylus

Beacon Adhesives: Zip Dry Adhesive

(Products listed above are Affiliated Links for your convenience)

DISCLAIMERS

This blog is compensated to provide opinion on products, services, websites, and various other topics. Even though the owner(s) of this blog receives compensation for our posts or advertisements. I always give my honest opinions, findings, beliefs, or experiences on those topics or products. The views and opinions expressed on this blog are purely my own. Any product claim, statistic, or quote should be checked with each manufacturer. Verify other representations about a product or service with the provider or party in question.This blog contains affiliate linksClicking these links helps to support Tonya Trantham Designs – Creative Paper Addiction. It’s at no additional cost to you. Today’s features are Sizzix, Eileen Hull and Scrapbook.com Products. 

A decorated gift box with colorful paper flowers, including large red and white flowers, smaller purple flowers, and green leaves, atop a teal and gold patterned surface.

Thanks for stopping by, I hope your Monday is wonderful and enjoy creating!

A decorative digital artwork featuring a bird and a variety of colorful flowers, with the name 'Tonya' artistically displayed in script.

How to Create a Tag with Color Wheel Stencils

Hi everyone! I’m back this week with a mix media tag I created using the Color Wheel Stencils by Eileen Hull. I used dies from the Rainbow Wheels Thinlits. Stamps from the Swatch Cards Stamp Set were also employed to complete this tag. Anyways, let’s get started!

A mixed media tag featuring two vintage black-and-white photographs of women, layered flowers, and embellishments, with the text 'FRIENDS FOREVER' and 'tried & true' on a colorful, textured background.

I found in my stash a tag I had cut from the Tag and Bookplates Diecut (retired). I had cut it out of Mat Board. Since it was a sturdy base I decided to use paint to cover the tag. I used an assortment of Ocean Breeze, Bright Mint and Celery acrylic paints.

A colorful tag with a mix of green and blue acrylic paint on a white plate, accompanied by a paintbrush.

Once dry I stamped the tag with the swatch stamp from the Swatch Cards Stamp Set. I used a blue ink to stamp onto the corner of the tag but the color started to disappear. I was able to reposition the stamp onto the MISTI Stamping Tool. I re-inked the stamp with a Black Ink and re-stamped the tag.

A colorful tag painted with green and blue acrylics, positioned on a stamping tool surrounded by a green ink pad, a black spacer, and a clear stamp block.

I used a Spatula and added a little Cloud Whip to a Styrofoam plate. I added a little water first to the Cloud Whip to thin it down. Next, I added Honeydew Pops of Colors to the cloud whip and mixed with the spatula.

A close-up image of a teal bottle labeled 'Pops of Color' next to a spatula on a styrofoam plate with mixed light green and white paint.

I taped the third stencil from the Color Wheel Stencils over the tag. I applied the Honeydew Cloud Whip mixture to a portion of the stencil. I added Sea Foam Pops of Color to the Cloud whip that was still in the plate and mixed. I applied that to a portion of the stencil. I did the same steps with the Olive, and Holly Green Pops of Color until the stencil was completed covered.

A stencil covered in a green mixture, partially placed over a colorful background, featuring texture and patterns.

I carefully removed the stencil and let it dry.

A multicolored tag featuring a circular stencil pattern with textured green and blue paint.

I lightly inked over the edges of the tag and the stenciled area with the green and blue Chalk Ink. I applied Adhesive to the back of a piece of cardstock. I cut a color wheel from the Rainbow Wheels Thinlits. I removed the backing from the adhesive and placed the color wheel onto the tag. I cut the excess off.

A colorful mixed media tag featuring circular stencil designs in shades of green and blue, alongside a die cut stencil placed next to it.

I cut a “v” in the ends of two strips of patterned cardstock and glued to the tag. I cut up some brown lace and added to the tag. Next I dug into my stash and found a flower chipboard piece, paper flower and leaf. I adhered all to the tag.

A handcrafted mixed media tag featuring a textured green background with stenciled patterns, adorned with a large brown flower, green leaves, and patterned paper strips.

I dug into my Mini Paper Dolls and selected these women and glued onto the paper flower. I picked the “Friends Forever” stamp, inked up and stamped onto a piece of cardstock. I went over the edges of the sentiment with a brown Chalk Ink. I adhered to the chipboard flower and I added a sequin under one edge of the sentiment.

A mixed media tag featuring two vintage-style women figures, layered floral embellishments, and the text 'Friends Forever' and 'tried & true'. The tag has a colorful background with various textures and materials.

I found in my stash the “tried and true” sentiment, leaf sprigs and an evergreen sprig. I glued all to the tag.

Close-up of a mixed media tag featuring two vintage-style photographs of women, layered flowers, and decorative elements with the text 'FRIENDS FOREVER' and 'tried & true' prominently displayed.

I made bows from thread and added. I cut two of the arrows from the Rainbow Wheels Thinlits and glued to the tag to finish.

I want to share a little. I struggle with stencils and I had put off using them. I think this tag turned out decent. Hopefully I will get over my fear of using them and will improve. What are your thoughts on stencils? Do you incorporate them in your projects? Let me know in the comments below.

If you haven’t been by Eileen’s blog lately, you might want to check it out. You can see what her creative team has been up to and find that latest post HERE.

A colorful mixed media tag featuring a black-and-white photo of two women, adorned with floral embellishments, leaves, and text that reads 'FRIENDS FOREVER' and 'tried & true'.

Supplies

Sizzix/Eileen Hull: Color Wheel Stencils

Sizzix/Eileen Hull: Rainbow Wheels Thinlits

Sizzix/Eileen Hull: Swatch Cards Stamp Set

Sizzix/Tim Holtz: Tag and Bookplates Diecut (retired)

Diecut Machine

Mat Board

Cloud Whip

Spatulas

Pops of Color: Honeydew, Sea Foam, Olive, and Holly Green

Paper Cutter

Scissors

Mini Paper Dolls

Adhesive Roll

MISTI Stamping Tool

Black Ink

Chalk Ink

Various Patterned Cardstocks

Lace, Brown Thread and One Sequin

Paper Flower, Leaf Sprigs and Greenery Diecuts

Craft Smart Acrylic Paints: Ocean Breeze, Bright Mint and Celery

Paint Brush

Beacon Adhesives: Zip Dry Adhesive

(Products listed above are Affiliated Links for your convenience)

DISCLAIMERS

This blog is compensated to provide opinion on products, services, websites, and various other topics. Even though the owner(s) of this blog receives compensation for our posts or advertisements. I always give my honest opinions, findings, beliefs, or experiences on those topics or products. The views and opinions expressed on this blog are purely my own. Any product claim, statistic, or quote should be checked with each manufacturer. Verify other representations about a product or service with the provider or party in question.This blog contains affiliate linksClicking these links helps to support Tonya Trantham Designs – Creative Paper Addiction. It’s at no additional cost to you. Today’s features are Sizzix, Eileen Hull and Scrapbook.com Products. 

Mixed media tag featuring a turquoise background with a texture, adorned with layered flowers, leaves, and a sentiment reading 'Friends Forever'. Two vintage-style black and white photos of women are prominently placed, along with decorative embellishments and the phrase 'tried & true'.

Thanks for stopping by, I hope your Wednesday is wonderful and enjoy creating!

A decorative graphic featuring a colorful bird amidst vibrant flowers, with the name 'Tonya' artistically written in a stylish font.