I am Grateful

Hi everyone and welcome to the Crafty Card Gallery Fall themed blog hop!
We have 9 very talented card makers who have each designed a fall themed card.
If you’ve never done a hop before, it’s a group of bloggers that have joined together. You hop from blog to blog using the links in each post.
Be sure to visit each of the blogs and comment on the posts and follow their blogs. Some of the bloggers are giving away prizes – so you want to be sure to comment so you can be eligible to win. 
You should have arrived from: Kerin Sylvester:  www.onecraftycorner.com
If you didn’t, please go back to the start so you can do the whole hop: http://craftycardgallery.blogspot.com/
Thanks for joining us in the hop!
Your next stop in the hop is: Shawnee Penkacik:  http://www.sunshinythought.com
Here’s the full list in case you get lost:
Kerin Sylvester:  www.onecraftycorner.com
Shawnee Penkacik:  http://www.sunshinythought.com

This card I started with a 5 1/2″x5 1/2″ folded cardbase which I cut a 5″x5″ piece of patterned cardstock, inked the edges and adhered to the cardbase. 

Even though the card looks hard to put together it really isn’t.  I cut the following pieces of patterned cardstocks 3 1/4″x5″, 2 3/4″x5″ and 2 1/4″x5″ and used a decorative punch (5” side) on each piece and then measured 2 1/2″ of the punched edge (the center) and cut with in a 1/2″ of each piece of cardstock. I then “curled” the cut edges around a pencil and then adhered each piece on top of each other to create a pocket.

I used the Doily diecut to cut a doily from off white piece of cardstock, ink edges and then glued to cardbase and inside the “pocket”.

 I cut the big leaves from the Holiday Greenery diecut on off white cardstock. I then inked with a variety of peach, tan, brown, yellow and green chalk ink. I blended the colors together and then wadded and crinkled the leaves up and then shaped the ends with my stylus. I folded down the middle and inked the center with brown ink.

The smaller leaves also come from the Holiday Greenery diecut too. I shaped those with the stylus and then I adhered all the leaves and paper flowers around the “pocket” of the card along with twine which I made a bow out of. I finished off the with a sentiment from Canvas Corp’s Grateful Stamp Set and two little twigs from a tree.

If you have any questions about this card please let me know.

Now for something fun! I will be giving away a goodie bag of things (such as blank cardbases, ribbon, buttons, RN dew drops, sequins, rubber stamp, etc.) that can be used for your own projects and all you have to do is be sure to comment and also become a follower of my blog! Pretty easy peasy huh? I will announce the winner Monday, October 26th. So be sure to comment below and become a follower of my blog for a chance to win!
Thanks for stopping by, hope your Saturday is awesome and enjoy creating!

Ghost Passport Mini Journal

Hi everyone! I am here to share my mini passport journal for this month’s s Hauntings and Holidays for Eileen Hull’s inspiration team project.
This is the first time using the Passport Book diecut and I can honestly say I LOVE IT!!! And I can see me using this one over and over again since I love creating junk journals so much.

I used a variety of leftover stickers, embellishments, printables from previous projects and swaps to create this little journal. The pumpkin diecut is from Tim Holtz and the Frame diecut is from Brenda Walton.

The covers and spine are cut from Mat Board and I stitched the pages in with black thread and then tied fiber, lace and ribbon on to the thread to add more color.

I used the following Halloween collections from Canvas Corp, 7 Gypsies and The Robin’s Nest for the pages inside the journal.

Also I included a little video to let you have a look inside. 

If you have any questions about this project please let me know. Be sure to check out the rest of the teams projects because I am sure they will knock your socks off. Also each month there is an Art with Heart Challenge that you can link your own project up to the blog and there is a chance to win one of Eileen’s diecuts too. Now who doesn’t love winning??? 🙂

Thanks for stopping by, hope your Tuesday is awesome and enjoy creating!

Crafty Card Gallery: Mini Christmas Tree Cards

Hi everyone! I am here to share a peek at two little cards I created for this month’s challenge over at the Crafty Card Galley blog.The theme this month is trees and since Christmas is just around the corner I thought I make a couple of cards that can be added to my Christmas packages. For more photos and info on these cards please click here to view.

If you have any questions about these cards please let me know. 
Thanks for stopping by, hope your Sunday is awesome and enjoy creating!

"Hope" Chest

Hi everyone! I am here to share another project I created for Breast Cancer Awareness month. I used Eileen Hull’s  Train Case Diecut for this hope chest. I cut the case from mat board and the following Canvas Corp cardstocks: Pink and Ivory Ribbon Stripe, Pink and Ivory Toile and Pink Lemonade Thickstock and put together according to the directions. The Pink Lemonade Thickstock was used for the top lid which I embossed with Brenda Walton’s Floral Tapestry Embossing Folder (retired).

Instead of using the diecut closure (hinges included too) that comes with the Train Case I added this closure that I purchased from Hobby Lobby.

The hinges I have had for several years and I am just now getting around to using them. I also adhered pom pom trim around the lid and base of the case. 

I glued trim and flat back pearls to the inside.

The top of the lid I decorated with two diecuts (Tim Holtz: Spring Greenery, Brenda Walton:Medallions…retired),store bought paper flowers, tulle and twine. I did punch out flowers from the Yellow and Ivory Mini Dot Reverse and 80 lb. Ivory cardstocks which I shaped added sequins and a  Dew Drop to the center of each one. The ivy and twigs are from the Spring Greenery Diecut which I cut from the Gypsy Moments: Take Our Breath Away Cardstock. I did ink the ivy with chalk ink for a deep green color around the edges of the leaves. The twigs I added sequins and Crystal Stickles to the center of each sequins. I foresee me creating several more of these little train case in the future. 
If you have any questions about this project please let me know.

Thanks for stopping by, hope your Tuesday is awesome and enjoy creating!

A Good Day for a Wedding

Hi everyone! I am here to finally share the fans (forty of them) I created for my son and now wife’s wedding which was last week. I had found in the Silhouette library a 3D Rosette Flower-Dotted design ID #21879 but it was small so I sized it up to 3 1/2″ in height and 11 1/8 wide and copied pasted another image onto the design area to be printed.
I used the following cardstocks from Canvas Corp to create these fans: Gold & Kraft Diamond, Gold & Kraft Damask and Gold & Kraft Stripe cardstocks.

After folding and gluing both strips of the rosette together (end to end) I had a circle that had to be “pushed” down to create the rosette. I used a hot glue gun to glue a small Kraft cardstock circle to the center. It dries a lot faster so you don’t have to hold it for what seems like forever. Then I repeated the same process on the other side of the rosette.

Since my daughter in law’s colors for the wedding was mint green, Lavender and pink I ran cardstock through my diecut machine to cut out several scalloped circles and then embossed with Brenda Walton’s Floral Tapestry embossing folder

I adhered those to the front and back of each fan. Along with a wood paddle that I purchased at Hobby Lobby.

Here is a small portion of the fans before I boxed them and since them off with my son before the wedding. 🙂

The day of the wedding it rained just a little bit and then cleared up…isn’t rain suppose to be good luck for a wedding? But all in all it was the perfect day for an outdoor wedding. The bride was beautiful and all the decorations and special touches truly made this a day to remember. Plus I gained a daughter I never had too. 🙂

If you have any questions about this project please let me know. 
Thanks for stopping by, hope your Friday is awesome and enjoy creating!

Precious Friends

Hi everyone! I am here to share a quick post of a card I created. About a month ago me and the hubby went to the Scrapbook Expo that was in Duluth, Georgia. I had won a pair of tickets to get in free off Instagram from Spellbinders, even though it was a 3 hour drive one way it was so worth it. 🙂 At one of the booths I purchased a decoupage pad from Belle & Boo. I absolutely fell in love with the adorable children images that is in the pad.

The images can be punched out and then put together to create a 3D effect. Since I don’t own pop dots I used the leftovers from rubber stamps that I cut apart instead. It was very easy to put together since everything is numbered. 🙂 I started with a 6″x6″ folded cardstock base and added scraps of patterned and plain cardstock to the surface along with sequins and thread.

The sentiment is from an old Brenda Walton’s Card Quotables Sticker Pad that I had forgotten that I had. I love how quickly the card came together and how cute it looks. 🙂

Also I would like to submit this card from the following challenge: 
If you have any questions about this card please let me know.

Thanks for stopping by, hope your Thursday is wonderful and enjoy creating!

Spring Snow Globe Baby

Hi everyone! I am here to share a very quick post with my Eileen Hull’s Art with Heart Challenge project…with only hours to spare I might add…YIKES! 
The bases of my project started with this empty jar that had Prima flowers in it. I thought wouldn’t it be perfect if I could somehow turn it into a snow globe??? After much thought and looking at my different diecuts I thought the Cookie Box die would make a perfect  base for the snow globe. I cut it from Mat Board , grungy looking cardstock, printed the Tinted Babies printable and fussy cut out and then added embellishments. Below is the finished results. 

I did center and trace the lid from the bottle on the diecut and then used a box cutter to cut a hole in the center. It fits perfectly and all I did was add a little bit of glue to keep it from coming out of the cookie box.

I also used the Holiday Greenery Die to cut the small flowers and leaves out. It added the perfect touch to the snow globe.

On a side note…I am almost finished with my NEW craft room/studio!!! It has taken almost a month and I am so ready to get all my craft supplies out of boxes and into shelves and cabinets! My parents have helped with the whole process which I am so thankful for them. This morning they brought my drafting table that I used in college to the house. I am loving the fact that I will have a table for my computers, printers and other electronically stuff on one wall and my drafting table will be facing the window so I can look outside for inspiration. 🙂 I think I will also have enough room for a small table  to put in the center of the room in case I want to have friends over to craft with me. 😉 So if you have been wondering why I have been missing in action that is why. 🙂 

Thanks for stopping by, hope your Thursday is awesome and enjoy creating!

Golden Mason Jar Gift Bag

Hi everyone! I’m here to share a project I created for a challenge that is going on over at Sizzix’s blog. My inspiration comes from the photo below. I love the soft, blurred and watercolor feel of the photo and this my take on it.


I started off with a small polka dot gift bag and added soft and vintage looking cardstock. Next I cut a jar from the packaging of what Eileen Hull’s Canning Jars, 3D diecut came in. Yep, the jar is plastic…I then embossed it with the Snowballs embossing folder which is from the Winter Set from Sizzix.


I then applied three coats of Gold Enamel Glitter Paint and once dry I cut and twisted two pieces of 20 gauge copper wire around the neck of the jar and “curled” all the ends.


I added a vintage earring I had received in a swap along with some twigs to the corner of the jar. I cut the flowers and leaves from Brenda Walton’s Holiday Greenery diecut, shaped and added sequins and gems/jewels/dew drops to the centers of the flowers. I cut from matboard a tag from the Tags, Mini diecut (Retired Sizzix Orginal). I sprayed it with Tattered Angels Sugar Plum Fairy and once dry I added a rub on and flower to finish it off. I then tied it to the wire. 


I adhered lace and velvet ribbon to the bottom of the bag. What a perfectly adorable way to present a gift to a friend. If you have any questions please let me know. Be sure to check out Sizzix Challenge for this month and see what everyone else has created.
Also I am submitting this project for the Paper Wing Productions September Challenge.


Supplies Used:

Sizzix: Eileen Hull-Canning Jars,3D, Brenda Walton’s-Holiday Greenery, Winter Embossing Set, Tags, Mini (38-1207)
Polka Dot Gift Bag
Cardstock
Gems, Jewels
Sequins
Lace
Velvet Ribbon
Gold Glitter Acrylic Paint
20 Gauge Copper Wire
Twigs
Vintage Earring
Tattered Angels Sugar Plum Fairy Spray
Matboard

Thanks so much for stopping by, hope your Tuesday is awesome and enjoy creating!

The Robin’s Nest: If the Shoe Fits Wear it

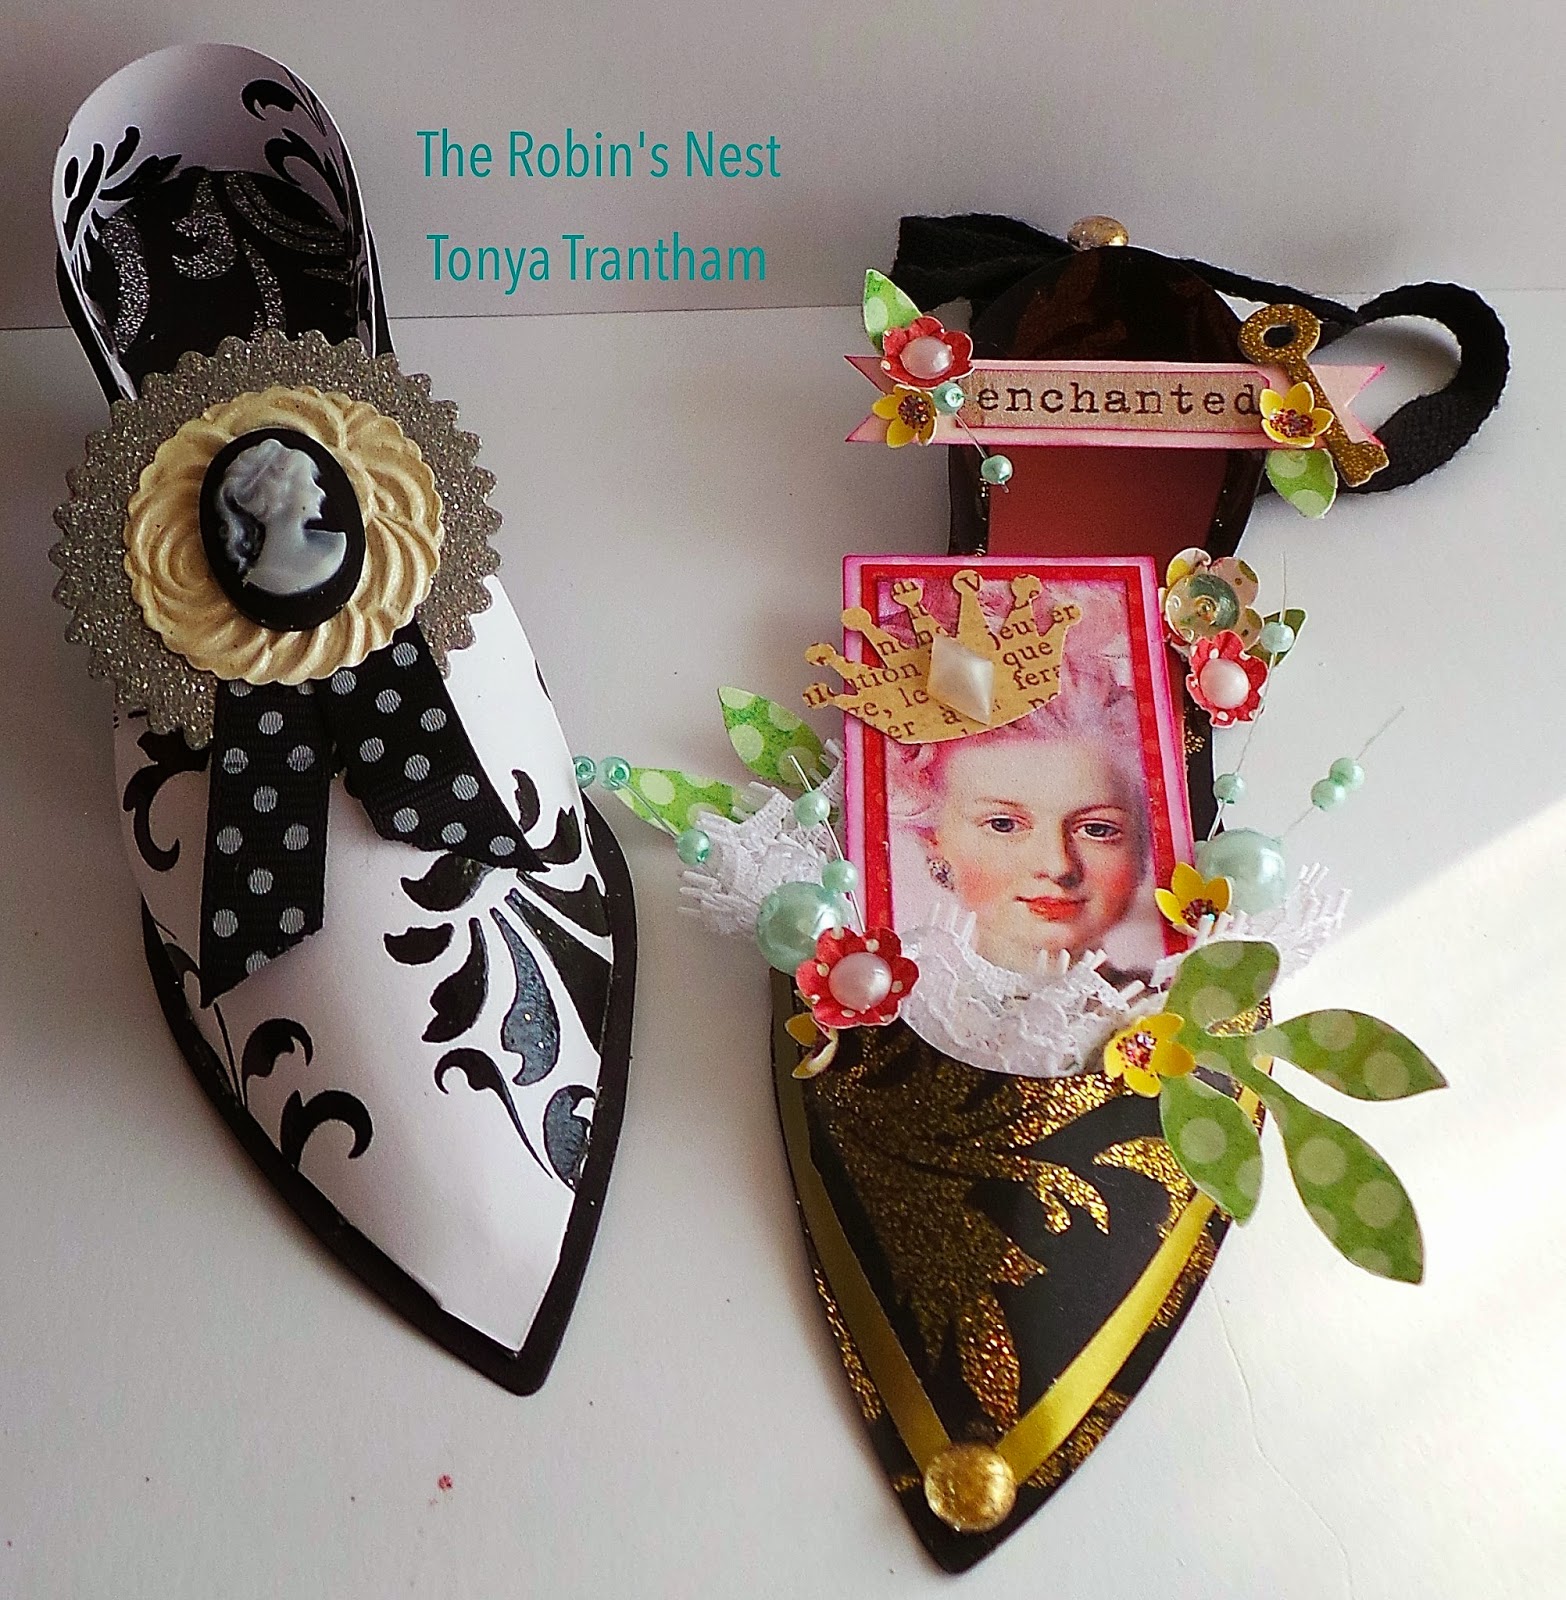
Hi everyone! It’s me and I’m back to share another couple of projects using the Wedding {in love} Collection which is also featured this month over at the Robin’s Nest.
I have these little shoes  I created using Brenda Walton’s: Sizzix Ballroom Slippers Diecut and an Anniversary card.

For more details on how to create these little shoes and card hop on over to the Chattering Robin’s blog and check it out! Also if you have any questions please let me know.
Thanks for stopping by, hope your Thursday is wonderful and enjoy creating!!!

Once in a While Card

Hi everyone! After taking a mini craft break this past week I’m back to share a quick card I created using Robin’s Nest Wedding {in love} Collection.
The card was very simple and quick to put together. The base of the card is Silver on Cream Classic Swirl Cardstock and I added vellum over the top of the base to soften the look of the card. I cut the dancing couple from the Wedding Cut-Outs Cardstock which is two sided and cut a suit and shoes out from the  Dark Vanilla Silver Glitter Cardstock for the gentleman dancer.  I embossed the silver chipboard and framed with the backside of the Dark Vanilla Silver Glitter Cardstock, cut a banner and adhered all to the card along with lace and dew drops. I also used the “Once in a while” sentiments which is from the Wedding Cut-Outs Cardstock which I thought was the perfect saying to go along with the dancing couple.

I cut a frame for to the sentiment and added pop dots to add dimension and a medallion diecut to finish off the card. 

Robin’s Nest: Silver on Cream Classic Swirl Cardstock, Dark Vanilla Silver Glitter Cardstock, Wedding Cut-Outs Cardstock, Irredescent Classic Glitter Swirl Vellum, Wedding Swirl Glitter Cardstock, Silver Glitter Chipboard, Dark Vanilla Dew Drops
Other supplies Used:
Lace
Sizzix- Brenda Walton: Medallion and Dancers Diecuts, Tim Holtz: French Script Embossing Folder
Chalk Ink
Sequin 


If you have any questions please let me know. Thanks for stopping by, hope your Monday is wonderful and enjoy creating!!!