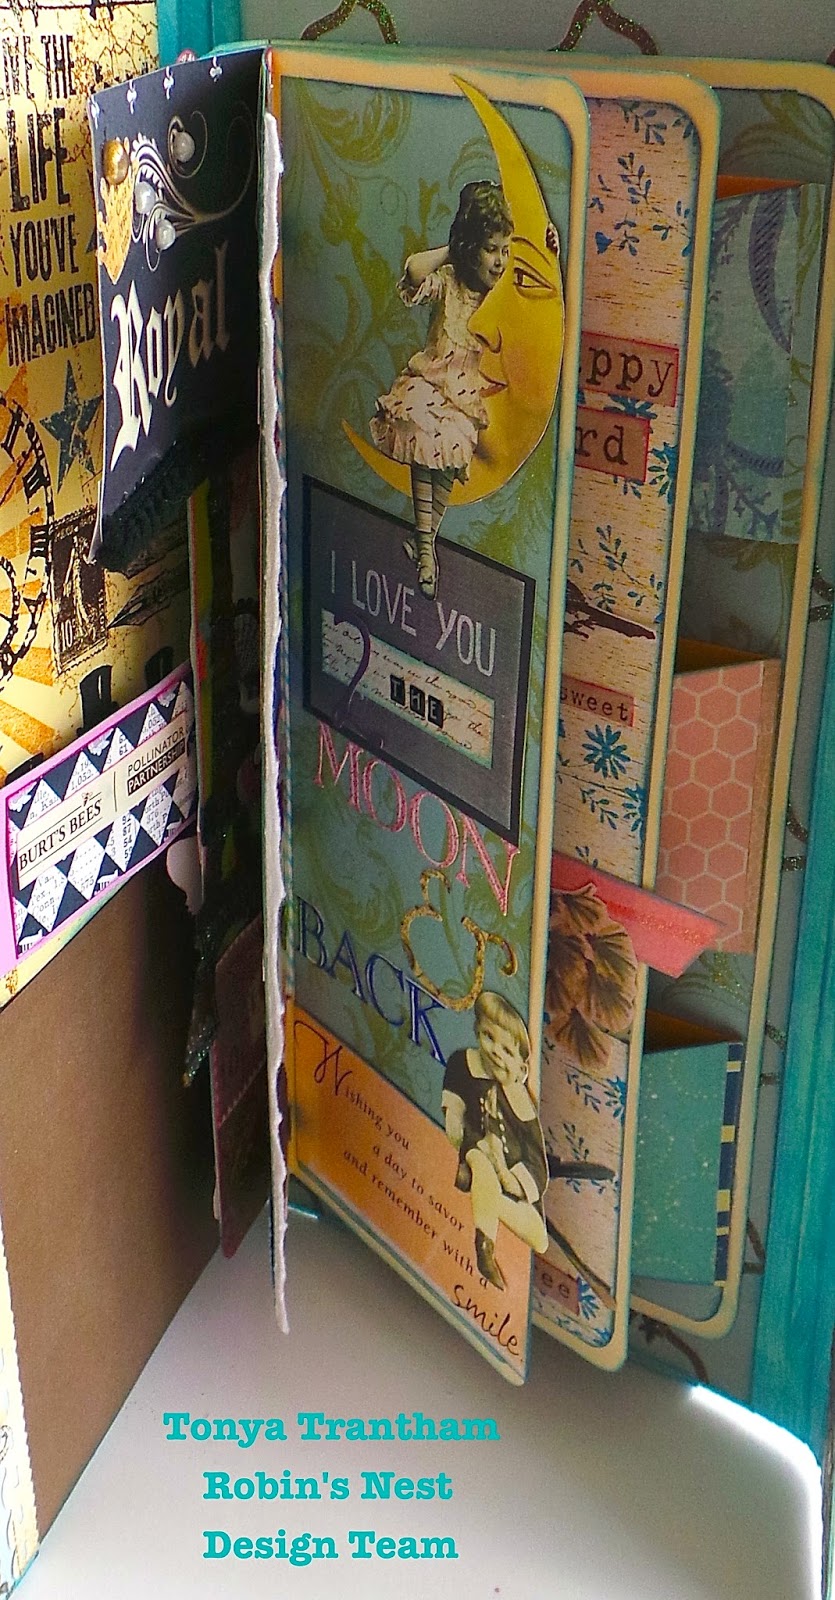
Artsy Stuff Folio~Part 2

Hi everyone! I’m here to share the inside of my finished folio with you. If you didn’t see last Sunday’s post of how I I created this folio you can find it here. I created it using the Paris Collection by the Robin’s Nest which is 20% off this month. It is simply a gorgeous paper collection and I had some much fun creating this folio with it.

Since I have tons of scraps of paper, embellishments, print-outs, stamped images and stickers I decided I really needed to use up some of my stash thus the name, artsy stuff folio. 🙂 You can check out the rest of my post over at the Chattering Robin’s blog to see how it came out.

Thanks for stopping by, hope your Sunday is awesome and enjoy creating!!!

Dragonfly Dreams

Hi everyone! First off let me tell you I’m super excited to be a part of Altered Pages/Mailbox Muse design team. The thought of having hundreds of vintage images to create with simply makes me giddy. 🙂
I want to share my first project I created using inks and markers from this month’s partner, IMAGE Crafts and product from Altered Pages. 
For more information on these journal page and how I created please hop on over to the Altered Page blog for complete details. 🙂

Thanks for stopping by, hope your Saturday is awesome and enjoy creating!!!

Motorcycles and Father’s Day

Hi everyone! I’m here to share a quick card I created and wish all of you fathers and fatherly figures out there a Happy Father’s Day!!!
I made this card for my wonderful husband using the Motorcycle printable from Altered Pages. I fussy cut the red motorcycle from the sheet and added a paint chip, scraps of scrapbook paper, embossed gears and sprockets from a cuttlebug embossing folder, Tim Holtz gears and the cut out gears are from a swap I was in a few years back and I never had found a use for them until now. Oh, the base of the card is from a pack of card bases I got on clearance at Hobby Lobby a few years back too.

I wound up giving the card to my husband a day early since we rode to the Harley Davidson store and then over to Cade’s Cove in the Smokey Mountains. We had used my camera to photograph our trip through the Cove and I knew once he got home and uploaded pics he would see the photos of the card. Even though it isn’t a blue sportster Harley he liked the card anyway. 🙂

If you have any questions please let me know. Thanks for stopping by, hope your Sunday is wonderful and enjoy creating!!!

A Day at the Beach

Hi everyone! I’m here to share an Altoid tin I altered using the Beach Collection from the Robin’s Nest which is 20% off this month. I was at the beach a few weeks ago and let me tell you I didn’t want to leave. The weather was perfect…sunny with ocean breezes. My type of weather for sure. 🙂 So I wanted to create something using the mini seashells I had collected while walking on the beach and this is what I came up with.

For this project you will need an empty and clean Altoids tin.

I sponged gessoed over the whole tin. Let dry and added a second coat.

Next I painted Americana Spa Blue Acrylic Paint around the outer and inside edges of the tin and let dry. Then  I painted over that with Ranger Picket Fence Distress Crackle Paint and let dry. You can speed up the process by using a blow dry. The paint should start cracking once it starts drying which gives it an old weathered look.

I cut from the Water Glitter Swirl cardstock four rectangles a little bit smaller than the tin, rounded, distressed and inked the edges. I adhered the striped side to the outside of the tin and water and wave side I adhered inside the tin.
I cut from the Sizzix Scoreboards XL Die Box Square three “frames”, two from Glitter Starfish Cardstock and one from the Vanilla Fleur Glitter Cardstock. I adhered the two to the outside and one to the inside of the tin.
The outside I fussy cut one of the images from Before Bikinis Collage Sheet and the bathing suit girl I found on the internet. Adhered to the tops of the diecuts and then added  sea life images I fussy cut from scrapbook paper, gauze, sequins, dew drops and real seashells. If you don’t seashells the Robin’s Nest has them in their shop for purchase.

I used some old alphabet stickers I have had forever to create the saying. Then I added sequins, dew drops, twine, gauze, cut outs, mini jar and real seashells to make the beachy little scene. 

I fussy cut another bathing suits girls from the Before Bikinis Collage Sheet and used pop dots to adhere to the inside of the tin.
I fussy cut “waves” from the Water Glitter Swirl Cardstock added Stickles and stacked one in front of the other and glued down to give depth.

I adhered a small seashell, sequin and dew drop to the top of the tin to finish it off. This was an easy project to complete and I have plans to create another one in the near future. 
Supplies Used:

Buttons
Sequins
Gauze
Crystal Stickles
Gesso
Mini Glass bottle
Americana Spa Blue Acrylic Paint
Ranger Picket Fence Distress Crackle Paint
Ocean Chalk Ink
Twine

 Be sure to stop by the  Robin’s Nest and check out the Beach Collection that is on sale this month. If you have any questions please let me know. Thanks for stopping by, hope your Sunday is wonderful and enjoy creating!!!


Lily Paper Doll and Some Exciting News!!!

Hi everyone!!! I’m back from vacationing at the beach. I wish there was some way we could live there permanently. I love the laid back, flip flops everyday and ocean breezes…maybe one day it will happen??? 🙂
I have some exciting news to share though…I have been asked to be a part of The Mailbox Muse Design Team and…of course…I said yes since I love ALL thing vintage!!! You can join the club for the Mailbox Muse kits which gives you a discount on the kits and product at Altered Page web site, video access and other specials for a year too. 

Also I would like to share a paper doll I created using the Lottie Stamp set from Pink Persimmon. I stamped out her head, arms and legs and then printed her body and dress pattern on white cardstock since I wanted her body to be sturdy. I cut everything out, used brads to attach the arms and legs to the body. Added a little blush to her cheeks and colors her lips with one of my markers.
Next I traced her dress onto Purple Flowers Glitter Cardstock and then cut out. I embossed the skirt with the flower embossing folder from Once Upon a Princess Cuttlebug set. I added lace, sequin and Purple Dew Drops to the dress and topped it off with a lily digis that I fussy cut and added Crystal Stickles to make it pop. I printed the lilies from the Altered Pages Vintage Easter Greeting college sheet. 

To attach the dress to the paper doll I used baker’s twine which I adhered underneath the lace on the sleeves of the dress. This way I can chance the clothes of my little paper doll. 

If you have any questions please let me know. Thanks for stopping by, hope your Monday is awesome and enjoying creating!!!

Happy Easter!!!

Hi everyone!!! I’m here to share a egg carton that I altered into what I call an adult version of an Easter basket. I gessoed and painted it a soft pink. I cut and adhered a piece of Bunny Stripe cardstock from the Robin’s Nest to the top of the carton. I fussy cut the bunny image which is from Altered Pages and glued in the corner and then proceeded to add all sorts of flowers, dew drops, bling, mini eggs, lace and tulle to the top.

I filled the inside with all sorts of goodies…crafty goodness and chocolate…you can’t go wrong with either. 🙂

If you have any questions let me know. Thanks for stopping by and I hope your Easter Sunday is full of love and time spent with your loved ones!!!


Garden Bunny Basket

Hi everyone! First off I would like to welcome you to the Robin’s Nest Garden Blog Hop! Second off please make sure to stop by each of the blogs and leave a comment, follow each blog and follow our FB page.  We are giving away a prize on each blog.  It is a $15 butterfly kit full of Robin’s Nest butterfly products, perfect for the garden. 🙂
Now I would like to share a quick project that is originally something that you would use to start plants in your garden with. When I went to Lowes I found two sizes of peat pots but I went with the larger size I figured it was the prefect size to alter and create an adorable basket.

I had very little Caribbean Blue acrylic paint leftover from another project so I mixed that paint with white and painted the peat pot. I let dry and then I used Antique Mod Podge to seal it.
I punched holes on either side of the pot and I run an iridescent pipe cleaner through each hole to make the handle. I adhered half of a doily and ric rac around the top of the pot. I created a banner and a rosette and glued on top of the doily. Next I fussy cut from the Vintage Easter Greetings  sheet a bunny. I punched a circle from the Moss Green Glitter Cardstock and adhered on top of the banner and rosette.

I cut four flowers from the Pink Glitter Cardstock using the Flower #3 die and I used green scraps of cardstock to cut the leaves out. I used a stylus to give the flower petals and leaves shape. Then I adhered together and added buttons, sequins and a Pearl Dew Drop (Crimson Mini Dew Drops). I glued it to the side of the handle.


That’s a pretty easy project, huh??? Now all I have to do is add some more goodies. 🙂


Supplies Used:
Caribbean Blue and White acrylic paint

5″ Peat Pot
Iridescent pipe cleaner
Antique Mod Podge
Buttons
Sequin
Bottle Cap Hole Punch
Ric Rac
Paper Doily
Sizzix: Rosette, Flower #3 and Stampin’ Up Little Leaves
Circle Punch

If you have any questions about this project let me know.
Remember to stop by each blog and leave a comment, follow each design team member’s blog and like/follow the Robin’s Nest Facebook page for your chance at winning a $15 prize package.
Thanks for stopping by, hope  your day is awesome and enjoy creating!!!


Easter Bluebird Cup

Hi everyone! I’m here to share a super fun project I created for the Robin’s Nest using the Spring Collection which is 20% off this month and we are also cross promoting with Altered Pages too.

I love creating these little tea cups and saucers. They are quick to create and makes a fun gift to give to someone that collects tea sets or it could make the perfect place setting at a party.  All you will need to do is print off the Paper Tea Cup and Saucer onto Spring Flower Glitter Cardstock and then cut out and ink the edges of the saucer before adhere together.I spritzed a doily from Gina’s Designs with Tattered Angels Lemon Zest Glimmer Mist once dry I glued it to the saucer and then adhered the cup on top of the that.

I next fussy cut from the Sweet Easter Cards printout the little bluebird. In the bottom of the cup I wadded up a piece of tissue paper and glued inside. Next I adhered the bluebird to the tissue paper.

Next I added Easter grass around the bird to cover the tissue paper.

Now all you have to do is add paper flowers, mini eggs, lace, ric rac and anything else that is Easter related. See super easy and cute to boot!!! 🙂


Robin’s Nest: Spring Flower Glitter Cardstock, Dew Drops and Purple Flower Glitter Cardstock
Paper Tea Cup and Saucer
Altered Pages: Sweet Easter Cards
Gina’s Designs: Cardstock Doily Set 1
Tattered Angels Lemon Zest Glimmer Mist
Sizzix: Rosette Diecut
Brad
Buttons
Ric Rac
Paper Flowers
Flower Punch
Sequins
Lace
Easter Grass

If you have any questions please let me know and remember to stop by the Robin’s Nest and check out the Spring Collection and while you are at it stop at by Altered Pages too.

Thanks for stopping by, hope your Saturday is awesome and enjoy creating!!!

P.S. Remember to check out the Robin’s Nest blog hop this Monday, March 31st for awesome ideas from all of our designers and some really cool blog candy!!!  


Easter Bunny Altered Egg Carton Swap

Hi everyone! I’m here to share another egg carton that I altered for Esveyde in a swap that was over at My Scrap Room site. The requirements the carton had to be decorated in a Easter theme, three cups filled with Easter candy and three with craft goodies for a total of six cups. Since I couldn’t find a half carton either at Walmart or Target I cut a dozen egg carton in half which I had found at Target. It had an indention in the center of the lid which made it a lot easier to cut in to. 
First I gessoed and painted the egg carton. Then I fussy cut a bunny from the Vintage Easter Images from Altered Pages. I used a combination of dew drops and cardstock from the Robin’s Nest to decorate the top of the carton along with paper flowers, store bought and handmade, and lace and trim to complete this adorable container.

A close up of the inside lid and this image is from the Vintage Easter Images too.

I included an assortment of candy and crafty embellishments  so my sweet partner could eat chocolate while she works on a project. 🙂

If you have any questions please let me know. Thanks for stopping by, hope your Monday is wonderful and enjoy creating!!!


Do You Hear Spring Calling?

Hi everyone and Happy Spring! I’m here to share my project for the Robin’s Nest. This month I used the Spring Collection which is 20% off  this month and I might say it is simply springy.  Also we are cross promoting with Altered Pages which has some awesome vintage collage images.
I have an over abundance of buttons, lace, ribbon, charms, ephemera from swaps and I really want to get it contained into one storage container. Well, this is what I came up with…an altered egg carton!!! It has 18 cups to put away tidbits of crafty goodness.


I started with gessoing the egg carton inside and out. Once the gesso is dry paint with acrylic paint. I didn’t paint the top or inside of the lid because I would be covering it with cardstock.

Next cut two Green Butterfly Glitter Cardstock (I used the backside of the cardstock) to fit the top and inside of the lid.

Adhere to the top of the lid.

Also to the inside lid…I inked around the edges of the cardstock to add more color.

I added Moss Green Glitter Cardstock to the top along with Purple Ants Glitter Cardstock and Spring Stripe Glitter Cardstock which I made banners out of and adhered to the lid. Next I glued lace around the outer edge of the egg carton.

I used this Metallic Blue Christmas Trim that I got on clearance for 40 cents at Hobby Lobby…I love a great deal! 🙂 I glued it just above the lace all the way around. I then added sequins and Beach Dew/Tear Drops to ever other “bead”.

A close up of the bow with stacked buttons and topped off with a Beach Dew/Tear Drops.

I fussy cut from the Little Spring Birdies collage sheet a bird and nest with baby birds and adhered them to the corners of the lid and then decorated with paper flowers (some store bought and some handmade), dew drops, gems that were rescued from a damaged prom dress and mini Easter eggs. I also added Stickles to the images.

The most time consuming part of altering this egg carton was the gessoing and the painting. Other than that it is easy peasy to decorate. 🙂
I have already added my collection of goodies to all the cups. Now I will be able to have them at my fingertips when I need to add the right little something to one of the many projects I have going on. 
Also notice I added a dew drop to each “tip” of each cup. 🙂

Supplies Used:
Empty 18 count egg carton
Green Butterfly Glitter Cardstock
Purple Ants Glitter Cardstock
Spring Stripe Glitter Cardstock
Moss Green Glitter Cardstock
Beach Dew/Tear Drops
Water Dew Drops
Cherry Chocolate Dew Drops
Altered Pages: Little Spring Birdies
Sequins
Christmas Garland
Paper Flowers
Flower Punches
Crystal Stickles
Mini Plastic Eggs
Lace
Ceramcoat Caribbean Blue Acrylic Paint
Gesso
Buttons
Sizzix: Sizzlits Little Leaves

Be sure to stop by the Robin’s Nest and check out the sale that is going on this month and while you are at it stop by Altered Pages too. If you have any questions give me a holler and I will do my best to answer.
Thanks for stopping by, hope your Sunday is wonderful and enjoy creating!!!

P.S. Be sure to stop back on Monday cause I have a “mini” altered egg carton that I want to share… it’s an adult version of an Easter basket. 🙂