Turning Trash into Treasure: Comfort and Joy 2025 Recycled Christmas
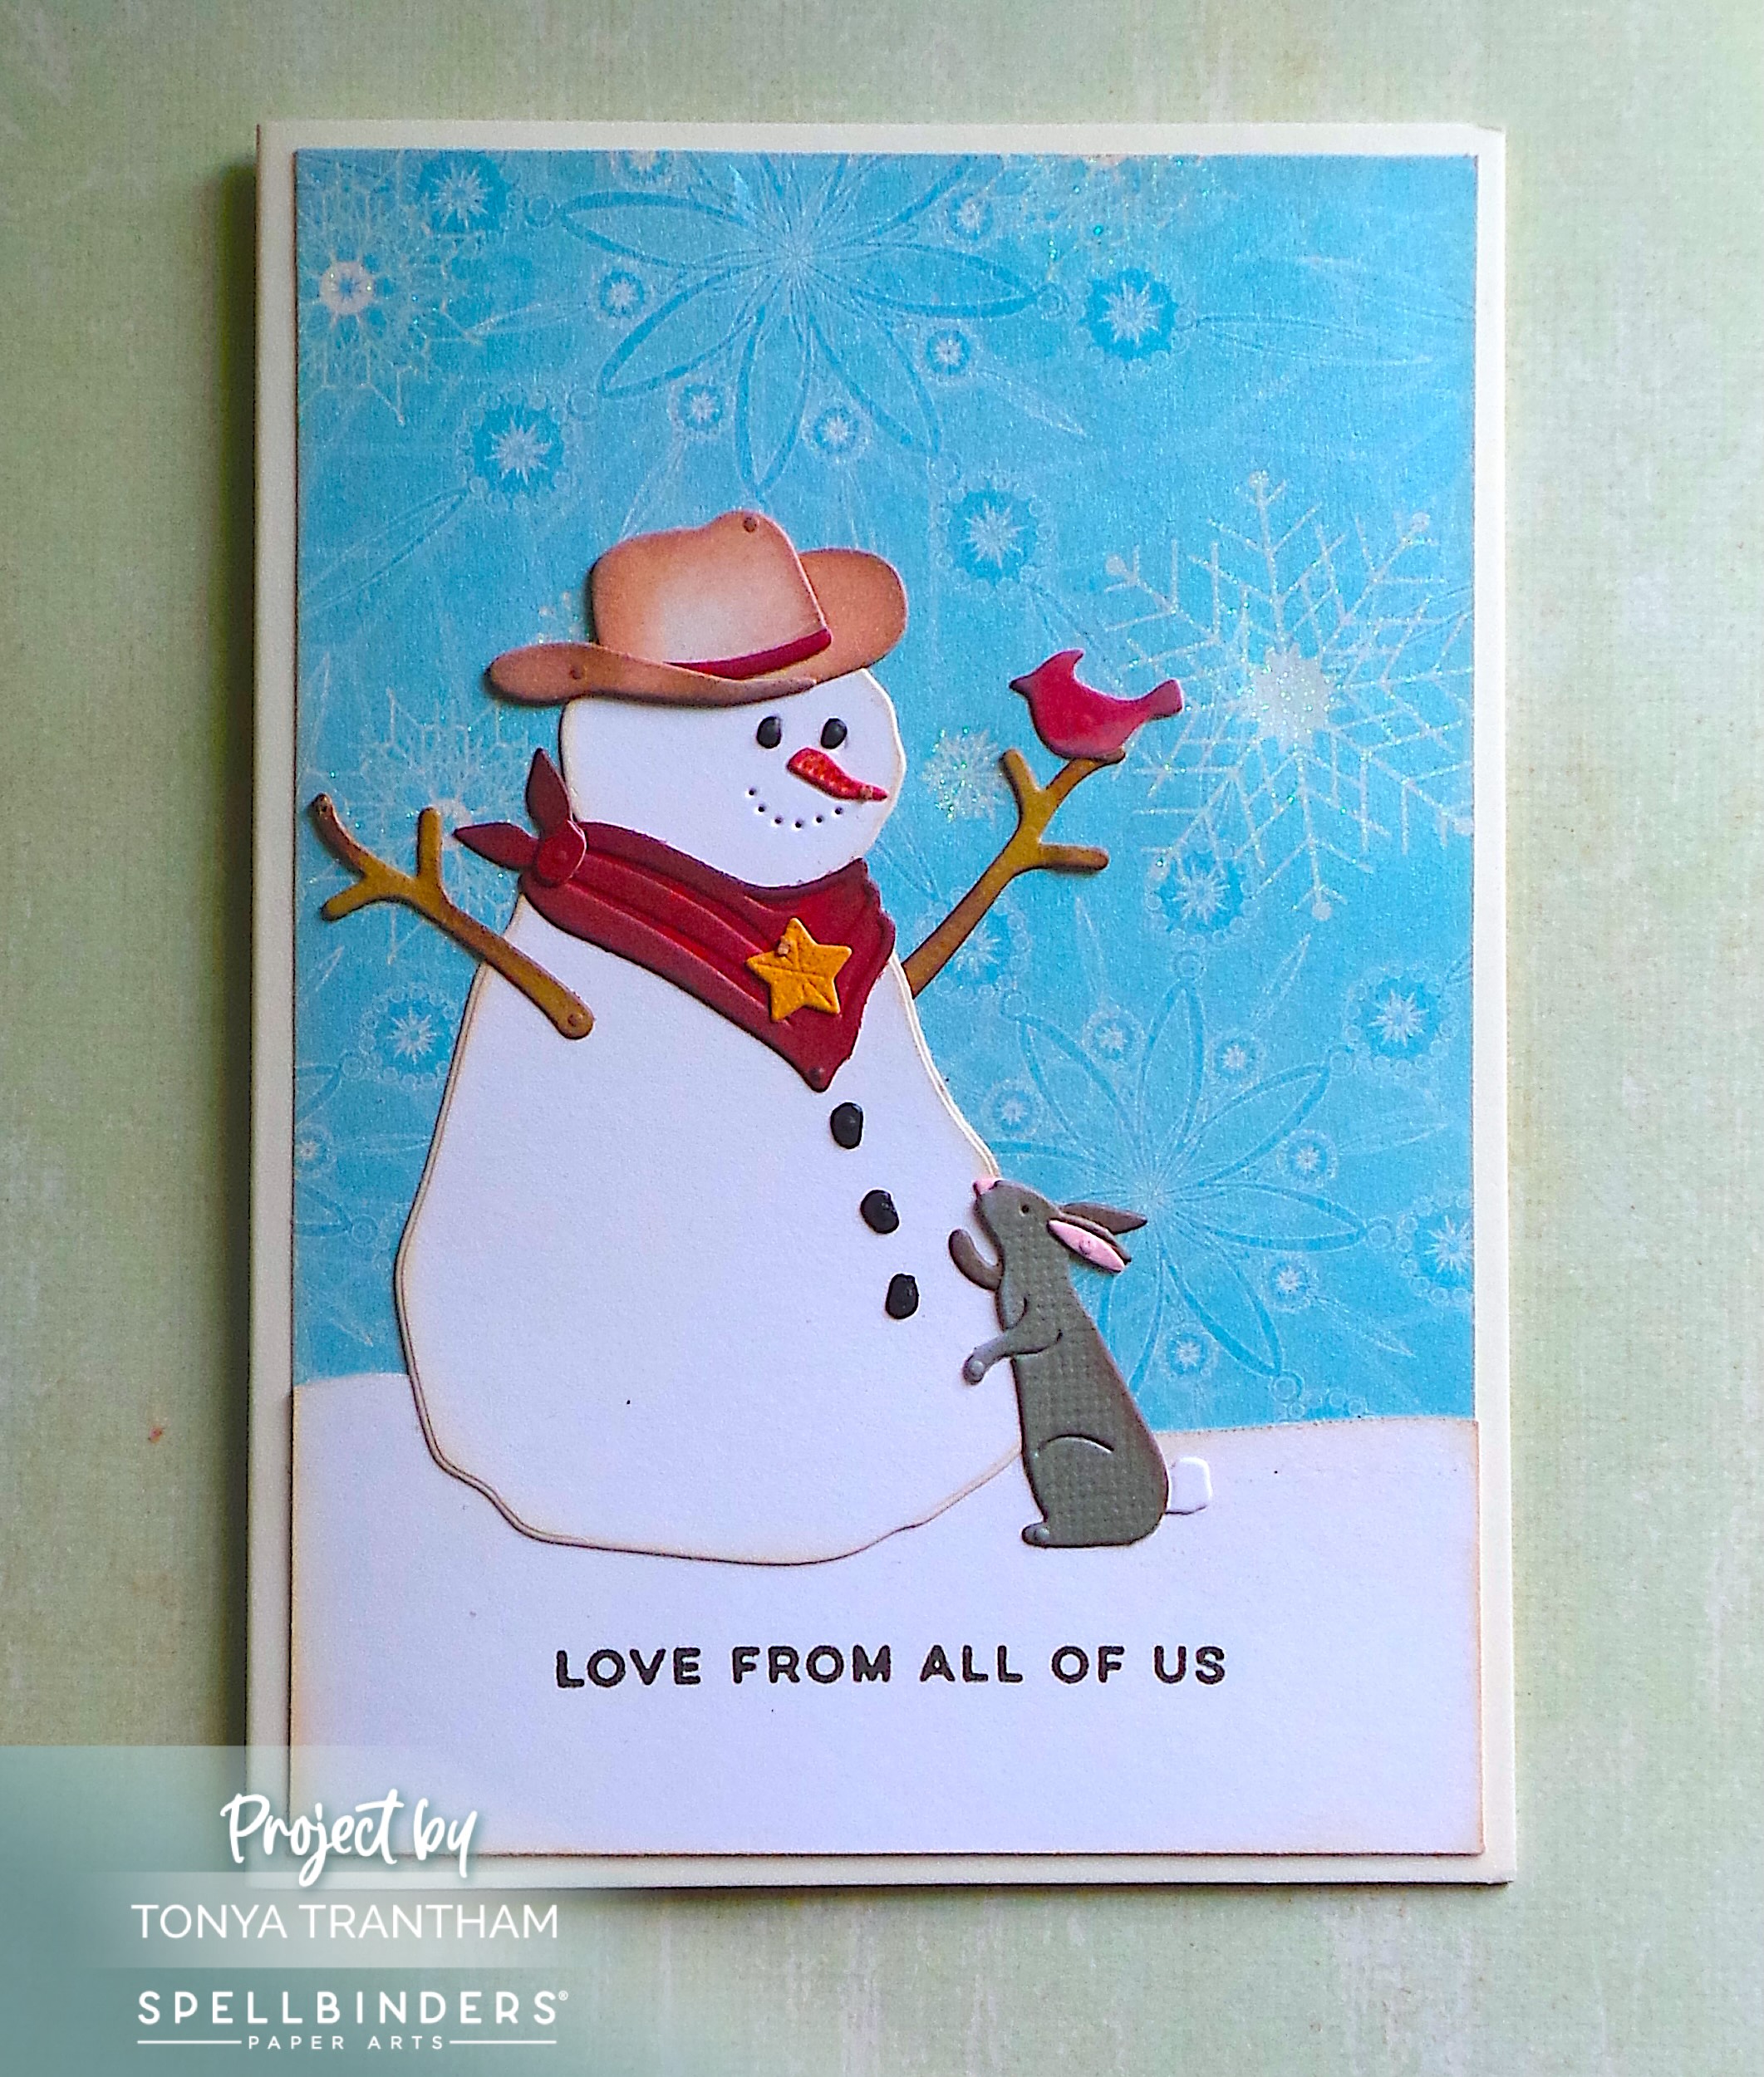
Hi everyone! It’s my turn to share my quick and easy Comfort and Joy project for Eileen Hull! I’m on a recycle kick and choose to use corrugated cardboard to create a Rudolph the Red Nose Reindeer Tag.

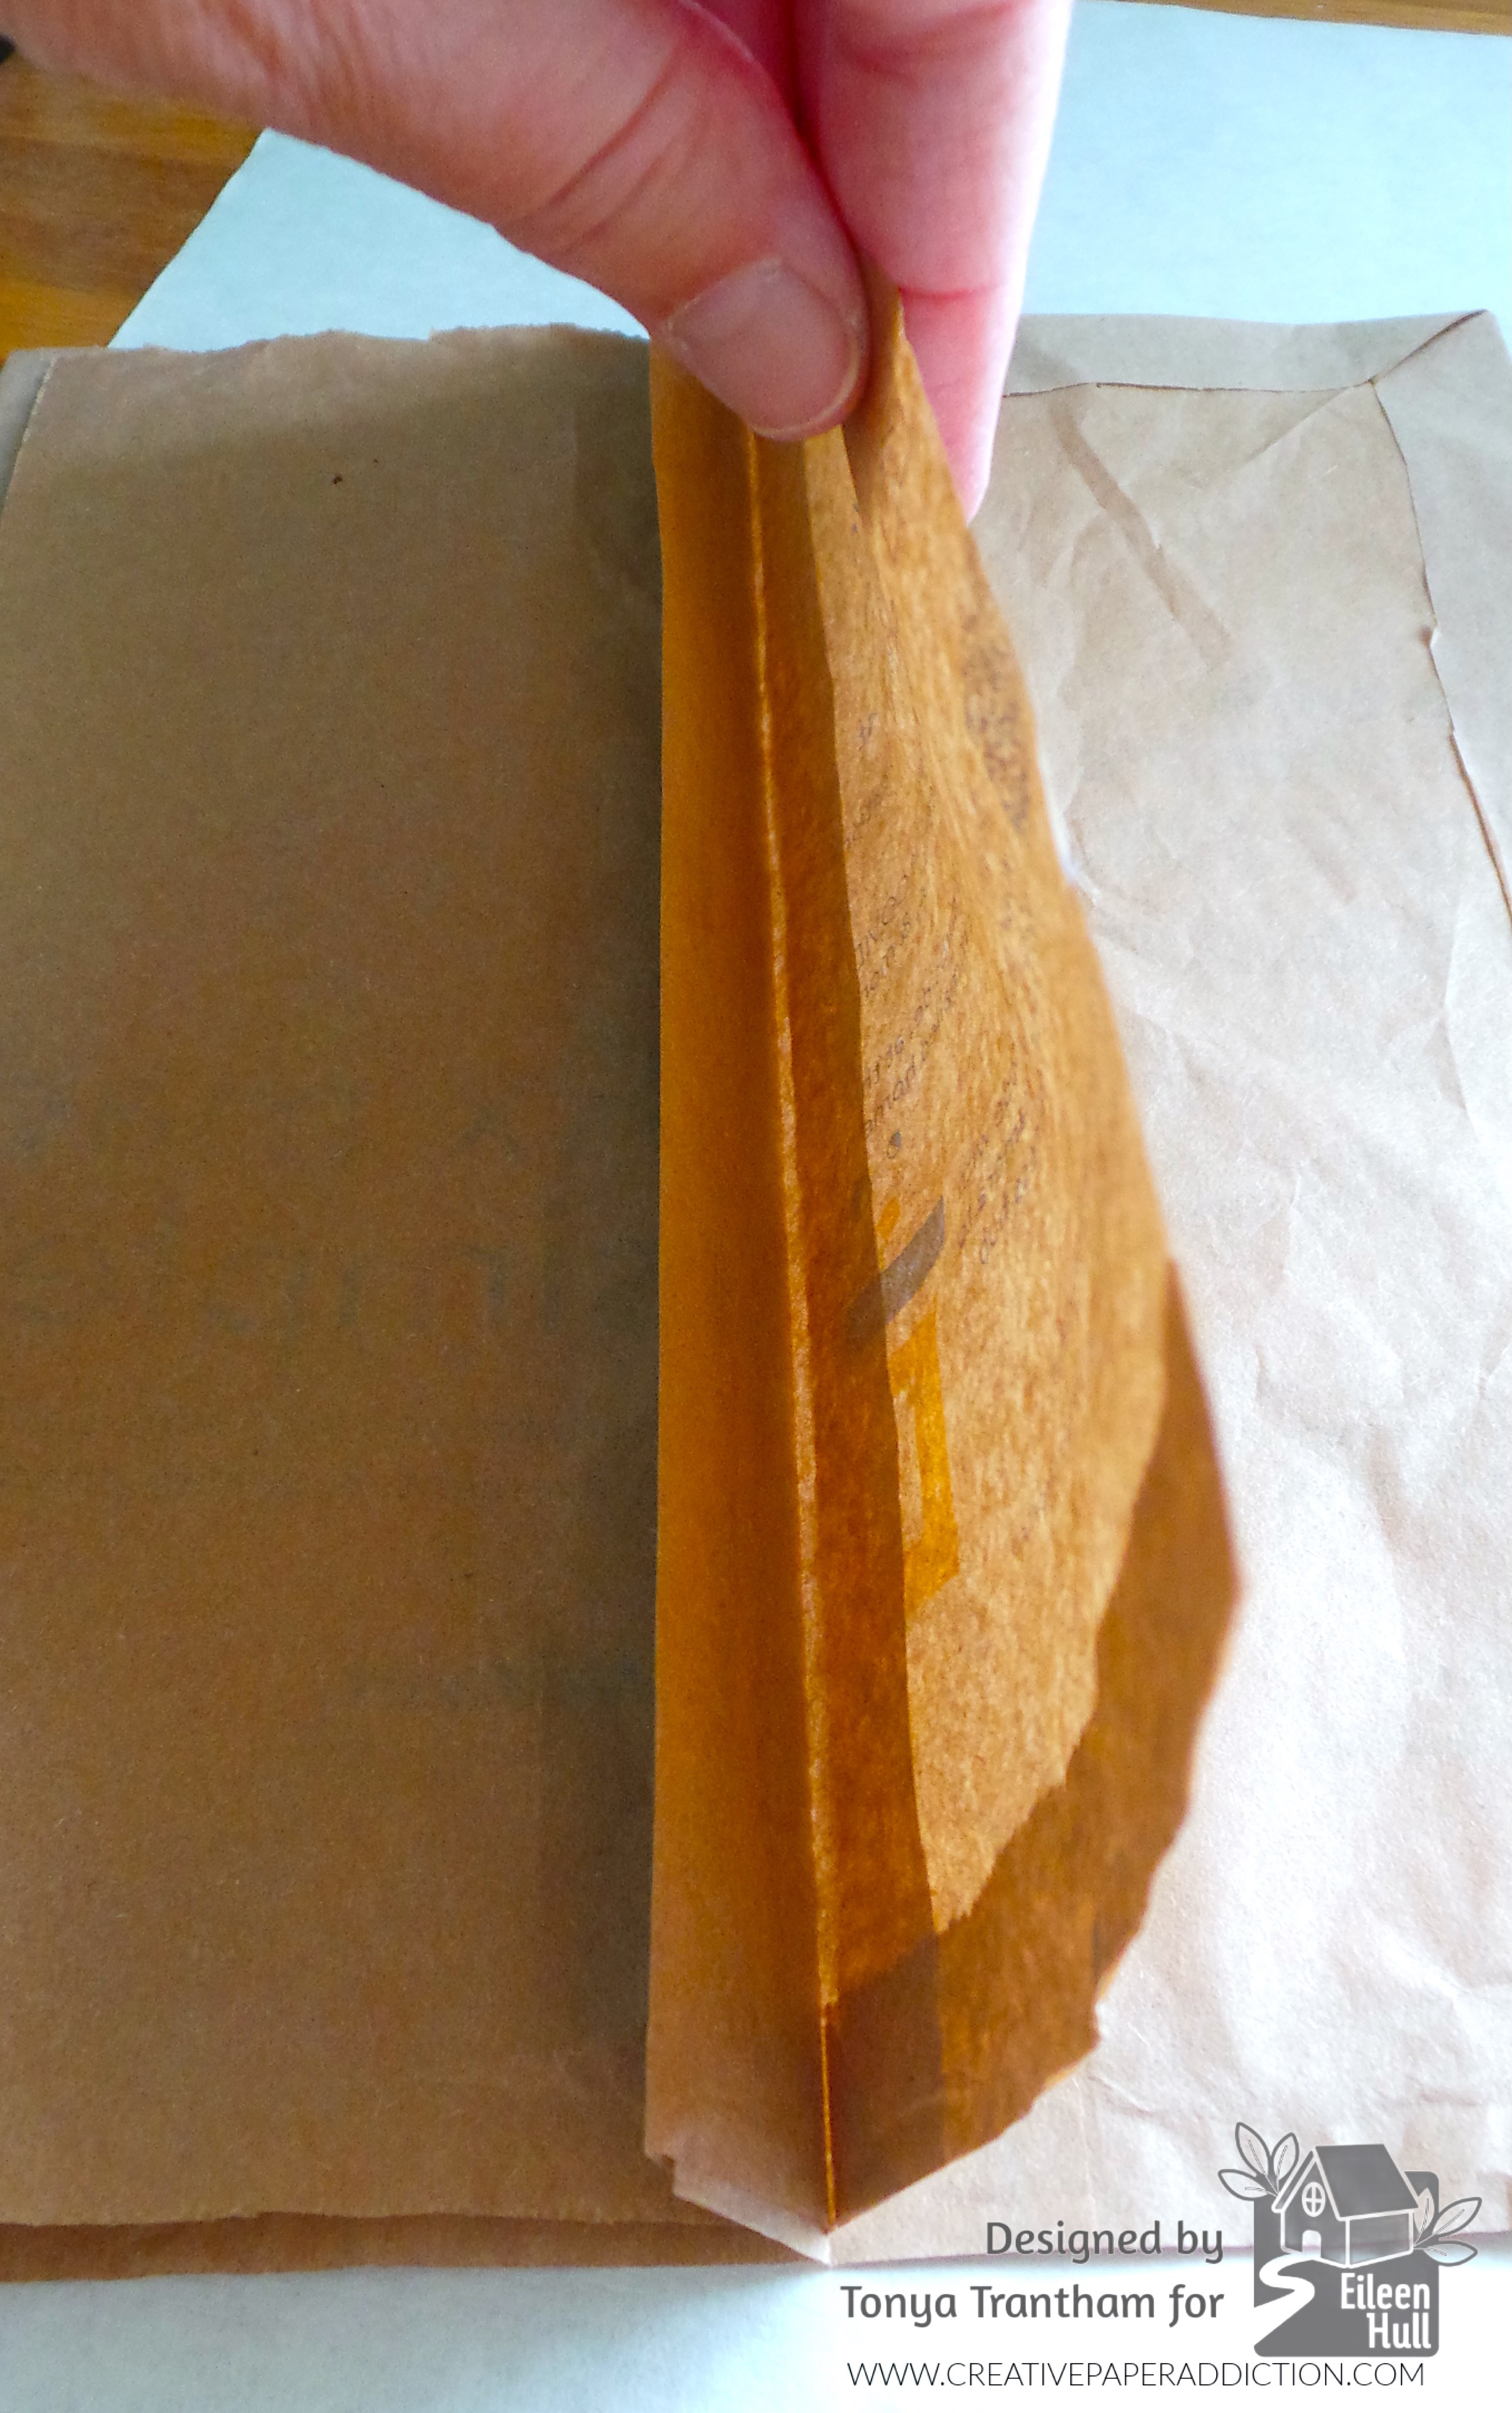
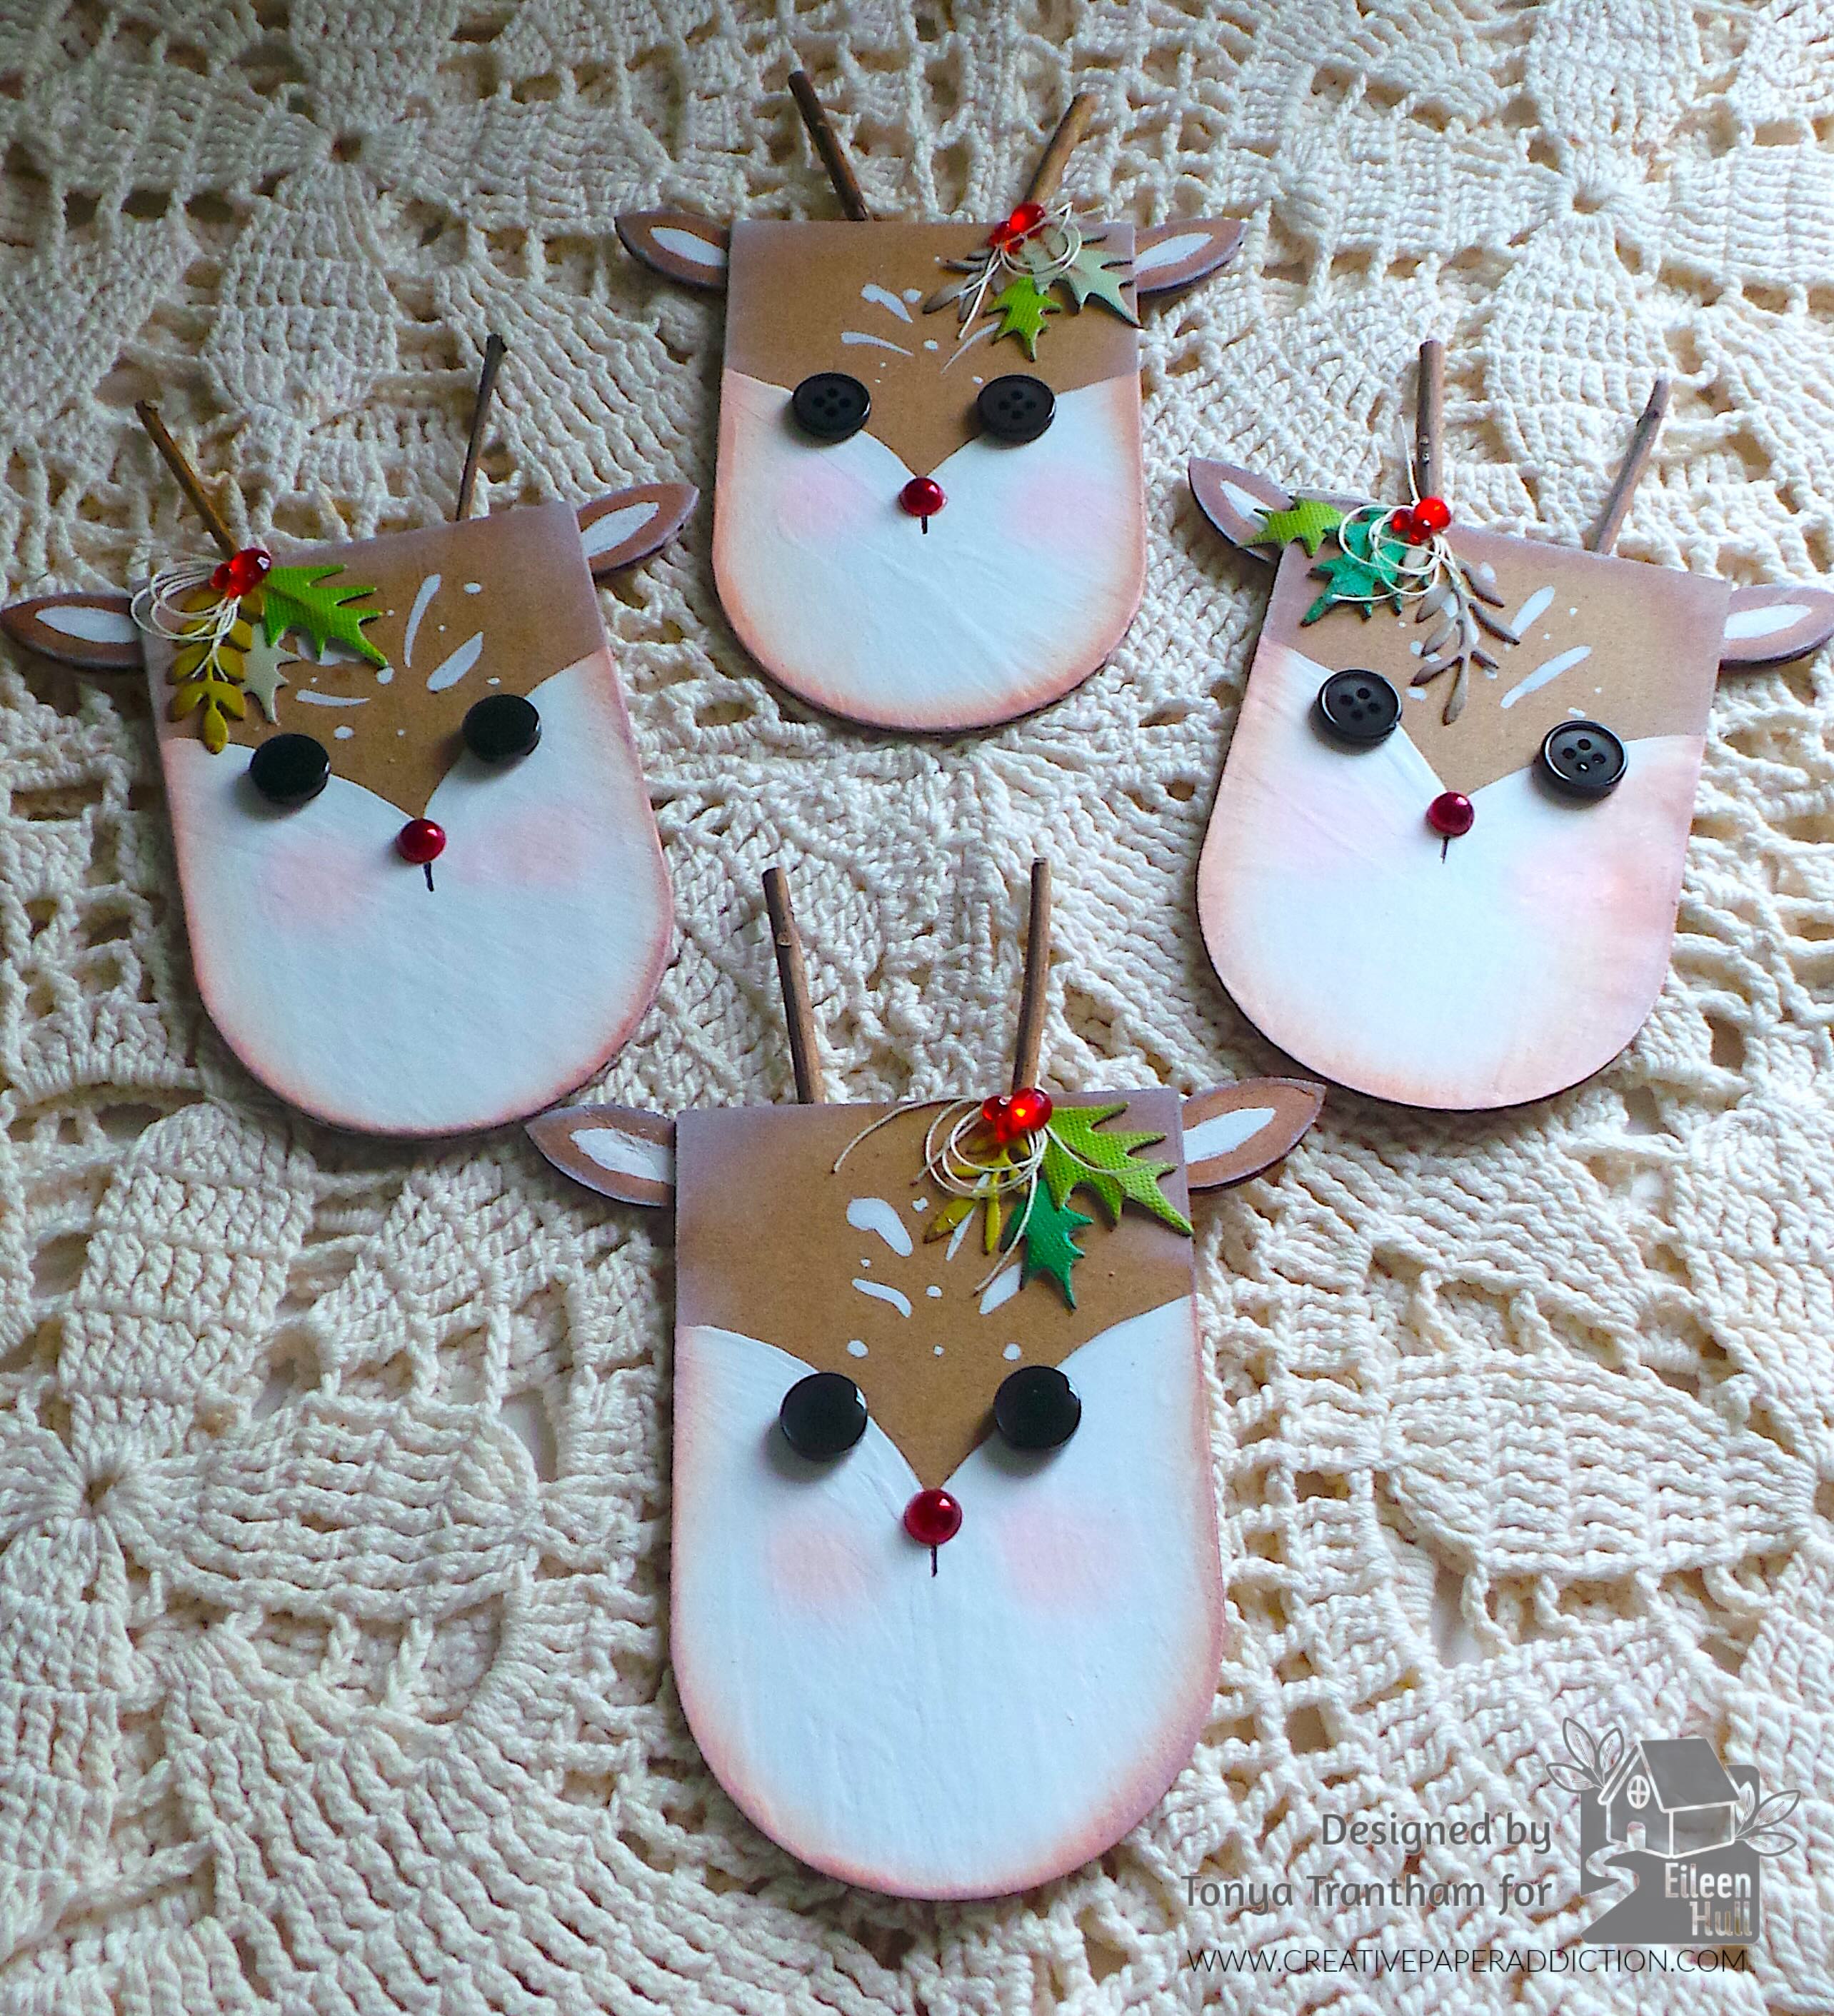
Since I have a lot of corrugated cardboard laying around I decided this would be a great way to keep it out of the landfill. The reindeer head I used the largest arch die from the Tunnel Arches Thinlits. The first time running it through the Diecut Machine it would not cut through the corrugated chipboard. So I ran it through the diecut machine three times and it cut the die out with no problem.

I used the Sunflower Diecut and cut out a couple of the sunflower from the corrugated cardboard. I cut the petals off to create ears for the reindeer. With a pencil I free handed the face onto the die. The face, the center of the ears and spots I painted with white acrylic paint.

I glued the ears to the face and lightly inked the edge with white and brown chalk inks.
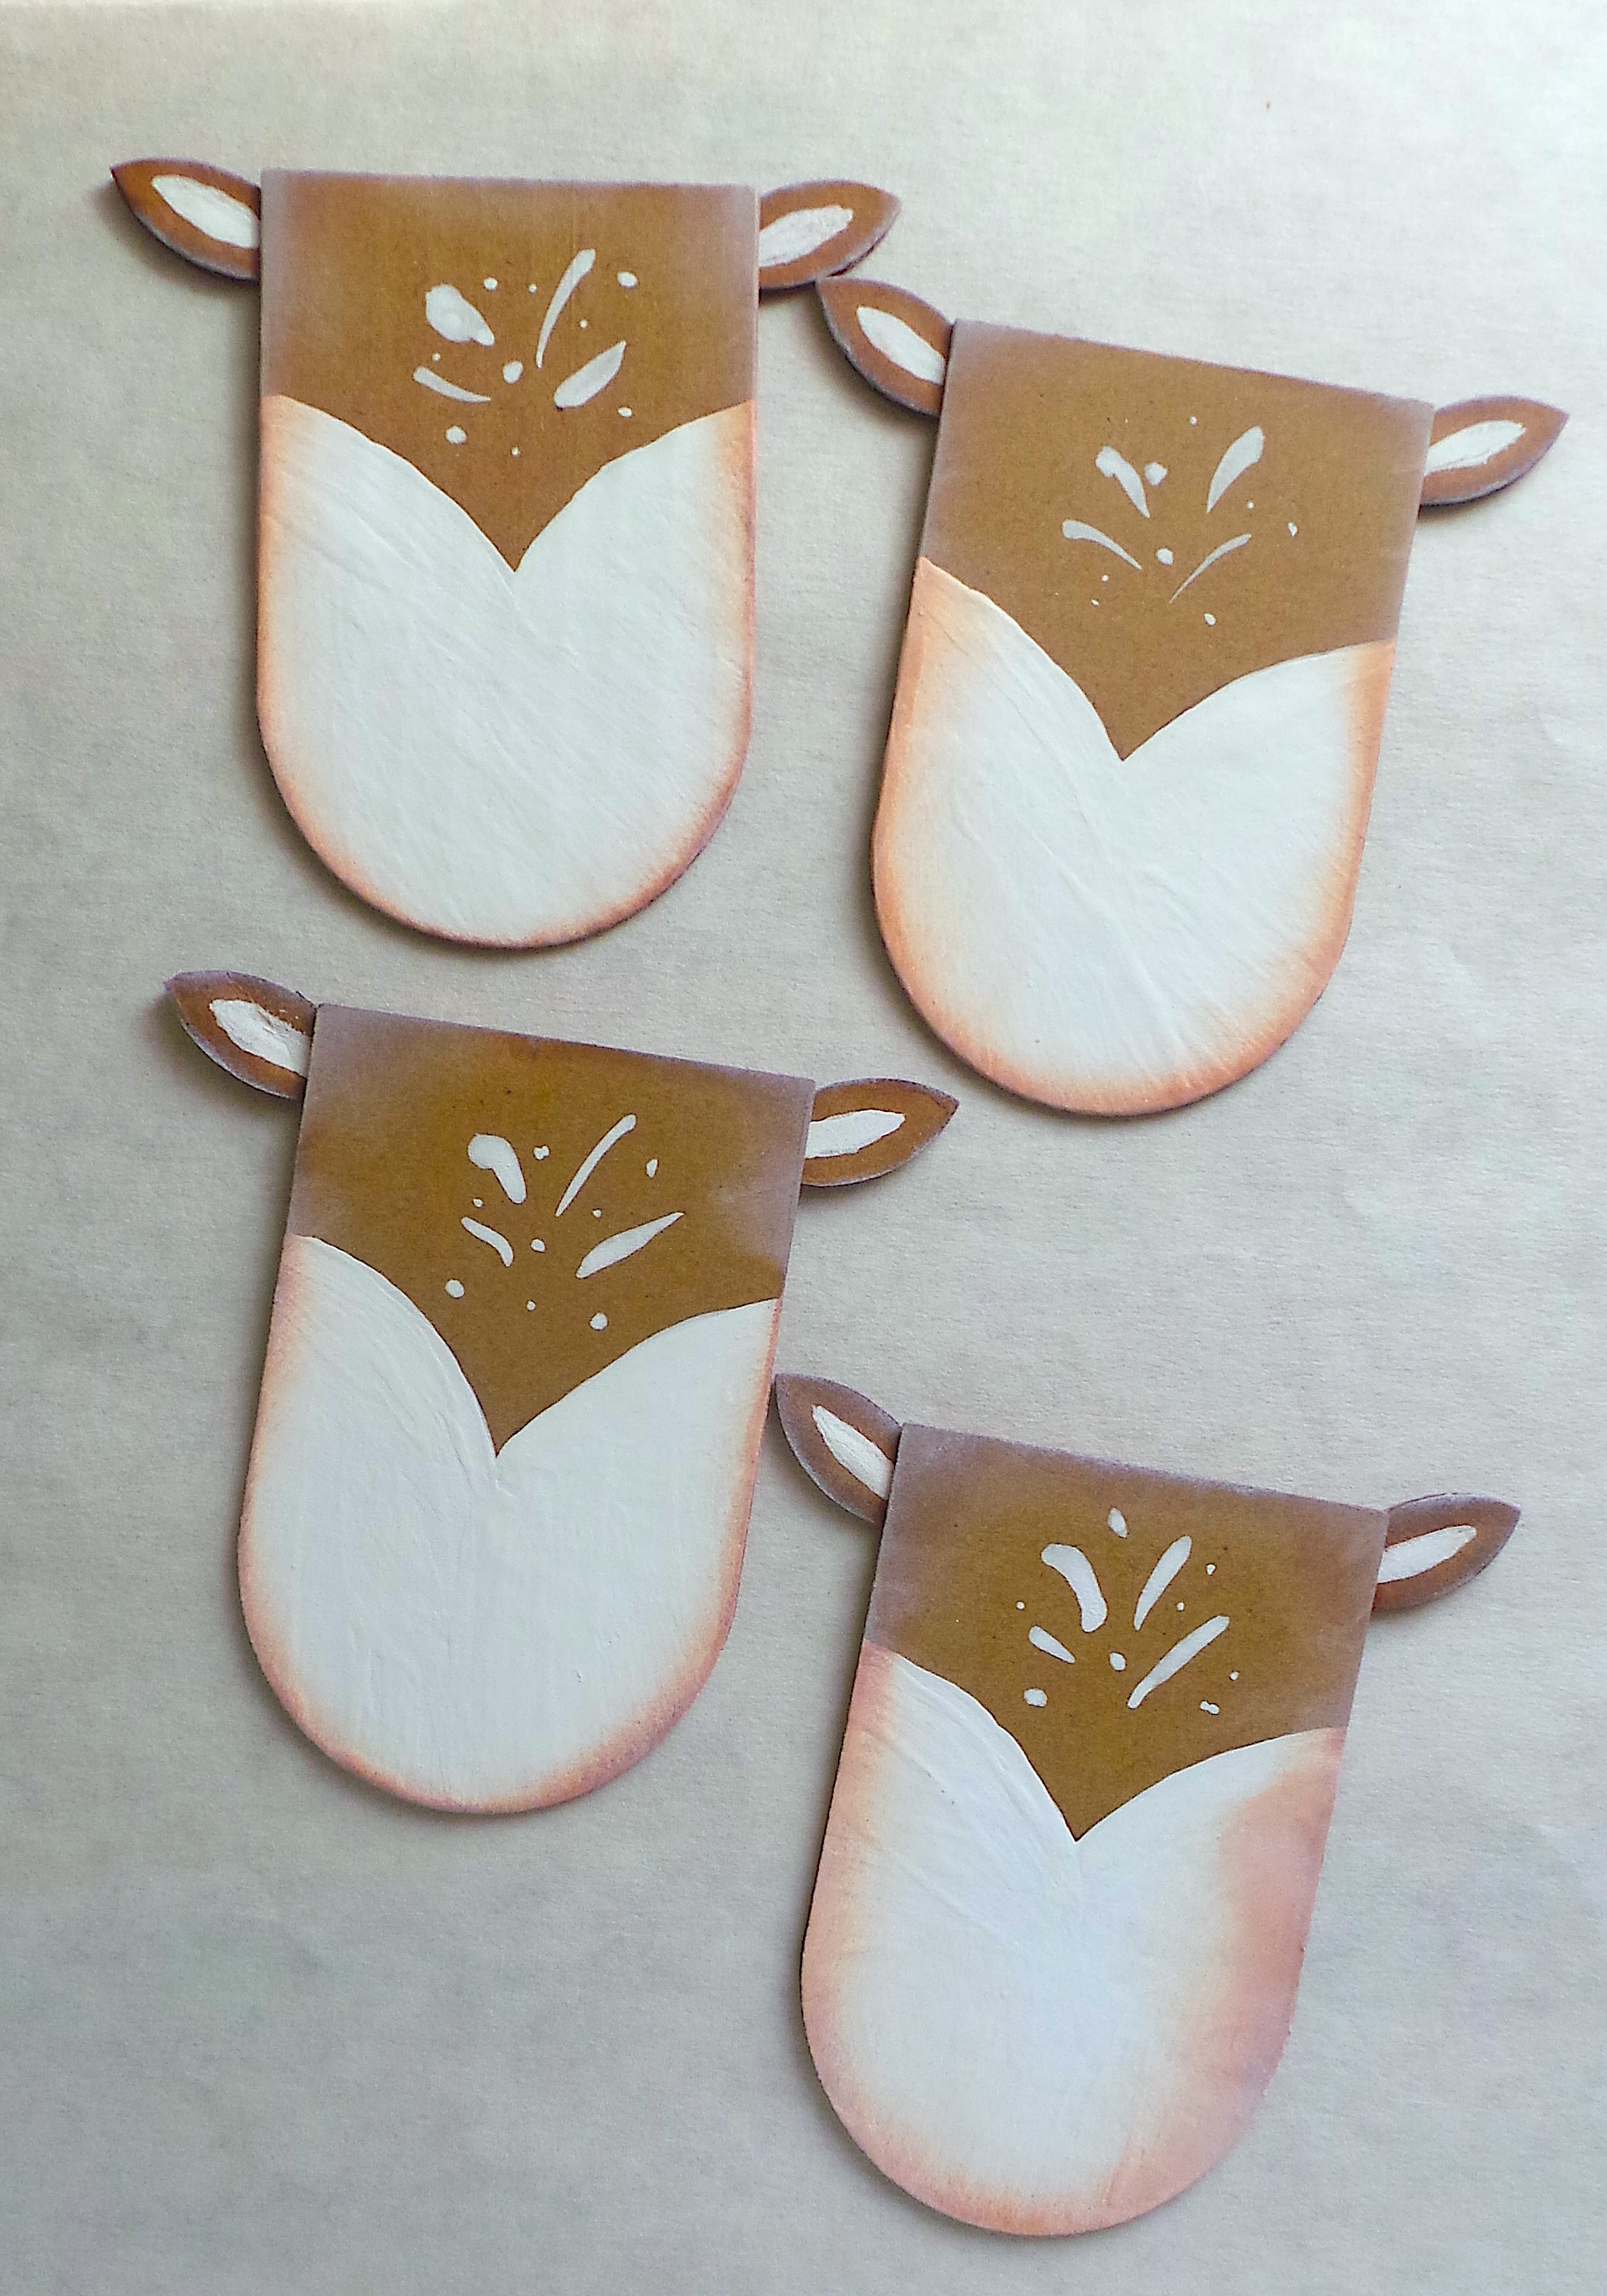
I adhered two Black Buttons for eyes and added a red gem for the nose to the face. I drew a black line with a fine tip black marker under the nose. I used a pink pastel to add color to the cheeks.
I sent my husband outside to round up some twigs to use as antlers. He came back with a couple of sticks. I cut all of those with a pair of scissors since they weren’t that thick. I glued to the back of the head.

Since I had several of the hollies cut from the Funky Festive Thinlits (retired) I added those to one of the antlers. I also added a leaf sprig which are from the Home Sweet Home Thinlits, loops of thread and red gems to finish.

Even though the plan is to use these reindeer as tags. I could easily add a mini clothes pin to the back to use as a closure to a bag. Or string them up to create an adorable banner. Also if you don’t have the supplies listed below you can change out with brown and white cardstock, hand draw or use a circle pinch for the eyes, pipe cleaners for the antlers, etc. There’s endless possibilities. Let me know in the comments below what you would use these reindeers for or if you have any questions.
Supplies
Sizzix/Eileen Hull: Tunnel Arches Thinlits
Sizzix/Eileen Hull: Sunflower Diecut
Sizzix/Eileen Hull: Home Sweet Home Thinlits
Sizzix/Tim Holtz: Funky Festive Thinlits (retired)
Corrugated Cardboard
White Acrylic Paint
Pink Pastel
Paint Brush
Fine Tip Black Marker
White and Brown Chalk Inks
Black Buttons, Red Gems and Thread
Twigs from a Tree
Beacon Adhesives: Zip Dry Adhesive
(Products listed above are Affiliated Links for your convenience)
DISCLAIMERS
This blog is compensated to provide opinion on products, services, websites, and various other topics. Even though the owner(s) of this blog receives compensation for our posts or advertisements. I always give my honest opinions, findings, beliefs, or experiences on those topics or products. The views and opinions expressed on this blog are purely my own. Any product claim, statistic, or quote should be checked with each manufacturer. Verify other representations about a product or service with the provider or party in question.This blog contains affiliate links. Clicking these links helps to support Tonya Trantham Designs – Creative Paper Addiction. It’s at no additional cost to you. Today’s features are Sizzix, Eileen Hull and Scrapbook.com Products.

Thanks for stopping by, I hope your Friday is great and enjoy creating!